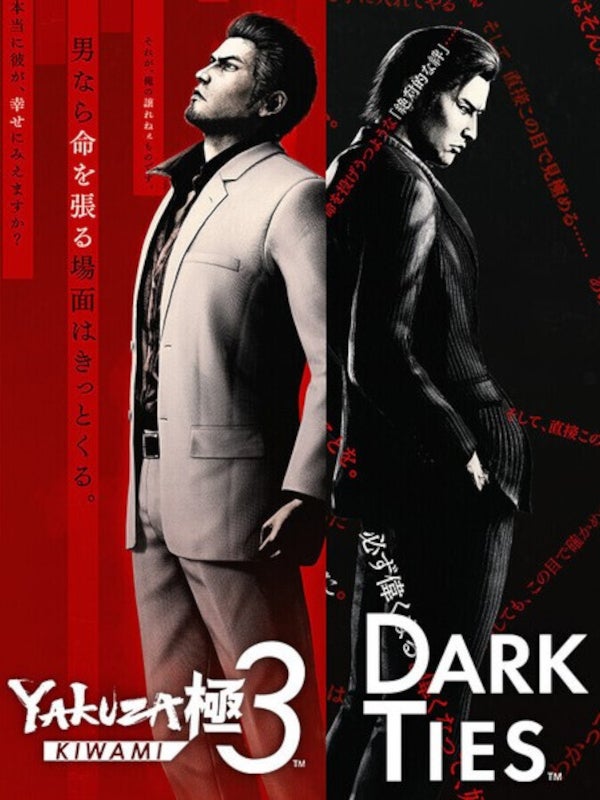
Yakuza Kiwami 3 & Dark Ties review - a stuffed remake defined by its own grim connections
Kazuma Kir-yeeshh
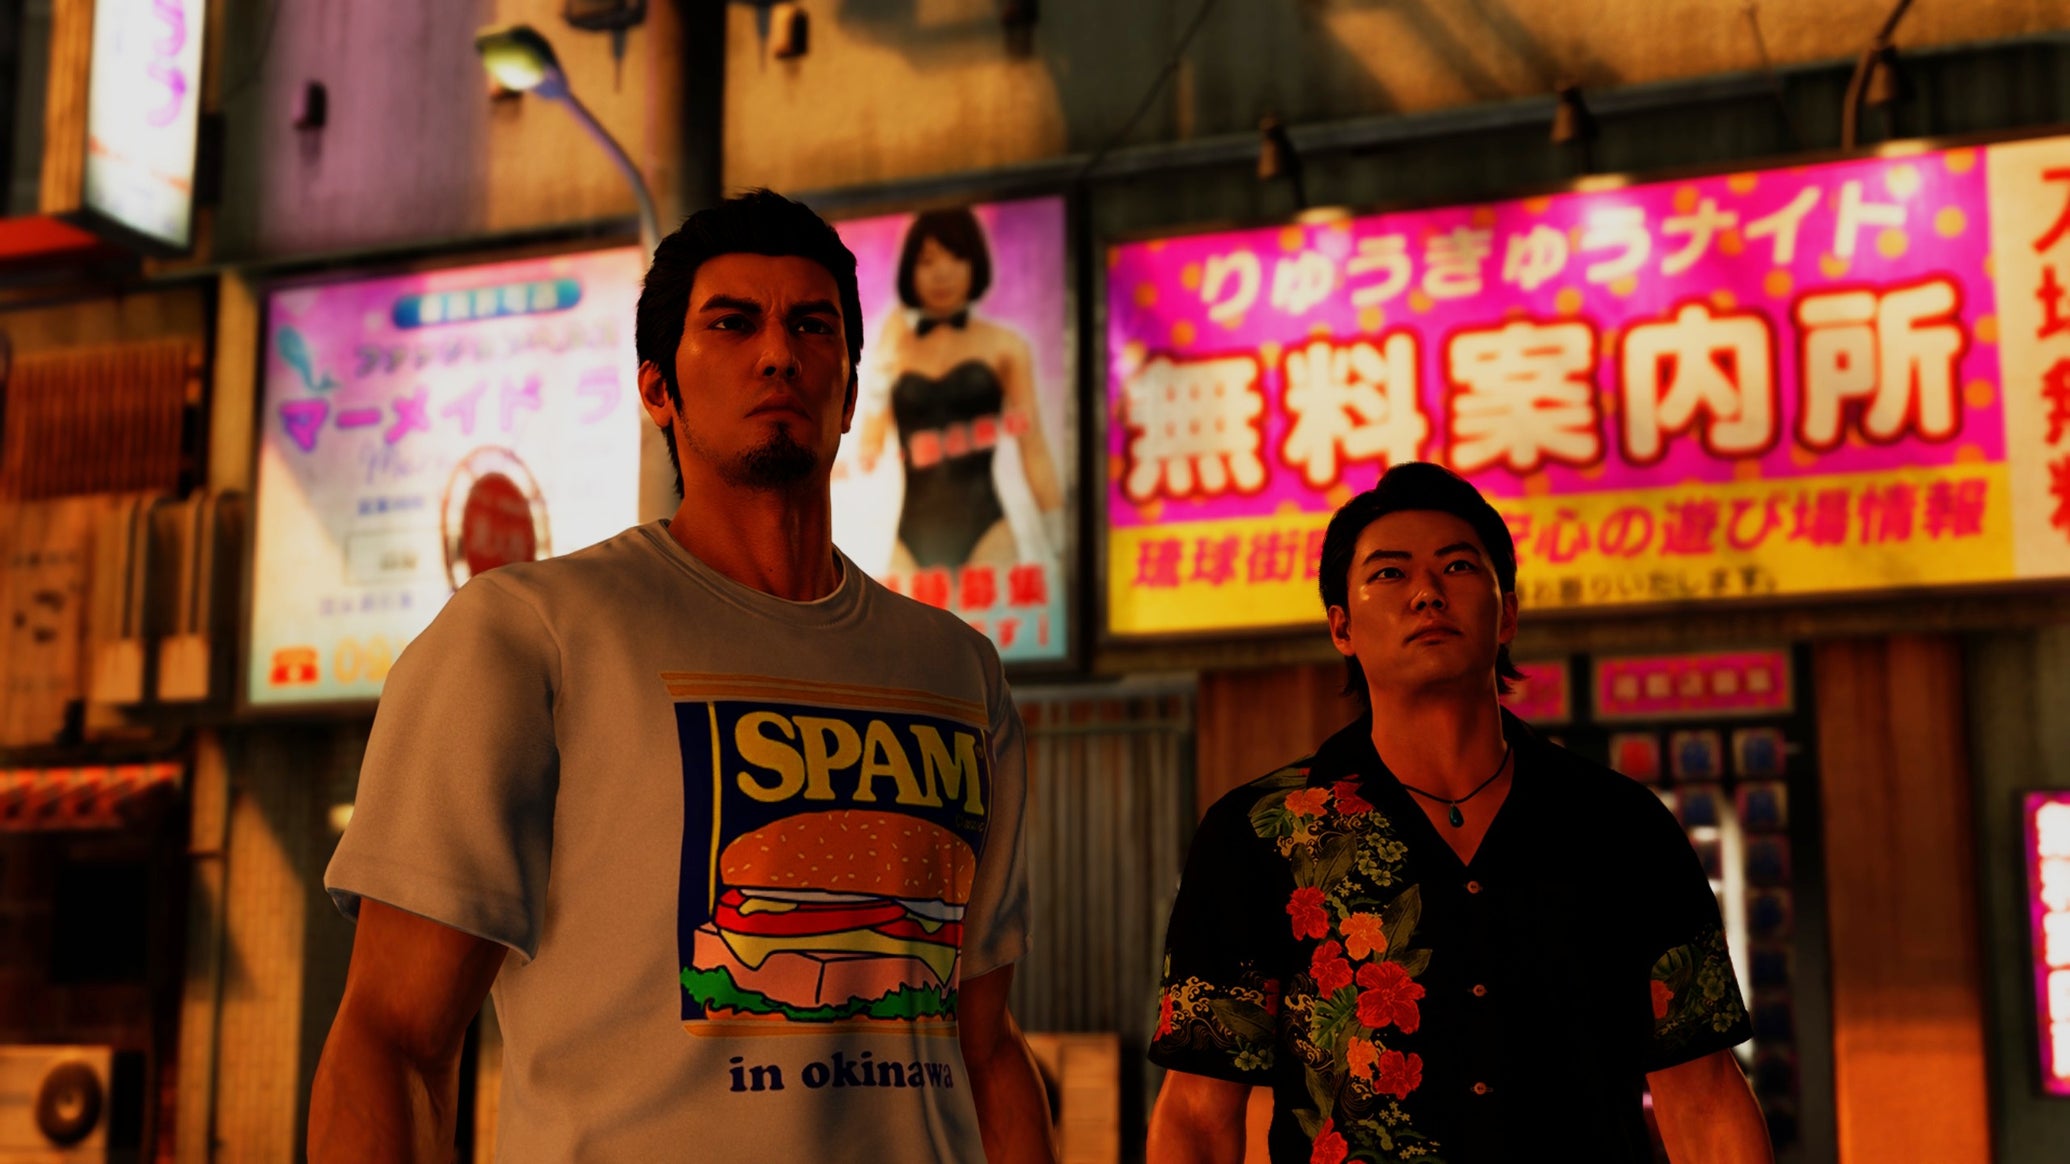
Image credit:Sega

Quirky charm and moreish busywork can’t distract from RGG’s questionable attitude to sexual assault.
- Developer: Ryu Ga Gotoku Studio
- Publisher: Sega
- Release: February 11th/February 12th 2026
- On: Windows
- From: Steam
- Price: £54.99/€59.99/$59.99
- Reviewed on: Intel Core i7-12700F, 16GB RAM, Nvidia RTX 3060 Ti, Windows 11
Excuse me, coming through. I’m Kazuma Kiryu, and I’m on my way to speak to some gruff yakuza lads about what their local gang war means for my orphanage. You can tell I’m serious because I’m riding a prototype segway dressed in nothing but a swimming cap, goggles and shorts. Now move, I’ve goons to beat up at two, photos to take at three, a biker gang war to resolve at four, and I also need to somehow fit in time to run around town waving my flip phone at strangers.
Once that’s done, I’m all good to head home to the kids I’ve left unattended. There’s no time to kick back, though. Vegetables must be planted, fish caught, bags sewed, and homework helped with.
The early chapters of Yakuza Kiwami 3 feature a lot more busywork than the 2009 original. You are still playing ex-yakuza member Kazuma Kiryu coming out of retirement to protect his Okinawan orphanage. But you can barely move for introductions to minigames and sidequests. The main story beats are spaced out between hasty rundowns of the litany of extras developers RGG Studio have stuffed into the Yakuza 3 remake.
As with last year’s wonderfully-named spin-off Like A Dragon: Pirate Yakuza In Hawaii , a lot of these ancillary distractions are recycled from recent mainline entries Yakuza: Like A Dragon and Infinite Wealth . As with the piratical adventure, much of it doesn’t fit into Kiwami 3 seamlessly. While there are new activities that fit perfectly into Kiryu trying to establish and run an orphanage, sourcing the ingredients for the kids’ favourite foods or doing quizzes to help them with their homework, there’s also a generic biker gang war side quest that exists because every RGG game seemingly needs a gang battle mode and there was no excuse to get 16th century galleons involved this time.
The less-tailored additions aren’t all bad – the Aloha Links-style social network lifted from Pirate Yakuza and Infinite Wealth at least brings customisable flip phones you can cover in rhinestones and tacky stickers, which I very much loved. But the (infinite) wealth of additions makes for a more distracted game than the original Yakuza 3.
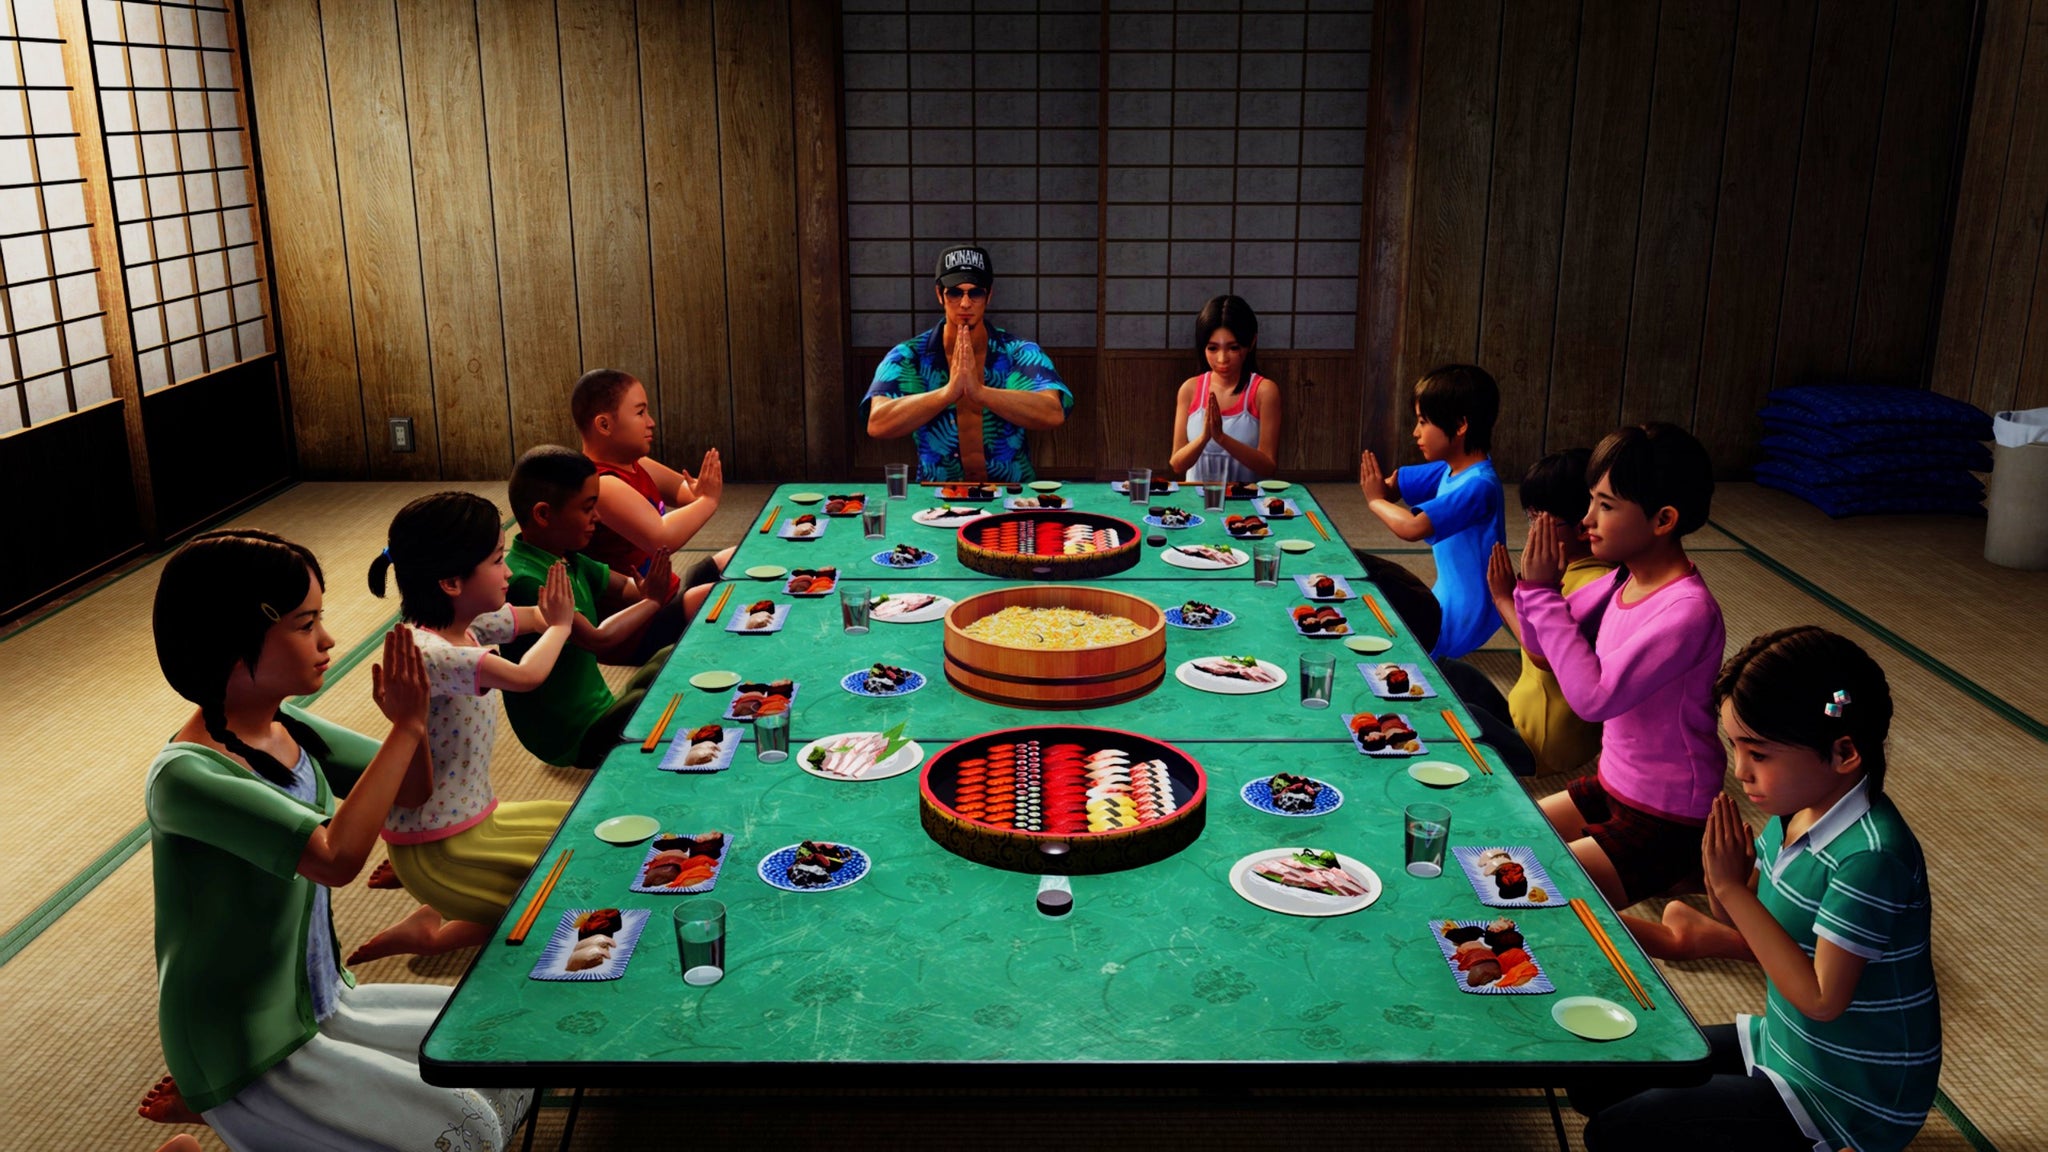
Image credit:Sega
It’s a shame that, in remaking Yakuza 3, RGG Studio have added gubbins, but done little to correct the original’s weaknesses. While the plot remains more focused than Yakuza 4 and Yakuza 5 ’s multi-protagonist romps, the story pales in comparison to the emotional weight of the original Yakuza and Yakuza 6 . Kiryu’s story plays out over six games, so it’s difficult for mushy middle entries like part three to stand out, but that’s something which could have been addressed here.
While the plot remains fairly so-so, individual characters and relationships still strike a memorable chord, such as Kiryu’s bond with his ally Rikiya Shimabukuro. As you battle to save the orphanage, the latter’s youthful impetuousness gradually wears down Kiryu’s stoicism, exposing the veteran brawler’s heart of gold.
I can’t say the same of Kiwami 3’s villains, who struggle to stand out because of their sheer numbers. Arch-baddie Yoshitaka Mine fights for screentime with secondary baddies Goh Hamazaki, Tsuyoshi Kanda, and Andre Richardson. The struggle leaves all four men as one-dimensional and underdeveloped, even if the well-stocked rogues’ gallery they make up helps the world feel like a proper nest of vipers.
The new prequel episode that comes paired with Kiwami 3, Dark Ties, is RGG’s attempt to remedy that issue in Mine’s case. The former-CEO-turned-corporate head of the Hahuko Clan is ripe for this attention because of how stark a contrast his approach to life and crime is to that of Kiryu, despite the parallels in their upbringings. He’s a funhouse mirror reflection of the family-oriented big Kaz, warped by lonely and cynical bitterness. Dark Ties is only a short romp compared to the main game. Set entirely in the uber-familiar Yakuza series stomping ground of Kamurocho - based on the real world Tokyo district of Kabukichō - the episode opens with Mine losing his position as CEO at his company and the start of his career in crime. You’ll help him climb the ranks of the Tojo Clan to become one of its most ruthless lieutenants, responsible for bringing in much of the organisation’s cash.
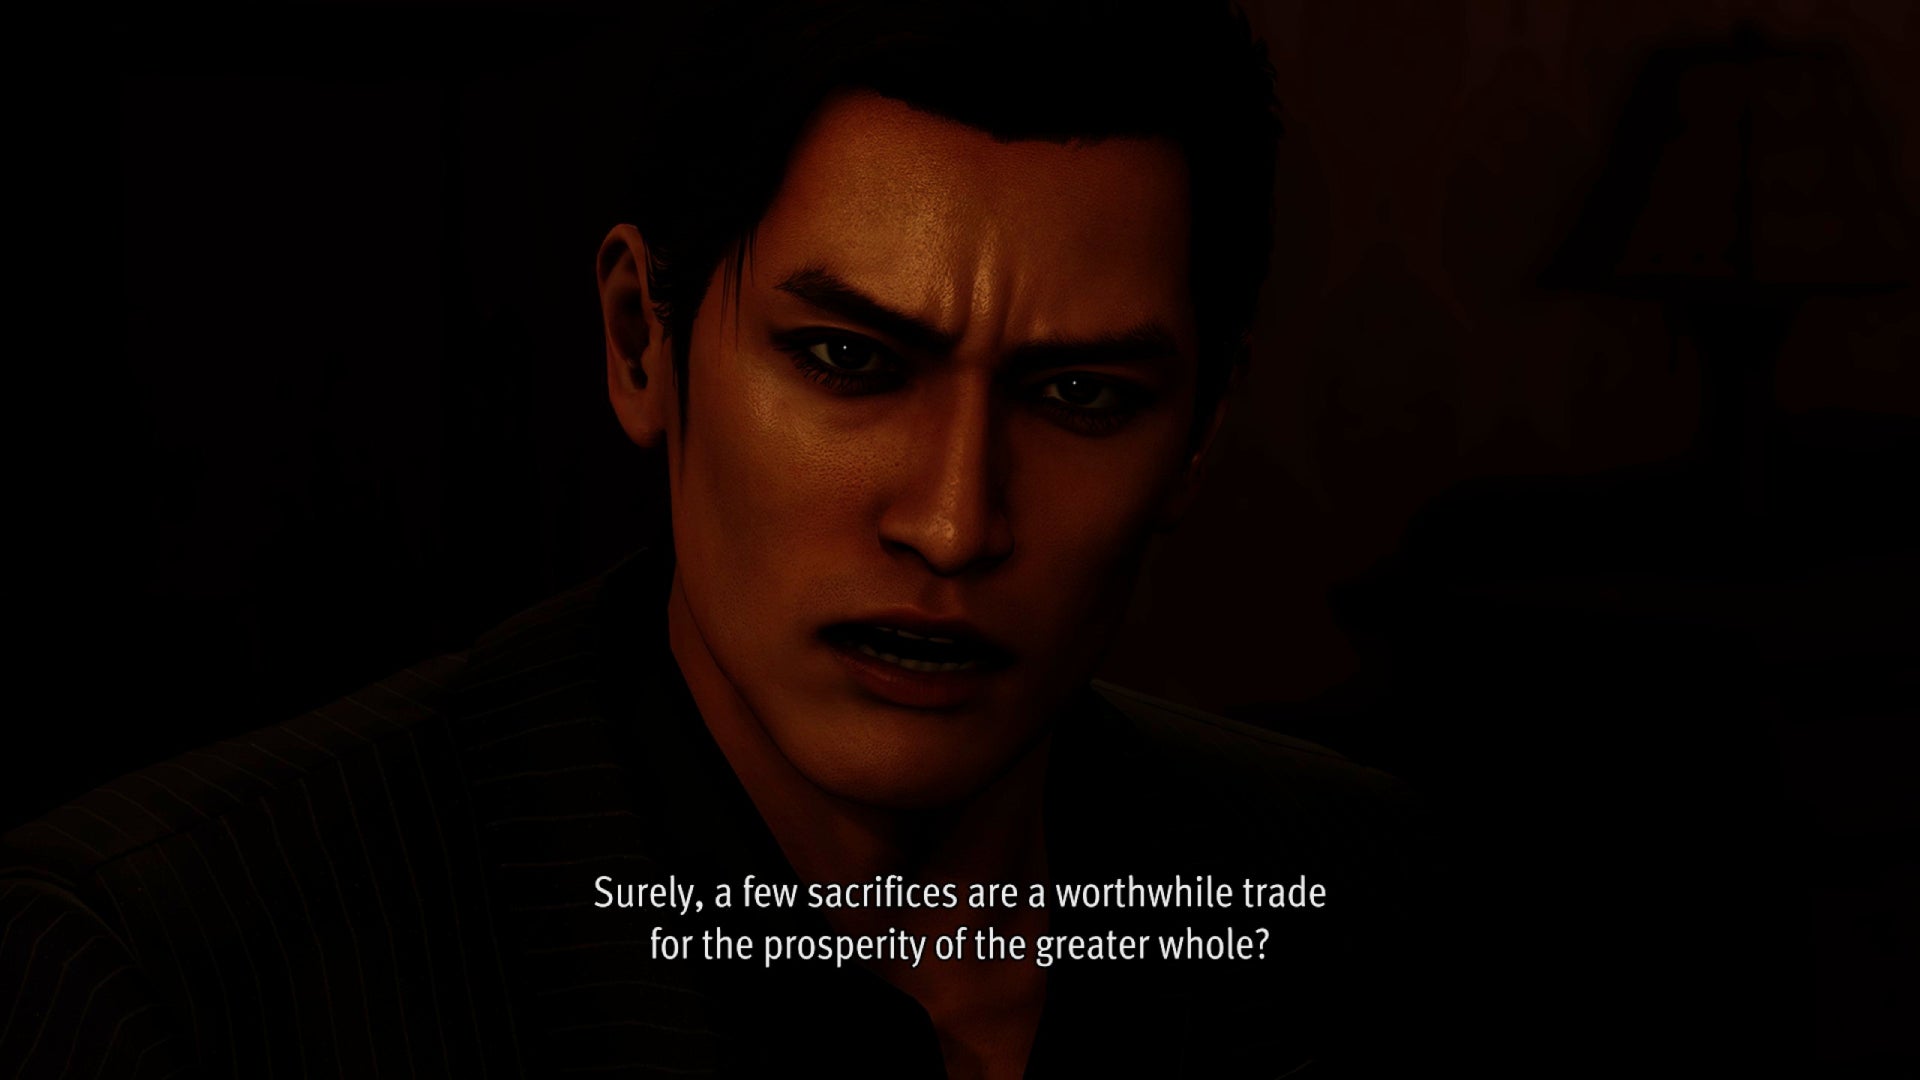
Image credit:Sega
In practice, climbing the corporate criminal ladder naturally means beating up a lot of people. Mine’s fighting style is a satisfying mix of takedowns and heavy punches that gain power as you charge up the Dark Ties meter – which, with its chained heart graphic, is possibly the most My Chemical Romance-ish HUD element ever devised. Oh, and you’ll also be chucking about Yakuza 0 -worthy sums of cash. Mine’s talent for making money and complete disregard for sentimental yakuza traditions – like honouring alliances – allow him to climb the ranks swiftly. There is much more depth to his character than we ever saw in Yakuza 3, with his relationship with Tojo Clan chairman Daigo Dojima framing the story. Mine grapples with seeing the value in trusting Daigo over sticking to his own well-honed instinct to use people purely for self-interest and personal gain. However, even with this extra focus, RGG Studio make missteps. The story frequently jumps forward by weeks and months, leading Mine’s attitude and outlook to dramatically shift without the cooldown time they might be afforded in a slower burn narrative. Overall, though, the goal of giving players a better view of what makes him tick has been accomplished.
I’m less sure the conclusions to both Kiwami 3 and Dark Ties match this newly developed Mine – but I’ll leave that spoiler heavy discussion for a separate feature that will pop up on the site soon. I’ll confirm that Kiwami 3’s ending has been changed, but not in a way that I see as fatally detrimental to that specific game’s story.
My main issue with Dark Ties is that Mine’s storyline comes with an expansion of Tsuyoshi Kanda’s role. A secondary antagonist in Yakuza 3 and Kiwami 3, Kanda is a one-dimensional, violent sexual predator, but in Dark Ties RGG Studio generally brush over the horrific aspects of his nature. Early in the episode, you prevent Kanda raping a woman in an alleyway, but from that point on he’s presented as a more palatable mixture of comic relief dumbass and treacherous manipulator desperate for power. While Mine spends 90% of the narrative treating Kanda with open disdain, usually expressed by thoughts delivered as bracketed asides which cut in during conversations between the two, you spend much of your time rehabilitating his image.
Fresh out of prison for sexual assault, Kanda wants to rise through the ranks of his clan, and for that he needs a better reputation. Mine, who’s intent on climbing the ranks himself, agrees to help him. The pair’s relationship grows more cordial as you work your way through the “bro time” bonding sessions unlocked via Kanda Damage Control, a mini-game that revolves around Mine doing good deeds under Kanda’s name to improve the odious gangster’s public reputation. Most of these good deeds are the sort of generic helping hand lending that Kiryu and other Yakuza goodies wouldn’t look out of place doing: go fetch this hungry worker a bento, beat up this rude salesman harassing passersby, hunt down a car burglar, expose some police corruption.
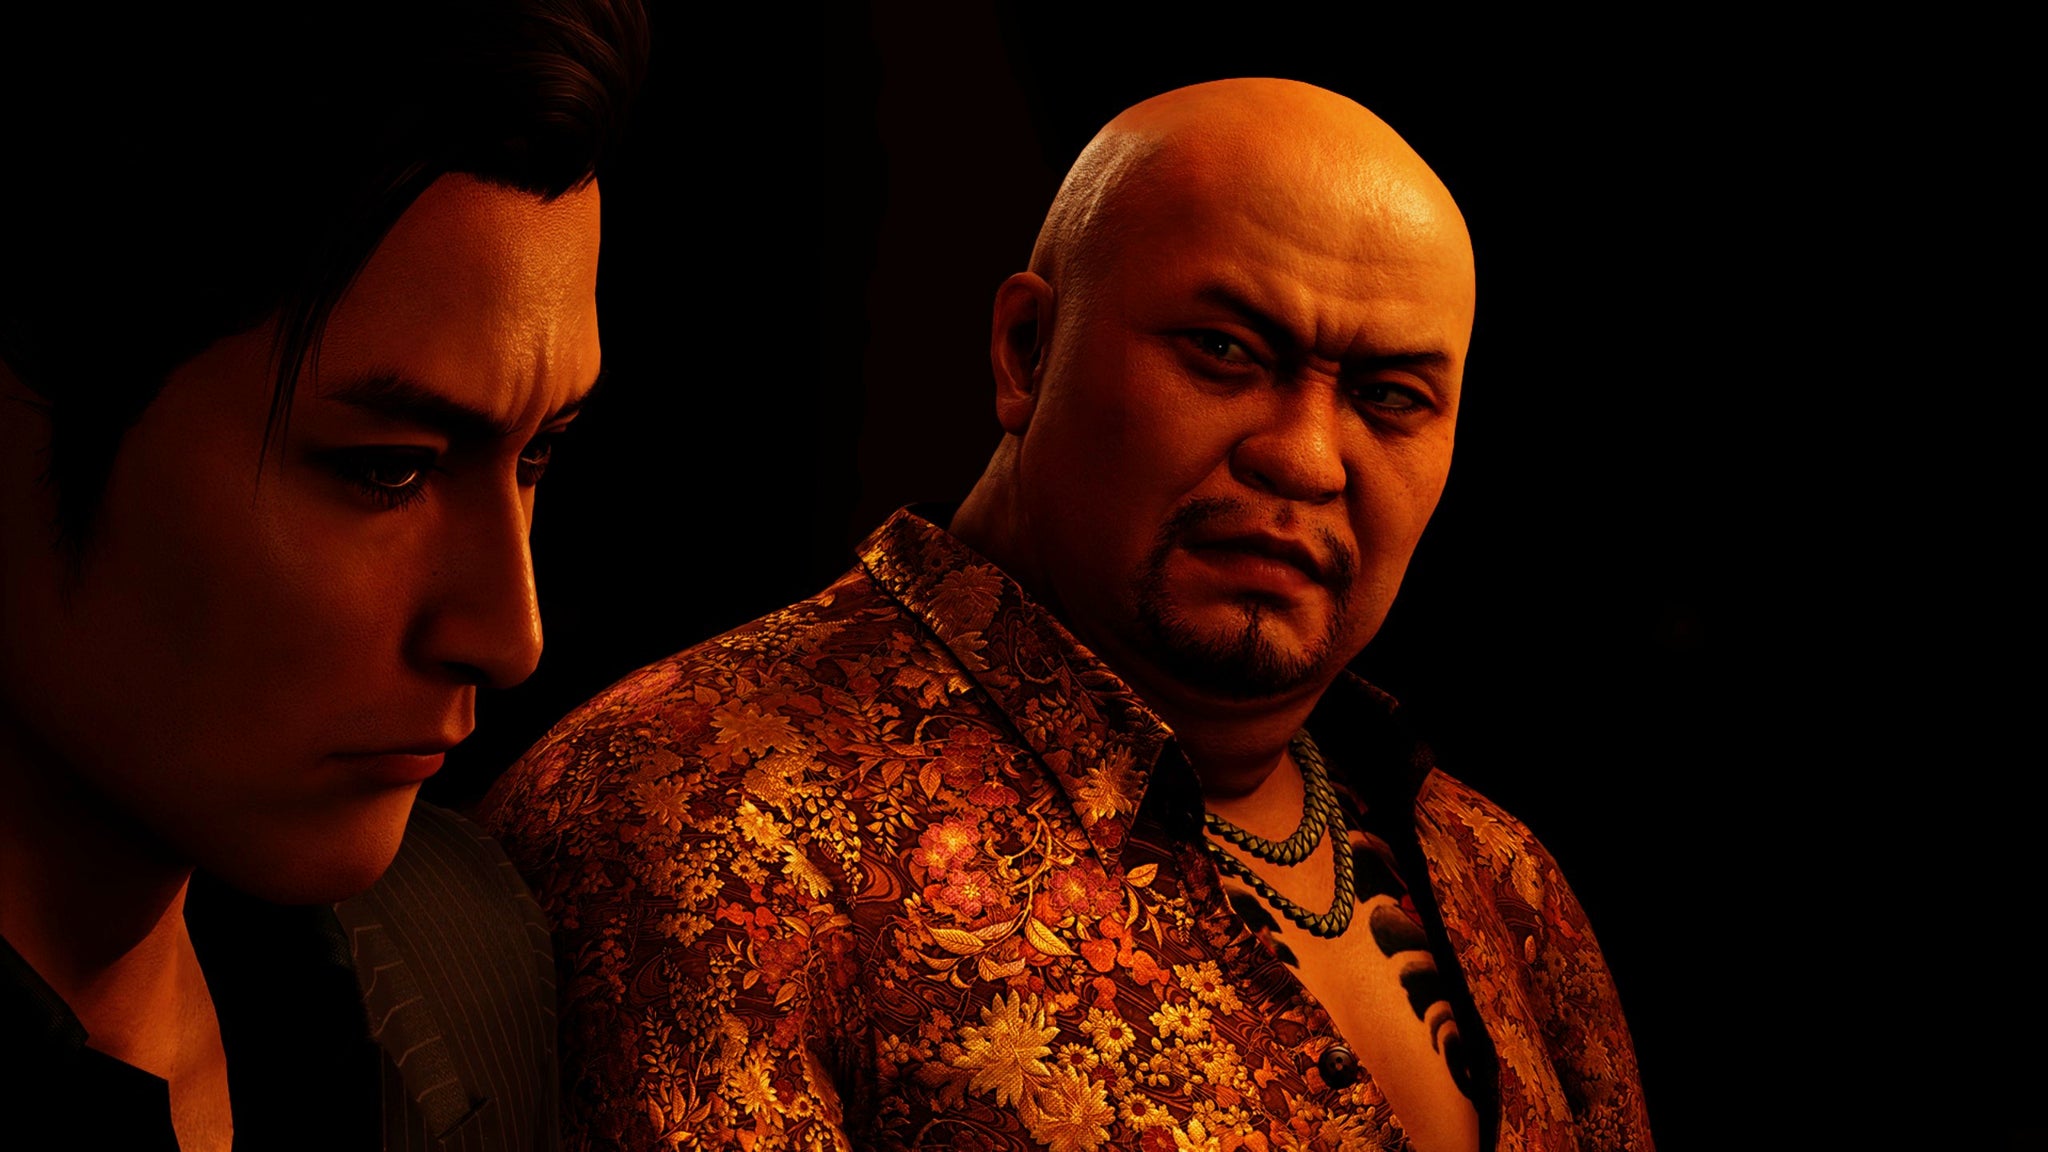
Image credit:Sega
One of the longer good deed missions stands out from the rest, though.
You’re told that one of Kamurocho’s brothels has asked for help with an aggressive customer. Despite being banned, the customer keeps forcing his way in. The joke is that Mine’s almost certain from the outset that the customer in question will turn out to be Kanda. You head to the brothel and the proprietor gives you a description of the culprit which mirrors Kanda’s appearance. So, filled with dread, Mine takes on a shift as the place’s bouncer, choosing whether to let in customers. Eventually, a random man who looks exactly like Kanda turns up and Mine beats him up, relieved that he’s not going to have to stop his workmate and friend with a history of sexually assaulting women from doing so again. The entire mission is played for laughs with the typical wacky Yakuza substory tone, but left a bad taste in my mouth. Even putting any Kanda-specific issues aside, RGG’s choice to cast actor Teruyuki Kagawa in the role of Kiwami 3 antagonist Hamazaki despite a 2022 newspaper report accusing him of sexual assault adds an inescapable extra level of discomfort to instances like this in Yakuza Kiwami 3 and Dark Ties.
Even if RGG Studio somehow developed Kanda with the nuance necessary to turn him into a flawed ally you could comfortably spend “bro time” with in a Soapland brothel, there’s another barrier. Kanda’s role in Kiwami 3 doesn’t change. He’s still a power-hungry and sex-crazed punching bag for Kiryu. As Dark Ties takes place prior to those events, reforming Kanda wouldn’t mesh with his presentation in the mainline entry. Outside of totally rebooting the character – which the developers certainly could and I think should have taken this opportunity to do – you’re left with this spin-off arc which feels like it wants Mine to hang out with Kanda just so RGG can make jokes about the sex pest getting angry when women find his asexual business partner more attractive.
That Kanda/Kagawa cloud hangs over Dark Ties and Kiwami 3, and expanding Yakuza 3 with minigames taken from later Like A Dragon games does nothing to dispel it. One moment, you can be merrily mashing away at baddies in the biker battles as the co-boss of a girl gang – which would feel refreshingly progressive in any other Like A Dragon game – but in the next you might need to consider adding Kanda and Hamazaki to your squad in order to win the next scrum. Yakuza Kiwami 3 & Dark Ties is a serviceable remake in a vacuum, but it doesn’t exist in isolation. Quirky charm and moreish busywork can’t distract from RGG’s questionable attitude to sexual assault.
Find out how we conduct our reviews by reading our review policy .
Yakuza Kiwami 3 & Dark Ties
PS4 , PS5 , Xbox Series X/S , PC , Nintendo Switch 2
Rock Paper Shotgun is better when you sign in
Sign in and join us on our journey to discover strange and compelling PC games.

All 75 Arc Raiders Blueprints and where to get them
These areas have the highest chance of giving you Blueprints

Image credit:Rock Paper Shotgun/Embark Studios

Looking for more Arc Raiders Blueprints? It’s a special day when you find a Blueprint, as they’re among the most valuable items in Arc Raiders. If you find a Blueprint that you haven’t already found, then you must make sure you hold onto it at all costs, because Blueprints are the key to one of the most important and powerful systems of meta-progression in the game.
This guide aims to be the very best guide on Blueprints you can find, starting with a primer on what exactly they are and how they work in Arc Raiders, before delving into exactly where to get Blueprints and the very best farming spots for you to take in your search.
We’ll also go over how to get Blueprints from other unlikely activities, such as destroying Surveyors and completing specific quests. And you’ll also find the full list of all 75 Blueprints in Arc Raiders on this page (including the newest Blueprints added with the Cold Snap update , such as the Deadline Blueprint and Firework Box Blueprint), giving you all the information you need to expand your own crafting repertoire.
In this guide:
- What are Blueprints in Arc Raiders?
- Full Blueprint list: All crafting recipes
- Where to find Blueprints in Arc Raiders Blueprints obtained from quests Blueprints obtained from Trials Best Blueprint farming locations

What are Blueprints in Arc Raiders?
Blueprints in Arc Raiders are special items which, if you manage to extract with them, you can expend to permanently unlock a new crafting recipe in your Workshop. If you manage to extract from a raid with an Anvil Blueprint, for example, you can unlock the ability to craft your very own Anvil Pistol, as many times as you like (as long as you have the crafting materials).
To use a Blueprint, simply open your Inventory while in the lobby, then right-click on the Blueprint and click “Learn And Consume” . This will permanently unlock the recipe for that item in your Workshop. As of the Stella Montis update, there are allegedly 75 different Blueprints to unlock - although only 68 are confirmed to be in the game so far. You can see all the Blueprints you’ve found and unlocked by going to the Workshop menu, and hitting “R” to bring up the Blueprint screen.
It’s possible to find duplicates of past Blueprints you’ve already unlocked. If you find these, then you can either sell them, or - if you like to play with friends - you can take it into a match and gift it to your friend so they can unlock that recipe for themselves. Another option is to keep hold of them until the time comes to donate them to the Expedition.
Full Blueprint list: All crafting recipes
Below is the full list of all the Blueprints that are currently available to find in Arc Raiders, and the crafting recipe required for each item:
| Blueprint | Type | Recipe | Crafted At |
|---|---|---|---|
| Bettina | Weapon | 3x Advanced Mechanical Components 3x Heavy Gun Parts 3x Canister | Gunsmith 3 |
| Blue Light Stick | Quick Use | 3x Chemicals | Utility Station 1 |
| Aphelion | Weapon | 3x Magnetic Accelerator 3x Complex Gun Parts 1x Matriarch Reactor | Gunsmith 3 |
| Combat Mk. 3 (Flanking) | Augment | 2x Advanced Electrical Components 3x Processor | Gear Bench 3 |
| Combat Mk. 3 (Aggressive) | Augment | 2x Advanced Electrical Components 3x Processor | Gear Bench 3 |
| Complex Gun Parts | Material | 2x Light Gun Parts 2x Medium Gun Parts 2x Heavy Gun Parts | Refiner 3 |
| Fireworks Box | Quick Use | 1x Explosive Compound 3x Pop Trigger | Explosives Station 2 |
| Gas Mine | Mine | 4x Chemicals 2x Rubber Parts | Explosives Station 1 |
| Green Light Stick | Quick Use | 3x Chemicals | Utility Station 1 |
| Pulse Mine | Mine | 1x Crude Explosives 1x Wires | Explosives Station 1 |
| Seeker Grenade | Grenade | 1x Crude Explosives 2x ARC Alloy | Explosives Station 1 |
| Looting Mk. 3 (Survivor) | Augment | 2x Advanced Electrical Components 3x Processor | Gear Bench 3 |
| Angled Grip II | Mod | 2x Mechanical Components 3x Duct Tape | Gunsmith 2 |
| Angled Grip III | Mod | 2x Mod Components 5x Duct Tape | Gunsmith 3 |
| Hullcracker | Weapon | 1x Magnetic Accelerator 3x Heavy Gun Parts 1x Exodus Modules | Gunsmith 3 |
| Launcher Ammo | Ammo | 5x Metal Parts 1x Crude Explosives | Workbench 1 |
| Anvil | Weapon | 5x Mechanical Components 5x Simple Gun Parts | Gunsmith 2 |
| Anvil Splitter | Mod | 2x Mod Components 3x Processor | Gunsmith 3 |
| ??? | ??? | ??? | ??? |
| Barricade Kit | Quick Use | 1x Mechanical Components | Utility Station 2 |
| Blaze Grenade | Grenade | 1x Explosive Compound 2x Oil | Explosives Station 3 |
| Bobcat | Weapon | 3x Advanced Mechanical Components 3x Light Gun Parts | Gunsmith 3 |
| Osprey | Weapon | 2x Advanced Mechanical Components 3x Medium Gun Parts 7x Wires | Gunsmith 3 |
| Burletta | Weapon | 3x Mechanical Components 3x Simple Gun Parts | Gunsmith 1 |
| Compensator II | Mod | 2x Mechanical Components 4x Wires | Gunsmith 2 |
| Compensator III | Mod | 2x Mod Components 8x Wires | Gunsmith 3 |
| Defibrillator | Quick Use | 9x Plastic Parts 1x Moss | Medical Lab 2 |
| ??? | ??? | ??? | ??? |
| Equalizer | Weapon | 3x Magnetic Accelerator 3x Complex Gun Parts 1x Queen Reactor | Gunsmith 3 |
| Extended Barrel | Mod | 2x Mod Components 8x Wires | Gunsmith 3 |
| Extended Light Mag II | Mod | 2x Mechanical Components 3x Steel Spring | Gunsmith 2 |
| Extended Light Mag III | Mod | 2x Mod Components 5x Steel Spring | Gunsmith 3 |
| Extended Medium Mag II | Mod | 2x Mechanical Components 3x Steel Spring | Gunsmith 2 |
| Extended Medium Mag III | Mod | 2x Mod Components 5x Steel Spring | Gunsmith 3 |
| Extended Shotgun Mag II | Mod | 2x Mechanical Components 3x Steel Spring | Gunsmith 2 |
| Extended Shotgun Mag III | Mod | 2x Mod Components 5x Steel Spring | Gunsmith 3 |
| Remote Raider Flare | Quick Use | 2x Chemicals 4x Rubber Parts | Utility Station 1 |
| Heavy Gun Parts | Material | 4x Simple Gun Parts | Refiner 2 |
| Venator | Weapon | 2x Advanced Mechanical Components 3x Medium Gun Parts 5x Magnet | Gunsmith 3 |
| Il Toro | Weapon | 5x Mechanical Components 6x Simple Gun Parts | Gunsmith 1 |
| Jolt Mine | Mine | 1x Electrical Components 1x Battery | Explosives Station 2 |
| Explosive Mine | Mine | 1x Explosive Compound 1x Sensors | Explosives Station 3 |
| Jupiter | Weapon | 3x Magnetic Accelerator 3x Complex Gun Parts 1x Queen Reactor | Gunsmith 3 |
| Light Gun Parts | Material | 4x Simple Gun Parts | Refiner 2 |
| Lightweight Stock | Mod | 2x Mod Components 5x Duct Tape | Gunsmith 3 |
| Lure Grenade | Grenade | 1x Speaker Component 1x Electrical Components | Utility Station 2 |
| Medium Gun Parts | Material | 4x Simple Gun Parts | Refiner 2 |
| Torrente | Weapon | 2x Advanced Mechanical Components 3x Medium Gun Parts 6x Steel Spring | Gunsmith 3 |
| Muzzle Brake II | Mod | 2x Mechanical Components 4x Wires | Gunsmith 2 |
| Muzzle Brake III | Mod | 2x Mod Components 8x Wires | Gunsmith 3 |
| Padded Stock | Mod | 2x Mod Components 5x Duct Tape | Gunsmith 3 |
| Shotgun Choke II | Mod | 2x Mechanical Components 4x Wires | Gunsmith 2 |
| Shotgun Choke III | Mod | 2x Mod Components 8x Wires | Gunsmith 3 |
| Shotgun Silencer | Mod | 2x Mod Components 8x Wires | Gunsmith 3 |
| Showstopper | Grenade | 1x Advanced Electrical Components 1x Voltage Converter | Explosives Station 3 |
| Silencer I | Mod | 2x Mechanical Components 4x Wires | Gunsmith 2 |
| Silencer II | Mod | 2x Mod Components 8x Wires | Gunsmith 3 |
| Snap Hook | Quick Use | 2x Power Rod 3x Rope 1x Exodus Modules | Utility Station 3 |
| Stable Stock II | Mod | 2x Mechanical Components 3x Duct Tape | Gunsmith 2 |
| Stable Stock III | Mod | 2x Mod Components 5x Duct Tape | Gunsmith 3 |
| Tagging Grenade | Grenade | 1x Electrical Components 1x Sensors | Utility Station 3 |
| Tempest | Weapon | 3x Advanced Mechanical Components 3x Medium Gun Parts 3x Canister | Gunsmith 3 |
| Trigger Nade | Grenade | 2x Crude Explosives 1x Processor | Explosives Station 2 |
| Vertical Grip II | Mod | 2x Mechanical Components 3x Duct Tape | Gunsmith 2 |
| Vertical Grip III | Mod | 2x Mod Components 5x Duct Tape | Gunsmith 3 |
| Vita Shot | Quick Use | 2x Antiseptic 1x Syringe | Medical Lab 3 |
| Vita Spray | Quick Use | 3x Antiseptic 1x Canister | Medical Lab 3 |
| Vulcano | Weapon | 1x Magnetic Accelerator 3x Heavy Gun Parts 1x Exodus Modules | Gunsmith 3 |
| Wolfpack | Grenade | 2x Explosive Compound 2x Sensors | Explosives Station 3 |
| Red Light Stick | Quick Use | 3x Chemicals | Utility Station 1 |
| Smoke Grenade | Grenade | 14x Chemicals 1x Canister | Utility Station 2 |
| Deadline | Mine | 3x Explosive Compound 2x ARC Circuitry | Explosives Station 3 |
| Trailblazer | Grenade | 1x Explosive Compound 1x Synthesized Fuel | Explosives Station 3 |
| Tactical Mk. 3 (Defensive) | Augment | 2x Advanced Electrical Components 3x Processor | Gear Bench 3 |
| Tactical Mk. 3 (Healing) | Augment | 2x Advanced Electrical Components 3x Processor | Gear Bench 3 |
| Yellow Light Stick | Quick Use | 3x Chemicals | Utility Station 1 |
Note: The missing Blueprints in this list likely have not actually been added to the game at the time of writing, because none of the playerbase has managed to find any of them. As they are added to the game, I will update this page with the most relevant information so you know exactly how to get all 75 Arc Raiders Blueprints.
Where to find Blueprints in Arc Raiders
Below is a list of all containers, modifiers, and events which maximise your chances of finding Blueprints:
- Certain quests reward you with specific Blueprints .
- Completing Trials has a high chance of offering Blueprints as rewards.
- Surveyors have a decent chance of dropping Blueprints on death.
- High loot value areas tend to have a greater chance of spawning Blueprints.
- Night Raids and Storms may increase rare Blueprint spawn chances in containers.
- Containers with higher numbers of items may have a higher tendency to spawn Blueprints. As a result, Blue Gate (which has many “large” containers containing multiple items) may give you a higher chance of spawning Blueprints.
- Raider containers (Raider Caches, Weapon Boxes, Medical Bags, Grenade Tubes) have increased Blueprint drop rates. As a result, the Uncovered Caches event gives you a high chance of finding Blueprints.
- Security Lockers have a higher than average chance of containing Blueprints.
- Certain Blueprints only seem to spawn under specific circumstances: Tempest Blueprint only spawns during Night Raid events. Vulcano Blueprint only spawns during Hidden Bunker events. Jupiter and Equaliser Blueprints only spawn during Harvester events.

Raider Caches, Weapon Boxes, and other raider-oriented container types have a good chance of offering Blueprints. |Image credit:Rock Paper Shotgun/Embark Studios
Blueprints have a very low chance of spawning in any container in Arc Raiders, around 1-2% on average. However, there is a higher chance of finding Blueprints in particular container types. Specifically, you can find more Blueprints in Raider containers and security lockers.
Beyond this, if you’re looking for Blueprints you should focus on regions of the map which are marked as having particularly high-value loot. Areas such as the Control Tower in Dam Battlegrounds, the Arrival and Departure Buildings in Spaceport, and Pilgrim’s Peak in Blue Gate all have a better-than-average chance of spawning Blueprints somewhere amongst all their containers. Night Raids and Electromagnetic Storm events also increase the drop chances of certain Blueprints .
In addition to these containers, you can often loot Blueprints from destroyed Surveyors - the largest of the rolling ball ARC. Surveyors are more commonly found on the later maps - Spaceport and Blue Gate - and if one spawns in your match, you’ll likely see it by the blue laser beam that it casts into the sky while “surveying”.
Surveyors are quite well-armoured and will very speedily run away from you once it notices you, but if you can take one down then make sure you loot all its parts for a chance of obtaining certain unusual Blueprints.
Blueprints obtained from quests
One way in which you can get Blueprints is by completing certain quests for the vendors in Speranza. Some quests will reward you with a specific item Blueprint upon completion, so as long as you work through all the quests in Arc Raiders, you are guaranteed those Blueprints.
Here is the full list of all Blueprints you can get from quest rewards:
- Trigger Nade Blueprint: Rewarded after completing “Sparks Fly”.
- Lure Grenade Blueprint: Rewarded after completing “Greasing Her Palms”.
- Burletta Blueprint: Rewarded after completing “Industrial Espionage”.
- Hullcracker Blueprint (and Launcher Ammo Blueprint): Rewarded after completing “The Major’s Footlocker”.
Alas, that’s only 4 Blueprints out of a total of 75 to unlock, so for the vast majority you will need to find them yourself during a raid. If you’re intent on farming Blueprints, then it’s best to equip yourself with cheap gear in case you lose it, but don’t use a free loadout because then you won’t get a safe pocket to stash any new Blueprint you find. No pain in Arc Raiders is sharper than failing to extract with a new Blueprint you’ve been after for a dozen hours already.

One of the best ways to get Blueprints is by hitting three stars on all five Trials every week. |Image credit:Rock Paper Shotgun/Embark Studios
Blueprints obtained from Trials
One of the very best ways to get Blueprints is as rewards for completing Trials in Arc Raiders. Trials are unlocked from Level 15 onwards, and allow you to earn rewards by focusing on certain tasks over the course of several raids. For example, one Trial might task you with dealing damage to Hornets, while another might challenge you to loot Supply Drops.
Trials refresh on a weekly basis, with a new week bringing five new Trials. Each Trial can offer up to three rewards after passing certain score milestones, and it’s possible to receive very high level loot from these reward crates - including Blueprints. So if you want to unlock as many Blueprints as possible, you should make a point of completing as many Trials as possible each week.
Best Blueprint farming locations
The very best way to get Blueprints is to frequent specific areas of the maps which combine high-tier loot pools with the right types of containers to search. Here are my recommendations for where to find Blueprints on every map, so you can always keep the search going for new crafting recipes to unlock.

Image credit:Rock Paper Shotgun/Embark Studios
Dam Battlegrounds
The best places to farm Blueprints on Dam Battlegrounds are the Control Tower, Power Generation Complex, Ruby Residence, and Pale Apartments . The first two regions, despite only being marked on the map as mid-tier loot, contain a phenomenal number of containers to loot. The Control Tower can also contain a couple of high-tier Security Lockers - though of course, you’ll need to have unlocked the Security Breach skill at the end of the Survival tree.
There’s also a lot of reporting amongst the playerbase that the Residential areas in the top-left of the map - Pale Apartments and Ruby Residence - give you a comparatively strong chance of finding Blueprints. Considering their size, there’s a high density of containers to loot in both locations, and they also have the benefit of being fairly out of the way. So you’re more likely to have all the containers to yourself.
Buried City
The best Blueprint farming locations on Buried City are the Santa Maria Houses, Grandioso Apartments, Town Hall, and the various buildings of the New District . Grandioso Apartments has a lower number of containers than the rest, but a high chance of spawning weapon cases - which have good Blueprint drop rates. The others are high-tier loot areas, with plenty of lootable containers - including Security Lockers.
Spaceport
The best places to find Blueprints on Spaceport are the Arrival and Departure Buildings, as well as Control Tower A6 and the Launch Towers . All these areas are labelled as high-value loot regions, and many of them are also very handily connected to one another by the Spaceport wall, which you can use to quickly run from one area to the next. At the tops of most of these buildings you’ll find at least one Security Locker, so this is an excellent farming route for players looking to find Blueprints.
The downside to looting Blueprints on Spaceport is that all these areas are hotly contested, particularly in Duos and Squads. You’ll need to be very focused and fast in order to complete the full farming route.

Image credit:Rock Paper Shotgun/Embark Studios
Blue Gate
Blue Gate tends to have a good chance of dropping Blueprints, potentially because it generally has a high number of containers which can hold lots of items; so there’s a higher chance of a Blueprint spawning in each container. In my experience, the best Blueprint farming spots on Blue Gate are Pilgrim’s Peak, Raider’s Refuge, the Ancient Fort, and the Underground Complex beneath the Warehouse .
All of these areas contain a wealth of containers to loot. Raider’s Refuge has less to loot, but the majority of the containers in and around the Refuge are raider containers, which have a high chance of containing Blueprints - particularly during major events.
Stella Montis
On the whole, Stella Montis seems to have a very low drop rate for Blueprints (though a high chance of dropping other high-tier loot). If you do want to try farming Blueprints on this map, the best places to find Blueprints in Stella Montis are Medical Research, Assembly Workshop, and the Business Center . These areas have the highest density of containers to loot on the map.
In addition to this, the Western Tunnel has a few different Security Lockers to loot, so while there’s very little to loot elsewhere in this area of the map, it’s worth hitting those Security Lockers if you spawn there at the start of a match.
That wraps up this primer on how to get all the Blueprints in Arc Raiders as quickly as possible. With the Expedition system constantly resetting a large number of players’ Blueprints, it’s more important than ever to have the most up-to-date information on where to find all these Blueprints.
While you’re here, be sure to check out our Arc Raiders best guns tier list , as well as our primers on the best skills to unlock and all the different Field Depot locations on every map.

ARC Raiders
PS5 , Xbox Series X/S , PC
Rock Paper Shotgun is better when you sign in
Sign in and join us on our journey to discover strange and compelling PC games.
