Warhammer 40,000: Space Marine 2 review: a devoted sequel of swords and spectacle
Grim lark
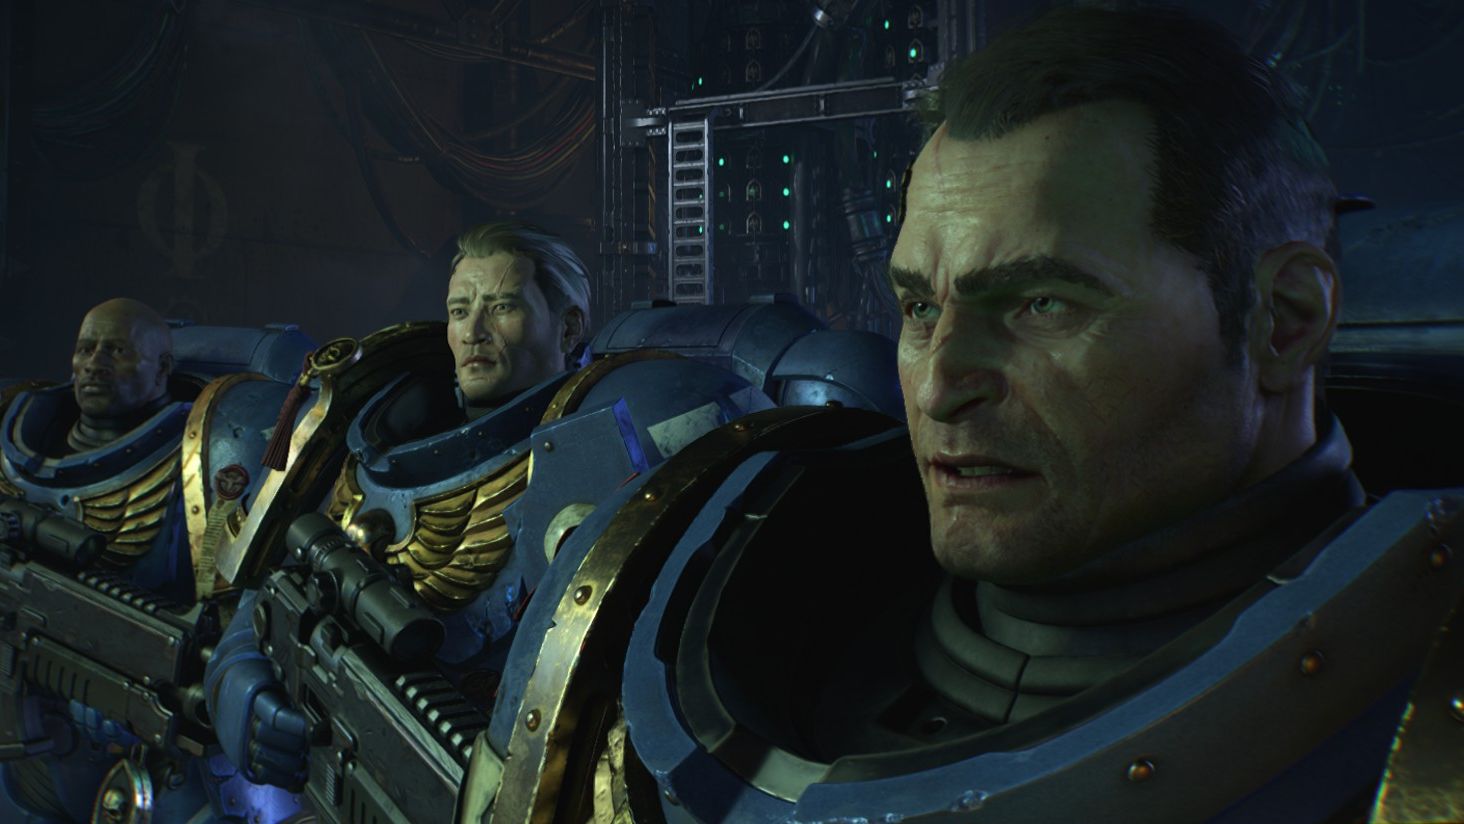
Image credit:Rock Paper Shotgun / Focus Entertainment

- Developer: Saber Interactive
- Publisher: Focus Entertainment
- Release: Sept 9th
- On: Windows
- From: Epic Games , Steam
- Price: £55/$60/€60
- Reviewed on: Intel Core-i7-11700F, 16GB RAM, Nvidia GeForce RTX 3060, Windows 10
It’s been 13 years since the first Space Marine came out. While it wasn’t outstanding in the grander landscape of gaming, enough Warhammer 40K fans seem to have cherished the escapades of bulky blue boltgunner Demetrian Titus for the action game to merit a sequel a decade later. It left its story on something of a cliffhanger, with said hero being dragged away to face untold tortures by the Inquisition, the most zealous sect of this preternaturally paranoid sci-fi universe. Today, Titus is free again. Free to stomp towards hordes of alien foes, blast them with a plasma incinerator, and shred the stragglers with a chainsaw sword. Space Marine 2 is an often-satisfying scrapper that has me convinced of 40K’s merit as a crafting ground for excellent-looking environments and creatures, even if I’m not particularly moved by the bland character of Titus and his fellow Ultramarines.
To provide some context, Titus has been found not guilty after a brief 100-year stint in the torture chambers. We meet him being recruited back into the marines, where he is tasked with leading a squad against endless swarms of tyranids (basically very spiky xenomorphs).

The story takes many cues from the first game. For example, one of your new sidekicks, Gadriel, mirrors the personality of a doublecrossing dirtbag named Leandros from Titus’ first adventure (an intentional callback to seed suggestions of mistrust among the squad). And other developments in the plot rhyme with twists of the first game. As a fan you might have two reactions to this kind of story. It may be a comfort blanket of nostalgia, complete with recognisable threads and motifs, or it may be a missed opportunity to take a new direction, and develop Titus or his cohorts in some deeper way.
In other words, this is no grandly moving myth, and our marines are all so similar in their gruff temperament that it’s hard for any depth to make itself known. As a story of camaraderie persevering in an environment of overwhelming mistrust, it fulfils its function with a sensuous flogging of the Warhammer 40K lexicon. But even as someone who knows little about this world, this is - in its broad strokes - a predictable tale.

Image credit:Rock Paper Shotgun / Focus Entertainment
The levels themselves will see you charging into various frays with a mix of ranged and melee combat. It does that health regaining trick made popular by Bloodborne , whereby you can steal back some of your trimmed lost health bar, provided you strike back at an enemy quickly enough. And you have a powerful “rage” ability that also regains your health as you tear through baddies (more on that in a bit).
Eventually fighting becomes a rhythmic loop of thinning out an approaching swarm with your autobolt rifle or heavy bolt pistol, before falling back on the chainsaw, combat knife, or power sword to mop up any creeps that make it through the bullet spray. My favourite guns were the close-quarters Melta rifle, which has a hefty and broad blast, or the chargey railgun zaps of the Las Fusil. But you can also indulge in versatile charged shots with a Plasma Incinerator, flamethrowing Pyreblasters, Stalker rifles with a scope, and boltguns with a grenade launcher attachment. There are quite a few guns that don’t feel significantly distinct from one another, but once you find the right bolter for you, it doesn’t matter much. They all feel heavy and punchy.
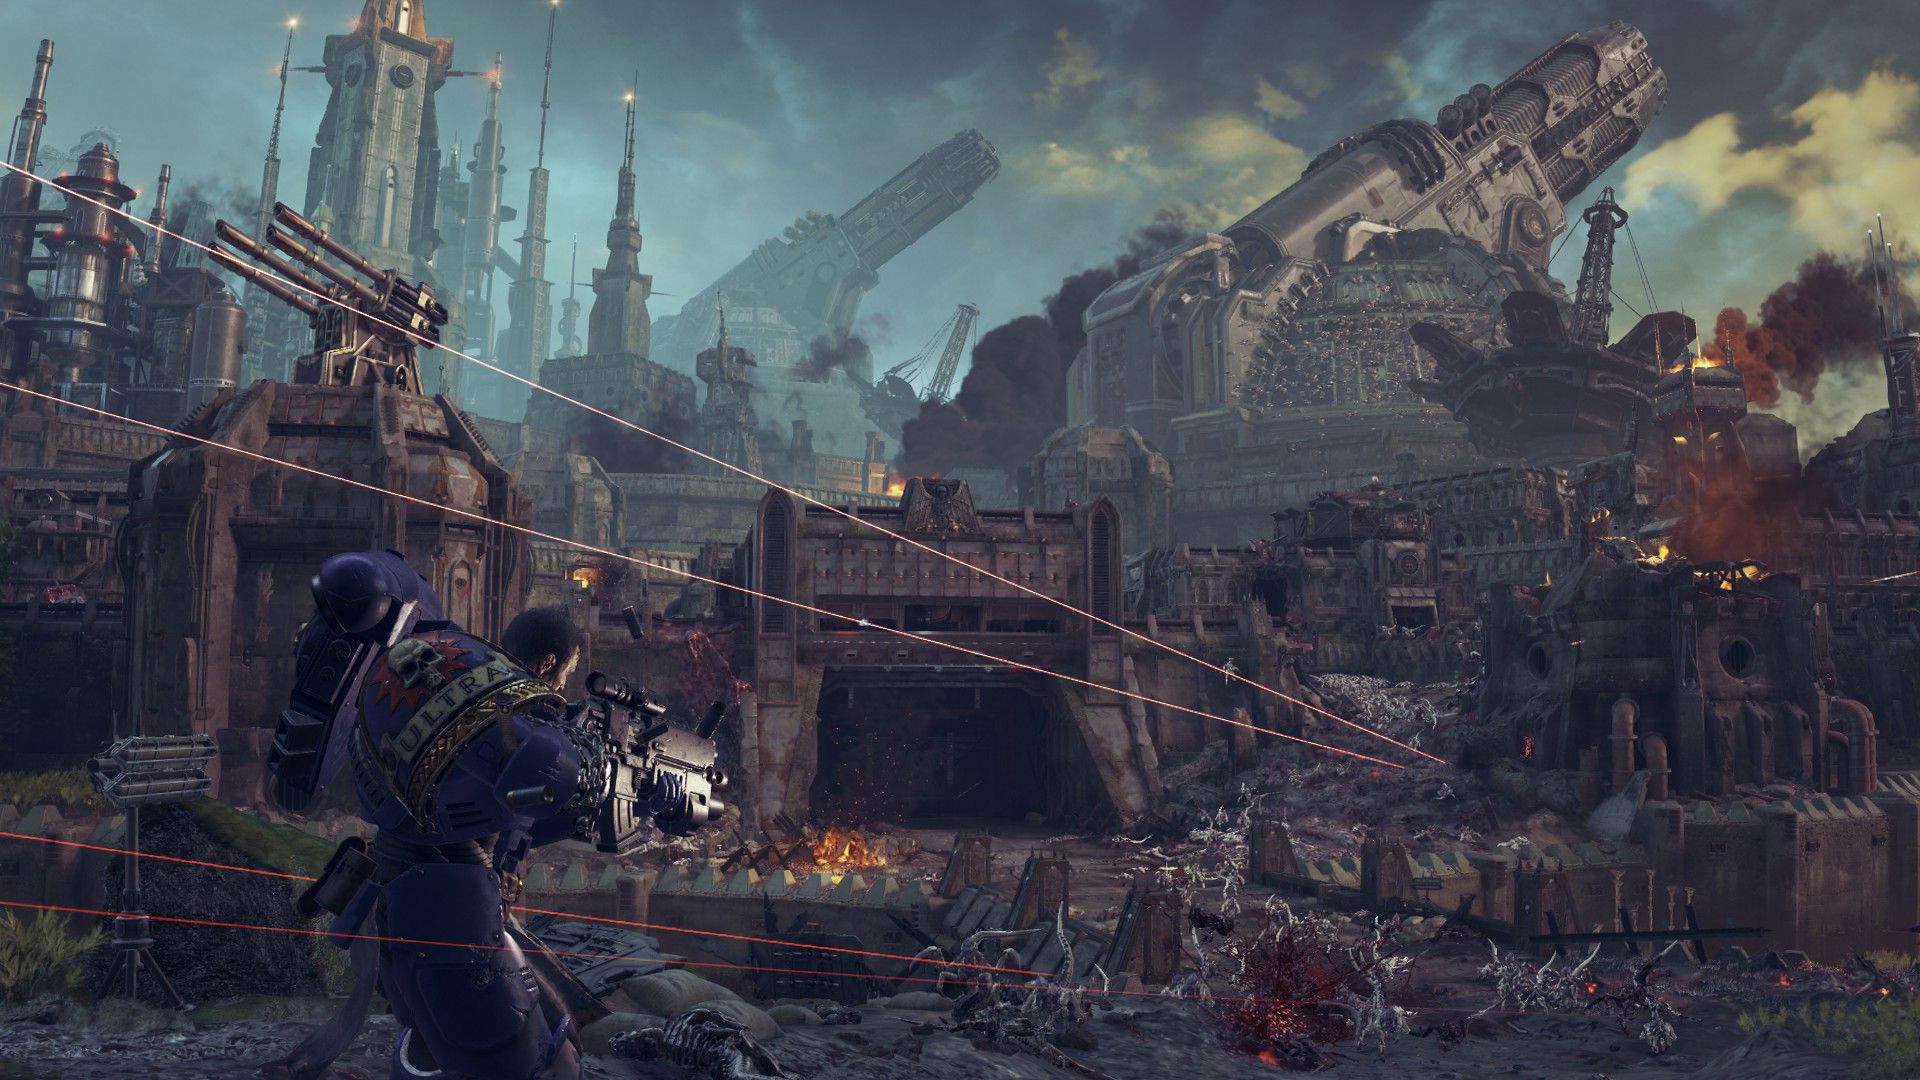
Image credit:Rock Paper Shotgun / Focus Entertainment
I’m less convinced by the parry system, which works well enough when telegraphed by big blue circles, but feels less precise when parrying basic attacks, or the often overlong windup animations of boss attacks. There’s a related problem in that the combat space is often so crowded with enemies that it sometimes becomes difficult to tell what is actually hitting you. Sure, the melee combat feels gory and satisfying, with all its stomps and swipes. But it’s also very busy, and I find parry systems work best when I’m given a focus, rather than trying to time a counterattack in the midst of a dogpile. Some boss fights can also become intensely noisy with visual effects that make even seeing the warning reticules very difficult.
The sense of fracas becomes most irksome when fighting airborne enemies. One sequence sees you juggling a flamethrower, melee combat, and a ranged pistol, while dodging quick unblockable attacks from floating psychic tyranids. Late in this scene there is barely room to catch a moment in which to strike, you’re so busy dodging attacks.

Image credit:Rock Paper Shotgun / Focus Entertainment
In fairness, this might be the result of that particular level being primarily designed as a co-op multiplayer mission, yet also needing to exist as a single player experience. It’s hard to design objectives, spaces, and enemy encounters that will satisfy both requirements. I played alone, but in co-op this same overwhelming sequence might feel badass, as each squad member takes on a different task - one flamethrower dealing with the rats, another soldier battering melee dorks, and a third on lookout for buff-billowing floatbastards. In singleplayer, your AI teammates don’t have that level of coordination, and you end up having to multitask in a manner that doesn’t always feel smooth or flowing.
Scrambles like this might be a good time to use your special “rage” mode - but it has a punitively long cooldown, and I’m a scrimper by nature. If I know something is rare, I want to save it. This is the old problem of “grenade hoarding” in another guise, and I doubt I’ll be the only one who simply forgets that this ability exists. But again, in multiplayer, the other characters have different abilities. And in one mid-game mission each player’s ability is replaced by some fluid and fabulous jump jets.

Image credit:Rock Paper Shotgun / Focus Entertainment
It’s stunning how much these jetpacks change the flow of combat. For much of the fighting up to this point, I craved some extra way of either dealing with a swampy crowd or removing myself from a fight (the basic dash is limited - you’re very heavy). The jet pack allows for both, giving you a huge stomping airborne attack, and a means of quickly boosting away from your current predicament. Once introduced, it feels like the real way to play Space Marine 2, and yet this merry toy is almost immediately taken away from you after this level, and only reappears once more in a slightly less interesting space. (In the campaign, anyway - I haven’t found the time to play through the six side Operations that look like they’re intended as the most replayable of the multiplayer meat).
I’ve been yammering on about the combat and abilities mostly because I want to get the nitty-gritty button-pushing stuff out of the way. Whatever misgivings I have about it, the combat remains a perfectly fine mix of gunblastin’, hammer-slammin’, and bottle-animated executin’. The jetpacking level got my blood pumping, but what impressed me most about the game is its lusty and rabid devotion to the visual aesthetics, atmosphere, and internal culture of Warhammer 40K.


Or my limited understanding of it. I’m not the most Warhammerest of people here at RPS (that would be Nic, who I believe is part Skaven). My favourite artefact of the 40K universe is not a game or novel or tabletop warrior, but the funny video of the snake wot got legs . Until watching multiple lore explainer videos in service of this review, that mechanised reptile was the extent of my 40K knowledge. So let’s examine whether Space Marine 2 feels like a good entry point to this world, especially considering the developer’s own assertions on this point. “Space Marine 2 is just as captivating and entertaining, whether you’re versed in Warhammer 40,000 lore or not,” they say in a press release. “Knowing the complete storyline of the first game is not a requirement.”
I always find statements like this difficult to swallow. 40K is such a huge and developed world by now that it’s intimidating just to glance at its gleaming pauldrons. I went to see the third Deadpool movie as a Marvel half-hearter and was repeatedly told “you don’t need to have seen the previous two movies to enjoy it”. Then I was assailed by cameos and TV spin-off characters whose significance I did not comprehend in the slightest. This is the “blorko effect” writ large, and it equally applies here - right down to the late-stage character reveals.

Image credit:Rock Paper Shotgun / Focus Entertainment
For Space Marine 2, I suspect I would have been adrift without those explainer videos. The feeling of being lost in a pre-existing web of factions and millennia of history definitely grew stronger in later sequences, where I got the sense that some characters were significant in a way I didn’t appreciate. Having said this, there is value in diving into the deep end of an existing universe completely cold, and submerging yourself in wild vernacular. Just know that’s what you’re signing up for.
To sum up my understanding of the universe following this blorko bath, 40K is a realm of over-the-top heft, of taking the unnecessarily brutish route through every problem. And that sense of a hideously comical overengineering goes double for the greebly craft on display when it comes to environmental design, probably my favourite thing about the game. Warhammer 40K is a maximalist melange of decaying Roman empire motifs embedded among sci-fi pipes, railings, metal grates, hanging wires, and rusty girders. All of this liberally daubed with skulls, of course.
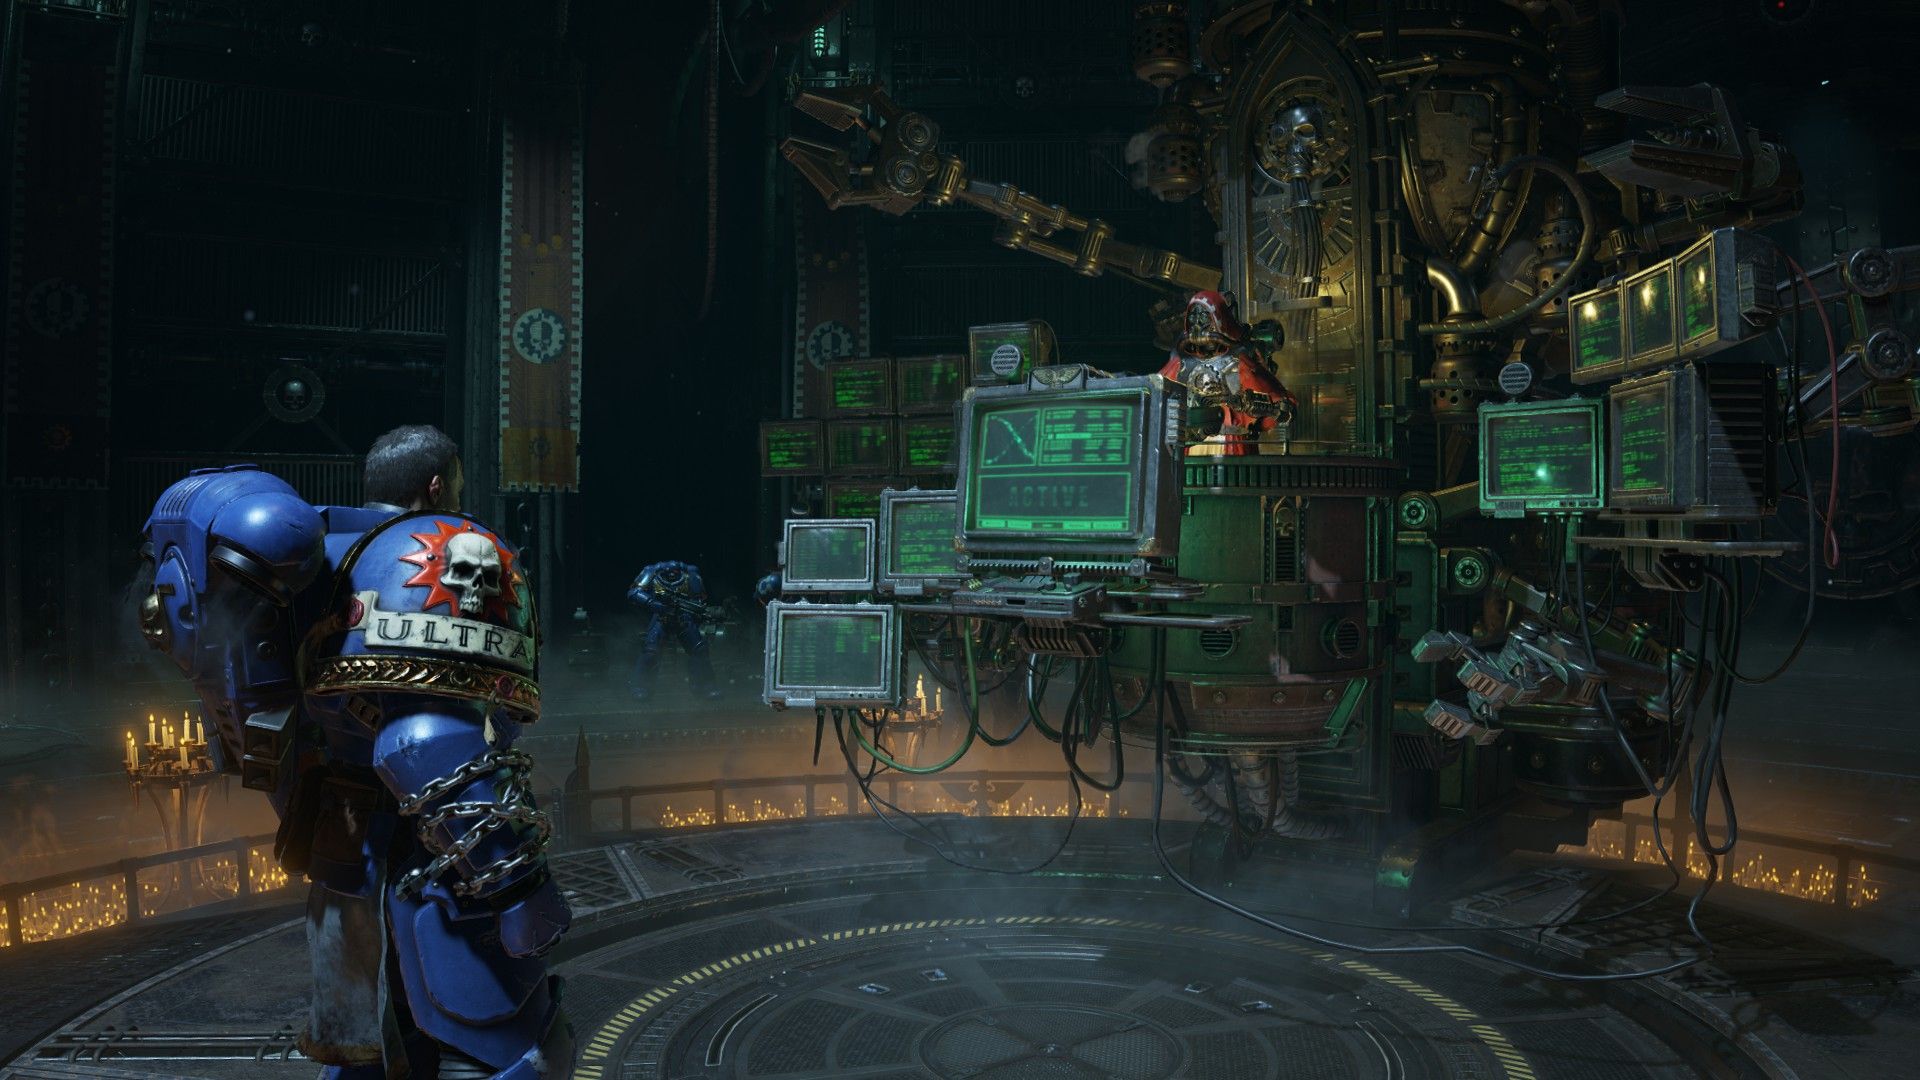
Image credit:Rock Paper Shotgun / Focus Entertainment
Even as someone for whom the aesthetic of tabletop Warhammer never truly gelled (I think giant shoulder pads make everyone look like a knucklehead NFL player), I deeply admire the work that goes into the meticulous recreation of this expansive universe of sad metal and terrifying cyber-cherubs. You look into the sky and see the murmurations of tyranids and think not: “alien scum” but “beautiful alien scum”. The grand decor of the Imperium, equal parts ornate and outlandish, is represented in oversized cathedral control rooms, in planet-spanning Sagrada Familias, in supererogatory skyboxes. These spaces are such an amalgamation of skill and effort that I was constantly pausing and dipping into photo mode. As a reviewer, I constantly take screenshots of games I play. On average I might take 30-50 screenshots of a game. For Space Marine 2, I took 235. I pressed the F12 key more times than I activated my rage ability.
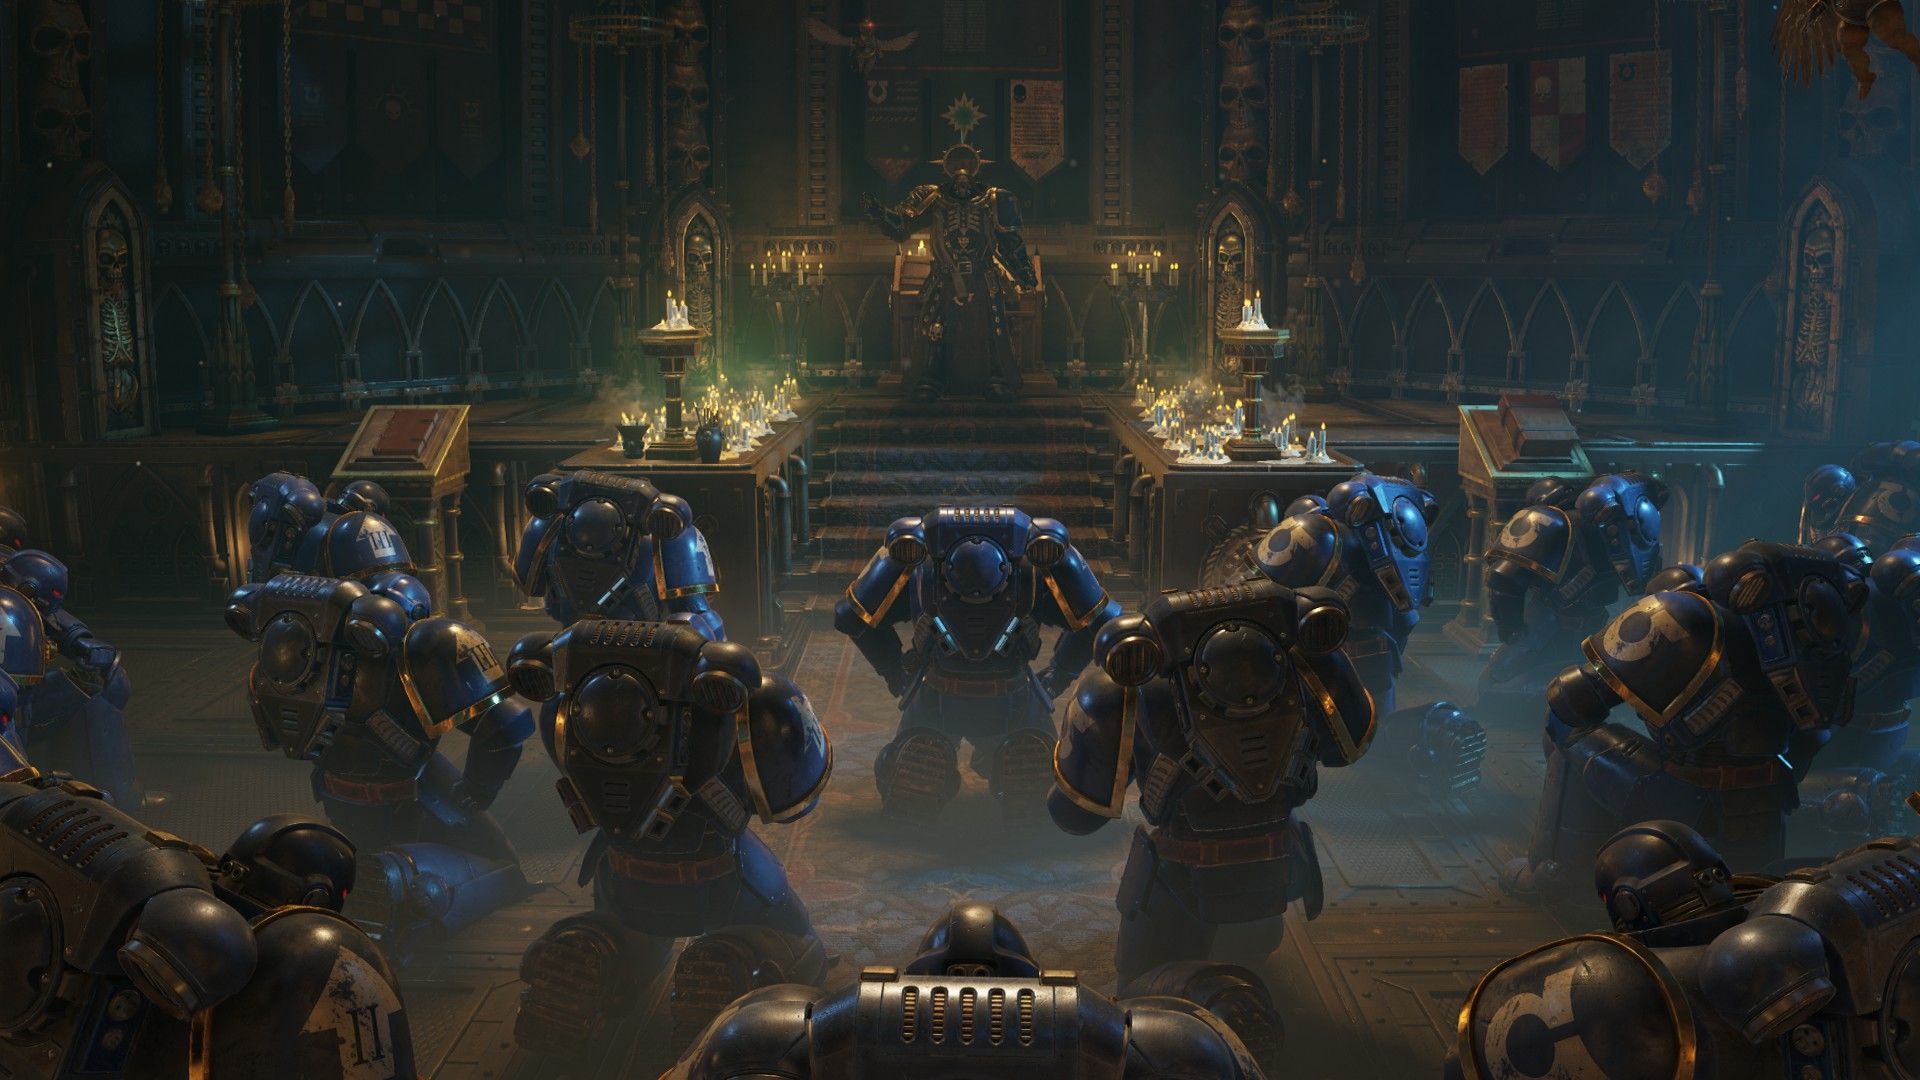
Image credit:Rock Paper Shotgun / Focus Entertainment
It’s not all beauty, mind. I did notice some severe frame drops, and got caught in more than a few freezy moments playing on “High” graphical settings. The sound also periodically bottomed out for some reason. And it was always painfully slow to exit to desktop. Of course, I’m reviewing this in a vacuum, so I don’t know how widespread technical difficulties like this might be when it comes to release day. Suffice to say this is PC gaming. As ever, stay frosty.
In short, this is a hulking jaunt through a gauntlet of scum, traitors, filth, and heretics. The social landscape of 40K’s galactic hellwar is fuelled primarily by hatred and secondarily by a twisted sense of honour. And it’s so overblown it is often Verhoeveningly funny . But within the confines of its own delightful cesspit, the story does its job. It gives us an excuse to see a chaos demon smashing the graves of a thousand unknown souls to pieces. The guns ’n’ galumphing likewise serves its weighty purpose. From the perspective of an outsider, this is a well-crafted third-person action game with a story somewhat bloated with lore. From the perspective of a fan, it may be pure ambrosia.
Find out how we conduct our reviews by reading our review policy .
Warhammer 40,000: Space Marine II
PS5 , Xbox Series X/S , PC
Rock Paper Shotgun is better when you sign in
Sign in and join us on our journey to discover strange and compelling PC games.

All 75 Arc Raiders Blueprints and where to get them
These areas have the highest chance of giving you Blueprints

Image credit:Rock Paper Shotgun/Embark Studios

Looking for more Arc Raiders Blueprints? It’s a special day when you find a Blueprint, as they’re among the most valuable items in Arc Raiders. If you find a Blueprint that you haven’t already found, then you must make sure you hold onto it at all costs, because Blueprints are the key to one of the most important and powerful systems of meta-progression in the game.
This guide aims to be the very best guide on Blueprints you can find, starting with a primer on what exactly they are and how they work in Arc Raiders, before delving into exactly where to get Blueprints and the very best farming spots for you to take in your search.
We’ll also go over how to get Blueprints from other unlikely activities, such as destroying Surveyors and completing specific quests. And you’ll also find the full list of all 75 Blueprints in Arc Raiders on this page (including the newest Blueprints added with the Cold Snap update , such as the Deadline Blueprint and Firework Box Blueprint), giving you all the information you need to expand your own crafting repertoire.
In this guide:
- What are Blueprints in Arc Raiders?
- Full Blueprint list: All crafting recipes
- Where to find Blueprints in Arc Raiders Blueprints obtained from quests Blueprints obtained from Trials Best Blueprint farming locations

What are Blueprints in Arc Raiders?
Blueprints in Arc Raiders are special items which, if you manage to extract with them, you can expend to permanently unlock a new crafting recipe in your Workshop. If you manage to extract from a raid with an Anvil Blueprint, for example, you can unlock the ability to craft your very own Anvil Pistol, as many times as you like (as long as you have the crafting materials).
To use a Blueprint, simply open your Inventory while in the lobby, then right-click on the Blueprint and click “Learn And Consume” . This will permanently unlock the recipe for that item in your Workshop. As of the Stella Montis update, there are allegedly 75 different Blueprints to unlock - although only 68 are confirmed to be in the game so far. You can see all the Blueprints you’ve found and unlocked by going to the Workshop menu, and hitting “R” to bring up the Blueprint screen.
It’s possible to find duplicates of past Blueprints you’ve already unlocked. If you find these, then you can either sell them, or - if you like to play with friends - you can take it into a match and gift it to your friend so they can unlock that recipe for themselves. Another option is to keep hold of them until the time comes to donate them to the Expedition.
Full Blueprint list: All crafting recipes
Below is the full list of all the Blueprints that are currently available to find in Arc Raiders, and the crafting recipe required for each item:
| Blueprint | Type | Recipe | Crafted At |
|---|---|---|---|
| Bettina | Weapon | 3x Advanced Mechanical Components 3x Heavy Gun Parts 3x Canister | Gunsmith 3 |
| Blue Light Stick | Quick Use | 3x Chemicals | Utility Station 1 |
| Aphelion | Weapon | 3x Magnetic Accelerator 3x Complex Gun Parts 1x Matriarch Reactor | Gunsmith 3 |
| Combat Mk. 3 (Flanking) | Augment | 2x Advanced Electrical Components 3x Processor | Gear Bench 3 |
| Combat Mk. 3 (Aggressive) | Augment | 2x Advanced Electrical Components 3x Processor | Gear Bench 3 |
| Complex Gun Parts | Material | 2x Light Gun Parts 2x Medium Gun Parts 2x Heavy Gun Parts | Refiner 3 |
| Fireworks Box | Quick Use | 1x Explosive Compound 3x Pop Trigger | Explosives Station 2 |
| Gas Mine | Mine | 4x Chemicals 2x Rubber Parts | Explosives Station 1 |
| Green Light Stick | Quick Use | 3x Chemicals | Utility Station 1 |
| Pulse Mine | Mine | 1x Crude Explosives 1x Wires | Explosives Station 1 |
| Seeker Grenade | Grenade | 1x Crude Explosives 2x ARC Alloy | Explosives Station 1 |
| Looting Mk. 3 (Survivor) | Augment | 2x Advanced Electrical Components 3x Processor | Gear Bench 3 |
| Angled Grip II | Mod | 2x Mechanical Components 3x Duct Tape | Gunsmith 2 |
| Angled Grip III | Mod | 2x Mod Components 5x Duct Tape | Gunsmith 3 |
| Hullcracker | Weapon | 1x Magnetic Accelerator 3x Heavy Gun Parts 1x Exodus Modules | Gunsmith 3 |
| Launcher Ammo | Ammo | 5x Metal Parts 1x Crude Explosives | Workbench 1 |
| Anvil | Weapon | 5x Mechanical Components 5x Simple Gun Parts | Gunsmith 2 |
| Anvil Splitter | Mod | 2x Mod Components 3x Processor | Gunsmith 3 |
| ??? | ??? | ??? | ??? |
| Barricade Kit | Quick Use | 1x Mechanical Components | Utility Station 2 |
| Blaze Grenade | Grenade | 1x Explosive Compound 2x Oil | Explosives Station 3 |
| Bobcat | Weapon | 3x Advanced Mechanical Components 3x Light Gun Parts | Gunsmith 3 |
| Osprey | Weapon | 2x Advanced Mechanical Components 3x Medium Gun Parts 7x Wires | Gunsmith 3 |
| Burletta | Weapon | 3x Mechanical Components 3x Simple Gun Parts | Gunsmith 1 |
| Compensator II | Mod | 2x Mechanical Components 4x Wires | Gunsmith 2 |
| Compensator III | Mod | 2x Mod Components 8x Wires | Gunsmith 3 |
| Defibrillator | Quick Use | 9x Plastic Parts 1x Moss | Medical Lab 2 |
| ??? | ??? | ??? | ??? |
| Equalizer | Weapon | 3x Magnetic Accelerator 3x Complex Gun Parts 1x Queen Reactor | Gunsmith 3 |
| Extended Barrel | Mod | 2x Mod Components 8x Wires | Gunsmith 3 |
| Extended Light Mag II | Mod | 2x Mechanical Components 3x Steel Spring | Gunsmith 2 |
| Extended Light Mag III | Mod | 2x Mod Components 5x Steel Spring | Gunsmith 3 |
| Extended Medium Mag II | Mod | 2x Mechanical Components 3x Steel Spring | Gunsmith 2 |
| Extended Medium Mag III | Mod | 2x Mod Components 5x Steel Spring | Gunsmith 3 |
| Extended Shotgun Mag II | Mod | 2x Mechanical Components 3x Steel Spring | Gunsmith 2 |
| Extended Shotgun Mag III | Mod | 2x Mod Components 5x Steel Spring | Gunsmith 3 |
| Remote Raider Flare | Quick Use | 2x Chemicals 4x Rubber Parts | Utility Station 1 |
| Heavy Gun Parts | Material | 4x Simple Gun Parts | Refiner 2 |
| Venator | Weapon | 2x Advanced Mechanical Components 3x Medium Gun Parts 5x Magnet | Gunsmith 3 |
| Il Toro | Weapon | 5x Mechanical Components 6x Simple Gun Parts | Gunsmith 1 |
| Jolt Mine | Mine | 1x Electrical Components 1x Battery | Explosives Station 2 |
| Explosive Mine | Mine | 1x Explosive Compound 1x Sensors | Explosives Station 3 |
| Jupiter | Weapon | 3x Magnetic Accelerator 3x Complex Gun Parts 1x Queen Reactor | Gunsmith 3 |
| Light Gun Parts | Material | 4x Simple Gun Parts | Refiner 2 |
| Lightweight Stock | Mod | 2x Mod Components 5x Duct Tape | Gunsmith 3 |
| Lure Grenade | Grenade | 1x Speaker Component 1x Electrical Components | Utility Station 2 |
| Medium Gun Parts | Material | 4x Simple Gun Parts | Refiner 2 |
| Torrente | Weapon | 2x Advanced Mechanical Components 3x Medium Gun Parts 6x Steel Spring | Gunsmith 3 |
| Muzzle Brake II | Mod | 2x Mechanical Components 4x Wires | Gunsmith 2 |
| Muzzle Brake III | Mod | 2x Mod Components 8x Wires | Gunsmith 3 |
| Padded Stock | Mod | 2x Mod Components 5x Duct Tape | Gunsmith 3 |
| Shotgun Choke II | Mod | 2x Mechanical Components 4x Wires | Gunsmith 2 |
| Shotgun Choke III | Mod | 2x Mod Components 8x Wires | Gunsmith 3 |
| Shotgun Silencer | Mod | 2x Mod Components 8x Wires | Gunsmith 3 |
| Showstopper | Grenade | 1x Advanced Electrical Components 1x Voltage Converter | Explosives Station 3 |
| Silencer I | Mod | 2x Mechanical Components 4x Wires | Gunsmith 2 |
| Silencer II | Mod | 2x Mod Components 8x Wires | Gunsmith 3 |
| Snap Hook | Quick Use | 2x Power Rod 3x Rope 1x Exodus Modules | Utility Station 3 |
| Stable Stock II | Mod | 2x Mechanical Components 3x Duct Tape | Gunsmith 2 |
| Stable Stock III | Mod | 2x Mod Components 5x Duct Tape | Gunsmith 3 |
| Tagging Grenade | Grenade | 1x Electrical Components 1x Sensors | Utility Station 3 |
| Tempest | Weapon | 3x Advanced Mechanical Components 3x Medium Gun Parts 3x Canister | Gunsmith 3 |
| Trigger Nade | Grenade | 2x Crude Explosives 1x Processor | Explosives Station 2 |
| Vertical Grip II | Mod | 2x Mechanical Components 3x Duct Tape | Gunsmith 2 |
| Vertical Grip III | Mod | 2x Mod Components 5x Duct Tape | Gunsmith 3 |
| Vita Shot | Quick Use | 2x Antiseptic 1x Syringe | Medical Lab 3 |
| Vita Spray | Quick Use | 3x Antiseptic 1x Canister | Medical Lab 3 |
| Vulcano | Weapon | 1x Magnetic Accelerator 3x Heavy Gun Parts 1x Exodus Modules | Gunsmith 3 |
| Wolfpack | Grenade | 2x Explosive Compound 2x Sensors | Explosives Station 3 |
| Red Light Stick | Quick Use | 3x Chemicals | Utility Station 1 |
| Smoke Grenade | Grenade | 14x Chemicals 1x Canister | Utility Station 2 |
| Deadline | Mine | 3x Explosive Compound 2x ARC Circuitry | Explosives Station 3 |
| Trailblazer | Grenade | 1x Explosive Compound 1x Synthesized Fuel | Explosives Station 3 |
| Tactical Mk. 3 (Defensive) | Augment | 2x Advanced Electrical Components 3x Processor | Gear Bench 3 |
| Tactical Mk. 3 (Healing) | Augment | 2x Advanced Electrical Components 3x Processor | Gear Bench 3 |
| Yellow Light Stick | Quick Use | 3x Chemicals | Utility Station 1 |
Note: The missing Blueprints in this list likely have not actually been added to the game at the time of writing, because none of the playerbase has managed to find any of them. As they are added to the game, I will update this page with the most relevant information so you know exactly how to get all 75 Arc Raiders Blueprints.
Where to find Blueprints in Arc Raiders
Below is a list of all containers, modifiers, and events which maximise your chances of finding Blueprints:
- Certain quests reward you with specific Blueprints .
- Completing Trials has a high chance of offering Blueprints as rewards.
- Surveyors have a decent chance of dropping Blueprints on death.
- High loot value areas tend to have a greater chance of spawning Blueprints.
- Night Raids and Storms may increase rare Blueprint spawn chances in containers.
- Containers with higher numbers of items may have a higher tendency to spawn Blueprints. As a result, Blue Gate (which has many “large” containers containing multiple items) may give you a higher chance of spawning Blueprints.
- Raider containers (Raider Caches, Weapon Boxes, Medical Bags, Grenade Tubes) have increased Blueprint drop rates. As a result, the Uncovered Caches event gives you a high chance of finding Blueprints.
- Security Lockers have a higher than average chance of containing Blueprints.
- Certain Blueprints only seem to spawn under specific circumstances: Tempest Blueprint only spawns during Night Raid events. Vulcano Blueprint only spawns during Hidden Bunker events. Jupiter and Equaliser Blueprints only spawn during Harvester events.

Raider Caches, Weapon Boxes, and other raider-oriented container types have a good chance of offering Blueprints. |Image credit:Rock Paper Shotgun/Embark Studios
Blueprints have a very low chance of spawning in any container in Arc Raiders, around 1-2% on average. However, there is a higher chance of finding Blueprints in particular container types. Specifically, you can find more Blueprints in Raider containers and security lockers.
Beyond this, if you’re looking for Blueprints you should focus on regions of the map which are marked as having particularly high-value loot. Areas such as the Control Tower in Dam Battlegrounds, the Arrival and Departure Buildings in Spaceport, and Pilgrim’s Peak in Blue Gate all have a better-than-average chance of spawning Blueprints somewhere amongst all their containers. Night Raids and Electromagnetic Storm events also increase the drop chances of certain Blueprints .
In addition to these containers, you can often loot Blueprints from destroyed Surveyors - the largest of the rolling ball ARC. Surveyors are more commonly found on the later maps - Spaceport and Blue Gate - and if one spawns in your match, you’ll likely see it by the blue laser beam that it casts into the sky while “surveying”.
Surveyors are quite well-armoured and will very speedily run away from you once it notices you, but if you can take one down then make sure you loot all its parts for a chance of obtaining certain unusual Blueprints.
Blueprints obtained from quests
One way in which you can get Blueprints is by completing certain quests for the vendors in Speranza. Some quests will reward you with a specific item Blueprint upon completion, so as long as you work through all the quests in Arc Raiders, you are guaranteed those Blueprints.
Here is the full list of all Blueprints you can get from quest rewards:
- Trigger Nade Blueprint: Rewarded after completing “Sparks Fly”.
- Lure Grenade Blueprint: Rewarded after completing “Greasing Her Palms”.
- Burletta Blueprint: Rewarded after completing “Industrial Espionage”.
- Hullcracker Blueprint (and Launcher Ammo Blueprint): Rewarded after completing “The Major’s Footlocker”.
Alas, that’s only 4 Blueprints out of a total of 75 to unlock, so for the vast majority you will need to find them yourself during a raid. If you’re intent on farming Blueprints, then it’s best to equip yourself with cheap gear in case you lose it, but don’t use a free loadout because then you won’t get a safe pocket to stash any new Blueprint you find. No pain in Arc Raiders is sharper than failing to extract with a new Blueprint you’ve been after for a dozen hours already.

One of the best ways to get Blueprints is by hitting three stars on all five Trials every week. |Image credit:Rock Paper Shotgun/Embark Studios
Blueprints obtained from Trials
One of the very best ways to get Blueprints is as rewards for completing Trials in Arc Raiders. Trials are unlocked from Level 15 onwards, and allow you to earn rewards by focusing on certain tasks over the course of several raids. For example, one Trial might task you with dealing damage to Hornets, while another might challenge you to loot Supply Drops.
Trials refresh on a weekly basis, with a new week bringing five new Trials. Each Trial can offer up to three rewards after passing certain score milestones, and it’s possible to receive very high level loot from these reward crates - including Blueprints. So if you want to unlock as many Blueprints as possible, you should make a point of completing as many Trials as possible each week.
Best Blueprint farming locations
The very best way to get Blueprints is to frequent specific areas of the maps which combine high-tier loot pools with the right types of containers to search. Here are my recommendations for where to find Blueprints on every map, so you can always keep the search going for new crafting recipes to unlock.

Image credit:Rock Paper Shotgun/Embark Studios
Dam Battlegrounds
The best places to farm Blueprints on Dam Battlegrounds are the Control Tower, Power Generation Complex, Ruby Residence, and Pale Apartments . The first two regions, despite only being marked on the map as mid-tier loot, contain a phenomenal number of containers to loot. The Control Tower can also contain a couple of high-tier Security Lockers - though of course, you’ll need to have unlocked the Security Breach skill at the end of the Survival tree.
There’s also a lot of reporting amongst the playerbase that the Residential areas in the top-left of the map - Pale Apartments and Ruby Residence - give you a comparatively strong chance of finding Blueprints. Considering their size, there’s a high density of containers to loot in both locations, and they also have the benefit of being fairly out of the way. So you’re more likely to have all the containers to yourself.
Buried City
The best Blueprint farming locations on Buried City are the Santa Maria Houses, Grandioso Apartments, Town Hall, and the various buildings of the New District . Grandioso Apartments has a lower number of containers than the rest, but a high chance of spawning weapon cases - which have good Blueprint drop rates. The others are high-tier loot areas, with plenty of lootable containers - including Security Lockers.
Spaceport
The best places to find Blueprints on Spaceport are the Arrival and Departure Buildings, as well as Control Tower A6 and the Launch Towers . All these areas are labelled as high-value loot regions, and many of them are also very handily connected to one another by the Spaceport wall, which you can use to quickly run from one area to the next. At the tops of most of these buildings you’ll find at least one Security Locker, so this is an excellent farming route for players looking to find Blueprints.
The downside to looting Blueprints on Spaceport is that all these areas are hotly contested, particularly in Duos and Squads. You’ll need to be very focused and fast in order to complete the full farming route.

Image credit:Rock Paper Shotgun/Embark Studios
Blue Gate
Blue Gate tends to have a good chance of dropping Blueprints, potentially because it generally has a high number of containers which can hold lots of items; so there’s a higher chance of a Blueprint spawning in each container. In my experience, the best Blueprint farming spots on Blue Gate are Pilgrim’s Peak, Raider’s Refuge, the Ancient Fort, and the Underground Complex beneath the Warehouse .
All of these areas contain a wealth of containers to loot. Raider’s Refuge has less to loot, but the majority of the containers in and around the Refuge are raider containers, which have a high chance of containing Blueprints - particularly during major events.
Stella Montis
On the whole, Stella Montis seems to have a very low drop rate for Blueprints (though a high chance of dropping other high-tier loot). If you do want to try farming Blueprints on this map, the best places to find Blueprints in Stella Montis are Medical Research, Assembly Workshop, and the Business Center . These areas have the highest density of containers to loot on the map.
In addition to this, the Western Tunnel has a few different Security Lockers to loot, so while there’s very little to loot elsewhere in this area of the map, it’s worth hitting those Security Lockers if you spawn there at the start of a match.
That wraps up this primer on how to get all the Blueprints in Arc Raiders as quickly as possible. With the Expedition system constantly resetting a large number of players’ Blueprints, it’s more important than ever to have the most up-to-date information on where to find all these Blueprints.
While you’re here, be sure to check out our Arc Raiders best guns tier list , as well as our primers on the best skills to unlock and all the different Field Depot locations on every map.

ARC Raiders
PS5 , Xbox Series X/S , PC
Rock Paper Shotgun is better when you sign in
Sign in and join us on our journey to discover strange and compelling PC games.
