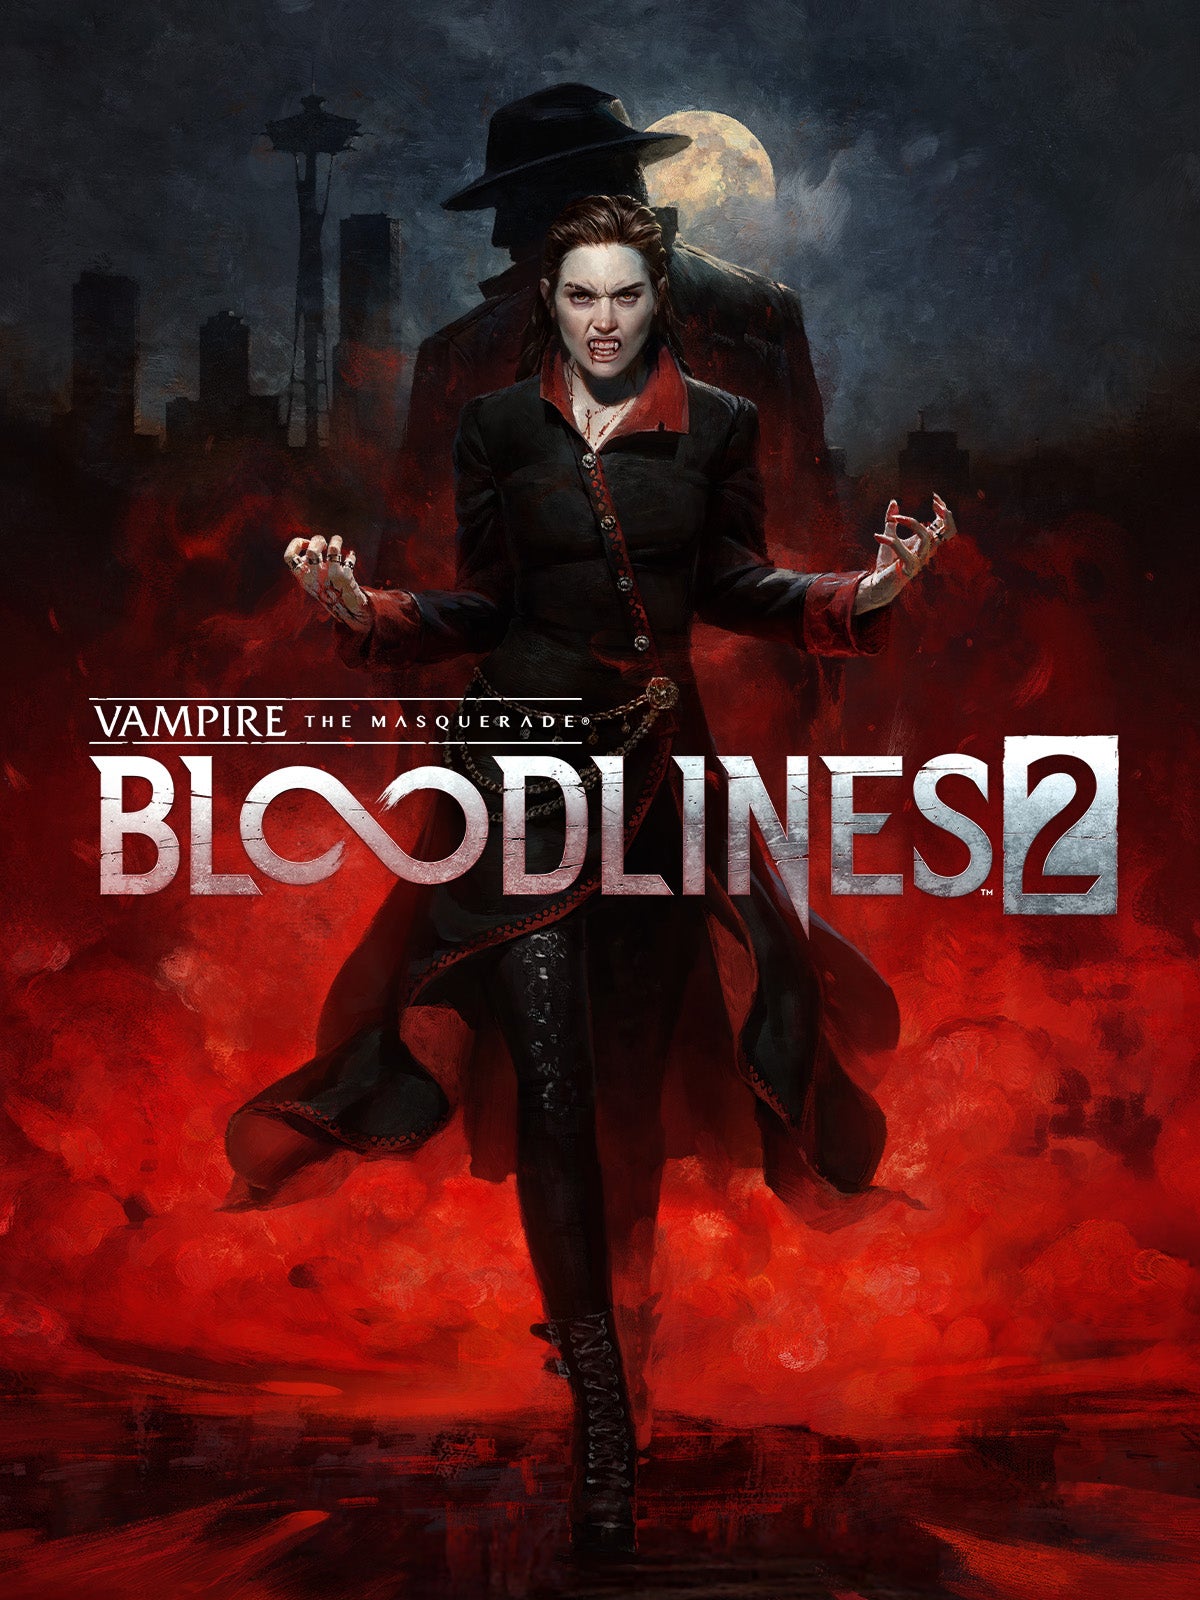
Vampire: The Masquerade - Bloodlines 2 review
The Vampire Phyries

Image credit:Rock Paper Shotgun / Paradox

An entertaining but flawed vampire brawler wrapped in a compelling mystery story. Just don’t mistake this for its cult hit predecessor - it’s no RPG or immersive sim.
- Developer: The Chinese Room
- Publisher: Paradox Interactive
- Release: October 21st 2025
- On: Windows
- From: Steam , Epic Games Store , GOG
- Price: £50/$60 (£75/$90 for Deluxe)
- Reviewed on: Intel Core i9-13900K, 64GB RAM, Nvidia RTX 4090, Windows 11
Let’s get this over with early: Bloodlines 2 probably should not have been called Bloodlines 2. Shared setting and a couple brief, questionable cameos (plus one utterly rubbish bit of cosmetic DLC ) aside, there is little tying this game to Troika’s original janky cult hit FPS/RPG hybrid . This is not an RPG with deep mechanics, a wide variety of character builds or dialogue that reacts to mechanical choices. If that is what you need out of a game bearing this most hallowed of names, then you will be disappointed and frustrated.
But if you are willing to lay decades of dreams to rest and approach it purely on its own terms, you might find an entertaining if flawed romp through the World Of Darkness. A brawl-heavy, linear action game punctuated with Telltale-esque reactive dialogue and held together by a surprisingly compelling, century-spanning undead detective mystery.
Weirdly, I’d say that Bloodlines 2’s closest peer is Teyon’s surprisingly charming Robocop: Rogue City . Another game set within a small spread of dense city streets and combat locations, offering dialogue choices to colour in the margins of a mostly-static story. A story in which your character is a corpse forced into the role of enforcer and investigator at the behest of the city’s cold-blooded rulers. Although, Robocop somehow has more RPG elements. Go figure.
At least your primary protagonist here is more photogenic than Alex Murphy. You’re playing as The Nomad, a semi-customizable (you can tweak their gender, face and outfit, but not skin tone or voice) Dracul-esque elder vampire, waking up from a hundred-year nap into modern-day Seattle. Picking the pseudonym ‘Phyre’ from a band poster, you’re thrown straight into the morally ambiguous action (splattering a couple hapless human security guards) before emerging straight into local vampire courtly intrigue.

Image credit:Rock Paper Shotgun / Paradox
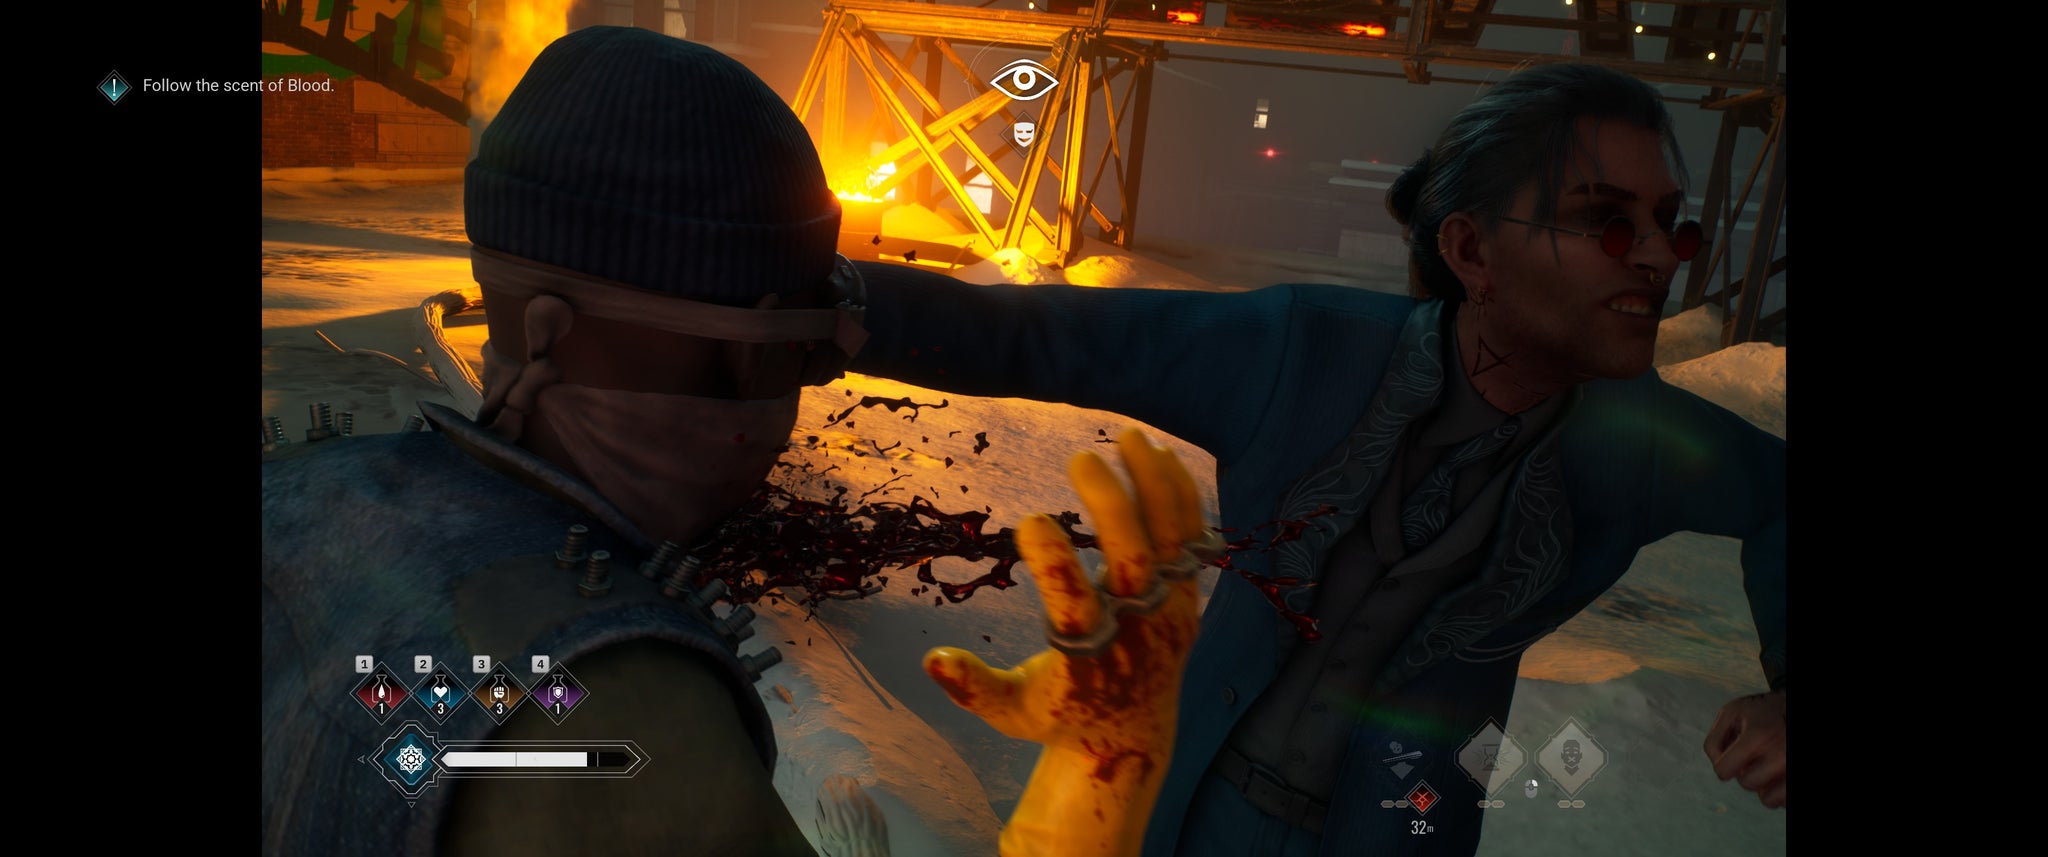
I say ‘primary’ protagonist because due to Plot Reasons, the Nomad is sharing their head with a second vampire’s disembodied personality - Fabien, a show-stealing bloodsucking detective who’s been working the Seattle beat since the 1920s. He’s a Malkavian - a member of a clan of vampires often plagued by visions and madness, but manifesting here as just being a quirky Tex Murphy-like gumshoe.
Fabien is an affable, ever-present voice of comic relief and insight, commenting on your actions and choices in dialogue, and occasionally cheering on your victories in combat. While most of the game has you playing as Phyre over the course of a week in the Emerald City, even a vampire needs their beauty sleep. During the daylight hours, control switches to Fabien’s extended flashback sequences - non-combat segments that use his psychic detective-ish powers to investigate a series of grisly murders dating back a hundred years.
Alternating between the two roles and storytelling styles works well, too. Fabien gets to chat with inanimate objects (really just arguing with his own imagination), dig into people’s memories and navigate conversations through psychic disguises, while Phyre handles all the fighting in the present, armed with a set of basic combat moves, plus four blood-fueled combat abilities based on which of the six clans you chose - an assortment of direct-damage abilities, movement powers, distractions and room-clearing ‘ultimates’.


There’s a whole lot of combat too, and while not without some awkwardness (The Chinese Room’s bread and butter has always been walk-and-talk narrative fare), it’s a mostly satisfying power trip. Operating like a blend of Batman: Arkham City , Dishonored and a first-person Streets Of Rage, Bloodlines 2 is very much not a stealth game, outside of a couple mercifully short instant-fail segments. Sneaking can help, but if the game puts you in a room with enemies, it wants them all dead before it’ll let you continue.
Fortunately, the Nomad is built for brawling, with a mixture of basic light and heavy punches - the latter sometimes setting enemies up for satisfying but infrequent air-juggle combos - triggered by short or long mouse clicks, and an assortment of poorly-tutorialised, multi-target kick moves performed by dodging in a direction and following up with an attack. You are tanky, aggressive and can heal and restore uses of your four clan-specific combat powers by finishing off enemies with a quick bite-punctuated finishing move. A bit like nu-Doom’s glory kills, albeit with less varied animations.
As you get further into Bloodlines 2, more powerful, interesting-to-fight enemies are introduced, and more weapons become available. While you can’t equip any gear permanently, the Nomad’s telekinesis power (available at all times with no cost) lets you magically throw knives and swords as projectiles, lob explosive gas canisters or pick up guns just long enough to empty them in the rough direction of an aggressor before discarding. The rhythm of brawling, improvising with dropped weapons, burning through combat powers, and refueling them with finishers is an engrossing loop.
Still, there’s a few rookie mistakes here. Things can get messy if too many enemies corner you in melee range. And as mentioned, parts of the combat are poorly explained, with kicks - especially the powerful dropkick move - never even getting mentioned, and a parry move - the only real defensive option, performed by dashing forwards - being largely useless in my experience. I would also recommend anyone re-bind the keys for the game’s four potion types - a non-replenishable resource only found in combat zones. They’re bound to the 1-4 buttons by default, and it’s all too easy to accidentally chug them, especially given that activating your combat powers requires you to hold the right mouse button and press one of those four keys, too.
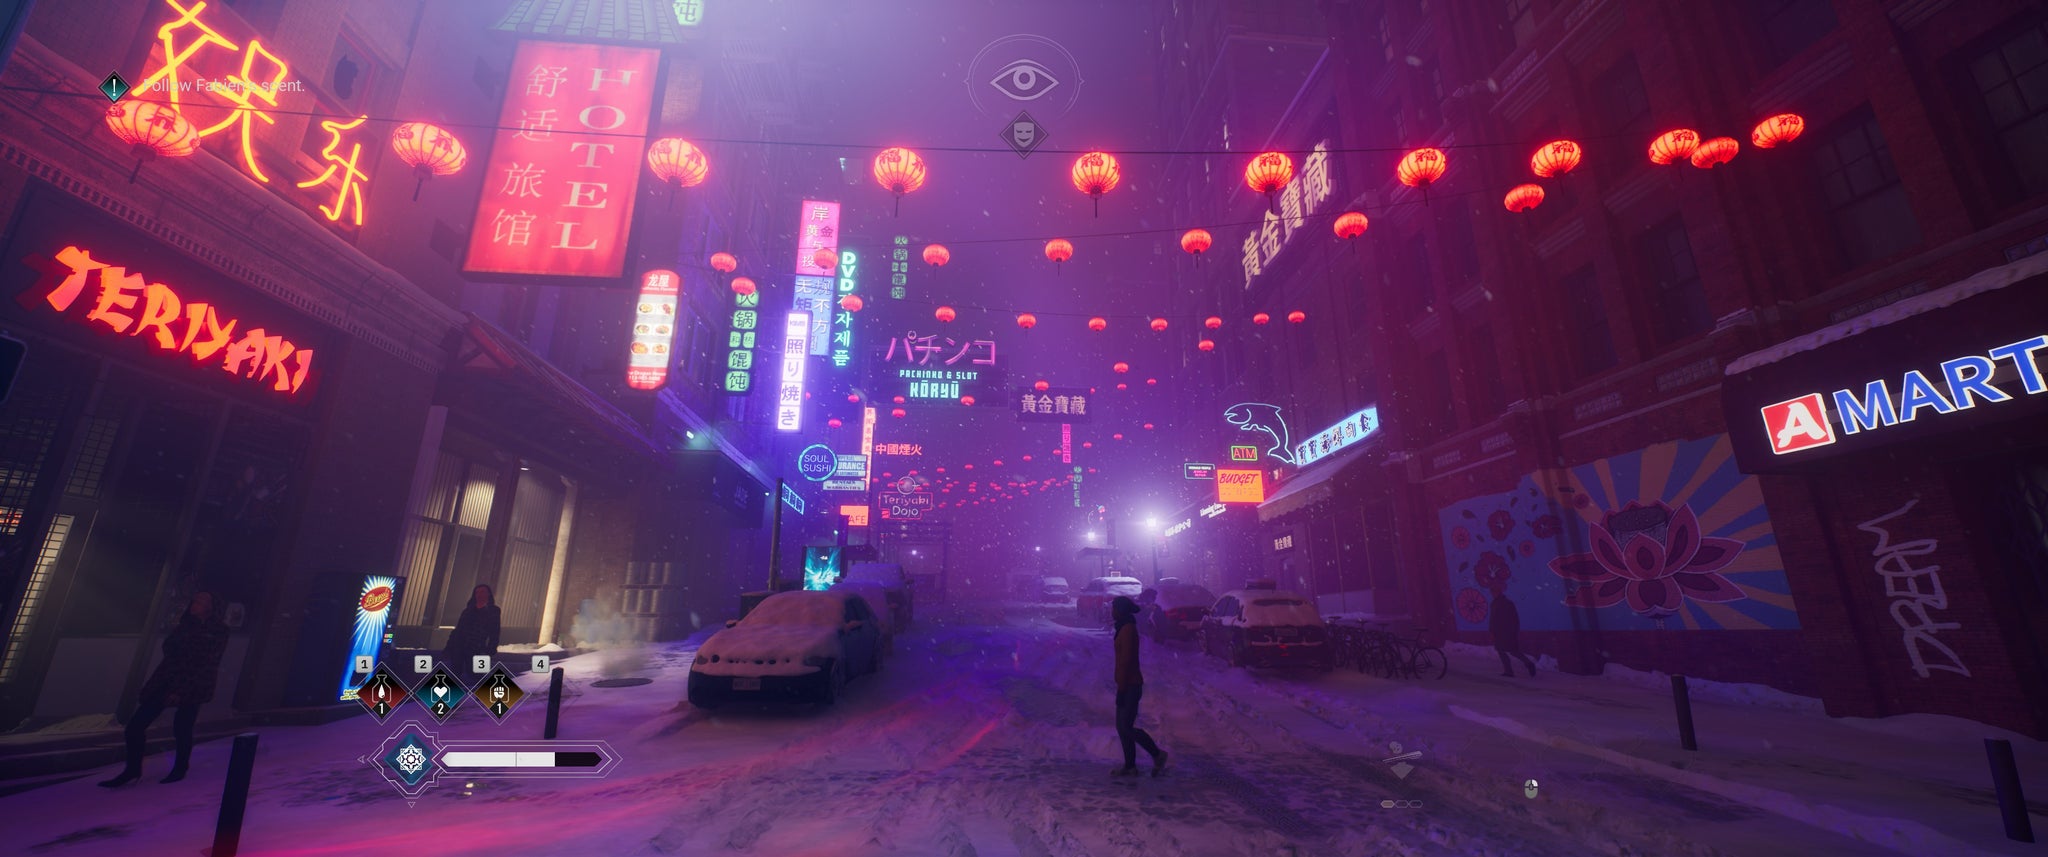
Image credit:Rock Paper Shotgun / Paradox
Outside of combat, Seattle is a surprisingly small place, approximately four blocks by four blocks, less than a square kilometer, all of it lying under several inches of snow and gearing up for Christmas celebrations. Less an open world, more a handful of very scenic streets that you’ll quickly become very familiar with. They’re gorgeous environments though, with neon lights illuminating the snowy haze around buildings.
Inside and out, each set is meticulously dressed, if usually static. Curiously, texture detail is wildly variable. Some walls are covered with signs that you can read every bit of fine print on, while others are illegible smears that look twenty years old. Everything looks great from a distance, but the insides of some rooms are full of these clashing assets. At least the end result is mercifully light on hard-drive space, with the game clocking in at a relatively svelte 25gb.
As scenic as Seattle’s streets might be from a distance, they are just sets for characters to act against. ‘Hunting’ humans for blood is a tedious process but only really necessary if you don’t want to bother climbing to the rooftops to pick on randomly spawning packs of enemies for healing. While not really providing any kind of reward - combat provides minimal XP, and there are no money or loot systems here - rooftop fights do get entertaining later on in the game, when rival enemy factions plus Seattle’s police department turn the upper city into a messy warzone, while the locals below pretend to not hear the constant screaming and gunfire. Still, it’s combat for combat’s sake, if the main mission areas haven’t sated your bloodlust.
Back at street level, the worst part is the sidequests, which are unquestionably bad. Each of the six vampire clan representatives scattered around town offers a little bit of dialogue about themselves and their faction, a ‘romance’ option that begins with awkward flirting and ends in a fade-to-black and a couple lines of eye-rolling dialogue, plus (most crucially) the option to unlock powers from the other clans, letting you swap out any of your default four - the closest thing the game has to RPG mechanics.

Image credit:Rock Paper Shotgun / Paradox
The problem being that to earn those unlocks, you’ve got to do busy-work, and it is the most shameless padding I’ve seen in any kind of open world in a long time. One vampire wants you to assassinate human targets. One wants you to assassinate named but otherwise regular enemies around the map. Another offers fetch quests, and the last three want you to tediously scour the city for hard-to-spot collectibles. Without fail, they are all time-wasters offering not a single interesting encounter, and should only be engaged with if you really want a specific power from another clan.
Bloodlines 2 does have a lot of little flaws around its edges, some of which could get patched in the course of around half a year of planned DLC, some of which are unshakeably structural, but the story the game tells kept me going until the end. This is a tightly written vampire murder mystery, delivered more theatrically than cinematically, with dialogue and exposition often happening with a handful of characters trading verbal blows against one of The Chinese Room’s exquisitely dressed backdrops. A few red herrings that feel like dropped story threads from a more ambitious iteration of the game aside, it builds up the layers of intrigue nicely, and almost all the cast (a couple dozen vampires and their minions) are just the right balance of shifty and flamboyant enough to keep you guessing at motivations, until the revelation-heavy final act.
Funnily enough, two of the biggest players in the story - the player character and Ryong Choi, the newly-appointed ruler of the city’s vampire population - are the blandest. The latter being a by-the-books corporate type as stiff as her pant suit, and the former’s motivations being yours to shape, within limits. Forcibly assigned the role of Seattle’s vampire ‘sheriff’ not long into the story, whether Phyre is working for personal gain, a desire to keep vampire society on the down-low, or benevolence to man and bloodsucker alike is up for you to choose.
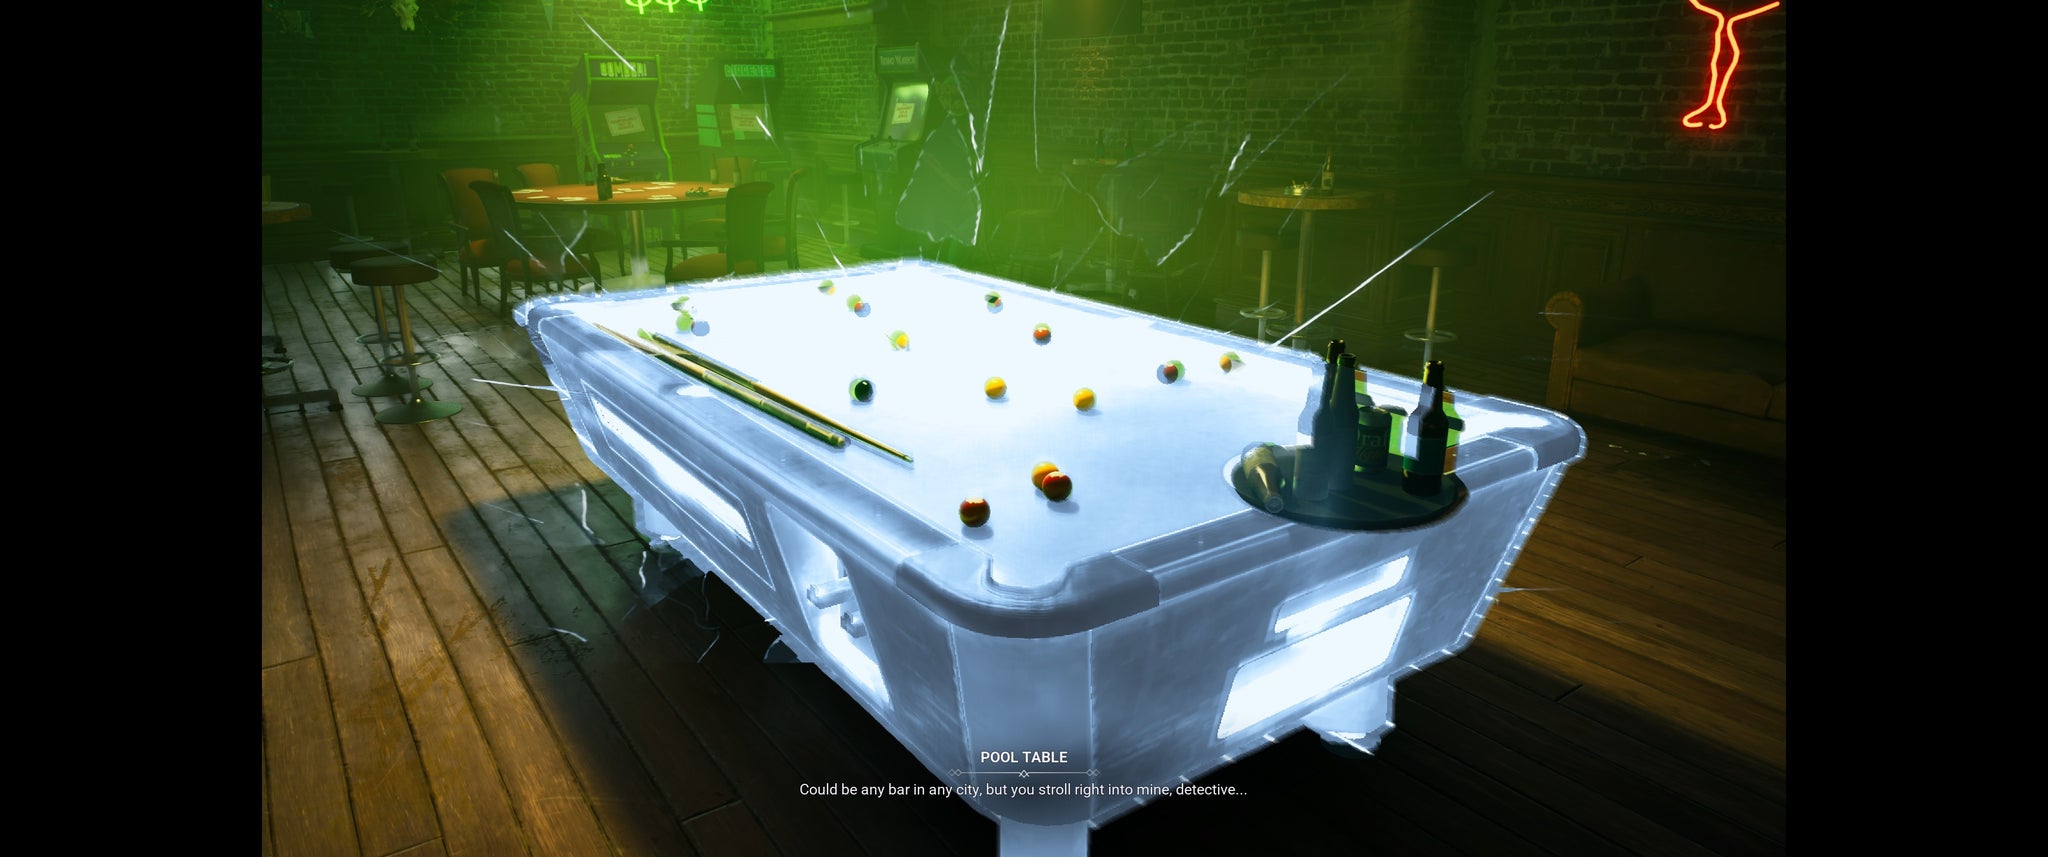
Image credit:Rock Paper Shotgun / Paradox
But it’s Fabien that steals the show. Even when playing as Phyre, he’s a cheerful, advising voice in your head that gives everything a bit more colour, and better still when you’re playing as him during those lengthy flashback sections. He’s a goofy 1920s gumshoe archetype that just happens to be a vampire, not so much hunting as accepting blood donations from a handful of contacts around town, fueling his ability to have sassy pieces of evidence back-talk him, or to interview suspects magically disguised as a random person that the interviewee knows, leaving you to navigate dialogue trees carefully to figure out who he’s even playing the role of. His presence turns Bloodlines 2 into a buddy cop drama with vampires. Phyre’s the good/bad/murderous straight man/woman (depending on how you play them) and Fabien’s the funny one. And it mostly works.
But is ‘mostly’ good enough to justify that steep price tag? The overall problem here is that in a year packed with absolutely amazing games of all shapes and sizes, Bloodlines 2 is merely okay. An entertaining mid-budget way to pass a few evenings in a familiar setting. With the credits rolling after around 22 hours, including some skippable sidequests, I can’t deny that I enjoyed most of my time with it, but not enough to have me replaying it any time soon.
Not that there’s much reason to, either. A cursory attempt to yank the story off the rails by picking every antisocial, confrontational dialogue option resulted in the plot following the exact same trajectory, with somewhat snippier interactions with the cast and a few new lines of incidental dialogue based on clan choice. Being an elder vampire means that people will put up with a LOT of your bullshit, it seems. Aside from some Fallout-esque epilogue slides based on your few choices, there’s not much you can do to steer the story. Not an inherent flaw if you’re willing to judge this game on its own terms, but a final nail in the coffin for those hoping Troika’s legacy lives on through this game.
Find out how we conduct our reviews by reading our review policy .
Vampire: The Masquerade - Bloodlines 2
PS4 , PS5 , Xbox One , Xbox Series X/S , PC
Rock Paper Shotgun is better when you sign in
Sign in and join us on our journey to discover strange and compelling PC games.

All 75 Arc Raiders Blueprints and where to get them
These areas have the highest chance of giving you Blueprints

Image credit:Rock Paper Shotgun/Embark Studios

Looking for more Arc Raiders Blueprints? It’s a special day when you find a Blueprint, as they’re among the most valuable items in Arc Raiders. If you find a Blueprint that you haven’t already found, then you must make sure you hold onto it at all costs, because Blueprints are the key to one of the most important and powerful systems of meta-progression in the game.
This guide aims to be the very best guide on Blueprints you can find, starting with a primer on what exactly they are and how they work in Arc Raiders, before delving into exactly where to get Blueprints and the very best farming spots for you to take in your search.
We’ll also go over how to get Blueprints from other unlikely activities, such as destroying Surveyors and completing specific quests. And you’ll also find the full list of all 75 Blueprints in Arc Raiders on this page (including the newest Blueprints added with the Cold Snap update , such as the Deadline Blueprint and Firework Box Blueprint), giving you all the information you need to expand your own crafting repertoire.
In this guide:
- What are Blueprints in Arc Raiders?
- Full Blueprint list: All crafting recipes
- Where to find Blueprints in Arc Raiders Blueprints obtained from quests Blueprints obtained from Trials Best Blueprint farming locations

What are Blueprints in Arc Raiders?
Blueprints in Arc Raiders are special items which, if you manage to extract with them, you can expend to permanently unlock a new crafting recipe in your Workshop. If you manage to extract from a raid with an Anvil Blueprint, for example, you can unlock the ability to craft your very own Anvil Pistol, as many times as you like (as long as you have the crafting materials).
To use a Blueprint, simply open your Inventory while in the lobby, then right-click on the Blueprint and click “Learn And Consume” . This will permanently unlock the recipe for that item in your Workshop. As of the Stella Montis update, there are allegedly 75 different Blueprints to unlock - although only 68 are confirmed to be in the game so far. You can see all the Blueprints you’ve found and unlocked by going to the Workshop menu, and hitting “R” to bring up the Blueprint screen.
It’s possible to find duplicates of past Blueprints you’ve already unlocked. If you find these, then you can either sell them, or - if you like to play with friends - you can take it into a match and gift it to your friend so they can unlock that recipe for themselves. Another option is to keep hold of them until the time comes to donate them to the Expedition.
Full Blueprint list: All crafting recipes
Below is the full list of all the Blueprints that are currently available to find in Arc Raiders, and the crafting recipe required for each item:
| Blueprint | Type | Recipe | Crafted At |
|---|---|---|---|
| Bettina | Weapon | 3x Advanced Mechanical Components 3x Heavy Gun Parts 3x Canister | Gunsmith 3 |
| Blue Light Stick | Quick Use | 3x Chemicals | Utility Station 1 |
| Aphelion | Weapon | 3x Magnetic Accelerator 3x Complex Gun Parts 1x Matriarch Reactor | Gunsmith 3 |
| Combat Mk. 3 (Flanking) | Augment | 2x Advanced Electrical Components 3x Processor | Gear Bench 3 |
| Combat Mk. 3 (Aggressive) | Augment | 2x Advanced Electrical Components 3x Processor | Gear Bench 3 |
| Complex Gun Parts | Material | 2x Light Gun Parts 2x Medium Gun Parts 2x Heavy Gun Parts | Refiner 3 |
| Fireworks Box | Quick Use | 1x Explosive Compound 3x Pop Trigger | Explosives Station 2 |
| Gas Mine | Mine | 4x Chemicals 2x Rubber Parts | Explosives Station 1 |
| Green Light Stick | Quick Use | 3x Chemicals | Utility Station 1 |
| Pulse Mine | Mine | 1x Crude Explosives 1x Wires | Explosives Station 1 |
| Seeker Grenade | Grenade | 1x Crude Explosives 2x ARC Alloy | Explosives Station 1 |
| Looting Mk. 3 (Survivor) | Augment | 2x Advanced Electrical Components 3x Processor | Gear Bench 3 |
| Angled Grip II | Mod | 2x Mechanical Components 3x Duct Tape | Gunsmith 2 |
| Angled Grip III | Mod | 2x Mod Components 5x Duct Tape | Gunsmith 3 |
| Hullcracker | Weapon | 1x Magnetic Accelerator 3x Heavy Gun Parts 1x Exodus Modules | Gunsmith 3 |
| Launcher Ammo | Ammo | 5x Metal Parts 1x Crude Explosives | Workbench 1 |
| Anvil | Weapon | 5x Mechanical Components 5x Simple Gun Parts | Gunsmith 2 |
| Anvil Splitter | Mod | 2x Mod Components 3x Processor | Gunsmith 3 |
| ??? | ??? | ??? | ??? |
| Barricade Kit | Quick Use | 1x Mechanical Components | Utility Station 2 |
| Blaze Grenade | Grenade | 1x Explosive Compound 2x Oil | Explosives Station 3 |
| Bobcat | Weapon | 3x Advanced Mechanical Components 3x Light Gun Parts | Gunsmith 3 |
| Osprey | Weapon | 2x Advanced Mechanical Components 3x Medium Gun Parts 7x Wires | Gunsmith 3 |
| Burletta | Weapon | 3x Mechanical Components 3x Simple Gun Parts | Gunsmith 1 |
| Compensator II | Mod | 2x Mechanical Components 4x Wires | Gunsmith 2 |
| Compensator III | Mod | 2x Mod Components 8x Wires | Gunsmith 3 |
| Defibrillator | Quick Use | 9x Plastic Parts 1x Moss | Medical Lab 2 |
| ??? | ??? | ??? | ??? |
| Equalizer | Weapon | 3x Magnetic Accelerator 3x Complex Gun Parts 1x Queen Reactor | Gunsmith 3 |
| Extended Barrel | Mod | 2x Mod Components 8x Wires | Gunsmith 3 |
| Extended Light Mag II | Mod | 2x Mechanical Components 3x Steel Spring | Gunsmith 2 |
| Extended Light Mag III | Mod | 2x Mod Components 5x Steel Spring | Gunsmith 3 |
| Extended Medium Mag II | Mod | 2x Mechanical Components 3x Steel Spring | Gunsmith 2 |
| Extended Medium Mag III | Mod | 2x Mod Components 5x Steel Spring | Gunsmith 3 |
| Extended Shotgun Mag II | Mod | 2x Mechanical Components 3x Steel Spring | Gunsmith 2 |
| Extended Shotgun Mag III | Mod | 2x Mod Components 5x Steel Spring | Gunsmith 3 |
| Remote Raider Flare | Quick Use | 2x Chemicals 4x Rubber Parts | Utility Station 1 |
| Heavy Gun Parts | Material | 4x Simple Gun Parts | Refiner 2 |
| Venator | Weapon | 2x Advanced Mechanical Components 3x Medium Gun Parts 5x Magnet | Gunsmith 3 |
| Il Toro | Weapon | 5x Mechanical Components 6x Simple Gun Parts | Gunsmith 1 |
| Jolt Mine | Mine | 1x Electrical Components 1x Battery | Explosives Station 2 |
| Explosive Mine | Mine | 1x Explosive Compound 1x Sensors | Explosives Station 3 |
| Jupiter | Weapon | 3x Magnetic Accelerator 3x Complex Gun Parts 1x Queen Reactor | Gunsmith 3 |
| Light Gun Parts | Material | 4x Simple Gun Parts | Refiner 2 |
| Lightweight Stock | Mod | 2x Mod Components 5x Duct Tape | Gunsmith 3 |
| Lure Grenade | Grenade | 1x Speaker Component 1x Electrical Components | Utility Station 2 |
| Medium Gun Parts | Material | 4x Simple Gun Parts | Refiner 2 |
| Torrente | Weapon | 2x Advanced Mechanical Components 3x Medium Gun Parts 6x Steel Spring | Gunsmith 3 |
| Muzzle Brake II | Mod | 2x Mechanical Components 4x Wires | Gunsmith 2 |
| Muzzle Brake III | Mod | 2x Mod Components 8x Wires | Gunsmith 3 |
| Padded Stock | Mod | 2x Mod Components 5x Duct Tape | Gunsmith 3 |
| Shotgun Choke II | Mod | 2x Mechanical Components 4x Wires | Gunsmith 2 |
| Shotgun Choke III | Mod | 2x Mod Components 8x Wires | Gunsmith 3 |
| Shotgun Silencer | Mod | 2x Mod Components 8x Wires | Gunsmith 3 |
| Showstopper | Grenade | 1x Advanced Electrical Components 1x Voltage Converter | Explosives Station 3 |
| Silencer I | Mod | 2x Mechanical Components 4x Wires | Gunsmith 2 |
| Silencer II | Mod | 2x Mod Components 8x Wires | Gunsmith 3 |
| Snap Hook | Quick Use | 2x Power Rod 3x Rope 1x Exodus Modules | Utility Station 3 |
| Stable Stock II | Mod | 2x Mechanical Components 3x Duct Tape | Gunsmith 2 |
| Stable Stock III | Mod | 2x Mod Components 5x Duct Tape | Gunsmith 3 |
| Tagging Grenade | Grenade | 1x Electrical Components 1x Sensors | Utility Station 3 |
| Tempest | Weapon | 3x Advanced Mechanical Components 3x Medium Gun Parts 3x Canister | Gunsmith 3 |
| Trigger Nade | Grenade | 2x Crude Explosives 1x Processor | Explosives Station 2 |
| Vertical Grip II | Mod | 2x Mechanical Components 3x Duct Tape | Gunsmith 2 |
| Vertical Grip III | Mod | 2x Mod Components 5x Duct Tape | Gunsmith 3 |
| Vita Shot | Quick Use | 2x Antiseptic 1x Syringe | Medical Lab 3 |
| Vita Spray | Quick Use | 3x Antiseptic 1x Canister | Medical Lab 3 |
| Vulcano | Weapon | 1x Magnetic Accelerator 3x Heavy Gun Parts 1x Exodus Modules | Gunsmith 3 |
| Wolfpack | Grenade | 2x Explosive Compound 2x Sensors | Explosives Station 3 |
| Red Light Stick | Quick Use | 3x Chemicals | Utility Station 1 |
| Smoke Grenade | Grenade | 14x Chemicals 1x Canister | Utility Station 2 |
| Deadline | Mine | 3x Explosive Compound 2x ARC Circuitry | Explosives Station 3 |
| Trailblazer | Grenade | 1x Explosive Compound 1x Synthesized Fuel | Explosives Station 3 |
| Tactical Mk. 3 (Defensive) | Augment | 2x Advanced Electrical Components 3x Processor | Gear Bench 3 |
| Tactical Mk. 3 (Healing) | Augment | 2x Advanced Electrical Components 3x Processor | Gear Bench 3 |
| Yellow Light Stick | Quick Use | 3x Chemicals | Utility Station 1 |
Note: The missing Blueprints in this list likely have not actually been added to the game at the time of writing, because none of the playerbase has managed to find any of them. As they are added to the game, I will update this page with the most relevant information so you know exactly how to get all 75 Arc Raiders Blueprints.
Where to find Blueprints in Arc Raiders
Below is a list of all containers, modifiers, and events which maximise your chances of finding Blueprints:
- Certain quests reward you with specific Blueprints .
- Completing Trials has a high chance of offering Blueprints as rewards.
- Surveyors have a decent chance of dropping Blueprints on death.
- High loot value areas tend to have a greater chance of spawning Blueprints.
- Night Raids and Storms may increase rare Blueprint spawn chances in containers.
- Containers with higher numbers of items may have a higher tendency to spawn Blueprints. As a result, Blue Gate (which has many “large” containers containing multiple items) may give you a higher chance of spawning Blueprints.
- Raider containers (Raider Caches, Weapon Boxes, Medical Bags, Grenade Tubes) have increased Blueprint drop rates. As a result, the Uncovered Caches event gives you a high chance of finding Blueprints.
- Security Lockers have a higher than average chance of containing Blueprints.
- Certain Blueprints only seem to spawn under specific circumstances: Tempest Blueprint only spawns during Night Raid events. Vulcano Blueprint only spawns during Hidden Bunker events. Jupiter and Equaliser Blueprints only spawn during Harvester events.

Raider Caches, Weapon Boxes, and other raider-oriented container types have a good chance of offering Blueprints. |Image credit:Rock Paper Shotgun/Embark Studios
Blueprints have a very low chance of spawning in any container in Arc Raiders, around 1-2% on average. However, there is a higher chance of finding Blueprints in particular container types. Specifically, you can find more Blueprints in Raider containers and security lockers.
Beyond this, if you’re looking for Blueprints you should focus on regions of the map which are marked as having particularly high-value loot. Areas such as the Control Tower in Dam Battlegrounds, the Arrival and Departure Buildings in Spaceport, and Pilgrim’s Peak in Blue Gate all have a better-than-average chance of spawning Blueprints somewhere amongst all their containers. Night Raids and Electromagnetic Storm events also increase the drop chances of certain Blueprints .
In addition to these containers, you can often loot Blueprints from destroyed Surveyors - the largest of the rolling ball ARC. Surveyors are more commonly found on the later maps - Spaceport and Blue Gate - and if one spawns in your match, you’ll likely see it by the blue laser beam that it casts into the sky while “surveying”.
Surveyors are quite well-armoured and will very speedily run away from you once it notices you, but if you can take one down then make sure you loot all its parts for a chance of obtaining certain unusual Blueprints.
Blueprints obtained from quests
One way in which you can get Blueprints is by completing certain quests for the vendors in Speranza. Some quests will reward you with a specific item Blueprint upon completion, so as long as you work through all the quests in Arc Raiders, you are guaranteed those Blueprints.
Here is the full list of all Blueprints you can get from quest rewards:
- Trigger Nade Blueprint: Rewarded after completing “Sparks Fly”.
- Lure Grenade Blueprint: Rewarded after completing “Greasing Her Palms”.
- Burletta Blueprint: Rewarded after completing “Industrial Espionage”.
- Hullcracker Blueprint (and Launcher Ammo Blueprint): Rewarded after completing “The Major’s Footlocker”.
Alas, that’s only 4 Blueprints out of a total of 75 to unlock, so for the vast majority you will need to find them yourself during a raid. If you’re intent on farming Blueprints, then it’s best to equip yourself with cheap gear in case you lose it, but don’t use a free loadout because then you won’t get a safe pocket to stash any new Blueprint you find. No pain in Arc Raiders is sharper than failing to extract with a new Blueprint you’ve been after for a dozen hours already.

One of the best ways to get Blueprints is by hitting three stars on all five Trials every week. |Image credit:Rock Paper Shotgun/Embark Studios
Blueprints obtained from Trials
One of the very best ways to get Blueprints is as rewards for completing Trials in Arc Raiders. Trials are unlocked from Level 15 onwards, and allow you to earn rewards by focusing on certain tasks over the course of several raids. For example, one Trial might task you with dealing damage to Hornets, while another might challenge you to loot Supply Drops.
Trials refresh on a weekly basis, with a new week bringing five new Trials. Each Trial can offer up to three rewards after passing certain score milestones, and it’s possible to receive very high level loot from these reward crates - including Blueprints. So if you want to unlock as many Blueprints as possible, you should make a point of completing as many Trials as possible each week.
Best Blueprint farming locations
The very best way to get Blueprints is to frequent specific areas of the maps which combine high-tier loot pools with the right types of containers to search. Here are my recommendations for where to find Blueprints on every map, so you can always keep the search going for new crafting recipes to unlock.

Image credit:Rock Paper Shotgun/Embark Studios
Dam Battlegrounds
The best places to farm Blueprints on Dam Battlegrounds are the Control Tower, Power Generation Complex, Ruby Residence, and Pale Apartments . The first two regions, despite only being marked on the map as mid-tier loot, contain a phenomenal number of containers to loot. The Control Tower can also contain a couple of high-tier Security Lockers - though of course, you’ll need to have unlocked the Security Breach skill at the end of the Survival tree.
There’s also a lot of reporting amongst the playerbase that the Residential areas in the top-left of the map - Pale Apartments and Ruby Residence - give you a comparatively strong chance of finding Blueprints. Considering their size, there’s a high density of containers to loot in both locations, and they also have the benefit of being fairly out of the way. So you’re more likely to have all the containers to yourself.
Buried City
The best Blueprint farming locations on Buried City are the Santa Maria Houses, Grandioso Apartments, Town Hall, and the various buildings of the New District . Grandioso Apartments has a lower number of containers than the rest, but a high chance of spawning weapon cases - which have good Blueprint drop rates. The others are high-tier loot areas, with plenty of lootable containers - including Security Lockers.
Spaceport
The best places to find Blueprints on Spaceport are the Arrival and Departure Buildings, as well as Control Tower A6 and the Launch Towers . All these areas are labelled as high-value loot regions, and many of them are also very handily connected to one another by the Spaceport wall, which you can use to quickly run from one area to the next. At the tops of most of these buildings you’ll find at least one Security Locker, so this is an excellent farming route for players looking to find Blueprints.
The downside to looting Blueprints on Spaceport is that all these areas are hotly contested, particularly in Duos and Squads. You’ll need to be very focused and fast in order to complete the full farming route.

Image credit:Rock Paper Shotgun/Embark Studios
Blue Gate
Blue Gate tends to have a good chance of dropping Blueprints, potentially because it generally has a high number of containers which can hold lots of items; so there’s a higher chance of a Blueprint spawning in each container. In my experience, the best Blueprint farming spots on Blue Gate are Pilgrim’s Peak, Raider’s Refuge, the Ancient Fort, and the Underground Complex beneath the Warehouse .
All of these areas contain a wealth of containers to loot. Raider’s Refuge has less to loot, but the majority of the containers in and around the Refuge are raider containers, which have a high chance of containing Blueprints - particularly during major events.
Stella Montis
On the whole, Stella Montis seems to have a very low drop rate for Blueprints (though a high chance of dropping other high-tier loot). If you do want to try farming Blueprints on this map, the best places to find Blueprints in Stella Montis are Medical Research, Assembly Workshop, and the Business Center . These areas have the highest density of containers to loot on the map.
In addition to this, the Western Tunnel has a few different Security Lockers to loot, so while there’s very little to loot elsewhere in this area of the map, it’s worth hitting those Security Lockers if you spawn there at the start of a match.
That wraps up this primer on how to get all the Blueprints in Arc Raiders as quickly as possible. With the Expedition system constantly resetting a large number of players’ Blueprints, it’s more important than ever to have the most up-to-date information on where to find all these Blueprints.
While you’re here, be sure to check out our Arc Raiders best guns tier list , as well as our primers on the best skills to unlock and all the different Field Depot locations on every map.

ARC Raiders
PS5 , Xbox Series X/S , PC
Rock Paper Shotgun is better when you sign in
Sign in and join us on our journey to discover strange and compelling PC games.
