The Precinct review
Turns out “good cop” and “bad cop” are the same cop
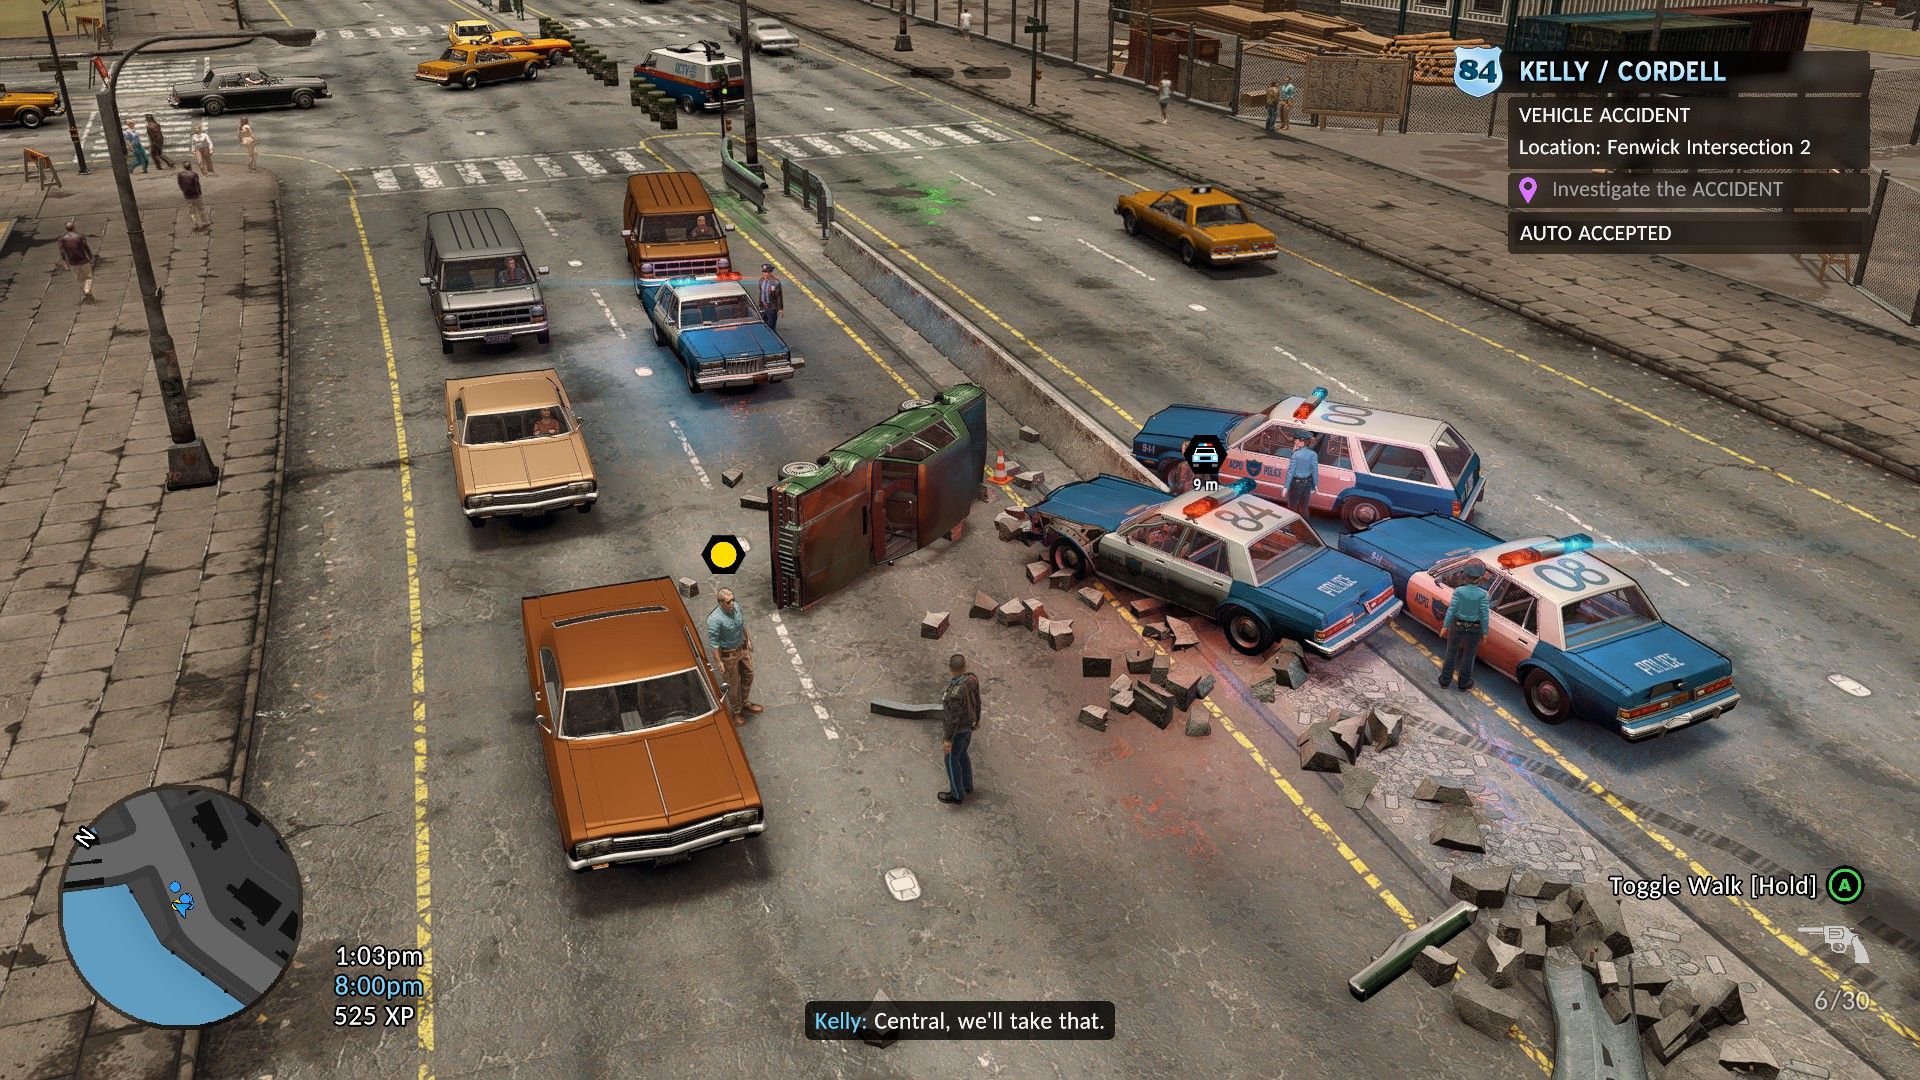
Image credit:Rock Paper Shotgun / Kwalee

- Developer: Fallen Tree Games
- Publisher: Kwalee
- Release: May 13th, 2025
- On: Windows
- From: Steam , Epic Games
- Price: £25/$30/€30
- Reviewed on: Intel Core-i7-11700F, 16GB RAM, Nvidia GeForce RTX 3060, Windows 10
I’ve arrested someone who did not deserve it. The chump was carrying counterfeit jewellry and I lazily slapped on the cuffs without reading my police handbook. I’m about to get that book thrown at me. When I sit at my desk at the end of a shift in cop sim The Precinct , I will get a chunk of XP deducted from my earnings for detaining this dude for a minor infraction. When The Precinct’s action ramps up and it transforms into a top-down blaster, it becomes ponderous and clunky, but its quieter moments of police pretending encourage a strict dedication to the role of petty rules enforcer. It’s a game of quibbles and quirks, imperfect in many ways, but there’s a sense of commitment underneath it all that I can respect. Even if I don’t respect the badge itself.

The easiest way to explain this arrest ’em up is to describe it as " Grand Theft Auto in reverse". You play a rookie cop in the fictional US city of Averno in 1983. You drive around in your patrol car, partner at your side, and deal with any crimes you spot happening on the streets. You’ll break up drunken brawls, interrupt alleyway muggings, and chase down drunk drivers. But a big component is that you’re not (just) beating thugs up or gunning bank robbers down - you’re arresting them and doing mild paperwork too. Every apprehended criminal has to be properly processed, their crimes listed accurately, and their heads pushed into the rear seat of a cop car with firm action movie closure.
Each day you choose from a bunch of shift patterns in the station. Maybe today you’ll just look for parking violations around the station. Or go to the other island of the city to patrol the highways for speeding offences. There are dogged day shifts and anti-social night shifts, and the ability to customise a shift’s location and focus to your liking.

You can spend a whole shift looking for cars to ticket, if you enjoy being awful. |Image credit:Rock Paper Shotgun / Kwalee
Or you can stick mostly to story-driven shifts, in which you’ll go after gang members, working your way up a small ladder of goons and underbosses until you land enough evidence (in the form of dropped weapons and confiscated contraband) to take down the capo dei capi of that specific gang. This basically trains the player to profile certain pedestrians (anyone with dyed hair is a potential member of the Jawheads, anyone wearing a snake t-shirt is a potential Crimson Serpent). There are ordinary decent criminals everywhere, but you can quickly get tunnel vision on these particular NPC types. An interesting side effect reflective of an aspect of real policing I don’t have the time or energy to unpack here.
Those story missions compose the central chunks in a pastiche soup of police story tropes and typical hardened cop drama characters. Your hero is the son of a cop killed in the line of duty (hi there, Rush Hour) with the suspiciously nice chief telling our boy how proud dad would be. The writing doesn’t get more imaginative out on the streets. While GTA games are famous for having thousands of unique snippets of overheard conversations from passing NPCs, nearly every citizen of Averno seems to talk exclusively in tired lines from popular culture, from “eat my shorts” to “you wouldn’t like me when I’m angry”. The concept of the game - Grand Theft Not-on-my-watch - feels fresh, but the actual dialogue and storytelling is trite in a way that feels wasteful. Don’t expect The Wire is what I’m saying.

The opening scenes aren’t helped by badly peaking audio in dialogue, with lots of harsh crackling. |Image credit:Rock Paper Shotgun / Kwalee
The game is best when it frees you to walk around in the sandbox and pretend to be on an everyday beat. On my first proper shift I arrested a car thief, three muggers, a burglar, a manslaughter suspect, and that one poor idiot who just happened to be carrying a counterfeit necklace who I put in cuffs too eagerly.
Averno City is awash with ne’er do wells in the same comically criminalistic manner of Gotham. You cannot walk 50 metres without spotting a badness, and this leads to a lot of funny incidents. You chase a murder suspect, only for a bystanding mugger to panic at the sight of a cop running toward him, and start hitting you with his crowbar. Once, I chased a perp down into a subway station and tackled her rag-dollishly onto the rail line, where we were both soon flattened by the incoming northbound.

You can unlock a helicopter to pilot and help chase down cars in hot pursuits across the city. |Image credit:Rock Paper Shotgun / Kwalee
Some of its most involving simulation is in the moments when you don’t act. When you see a burglar swaggering away with a hi-fi stereo and just let him walk on because, hey, you’re busy arresting a drug dealer. Or when you overtake and ignore a driver who throws trash out his window right in front of you, just because your shift is over and it’s not your problem. In these nuggets lie the feeling of being a work-a-day no-good beat cop. Why answer the radio call about a robbery when it’s a whole 200 metres outside your patrol zone? That’s someone else’s problem, chief.
That this feeling of cop-ness arises organically is promising. Although it’s easily subsumed when the game takes a U-turn into unimaginative cover shooting with a stick-to-walls button that is often unresponsive and an aiming reticule that feels brainless. There are big numbers of perps, but you are barely encouraged to move or flank enemies. It’s just a whack-a-mole game of target practice. Ammo is restocked at crates near the combat zone, and these summon a superfluous radial wheel pop-up, artificially halting the flow of combat.
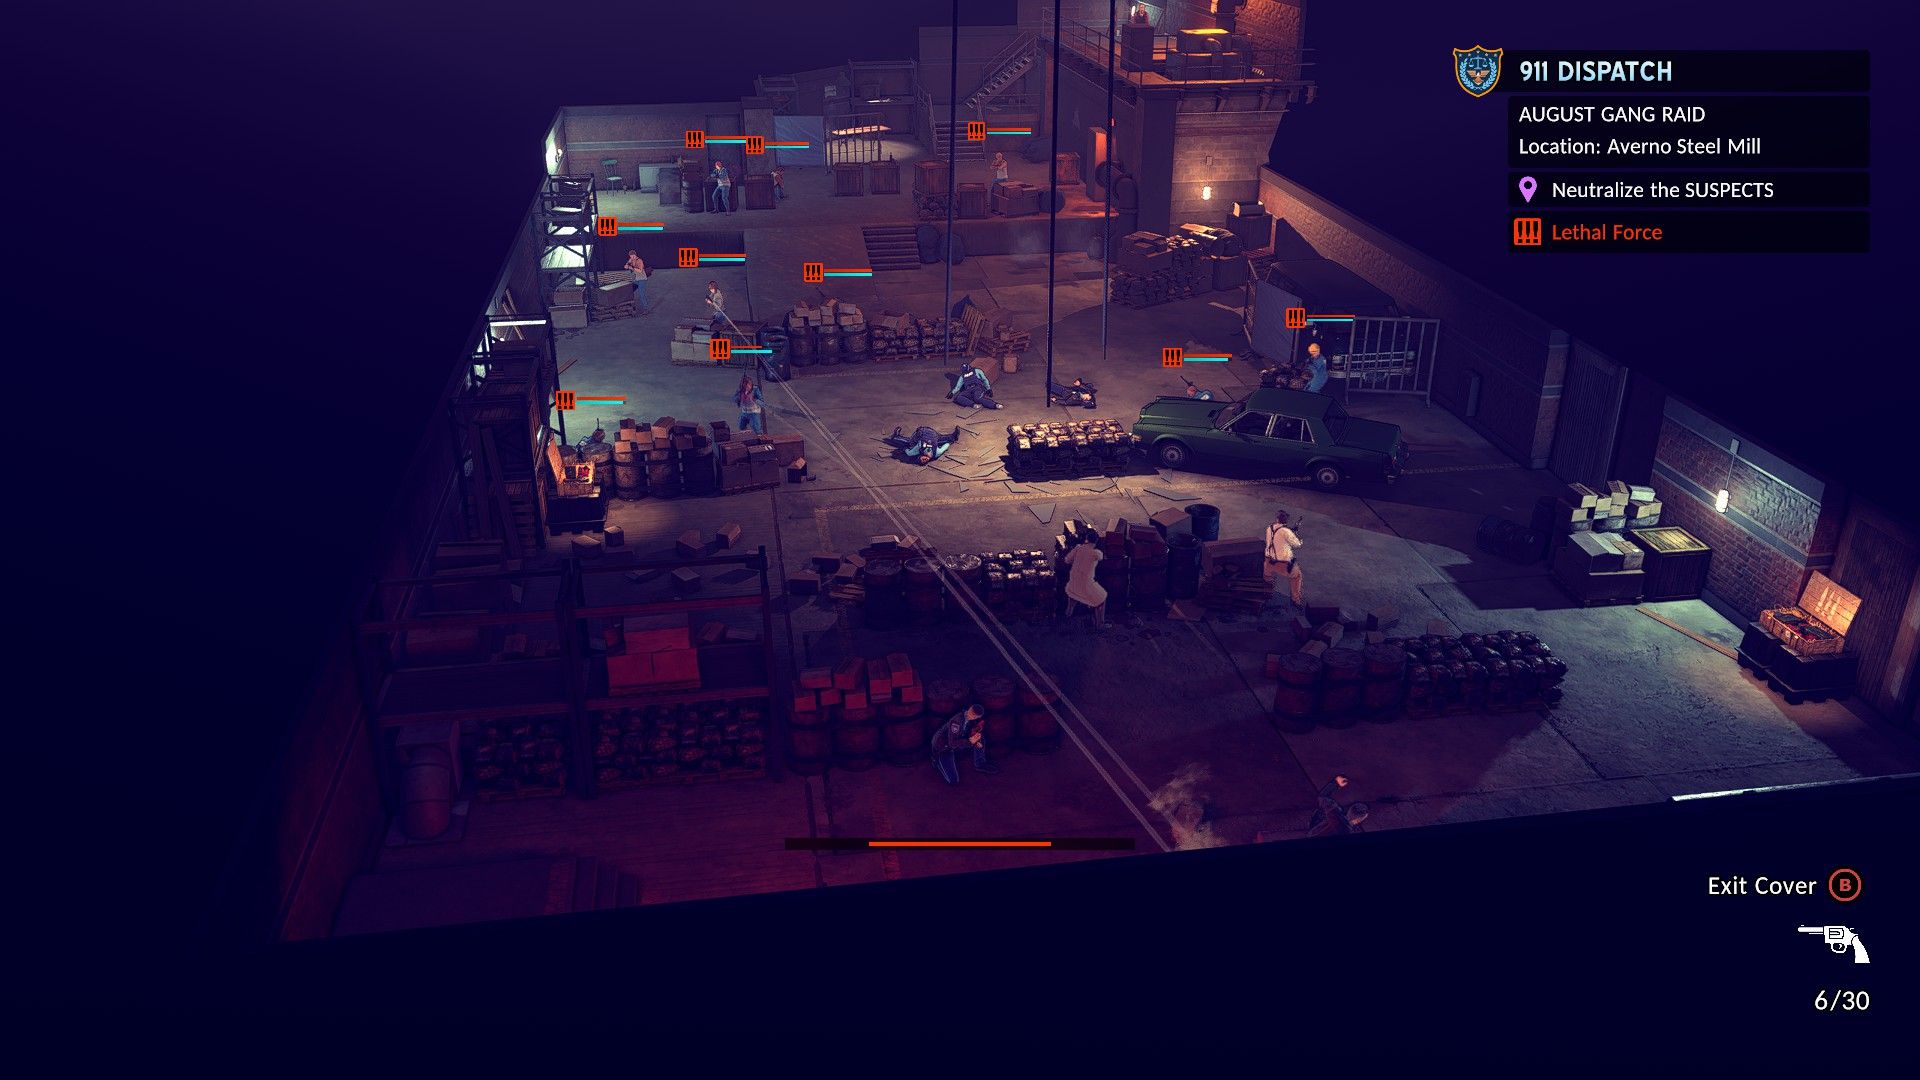
The cover shooting is the game at its least engaging. |Image credit:Rock Paper Shotgun / Kwalee
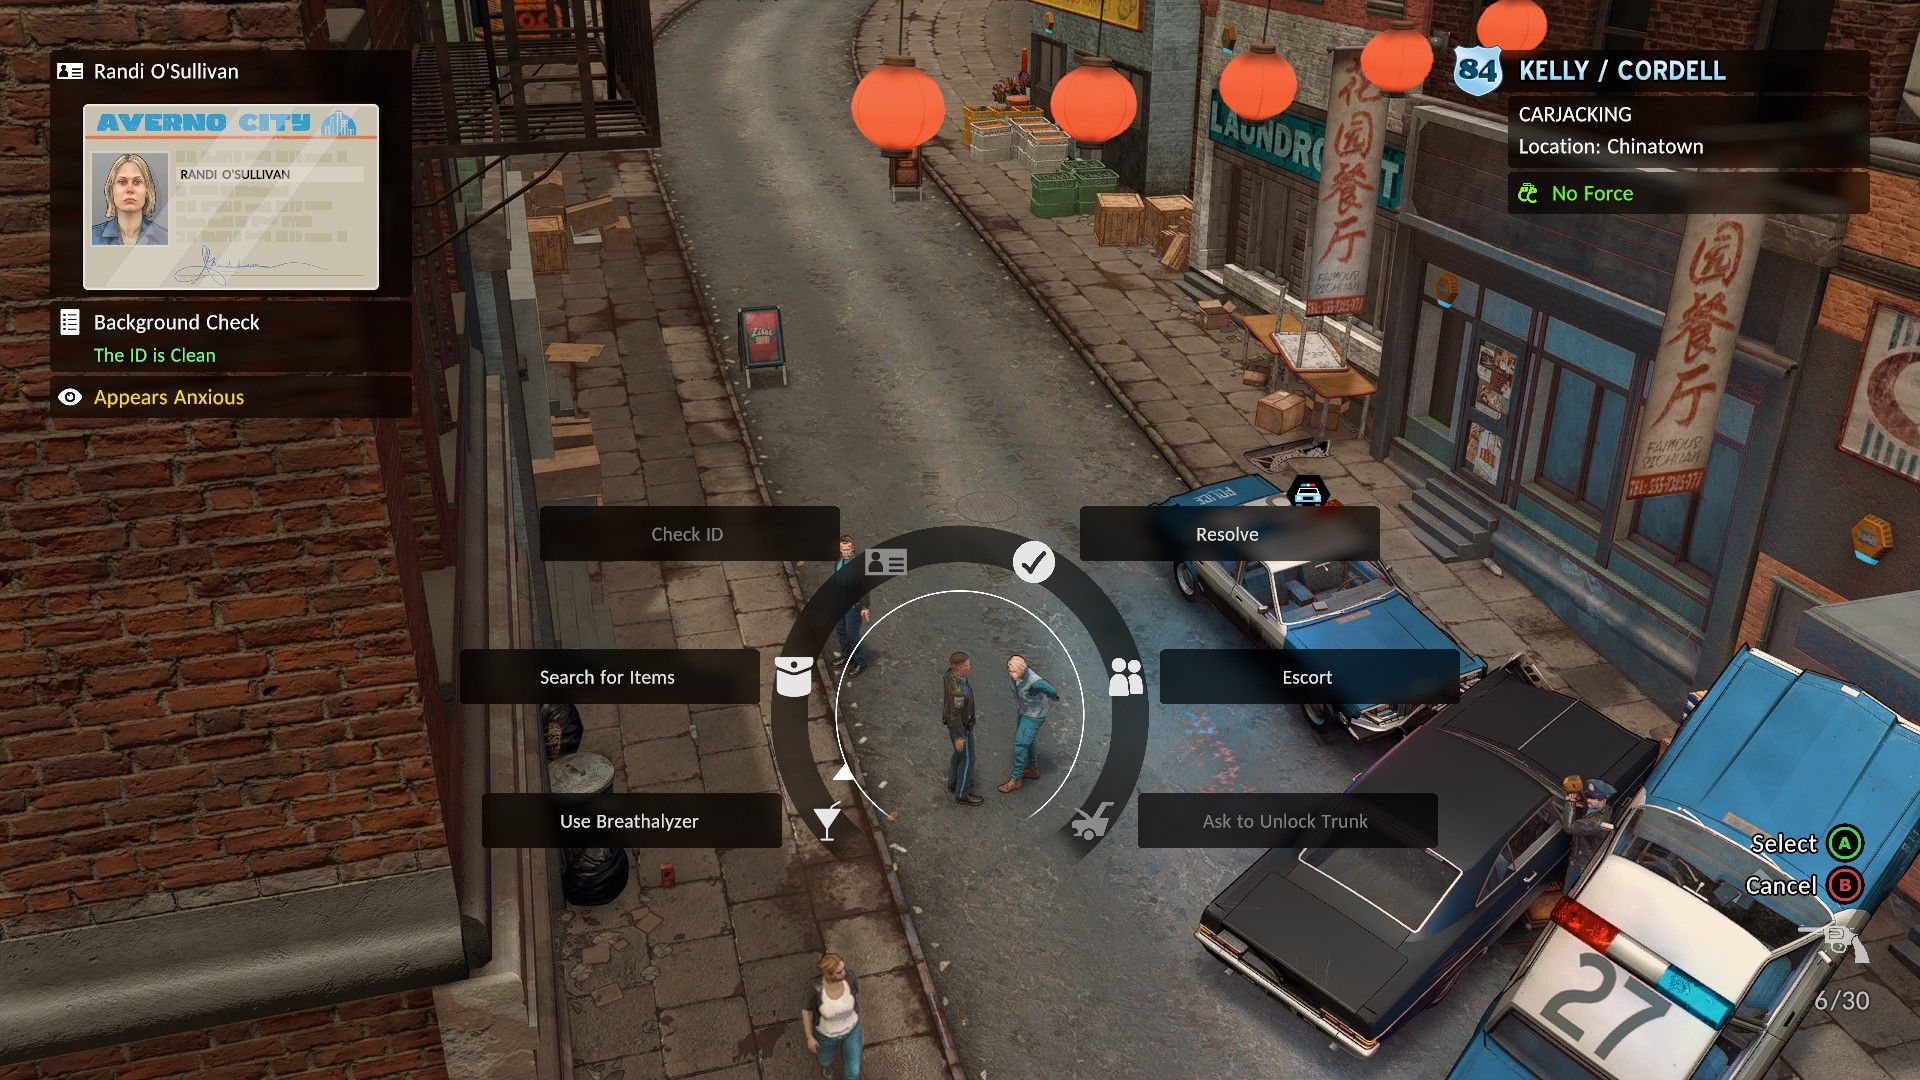
In fact, let’s talk about the radial wheel. A lot of the policey actions you take are done via the same sort of context-sensitive command wheel that hovers around your head and sometimes requires multiple dips into nested categories of action. When you’ve apprehended a crook, you click on “Resolve” to bring up a selection of options like “Arrest” or “Let Go”. One menu you’ll often use to tick off crimes committed by the person involves repeated dives down the radial rabbithole (Resolve > Additional Offences > On-Foot Offences > Assault).
Death to the radial wheel. |Image credit:Rock Paper Shotgun / Kwalee
It makes the game feel less like GTA in reverse and more like The Sims if you followed a cop dad to work. I’m not a fan of the ubiquitous slow-mo radial wheel even when it is used in shooters to lessen the pain of weapon selection. You retain choice, sure, but at the expense of flow as the player is confronted with a cluttered disc of symbols in the middle of fight. Here I find it almost as cumbersome. You can tweak an option so the game automatically ticks off criminal offences, but this only removes any actual thought from every stop and search. To be honest, I’d rather just fill out a big form full of tickboxes when I get back to the station.
Other minor annoyances stack up. I had to play through the opening of the game twice because it swallowed my save file whole. Both AI citizens and your police partner can act stupid or weird, although this is often a source of unintentional comedy. My fellow patrol officer once went fully invisible for a few minutes. And later that day I was told I’d lost a suspect even after handing him directly to the police station front desk. One handcuffed citizen who fell into the water by the docks climbed back out using a ladder using only his feet, a show of extreme circus skill for which I almost uncuffed and set him loose in reward. Sadly, I was unable to interact with him after the dip.
I saw this shade of red a lot. I’m probably a bad person. |Image credit:Rock Paper Shotgun / Kwalee
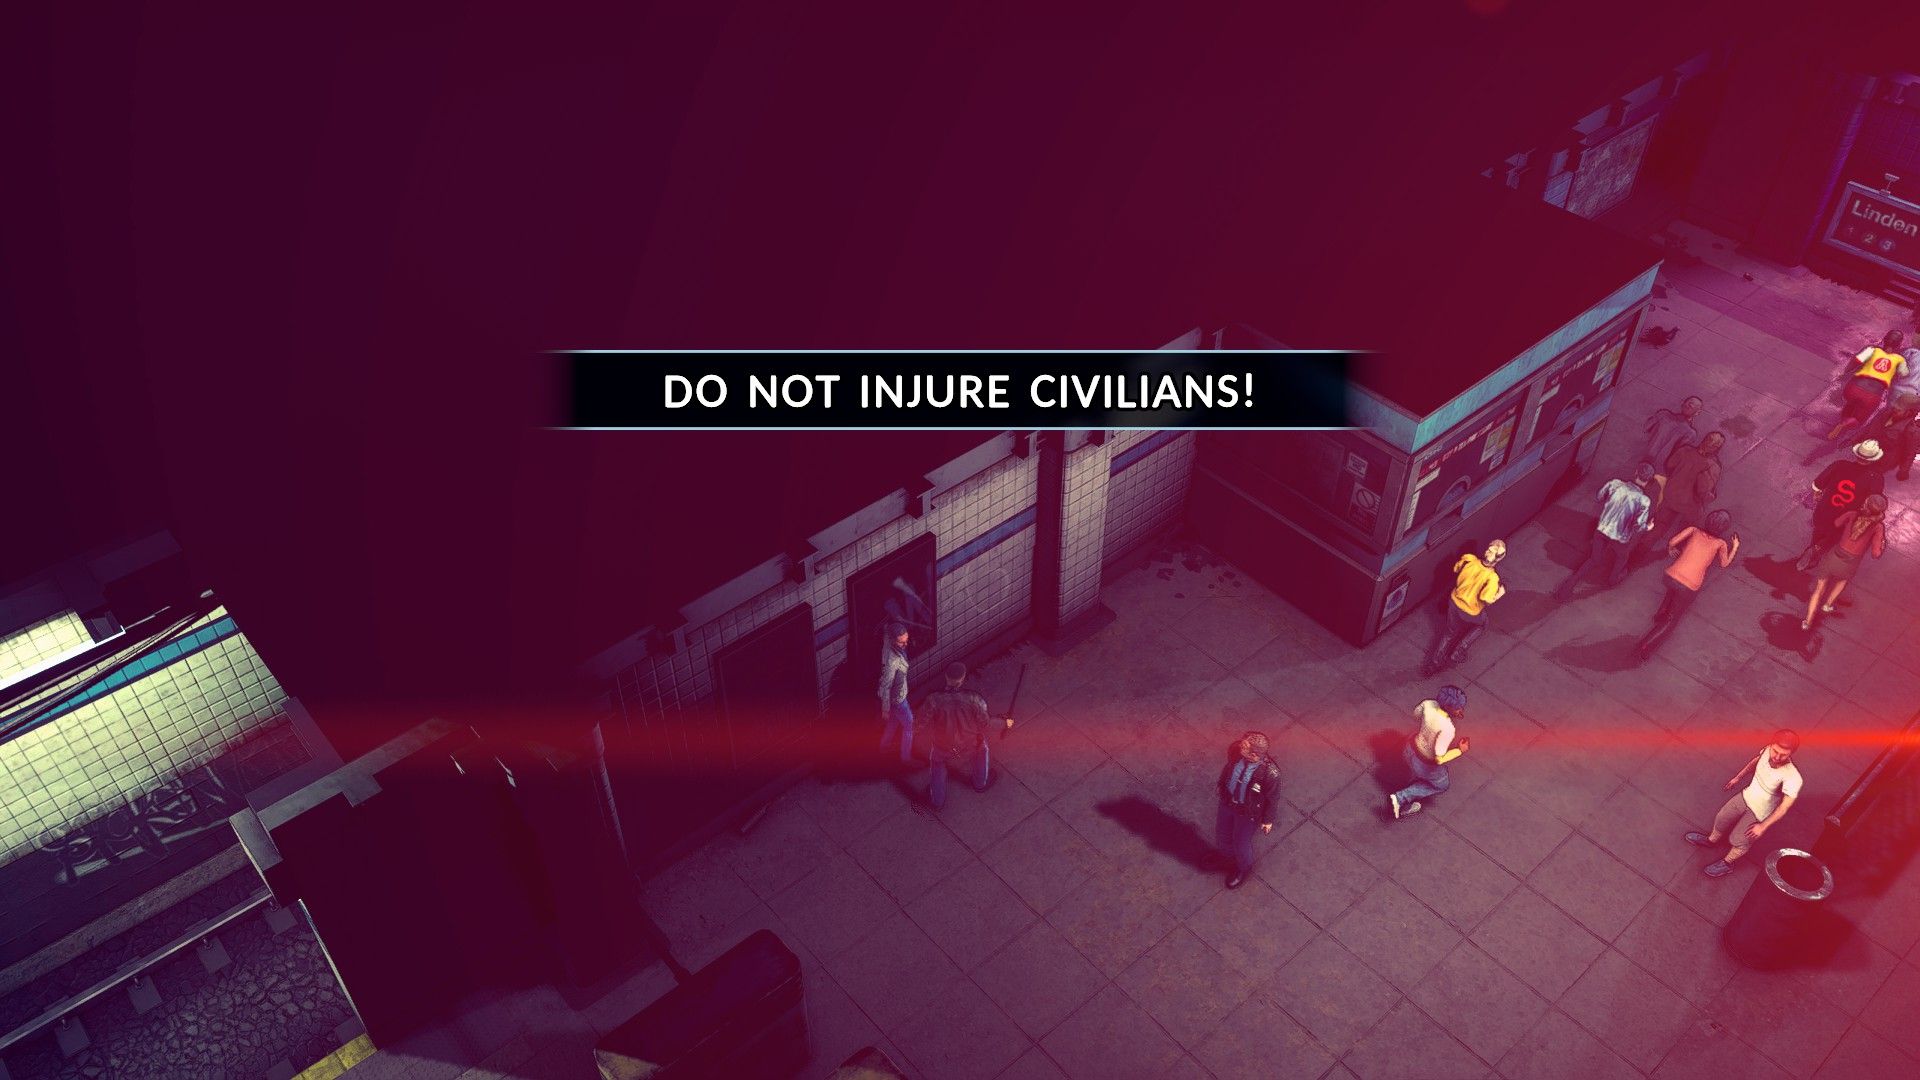
If bugs don’t distract you, the game’s many warning notices might. As you may expect from a cop game, it wants you to stick to your role of upstanding badge bearer, yet it does this even as it gives you all the violent freedom of a GTA clown. Sure, you can kill random civilians or murder suspects in cold blood for minor littering offences. But do so and you’ll be greeted with a variety of red-screening warning messages and an instafail shutdown of your dastardly acts. “Do not injure civilians!” it barks. “Use appropriate force at all times!” and “Do not shoot!” and “Suspect must not be killed!”. Even if you aren’t slapped with a game over, you are often scolded for lesser infractions. “That’s not my current objective” if you talk to someone out of turn, or “Wait for Kelly!” if you drive off without your partner.
All these orders, game-ending or otherwise, reinforce the designer’s intentions. The player must be good cop, not bad cop. I understand the reasoning for such commands, it’s a solution to the question: “what if the player isn’t doing what we want?” But it tastes overwhelmingly of “return to the mission area”, the blunt instrument of a failstate wielded like a baton. More interesting is the big whack of XP that gets deducted at the end of your shift for “poor conduct” if you do things wrong, like arrest someone for the wrong offence (oops) or search an innocent pedestrian without running a proper ID check. Either way, the designers have made a GTA-esque open world, but they want you to inhabit it in a (mostly) orderly fashion. The game polices you as much as you police the game.
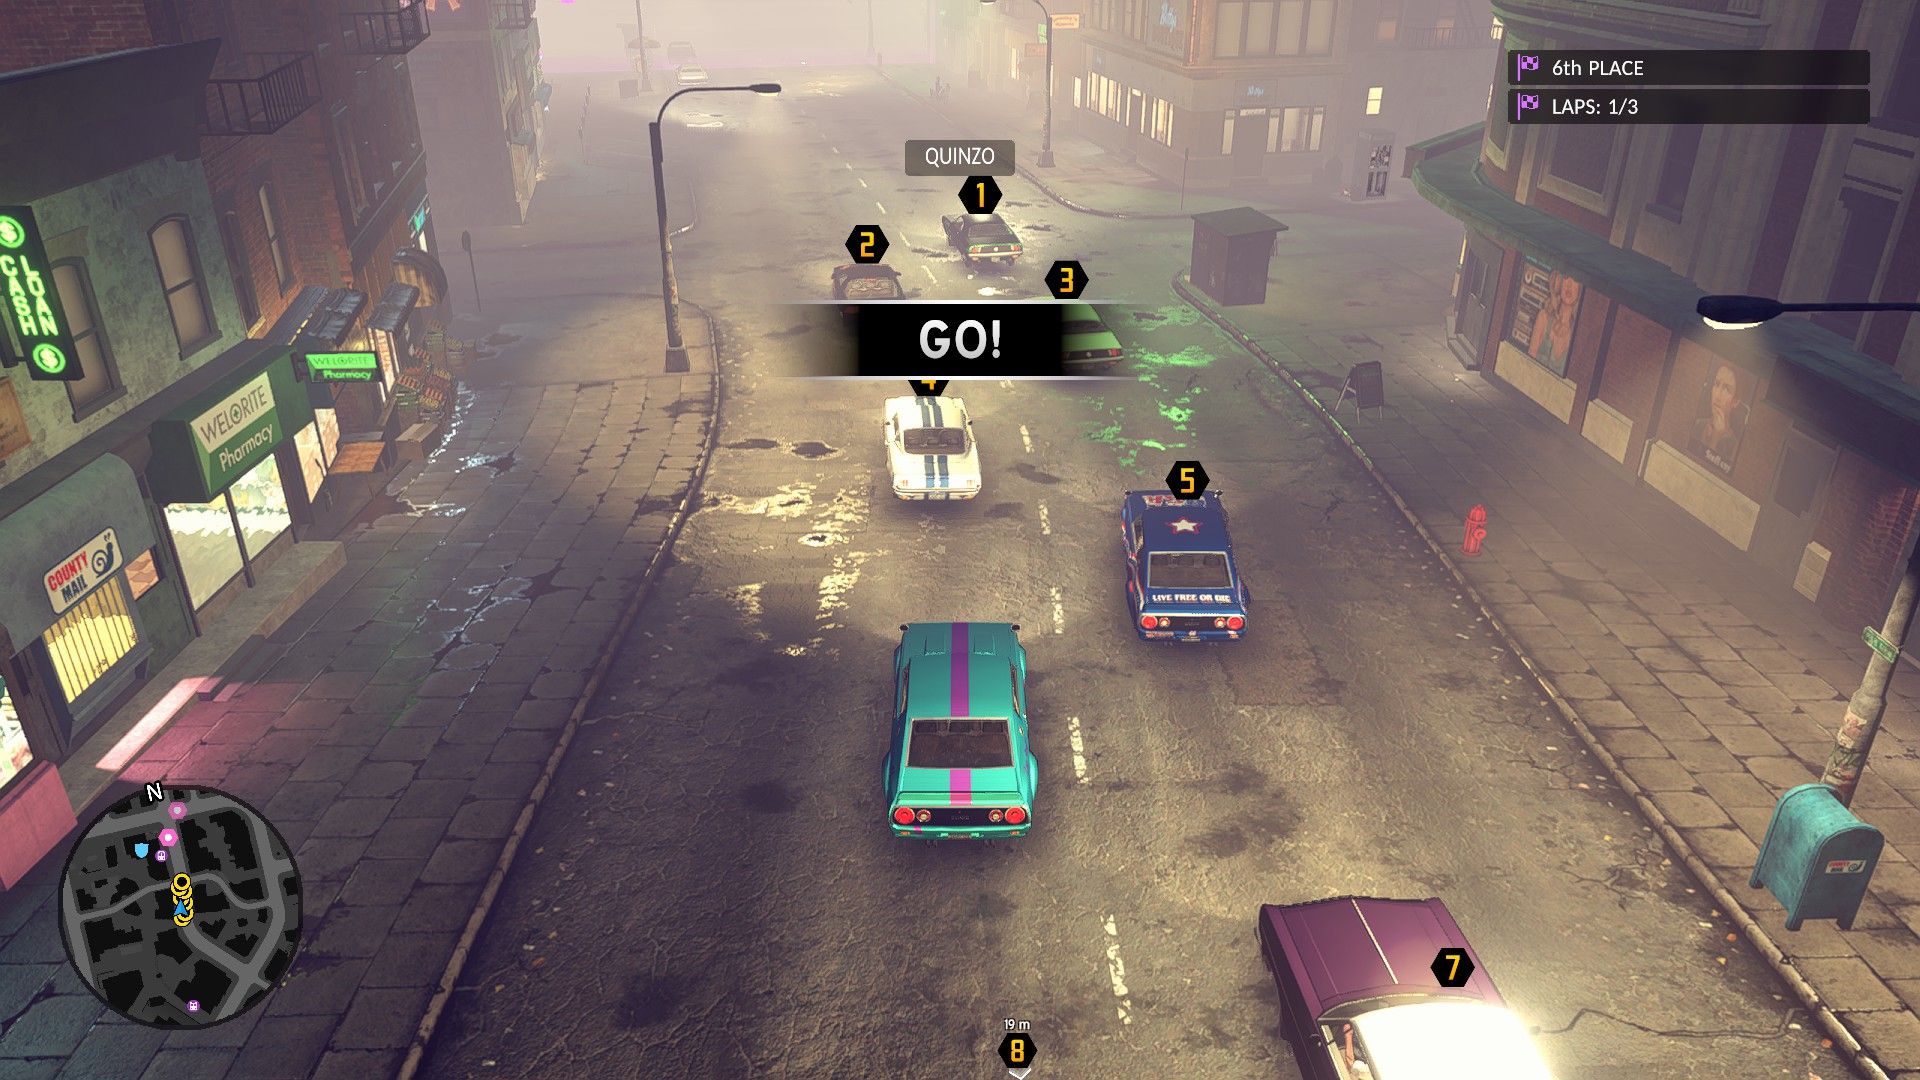
There’s a Fast And Furious style subplot that’s basically there to facilitate racing events throughout the city. |Image credit:Rock Paper Shotgun / Kwalee
So as far as cop ’em ups go, it fits somewhere between the grey dispatch tales of This Is The Police and the boots-on-the-ground patrolling of Police Simulator: Patrol Officers . As much as the comparison isn’t fair, I also find myself thinking of it alongside Shadows Of Doubt , the recent open world detective sim. One of these games leans into reality, and tries to disguise its inherent silliness with gritty crime writing and big messages that say “don’t do that!” while the other approaches crime fighting as an emergent and daft misadventure, with barely any thought put into a linear or traditional narrative at all. Both are buggy, scrappy, repetitious, and characterful in their own way. Personally, I prefer the one that doesn’t do things so strictly by the book . But if you’d rather wear a uniform and follow the rules, The Precinct will keep you in line.
Find out how we conduct our reviews by reading our review policy .
The Precinct
PS5 , Xbox Series X/S , PC
Rock Paper Shotgun is better when you sign in
Sign in and join us on our journey to discover strange and compelling PC games.

All 75 Arc Raiders Blueprints and where to get them
These areas have the highest chance of giving you Blueprints

Image credit:Rock Paper Shotgun/Embark Studios

Looking for more Arc Raiders Blueprints? It’s a special day when you find a Blueprint, as they’re among the most valuable items in Arc Raiders. If you find a Blueprint that you haven’t already found, then you must make sure you hold onto it at all costs, because Blueprints are the key to one of the most important and powerful systems of meta-progression in the game.
This guide aims to be the very best guide on Blueprints you can find, starting with a primer on what exactly they are and how they work in Arc Raiders, before delving into exactly where to get Blueprints and the very best farming spots for you to take in your search.
We’ll also go over how to get Blueprints from other unlikely activities, such as destroying Surveyors and completing specific quests. And you’ll also find the full list of all 75 Blueprints in Arc Raiders on this page (including the newest Blueprints added with the Cold Snap update , such as the Deadline Blueprint and Firework Box Blueprint), giving you all the information you need to expand your own crafting repertoire.
In this guide:
- What are Blueprints in Arc Raiders?
- Full Blueprint list: All crafting recipes
- Where to find Blueprints in Arc Raiders Blueprints obtained from quests Blueprints obtained from Trials Best Blueprint farming locations

What are Blueprints in Arc Raiders?
Blueprints in Arc Raiders are special items which, if you manage to extract with them, you can expend to permanently unlock a new crafting recipe in your Workshop. If you manage to extract from a raid with an Anvil Blueprint, for example, you can unlock the ability to craft your very own Anvil Pistol, as many times as you like (as long as you have the crafting materials).
To use a Blueprint, simply open your Inventory while in the lobby, then right-click on the Blueprint and click “Learn And Consume” . This will permanently unlock the recipe for that item in your Workshop. As of the Stella Montis update, there are allegedly 75 different Blueprints to unlock - although only 68 are confirmed to be in the game so far. You can see all the Blueprints you’ve found and unlocked by going to the Workshop menu, and hitting “R” to bring up the Blueprint screen.
It’s possible to find duplicates of past Blueprints you’ve already unlocked. If you find these, then you can either sell them, or - if you like to play with friends - you can take it into a match and gift it to your friend so they can unlock that recipe for themselves. Another option is to keep hold of them until the time comes to donate them to the Expedition.
Full Blueprint list: All crafting recipes
Below is the full list of all the Blueprints that are currently available to find in Arc Raiders, and the crafting recipe required for each item:
| Blueprint | Type | Recipe | Crafted At |
|---|---|---|---|
| Bettina | Weapon | 3x Advanced Mechanical Components 3x Heavy Gun Parts 3x Canister | Gunsmith 3 |
| Blue Light Stick | Quick Use | 3x Chemicals | Utility Station 1 |
| Aphelion | Weapon | 3x Magnetic Accelerator 3x Complex Gun Parts 1x Matriarch Reactor | Gunsmith 3 |
| Combat Mk. 3 (Flanking) | Augment | 2x Advanced Electrical Components 3x Processor | Gear Bench 3 |
| Combat Mk. 3 (Aggressive) | Augment | 2x Advanced Electrical Components 3x Processor | Gear Bench 3 |
| Complex Gun Parts | Material | 2x Light Gun Parts 2x Medium Gun Parts 2x Heavy Gun Parts | Refiner 3 |
| Fireworks Box | Quick Use | 1x Explosive Compound 3x Pop Trigger | Explosives Station 2 |
| Gas Mine | Mine | 4x Chemicals 2x Rubber Parts | Explosives Station 1 |
| Green Light Stick | Quick Use | 3x Chemicals | Utility Station 1 |
| Pulse Mine | Mine | 1x Crude Explosives 1x Wires | Explosives Station 1 |
| Seeker Grenade | Grenade | 1x Crude Explosives 2x ARC Alloy | Explosives Station 1 |
| Looting Mk. 3 (Survivor) | Augment | 2x Advanced Electrical Components 3x Processor | Gear Bench 3 |
| Angled Grip II | Mod | 2x Mechanical Components 3x Duct Tape | Gunsmith 2 |
| Angled Grip III | Mod | 2x Mod Components 5x Duct Tape | Gunsmith 3 |
| Hullcracker | Weapon | 1x Magnetic Accelerator 3x Heavy Gun Parts 1x Exodus Modules | Gunsmith 3 |
| Launcher Ammo | Ammo | 5x Metal Parts 1x Crude Explosives | Workbench 1 |
| Anvil | Weapon | 5x Mechanical Components 5x Simple Gun Parts | Gunsmith 2 |
| Anvil Splitter | Mod | 2x Mod Components 3x Processor | Gunsmith 3 |
| ??? | ??? | ??? | ??? |
| Barricade Kit | Quick Use | 1x Mechanical Components | Utility Station 2 |
| Blaze Grenade | Grenade | 1x Explosive Compound 2x Oil | Explosives Station 3 |
| Bobcat | Weapon | 3x Advanced Mechanical Components 3x Light Gun Parts | Gunsmith 3 |
| Osprey | Weapon | 2x Advanced Mechanical Components 3x Medium Gun Parts 7x Wires | Gunsmith 3 |
| Burletta | Weapon | 3x Mechanical Components 3x Simple Gun Parts | Gunsmith 1 |
| Compensator II | Mod | 2x Mechanical Components 4x Wires | Gunsmith 2 |
| Compensator III | Mod | 2x Mod Components 8x Wires | Gunsmith 3 |
| Defibrillator | Quick Use | 9x Plastic Parts 1x Moss | Medical Lab 2 |
| ??? | ??? | ??? | ??? |
| Equalizer | Weapon | 3x Magnetic Accelerator 3x Complex Gun Parts 1x Queen Reactor | Gunsmith 3 |
| Extended Barrel | Mod | 2x Mod Components 8x Wires | Gunsmith 3 |
| Extended Light Mag II | Mod | 2x Mechanical Components 3x Steel Spring | Gunsmith 2 |
| Extended Light Mag III | Mod | 2x Mod Components 5x Steel Spring | Gunsmith 3 |
| Extended Medium Mag II | Mod | 2x Mechanical Components 3x Steel Spring | Gunsmith 2 |
| Extended Medium Mag III | Mod | 2x Mod Components 5x Steel Spring | Gunsmith 3 |
| Extended Shotgun Mag II | Mod | 2x Mechanical Components 3x Steel Spring | Gunsmith 2 |
| Extended Shotgun Mag III | Mod | 2x Mod Components 5x Steel Spring | Gunsmith 3 |
| Remote Raider Flare | Quick Use | 2x Chemicals 4x Rubber Parts | Utility Station 1 |
| Heavy Gun Parts | Material | 4x Simple Gun Parts | Refiner 2 |
| Venator | Weapon | 2x Advanced Mechanical Components 3x Medium Gun Parts 5x Magnet | Gunsmith 3 |
| Il Toro | Weapon | 5x Mechanical Components 6x Simple Gun Parts | Gunsmith 1 |
| Jolt Mine | Mine | 1x Electrical Components 1x Battery | Explosives Station 2 |
| Explosive Mine | Mine | 1x Explosive Compound 1x Sensors | Explosives Station 3 |
| Jupiter | Weapon | 3x Magnetic Accelerator 3x Complex Gun Parts 1x Queen Reactor | Gunsmith 3 |
| Light Gun Parts | Material | 4x Simple Gun Parts | Refiner 2 |
| Lightweight Stock | Mod | 2x Mod Components 5x Duct Tape | Gunsmith 3 |
| Lure Grenade | Grenade | 1x Speaker Component 1x Electrical Components | Utility Station 2 |
| Medium Gun Parts | Material | 4x Simple Gun Parts | Refiner 2 |
| Torrente | Weapon | 2x Advanced Mechanical Components 3x Medium Gun Parts 6x Steel Spring | Gunsmith 3 |
| Muzzle Brake II | Mod | 2x Mechanical Components 4x Wires | Gunsmith 2 |
| Muzzle Brake III | Mod | 2x Mod Components 8x Wires | Gunsmith 3 |
| Padded Stock | Mod | 2x Mod Components 5x Duct Tape | Gunsmith 3 |
| Shotgun Choke II | Mod | 2x Mechanical Components 4x Wires | Gunsmith 2 |
| Shotgun Choke III | Mod | 2x Mod Components 8x Wires | Gunsmith 3 |
| Shotgun Silencer | Mod | 2x Mod Components 8x Wires | Gunsmith 3 |
| Showstopper | Grenade | 1x Advanced Electrical Components 1x Voltage Converter | Explosives Station 3 |
| Silencer I | Mod | 2x Mechanical Components 4x Wires | Gunsmith 2 |
| Silencer II | Mod | 2x Mod Components 8x Wires | Gunsmith 3 |
| Snap Hook | Quick Use | 2x Power Rod 3x Rope 1x Exodus Modules | Utility Station 3 |
| Stable Stock II | Mod | 2x Mechanical Components 3x Duct Tape | Gunsmith 2 |
| Stable Stock III | Mod | 2x Mod Components 5x Duct Tape | Gunsmith 3 |
| Tagging Grenade | Grenade | 1x Electrical Components 1x Sensors | Utility Station 3 |
| Tempest | Weapon | 3x Advanced Mechanical Components 3x Medium Gun Parts 3x Canister | Gunsmith 3 |
| Trigger Nade | Grenade | 2x Crude Explosives 1x Processor | Explosives Station 2 |
| Vertical Grip II | Mod | 2x Mechanical Components 3x Duct Tape | Gunsmith 2 |
| Vertical Grip III | Mod | 2x Mod Components 5x Duct Tape | Gunsmith 3 |
| Vita Shot | Quick Use | 2x Antiseptic 1x Syringe | Medical Lab 3 |
| Vita Spray | Quick Use | 3x Antiseptic 1x Canister | Medical Lab 3 |
| Vulcano | Weapon | 1x Magnetic Accelerator 3x Heavy Gun Parts 1x Exodus Modules | Gunsmith 3 |
| Wolfpack | Grenade | 2x Explosive Compound 2x Sensors | Explosives Station 3 |
| Red Light Stick | Quick Use | 3x Chemicals | Utility Station 1 |
| Smoke Grenade | Grenade | 14x Chemicals 1x Canister | Utility Station 2 |
| Deadline | Mine | 3x Explosive Compound 2x ARC Circuitry | Explosives Station 3 |
| Trailblazer | Grenade | 1x Explosive Compound 1x Synthesized Fuel | Explosives Station 3 |
| Tactical Mk. 3 (Defensive) | Augment | 2x Advanced Electrical Components 3x Processor | Gear Bench 3 |
| Tactical Mk. 3 (Healing) | Augment | 2x Advanced Electrical Components 3x Processor | Gear Bench 3 |
| Yellow Light Stick | Quick Use | 3x Chemicals | Utility Station 1 |
Note: The missing Blueprints in this list likely have not actually been added to the game at the time of writing, because none of the playerbase has managed to find any of them. As they are added to the game, I will update this page with the most relevant information so you know exactly how to get all 75 Arc Raiders Blueprints.
Where to find Blueprints in Arc Raiders
Below is a list of all containers, modifiers, and events which maximise your chances of finding Blueprints:
- Certain quests reward you with specific Blueprints .
- Completing Trials has a high chance of offering Blueprints as rewards.
- Surveyors have a decent chance of dropping Blueprints on death.
- High loot value areas tend to have a greater chance of spawning Blueprints.
- Night Raids and Storms may increase rare Blueprint spawn chances in containers.
- Containers with higher numbers of items may have a higher tendency to spawn Blueprints. As a result, Blue Gate (which has many “large” containers containing multiple items) may give you a higher chance of spawning Blueprints.
- Raider containers (Raider Caches, Weapon Boxes, Medical Bags, Grenade Tubes) have increased Blueprint drop rates. As a result, the Uncovered Caches event gives you a high chance of finding Blueprints.
- Security Lockers have a higher than average chance of containing Blueprints.
- Certain Blueprints only seem to spawn under specific circumstances: Tempest Blueprint only spawns during Night Raid events. Vulcano Blueprint only spawns during Hidden Bunker events. Jupiter and Equaliser Blueprints only spawn during Harvester events.

Raider Caches, Weapon Boxes, and other raider-oriented container types have a good chance of offering Blueprints. |Image credit:Rock Paper Shotgun/Embark Studios
Blueprints have a very low chance of spawning in any container in Arc Raiders, around 1-2% on average. However, there is a higher chance of finding Blueprints in particular container types. Specifically, you can find more Blueprints in Raider containers and security lockers.
Beyond this, if you’re looking for Blueprints you should focus on regions of the map which are marked as having particularly high-value loot. Areas such as the Control Tower in Dam Battlegrounds, the Arrival and Departure Buildings in Spaceport, and Pilgrim’s Peak in Blue Gate all have a better-than-average chance of spawning Blueprints somewhere amongst all their containers. Night Raids and Electromagnetic Storm events also increase the drop chances of certain Blueprints .
In addition to these containers, you can often loot Blueprints from destroyed Surveyors - the largest of the rolling ball ARC. Surveyors are more commonly found on the later maps - Spaceport and Blue Gate - and if one spawns in your match, you’ll likely see it by the blue laser beam that it casts into the sky while “surveying”.
Surveyors are quite well-armoured and will very speedily run away from you once it notices you, but if you can take one down then make sure you loot all its parts for a chance of obtaining certain unusual Blueprints.
Blueprints obtained from quests
One way in which you can get Blueprints is by completing certain quests for the vendors in Speranza. Some quests will reward you with a specific item Blueprint upon completion, so as long as you work through all the quests in Arc Raiders, you are guaranteed those Blueprints.
Here is the full list of all Blueprints you can get from quest rewards:
- Trigger Nade Blueprint: Rewarded after completing “Sparks Fly”.
- Lure Grenade Blueprint: Rewarded after completing “Greasing Her Palms”.
- Burletta Blueprint: Rewarded after completing “Industrial Espionage”.
- Hullcracker Blueprint (and Launcher Ammo Blueprint): Rewarded after completing “The Major’s Footlocker”.
Alas, that’s only 4 Blueprints out of a total of 75 to unlock, so for the vast majority you will need to find them yourself during a raid. If you’re intent on farming Blueprints, then it’s best to equip yourself with cheap gear in case you lose it, but don’t use a free loadout because then you won’t get a safe pocket to stash any new Blueprint you find. No pain in Arc Raiders is sharper than failing to extract with a new Blueprint you’ve been after for a dozen hours already.

One of the best ways to get Blueprints is by hitting three stars on all five Trials every week. |Image credit:Rock Paper Shotgun/Embark Studios
Blueprints obtained from Trials
One of the very best ways to get Blueprints is as rewards for completing Trials in Arc Raiders. Trials are unlocked from Level 15 onwards, and allow you to earn rewards by focusing on certain tasks over the course of several raids. For example, one Trial might task you with dealing damage to Hornets, while another might challenge you to loot Supply Drops.
Trials refresh on a weekly basis, with a new week bringing five new Trials. Each Trial can offer up to three rewards after passing certain score milestones, and it’s possible to receive very high level loot from these reward crates - including Blueprints. So if you want to unlock as many Blueprints as possible, you should make a point of completing as many Trials as possible each week.
Best Blueprint farming locations
The very best way to get Blueprints is to frequent specific areas of the maps which combine high-tier loot pools with the right types of containers to search. Here are my recommendations for where to find Blueprints on every map, so you can always keep the search going for new crafting recipes to unlock.

Image credit:Rock Paper Shotgun/Embark Studios
Dam Battlegrounds
The best places to farm Blueprints on Dam Battlegrounds are the Control Tower, Power Generation Complex, Ruby Residence, and Pale Apartments . The first two regions, despite only being marked on the map as mid-tier loot, contain a phenomenal number of containers to loot. The Control Tower can also contain a couple of high-tier Security Lockers - though of course, you’ll need to have unlocked the Security Breach skill at the end of the Survival tree.
There’s also a lot of reporting amongst the playerbase that the Residential areas in the top-left of the map - Pale Apartments and Ruby Residence - give you a comparatively strong chance of finding Blueprints. Considering their size, there’s a high density of containers to loot in both locations, and they also have the benefit of being fairly out of the way. So you’re more likely to have all the containers to yourself.
Buried City
The best Blueprint farming locations on Buried City are the Santa Maria Houses, Grandioso Apartments, Town Hall, and the various buildings of the New District . Grandioso Apartments has a lower number of containers than the rest, but a high chance of spawning weapon cases - which have good Blueprint drop rates. The others are high-tier loot areas, with plenty of lootable containers - including Security Lockers.
Spaceport
The best places to find Blueprints on Spaceport are the Arrival and Departure Buildings, as well as Control Tower A6 and the Launch Towers . All these areas are labelled as high-value loot regions, and many of them are also very handily connected to one another by the Spaceport wall, which you can use to quickly run from one area to the next. At the tops of most of these buildings you’ll find at least one Security Locker, so this is an excellent farming route for players looking to find Blueprints.
The downside to looting Blueprints on Spaceport is that all these areas are hotly contested, particularly in Duos and Squads. You’ll need to be very focused and fast in order to complete the full farming route.

Image credit:Rock Paper Shotgun/Embark Studios
Blue Gate
Blue Gate tends to have a good chance of dropping Blueprints, potentially because it generally has a high number of containers which can hold lots of items; so there’s a higher chance of a Blueprint spawning in each container. In my experience, the best Blueprint farming spots on Blue Gate are Pilgrim’s Peak, Raider’s Refuge, the Ancient Fort, and the Underground Complex beneath the Warehouse .
All of these areas contain a wealth of containers to loot. Raider’s Refuge has less to loot, but the majority of the containers in and around the Refuge are raider containers, which have a high chance of containing Blueprints - particularly during major events.
Stella Montis
On the whole, Stella Montis seems to have a very low drop rate for Blueprints (though a high chance of dropping other high-tier loot). If you do want to try farming Blueprints on this map, the best places to find Blueprints in Stella Montis are Medical Research, Assembly Workshop, and the Business Center . These areas have the highest density of containers to loot on the map.
In addition to this, the Western Tunnel has a few different Security Lockers to loot, so while there’s very little to loot elsewhere in this area of the map, it’s worth hitting those Security Lockers if you spawn there at the start of a match.
That wraps up this primer on how to get all the Blueprints in Arc Raiders as quickly as possible. With the Expedition system constantly resetting a large number of players’ Blueprints, it’s more important than ever to have the most up-to-date information on where to find all these Blueprints.
While you’re here, be sure to check out our Arc Raiders best guns tier list , as well as our primers on the best skills to unlock and all the different Field Depot locations on every map.

ARC Raiders
PS5 , Xbox Series X/S , PC
Rock Paper Shotgun is better when you sign in
Sign in and join us on our journey to discover strange and compelling PC games.
