The next League Of Legends spin-off is a deep and crafty blend of Stardew, Spiritfarer and Animal Crossing
Bandle Tale and its enormous skill trees arrive on February 21st

Image credit:Riot Forge

When cute crafting RPG Bandle Tale: A League Of Legends Story was first announced at the end of last year, I don’t think I really appreciated the fact it was going to be the next game from the devs behind mortuary farming-me-do Graveyard Keeper . I keep turning this fact over in my head as I watch Lazy Bear Games’ associate producer Vlada Redko play a portion of Bandle Tale over Discord for me, with creative director Nikita Kulaga and Riot Forge’s creative director Rowan Parker telling me about what’s happening onscreen in front of me. As Redko explores the whimsical, knitting-themed city of Bandle as one of League Of Legends ’ tiny fluffy Yordle creatures, it is, to put it lightly, quite the tonal shift from their previous work. But don’t let its cute looks fool you.
This is a crafting RPG with a ferociously long set of skill trees to master, with 40-60 hours’ worth of new abilities to learn, objects to construct, errands to run, friends to enlist and - crucially - parties to throw. For in the Bandle woods of Runeterra, life’s problems are solved by having a good old fashioned boogie, including the rather urgent issue of fixing the world’s portal network, which has collapsed in a mysterious accident. It may have a softer, fluffier-looking surface than Graveyard Keeper, but underneath it looks as though there’s just as much to dig into here, so here’s what I’ve learned so far ahead of its release on February 21st.
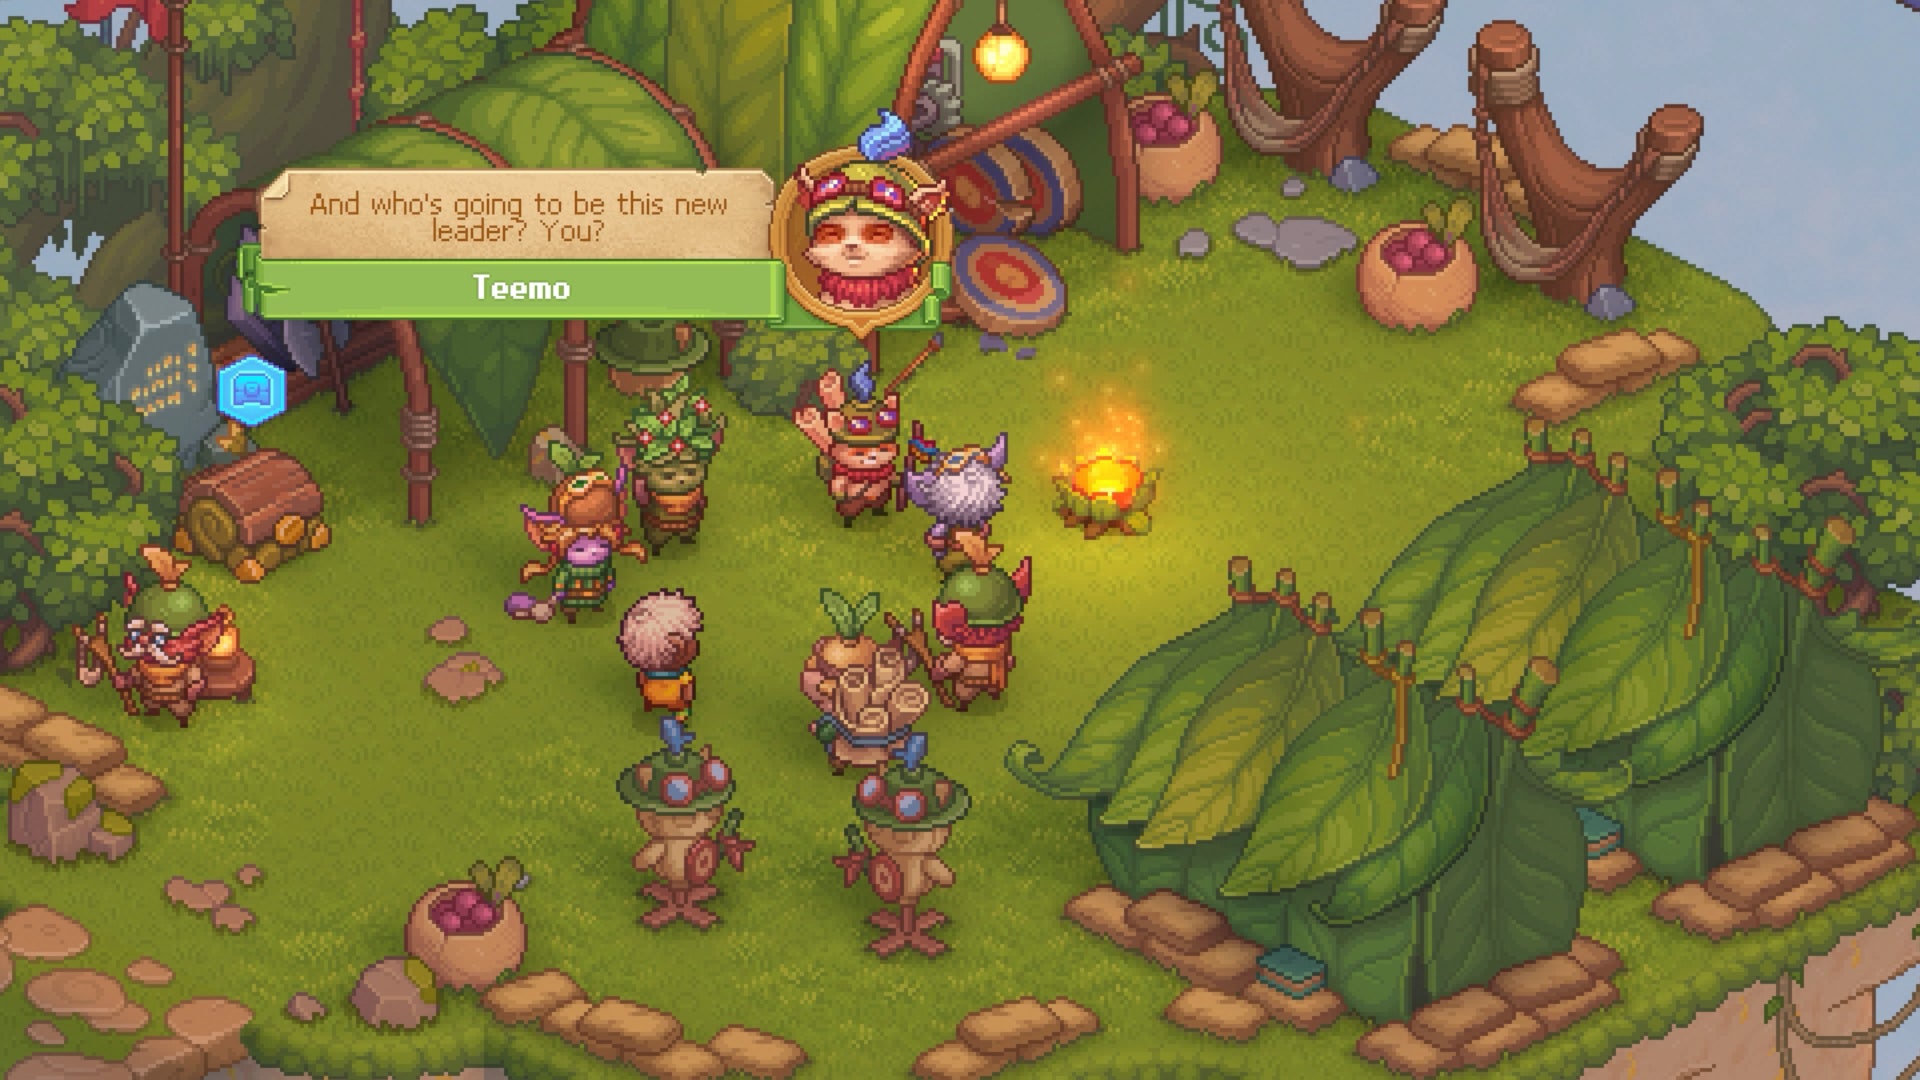
This is the first League Of Legends Story game where you don’t play as a Champion. You’ll meet many of them along the way, however. |Image credit:Riot Forge
Before we get to the business of putting its frankly gorgeous pixel art world back together again, my preview session begins with a look at the basics, with Redko’s customisable Yordle character learning how to cook (and thus farm, and thus collect individual food stuffs) from local chef Winstock, who’s one of the 70-odd Yordles you’ll meet and befriend across the game. It’s classic crafting territory, in other words, and a familiar framework to introduce budding Stardew, Spiritfarer and Animal Crossing heads to its extensive set of systems. Naturally, our first task is to assemble the requisite ingredients, and Kulaga says you’ll be able to grow and collect all sorts of different resources across the game’s five islands as the game goes on. Doing so will also earn you inspiration points, which you can then pump into its vast array of skills and abilities - and the emphasis really is on the word ‘vast’ there.
For instance, after consulting her notebook menu and seeing that we need the Natural Gathering skill in order to collect the appropriate ingredients, Redko clicks on the name of that skill and is instantly transported to the Nature tab of Bandle Tale’s skill tree menu. This particular strand covers all things cooking, farming and food-related, and as Redko scrolls through the horizontal menu screen, it seems to go on forever and ever. Each node has a number of little icons beneath it, too, denoting what you’ll be able to do with that skill, and as you progress further and further along the tree, it will start branching and splintering into even more specific sub-skills.
Thankfully, Lazy Bear Games have presented these skill trees in such a way that, despite their seemingly never-ending length, there are never more than four strands layered up at any one moment, and there was a real sense of clarity in how everything was laid out. Crucially, they felt manageable and not overwhelming, and if nothing else, made clear there will be plenty of things to do and learn in Bandle Tale, especially when Nature is just one of four eventual skill tree tabs you’ll be able to dig into.
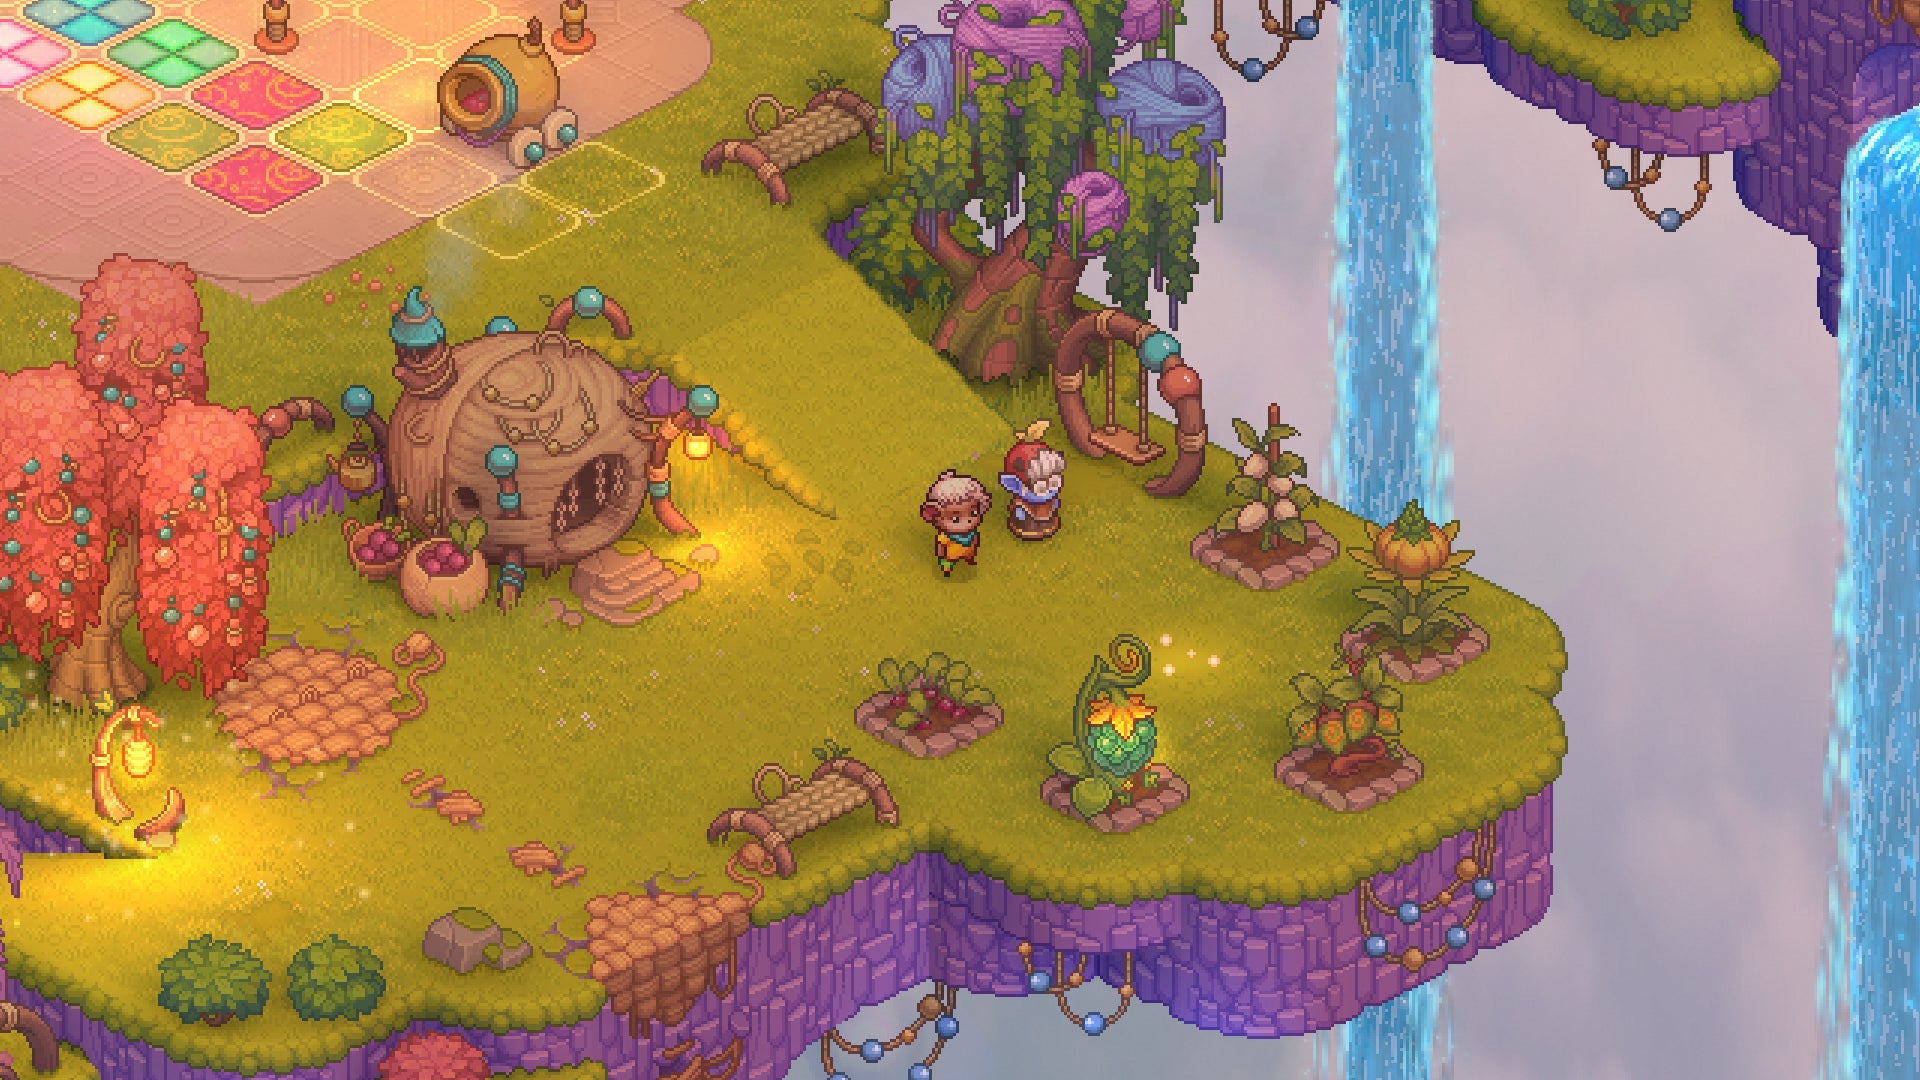
Everything you do in Bandle Tale fills you with inspiration, even basic tasks such as gathering resources and farming food plots. |Image credit:Riot Forge
Each skill tree is also gated by certain badges along their various pathways, so you won’t be able to unlock the ability to bake Prism Apples or Honeyfruit, for example, until you’ve reached Level 2 of your Head Chef badge. Badges are obtained by completing specific quests, such as Winstock’s initial cooking lesson, and seeking out additional Yordles to aid and assist will be vital to your character’s progression. Especially on the food front, as Kulaga says you’re not just cooking for yourself in Bandle Tale, but also for your friends, either in your home’s built-in diner, or at those aforementioned parties (more on which in a second).
Speaking of your home, Kaluga is keen to stress that this isn’t a permanent, fixed structure in Bandle Tale. Oh no. Your home is actually a magical backpack that you can take with you and unfurl at specific locations on each island - a trick that Kulaga and his team thought was essential to avoid any unnecessary backtracking to your base between tasks. “We wanted to make Bandle City pretty big with the different districts, and we wanted players to travel a lot,” he says. “It’s always quite a bummer when you need to go back to your house and it’s on the other side of the city, so we decided it would be cool to take your house with you. It’s also just very cute to have your house on your back!”
Once you’ve found a good spot, you can also unroll special outdoor carpets - one of which is the diner I mentioned above. You’ll also need to construct and arrange (and unlock) specific crafting stations on these carpets to get the most out of them, which in the case of your diner means various ovens, tables and heat conductors to serve up some dishes. You’ll also need to set the menu, which is limited by what meals you’ve unlocked in the skill tree. Opening your diner for business isn’t simply a matter of pressing a button and sititng back to reap the rewards for your city’s mood, friendship and satisfaction bars, though. You’ll have to put your back into it a little bit, as the diner in particular has its own Overcooked /Dave The Diver-style mini-game where you’ll need to serve your guests the correct order in a reasonable time limit.
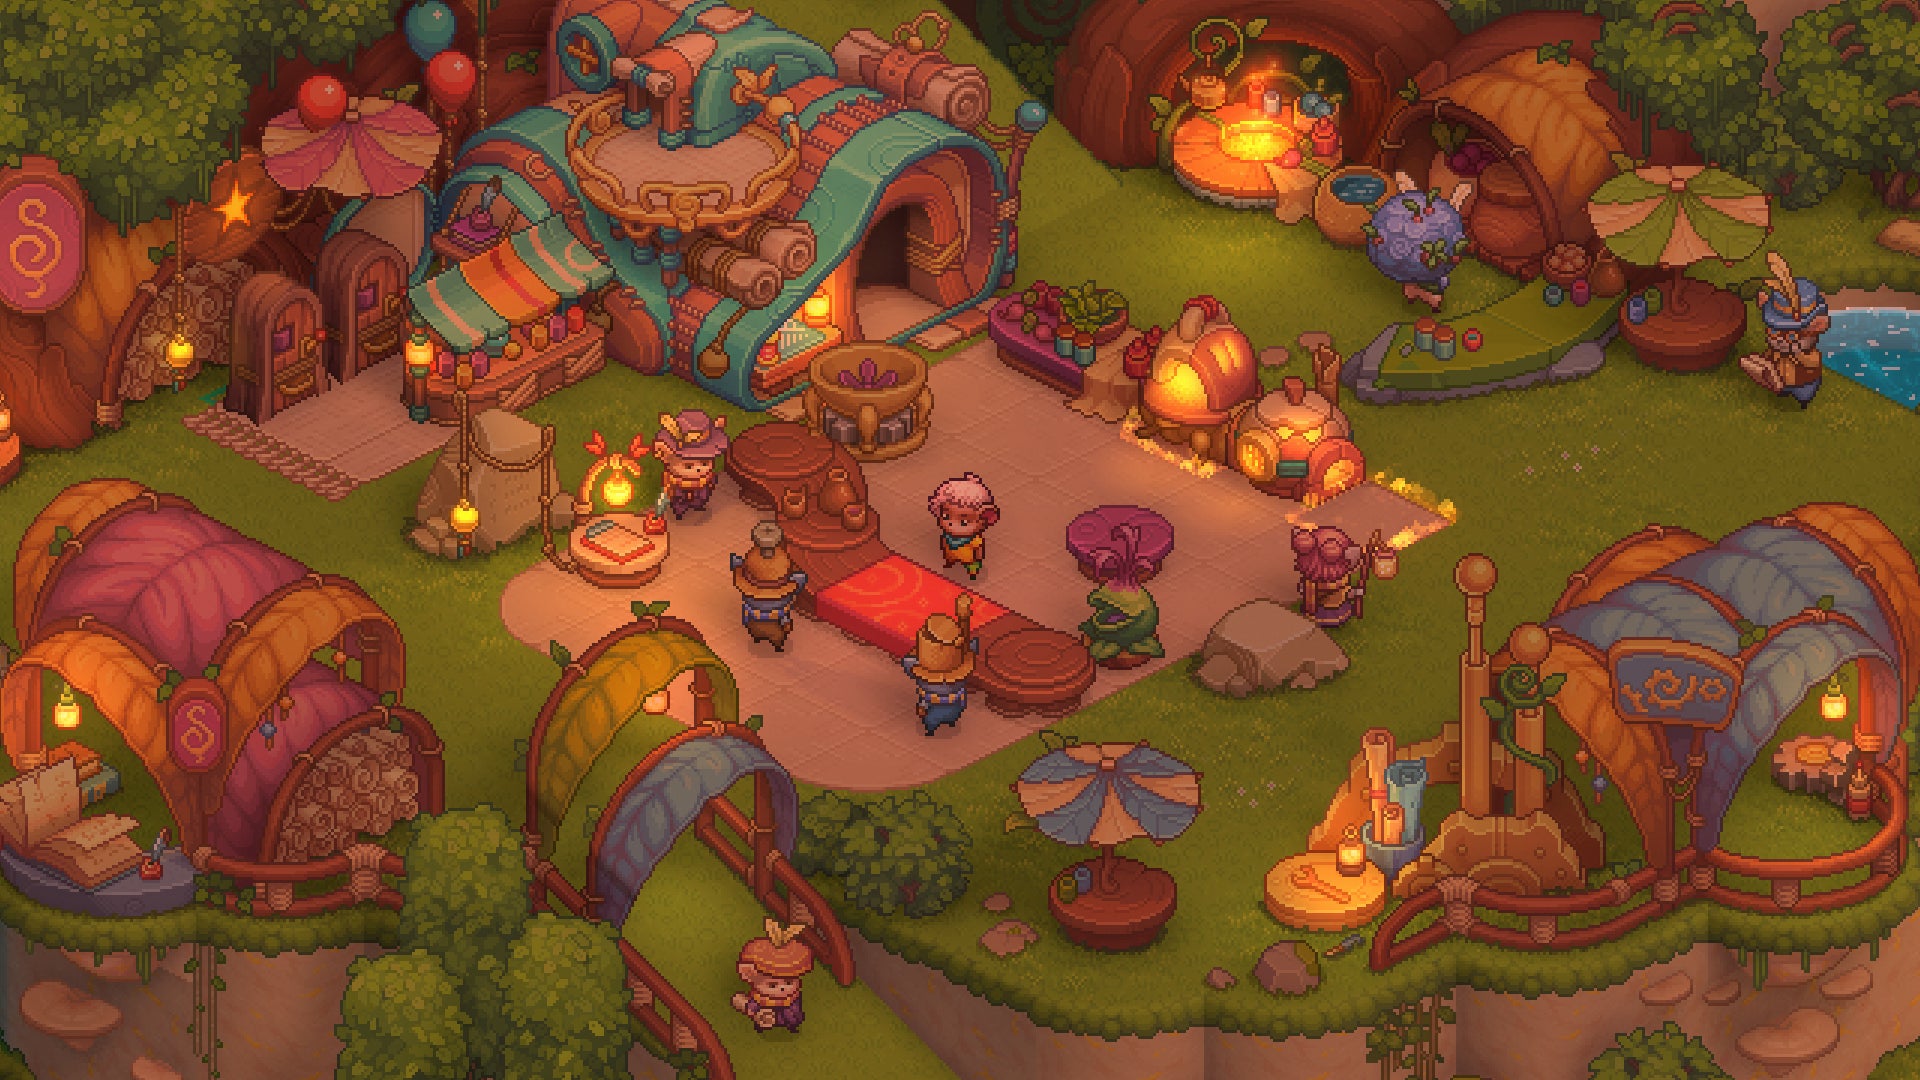
Once your diner is ready to go, you can open it up to guests to reap more inspiration for your next adventure. |Image credit:Riot Forge
Hoiking your home about also lets you solve some of its more specific crafting tasks and puzzles, says Kulaga. Occasionally, for example, you might notice some glowing squares on its isometric plains. These have special magical aura properties, he explains, and only when you place the correct workbench on top of it can you take full advantage of them to craft special items that are unique to that location.
Not all the items you craft will be required for completing specific quests and tasks, however. Once you acquire the shop carpet, for example, you can sell your goods for various types of currency. Now, I’ll admit I felt a stab of Mineko’s Night Market trauma rear its head here, but I’m hopeful that Bandle Tale won’t fall into the same dirge-like grind trap thanks to the way its inspiration system works. A bit like in real life, you’ll earn more inspiration the first time you do something, and less as you repeat the task over time. It’s very anti-grind, in other words, and is very much geared toward pushing you to experience new types of activities to further your progress. (And for further evidence on this subject, the XP system in Nintendo’s JRPG series Xenoblade Chronicles does the same thing to great effect as well, so I’m crossing my fingers that Bandle Tale will be equally successful in stamping out signs of repetitiveness).
As for the inside of your magical backpack home, there’s plenty of customisation to be had here as well, tapping into that increasingly deep vein of Animal Crossing-esque home-making that has kept me coming back to Nintendo’s life sim for hundreds and hundreds of hours. Indeed, as Redko jumps to a later save file, I get to see the innards of the backpack transform in both size and visual variety, with additional floors, rooms and pocket dimensions all visible, including an enormous garden whose plants keep on growing when it’s on your back, so you don’t lose time when you’re in transit. You can change everything from the wall colour and flooring type to the shape of your windows to name just a few of its myriad options, as well as the types of decorations on show.
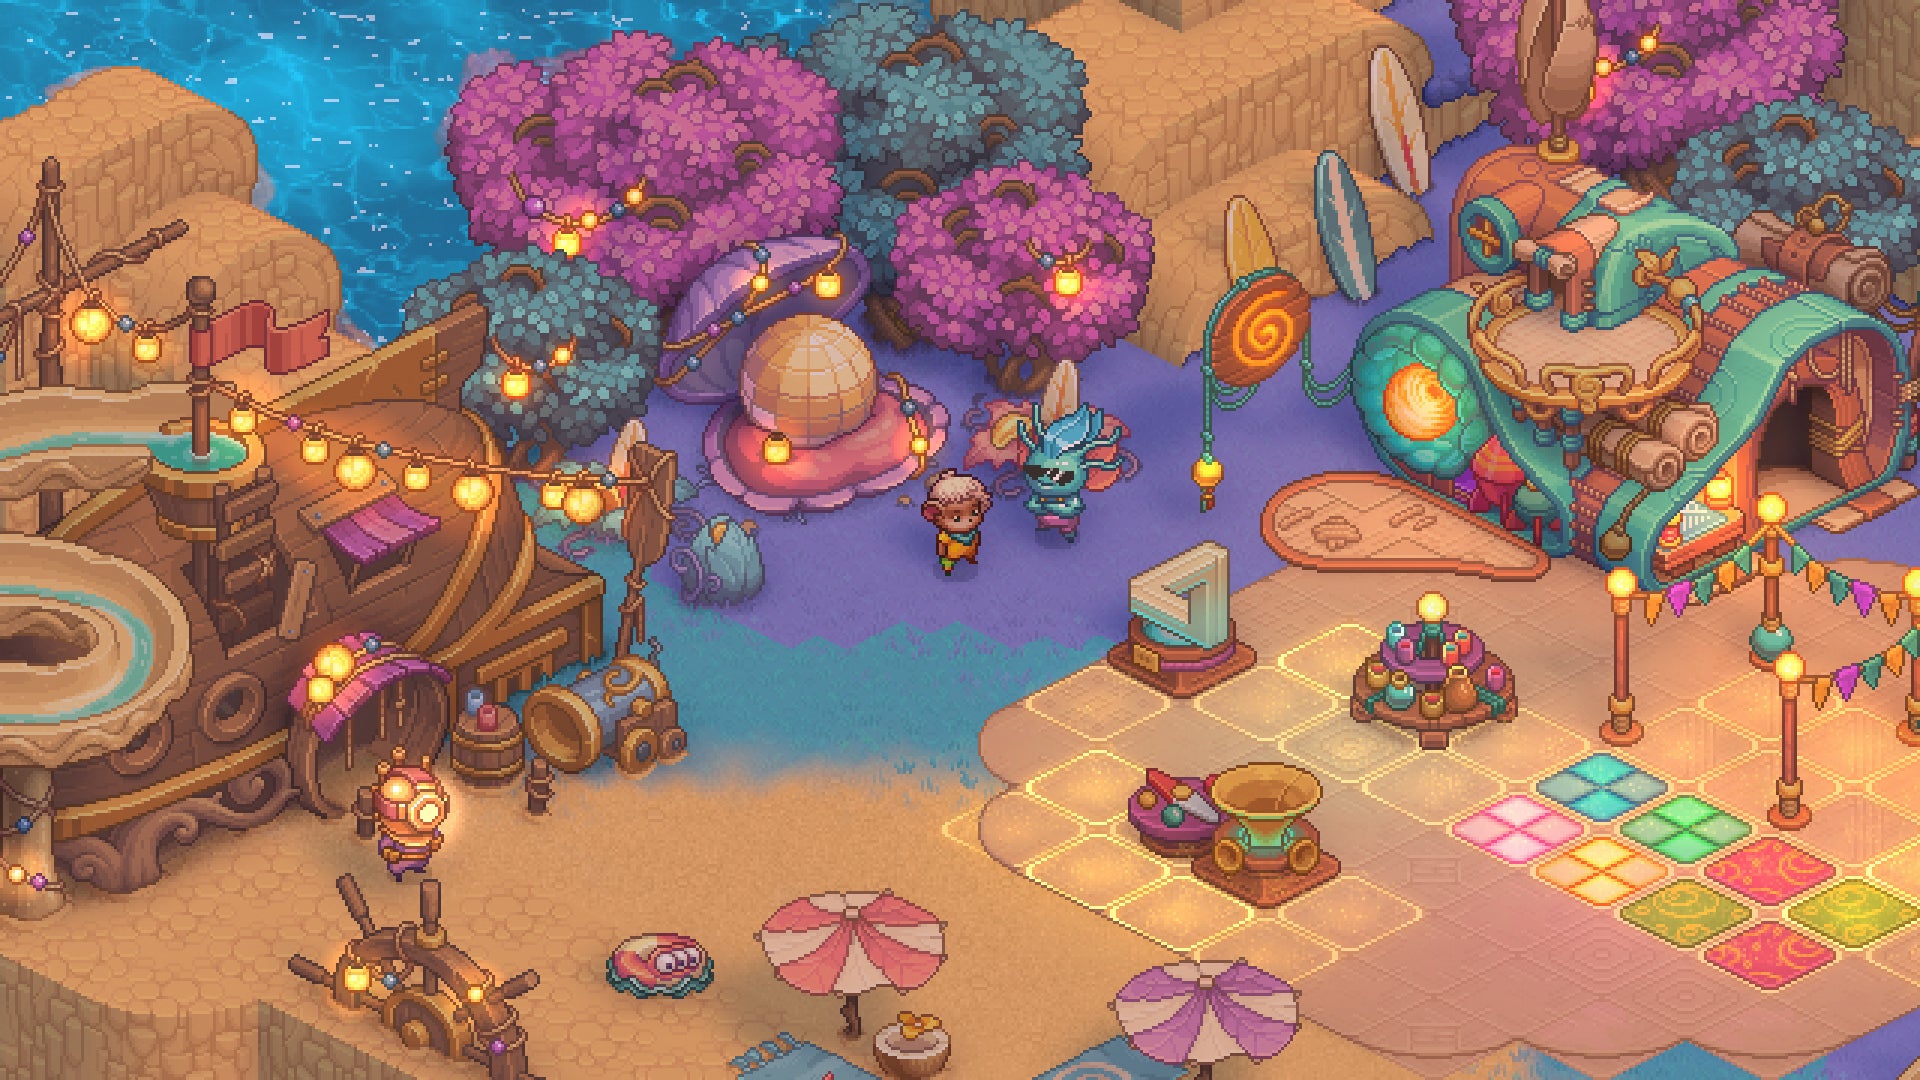
Image credit:Riot Forge
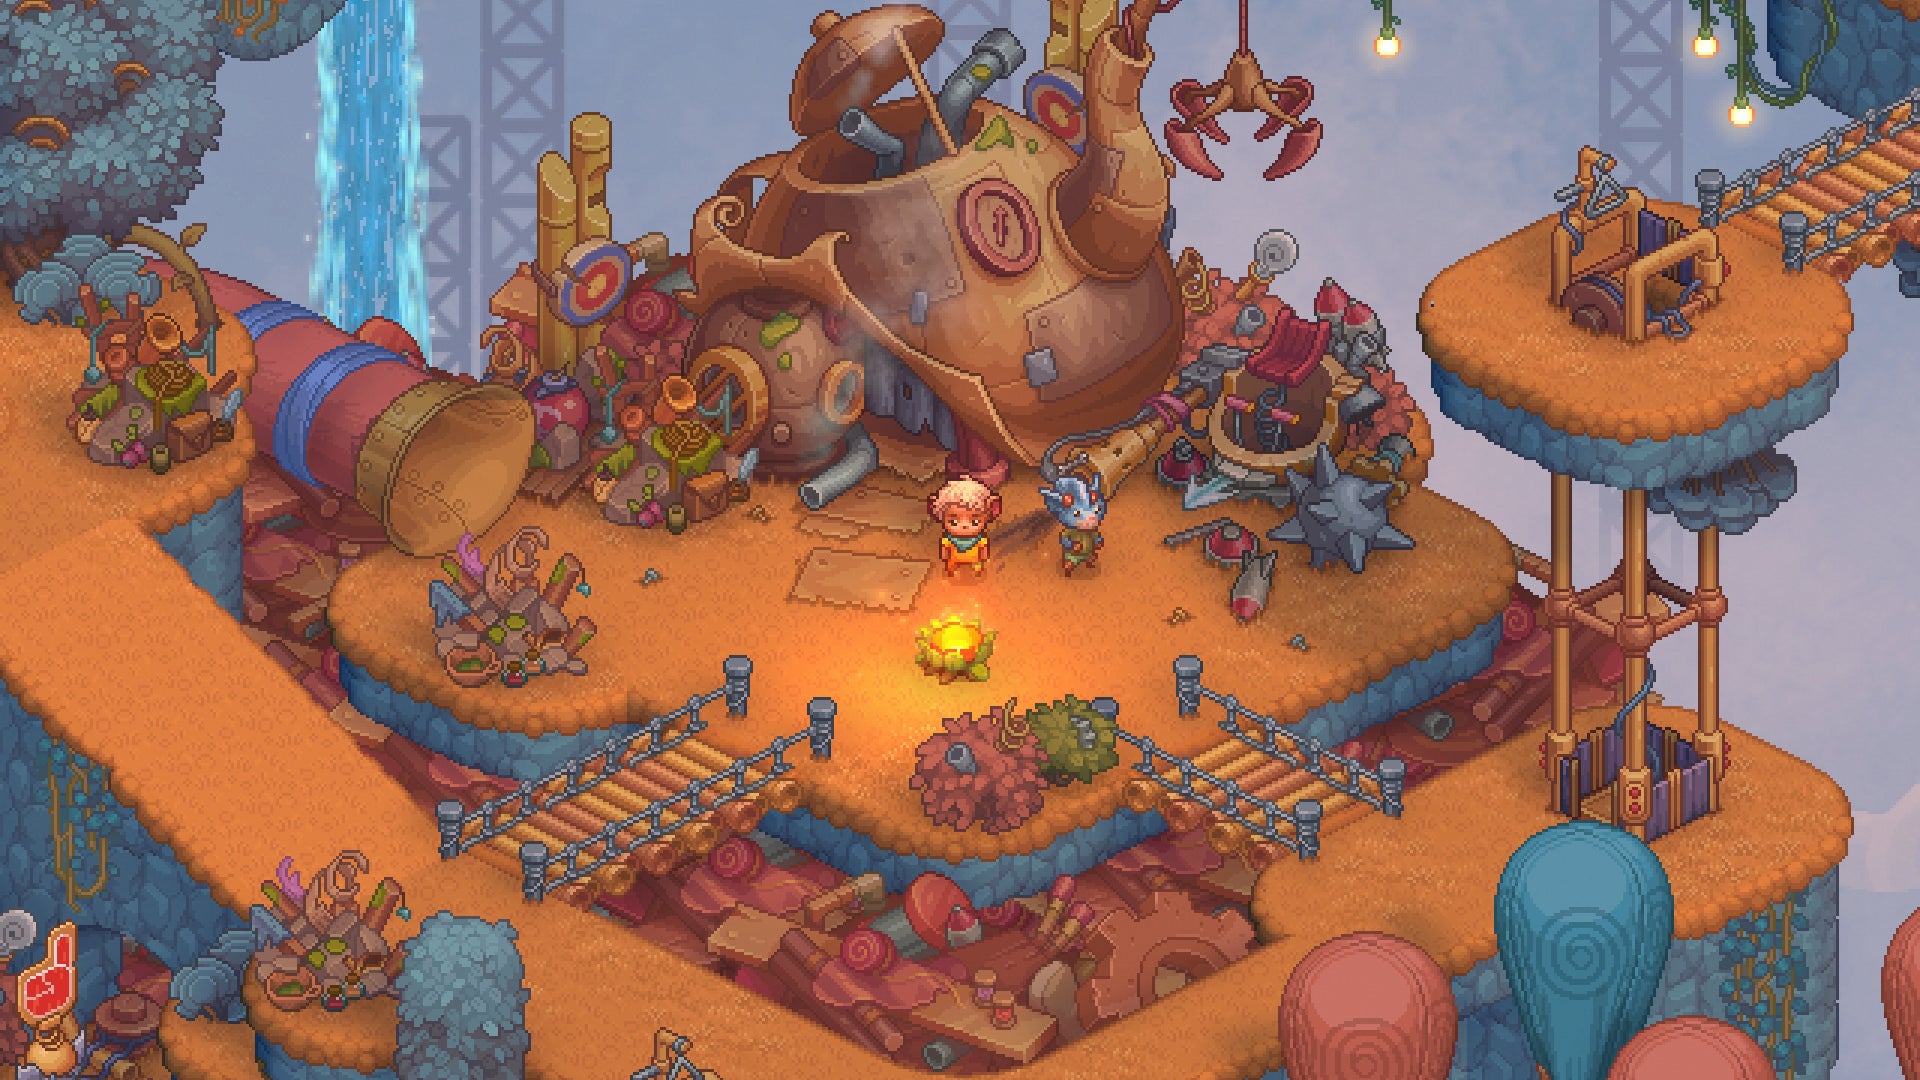
The pixel art worlds are properly stunning in Bandle Tale, and each one has a different theme and hook. |Image credit:Riot Forge
Alas, I got the sense that - in the entrance room at least - you can only control the placement of your indoor crafting benches rather than the full extent of your furniture collection, but other rooms look to be more freeform. The aforementioned garden was completely player-designed, says Parker, so even if a lot of its more decorative elements do end up being fixed, I get the feeling that whatever combo of its plentiful options you happen to settle on, it’ll still end up feeling reasonably unique.
Finally, I got to see one of its all-important parties in action - although not before Redko had laid out her special party carpet (but of course), and filled it with attractions, entertainment, and decided what food and drinks she was going to serve. Parties aren’t just a one-size fits all affair, though. Just like the skill tree menu, there are dozens of different festival types to choose from, and each one has its own set of requirements, conditions and rewards. You’ll need to match it with the appropriate music choices, lighting styles and invite the right guests to get the most from it. And crikey, I’m getting wedding planning flashbacks just thinking about.
“The player has had to work for a long time to work up to this,” says Parker. “The Yordles that you’re inviting - you did quests, you made friends with them, and you had to earn points to invite them. The [festival requirement] stats - that’s the puzzle that you’re solving on the carpet layout, so all of the activity props add points to the three stats of beauty, music and comfort, and you’re trying to manifest the right combination of stats to trigger the party,” likening it to “party planning Tetris.”
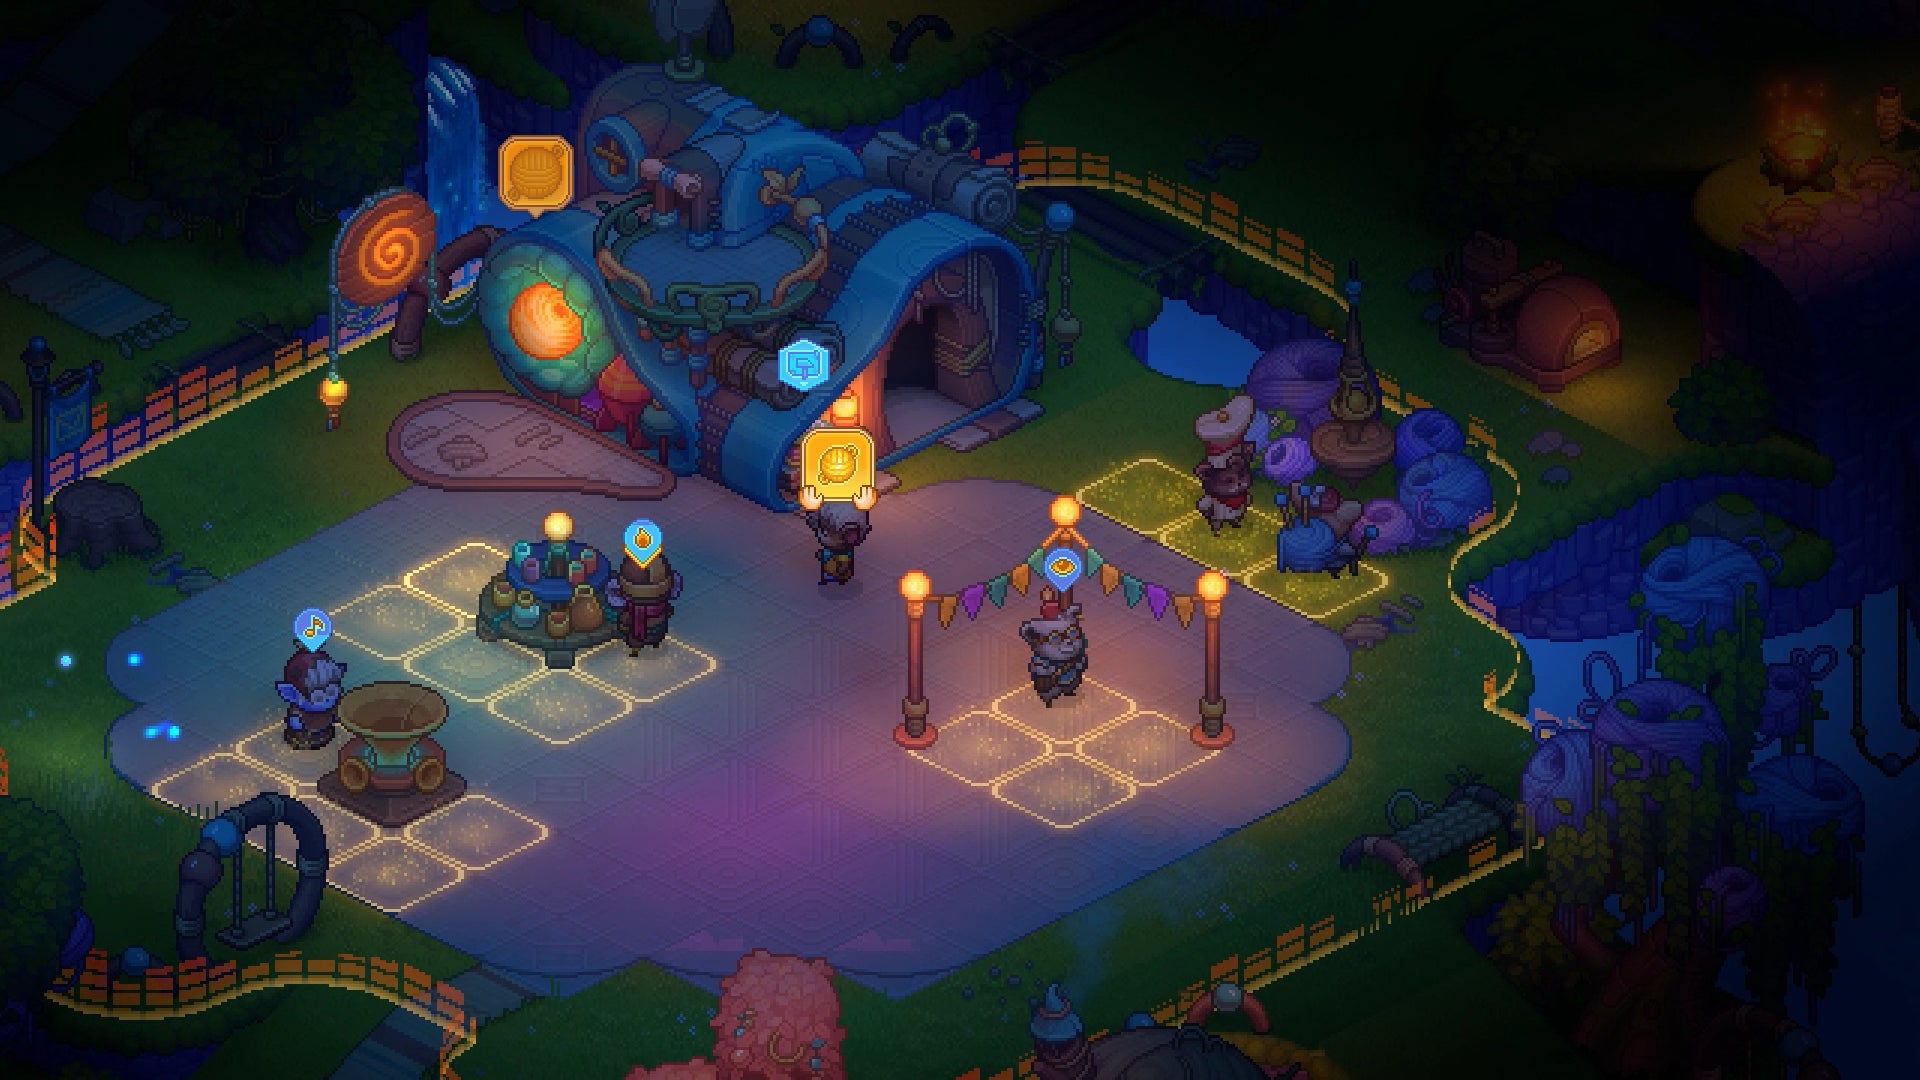
It’s party time, baybeee! |Image credit:Riot Forge
Like the diner’s homage to Overcooked, you’ll still need to work these parties once you’ve met their respective requirements. Good hosts will be scurrying around collecting their fun points, boosting guests’ enjoyment levels at opportune moments before converting it to inspiration. “It’s Good Vibes: The Currency,” Parker laughs, even though you’ve only technically got a couple of minutes to collect said vibes, as parties all have their own time limits. If you fail, you can always just try again, though, Parker adds, as ultimately, the goal is really to just have a fun, chill time with your pals. “All roads lead to these parties,” he continues. “You’re crafting things, you’re inviting Yordles, and you’re throwing food stands and running a diner to feed everybody, but ultimately it all culminates in throwing a party and having a cool time.”
It’s here where my demo ends, and Graveyard Keeper once again enters the conversation, reminding me yet again of the wild contrast between the two games. But as Parker is keen to point out, it was precisely Lazy Bear Games’ supernatural take on the hallowed farming game genre that led him to reach out to Kulaga and his team and propose this project in the first place. “Graveyard Keeper showed their knowledge of the genre, and being able shortcut and short-circuit loops was a pretty cool twist for me when I played it,” says Parker. “You need a really deep genre knowledge to come up with ideas like moving your base, having pocket space in there, having auras and things overlap, and having five systems all interact and overlay with each other in this deep complex way, but also just have it feel chill and inviting is something I really only think you can do if you’ve made these games before, which this team has.”
Indeed, you might not think to look at it, but Kulaga says the team did, in fact, take a surprising amount of inspiration from Graveyard Keeper when it came to creating Bandle Tale. “We decided just to make everything bigger and better this time,” he says, adding that “it’s all about having a chilled time, doing your chores, crafting and planting,” putting it very much in the same kind of vein as their other two big touchstones, Harvest Moon and Stardew Valley . Here’s hoping Bandle Tale makes good on its good vibes promises when it launches in full on Steam and the Epic Games Store on February 21st.


Bandle Tale: A League Of Legends Story
PC , Nintendo Switch
Rock Paper Shotgun is better when you sign in
Sign in and join us on our journey to discover strange and compelling PC games.

All 75 Arc Raiders Blueprints and where to get them
These areas have the highest chance of giving you Blueprints

Image credit:Rock Paper Shotgun/Embark Studios

Looking for more Arc Raiders Blueprints? It’s a special day when you find a Blueprint, as they’re among the most valuable items in Arc Raiders. If you find a Blueprint that you haven’t already found, then you must make sure you hold onto it at all costs, because Blueprints are the key to one of the most important and powerful systems of meta-progression in the game.
This guide aims to be the very best guide on Blueprints you can find, starting with a primer on what exactly they are and how they work in Arc Raiders, before delving into exactly where to get Blueprints and the very best farming spots for you to take in your search.
We’ll also go over how to get Blueprints from other unlikely activities, such as destroying Surveyors and completing specific quests. And you’ll also find the full list of all 75 Blueprints in Arc Raiders on this page (including the newest Blueprints added with the Cold Snap update , such as the Deadline Blueprint and Firework Box Blueprint), giving you all the information you need to expand your own crafting repertoire.
In this guide:
- What are Blueprints in Arc Raiders?
- Full Blueprint list: All crafting recipes
- Where to find Blueprints in Arc Raiders Blueprints obtained from quests Blueprints obtained from Trials Best Blueprint farming locations

What are Blueprints in Arc Raiders?
Blueprints in Arc Raiders are special items which, if you manage to extract with them, you can expend to permanently unlock a new crafting recipe in your Workshop. If you manage to extract from a raid with an Anvil Blueprint, for example, you can unlock the ability to craft your very own Anvil Pistol, as many times as you like (as long as you have the crafting materials).
To use a Blueprint, simply open your Inventory while in the lobby, then right-click on the Blueprint and click “Learn And Consume” . This will permanently unlock the recipe for that item in your Workshop. As of the Stella Montis update, there are allegedly 75 different Blueprints to unlock - although only 68 are confirmed to be in the game so far. You can see all the Blueprints you’ve found and unlocked by going to the Workshop menu, and hitting “R” to bring up the Blueprint screen.
It’s possible to find duplicates of past Blueprints you’ve already unlocked. If you find these, then you can either sell them, or - if you like to play with friends - you can take it into a match and gift it to your friend so they can unlock that recipe for themselves. Another option is to keep hold of them until the time comes to donate them to the Expedition.
Full Blueprint list: All crafting recipes
Below is the full list of all the Blueprints that are currently available to find in Arc Raiders, and the crafting recipe required for each item:
| Blueprint | Type | Recipe | Crafted At |
|---|---|---|---|
| Bettina | Weapon | 3x Advanced Mechanical Components 3x Heavy Gun Parts 3x Canister | Gunsmith 3 |
| Blue Light Stick | Quick Use | 3x Chemicals | Utility Station 1 |
| Aphelion | Weapon | 3x Magnetic Accelerator 3x Complex Gun Parts 1x Matriarch Reactor | Gunsmith 3 |
| Combat Mk. 3 (Flanking) | Augment | 2x Advanced Electrical Components 3x Processor | Gear Bench 3 |
| Combat Mk. 3 (Aggressive) | Augment | 2x Advanced Electrical Components 3x Processor | Gear Bench 3 |
| Complex Gun Parts | Material | 2x Light Gun Parts 2x Medium Gun Parts 2x Heavy Gun Parts | Refiner 3 |
| Fireworks Box | Quick Use | 1x Explosive Compound 3x Pop Trigger | Explosives Station 2 |
| Gas Mine | Mine | 4x Chemicals 2x Rubber Parts | Explosives Station 1 |
| Green Light Stick | Quick Use | 3x Chemicals | Utility Station 1 |
| Pulse Mine | Mine | 1x Crude Explosives 1x Wires | Explosives Station 1 |
| Seeker Grenade | Grenade | 1x Crude Explosives 2x ARC Alloy | Explosives Station 1 |
| Looting Mk. 3 (Survivor) | Augment | 2x Advanced Electrical Components 3x Processor | Gear Bench 3 |
| Angled Grip II | Mod | 2x Mechanical Components 3x Duct Tape | Gunsmith 2 |
| Angled Grip III | Mod | 2x Mod Components 5x Duct Tape | Gunsmith 3 |
| Hullcracker | Weapon | 1x Magnetic Accelerator 3x Heavy Gun Parts 1x Exodus Modules | Gunsmith 3 |
| Launcher Ammo | Ammo | 5x Metal Parts 1x Crude Explosives | Workbench 1 |
| Anvil | Weapon | 5x Mechanical Components 5x Simple Gun Parts | Gunsmith 2 |
| Anvil Splitter | Mod | 2x Mod Components 3x Processor | Gunsmith 3 |
| ??? | ??? | ??? | ??? |
| Barricade Kit | Quick Use | 1x Mechanical Components | Utility Station 2 |
| Blaze Grenade | Grenade | 1x Explosive Compound 2x Oil | Explosives Station 3 |
| Bobcat | Weapon | 3x Advanced Mechanical Components 3x Light Gun Parts | Gunsmith 3 |
| Osprey | Weapon | 2x Advanced Mechanical Components 3x Medium Gun Parts 7x Wires | Gunsmith 3 |
| Burletta | Weapon | 3x Mechanical Components 3x Simple Gun Parts | Gunsmith 1 |
| Compensator II | Mod | 2x Mechanical Components 4x Wires | Gunsmith 2 |
| Compensator III | Mod | 2x Mod Components 8x Wires | Gunsmith 3 |
| Defibrillator | Quick Use | 9x Plastic Parts 1x Moss | Medical Lab 2 |
| ??? | ??? | ??? | ??? |
| Equalizer | Weapon | 3x Magnetic Accelerator 3x Complex Gun Parts 1x Queen Reactor | Gunsmith 3 |
| Extended Barrel | Mod | 2x Mod Components 8x Wires | Gunsmith 3 |
| Extended Light Mag II | Mod | 2x Mechanical Components 3x Steel Spring | Gunsmith 2 |
| Extended Light Mag III | Mod | 2x Mod Components 5x Steel Spring | Gunsmith 3 |
| Extended Medium Mag II | Mod | 2x Mechanical Components 3x Steel Spring | Gunsmith 2 |
| Extended Medium Mag III | Mod | 2x Mod Components 5x Steel Spring | Gunsmith 3 |
| Extended Shotgun Mag II | Mod | 2x Mechanical Components 3x Steel Spring | Gunsmith 2 |
| Extended Shotgun Mag III | Mod | 2x Mod Components 5x Steel Spring | Gunsmith 3 |
| Remote Raider Flare | Quick Use | 2x Chemicals 4x Rubber Parts | Utility Station 1 |
| Heavy Gun Parts | Material | 4x Simple Gun Parts | Refiner 2 |
| Venator | Weapon | 2x Advanced Mechanical Components 3x Medium Gun Parts 5x Magnet | Gunsmith 3 |
| Il Toro | Weapon | 5x Mechanical Components 6x Simple Gun Parts | Gunsmith 1 |
| Jolt Mine | Mine | 1x Electrical Components 1x Battery | Explosives Station 2 |
| Explosive Mine | Mine | 1x Explosive Compound 1x Sensors | Explosives Station 3 |
| Jupiter | Weapon | 3x Magnetic Accelerator 3x Complex Gun Parts 1x Queen Reactor | Gunsmith 3 |
| Light Gun Parts | Material | 4x Simple Gun Parts | Refiner 2 |
| Lightweight Stock | Mod | 2x Mod Components 5x Duct Tape | Gunsmith 3 |
| Lure Grenade | Grenade | 1x Speaker Component 1x Electrical Components | Utility Station 2 |
| Medium Gun Parts | Material | 4x Simple Gun Parts | Refiner 2 |
| Torrente | Weapon | 2x Advanced Mechanical Components 3x Medium Gun Parts 6x Steel Spring | Gunsmith 3 |
| Muzzle Brake II | Mod | 2x Mechanical Components 4x Wires | Gunsmith 2 |
| Muzzle Brake III | Mod | 2x Mod Components 8x Wires | Gunsmith 3 |
| Padded Stock | Mod | 2x Mod Components 5x Duct Tape | Gunsmith 3 |
| Shotgun Choke II | Mod | 2x Mechanical Components 4x Wires | Gunsmith 2 |
| Shotgun Choke III | Mod | 2x Mod Components 8x Wires | Gunsmith 3 |
| Shotgun Silencer | Mod | 2x Mod Components 8x Wires | Gunsmith 3 |
| Showstopper | Grenade | 1x Advanced Electrical Components 1x Voltage Converter | Explosives Station 3 |
| Silencer I | Mod | 2x Mechanical Components 4x Wires | Gunsmith 2 |
| Silencer II | Mod | 2x Mod Components 8x Wires | Gunsmith 3 |
| Snap Hook | Quick Use | 2x Power Rod 3x Rope 1x Exodus Modules | Utility Station 3 |
| Stable Stock II | Mod | 2x Mechanical Components 3x Duct Tape | Gunsmith 2 |
| Stable Stock III | Mod | 2x Mod Components 5x Duct Tape | Gunsmith 3 |
| Tagging Grenade | Grenade | 1x Electrical Components 1x Sensors | Utility Station 3 |
| Tempest | Weapon | 3x Advanced Mechanical Components 3x Medium Gun Parts 3x Canister | Gunsmith 3 |
| Trigger Nade | Grenade | 2x Crude Explosives 1x Processor | Explosives Station 2 |
| Vertical Grip II | Mod | 2x Mechanical Components 3x Duct Tape | Gunsmith 2 |
| Vertical Grip III | Mod | 2x Mod Components 5x Duct Tape | Gunsmith 3 |
| Vita Shot | Quick Use | 2x Antiseptic 1x Syringe | Medical Lab 3 |
| Vita Spray | Quick Use | 3x Antiseptic 1x Canister | Medical Lab 3 |
| Vulcano | Weapon | 1x Magnetic Accelerator 3x Heavy Gun Parts 1x Exodus Modules | Gunsmith 3 |
| Wolfpack | Grenade | 2x Explosive Compound 2x Sensors | Explosives Station 3 |
| Red Light Stick | Quick Use | 3x Chemicals | Utility Station 1 |
| Smoke Grenade | Grenade | 14x Chemicals 1x Canister | Utility Station 2 |
| Deadline | Mine | 3x Explosive Compound 2x ARC Circuitry | Explosives Station 3 |
| Trailblazer | Grenade | 1x Explosive Compound 1x Synthesized Fuel | Explosives Station 3 |
| Tactical Mk. 3 (Defensive) | Augment | 2x Advanced Electrical Components 3x Processor | Gear Bench 3 |
| Tactical Mk. 3 (Healing) | Augment | 2x Advanced Electrical Components 3x Processor | Gear Bench 3 |
| Yellow Light Stick | Quick Use | 3x Chemicals | Utility Station 1 |
Note: The missing Blueprints in this list likely have not actually been added to the game at the time of writing, because none of the playerbase has managed to find any of them. As they are added to the game, I will update this page with the most relevant information so you know exactly how to get all 75 Arc Raiders Blueprints.
Where to find Blueprints in Arc Raiders
Below is a list of all containers, modifiers, and events which maximise your chances of finding Blueprints:
- Certain quests reward you with specific Blueprints .
- Completing Trials has a high chance of offering Blueprints as rewards.
- Surveyors have a decent chance of dropping Blueprints on death.
- High loot value areas tend to have a greater chance of spawning Blueprints.
- Night Raids and Storms may increase rare Blueprint spawn chances in containers.
- Containers with higher numbers of items may have a higher tendency to spawn Blueprints. As a result, Blue Gate (which has many “large” containers containing multiple items) may give you a higher chance of spawning Blueprints.
- Raider containers (Raider Caches, Weapon Boxes, Medical Bags, Grenade Tubes) have increased Blueprint drop rates. As a result, the Uncovered Caches event gives you a high chance of finding Blueprints.
- Security Lockers have a higher than average chance of containing Blueprints.
- Certain Blueprints only seem to spawn under specific circumstances: Tempest Blueprint only spawns during Night Raid events. Vulcano Blueprint only spawns during Hidden Bunker events. Jupiter and Equaliser Blueprints only spawn during Harvester events.

Raider Caches, Weapon Boxes, and other raider-oriented container types have a good chance of offering Blueprints. |Image credit:Rock Paper Shotgun/Embark Studios
Blueprints have a very low chance of spawning in any container in Arc Raiders, around 1-2% on average. However, there is a higher chance of finding Blueprints in particular container types. Specifically, you can find more Blueprints in Raider containers and security lockers.
Beyond this, if you’re looking for Blueprints you should focus on regions of the map which are marked as having particularly high-value loot. Areas such as the Control Tower in Dam Battlegrounds, the Arrival and Departure Buildings in Spaceport, and Pilgrim’s Peak in Blue Gate all have a better-than-average chance of spawning Blueprints somewhere amongst all their containers. Night Raids and Electromagnetic Storm events also increase the drop chances of certain Blueprints .
In addition to these containers, you can often loot Blueprints from destroyed Surveyors - the largest of the rolling ball ARC. Surveyors are more commonly found on the later maps - Spaceport and Blue Gate - and if one spawns in your match, you’ll likely see it by the blue laser beam that it casts into the sky while “surveying”.
Surveyors are quite well-armoured and will very speedily run away from you once it notices you, but if you can take one down then make sure you loot all its parts for a chance of obtaining certain unusual Blueprints.
Blueprints obtained from quests
One way in which you can get Blueprints is by completing certain quests for the vendors in Speranza. Some quests will reward you with a specific item Blueprint upon completion, so as long as you work through all the quests in Arc Raiders, you are guaranteed those Blueprints.
Here is the full list of all Blueprints you can get from quest rewards:
- Trigger Nade Blueprint: Rewarded after completing “Sparks Fly”.
- Lure Grenade Blueprint: Rewarded after completing “Greasing Her Palms”.
- Burletta Blueprint: Rewarded after completing “Industrial Espionage”.
- Hullcracker Blueprint (and Launcher Ammo Blueprint): Rewarded after completing “The Major’s Footlocker”.
Alas, that’s only 4 Blueprints out of a total of 75 to unlock, so for the vast majority you will need to find them yourself during a raid. If you’re intent on farming Blueprints, then it’s best to equip yourself with cheap gear in case you lose it, but don’t use a free loadout because then you won’t get a safe pocket to stash any new Blueprint you find. No pain in Arc Raiders is sharper than failing to extract with a new Blueprint you’ve been after for a dozen hours already.

One of the best ways to get Blueprints is by hitting three stars on all five Trials every week. |Image credit:Rock Paper Shotgun/Embark Studios
Blueprints obtained from Trials
One of the very best ways to get Blueprints is as rewards for completing Trials in Arc Raiders. Trials are unlocked from Level 15 onwards, and allow you to earn rewards by focusing on certain tasks over the course of several raids. For example, one Trial might task you with dealing damage to Hornets, while another might challenge you to loot Supply Drops.
Trials refresh on a weekly basis, with a new week bringing five new Trials. Each Trial can offer up to three rewards after passing certain score milestones, and it’s possible to receive very high level loot from these reward crates - including Blueprints. So if you want to unlock as many Blueprints as possible, you should make a point of completing as many Trials as possible each week.
Best Blueprint farming locations
The very best way to get Blueprints is to frequent specific areas of the maps which combine high-tier loot pools with the right types of containers to search. Here are my recommendations for where to find Blueprints on every map, so you can always keep the search going for new crafting recipes to unlock.

Image credit:Rock Paper Shotgun/Embark Studios
Dam Battlegrounds
The best places to farm Blueprints on Dam Battlegrounds are the Control Tower, Power Generation Complex, Ruby Residence, and Pale Apartments . The first two regions, despite only being marked on the map as mid-tier loot, contain a phenomenal number of containers to loot. The Control Tower can also contain a couple of high-tier Security Lockers - though of course, you’ll need to have unlocked the Security Breach skill at the end of the Survival tree.
There’s also a lot of reporting amongst the playerbase that the Residential areas in the top-left of the map - Pale Apartments and Ruby Residence - give you a comparatively strong chance of finding Blueprints. Considering their size, there’s a high density of containers to loot in both locations, and they also have the benefit of being fairly out of the way. So you’re more likely to have all the containers to yourself.
Buried City
The best Blueprint farming locations on Buried City are the Santa Maria Houses, Grandioso Apartments, Town Hall, and the various buildings of the New District . Grandioso Apartments has a lower number of containers than the rest, but a high chance of spawning weapon cases - which have good Blueprint drop rates. The others are high-tier loot areas, with plenty of lootable containers - including Security Lockers.
Spaceport
The best places to find Blueprints on Spaceport are the Arrival and Departure Buildings, as well as Control Tower A6 and the Launch Towers . All these areas are labelled as high-value loot regions, and many of them are also very handily connected to one another by the Spaceport wall, which you can use to quickly run from one area to the next. At the tops of most of these buildings you’ll find at least one Security Locker, so this is an excellent farming route for players looking to find Blueprints.
The downside to looting Blueprints on Spaceport is that all these areas are hotly contested, particularly in Duos and Squads. You’ll need to be very focused and fast in order to complete the full farming route.

Image credit:Rock Paper Shotgun/Embark Studios
Blue Gate
Blue Gate tends to have a good chance of dropping Blueprints, potentially because it generally has a high number of containers which can hold lots of items; so there’s a higher chance of a Blueprint spawning in each container. In my experience, the best Blueprint farming spots on Blue Gate are Pilgrim’s Peak, Raider’s Refuge, the Ancient Fort, and the Underground Complex beneath the Warehouse .
All of these areas contain a wealth of containers to loot. Raider’s Refuge has less to loot, but the majority of the containers in and around the Refuge are raider containers, which have a high chance of containing Blueprints - particularly during major events.
Stella Montis
On the whole, Stella Montis seems to have a very low drop rate for Blueprints (though a high chance of dropping other high-tier loot). If you do want to try farming Blueprints on this map, the best places to find Blueprints in Stella Montis are Medical Research, Assembly Workshop, and the Business Center . These areas have the highest density of containers to loot on the map.
In addition to this, the Western Tunnel has a few different Security Lockers to loot, so while there’s very little to loot elsewhere in this area of the map, it’s worth hitting those Security Lockers if you spawn there at the start of a match.
That wraps up this primer on how to get all the Blueprints in Arc Raiders as quickly as possible. With the Expedition system constantly resetting a large number of players’ Blueprints, it’s more important than ever to have the most up-to-date information on where to find all these Blueprints.
While you’re here, be sure to check out our Arc Raiders best guns tier list , as well as our primers on the best skills to unlock and all the different Field Depot locations on every map.


ARC Raiders
PS5 , Xbox Series X/S , PC
Rock Paper Shotgun is better when you sign in
Sign in and join us on our journey to discover strange and compelling PC games.
