The Forge: Pickaxe guide
Wondering what’s the best Pickaxe in The Forge? Here’s our guide to the best Picks money can buy.
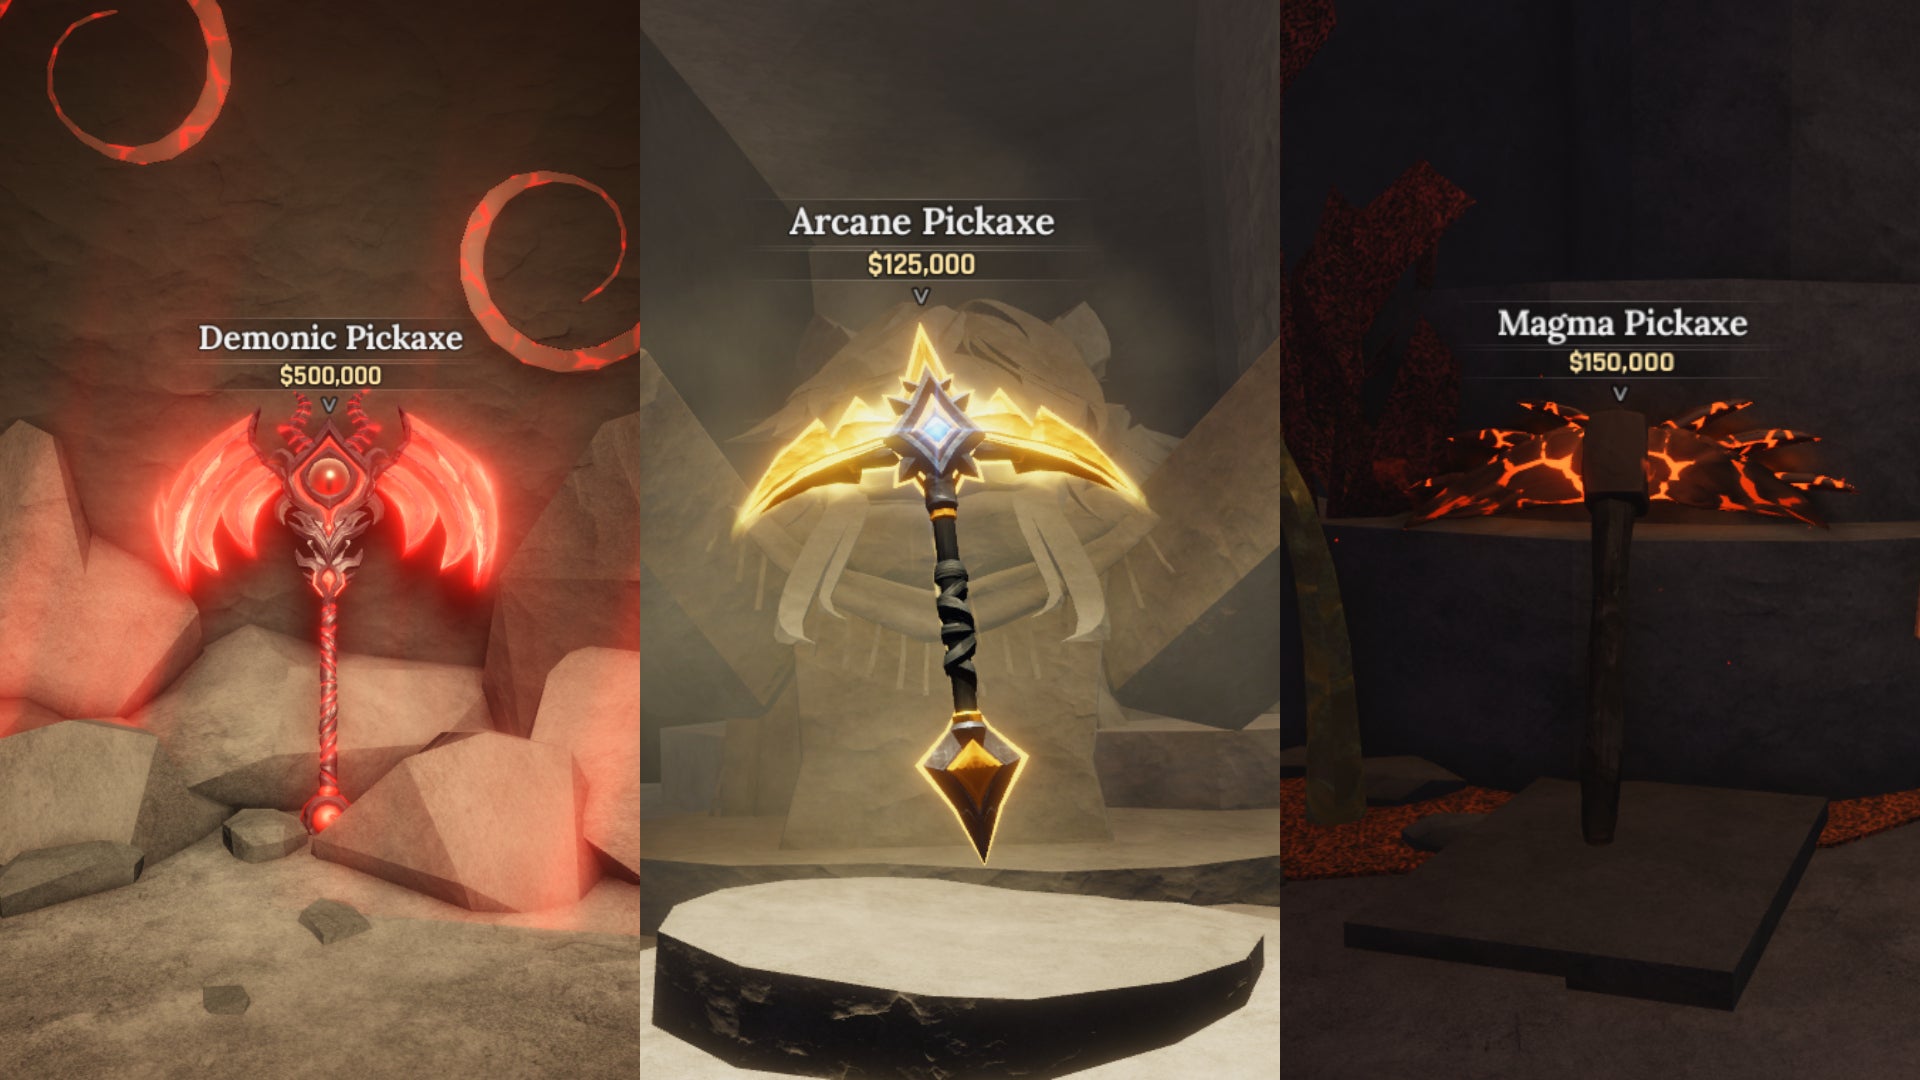
Image credit:Rock Paper Shotgun / The Forge Community

What’s the best Pickaxe in The Forge? It’s a question you’ll no doubt be asking as you drum up funds and consider snagging yourself one of the very expensive endgame Pickaxes hidden deep within this Roblox RPG’s labyrinthian mines. While some Pickaxes you’ll find are objectively better than others, having higher stats across the board, the rarest ones are less cut and dry.
You’ll need to really think about what matters to you in a Pickaxe as the price tags grow higher. Want to boost Luck for rarer Ores? Harness sheer power to eviscerate rocks? Or perhaps the speed you chip away at rocks is key. Whatever it is, we’ve cooked up the ultimate Pickaxe guide, featuring a tier list of all the Pickaxes, their locations, stats, the rocks they can break, and our take on the current best Pickaxe in the game.
In this guide:
- The Forge Pickaxe Tier List
- What’s the best Pickaxe in The Forge?
- All Pickaxe Stats
- Every Pickaxe in The Forge
The Forge Pickaxe Tier List
| Tier | Pickaxe |
|---|---|
| S-Tier | Demonic Pickaxe , Arcane Pickaxe |
| A-Tier | Magma Pickaxe , Lightite Pickaxe |
| B-Tier | Mythril Pickaxe , Uranium Pickaxe , Stonewake’s Pickaxe |
| C-Tier | Titanium Pickaxe , Cobalt Pickaxe |
| D-Tier | Platinum Pickaxe , Gold Pickaxe , Iron Pickaxe , Bronze Pickaxe |
What’s the best Pickaxe in The Forge?
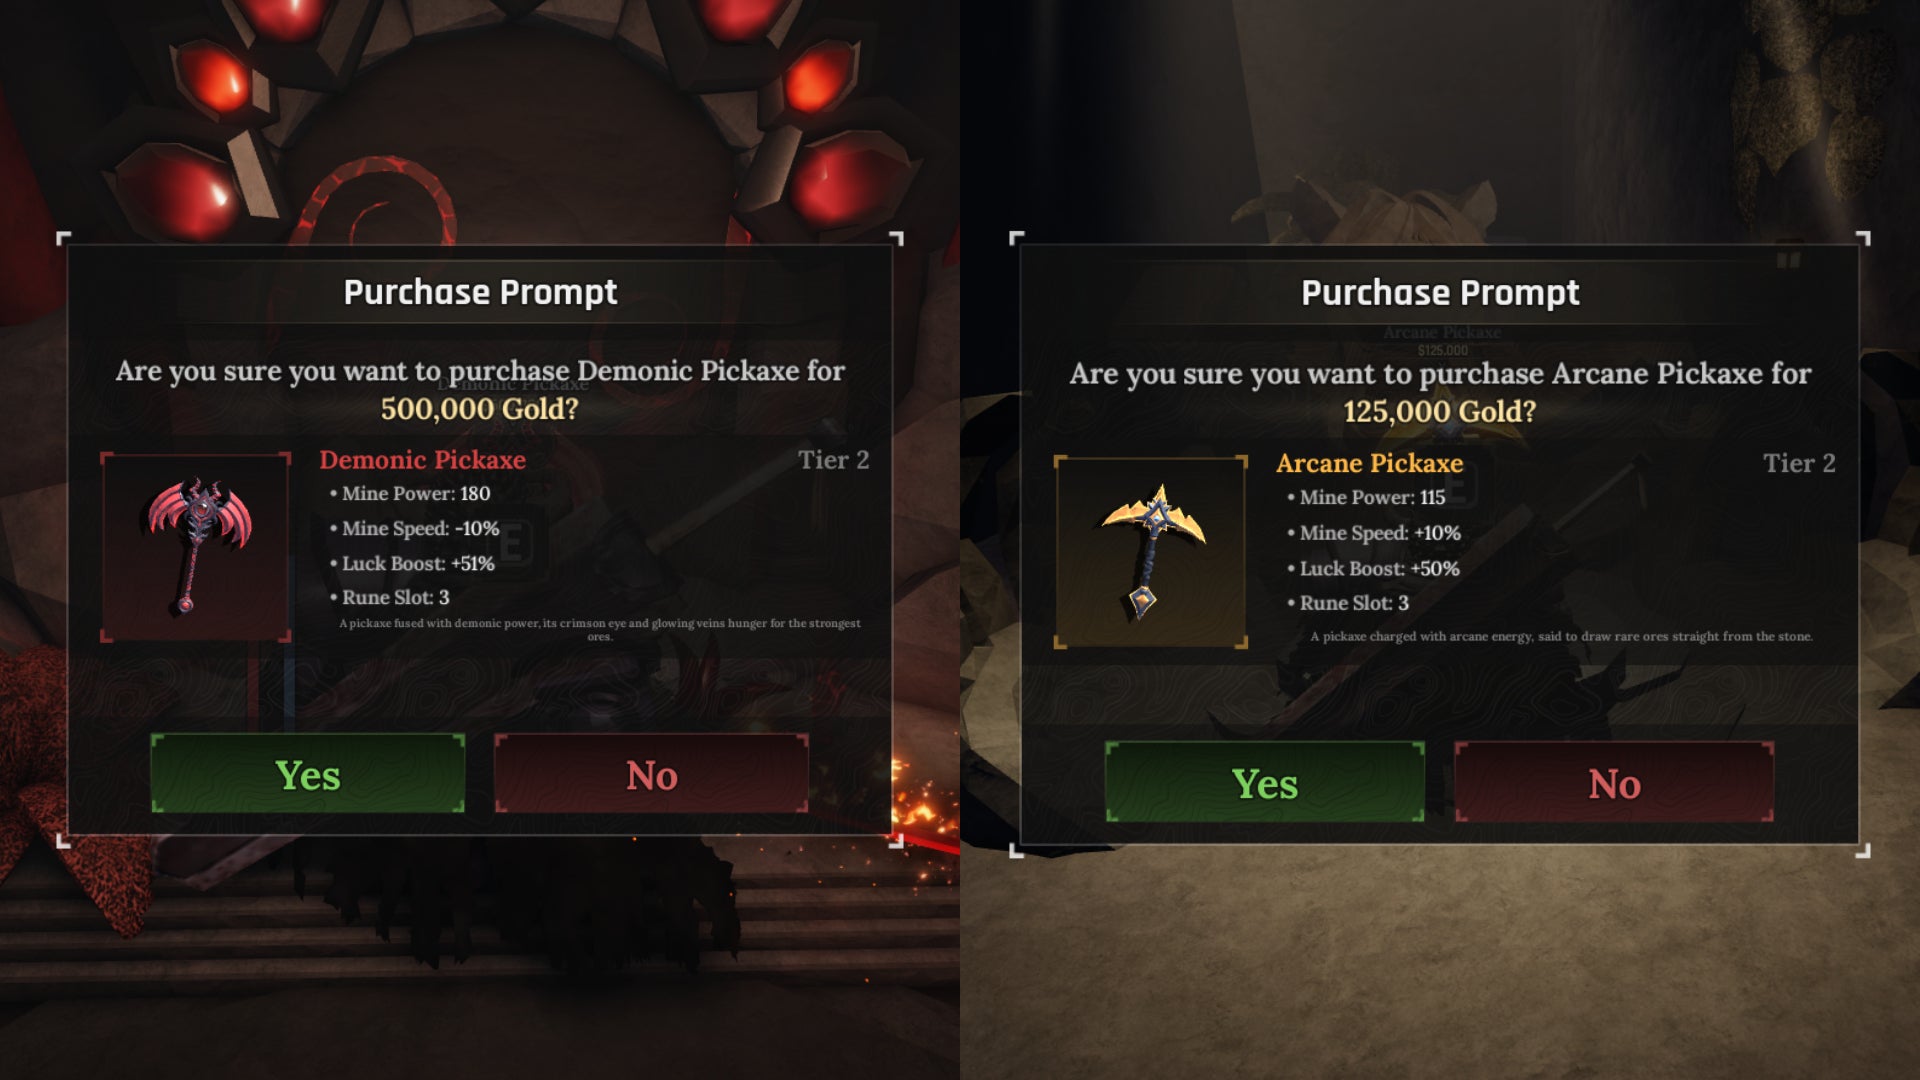
Image credit:Rock Paper Shotgun / The Forge Community
The best Pickaxes in the The Forge are The Demonic Pickaxe and the Arcane Pickaxe .
As for which Pickaxe reigns supreme out of the two, that will mostly come down to which stats you value and how full your wallet is. The Demonic Pickaxe is inarguably the pound-for-pound best, but in my opinion, the wisest option so far is the Arcane Pickaxe. It’s cheaper than the Demonic Pickaxe, with the Arcane Pickaxe coming in at $125,000 rather than the Demonic Pickaxe’s whopping $500,000, but regardless of the lower price tag, it has an almost identical Luck Boost stat.
While you could be very particular about stats, Luck Boost and Rune Slots are the main two you’ll want to inspect when buying a Pickaxe. Luck improves the odds of mining rare Ores, which is why you’re mining rocks in the first place. The higher your Luck Boost stat, the more likely you’ll get Demonite, Darkryte, Arcane Crystals, or any of the other rare Ores found inside The Forge’s various rocks. And you can bump that stat even higher by finding Miner Shard Runes and inserting them into Rune slots. The Arcane Pickaxe has a default Luck Boost of +50%. Meanwhile, the Demonic Pickaxe has a Luck Boost stat of +51%. It’s up to you, but considering both Pickaxes have three Rune Slots, an extra 1% luck bump and more rock damage doesn’t seem worth the significantly higher price tag.
All Pickaxe Stats
If you want to see exactly what you’re getting with each Pickaxe, we’ve put together a comparison table to show you the raw stats:
| Pickaxe | Price | Luck | Mine Power | Mine Speed | Rune Slots |
|---|---|---|---|---|---|
| Bronze Pickaxe | $150 | None | 7 | None | None |
| Iron Pickaxe | $500 | +5% | 10 | None | None |
| Gold Pickaxe | $1,500 | +15% | 16 | None | 1 |
| Platinum Pickaxe | $5,000 | +25% | 24 | None | 2 |
| Stonewake’s Pickaxe | $3,333 | +10% | 33 | -30% | 3 |
| Cobalt Pickaxe | $10,000 | +35% | 40 | None | 2 |
| Titanium Pickaxe | $22,500 | +38% | 55 | None | 2 |
| Uranium Pickaxe | $37,500 | +41% | 67 | None | 2 |
| Mythril Pickaxe | $67,500 | +43% | 80 | None | 2 |
| Lightite Pickaxe | $98,500 | +45% | 100 | +30% | 2 |
| Arcane Pickaxe | $125,000 | +50% | 115 | +10% | 3 |
| Magma Pickaxe | $150,000 | +46% | 135 | None | 2 |
| Demonic Pickaxe | $500,000 | +51% | 180 | -10% | 3 |
Every Pickaxe in The Forge
Now we’ve covered stats, let’s look closer at each Pickaxe, what it’s good for and where to find it.
S-Tier Pickaxes
Arcane Pickaxe
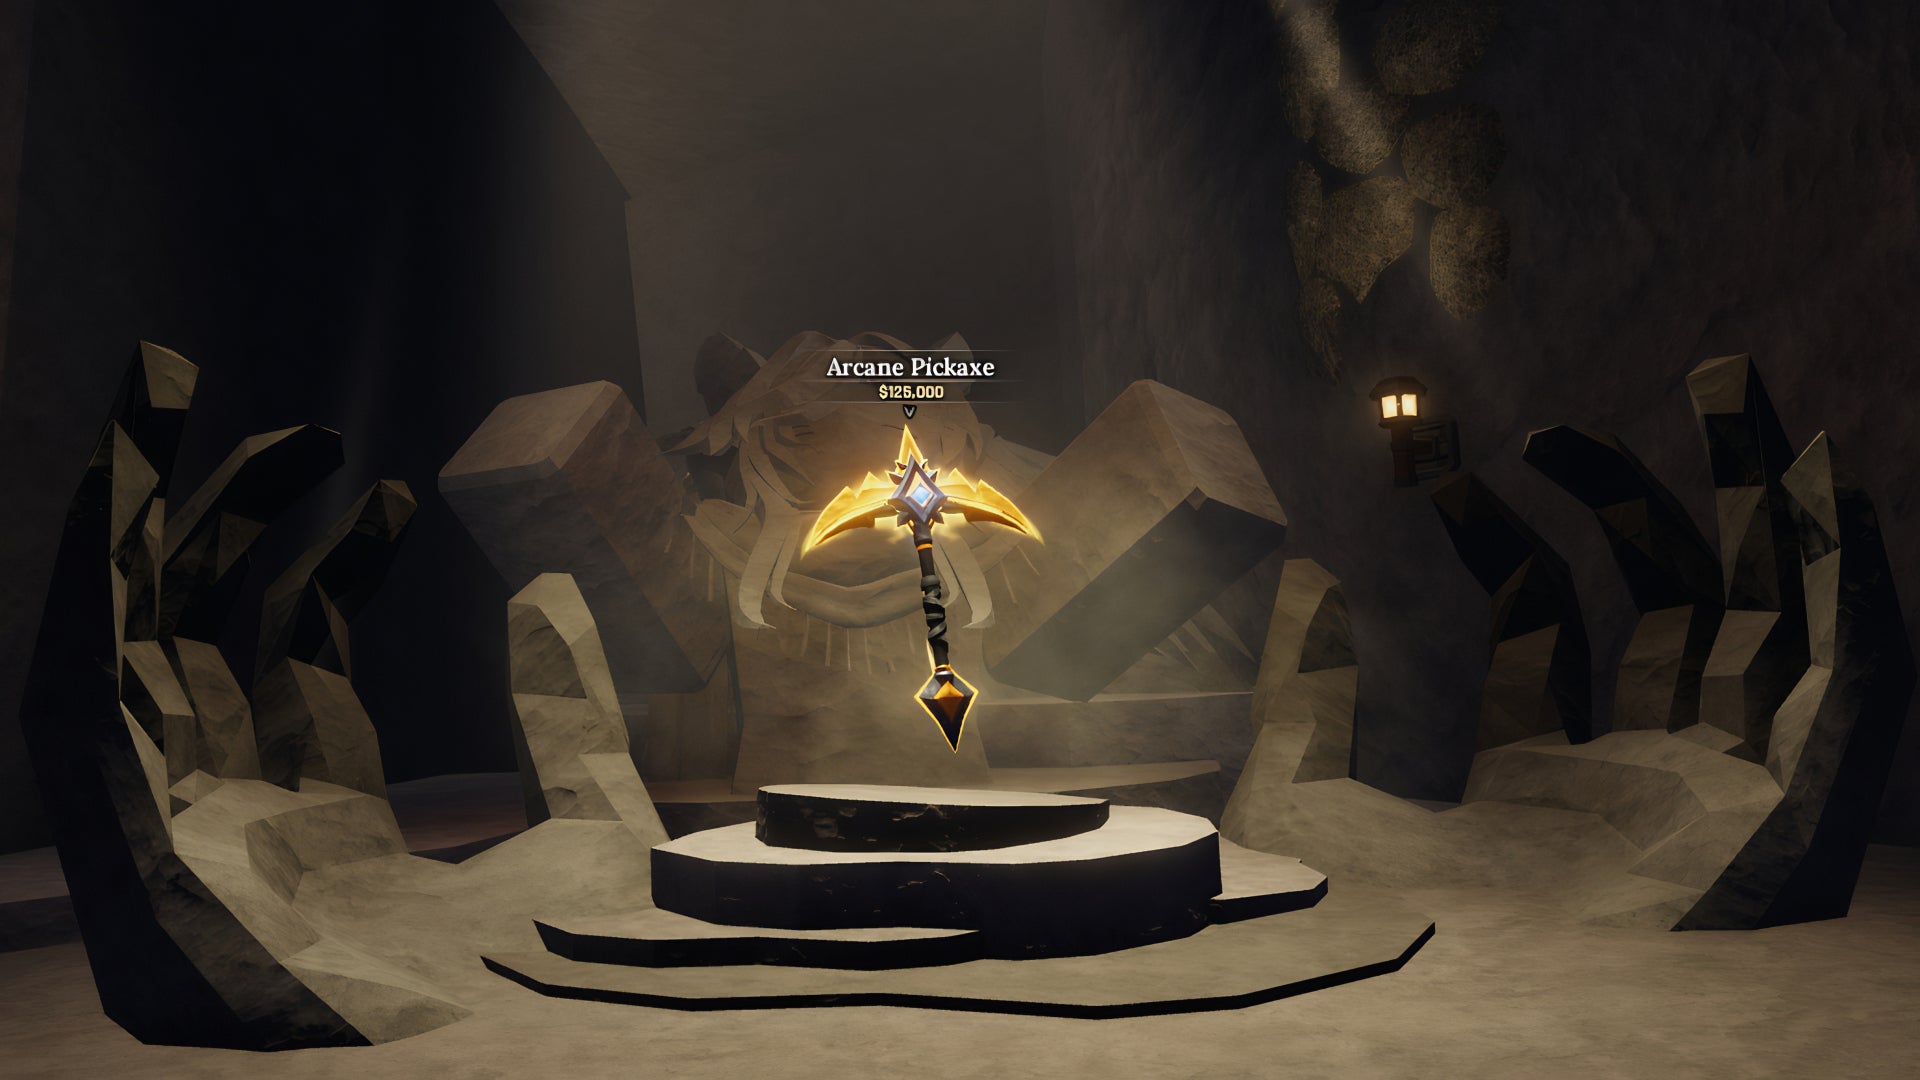
Image credit:Rock Paper Shotgun / The Forge Community
| Can break | Volcanic Rock, all Crystals, Basalt Vein, Basalt Core, Basalt Rock, Boulder, Rock, Pebble, Lucky Block |
|---|---|
| Location | Complete the Lost Guitar quest to get a secret key that unlocks the gate in Stonewake’s Cross mine. Once inside, you’ll find the Arcane Pickaxe. |
| Price | $125,000 |
| Best suited for | Endgame players looking for a significant luck boost while mining the rarest Ores in the Volcanic Depths. |
The Arcane Pickaxe is one of the two best Pickaxes in The Forge. It has a Luck Boost stat of +50% and three Rune Slots, which you can fill with Miner Shards sporting the Luck trait to raise its Luck Boost stat even higher. It’s pretty much the ideal Pickaxe for anyone that’s understandably not bothered about farming the $500,000 required to purchase its rival, the Demonic Pickaxe, which only offers a marginal stat increase in everything but Mine Power. In my opinion, it’s the most solid option you can pick up in the game’s current build.
Demonic Pickaxe
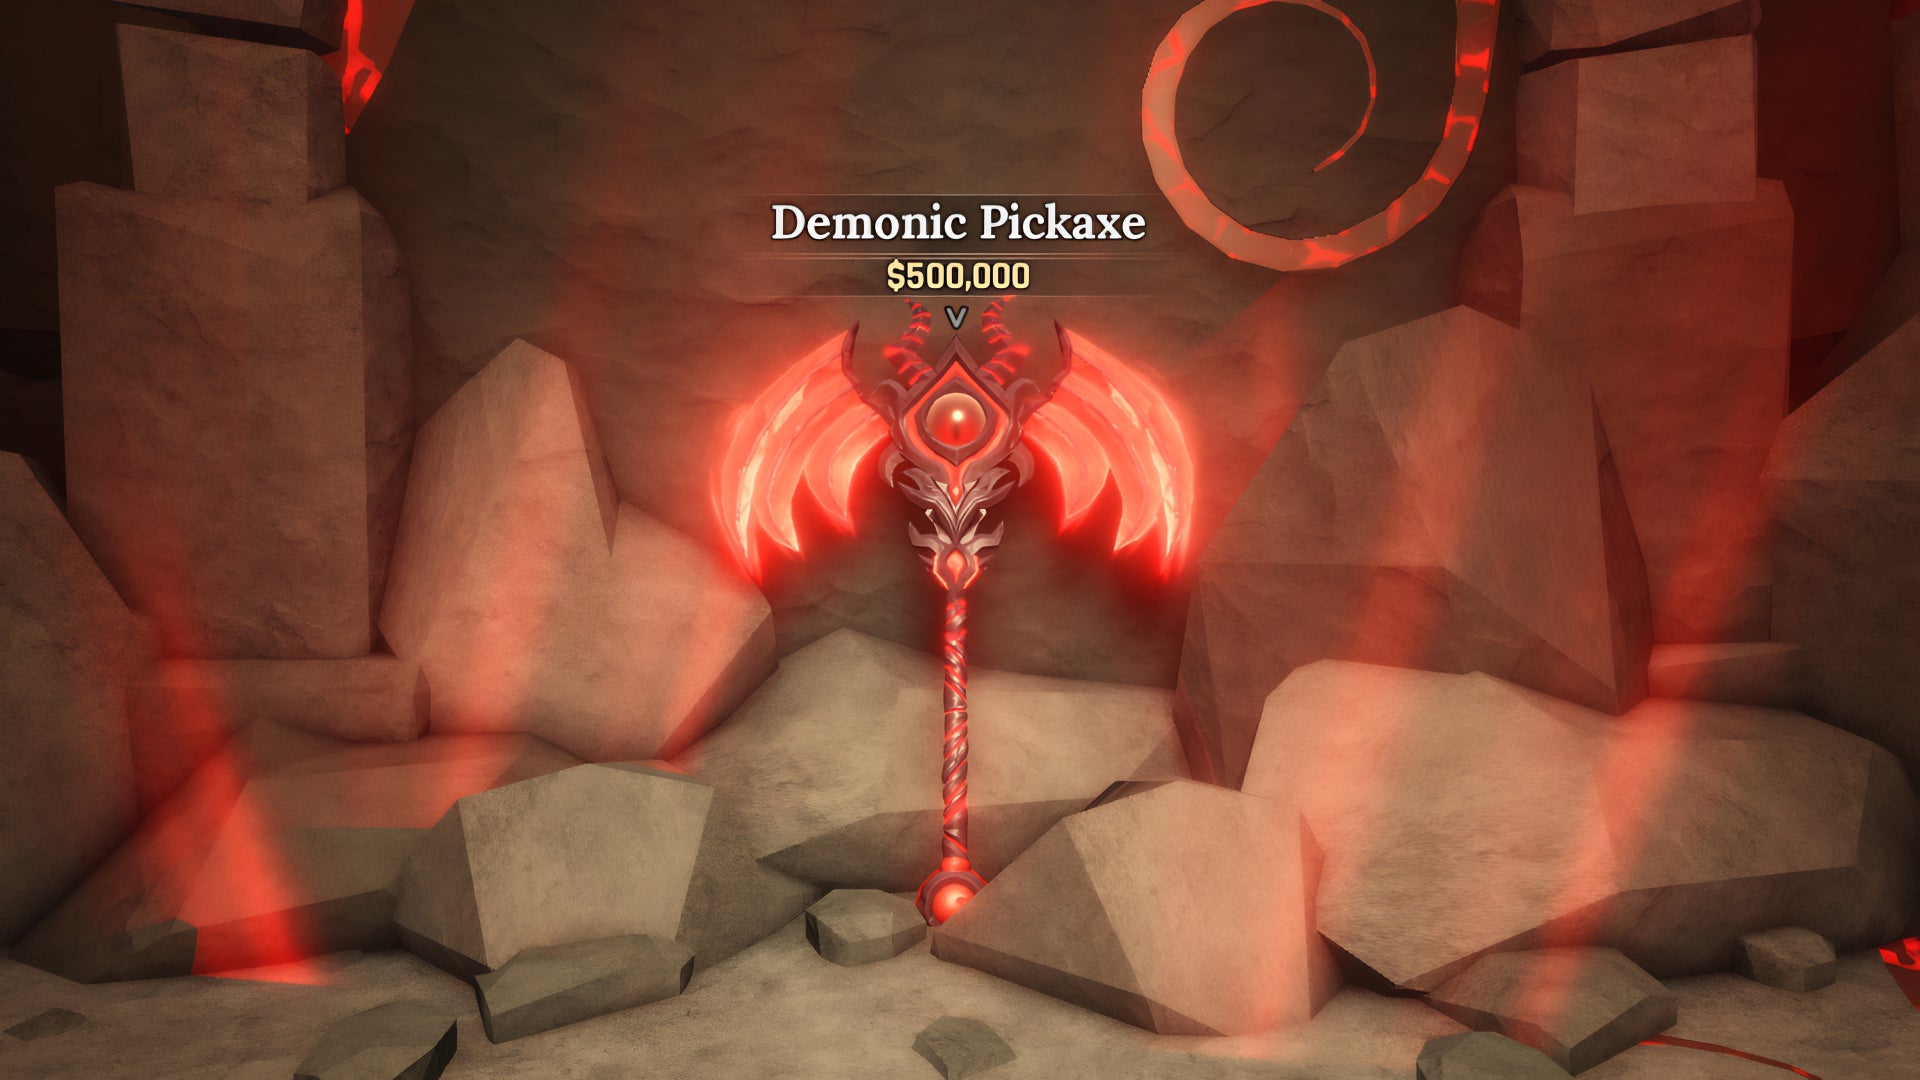
Image credit:Rock Paper Shotgun / The Forge Community
| Can break | Volcanic Rock, all Crystals, Basalt Vein, Basalt Core, Basalt Rock, Boulder, Rock, Pebble, Lucky Block |
|---|---|
| Location | Found behind the locked door in the Forgotten Kingdom mine’s Volcanic Depths area. To enter, you must complete Skal’s quest by bringing him 3 Demonite. |
| Price | $500,000 |
| Best suited for | Endgame players who want a Pickaxe with the best stats The Forge has to offer. |
On paper, The Demonic Pickaxe is the best Pickaxe in the game. Its Mine Power stat is hefty, offering a mining damage output of 180, and its Luck stat trumps all others, offering a +51% Luck Boost. You’ll take a slight decrease in Mining Speed, however, the positives vastly outweigh the drawbacks. But there’s an elephant in the room here, and he’s really trying to rinse you of all the loose change in your pocket. The Demonic Pickaxe is incredibly expensive, and you’ll have to fiercely grind to purchase it. Regardless, it belongs in the S-tier.
A-Tier Pickaxes
Magma Pickaxe
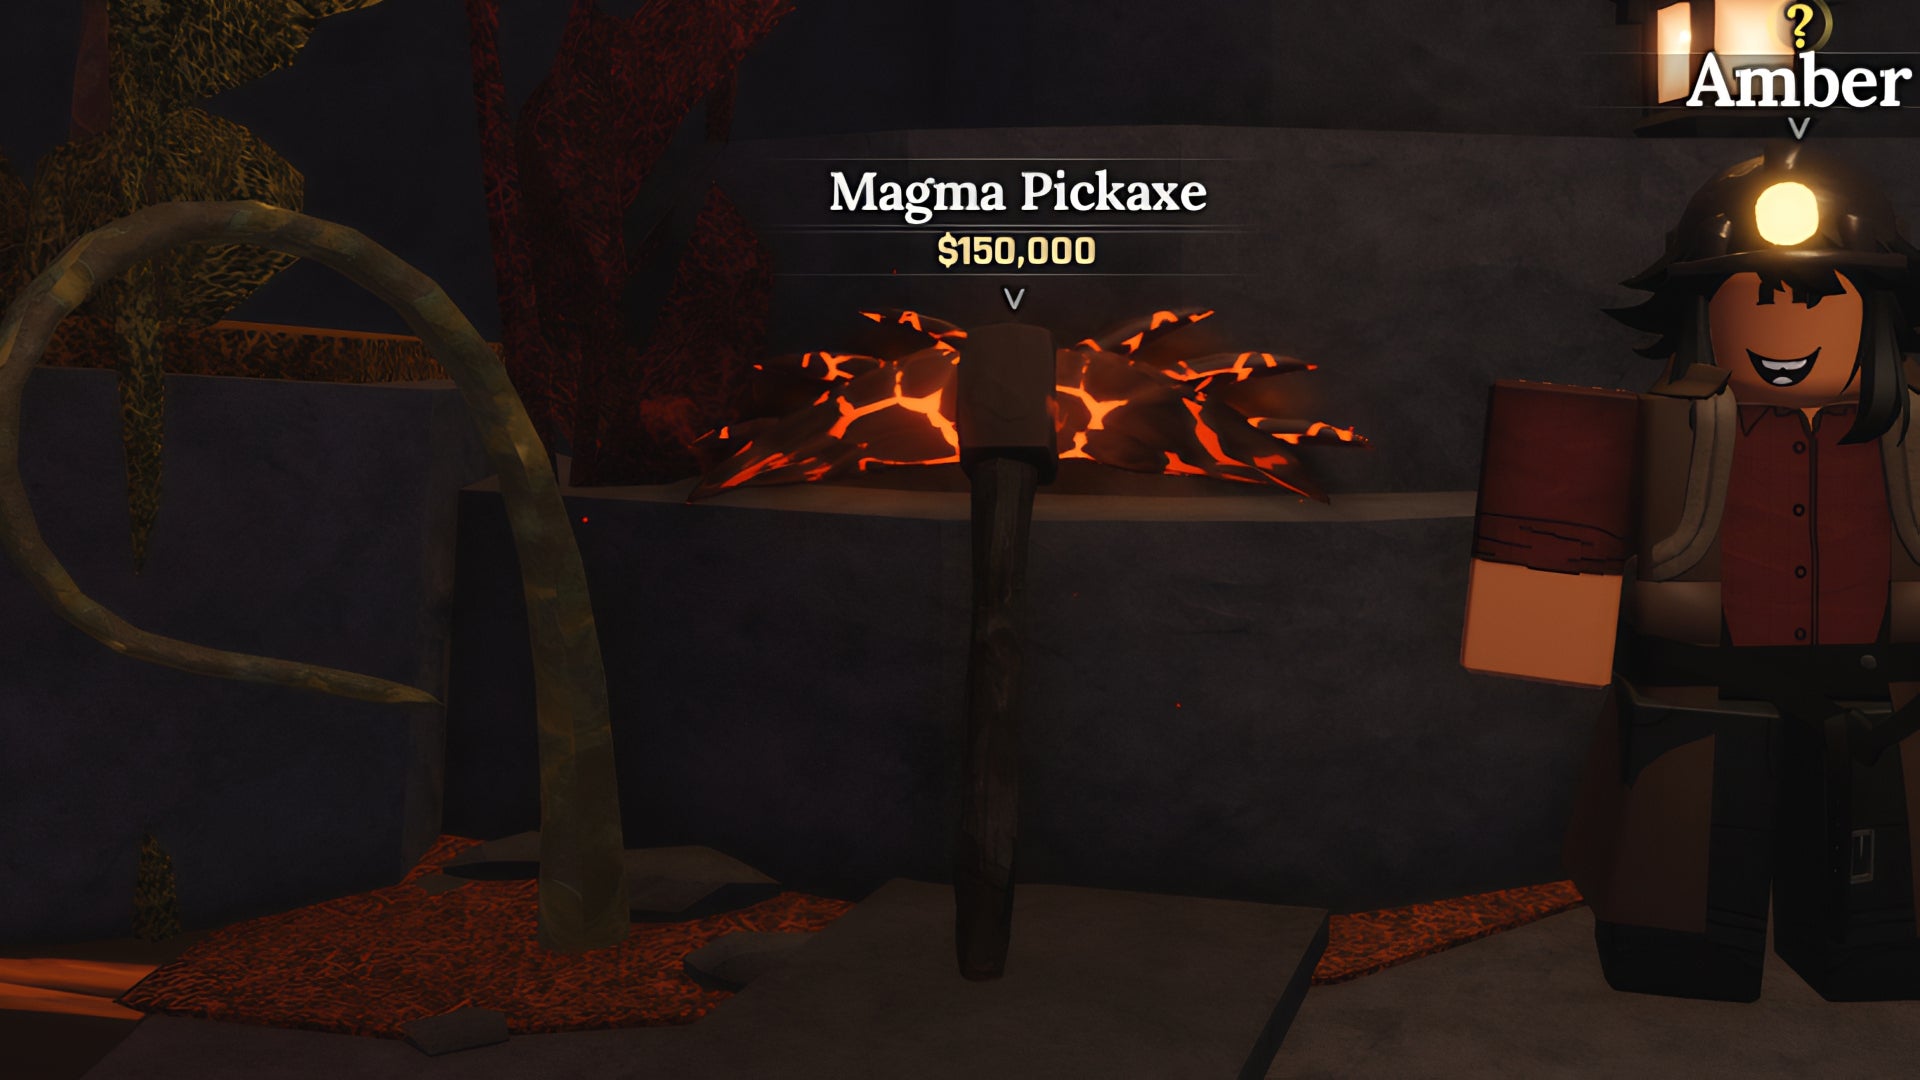
Image credit:Rock Paper Shotgun / The Forge Community
| Can break | Volcanic Rock, all Crystals, Basalt Vein, Basalt Core, Basalt Rock, Boulder, Rock, Pebble, Lucky Block |
|---|---|
| Location | Found in the Ashen Passage in the Forgotten Kingdom, directly beside an NPC named Amber. |
| Price | $150,000 |
| Best suited for | Late-game players looking for a big power boost at the cost of their Luck stat. |
The Magma Pickaxe is the third and final endgame Pickaxe that rounds out the trifecta. It does more Mine Damage than the Arcane Pickaxe, and is a more affordable get than the Demonic Pickaxe if you want to tear through rocks quickly. The drawback is that it offers a smaller Luck Boost (although hardly anything to scoff at) and one less Rune Slot. Less luck and only 2 Rune Slots means it’s not as reliable as the Arcane Pickaxe (and more expensive too!), but if you want to speed up your mining expeditions, it’s a good get.
Lightite Pickaxe
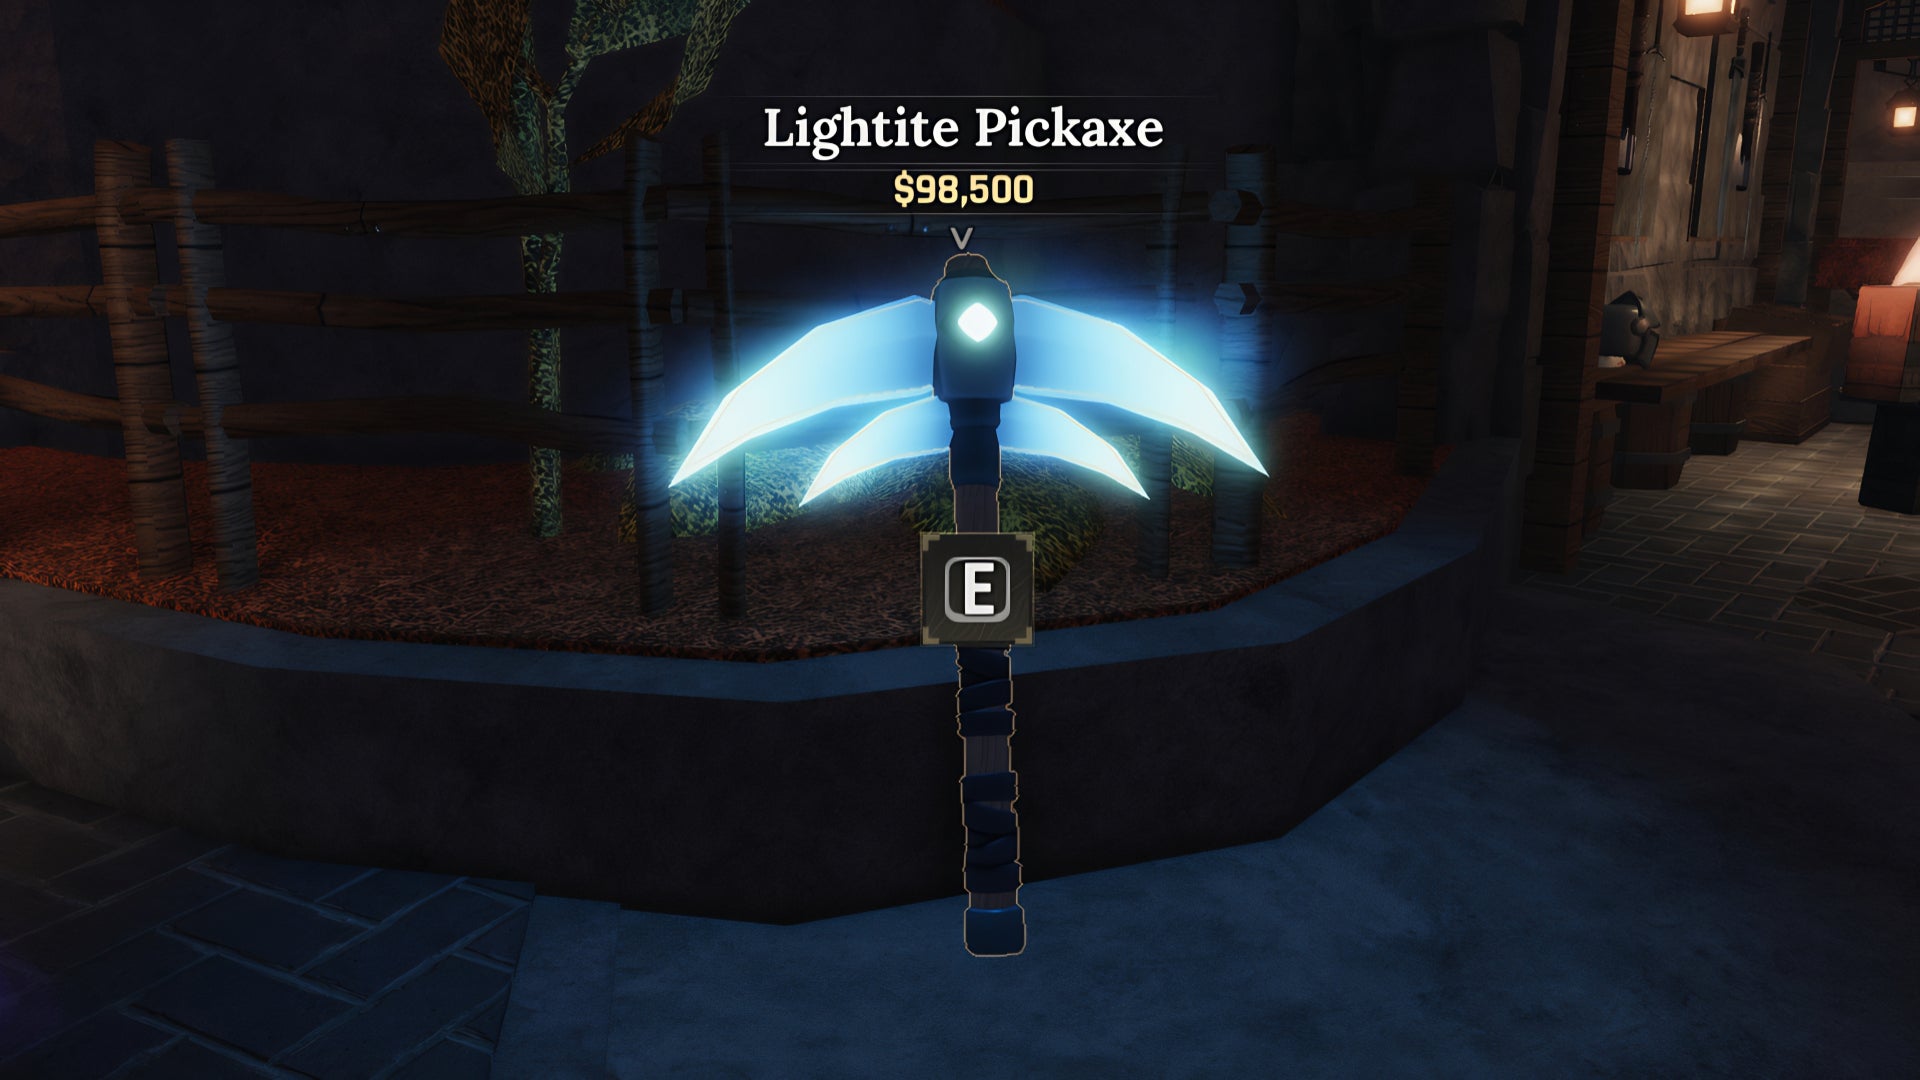
Image credit:Rock Paper Shotgun / The Forge Community
| Can break | Volcanic Rock, all Crystals, Basalt Vein, Basalt Core, Basalt Rock, Boulder, Rock, Pebble, Lucky Block |
|---|---|
| Location | Sold at the Forgotten Kingdom Pickaxe Store. |
| Price | $98,500 |
| Best suited for | Mid-game players making the transition to late-game and exploring the Volcanic Depths. |
The Lightite Pickaxe is a pretty good deal for a late-game Pickaxe. It costs under $100,000, but has just enough power to mine every single rock currently in the game. Plus, it’s got the added benefit of +30% Mine Speed, which no other late-game Pickaxe possesses. It’s a great get for anyone trying to make the jump from mid-game to late-game, starting their transition to mining Volcanic Rock from the Volcanic Depths and Crystals from the Goblin Cave.
B-Tier Pickaxes
Mythril Pickaxe
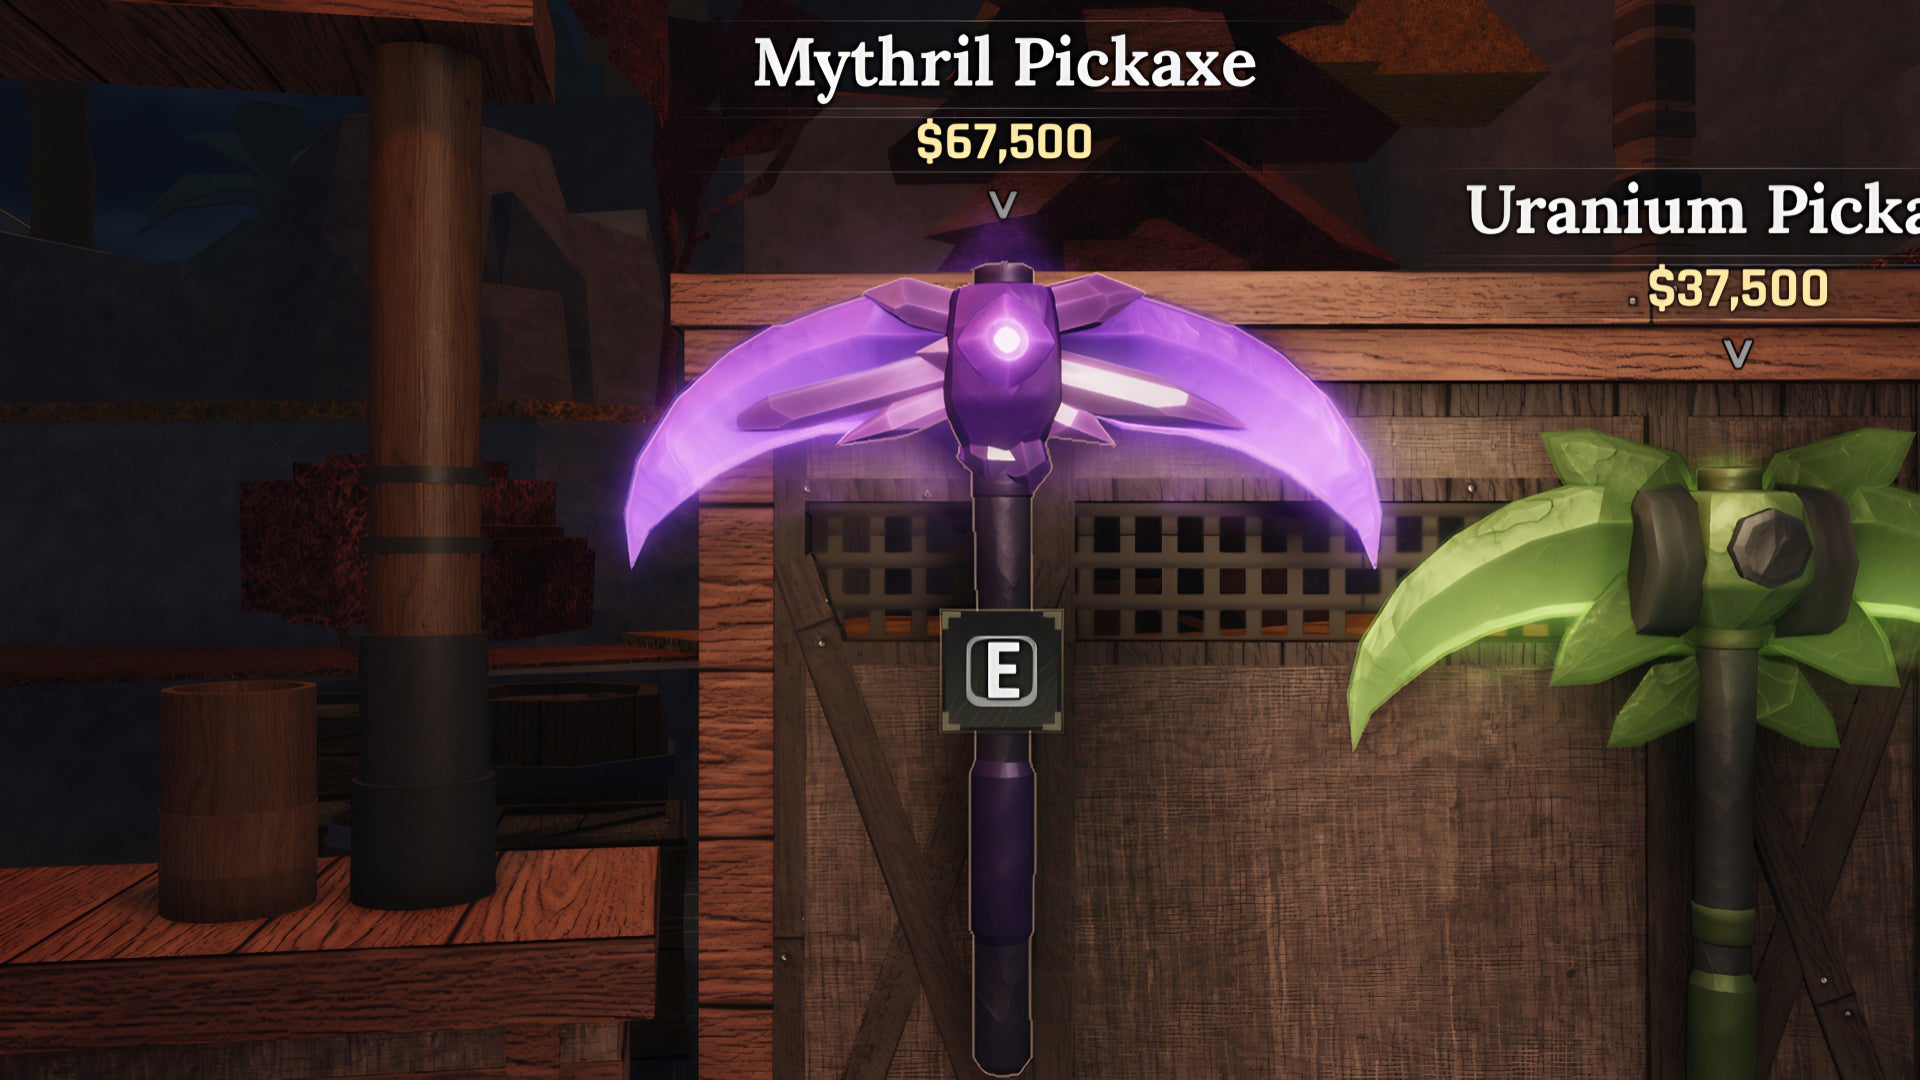
Image credit:Rock Paper Shotgun / The Forge Community
| Can break | All Crystals, Basalt Vein, Basalt Core, Basalt Rock, Boulder, Rock, Pebble, Lucky Block |
|---|---|
| Location | Sold at the Forgotten Kingdom Pickaxe Store. |
| Price | $67,500 |
| Best suited for | Mid-game players who want to mine Basalt Veins. |
The Mythril Pickaxe is the best mid-game Pickaxe money can buy. It’s got 80 Mine Damage, so you can finally start cracking into the Basalt Veins you find in the Ashen Passage and Volcanic Depths. Plus, it has a decent +43% Luck Boost. You’ll eventually transition away from it, but it’s definitely a good option if you don’t quite have the muscle to explore the Volcanic Depths and brave its monstrous locals, but want to start getting resources like Rubies that can only be found in Basalt Veins.
Uranium Pickaxe
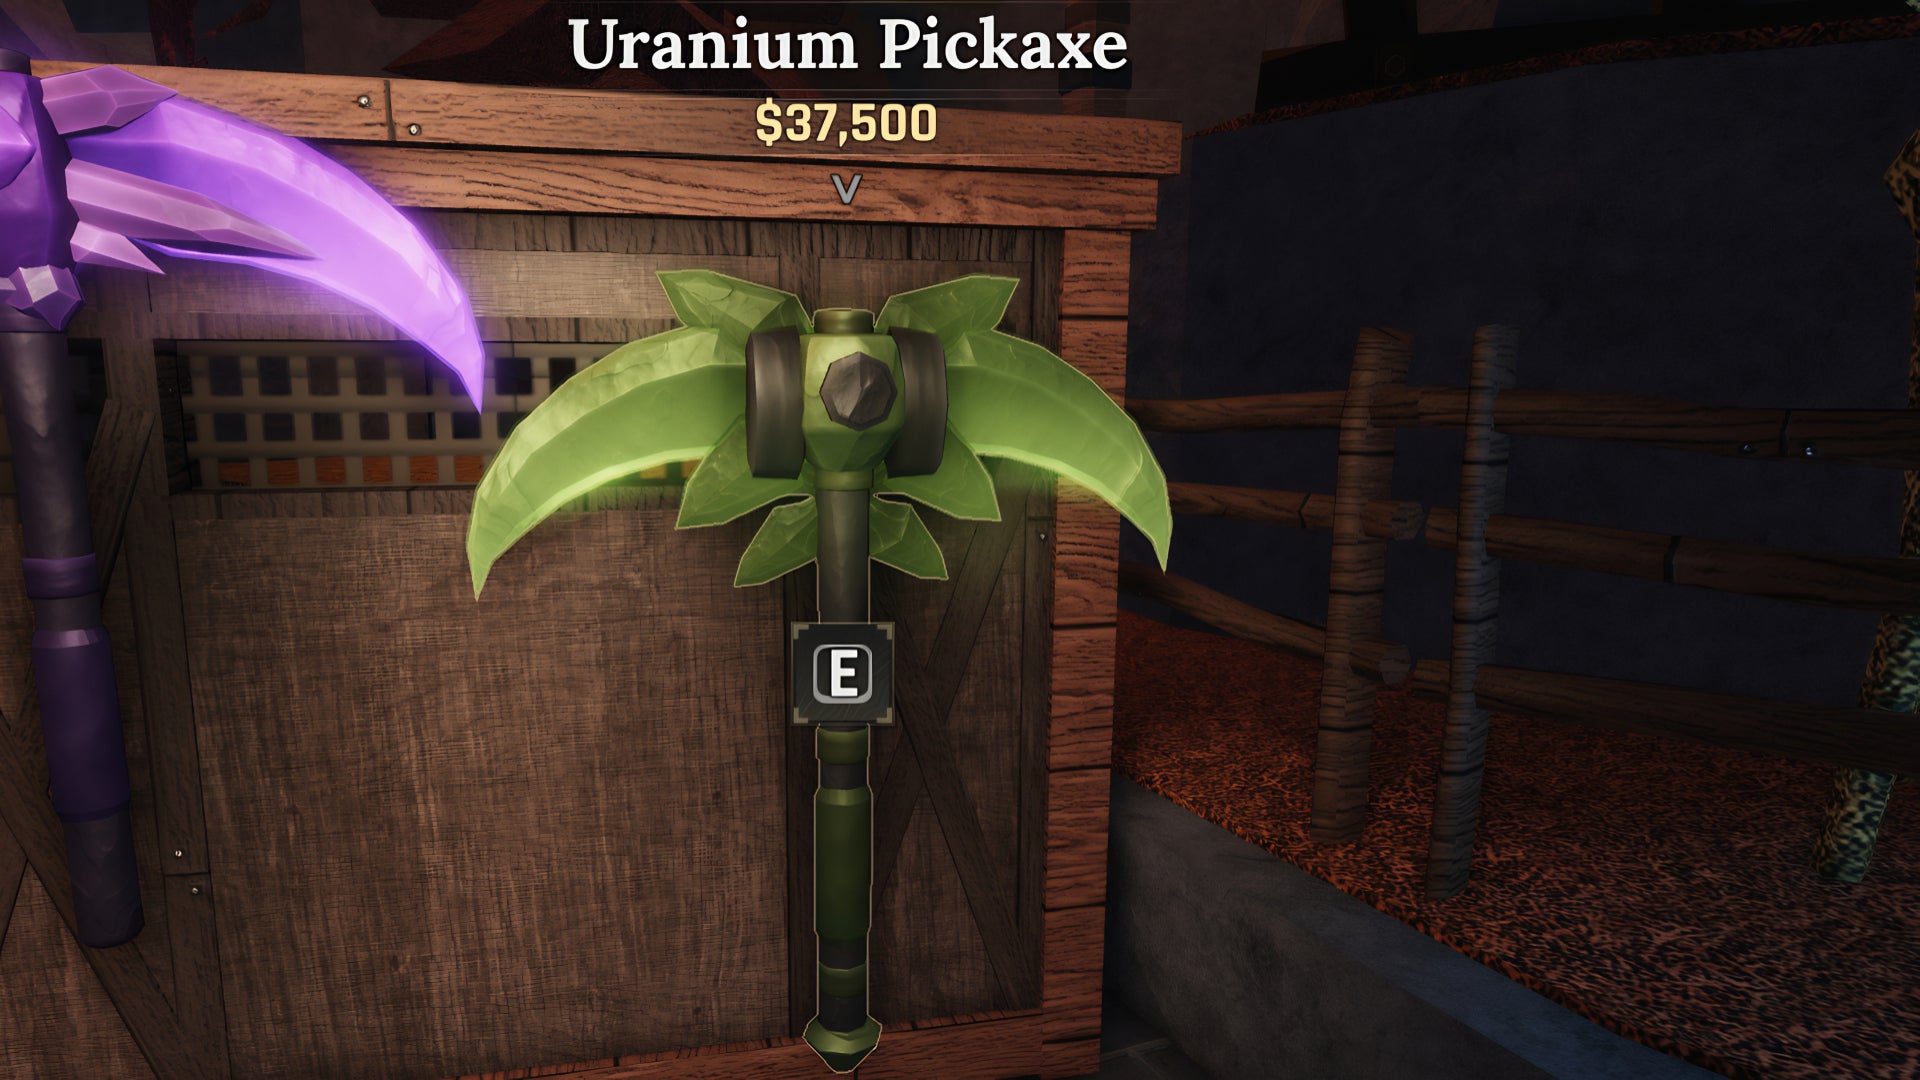
Image credit:Rock Paper Shotgun / The Forge Community
| Can break | Basalt Core, Basalt Rock, Boulder, Rock, Pebble, Lucky Block |
|---|---|
| Location | Sold at the Forgotten Kingdom Pickaxe Store. |
| Price | $37,500 |
| Best suited for | Mid-game players who want to boost their stats. |
The Uranium Pickaxe is a solid baseline mid-game pick. It’s strong enough to crunch through Basalt Cores quickly, and has a +41% Luck Boost, so you’re in the upper echelons of the Luck Boost stat. It can’t break Basalt Veins, Crystals or Volcanic Rocks, but it smashes everything else particularly well.
Stonewake’s Pickaxe
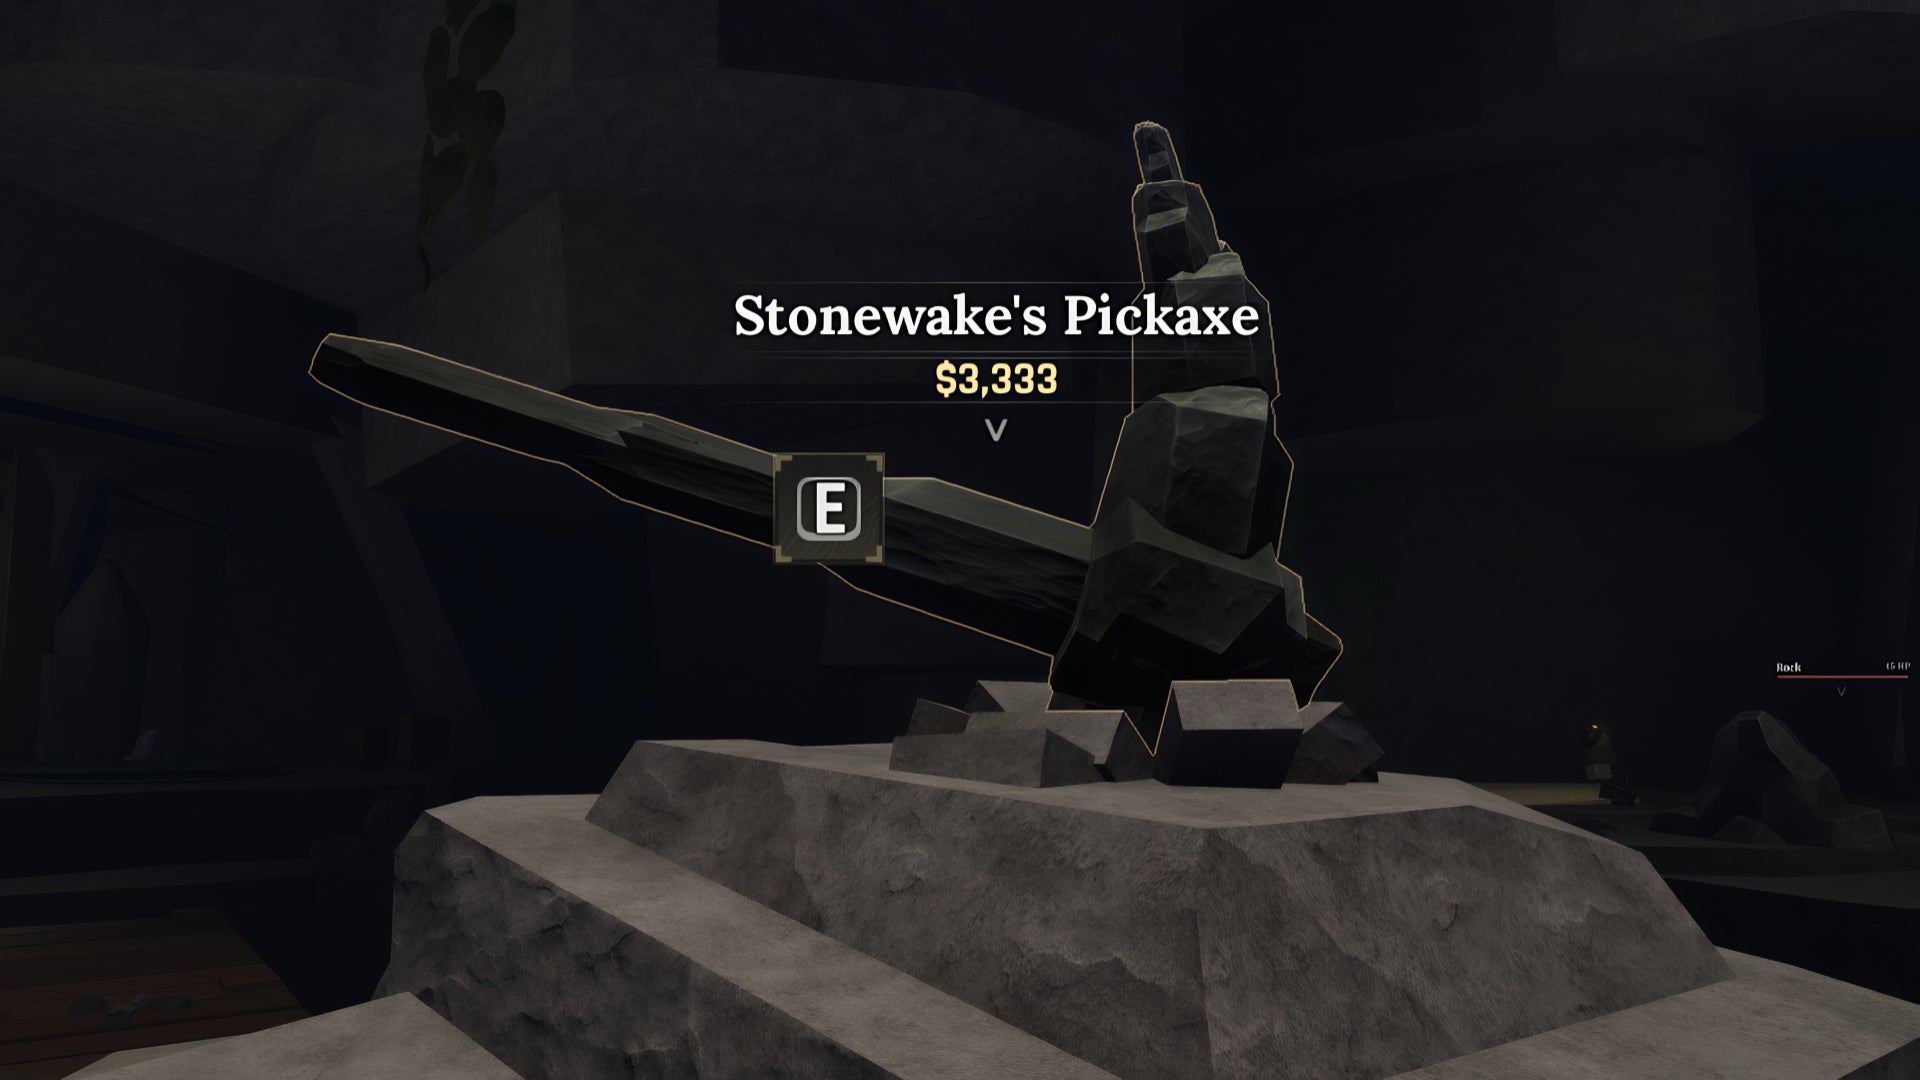
Image credit:Rock Paper Shotgun / The Forge Community
| Can break | Basalt Rock, Boulder, Rock, Pebble, Lucky Block |
|---|---|
| Location | Found in the centre of the Inner Cave area of Stonewake’s Cross Mine, lodged in a rock. |
| Price | $3,333 |
| Best suited for | Early-game players who want to boost luck and get to the Forgotten Kingdom quickly. |
If you’re wondering why such an early game Pickaxe is this high on the list, it’s purely for one reason. While every other early game Pickaxe in Stonewake’s Cross has 1 or 2 Rune Slots, Stonewake’s Pickaxe has 3, and considering the starter area’s Delver Zombie enemies drop Miner Shards, you can spec this bad boy into a luck generator. By loading 3 Miner Shards with the Luck Trait into it, you can boost your Luck by as much as 40%, putting it on the same level as the natural Luck stat of the Arcane Pickaxe. That’s very useful, even if it can only break smaller rocks. It’ll allow you to generate cash from rarer Ores as you explore the first area, meaning you can speed through to the Forgotten Kingdom in no time.
C-tier
Titanium Pickaxe
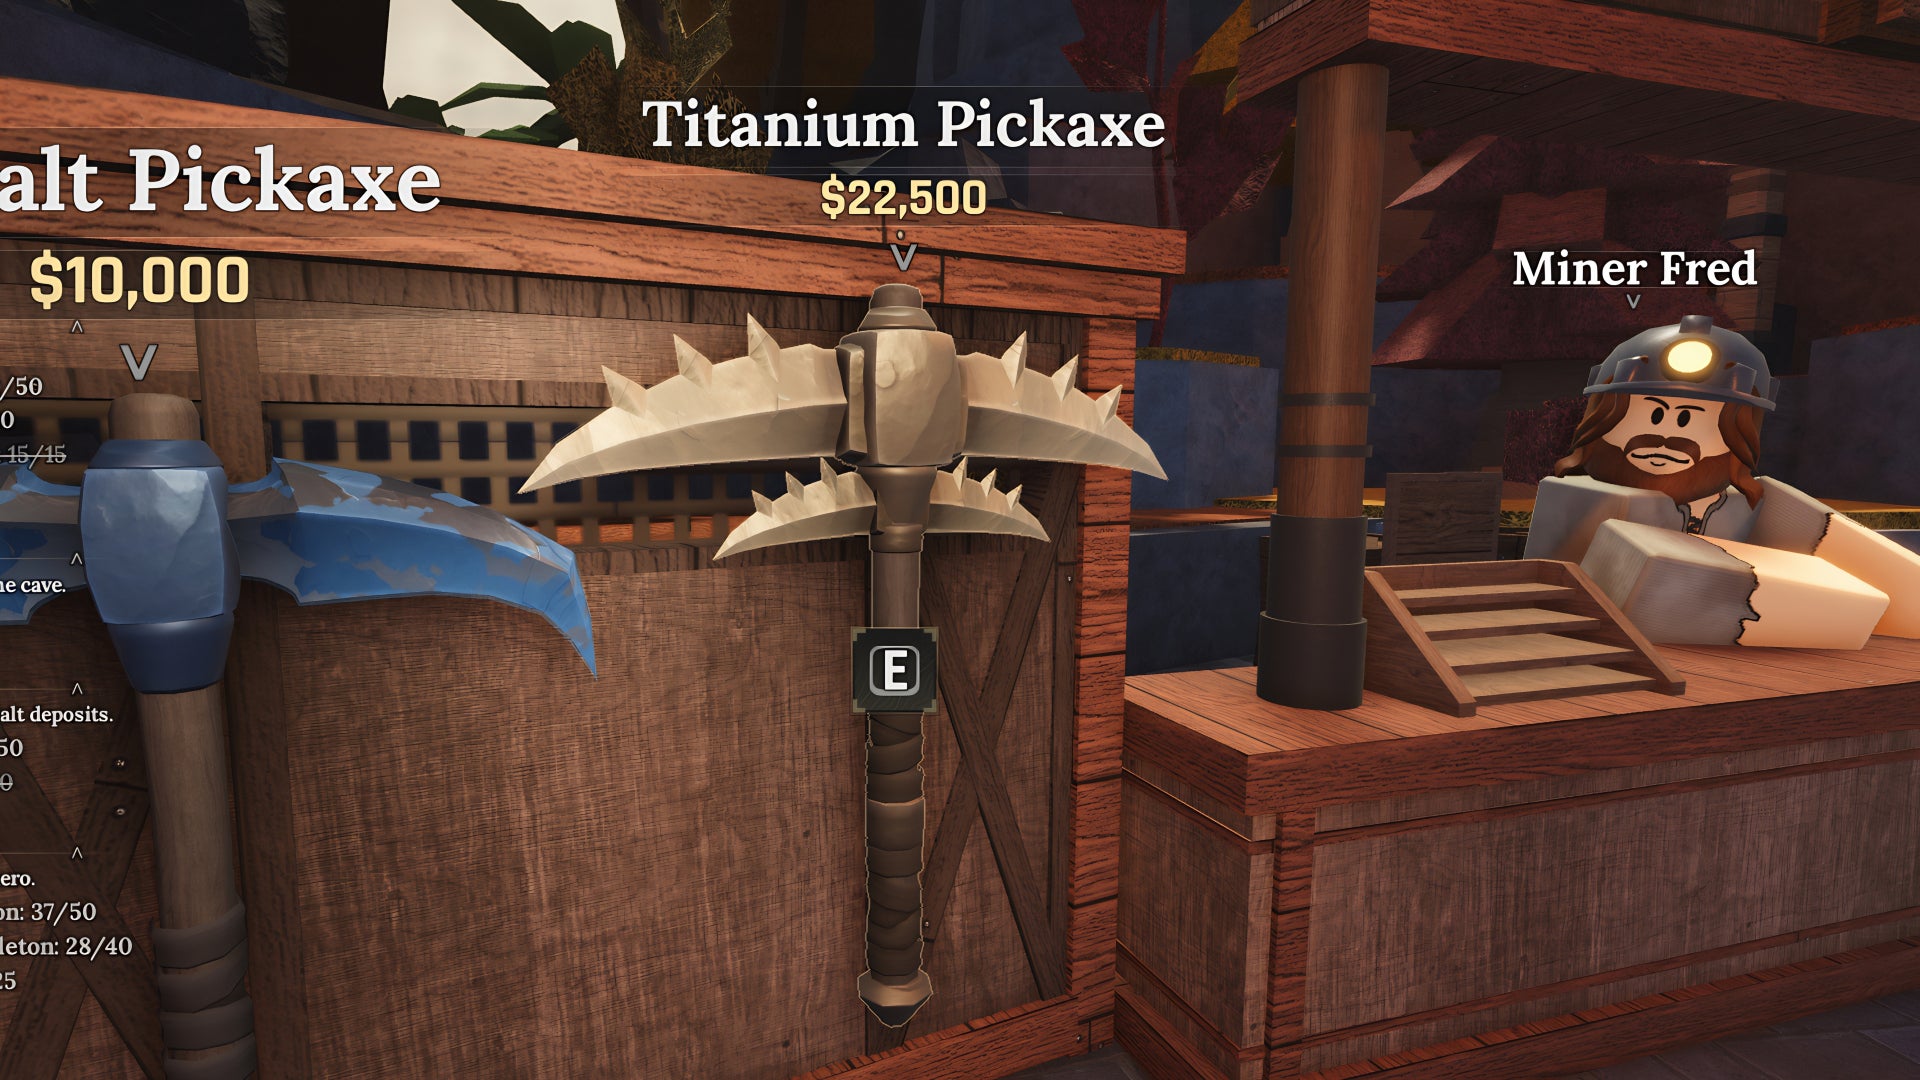
Image credit:Rock Paper Shotgun / The Forge Community
| Can break | Basalt Core, Basalt Rock, Boulder, Rock, Pebble, Lucky Block |
|---|---|
| Location | Bought from the Forgotten Kingdom Pickaxe Store. |
| Price | $22,500 |
| Best suited for | Players early into the mid-game who want an incremental stat increase on the Cobalt Pickaxe. |
The Titanium Pickaxe is really just a slightly better version of the Cobalt Pickaxe . You’ll probably consider it early into your time in the Forgotten Kingdom’s mines, as it offers a +3% Luck Boost and 15 more Mine Power than its Cobalt variant. Not much else to say, really. It’s an incremental stat increase, and you may be better served just saving your cash to jump straight to the Uranium Pickaxe .
Cobalt Pickaxe

Image credit:Rock Paper Shotgun / The Forge Community
| Can break | Basalt Core, Basalt Rock, Boulder, Rock, Pebble, Lucky Block |
|---|---|
| Location | Bought from the Forgotten Kingdom Pickaxe Store. |
| Price | $10,000 |
| Best suited for | Early-game players transitioning to the mid-game. |
The Cobalt Pickaxe is really just your key to unlocking the treasures of the Forgotten Kingdom mines. It’s solidly reliable as a starter Pickaxe for The Forge’s mid-game that can break Basalt Cores, so you can start earning rarer Ores like Sapphires, Diamonds and Emeralds.
D-Tier
Platinum Pickaxe
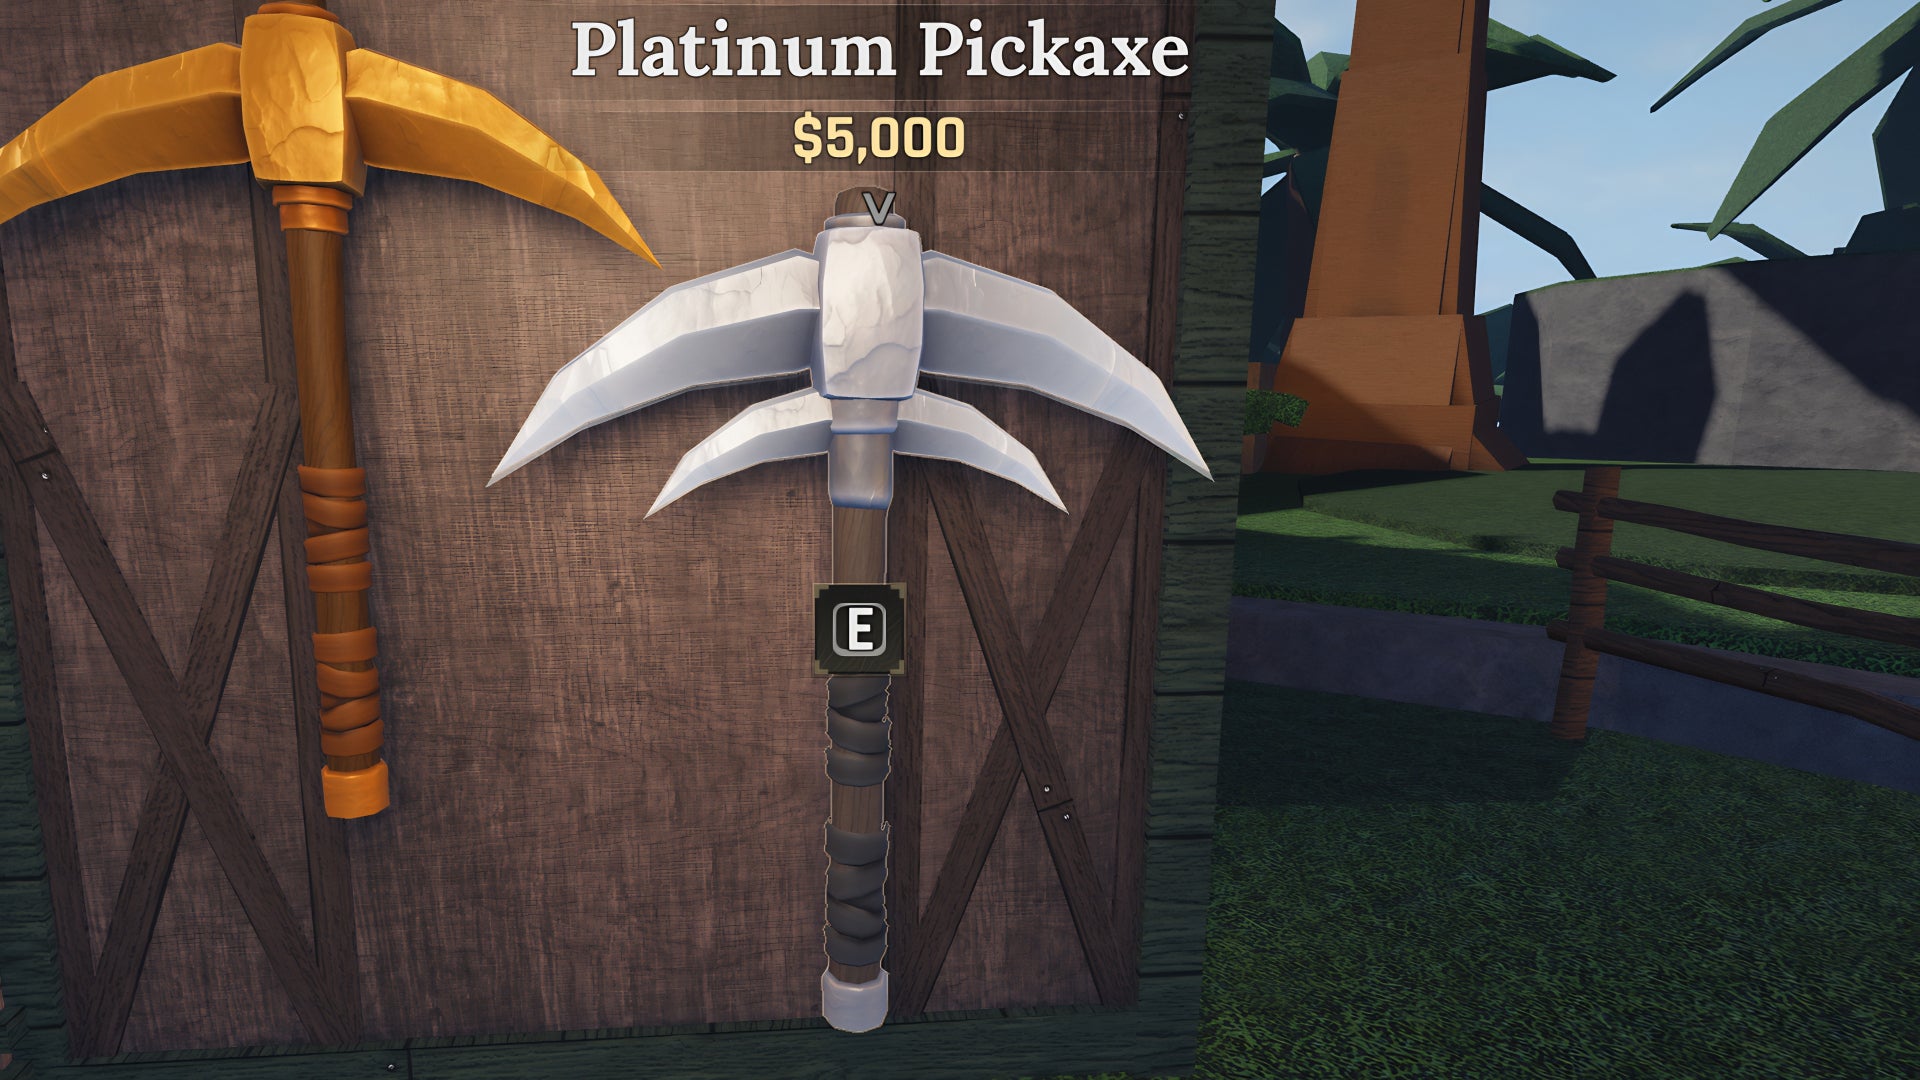
Image credit:Rock Paper Shotgun / The Forge Community
| Can break | Basalt Rock, Boulder, Rock, Pebble, Lucky Block |
|---|---|
| Location | Bought from the Stonewake’s Cross Pickaxe Store. |
| Price | $5,000 |
| Best suited for | Early game players grinding levels to unlock the Forgotten Kingdom. |
The most expensive early-game Pickaxe, I’d probably suggest you just forego the Platinum Pickaxe in favour of the Stonewake’s Pickaxe instead. It’s cheaper and has more Rune Slots to fill with Luck Miner Shards, after all. But the Platinum Pickaxe has a naturally higher Luck Boost if you don’t want to go around farming zombies for Miner Shards. Other than that and a Mine Power boost, there’s not much to write home about. You probably won’t have 5k to waste while exploring Stonewake’s Cross, so don’t bother.
Gold Pickaxe
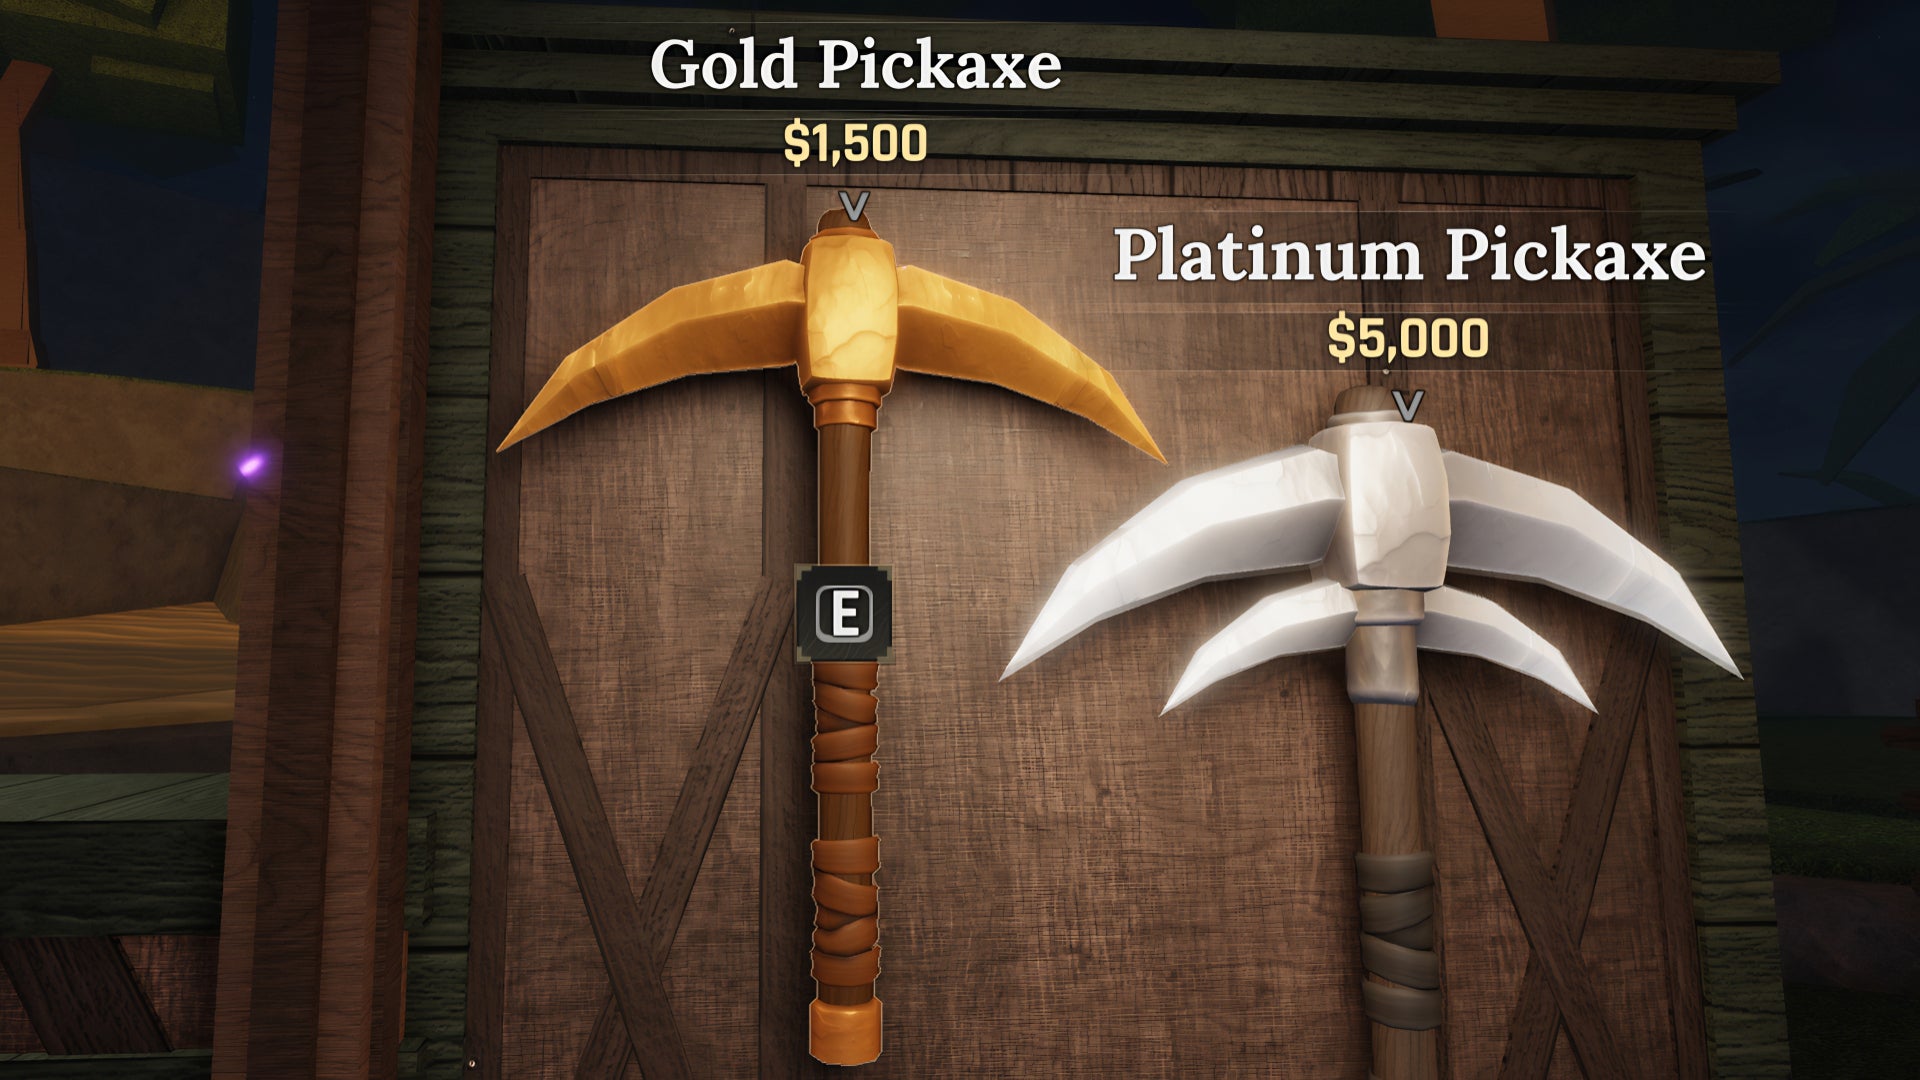
Image credit:Rock Paper Shotgun / The Forge Community
| Can break | Basalt Rock, Boulder, Rock, Pebble, Lucky Block |
|---|---|
| Location | Bought from the Stonewake’s Cross Pickaxe Store. |
| Price | $1,500 |
| Best suited for | Early game players ready to start mining Boulders. |
The Gold Pickaxe will be the first proper investment you make in your mining gear, and it’s a necessary one, because it provides the Mine Power required to crack open Boulders in Stonewake’s Cross mine. Aside from that, it offers a +15% Luck Boost, so you’ll get more rare Ores while you explore. It’s a required purchase, as Boulders contain the best Ore in Stonewake’s Cross mine, but not one you’ll be using for very long.
Iron Pickaxe
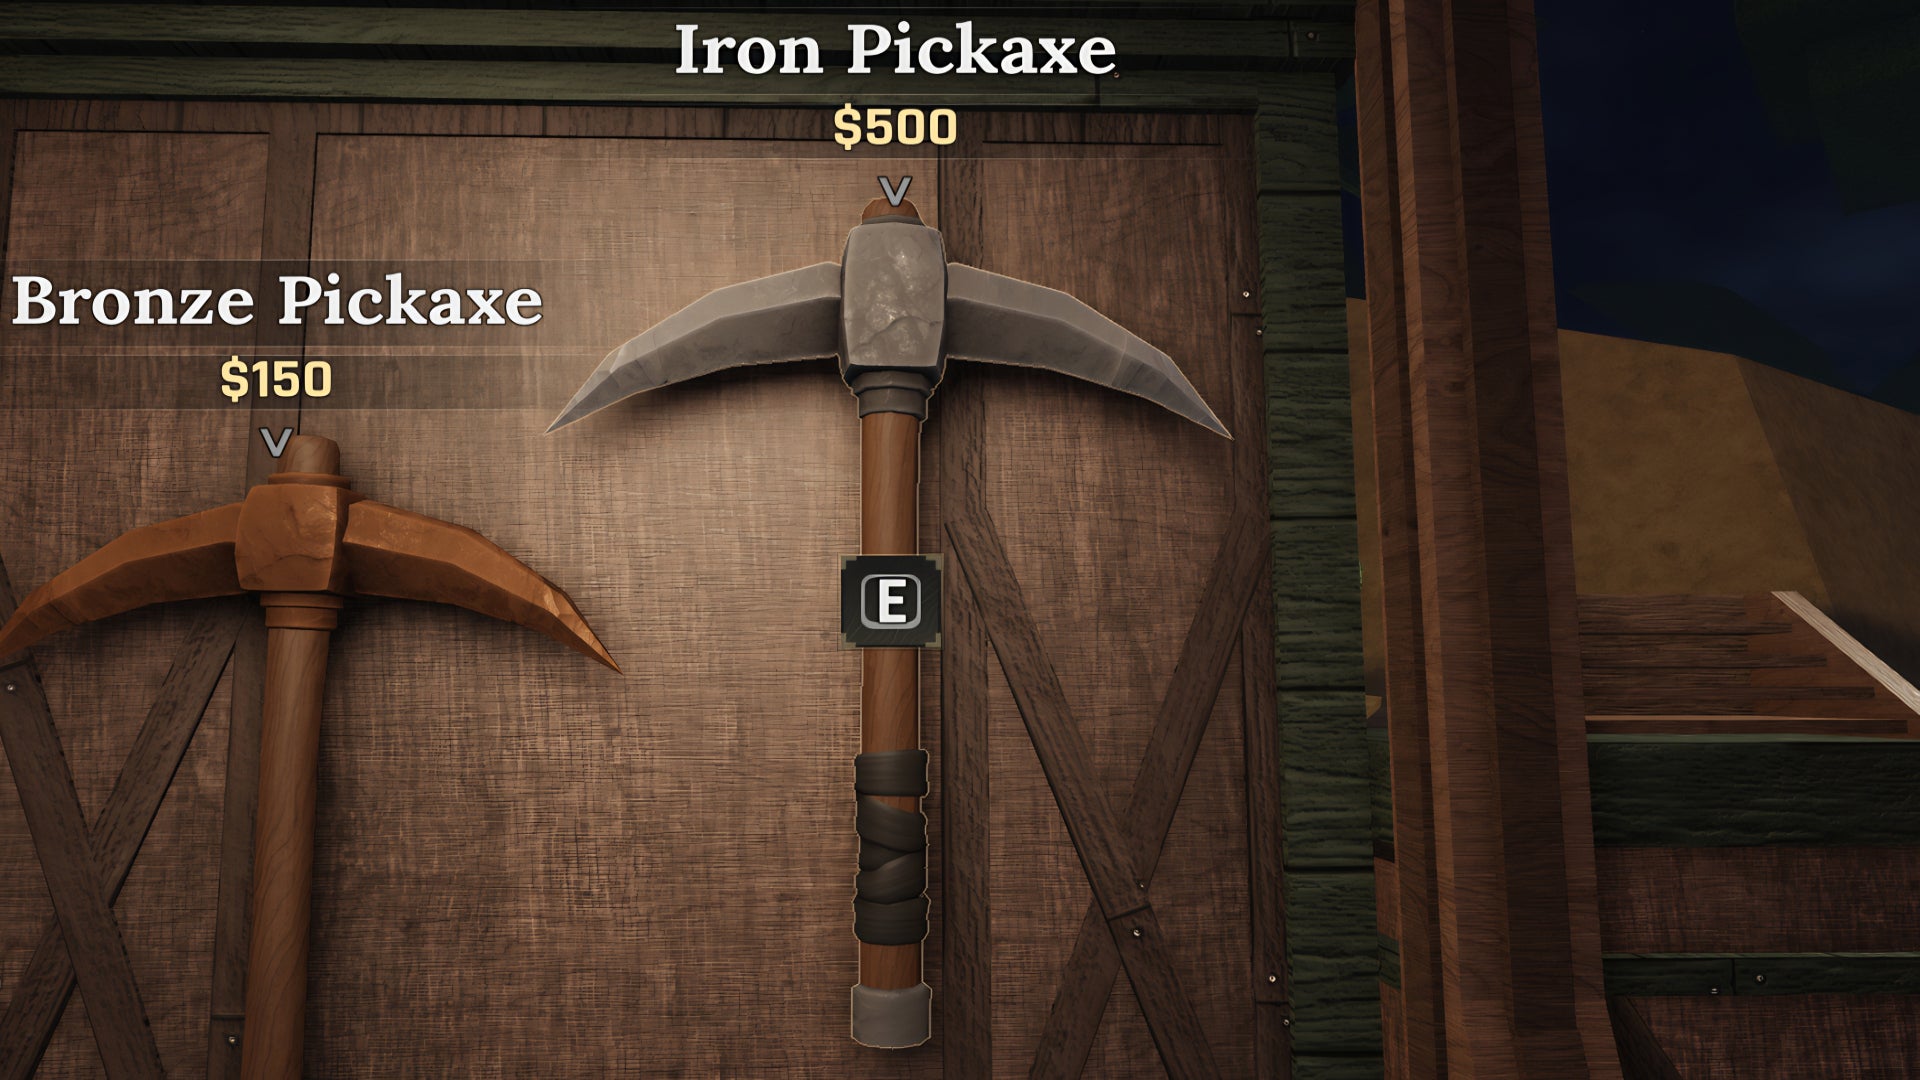
Image credit:Rock Paper Shotgun / The Forge Community
| Can break | Rock, Pebble, Lucky Block |
|---|---|
| Location | Bought from the Stonewake’s Cross Pickaxe Store. |
| Price | $500 |
| Best suited for | Early game players who want a stat boost from the default Bronze Pickaxe. |
The Iron Pickaxe is one of the earliest Pickaxes in the game, and it exists solely for those tired of the minimal stats of the default Pickaxe. You can skip it altogether for the Gold Pickaxe and you won’t be missing anything. It just has a minor Mine Power and Luck Boost increase over the Bronze Pickaxe. Not much else to it. If you’re doing Sensei Moro’s quest, you’ll probably be making enough money that it’s entirely skippable.
Bronze Pickaxe
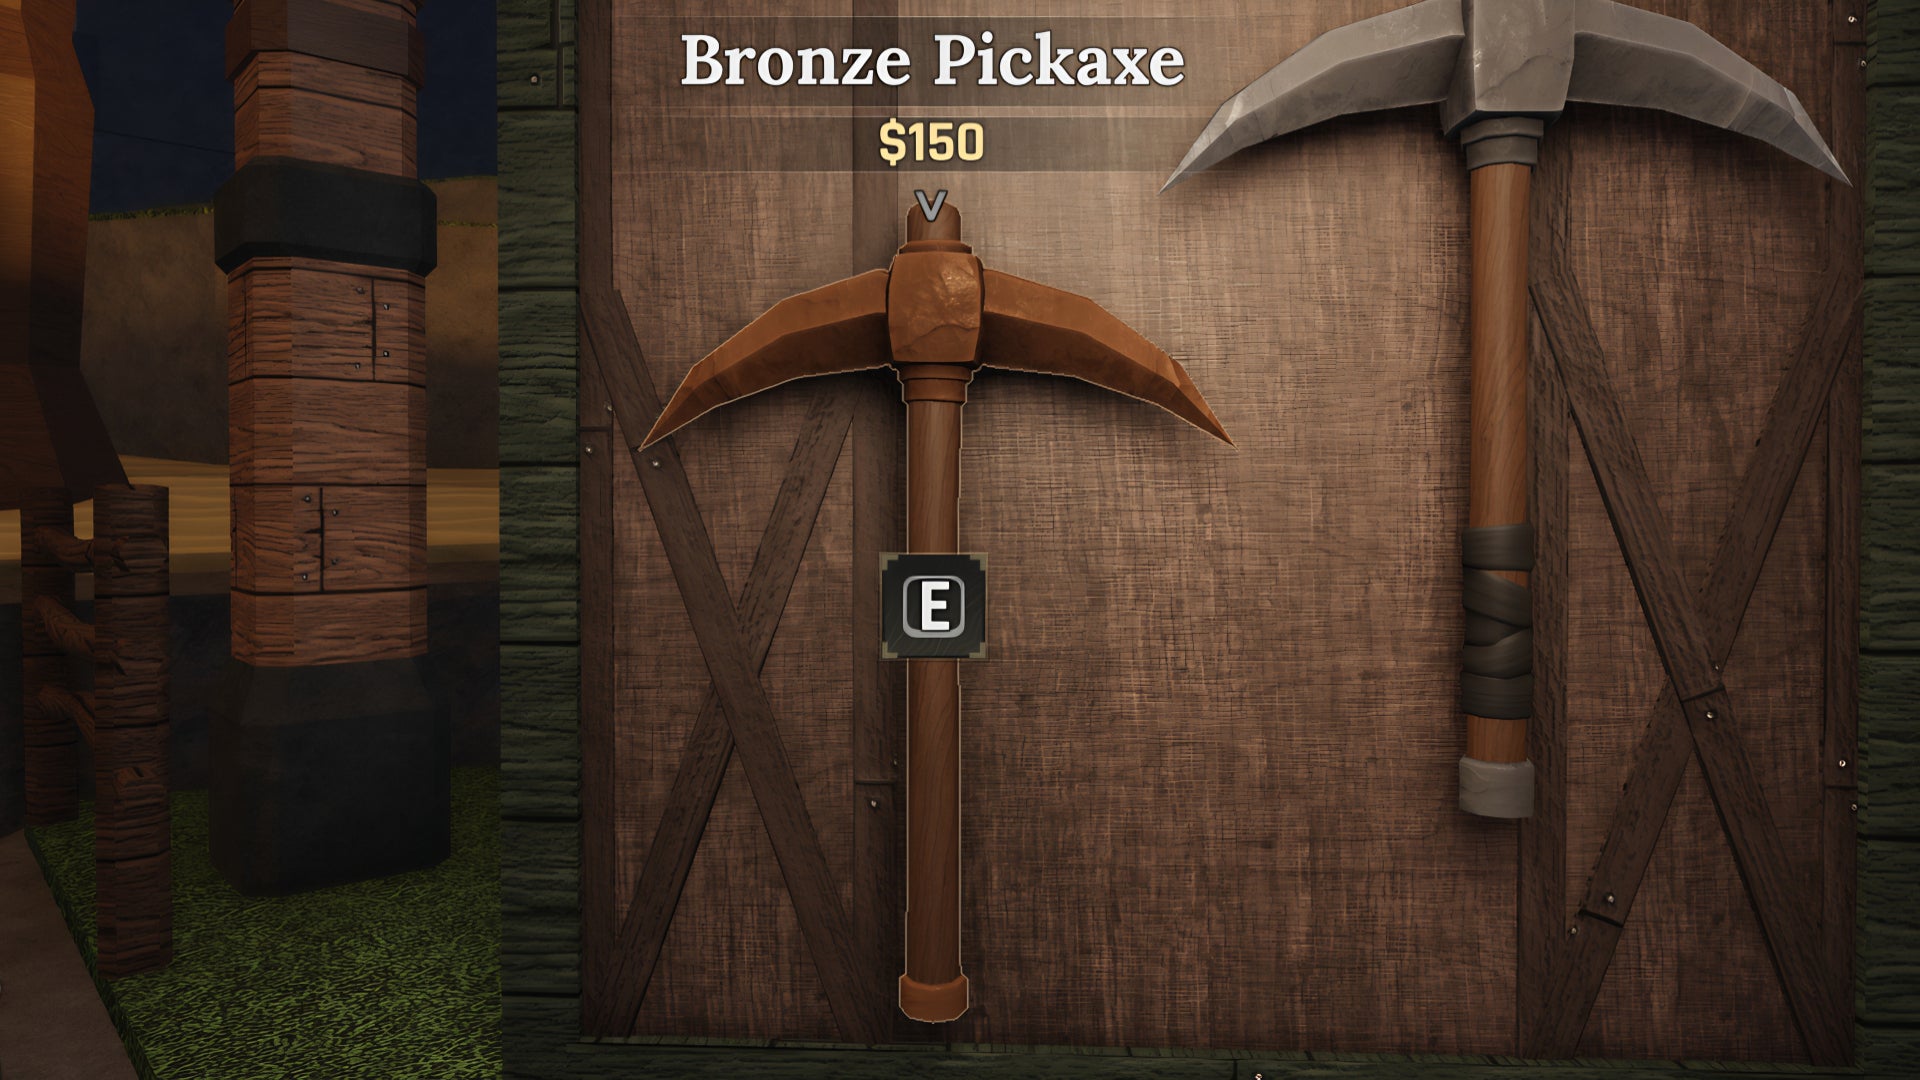
Image credit:Rock Paper Shotgun / The Forge Community
| Can break | Rock, Pebble, Lucky Block |
|---|---|
| Location | Bought from the Stonewake’s Cross Pickaxe Store. |
| Price | $150 |
| Best suited for | Beginners starting their mining adventure. |
The Bronze Pickaxe is the only Pickaxe you’ll be forced to buy, with Sensei Moro’s quest tasking you with purchasing it. It’s the starter Pickaxe, which means all it has is a basic Mine Power of 7. It’s purposefully terrible, and you should use it for as short a time as possible.
Need more Forge guides? We’ve compiled a full list of The Forge codes , put together walkthroughs for The Goblin King quest , finding Bard’s missing guitar , and finding Tomo’s missing cat , as well as guides on farming Miner Shards , farming cash , and a list of all The Forge’s Ores and where to find them . But if none of that appeals, you can find our full list of The Forge guides here .


Roblox
Video Game
The Forge
Android , iOS , PS4 , PS5 , Xbox One , Xbox Series X/S , PC , Mac
Rock Paper Shotgun is better when you sign in
Sign in and join us on our journey to discover strange and compelling PC games.

All 75 Arc Raiders Blueprints and where to get them
These areas have the highest chance of giving you Blueprints

Image credit:Rock Paper Shotgun/Embark Studios

Looking for more Arc Raiders Blueprints? It’s a special day when you find a Blueprint, as they’re among the most valuable items in Arc Raiders. If you find a Blueprint that you haven’t already found, then you must make sure you hold onto it at all costs, because Blueprints are the key to one of the most important and powerful systems of meta-progression in the game.
This guide aims to be the very best guide on Blueprints you can find, starting with a primer on what exactly they are and how they work in Arc Raiders, before delving into exactly where to get Blueprints and the very best farming spots for you to take in your search.
We’ll also go over how to get Blueprints from other unlikely activities, such as destroying Surveyors and completing specific quests. And you’ll also find the full list of all 75 Blueprints in Arc Raiders on this page (including the newest Blueprints added with the Cold Snap update , such as the Deadline Blueprint and Firework Box Blueprint), giving you all the information you need to expand your own crafting repertoire.
In this guide:
- What are Blueprints in Arc Raiders?
- Full Blueprint list: All crafting recipes
- Where to find Blueprints in Arc Raiders Blueprints obtained from quests Blueprints obtained from Trials Best Blueprint farming locations

What are Blueprints in Arc Raiders?
Blueprints in Arc Raiders are special items which, if you manage to extract with them, you can expend to permanently unlock a new crafting recipe in your Workshop. If you manage to extract from a raid with an Anvil Blueprint, for example, you can unlock the ability to craft your very own Anvil Pistol, as many times as you like (as long as you have the crafting materials).
To use a Blueprint, simply open your Inventory while in the lobby, then right-click on the Blueprint and click “Learn And Consume” . This will permanently unlock the recipe for that item in your Workshop. As of the Stella Montis update, there are allegedly 75 different Blueprints to unlock - although only 68 are confirmed to be in the game so far. You can see all the Blueprints you’ve found and unlocked by going to the Workshop menu, and hitting “R” to bring up the Blueprint screen.
It’s possible to find duplicates of past Blueprints you’ve already unlocked. If you find these, then you can either sell them, or - if you like to play with friends - you can take it into a match and gift it to your friend so they can unlock that recipe for themselves. Another option is to keep hold of them until the time comes to donate them to the Expedition.
Full Blueprint list: All crafting recipes
Below is the full list of all the Blueprints that are currently available to find in Arc Raiders, and the crafting recipe required for each item:
| Blueprint | Type | Recipe | Crafted At |
|---|---|---|---|
| Bettina | Weapon | 3x Advanced Mechanical Components 3x Heavy Gun Parts 3x Canister | Gunsmith 3 |
| Blue Light Stick | Quick Use | 3x Chemicals | Utility Station 1 |
| Aphelion | Weapon | 3x Magnetic Accelerator 3x Complex Gun Parts 1x Matriarch Reactor | Gunsmith 3 |
| Combat Mk. 3 (Flanking) | Augment | 2x Advanced Electrical Components 3x Processor | Gear Bench 3 |
| Combat Mk. 3 (Aggressive) | Augment | 2x Advanced Electrical Components 3x Processor | Gear Bench 3 |
| Complex Gun Parts | Material | 2x Light Gun Parts 2x Medium Gun Parts 2x Heavy Gun Parts | Refiner 3 |
| Fireworks Box | Quick Use | 1x Explosive Compound 3x Pop Trigger | Explosives Station 2 |
| Gas Mine | Mine | 4x Chemicals 2x Rubber Parts | Explosives Station 1 |
| Green Light Stick | Quick Use | 3x Chemicals | Utility Station 1 |
| Pulse Mine | Mine | 1x Crude Explosives 1x Wires | Explosives Station 1 |
| Seeker Grenade | Grenade | 1x Crude Explosives 2x ARC Alloy | Explosives Station 1 |
| Looting Mk. 3 (Survivor) | Augment | 2x Advanced Electrical Components 3x Processor | Gear Bench 3 |
| Angled Grip II | Mod | 2x Mechanical Components 3x Duct Tape | Gunsmith 2 |
| Angled Grip III | Mod | 2x Mod Components 5x Duct Tape | Gunsmith 3 |
| Hullcracker | Weapon | 1x Magnetic Accelerator 3x Heavy Gun Parts 1x Exodus Modules | Gunsmith 3 |
| Launcher Ammo | Ammo | 5x Metal Parts 1x Crude Explosives | Workbench 1 |
| Anvil | Weapon | 5x Mechanical Components 5x Simple Gun Parts | Gunsmith 2 |
| Anvil Splitter | Mod | 2x Mod Components 3x Processor | Gunsmith 3 |
| ??? | ??? | ??? | ??? |
| Barricade Kit | Quick Use | 1x Mechanical Components | Utility Station 2 |
| Blaze Grenade | Grenade | 1x Explosive Compound 2x Oil | Explosives Station 3 |
| Bobcat | Weapon | 3x Advanced Mechanical Components 3x Light Gun Parts | Gunsmith 3 |
| Osprey | Weapon | 2x Advanced Mechanical Components 3x Medium Gun Parts 7x Wires | Gunsmith 3 |
| Burletta | Weapon | 3x Mechanical Components 3x Simple Gun Parts | Gunsmith 1 |
| Compensator II | Mod | 2x Mechanical Components 4x Wires | Gunsmith 2 |
| Compensator III | Mod | 2x Mod Components 8x Wires | Gunsmith 3 |
| Defibrillator | Quick Use | 9x Plastic Parts 1x Moss | Medical Lab 2 |
| ??? | ??? | ??? | ??? |
| Equalizer | Weapon | 3x Magnetic Accelerator 3x Complex Gun Parts 1x Queen Reactor | Gunsmith 3 |
| Extended Barrel | Mod | 2x Mod Components 8x Wires | Gunsmith 3 |
| Extended Light Mag II | Mod | 2x Mechanical Components 3x Steel Spring | Gunsmith 2 |
| Extended Light Mag III | Mod | 2x Mod Components 5x Steel Spring | Gunsmith 3 |
| Extended Medium Mag II | Mod | 2x Mechanical Components 3x Steel Spring | Gunsmith 2 |
| Extended Medium Mag III | Mod | 2x Mod Components 5x Steel Spring | Gunsmith 3 |
| Extended Shotgun Mag II | Mod | 2x Mechanical Components 3x Steel Spring | Gunsmith 2 |
| Extended Shotgun Mag III | Mod | 2x Mod Components 5x Steel Spring | Gunsmith 3 |
| Remote Raider Flare | Quick Use | 2x Chemicals 4x Rubber Parts | Utility Station 1 |
| Heavy Gun Parts | Material | 4x Simple Gun Parts | Refiner 2 |
| Venator | Weapon | 2x Advanced Mechanical Components 3x Medium Gun Parts 5x Magnet | Gunsmith 3 |
| Il Toro | Weapon | 5x Mechanical Components 6x Simple Gun Parts | Gunsmith 1 |
| Jolt Mine | Mine | 1x Electrical Components 1x Battery | Explosives Station 2 |
| Explosive Mine | Mine | 1x Explosive Compound 1x Sensors | Explosives Station 3 |
| Jupiter | Weapon | 3x Magnetic Accelerator 3x Complex Gun Parts 1x Queen Reactor | Gunsmith 3 |
| Light Gun Parts | Material | 4x Simple Gun Parts | Refiner 2 |
| Lightweight Stock | Mod | 2x Mod Components 5x Duct Tape | Gunsmith 3 |
| Lure Grenade | Grenade | 1x Speaker Component 1x Electrical Components | Utility Station 2 |
| Medium Gun Parts | Material | 4x Simple Gun Parts | Refiner 2 |
| Torrente | Weapon | 2x Advanced Mechanical Components 3x Medium Gun Parts 6x Steel Spring | Gunsmith 3 |
| Muzzle Brake II | Mod | 2x Mechanical Components 4x Wires | Gunsmith 2 |
| Muzzle Brake III | Mod | 2x Mod Components 8x Wires | Gunsmith 3 |
| Padded Stock | Mod | 2x Mod Components 5x Duct Tape | Gunsmith 3 |
| Shotgun Choke II | Mod | 2x Mechanical Components 4x Wires | Gunsmith 2 |
| Shotgun Choke III | Mod | 2x Mod Components 8x Wires | Gunsmith 3 |
| Shotgun Silencer | Mod | 2x Mod Components 8x Wires | Gunsmith 3 |
| Showstopper | Grenade | 1x Advanced Electrical Components 1x Voltage Converter | Explosives Station 3 |
| Silencer I | Mod | 2x Mechanical Components 4x Wires | Gunsmith 2 |
| Silencer II | Mod | 2x Mod Components 8x Wires | Gunsmith 3 |
| Snap Hook | Quick Use | 2x Power Rod 3x Rope 1x Exodus Modules | Utility Station 3 |
| Stable Stock II | Mod | 2x Mechanical Components 3x Duct Tape | Gunsmith 2 |
| Stable Stock III | Mod | 2x Mod Components 5x Duct Tape | Gunsmith 3 |
| Tagging Grenade | Grenade | 1x Electrical Components 1x Sensors | Utility Station 3 |
| Tempest | Weapon | 3x Advanced Mechanical Components 3x Medium Gun Parts 3x Canister | Gunsmith 3 |
| Trigger Nade | Grenade | 2x Crude Explosives 1x Processor | Explosives Station 2 |
| Vertical Grip II | Mod | 2x Mechanical Components 3x Duct Tape | Gunsmith 2 |
| Vertical Grip III | Mod | 2x Mod Components 5x Duct Tape | Gunsmith 3 |
| Vita Shot | Quick Use | 2x Antiseptic 1x Syringe | Medical Lab 3 |
| Vita Spray | Quick Use | 3x Antiseptic 1x Canister | Medical Lab 3 |
| Vulcano | Weapon | 1x Magnetic Accelerator 3x Heavy Gun Parts 1x Exodus Modules | Gunsmith 3 |
| Wolfpack | Grenade | 2x Explosive Compound 2x Sensors | Explosives Station 3 |
| Red Light Stick | Quick Use | 3x Chemicals | Utility Station 1 |
| Smoke Grenade | Grenade | 14x Chemicals 1x Canister | Utility Station 2 |
| Deadline | Mine | 3x Explosive Compound 2x ARC Circuitry | Explosives Station 3 |
| Trailblazer | Grenade | 1x Explosive Compound 1x Synthesized Fuel | Explosives Station 3 |
| Tactical Mk. 3 (Defensive) | Augment | 2x Advanced Electrical Components 3x Processor | Gear Bench 3 |
| Tactical Mk. 3 (Healing) | Augment | 2x Advanced Electrical Components 3x Processor | Gear Bench 3 |
| Yellow Light Stick | Quick Use | 3x Chemicals | Utility Station 1 |
Note: The missing Blueprints in this list likely have not actually been added to the game at the time of writing, because none of the playerbase has managed to find any of them. As they are added to the game, I will update this page with the most relevant information so you know exactly how to get all 75 Arc Raiders Blueprints.
Where to find Blueprints in Arc Raiders
Below is a list of all containers, modifiers, and events which maximise your chances of finding Blueprints:
- Certain quests reward you with specific Blueprints .
- Completing Trials has a high chance of offering Blueprints as rewards.
- Surveyors have a decent chance of dropping Blueprints on death.
- High loot value areas tend to have a greater chance of spawning Blueprints.
- Night Raids and Storms may increase rare Blueprint spawn chances in containers.
- Containers with higher numbers of items may have a higher tendency to spawn Blueprints. As a result, Blue Gate (which has many “large” containers containing multiple items) may give you a higher chance of spawning Blueprints.
- Raider containers (Raider Caches, Weapon Boxes, Medical Bags, Grenade Tubes) have increased Blueprint drop rates. As a result, the Uncovered Caches event gives you a high chance of finding Blueprints.
- Security Lockers have a higher than average chance of containing Blueprints.
- Certain Blueprints only seem to spawn under specific circumstances: Tempest Blueprint only spawns during Night Raid events. Vulcano Blueprint only spawns during Hidden Bunker events. Jupiter and Equaliser Blueprints only spawn during Harvester events.

Raider Caches, Weapon Boxes, and other raider-oriented container types have a good chance of offering Blueprints. |Image credit:Rock Paper Shotgun/Embark Studios
Blueprints have a very low chance of spawning in any container in Arc Raiders, around 1-2% on average. However, there is a higher chance of finding Blueprints in particular container types. Specifically, you can find more Blueprints in Raider containers and security lockers.
Beyond this, if you’re looking for Blueprints you should focus on regions of the map which are marked as having particularly high-value loot. Areas such as the Control Tower in Dam Battlegrounds, the Arrival and Departure Buildings in Spaceport, and Pilgrim’s Peak in Blue Gate all have a better-than-average chance of spawning Blueprints somewhere amongst all their containers. Night Raids and Electromagnetic Storm events also increase the drop chances of certain Blueprints .
In addition to these containers, you can often loot Blueprints from destroyed Surveyors - the largest of the rolling ball ARC. Surveyors are more commonly found on the later maps - Spaceport and Blue Gate - and if one spawns in your match, you’ll likely see it by the blue laser beam that it casts into the sky while “surveying”.
Surveyors are quite well-armoured and will very speedily run away from you once it notices you, but if you can take one down then make sure you loot all its parts for a chance of obtaining certain unusual Blueprints.
Blueprints obtained from quests
One way in which you can get Blueprints is by completing certain quests for the vendors in Speranza. Some quests will reward you with a specific item Blueprint upon completion, so as long as you work through all the quests in Arc Raiders, you are guaranteed those Blueprints.
Here is the full list of all Blueprints you can get from quest rewards:
- Trigger Nade Blueprint: Rewarded after completing “Sparks Fly”.
- Lure Grenade Blueprint: Rewarded after completing “Greasing Her Palms”.
- Burletta Blueprint: Rewarded after completing “Industrial Espionage”.
- Hullcracker Blueprint (and Launcher Ammo Blueprint): Rewarded after completing “The Major’s Footlocker”.
Alas, that’s only 4 Blueprints out of a total of 75 to unlock, so for the vast majority you will need to find them yourself during a raid. If you’re intent on farming Blueprints, then it’s best to equip yourself with cheap gear in case you lose it, but don’t use a free loadout because then you won’t get a safe pocket to stash any new Blueprint you find. No pain in Arc Raiders is sharper than failing to extract with a new Blueprint you’ve been after for a dozen hours already.

One of the best ways to get Blueprints is by hitting three stars on all five Trials every week. |Image credit:Rock Paper Shotgun/Embark Studios
Blueprints obtained from Trials
One of the very best ways to get Blueprints is as rewards for completing Trials in Arc Raiders. Trials are unlocked from Level 15 onwards, and allow you to earn rewards by focusing on certain tasks over the course of several raids. For example, one Trial might task you with dealing damage to Hornets, while another might challenge you to loot Supply Drops.
Trials refresh on a weekly basis, with a new week bringing five new Trials. Each Trial can offer up to three rewards after passing certain score milestones, and it’s possible to receive very high level loot from these reward crates - including Blueprints. So if you want to unlock as many Blueprints as possible, you should make a point of completing as many Trials as possible each week.
Best Blueprint farming locations
The very best way to get Blueprints is to frequent specific areas of the maps which combine high-tier loot pools with the right types of containers to search. Here are my recommendations for where to find Blueprints on every map, so you can always keep the search going for new crafting recipes to unlock.

Image credit:Rock Paper Shotgun/Embark Studios
Dam Battlegrounds
The best places to farm Blueprints on Dam Battlegrounds are the Control Tower, Power Generation Complex, Ruby Residence, and Pale Apartments . The first two regions, despite only being marked on the map as mid-tier loot, contain a phenomenal number of containers to loot. The Control Tower can also contain a couple of high-tier Security Lockers - though of course, you’ll need to have unlocked the Security Breach skill at the end of the Survival tree.
There’s also a lot of reporting amongst the playerbase that the Residential areas in the top-left of the map - Pale Apartments and Ruby Residence - give you a comparatively strong chance of finding Blueprints. Considering their size, there’s a high density of containers to loot in both locations, and they also have the benefit of being fairly out of the way. So you’re more likely to have all the containers to yourself.
Buried City
The best Blueprint farming locations on Buried City are the Santa Maria Houses, Grandioso Apartments, Town Hall, and the various buildings of the New District . Grandioso Apartments has a lower number of containers than the rest, but a high chance of spawning weapon cases - which have good Blueprint drop rates. The others are high-tier loot areas, with plenty of lootable containers - including Security Lockers.
Spaceport
The best places to find Blueprints on Spaceport are the Arrival and Departure Buildings, as well as Control Tower A6 and the Launch Towers . All these areas are labelled as high-value loot regions, and many of them are also very handily connected to one another by the Spaceport wall, which you can use to quickly run from one area to the next. At the tops of most of these buildings you’ll find at least one Security Locker, so this is an excellent farming route for players looking to find Blueprints.
The downside to looting Blueprints on Spaceport is that all these areas are hotly contested, particularly in Duos and Squads. You’ll need to be very focused and fast in order to complete the full farming route.

Image credit:Rock Paper Shotgun/Embark Studios
Blue Gate
Blue Gate tends to have a good chance of dropping Blueprints, potentially because it generally has a high number of containers which can hold lots of items; so there’s a higher chance of a Blueprint spawning in each container. In my experience, the best Blueprint farming spots on Blue Gate are Pilgrim’s Peak, Raider’s Refuge, the Ancient Fort, and the Underground Complex beneath the Warehouse .
All of these areas contain a wealth of containers to loot. Raider’s Refuge has less to loot, but the majority of the containers in and around the Refuge are raider containers, which have a high chance of containing Blueprints - particularly during major events.
Stella Montis
On the whole, Stella Montis seems to have a very low drop rate for Blueprints (though a high chance of dropping other high-tier loot). If you do want to try farming Blueprints on this map, the best places to find Blueprints in Stella Montis are Medical Research, Assembly Workshop, and the Business Center . These areas have the highest density of containers to loot on the map.
In addition to this, the Western Tunnel has a few different Security Lockers to loot, so while there’s very little to loot elsewhere in this area of the map, it’s worth hitting those Security Lockers if you spawn there at the start of a match.
That wraps up this primer on how to get all the Blueprints in Arc Raiders as quickly as possible. With the Expedition system constantly resetting a large number of players’ Blueprints, it’s more important than ever to have the most up-to-date information on where to find all these Blueprints.
While you’re here, be sure to check out our Arc Raiders best guns tier list , as well as our primers on the best skills to unlock and all the different Field Depot locations on every map.


ARC Raiders
PS5 , Xbox Series X/S , PC
Rock Paper Shotgun is better when you sign in
Sign in and join us on our journey to discover strange and compelling PC games.
