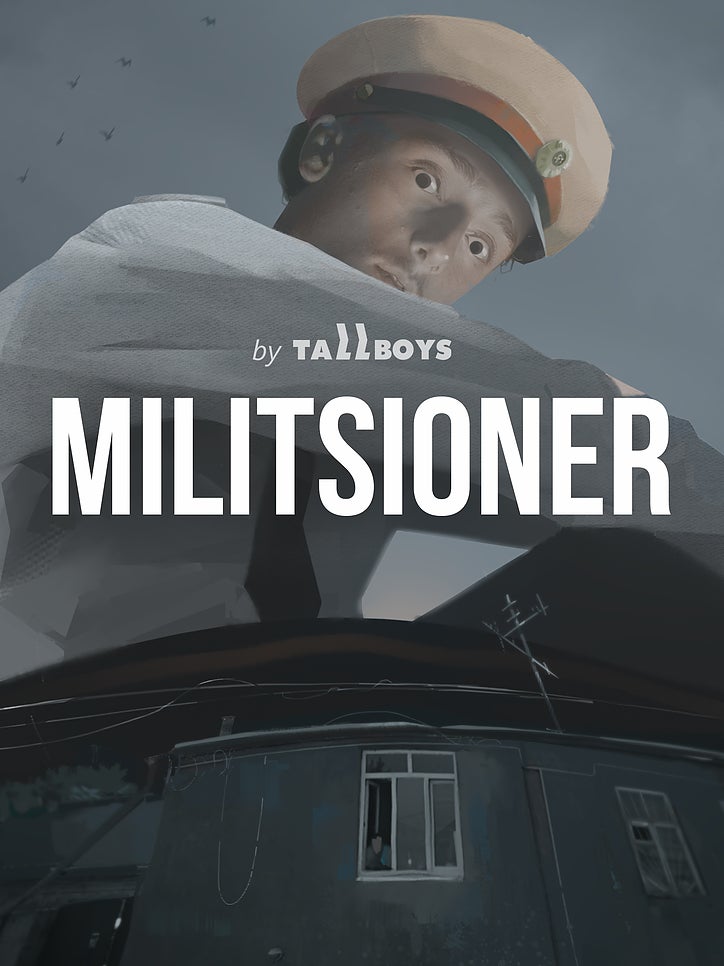
The devs of surreal escape sim Militsioner explain how they’ve shrunk their giant ambition
TallBoys cut their voice recognition feature and added a tutorial
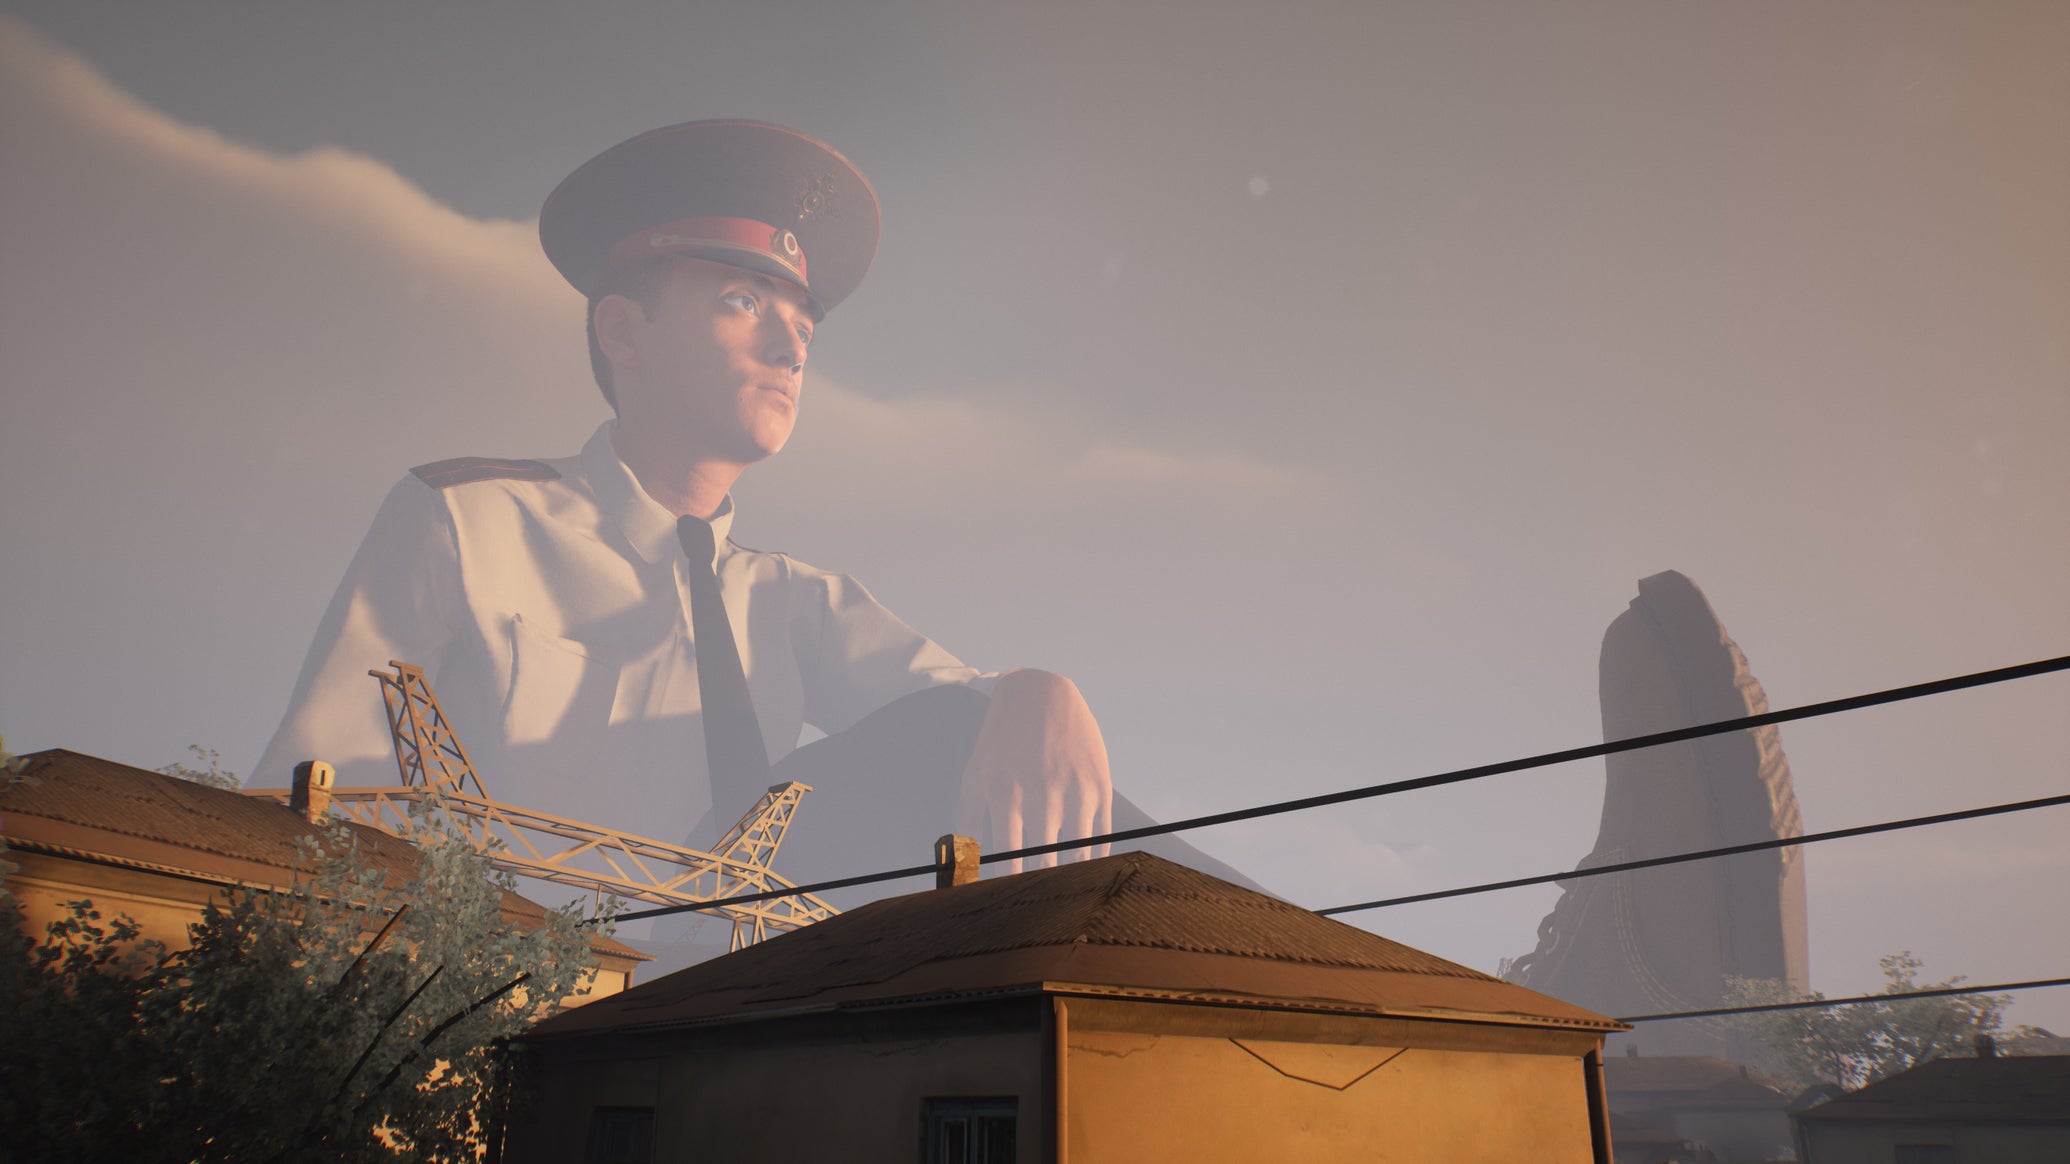
Image credit:TallBoys
.jpg?width=2048&height=2048&fit=bounds&quality=85&format=jpg&auto=webp)
Could there be a more than universally relatable quote shared by indie developers than: “We really just wanted to make a small game”? Of course, there’s little to complain about when games like Cuphead or Owlboy finally see the light of the day, demonstrating what wonders growing ambition can often bring.
Having said that, I’m not entirely surprised that Vladimir Semenets, the lead game designer of Militsioner , sits in front of me on Zoom and tells me how they initially envisioned a six-month project, “something very fast”. Yet, here we are, three years and more than a dozen developer vlogs since TallBoys’ surreal runaway sim first captured everyone’s attention (including one state-owned Russian news channel ). If not for its Kafkaesque premise, which pits players against a ten-story tall looming policeman in a quest to escape a small town, then definitely because of the game’s ambitious voice recognition feature that promised real-time conversation instead of pre-written dialogue.
After that, TallBoys went silently into the night, occasionally releasing behind-the-scenes progress videos on their YouTube channel to a humble yet dedicated fanbase. That is, until the end of last year, when Militsioner returned to the public eye as part of Day Of The Devs ’ showcase to demonstrate how much this Orwellian “dating sim”, as they like to joke , has changed since the last time we were reprimanded by the Brobdingnagian policeman.
As soon as you open Militsioner’s demo, which I was lucky enough to get my hands on, you are given a brief run-through of all the tricks you can use to escape the all-seeing eye. Besides the classics, like throwing bricks at cars to distract your captor while you skedaddle towards the exit, players also learn how to get on the Militsioner’s good side by plying him with compliments (“You’re a radiant soul!”) and gifts. Make him happy and you’re rewarded with a black-and-white close-up shot of the giant’s grinning face. Upset him and prepare to be plucked away by his mammoth hand, before having to explain yourself.
While this optional tutorial feels like a great way to introduce newcomers to the basics of stealth sims, TallBoys admit that wasn’t why it was added. “Some testers completely ignored the Militsioner and most of the mechanics, like the time system, that we spent a lot of time to make. It felt like they were playing someone else’s game,” Dmitry Shevchenko, Militsioner’s game designer and the head of studio operations, explains, and promises that all of this tutorialising will be naturally eased into the final game. He says the team “spent months trying to understand what we really needed” for the tutorial, adding that they all admire the masterclass way Nintendo “introduce complex mechanics so effortlessly” in modern The Legend Of Zelda titles.
On my first attempt to catch the train leaving the depressing, ghostly town that forms the setting for the game, I befriended a stranger who was craving a cigarette. After learning how the pawnshop works, and scraping together enough rubles to buy a pack of cowboy killers for the nicotine-hungry fella, I was rewarded a key to the smoker’s tenement for my trouble. This allowed me to bypass the ticket booth, by parkouring a couple of roofs under the cover of the night – when Militsioner is sound asleep. There, I found a ladder to a platform perched directly above the train tracks.
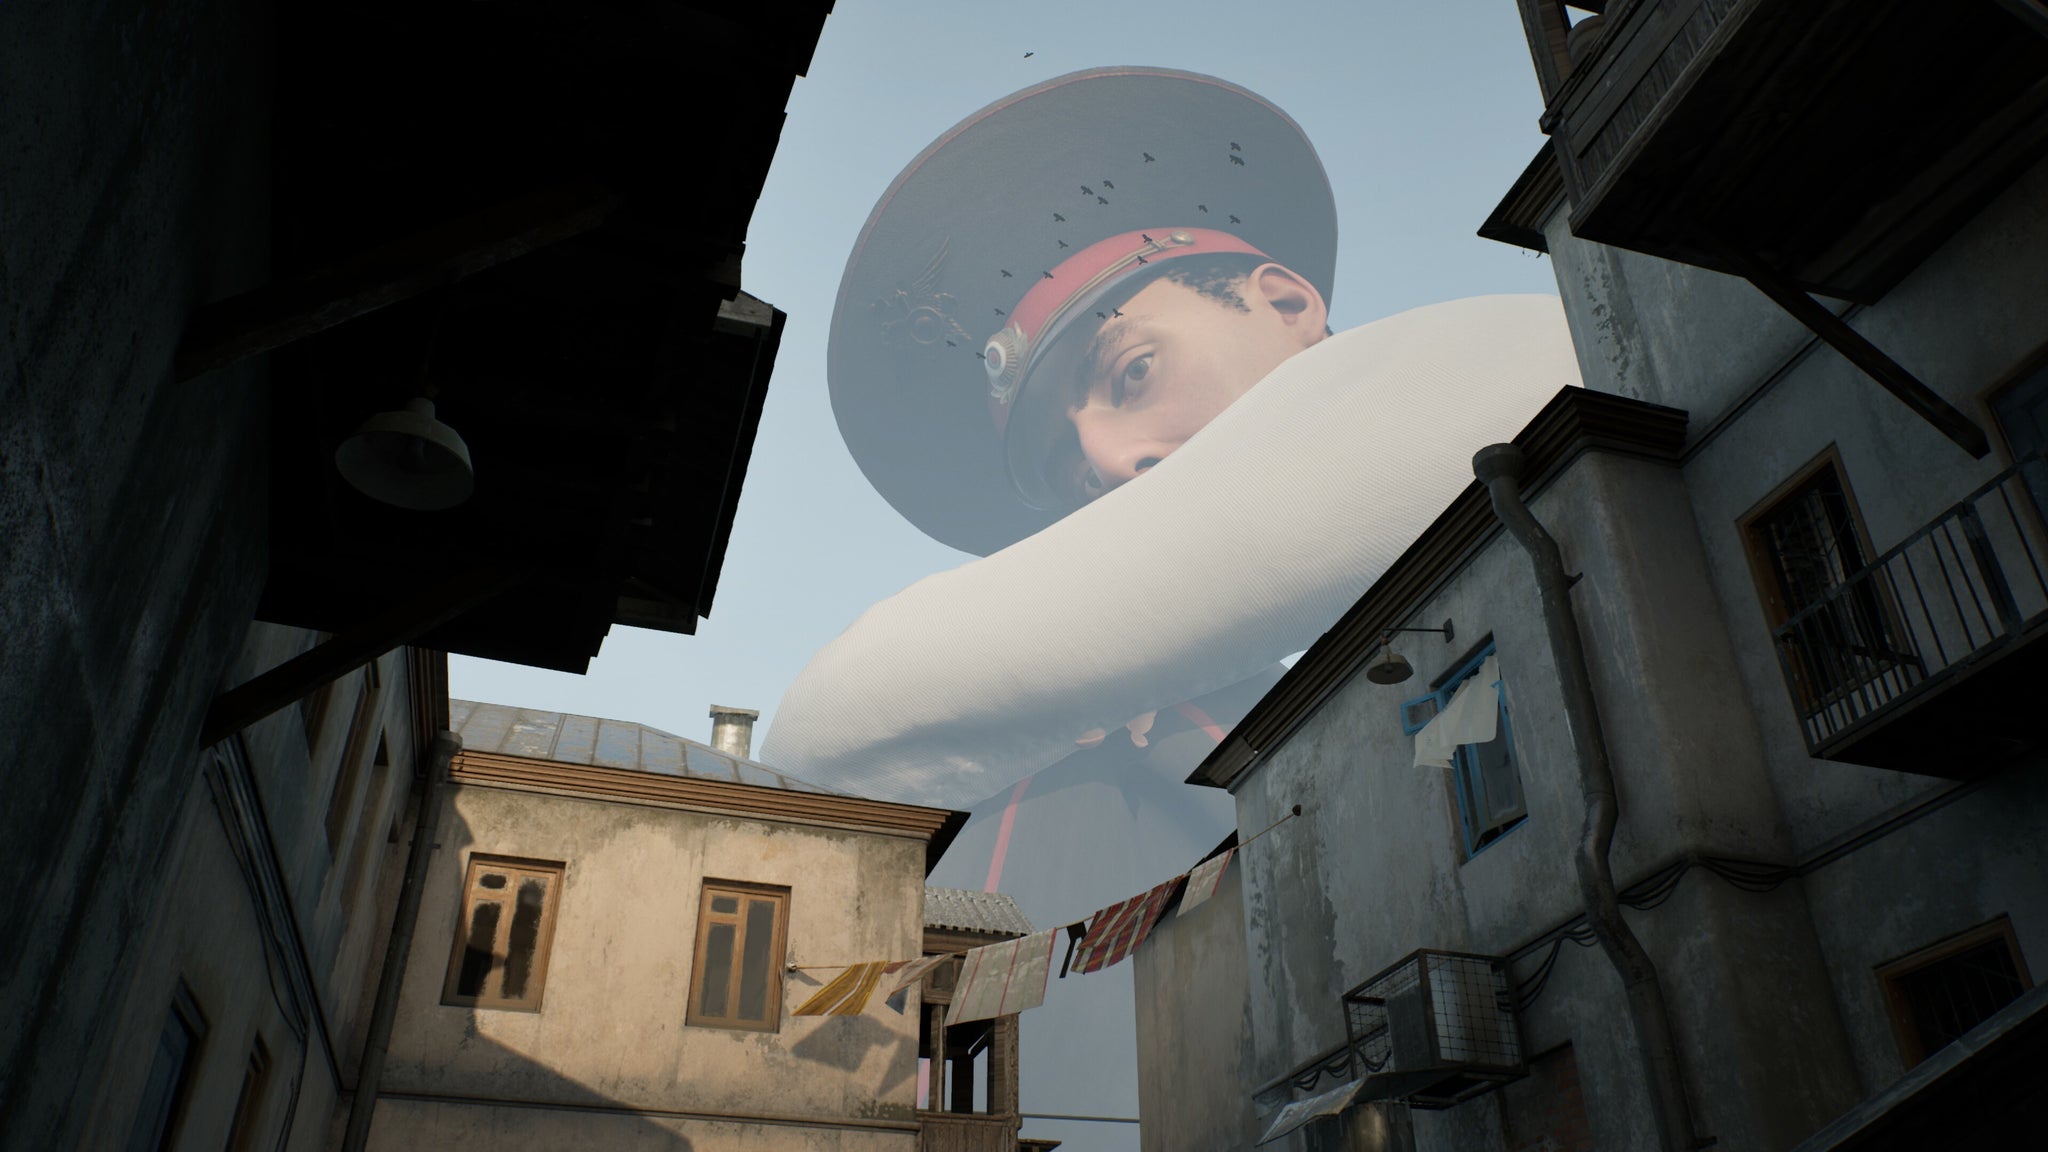
Image credit:TallBoys
If all this sounds a bit like planning an execution as Agent 47, it’s not far from the truth, as that’s exactly the feeling TallBoys were aiming for. Semenets says that the Hitman games were one of the biggest inspirations for Militsioner, also citing the Dishonored series. “They play like immersive sims: there’s an open map which allows the player to explore different ways and approaches to reach their goal. We tried to model escaping in Militsioner as if it was elimination in Hitman games,” he tells me.
If my first attempt to leave this God-forsaken town behind was to be compared with executing an assassination, by the end of it I’d be spending the foreseeable future behind bars in a freezing Siberian gulag. As the train rolled into view, I made my way to the platform above it, which allowed me to do the Leap of Faith into a pile of leaves conveniently located on its roof. I thought I was a free man, but as soon as I hit the train’s leafy rooftop, I respawned right at the start of the level. While such bug-related setbacks aren’t unexpected given Militsioner’s alpha status, that didn’t stop the train from departing and leaving me for a date with the face of authority.
After spending more than two hours trying to please this Leviathan-sized Russian cop while trying new ways to escape his regime, I felt Stockholm syndrome was beginning to take hold. I wanted freedom, sure, but every time Militsioner caught me and interrogated me about the weirdos I met in the village (without spoiling too much, Zelda fans will be delighted with a nod to one of Majora’s Mask’s strangest characters), I couldn’t help but feel like his stoic facade was starting to loosen up. Him being the titular character, it only makes sense that players get to know their captor’s whole deal.
“For the narrative of Militsioner to work, you will be playing as different characters,” Semenets explains. “It wouldn’t work if you escape and snap right back into it. Not only will this change the approach of him catching you as a criminal, but the dynamic between him and the player.” While TallBoys didn’t say how many different escape scenarios we’re talking about for the final game, they were happy to share what overarching story lies behind this Kafkaesque Groundhog Day.
“The story idea is that Militsioner is pushing the ground downward so the town is getting flooded. He’s flooding himself, but he wants to retain his power,” Semenets says before Nikita K., the game’s composer and animator, takes over: “Our game is basically about choosing between escaping or not. Every citizen should answer this question [of] why he chooses to escape or not. Militsioner will explain why he doesn’t escape, why he sits on the ground and creates this deep pit that slowly gets flooded. That’s the moral dilemma we try to explore more in our game.” Deep, yes, but at the same time, very Dostoevsky-esque.

Image credit:TallBoys
Only a few studios have as much first-hand experience in escaping as TallBoys. After all, in their last developer vlog they revealed that part of the team had to flee their homes in Russia, due to numerous repressive policies targeting any “anti-military stance [that] can result in lengthy prison terms.”
When asked where the team’s fascination with fleeing comes from - a motif evident in both of the studio’s previous games - Shevchenko likened every TallBoys project to a therapeutic memento. “With Where the Clouds End, for example, we wanted to express our tiredness, being burnt out. Where with Pandemic Express, we explored some form of escaping and trying to find something new,” he says. “In Militsioner we’re trying to describe a real situation.”
If you’ve been following Militsioner since its infancy, one of the main changes you’ll notice is that voice recognition, one of the project’s central hooks when it was revealed, is no longer present. All the talking in the game is now done not by using the mic, but by selecting from fairly limited options (“it’s not perfect right now and there will be a lot of changes in this aspect”). It’s a reactive dialogue system that most Firewatch players will be familiar with.
While I was intrigued by the idea of sweet-talking your way out of punishment, you know, like you’d normally do after being pulled over for going a tad too fast, Semenets said ditching the voice recognition was the only way we’d ever see Militsioner reaching the finish line - which was already way overdue. “We felt like we were stagnating. There was a point where we were developing Militsioner and felt like we’re just getting cornered with this mechanic,” he says, with a heavy sigh. “It conflicted with a lot of input from the players. For example, not everyone has a microphone. We had to make different ways to enter commands. You would need to have a keyboard or maybe a controller, and typing with the controller is just painful.”
Of course, the team tried to catch the thunder by implementing ChatGPT (version 2.0), the hottest thing in the tech world, even before most of us knew its name - or just how lacklustre AI’s integration into the industry would prove to be. “We spent months trying to wrap our minds around how we want to implement it. It was a lot of guesswork [and] a huge amount of work,” Semenets says. In the end, the tech was too advanced, and advancing too fast, to be worth the trouble.

Image credit:TallBoys
And so was the voice recognition function - a Herculean feat only recently tackled by infinitely-pocketed Nvidia during its eyebrow-raising CES demonstration . “One day we just discussed the idea that maybe we should just drop it. ‘Maybe we don’t want to waste another year on making it,’” Semenets remembers, calling it one of the most painful decisions during Militsioner’s development. “I really liked the idea that you can speak freely in a game that doesn’t care about your freedom of speech. It’s a cool idea, but it was simply too much work.”
For a studio that has been forced to flee its home and scale down its Brobdingnagian vision stuck in a development hamster wheel, I was expecting more regretful, world-weary sighs. But in fact, all three TallBoys’ members radiate the energy of a game dev on the brink of a breakthrough. Does that mean the finish line is on the horizon?
“We do have a deadline actually,” Shevchenko promises. “At the beginning, we felt like we were relaxed in our development - there were deadlines but they were really soft. It was as if we were making this game for fun.” Naturally, Shevchenko and Semenets are playing coy about Militsioner’s release date, only hinting that it might take about 10 hours to beat, based on players’ experience with similar games.
After spending the better part of the demo toying around with Militsioner’s world, testing how reactive this Orwellian toybox is, it’s not difficult to see why TallBoys are not in a rush to make any big announcements. You can play it like a shameless criminal, smashing the ticket booth’s window with a brick, snatching the ticket and making a run for it, before (verbally) flipping off the giant. Or you can play along, interacting with its wacky characters and collecting hints about Militsioner’s delicate sleeping patterns.
With the addition of a few more missions, some new dialogue lines to compliment the policeman’s uniform, and Militsioner’s tweaked morality system - which is currently fairly rudimentary - TallBoys might have something big enough to compete with the immersive sim giants.
Militsioner
PC
Rock Paper Shotgun is better when you sign in
Sign in and join us on our journey to discover strange and compelling PC games.

All 75 Arc Raiders Blueprints and where to get them
These areas have the highest chance of giving you Blueprints

Image credit:Rock Paper Shotgun/Embark Studios

Looking for more Arc Raiders Blueprints? It’s a special day when you find a Blueprint, as they’re among the most valuable items in Arc Raiders. If you find a Blueprint that you haven’t already found, then you must make sure you hold onto it at all costs, because Blueprints are the key to one of the most important and powerful systems of meta-progression in the game.
This guide aims to be the very best guide on Blueprints you can find, starting with a primer on what exactly they are and how they work in Arc Raiders, before delving into exactly where to get Blueprints and the very best farming spots for you to take in your search.
We’ll also go over how to get Blueprints from other unlikely activities, such as destroying Surveyors and completing specific quests. And you’ll also find the full list of all 75 Blueprints in Arc Raiders on this page (including the newest Blueprints added with the Cold Snap update , such as the Deadline Blueprint and Firework Box Blueprint), giving you all the information you need to expand your own crafting repertoire.
In this guide:
- What are Blueprints in Arc Raiders?
- Full Blueprint list: All crafting recipes
- Where to find Blueprints in Arc Raiders Blueprints obtained from quests Blueprints obtained from Trials Best Blueprint farming locations

What are Blueprints in Arc Raiders?
Blueprints in Arc Raiders are special items which, if you manage to extract with them, you can expend to permanently unlock a new crafting recipe in your Workshop. If you manage to extract from a raid with an Anvil Blueprint, for example, you can unlock the ability to craft your very own Anvil Pistol, as many times as you like (as long as you have the crafting materials).
To use a Blueprint, simply open your Inventory while in the lobby, then right-click on the Blueprint and click “Learn And Consume” . This will permanently unlock the recipe for that item in your Workshop. As of the Stella Montis update, there are allegedly 75 different Blueprints to unlock - although only 68 are confirmed to be in the game so far. You can see all the Blueprints you’ve found and unlocked by going to the Workshop menu, and hitting “R” to bring up the Blueprint screen.
It’s possible to find duplicates of past Blueprints you’ve already unlocked. If you find these, then you can either sell them, or - if you like to play with friends - you can take it into a match and gift it to your friend so they can unlock that recipe for themselves. Another option is to keep hold of them until the time comes to donate them to the Expedition.
Full Blueprint list: All crafting recipes
Below is the full list of all the Blueprints that are currently available to find in Arc Raiders, and the crafting recipe required for each item:
| Blueprint | Type | Recipe | Crafted At |
|---|---|---|---|
| Bettina | Weapon | 3x Advanced Mechanical Components 3x Heavy Gun Parts 3x Canister | Gunsmith 3 |
| Blue Light Stick | Quick Use | 3x Chemicals | Utility Station 1 |
| Aphelion | Weapon | 3x Magnetic Accelerator 3x Complex Gun Parts 1x Matriarch Reactor | Gunsmith 3 |
| Combat Mk. 3 (Flanking) | Augment | 2x Advanced Electrical Components 3x Processor | Gear Bench 3 |
| Combat Mk. 3 (Aggressive) | Augment | 2x Advanced Electrical Components 3x Processor | Gear Bench 3 |
| Complex Gun Parts | Material | 2x Light Gun Parts 2x Medium Gun Parts 2x Heavy Gun Parts | Refiner 3 |
| Fireworks Box | Quick Use | 1x Explosive Compound 3x Pop Trigger | Explosives Station 2 |
| Gas Mine | Mine | 4x Chemicals 2x Rubber Parts | Explosives Station 1 |
| Green Light Stick | Quick Use | 3x Chemicals | Utility Station 1 |
| Pulse Mine | Mine | 1x Crude Explosives 1x Wires | Explosives Station 1 |
| Seeker Grenade | Grenade | 1x Crude Explosives 2x ARC Alloy | Explosives Station 1 |
| Looting Mk. 3 (Survivor) | Augment | 2x Advanced Electrical Components 3x Processor | Gear Bench 3 |
| Angled Grip II | Mod | 2x Mechanical Components 3x Duct Tape | Gunsmith 2 |
| Angled Grip III | Mod | 2x Mod Components 5x Duct Tape | Gunsmith 3 |
| Hullcracker | Weapon | 1x Magnetic Accelerator 3x Heavy Gun Parts 1x Exodus Modules | Gunsmith 3 |
| Launcher Ammo | Ammo | 5x Metal Parts 1x Crude Explosives | Workbench 1 |
| Anvil | Weapon | 5x Mechanical Components 5x Simple Gun Parts | Gunsmith 2 |
| Anvil Splitter | Mod | 2x Mod Components 3x Processor | Gunsmith 3 |
| ??? | ??? | ??? | ??? |
| Barricade Kit | Quick Use | 1x Mechanical Components | Utility Station 2 |
| Blaze Grenade | Grenade | 1x Explosive Compound 2x Oil | Explosives Station 3 |
| Bobcat | Weapon | 3x Advanced Mechanical Components 3x Light Gun Parts | Gunsmith 3 |
| Osprey | Weapon | 2x Advanced Mechanical Components 3x Medium Gun Parts 7x Wires | Gunsmith 3 |
| Burletta | Weapon | 3x Mechanical Components 3x Simple Gun Parts | Gunsmith 1 |
| Compensator II | Mod | 2x Mechanical Components 4x Wires | Gunsmith 2 |
| Compensator III | Mod | 2x Mod Components 8x Wires | Gunsmith 3 |
| Defibrillator | Quick Use | 9x Plastic Parts 1x Moss | Medical Lab 2 |
| ??? | ??? | ??? | ??? |
| Equalizer | Weapon | 3x Magnetic Accelerator 3x Complex Gun Parts 1x Queen Reactor | Gunsmith 3 |
| Extended Barrel | Mod | 2x Mod Components 8x Wires | Gunsmith 3 |
| Extended Light Mag II | Mod | 2x Mechanical Components 3x Steel Spring | Gunsmith 2 |
| Extended Light Mag III | Mod | 2x Mod Components 5x Steel Spring | Gunsmith 3 |
| Extended Medium Mag II | Mod | 2x Mechanical Components 3x Steel Spring | Gunsmith 2 |
| Extended Medium Mag III | Mod | 2x Mod Components 5x Steel Spring | Gunsmith 3 |
| Extended Shotgun Mag II | Mod | 2x Mechanical Components 3x Steel Spring | Gunsmith 2 |
| Extended Shotgun Mag III | Mod | 2x Mod Components 5x Steel Spring | Gunsmith 3 |
| Remote Raider Flare | Quick Use | 2x Chemicals 4x Rubber Parts | Utility Station 1 |
| Heavy Gun Parts | Material | 4x Simple Gun Parts | Refiner 2 |
| Venator | Weapon | 2x Advanced Mechanical Components 3x Medium Gun Parts 5x Magnet | Gunsmith 3 |
| Il Toro | Weapon | 5x Mechanical Components 6x Simple Gun Parts | Gunsmith 1 |
| Jolt Mine | Mine | 1x Electrical Components 1x Battery | Explosives Station 2 |
| Explosive Mine | Mine | 1x Explosive Compound 1x Sensors | Explosives Station 3 |
| Jupiter | Weapon | 3x Magnetic Accelerator 3x Complex Gun Parts 1x Queen Reactor | Gunsmith 3 |
| Light Gun Parts | Material | 4x Simple Gun Parts | Refiner 2 |
| Lightweight Stock | Mod | 2x Mod Components 5x Duct Tape | Gunsmith 3 |
| Lure Grenade | Grenade | 1x Speaker Component 1x Electrical Components | Utility Station 2 |
| Medium Gun Parts | Material | 4x Simple Gun Parts | Refiner 2 |
| Torrente | Weapon | 2x Advanced Mechanical Components 3x Medium Gun Parts 6x Steel Spring | Gunsmith 3 |
| Muzzle Brake II | Mod | 2x Mechanical Components 4x Wires | Gunsmith 2 |
| Muzzle Brake III | Mod | 2x Mod Components 8x Wires | Gunsmith 3 |
| Padded Stock | Mod | 2x Mod Components 5x Duct Tape | Gunsmith 3 |
| Shotgun Choke II | Mod | 2x Mechanical Components 4x Wires | Gunsmith 2 |
| Shotgun Choke III | Mod | 2x Mod Components 8x Wires | Gunsmith 3 |
| Shotgun Silencer | Mod | 2x Mod Components 8x Wires | Gunsmith 3 |
| Showstopper | Grenade | 1x Advanced Electrical Components 1x Voltage Converter | Explosives Station 3 |
| Silencer I | Mod | 2x Mechanical Components 4x Wires | Gunsmith 2 |
| Silencer II | Mod | 2x Mod Components 8x Wires | Gunsmith 3 |
| Snap Hook | Quick Use | 2x Power Rod 3x Rope 1x Exodus Modules | Utility Station 3 |
| Stable Stock II | Mod | 2x Mechanical Components 3x Duct Tape | Gunsmith 2 |
| Stable Stock III | Mod | 2x Mod Components 5x Duct Tape | Gunsmith 3 |
| Tagging Grenade | Grenade | 1x Electrical Components 1x Sensors | Utility Station 3 |
| Tempest | Weapon | 3x Advanced Mechanical Components 3x Medium Gun Parts 3x Canister | Gunsmith 3 |
| Trigger Nade | Grenade | 2x Crude Explosives 1x Processor | Explosives Station 2 |
| Vertical Grip II | Mod | 2x Mechanical Components 3x Duct Tape | Gunsmith 2 |
| Vertical Grip III | Mod | 2x Mod Components 5x Duct Tape | Gunsmith 3 |
| Vita Shot | Quick Use | 2x Antiseptic 1x Syringe | Medical Lab 3 |
| Vita Spray | Quick Use | 3x Antiseptic 1x Canister | Medical Lab 3 |
| Vulcano | Weapon | 1x Magnetic Accelerator 3x Heavy Gun Parts 1x Exodus Modules | Gunsmith 3 |
| Wolfpack | Grenade | 2x Explosive Compound 2x Sensors | Explosives Station 3 |
| Red Light Stick | Quick Use | 3x Chemicals | Utility Station 1 |
| Smoke Grenade | Grenade | 14x Chemicals 1x Canister | Utility Station 2 |
| Deadline | Mine | 3x Explosive Compound 2x ARC Circuitry | Explosives Station 3 |
| Trailblazer | Grenade | 1x Explosive Compound 1x Synthesized Fuel | Explosives Station 3 |
| Tactical Mk. 3 (Defensive) | Augment | 2x Advanced Electrical Components 3x Processor | Gear Bench 3 |
| Tactical Mk. 3 (Healing) | Augment | 2x Advanced Electrical Components 3x Processor | Gear Bench 3 |
| Yellow Light Stick | Quick Use | 3x Chemicals | Utility Station 1 |
Note: The missing Blueprints in this list likely have not actually been added to the game at the time of writing, because none of the playerbase has managed to find any of them. As they are added to the game, I will update this page with the most relevant information so you know exactly how to get all 75 Arc Raiders Blueprints.
Where to find Blueprints in Arc Raiders
Below is a list of all containers, modifiers, and events which maximise your chances of finding Blueprints:
- Certain quests reward you with specific Blueprints .
- Completing Trials has a high chance of offering Blueprints as rewards.
- Surveyors have a decent chance of dropping Blueprints on death.
- High loot value areas tend to have a greater chance of spawning Blueprints.
- Night Raids and Storms may increase rare Blueprint spawn chances in containers.
- Containers with higher numbers of items may have a higher tendency to spawn Blueprints. As a result, Blue Gate (which has many “large” containers containing multiple items) may give you a higher chance of spawning Blueprints.
- Raider containers (Raider Caches, Weapon Boxes, Medical Bags, Grenade Tubes) have increased Blueprint drop rates. As a result, the Uncovered Caches event gives you a high chance of finding Blueprints.
- Security Lockers have a higher than average chance of containing Blueprints.
- Certain Blueprints only seem to spawn under specific circumstances: Tempest Blueprint only spawns during Night Raid events. Vulcano Blueprint only spawns during Hidden Bunker events. Jupiter and Equaliser Blueprints only spawn during Harvester events.

Raider Caches, Weapon Boxes, and other raider-oriented container types have a good chance of offering Blueprints. |Image credit:Rock Paper Shotgun/Embark Studios
Blueprints have a very low chance of spawning in any container in Arc Raiders, around 1-2% on average. However, there is a higher chance of finding Blueprints in particular container types. Specifically, you can find more Blueprints in Raider containers and security lockers.
Beyond this, if you’re looking for Blueprints you should focus on regions of the map which are marked as having particularly high-value loot. Areas such as the Control Tower in Dam Battlegrounds, the Arrival and Departure Buildings in Spaceport, and Pilgrim’s Peak in Blue Gate all have a better-than-average chance of spawning Blueprints somewhere amongst all their containers. Night Raids and Electromagnetic Storm events also increase the drop chances of certain Blueprints .
In addition to these containers, you can often loot Blueprints from destroyed Surveyors - the largest of the rolling ball ARC. Surveyors are more commonly found on the later maps - Spaceport and Blue Gate - and if one spawns in your match, you’ll likely see it by the blue laser beam that it casts into the sky while “surveying”.
Surveyors are quite well-armoured and will very speedily run away from you once it notices you, but if you can take one down then make sure you loot all its parts for a chance of obtaining certain unusual Blueprints.
Blueprints obtained from quests
One way in which you can get Blueprints is by completing certain quests for the vendors in Speranza. Some quests will reward you with a specific item Blueprint upon completion, so as long as you work through all the quests in Arc Raiders, you are guaranteed those Blueprints.
Here is the full list of all Blueprints you can get from quest rewards:
- Trigger Nade Blueprint: Rewarded after completing “Sparks Fly”.
- Lure Grenade Blueprint: Rewarded after completing “Greasing Her Palms”.
- Burletta Blueprint: Rewarded after completing “Industrial Espionage”.
- Hullcracker Blueprint (and Launcher Ammo Blueprint): Rewarded after completing “The Major’s Footlocker”.
Alas, that’s only 4 Blueprints out of a total of 75 to unlock, so for the vast majority you will need to find them yourself during a raid. If you’re intent on farming Blueprints, then it’s best to equip yourself with cheap gear in case you lose it, but don’t use a free loadout because then you won’t get a safe pocket to stash any new Blueprint you find. No pain in Arc Raiders is sharper than failing to extract with a new Blueprint you’ve been after for a dozen hours already.

One of the best ways to get Blueprints is by hitting three stars on all five Trials every week. |Image credit:Rock Paper Shotgun/Embark Studios
Blueprints obtained from Trials
One of the very best ways to get Blueprints is as rewards for completing Trials in Arc Raiders. Trials are unlocked from Level 15 onwards, and allow you to earn rewards by focusing on certain tasks over the course of several raids. For example, one Trial might task you with dealing damage to Hornets, while another might challenge you to loot Supply Drops.
Trials refresh on a weekly basis, with a new week bringing five new Trials. Each Trial can offer up to three rewards after passing certain score milestones, and it’s possible to receive very high level loot from these reward crates - including Blueprints. So if you want to unlock as many Blueprints as possible, you should make a point of completing as many Trials as possible each week.
Best Blueprint farming locations
The very best way to get Blueprints is to frequent specific areas of the maps which combine high-tier loot pools with the right types of containers to search. Here are my recommendations for where to find Blueprints on every map, so you can always keep the search going for new crafting recipes to unlock.

Image credit:Rock Paper Shotgun/Embark Studios
Dam Battlegrounds
The best places to farm Blueprints on Dam Battlegrounds are the Control Tower, Power Generation Complex, Ruby Residence, and Pale Apartments . The first two regions, despite only being marked on the map as mid-tier loot, contain a phenomenal number of containers to loot. The Control Tower can also contain a couple of high-tier Security Lockers - though of course, you’ll need to have unlocked the Security Breach skill at the end of the Survival tree.
There’s also a lot of reporting amongst the playerbase that the Residential areas in the top-left of the map - Pale Apartments and Ruby Residence - give you a comparatively strong chance of finding Blueprints. Considering their size, there’s a high density of containers to loot in both locations, and they also have the benefit of being fairly out of the way. So you’re more likely to have all the containers to yourself.
Buried City
The best Blueprint farming locations on Buried City are the Santa Maria Houses, Grandioso Apartments, Town Hall, and the various buildings of the New District . Grandioso Apartments has a lower number of containers than the rest, but a high chance of spawning weapon cases - which have good Blueprint drop rates. The others are high-tier loot areas, with plenty of lootable containers - including Security Lockers.
Spaceport
The best places to find Blueprints on Spaceport are the Arrival and Departure Buildings, as well as Control Tower A6 and the Launch Towers . All these areas are labelled as high-value loot regions, and many of them are also very handily connected to one another by the Spaceport wall, which you can use to quickly run from one area to the next. At the tops of most of these buildings you’ll find at least one Security Locker, so this is an excellent farming route for players looking to find Blueprints.
The downside to looting Blueprints on Spaceport is that all these areas are hotly contested, particularly in Duos and Squads. You’ll need to be very focused and fast in order to complete the full farming route.

Image credit:Rock Paper Shotgun/Embark Studios
Blue Gate
Blue Gate tends to have a good chance of dropping Blueprints, potentially because it generally has a high number of containers which can hold lots of items; so there’s a higher chance of a Blueprint spawning in each container. In my experience, the best Blueprint farming spots on Blue Gate are Pilgrim’s Peak, Raider’s Refuge, the Ancient Fort, and the Underground Complex beneath the Warehouse .
All of these areas contain a wealth of containers to loot. Raider’s Refuge has less to loot, but the majority of the containers in and around the Refuge are raider containers, which have a high chance of containing Blueprints - particularly during major events.
Stella Montis
On the whole, Stella Montis seems to have a very low drop rate for Blueprints (though a high chance of dropping other high-tier loot). If you do want to try farming Blueprints on this map, the best places to find Blueprints in Stella Montis are Medical Research, Assembly Workshop, and the Business Center . These areas have the highest density of containers to loot on the map.
In addition to this, the Western Tunnel has a few different Security Lockers to loot, so while there’s very little to loot elsewhere in this area of the map, it’s worth hitting those Security Lockers if you spawn there at the start of a match.
That wraps up this primer on how to get all the Blueprints in Arc Raiders as quickly as possible. With the Expedition system constantly resetting a large number of players’ Blueprints, it’s more important than ever to have the most up-to-date information on where to find all these Blueprints.
While you’re here, be sure to check out our Arc Raiders best guns tier list , as well as our primers on the best skills to unlock and all the different Field Depot locations on every map.

ARC Raiders
PS5 , Xbox Series X/S , PC
Rock Paper Shotgun is better when you sign in
Sign in and join us on our journey to discover strange and compelling PC games.
