The best Tools in Hollow Knight Silksong
The best Red, Blue, and Yellow Tools in Silksong

Image credit:Rock Paper Shotgun/Team Cherry

Looking for the best Tools to equip in Hollow Knight Silksong? There are 53 of these handy items to find in the game, so you’re never spoiled for choice. The best of them turn Hornet into an even deadlier warrior than she’d ever be without them, and many Tools provide interesting synergies when equipped. Find as many Tools as you can, and you can unlock buildcrafting opportunities that crack the balance of Silksong open like so many eggs.
In this guide, we’ll list the best Tools in Hollow Knight Silksong , dividing them up by each of the three colors: red, blue, and yellow. This way, you’ll know what to prioritise as you explore the depths of haunted Pharloom.
- The best Red Tools
- The best Blue Tools
- The best Yellow Tools
Be sure to hit the links contained within our description of each Tool to be taken to the corresponding section in our giant Silksong walkthrough , letting you know where you can pick these valuable items up.

The best Red Tools
Red Tools are active and offensive-minded, each costing their particular usage bar to activate. When you deplete the bar completely, that particular tool becomes unusable and can only be refreshed by spending Shell Shards at a resting bench. If you have the Architect Crest , you can make a specific input to refresh a Tool’s bar on the go.
Sting Shard
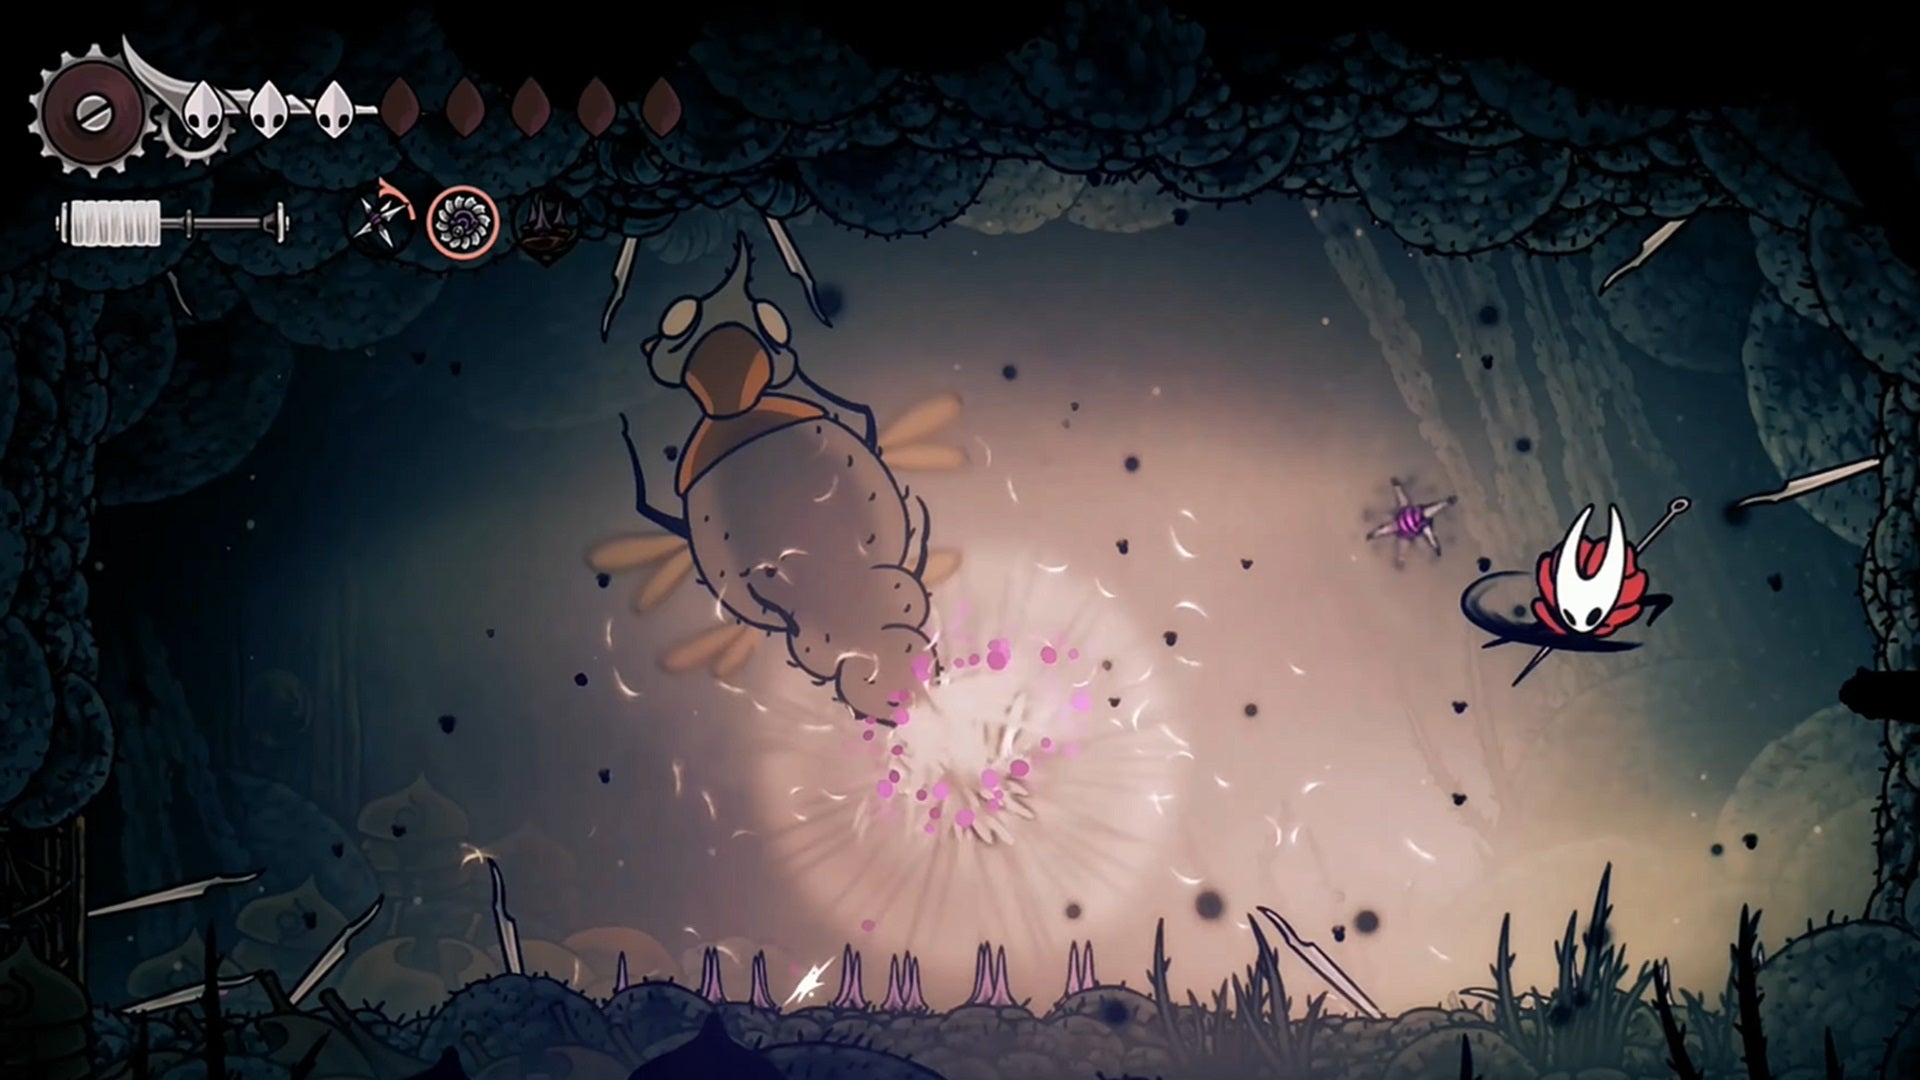
Littering an arena with Sting Shards is a great way to tackle bosses in close quarters. |Image credit:Rock Paper Shotgun/Team Cherry
The Sting Shard is as simple as it is effective. Use it to place a small spike trap in the air. When enemies touch it, the spikes will extend and deal solid damage to any hostile creature that hits it. It’s a bit more expensive to use than some other damaging Tools, but its availability in the early game, via the merchant Forge Daughter, makes it a strong candidate for one of the best Tools in Silksong.
Flea Brew

Who would’ve thought that these cute Fleas could produce such a potent brew? |Image credit:Rock Paper Shotgun/Team Cherry
Another straightforward Tool, the Flea Brew increases your movement and attack speed for a short duration. It has no other effects, but one Flea Brew is enough to vastly bump up your damage potential. That’s especially true if you’re using a Crest like the Beast or Wanderer, which have inherently high default attack speeds. The increase to your movement speed can be a little jarring at first, but once you’re used to it, it can make getting around in a fight much less of a hassle.
Delver’s Drill
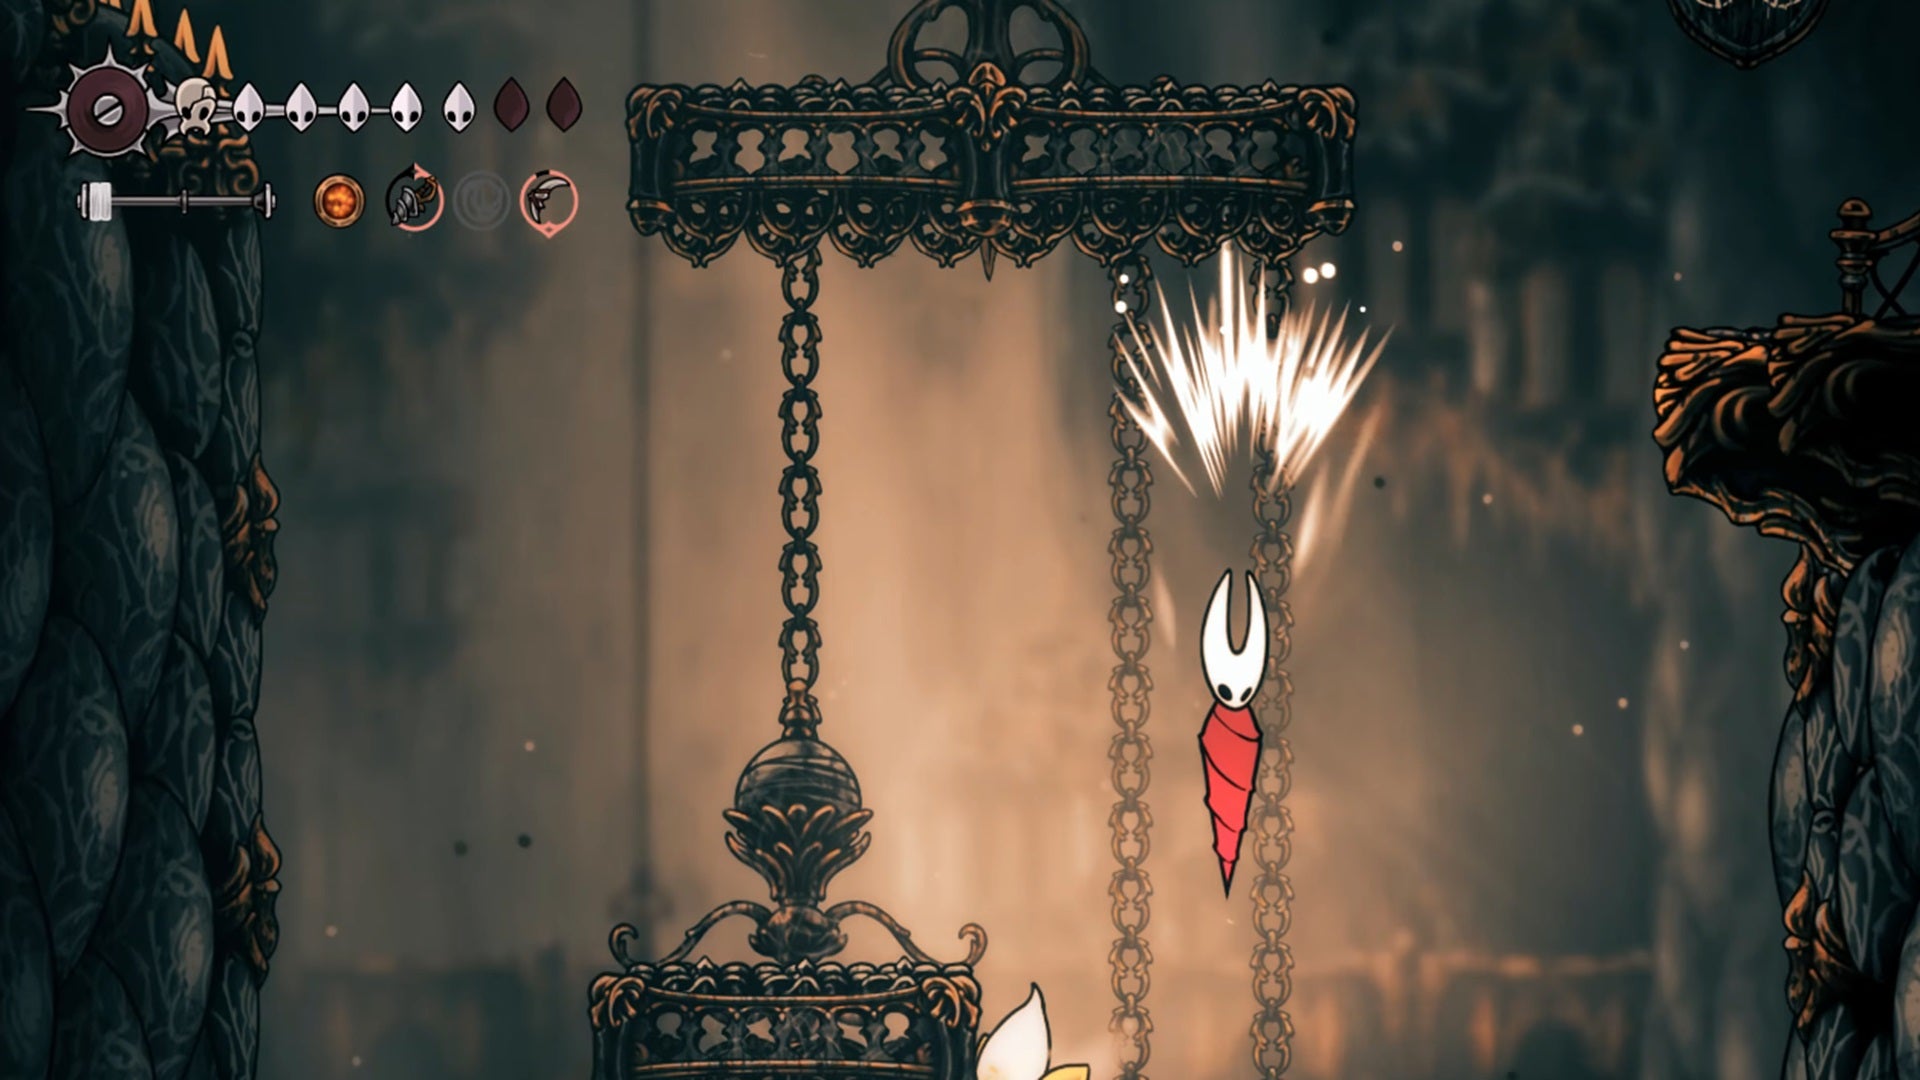
Enemies better watch out below; Hornet’s in drill mode. |Image credit:Rock Paper Shotgun/Team Cherry
As long as you’re above the enemy, the Delver’s Drill is one of the best burst damage weapons in Silksong. Even more so when you’ve upgraded your Tool pouch. When used, the Delver ’s Drill shoots Hornet down at high speed and drills into enemies up to five times when it makes contact. It’s more than capable of defeating most trash mobs in a single use, and can make tanky bosses a bit less laborious to defeat.
Silkshot

Ahh, a gun. The most excellent Tool there is. |Image credit:Rock Paper Shotgun/Team Cherry
The Silkshot you get by visiting the shop near the top of Mount Fay is a literal railgun. It fires a laser beam that instantly reaches its maximum range, ignores enemy armour, and pierces through multiple foes. You will also briefly hang in the air when firing, meaning you can use it as a platforming tool in addition to its high damage capabilities. It’s also on this list thanks to its incredible cool factor, as there’s nothing else like it in Silksong.
Flintslate
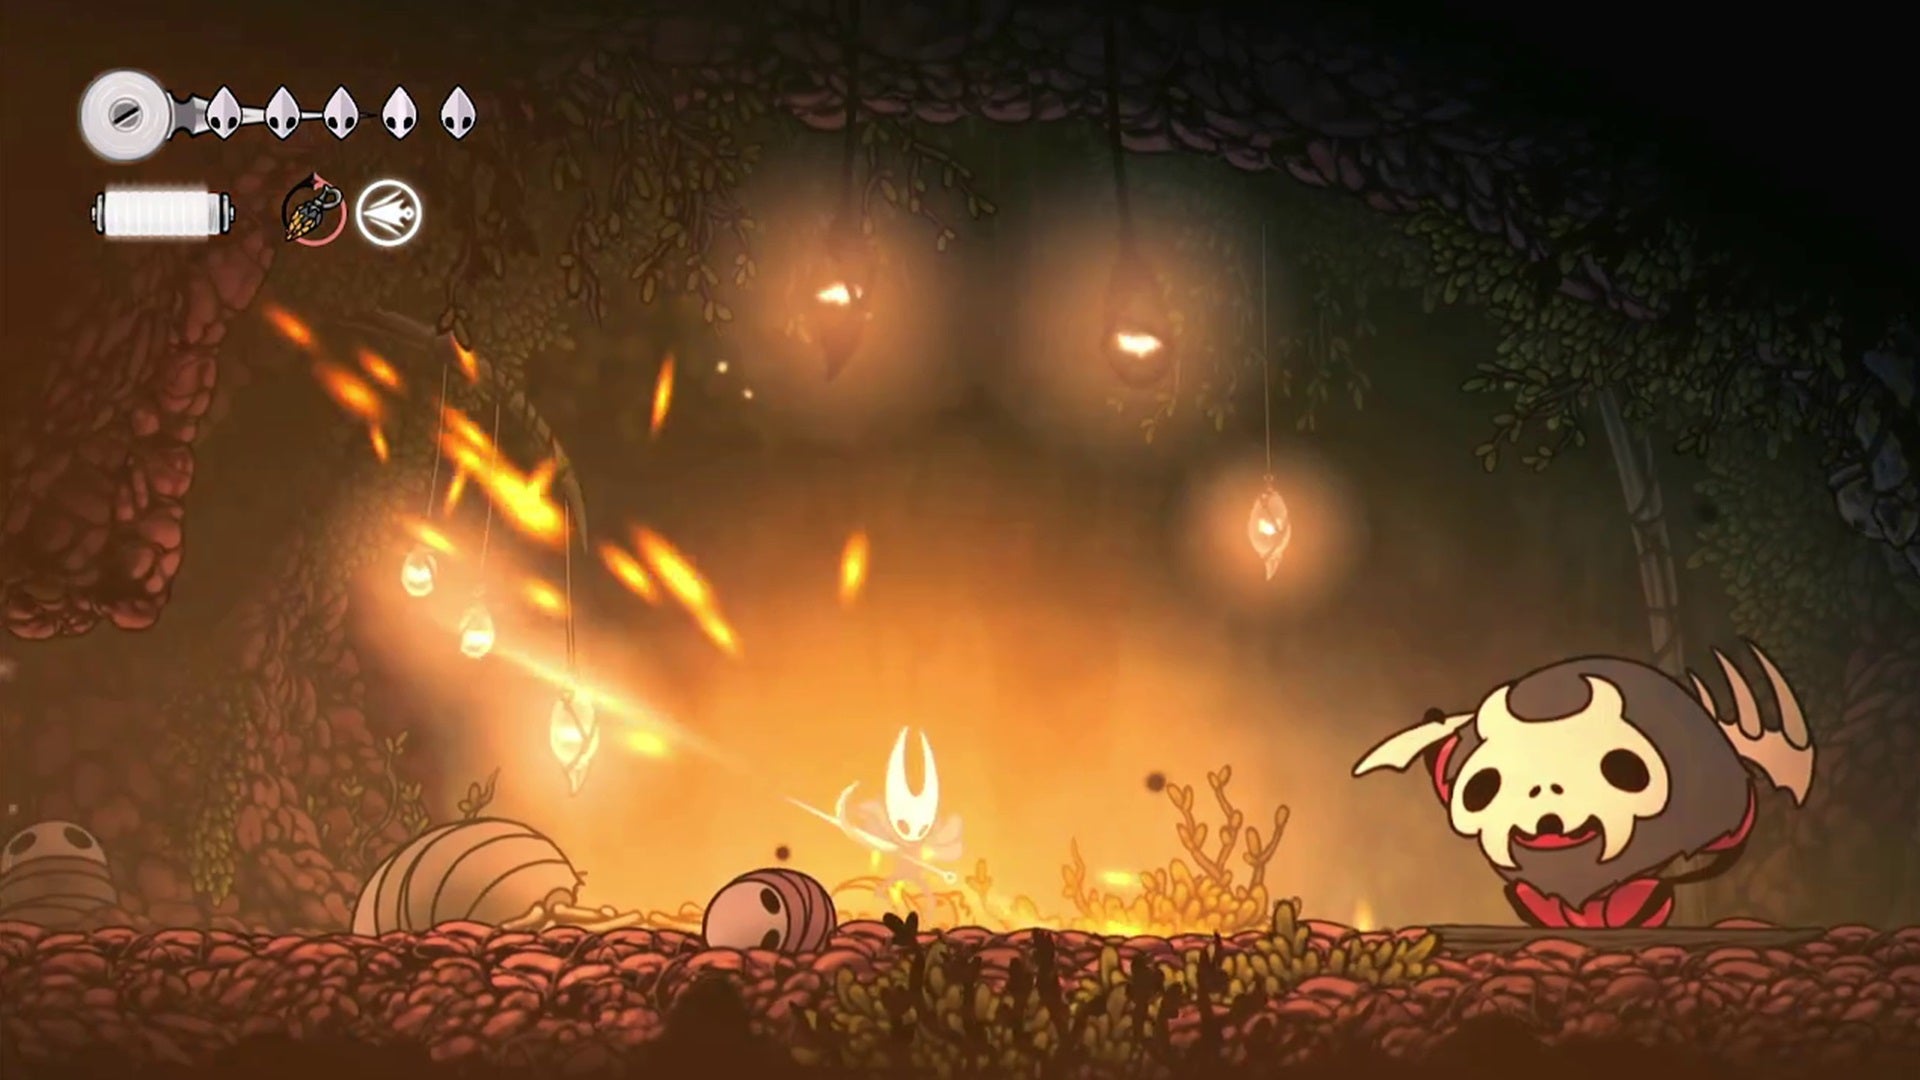
Light those ants on fire with the Flintslate. |Image credit:IGN/Team Cherry
Simple Tools are often the best, and the Flintslate is another excellent example of that concept. Using it “superheats” your Needle, increasing its damage output by a full 50% for a brief duration. Like Binding and the Silkshot, you’ll hang if you use the Flintslate midair, which can be useful if you would have otherwise collided with an enemy on your descent.
The best Blue Tools
Blue Tools provide passive buffs and bonuses when equipped, and can also change or improve how you use Silk, particularly the damage and effects of your Silk Skills. There are no drawbacks to speak of. The only downside is that there are no Crests in the game that have more than three Blue slots, so you can never equip all the best Blue Tools at the same time.
Injector Band
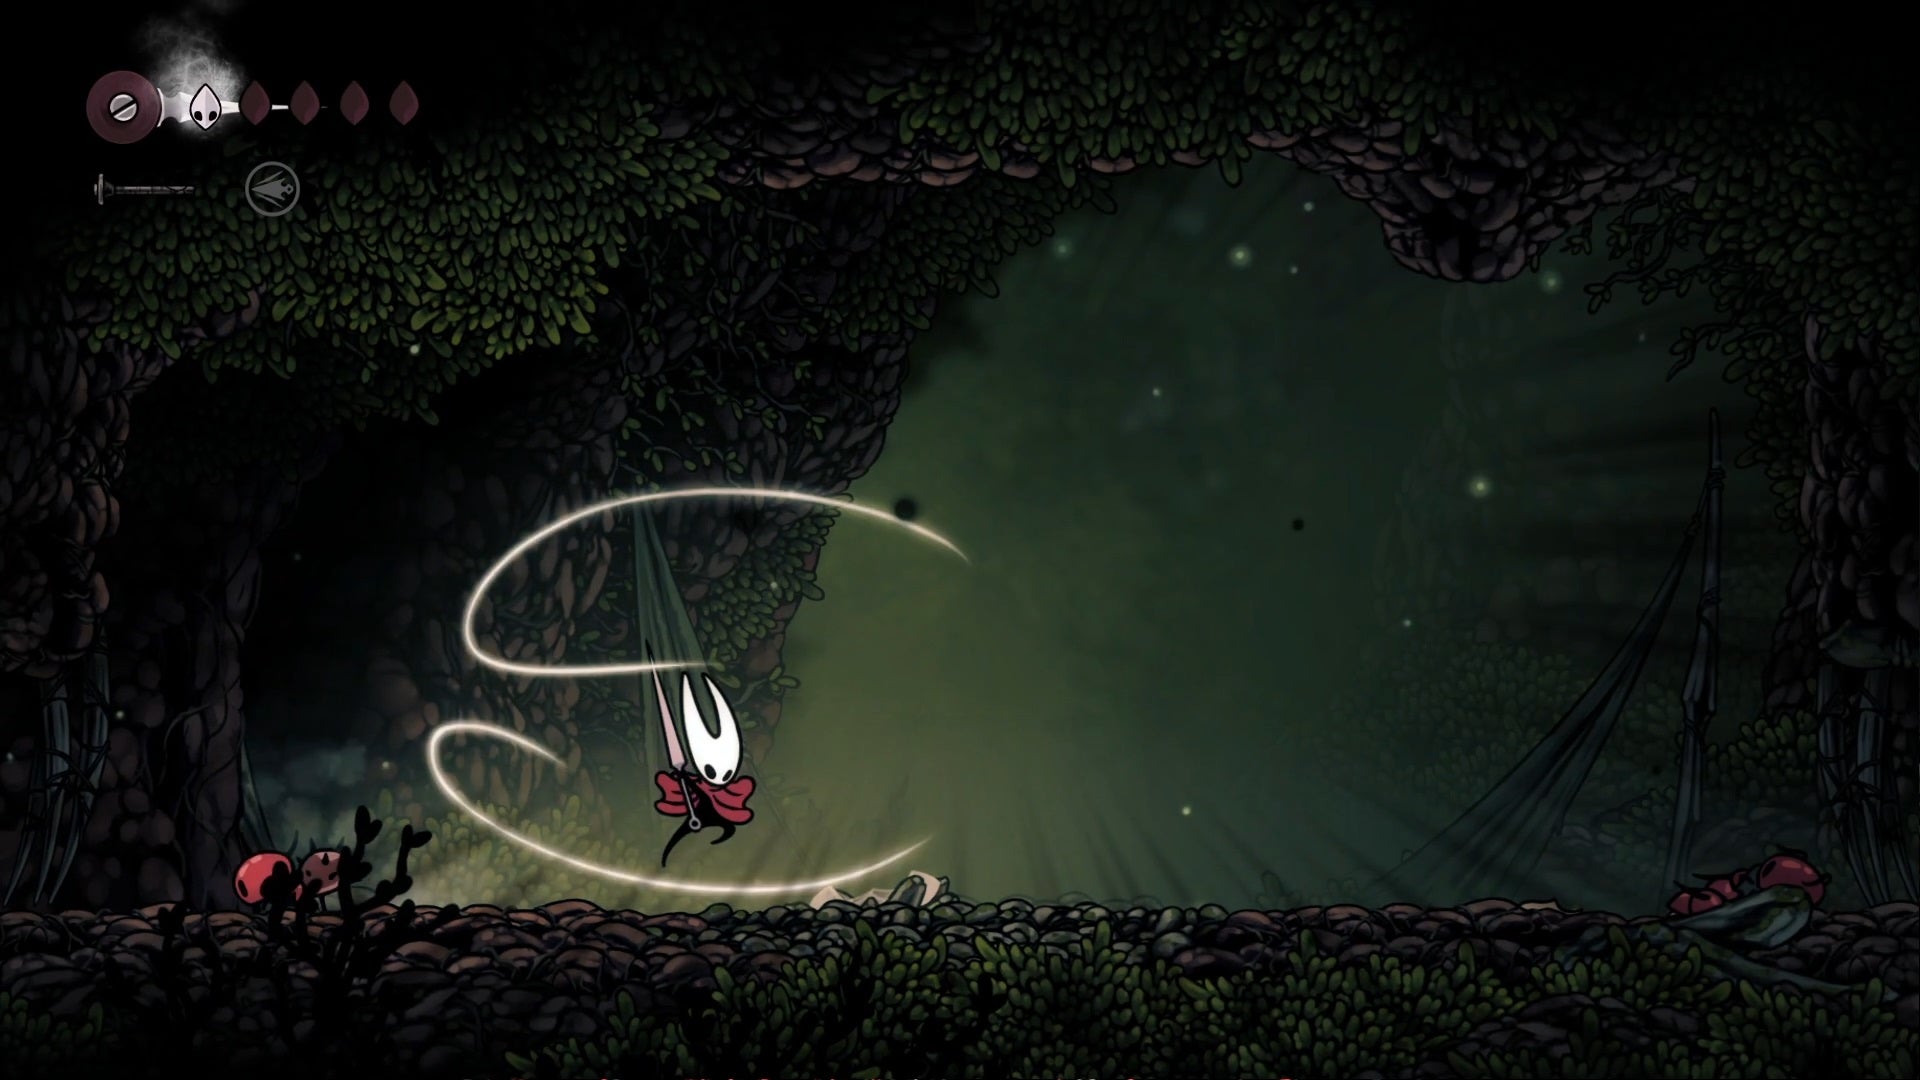
If you’re tired of Binding taking forever, the Injector Band is the Tool for you. |Image credit:Rock Paper Shotgun/Team Cherry
Speed is almost as important as precision in Silksong, and the Injector Band’s effect is as simple as it is useful. With the Injector Band equipped, Binding to heal takes less time. This increased speed can and will save you from wasting Silk by getting hit while Binding, which is bound to happen at least a few times during a playthrough.
Multibinder
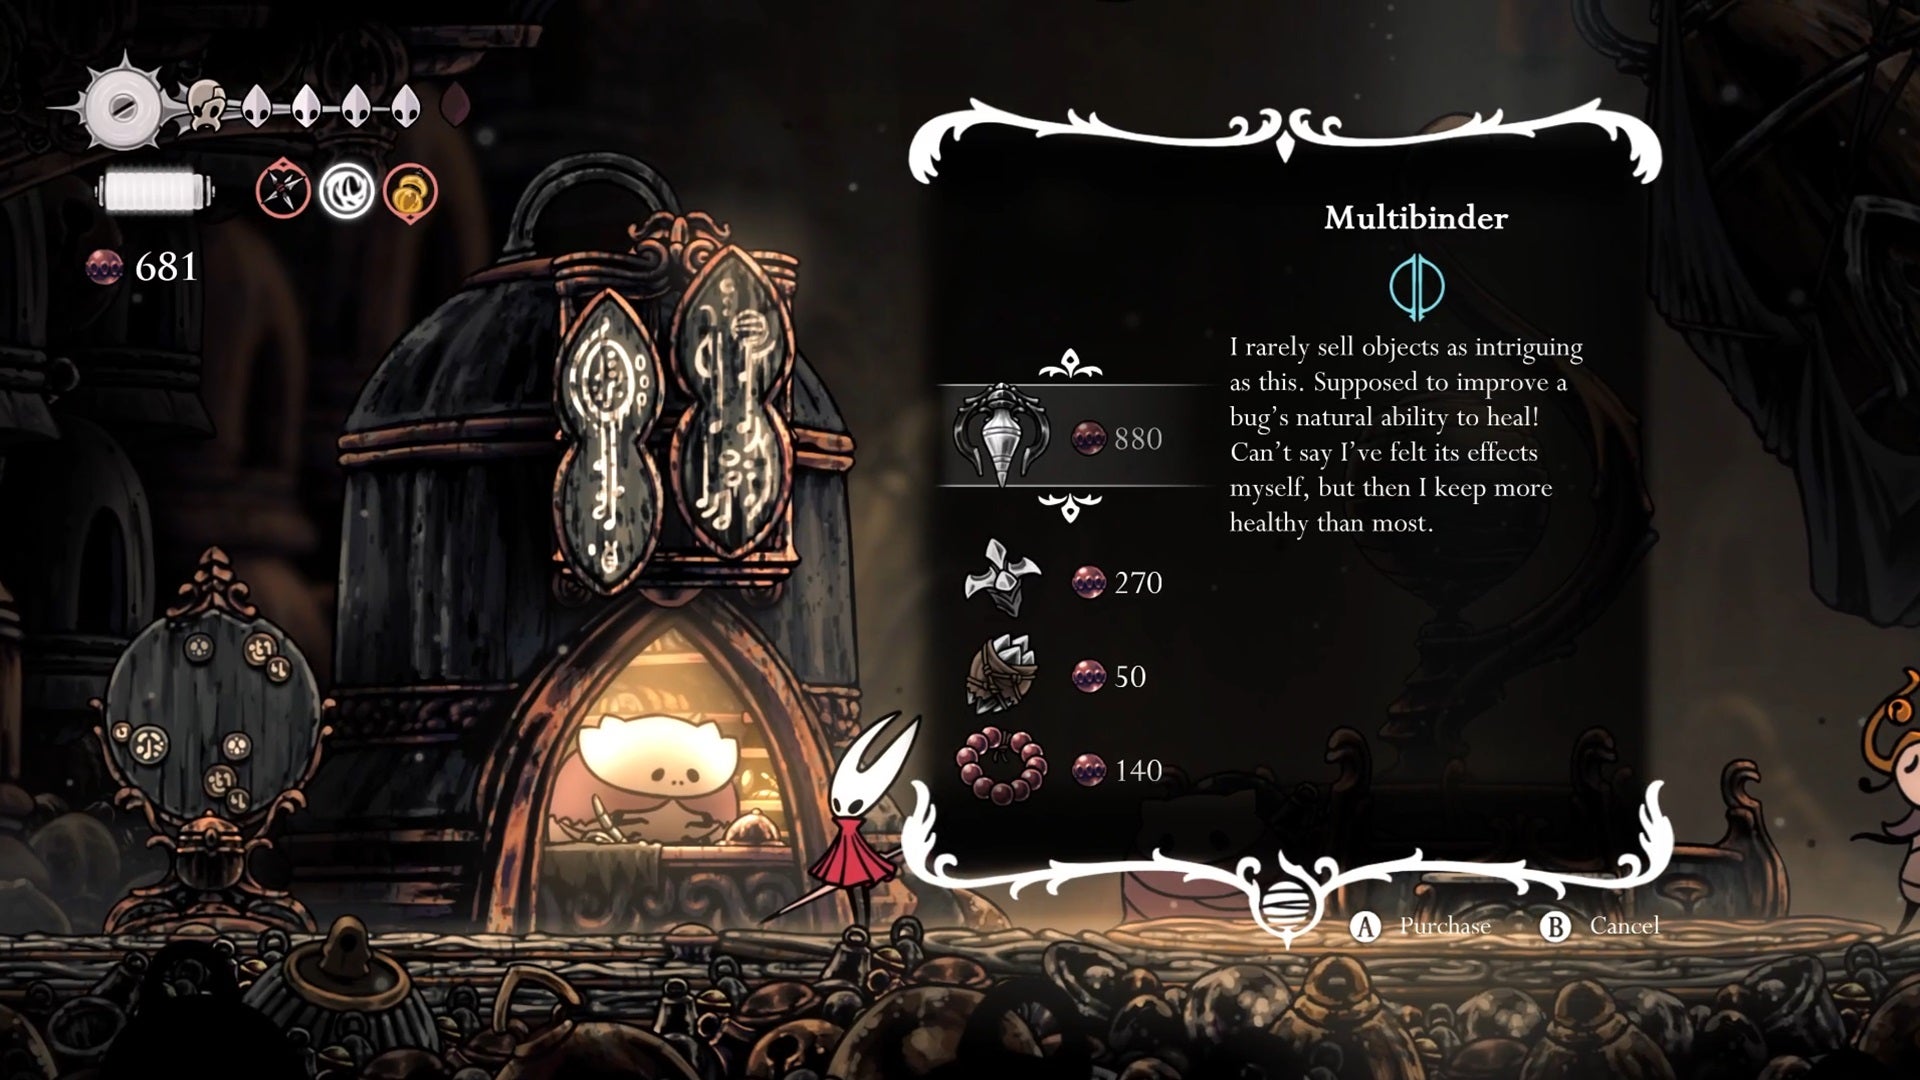
The health benefits of purchasing the Multibinder are supremely handy, though whether they’re worth the extra time it takes to heal is your call. |Image credit:IGN/Team Cherry
Multibinder is more complex than some of the other Tools on this list, as its effects take a bit more time to occur. The item splits your Binding heal animation into two parts, each Bind healing two Masks of health. That makes four health restored in total. Binding does, however, take almost twice as long to compete. You can mitigate the increased use time by pairing Multibinder with the Injector Band, as their effects complement each other.
Volt Filament

Kill this big shocking thing in order to get Volt Filament for your arsenal. |Image credit:Rock Paper Shotgun/Team Cherry
Lightning is always a fun way to increase your damage output, and the Volt Filament adds a pink lightning effect that drastically improves the damage of all Silk Skills. It also applies a brief damage-over-time effect that deals minor damage, but every bit is valuable, especially as you reach the later game and enemies boast larger and larger health pools.
Claw Mirrors
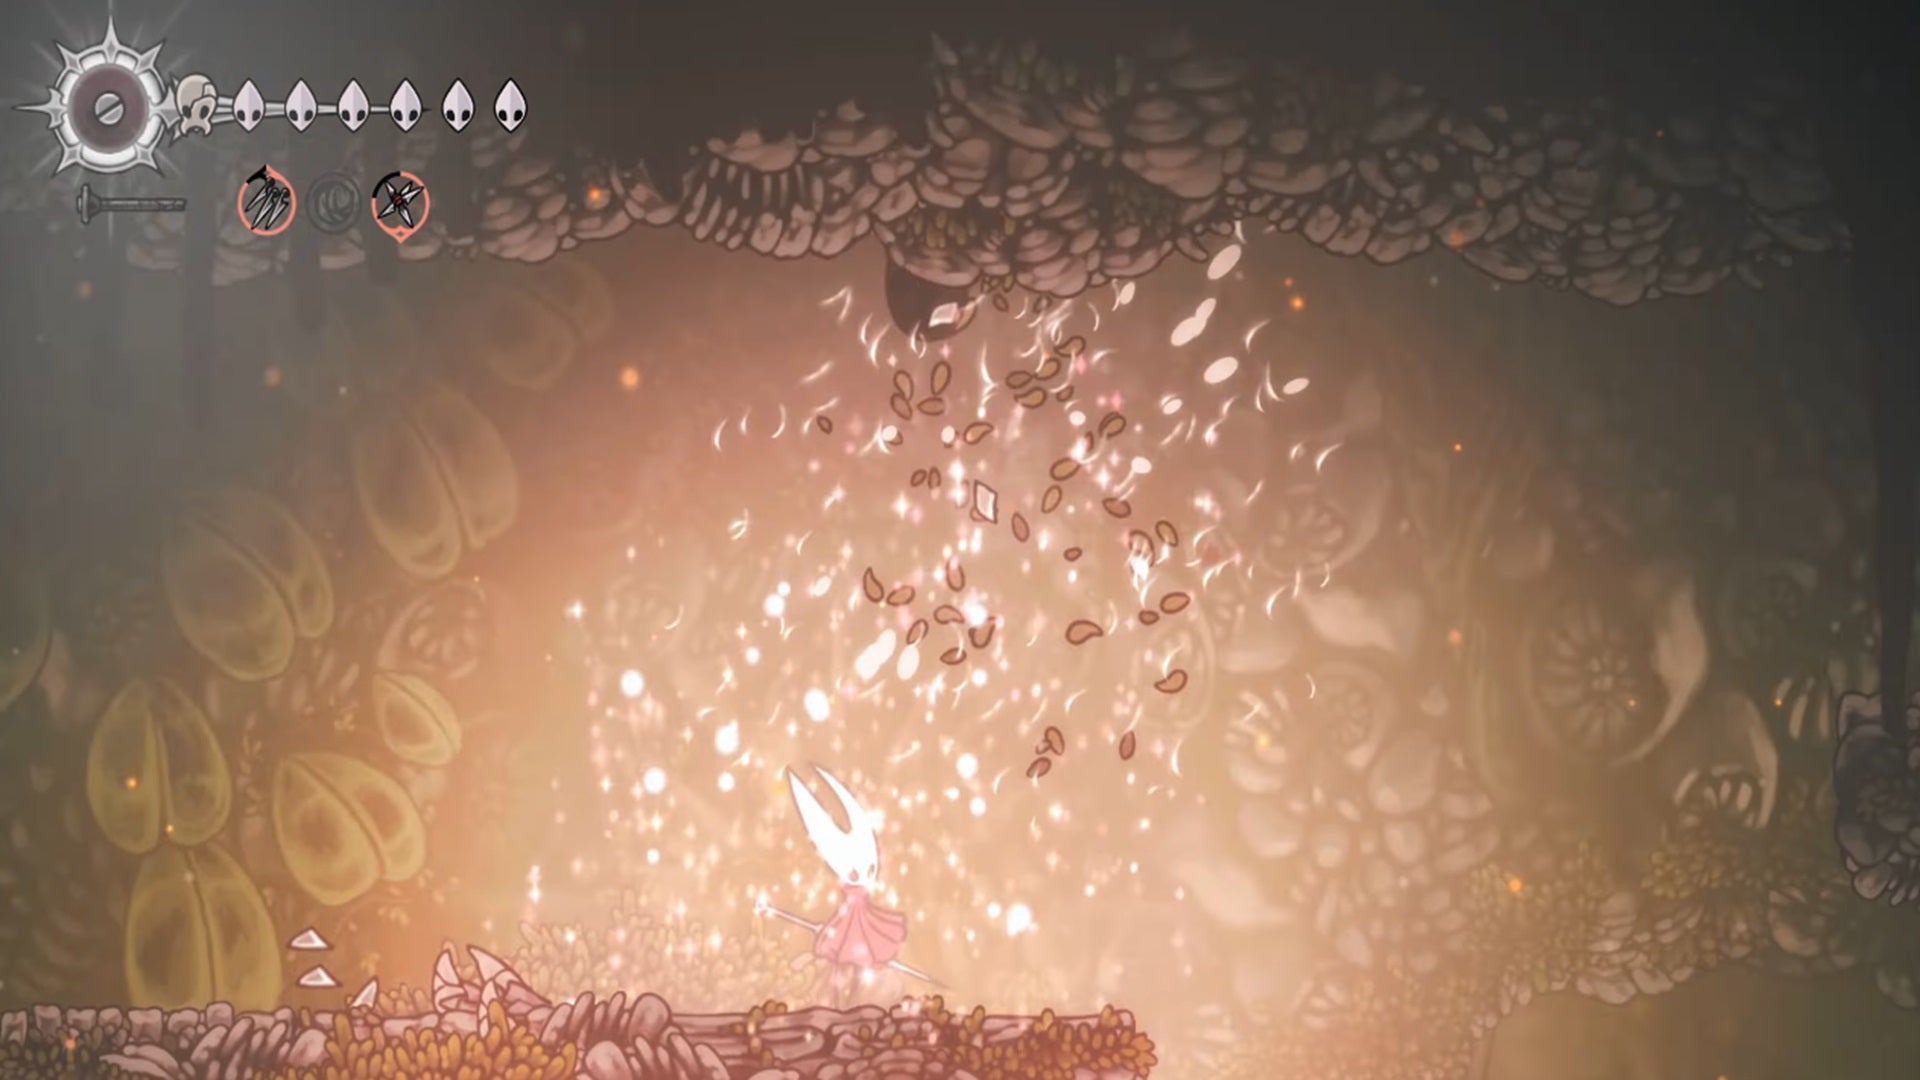
The sparkles that result from using the Claw Mirror are both blinding and good AoE damage against nearby foes. |Image credit:Rock Paper Shotgun/Team Cherry
The Claw Mirror , and the dual Claw Mirrors , are another Binding-centric Tool. When you Bind to heal, both versions of the Tool cause a sparkling explosion around Hornet that damages nearby enemies. This damaging burst works together with the Multibinder. When equipped together, the Mirror causes two explosions in quick succession. If you have the Warding Bell equipped, that Tool’s damage mitigation effect causes the Mirror explosion to be much larger.
Longclaw

Complete the Broodfeast quest for the Huntress, and the gift of the Longclaw is yours. |Image credit:IGN/Team Cherry
There are few worse feelings in Silksong than watching an attack come up just short of hitting, especially during a tense boss fight. The Longclaw Tool helps solve that problem by extending the range of your Needle, no matter which Crest you have equipped.
This extra range is especially appreciated on shorter Crest attacks like those from the Wanderer Crest, but even the longer ones, like those from the active Beast Crest, receive the bonus, too. That extra room gives you leeway to keep some of the most difficult bosses at arm’s length while still doing damage.
The best Yellow Tools
Yellow Tools are a sort of catch-all category, as some provide buffs and bonuses, while others offer quality-of-life features that make exploring the world a bit more enjoyable. A select few have more powerful effects that can turn the tide of a battle.
Compass
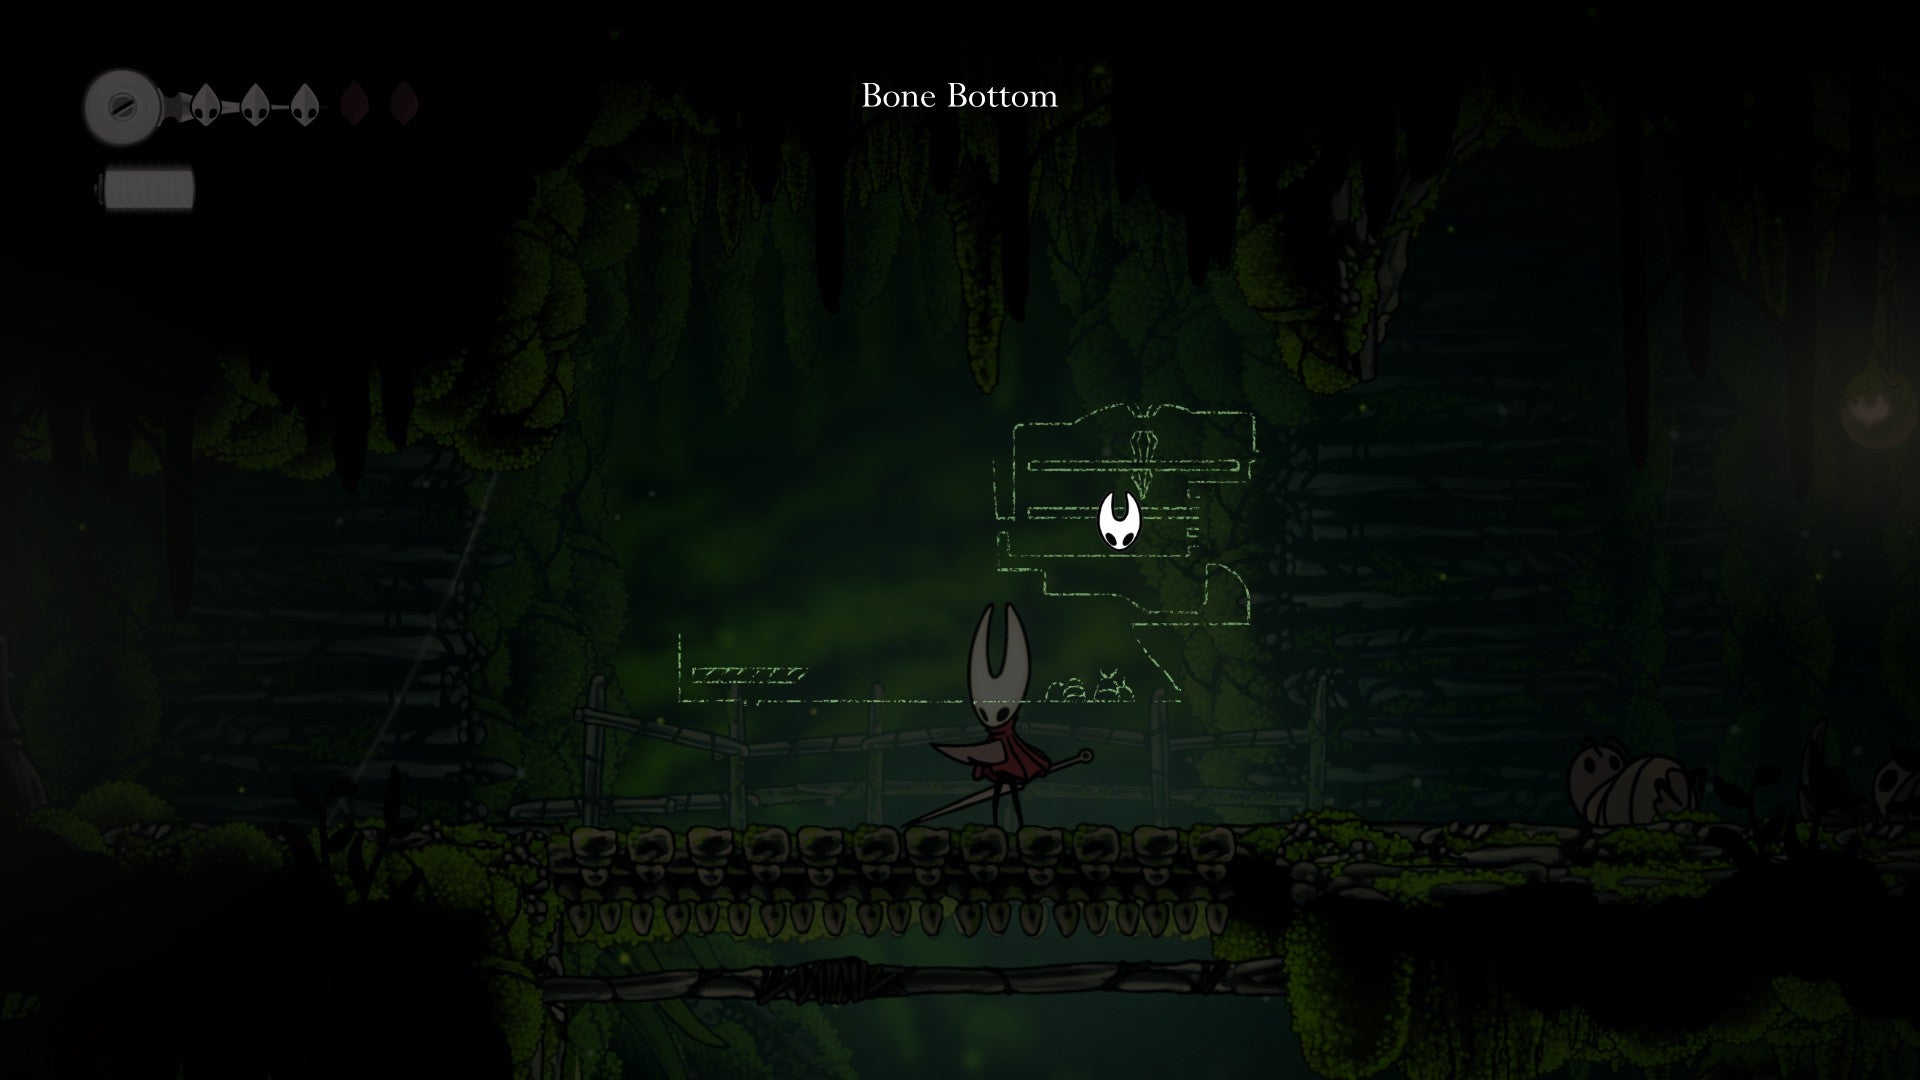
This map might be incomplete, but at least Hornet can tell where she’s going thanks to the Compass marker. |Image credit:Rock Paper Shotgun/Team Cherry
The Compass shows Hornet’s current location on the map (provided you have the area map unlocked), and her icon moves with her as she explores with the map open. It’s entirely possible to keep track of where you are in Pharloom without a Compass, but having one will save you a few seconds every time you’d otherwise need to guesstimate where you’re at.
Weighted Belt

The Weighted Belt - it’s key to maintaining your poise! |Image credit:Rock Paper Shotgun/Team Cherry
Getting knocked around by enemy attacks can be incredibly frustrating, especially if you get pushed into a hazard and lose at least two masks for the price of a single hit. With the Weighted Belt , Hornet can withstand hits more efficiently, and while there will still be a bit of knockback, it’s heavily reduced. You’ll be able to stand your ground or continue your offensive without needing to worry about bouncing all over the arena. After you get used to the effect, of course.
Magnetite Dice

Roll the dice against this fella to get a pair of Magnetite Dice for yourself. |Image credit:Rock Paper Shotgun/Team Cherry
With the Magnetite Dice equipped, Hornet receives a small chance to negate a single hit, making it cause no damage. You’ll still take the knockback and receive the momentary invincibility frames, so pairing these dice with the Weighted Belt isn’t a terrible idea. As you’re literally rolling the dice on whether you’ll block an attack, you shouldn’t rely on this Tool, but if luck is on your side, it will save what would otherwise be a lost fight.
Ascendant’s Grip

Stay sticky on the walls with the Ascendant’s Grip, which can be a lifesaver in many situations. |Image credit:Rock Paper Shotgun/Team Cherry
After getting the Cling Grip ability, the Ascendant’s Grip Tool allows you to stick to walls without sliding down. This lets you consider your next jump with a little more care. While this effect might not sound like a lot on paper, trust that once you’ve used it even a few times, it can make some of the trickier platforming sections in Silksong much less frustrating.
Those are our picks for the best Tools you can equip in Hollow Knight Silksong. You’ll likely want to have all of them in time for the Sea of Sorrows DLC , and they can also come in super handy during Steel Soul mode , if you’ve the stomach for it. Knowing where to find them as early as possible will also make challenging the game’s 48 bosses less of a mountain to climb.


Hollow Knight: Silksong
PC , Nintendo Switch
Rock Paper Shotgun is better when you sign in
Sign in and join us on our journey to discover strange and compelling PC games.

All 75 Arc Raiders Blueprints and where to get them
These areas have the highest chance of giving you Blueprints

Image credit:Rock Paper Shotgun/Embark Studios

Looking for more Arc Raiders Blueprints? It’s a special day when you find a Blueprint, as they’re among the most valuable items in Arc Raiders. If you find a Blueprint that you haven’t already found, then you must make sure you hold onto it at all costs, because Blueprints are the key to one of the most important and powerful systems of meta-progression in the game.
This guide aims to be the very best guide on Blueprints you can find, starting with a primer on what exactly they are and how they work in Arc Raiders, before delving into exactly where to get Blueprints and the very best farming spots for you to take in your search.
We’ll also go over how to get Blueprints from other unlikely activities, such as destroying Surveyors and completing specific quests. And you’ll also find the full list of all 75 Blueprints in Arc Raiders on this page (including the newest Blueprints added with the Cold Snap update , such as the Deadline Blueprint and Firework Box Blueprint), giving you all the information you need to expand your own crafting repertoire.
In this guide:
- What are Blueprints in Arc Raiders?
- Full Blueprint list: All crafting recipes
- Where to find Blueprints in Arc Raiders Blueprints obtained from quests Blueprints obtained from Trials Best Blueprint farming locations

What are Blueprints in Arc Raiders?
Blueprints in Arc Raiders are special items which, if you manage to extract with them, you can expend to permanently unlock a new crafting recipe in your Workshop. If you manage to extract from a raid with an Anvil Blueprint, for example, you can unlock the ability to craft your very own Anvil Pistol, as many times as you like (as long as you have the crafting materials).
To use a Blueprint, simply open your Inventory while in the lobby, then right-click on the Blueprint and click “Learn And Consume” . This will permanently unlock the recipe for that item in your Workshop. As of the Stella Montis update, there are allegedly 75 different Blueprints to unlock - although only 68 are confirmed to be in the game so far. You can see all the Blueprints you’ve found and unlocked by going to the Workshop menu, and hitting “R” to bring up the Blueprint screen.
It’s possible to find duplicates of past Blueprints you’ve already unlocked. If you find these, then you can either sell them, or - if you like to play with friends - you can take it into a match and gift it to your friend so they can unlock that recipe for themselves. Another option is to keep hold of them until the time comes to donate them to the Expedition.
Full Blueprint list: All crafting recipes
Below is the full list of all the Blueprints that are currently available to find in Arc Raiders, and the crafting recipe required for each item:
| Blueprint | Type | Recipe | Crafted At |
|---|---|---|---|
| Bettina | Weapon | 3x Advanced Mechanical Components 3x Heavy Gun Parts 3x Canister | Gunsmith 3 |
| Blue Light Stick | Quick Use | 3x Chemicals | Utility Station 1 |
| Aphelion | Weapon | 3x Magnetic Accelerator 3x Complex Gun Parts 1x Matriarch Reactor | Gunsmith 3 |
| Combat Mk. 3 (Flanking) | Augment | 2x Advanced Electrical Components 3x Processor | Gear Bench 3 |
| Combat Mk. 3 (Aggressive) | Augment | 2x Advanced Electrical Components 3x Processor | Gear Bench 3 |
| Complex Gun Parts | Material | 2x Light Gun Parts 2x Medium Gun Parts 2x Heavy Gun Parts | Refiner 3 |
| Fireworks Box | Quick Use | 1x Explosive Compound 3x Pop Trigger | Explosives Station 2 |
| Gas Mine | Mine | 4x Chemicals 2x Rubber Parts | Explosives Station 1 |
| Green Light Stick | Quick Use | 3x Chemicals | Utility Station 1 |
| Pulse Mine | Mine | 1x Crude Explosives 1x Wires | Explosives Station 1 |
| Seeker Grenade | Grenade | 1x Crude Explosives 2x ARC Alloy | Explosives Station 1 |
| Looting Mk. 3 (Survivor) | Augment | 2x Advanced Electrical Components 3x Processor | Gear Bench 3 |
| Angled Grip II | Mod | 2x Mechanical Components 3x Duct Tape | Gunsmith 2 |
| Angled Grip III | Mod | 2x Mod Components 5x Duct Tape | Gunsmith 3 |
| Hullcracker | Weapon | 1x Magnetic Accelerator 3x Heavy Gun Parts 1x Exodus Modules | Gunsmith 3 |
| Launcher Ammo | Ammo | 5x Metal Parts 1x Crude Explosives | Workbench 1 |
| Anvil | Weapon | 5x Mechanical Components 5x Simple Gun Parts | Gunsmith 2 |
| Anvil Splitter | Mod | 2x Mod Components 3x Processor | Gunsmith 3 |
| ??? | ??? | ??? | ??? |
| Barricade Kit | Quick Use | 1x Mechanical Components | Utility Station 2 |
| Blaze Grenade | Grenade | 1x Explosive Compound 2x Oil | Explosives Station 3 |
| Bobcat | Weapon | 3x Advanced Mechanical Components 3x Light Gun Parts | Gunsmith 3 |
| Osprey | Weapon | 2x Advanced Mechanical Components 3x Medium Gun Parts 7x Wires | Gunsmith 3 |
| Burletta | Weapon | 3x Mechanical Components 3x Simple Gun Parts | Gunsmith 1 |
| Compensator II | Mod | 2x Mechanical Components 4x Wires | Gunsmith 2 |
| Compensator III | Mod | 2x Mod Components 8x Wires | Gunsmith 3 |
| Defibrillator | Quick Use | 9x Plastic Parts 1x Moss | Medical Lab 2 |
| ??? | ??? | ??? | ??? |
| Equalizer | Weapon | 3x Magnetic Accelerator 3x Complex Gun Parts 1x Queen Reactor | Gunsmith 3 |
| Extended Barrel | Mod | 2x Mod Components 8x Wires | Gunsmith 3 |
| Extended Light Mag II | Mod | 2x Mechanical Components 3x Steel Spring | Gunsmith 2 |
| Extended Light Mag III | Mod | 2x Mod Components 5x Steel Spring | Gunsmith 3 |
| Extended Medium Mag II | Mod | 2x Mechanical Components 3x Steel Spring | Gunsmith 2 |
| Extended Medium Mag III | Mod | 2x Mod Components 5x Steel Spring | Gunsmith 3 |
| Extended Shotgun Mag II | Mod | 2x Mechanical Components 3x Steel Spring | Gunsmith 2 |
| Extended Shotgun Mag III | Mod | 2x Mod Components 5x Steel Spring | Gunsmith 3 |
| Remote Raider Flare | Quick Use | 2x Chemicals 4x Rubber Parts | Utility Station 1 |
| Heavy Gun Parts | Material | 4x Simple Gun Parts | Refiner 2 |
| Venator | Weapon | 2x Advanced Mechanical Components 3x Medium Gun Parts 5x Magnet | Gunsmith 3 |
| Il Toro | Weapon | 5x Mechanical Components 6x Simple Gun Parts | Gunsmith 1 |
| Jolt Mine | Mine | 1x Electrical Components 1x Battery | Explosives Station 2 |
| Explosive Mine | Mine | 1x Explosive Compound 1x Sensors | Explosives Station 3 |
| Jupiter | Weapon | 3x Magnetic Accelerator 3x Complex Gun Parts 1x Queen Reactor | Gunsmith 3 |
| Light Gun Parts | Material | 4x Simple Gun Parts | Refiner 2 |
| Lightweight Stock | Mod | 2x Mod Components 5x Duct Tape | Gunsmith 3 |
| Lure Grenade | Grenade | 1x Speaker Component 1x Electrical Components | Utility Station 2 |
| Medium Gun Parts | Material | 4x Simple Gun Parts | Refiner 2 |
| Torrente | Weapon | 2x Advanced Mechanical Components 3x Medium Gun Parts 6x Steel Spring | Gunsmith 3 |
| Muzzle Brake II | Mod | 2x Mechanical Components 4x Wires | Gunsmith 2 |
| Muzzle Brake III | Mod | 2x Mod Components 8x Wires | Gunsmith 3 |
| Padded Stock | Mod | 2x Mod Components 5x Duct Tape | Gunsmith 3 |
| Shotgun Choke II | Mod | 2x Mechanical Components 4x Wires | Gunsmith 2 |
| Shotgun Choke III | Mod | 2x Mod Components 8x Wires | Gunsmith 3 |
| Shotgun Silencer | Mod | 2x Mod Components 8x Wires | Gunsmith 3 |
| Showstopper | Grenade | 1x Advanced Electrical Components 1x Voltage Converter | Explosives Station 3 |
| Silencer I | Mod | 2x Mechanical Components 4x Wires | Gunsmith 2 |
| Silencer II | Mod | 2x Mod Components 8x Wires | Gunsmith 3 |
| Snap Hook | Quick Use | 2x Power Rod 3x Rope 1x Exodus Modules | Utility Station 3 |
| Stable Stock II | Mod | 2x Mechanical Components 3x Duct Tape | Gunsmith 2 |
| Stable Stock III | Mod | 2x Mod Components 5x Duct Tape | Gunsmith 3 |
| Tagging Grenade | Grenade | 1x Electrical Components 1x Sensors | Utility Station 3 |
| Tempest | Weapon | 3x Advanced Mechanical Components 3x Medium Gun Parts 3x Canister | Gunsmith 3 |
| Trigger Nade | Grenade | 2x Crude Explosives 1x Processor | Explosives Station 2 |
| Vertical Grip II | Mod | 2x Mechanical Components 3x Duct Tape | Gunsmith 2 |
| Vertical Grip III | Mod | 2x Mod Components 5x Duct Tape | Gunsmith 3 |
| Vita Shot | Quick Use | 2x Antiseptic 1x Syringe | Medical Lab 3 |
| Vita Spray | Quick Use | 3x Antiseptic 1x Canister | Medical Lab 3 |
| Vulcano | Weapon | 1x Magnetic Accelerator 3x Heavy Gun Parts 1x Exodus Modules | Gunsmith 3 |
| Wolfpack | Grenade | 2x Explosive Compound 2x Sensors | Explosives Station 3 |
| Red Light Stick | Quick Use | 3x Chemicals | Utility Station 1 |
| Smoke Grenade | Grenade | 14x Chemicals 1x Canister | Utility Station 2 |
| Deadline | Mine | 3x Explosive Compound 2x ARC Circuitry | Explosives Station 3 |
| Trailblazer | Grenade | 1x Explosive Compound 1x Synthesized Fuel | Explosives Station 3 |
| Tactical Mk. 3 (Defensive) | Augment | 2x Advanced Electrical Components 3x Processor | Gear Bench 3 |
| Tactical Mk. 3 (Healing) | Augment | 2x Advanced Electrical Components 3x Processor | Gear Bench 3 |
| Yellow Light Stick | Quick Use | 3x Chemicals | Utility Station 1 |
Note: The missing Blueprints in this list likely have not actually been added to the game at the time of writing, because none of the playerbase has managed to find any of them. As they are added to the game, I will update this page with the most relevant information so you know exactly how to get all 75 Arc Raiders Blueprints.
Where to find Blueprints in Arc Raiders
Below is a list of all containers, modifiers, and events which maximise your chances of finding Blueprints:
- Certain quests reward you with specific Blueprints .
- Completing Trials has a high chance of offering Blueprints as rewards.
- Surveyors have a decent chance of dropping Blueprints on death.
- High loot value areas tend to have a greater chance of spawning Blueprints.
- Night Raids and Storms may increase rare Blueprint spawn chances in containers.
- Containers with higher numbers of items may have a higher tendency to spawn Blueprints. As a result, Blue Gate (which has many “large” containers containing multiple items) may give you a higher chance of spawning Blueprints.
- Raider containers (Raider Caches, Weapon Boxes, Medical Bags, Grenade Tubes) have increased Blueprint drop rates. As a result, the Uncovered Caches event gives you a high chance of finding Blueprints.
- Security Lockers have a higher than average chance of containing Blueprints.
- Certain Blueprints only seem to spawn under specific circumstances: Tempest Blueprint only spawns during Night Raid events. Vulcano Blueprint only spawns during Hidden Bunker events. Jupiter and Equaliser Blueprints only spawn during Harvester events.

Raider Caches, Weapon Boxes, and other raider-oriented container types have a good chance of offering Blueprints. |Image credit:Rock Paper Shotgun/Embark Studios
Blueprints have a very low chance of spawning in any container in Arc Raiders, around 1-2% on average. However, there is a higher chance of finding Blueprints in particular container types. Specifically, you can find more Blueprints in Raider containers and security lockers.
Beyond this, if you’re looking for Blueprints you should focus on regions of the map which are marked as having particularly high-value loot. Areas such as the Control Tower in Dam Battlegrounds, the Arrival and Departure Buildings in Spaceport, and Pilgrim’s Peak in Blue Gate all have a better-than-average chance of spawning Blueprints somewhere amongst all their containers. Night Raids and Electromagnetic Storm events also increase the drop chances of certain Blueprints .
In addition to these containers, you can often loot Blueprints from destroyed Surveyors - the largest of the rolling ball ARC. Surveyors are more commonly found on the later maps - Spaceport and Blue Gate - and if one spawns in your match, you’ll likely see it by the blue laser beam that it casts into the sky while “surveying”.
Surveyors are quite well-armoured and will very speedily run away from you once it notices you, but if you can take one down then make sure you loot all its parts for a chance of obtaining certain unusual Blueprints.
Blueprints obtained from quests
One way in which you can get Blueprints is by completing certain quests for the vendors in Speranza. Some quests will reward you with a specific item Blueprint upon completion, so as long as you work through all the quests in Arc Raiders, you are guaranteed those Blueprints.
Here is the full list of all Blueprints you can get from quest rewards:
- Trigger Nade Blueprint: Rewarded after completing “Sparks Fly”.
- Lure Grenade Blueprint: Rewarded after completing “Greasing Her Palms”.
- Burletta Blueprint: Rewarded after completing “Industrial Espionage”.
- Hullcracker Blueprint (and Launcher Ammo Blueprint): Rewarded after completing “The Major’s Footlocker”.
Alas, that’s only 4 Blueprints out of a total of 75 to unlock, so for the vast majority you will need to find them yourself during a raid. If you’re intent on farming Blueprints, then it’s best to equip yourself with cheap gear in case you lose it, but don’t use a free loadout because then you won’t get a safe pocket to stash any new Blueprint you find. No pain in Arc Raiders is sharper than failing to extract with a new Blueprint you’ve been after for a dozen hours already.

One of the best ways to get Blueprints is by hitting three stars on all five Trials every week. |Image credit:Rock Paper Shotgun/Embark Studios
Blueprints obtained from Trials
One of the very best ways to get Blueprints is as rewards for completing Trials in Arc Raiders. Trials are unlocked from Level 15 onwards, and allow you to earn rewards by focusing on certain tasks over the course of several raids. For example, one Trial might task you with dealing damage to Hornets, while another might challenge you to loot Supply Drops.
Trials refresh on a weekly basis, with a new week bringing five new Trials. Each Trial can offer up to three rewards after passing certain score milestones, and it’s possible to receive very high level loot from these reward crates - including Blueprints. So if you want to unlock as many Blueprints as possible, you should make a point of completing as many Trials as possible each week.
Best Blueprint farming locations
The very best way to get Blueprints is to frequent specific areas of the maps which combine high-tier loot pools with the right types of containers to search. Here are my recommendations for where to find Blueprints on every map, so you can always keep the search going for new crafting recipes to unlock.

Image credit:Rock Paper Shotgun/Embark Studios
Dam Battlegrounds
The best places to farm Blueprints on Dam Battlegrounds are the Control Tower, Power Generation Complex, Ruby Residence, and Pale Apartments . The first two regions, despite only being marked on the map as mid-tier loot, contain a phenomenal number of containers to loot. The Control Tower can also contain a couple of high-tier Security Lockers - though of course, you’ll need to have unlocked the Security Breach skill at the end of the Survival tree.
There’s also a lot of reporting amongst the playerbase that the Residential areas in the top-left of the map - Pale Apartments and Ruby Residence - give you a comparatively strong chance of finding Blueprints. Considering their size, there’s a high density of containers to loot in both locations, and they also have the benefit of being fairly out of the way. So you’re more likely to have all the containers to yourself.
Buried City
The best Blueprint farming locations on Buried City are the Santa Maria Houses, Grandioso Apartments, Town Hall, and the various buildings of the New District . Grandioso Apartments has a lower number of containers than the rest, but a high chance of spawning weapon cases - which have good Blueprint drop rates. The others are high-tier loot areas, with plenty of lootable containers - including Security Lockers.
Spaceport
The best places to find Blueprints on Spaceport are the Arrival and Departure Buildings, as well as Control Tower A6 and the Launch Towers . All these areas are labelled as high-value loot regions, and many of them are also very handily connected to one another by the Spaceport wall, which you can use to quickly run from one area to the next. At the tops of most of these buildings you’ll find at least one Security Locker, so this is an excellent farming route for players looking to find Blueprints.
The downside to looting Blueprints on Spaceport is that all these areas are hotly contested, particularly in Duos and Squads. You’ll need to be very focused and fast in order to complete the full farming route.

Image credit:Rock Paper Shotgun/Embark Studios
Blue Gate
Blue Gate tends to have a good chance of dropping Blueprints, potentially because it generally has a high number of containers which can hold lots of items; so there’s a higher chance of a Blueprint spawning in each container. In my experience, the best Blueprint farming spots on Blue Gate are Pilgrim’s Peak, Raider’s Refuge, the Ancient Fort, and the Underground Complex beneath the Warehouse .
All of these areas contain a wealth of containers to loot. Raider’s Refuge has less to loot, but the majority of the containers in and around the Refuge are raider containers, which have a high chance of containing Blueprints - particularly during major events.
Stella Montis
On the whole, Stella Montis seems to have a very low drop rate for Blueprints (though a high chance of dropping other high-tier loot). If you do want to try farming Blueprints on this map, the best places to find Blueprints in Stella Montis are Medical Research, Assembly Workshop, and the Business Center . These areas have the highest density of containers to loot on the map.
In addition to this, the Western Tunnel has a few different Security Lockers to loot, so while there’s very little to loot elsewhere in this area of the map, it’s worth hitting those Security Lockers if you spawn there at the start of a match.
That wraps up this primer on how to get all the Blueprints in Arc Raiders as quickly as possible. With the Expedition system constantly resetting a large number of players’ Blueprints, it’s more important than ever to have the most up-to-date information on where to find all these Blueprints.
While you’re here, be sure to check out our Arc Raiders best guns tier list , as well as our primers on the best skills to unlock and all the different Field Depot locations on every map.


ARC Raiders
PS5 , Xbox Series X/S , PC
Rock Paper Shotgun is better when you sign in
Sign in and join us on our journey to discover strange and compelling PC games.
