The best classes in Elden Ring
A look at all 10 Elden Ring origins, including the best starting class for beginners


Looking for the best class in Elden Ring? Whether you’re an experienced Elden Ring veteran starting a fresh playthrough before jumping into Shadow Of The Erdtree , or you’re a complete newbie, picking the starting origin for your character can be a daunting task.
With ten to choose from, all boosting different attributes , there are pros and cons to each class. If you’re not sure where to start, our Elden Ring best class guide is here to help. Below we’ve gone through the best origins for beginners, melee fighters, and magic-users. For thrill seekers looking for punishment, we’ve also highlighted classes that will pose the hardest challenge, and offered some additional thoughts on the strongest Elden Ring class, as well as what stats you should prioritise.

In this guide:
- All Elden Ring classes
- Best Elden Ring classes for beginners
- Best Elden Ring classes for melee
- Best Elden Ring classes for magic
- Hardest Elden Ring class for a challenge
- Strongest Elden Ring class
- Which stats should you prioritise in Elden Ring?
All Elden Ring classes
Each of the 10 origins in Elden Ring begins the game with a predefined set of attributes, stats, and starting items. Whichever class you choose will also determine your starting weapons , abilities, and armor . In the table below, we’ve listed all 10 Elden Ring classes and their starting stats to help compare them:
| Origin | Level | Vigor | Mind | Endurance | Strength | Dexterity | Intel. | Faith | Arcane |
|---|---|---|---|---|---|---|---|---|---|
| Astrologer | 6 | 9 | 15 | 9 | 8 | 12 | 16 | 7 | 9 |
| Bandit | 5 | 10 | 11 | 10 | 9 | 13 | 9 | 8 | 14 |
| Confessor | 10 | 10 | 13 | 10 | 12 | 12 | 9 | 14 | 9 |
| Hero | 7 | 14 | 9 | 12 | 16 | 9 | 7 | 8 | 11 |
| Prisoner | 6 | 11 | 12 | 11 | 8 | 14 | 14 | 6 | 9 |
| Prophet | 7 | 10 | 14 | 8 | 11 | 10 | 7 | 16 | 10 |
| Samurai | 9 | 12 | 11 | 13 | 12 | 15 | 9 | 8 | 8 |
| Vagabond | 9 | 15 | 10 | 11 | 14 | 13 | 9 | 9 | 7 |
| Warrior | 8 | 11 | 12 | 11 | 10 | 16 | 10 | 8 | 9 |
| Wretch | 1 | 10 | 10 | 10 | 10 | 10 | 10 | 10 | 10 |
These starting stats are fixed for each class, and points can’t be redistributed at all in character creation, though once you level up you can respec . At this point in the game all you can choose beyond your character’s origin is their appearance and the Keepsake they begin with. So while your choice of origin doesn’t set in stone how you have to play the game, it is worth considering carefully which you like the look of most.
To help you pick, we’ve put together a quick description of each class below, along with the role to which we’d most recommend each one.
Best Elden Ring classes for beginners
Whether you’re a seasoned player looking to perfect builds before digging into Shadow Of The Erdtree or you’re a complete novice, choosing your starting class can set you up nicely for a smooth playthrough. Of course, no one’s having an easy time of it in the Lands Between, but newbies who are just learning the ropes might appreciate starting with a sturdy, balanced character, such as those found in the classes below.
Confessor

Starting weaponry: Broadsword, Finger Seal Starting incantations: Assassin Approach, Urgent Heal
If it’s a balanced beginners’ class you’re after, you won’t do better than the Confessor. The Confessor has the highest starting level of any origin and begins the game with a decent shield, which is a valuable tool to have in hand if you’re not quite up to speed with FromSoft combat yet. The Confessor has access to magic and is quite proficient in hand-to-hand combat, so you won’t ever find yourself in a corner that you can’t (theoretically at least) extract yourself from. FromSoft themselves have described this origin as “jack-of-all-trades, master of none”, and this seems like a very fair assessment: you start with no particular specialisms, but no glaring gaps in your build either.
Warrior

Starting weaponry: Scimitar x2
The Warrior has the highest Dexterity stat of any class, so if (like me) you’re confident in your combat skills but less certain of your defensive abilities, this is a good origin to start with. Warriors enjoy decent stats in all other areas except for Faith and Arcane, which definitely constitute their blind spots. If you’re planning to do just a single playthrough of Elden Ring as a Warrior, then you do risk missing out on most of the game’s best magic abilities. But if you’re looking for a swift fighter who can dodge out of the way in most combats, then you should definitely consider giving the Warrior a go.
Hero

Starting weaponry: Battle Axe
The Hero has the highest Strength stat of any class. Personally, I never feel safer in a game than when I’m in control of a tank, and the Hero is the closest thing Elden Ring offers (though the Samurai isn’t a bad shout for this purpose either). The Hero comes ready to batter away at their enemies with less concern for avoiding blows, which is maybe not going to help you learn the delicate dance of Soulsborne combat, but will at least leave you less vulnerable in the short-term. On the downside, they have even less magical proficiency than the Warrior, and their comparatively low Dexterity means that they struggle to pick up many of the game’s better weapons without additional stat investment.
Best Elden Ring classes for melee
We’ve already talked about the Warrior , a solid melee class who’s good for testing the waters if you’re just starting out with Elden Ring. However, if you’re well-versed in Soulsborne combat and want to maximise damage output, or you’re looking for a slightly more challenging melee-heavy build to enjoy a subsequent playthrough, try one of these origins on for size.
Vagabond

Starting weaponry: Halberd, Longsword
The Vagabond begins with a balanced, physically-oriented stat set-up that can be easily moulded to fit any melee speciality of your choosing. Though they boast the highest starting Vigor stat, there are a couple of downsides to the Vagabond: their armour over-encumbers them a little, meaning you’ll probably want to unequip one or two pieces to allow them to dodge effectively; while their weaknesses in Intelligence, Faith, and Arcane mean that they start with no inherent ability to do magic. However, a little forward planning and wise investment of stat points ought to take care of their shortcomings early on in the game, at which point you can start to build them to your liking. As just one example: invest your first few points in one of their mental traits and a Vagabond can quickly become a “spellsword” specialist akin to the Prisoner, but with less punishing starting conditions.
Samurai
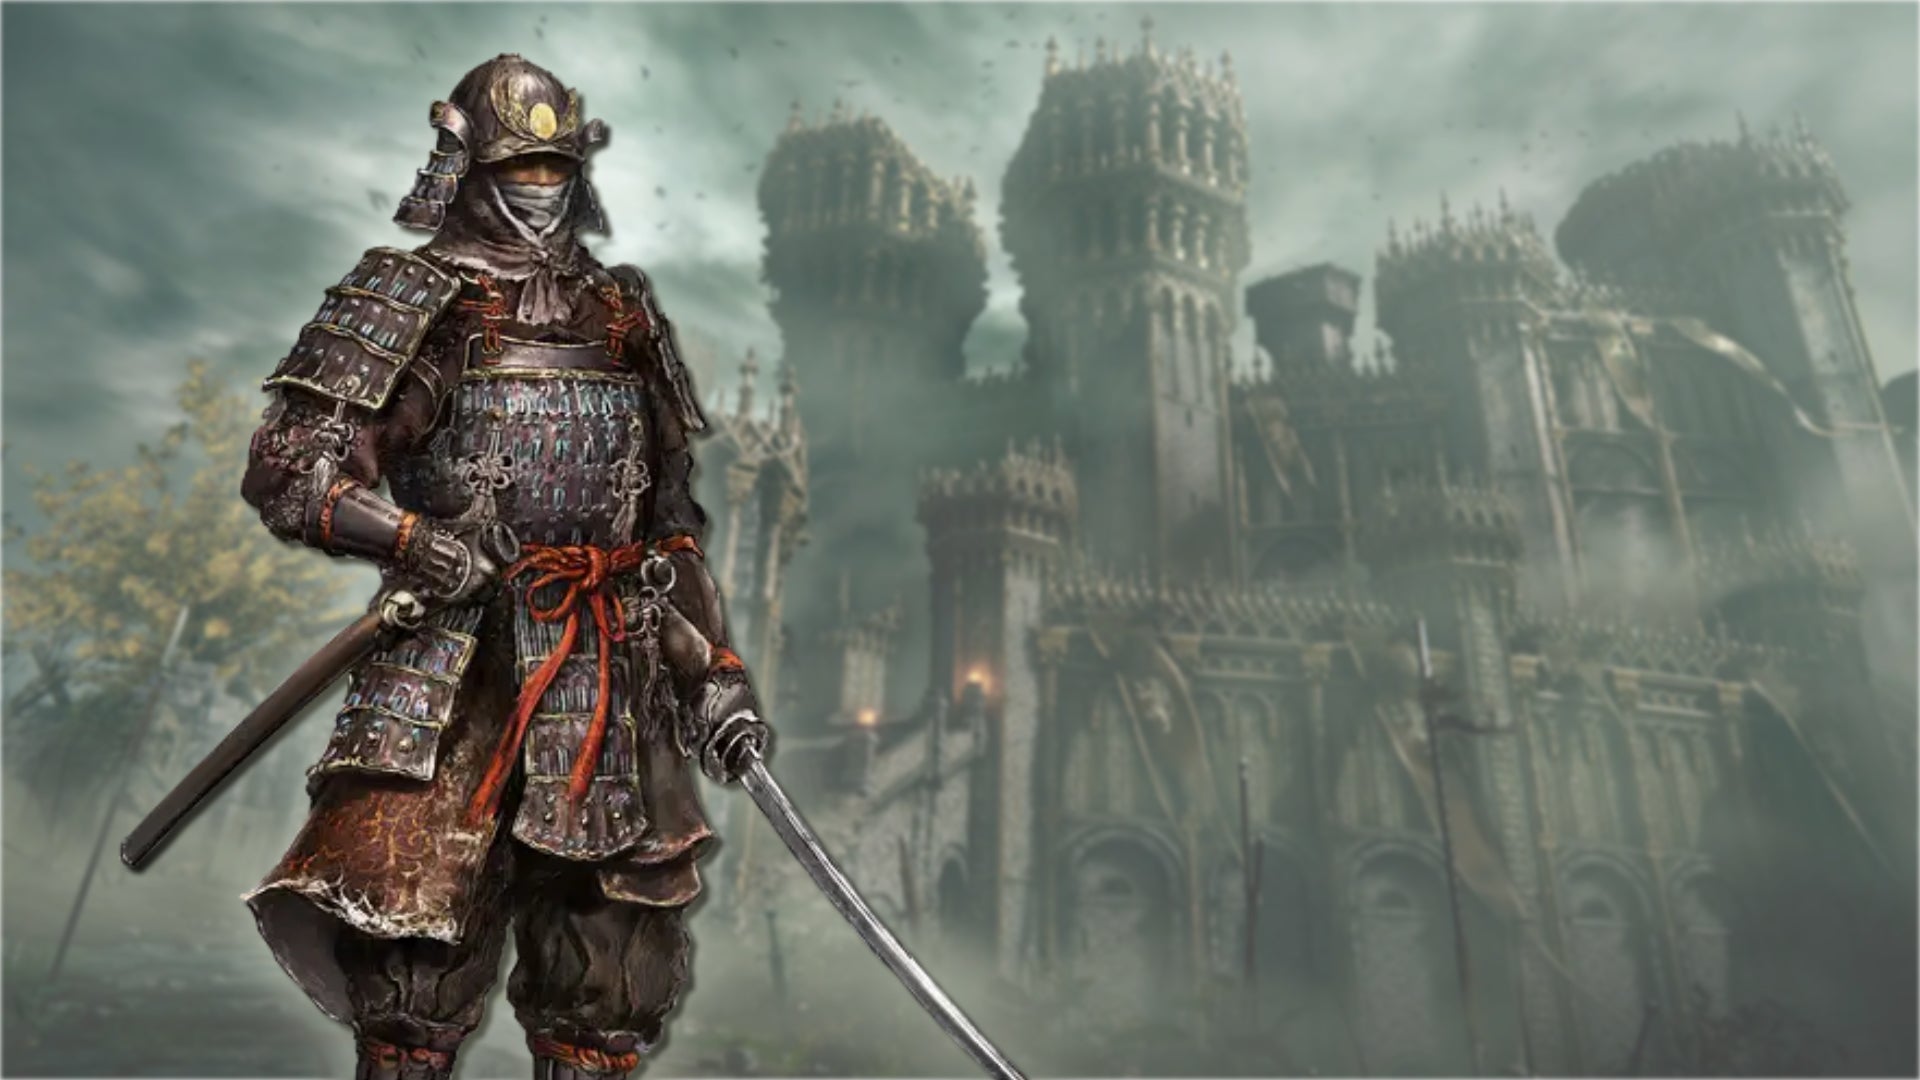
Starting weaponry: Long Bow + Bone Arrow, Uchigatana
None of the Samurai’s starting stats are world-beating, but they’re decently balanced and, for what it’s worth, do technically have the highest starting Endurance of any class in the game. Along with the Bandit class, they’re one of just two ranged combat specialists, which can be a uniquely fun challenge. Thankfully, they also come equipped with a katana that they can happily wield for some heavy melee attacks. This makes them the only class in the game that comes equipped to switch up their combat range on the fly, which is supported by their prowess in Endurance and Dexterity (although that does come at the expense of them being slightly squishy).
Best Elden Ring classes for magic
The Confessor is a good starting class if you’re interested in test-driving Elden Ring’s magic wielding skills, but if you really want to lean into the mage build, there are a couple of origins who begin with a knowledge of Incantations and Sorceries, allowing you to delve right into higher-level spellcasting in combat right away.
Astrologer

Starting weaponry: Astrologer’s Staff, Short Sword Starting sorceries: Glintstone Arc, Glintstone Pebble
Possessed of the game’s highest base Intelligence and Mind stats (making them the only origin to have two bests going for them), the Astrologer starts out with a damage modifier that pairs nicely with their high-level mastery of Sorceries. Ironically, they start off with relatively low Faith and Arcane stats, but don’t be fooled: this origin is the archetype to opt for if you want to put together a traditional Mage build. Their physical attributes aren’t stunning, but they do have a decent bit of Dexterity going for them and a short sword on hand for emergencies, so this is the origin to opt for if you want to focus on magic but not be entirely reliant on it.
Prophet

Starting weaponry: Finger Seal, Spear Starting incantations: Beast Claw, Heal, Oh Flame!
Boasting the highest base Faith stat in the game, Prophets therefore start with the best grasp of Incantations. Prophets are very similar to Astrologers in many ways, and though lower Endurance and Dexterity mean that evading harm in combat will be more difficult, they fare slightly better in melee at the very start of Elden Ring. However, of the two magic-focussed classes, this is the one that comes into its element later on. Quite literally: the Prophet’s high Faith can be built upon to give them access to Fire and Holy elemental attacks, self-healing spells, and other utilities that are well worth the wait.
Hardest Elden Ring class for a challenge
Elden Ring, in line with its FromSoft predecessors, doesn’t feature difficulty settings. However, that doesn’t mean that you can’t up the challenge for yourself based on the character you choose to play as. If you’re a Soulsborne veteran, or you’re looking for a way to change things up on a replay, these classes are the ones to pick if you not only don’t want your hand held, but think it would be pretty cool to have your hands lopped off altogether and have to play using your feet instead. Metaphorically, of course.
Prisoner

Starting weaponry: Catalyst Staff, Estoc Starting sorceries: Magic Glintblade
A kind of hybrid of the Warrior and Astrologer classes, the Prisoner can be seen as a counterpart to the Confessor. While the Confessor is the ideal starting class due to their mixed approach, the Prisoner nevertheless begins at something of a disadvantage thanks to their low starting level, but can leverage their dual specialism in Intelligence and Dexterity to scale their sorcery and swordsmanship off each other to deadly effect. Described as a “late bloomer”, the Prisoner challenges you to endure some difficult times in the early game in exchange for some great fun later on once you get hold of the advanced weapons and spells that make the most of their stats. Again, it’s not necessarily an ideal origin for a first playthrough, but brilliant for seeing what the game has to offer on subsequent runs.
Bandit

Starting weaponry: Knife, Short Bow + Bone Arrow
For a stealth challenge with a ranged combat build, try the Bandit. There’s some crossover here with the Samurai, who’s the other archer class; but while the Samurai is prepared to go melee with their katana, the Bandit relies far more on avoiding confrontation altogether. Elden Ring is designed such that you can avoid combat to a surprising degree, and outside of mandatory boss fights you can almost always take what you want and sneak away rather than engaging in a fight. The Bandit is further helped in this endeavour by having the highest base Arcane stat, which gives them the best Item Discovery rate. Most players probably wouldn’t want to attempt this on a first playthrough, especially since combat is arguably the point of Soulsborne games; but on subsequent replays, trying out the Bandit can show you a whole new perspective on the game.
Wretch

Starting weaponry: Club
Players already familiar with Dark Souls ’ Deprived class (or the similar Waste of Skin class in Bloodborne ) will know what to expect from the Wretch. Beginning with no armour and only a basic club for a weapon, the Wretch has a flat 10 rating in every stat and begins the game at level 1. This class is specifically designed for players taking on the game after already beating it at least once, and the significant drawbacks at the start come with a major benefit in that you can tailor your Wretch build over time to encompass basically anything you want. It’s a sandboxy, creative origin for you to really play around with, but only really workable once you know how to do the basics without getting flattened.
Strongest Elden Ring class
The strongest class in Elden Ring is the Hero Class with a starting Strength stat of 16. As such, this is a great option for any melee-focused players who want to start making a Strength build .
Most weapons (even strength-based ones) will require a few levels into Dexterity, so we recommend keeping a watchful eye on your other stats too. You can see our selection of the best Strength weapons by visiting our best weapons list.
Which stats should you prioritise in Elden Ring?
The stats in Elden Ring can be summarised by the following:
- Vigor: Measures your maximum HP.
- Mind: Measures your maximum FP (mana) pool.
- Endurance: Measures your maximum stamina meter and carrying capacity.
- Strength: Measures your maximum damage modifier for strength-based weapons.
- Dexterity: Measures your maximum damage modifier for dex-based weapons
- Intelligence: Measures your maximum damage modifier for magic (sorcery) attacks.
- Faith: Measures your maximum damage modifier for magic (incantation) attacks.
- Arcane: Contributes to your ability to find items.
Be sure to check out our Elden Ring attribute guide for a more thorough walkthrough of each stat.
To survive long in Elden Ring, your character will need the best arsenal they can lay their hands on, so be sure to check out our guide to the best weapons in Elden Ring so you know what to look out for. Similarly, a good set of armour is invaluable; see our page on the best armor to use early on in Elden Ring for ideas. And if you’re more interested in tips for Elden Ring’s DLC, head over to our guide on what to do first in Shadow of the Erdtree .


Elden Ring
PS4 , PS5 , Xbox One , Xbox Series X/S , PC
Rock Paper Shotgun is better when you sign in
Sign in and join us on our journey to discover strange and compelling PC games.

All 75 Arc Raiders Blueprints and where to get them
These areas have the highest chance of giving you Blueprints

Image credit:Rock Paper Shotgun/Embark Studios

Looking for more Arc Raiders Blueprints? It’s a special day when you find a Blueprint, as they’re among the most valuable items in Arc Raiders. If you find a Blueprint that you haven’t already found, then you must make sure you hold onto it at all costs, because Blueprints are the key to one of the most important and powerful systems of meta-progression in the game.
This guide aims to be the very best guide on Blueprints you can find, starting with a primer on what exactly they are and how they work in Arc Raiders, before delving into exactly where to get Blueprints and the very best farming spots for you to take in your search.
We’ll also go over how to get Blueprints from other unlikely activities, such as destroying Surveyors and completing specific quests. And you’ll also find the full list of all 75 Blueprints in Arc Raiders on this page (including the newest Blueprints added with the Cold Snap update , such as the Deadline Blueprint and Firework Box Blueprint), giving you all the information you need to expand your own crafting repertoire.
In this guide:
- What are Blueprints in Arc Raiders?
- Full Blueprint list: All crafting recipes
- Where to find Blueprints in Arc Raiders Blueprints obtained from quests Blueprints obtained from Trials Best Blueprint farming locations

What are Blueprints in Arc Raiders?
Blueprints in Arc Raiders are special items which, if you manage to extract with them, you can expend to permanently unlock a new crafting recipe in your Workshop. If you manage to extract from a raid with an Anvil Blueprint, for example, you can unlock the ability to craft your very own Anvil Pistol, as many times as you like (as long as you have the crafting materials).
To use a Blueprint, simply open your Inventory while in the lobby, then right-click on the Blueprint and click “Learn And Consume” . This will permanently unlock the recipe for that item in your Workshop. As of the Stella Montis update, there are allegedly 75 different Blueprints to unlock - although only 68 are confirmed to be in the game so far. You can see all the Blueprints you’ve found and unlocked by going to the Workshop menu, and hitting “R” to bring up the Blueprint screen.
It’s possible to find duplicates of past Blueprints you’ve already unlocked. If you find these, then you can either sell them, or - if you like to play with friends - you can take it into a match and gift it to your friend so they can unlock that recipe for themselves. Another option is to keep hold of them until the time comes to donate them to the Expedition.
Full Blueprint list: All crafting recipes
Below is the full list of all the Blueprints that are currently available to find in Arc Raiders, and the crafting recipe required for each item:
| Blueprint | Type | Recipe | Crafted At |
|---|---|---|---|
| Bettina | Weapon | 3x Advanced Mechanical Components 3x Heavy Gun Parts 3x Canister | Gunsmith 3 |
| Blue Light Stick | Quick Use | 3x Chemicals | Utility Station 1 |
| Aphelion | Weapon | 3x Magnetic Accelerator 3x Complex Gun Parts 1x Matriarch Reactor | Gunsmith 3 |
| Combat Mk. 3 (Flanking) | Augment | 2x Advanced Electrical Components 3x Processor | Gear Bench 3 |
| Combat Mk. 3 (Aggressive) | Augment | 2x Advanced Electrical Components 3x Processor | Gear Bench 3 |
| Complex Gun Parts | Material | 2x Light Gun Parts 2x Medium Gun Parts 2x Heavy Gun Parts | Refiner 3 |
| Fireworks Box | Quick Use | 1x Explosive Compound 3x Pop Trigger | Explosives Station 2 |
| Gas Mine | Mine | 4x Chemicals 2x Rubber Parts | Explosives Station 1 |
| Green Light Stick | Quick Use | 3x Chemicals | Utility Station 1 |
| Pulse Mine | Mine | 1x Crude Explosives 1x Wires | Explosives Station 1 |
| Seeker Grenade | Grenade | 1x Crude Explosives 2x ARC Alloy | Explosives Station 1 |
| Looting Mk. 3 (Survivor) | Augment | 2x Advanced Electrical Components 3x Processor | Gear Bench 3 |
| Angled Grip II | Mod | 2x Mechanical Components 3x Duct Tape | Gunsmith 2 |
| Angled Grip III | Mod | 2x Mod Components 5x Duct Tape | Gunsmith 3 |
| Hullcracker | Weapon | 1x Magnetic Accelerator 3x Heavy Gun Parts 1x Exodus Modules | Gunsmith 3 |
| Launcher Ammo | Ammo | 5x Metal Parts 1x Crude Explosives | Workbench 1 |
| Anvil | Weapon | 5x Mechanical Components 5x Simple Gun Parts | Gunsmith 2 |
| Anvil Splitter | Mod | 2x Mod Components 3x Processor | Gunsmith 3 |
| ??? | ??? | ??? | ??? |
| Barricade Kit | Quick Use | 1x Mechanical Components | Utility Station 2 |
| Blaze Grenade | Grenade | 1x Explosive Compound 2x Oil | Explosives Station 3 |
| Bobcat | Weapon | 3x Advanced Mechanical Components 3x Light Gun Parts | Gunsmith 3 |
| Osprey | Weapon | 2x Advanced Mechanical Components 3x Medium Gun Parts 7x Wires | Gunsmith 3 |
| Burletta | Weapon | 3x Mechanical Components 3x Simple Gun Parts | Gunsmith 1 |
| Compensator II | Mod | 2x Mechanical Components 4x Wires | Gunsmith 2 |
| Compensator III | Mod | 2x Mod Components 8x Wires | Gunsmith 3 |
| Defibrillator | Quick Use | 9x Plastic Parts 1x Moss | Medical Lab 2 |
| ??? | ??? | ??? | ??? |
| Equalizer | Weapon | 3x Magnetic Accelerator 3x Complex Gun Parts 1x Queen Reactor | Gunsmith 3 |
| Extended Barrel | Mod | 2x Mod Components 8x Wires | Gunsmith 3 |
| Extended Light Mag II | Mod | 2x Mechanical Components 3x Steel Spring | Gunsmith 2 |
| Extended Light Mag III | Mod | 2x Mod Components 5x Steel Spring | Gunsmith 3 |
| Extended Medium Mag II | Mod | 2x Mechanical Components 3x Steel Spring | Gunsmith 2 |
| Extended Medium Mag III | Mod | 2x Mod Components 5x Steel Spring | Gunsmith 3 |
| Extended Shotgun Mag II | Mod | 2x Mechanical Components 3x Steel Spring | Gunsmith 2 |
| Extended Shotgun Mag III | Mod | 2x Mod Components 5x Steel Spring | Gunsmith 3 |
| Remote Raider Flare | Quick Use | 2x Chemicals 4x Rubber Parts | Utility Station 1 |
| Heavy Gun Parts | Material | 4x Simple Gun Parts | Refiner 2 |
| Venator | Weapon | 2x Advanced Mechanical Components 3x Medium Gun Parts 5x Magnet | Gunsmith 3 |
| Il Toro | Weapon | 5x Mechanical Components 6x Simple Gun Parts | Gunsmith 1 |
| Jolt Mine | Mine | 1x Electrical Components 1x Battery | Explosives Station 2 |
| Explosive Mine | Mine | 1x Explosive Compound 1x Sensors | Explosives Station 3 |
| Jupiter | Weapon | 3x Magnetic Accelerator 3x Complex Gun Parts 1x Queen Reactor | Gunsmith 3 |
| Light Gun Parts | Material | 4x Simple Gun Parts | Refiner 2 |
| Lightweight Stock | Mod | 2x Mod Components 5x Duct Tape | Gunsmith 3 |
| Lure Grenade | Grenade | 1x Speaker Component 1x Electrical Components | Utility Station 2 |
| Medium Gun Parts | Material | 4x Simple Gun Parts | Refiner 2 |
| Torrente | Weapon | 2x Advanced Mechanical Components 3x Medium Gun Parts 6x Steel Spring | Gunsmith 3 |
| Muzzle Brake II | Mod | 2x Mechanical Components 4x Wires | Gunsmith 2 |
| Muzzle Brake III | Mod | 2x Mod Components 8x Wires | Gunsmith 3 |
| Padded Stock | Mod | 2x Mod Components 5x Duct Tape | Gunsmith 3 |
| Shotgun Choke II | Mod | 2x Mechanical Components 4x Wires | Gunsmith 2 |
| Shotgun Choke III | Mod | 2x Mod Components 8x Wires | Gunsmith 3 |
| Shotgun Silencer | Mod | 2x Mod Components 8x Wires | Gunsmith 3 |
| Showstopper | Grenade | 1x Advanced Electrical Components 1x Voltage Converter | Explosives Station 3 |
| Silencer I | Mod | 2x Mechanical Components 4x Wires | Gunsmith 2 |
| Silencer II | Mod | 2x Mod Components 8x Wires | Gunsmith 3 |
| Snap Hook | Quick Use | 2x Power Rod 3x Rope 1x Exodus Modules | Utility Station 3 |
| Stable Stock II | Mod | 2x Mechanical Components 3x Duct Tape | Gunsmith 2 |
| Stable Stock III | Mod | 2x Mod Components 5x Duct Tape | Gunsmith 3 |
| Tagging Grenade | Grenade | 1x Electrical Components 1x Sensors | Utility Station 3 |
| Tempest | Weapon | 3x Advanced Mechanical Components 3x Medium Gun Parts 3x Canister | Gunsmith 3 |
| Trigger Nade | Grenade | 2x Crude Explosives 1x Processor | Explosives Station 2 |
| Vertical Grip II | Mod | 2x Mechanical Components 3x Duct Tape | Gunsmith 2 |
| Vertical Grip III | Mod | 2x Mod Components 5x Duct Tape | Gunsmith 3 |
| Vita Shot | Quick Use | 2x Antiseptic 1x Syringe | Medical Lab 3 |
| Vita Spray | Quick Use | 3x Antiseptic 1x Canister | Medical Lab 3 |
| Vulcano | Weapon | 1x Magnetic Accelerator 3x Heavy Gun Parts 1x Exodus Modules | Gunsmith 3 |
| Wolfpack | Grenade | 2x Explosive Compound 2x Sensors | Explosives Station 3 |
| Red Light Stick | Quick Use | 3x Chemicals | Utility Station 1 |
| Smoke Grenade | Grenade | 14x Chemicals 1x Canister | Utility Station 2 |
| Deadline | Mine | 3x Explosive Compound 2x ARC Circuitry | Explosives Station 3 |
| Trailblazer | Grenade | 1x Explosive Compound 1x Synthesized Fuel | Explosives Station 3 |
| Tactical Mk. 3 (Defensive) | Augment | 2x Advanced Electrical Components 3x Processor | Gear Bench 3 |
| Tactical Mk. 3 (Healing) | Augment | 2x Advanced Electrical Components 3x Processor | Gear Bench 3 |
| Yellow Light Stick | Quick Use | 3x Chemicals | Utility Station 1 |
Note: The missing Blueprints in this list likely have not actually been added to the game at the time of writing, because none of the playerbase has managed to find any of them. As they are added to the game, I will update this page with the most relevant information so you know exactly how to get all 75 Arc Raiders Blueprints.
Where to find Blueprints in Arc Raiders
Below is a list of all containers, modifiers, and events which maximise your chances of finding Blueprints:
- Certain quests reward you with specific Blueprints .
- Completing Trials has a high chance of offering Blueprints as rewards.
- Surveyors have a decent chance of dropping Blueprints on death.
- High loot value areas tend to have a greater chance of spawning Blueprints.
- Night Raids and Storms may increase rare Blueprint spawn chances in containers.
- Containers with higher numbers of items may have a higher tendency to spawn Blueprints. As a result, Blue Gate (which has many “large” containers containing multiple items) may give you a higher chance of spawning Blueprints.
- Raider containers (Raider Caches, Weapon Boxes, Medical Bags, Grenade Tubes) have increased Blueprint drop rates. As a result, the Uncovered Caches event gives you a high chance of finding Blueprints.
- Security Lockers have a higher than average chance of containing Blueprints.
- Certain Blueprints only seem to spawn under specific circumstances: Tempest Blueprint only spawns during Night Raid events. Vulcano Blueprint only spawns during Hidden Bunker events. Jupiter and Equaliser Blueprints only spawn during Harvester events.

Raider Caches, Weapon Boxes, and other raider-oriented container types have a good chance of offering Blueprints. |Image credit:Rock Paper Shotgun/Embark Studios
Blueprints have a very low chance of spawning in any container in Arc Raiders, around 1-2% on average. However, there is a higher chance of finding Blueprints in particular container types. Specifically, you can find more Blueprints in Raider containers and security lockers.
Beyond this, if you’re looking for Blueprints you should focus on regions of the map which are marked as having particularly high-value loot. Areas such as the Control Tower in Dam Battlegrounds, the Arrival and Departure Buildings in Spaceport, and Pilgrim’s Peak in Blue Gate all have a better-than-average chance of spawning Blueprints somewhere amongst all their containers. Night Raids and Electromagnetic Storm events also increase the drop chances of certain Blueprints .
In addition to these containers, you can often loot Blueprints from destroyed Surveyors - the largest of the rolling ball ARC. Surveyors are more commonly found on the later maps - Spaceport and Blue Gate - and if one spawns in your match, you’ll likely see it by the blue laser beam that it casts into the sky while “surveying”.
Surveyors are quite well-armoured and will very speedily run away from you once it notices you, but if you can take one down then make sure you loot all its parts for a chance of obtaining certain unusual Blueprints.
Blueprints obtained from quests
One way in which you can get Blueprints is by completing certain quests for the vendors in Speranza. Some quests will reward you with a specific item Blueprint upon completion, so as long as you work through all the quests in Arc Raiders, you are guaranteed those Blueprints.
Here is the full list of all Blueprints you can get from quest rewards:
- Trigger Nade Blueprint: Rewarded after completing “Sparks Fly”.
- Lure Grenade Blueprint: Rewarded after completing “Greasing Her Palms”.
- Burletta Blueprint: Rewarded after completing “Industrial Espionage”.
- Hullcracker Blueprint (and Launcher Ammo Blueprint): Rewarded after completing “The Major’s Footlocker”.
Alas, that’s only 4 Blueprints out of a total of 75 to unlock, so for the vast majority you will need to find them yourself during a raid. If you’re intent on farming Blueprints, then it’s best to equip yourself with cheap gear in case you lose it, but don’t use a free loadout because then you won’t get a safe pocket to stash any new Blueprint you find. No pain in Arc Raiders is sharper than failing to extract with a new Blueprint you’ve been after for a dozen hours already.

One of the best ways to get Blueprints is by hitting three stars on all five Trials every week. |Image credit:Rock Paper Shotgun/Embark Studios
Blueprints obtained from Trials
One of the very best ways to get Blueprints is as rewards for completing Trials in Arc Raiders. Trials are unlocked from Level 15 onwards, and allow you to earn rewards by focusing on certain tasks over the course of several raids. For example, one Trial might task you with dealing damage to Hornets, while another might challenge you to loot Supply Drops.
Trials refresh on a weekly basis, with a new week bringing five new Trials. Each Trial can offer up to three rewards after passing certain score milestones, and it’s possible to receive very high level loot from these reward crates - including Blueprints. So if you want to unlock as many Blueprints as possible, you should make a point of completing as many Trials as possible each week.
Best Blueprint farming locations
The very best way to get Blueprints is to frequent specific areas of the maps which combine high-tier loot pools with the right types of containers to search. Here are my recommendations for where to find Blueprints on every map, so you can always keep the search going for new crafting recipes to unlock.

Image credit:Rock Paper Shotgun/Embark Studios
Dam Battlegrounds
The best places to farm Blueprints on Dam Battlegrounds are the Control Tower, Power Generation Complex, Ruby Residence, and Pale Apartments . The first two regions, despite only being marked on the map as mid-tier loot, contain a phenomenal number of containers to loot. The Control Tower can also contain a couple of high-tier Security Lockers - though of course, you’ll need to have unlocked the Security Breach skill at the end of the Survival tree.
There’s also a lot of reporting amongst the playerbase that the Residential areas in the top-left of the map - Pale Apartments and Ruby Residence - give you a comparatively strong chance of finding Blueprints. Considering their size, there’s a high density of containers to loot in both locations, and they also have the benefit of being fairly out of the way. So you’re more likely to have all the containers to yourself.
Buried City
The best Blueprint farming locations on Buried City are the Santa Maria Houses, Grandioso Apartments, Town Hall, and the various buildings of the New District . Grandioso Apartments has a lower number of containers than the rest, but a high chance of spawning weapon cases - which have good Blueprint drop rates. The others are high-tier loot areas, with plenty of lootable containers - including Security Lockers.
Spaceport
The best places to find Blueprints on Spaceport are the Arrival and Departure Buildings, as well as Control Tower A6 and the Launch Towers . All these areas are labelled as high-value loot regions, and many of them are also very handily connected to one another by the Spaceport wall, which you can use to quickly run from one area to the next. At the tops of most of these buildings you’ll find at least one Security Locker, so this is an excellent farming route for players looking to find Blueprints.
The downside to looting Blueprints on Spaceport is that all these areas are hotly contested, particularly in Duos and Squads. You’ll need to be very focused and fast in order to complete the full farming route.

Image credit:Rock Paper Shotgun/Embark Studios
Blue Gate
Blue Gate tends to have a good chance of dropping Blueprints, potentially because it generally has a high number of containers which can hold lots of items; so there’s a higher chance of a Blueprint spawning in each container. In my experience, the best Blueprint farming spots on Blue Gate are Pilgrim’s Peak, Raider’s Refuge, the Ancient Fort, and the Underground Complex beneath the Warehouse .
All of these areas contain a wealth of containers to loot. Raider’s Refuge has less to loot, but the majority of the containers in and around the Refuge are raider containers, which have a high chance of containing Blueprints - particularly during major events.
Stella Montis
On the whole, Stella Montis seems to have a very low drop rate for Blueprints (though a high chance of dropping other high-tier loot). If you do want to try farming Blueprints on this map, the best places to find Blueprints in Stella Montis are Medical Research, Assembly Workshop, and the Business Center . These areas have the highest density of containers to loot on the map.
In addition to this, the Western Tunnel has a few different Security Lockers to loot, so while there’s very little to loot elsewhere in this area of the map, it’s worth hitting those Security Lockers if you spawn there at the start of a match.
That wraps up this primer on how to get all the Blueprints in Arc Raiders as quickly as possible. With the Expedition system constantly resetting a large number of players’ Blueprints, it’s more important than ever to have the most up-to-date information on where to find all these Blueprints.
While you’re here, be sure to check out our Arc Raiders best guns tier list , as well as our primers on the best skills to unlock and all the different Field Depot locations on every map.


ARC Raiders
PS5 , Xbox Series X/S , PC
Rock Paper Shotgun is better when you sign in
Sign in and join us on our journey to discover strange and compelling PC games.
