Silent Hill 2 review: a handsome horror remake that plays safe with its own history
Hole lot of trauma
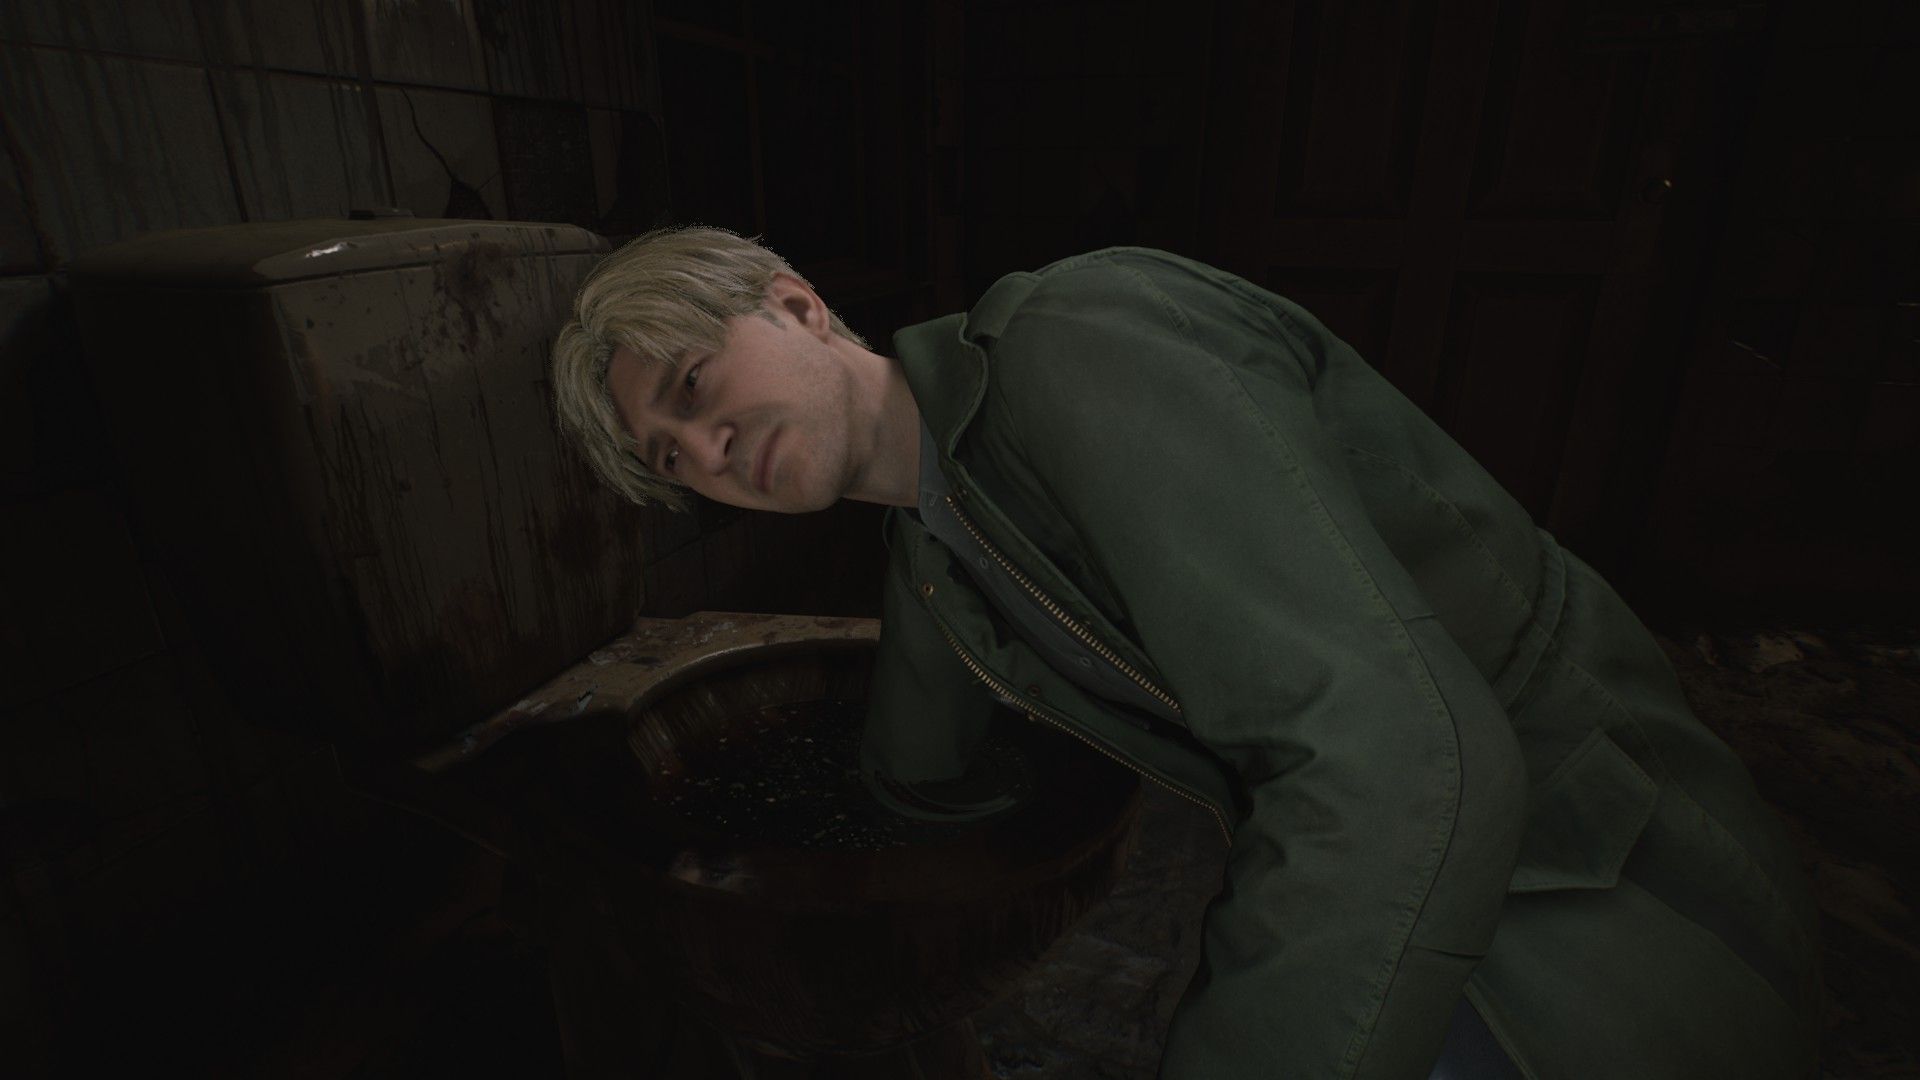
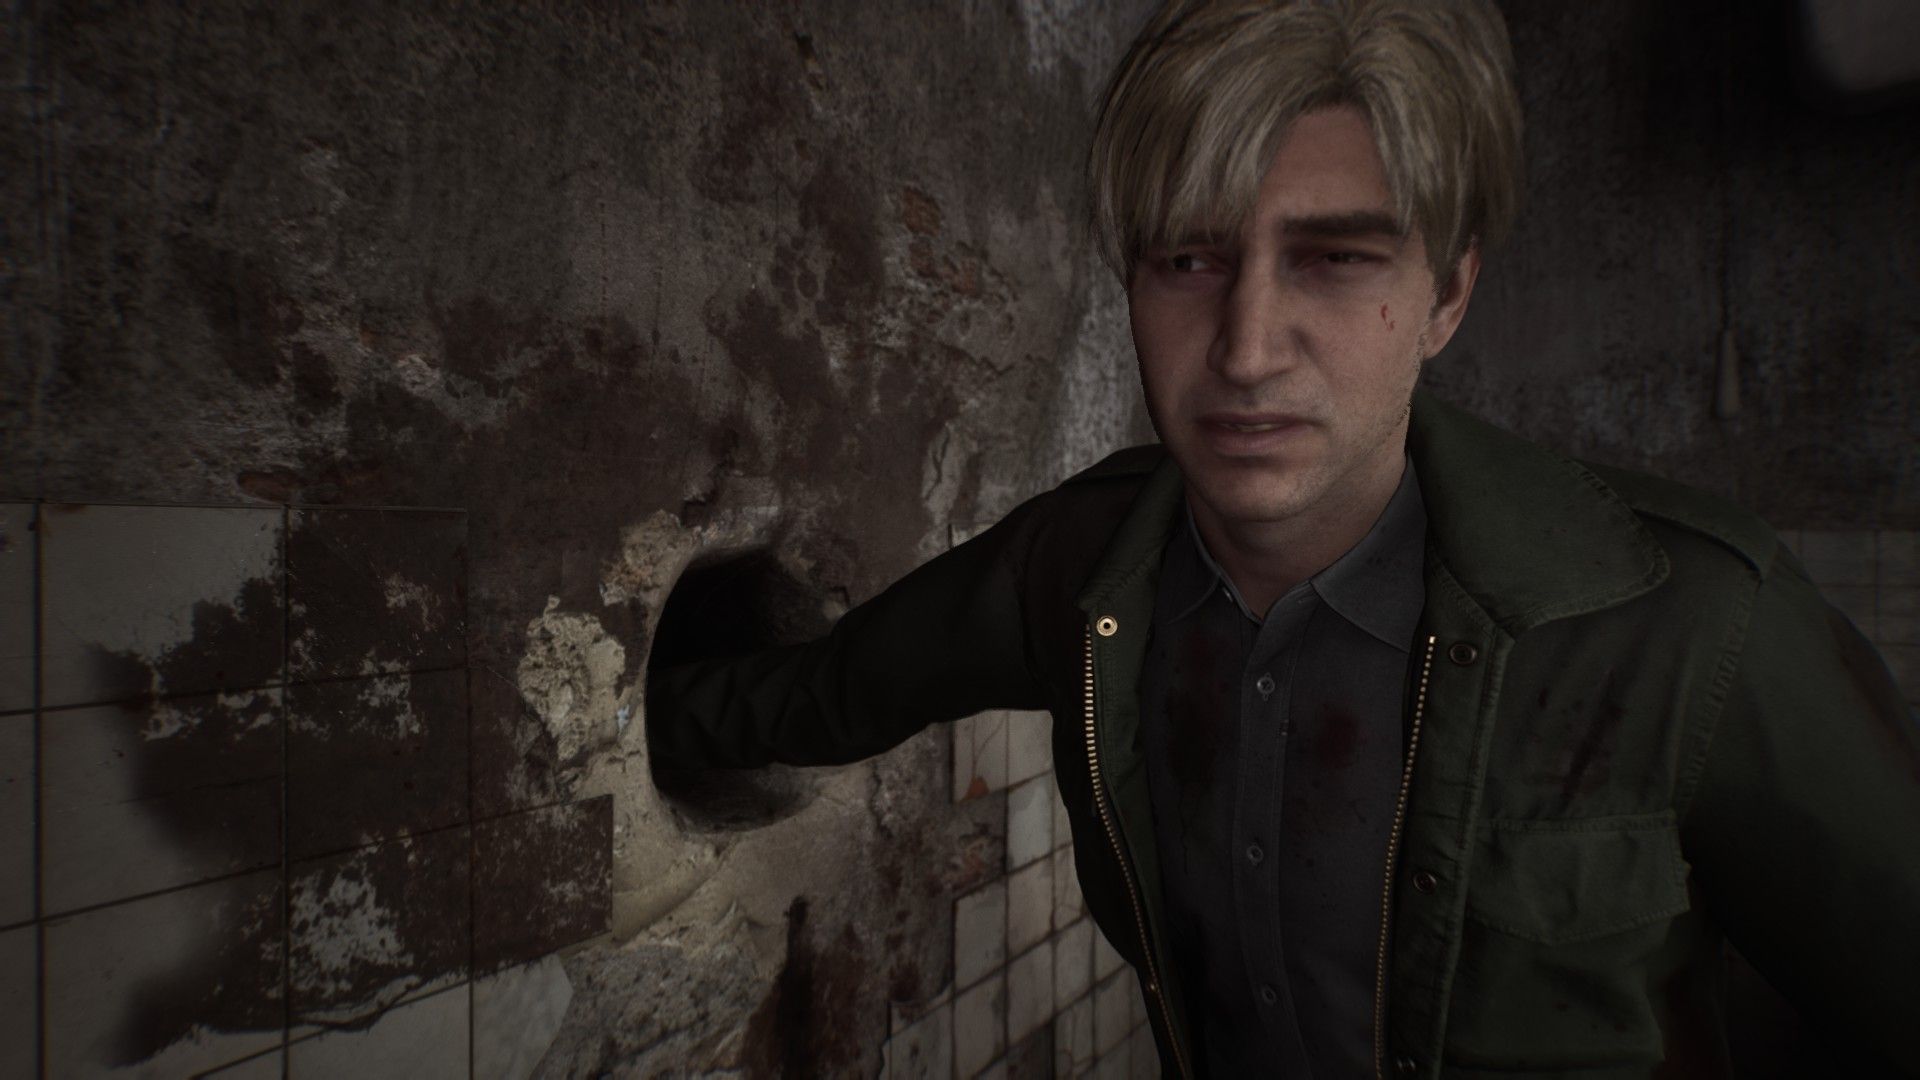
Image credit:Rock Paper Shotgun / Konami

- Developer: Bloober Team
- Publisher: Konami
- Release: October 8th
- On: Windows
- From: Steam
- Price: £60/$70/€70
- Reviewed on: Intel Core-i7-11700F, 16GB RAM, Nvidia GeForce RTX 3060, Windows 10
No game protagonist is more willing to stick his hand down a toilet than James Sunderland. Why is he doing this? You would have to ask him or the psychiatrist he badly requires. And it’s unlikely he’d explain himself. This isn’t the type of story in which the protagonist has difficulty accepting the existence of horrors, nor struggles with the surreality of what he needs to do to get through a locked door. In the opening minutes, James finds a well with a glowing red square floating inside, stares into it (it saves your game), then makes a calm remark about the odd sensation he feels, and moves on. The human corpses that pepper the town of Silent Hill are noticeably that of James himself, his head bludgeoned and bloodied beyond recognition but his jacket and boots unmistakable. He makes no remark on this. It’s probably nothing.
When I say it like that, it’s funny. But it all compliments Silent Hill 2 ’s ghostly and Lynchian psychological horror. Characters barely understand that they exist, never mind that they may be prisoners of a shame-triggered nightmare or manifestations of some unholy trauma. Your protagonist’s muted response to the atrocious lake town fits with what we later come to learn about Jim “Dirty Hands” Sunderland. As a player, you not only need to embrace James’ unquestioning acceptance of bizarre item-combining puzzles, you also have to be willing to accept a certain lack of naturalism to everyone’s dialogue and behaviour. A lot of what happens will not make sense on a human level, including people’s motivations. In exchange, you get what might be a masterclass of symbolism, or a mish-mash of morbid motifs - it’s sometimes hard to tell.

Image credit:Rock Paper Shotgun / Konami
As a third-person shooty-scare, it isn’t particularly worse off for that mystery. The setup is the schlockiest thing about it. A man travels to the town of Silent Hill on the beckoning of a letter from his wife. The thing is… his wife has been dead for three years… [mysterious piano notes]. What follows is nowhere near as narratively rote: an anxiety tour of an unsettling locale, familiar to James and (probably) to you. For an actually thoughtful take on how Silent Hill 2 and Silent Hill 2 overlap like two distorted memories recorded on the same VHS tape, please read Edwin’s article that discusses who is remaking who .
This, on the other hand, is a review, so I’m going to talk about graphics! Combat! Puzzles! The act of remaking a beloved horror game is not one I envy, especially one as rose-tintingly remembered as this. Therefore the act of reviewing it carries with it a similar (if far less potent) sense of pressure. I’ll try not to use the word “visceral” , not even when I’m talking about the shiny, anatomically accurate guts.
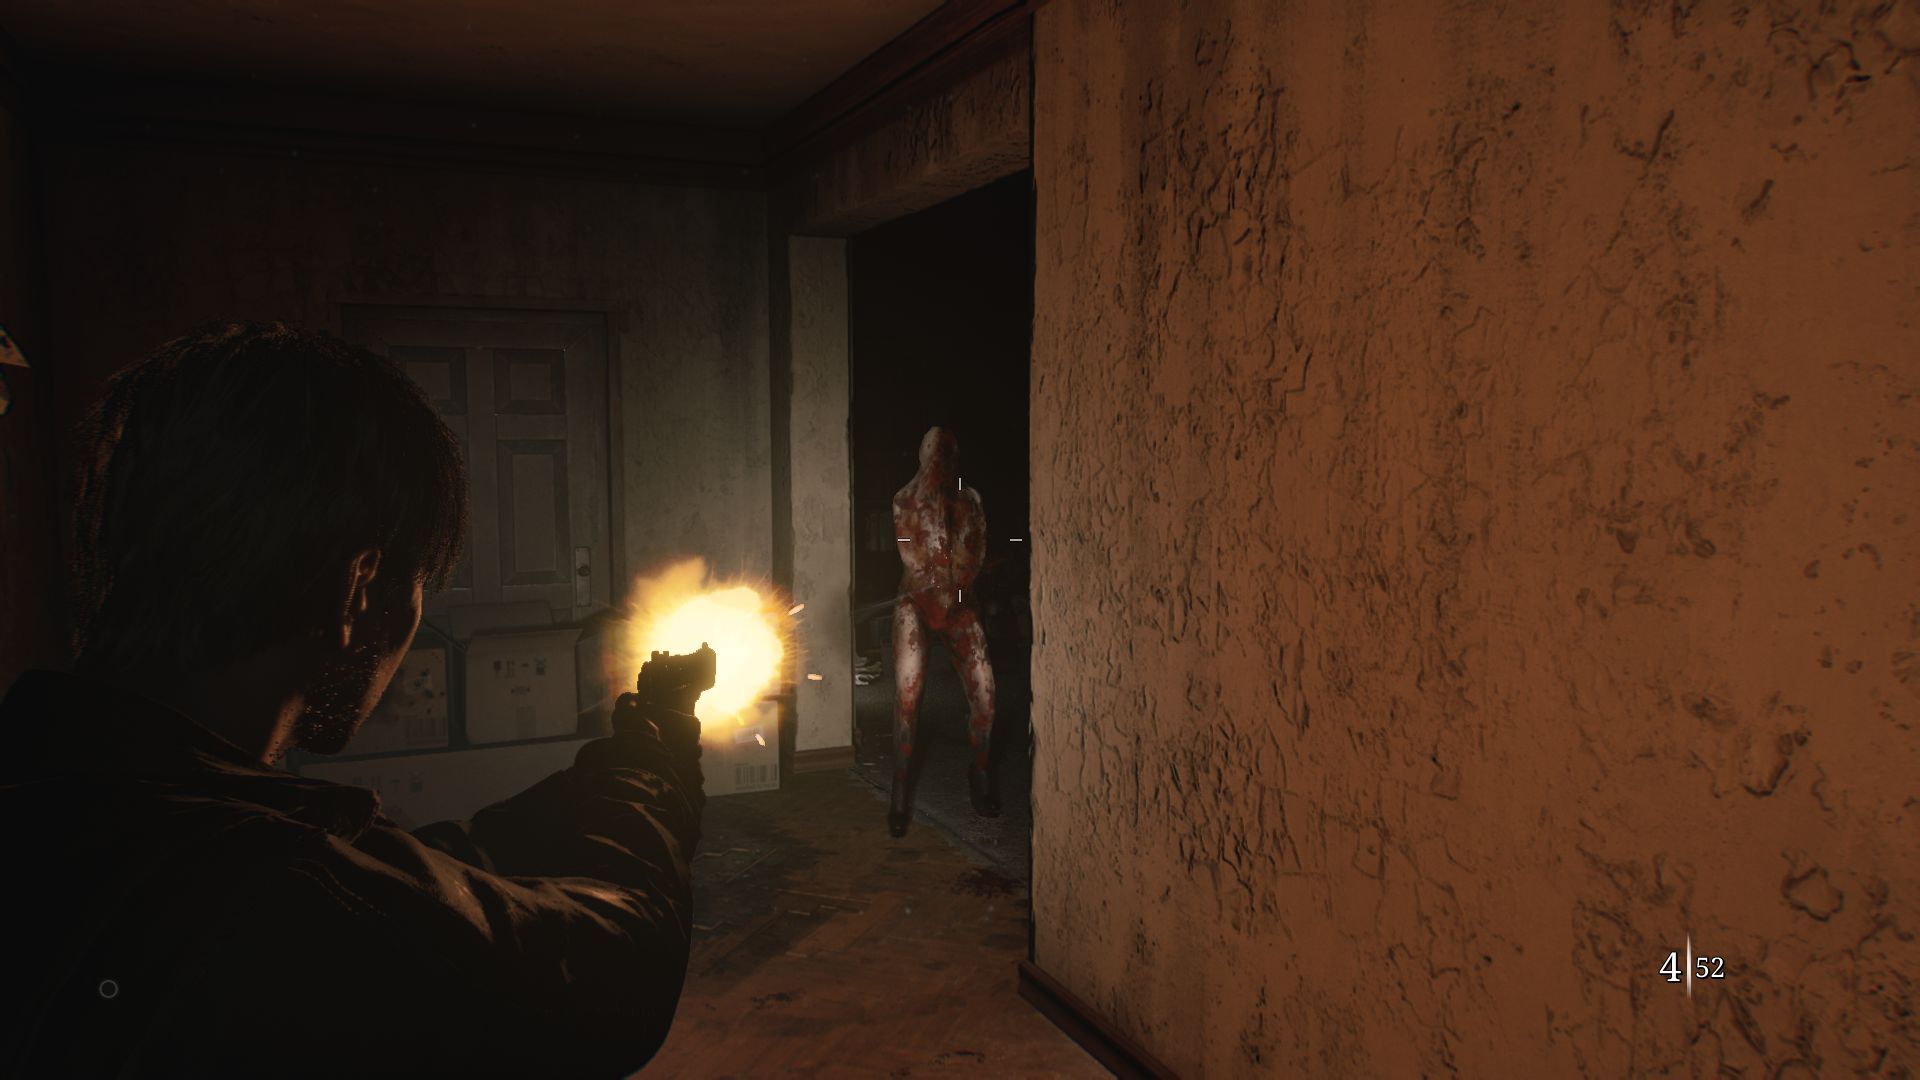
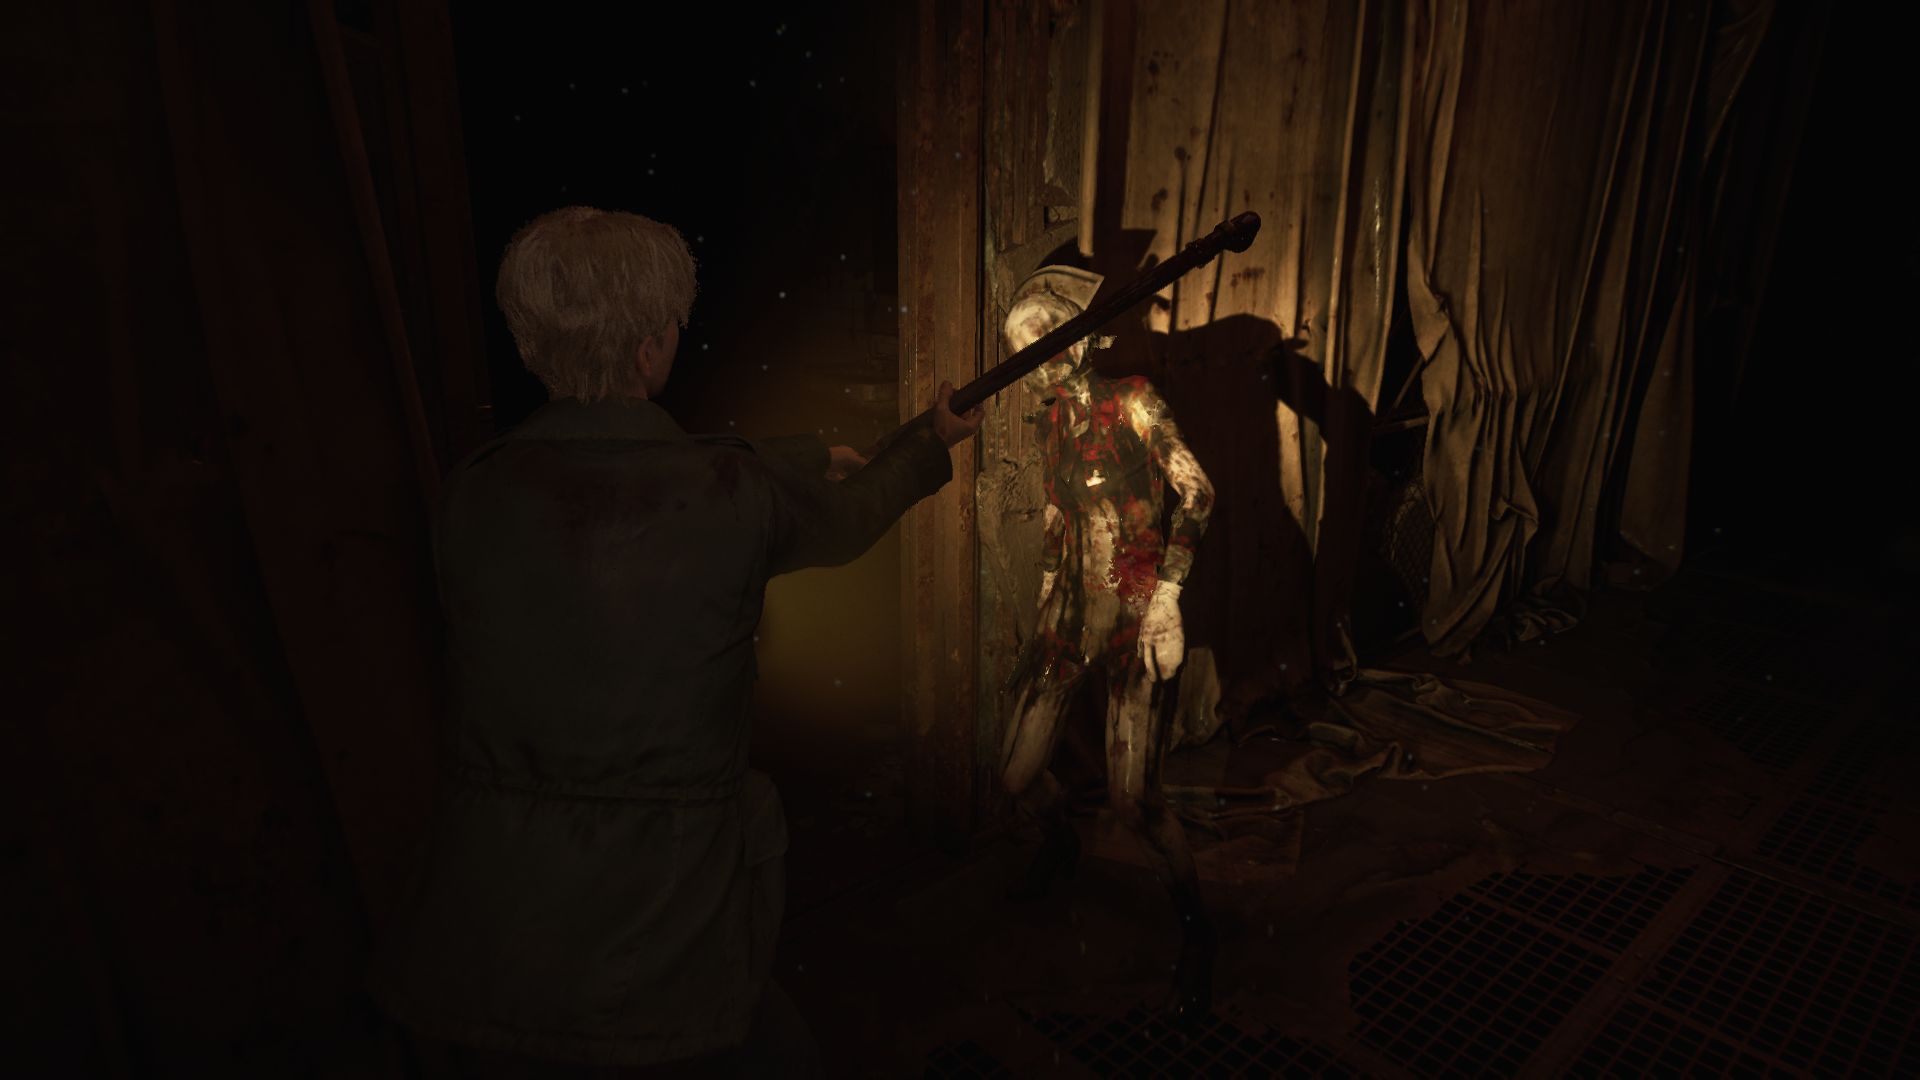
Image credit:Rock Paper Shotgun / Konami
It’s clear mountains of work has gone into giving the world its distinctly desaturated sense of reality, right down to the way the flesh on James’ trembling hand deforms when he massages it, or the cloth of a handkerchief as it falls in natural folds when you examine it. When you peer at a note scribbled on a sheet of paper, you can flip it over and you’ll still be able to make out the writing through the other side of the thin sheet. The sound design too is a disturbing aural landscape of squelching mud, distant gurgles, creaking gates, and the faint tone of payphones hanging off the hook. Every now and then you hear the faint gasp of some unseen woman in trouble, as if right next to you, a small but important touch that I appreciated.
The rusted car bonnets, the drifting leaves, the glistening reflections in wet asphalt - it all underscores a devotion to realism that will leave some impressed and others mildly bored. I don’t want to get bogged down in an argument about the merits of realism for realism’s sake vs realism as an art direction. I don’t know why developers Bloober Team went so hard on this stuff, but suffice to say: big puddle look gud. (If you’re deadly into these things, James has you covered with the best performance settings .)
Meanwhile, the town’s ever-present fog (a visual effect of morbidly intense significance for many Silent Hill fans) is recreated with particular focus and attention, although it often billows like smoke, rather than existing as a simple haze, making it feel a little overworked when standing against all the other finely crafted detail. I wanted to make a joke like “If you think remaking Silent Hill 2 is about recreating weather, you’ve mist the point.” But on reflection, the mist is the point. At least partially, in the sense that it is as irremovable from Silent Hill 2 as any of the town’s troubled characters or the worrisome map-reliant exploration.
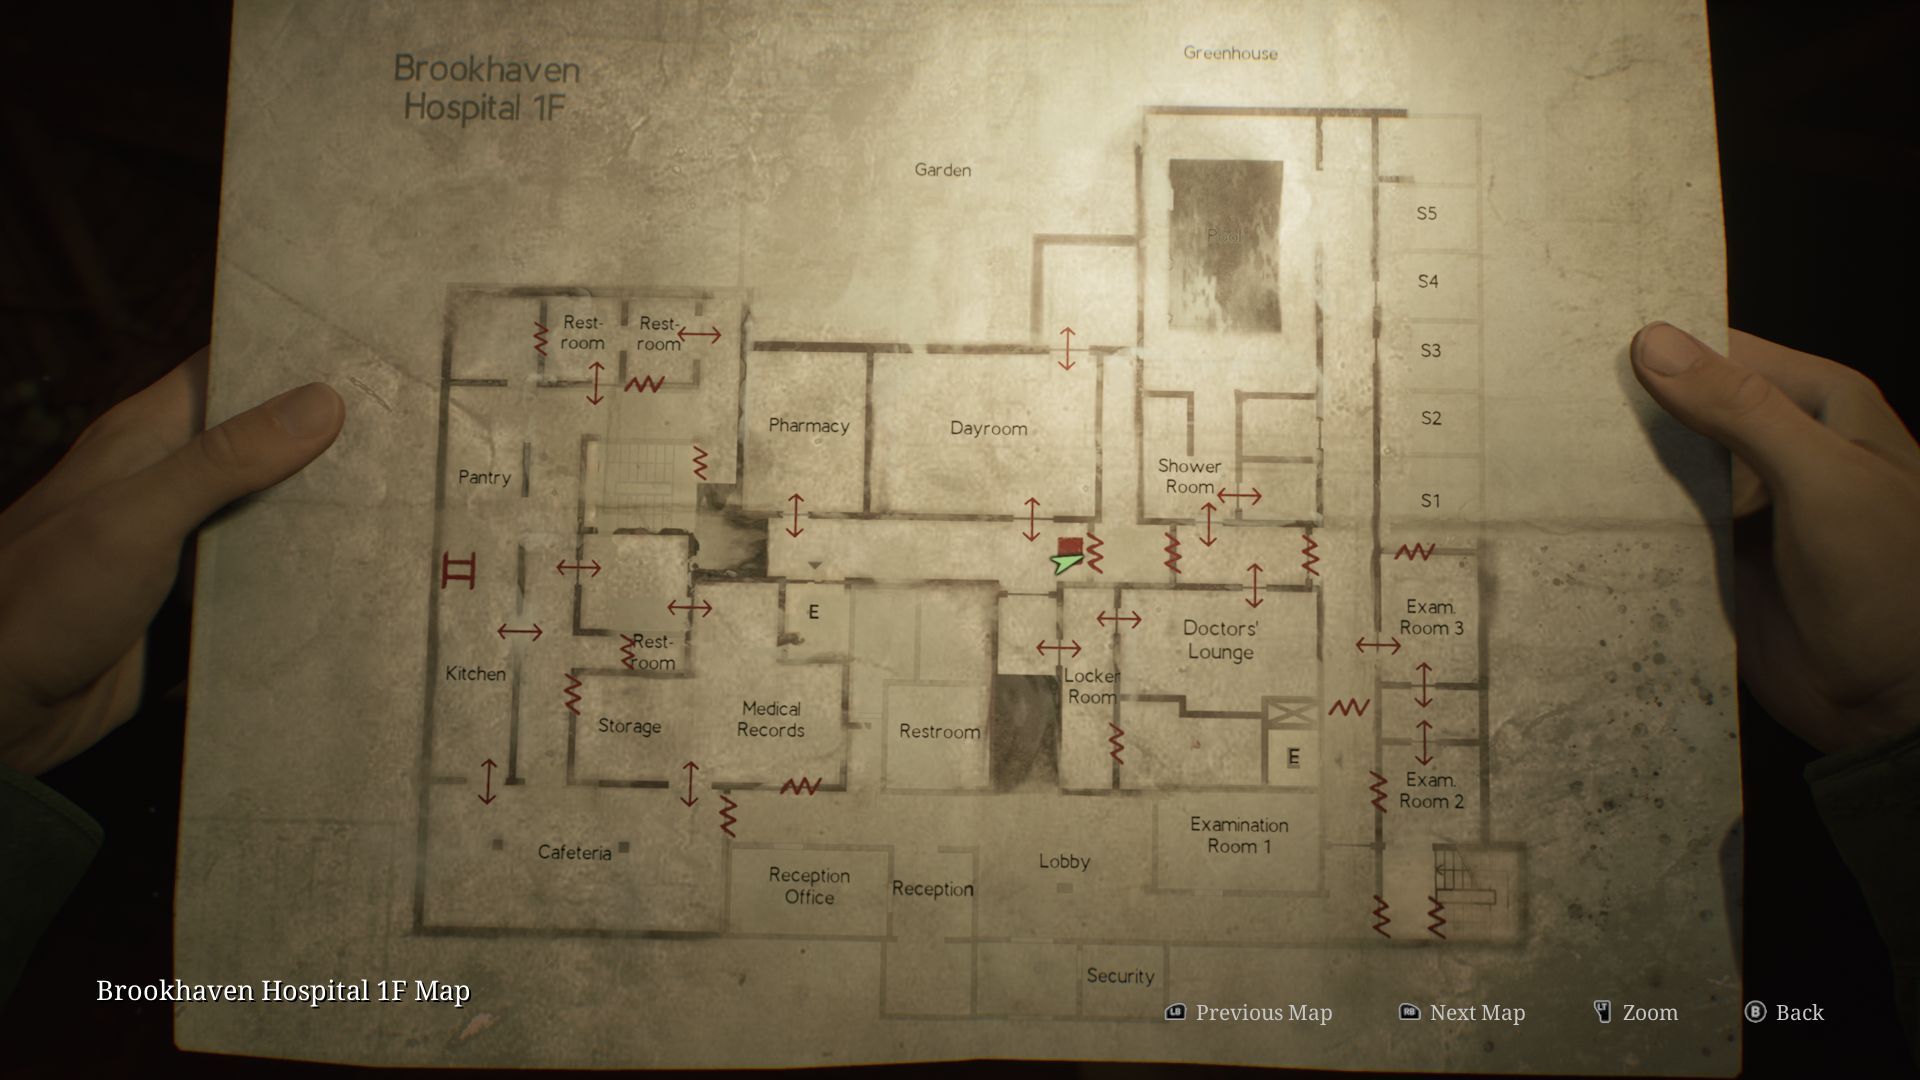
Image credit:Rock Paper Shotgun / Konami
And what about that exploration? Mostly it remains an old-fashioned affair of checking doors and finding an object in one place and bringing it to another. You will collect coins and broken records and valves and porcelain figures and dozens of ornate keys. You will pick them up before you know why you’re even doing it, pocketing seemingly random objects like a kleptomaniac let loose in a mall at midnight. You will stick your arm into dark holes in the wall that smell like rot without stopping to wonder why. All this certainly lends it the distinctive feeling of a PlayStation 2 game circa 2001, and fits with the surrealism of the piece at large. But it was impossible not to laugh the fifth time I was asked to leap into a big hole in the ground, or to stick my bare arm in a bath of bubbling acid “just to see”.
Many of the objects you pinch end up clicking into centrepiece puzzles - music boxes and tricky paintings and zodiac-adorned cabinets that lie in some central space, which require tinkering and toying with to reveal the most key of key items. These puzzles can be hit and miss. One later puzzle, involving some poetically morbid riddles, seemed to just be trial and error lever pulling, despite having a thematically strong setup (you are choosing which “criminal” to hang at a gallows). This puzzle, like others, will change according to each playthrough. So it’s possible I just got a particularly shonky combination of riddlepoems that made the goal unclear. It felt broken.
Yet many other puzzles are strong tests of logic, intuition and understanding. These benefit from pausing and taking a moment to think things through. To spoil one very small example, you become locked in a tiny room full of respawning insects. To escape you have to input a three number code on the door. There doesn’t seem to be any hints around. Until you realise there’s a pattern of blood on the keypad. Great! Try all the bloody buttons, my brain said. Game designers love to paint the answer on for you, right?
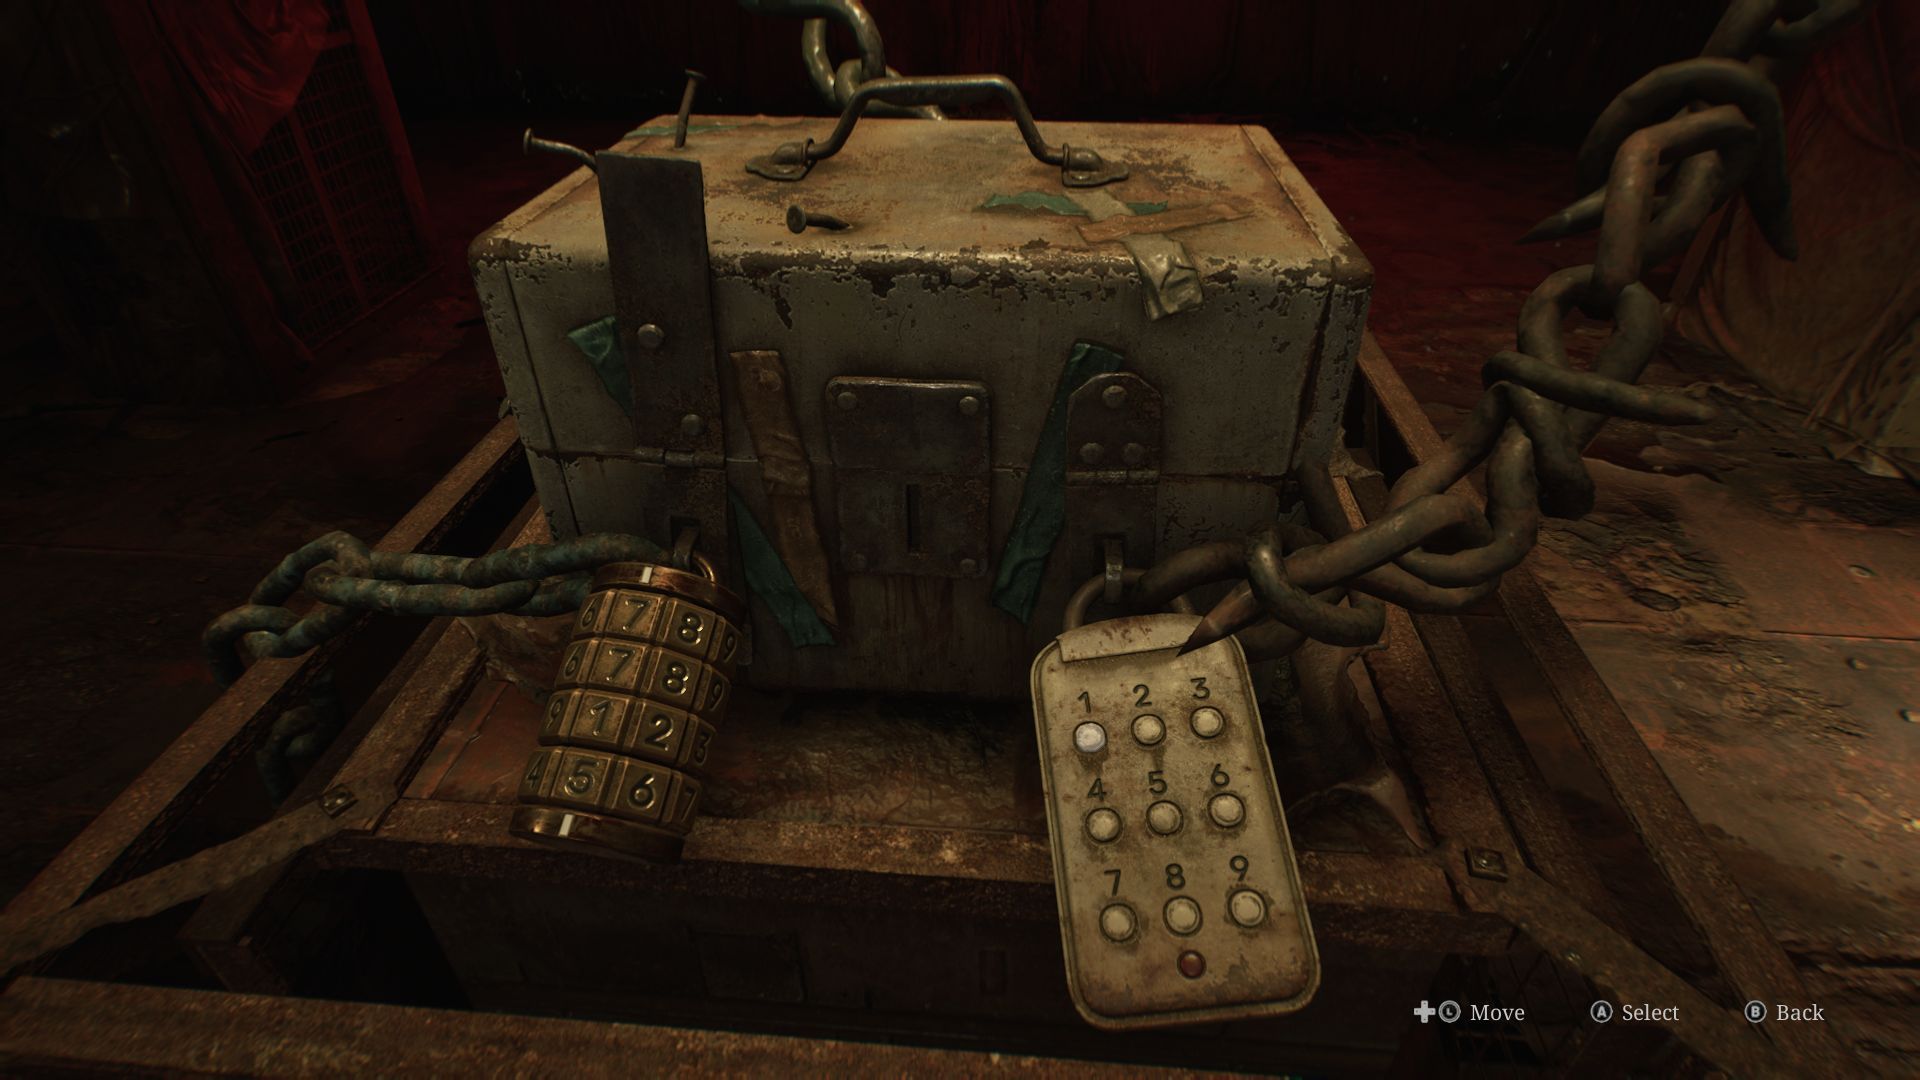
Image credit:Rock Paper Shotgun / Konami
Nope, those combinations weren’t working. I frowned. Then, perhaps remembering that one picture of the WW2 bomber with all the bullet holes , I tried combining the buttons without the blood. Ding ding, door opened. This is exactly the level of puzzle I like. Obvious in hindsight, but one that makes you feel clever in the moment.
And then you get kicked in the head by a monster hiding around the corner. Despite recent assertions by Bloober Team that they value atmosphere over jump scares , the game is absolutely full of monster closets, ambushes, shrieking sound effects, and sudden surprises. Combat is mostly the straightforward third-person shooting that has been with us since the dawn of Dead Space , with some wildly magnetic melee combat thrown in for good measure. Enemy corpses stick around and may get up again, as in the big elephant-shaped remake in the room, Resident Evil 2 . But it’s worth knowing that Pyramid Head (the butcher-aproned antagonist that hounds James throughout his hellish holiday) is not given the full Mr X treatment as a being who walks around after you while you explore. Silent Hill 2’s approach to boss fights and enemy encounters is to play it utterly safe.
This is a decision that extends to all aspects of the game. It’s a great-looking, tonally faithful reproduction, if dry as an act of adaptation. It sometimes refers to its own place in video game history to keep you interested - little scenes of the old game lie scattered around as clearly signposted easter eggs, and the screen wobbles and chirps with recognition when you discover these, even if you don’t remember them yourself, the game will elbow you gently as if to say: “remember this wall with the scratches on it!”. You might. I did not.
It also starts to drag quite a bit in later acts which see James lumbering around a tormented labyrinth, traipsing down abstract corridor upon abstract corridor, leaping into abyss after abyss of his own wretched psychology with an unquestioning anti-resolve the original game’s 8-10 hour playtime did not demand. Sticking his arm into every unsanitary cavity he can find. James “loves a hole” Sunderland. James “elbows deep” Sunderland.


Again, I can’t help but compare James’ Jolly Jaunt to Leon’s Laudable Lark. Where Resi 2 often feels like a playful reimagining of its source material, Silent Hill 2 often feels like the same game from 2001 turned into a perfectly fine third-person horror. The window-blocking planks and the stomping pursuits from Mr X made Resi 2 mechanically interesting in a way that James’ window smashing and crate moving does not. If Bloober play any cheeky memory games in the vein of Raccoon City Police Station’s first “licker” (the remake puts it on a different floor than you remember), then I didn’t notice it. But it’s possible I just don’t have as fond a memory for Konami’s wife finder as I do for Capcom’s much shorter corridor waltzer.
Consider also the much-altered storytelling of Final Fantasy VII ’s ongoing remake. The revamped Xen of Black Mesa . The thorough Majima-ing of Yakuza Kiwami 1 and 2. Next to these, Silent Hill 2 feels unambitious in all aspects but the admittedly excellent technical craft. Like I say, I don’t envy Bloober Team’s job here. They are not going to please everyone - some will find it does not steer close enough to their memories and expectations. Others, like me, will find it conservative and unwilling to take risks, mechanically or otherwise. I learned a theory the other day about adaptations - that each adaptation of a known work can be measured by both faithfulness and by the “piquancy of surprise”. Bloober’s Silent Hill 2 is both rapturously faithful and as mild as bottled water.
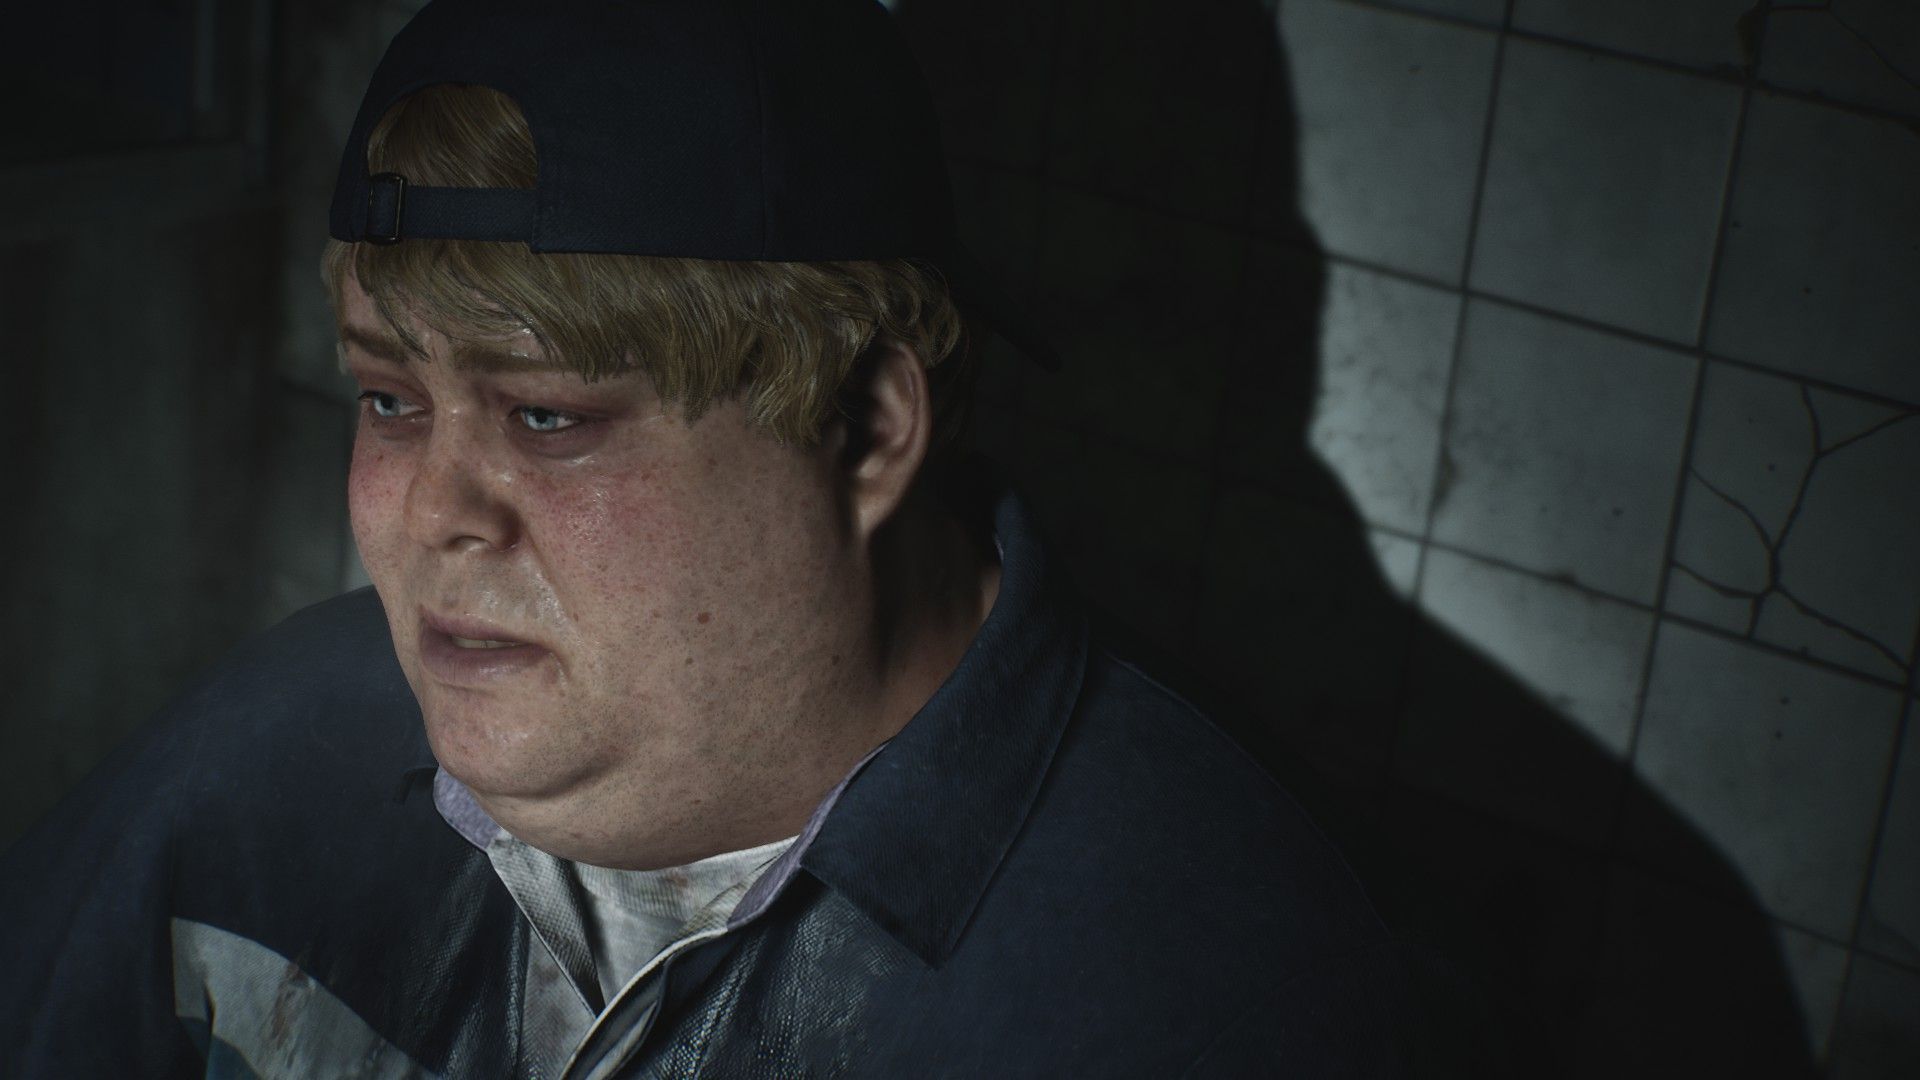
Image credit:Rock Paper Shotgun / Konami
Whether the taste of horror game Evian bothers you will come down to personal taste. I like it when a remake bites. I want Tifa to die in Final Fantasy VII , just to see how it plays out. In the inevitable Dino Crisis remake, I want to play as a velociraptor. So for me there is a vague feeling of a missed opportunity, like I’ve seen this Silent Hill 2 for more than 20 years. The spiced-up puzzles and niced-up puddles only add so much. At twice the length of its original, the scares and creepiness also started to wane long before the story wrapped up. If you know what’s coming in the final act, the mystery of James’ grief can’t carry those hours either.
For me, the impact of Silent Hill 2 has dissolved into history, like a freaky twitching monster fading into fog. Even in 2001, I wasn’t blown away by the jumble of psychological symbolism that friends found fascinating enough to venerate. That’s not to say I would have preferred Bloober to de-mystify the disjointed dialogue and unreliably shifting world. It goes without saying that the more you relish tossing yourself into the abyss of literary pareidolia, the more you will enjoy this particular brand of Blue Velvet-inspired horror. But you probably knew that in 2001, when the original game first introduced you to the fuckedest-uppest of Internal Family Systems - the broken psyche of Jimmy Sunderland, aka, the worst Orpheus.


And so, I have sometimes struggled to enjoy it in the same way as I enjoy written fiction with the same style of storytelling. The longer I spent in James’ personal hellscape, the more I could accept it as the video game equivalent of Alisdair Gray’s Lanark , but I also don’t have the patience to analyse every detail within its 16 to 20-hour story, as some will. And ultimately, I can’t help but feel underwhelmed by how much its sacred history has chained this remake down.
In the options, beside a lot of good accessibility features, you can find colour-altering visual options that allow you to play the whole game through a “90s” filter, a “CRT” filter, or a “pixelate” filter. In remaking Silent Hill 2, Bloober and Konami have passed their entire classic horror game through a similar 2020s filter. It looks different, but it’s the same game.
Find out how we conduct our reviews by reading our review policy .

Silent Hill 2
PS2
Silent Hill 2 Remake
PS5 , PC
Rock Paper Shotgun is better when you sign in
Sign in and join us on our journey to discover strange and compelling PC games.

All 75 Arc Raiders Blueprints and where to get them
These areas have the highest chance of giving you Blueprints

Image credit:Rock Paper Shotgun/Embark Studios

Looking for more Arc Raiders Blueprints? It’s a special day when you find a Blueprint, as they’re among the most valuable items in Arc Raiders. If you find a Blueprint that you haven’t already found, then you must make sure you hold onto it at all costs, because Blueprints are the key to one of the most important and powerful systems of meta-progression in the game.
This guide aims to be the very best guide on Blueprints you can find, starting with a primer on what exactly they are and how they work in Arc Raiders, before delving into exactly where to get Blueprints and the very best farming spots for you to take in your search.
We’ll also go over how to get Blueprints from other unlikely activities, such as destroying Surveyors and completing specific quests. And you’ll also find the full list of all 75 Blueprints in Arc Raiders on this page (including the newest Blueprints added with the Cold Snap update , such as the Deadline Blueprint and Firework Box Blueprint), giving you all the information you need to expand your own crafting repertoire.
In this guide:
- What are Blueprints in Arc Raiders?
- Full Blueprint list: All crafting recipes
- Where to find Blueprints in Arc Raiders Blueprints obtained from quests Blueprints obtained from Trials Best Blueprint farming locations

What are Blueprints in Arc Raiders?
Blueprints in Arc Raiders are special items which, if you manage to extract with them, you can expend to permanently unlock a new crafting recipe in your Workshop. If you manage to extract from a raid with an Anvil Blueprint, for example, you can unlock the ability to craft your very own Anvil Pistol, as many times as you like (as long as you have the crafting materials).
To use a Blueprint, simply open your Inventory while in the lobby, then right-click on the Blueprint and click “Learn And Consume” . This will permanently unlock the recipe for that item in your Workshop. As of the Stella Montis update, there are allegedly 75 different Blueprints to unlock - although only 68 are confirmed to be in the game so far. You can see all the Blueprints you’ve found and unlocked by going to the Workshop menu, and hitting “R” to bring up the Blueprint screen.
It’s possible to find duplicates of past Blueprints you’ve already unlocked. If you find these, then you can either sell them, or - if you like to play with friends - you can take it into a match and gift it to your friend so they can unlock that recipe for themselves. Another option is to keep hold of them until the time comes to donate them to the Expedition.
Full Blueprint list: All crafting recipes
Below is the full list of all the Blueprints that are currently available to find in Arc Raiders, and the crafting recipe required for each item:
| Blueprint | Type | Recipe | Crafted At |
|---|---|---|---|
| Bettina | Weapon | 3x Advanced Mechanical Components 3x Heavy Gun Parts 3x Canister | Gunsmith 3 |
| Blue Light Stick | Quick Use | 3x Chemicals | Utility Station 1 |
| Aphelion | Weapon | 3x Magnetic Accelerator 3x Complex Gun Parts 1x Matriarch Reactor | Gunsmith 3 |
| Combat Mk. 3 (Flanking) | Augment | 2x Advanced Electrical Components 3x Processor | Gear Bench 3 |
| Combat Mk. 3 (Aggressive) | Augment | 2x Advanced Electrical Components 3x Processor | Gear Bench 3 |
| Complex Gun Parts | Material | 2x Light Gun Parts 2x Medium Gun Parts 2x Heavy Gun Parts | Refiner 3 |
| Fireworks Box | Quick Use | 1x Explosive Compound 3x Pop Trigger | Explosives Station 2 |
| Gas Mine | Mine | 4x Chemicals 2x Rubber Parts | Explosives Station 1 |
| Green Light Stick | Quick Use | 3x Chemicals | Utility Station 1 |
| Pulse Mine | Mine | 1x Crude Explosives 1x Wires | Explosives Station 1 |
| Seeker Grenade | Grenade | 1x Crude Explosives 2x ARC Alloy | Explosives Station 1 |
| Looting Mk. 3 (Survivor) | Augment | 2x Advanced Electrical Components 3x Processor | Gear Bench 3 |
| Angled Grip II | Mod | 2x Mechanical Components 3x Duct Tape | Gunsmith 2 |
| Angled Grip III | Mod | 2x Mod Components 5x Duct Tape | Gunsmith 3 |
| Hullcracker | Weapon | 1x Magnetic Accelerator 3x Heavy Gun Parts 1x Exodus Modules | Gunsmith 3 |
| Launcher Ammo | Ammo | 5x Metal Parts 1x Crude Explosives | Workbench 1 |
| Anvil | Weapon | 5x Mechanical Components 5x Simple Gun Parts | Gunsmith 2 |
| Anvil Splitter | Mod | 2x Mod Components 3x Processor | Gunsmith 3 |
| ??? | ??? | ??? | ??? |
| Barricade Kit | Quick Use | 1x Mechanical Components | Utility Station 2 |
| Blaze Grenade | Grenade | 1x Explosive Compound 2x Oil | Explosives Station 3 |
| Bobcat | Weapon | 3x Advanced Mechanical Components 3x Light Gun Parts | Gunsmith 3 |
| Osprey | Weapon | 2x Advanced Mechanical Components 3x Medium Gun Parts 7x Wires | Gunsmith 3 |
| Burletta | Weapon | 3x Mechanical Components 3x Simple Gun Parts | Gunsmith 1 |
| Compensator II | Mod | 2x Mechanical Components 4x Wires | Gunsmith 2 |
| Compensator III | Mod | 2x Mod Components 8x Wires | Gunsmith 3 |
| Defibrillator | Quick Use | 9x Plastic Parts 1x Moss | Medical Lab 2 |
| ??? | ??? | ??? | ??? |
| Equalizer | Weapon | 3x Magnetic Accelerator 3x Complex Gun Parts 1x Queen Reactor | Gunsmith 3 |
| Extended Barrel | Mod | 2x Mod Components 8x Wires | Gunsmith 3 |
| Extended Light Mag II | Mod | 2x Mechanical Components 3x Steel Spring | Gunsmith 2 |
| Extended Light Mag III | Mod | 2x Mod Components 5x Steel Spring | Gunsmith 3 |
| Extended Medium Mag II | Mod | 2x Mechanical Components 3x Steel Spring | Gunsmith 2 |
| Extended Medium Mag III | Mod | 2x Mod Components 5x Steel Spring | Gunsmith 3 |
| Extended Shotgun Mag II | Mod | 2x Mechanical Components 3x Steel Spring | Gunsmith 2 |
| Extended Shotgun Mag III | Mod | 2x Mod Components 5x Steel Spring | Gunsmith 3 |
| Remote Raider Flare | Quick Use | 2x Chemicals 4x Rubber Parts | Utility Station 1 |
| Heavy Gun Parts | Material | 4x Simple Gun Parts | Refiner 2 |
| Venator | Weapon | 2x Advanced Mechanical Components 3x Medium Gun Parts 5x Magnet | Gunsmith 3 |
| Il Toro | Weapon | 5x Mechanical Components 6x Simple Gun Parts | Gunsmith 1 |
| Jolt Mine | Mine | 1x Electrical Components 1x Battery | Explosives Station 2 |
| Explosive Mine | Mine | 1x Explosive Compound 1x Sensors | Explosives Station 3 |
| Jupiter | Weapon | 3x Magnetic Accelerator 3x Complex Gun Parts 1x Queen Reactor | Gunsmith 3 |
| Light Gun Parts | Material | 4x Simple Gun Parts | Refiner 2 |
| Lightweight Stock | Mod | 2x Mod Components 5x Duct Tape | Gunsmith 3 |
| Lure Grenade | Grenade | 1x Speaker Component 1x Electrical Components | Utility Station 2 |
| Medium Gun Parts | Material | 4x Simple Gun Parts | Refiner 2 |
| Torrente | Weapon | 2x Advanced Mechanical Components 3x Medium Gun Parts 6x Steel Spring | Gunsmith 3 |
| Muzzle Brake II | Mod | 2x Mechanical Components 4x Wires | Gunsmith 2 |
| Muzzle Brake III | Mod | 2x Mod Components 8x Wires | Gunsmith 3 |
| Padded Stock | Mod | 2x Mod Components 5x Duct Tape | Gunsmith 3 |
| Shotgun Choke II | Mod | 2x Mechanical Components 4x Wires | Gunsmith 2 |
| Shotgun Choke III | Mod | 2x Mod Components 8x Wires | Gunsmith 3 |
| Shotgun Silencer | Mod | 2x Mod Components 8x Wires | Gunsmith 3 |
| Showstopper | Grenade | 1x Advanced Electrical Components 1x Voltage Converter | Explosives Station 3 |
| Silencer I | Mod | 2x Mechanical Components 4x Wires | Gunsmith 2 |
| Silencer II | Mod | 2x Mod Components 8x Wires | Gunsmith 3 |
| Snap Hook | Quick Use | 2x Power Rod 3x Rope 1x Exodus Modules | Utility Station 3 |
| Stable Stock II | Mod | 2x Mechanical Components 3x Duct Tape | Gunsmith 2 |
| Stable Stock III | Mod | 2x Mod Components 5x Duct Tape | Gunsmith 3 |
| Tagging Grenade | Grenade | 1x Electrical Components 1x Sensors | Utility Station 3 |
| Tempest | Weapon | 3x Advanced Mechanical Components 3x Medium Gun Parts 3x Canister | Gunsmith 3 |
| Trigger Nade | Grenade | 2x Crude Explosives 1x Processor | Explosives Station 2 |
| Vertical Grip II | Mod | 2x Mechanical Components 3x Duct Tape | Gunsmith 2 |
| Vertical Grip III | Mod | 2x Mod Components 5x Duct Tape | Gunsmith 3 |
| Vita Shot | Quick Use | 2x Antiseptic 1x Syringe | Medical Lab 3 |
| Vita Spray | Quick Use | 3x Antiseptic 1x Canister | Medical Lab 3 |
| Vulcano | Weapon | 1x Magnetic Accelerator 3x Heavy Gun Parts 1x Exodus Modules | Gunsmith 3 |
| Wolfpack | Grenade | 2x Explosive Compound 2x Sensors | Explosives Station 3 |
| Red Light Stick | Quick Use | 3x Chemicals | Utility Station 1 |
| Smoke Grenade | Grenade | 14x Chemicals 1x Canister | Utility Station 2 |
| Deadline | Mine | 3x Explosive Compound 2x ARC Circuitry | Explosives Station 3 |
| Trailblazer | Grenade | 1x Explosive Compound 1x Synthesized Fuel | Explosives Station 3 |
| Tactical Mk. 3 (Defensive) | Augment | 2x Advanced Electrical Components 3x Processor | Gear Bench 3 |
| Tactical Mk. 3 (Healing) | Augment | 2x Advanced Electrical Components 3x Processor | Gear Bench 3 |
| Yellow Light Stick | Quick Use | 3x Chemicals | Utility Station 1 |
Note: The missing Blueprints in this list likely have not actually been added to the game at the time of writing, because none of the playerbase has managed to find any of them. As they are added to the game, I will update this page with the most relevant information so you know exactly how to get all 75 Arc Raiders Blueprints.
Where to find Blueprints in Arc Raiders
Below is a list of all containers, modifiers, and events which maximise your chances of finding Blueprints:
- Certain quests reward you with specific Blueprints .
- Completing Trials has a high chance of offering Blueprints as rewards.
- Surveyors have a decent chance of dropping Blueprints on death.
- High loot value areas tend to have a greater chance of spawning Blueprints.
- Night Raids and Storms may increase rare Blueprint spawn chances in containers.
- Containers with higher numbers of items may have a higher tendency to spawn Blueprints. As a result, Blue Gate (which has many “large” containers containing multiple items) may give you a higher chance of spawning Blueprints.
- Raider containers (Raider Caches, Weapon Boxes, Medical Bags, Grenade Tubes) have increased Blueprint drop rates. As a result, the Uncovered Caches event gives you a high chance of finding Blueprints.
- Security Lockers have a higher than average chance of containing Blueprints.
- Certain Blueprints only seem to spawn under specific circumstances: Tempest Blueprint only spawns during Night Raid events. Vulcano Blueprint only spawns during Hidden Bunker events. Jupiter and Equaliser Blueprints only spawn during Harvester events.

Raider Caches, Weapon Boxes, and other raider-oriented container types have a good chance of offering Blueprints. |Image credit:Rock Paper Shotgun/Embark Studios
Blueprints have a very low chance of spawning in any container in Arc Raiders, around 1-2% on average. However, there is a higher chance of finding Blueprints in particular container types. Specifically, you can find more Blueprints in Raider containers and security lockers.
Beyond this, if you’re looking for Blueprints you should focus on regions of the map which are marked as having particularly high-value loot. Areas such as the Control Tower in Dam Battlegrounds, the Arrival and Departure Buildings in Spaceport, and Pilgrim’s Peak in Blue Gate all have a better-than-average chance of spawning Blueprints somewhere amongst all their containers. Night Raids and Electromagnetic Storm events also increase the drop chances of certain Blueprints .
In addition to these containers, you can often loot Blueprints from destroyed Surveyors - the largest of the rolling ball ARC. Surveyors are more commonly found on the later maps - Spaceport and Blue Gate - and if one spawns in your match, you’ll likely see it by the blue laser beam that it casts into the sky while “surveying”.
Surveyors are quite well-armoured and will very speedily run away from you once it notices you, but if you can take one down then make sure you loot all its parts for a chance of obtaining certain unusual Blueprints.
Blueprints obtained from quests
One way in which you can get Blueprints is by completing certain quests for the vendors in Speranza. Some quests will reward you with a specific item Blueprint upon completion, so as long as you work through all the quests in Arc Raiders, you are guaranteed those Blueprints.
Here is the full list of all Blueprints you can get from quest rewards:
- Trigger Nade Blueprint: Rewarded after completing “Sparks Fly”.
- Lure Grenade Blueprint: Rewarded after completing “Greasing Her Palms”.
- Burletta Blueprint: Rewarded after completing “Industrial Espionage”.
- Hullcracker Blueprint (and Launcher Ammo Blueprint): Rewarded after completing “The Major’s Footlocker”.
Alas, that’s only 4 Blueprints out of a total of 75 to unlock, so for the vast majority you will need to find them yourself during a raid. If you’re intent on farming Blueprints, then it’s best to equip yourself with cheap gear in case you lose it, but don’t use a free loadout because then you won’t get a safe pocket to stash any new Blueprint you find. No pain in Arc Raiders is sharper than failing to extract with a new Blueprint you’ve been after for a dozen hours already.

One of the best ways to get Blueprints is by hitting three stars on all five Trials every week. |Image credit:Rock Paper Shotgun/Embark Studios
Blueprints obtained from Trials
One of the very best ways to get Blueprints is as rewards for completing Trials in Arc Raiders. Trials are unlocked from Level 15 onwards, and allow you to earn rewards by focusing on certain tasks over the course of several raids. For example, one Trial might task you with dealing damage to Hornets, while another might challenge you to loot Supply Drops.
Trials refresh on a weekly basis, with a new week bringing five new Trials. Each Trial can offer up to three rewards after passing certain score milestones, and it’s possible to receive very high level loot from these reward crates - including Blueprints. So if you want to unlock as many Blueprints as possible, you should make a point of completing as many Trials as possible each week.
Best Blueprint farming locations
The very best way to get Blueprints is to frequent specific areas of the maps which combine high-tier loot pools with the right types of containers to search. Here are my recommendations for where to find Blueprints on every map, so you can always keep the search going for new crafting recipes to unlock.

Image credit:Rock Paper Shotgun/Embark Studios
Dam Battlegrounds
The best places to farm Blueprints on Dam Battlegrounds are the Control Tower, Power Generation Complex, Ruby Residence, and Pale Apartments . The first two regions, despite only being marked on the map as mid-tier loot, contain a phenomenal number of containers to loot. The Control Tower can also contain a couple of high-tier Security Lockers - though of course, you’ll need to have unlocked the Security Breach skill at the end of the Survival tree.
There’s also a lot of reporting amongst the playerbase that the Residential areas in the top-left of the map - Pale Apartments and Ruby Residence - give you a comparatively strong chance of finding Blueprints. Considering their size, there’s a high density of containers to loot in both locations, and they also have the benefit of being fairly out of the way. So you’re more likely to have all the containers to yourself.
Buried City
The best Blueprint farming locations on Buried City are the Santa Maria Houses, Grandioso Apartments, Town Hall, and the various buildings of the New District . Grandioso Apartments has a lower number of containers than the rest, but a high chance of spawning weapon cases - which have good Blueprint drop rates. The others are high-tier loot areas, with plenty of lootable containers - including Security Lockers.
Spaceport
The best places to find Blueprints on Spaceport are the Arrival and Departure Buildings, as well as Control Tower A6 and the Launch Towers . All these areas are labelled as high-value loot regions, and many of them are also very handily connected to one another by the Spaceport wall, which you can use to quickly run from one area to the next. At the tops of most of these buildings you’ll find at least one Security Locker, so this is an excellent farming route for players looking to find Blueprints.
The downside to looting Blueprints on Spaceport is that all these areas are hotly contested, particularly in Duos and Squads. You’ll need to be very focused and fast in order to complete the full farming route.

Image credit:Rock Paper Shotgun/Embark Studios
Blue Gate
Blue Gate tends to have a good chance of dropping Blueprints, potentially because it generally has a high number of containers which can hold lots of items; so there’s a higher chance of a Blueprint spawning in each container. In my experience, the best Blueprint farming spots on Blue Gate are Pilgrim’s Peak, Raider’s Refuge, the Ancient Fort, and the Underground Complex beneath the Warehouse .
All of these areas contain a wealth of containers to loot. Raider’s Refuge has less to loot, but the majority of the containers in and around the Refuge are raider containers, which have a high chance of containing Blueprints - particularly during major events.
Stella Montis
On the whole, Stella Montis seems to have a very low drop rate for Blueprints (though a high chance of dropping other high-tier loot). If you do want to try farming Blueprints on this map, the best places to find Blueprints in Stella Montis are Medical Research, Assembly Workshop, and the Business Center . These areas have the highest density of containers to loot on the map.
In addition to this, the Western Tunnel has a few different Security Lockers to loot, so while there’s very little to loot elsewhere in this area of the map, it’s worth hitting those Security Lockers if you spawn there at the start of a match.
That wraps up this primer on how to get all the Blueprints in Arc Raiders as quickly as possible. With the Expedition system constantly resetting a large number of players’ Blueprints, it’s more important than ever to have the most up-to-date information on where to find all these Blueprints.
While you’re here, be sure to check out our Arc Raiders best guns tier list , as well as our primers on the best skills to unlock and all the different Field Depot locations on every map.

ARC Raiders
PS5 , Xbox Series X/S , PC
Rock Paper Shotgun is better when you sign in
Sign in and join us on our journey to discover strange and compelling PC games.
