Sid Meier’s Civilization VII review
One more turn
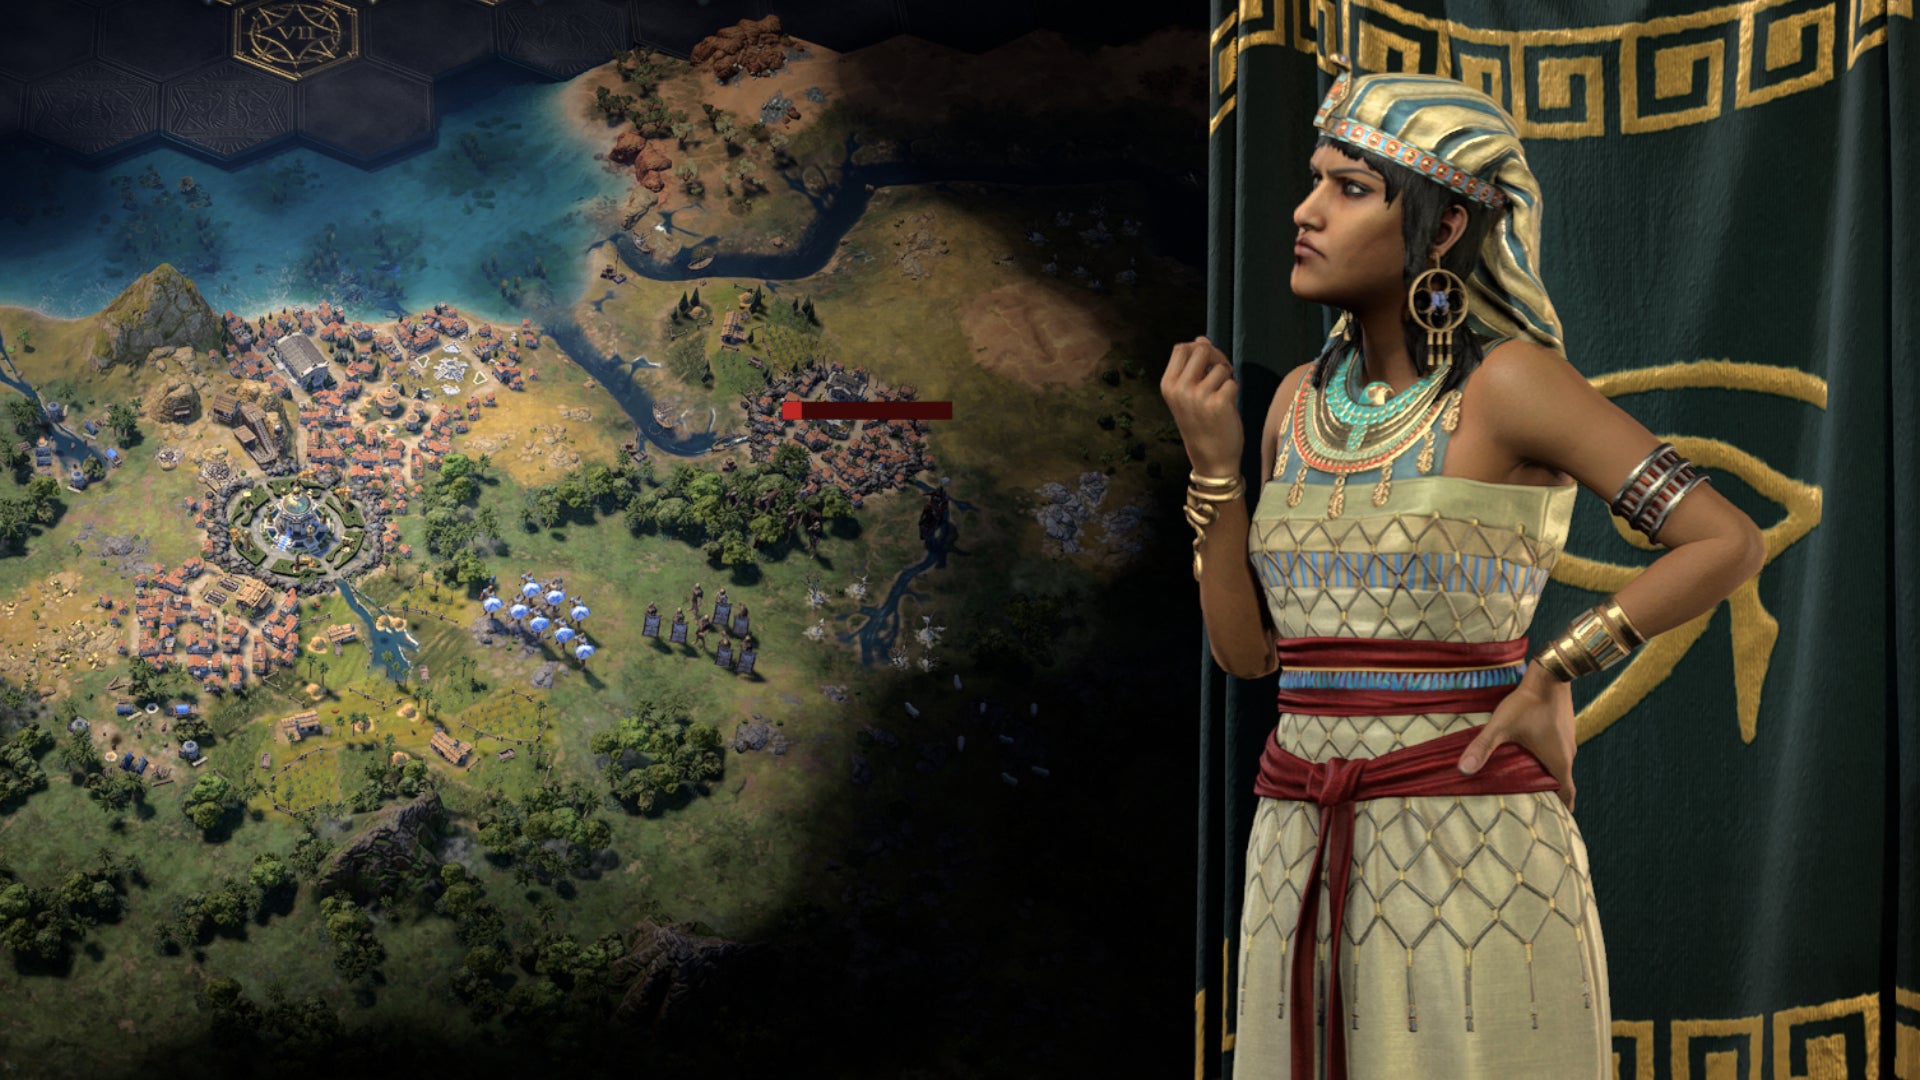
Image credit:RPS / Firaxis

- Developer: 2K
- Publisher: Firaxis
- Release: Feb 10th, 2025
- On: Windows
- From: Steam
- Price: £60/$70/€70
- Reviewed on: AMD Ryzen 7 4800H, 16GB RAM
Civilization is one of only two games I’ve had on every computer I’ve ever owned, in its multiple versions, since I first encountered it. (The other is NetHack.) It’s also important in my family. My wife plays it frequently (although she’s been on a Balatro kick recently), and I remember my middle child, in middle school, responding to a vocabulary quiz where they were asked to define “civilization” with the answer: “Civilization is a game designed by Sid Meier.”
Obviously, I’m well disposed toward this long-running turn-based strategy series. But Civilization 7 , as currently constituted, has some real flaws – and though I expect they may be fixed in future updates (and there are workarounds), some of this is a little sloppy.
The most basic issue is: combat sucks.
Before we get to why, let’s first talk about some of Civilization 7’s big new ideas. It’s pretty clear that the main design concern this time is to address two criticisms of the earlier iterations. In fact, the game is successful on that score.
One concern is the “snowball effect.” In most previous versions of Civ, the tension tends to fall in the early to mid-game. In these earliest eras of history, you need to expand rapidly, you can encounter risky dealings with barbarians and city states, and other countries can attack you when you’re not really ready to wage a war. But by the time you’ve entered the late game, you can probably power through any challenge you face, because you’re smart enough to ensure that you have superior technology and enough of a military to deal with any challenge the AI throws at you. In other words, the end-game can get dull, and you’re just playing to a fairly inevitable victory.
This is the motivation behind Civ 7’s most sweeping changes to the formula. The basic idea is that, as the age changes from ancient to exploration to modern, there’s kind of a reset. In previous iterations, you played the same civilization from front to back; once you had selected to play as the French or the Americans or the Aztecs, you were always the French or the Americans or the Aztecs. In this game, you change civilizations with each age change; I was the Greeks, then the Ming (a Chinese dynasty), then the French (vive l’empereur!).
With each era change, many of your military units go away (you get to keep six, plus what your generals can sustain). You keep your settlements, but towns you promoted to cities become towns again (you get to keep or establish one more city). Wars go away, along with negative policies, and relationships with AI opponents reset. In other words, you retain much progress, but it’s almost like you’re starting a new game.


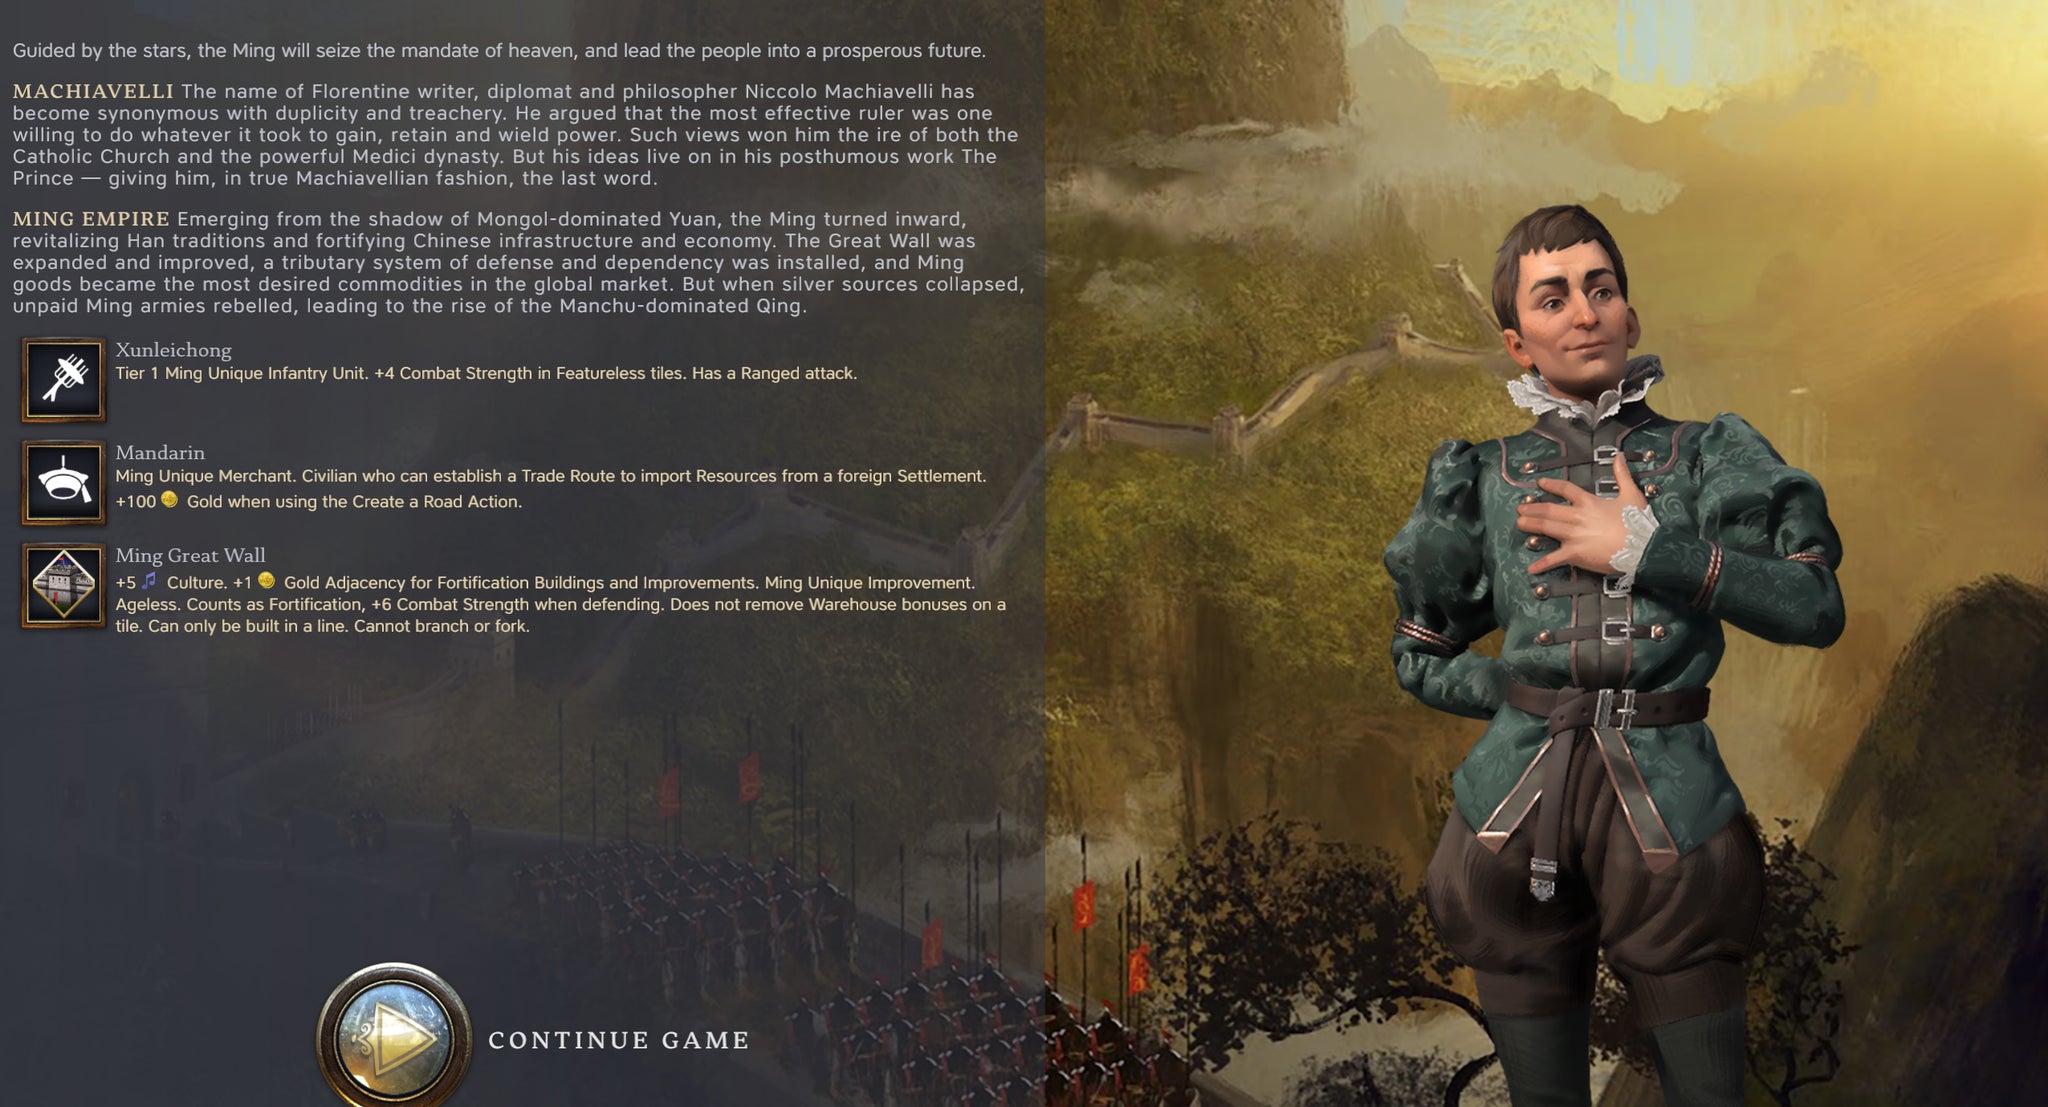
You also get a choice of what your new civilization is at the era change. At the end of the classic era, I was lagging greatly in technology (as the Greeks? Does that make sense?) so chose the Ming, who have an advantage in technology, and this did allow me to recapture ground in the tech sector. So there are tasty strategic choices here, in terms of what next-gen civilization serves you best.
Civ 7 differentiates between “towns” and “cities”: cities are much like cities in other versions of the series, using production to construct buildings, units, and wonders, although they can no longer insta-complete construction projects with money. Towns can be improved too, but take only money to build things. You can promote a town to a city (with money maybe better spent on town improvements), but at the end of the age, promoted cities get demoted to towns again, so you rarely want to do that (except in the modern age, if your town has a decent production economy, because no demotion is forthcoming).
In other words, the basic idea behind this system is to reset the game and the economy with each era change, to avoid the snowballing end-game of previous versions. And it works! It does solve that problem, but with some downsides.
In some ways, you stop identifying with a civilization, and instead identify with your leader, who persists through the ages. I played as Machiavelli, who has some advantages in diplomacy, and I generally try to avoid wars if I can. But you also tend to identify opposing AIs with their leader: Frederic the Great was a persistent pain in the butt for me, and I don’t even remember what civilizations he led (aggressive asshole, though). There is an upside in that I’d bet that playing Greece-Ming-France as Harriet Tubman would be a rather different experience than the same succession as Machiavelli. In other words, diverse combinations of leaders and civilizations creates more - and more interesting - choices.
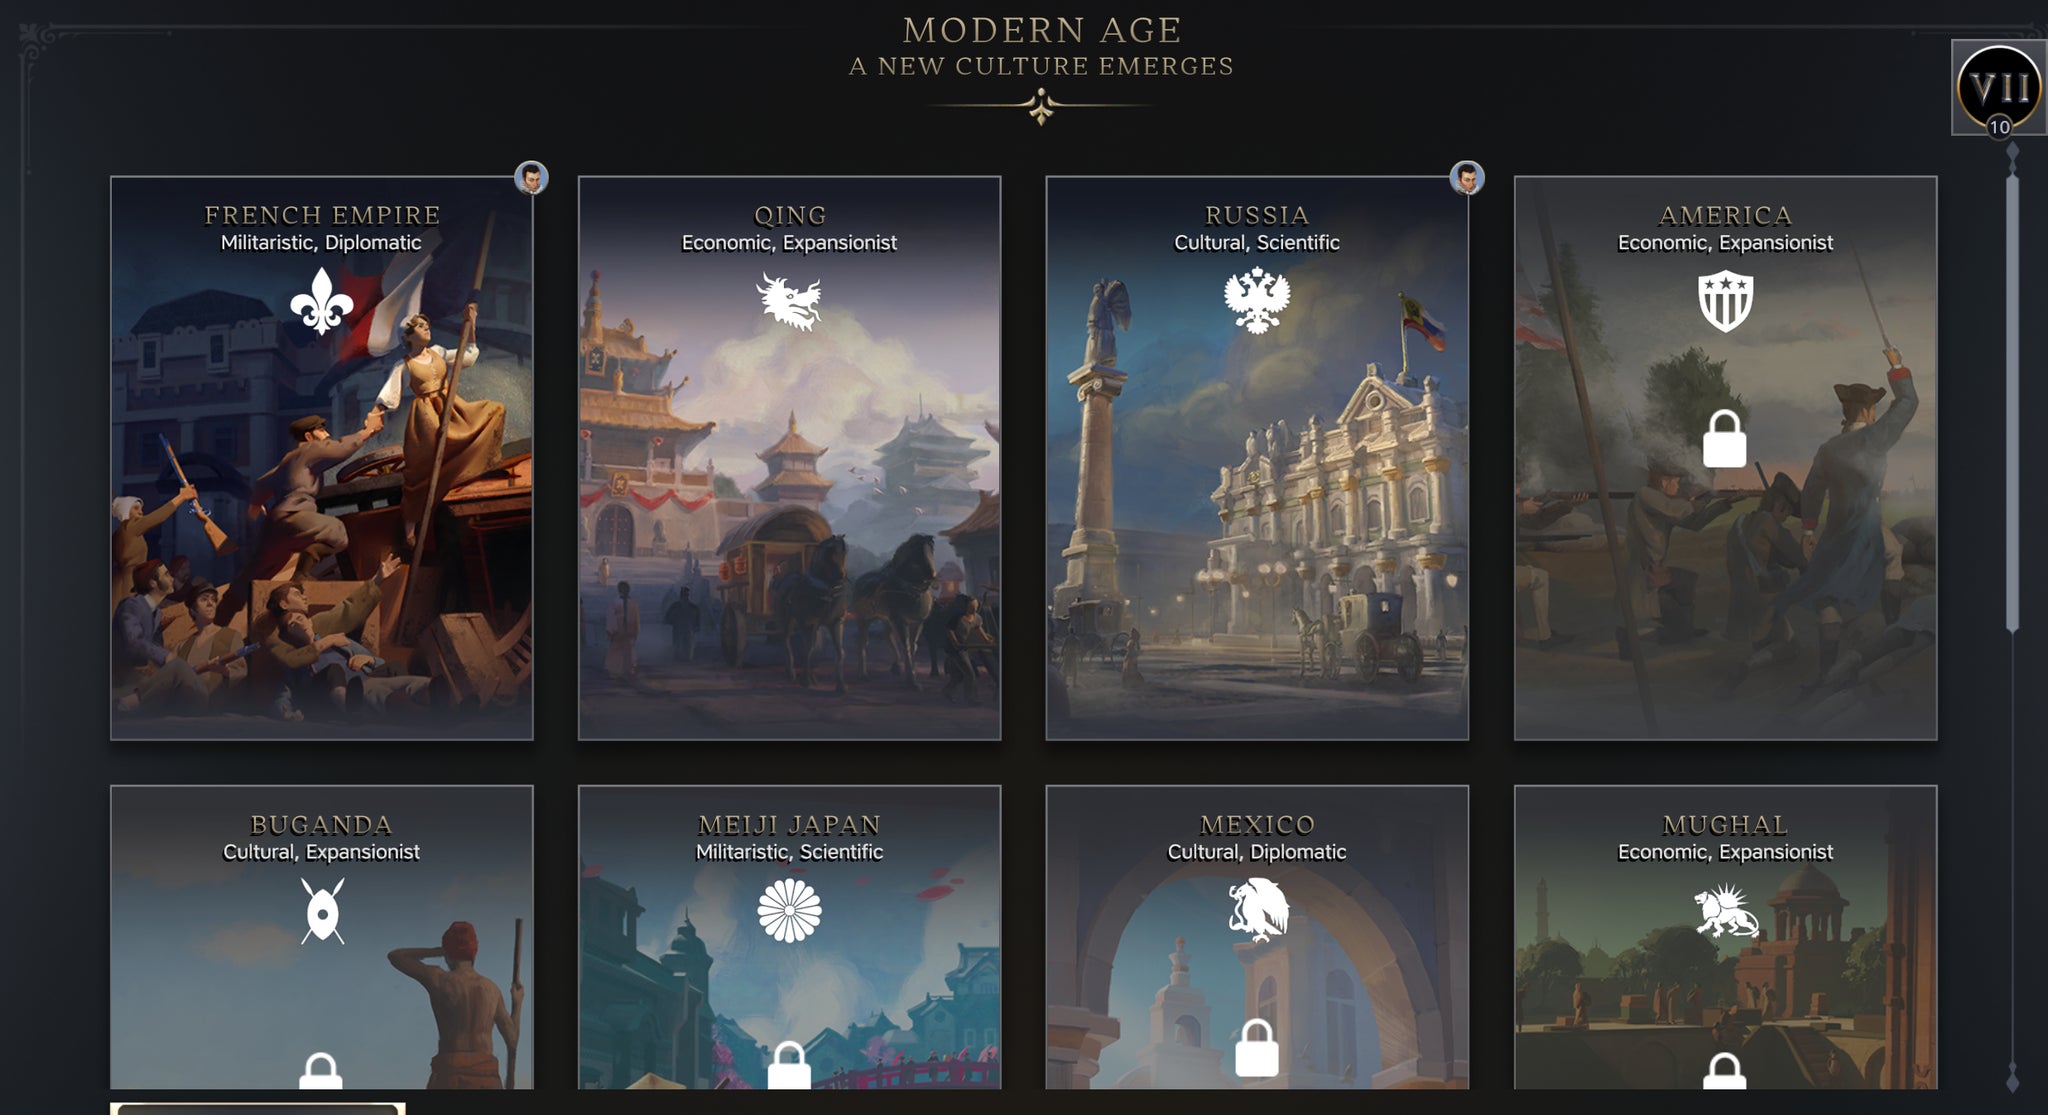
Image credit:RPS / Firaxis
One of the other criticisms of late-game Civ in earlier versions is the sheer amount of monkey work you had to do. You had, by the late game, a horde of worker units you had to manage, and while you could partially automate them (just build railroads until I tell you otherwise), it still took a lot of time. Oh, build a farm here. Oh, build a road to this city. Particularly on large maps, this produced a fair bit of grind.
This is totally gone in Civ 7. Building improvements to a hex does not require the use of a worker, and instead you simply select the hex and order the improvement with hammers (for cities) or gold (for towns) and wait for it to complete. Roads and railroads are automagically completed between your settlements over time. Mostly, this is a good thing, though at times it’s frustrating (why don’t I have a railroad to here yet, when I could totally use one?) but it absolutely does reduce the amount of busy-work you face in the late game.
It’s not just workers. Another improvement is the use of military leaders. Let’s say Prussia has just invaded (thanks, Frederick the Great) and I need to bus a whole bunch of military units to my southern border. Instead of having to move them one-by-one, I can take a military leader, have a whole bunch of units join under their command, move it where it needs to be, and then either have the commander attack as a whole or deploy the units around that commander to control more territory. In Civ, being at war slows the game down a great deal, as you suddenly have to activate (or build) a slew of military units and control them over multiple turns. That’s still the case in this edition, but the system of military leaders does ameliorate the problem to a noticeable degree, by allowing you to group multiple units under leaders and toss them about the map by issuing commands to the leader alone.
In other words, Civ 7 takes time-consuming chores from previous iterations of the game, and makes them faster. Need to command workers? No more. Need to move a bunch of troops? Easier. In other words: smart and commendable design decisions.
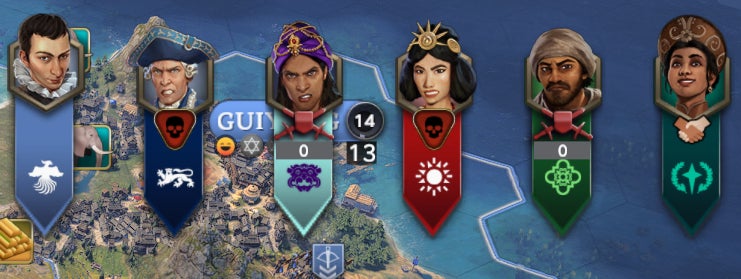
Image credit:RPS / Firaxis
This makes it all the more baffling how boneheaded the combat interface is. To attack units in an adjoining hex, you select your unit, then click on the hex you want to attack. Simple, right? Nope! Did you click the “move” button first? No, so the attack doesn’t happen. Instead, you get a dialog telling you about the enemy unit.
Okay, so you have to make clear that you want to move into the hex to deliver the attack? Fine, okay, click on your unit, then the move button, then on the hex containing the enemy unit. That’s clear right? Nope! You click move, then on the enemy unit, and you get a dialog telling you about the enemy unit.
It can get even worse. Let’s say the enemy unit is in a city with a city banner along the top of the hex. You clicked on the banner? You get a dialog about the city, and do not attack, even if you selected your unit and then the move button. In some cases, 90+% of the hex is occupied by either the enemy unit icon or a city banner and the only way to cause an attack is to zoom in, and click on the tiny 10% of the hex that isn’t occupied by the enemy unit icon or the city banner. Otherwise, you’re sitting there like an idiot saying “But I’m at war, why can’t I attack, I told you to attack, this is dumb.”

Sid Meier’s Civilization 7’s launch trailer.Watch on YouTube
The UI gives you no interaction as to why you’re failing. In my early user experience, I actually Googled “how do I attack in Civ 7?”. No help there. Eventually I figured it out. I can’t click on a unit to attack. I can’t click on a city to attack. I have to… click anywhere else to attack.
This is just braindead UI/UX design. If I hadn’t already selected “move,” the game might reasonably say “okay, the player wants info on the unit or city if they click there.” Fine, I might. Or the game could give an “attack!” button to make it absolutely clear what I want to do. But every other iteration of the Civ series assumes that if you move into an enemy unit or city, you want to attack it. So there is no verb other than “move into.” Except that now, that means… nothing. “Move into,” but we don’t let you attack unless you specifically click on…. Anything else in the hex that you don’t actually want to attack.
This issue is blindingly obvious , and the fix is simple: if the user has clicked the “move to” icon, it should be clear they want to attack, and it shouldn’t matter at all where in the target hex they click. You could also maybe have a modal dialog saying “oh are you sure you want to attack?” Which would still be kind of dumb, but at least better UX than the current experience.
As noted, I typically prefer to avoid war in Civ games anyway, but achieving a world-conquest victory is also harder in this iteration. First of all, there are severe happiness penalties if you exceed a limit on the number of cities you are allowed to own, particularly punishing if you exceed that limit in the Ancient era. But there’s another difference: Civ 7, by default, generates the world with different continents, separated by deep sea zones you cannot penetrate until the Exploration era and its accompanying naval units. So a world conquest option is not even feasible at game start – there are civs on other continents not even reachable until you reach the Exploration era.
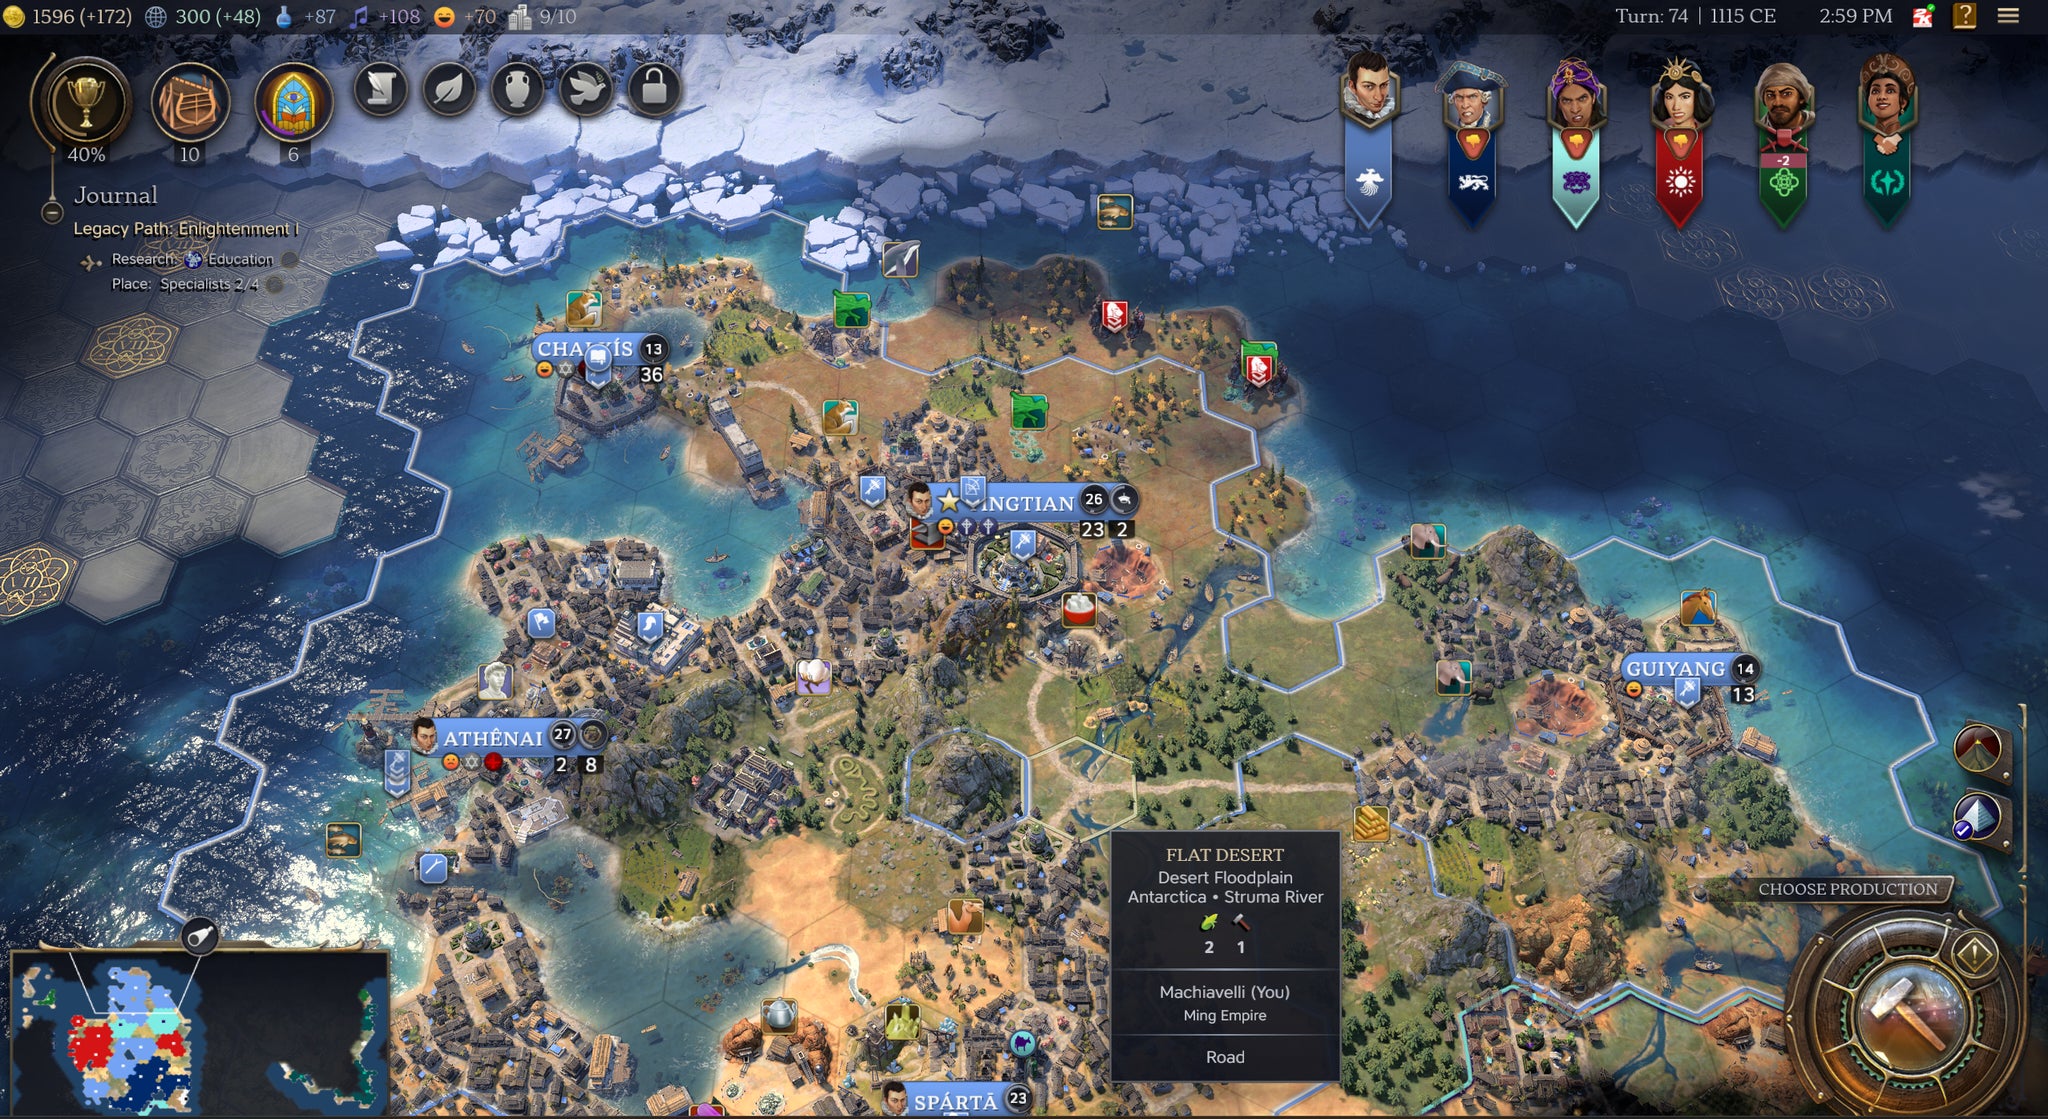
Image credit:RPS / Firaxis
There are other world-generation options at start-up, like the archipeligo-style distribution of other prior Civs. But this default setting remains startling in its own way, because only the original Civ had this kind of “continental” set-up. Playing Civ 1, I encountered a surprisingly advanced France on the other side of the globe, and while I managed to defeat them, I did so only by pumping out battleships and bombarding their ports by sending them to the other side of the planet. Civ 7 is (as far as I know) the first game in the series since then to focus on disconnected continents. In a way, this continental distribution is more realistic, and I think this is a reasonable design choice, and maybe one I prefer.
Particularly in combat, the game has real UI issues, and while I personally like to play versions of Civ keeping wars to a minimum, you can’t always ensure that. Even though I chose a leader with advantages in diplomacy, I found myself at war for much of the game (opponents seem to be particularly aggressive in the Exploration era, while it’s easier to avoid wars in the early and late game), so this is an issue. And of course, some players prefer more aggressive strategies than I.
Otherwise, the major design changes in Civ 7 address important criticisms of earlier versions and help to ensure that players are faced with challenges, not tedium, even as the game progresses - albeit at some loss. By the time I wrote this review, I had spent more than 50 hours playing the game - proof enough that despite its flaws, Civilization 7 sustains that “one more turn!” desire to plow through history and see what happens next.
This review is based on a free copy of the game provided by the publisher.

Find out how we conduct our reviews by reading our review policy .
Sid Meier’s Civilization VII
Video Game
Rock Paper Shotgun is better when you sign in
Sign in and join us on our journey to discover strange and compelling PC games.

All 75 Arc Raiders Blueprints and where to get them
These areas have the highest chance of giving you Blueprints

Image credit:Rock Paper Shotgun/Embark Studios

Looking for more Arc Raiders Blueprints? It’s a special day when you find a Blueprint, as they’re among the most valuable items in Arc Raiders. If you find a Blueprint that you haven’t already found, then you must make sure you hold onto it at all costs, because Blueprints are the key to one of the most important and powerful systems of meta-progression in the game.
This guide aims to be the very best guide on Blueprints you can find, starting with a primer on what exactly they are and how they work in Arc Raiders, before delving into exactly where to get Blueprints and the very best farming spots for you to take in your search.
We’ll also go over how to get Blueprints from other unlikely activities, such as destroying Surveyors and completing specific quests. And you’ll also find the full list of all 75 Blueprints in Arc Raiders on this page (including the newest Blueprints added with the Cold Snap update , such as the Deadline Blueprint and Firework Box Blueprint), giving you all the information you need to expand your own crafting repertoire.
In this guide:
- What are Blueprints in Arc Raiders?
- Full Blueprint list: All crafting recipes
- Where to find Blueprints in Arc Raiders Blueprints obtained from quests Blueprints obtained from Trials Best Blueprint farming locations

What are Blueprints in Arc Raiders?
Blueprints in Arc Raiders are special items which, if you manage to extract with them, you can expend to permanently unlock a new crafting recipe in your Workshop. If you manage to extract from a raid with an Anvil Blueprint, for example, you can unlock the ability to craft your very own Anvil Pistol, as many times as you like (as long as you have the crafting materials).
To use a Blueprint, simply open your Inventory while in the lobby, then right-click on the Blueprint and click “Learn And Consume” . This will permanently unlock the recipe for that item in your Workshop. As of the Stella Montis update, there are allegedly 75 different Blueprints to unlock - although only 68 are confirmed to be in the game so far. You can see all the Blueprints you’ve found and unlocked by going to the Workshop menu, and hitting “R” to bring up the Blueprint screen.
It’s possible to find duplicates of past Blueprints you’ve already unlocked. If you find these, then you can either sell them, or - if you like to play with friends - you can take it into a match and gift it to your friend so they can unlock that recipe for themselves. Another option is to keep hold of them until the time comes to donate them to the Expedition.
Full Blueprint list: All crafting recipes
Below is the full list of all the Blueprints that are currently available to find in Arc Raiders, and the crafting recipe required for each item:
| Blueprint | Type | Recipe | Crafted At |
|---|---|---|---|
| Bettina | Weapon | 3x Advanced Mechanical Components 3x Heavy Gun Parts 3x Canister | Gunsmith 3 |
| Blue Light Stick | Quick Use | 3x Chemicals | Utility Station 1 |
| Aphelion | Weapon | 3x Magnetic Accelerator 3x Complex Gun Parts 1x Matriarch Reactor | Gunsmith 3 |
| Combat Mk. 3 (Flanking) | Augment | 2x Advanced Electrical Components 3x Processor | Gear Bench 3 |
| Combat Mk. 3 (Aggressive) | Augment | 2x Advanced Electrical Components 3x Processor | Gear Bench 3 |
| Complex Gun Parts | Material | 2x Light Gun Parts 2x Medium Gun Parts 2x Heavy Gun Parts | Refiner 3 |
| Fireworks Box | Quick Use | 1x Explosive Compound 3x Pop Trigger | Explosives Station 2 |
| Gas Mine | Mine | 4x Chemicals 2x Rubber Parts | Explosives Station 1 |
| Green Light Stick | Quick Use | 3x Chemicals | Utility Station 1 |
| Pulse Mine | Mine | 1x Crude Explosives 1x Wires | Explosives Station 1 |
| Seeker Grenade | Grenade | 1x Crude Explosives 2x ARC Alloy | Explosives Station 1 |
| Looting Mk. 3 (Survivor) | Augment | 2x Advanced Electrical Components 3x Processor | Gear Bench 3 |
| Angled Grip II | Mod | 2x Mechanical Components 3x Duct Tape | Gunsmith 2 |
| Angled Grip III | Mod | 2x Mod Components 5x Duct Tape | Gunsmith 3 |
| Hullcracker | Weapon | 1x Magnetic Accelerator 3x Heavy Gun Parts 1x Exodus Modules | Gunsmith 3 |
| Launcher Ammo | Ammo | 5x Metal Parts 1x Crude Explosives | Workbench 1 |
| Anvil | Weapon | 5x Mechanical Components 5x Simple Gun Parts | Gunsmith 2 |
| Anvil Splitter | Mod | 2x Mod Components 3x Processor | Gunsmith 3 |
| ??? | ??? | ??? | ??? |
| Barricade Kit | Quick Use | 1x Mechanical Components | Utility Station 2 |
| Blaze Grenade | Grenade | 1x Explosive Compound 2x Oil | Explosives Station 3 |
| Bobcat | Weapon | 3x Advanced Mechanical Components 3x Light Gun Parts | Gunsmith 3 |
| Osprey | Weapon | 2x Advanced Mechanical Components 3x Medium Gun Parts 7x Wires | Gunsmith 3 |
| Burletta | Weapon | 3x Mechanical Components 3x Simple Gun Parts | Gunsmith 1 |
| Compensator II | Mod | 2x Mechanical Components 4x Wires | Gunsmith 2 |
| Compensator III | Mod | 2x Mod Components 8x Wires | Gunsmith 3 |
| Defibrillator | Quick Use | 9x Plastic Parts 1x Moss | Medical Lab 2 |
| ??? | ??? | ??? | ??? |
| Equalizer | Weapon | 3x Magnetic Accelerator 3x Complex Gun Parts 1x Queen Reactor | Gunsmith 3 |
| Extended Barrel | Mod | 2x Mod Components 8x Wires | Gunsmith 3 |
| Extended Light Mag II | Mod | 2x Mechanical Components 3x Steel Spring | Gunsmith 2 |
| Extended Light Mag III | Mod | 2x Mod Components 5x Steel Spring | Gunsmith 3 |
| Extended Medium Mag II | Mod | 2x Mechanical Components 3x Steel Spring | Gunsmith 2 |
| Extended Medium Mag III | Mod | 2x Mod Components 5x Steel Spring | Gunsmith 3 |
| Extended Shotgun Mag II | Mod | 2x Mechanical Components 3x Steel Spring | Gunsmith 2 |
| Extended Shotgun Mag III | Mod | 2x Mod Components 5x Steel Spring | Gunsmith 3 |
| Remote Raider Flare | Quick Use | 2x Chemicals 4x Rubber Parts | Utility Station 1 |
| Heavy Gun Parts | Material | 4x Simple Gun Parts | Refiner 2 |
| Venator | Weapon | 2x Advanced Mechanical Components 3x Medium Gun Parts 5x Magnet | Gunsmith 3 |
| Il Toro | Weapon | 5x Mechanical Components 6x Simple Gun Parts | Gunsmith 1 |
| Jolt Mine | Mine | 1x Electrical Components 1x Battery | Explosives Station 2 |
| Explosive Mine | Mine | 1x Explosive Compound 1x Sensors | Explosives Station 3 |
| Jupiter | Weapon | 3x Magnetic Accelerator 3x Complex Gun Parts 1x Queen Reactor | Gunsmith 3 |
| Light Gun Parts | Material | 4x Simple Gun Parts | Refiner 2 |
| Lightweight Stock | Mod | 2x Mod Components 5x Duct Tape | Gunsmith 3 |
| Lure Grenade | Grenade | 1x Speaker Component 1x Electrical Components | Utility Station 2 |
| Medium Gun Parts | Material | 4x Simple Gun Parts | Refiner 2 |
| Torrente | Weapon | 2x Advanced Mechanical Components 3x Medium Gun Parts 6x Steel Spring | Gunsmith 3 |
| Muzzle Brake II | Mod | 2x Mechanical Components 4x Wires | Gunsmith 2 |
| Muzzle Brake III | Mod | 2x Mod Components 8x Wires | Gunsmith 3 |
| Padded Stock | Mod | 2x Mod Components 5x Duct Tape | Gunsmith 3 |
| Shotgun Choke II | Mod | 2x Mechanical Components 4x Wires | Gunsmith 2 |
| Shotgun Choke III | Mod | 2x Mod Components 8x Wires | Gunsmith 3 |
| Shotgun Silencer | Mod | 2x Mod Components 8x Wires | Gunsmith 3 |
| Showstopper | Grenade | 1x Advanced Electrical Components 1x Voltage Converter | Explosives Station 3 |
| Silencer I | Mod | 2x Mechanical Components 4x Wires | Gunsmith 2 |
| Silencer II | Mod | 2x Mod Components 8x Wires | Gunsmith 3 |
| Snap Hook | Quick Use | 2x Power Rod 3x Rope 1x Exodus Modules | Utility Station 3 |
| Stable Stock II | Mod | 2x Mechanical Components 3x Duct Tape | Gunsmith 2 |
| Stable Stock III | Mod | 2x Mod Components 5x Duct Tape | Gunsmith 3 |
| Tagging Grenade | Grenade | 1x Electrical Components 1x Sensors | Utility Station 3 |
| Tempest | Weapon | 3x Advanced Mechanical Components 3x Medium Gun Parts 3x Canister | Gunsmith 3 |
| Trigger Nade | Grenade | 2x Crude Explosives 1x Processor | Explosives Station 2 |
| Vertical Grip II | Mod | 2x Mechanical Components 3x Duct Tape | Gunsmith 2 |
| Vertical Grip III | Mod | 2x Mod Components 5x Duct Tape | Gunsmith 3 |
| Vita Shot | Quick Use | 2x Antiseptic 1x Syringe | Medical Lab 3 |
| Vita Spray | Quick Use | 3x Antiseptic 1x Canister | Medical Lab 3 |
| Vulcano | Weapon | 1x Magnetic Accelerator 3x Heavy Gun Parts 1x Exodus Modules | Gunsmith 3 |
| Wolfpack | Grenade | 2x Explosive Compound 2x Sensors | Explosives Station 3 |
| Red Light Stick | Quick Use | 3x Chemicals | Utility Station 1 |
| Smoke Grenade | Grenade | 14x Chemicals 1x Canister | Utility Station 2 |
| Deadline | Mine | 3x Explosive Compound 2x ARC Circuitry | Explosives Station 3 |
| Trailblazer | Grenade | 1x Explosive Compound 1x Synthesized Fuel | Explosives Station 3 |
| Tactical Mk. 3 (Defensive) | Augment | 2x Advanced Electrical Components 3x Processor | Gear Bench 3 |
| Tactical Mk. 3 (Healing) | Augment | 2x Advanced Electrical Components 3x Processor | Gear Bench 3 |
| Yellow Light Stick | Quick Use | 3x Chemicals | Utility Station 1 |
Note: The missing Blueprints in this list likely have not actually been added to the game at the time of writing, because none of the playerbase has managed to find any of them. As they are added to the game, I will update this page with the most relevant information so you know exactly how to get all 75 Arc Raiders Blueprints.
Where to find Blueprints in Arc Raiders
Below is a list of all containers, modifiers, and events which maximise your chances of finding Blueprints:
- Certain quests reward you with specific Blueprints .
- Completing Trials has a high chance of offering Blueprints as rewards.
- Surveyors have a decent chance of dropping Blueprints on death.
- High loot value areas tend to have a greater chance of spawning Blueprints.
- Night Raids and Storms may increase rare Blueprint spawn chances in containers.
- Containers with higher numbers of items may have a higher tendency to spawn Blueprints. As a result, Blue Gate (which has many “large” containers containing multiple items) may give you a higher chance of spawning Blueprints.
- Raider containers (Raider Caches, Weapon Boxes, Medical Bags, Grenade Tubes) have increased Blueprint drop rates. As a result, the Uncovered Caches event gives you a high chance of finding Blueprints.
- Security Lockers have a higher than average chance of containing Blueprints.
- Certain Blueprints only seem to spawn under specific circumstances: Tempest Blueprint only spawns during Night Raid events. Vulcano Blueprint only spawns during Hidden Bunker events. Jupiter and Equaliser Blueprints only spawn during Harvester events.

Raider Caches, Weapon Boxes, and other raider-oriented container types have a good chance of offering Blueprints. |Image credit:Rock Paper Shotgun/Embark Studios
Blueprints have a very low chance of spawning in any container in Arc Raiders, around 1-2% on average. However, there is a higher chance of finding Blueprints in particular container types. Specifically, you can find more Blueprints in Raider containers and security lockers.
Beyond this, if you’re looking for Blueprints you should focus on regions of the map which are marked as having particularly high-value loot. Areas such as the Control Tower in Dam Battlegrounds, the Arrival and Departure Buildings in Spaceport, and Pilgrim’s Peak in Blue Gate all have a better-than-average chance of spawning Blueprints somewhere amongst all their containers. Night Raids and Electromagnetic Storm events also increase the drop chances of certain Blueprints .
In addition to these containers, you can often loot Blueprints from destroyed Surveyors - the largest of the rolling ball ARC. Surveyors are more commonly found on the later maps - Spaceport and Blue Gate - and if one spawns in your match, you’ll likely see it by the blue laser beam that it casts into the sky while “surveying”.
Surveyors are quite well-armoured and will very speedily run away from you once it notices you, but if you can take one down then make sure you loot all its parts for a chance of obtaining certain unusual Blueprints.
Blueprints obtained from quests
One way in which you can get Blueprints is by completing certain quests for the vendors in Speranza. Some quests will reward you with a specific item Blueprint upon completion, so as long as you work through all the quests in Arc Raiders, you are guaranteed those Blueprints.
Here is the full list of all Blueprints you can get from quest rewards:
- Trigger Nade Blueprint: Rewarded after completing “Sparks Fly”.
- Lure Grenade Blueprint: Rewarded after completing “Greasing Her Palms”.
- Burletta Blueprint: Rewarded after completing “Industrial Espionage”.
- Hullcracker Blueprint (and Launcher Ammo Blueprint): Rewarded after completing “The Major’s Footlocker”.
Alas, that’s only 4 Blueprints out of a total of 75 to unlock, so for the vast majority you will need to find them yourself during a raid. If you’re intent on farming Blueprints, then it’s best to equip yourself with cheap gear in case you lose it, but don’t use a free loadout because then you won’t get a safe pocket to stash any new Blueprint you find. No pain in Arc Raiders is sharper than failing to extract with a new Blueprint you’ve been after for a dozen hours already.

One of the best ways to get Blueprints is by hitting three stars on all five Trials every week. |Image credit:Rock Paper Shotgun/Embark Studios
Blueprints obtained from Trials
One of the very best ways to get Blueprints is as rewards for completing Trials in Arc Raiders. Trials are unlocked from Level 15 onwards, and allow you to earn rewards by focusing on certain tasks over the course of several raids. For example, one Trial might task you with dealing damage to Hornets, while another might challenge you to loot Supply Drops.
Trials refresh on a weekly basis, with a new week bringing five new Trials. Each Trial can offer up to three rewards after passing certain score milestones, and it’s possible to receive very high level loot from these reward crates - including Blueprints. So if you want to unlock as many Blueprints as possible, you should make a point of completing as many Trials as possible each week.
Best Blueprint farming locations
The very best way to get Blueprints is to frequent specific areas of the maps which combine high-tier loot pools with the right types of containers to search. Here are my recommendations for where to find Blueprints on every map, so you can always keep the search going for new crafting recipes to unlock.

Image credit:Rock Paper Shotgun/Embark Studios
Dam Battlegrounds
The best places to farm Blueprints on Dam Battlegrounds are the Control Tower, Power Generation Complex, Ruby Residence, and Pale Apartments . The first two regions, despite only being marked on the map as mid-tier loot, contain a phenomenal number of containers to loot. The Control Tower can also contain a couple of high-tier Security Lockers - though of course, you’ll need to have unlocked the Security Breach skill at the end of the Survival tree.
There’s also a lot of reporting amongst the playerbase that the Residential areas in the top-left of the map - Pale Apartments and Ruby Residence - give you a comparatively strong chance of finding Blueprints. Considering their size, there’s a high density of containers to loot in both locations, and they also have the benefit of being fairly out of the way. So you’re more likely to have all the containers to yourself.
Buried City
The best Blueprint farming locations on Buried City are the Santa Maria Houses, Grandioso Apartments, Town Hall, and the various buildings of the New District . Grandioso Apartments has a lower number of containers than the rest, but a high chance of spawning weapon cases - which have good Blueprint drop rates. The others are high-tier loot areas, with plenty of lootable containers - including Security Lockers.
Spaceport
The best places to find Blueprints on Spaceport are the Arrival and Departure Buildings, as well as Control Tower A6 and the Launch Towers . All these areas are labelled as high-value loot regions, and many of them are also very handily connected to one another by the Spaceport wall, which you can use to quickly run from one area to the next. At the tops of most of these buildings you’ll find at least one Security Locker, so this is an excellent farming route for players looking to find Blueprints.
The downside to looting Blueprints on Spaceport is that all these areas are hotly contested, particularly in Duos and Squads. You’ll need to be very focused and fast in order to complete the full farming route.

Image credit:Rock Paper Shotgun/Embark Studios
Blue Gate
Blue Gate tends to have a good chance of dropping Blueprints, potentially because it generally has a high number of containers which can hold lots of items; so there’s a higher chance of a Blueprint spawning in each container. In my experience, the best Blueprint farming spots on Blue Gate are Pilgrim’s Peak, Raider’s Refuge, the Ancient Fort, and the Underground Complex beneath the Warehouse .
All of these areas contain a wealth of containers to loot. Raider’s Refuge has less to loot, but the majority of the containers in and around the Refuge are raider containers, which have a high chance of containing Blueprints - particularly during major events.
Stella Montis
On the whole, Stella Montis seems to have a very low drop rate for Blueprints (though a high chance of dropping other high-tier loot). If you do want to try farming Blueprints on this map, the best places to find Blueprints in Stella Montis are Medical Research, Assembly Workshop, and the Business Center . These areas have the highest density of containers to loot on the map.
In addition to this, the Western Tunnel has a few different Security Lockers to loot, so while there’s very little to loot elsewhere in this area of the map, it’s worth hitting those Security Lockers if you spawn there at the start of a match.
That wraps up this primer on how to get all the Blueprints in Arc Raiders as quickly as possible. With the Expedition system constantly resetting a large number of players’ Blueprints, it’s more important than ever to have the most up-to-date information on where to find all these Blueprints.
While you’re here, be sure to check out our Arc Raiders best guns tier list , as well as our primers on the best skills to unlock and all the different Field Depot locations on every map.


ARC Raiders
PS5 , Xbox Series X/S , PC
Rock Paper Shotgun is better when you sign in
Sign in and join us on our journey to discover strange and compelling PC games.
