Shapez 2 early access review: splendid abstract factory-building with room for a few more surprises
Shaping up very nicely

Image credit:Rock Paper Shotgun/Gamera Games

- Developer: tobspr Games
- Publisher: tobspr Games, Gamera Games
- Release: August 15th 2024
- On: Windows, MacOS, Linux
- From: Steam
- Price: TBC
- Reviewed on: AMD Ryzen 9 7950X, Nvidia RTX 4080, 32GB RAM, Windows 10, 3840x2160
Over 2000 hours spent in various factory games makes me a bit of a purist, I suppose. In theory, I should then be the ideal reviewer to enjoy Shapez 2 . But I’m also the ideal reviewer to tear it apart over the most minor hiccups and defects. I’m the Anton Ego of factory games. I don’t like food, I love it. If I don’t love it, I don’t swallow.
Ah, you needn’t worry. This is by far the most fun I’ve had reviewing a game, and Shapez 2 has, in my mind at least, turned the holy trinity of factory games ( Factorio , Satisfactory , Dyson Sphere Program ) into a holy quartet. Its pared back, everything-is-free-forever approach is quite liberating, and I’ve never had so much fun placing conveyor belts in my life. But 40 hours into my save file, I’ve often found myself yearning for a bit more creativity in the challenges, a few more curveballs sent in my direction.
If you’ve played a factory game before, you know the drill with Shapez 2, and will be able to settle into its rhythm of cutting, rotating, and combining shapes very quickly. Life begins at the centre of the world, where a giant, shape-hungry vortex lives. It wants you to feed it circles. So, you plop a few extractors on the nearby circle deposit, and conveyor belt your new shapes right into the vortex’s maw. Ding! The vortex is now bored of circles. It wants squares. So, you connect up a patch of nearby squares. Ding! Now it wants semi-circles, so you need to do your first bit of shape manipulation, by slicing some of those circles in half. Ding! Now the vortex craves semicircles attached to rectangles. Ding! Now a circle on top of a square. Ding! Now the circle is red and the square is blue. Ding! Ding! Ding!
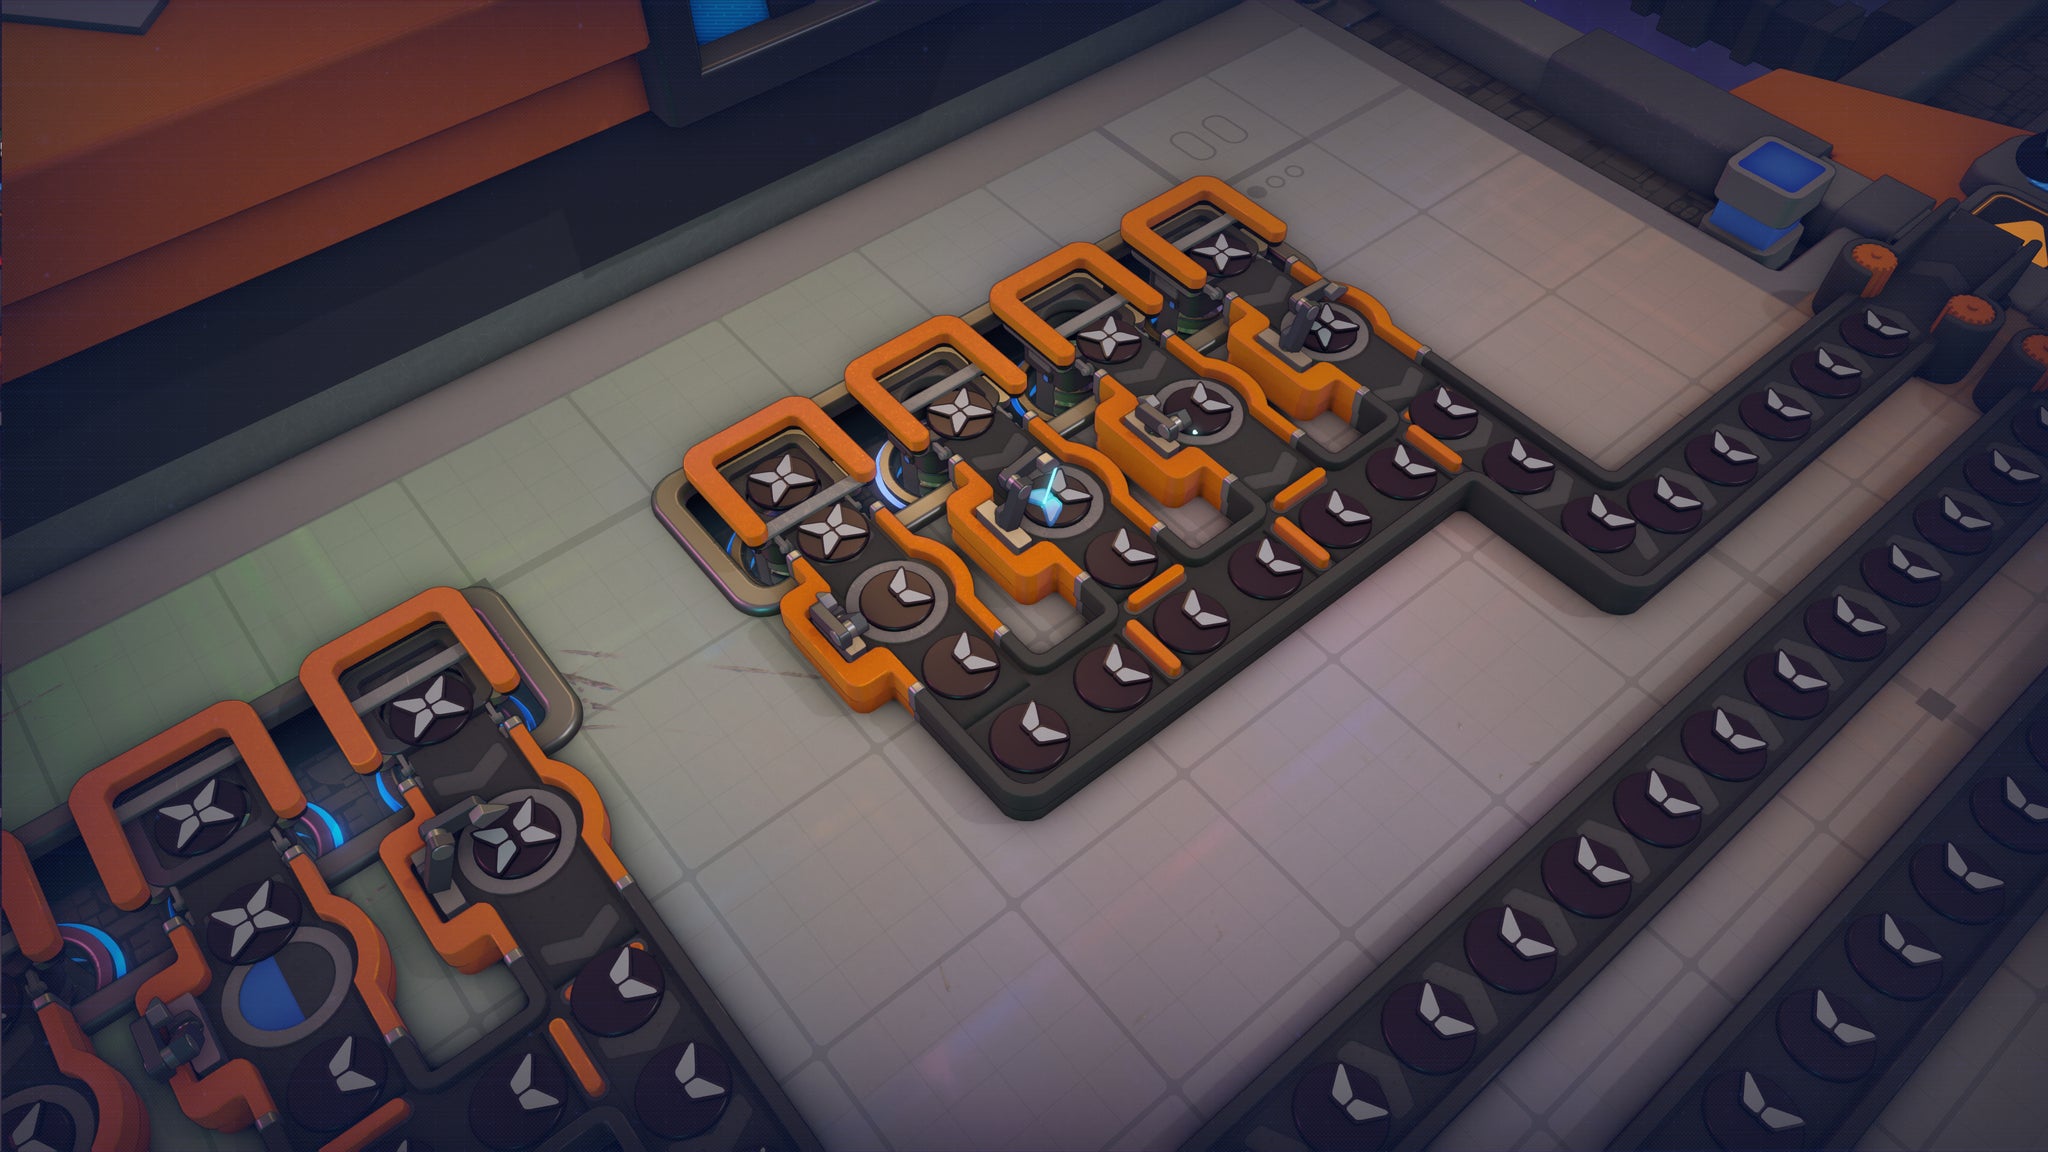
Shapez 2 is all about manipulating shapes. From humble beginnings (circles, squares, and stars) you can chop up, paint, rotate, and piece together all sorts of different Frankensteinian creations. |Image credit:Rock Paper Shotgun/Gamera Games
You get the idea. There are two big points of differentiation between Shapez 2 and other factory builders. First is the sandbox nature. There are no enemies to contend with, and buildings don’t cost any resources, so you’re free to build up or tear down belts and buildings as much as you like. The second is the abstraction of the factory products and goals. In Factorio, you’re building circuitboards, gears, plastic bars, all with the end goal of building a rocket to fly away from the hellish planet you’ve crashlanded on. In Shapez 2, you’re building shapes, for no other reason than to feed an ever-hungry vortex who wants to eat shapes.
Cheffing shapes for a ravenous abyss means the game does throw tasks and milestone goals at you non-stop, like the ability to paint shapes different colours or use trains to transport shapes over huge distances, so you feel propelled along by the intrigue of not knowing what you’d make next. But even still, you do feel like things start to slow a little as the milestones keep coming, as I was hoping for a few more unlocks that would really get my brain working.
Whether these points of differentiation are appealing or repulsive is entirely subjective. I’ve no issue with the level of abstraction; in fact, I think it’s very intuitive. In other games, you have to hover over a circuit board to find out how to make it. In Shapez 2, you can clearly see - oh, okay, so that’s a square on the bottom, with opposite quarters of a circle layered atop it. Cool. This sandbox approach means that many of the issues you run into in games like Factorio - running out of resources, defending against enemy attacks, exploring the world for new areas - don’t exist here, and will appeal to some players. But I don’t think the game goes far enough to replace those problem-solving moments with other quandries.

The horrors of belt spaghetti are nothing new to factory game veterans, but things can get pretty wild in Shapez 2 once you unlock the third height level. |Image credit:Rock Paper Shotgun/Gamera Games
Nevertheless, the game has also grown vastly since I played its Next Fest demo , not just in scale but in sophistication. One bugbear I had with the demo was that completing tasks would automatically improve the efficiency and throughput of your belts and factory buildings. Sounds good on paper, but actually it’s pissing annoying for people who cares about carefully engineering a build based on throughput levels, only to have those levels change a few minutes later. With the early access release though, non-Milestone tasks will grant you research points which you can make the choice to spend on improving the efficiency of different buildings - as well as unlocking entirely new buildings and features. It’s a well-implemented system and an excellent change which places control of production rates directly in the player’s hands where it belongs.
One slightly bizarre design choice is that Shapez 2 makes all the buildings and belts free, but simultaneously ascribes a currency to both copy-pasting blueprints and placing down platforms. The procedurally generated worlds of Shapez 2 are vast and - unlike in Shapez 1 - mostly outer space which you can’t build on. To reach far-flung “shape asteroids” to mine more interesting shapes, you need to place down more platforms like the one that houses your central vortex, thus increasing your real-estate for factory-building. The game’s tutorials also encourage you to pre-build platforms for a certain purpose. For example, I spent a bit of time putting together a platform which takes in eight full conveyor belts of one shape, splits them all in half down the middle, and then outputs the two halves in different directions. After that, I could just copy and paste that platform whenever I needed it. Well, as long as I had the Blueprint Points for pasting it, and some spare Platforms to place down.

After you hit a certain critical mass in production, you’ll organically start to think in whole platforms rather than individual buildings and belts, which is where blueprinting becomes very handy. |Image credit:Rock Paper Shotgun/Gamera Games
It’s an odd, slightly muddled mixture. On the one hand, the things which normally cost resources in these games, like buildings and belts, are free. On the other, things that are normally just completely free quality of life things, like copy-pasting a blueprint, have a cost. Back when I played the Next Fest demo I liked the idea of having an extra goal in the background to toil away at, but now I’m not so sure. Mostly because the balance seems completely wacky with the costs, anyway. You gain Blueprint Points by inputting certain shapes into the vortex, and maybe I was just a bit too proactive, but I always had several million Blueprint Points available, and even the costliest copy-paste jobs would only cost a few thousand at the most. It feels some rebalancing might be in order here.
But those kinds of minor quibbles are easily forgotten when you’re halfway through a major shape-building project. In my current save file, I’m working on a factory which outputs over 4,000 of a certain milestone shape every minute. After you complete the final shape in a milestone, you can continue to produce that shape and send it into the vortex to increase your Operator Level, which is mostly just for bragging rights but also gives you some research points, Blueprint Points, and so on for your trouble. It’s a nice touch, at once celebratory and motivational.
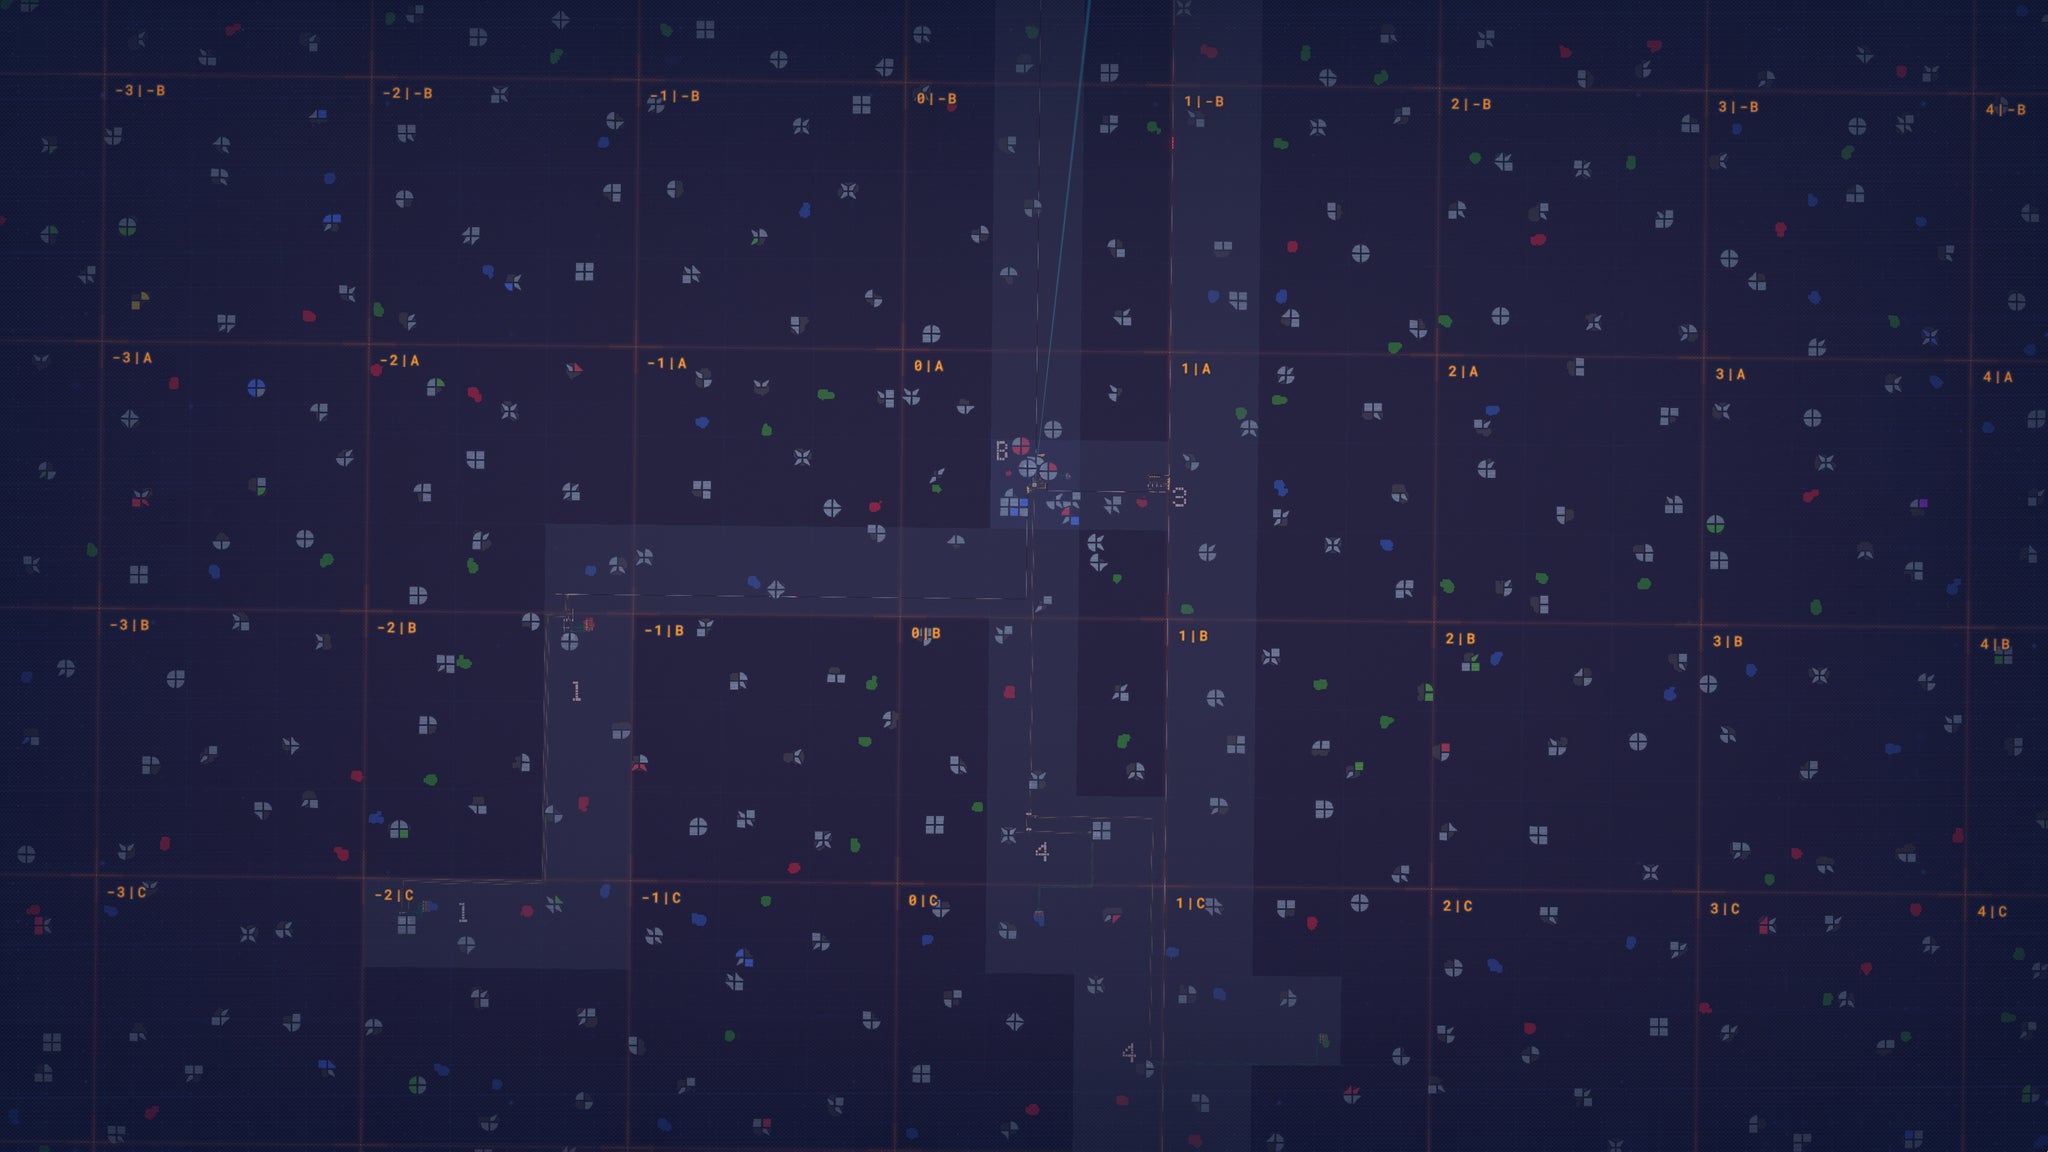
I really wish the map was more inspiring than this uniform spritzing of shapes across a flat plane. |Image credit:Rock Paper Shotgun/Gamera Games
And once you unlock the final milestones, the milestone shapes become randomised, and the game encourages you to start using logic and circuitry to create what’s called a Make Anything Machine (MAM) - the ultimate step in automation. Now that’s the kind of intriguing step up in complexity I want more of throughout the game, and it’s one that I hope to spend plenty more time with.
This rings especially true, given how the game realises that satisfaction is the bedrock of the factory genre, and leans heavily into it. Dopamine is a byproduct of just about every building in the game, with wonderfully charming animations that show the shapes actually being split apart, rotated, and stacked atop one another. Some of this small-scale refinement is lost when you grow your factory to a certain size and start to spend most of your time zoomed out, copy-pasting whole platforms at a time instead of individual buildings and belts. Once you get to that stage though, you are already well and truly in the clutches of the game’s siren song of mass production and automation.
Shapez 2 is a different flavour of factory game than I’m used to, but executed at times to a near-masterpiece level which makes it very easy to dive in and try something a bit different. Minor balancing issues aside, it all feels incredibly tightly wound, with a huge emphasis placed on comfort, user experience, and satisfaction. I just hope the depth increases over its early access period, with more types of challenges built into later factory processes, and more reasons to explore further afield.

Find out how we conduct our reviews by reading our review policy .
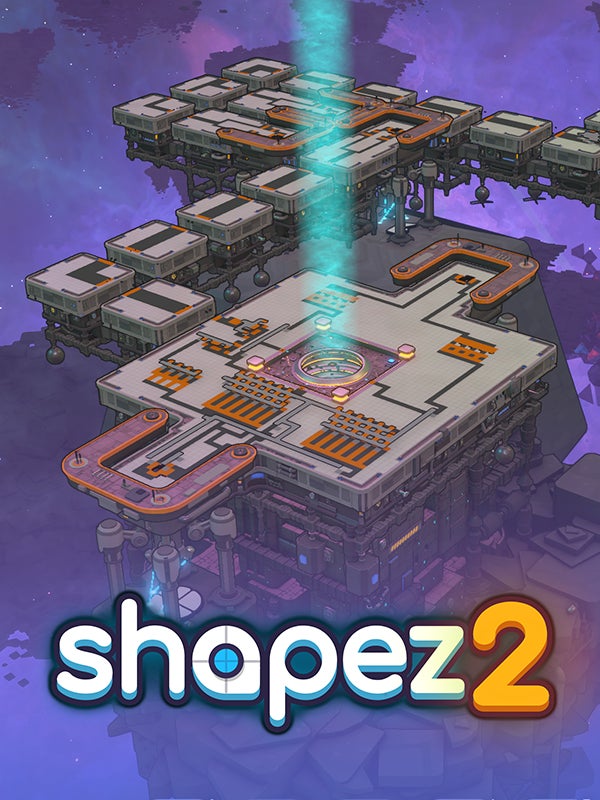
Shapez 2
Video Game
Rock Paper Shotgun is better when you sign in
Sign in and join us on our journey to discover strange and compelling PC games.

All 75 Arc Raiders Blueprints and where to get them
These areas have the highest chance of giving you Blueprints

Image credit:Rock Paper Shotgun/Embark Studios

Looking for more Arc Raiders Blueprints? It’s a special day when you find a Blueprint, as they’re among the most valuable items in Arc Raiders. If you find a Blueprint that you haven’t already found, then you must make sure you hold onto it at all costs, because Blueprints are the key to one of the most important and powerful systems of meta-progression in the game.
This guide aims to be the very best guide on Blueprints you can find, starting with a primer on what exactly they are and how they work in Arc Raiders, before delving into exactly where to get Blueprints and the very best farming spots for you to take in your search.
We’ll also go over how to get Blueprints from other unlikely activities, such as destroying Surveyors and completing specific quests. And you’ll also find the full list of all 75 Blueprints in Arc Raiders on this page (including the newest Blueprints added with the Cold Snap update , such as the Deadline Blueprint and Firework Box Blueprint), giving you all the information you need to expand your own crafting repertoire.
In this guide:
- What are Blueprints in Arc Raiders?
- Full Blueprint list: All crafting recipes
- Where to find Blueprints in Arc Raiders Blueprints obtained from quests Blueprints obtained from Trials Best Blueprint farming locations

What are Blueprints in Arc Raiders?
Blueprints in Arc Raiders are special items which, if you manage to extract with them, you can expend to permanently unlock a new crafting recipe in your Workshop. If you manage to extract from a raid with an Anvil Blueprint, for example, you can unlock the ability to craft your very own Anvil Pistol, as many times as you like (as long as you have the crafting materials).
To use a Blueprint, simply open your Inventory while in the lobby, then right-click on the Blueprint and click “Learn And Consume” . This will permanently unlock the recipe for that item in your Workshop. As of the Stella Montis update, there are allegedly 75 different Blueprints to unlock - although only 68 are confirmed to be in the game so far. You can see all the Blueprints you’ve found and unlocked by going to the Workshop menu, and hitting “R” to bring up the Blueprint screen.
It’s possible to find duplicates of past Blueprints you’ve already unlocked. If you find these, then you can either sell them, or - if you like to play with friends - you can take it into a match and gift it to your friend so they can unlock that recipe for themselves. Another option is to keep hold of them until the time comes to donate them to the Expedition.
Full Blueprint list: All crafting recipes
Below is the full list of all the Blueprints that are currently available to find in Arc Raiders, and the crafting recipe required for each item:
| Blueprint | Type | Recipe | Crafted At |
|---|---|---|---|
| Bettina | Weapon | 3x Advanced Mechanical Components 3x Heavy Gun Parts 3x Canister | Gunsmith 3 |
| Blue Light Stick | Quick Use | 3x Chemicals | Utility Station 1 |
| Aphelion | Weapon | 3x Magnetic Accelerator 3x Complex Gun Parts 1x Matriarch Reactor | Gunsmith 3 |
| Combat Mk. 3 (Flanking) | Augment | 2x Advanced Electrical Components 3x Processor | Gear Bench 3 |
| Combat Mk. 3 (Aggressive) | Augment | 2x Advanced Electrical Components 3x Processor | Gear Bench 3 |
| Complex Gun Parts | Material | 2x Light Gun Parts 2x Medium Gun Parts 2x Heavy Gun Parts | Refiner 3 |
| Fireworks Box | Quick Use | 1x Explosive Compound 3x Pop Trigger | Explosives Station 2 |
| Gas Mine | Mine | 4x Chemicals 2x Rubber Parts | Explosives Station 1 |
| Green Light Stick | Quick Use | 3x Chemicals | Utility Station 1 |
| Pulse Mine | Mine | 1x Crude Explosives 1x Wires | Explosives Station 1 |
| Seeker Grenade | Grenade | 1x Crude Explosives 2x ARC Alloy | Explosives Station 1 |
| Looting Mk. 3 (Survivor) | Augment | 2x Advanced Electrical Components 3x Processor | Gear Bench 3 |
| Angled Grip II | Mod | 2x Mechanical Components 3x Duct Tape | Gunsmith 2 |
| Angled Grip III | Mod | 2x Mod Components 5x Duct Tape | Gunsmith 3 |
| Hullcracker | Weapon | 1x Magnetic Accelerator 3x Heavy Gun Parts 1x Exodus Modules | Gunsmith 3 |
| Launcher Ammo | Ammo | 5x Metal Parts 1x Crude Explosives | Workbench 1 |
| Anvil | Weapon | 5x Mechanical Components 5x Simple Gun Parts | Gunsmith 2 |
| Anvil Splitter | Mod | 2x Mod Components 3x Processor | Gunsmith 3 |
| ??? | ??? | ??? | ??? |
| Barricade Kit | Quick Use | 1x Mechanical Components | Utility Station 2 |
| Blaze Grenade | Grenade | 1x Explosive Compound 2x Oil | Explosives Station 3 |
| Bobcat | Weapon | 3x Advanced Mechanical Components 3x Light Gun Parts | Gunsmith 3 |
| Osprey | Weapon | 2x Advanced Mechanical Components 3x Medium Gun Parts 7x Wires | Gunsmith 3 |
| Burletta | Weapon | 3x Mechanical Components 3x Simple Gun Parts | Gunsmith 1 |
| Compensator II | Mod | 2x Mechanical Components 4x Wires | Gunsmith 2 |
| Compensator III | Mod | 2x Mod Components 8x Wires | Gunsmith 3 |
| Defibrillator | Quick Use | 9x Plastic Parts 1x Moss | Medical Lab 2 |
| ??? | ??? | ??? | ??? |
| Equalizer | Weapon | 3x Magnetic Accelerator 3x Complex Gun Parts 1x Queen Reactor | Gunsmith 3 |
| Extended Barrel | Mod | 2x Mod Components 8x Wires | Gunsmith 3 |
| Extended Light Mag II | Mod | 2x Mechanical Components 3x Steel Spring | Gunsmith 2 |
| Extended Light Mag III | Mod | 2x Mod Components 5x Steel Spring | Gunsmith 3 |
| Extended Medium Mag II | Mod | 2x Mechanical Components 3x Steel Spring | Gunsmith 2 |
| Extended Medium Mag III | Mod | 2x Mod Components 5x Steel Spring | Gunsmith 3 |
| Extended Shotgun Mag II | Mod | 2x Mechanical Components 3x Steel Spring | Gunsmith 2 |
| Extended Shotgun Mag III | Mod | 2x Mod Components 5x Steel Spring | Gunsmith 3 |
| Remote Raider Flare | Quick Use | 2x Chemicals 4x Rubber Parts | Utility Station 1 |
| Heavy Gun Parts | Material | 4x Simple Gun Parts | Refiner 2 |
| Venator | Weapon | 2x Advanced Mechanical Components 3x Medium Gun Parts 5x Magnet | Gunsmith 3 |
| Il Toro | Weapon | 5x Mechanical Components 6x Simple Gun Parts | Gunsmith 1 |
| Jolt Mine | Mine | 1x Electrical Components 1x Battery | Explosives Station 2 |
| Explosive Mine | Mine | 1x Explosive Compound 1x Sensors | Explosives Station 3 |
| Jupiter | Weapon | 3x Magnetic Accelerator 3x Complex Gun Parts 1x Queen Reactor | Gunsmith 3 |
| Light Gun Parts | Material | 4x Simple Gun Parts | Refiner 2 |
| Lightweight Stock | Mod | 2x Mod Components 5x Duct Tape | Gunsmith 3 |
| Lure Grenade | Grenade | 1x Speaker Component 1x Electrical Components | Utility Station 2 |
| Medium Gun Parts | Material | 4x Simple Gun Parts | Refiner 2 |
| Torrente | Weapon | 2x Advanced Mechanical Components 3x Medium Gun Parts 6x Steel Spring | Gunsmith 3 |
| Muzzle Brake II | Mod | 2x Mechanical Components 4x Wires | Gunsmith 2 |
| Muzzle Brake III | Mod | 2x Mod Components 8x Wires | Gunsmith 3 |
| Padded Stock | Mod | 2x Mod Components 5x Duct Tape | Gunsmith 3 |
| Shotgun Choke II | Mod | 2x Mechanical Components 4x Wires | Gunsmith 2 |
| Shotgun Choke III | Mod | 2x Mod Components 8x Wires | Gunsmith 3 |
| Shotgun Silencer | Mod | 2x Mod Components 8x Wires | Gunsmith 3 |
| Showstopper | Grenade | 1x Advanced Electrical Components 1x Voltage Converter | Explosives Station 3 |
| Silencer I | Mod | 2x Mechanical Components 4x Wires | Gunsmith 2 |
| Silencer II | Mod | 2x Mod Components 8x Wires | Gunsmith 3 |
| Snap Hook | Quick Use | 2x Power Rod 3x Rope 1x Exodus Modules | Utility Station 3 |
| Stable Stock II | Mod | 2x Mechanical Components 3x Duct Tape | Gunsmith 2 |
| Stable Stock III | Mod | 2x Mod Components 5x Duct Tape | Gunsmith 3 |
| Tagging Grenade | Grenade | 1x Electrical Components 1x Sensors | Utility Station 3 |
| Tempest | Weapon | 3x Advanced Mechanical Components 3x Medium Gun Parts 3x Canister | Gunsmith 3 |
| Trigger Nade | Grenade | 2x Crude Explosives 1x Processor | Explosives Station 2 |
| Vertical Grip II | Mod | 2x Mechanical Components 3x Duct Tape | Gunsmith 2 |
| Vertical Grip III | Mod | 2x Mod Components 5x Duct Tape | Gunsmith 3 |
| Vita Shot | Quick Use | 2x Antiseptic 1x Syringe | Medical Lab 3 |
| Vita Spray | Quick Use | 3x Antiseptic 1x Canister | Medical Lab 3 |
| Vulcano | Weapon | 1x Magnetic Accelerator 3x Heavy Gun Parts 1x Exodus Modules | Gunsmith 3 |
| Wolfpack | Grenade | 2x Explosive Compound 2x Sensors | Explosives Station 3 |
| Red Light Stick | Quick Use | 3x Chemicals | Utility Station 1 |
| Smoke Grenade | Grenade | 14x Chemicals 1x Canister | Utility Station 2 |
| Deadline | Mine | 3x Explosive Compound 2x ARC Circuitry | Explosives Station 3 |
| Trailblazer | Grenade | 1x Explosive Compound 1x Synthesized Fuel | Explosives Station 3 |
| Tactical Mk. 3 (Defensive) | Augment | 2x Advanced Electrical Components 3x Processor | Gear Bench 3 |
| Tactical Mk. 3 (Healing) | Augment | 2x Advanced Electrical Components 3x Processor | Gear Bench 3 |
| Yellow Light Stick | Quick Use | 3x Chemicals | Utility Station 1 |
Note: The missing Blueprints in this list likely have not actually been added to the game at the time of writing, because none of the playerbase has managed to find any of them. As they are added to the game, I will update this page with the most relevant information so you know exactly how to get all 75 Arc Raiders Blueprints.
Where to find Blueprints in Arc Raiders
Below is a list of all containers, modifiers, and events which maximise your chances of finding Blueprints:
- Certain quests reward you with specific Blueprints .
- Completing Trials has a high chance of offering Blueprints as rewards.
- Surveyors have a decent chance of dropping Blueprints on death.
- High loot value areas tend to have a greater chance of spawning Blueprints.
- Night Raids and Storms may increase rare Blueprint spawn chances in containers.
- Containers with higher numbers of items may have a higher tendency to spawn Blueprints. As a result, Blue Gate (which has many “large” containers containing multiple items) may give you a higher chance of spawning Blueprints.
- Raider containers (Raider Caches, Weapon Boxes, Medical Bags, Grenade Tubes) have increased Blueprint drop rates. As a result, the Uncovered Caches event gives you a high chance of finding Blueprints.
- Security Lockers have a higher than average chance of containing Blueprints.
- Certain Blueprints only seem to spawn under specific circumstances: Tempest Blueprint only spawns during Night Raid events. Vulcano Blueprint only spawns during Hidden Bunker events. Jupiter and Equaliser Blueprints only spawn during Harvester events.

Raider Caches, Weapon Boxes, and other raider-oriented container types have a good chance of offering Blueprints. |Image credit:Rock Paper Shotgun/Embark Studios
Blueprints have a very low chance of spawning in any container in Arc Raiders, around 1-2% on average. However, there is a higher chance of finding Blueprints in particular container types. Specifically, you can find more Blueprints in Raider containers and security lockers.
Beyond this, if you’re looking for Blueprints you should focus on regions of the map which are marked as having particularly high-value loot. Areas such as the Control Tower in Dam Battlegrounds, the Arrival and Departure Buildings in Spaceport, and Pilgrim’s Peak in Blue Gate all have a better-than-average chance of spawning Blueprints somewhere amongst all their containers. Night Raids and Electromagnetic Storm events also increase the drop chances of certain Blueprints .
In addition to these containers, you can often loot Blueprints from destroyed Surveyors - the largest of the rolling ball ARC. Surveyors are more commonly found on the later maps - Spaceport and Blue Gate - and if one spawns in your match, you’ll likely see it by the blue laser beam that it casts into the sky while “surveying”.
Surveyors are quite well-armoured and will very speedily run away from you once it notices you, but if you can take one down then make sure you loot all its parts for a chance of obtaining certain unusual Blueprints.
Blueprints obtained from quests
One way in which you can get Blueprints is by completing certain quests for the vendors in Speranza. Some quests will reward you with a specific item Blueprint upon completion, so as long as you work through all the quests in Arc Raiders, you are guaranteed those Blueprints.
Here is the full list of all Blueprints you can get from quest rewards:
- Trigger Nade Blueprint: Rewarded after completing “Sparks Fly”.
- Lure Grenade Blueprint: Rewarded after completing “Greasing Her Palms”.
- Burletta Blueprint: Rewarded after completing “Industrial Espionage”.
- Hullcracker Blueprint (and Launcher Ammo Blueprint): Rewarded after completing “The Major’s Footlocker”.
Alas, that’s only 4 Blueprints out of a total of 75 to unlock, so for the vast majority you will need to find them yourself during a raid. If you’re intent on farming Blueprints, then it’s best to equip yourself with cheap gear in case you lose it, but don’t use a free loadout because then you won’t get a safe pocket to stash any new Blueprint you find. No pain in Arc Raiders is sharper than failing to extract with a new Blueprint you’ve been after for a dozen hours already.

One of the best ways to get Blueprints is by hitting three stars on all five Trials every week. |Image credit:Rock Paper Shotgun/Embark Studios
Blueprints obtained from Trials
One of the very best ways to get Blueprints is as rewards for completing Trials in Arc Raiders. Trials are unlocked from Level 15 onwards, and allow you to earn rewards by focusing on certain tasks over the course of several raids. For example, one Trial might task you with dealing damage to Hornets, while another might challenge you to loot Supply Drops.
Trials refresh on a weekly basis, with a new week bringing five new Trials. Each Trial can offer up to three rewards after passing certain score milestones, and it’s possible to receive very high level loot from these reward crates - including Blueprints. So if you want to unlock as many Blueprints as possible, you should make a point of completing as many Trials as possible each week.
Best Blueprint farming locations
The very best way to get Blueprints is to frequent specific areas of the maps which combine high-tier loot pools with the right types of containers to search. Here are my recommendations for where to find Blueprints on every map, so you can always keep the search going for new crafting recipes to unlock.

Image credit:Rock Paper Shotgun/Embark Studios
Dam Battlegrounds
The best places to farm Blueprints on Dam Battlegrounds are the Control Tower, Power Generation Complex, Ruby Residence, and Pale Apartments . The first two regions, despite only being marked on the map as mid-tier loot, contain a phenomenal number of containers to loot. The Control Tower can also contain a couple of high-tier Security Lockers - though of course, you’ll need to have unlocked the Security Breach skill at the end of the Survival tree.
There’s also a lot of reporting amongst the playerbase that the Residential areas in the top-left of the map - Pale Apartments and Ruby Residence - give you a comparatively strong chance of finding Blueprints. Considering their size, there’s a high density of containers to loot in both locations, and they also have the benefit of being fairly out of the way. So you’re more likely to have all the containers to yourself.
Buried City
The best Blueprint farming locations on Buried City are the Santa Maria Houses, Grandioso Apartments, Town Hall, and the various buildings of the New District . Grandioso Apartments has a lower number of containers than the rest, but a high chance of spawning weapon cases - which have good Blueprint drop rates. The others are high-tier loot areas, with plenty of lootable containers - including Security Lockers.
Spaceport
The best places to find Blueprints on Spaceport are the Arrival and Departure Buildings, as well as Control Tower A6 and the Launch Towers . All these areas are labelled as high-value loot regions, and many of them are also very handily connected to one another by the Spaceport wall, which you can use to quickly run from one area to the next. At the tops of most of these buildings you’ll find at least one Security Locker, so this is an excellent farming route for players looking to find Blueprints.
The downside to looting Blueprints on Spaceport is that all these areas are hotly contested, particularly in Duos and Squads. You’ll need to be very focused and fast in order to complete the full farming route.

Image credit:Rock Paper Shotgun/Embark Studios
Blue Gate
Blue Gate tends to have a good chance of dropping Blueprints, potentially because it generally has a high number of containers which can hold lots of items; so there’s a higher chance of a Blueprint spawning in each container. In my experience, the best Blueprint farming spots on Blue Gate are Pilgrim’s Peak, Raider’s Refuge, the Ancient Fort, and the Underground Complex beneath the Warehouse .
All of these areas contain a wealth of containers to loot. Raider’s Refuge has less to loot, but the majority of the containers in and around the Refuge are raider containers, which have a high chance of containing Blueprints - particularly during major events.
Stella Montis
On the whole, Stella Montis seems to have a very low drop rate for Blueprints (though a high chance of dropping other high-tier loot). If you do want to try farming Blueprints on this map, the best places to find Blueprints in Stella Montis are Medical Research, Assembly Workshop, and the Business Center . These areas have the highest density of containers to loot on the map.
In addition to this, the Western Tunnel has a few different Security Lockers to loot, so while there’s very little to loot elsewhere in this area of the map, it’s worth hitting those Security Lockers if you spawn there at the start of a match.
That wraps up this primer on how to get all the Blueprints in Arc Raiders as quickly as possible. With the Expedition system constantly resetting a large number of players’ Blueprints, it’s more important than ever to have the most up-to-date information on where to find all these Blueprints.
While you’re here, be sure to check out our Arc Raiders best guns tier list , as well as our primers on the best skills to unlock and all the different Field Depot locations on every map.


ARC Raiders
PS5 , Xbox Series X/S , PC
Rock Paper Shotgun is better when you sign in
Sign in and join us on our journey to discover strange and compelling PC games.

Shapez 2’s Next Fest demo is the purest catnip for factory game lovers
Join me in drooling over endless lines of conveyor belts
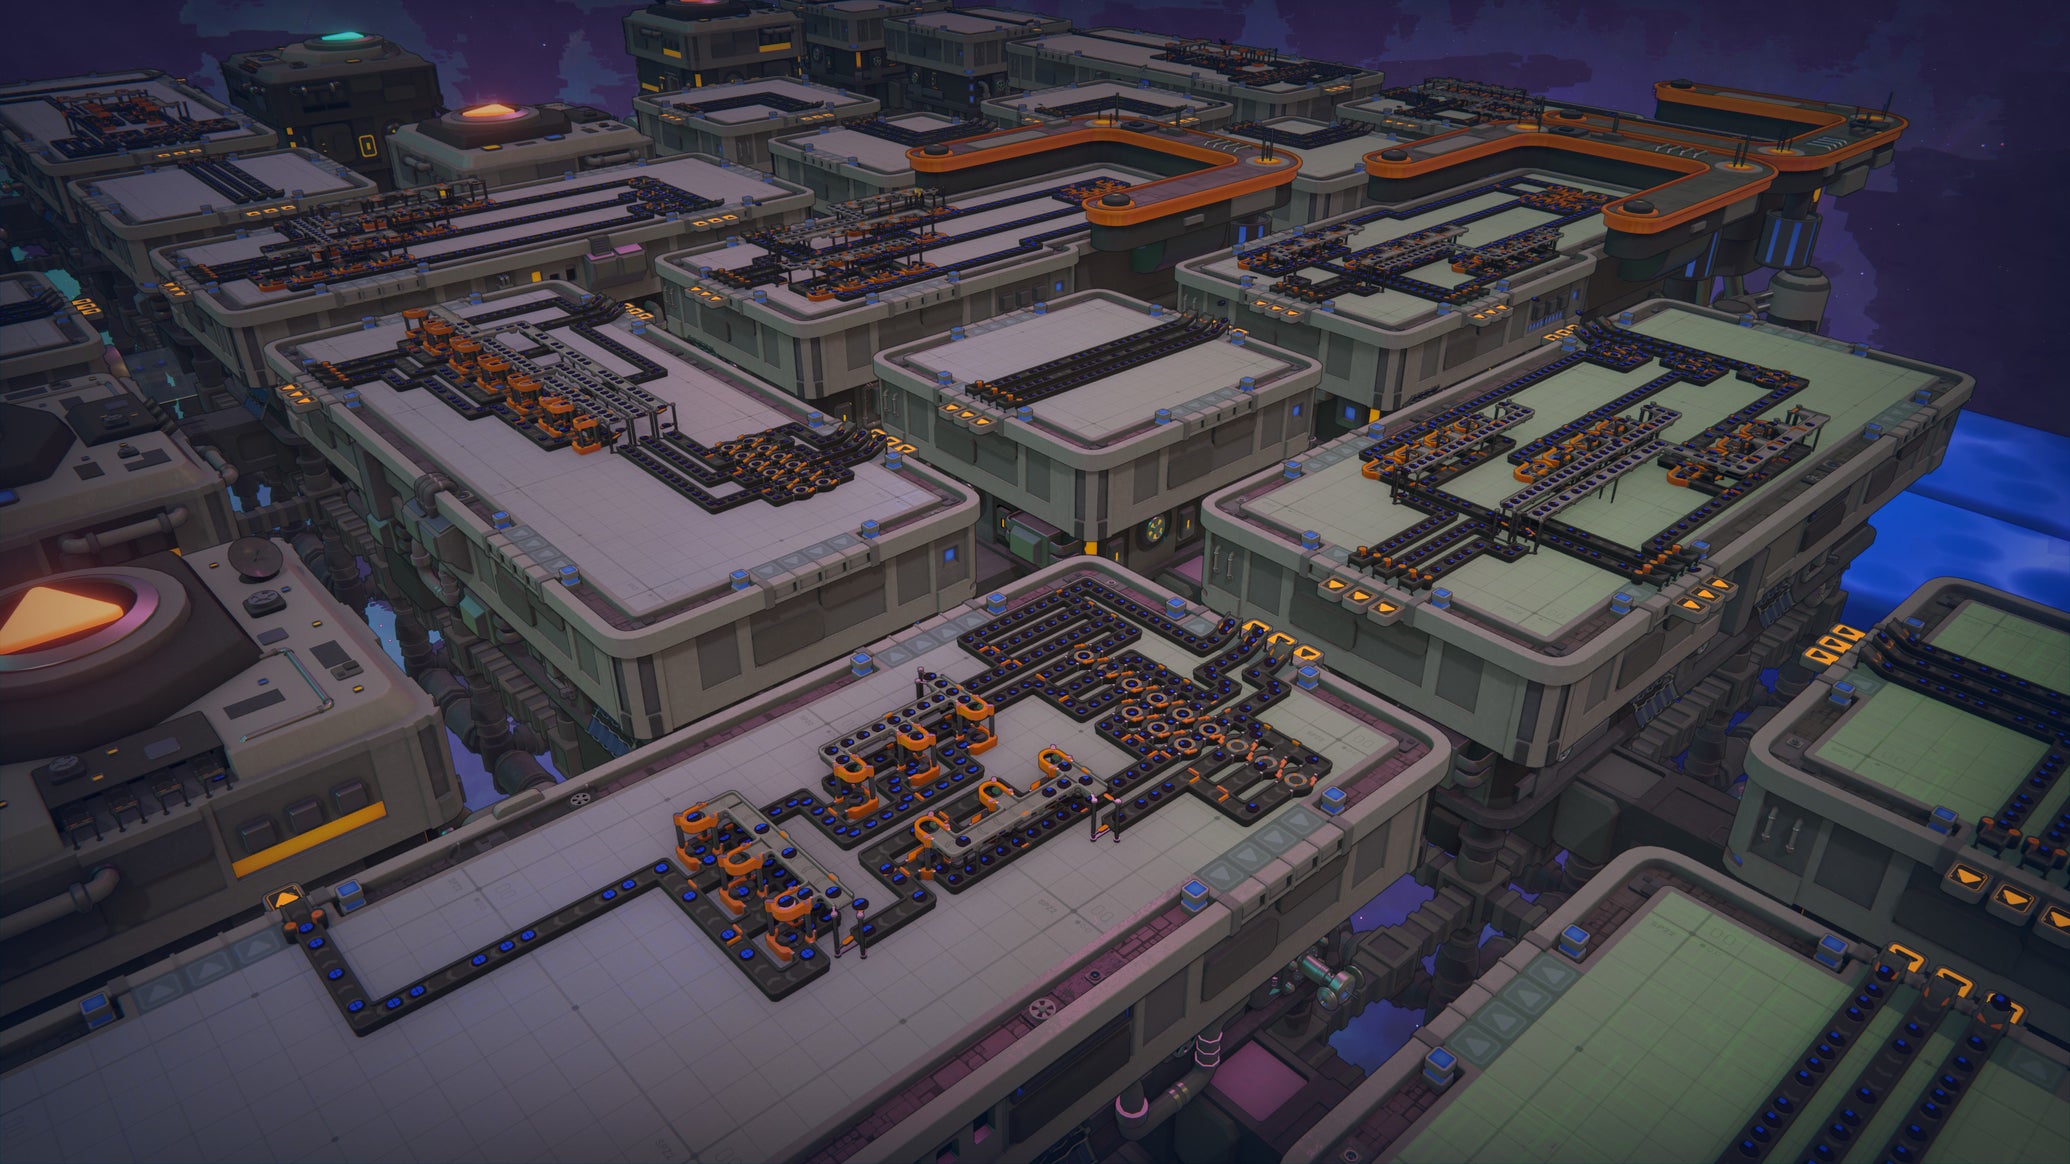
Image credit:Rock Paper Shotgun/Gamera Games

According to Steam, I’ve spent about 2000 hours playing factory games. Terms like throughput, modularity, and automation are like dog-whistles to me, so when I heard that Shapez 2 was getting a demo for Steam Next Fest this month, I knew my weekend plans were instantly sorted. Well, here we are in the new week. I’ve finished the Shapez 2 demo twice and logged 10 hours into the game. I see conveyor belts of circles and squares behind my eyelids and the reward system of my brain has been well and truly hijacked. The only way I can continue to do my job effectively is by making my job be about Shapez 2. So here I am.
Shapez 2 knows exactly what it needs to be. It’s what developers Tobspr are calling a “pure” factory game, which means there are no enemies to fight, and all the factory buildings and belts you place down are entirely free. It’s simply about taking simple shapes, cutting them up, rotating them, and stitching them together again into more complex shapes which you then feed into the big shape-hungry portal at the centre of the map.
Click on any of the shapes you need to deliver, and the game will offer multiple 3D views of the shape so you can easily understand how to make it. |Image credit:Rock Paper Shotgun/Gamera Games
If you played Shapez 1, it will all be very familiar to you. The main difference is that Shapez 2 is entirely 3D, and aside from the obvious added complexity of having multiple levels of belts, it means everything looks about 8000% more gorgeous. But it’s not just that. Key info such as belt throughput and ideal ratios is much more freely accessible. The controls are more intuitive, too, particularly when placing down conveyor belts - which make up a good 75% of everything you’ll ever place, so it’s a damn good thing they got it so spot on.
Shapez 2’s animation also does a lot of the heavy lifting in making everything feel as satisfying as possible. Watching the cutters neatly bisect and re-organise shapes, or seeing the belt elevators scoop items up and down like bike pedals, is just sublime. The design throughout is exceptional, and stopping to zoom in on a section of my factory at work was just a great big 14-gauge needleful of serotonin to the brain.
The demo is organised by a series of missions displayed in the top-left. There are big main missions, which unlock new building types upon completion, and smaller “suggestion” objectives, which tend to improve the speed of belts and buildings. Both types of missions ask for certain numbers of specific shapes to be delivered to the central portal. An early example might be a shape that’s half-circle and half-square, so you have to belt in some circles and squares, cut them up, and stitch them together. Nice and easy. But towards the end of the demo, it starts asking for Frankensteinian multi-coloured shapes, stacked atop one another in dauntingly pleasing patterns.
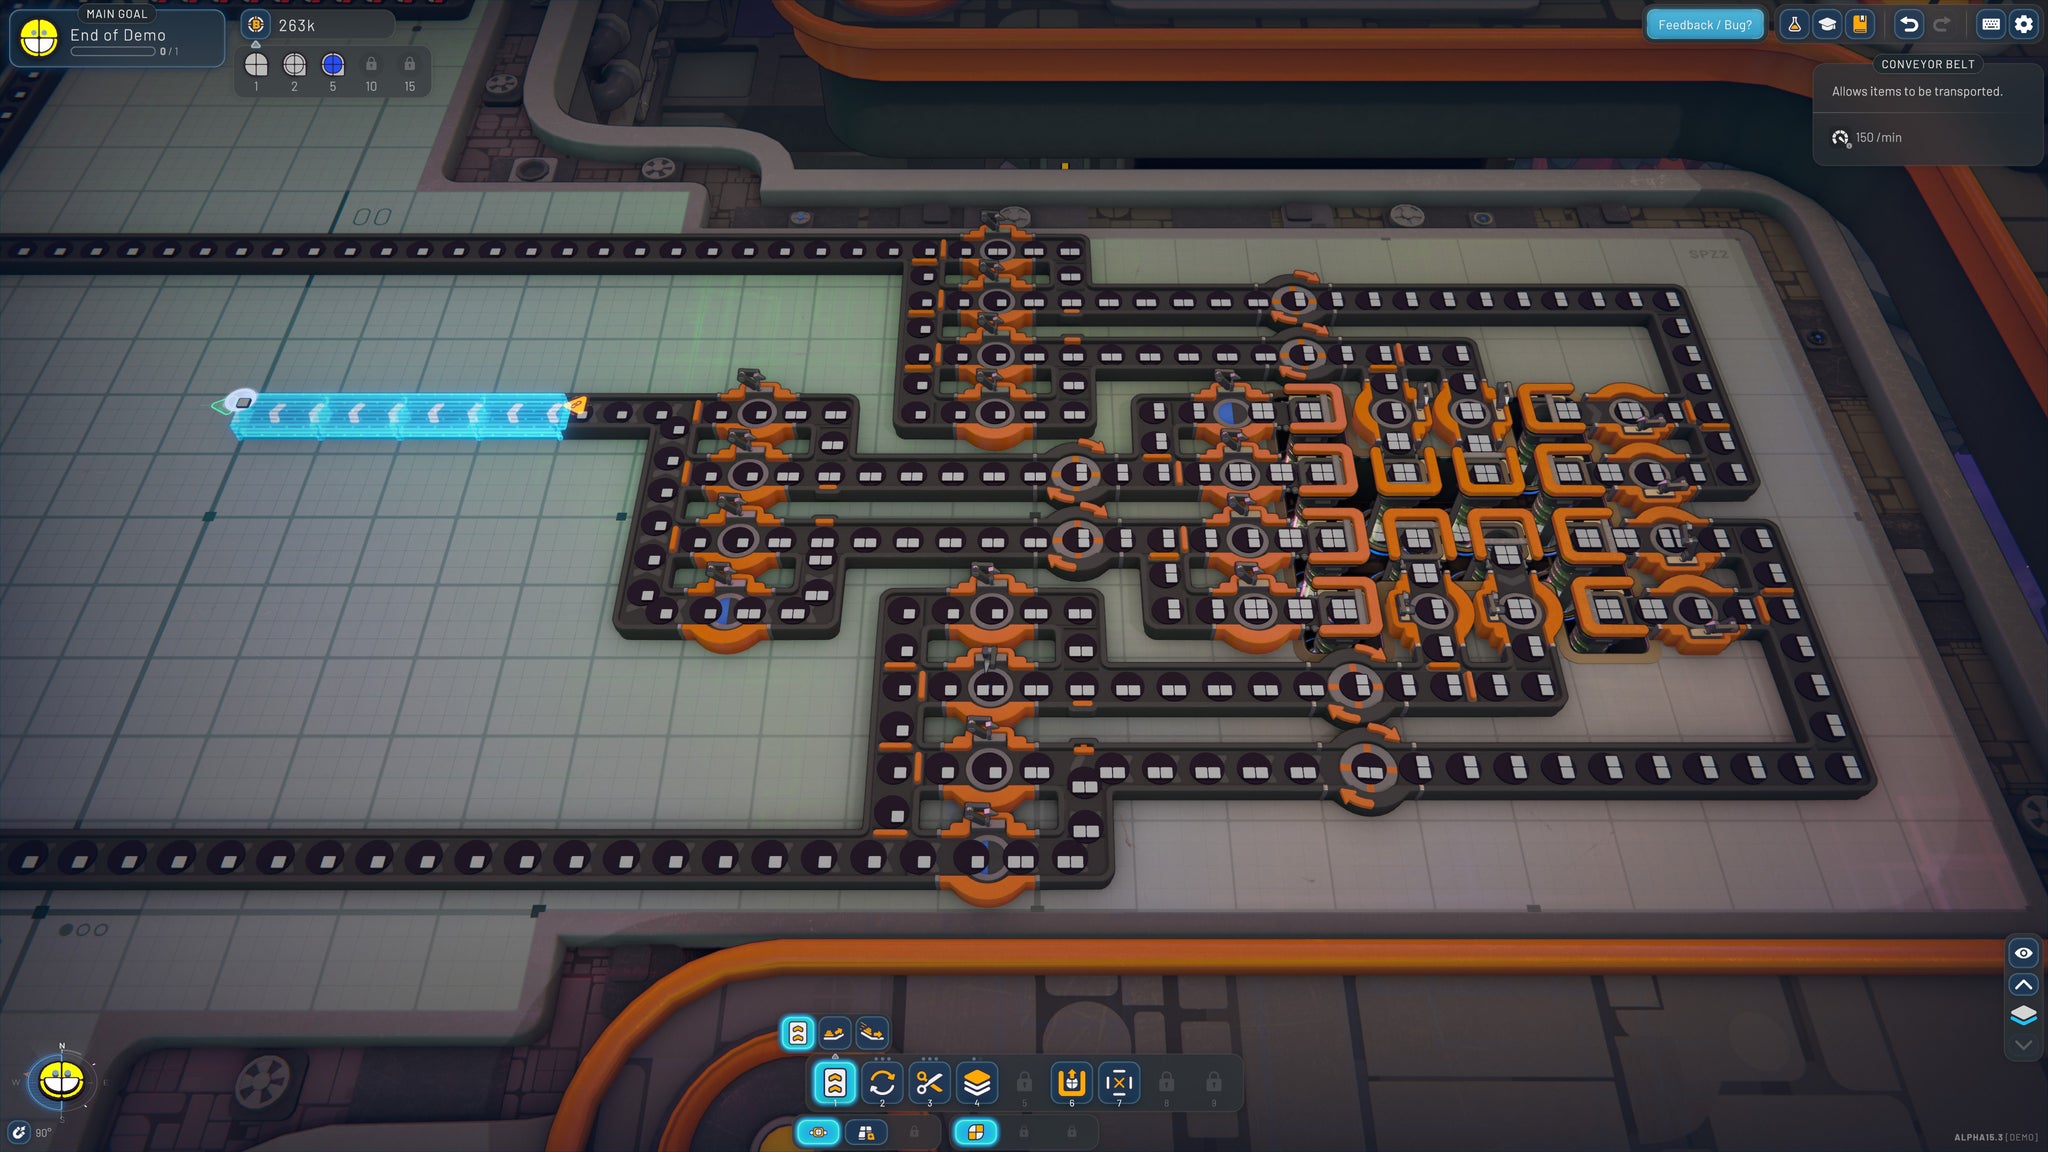
Placing down conveyor belts in Shapez 2 is more pain-free and satisfying than in any other factory game I’ve played. |Image credit:Rock Paper Shotgun/Gamera Games
As the demand for more complex shapes increased, I had to expand beyond the central starting platform that housed the portal and my first few rudimentary factories. That’s the other masterstoke of Shapez 2. Instead of just being an endless plain of land like in Shapez 1, everything is untraversable space until you expand outwards by placing new platforms. These platforms are limited in size, too, requiring players to create space-saving designs that take in a shape and do one particular thing to it, for example, before outputting it to a neighbouring platform, which does another particular thing, and so on. Each platform is designed for you to make modular factory blocks that act as macrocosms of the individual cutter and rotator buildings you were placing down at the start of the demo, massively opening up the game’s scope and building possibilities in the process.
One other thing I really liked was Shapez 2’s Blueprint Points. These are a kind of perpetual side-mission in the demo, earned by delivering more complex types of shapes (the more complex the shape, the more points you get), and spent on essentially copy-pasting sections of your factory elsewhere, reducing the manual labour of placing everything down tile by tile. Blueprints aren’t new, of course. They’re a staple of the genre. But I really like the decision to tie it to earning points. Given the lack of any building costs, it would feel a bit cheap to just be able to CTRL+C and CTRL+V huge sections of factory for free. But with blueprint points, you have to work towards that ability with a regular influx of shapes, and it gives you another nice avenue of progression and strategy besides completing the main missions.
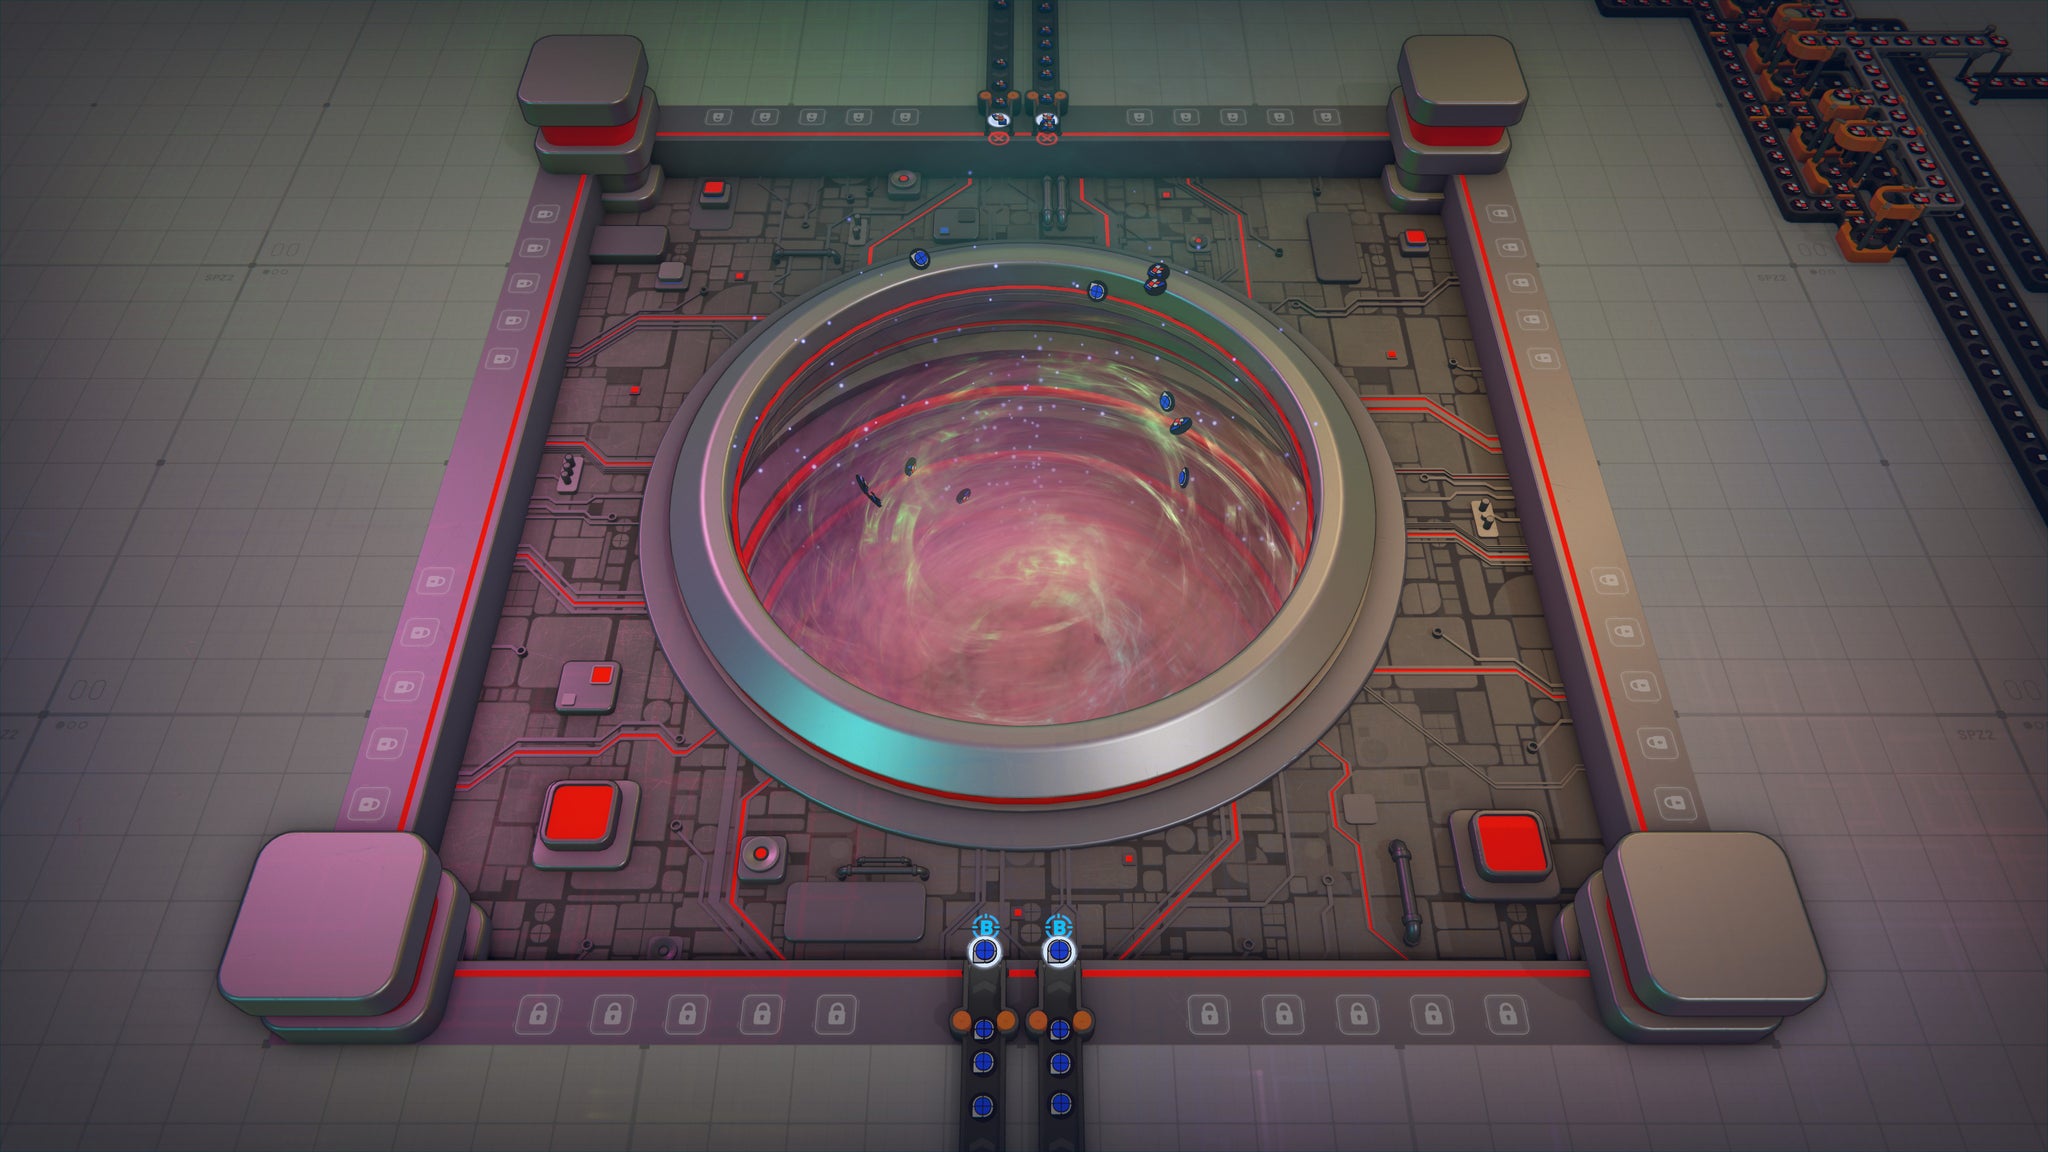
You can zoom out extremely far in Shapez 2, and pan around to see the full and daunting scale of its procedurally generated maps. |Image credit:Rock Paper Shotgun/Gamera Games
I do wish the demo challenged me a bit more. Unlike in Shapez 1, the portal will accept the right shape in any orientation, which feels odd in a game that’s so hyperfocused on precision with its shapes, and I’m still not sure about all your building costs being free, either. It’s convenient, but it also means there’s less incentive to be efficient. The platforms may help with this, of course, but even in the demo it’s very easy to circumvent this, as I simply had more platforms than I knew what to do with. Convenience is nice, but removing all limits isn’t necessarily always the most enjoyable thing.
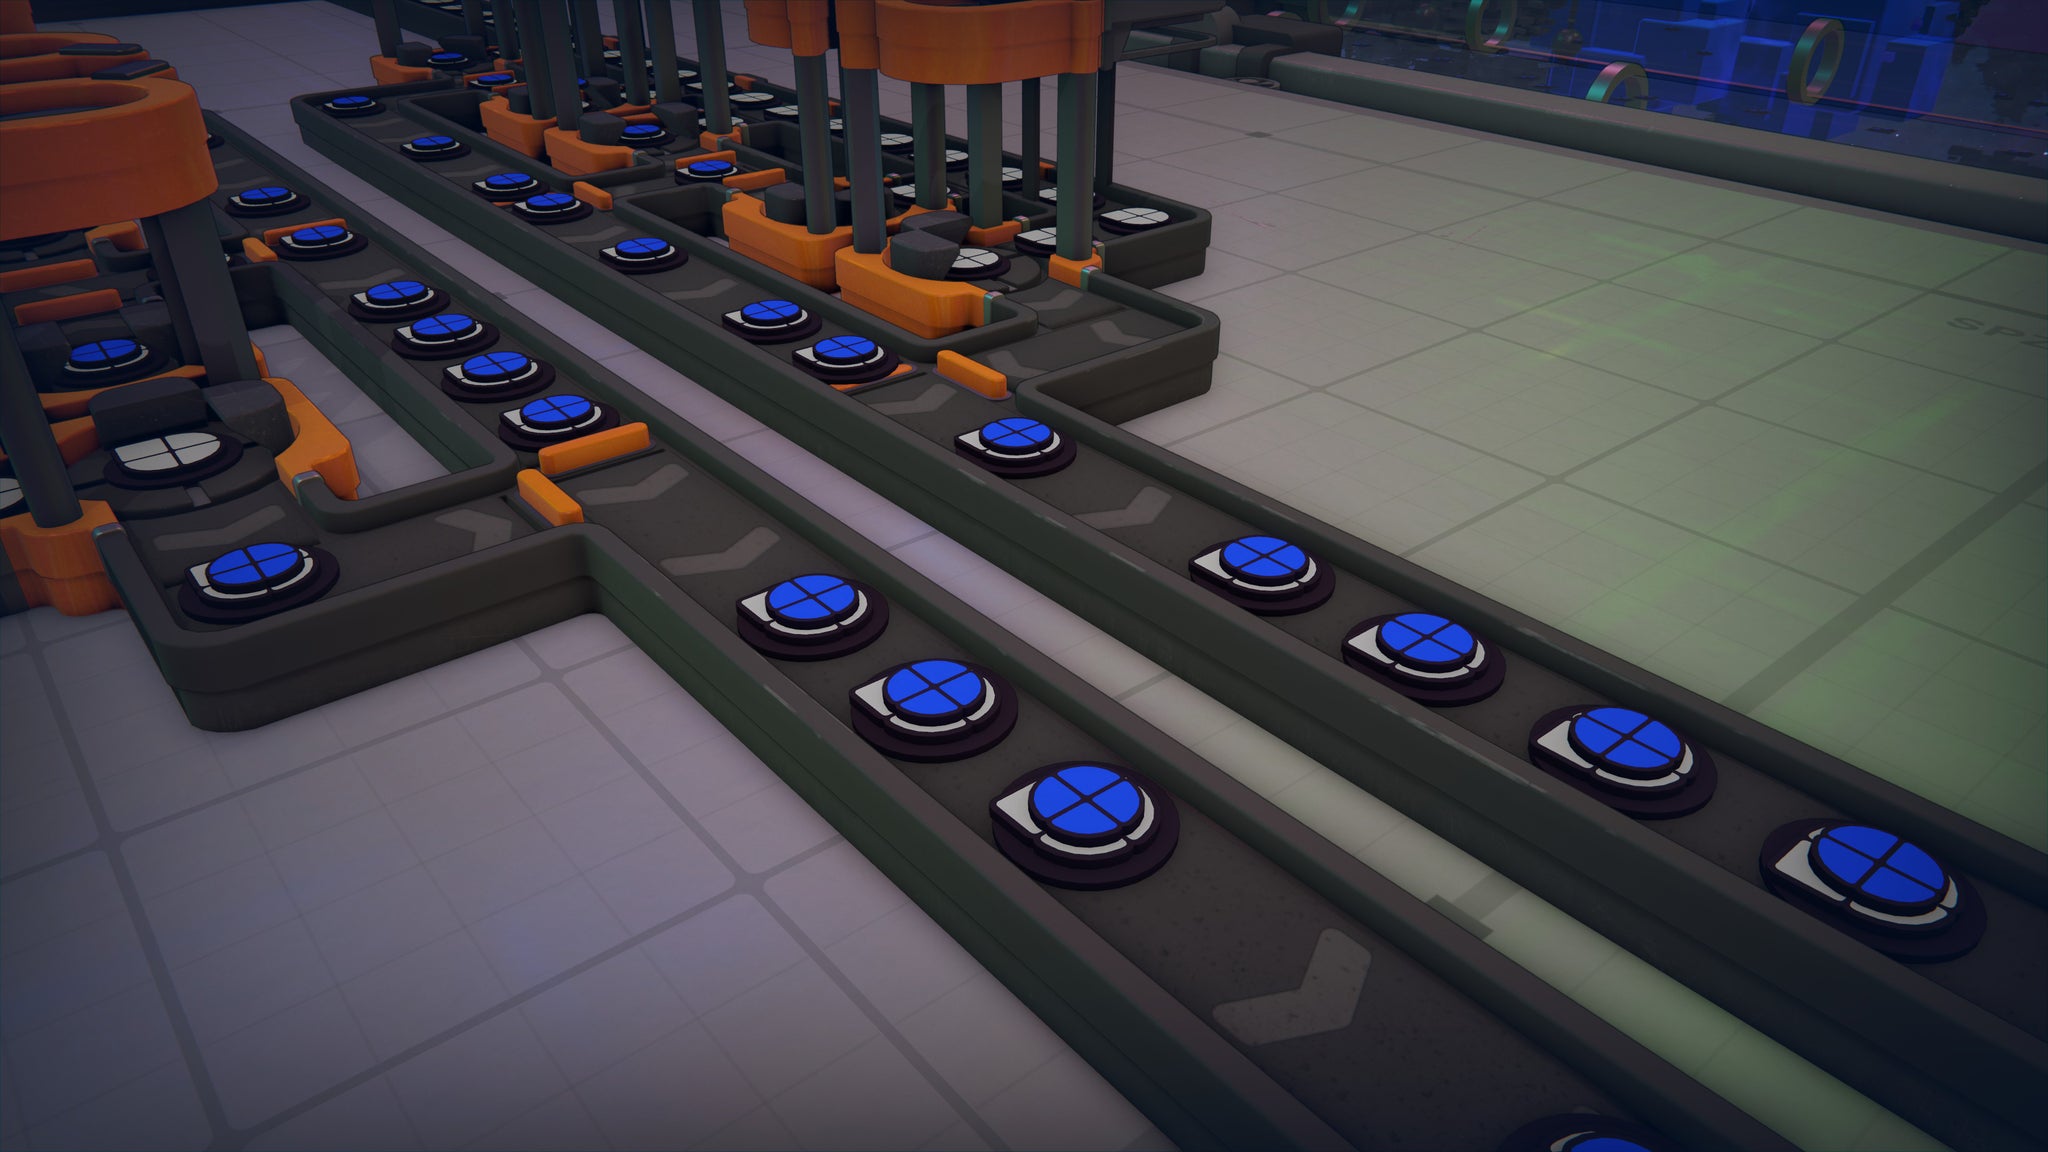
The visual upgrade from Shapez 1 to Shapez 2 goes far beyond simply making everything 3D. Everything from the textures to the animations are beautiful, especially in motion. |Image credit:Rock Paper Shotgun/Gamera Games
- Developer: Tobspr Games
- Publisher: Tobspr Games, Gamera Games
- Release: 2024 (early access)
- On: Windows
- From: Steam
I think Shapez 2’s long-term success will come down to how ambitious it ends up being. I had a scroll through the tech tree beyond the point where the demo ends, and I saw a few very cool-sounding features - trains, colour mixing, and vortex technology (whatever that is) - but I’m mostly hoping for at least one or two more basic shape types. At the moment there’s only the circle, square, star, and windmill shapes, and everything is built out of those four. I know that the complexity comes from the layering and colouring of those shapes, but still. What I wouldn’t give for a clover, or a diamond, or a donut!
Despite that, the demo left me aching for more. Which probably means it was exactly the right length. I spent a languorous seven hours beating it the first time, but that was down to me deliberately scaling up my production to silly levels. I played the demo again afterwards, and finished it in 90 minutes. So it’s really dependent on how you decide to play. Still, everything I’ve seen looks very promising indeed, and here’s hoping that when Shapez 2 releases into early access this year, it will turn the holy trinity of factory games ( Factorio , Satisfactory , and Dyson Sphere Program ) into a quartet.


Shapez 2
Video Game
Rock Paper Shotgun is better when you sign in
Sign in and join us on our journey to discover strange and compelling PC games.
