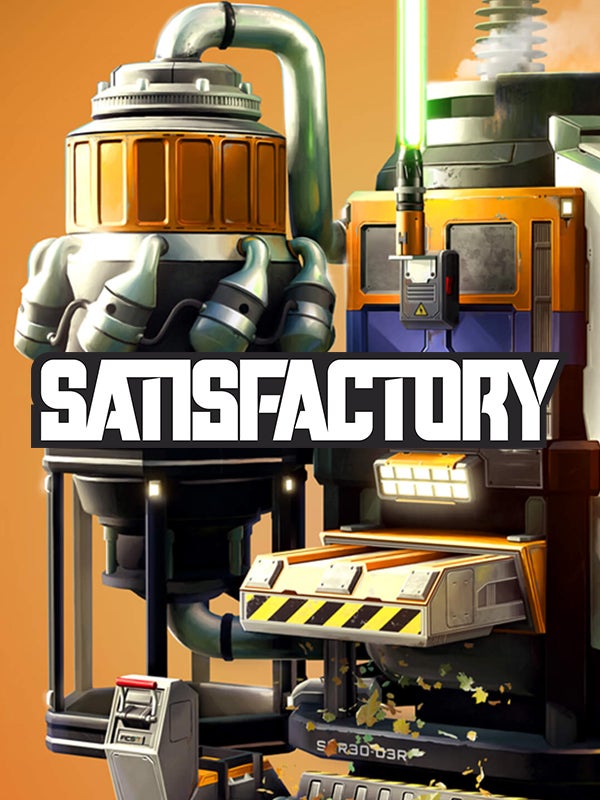
Satisfactory 1.0 review: yes, it is
Frack the planet
.jpg?width=690&quality=85&format=jpg&dpr=3&auto=webp)
Image credit:Rock Paper Shotgun/Coffee Stain Publishing

- Developer: Coffee Stain Studios
- Publisher: Coffee Stain Publishing
- Release: Out now
- On: Windows
- From: Steam , Epic Games Store
- Price: £33/€36/$36
- Reviewed on: Intel Core i7-10875H, 16GB RAM, Nvidia RTX 2080 Super, Windows 11
I am lost in my own factory. From every direction, every angle, conveyor belts and smelters and assemblers obscure my senses and envelop my being. Twenty hours ago I placed my first manufacturer somewhere around here. Back then it represented the state of the art, hatching me a pristine batch of 1.25 computers every minute - now I’ve forgotten where I put the damn thing, after delving into my factory’s guts to hook that piddly yet still useful batch of old relics up to my main production line. I’m building supercomputers now, and the many manufacturers that make those are hungry.
Something is always hungry in Satisfactory , and that hunger pulls you from task to task in a near-seamless and frankly beautiful daze of ever-escalating industry. It is mesmerising and it is fearsome, and after five years of early access it’s finally complete.

Image credit:Rock Paper Shotgun/Coffee Stain Publishing
You know the brief: you’re alone (or not, in co-op) on a planet whose minerals must be turned into gizmos, at the behest of a totally humane and non-exploitative company. The 1.0 update introduces a story that peppers in cryptic allusion, delivered by your Glados-like AI boss, to how The Project you spend the game building will somehow save the universe,
Forget that - back to my factory. Free of the innards, I use my hoverpack to zoom up and out, higher and higher as I appreciate just how much of the planet’s surface is now yoked to my whim. There are my first iron miners, belching out the plates I used to build the mark one conveyor belts that brought my initial copper wire supply over from a hundred metres to the west. There’s my foundry, chugging away at the steel brought in from my first proper outpost, feasting on the ingots that stream out from the latest automated train shipment. Out to sea lies my nuclear power plant, tucked away far enough that the radiation can’t touch me. Up above zooms a drone, jetting in the sulphur that ultimately gets mixed into the rocket fuel that powers my jetpack, as well as half a dozen machines on the factory floor.
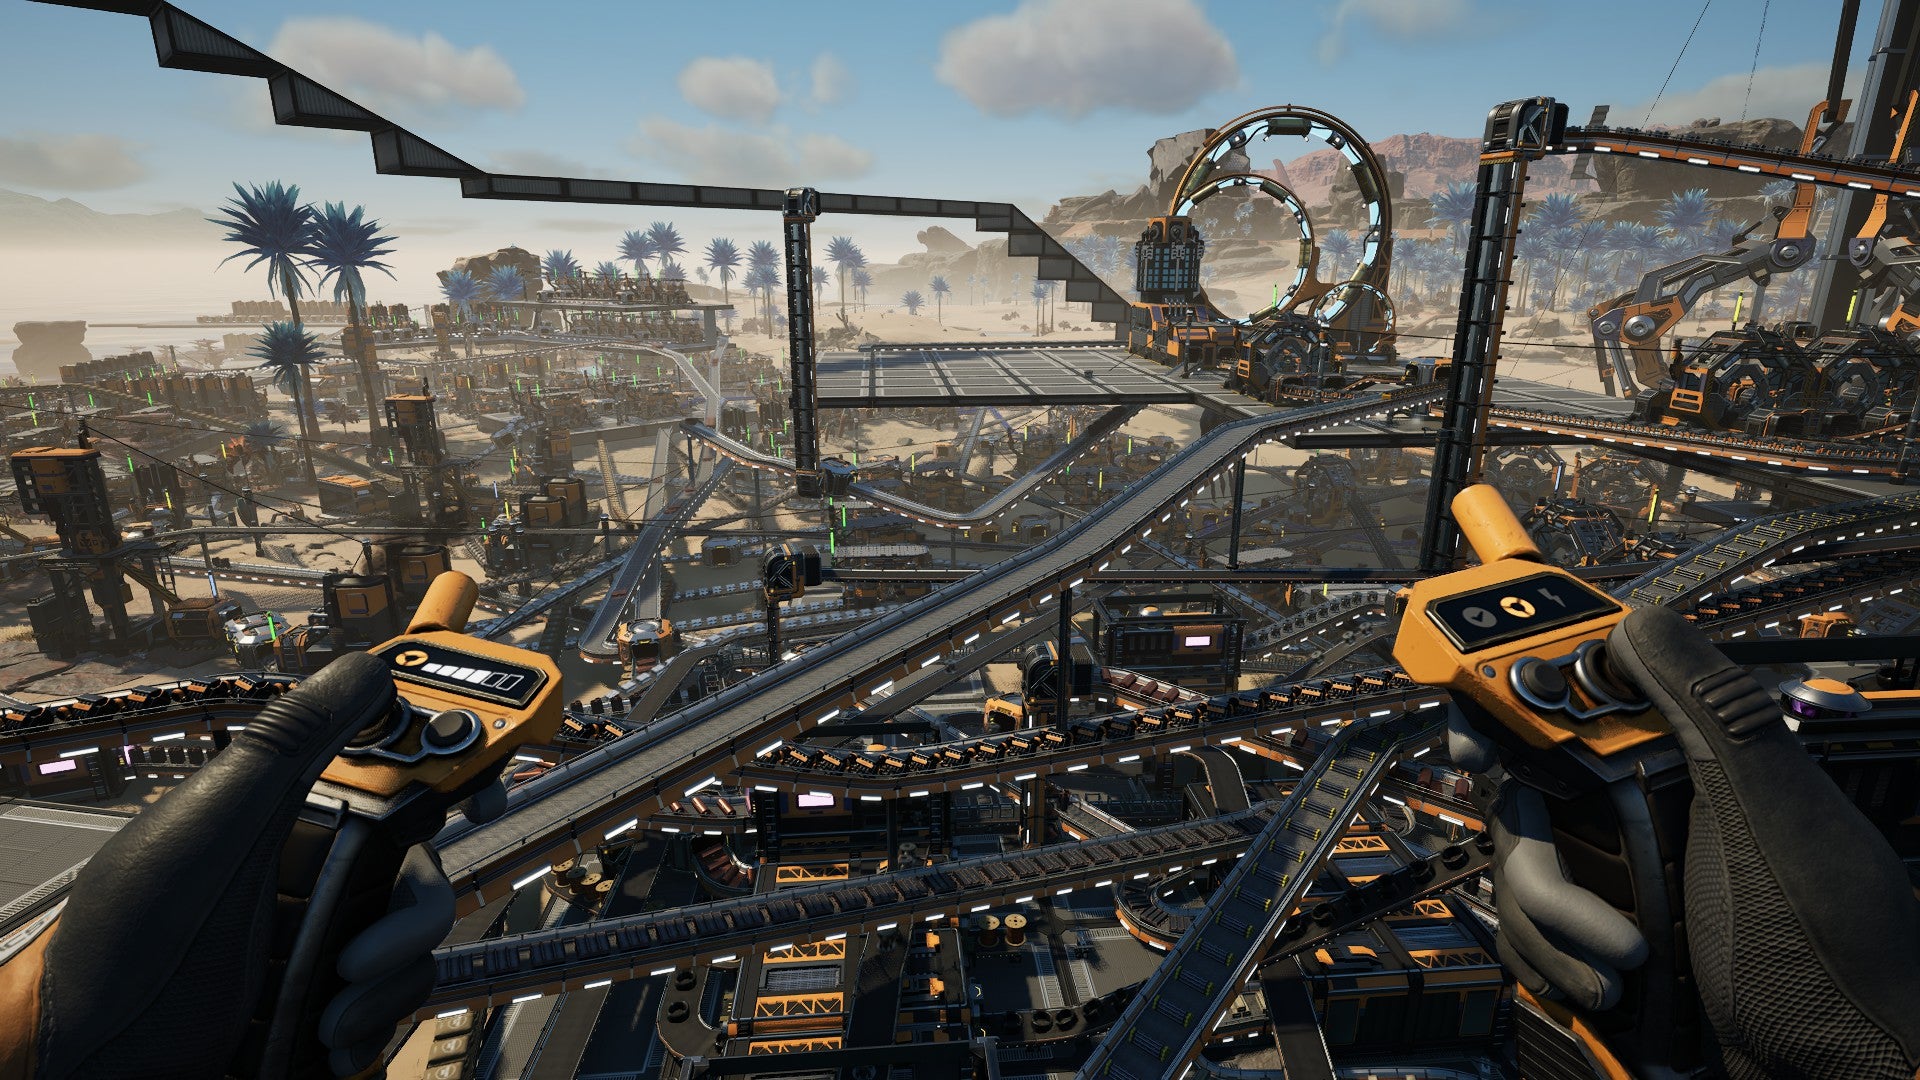
Satisfactory sells a sense a scale better than any other automation game, which is saying something when Dyson Sphere Program has you literally encase a star. It’s because you’re there, of course, in the midst of it, conjuring refineries that tower above you and cause practical, immediate navigation problems until you unlock the tools that free you from gravity’s diktat. Having to traverse every inch of my automated empire is what allows me to relish it, transforming even a mundane supply run into an opportunity to marvel at what my will has wrought. Other games have had me annihilate armies and topple literal gods, but conjuring planet-chewing factories is where I’ve felt most powerful.

Image credit:Rock Paper Shotgun/Coffee Stain Publishing
On a practical level, playing Satisfactory is like being Matt Damon if Matt Damon had been stranded on Mars with a sci-fi multi-tool, and instead of Mars he’d been stranded on a luscious planet filled with kamikaze bees and armour-plated rhinos. It’s cool, they’re chill as long as you don’t go near them: all the hostile flora and fauna keep to themselves, so you only need to tangle with them when you’re exploring. They add tension to a stroll, and there’s heft to each swing of your standard FICSIT issued xeno-basher, but they’re not the main event. The main event is doing maths.
Pretty simple maths! You’ll probably want to know how many smelters you need to handle 180 iron, or how many gallons of oil you’ll need to fuel up your generators, though how much calculation you do is largely up to you. Early on I tend to maths everything out exactly, making sure each machine gets fed exactly as much as it needs to and no more. It’s hard to relate just how satisfying a perfectly optimised production flow can be, and I respect the hell out of anyone who manages to stick with that level of organisation as you progress. As the complexity scales up - and boy does it scale - I tend to swap to an overflow system, sometimes not even bothering with the maths and just cramming in raw material until the handy light on top of each building swaps from ‘feed me’ yellow to sated green.
Playstyle preference and to some extent your nature as a human is also rather brilliantly reflected in the layout of your factories, and how fastidious you are about keeping them neat. Regimented zones, straight lines and neatly regulated angles? (Nerd). Or sprawling spaghetti mess? (Unhinged). The game’s gloriously accommodating of either approach, with plentiful tools to keep your buildings lined up perfectly, or the freedom to almost entirely ignore clipping issues and scribble over the world wherever you please. I fall (ironically) squarely into the latter camp, which all of my friends regard as perverted. That means statistically you will too, so I’m glad of this opportunity to taunt you all with screenshots of my smut.
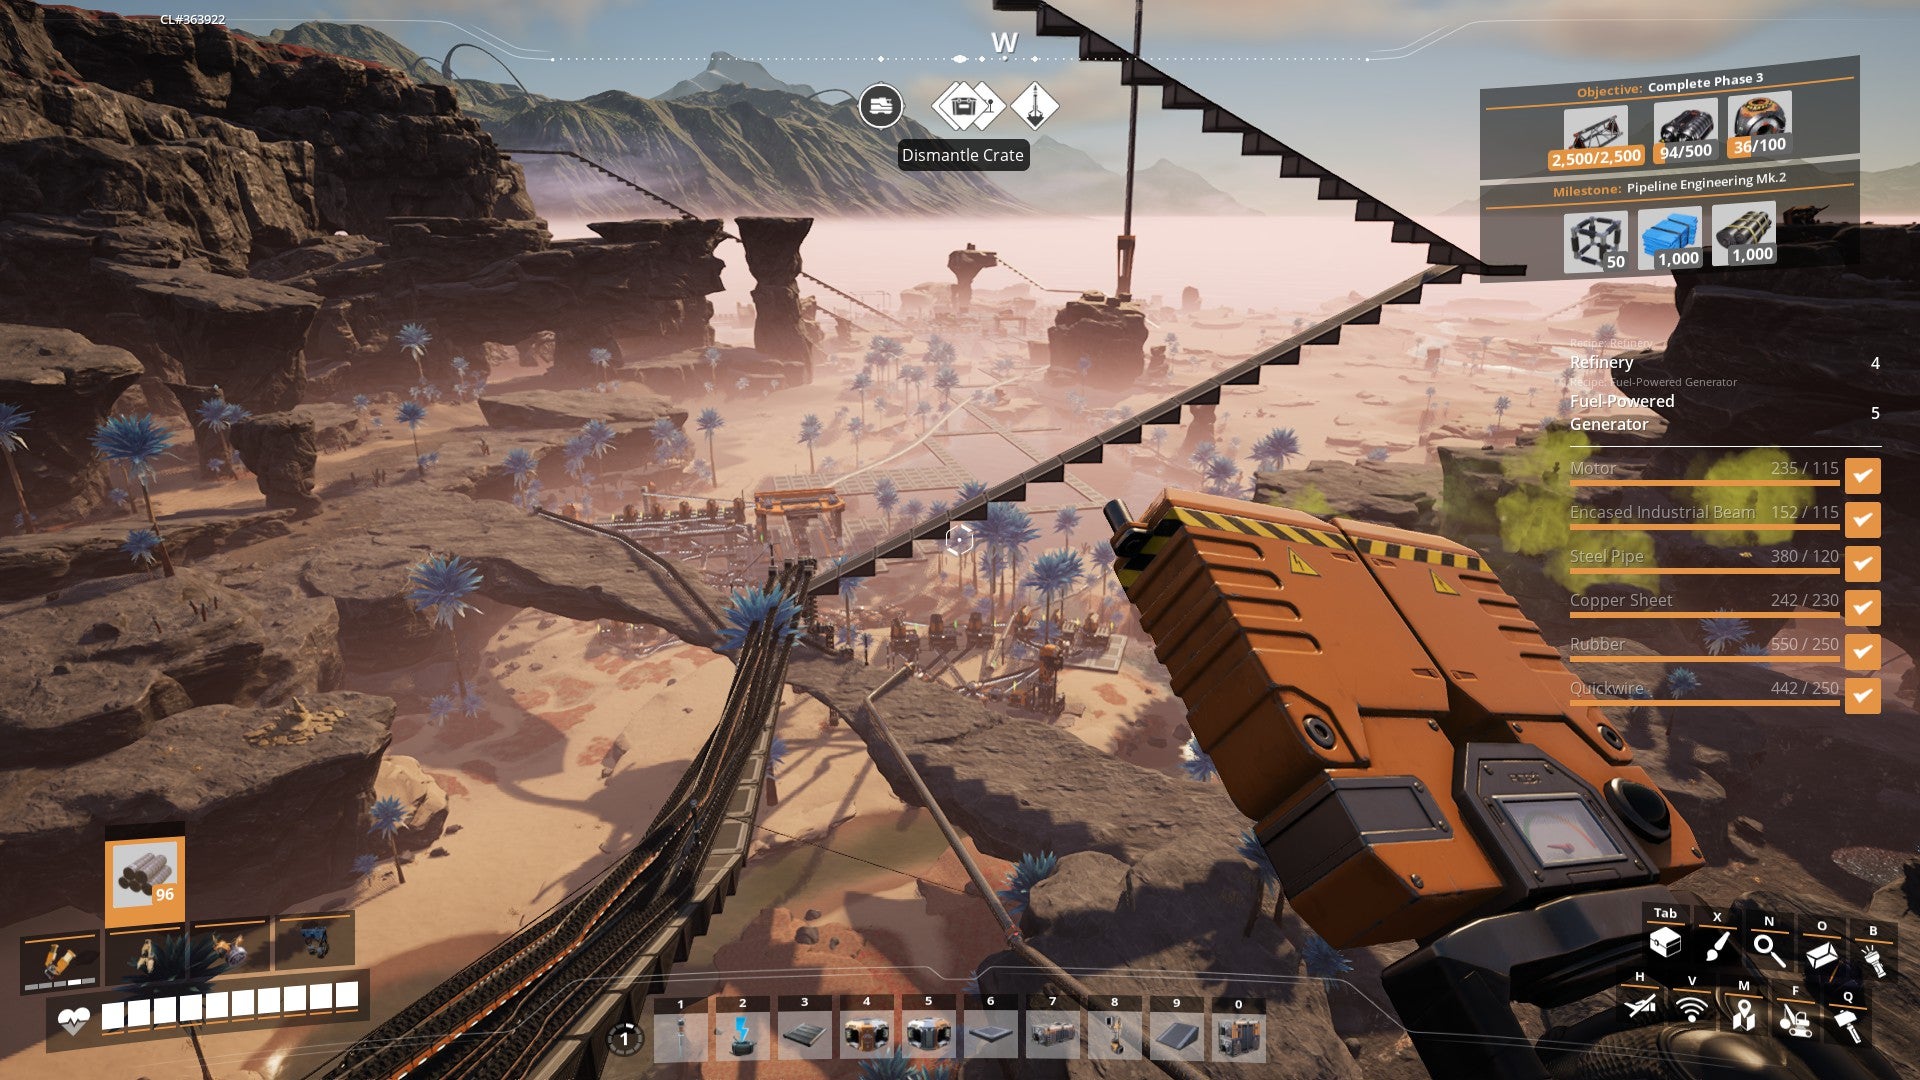
Image credit:Rock Paper Shotgun/Coffee Stain Publishing
Image credit:Rock Paper Shotgun/Coffee Stain Publishing
Even your AI boss teases you about your organisational prowess, in one of many remarks that play whenever you deliver enough products to unlock a new tech. There are loads more of those with the 1.0 update, too, some of them funny enough to catch me off guard with an out loud chuckle. There was the reminder not to worry about amnesia, because beloved memories of animal companions would have been a distraction from my mission. Or the celebration of Futurama-style transport tubes: “Hypertubes: because FICSIT makes pioneer’s closely monitored dreams come true”. There’s also a whole new sinister side-plot involving a mysterious creepy voice that keeps raving about blood and temples, so that’s fun.
You’ll hear from that voice whenever you hunt down a Mercer Sphere, which have gone from placeholder curiosities to indispensable time-savers that let you rig up dimensional depots that you can hook up to your production lines, which serve as a second, infinitely re-filling personal inventory. Those Spheres are found out there with the power slugs that already served as a fantastic incentive to go exploring, seen as you can squish them into power shard smoothies and plug them into machines to boost their output.
It really is a sumptuous, creative and properly alien world that deserves acclaim as an achievement in its own right, with varied biomes and surprises tucked into its canyons, caves and crevices. Shout out to the random rhino with a jetpack. I shall never know your story.
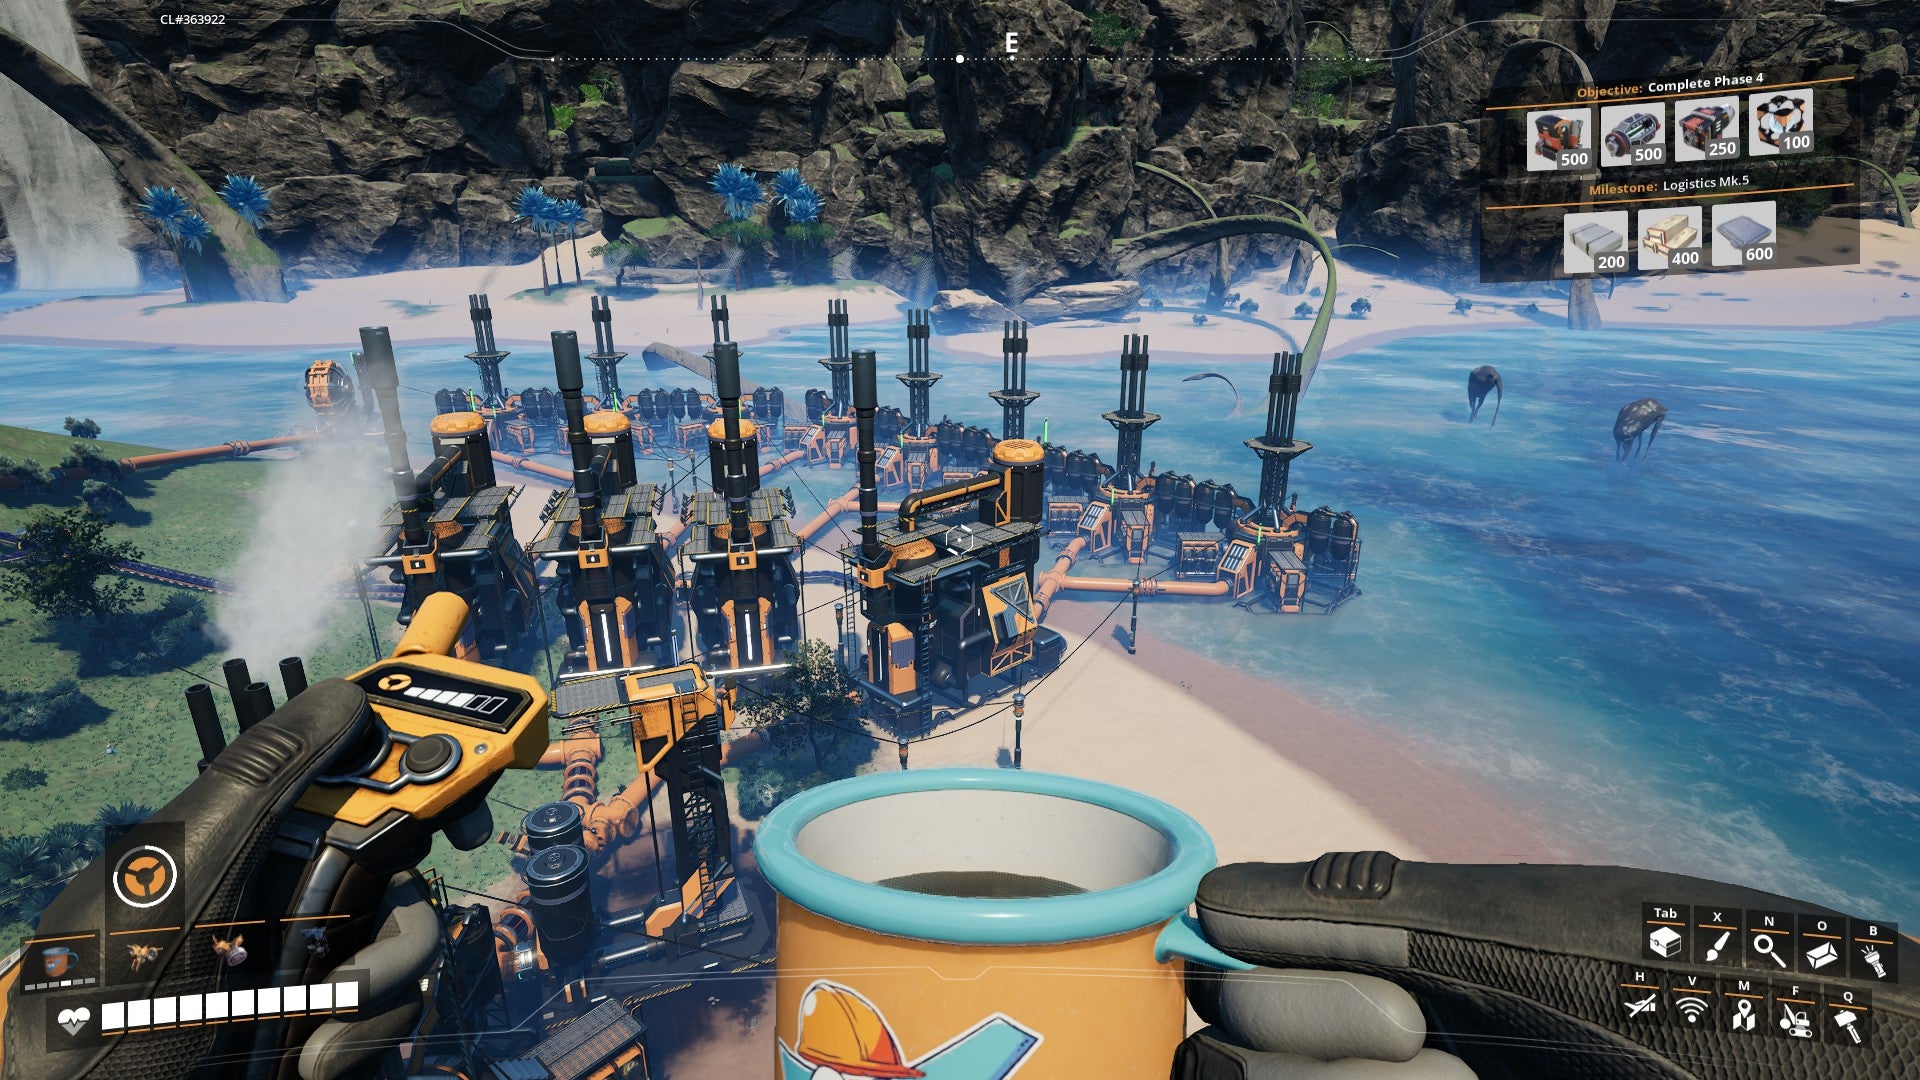
Image credit:Rock Paper Shotgun/Coffee Stain Publishing
The jetpack! Yet another component Satisfactory nails (factory joke) is its movement, from the powerslide to the unlockable sprinty robo-legs to the powerline grappler. Using all of those in tandem with the jetpack is a genuine joy, building up momentum and giving your spacebar little tippy-taps to fling yourself forwards. That only becomes more powerful as you unlock (and industrialise production of, naturally) superior fuel, with each tantalising new method of traversal a better reward for your labours than even Factorio ’s spidertrons.
It’s all so tangible. That’s what elevates this above Factorio and Dyson Sphere, even though both are tremendous in their own right. The first-person perspective is part of that, but there’s a similar sense of concrete reward on a structural level, too (factory joke). You’re not pouring resources into machines that Do Science: you’re manufacturing a specific number of parts to accomplish a specific goal, be that to launch the next phase of The Project or unlock a new powerpole.
Problems? There are a few. Hopefully some of my crashes can be pinned on the media build, but the occasional Crash-To-Desktops that plagued early access haven’t gone away (I literally can’t go near one cursed quartz vein.) Despite now coming with a one-time re-roll, I still feel the alternative recipes you unlock from hard-drives are too rarely useful. The car is too slow, and if I’m being grumpy, a late-game factory can at times feel like it’s asking too much. Another 240 plastic for a mere 22.5 computers a minute? Gah!
I don’t mean it, though. Not really. That’s partly because I’ve got myself to blame: I could be putting the blueprint designer to more work, or building in a more scalable way. But I like my spaghetti cathedral. In fact, I adore it.


I love the thrill of threading a conveyor through my domain and hunting down an errant input port, in a weird shark-like sort of way. I love cleaning up a kink that’s been unknowingly bottlenecking me for hours, then watching a dormant part of my factory spring back into life (and I love that I can now place signs as reminders that make those happen slightly less). Most of all I love passing by old projects, grinning at hodge-podge engineering that’s still thrumming away, playing its part in the overall colossus I have somehow crafted.
Nothing devours a weekend like Satisfactory, whose demands are so often in that sweet spot where the work is complicated enough to yield capital S Satisfaction without tipping into choredom. No management game has made me feel as powerful, letting me relish in how my labours have sculpted the world on such a scale. And nowhere else, or rarely, have I appreciated such loving attention to detail, be that in the bloops of an unfolding miner or the toot of a departing train.
Also with 1.0 you can hook conveyor belts up to your early-game bioreactors. Everyone at Coffee Stain Studios deserves a big kiss.
Find out how we conduct our reviews by reading our review policy .
Satisfactory
PC
Rock Paper Shotgun is better when you sign in
Sign in and join us on our journey to discover strange and compelling PC games.

All 75 Arc Raiders Blueprints and where to get them
These areas have the highest chance of giving you Blueprints

Image credit:Rock Paper Shotgun/Embark Studios

Looking for more Arc Raiders Blueprints? It’s a special day when you find a Blueprint, as they’re among the most valuable items in Arc Raiders. If you find a Blueprint that you haven’t already found, then you must make sure you hold onto it at all costs, because Blueprints are the key to one of the most important and powerful systems of meta-progression in the game.
This guide aims to be the very best guide on Blueprints you can find, starting with a primer on what exactly they are and how they work in Arc Raiders, before delving into exactly where to get Blueprints and the very best farming spots for you to take in your search.
We’ll also go over how to get Blueprints from other unlikely activities, such as destroying Surveyors and completing specific quests. And you’ll also find the full list of all 75 Blueprints in Arc Raiders on this page (including the newest Blueprints added with the Cold Snap update , such as the Deadline Blueprint and Firework Box Blueprint), giving you all the information you need to expand your own crafting repertoire.
In this guide:
- What are Blueprints in Arc Raiders?
- Full Blueprint list: All crafting recipes
- Where to find Blueprints in Arc Raiders Blueprints obtained from quests Blueprints obtained from Trials Best Blueprint farming locations

What are Blueprints in Arc Raiders?
Blueprints in Arc Raiders are special items which, if you manage to extract with them, you can expend to permanently unlock a new crafting recipe in your Workshop. If you manage to extract from a raid with an Anvil Blueprint, for example, you can unlock the ability to craft your very own Anvil Pistol, as many times as you like (as long as you have the crafting materials).
To use a Blueprint, simply open your Inventory while in the lobby, then right-click on the Blueprint and click “Learn And Consume” . This will permanently unlock the recipe for that item in your Workshop. As of the Stella Montis update, there are allegedly 75 different Blueprints to unlock - although only 68 are confirmed to be in the game so far. You can see all the Blueprints you’ve found and unlocked by going to the Workshop menu, and hitting “R” to bring up the Blueprint screen.
It’s possible to find duplicates of past Blueprints you’ve already unlocked. If you find these, then you can either sell them, or - if you like to play with friends - you can take it into a match and gift it to your friend so they can unlock that recipe for themselves. Another option is to keep hold of them until the time comes to donate them to the Expedition.
Full Blueprint list: All crafting recipes
Below is the full list of all the Blueprints that are currently available to find in Arc Raiders, and the crafting recipe required for each item:
| Blueprint | Type | Recipe | Crafted At |
|---|---|---|---|
| Bettina | Weapon | 3x Advanced Mechanical Components 3x Heavy Gun Parts 3x Canister | Gunsmith 3 |
| Blue Light Stick | Quick Use | 3x Chemicals | Utility Station 1 |
| Aphelion | Weapon | 3x Magnetic Accelerator 3x Complex Gun Parts 1x Matriarch Reactor | Gunsmith 3 |
| Combat Mk. 3 (Flanking) | Augment | 2x Advanced Electrical Components 3x Processor | Gear Bench 3 |
| Combat Mk. 3 (Aggressive) | Augment | 2x Advanced Electrical Components 3x Processor | Gear Bench 3 |
| Complex Gun Parts | Material | 2x Light Gun Parts 2x Medium Gun Parts 2x Heavy Gun Parts | Refiner 3 |
| Fireworks Box | Quick Use | 1x Explosive Compound 3x Pop Trigger | Explosives Station 2 |
| Gas Mine | Mine | 4x Chemicals 2x Rubber Parts | Explosives Station 1 |
| Green Light Stick | Quick Use | 3x Chemicals | Utility Station 1 |
| Pulse Mine | Mine | 1x Crude Explosives 1x Wires | Explosives Station 1 |
| Seeker Grenade | Grenade | 1x Crude Explosives 2x ARC Alloy | Explosives Station 1 |
| Looting Mk. 3 (Survivor) | Augment | 2x Advanced Electrical Components 3x Processor | Gear Bench 3 |
| Angled Grip II | Mod | 2x Mechanical Components 3x Duct Tape | Gunsmith 2 |
| Angled Grip III | Mod | 2x Mod Components 5x Duct Tape | Gunsmith 3 |
| Hullcracker | Weapon | 1x Magnetic Accelerator 3x Heavy Gun Parts 1x Exodus Modules | Gunsmith 3 |
| Launcher Ammo | Ammo | 5x Metal Parts 1x Crude Explosives | Workbench 1 |
| Anvil | Weapon | 5x Mechanical Components 5x Simple Gun Parts | Gunsmith 2 |
| Anvil Splitter | Mod | 2x Mod Components 3x Processor | Gunsmith 3 |
| ??? | ??? | ??? | ??? |
| Barricade Kit | Quick Use | 1x Mechanical Components | Utility Station 2 |
| Blaze Grenade | Grenade | 1x Explosive Compound 2x Oil | Explosives Station 3 |
| Bobcat | Weapon | 3x Advanced Mechanical Components 3x Light Gun Parts | Gunsmith 3 |
| Osprey | Weapon | 2x Advanced Mechanical Components 3x Medium Gun Parts 7x Wires | Gunsmith 3 |
| Burletta | Weapon | 3x Mechanical Components 3x Simple Gun Parts | Gunsmith 1 |
| Compensator II | Mod | 2x Mechanical Components 4x Wires | Gunsmith 2 |
| Compensator III | Mod | 2x Mod Components 8x Wires | Gunsmith 3 |
| Defibrillator | Quick Use | 9x Plastic Parts 1x Moss | Medical Lab 2 |
| ??? | ??? | ??? | ??? |
| Equalizer | Weapon | 3x Magnetic Accelerator 3x Complex Gun Parts 1x Queen Reactor | Gunsmith 3 |
| Extended Barrel | Mod | 2x Mod Components 8x Wires | Gunsmith 3 |
| Extended Light Mag II | Mod | 2x Mechanical Components 3x Steel Spring | Gunsmith 2 |
| Extended Light Mag III | Mod | 2x Mod Components 5x Steel Spring | Gunsmith 3 |
| Extended Medium Mag II | Mod | 2x Mechanical Components 3x Steel Spring | Gunsmith 2 |
| Extended Medium Mag III | Mod | 2x Mod Components 5x Steel Spring | Gunsmith 3 |
| Extended Shotgun Mag II | Mod | 2x Mechanical Components 3x Steel Spring | Gunsmith 2 |
| Extended Shotgun Mag III | Mod | 2x Mod Components 5x Steel Spring | Gunsmith 3 |
| Remote Raider Flare | Quick Use | 2x Chemicals 4x Rubber Parts | Utility Station 1 |
| Heavy Gun Parts | Material | 4x Simple Gun Parts | Refiner 2 |
| Venator | Weapon | 2x Advanced Mechanical Components 3x Medium Gun Parts 5x Magnet | Gunsmith 3 |
| Il Toro | Weapon | 5x Mechanical Components 6x Simple Gun Parts | Gunsmith 1 |
| Jolt Mine | Mine | 1x Electrical Components 1x Battery | Explosives Station 2 |
| Explosive Mine | Mine | 1x Explosive Compound 1x Sensors | Explosives Station 3 |
| Jupiter | Weapon | 3x Magnetic Accelerator 3x Complex Gun Parts 1x Queen Reactor | Gunsmith 3 |
| Light Gun Parts | Material | 4x Simple Gun Parts | Refiner 2 |
| Lightweight Stock | Mod | 2x Mod Components 5x Duct Tape | Gunsmith 3 |
| Lure Grenade | Grenade | 1x Speaker Component 1x Electrical Components | Utility Station 2 |
| Medium Gun Parts | Material | 4x Simple Gun Parts | Refiner 2 |
| Torrente | Weapon | 2x Advanced Mechanical Components 3x Medium Gun Parts 6x Steel Spring | Gunsmith 3 |
| Muzzle Brake II | Mod | 2x Mechanical Components 4x Wires | Gunsmith 2 |
| Muzzle Brake III | Mod | 2x Mod Components 8x Wires | Gunsmith 3 |
| Padded Stock | Mod | 2x Mod Components 5x Duct Tape | Gunsmith 3 |
| Shotgun Choke II | Mod | 2x Mechanical Components 4x Wires | Gunsmith 2 |
| Shotgun Choke III | Mod | 2x Mod Components 8x Wires | Gunsmith 3 |
| Shotgun Silencer | Mod | 2x Mod Components 8x Wires | Gunsmith 3 |
| Showstopper | Grenade | 1x Advanced Electrical Components 1x Voltage Converter | Explosives Station 3 |
| Silencer I | Mod | 2x Mechanical Components 4x Wires | Gunsmith 2 |
| Silencer II | Mod | 2x Mod Components 8x Wires | Gunsmith 3 |
| Snap Hook | Quick Use | 2x Power Rod 3x Rope 1x Exodus Modules | Utility Station 3 |
| Stable Stock II | Mod | 2x Mechanical Components 3x Duct Tape | Gunsmith 2 |
| Stable Stock III | Mod | 2x Mod Components 5x Duct Tape | Gunsmith 3 |
| Tagging Grenade | Grenade | 1x Electrical Components 1x Sensors | Utility Station 3 |
| Tempest | Weapon | 3x Advanced Mechanical Components 3x Medium Gun Parts 3x Canister | Gunsmith 3 |
| Trigger Nade | Grenade | 2x Crude Explosives 1x Processor | Explosives Station 2 |
| Vertical Grip II | Mod | 2x Mechanical Components 3x Duct Tape | Gunsmith 2 |
| Vertical Grip III | Mod | 2x Mod Components 5x Duct Tape | Gunsmith 3 |
| Vita Shot | Quick Use | 2x Antiseptic 1x Syringe | Medical Lab 3 |
| Vita Spray | Quick Use | 3x Antiseptic 1x Canister | Medical Lab 3 |
| Vulcano | Weapon | 1x Magnetic Accelerator 3x Heavy Gun Parts 1x Exodus Modules | Gunsmith 3 |
| Wolfpack | Grenade | 2x Explosive Compound 2x Sensors | Explosives Station 3 |
| Red Light Stick | Quick Use | 3x Chemicals | Utility Station 1 |
| Smoke Grenade | Grenade | 14x Chemicals 1x Canister | Utility Station 2 |
| Deadline | Mine | 3x Explosive Compound 2x ARC Circuitry | Explosives Station 3 |
| Trailblazer | Grenade | 1x Explosive Compound 1x Synthesized Fuel | Explosives Station 3 |
| Tactical Mk. 3 (Defensive) | Augment | 2x Advanced Electrical Components 3x Processor | Gear Bench 3 |
| Tactical Mk. 3 (Healing) | Augment | 2x Advanced Electrical Components 3x Processor | Gear Bench 3 |
| Yellow Light Stick | Quick Use | 3x Chemicals | Utility Station 1 |
Note: The missing Blueprints in this list likely have not actually been added to the game at the time of writing, because none of the playerbase has managed to find any of them. As they are added to the game, I will update this page with the most relevant information so you know exactly how to get all 75 Arc Raiders Blueprints.
Where to find Blueprints in Arc Raiders
Below is a list of all containers, modifiers, and events which maximise your chances of finding Blueprints:
- Certain quests reward you with specific Blueprints .
- Completing Trials has a high chance of offering Blueprints as rewards.
- Surveyors have a decent chance of dropping Blueprints on death.
- High loot value areas tend to have a greater chance of spawning Blueprints.
- Night Raids and Storms may increase rare Blueprint spawn chances in containers.
- Containers with higher numbers of items may have a higher tendency to spawn Blueprints. As a result, Blue Gate (which has many “large” containers containing multiple items) may give you a higher chance of spawning Blueprints.
- Raider containers (Raider Caches, Weapon Boxes, Medical Bags, Grenade Tubes) have increased Blueprint drop rates. As a result, the Uncovered Caches event gives you a high chance of finding Blueprints.
- Security Lockers have a higher than average chance of containing Blueprints.
- Certain Blueprints only seem to spawn under specific circumstances: Tempest Blueprint only spawns during Night Raid events. Vulcano Blueprint only spawns during Hidden Bunker events. Jupiter and Equaliser Blueprints only spawn during Harvester events.

Raider Caches, Weapon Boxes, and other raider-oriented container types have a good chance of offering Blueprints. |Image credit:Rock Paper Shotgun/Embark Studios
Blueprints have a very low chance of spawning in any container in Arc Raiders, around 1-2% on average. However, there is a higher chance of finding Blueprints in particular container types. Specifically, you can find more Blueprints in Raider containers and security lockers.
Beyond this, if you’re looking for Blueprints you should focus on regions of the map which are marked as having particularly high-value loot. Areas such as the Control Tower in Dam Battlegrounds, the Arrival and Departure Buildings in Spaceport, and Pilgrim’s Peak in Blue Gate all have a better-than-average chance of spawning Blueprints somewhere amongst all their containers. Night Raids and Electromagnetic Storm events also increase the drop chances of certain Blueprints .
In addition to these containers, you can often loot Blueprints from destroyed Surveyors - the largest of the rolling ball ARC. Surveyors are more commonly found on the later maps - Spaceport and Blue Gate - and if one spawns in your match, you’ll likely see it by the blue laser beam that it casts into the sky while “surveying”.
Surveyors are quite well-armoured and will very speedily run away from you once it notices you, but if you can take one down then make sure you loot all its parts for a chance of obtaining certain unusual Blueprints.
Blueprints obtained from quests
One way in which you can get Blueprints is by completing certain quests for the vendors in Speranza. Some quests will reward you with a specific item Blueprint upon completion, so as long as you work through all the quests in Arc Raiders, you are guaranteed those Blueprints.
Here is the full list of all Blueprints you can get from quest rewards:
- Trigger Nade Blueprint: Rewarded after completing “Sparks Fly”.
- Lure Grenade Blueprint: Rewarded after completing “Greasing Her Palms”.
- Burletta Blueprint: Rewarded after completing “Industrial Espionage”.
- Hullcracker Blueprint (and Launcher Ammo Blueprint): Rewarded after completing “The Major’s Footlocker”.
Alas, that’s only 4 Blueprints out of a total of 75 to unlock, so for the vast majority you will need to find them yourself during a raid. If you’re intent on farming Blueprints, then it’s best to equip yourself with cheap gear in case you lose it, but don’t use a free loadout because then you won’t get a safe pocket to stash any new Blueprint you find. No pain in Arc Raiders is sharper than failing to extract with a new Blueprint you’ve been after for a dozen hours already.

One of the best ways to get Blueprints is by hitting three stars on all five Trials every week. |Image credit:Rock Paper Shotgun/Embark Studios
Blueprints obtained from Trials
One of the very best ways to get Blueprints is as rewards for completing Trials in Arc Raiders. Trials are unlocked from Level 15 onwards, and allow you to earn rewards by focusing on certain tasks over the course of several raids. For example, one Trial might task you with dealing damage to Hornets, while another might challenge you to loot Supply Drops.
Trials refresh on a weekly basis, with a new week bringing five new Trials. Each Trial can offer up to three rewards after passing certain score milestones, and it’s possible to receive very high level loot from these reward crates - including Blueprints. So if you want to unlock as many Blueprints as possible, you should make a point of completing as many Trials as possible each week.
Best Blueprint farming locations
The very best way to get Blueprints is to frequent specific areas of the maps which combine high-tier loot pools with the right types of containers to search. Here are my recommendations for where to find Blueprints on every map, so you can always keep the search going for new crafting recipes to unlock.

Image credit:Rock Paper Shotgun/Embark Studios
Dam Battlegrounds
The best places to farm Blueprints on Dam Battlegrounds are the Control Tower, Power Generation Complex, Ruby Residence, and Pale Apartments . The first two regions, despite only being marked on the map as mid-tier loot, contain a phenomenal number of containers to loot. The Control Tower can also contain a couple of high-tier Security Lockers - though of course, you’ll need to have unlocked the Security Breach skill at the end of the Survival tree.
There’s also a lot of reporting amongst the playerbase that the Residential areas in the top-left of the map - Pale Apartments and Ruby Residence - give you a comparatively strong chance of finding Blueprints. Considering their size, there’s a high density of containers to loot in both locations, and they also have the benefit of being fairly out of the way. So you’re more likely to have all the containers to yourself.
Buried City
The best Blueprint farming locations on Buried City are the Santa Maria Houses, Grandioso Apartments, Town Hall, and the various buildings of the New District . Grandioso Apartments has a lower number of containers than the rest, but a high chance of spawning weapon cases - which have good Blueprint drop rates. The others are high-tier loot areas, with plenty of lootable containers - including Security Lockers.
Spaceport
The best places to find Blueprints on Spaceport are the Arrival and Departure Buildings, as well as Control Tower A6 and the Launch Towers . All these areas are labelled as high-value loot regions, and many of them are also very handily connected to one another by the Spaceport wall, which you can use to quickly run from one area to the next. At the tops of most of these buildings you’ll find at least one Security Locker, so this is an excellent farming route for players looking to find Blueprints.
The downside to looting Blueprints on Spaceport is that all these areas are hotly contested, particularly in Duos and Squads. You’ll need to be very focused and fast in order to complete the full farming route.

Image credit:Rock Paper Shotgun/Embark Studios
Blue Gate
Blue Gate tends to have a good chance of dropping Blueprints, potentially because it generally has a high number of containers which can hold lots of items; so there’s a higher chance of a Blueprint spawning in each container. In my experience, the best Blueprint farming spots on Blue Gate are Pilgrim’s Peak, Raider’s Refuge, the Ancient Fort, and the Underground Complex beneath the Warehouse .
All of these areas contain a wealth of containers to loot. Raider’s Refuge has less to loot, but the majority of the containers in and around the Refuge are raider containers, which have a high chance of containing Blueprints - particularly during major events.
Stella Montis
On the whole, Stella Montis seems to have a very low drop rate for Blueprints (though a high chance of dropping other high-tier loot). If you do want to try farming Blueprints on this map, the best places to find Blueprints in Stella Montis are Medical Research, Assembly Workshop, and the Business Center . These areas have the highest density of containers to loot on the map.
In addition to this, the Western Tunnel has a few different Security Lockers to loot, so while there’s very little to loot elsewhere in this area of the map, it’s worth hitting those Security Lockers if you spawn there at the start of a match.
That wraps up this primer on how to get all the Blueprints in Arc Raiders as quickly as possible. With the Expedition system constantly resetting a large number of players’ Blueprints, it’s more important than ever to have the most up-to-date information on where to find all these Blueprints.
While you’re here, be sure to check out our Arc Raiders best guns tier list , as well as our primers on the best skills to unlock and all the different Field Depot locations on every map.

ARC Raiders
PS5 , Xbox Series X/S , PC
Rock Paper Shotgun is better when you sign in
Sign in and join us on our journey to discover strange and compelling PC games.
