Rematch review
“Good job!”

Image credit:Rock Paper Shotgun / Sloclap

Even to a footy agnostic, this multiplayer sports game offers an exciting and acrobatic contest of skill. Brilliant, for as long as it doesn’t crash.
- Developer: Sloclap
- Publisher: Sloclap, Kepler Interactive
- Release: June 19th, 2025
- On: Windows
- From: Steam
- Price: £21/$30/€25
- Reviewed on: Intel Core-i7-11700F, 16GB RAM, Nvidia GeForce RTX 3060, Windows 10
I am getting a real kick out of Rematch . As a football game, its closest analogue isn’t FIFA or eFootball, but a certain nitro-boosting sports ’em up that has been going for ten years. I’ve already seen it jokingly described as " Rocket League without cars." An infuriatingly accurate description that does half my job for me. My list of irritations with it is long. But there is something so compelling about the kick-by-kick play, each match a little drama, that I will gladly scrunch that list of complaints into a ball and toepoke it into a waste paper basket on the other side of the room. GOOOAAALLL!
This is multiplayer football as imagined by Sloclap, the developers of kung fu games Sifu and Absolver . Fans of buttery body movements will be glad to know that the studio’s command of expressive and fluid animation remains intact. These ball experts can really blatter that sports sphere. You control a single player on the field, sprinting up and down and yelling “cross it!” with a tap of a button to ask for a chance to even tap the ball, like some desperate schoolkid at lunch time.

Once got, movement is a good balance of straightforward legging it and working some judicious button combinations when under threat. The game hasn’t over-egged things with move upon move upon move, but pared the beautiful game back to a few select gimmicks that make each rapid encounter with an opponent its own little mind game of direction and speed. This is a skill-based game, but it doesn’t feel difficult to learn the basics of ball control.
You can tackle folks with a simple footpoke at their ankles, or do a more powerful slide tackle at their feet (at the risk of missing and ending up lagging behind in the chase). While in possession, you can avoid tackles by bopping the ball lightly in another direction, dancing around your shin accoster with a defensive dribble, or trickily toe-tapping the ball into the air - a showy rainbow flick that is endlessly embarrassing to be caught out by, yet smugly satisfying to pull off yourself.
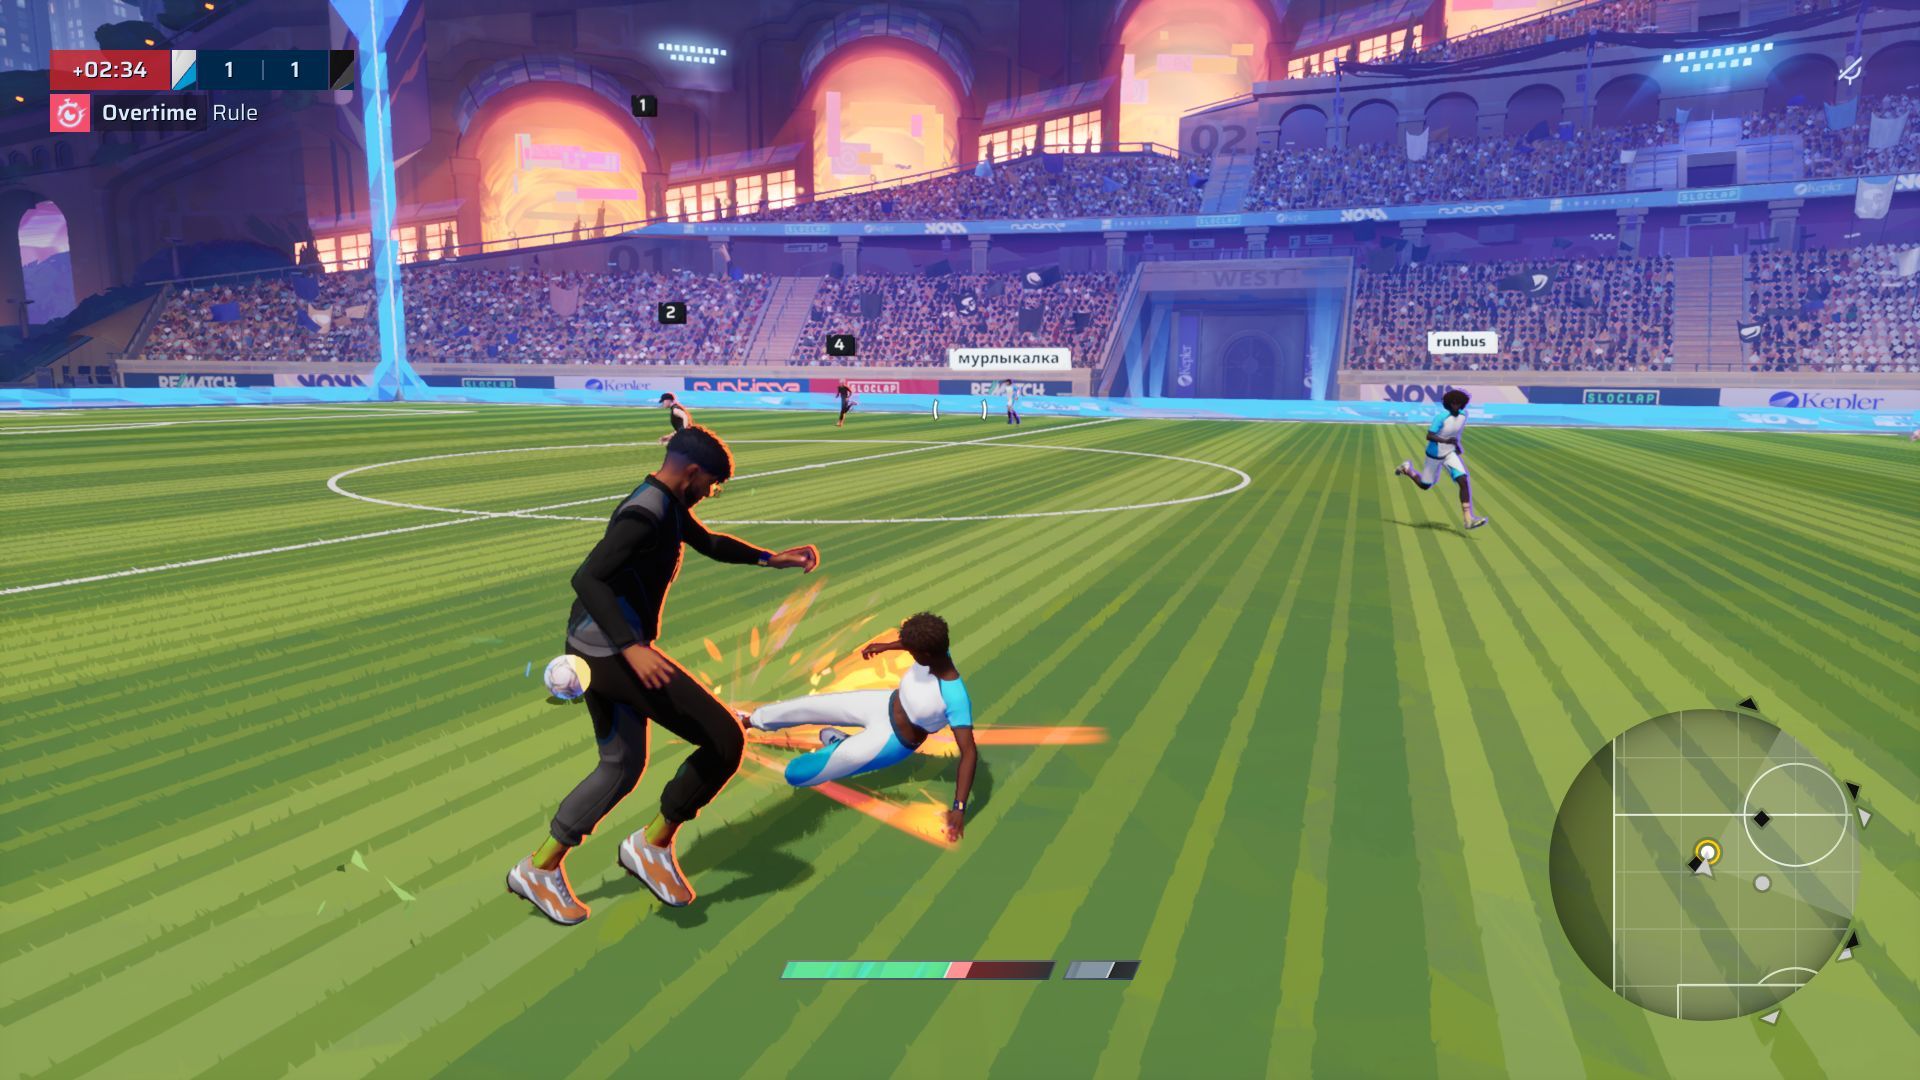
It’s best not to overuse the sliding tackle, but when it works - mmmmmm. |Image credit:Rock Paper Shotgun / Sloclap
Even though the ball “sticks” to you while dribbling, it still feels like its own entity, drifting away just a touch any time you sprint while in possession, making it more easily claimed by any opposing footyist in range. Doing an about-face which tucks the ball backward under your heels might feel triumphant for only a second, when you realise there’s another player waiting there to nab it. Get close to the goalposts and a firm pull of the right trigger will see you shoot. Hold it down longer to charge up a stronger hoof. To my hands it all feels fluid and smooth, even if an encounter with multiple tacklers can sometimes become a chaotic pile-on of slide tackles and stumbles.
I mostly played quick matches of 3v3. These are casual games with lots of goals and a nippy turnover. If either team gets a four-goal lead they win the game under the “mercy rule”, which prevents matches from turning into steamrolled episodes of despair. Otherwise matches are timed to six minutes. There are also 4v4 and 5v5 quick matches, but I feel like a lot of players will either stick to friendly low-stakes three-a-side, or step into the ranked matches for larger games, where teams of five face off in matchmade bouts across six divisions - bronze, silver, gold, platinum, diamond, and elite.

As in many a multiplayer face-off, you can customise your victory pose. |Image credit:Rock Paper Shotgun / Sloclap
Games go a little steadier with the larger headcount, and it feels like you’ll need more co-ordination - or at least a good instinctive rapport - to make any headway. Certainly there are fewer noticeable instances of Ronaldo syndrome. This “ball hog” phenomenon is seemingly driving some players crazy (I saw one complaint on Steam asking for passing to become “mandatory”). The game is replicating the spirit of football so accurately, that it allows for this frustration to develop. When it feels this fun to be in control of the ball and swivel around everyone with grace, it is natural that some people will not want to give up their moment in the spotlight.
Of course, this leads to inevitable loss due to many Dunning-Krugerites who did not seem to get the message of the game’s tutorial prologue. This part-playable, part-cinematic sequence is a story about a scouted player whose showy talent won’t get him as far as he expected without learning to work as a unit with his team mates. It’s a well-told tale, entirely without dialogue, and further proof if it were needed that Sloclap have some very competent and thoughtful animators and storyboarders. If FIFA’s story modes could tell their equivalent tales of tactics and teamwork with as much efficacy and grace as this ten-minute tutorial, they might not have to rely on turning their game into a slot machine .


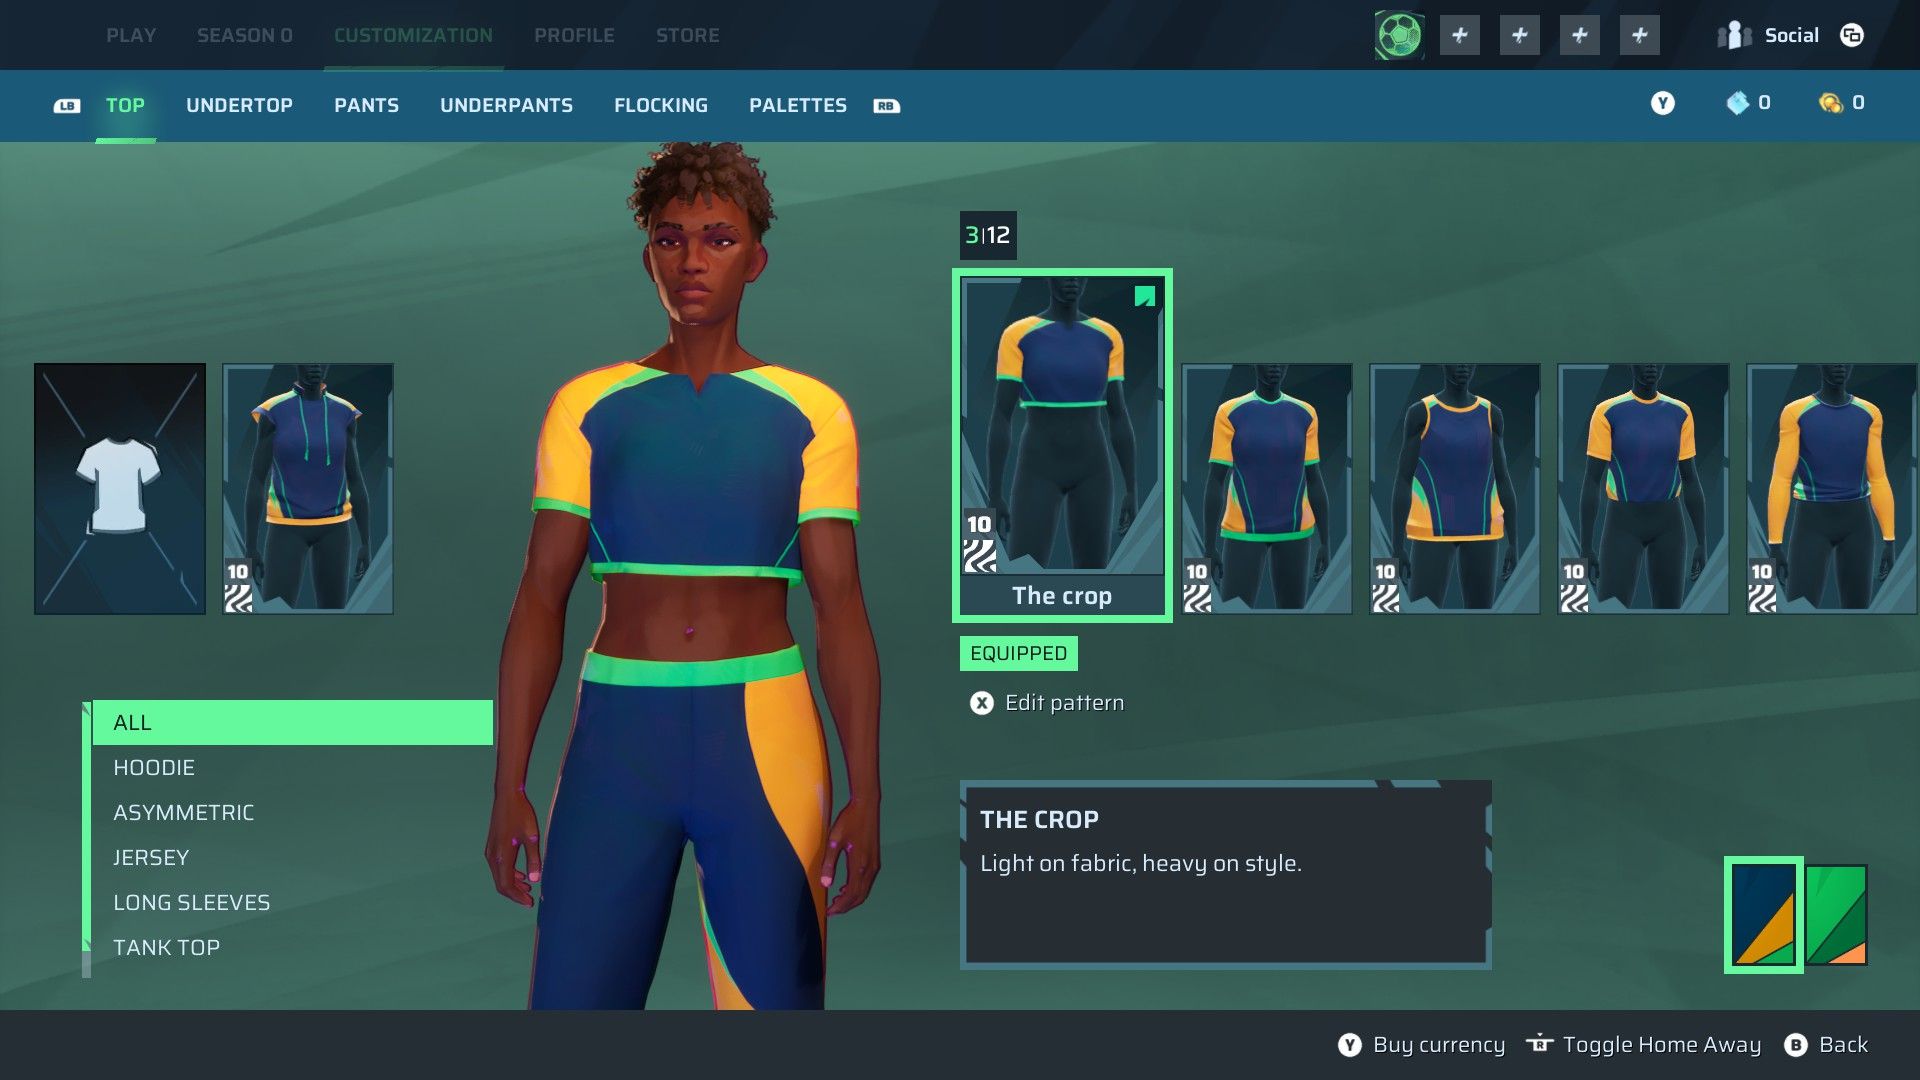
That’s not to say Rematch is free from all the usual live service graft. There are DLC cosmetics (four quid for a pair of trainers, eight quid to play as Ronaldinho) as well as the inevitable season pass, in which you unlock new shorts, shirts, haircuts, and other stuff - a string of pearls with some marked as free and others requiring you buy that “Captain pass” every few months. It’s not too in-your-face, though, and as per common game design wisdom, there’s nothing to alter how speedy you shoot or how quickly your stamina recharges. There are no stats to boost or skills to unlock either, so the playing field remains mercifully level.
Being goalkeeper is my favourite position on said playing field. I’m not so hot when it comes to dribbling around a tacklebastard, but between the posts I can focus on one job. The diving is responsive and covers a lot of air. A good goalkeeper can win the day and lock down the game. I am an OK goalkeeper. All the tricks of real life football come to bully you in the box. The cunning crosses, the unexpected longshots, the nippy flat ones that hug the ground when you don’t expect them to. It is humiliating to fall for another trick, in which an attacker bounces the ball off the magical football forcefield above the posts and then taps it in with the rebound. There is a button to say “Sorry” in Rematch. I find myself using it a lot.
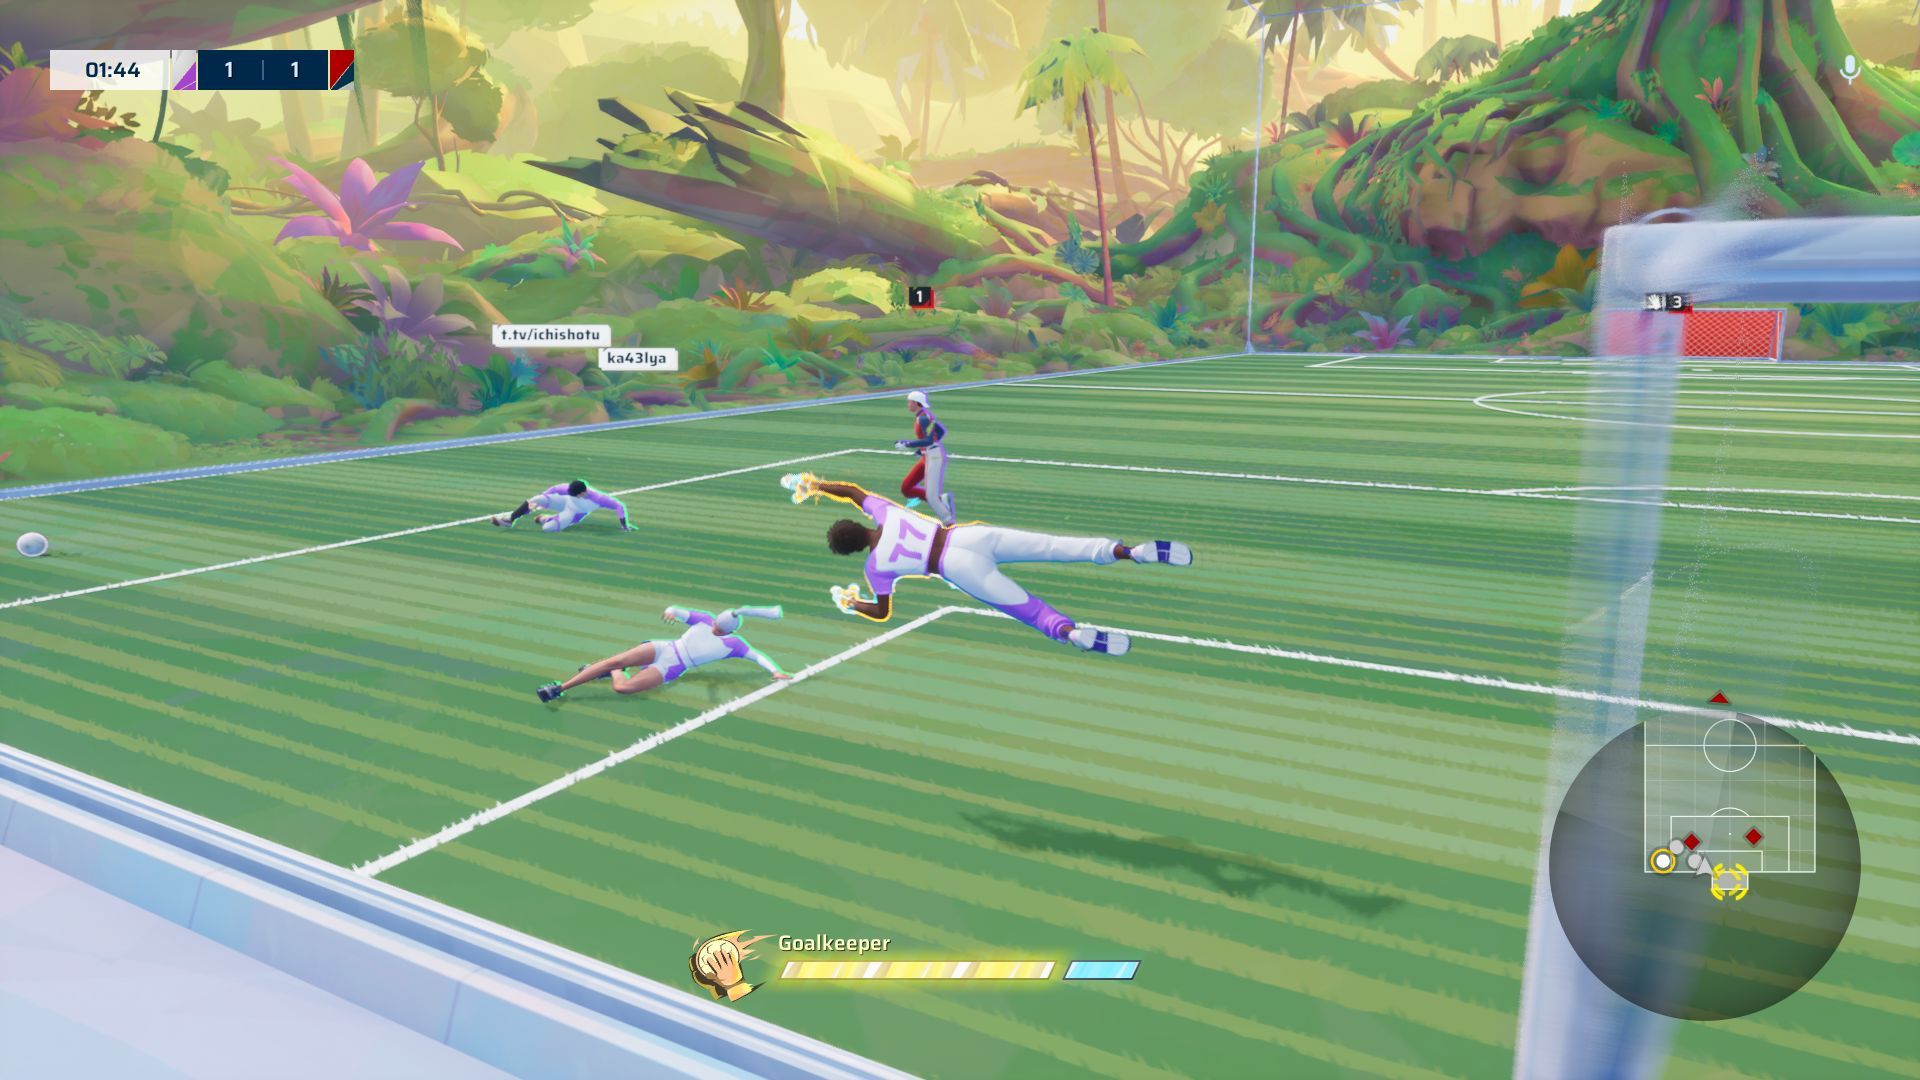
This was a moment of panic, I admit. |Image credit:Rock Paper Shotgun / Sloclap
You won’t stay as keeper throughout the match, though. The starting positions rotate with each post-goal kick-off, the game encouraging players to put in some time at all roles on the field. I like this, because no matter my desire to be the bulwark, it pulls you out to take a shot or two in every casual game. Although I’ve seen plenty of netphobes who cannot wait one second in a defensive position. Leaving the goal open is something that you might have to do as a team once in a while, especially during 3v3 matches. But abandoning it every time it’s assigned to you invites vulture-like longshots - a totally valid tactic. No opportunity goes wasted. This is less a criticism of the game and more an observation about how it will inevitably be played, as beginners learn the importance of teamwork, positioning, and not being a selfish asshat.
Most people, I should stress, are not like that. The in-game comms allows for cries of “Thanks” or “We got this”. All good, friendly material, even if the cry of another line - “Good job!” - is already being used sarcastically for every open goal you fluff. Even simpler lines of decent sportsmanship would be nice, like a quick way to say “Good game” to players of both teams when the clock hits zero. I feel like a sulky Suarez at the end of every match when we all walk away without so much as a head nod.
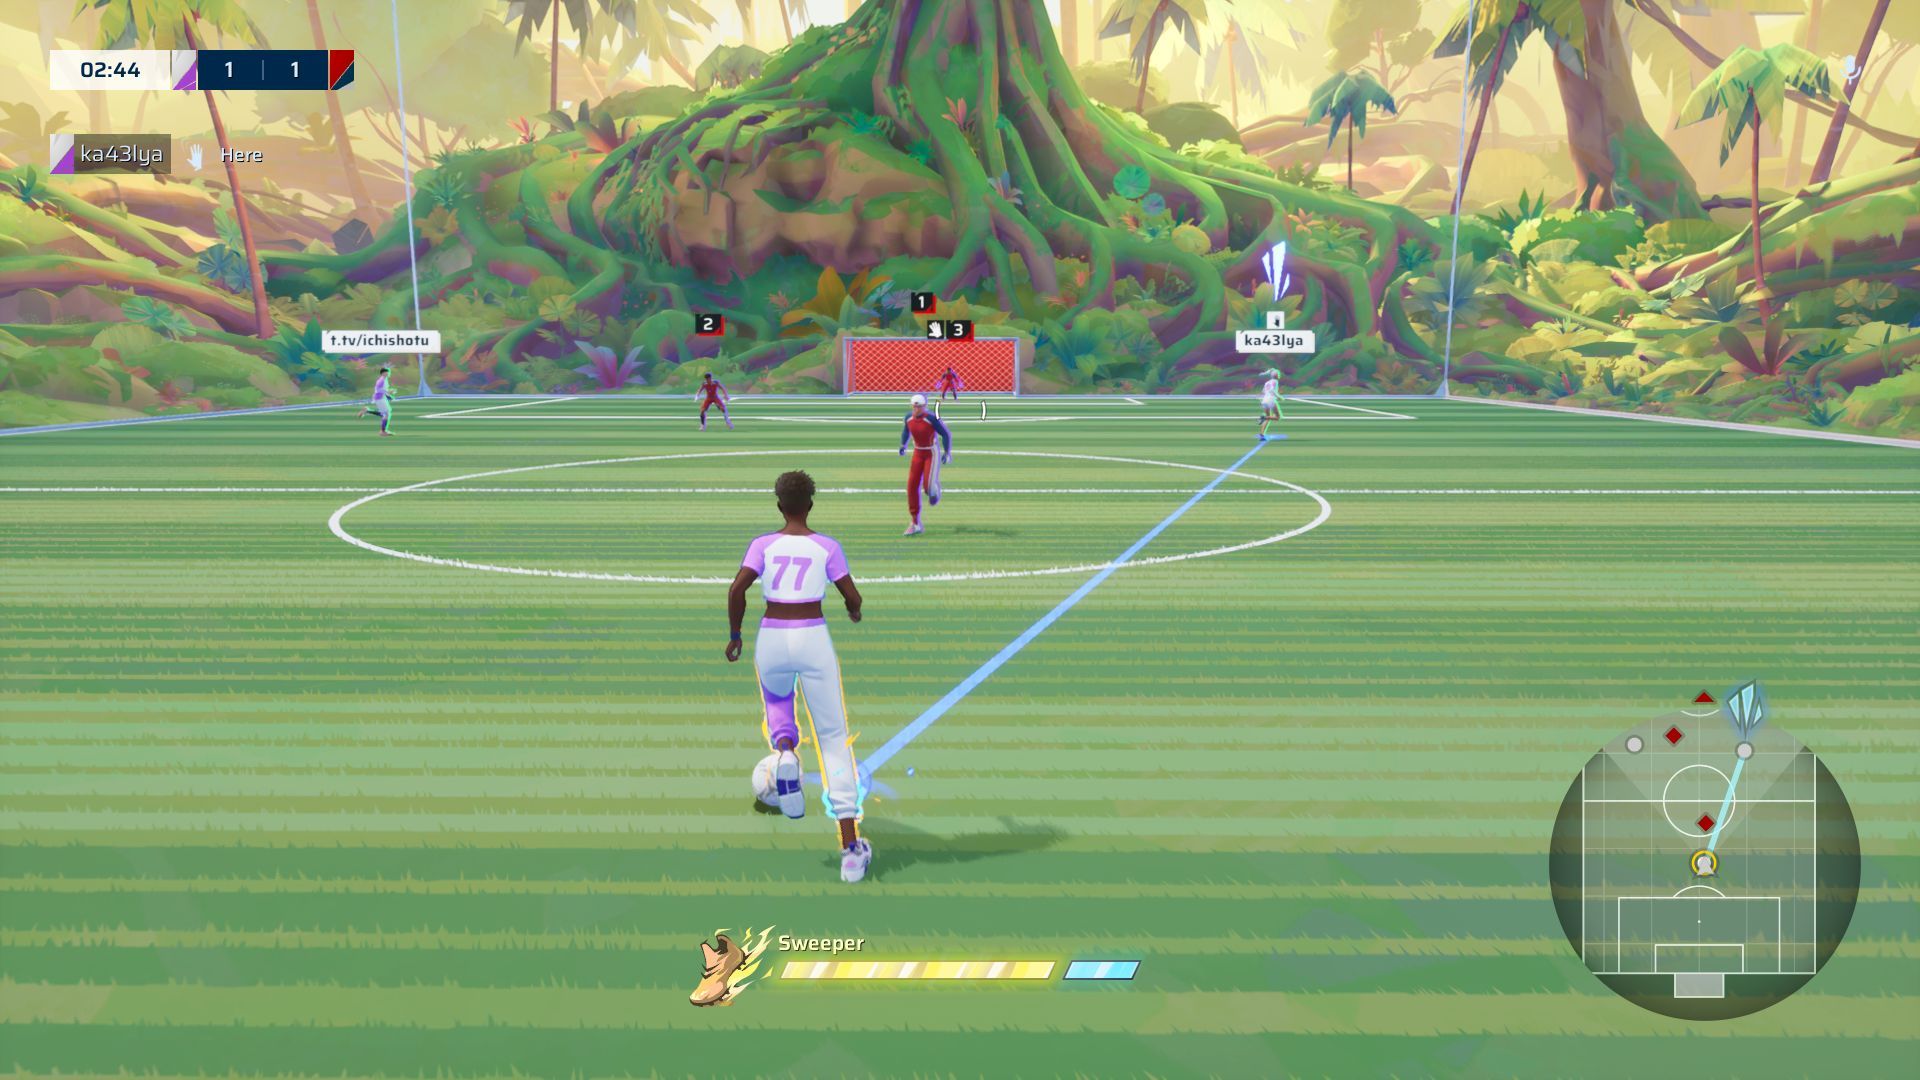
When a team mate shouts “pass” a little blue line will appear to show who’s calling. |Image credit:Rock Paper Shotgun / Sloclap
The game boasts no interruptions to play. And, okay yes, there are no fouls, offsides, or throw-ins to stop play dead with an irksome whistle, but there are interruptions in a more mundane crashing-to-desktop-quite-a-lot sense. I have seen hangs, server drops, and weird bugs that froze me on the field as my teammates played around me. As networking and stability goes, this not a flawless game. The devs recently apologised for not including crossplay at launch , and it’s somewhat disappointing to see Sloclap fall victim to technical problems in the same way that fighting game Absolver was affected on its release in 2017.
This is the silent hero of the prologue. He learns not to be a ball hog. Be like him. |Image credit:Rock Paper Shotgun / Sloclap
There are other flies in the Deep Heat. The post match screens infuriate me because they automatically change from stats screen to another screen while you’re in the middle of looking at the number of saves or passes you made. There are theoretically useful practice challenges against bots where you try to keep possession or intercept passes, but they’ll sling you out to the main menu after every failure, rather than offering a quick way to restart. Critically, there is no way to remap keybinds or controls, the current extent of available customisations being limited to a choice between three very similar presets. And there’s no way to turn on camera lock (wherein the camera automatically follows the ball) without choosing one of these controller presets and messing up your twitchy memory of the default buttons.
All of these nits irritate me enough to be duly picked, but they all feel obvious and changeable, inevitable to be fixed as more folks complain they can’t rebind the pass button to Numpad 7 or whatever personal keyboard insanity you suffer from. I’m saying that I’ve seen Sloclap fix their broken online game before, and I trust them to do it again.
It’s telling that the missing feature I desire most is not an emote or a graphics setting or a - pffft - “mandatory pass”. But just some way to auto-rematch, so I don’t have to tap Y at the end of every game within a 10-second countdown to re-enter the queue for another game. This is how moreish (and perfectly named) Rematch is. My biggest complaint is that I’m sick of the game asking “Do you want to play again?” Of course I do.
Find out how we conduct our reviews by reading our review policy .

Rematch
PC
Rock Paper Shotgun is better when you sign in
Sign in and join us on our journey to discover strange and compelling PC games.

All 75 Arc Raiders Blueprints and where to get them
These areas have the highest chance of giving you Blueprints

Image credit:Rock Paper Shotgun/Embark Studios

Looking for more Arc Raiders Blueprints? It’s a special day when you find a Blueprint, as they’re among the most valuable items in Arc Raiders. If you find a Blueprint that you haven’t already found, then you must make sure you hold onto it at all costs, because Blueprints are the key to one of the most important and powerful systems of meta-progression in the game.
This guide aims to be the very best guide on Blueprints you can find, starting with a primer on what exactly they are and how they work in Arc Raiders, before delving into exactly where to get Blueprints and the very best farming spots for you to take in your search.
We’ll also go over how to get Blueprints from other unlikely activities, such as destroying Surveyors and completing specific quests. And you’ll also find the full list of all 75 Blueprints in Arc Raiders on this page (including the newest Blueprints added with the Cold Snap update , such as the Deadline Blueprint and Firework Box Blueprint), giving you all the information you need to expand your own crafting repertoire.
In this guide:
- What are Blueprints in Arc Raiders?
- Full Blueprint list: All crafting recipes
- Where to find Blueprints in Arc Raiders Blueprints obtained from quests Blueprints obtained from Trials Best Blueprint farming locations

What are Blueprints in Arc Raiders?
Blueprints in Arc Raiders are special items which, if you manage to extract with them, you can expend to permanently unlock a new crafting recipe in your Workshop. If you manage to extract from a raid with an Anvil Blueprint, for example, you can unlock the ability to craft your very own Anvil Pistol, as many times as you like (as long as you have the crafting materials).
To use a Blueprint, simply open your Inventory while in the lobby, then right-click on the Blueprint and click “Learn And Consume” . This will permanently unlock the recipe for that item in your Workshop. As of the Stella Montis update, there are allegedly 75 different Blueprints to unlock - although only 68 are confirmed to be in the game so far. You can see all the Blueprints you’ve found and unlocked by going to the Workshop menu, and hitting “R” to bring up the Blueprint screen.
It’s possible to find duplicates of past Blueprints you’ve already unlocked. If you find these, then you can either sell them, or - if you like to play with friends - you can take it into a match and gift it to your friend so they can unlock that recipe for themselves. Another option is to keep hold of them until the time comes to donate them to the Expedition.
Full Blueprint list: All crafting recipes
Below is the full list of all the Blueprints that are currently available to find in Arc Raiders, and the crafting recipe required for each item:
| Blueprint | Type | Recipe | Crafted At |
|---|---|---|---|
| Bettina | Weapon | 3x Advanced Mechanical Components 3x Heavy Gun Parts 3x Canister | Gunsmith 3 |
| Blue Light Stick | Quick Use | 3x Chemicals | Utility Station 1 |
| Aphelion | Weapon | 3x Magnetic Accelerator 3x Complex Gun Parts 1x Matriarch Reactor | Gunsmith 3 |
| Combat Mk. 3 (Flanking) | Augment | 2x Advanced Electrical Components 3x Processor | Gear Bench 3 |
| Combat Mk. 3 (Aggressive) | Augment | 2x Advanced Electrical Components 3x Processor | Gear Bench 3 |
| Complex Gun Parts | Material | 2x Light Gun Parts 2x Medium Gun Parts 2x Heavy Gun Parts | Refiner 3 |
| Fireworks Box | Quick Use | 1x Explosive Compound 3x Pop Trigger | Explosives Station 2 |
| Gas Mine | Mine | 4x Chemicals 2x Rubber Parts | Explosives Station 1 |
| Green Light Stick | Quick Use | 3x Chemicals | Utility Station 1 |
| Pulse Mine | Mine | 1x Crude Explosives 1x Wires | Explosives Station 1 |
| Seeker Grenade | Grenade | 1x Crude Explosives 2x ARC Alloy | Explosives Station 1 |
| Looting Mk. 3 (Survivor) | Augment | 2x Advanced Electrical Components 3x Processor | Gear Bench 3 |
| Angled Grip II | Mod | 2x Mechanical Components 3x Duct Tape | Gunsmith 2 |
| Angled Grip III | Mod | 2x Mod Components 5x Duct Tape | Gunsmith 3 |
| Hullcracker | Weapon | 1x Magnetic Accelerator 3x Heavy Gun Parts 1x Exodus Modules | Gunsmith 3 |
| Launcher Ammo | Ammo | 5x Metal Parts 1x Crude Explosives | Workbench 1 |
| Anvil | Weapon | 5x Mechanical Components 5x Simple Gun Parts | Gunsmith 2 |
| Anvil Splitter | Mod | 2x Mod Components 3x Processor | Gunsmith 3 |
| ??? | ??? | ??? | ??? |
| Barricade Kit | Quick Use | 1x Mechanical Components | Utility Station 2 |
| Blaze Grenade | Grenade | 1x Explosive Compound 2x Oil | Explosives Station 3 |
| Bobcat | Weapon | 3x Advanced Mechanical Components 3x Light Gun Parts | Gunsmith 3 |
| Osprey | Weapon | 2x Advanced Mechanical Components 3x Medium Gun Parts 7x Wires | Gunsmith 3 |
| Burletta | Weapon | 3x Mechanical Components 3x Simple Gun Parts | Gunsmith 1 |
| Compensator II | Mod | 2x Mechanical Components 4x Wires | Gunsmith 2 |
| Compensator III | Mod | 2x Mod Components 8x Wires | Gunsmith 3 |
| Defibrillator | Quick Use | 9x Plastic Parts 1x Moss | Medical Lab 2 |
| ??? | ??? | ??? | ??? |
| Equalizer | Weapon | 3x Magnetic Accelerator 3x Complex Gun Parts 1x Queen Reactor | Gunsmith 3 |
| Extended Barrel | Mod | 2x Mod Components 8x Wires | Gunsmith 3 |
| Extended Light Mag II | Mod | 2x Mechanical Components 3x Steel Spring | Gunsmith 2 |
| Extended Light Mag III | Mod | 2x Mod Components 5x Steel Spring | Gunsmith 3 |
| Extended Medium Mag II | Mod | 2x Mechanical Components 3x Steel Spring | Gunsmith 2 |
| Extended Medium Mag III | Mod | 2x Mod Components 5x Steel Spring | Gunsmith 3 |
| Extended Shotgun Mag II | Mod | 2x Mechanical Components 3x Steel Spring | Gunsmith 2 |
| Extended Shotgun Mag III | Mod | 2x Mod Components 5x Steel Spring | Gunsmith 3 |
| Remote Raider Flare | Quick Use | 2x Chemicals 4x Rubber Parts | Utility Station 1 |
| Heavy Gun Parts | Material | 4x Simple Gun Parts | Refiner 2 |
| Venator | Weapon | 2x Advanced Mechanical Components 3x Medium Gun Parts 5x Magnet | Gunsmith 3 |
| Il Toro | Weapon | 5x Mechanical Components 6x Simple Gun Parts | Gunsmith 1 |
| Jolt Mine | Mine | 1x Electrical Components 1x Battery | Explosives Station 2 |
| Explosive Mine | Mine | 1x Explosive Compound 1x Sensors | Explosives Station 3 |
| Jupiter | Weapon | 3x Magnetic Accelerator 3x Complex Gun Parts 1x Queen Reactor | Gunsmith 3 |
| Light Gun Parts | Material | 4x Simple Gun Parts | Refiner 2 |
| Lightweight Stock | Mod | 2x Mod Components 5x Duct Tape | Gunsmith 3 |
| Lure Grenade | Grenade | 1x Speaker Component 1x Electrical Components | Utility Station 2 |
| Medium Gun Parts | Material | 4x Simple Gun Parts | Refiner 2 |
| Torrente | Weapon | 2x Advanced Mechanical Components 3x Medium Gun Parts 6x Steel Spring | Gunsmith 3 |
| Muzzle Brake II | Mod | 2x Mechanical Components 4x Wires | Gunsmith 2 |
| Muzzle Brake III | Mod | 2x Mod Components 8x Wires | Gunsmith 3 |
| Padded Stock | Mod | 2x Mod Components 5x Duct Tape | Gunsmith 3 |
| Shotgun Choke II | Mod | 2x Mechanical Components 4x Wires | Gunsmith 2 |
| Shotgun Choke III | Mod | 2x Mod Components 8x Wires | Gunsmith 3 |
| Shotgun Silencer | Mod | 2x Mod Components 8x Wires | Gunsmith 3 |
| Showstopper | Grenade | 1x Advanced Electrical Components 1x Voltage Converter | Explosives Station 3 |
| Silencer I | Mod | 2x Mechanical Components 4x Wires | Gunsmith 2 |
| Silencer II | Mod | 2x Mod Components 8x Wires | Gunsmith 3 |
| Snap Hook | Quick Use | 2x Power Rod 3x Rope 1x Exodus Modules | Utility Station 3 |
| Stable Stock II | Mod | 2x Mechanical Components 3x Duct Tape | Gunsmith 2 |
| Stable Stock III | Mod | 2x Mod Components 5x Duct Tape | Gunsmith 3 |
| Tagging Grenade | Grenade | 1x Electrical Components 1x Sensors | Utility Station 3 |
| Tempest | Weapon | 3x Advanced Mechanical Components 3x Medium Gun Parts 3x Canister | Gunsmith 3 |
| Trigger Nade | Grenade | 2x Crude Explosives 1x Processor | Explosives Station 2 |
| Vertical Grip II | Mod | 2x Mechanical Components 3x Duct Tape | Gunsmith 2 |
| Vertical Grip III | Mod | 2x Mod Components 5x Duct Tape | Gunsmith 3 |
| Vita Shot | Quick Use | 2x Antiseptic 1x Syringe | Medical Lab 3 |
| Vita Spray | Quick Use | 3x Antiseptic 1x Canister | Medical Lab 3 |
| Vulcano | Weapon | 1x Magnetic Accelerator 3x Heavy Gun Parts 1x Exodus Modules | Gunsmith 3 |
| Wolfpack | Grenade | 2x Explosive Compound 2x Sensors | Explosives Station 3 |
| Red Light Stick | Quick Use | 3x Chemicals | Utility Station 1 |
| Smoke Grenade | Grenade | 14x Chemicals 1x Canister | Utility Station 2 |
| Deadline | Mine | 3x Explosive Compound 2x ARC Circuitry | Explosives Station 3 |
| Trailblazer | Grenade | 1x Explosive Compound 1x Synthesized Fuel | Explosives Station 3 |
| Tactical Mk. 3 (Defensive) | Augment | 2x Advanced Electrical Components 3x Processor | Gear Bench 3 |
| Tactical Mk. 3 (Healing) | Augment | 2x Advanced Electrical Components 3x Processor | Gear Bench 3 |
| Yellow Light Stick | Quick Use | 3x Chemicals | Utility Station 1 |
Note: The missing Blueprints in this list likely have not actually been added to the game at the time of writing, because none of the playerbase has managed to find any of them. As they are added to the game, I will update this page with the most relevant information so you know exactly how to get all 75 Arc Raiders Blueprints.
Where to find Blueprints in Arc Raiders
Below is a list of all containers, modifiers, and events which maximise your chances of finding Blueprints:
- Certain quests reward you with specific Blueprints .
- Completing Trials has a high chance of offering Blueprints as rewards.
- Surveyors have a decent chance of dropping Blueprints on death.
- High loot value areas tend to have a greater chance of spawning Blueprints.
- Night Raids and Storms may increase rare Blueprint spawn chances in containers.
- Containers with higher numbers of items may have a higher tendency to spawn Blueprints. As a result, Blue Gate (which has many “large” containers containing multiple items) may give you a higher chance of spawning Blueprints.
- Raider containers (Raider Caches, Weapon Boxes, Medical Bags, Grenade Tubes) have increased Blueprint drop rates. As a result, the Uncovered Caches event gives you a high chance of finding Blueprints.
- Security Lockers have a higher than average chance of containing Blueprints.
- Certain Blueprints only seem to spawn under specific circumstances: Tempest Blueprint only spawns during Night Raid events. Vulcano Blueprint only spawns during Hidden Bunker events. Jupiter and Equaliser Blueprints only spawn during Harvester events.

Raider Caches, Weapon Boxes, and other raider-oriented container types have a good chance of offering Blueprints. |Image credit:Rock Paper Shotgun/Embark Studios
Blueprints have a very low chance of spawning in any container in Arc Raiders, around 1-2% on average. However, there is a higher chance of finding Blueprints in particular container types. Specifically, you can find more Blueprints in Raider containers and security lockers.
Beyond this, if you’re looking for Blueprints you should focus on regions of the map which are marked as having particularly high-value loot. Areas such as the Control Tower in Dam Battlegrounds, the Arrival and Departure Buildings in Spaceport, and Pilgrim’s Peak in Blue Gate all have a better-than-average chance of spawning Blueprints somewhere amongst all their containers. Night Raids and Electromagnetic Storm events also increase the drop chances of certain Blueprints .
In addition to these containers, you can often loot Blueprints from destroyed Surveyors - the largest of the rolling ball ARC. Surveyors are more commonly found on the later maps - Spaceport and Blue Gate - and if one spawns in your match, you’ll likely see it by the blue laser beam that it casts into the sky while “surveying”.
Surveyors are quite well-armoured and will very speedily run away from you once it notices you, but if you can take one down then make sure you loot all its parts for a chance of obtaining certain unusual Blueprints.
Blueprints obtained from quests
One way in which you can get Blueprints is by completing certain quests for the vendors in Speranza. Some quests will reward you with a specific item Blueprint upon completion, so as long as you work through all the quests in Arc Raiders, you are guaranteed those Blueprints.
Here is the full list of all Blueprints you can get from quest rewards:
- Trigger Nade Blueprint: Rewarded after completing “Sparks Fly”.
- Lure Grenade Blueprint: Rewarded after completing “Greasing Her Palms”.
- Burletta Blueprint: Rewarded after completing “Industrial Espionage”.
- Hullcracker Blueprint (and Launcher Ammo Blueprint): Rewarded after completing “The Major’s Footlocker”.
Alas, that’s only 4 Blueprints out of a total of 75 to unlock, so for the vast majority you will need to find them yourself during a raid. If you’re intent on farming Blueprints, then it’s best to equip yourself with cheap gear in case you lose it, but don’t use a free loadout because then you won’t get a safe pocket to stash any new Blueprint you find. No pain in Arc Raiders is sharper than failing to extract with a new Blueprint you’ve been after for a dozen hours already.

One of the best ways to get Blueprints is by hitting three stars on all five Trials every week. |Image credit:Rock Paper Shotgun/Embark Studios
Blueprints obtained from Trials
One of the very best ways to get Blueprints is as rewards for completing Trials in Arc Raiders. Trials are unlocked from Level 15 onwards, and allow you to earn rewards by focusing on certain tasks over the course of several raids. For example, one Trial might task you with dealing damage to Hornets, while another might challenge you to loot Supply Drops.
Trials refresh on a weekly basis, with a new week bringing five new Trials. Each Trial can offer up to three rewards after passing certain score milestones, and it’s possible to receive very high level loot from these reward crates - including Blueprints. So if you want to unlock as many Blueprints as possible, you should make a point of completing as many Trials as possible each week.
Best Blueprint farming locations
The very best way to get Blueprints is to frequent specific areas of the maps which combine high-tier loot pools with the right types of containers to search. Here are my recommendations for where to find Blueprints on every map, so you can always keep the search going for new crafting recipes to unlock.

Image credit:Rock Paper Shotgun/Embark Studios
Dam Battlegrounds
The best places to farm Blueprints on Dam Battlegrounds are the Control Tower, Power Generation Complex, Ruby Residence, and Pale Apartments . The first two regions, despite only being marked on the map as mid-tier loot, contain a phenomenal number of containers to loot. The Control Tower can also contain a couple of high-tier Security Lockers - though of course, you’ll need to have unlocked the Security Breach skill at the end of the Survival tree.
There’s also a lot of reporting amongst the playerbase that the Residential areas in the top-left of the map - Pale Apartments and Ruby Residence - give you a comparatively strong chance of finding Blueprints. Considering their size, there’s a high density of containers to loot in both locations, and they also have the benefit of being fairly out of the way. So you’re more likely to have all the containers to yourself.
Buried City
The best Blueprint farming locations on Buried City are the Santa Maria Houses, Grandioso Apartments, Town Hall, and the various buildings of the New District . Grandioso Apartments has a lower number of containers than the rest, but a high chance of spawning weapon cases - which have good Blueprint drop rates. The others are high-tier loot areas, with plenty of lootable containers - including Security Lockers.
Spaceport
The best places to find Blueprints on Spaceport are the Arrival and Departure Buildings, as well as Control Tower A6 and the Launch Towers . All these areas are labelled as high-value loot regions, and many of them are also very handily connected to one another by the Spaceport wall, which you can use to quickly run from one area to the next. At the tops of most of these buildings you’ll find at least one Security Locker, so this is an excellent farming route for players looking to find Blueprints.
The downside to looting Blueprints on Spaceport is that all these areas are hotly contested, particularly in Duos and Squads. You’ll need to be very focused and fast in order to complete the full farming route.

Image credit:Rock Paper Shotgun/Embark Studios
Blue Gate
Blue Gate tends to have a good chance of dropping Blueprints, potentially because it generally has a high number of containers which can hold lots of items; so there’s a higher chance of a Blueprint spawning in each container. In my experience, the best Blueprint farming spots on Blue Gate are Pilgrim’s Peak, Raider’s Refuge, the Ancient Fort, and the Underground Complex beneath the Warehouse .
All of these areas contain a wealth of containers to loot. Raider’s Refuge has less to loot, but the majority of the containers in and around the Refuge are raider containers, which have a high chance of containing Blueprints - particularly during major events.
Stella Montis
On the whole, Stella Montis seems to have a very low drop rate for Blueprints (though a high chance of dropping other high-tier loot). If you do want to try farming Blueprints on this map, the best places to find Blueprints in Stella Montis are Medical Research, Assembly Workshop, and the Business Center . These areas have the highest density of containers to loot on the map.
In addition to this, the Western Tunnel has a few different Security Lockers to loot, so while there’s very little to loot elsewhere in this area of the map, it’s worth hitting those Security Lockers if you spawn there at the start of a match.
That wraps up this primer on how to get all the Blueprints in Arc Raiders as quickly as possible. With the Expedition system constantly resetting a large number of players’ Blueprints, it’s more important than ever to have the most up-to-date information on where to find all these Blueprints.
While you’re here, be sure to check out our Arc Raiders best guns tier list , as well as our primers on the best skills to unlock and all the different Field Depot locations on every map.

ARC Raiders
PS5 , Xbox Series X/S , PC
Rock Paper Shotgun is better when you sign in
Sign in and join us on our journey to discover strange and compelling PC games.
