Rally Point: Unorthodox. Complex. Laborious. Not just XCOM again. Of course I love USC: Counterforce
Marine learning

Image credit:Rock Paper Shotgun/Firesquid

The Rally Point is a regular column where the inimitable Sin Vega delves deep into strategy gaming.
What did you do while recovering from your big medical thing, Sin? Well. Loath as I am to talk about myself ( “lol. lmao.” - Combative New Ed ), I… don’t know? There was some Ultima Underworld, some workers, some resources, some Pagonians pioneered. But in the dimensionless vortex of first-time-off-since-2020, I think I did… nothing. The lists barely moved.
Except, finally, for a game I struggled with last year. A strange game, easily punished, as all turn-based games must be for dolt reasons, for not being bloody XCOM. USC Colon Counterforce is more like old XCOM, aka UFO. But it’s not a recreation of that, nor of Aliens, its other obvious inspiration. It diverges as much as it reminds, and makes some mistakes in a way that we all must, when pursuing our own identity instead of an impression of someone else’s.
I wish I’d given it a second chance sooner. I wish I could shake everyone and say “This! This is the way! There is more than one path, if you just look for it! Yes, the one before you stumbled. But look at it it. See the admittedly weakly-named USC, and its bruises. It is beautiful. It is itself”.
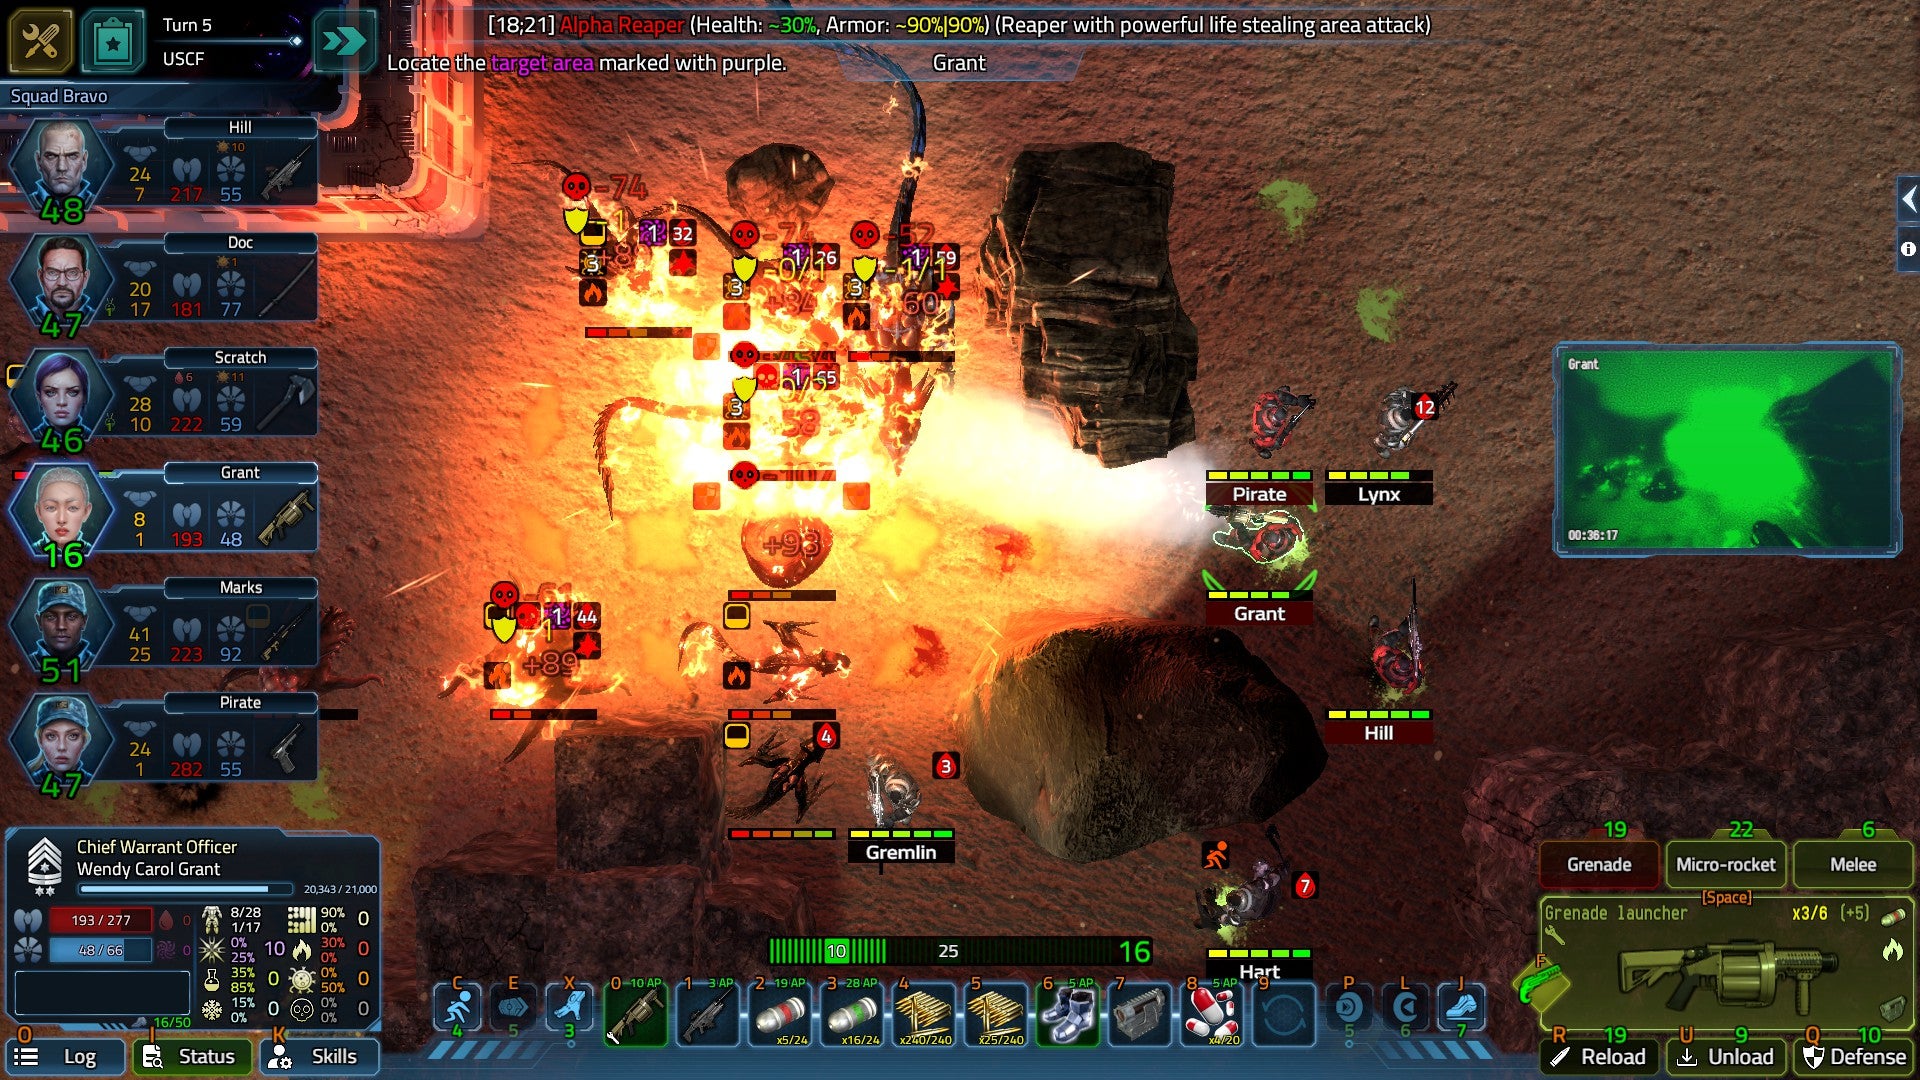
Image credit:Rock Paper Shotgun/Firesquid
Aliens are doing an Aliens on a mining and not evil science planet. You lead a team of soldiers to stop them. Scanning the hexy surface reveals hordes, nests, occasional installations, and pink spacerocks to kill, salvage, and mine, zooming in to the pinkest hexes to build mining installations square by square, with walls and generators and machinery to boost efficient or refresh your soldiers, should the aliens visit to bite everything.
You’ll need supplies. No, more than that. Your first mission will be a disaster (within the campaign, or one-off missions), most likely because you ran out of ammo. This aggravated me. It surprised me. It exhausted what I had. It did an Aliens . USC is not sadistic or (ugh) “hardcore”, but it wants to feel like throwing soldiers into a horde, not level 1 avatars bullying four bronchitic trainees armed with plasma tweezers. Every confrontation teems with claws and teeth, and they will all come at once. Even the smallest could survive several hits, and the biggest take entire magazines like an insult. Some deal acid or poison damage and there’s a fire one now and everyone’s bleeding and the meds cause paralysis if you overdo them and what the hell how many more are there?
But I’ve loved it since I came back. You’re the first team, see. That one-off mission was the prologue; the squad that disappeared so my campaign one would know better. They’d need more supplies, and to build mines for precious spacerocks. I’d have to learn all seven damage types, which instead of boring HP damage, cause “buildup” of different problems. Each behaves differently, and is washed away with different items.
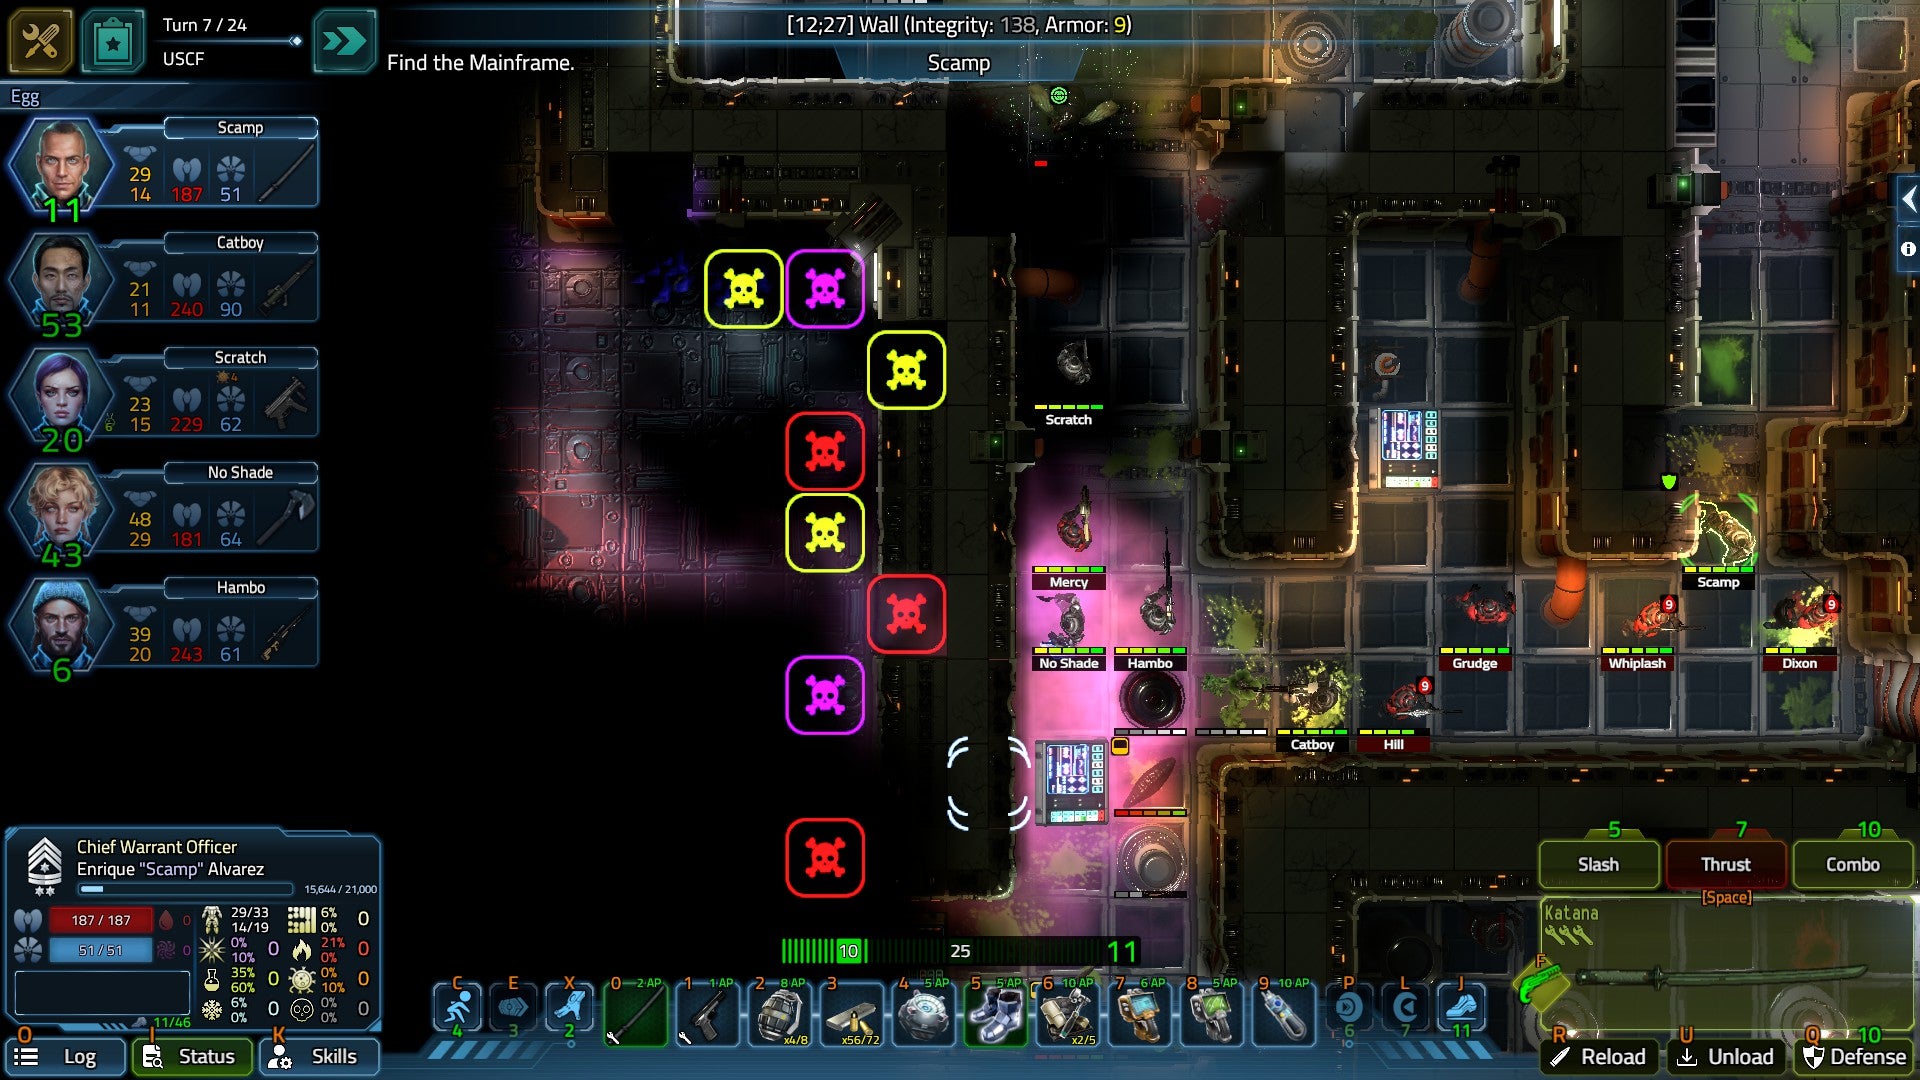
Image credit:Rock Paper Shotgun/Firesquid
USC: Counterforce, see, is not about levelling supermen to get the best perks. It’s about preparing . Your team improve with experience, but they start out with good skills, your commander already maxed out. Moreover, skills are pure bonus. A guy with 5/5 in Heavy weapons will be dramatically better, but everyone can use them. Even perks are modest passive bonuses chosen once and early. Marksmanship girls reload faster and score more critical hits with small arms, Agility guys move faster diagonally (which adds up when Action Points are in the 30-60s). It’s not hard to max out several skills, and 2/5 in melee is a decent backup.
Just about everything is granular, including equipment. 10 inventory slots offer ample possibilities, but many things might be useful. A chestplate, gas mask, two ammo types, a backup weapon, scanner, pills that swap 1AP for a drop of morale, one million types of medkit. The “Field Expertise” skill is about moving items quickly: a godsend when it’s mission phase 2 of 3 and everyone’s desperately handing meds and knives and twelve bullets back and forth like every trans person you know. You’ll want room for loot too, since nothing else is free.
Spacerocks can convert into cash, but that only funds building. Equipment is bought with credit, which depends on your boss’s approval. It won’t stretch forever, so spacerocks also fit into a web of conversions and trades between eight materials for crafting instead. You start with access to miniguns, grenade launchers, and refreshingly odd guns like the bio-rifle, which poisons aliens and heals humans, or the quadseeker, which hits four targets and can shoot around cover. But it all costs.
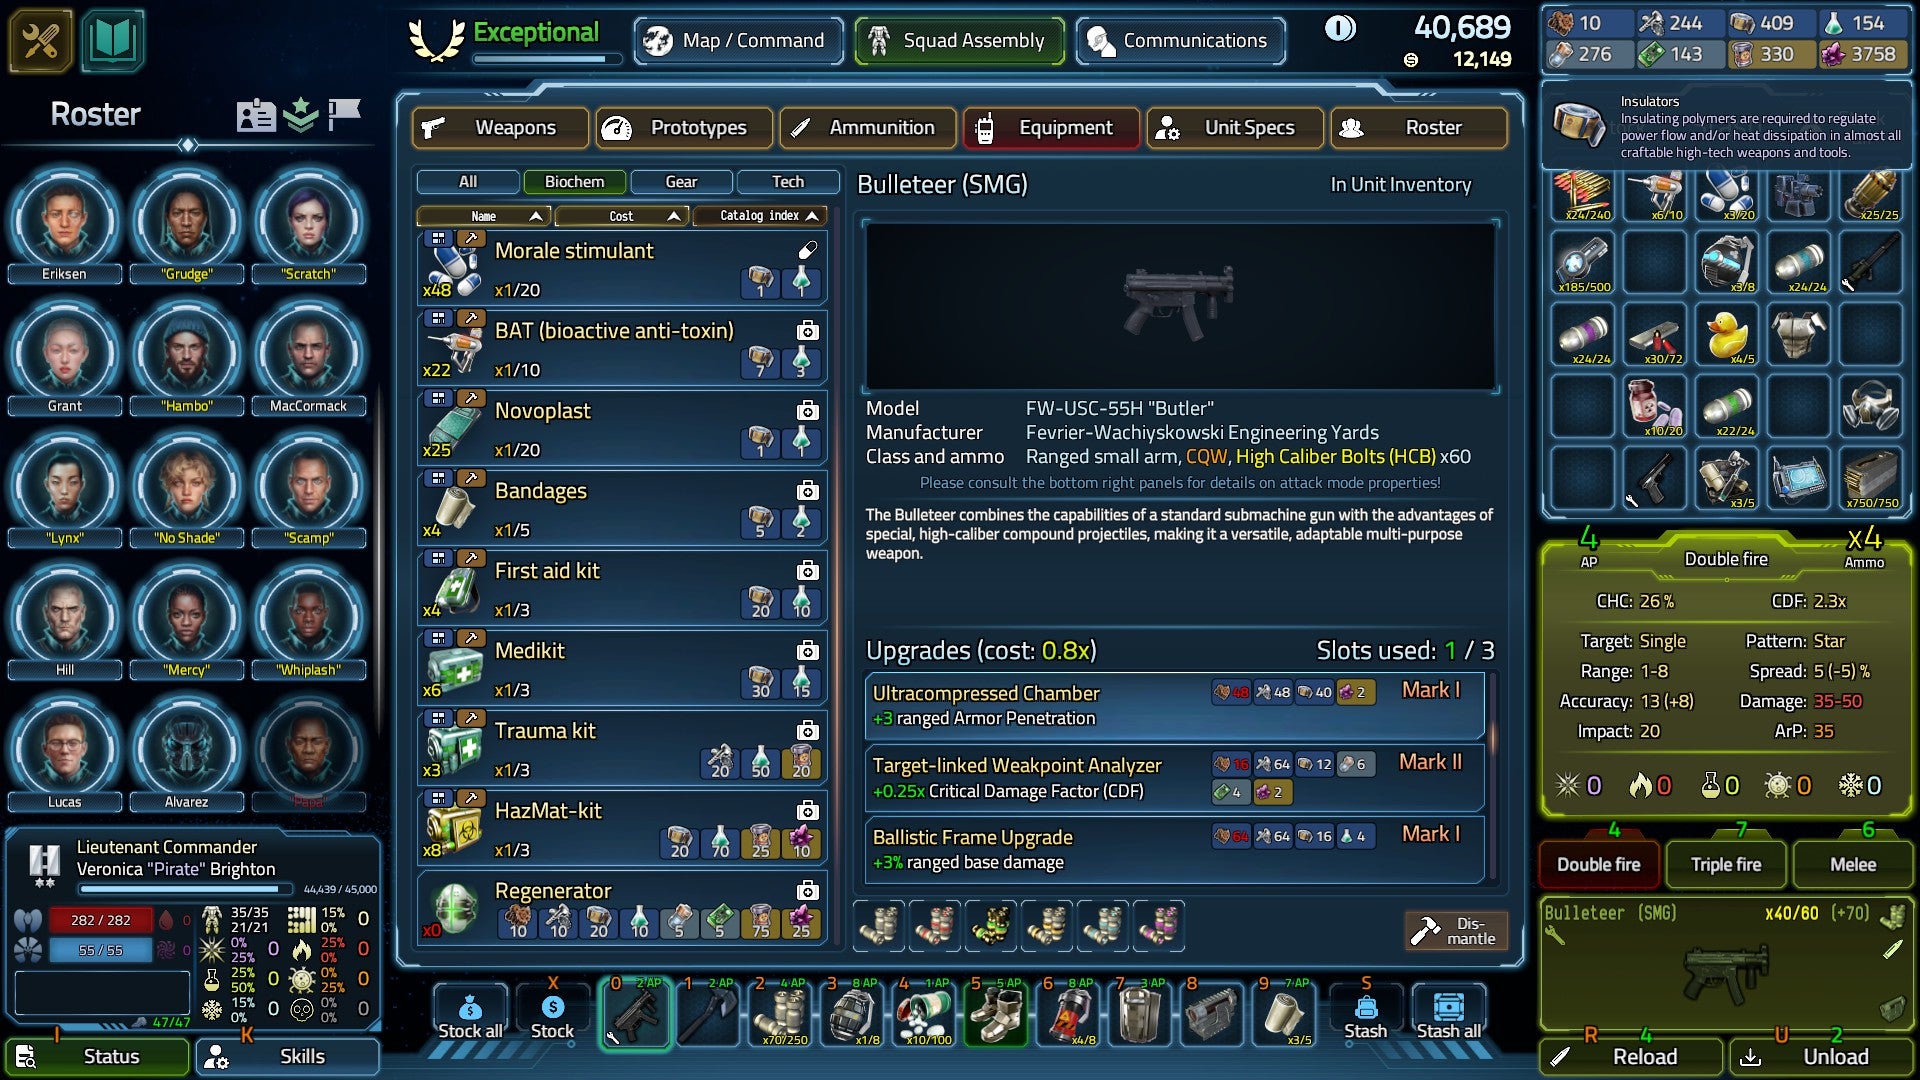
Image credit:Rock Paper Shotgun/Firesquid
That adds another dimension to preparation: tactically, USC is about balancing swarms and high-threat target prioritisation, but strategically, it’s about doing that when every bullet, every bandage has a budgetary opportunity cost. So you learn to carry pistols, hack doors and move barrels to slow enemies so poison and fire can do their grisly work. Sniper rifles are excellent value per shot, but overwhelmed without backup from launchers and SMGs. Blades obviously need no ammunition, but their real power is raising defence, saving lives and medkits. Everything works best in tandem. You must learn how to use every skill and tool as supplies fluctuate between unpredictable fights.
Soldier skills are capped hard, and there’s no traditional research, no unlocks, and nothing becomes obsolete. As the locals get narkier, your counter is upgrades and prototypes. Every individual weapon can be upgraded with materials (and downgraded for a full refund), and five factions can, for enough spacerocks, replace your upgrades with better versions. Prototypes add another magic hole to gamble spacerocks in: a novel variant of a weapon, with randomised bonuses. A bit like Borderlands , this could provide a paralysing pistol or a super fast cryoblaster, or useless junk. But you must manufacture these blueprints, draining yet more materials. Their quality depends on faction reputation, too, and your bosses dislike everything they like, especially giving spacerocks to the smugglers, the only reliable source of some materials.
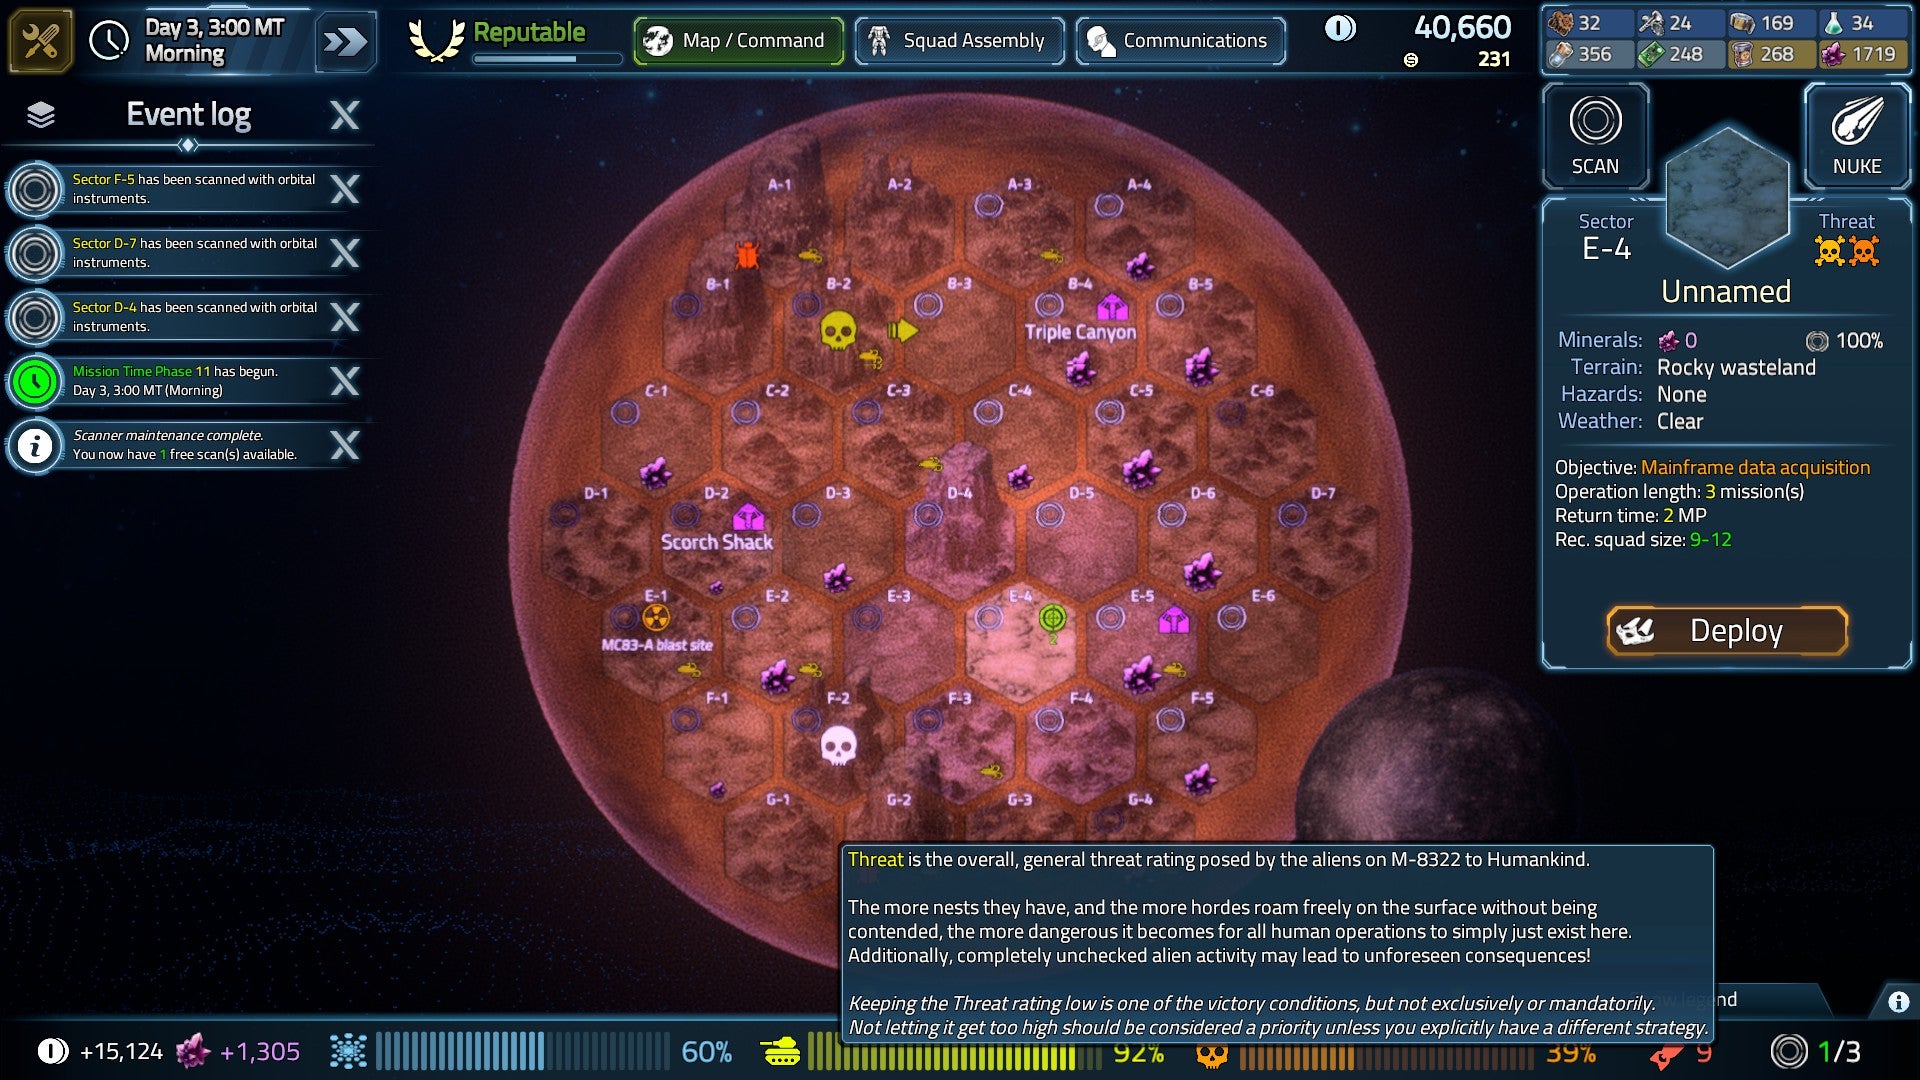
Image credit:Rock Paper Shotgun/Firesquid
Little in USC works quite like its peers. Combat is asymmetrical, unpredictable, attritional. Aliens are hardy, but big weapons are costly to run, so you’ll learn where to put your shield guy and when his AP should go on blocking vs stabbing. The incredible utility of welding torches (until you hit a floor with no power), when you should just let a wound bleed, and especially, positioning. A quirk reminiscent of Odium means some weapons can only aim at targets within a “star” shape, others only in eight or four cardinal directions. Unrealistic, sure, but so what? It’s an interesting wrinkle, and forces you to actively arm and position everyone to support each other, not just use Optimal Loadout. Opportunity fire is less restricted, but weak aliens move first, so that requires thoughtful positioning and range-setting too.
That’s the main thing, aside from the tough, swarming enemies, that makes USC genuinely great. All that granularity, all those possibilities, creating room for chaos and desperation while ensuring that teamwork is vital and good preparation pays off. High AP range tempts you to sprint recklessly across an unexplored room to help some soldiers in trouble. Beagle hacks the door, and through it lie multiple aliens… and the generator. Hambo chucks some grenades in, obliterating the room, allowing two other soldiers to run through and distract the alphas about to finish off poor Gremlin… and plunging the facility into darkness, unleashing god knows what as all the doors on the level automatically open. And yet, sometimes the handiest thing a soldier can do with her AP is run in close so her headlamp will face a Crawler that someone’s struggling to hit.
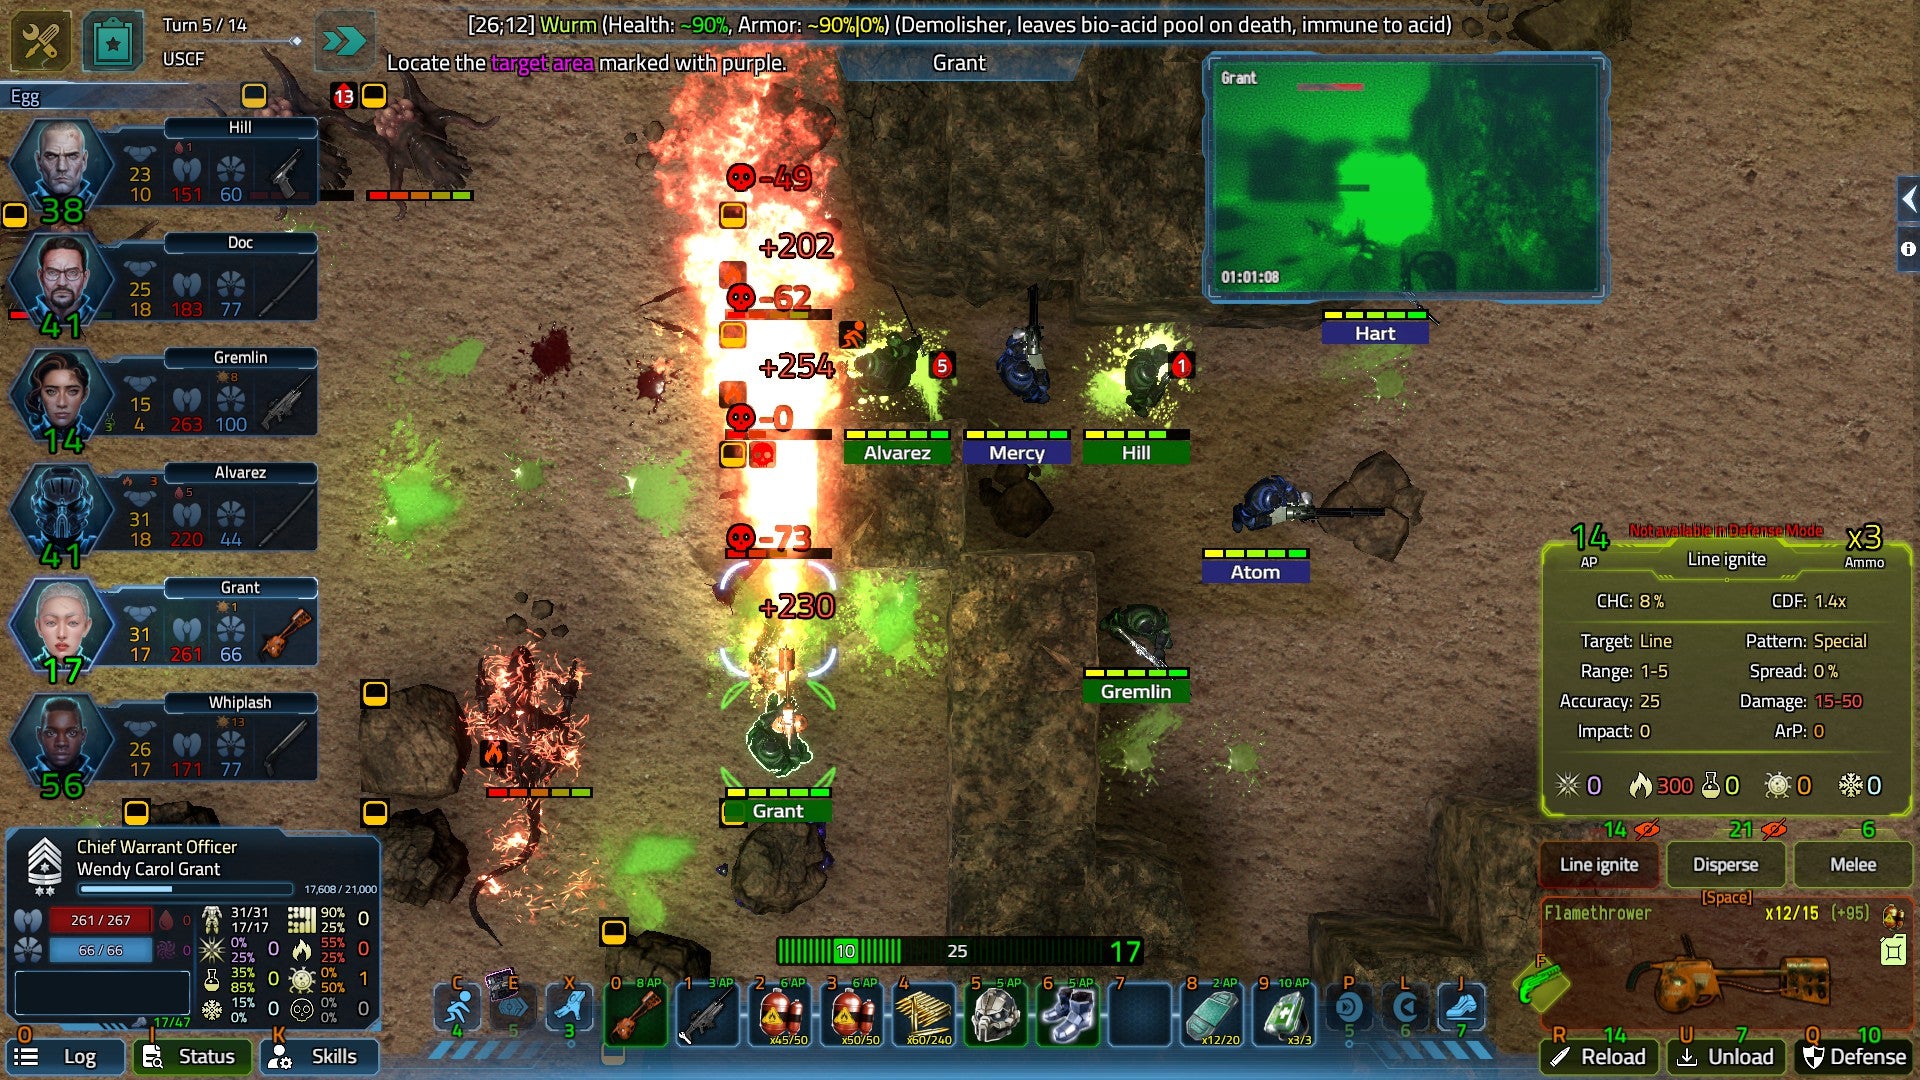
Image credit:Rock Paper Shotgun/Firesquid
Aliens don’t use opportunity fire, but some will find flanking routes, seek out the wounded, claw through doors and walls. Some flee when wounded, others will kill other aliens if it’s the fastest way to get to you. Their turns are unfortunately slow, and there’s too little information about missions or game systems. Some of this I consider a Good Thing - questions to answer through initiative instead of a wiki reducing everything to boring nerd calculation. But they put far too much work and frustration upfront, which exacerbates USC’s biggest problem by far: the sheer time and work it takes to prepare everyone, every time.
Jagged Alliance fans rejoice, for USC is all about gearing everyone up for every mission. The high Action Points, fast shooting, 18 soldiers per fight, and all those weapons, ammunition types, upgrades, prototypes, tools, possible problems (Flamethrower good! Flooded installation bad), cost/benefit analyses, mission return times requiring you to pencil in the next mission’s supplies… even this sentence kind of reflects how playing Soldier Mum can make a brain buzz. But it’s also s l o w . The prep screen is awkwardly laid out, and lacks timesaving functions like drag and drop, saved loadouts or replenish buttons. You can instantly store a soldier’s gear, but then have to retrieve 17 grenades in turn to see their price. It’s far from the worst I’ve seen, but it’s unintuitive, and never becomes as smooth as it should considering the time you’ll spend there.
Preparation is half the game, and the weighing of options and potential tactics makes it rewarding. I love that USC is like this instead of “give M4 to Assault class, press Best Perk”. There’s something great here, and wonderfully unusual despite its very popular influences. But its friction burns too much to deny that it’s fallen short of its potential. I wish it had found the audience who’d appreciate what it does, the support that carried it a little further.

USC: Counterforce
PC
Rock Paper Shotgun is better when you sign in
Sign in and join us on our journey to discover strange and compelling PC games.

All 75 Arc Raiders Blueprints and where to get them
These areas have the highest chance of giving you Blueprints

Image credit:Rock Paper Shotgun/Embark Studios

Looking for more Arc Raiders Blueprints? It’s a special day when you find a Blueprint, as they’re among the most valuable items in Arc Raiders. If you find a Blueprint that you haven’t already found, then you must make sure you hold onto it at all costs, because Blueprints are the key to one of the most important and powerful systems of meta-progression in the game.
This guide aims to be the very best guide on Blueprints you can find, starting with a primer on what exactly they are and how they work in Arc Raiders, before delving into exactly where to get Blueprints and the very best farming spots for you to take in your search.
We’ll also go over how to get Blueprints from other unlikely activities, such as destroying Surveyors and completing specific quests. And you’ll also find the full list of all 75 Blueprints in Arc Raiders on this page (including the newest Blueprints added with the Cold Snap update , such as the Deadline Blueprint and Firework Box Blueprint), giving you all the information you need to expand your own crafting repertoire.
In this guide:
- What are Blueprints in Arc Raiders?
- Full Blueprint list: All crafting recipes
- Where to find Blueprints in Arc Raiders Blueprints obtained from quests Blueprints obtained from Trials Best Blueprint farming locations

What are Blueprints in Arc Raiders?
Blueprints in Arc Raiders are special items which, if you manage to extract with them, you can expend to permanently unlock a new crafting recipe in your Workshop. If you manage to extract from a raid with an Anvil Blueprint, for example, you can unlock the ability to craft your very own Anvil Pistol, as many times as you like (as long as you have the crafting materials).
To use a Blueprint, simply open your Inventory while in the lobby, then right-click on the Blueprint and click “Learn And Consume” . This will permanently unlock the recipe for that item in your Workshop. As of the Stella Montis update, there are allegedly 75 different Blueprints to unlock - although only 68 are confirmed to be in the game so far. You can see all the Blueprints you’ve found and unlocked by going to the Workshop menu, and hitting “R” to bring up the Blueprint screen.
It’s possible to find duplicates of past Blueprints you’ve already unlocked. If you find these, then you can either sell them, or - if you like to play with friends - you can take it into a match and gift it to your friend so they can unlock that recipe for themselves. Another option is to keep hold of them until the time comes to donate them to the Expedition.
Full Blueprint list: All crafting recipes
Below is the full list of all the Blueprints that are currently available to find in Arc Raiders, and the crafting recipe required for each item:
| Blueprint | Type | Recipe | Crafted At |
|---|---|---|---|
| Bettina | Weapon | 3x Advanced Mechanical Components 3x Heavy Gun Parts 3x Canister | Gunsmith 3 |
| Blue Light Stick | Quick Use | 3x Chemicals | Utility Station 1 |
| Aphelion | Weapon | 3x Magnetic Accelerator 3x Complex Gun Parts 1x Matriarch Reactor | Gunsmith 3 |
| Combat Mk. 3 (Flanking) | Augment | 2x Advanced Electrical Components 3x Processor | Gear Bench 3 |
| Combat Mk. 3 (Aggressive) | Augment | 2x Advanced Electrical Components 3x Processor | Gear Bench 3 |
| Complex Gun Parts | Material | 2x Light Gun Parts 2x Medium Gun Parts 2x Heavy Gun Parts | Refiner 3 |
| Fireworks Box | Quick Use | 1x Explosive Compound 3x Pop Trigger | Explosives Station 2 |
| Gas Mine | Mine | 4x Chemicals 2x Rubber Parts | Explosives Station 1 |
| Green Light Stick | Quick Use | 3x Chemicals | Utility Station 1 |
| Pulse Mine | Mine | 1x Crude Explosives 1x Wires | Explosives Station 1 |
| Seeker Grenade | Grenade | 1x Crude Explosives 2x ARC Alloy | Explosives Station 1 |
| Looting Mk. 3 (Survivor) | Augment | 2x Advanced Electrical Components 3x Processor | Gear Bench 3 |
| Angled Grip II | Mod | 2x Mechanical Components 3x Duct Tape | Gunsmith 2 |
| Angled Grip III | Mod | 2x Mod Components 5x Duct Tape | Gunsmith 3 |
| Hullcracker | Weapon | 1x Magnetic Accelerator 3x Heavy Gun Parts 1x Exodus Modules | Gunsmith 3 |
| Launcher Ammo | Ammo | 5x Metal Parts 1x Crude Explosives | Workbench 1 |
| Anvil | Weapon | 5x Mechanical Components 5x Simple Gun Parts | Gunsmith 2 |
| Anvil Splitter | Mod | 2x Mod Components 3x Processor | Gunsmith 3 |
| ??? | ??? | ??? | ??? |
| Barricade Kit | Quick Use | 1x Mechanical Components | Utility Station 2 |
| Blaze Grenade | Grenade | 1x Explosive Compound 2x Oil | Explosives Station 3 |
| Bobcat | Weapon | 3x Advanced Mechanical Components 3x Light Gun Parts | Gunsmith 3 |
| Osprey | Weapon | 2x Advanced Mechanical Components 3x Medium Gun Parts 7x Wires | Gunsmith 3 |
| Burletta | Weapon | 3x Mechanical Components 3x Simple Gun Parts | Gunsmith 1 |
| Compensator II | Mod | 2x Mechanical Components 4x Wires | Gunsmith 2 |
| Compensator III | Mod | 2x Mod Components 8x Wires | Gunsmith 3 |
| Defibrillator | Quick Use | 9x Plastic Parts 1x Moss | Medical Lab 2 |
| ??? | ??? | ??? | ??? |
| Equalizer | Weapon | 3x Magnetic Accelerator 3x Complex Gun Parts 1x Queen Reactor | Gunsmith 3 |
| Extended Barrel | Mod | 2x Mod Components 8x Wires | Gunsmith 3 |
| Extended Light Mag II | Mod | 2x Mechanical Components 3x Steel Spring | Gunsmith 2 |
| Extended Light Mag III | Mod | 2x Mod Components 5x Steel Spring | Gunsmith 3 |
| Extended Medium Mag II | Mod | 2x Mechanical Components 3x Steel Spring | Gunsmith 2 |
| Extended Medium Mag III | Mod | 2x Mod Components 5x Steel Spring | Gunsmith 3 |
| Extended Shotgun Mag II | Mod | 2x Mechanical Components 3x Steel Spring | Gunsmith 2 |
| Extended Shotgun Mag III | Mod | 2x Mod Components 5x Steel Spring | Gunsmith 3 |
| Remote Raider Flare | Quick Use | 2x Chemicals 4x Rubber Parts | Utility Station 1 |
| Heavy Gun Parts | Material | 4x Simple Gun Parts | Refiner 2 |
| Venator | Weapon | 2x Advanced Mechanical Components 3x Medium Gun Parts 5x Magnet | Gunsmith 3 |
| Il Toro | Weapon | 5x Mechanical Components 6x Simple Gun Parts | Gunsmith 1 |
| Jolt Mine | Mine | 1x Electrical Components 1x Battery | Explosives Station 2 |
| Explosive Mine | Mine | 1x Explosive Compound 1x Sensors | Explosives Station 3 |
| Jupiter | Weapon | 3x Magnetic Accelerator 3x Complex Gun Parts 1x Queen Reactor | Gunsmith 3 |
| Light Gun Parts | Material | 4x Simple Gun Parts | Refiner 2 |
| Lightweight Stock | Mod | 2x Mod Components 5x Duct Tape | Gunsmith 3 |
| Lure Grenade | Grenade | 1x Speaker Component 1x Electrical Components | Utility Station 2 |
| Medium Gun Parts | Material | 4x Simple Gun Parts | Refiner 2 |
| Torrente | Weapon | 2x Advanced Mechanical Components 3x Medium Gun Parts 6x Steel Spring | Gunsmith 3 |
| Muzzle Brake II | Mod | 2x Mechanical Components 4x Wires | Gunsmith 2 |
| Muzzle Brake III | Mod | 2x Mod Components 8x Wires | Gunsmith 3 |
| Padded Stock | Mod | 2x Mod Components 5x Duct Tape | Gunsmith 3 |
| Shotgun Choke II | Mod | 2x Mechanical Components 4x Wires | Gunsmith 2 |
| Shotgun Choke III | Mod | 2x Mod Components 8x Wires | Gunsmith 3 |
| Shotgun Silencer | Mod | 2x Mod Components 8x Wires | Gunsmith 3 |
| Showstopper | Grenade | 1x Advanced Electrical Components 1x Voltage Converter | Explosives Station 3 |
| Silencer I | Mod | 2x Mechanical Components 4x Wires | Gunsmith 2 |
| Silencer II | Mod | 2x Mod Components 8x Wires | Gunsmith 3 |
| Snap Hook | Quick Use | 2x Power Rod 3x Rope 1x Exodus Modules | Utility Station 3 |
| Stable Stock II | Mod | 2x Mechanical Components 3x Duct Tape | Gunsmith 2 |
| Stable Stock III | Mod | 2x Mod Components 5x Duct Tape | Gunsmith 3 |
| Tagging Grenade | Grenade | 1x Electrical Components 1x Sensors | Utility Station 3 |
| Tempest | Weapon | 3x Advanced Mechanical Components 3x Medium Gun Parts 3x Canister | Gunsmith 3 |
| Trigger Nade | Grenade | 2x Crude Explosives 1x Processor | Explosives Station 2 |
| Vertical Grip II | Mod | 2x Mechanical Components 3x Duct Tape | Gunsmith 2 |
| Vertical Grip III | Mod | 2x Mod Components 5x Duct Tape | Gunsmith 3 |
| Vita Shot | Quick Use | 2x Antiseptic 1x Syringe | Medical Lab 3 |
| Vita Spray | Quick Use | 3x Antiseptic 1x Canister | Medical Lab 3 |
| Vulcano | Weapon | 1x Magnetic Accelerator 3x Heavy Gun Parts 1x Exodus Modules | Gunsmith 3 |
| Wolfpack | Grenade | 2x Explosive Compound 2x Sensors | Explosives Station 3 |
| Red Light Stick | Quick Use | 3x Chemicals | Utility Station 1 |
| Smoke Grenade | Grenade | 14x Chemicals 1x Canister | Utility Station 2 |
| Deadline | Mine | 3x Explosive Compound 2x ARC Circuitry | Explosives Station 3 |
| Trailblazer | Grenade | 1x Explosive Compound 1x Synthesized Fuel | Explosives Station 3 |
| Tactical Mk. 3 (Defensive) | Augment | 2x Advanced Electrical Components 3x Processor | Gear Bench 3 |
| Tactical Mk. 3 (Healing) | Augment | 2x Advanced Electrical Components 3x Processor | Gear Bench 3 |
| Yellow Light Stick | Quick Use | 3x Chemicals | Utility Station 1 |
Note: The missing Blueprints in this list likely have not actually been added to the game at the time of writing, because none of the playerbase has managed to find any of them. As they are added to the game, I will update this page with the most relevant information so you know exactly how to get all 75 Arc Raiders Blueprints.
Where to find Blueprints in Arc Raiders
Below is a list of all containers, modifiers, and events which maximise your chances of finding Blueprints:
- Certain quests reward you with specific Blueprints .
- Completing Trials has a high chance of offering Blueprints as rewards.
- Surveyors have a decent chance of dropping Blueprints on death.
- High loot value areas tend to have a greater chance of spawning Blueprints.
- Night Raids and Storms may increase rare Blueprint spawn chances in containers.
- Containers with higher numbers of items may have a higher tendency to spawn Blueprints. As a result, Blue Gate (which has many “large” containers containing multiple items) may give you a higher chance of spawning Blueprints.
- Raider containers (Raider Caches, Weapon Boxes, Medical Bags, Grenade Tubes) have increased Blueprint drop rates. As a result, the Uncovered Caches event gives you a high chance of finding Blueprints.
- Security Lockers have a higher than average chance of containing Blueprints.
- Certain Blueprints only seem to spawn under specific circumstances: Tempest Blueprint only spawns during Night Raid events. Vulcano Blueprint only spawns during Hidden Bunker events. Jupiter and Equaliser Blueprints only spawn during Harvester events.

Raider Caches, Weapon Boxes, and other raider-oriented container types have a good chance of offering Blueprints. |Image credit:Rock Paper Shotgun/Embark Studios
Blueprints have a very low chance of spawning in any container in Arc Raiders, around 1-2% on average. However, there is a higher chance of finding Blueprints in particular container types. Specifically, you can find more Blueprints in Raider containers and security lockers.
Beyond this, if you’re looking for Blueprints you should focus on regions of the map which are marked as having particularly high-value loot. Areas such as the Control Tower in Dam Battlegrounds, the Arrival and Departure Buildings in Spaceport, and Pilgrim’s Peak in Blue Gate all have a better-than-average chance of spawning Blueprints somewhere amongst all their containers. Night Raids and Electromagnetic Storm events also increase the drop chances of certain Blueprints .
In addition to these containers, you can often loot Blueprints from destroyed Surveyors - the largest of the rolling ball ARC. Surveyors are more commonly found on the later maps - Spaceport and Blue Gate - and if one spawns in your match, you’ll likely see it by the blue laser beam that it casts into the sky while “surveying”.
Surveyors are quite well-armoured and will very speedily run away from you once it notices you, but if you can take one down then make sure you loot all its parts for a chance of obtaining certain unusual Blueprints.
Blueprints obtained from quests
One way in which you can get Blueprints is by completing certain quests for the vendors in Speranza. Some quests will reward you with a specific item Blueprint upon completion, so as long as you work through all the quests in Arc Raiders, you are guaranteed those Blueprints.
Here is the full list of all Blueprints you can get from quest rewards:
- Trigger Nade Blueprint: Rewarded after completing “Sparks Fly”.
- Lure Grenade Blueprint: Rewarded after completing “Greasing Her Palms”.
- Burletta Blueprint: Rewarded after completing “Industrial Espionage”.
- Hullcracker Blueprint (and Launcher Ammo Blueprint): Rewarded after completing “The Major’s Footlocker”.
Alas, that’s only 4 Blueprints out of a total of 75 to unlock, so for the vast majority you will need to find them yourself during a raid. If you’re intent on farming Blueprints, then it’s best to equip yourself with cheap gear in case you lose it, but don’t use a free loadout because then you won’t get a safe pocket to stash any new Blueprint you find. No pain in Arc Raiders is sharper than failing to extract with a new Blueprint you’ve been after for a dozen hours already.

One of the best ways to get Blueprints is by hitting three stars on all five Trials every week. |Image credit:Rock Paper Shotgun/Embark Studios
Blueprints obtained from Trials
One of the very best ways to get Blueprints is as rewards for completing Trials in Arc Raiders. Trials are unlocked from Level 15 onwards, and allow you to earn rewards by focusing on certain tasks over the course of several raids. For example, one Trial might task you with dealing damage to Hornets, while another might challenge you to loot Supply Drops.
Trials refresh on a weekly basis, with a new week bringing five new Trials. Each Trial can offer up to three rewards after passing certain score milestones, and it’s possible to receive very high level loot from these reward crates - including Blueprints. So if you want to unlock as many Blueprints as possible, you should make a point of completing as many Trials as possible each week.
Best Blueprint farming locations
The very best way to get Blueprints is to frequent specific areas of the maps which combine high-tier loot pools with the right types of containers to search. Here are my recommendations for where to find Blueprints on every map, so you can always keep the search going for new crafting recipes to unlock.

Image credit:Rock Paper Shotgun/Embark Studios
Dam Battlegrounds
The best places to farm Blueprints on Dam Battlegrounds are the Control Tower, Power Generation Complex, Ruby Residence, and Pale Apartments . The first two regions, despite only being marked on the map as mid-tier loot, contain a phenomenal number of containers to loot. The Control Tower can also contain a couple of high-tier Security Lockers - though of course, you’ll need to have unlocked the Security Breach skill at the end of the Survival tree.
There’s also a lot of reporting amongst the playerbase that the Residential areas in the top-left of the map - Pale Apartments and Ruby Residence - give you a comparatively strong chance of finding Blueprints. Considering their size, there’s a high density of containers to loot in both locations, and they also have the benefit of being fairly out of the way. So you’re more likely to have all the containers to yourself.
Buried City
The best Blueprint farming locations on Buried City are the Santa Maria Houses, Grandioso Apartments, Town Hall, and the various buildings of the New District . Grandioso Apartments has a lower number of containers than the rest, but a high chance of spawning weapon cases - which have good Blueprint drop rates. The others are high-tier loot areas, with plenty of lootable containers - including Security Lockers.
Spaceport
The best places to find Blueprints on Spaceport are the Arrival and Departure Buildings, as well as Control Tower A6 and the Launch Towers . All these areas are labelled as high-value loot regions, and many of them are also very handily connected to one another by the Spaceport wall, which you can use to quickly run from one area to the next. At the tops of most of these buildings you’ll find at least one Security Locker, so this is an excellent farming route for players looking to find Blueprints.
The downside to looting Blueprints on Spaceport is that all these areas are hotly contested, particularly in Duos and Squads. You’ll need to be very focused and fast in order to complete the full farming route.

Image credit:Rock Paper Shotgun/Embark Studios
Blue Gate
Blue Gate tends to have a good chance of dropping Blueprints, potentially because it generally has a high number of containers which can hold lots of items; so there’s a higher chance of a Blueprint spawning in each container. In my experience, the best Blueprint farming spots on Blue Gate are Pilgrim’s Peak, Raider’s Refuge, the Ancient Fort, and the Underground Complex beneath the Warehouse .
All of these areas contain a wealth of containers to loot. Raider’s Refuge has less to loot, but the majority of the containers in and around the Refuge are raider containers, which have a high chance of containing Blueprints - particularly during major events.
Stella Montis
On the whole, Stella Montis seems to have a very low drop rate for Blueprints (though a high chance of dropping other high-tier loot). If you do want to try farming Blueprints on this map, the best places to find Blueprints in Stella Montis are Medical Research, Assembly Workshop, and the Business Center . These areas have the highest density of containers to loot on the map.
In addition to this, the Western Tunnel has a few different Security Lockers to loot, so while there’s very little to loot elsewhere in this area of the map, it’s worth hitting those Security Lockers if you spawn there at the start of a match.
That wraps up this primer on how to get all the Blueprints in Arc Raiders as quickly as possible. With the Expedition system constantly resetting a large number of players’ Blueprints, it’s more important than ever to have the most up-to-date information on where to find all these Blueprints.
While you’re here, be sure to check out our Arc Raiders best guns tier list , as well as our primers on the best skills to unlock and all the different Field Depot locations on every map.


ARC Raiders
PS5 , Xbox Series X/S , PC
Rock Paper Shotgun is better when you sign in
Sign in and join us on our journey to discover strange and compelling PC games.
