Nioh 3 review - A superb blend of soulslike splendour
Samurai (and ninja) champloo

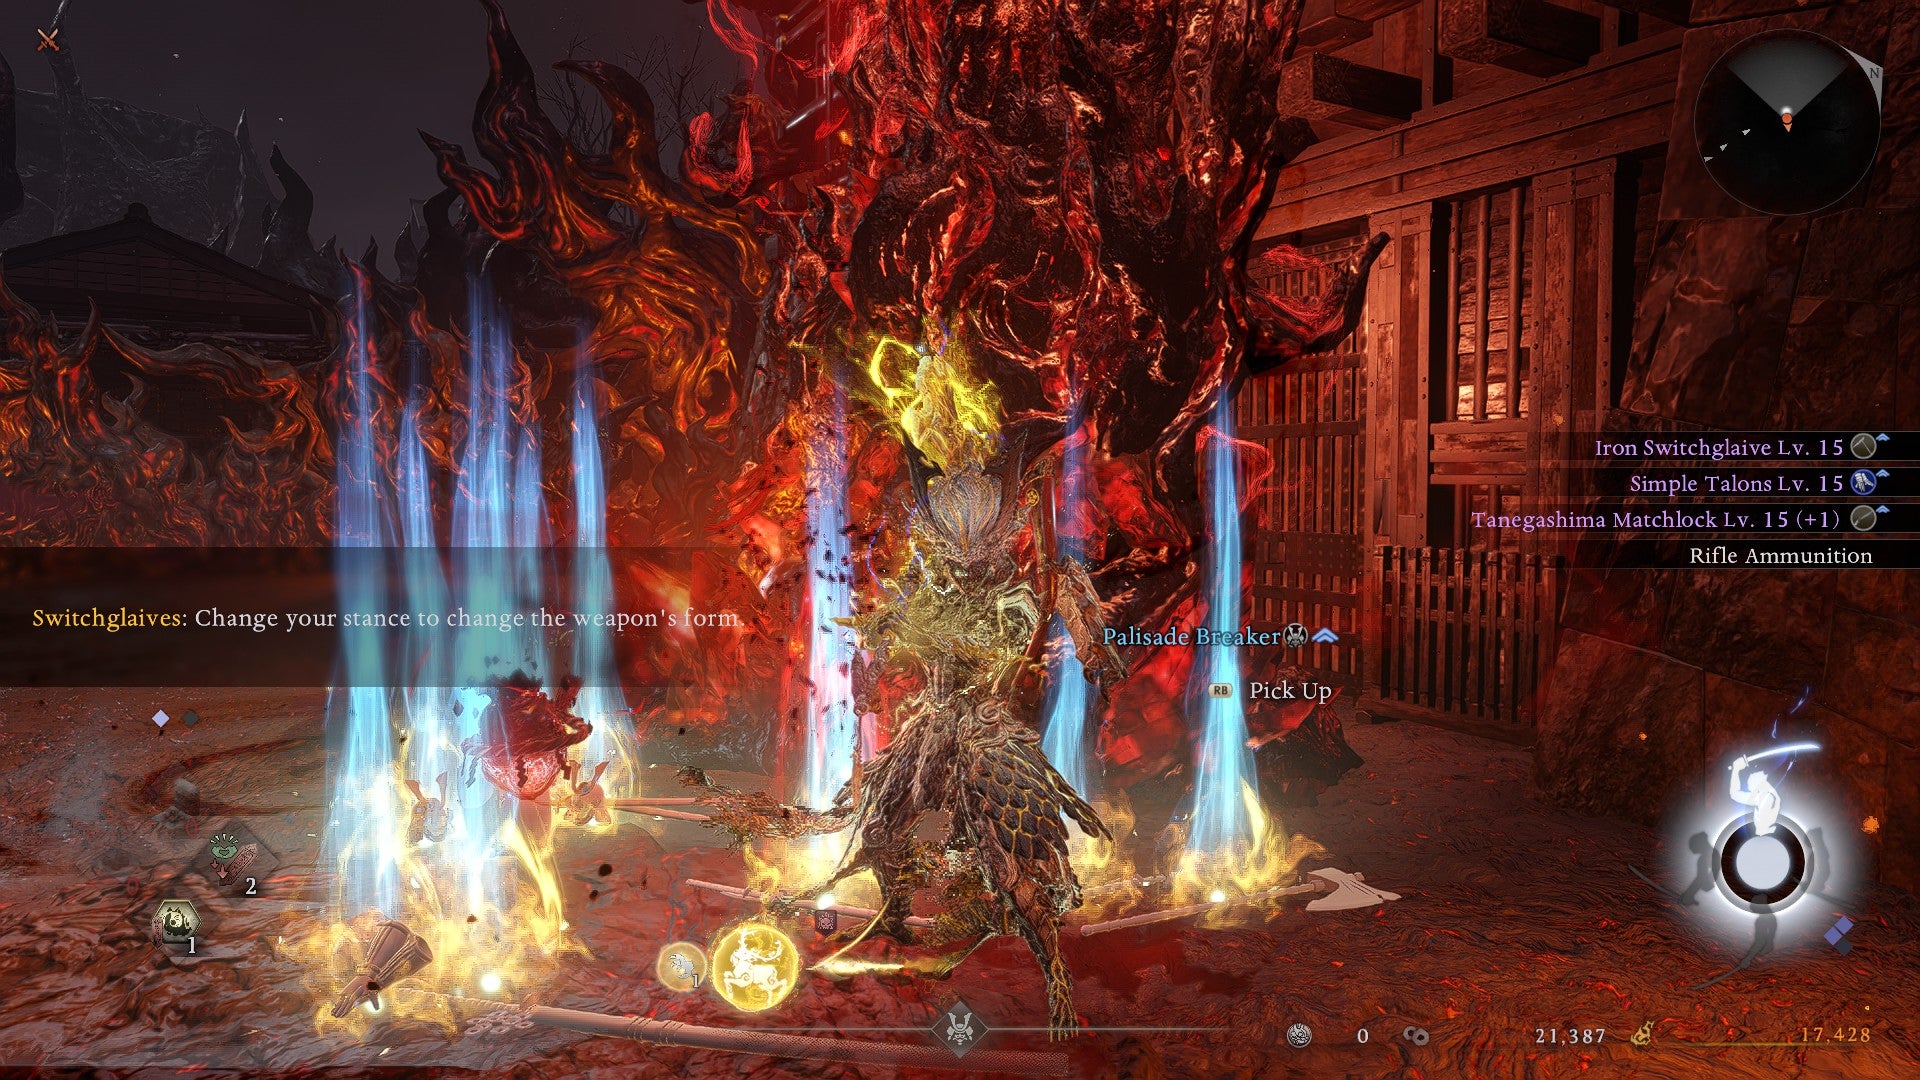
Image credit:Rock Paper Shotgun/Koei Tecmo

- Developer: Team Ninja
- Publisher: Koei Tecmo
- Release: February 6 2026
- On: Windows
- From: Steam
- Price: £64.99/$69.99
- Reviewed on: Intel Core-i9-10850K, 32GB RAM, Nvidia GeForce RTX 3060, Windows 11
My experience with the third Nioh reminded me of many other games — the open world of Elden Ring , the samurai/ninja gameplay of Assassin’s Creed Shadows , and the dopamine-generating loot drops of Diablo.
I make these comparisons not to disparage Nioh 3 , but rather to praise its adroitness. This is a great game that pilfers elements from many disparate titles with the stealthy fluidity of a shinobi, blending them into an attractive whole that resembles a shiny samurai cuirass.
I should now admit that I find samurai, who were basically the cops of their day, overrated. I particularly roll my eyes at the “honourable warrior” myth that romanticises the Warring States, AKA Sengoku era, a period of civil war in Japan. That said, Nioh 3, which is full of Sengoku stereotypes, is good enough to overlook the cliches.
The plot of Nioh 3 may be incomprehensible if you’re unfamiliar with Japanese history — I have a degree in East Asian Studies, and I found it a blur at times. You play as Tokugawa Takechiyo, the grandchild of famed shogun Tokugawa Ieyasu. You’re supposed to be next in line for the throne until your emo brother, Tokugawa Kunimatsu, seizes control and summons a giant red eyed-yokai (which bears an odd resemblance to the boss Bongo Bongo from Zelda: Ocarina of Time) to engulf Edo Castle.
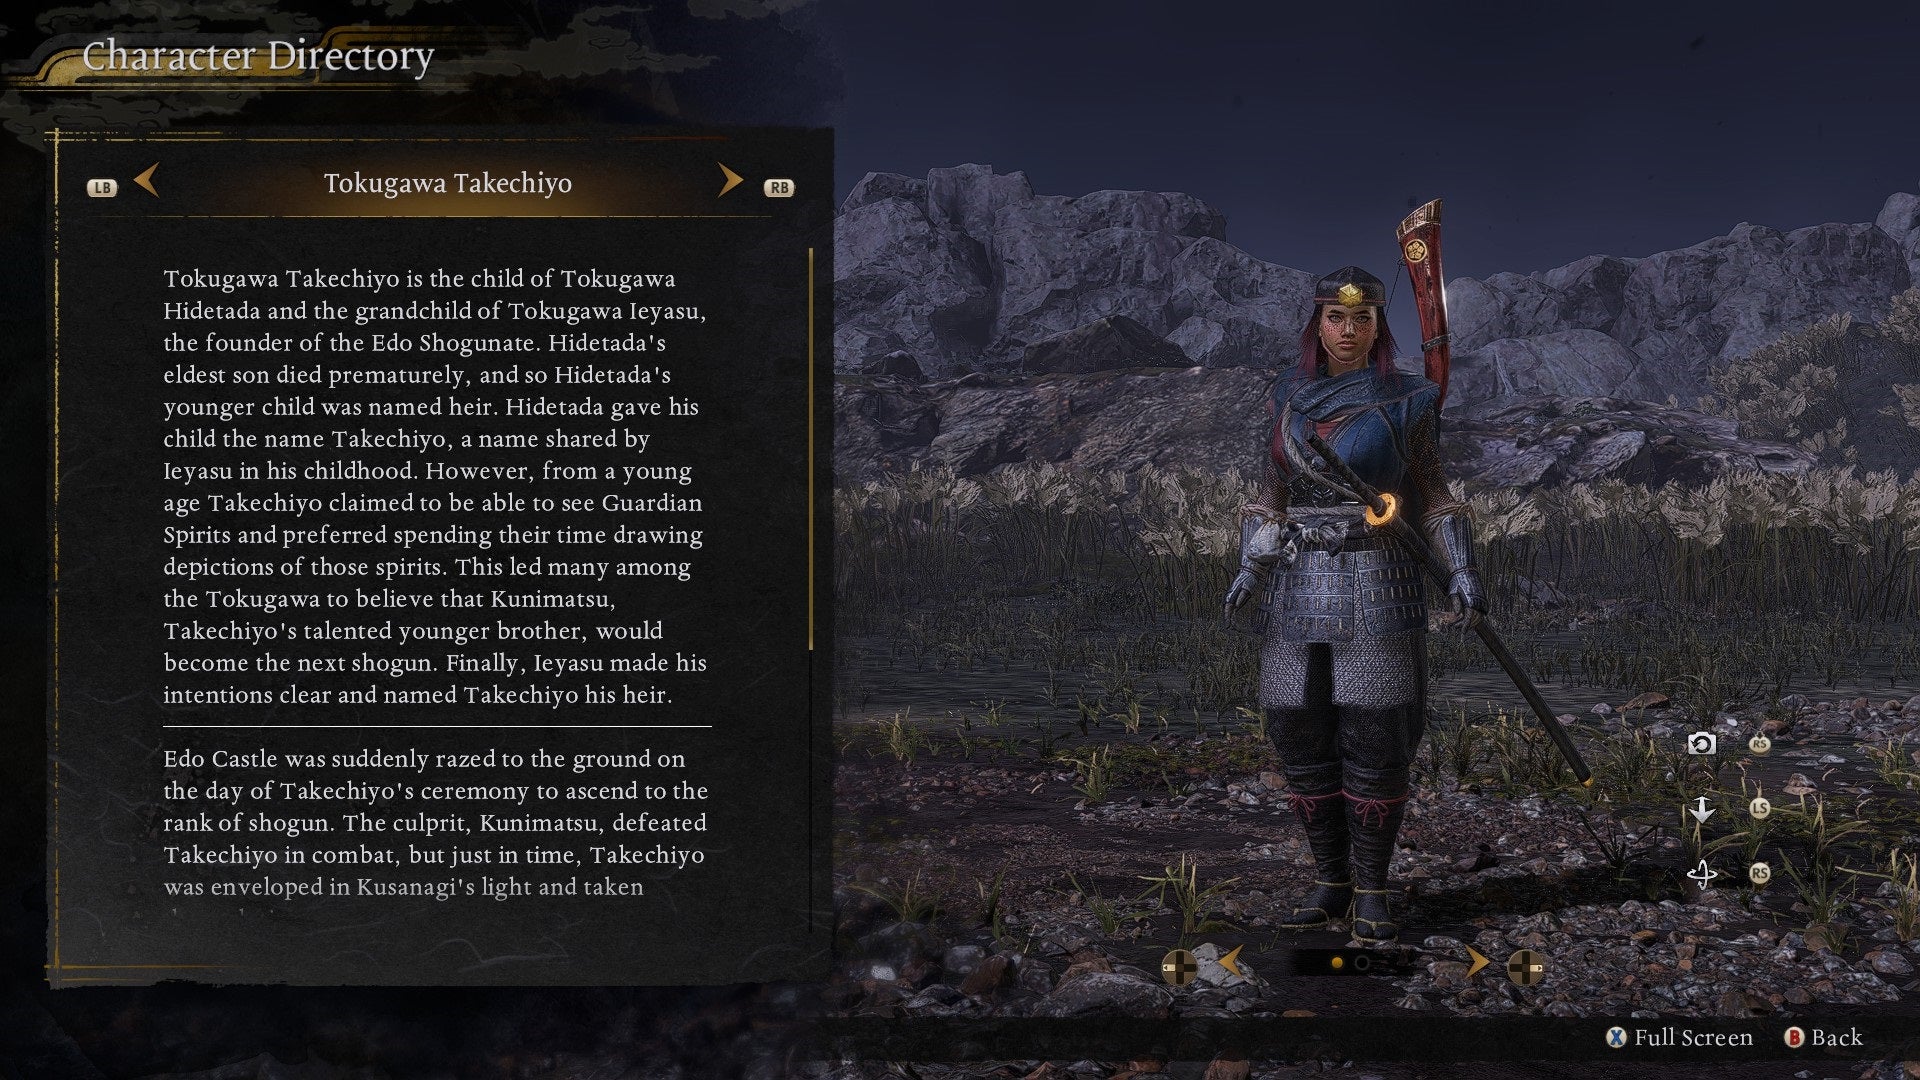
You can customise your version of Tokugawa Takechiyo to look however you like - hence my femme, freckled, red-haired shogun-in-training. |Image credit:Rock Paper Shotgun/Koei Tecmo
The next thing you know, you’re jumping around in time from 1622 to 1572 trying to save the day, and your quest leads to multiple eras. Expect to run into dozens of mythologised Japanese personas who come and go in the blink of an eye. How many versions of Tokugawa ninja Hattori Hanzo has this series featured, anyway?
I haven’t played the previous Nioh games (though now I want to), but Ed, RPS in peace, mentioned a similarly sloppy story in his review of Nioh 2 . The Tale of the Heike, this franchise is not. Gameplay has always been the priority for Koei Tecmo, and happily, they’ve done a fine job here, starting with the Ninja playstyle, which complements the Samurai stances that defined Nioh 1 & 2. While Assassin’s Creed Shadows split things up by featuring one Samurai character and one Ninja character, here your version of Tokugawa Takechiyo learns both styles and switches between the two with a single button press, which you’re encouraged to do so as a means to parry major enemy attacks.
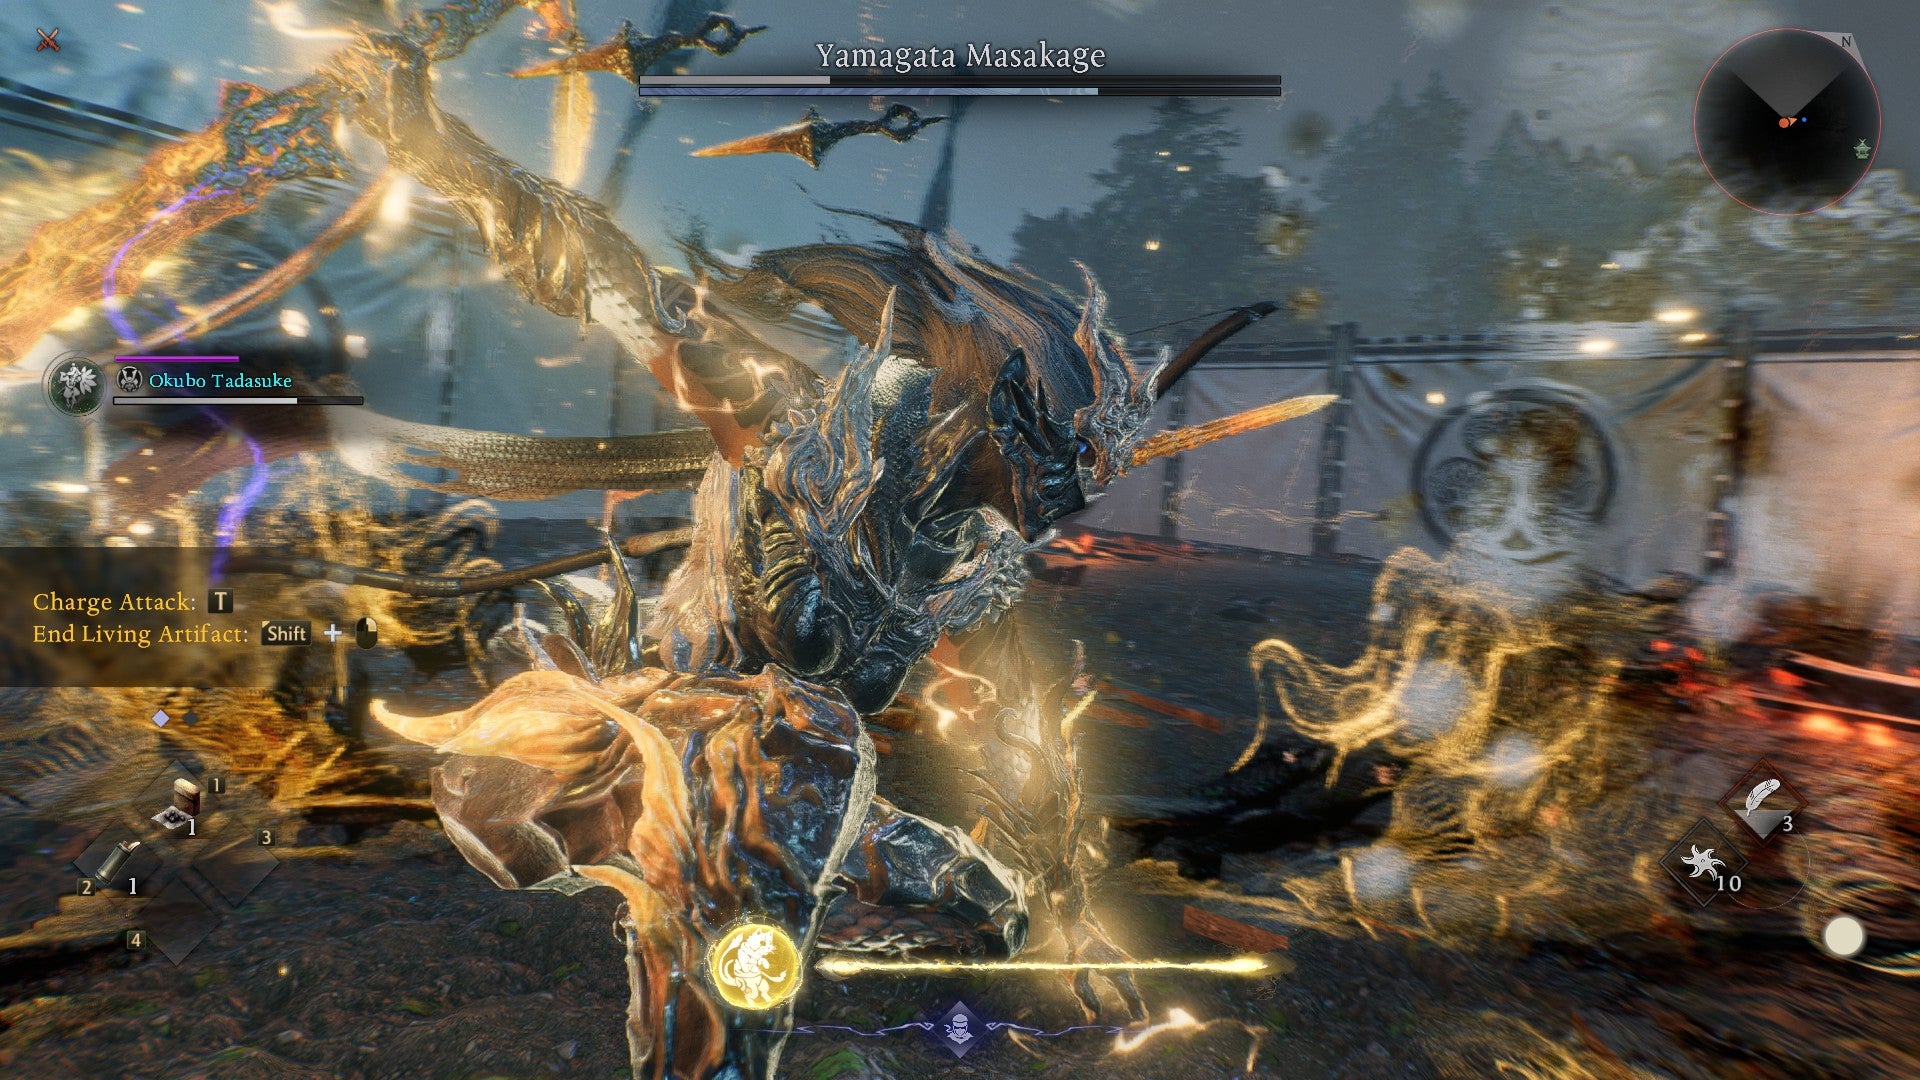
Playing as a Ninja is a fast experience where you can pepper a boss with ranged projectiles, including kunai, shuriken, and all manner of Ninjutsu magics, breaking to dash in for some hit-and-run backstabs with talons or tonfa. In contrast, the Samurai leans closer to typical soulslike patterns of attacking and parrying with the occasional dodge. You’ll wield slower, heavier, and more reliable strikes, all while rhymthically tapping buttons at the right intervals to keep from running out of Ki.

Soulslike fashionistas rejoice - you can transmog armour sets for both Samurai and Ninja freely. |Image credit:Rock Paper Shotgun/Koei Tecmo
Whichever style you choose, the combat feels refined, though there is much more to keep track of than other soulslikes. There’s all that tapping to maintain your Ki, and you also need to be wary of so-called “Yokai Realm” pools of corruption that occasionally appear from enemies and suck up said Ki, and then you can invest in skill trees to get additional attacks that require combos a la a fighting game, and let’s not forget the dozens of weapons on display, each of which must be learnt with care. Nioh veterans will know all of this already, but you can tell that the folks who made Dead or Alive and Ninja Gaiden are behind this series.
Perhaps the Ninja playstyle, which allows beginners to toss tonnes of bombs with relative ease, was included for newbies. I certainly found Ninja easier at first, though I soon began to switch to Samurai whenever I needed to tank a boss or deal maximum damage.
Nioh 3 does a fine job, in other words, at encouraging players to utilise both styles as they become more adept. If you practice, you can pull off some truly ridiulous attack patterns by switching between Samurai/Ninja in rapid succession, and I doubt that even the hardened Nioh 1 & 2 Redditors grumbling about the inclusion of Ninja are going to stay grumpy when they discover this potential. Though they might justifably bristle at the fact that gear and weapons are now divided into Samurai and Ninja types, and one cannot use the other, which means that you’ve got to be a Ninja if you want to use old favourites like the Splitstaff.
Play your cards right in combat, and you can fill up your Amrita Gauge and transform into a Living Artifact - basically a Super Sentai/Power Rangers armoured version of yourself. It’s pretty cool. |Image credit:Rock Paper Shotgun/Koei Tecmo
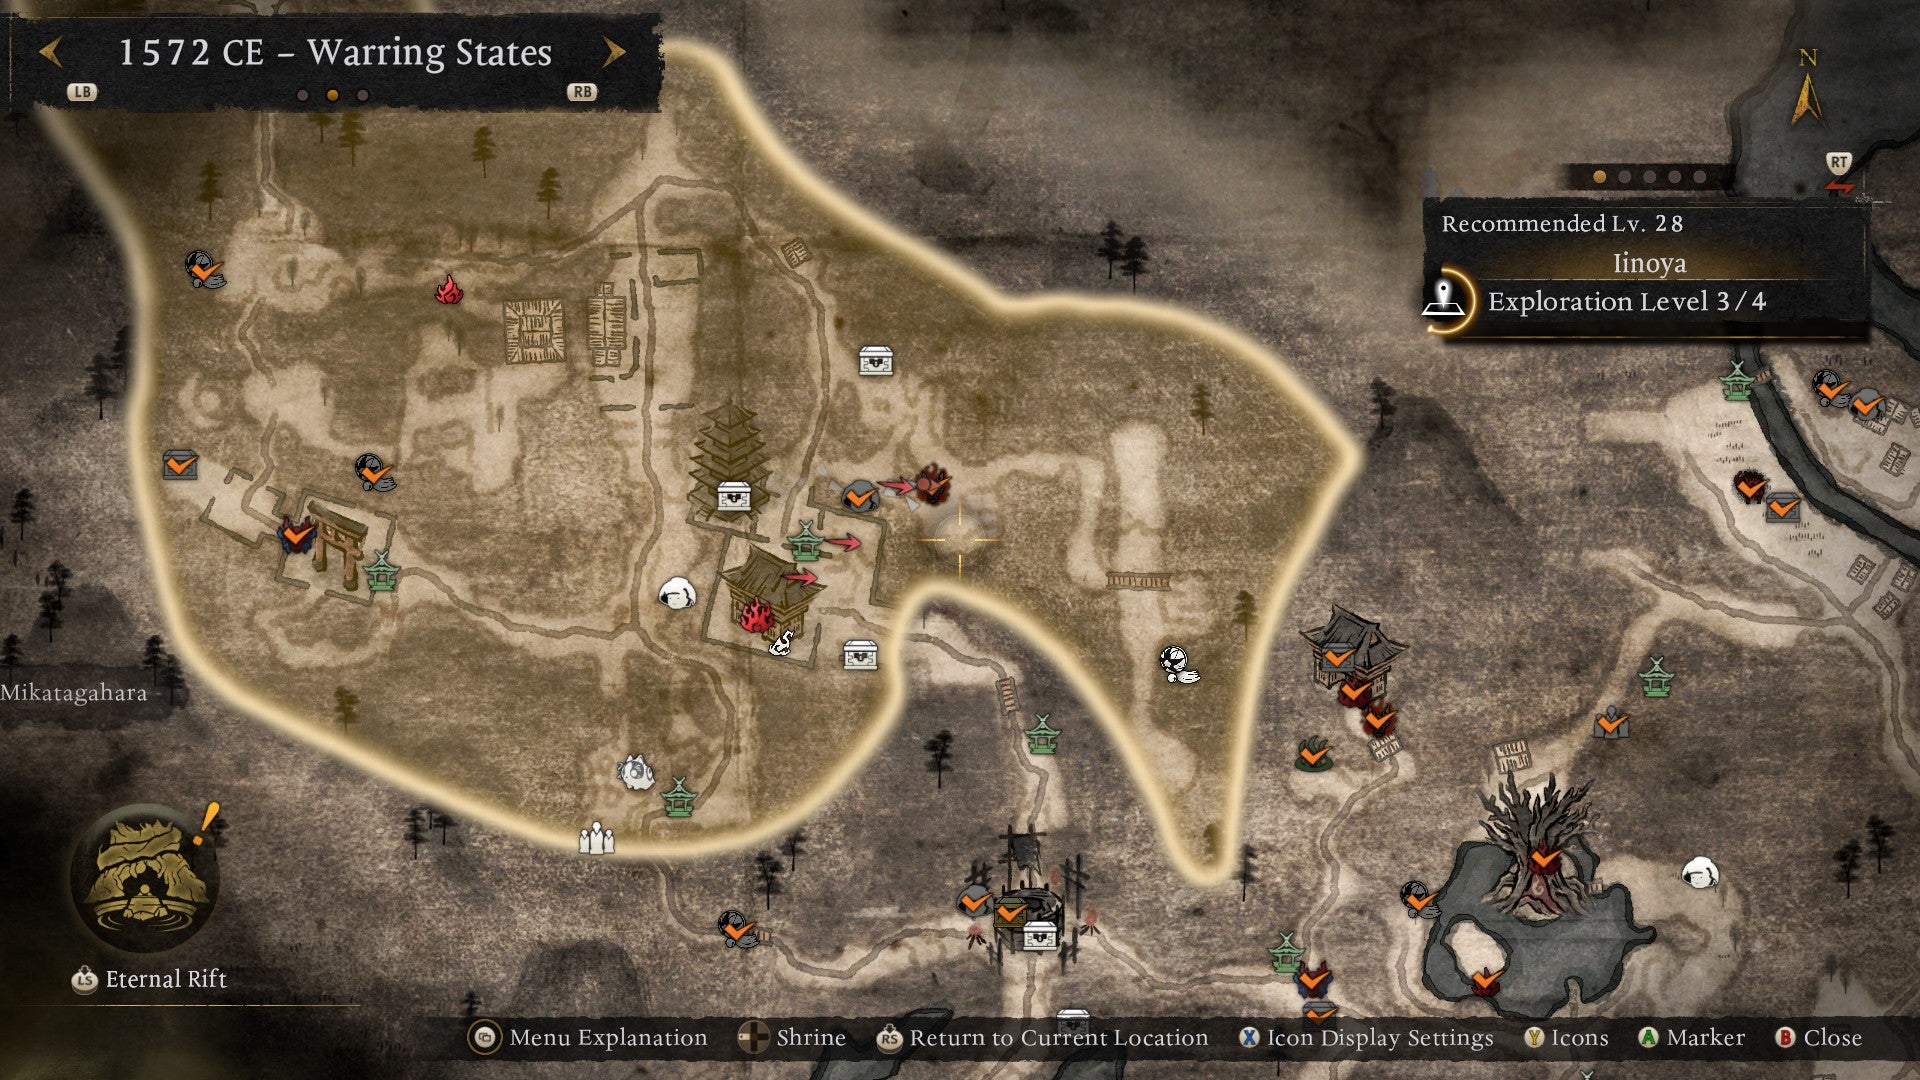
Nioh 3 also differs from its mission-based, linear predecessors in its now open world. As someone who finds the size of Elden Ring intimidating, I became worried once I cleared the tutorial segment, crested a hill, and the logo appeared over a vast valley that dared me to lose myself in its seemingly excessive intricacies. I was even more nervous when I opened my menu and was once again reminded of Assassin’s Creed, this time by a map that seemed destined to be plastered with a nonstop array of markers.
I’m relieved to report my first impressions were false. Not as big as Elden Ring’s (but still pretty big), Nioh 3’s open world uses gentle features to keep from overwhelming you. Each sector of the map comes with a Recommended Level, a decision that seems pulled from ARPGs and MMOs. (Don’t worry — you can ignore these recommendations if you’re skilled (or brave) enough to attempt a tougher area.) You also aren’t hit with hundreds of map markers and checklists from the getgo. Rather, as you move through an area and raise its Exploration Level, there’s a gradual rollout of icons on your map.


Even when a region’s Exploration Level is full, Nioh 3 still avoids most of the fat common in open worlds. Sidequests, called Myths, are spaced out, the Enemy Bases that you can clear (which once again feel extremely similar to Assassin’s Creed Shadows, which had the exact same mechanic) aren’t too grueling, and the bog-standard “collect X number of doodad” tasks are entertaining, because they revolve around chasing chonky cats called Scampusses and shooting fantastical flying otters known as Chijiko out of the sky. (If you’re reacting in horror, know that their bestiary entry mentions they like acting as target practice for humans. They’ll also always give you a cuddle after you zap ’em to the ground.)
Interspersed through the open world are fragments of the structure of the previous Niohs. Certain quests are instanced missions that can be replayed in co-op, which I didn’t get to test for this review, but I imagine may please anyone who played through Elden Ring with a buddy. Chief among these are deep dives into a hell-like landscape called the Crucible, created by that big Bongo Bongo-esque yokai in the sky. The Crucible missions offer something similar to the traditional soulslike levels that I typically prefer, though their confusing fire red landscape had me running in circles more often than not and dying in lava pits.
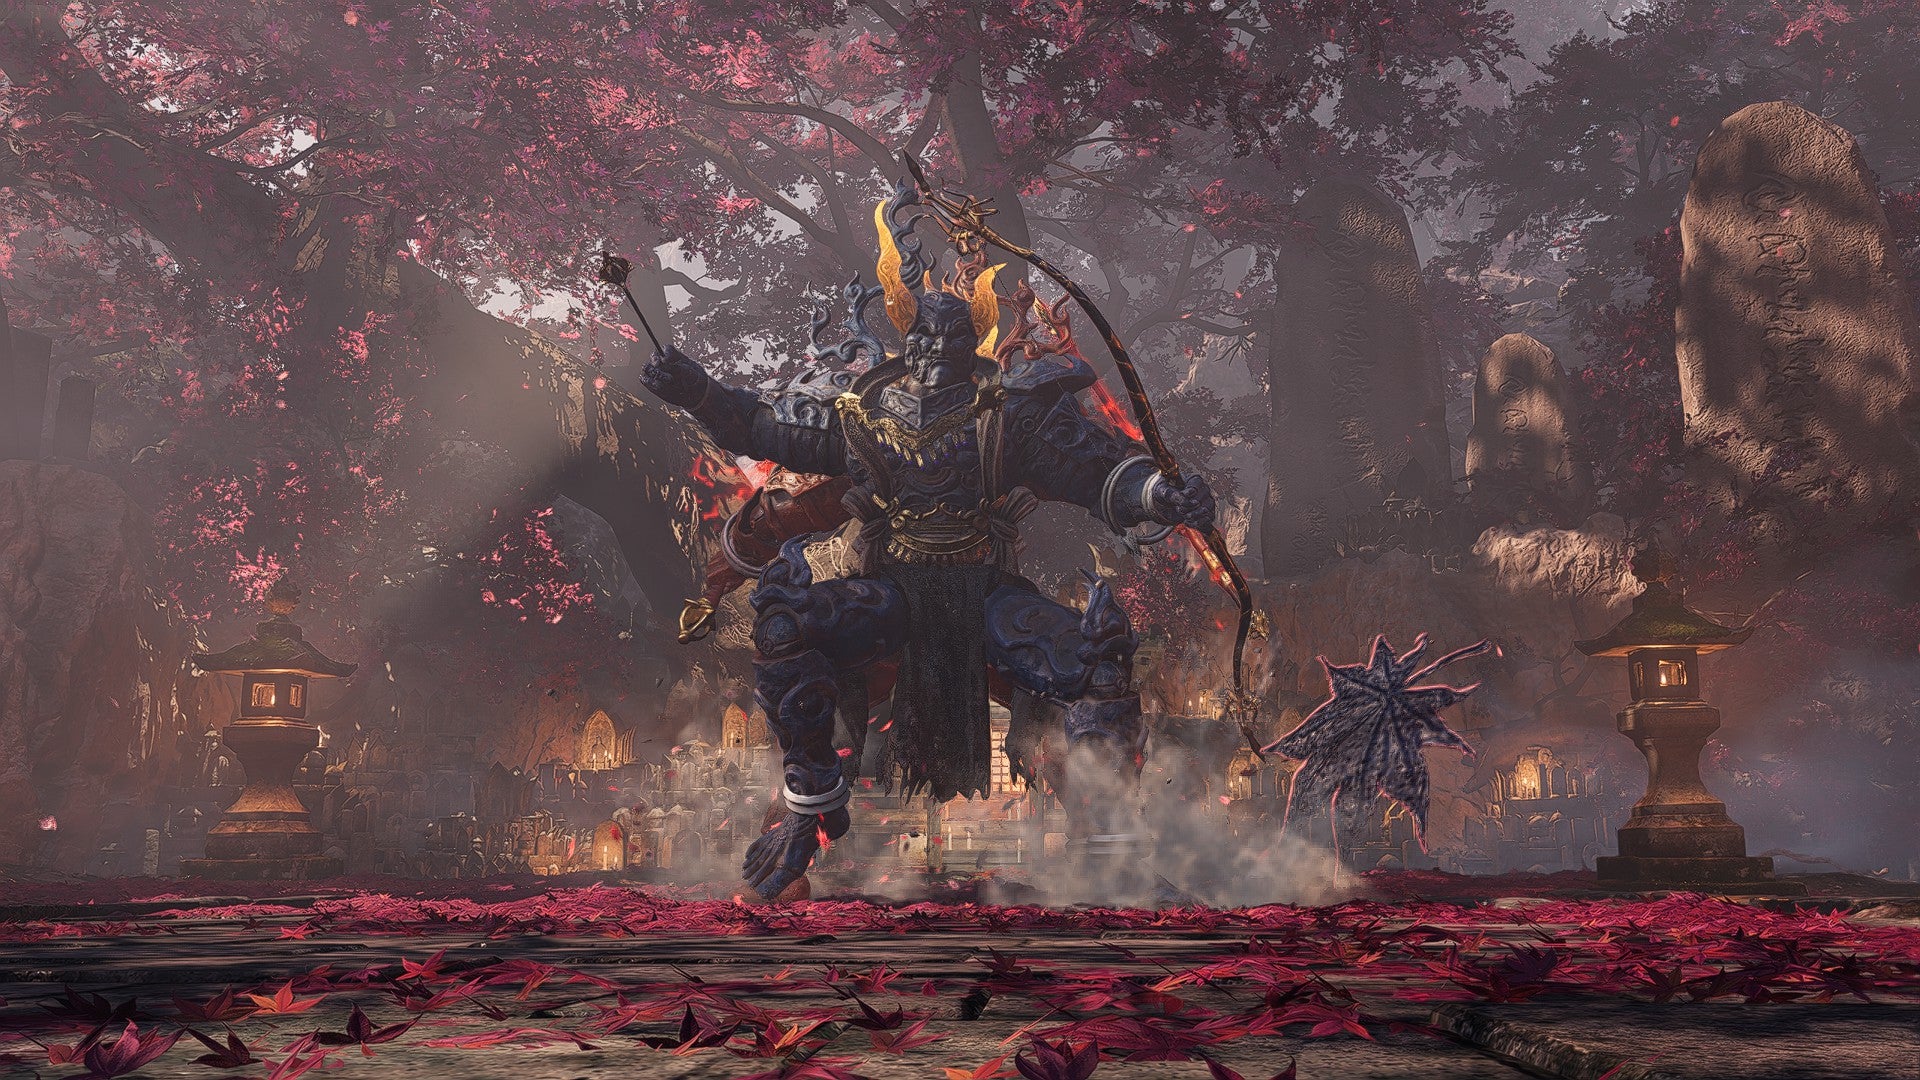

Speaking of death, on the difficulty scale, Nioh 3 is less punishing than its contemporaries except when it comes to certain bosses, one of which frustrated me so much that I slammed my controller into the piece of MDF that masquerades as my desk and left a hole in it, something I haven’t done since the NES days. But tales of the Bloodedge Demon plaguing demo players aside, none of these bosses are insurmountable, largely thanks to the freedom that switching between Ninja and Samurai offers.
There’s also a heckuva lot of gear, skills, and customisation to help you deal with the opponents in your path. Nioh’s loot and leveling system has always taken influence from ARPGs, and you will see slot machine-style drops of weapons and equipment colour-coded for rarity, with purple representing that sweet legendary gear. Diablo and Path of Exile fans will be right at home, and all everyone else needs to know is that even though there’s a blacksmith designed to help you improve loot, you really don’t need to fuss around with it in your first playthrough. Pick a few weapons to specialise in, equip the highest level gear you get, choose skills you like, rinse and repeat. You can transmog your look and run around in a not-leaving-much-to-the-imagination fundoshi if you so prefer, and respeccing stats is 100% free. I haven’t even touched on the Onmyo magic system, which returns from Nioh 2 and lets you collect the souls of yokai like Pocket Monsters to supplement your attacks.
Clearly, there’s enough stuff under the hood to entertain for a very long time. (The first era of the game took me 45 hours to clear.) The only quirks you might face are optimisation issues, which sadly cropped up for me more than once. I know that my RTX 3060 is getting on in years, but Nioh 3 chugged like molasses at times, even when I tweaked FPS and turned down a bunch of graphical flairs. Team Ninja has never succeeded at optimising their games for PC, even when they brought a bunch of decade-old Ninja Gaiden titles to Steam long ago, so there’s no surprise here.
Wonky performance aside, Nioh 3 is excellent. It’s not as elegant and practiced as FromSoftware’s efforts, and I daresay that the creativity present in recent Chinese soulslikes like Black Myth: Wukong isn’t matched here either. But it still warrants a Bestest Best, because what this game does do is deftly borrow from modern titles in a variety of genres, mingling their flavours into one delicate Miso soup. There’s a word in Okinawan - chanpurū - which means to mix together. That’s what Nioh 3 is - a chanpurū of influences that manages to entertain in a wonderful fashion. Even if you’re biased against samurai like I am, it’s still worth your while to fire this one up, tackle the Crucible, and cuddle a Chijiko or three.
This review is based on a review build of the game provided by the developer.
Find out how we conduct our reviews by reading our review policy .
Nioh 3
PS5 , PC
Rock Paper Shotgun is better when you sign in
Sign in and join us on our journey to discover strange and compelling PC games.

All 75 Arc Raiders Blueprints and where to get them
These areas have the highest chance of giving you Blueprints

Image credit:Rock Paper Shotgun/Embark Studios

Looking for more Arc Raiders Blueprints? It’s a special day when you find a Blueprint, as they’re among the most valuable items in Arc Raiders. If you find a Blueprint that you haven’t already found, then you must make sure you hold onto it at all costs, because Blueprints are the key to one of the most important and powerful systems of meta-progression in the game.
This guide aims to be the very best guide on Blueprints you can find, starting with a primer on what exactly they are and how they work in Arc Raiders, before delving into exactly where to get Blueprints and the very best farming spots for you to take in your search.
We’ll also go over how to get Blueprints from other unlikely activities, such as destroying Surveyors and completing specific quests. And you’ll also find the full list of all 75 Blueprints in Arc Raiders on this page (including the newest Blueprints added with the Cold Snap update , such as the Deadline Blueprint and Firework Box Blueprint), giving you all the information you need to expand your own crafting repertoire.
In this guide:
- What are Blueprints in Arc Raiders?
- Full Blueprint list: All crafting recipes
- Where to find Blueprints in Arc Raiders Blueprints obtained from quests Blueprints obtained from Trials Best Blueprint farming locations

What are Blueprints in Arc Raiders?
Blueprints in Arc Raiders are special items which, if you manage to extract with them, you can expend to permanently unlock a new crafting recipe in your Workshop. If you manage to extract from a raid with an Anvil Blueprint, for example, you can unlock the ability to craft your very own Anvil Pistol, as many times as you like (as long as you have the crafting materials).
To use a Blueprint, simply open your Inventory while in the lobby, then right-click on the Blueprint and click “Learn And Consume” . This will permanently unlock the recipe for that item in your Workshop. As of the Stella Montis update, there are allegedly 75 different Blueprints to unlock - although only 68 are confirmed to be in the game so far. You can see all the Blueprints you’ve found and unlocked by going to the Workshop menu, and hitting “R” to bring up the Blueprint screen.
It’s possible to find duplicates of past Blueprints you’ve already unlocked. If you find these, then you can either sell them, or - if you like to play with friends - you can take it into a match and gift it to your friend so they can unlock that recipe for themselves. Another option is to keep hold of them until the time comes to donate them to the Expedition.
Full Blueprint list: All crafting recipes
Below is the full list of all the Blueprints that are currently available to find in Arc Raiders, and the crafting recipe required for each item:
| Blueprint | Type | Recipe | Crafted At |
|---|---|---|---|
| Bettina | Weapon | 3x Advanced Mechanical Components 3x Heavy Gun Parts 3x Canister | Gunsmith 3 |
| Blue Light Stick | Quick Use | 3x Chemicals | Utility Station 1 |
| Aphelion | Weapon | 3x Magnetic Accelerator 3x Complex Gun Parts 1x Matriarch Reactor | Gunsmith 3 |
| Combat Mk. 3 (Flanking) | Augment | 2x Advanced Electrical Components 3x Processor | Gear Bench 3 |
| Combat Mk. 3 (Aggressive) | Augment | 2x Advanced Electrical Components 3x Processor | Gear Bench 3 |
| Complex Gun Parts | Material | 2x Light Gun Parts 2x Medium Gun Parts 2x Heavy Gun Parts | Refiner 3 |
| Fireworks Box | Quick Use | 1x Explosive Compound 3x Pop Trigger | Explosives Station 2 |
| Gas Mine | Mine | 4x Chemicals 2x Rubber Parts | Explosives Station 1 |
| Green Light Stick | Quick Use | 3x Chemicals | Utility Station 1 |
| Pulse Mine | Mine | 1x Crude Explosives 1x Wires | Explosives Station 1 |
| Seeker Grenade | Grenade | 1x Crude Explosives 2x ARC Alloy | Explosives Station 1 |
| Looting Mk. 3 (Survivor) | Augment | 2x Advanced Electrical Components 3x Processor | Gear Bench 3 |
| Angled Grip II | Mod | 2x Mechanical Components 3x Duct Tape | Gunsmith 2 |
| Angled Grip III | Mod | 2x Mod Components 5x Duct Tape | Gunsmith 3 |
| Hullcracker | Weapon | 1x Magnetic Accelerator 3x Heavy Gun Parts 1x Exodus Modules | Gunsmith 3 |
| Launcher Ammo | Ammo | 5x Metal Parts 1x Crude Explosives | Workbench 1 |
| Anvil | Weapon | 5x Mechanical Components 5x Simple Gun Parts | Gunsmith 2 |
| Anvil Splitter | Mod | 2x Mod Components 3x Processor | Gunsmith 3 |
| ??? | ??? | ??? | ??? |
| Barricade Kit | Quick Use | 1x Mechanical Components | Utility Station 2 |
| Blaze Grenade | Grenade | 1x Explosive Compound 2x Oil | Explosives Station 3 |
| Bobcat | Weapon | 3x Advanced Mechanical Components 3x Light Gun Parts | Gunsmith 3 |
| Osprey | Weapon | 2x Advanced Mechanical Components 3x Medium Gun Parts 7x Wires | Gunsmith 3 |
| Burletta | Weapon | 3x Mechanical Components 3x Simple Gun Parts | Gunsmith 1 |
| Compensator II | Mod | 2x Mechanical Components 4x Wires | Gunsmith 2 |
| Compensator III | Mod | 2x Mod Components 8x Wires | Gunsmith 3 |
| Defibrillator | Quick Use | 9x Plastic Parts 1x Moss | Medical Lab 2 |
| ??? | ??? | ??? | ??? |
| Equalizer | Weapon | 3x Magnetic Accelerator 3x Complex Gun Parts 1x Queen Reactor | Gunsmith 3 |
| Extended Barrel | Mod | 2x Mod Components 8x Wires | Gunsmith 3 |
| Extended Light Mag II | Mod | 2x Mechanical Components 3x Steel Spring | Gunsmith 2 |
| Extended Light Mag III | Mod | 2x Mod Components 5x Steel Spring | Gunsmith 3 |
| Extended Medium Mag II | Mod | 2x Mechanical Components 3x Steel Spring | Gunsmith 2 |
| Extended Medium Mag III | Mod | 2x Mod Components 5x Steel Spring | Gunsmith 3 |
| Extended Shotgun Mag II | Mod | 2x Mechanical Components 3x Steel Spring | Gunsmith 2 |
| Extended Shotgun Mag III | Mod | 2x Mod Components 5x Steel Spring | Gunsmith 3 |
| Remote Raider Flare | Quick Use | 2x Chemicals 4x Rubber Parts | Utility Station 1 |
| Heavy Gun Parts | Material | 4x Simple Gun Parts | Refiner 2 |
| Venator | Weapon | 2x Advanced Mechanical Components 3x Medium Gun Parts 5x Magnet | Gunsmith 3 |
| Il Toro | Weapon | 5x Mechanical Components 6x Simple Gun Parts | Gunsmith 1 |
| Jolt Mine | Mine | 1x Electrical Components 1x Battery | Explosives Station 2 |
| Explosive Mine | Mine | 1x Explosive Compound 1x Sensors | Explosives Station 3 |
| Jupiter | Weapon | 3x Magnetic Accelerator 3x Complex Gun Parts 1x Queen Reactor | Gunsmith 3 |
| Light Gun Parts | Material | 4x Simple Gun Parts | Refiner 2 |
| Lightweight Stock | Mod | 2x Mod Components 5x Duct Tape | Gunsmith 3 |
| Lure Grenade | Grenade | 1x Speaker Component 1x Electrical Components | Utility Station 2 |
| Medium Gun Parts | Material | 4x Simple Gun Parts | Refiner 2 |
| Torrente | Weapon | 2x Advanced Mechanical Components 3x Medium Gun Parts 6x Steel Spring | Gunsmith 3 |
| Muzzle Brake II | Mod | 2x Mechanical Components 4x Wires | Gunsmith 2 |
| Muzzle Brake III | Mod | 2x Mod Components 8x Wires | Gunsmith 3 |
| Padded Stock | Mod | 2x Mod Components 5x Duct Tape | Gunsmith 3 |
| Shotgun Choke II | Mod | 2x Mechanical Components 4x Wires | Gunsmith 2 |
| Shotgun Choke III | Mod | 2x Mod Components 8x Wires | Gunsmith 3 |
| Shotgun Silencer | Mod | 2x Mod Components 8x Wires | Gunsmith 3 |
| Showstopper | Grenade | 1x Advanced Electrical Components 1x Voltage Converter | Explosives Station 3 |
| Silencer I | Mod | 2x Mechanical Components 4x Wires | Gunsmith 2 |
| Silencer II | Mod | 2x Mod Components 8x Wires | Gunsmith 3 |
| Snap Hook | Quick Use | 2x Power Rod 3x Rope 1x Exodus Modules | Utility Station 3 |
| Stable Stock II | Mod | 2x Mechanical Components 3x Duct Tape | Gunsmith 2 |
| Stable Stock III | Mod | 2x Mod Components 5x Duct Tape | Gunsmith 3 |
| Tagging Grenade | Grenade | 1x Electrical Components 1x Sensors | Utility Station 3 |
| Tempest | Weapon | 3x Advanced Mechanical Components 3x Medium Gun Parts 3x Canister | Gunsmith 3 |
| Trigger Nade | Grenade | 2x Crude Explosives 1x Processor | Explosives Station 2 |
| Vertical Grip II | Mod | 2x Mechanical Components 3x Duct Tape | Gunsmith 2 |
| Vertical Grip III | Mod | 2x Mod Components 5x Duct Tape | Gunsmith 3 |
| Vita Shot | Quick Use | 2x Antiseptic 1x Syringe | Medical Lab 3 |
| Vita Spray | Quick Use | 3x Antiseptic 1x Canister | Medical Lab 3 |
| Vulcano | Weapon | 1x Magnetic Accelerator 3x Heavy Gun Parts 1x Exodus Modules | Gunsmith 3 |
| Wolfpack | Grenade | 2x Explosive Compound 2x Sensors | Explosives Station 3 |
| Red Light Stick | Quick Use | 3x Chemicals | Utility Station 1 |
| Smoke Grenade | Grenade | 14x Chemicals 1x Canister | Utility Station 2 |
| Deadline | Mine | 3x Explosive Compound 2x ARC Circuitry | Explosives Station 3 |
| Trailblazer | Grenade | 1x Explosive Compound 1x Synthesized Fuel | Explosives Station 3 |
| Tactical Mk. 3 (Defensive) | Augment | 2x Advanced Electrical Components 3x Processor | Gear Bench 3 |
| Tactical Mk. 3 (Healing) | Augment | 2x Advanced Electrical Components 3x Processor | Gear Bench 3 |
| Yellow Light Stick | Quick Use | 3x Chemicals | Utility Station 1 |
Note: The missing Blueprints in this list likely have not actually been added to the game at the time of writing, because none of the playerbase has managed to find any of them. As they are added to the game, I will update this page with the most relevant information so you know exactly how to get all 75 Arc Raiders Blueprints.
Where to find Blueprints in Arc Raiders
Below is a list of all containers, modifiers, and events which maximise your chances of finding Blueprints:
- Certain quests reward you with specific Blueprints .
- Completing Trials has a high chance of offering Blueprints as rewards.
- Surveyors have a decent chance of dropping Blueprints on death.
- High loot value areas tend to have a greater chance of spawning Blueprints.
- Night Raids and Storms may increase rare Blueprint spawn chances in containers.
- Containers with higher numbers of items may have a higher tendency to spawn Blueprints. As a result, Blue Gate (which has many “large” containers containing multiple items) may give you a higher chance of spawning Blueprints.
- Raider containers (Raider Caches, Weapon Boxes, Medical Bags, Grenade Tubes) have increased Blueprint drop rates. As a result, the Uncovered Caches event gives you a high chance of finding Blueprints.
- Security Lockers have a higher than average chance of containing Blueprints.
- Certain Blueprints only seem to spawn under specific circumstances: Tempest Blueprint only spawns during Night Raid events. Vulcano Blueprint only spawns during Hidden Bunker events. Jupiter and Equaliser Blueprints only spawn during Harvester events.

Raider Caches, Weapon Boxes, and other raider-oriented container types have a good chance of offering Blueprints. |Image credit:Rock Paper Shotgun/Embark Studios
Blueprints have a very low chance of spawning in any container in Arc Raiders, around 1-2% on average. However, there is a higher chance of finding Blueprints in particular container types. Specifically, you can find more Blueprints in Raider containers and security lockers.
Beyond this, if you’re looking for Blueprints you should focus on regions of the map which are marked as having particularly high-value loot. Areas such as the Control Tower in Dam Battlegrounds, the Arrival and Departure Buildings in Spaceport, and Pilgrim’s Peak in Blue Gate all have a better-than-average chance of spawning Blueprints somewhere amongst all their containers. Night Raids and Electromagnetic Storm events also increase the drop chances of certain Blueprints .
In addition to these containers, you can often loot Blueprints from destroyed Surveyors - the largest of the rolling ball ARC. Surveyors are more commonly found on the later maps - Spaceport and Blue Gate - and if one spawns in your match, you’ll likely see it by the blue laser beam that it casts into the sky while “surveying”.
Surveyors are quite well-armoured and will very speedily run away from you once it notices you, but if you can take one down then make sure you loot all its parts for a chance of obtaining certain unusual Blueprints.
Blueprints obtained from quests
One way in which you can get Blueprints is by completing certain quests for the vendors in Speranza. Some quests will reward you with a specific item Blueprint upon completion, so as long as you work through all the quests in Arc Raiders, you are guaranteed those Blueprints.
Here is the full list of all Blueprints you can get from quest rewards:
- Trigger Nade Blueprint: Rewarded after completing “Sparks Fly”.
- Lure Grenade Blueprint: Rewarded after completing “Greasing Her Palms”.
- Burletta Blueprint: Rewarded after completing “Industrial Espionage”.
- Hullcracker Blueprint (and Launcher Ammo Blueprint): Rewarded after completing “The Major’s Footlocker”.
Alas, that’s only 4 Blueprints out of a total of 75 to unlock, so for the vast majority you will need to find them yourself during a raid. If you’re intent on farming Blueprints, then it’s best to equip yourself with cheap gear in case you lose it, but don’t use a free loadout because then you won’t get a safe pocket to stash any new Blueprint you find. No pain in Arc Raiders is sharper than failing to extract with a new Blueprint you’ve been after for a dozen hours already.

One of the best ways to get Blueprints is by hitting three stars on all five Trials every week. |Image credit:Rock Paper Shotgun/Embark Studios
Blueprints obtained from Trials
One of the very best ways to get Blueprints is as rewards for completing Trials in Arc Raiders. Trials are unlocked from Level 15 onwards, and allow you to earn rewards by focusing on certain tasks over the course of several raids. For example, one Trial might task you with dealing damage to Hornets, while another might challenge you to loot Supply Drops.
Trials refresh on a weekly basis, with a new week bringing five new Trials. Each Trial can offer up to three rewards after passing certain score milestones, and it’s possible to receive very high level loot from these reward crates - including Blueprints. So if you want to unlock as many Blueprints as possible, you should make a point of completing as many Trials as possible each week.
Best Blueprint farming locations
The very best way to get Blueprints is to frequent specific areas of the maps which combine high-tier loot pools with the right types of containers to search. Here are my recommendations for where to find Blueprints on every map, so you can always keep the search going for new crafting recipes to unlock.

Image credit:Rock Paper Shotgun/Embark Studios
Dam Battlegrounds
The best places to farm Blueprints on Dam Battlegrounds are the Control Tower, Power Generation Complex, Ruby Residence, and Pale Apartments . The first two regions, despite only being marked on the map as mid-tier loot, contain a phenomenal number of containers to loot. The Control Tower can also contain a couple of high-tier Security Lockers - though of course, you’ll need to have unlocked the Security Breach skill at the end of the Survival tree.
There’s also a lot of reporting amongst the playerbase that the Residential areas in the top-left of the map - Pale Apartments and Ruby Residence - give you a comparatively strong chance of finding Blueprints. Considering their size, there’s a high density of containers to loot in both locations, and they also have the benefit of being fairly out of the way. So you’re more likely to have all the containers to yourself.
Buried City
The best Blueprint farming locations on Buried City are the Santa Maria Houses, Grandioso Apartments, Town Hall, and the various buildings of the New District . Grandioso Apartments has a lower number of containers than the rest, but a high chance of spawning weapon cases - which have good Blueprint drop rates. The others are high-tier loot areas, with plenty of lootable containers - including Security Lockers.
Spaceport
The best places to find Blueprints on Spaceport are the Arrival and Departure Buildings, as well as Control Tower A6 and the Launch Towers . All these areas are labelled as high-value loot regions, and many of them are also very handily connected to one another by the Spaceport wall, which you can use to quickly run from one area to the next. At the tops of most of these buildings you’ll find at least one Security Locker, so this is an excellent farming route for players looking to find Blueprints.
The downside to looting Blueprints on Spaceport is that all these areas are hotly contested, particularly in Duos and Squads. You’ll need to be very focused and fast in order to complete the full farming route.

Image credit:Rock Paper Shotgun/Embark Studios
Blue Gate
Blue Gate tends to have a good chance of dropping Blueprints, potentially because it generally has a high number of containers which can hold lots of items; so there’s a higher chance of a Blueprint spawning in each container. In my experience, the best Blueprint farming spots on Blue Gate are Pilgrim’s Peak, Raider’s Refuge, the Ancient Fort, and the Underground Complex beneath the Warehouse .
All of these areas contain a wealth of containers to loot. Raider’s Refuge has less to loot, but the majority of the containers in and around the Refuge are raider containers, which have a high chance of containing Blueprints - particularly during major events.
Stella Montis
On the whole, Stella Montis seems to have a very low drop rate for Blueprints (though a high chance of dropping other high-tier loot). If you do want to try farming Blueprints on this map, the best places to find Blueprints in Stella Montis are Medical Research, Assembly Workshop, and the Business Center . These areas have the highest density of containers to loot on the map.
In addition to this, the Western Tunnel has a few different Security Lockers to loot, so while there’s very little to loot elsewhere in this area of the map, it’s worth hitting those Security Lockers if you spawn there at the start of a match.
That wraps up this primer on how to get all the Blueprints in Arc Raiders as quickly as possible. With the Expedition system constantly resetting a large number of players’ Blueprints, it’s more important than ever to have the most up-to-date information on where to find all these Blueprints.
While you’re here, be sure to check out our Arc Raiders best guns tier list , as well as our primers on the best skills to unlock and all the different Field Depot locations on every map.

ARC Raiders
PS5 , Xbox Series X/S , PC
Rock Paper Shotgun is better when you sign in
Sign in and join us on our journey to discover strange and compelling PC games.
