Nioh 3: Best weapons tier list
The best weapons for both Samurai and Ninja
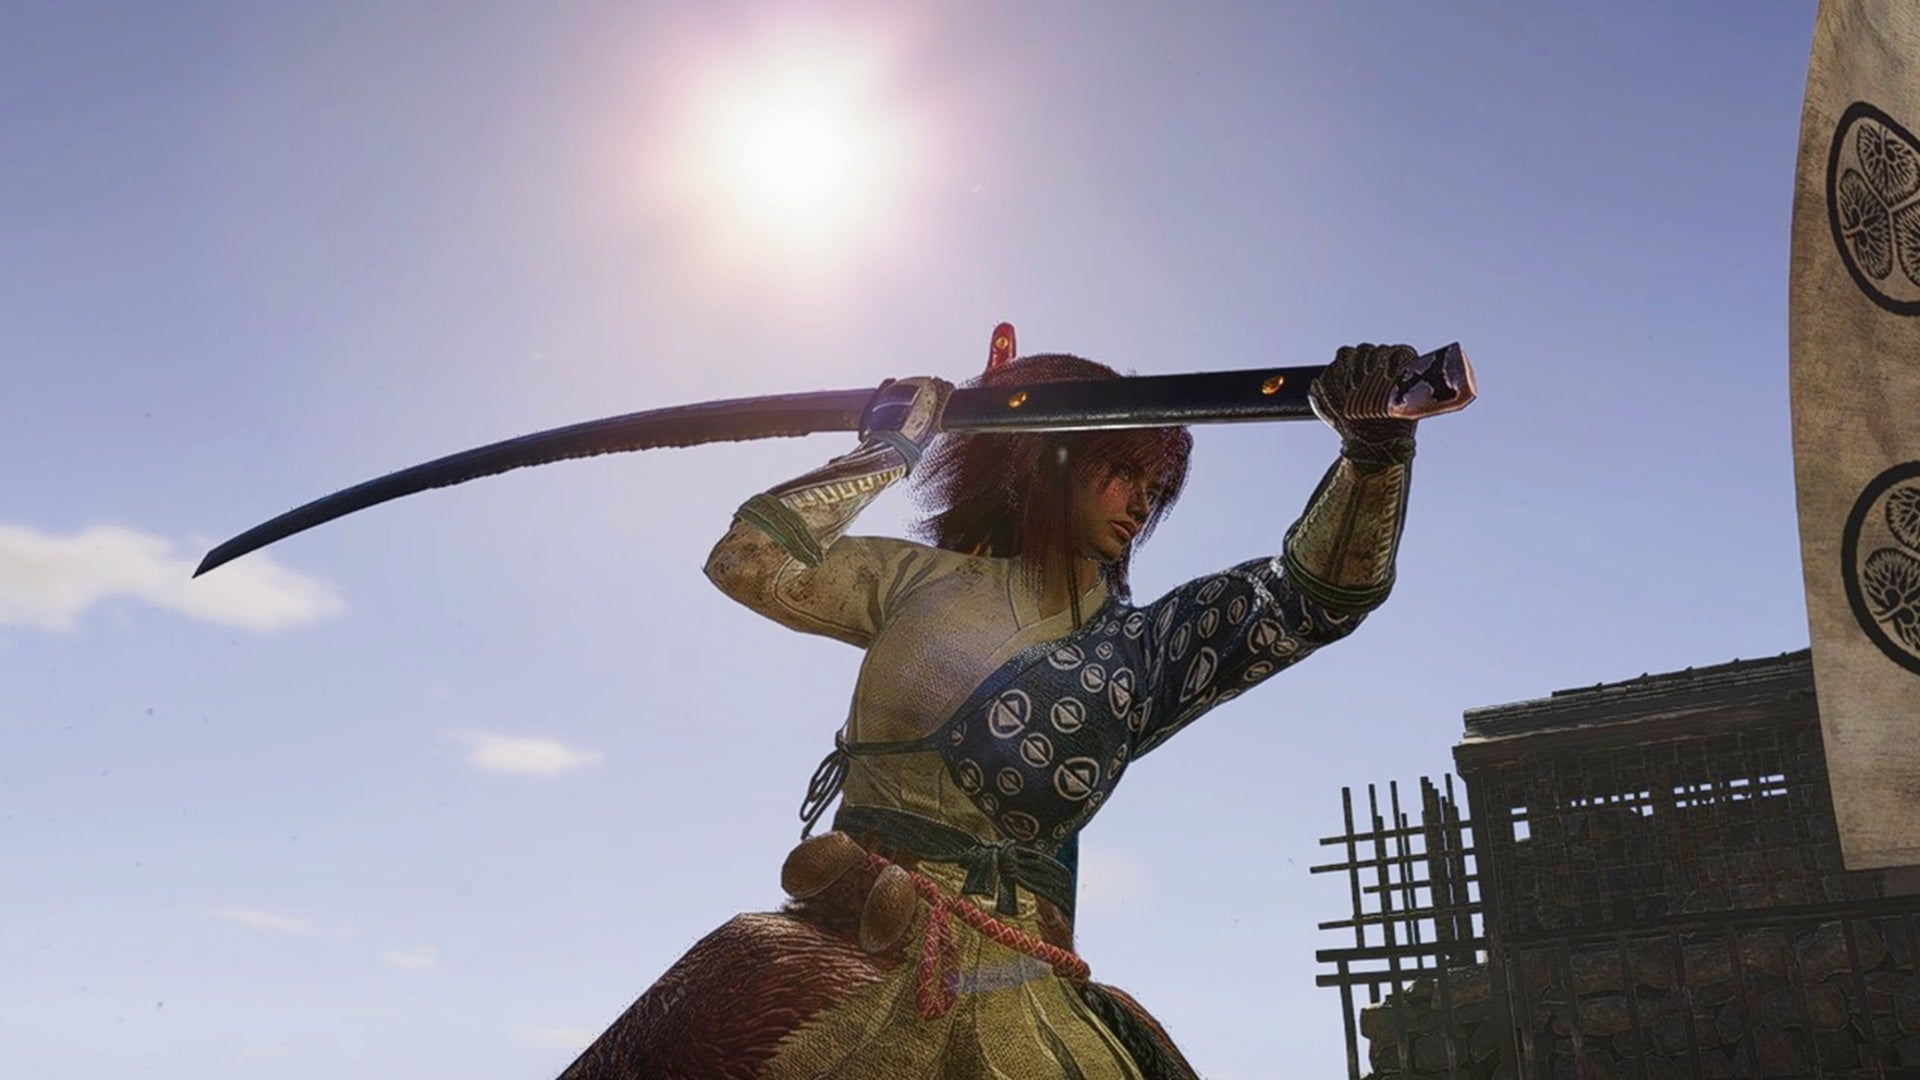
Image credit:Rock Paper Shotgun/Koei Tecmo

Looking for a Nioh 3 weapons tier list? There are 14 weapon types in Nioh 3 , evenly split with seven for Samurai and seven for Ninja. All of these weapons are dramatically different, from the quick fisticuffs of the Cestus to the hook and sickle action of the Kusarigama. Considering that Nioh is such a combo-heavy series, most beginners will probably do best picking two or three weapons they want to specialise in, and figuring out where to start is half the battle.
Even if you’re a longtime fan of this franchise, the inclusion of two playable styles in Nioh 3 has dramatically mixed things up. Returning weapons are now gated to either your Samurai or Ninja form, so you’ve got to be a Ninja if you want to use the Splitstaff, and only Samurai can use the Odachi, for instance. This also means that you’ll need to relearn certain weapons, since many of them function differently under the Ninja’s new skillset.
To help you on your road to martial mastery, this guide presents a tier list of all weapons in Nioh 3 for both the Samurai and Ninja, outlining my personal preferences based around how much I utilised each weapon in my playthrough, combined with thoughts on beginner friendliness and versatility. Lest you be annoyed that I’ve ranked your favourite low, keep in mind that any weapon can be S-Tier, as long as you’re willing to put in the time!
In this guide:
- Samurai weapon tier list
- Ninja weapon tier list

Samurai weapon tier list
Samurai weapons include old favourites from Nioh 1 & 2 along with the Cestus, a fresh inclusion. Utilising these in combat is all about balancing their Ki usage with multiple Stances, parrying as much as possible along the way.
| S-Tier | Axes, Switchglaives |
|---|---|
| A-Tier | Cestuses, Dual Swords, Spears |
| B-Tier | Odachi, Swords |
S-Tier
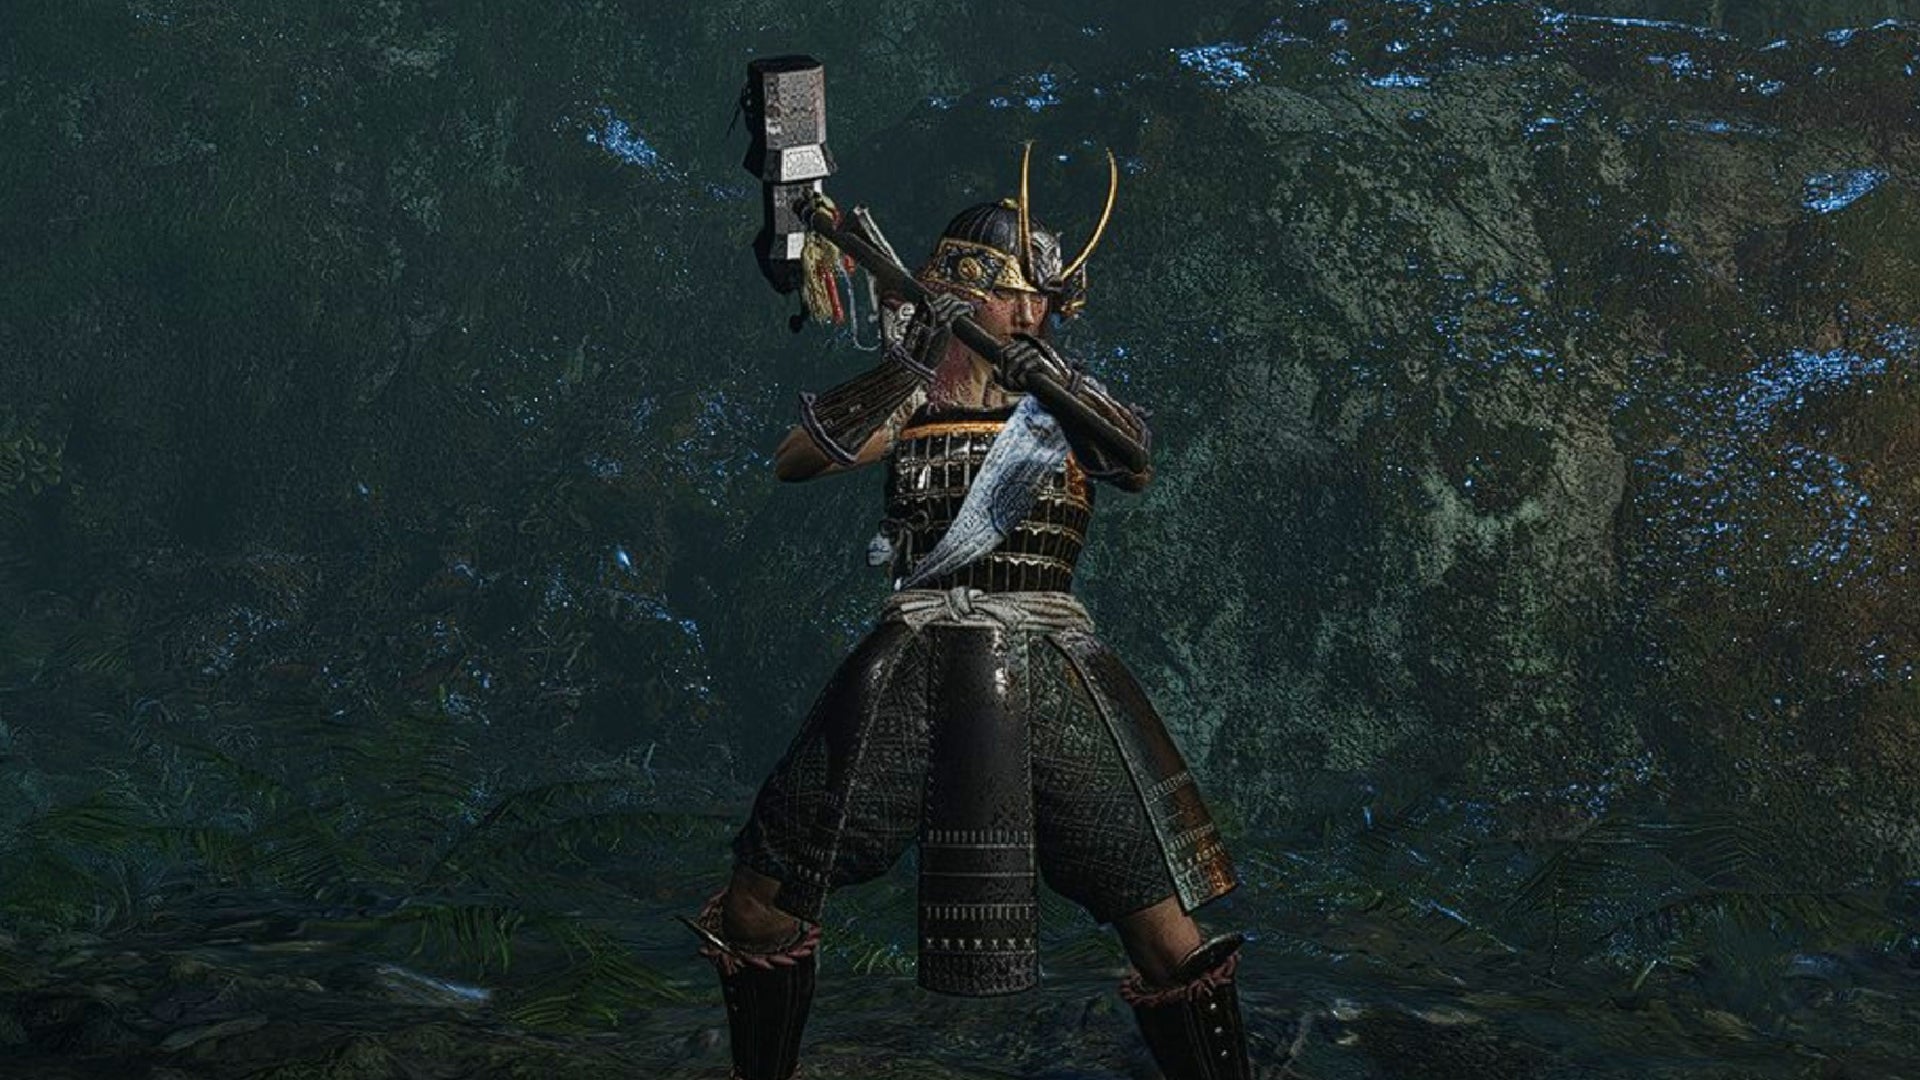
Get ready to smash with that Axe/Hammer/Rusty Hoe. |Image credit:Rock Paper Shotgun/Koei Tecmo
Axes
Axes (a category that also includes Hammers and even one implement comically called the Rusty Hoe) are pulverising powerhouses, as long as you manage to keep up the offense! Of course, all of that strength comes with a price, because these big boys are sloooow. At times, especially when you use Mad Spinner to move around like a top, it may also feel like you’re not entirely in control of your character. That said, I love Axes for the absolute raw power that Heavy Stance charged strikes can deliver. And if you want something more controlled, poking away with Low Stance will still whittle down an enemy’s health bar, so you get the best of both worlds.
- Stat: Constitution, Stamina, Strength
- Recommended Martial Arts: Mad Spinner, The Adamantine, Titanic Strength
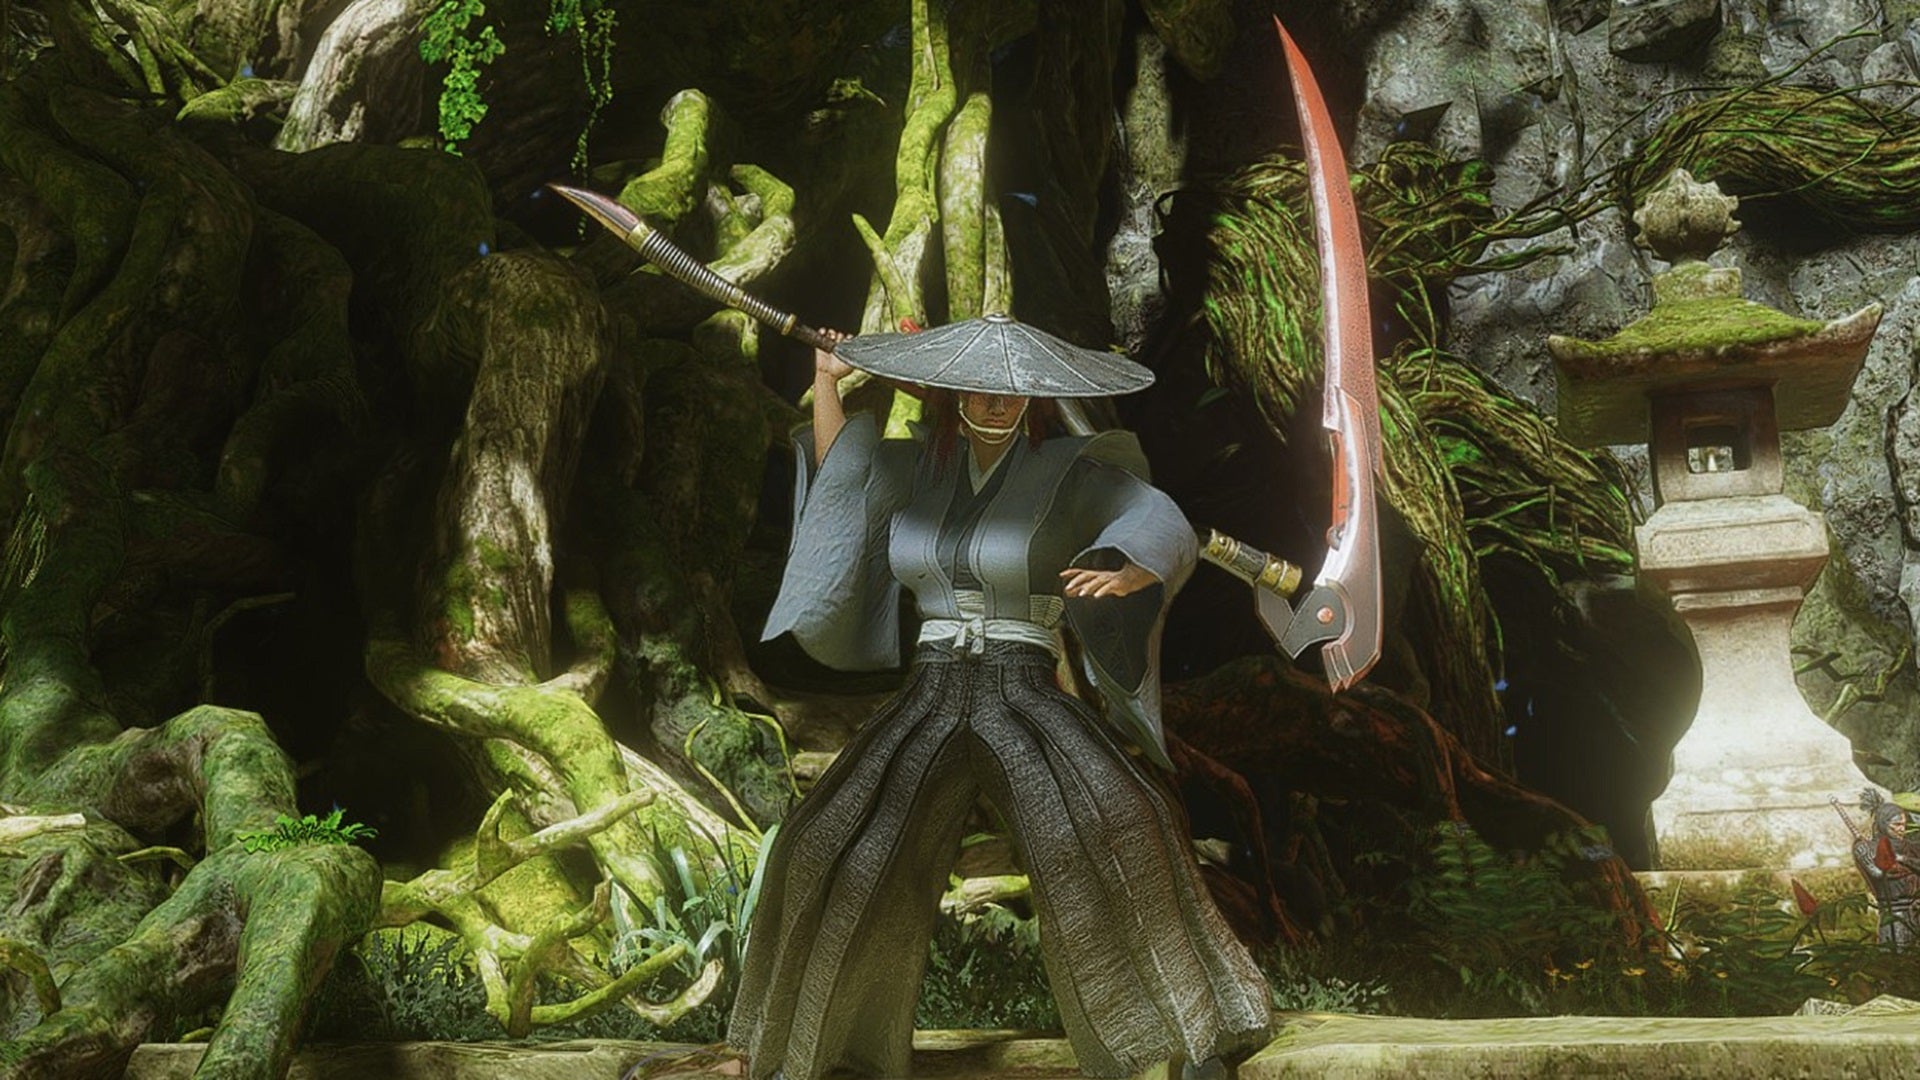
Complicated it may be, the Switchglaive is the perfect weapon for those with a mastery of Nioh’s Stances. |Image credit:Rock Paper Shotgun/Koei Tecmo
Switchglaives
The Switchglaive is probably the most complicated weapon in Nioh 3, as it has multiple forms, going from a glaive to a guillotine to a scythe. But those who study it can be unstoppable. As long as you can successfully pull off Stance switches mid-combo and change the Switchglaive’s forms on the fly, your combo potential and offensive output will be immense. Honestly, Switchglaives make S-tier for the potential they hold, but there’s no shame in using an easier weapon. If you aren’t an expert Stance switcher, drop Switchglaives down to B-Tier - or feel free to steer clear of them entirely.
- Stat: Skill, Intellect, Magic
- Recommended Martial Arts: Switch Stance: Blade, Switch Stance: Edge, Switch Stance: Retribution
A-Tier
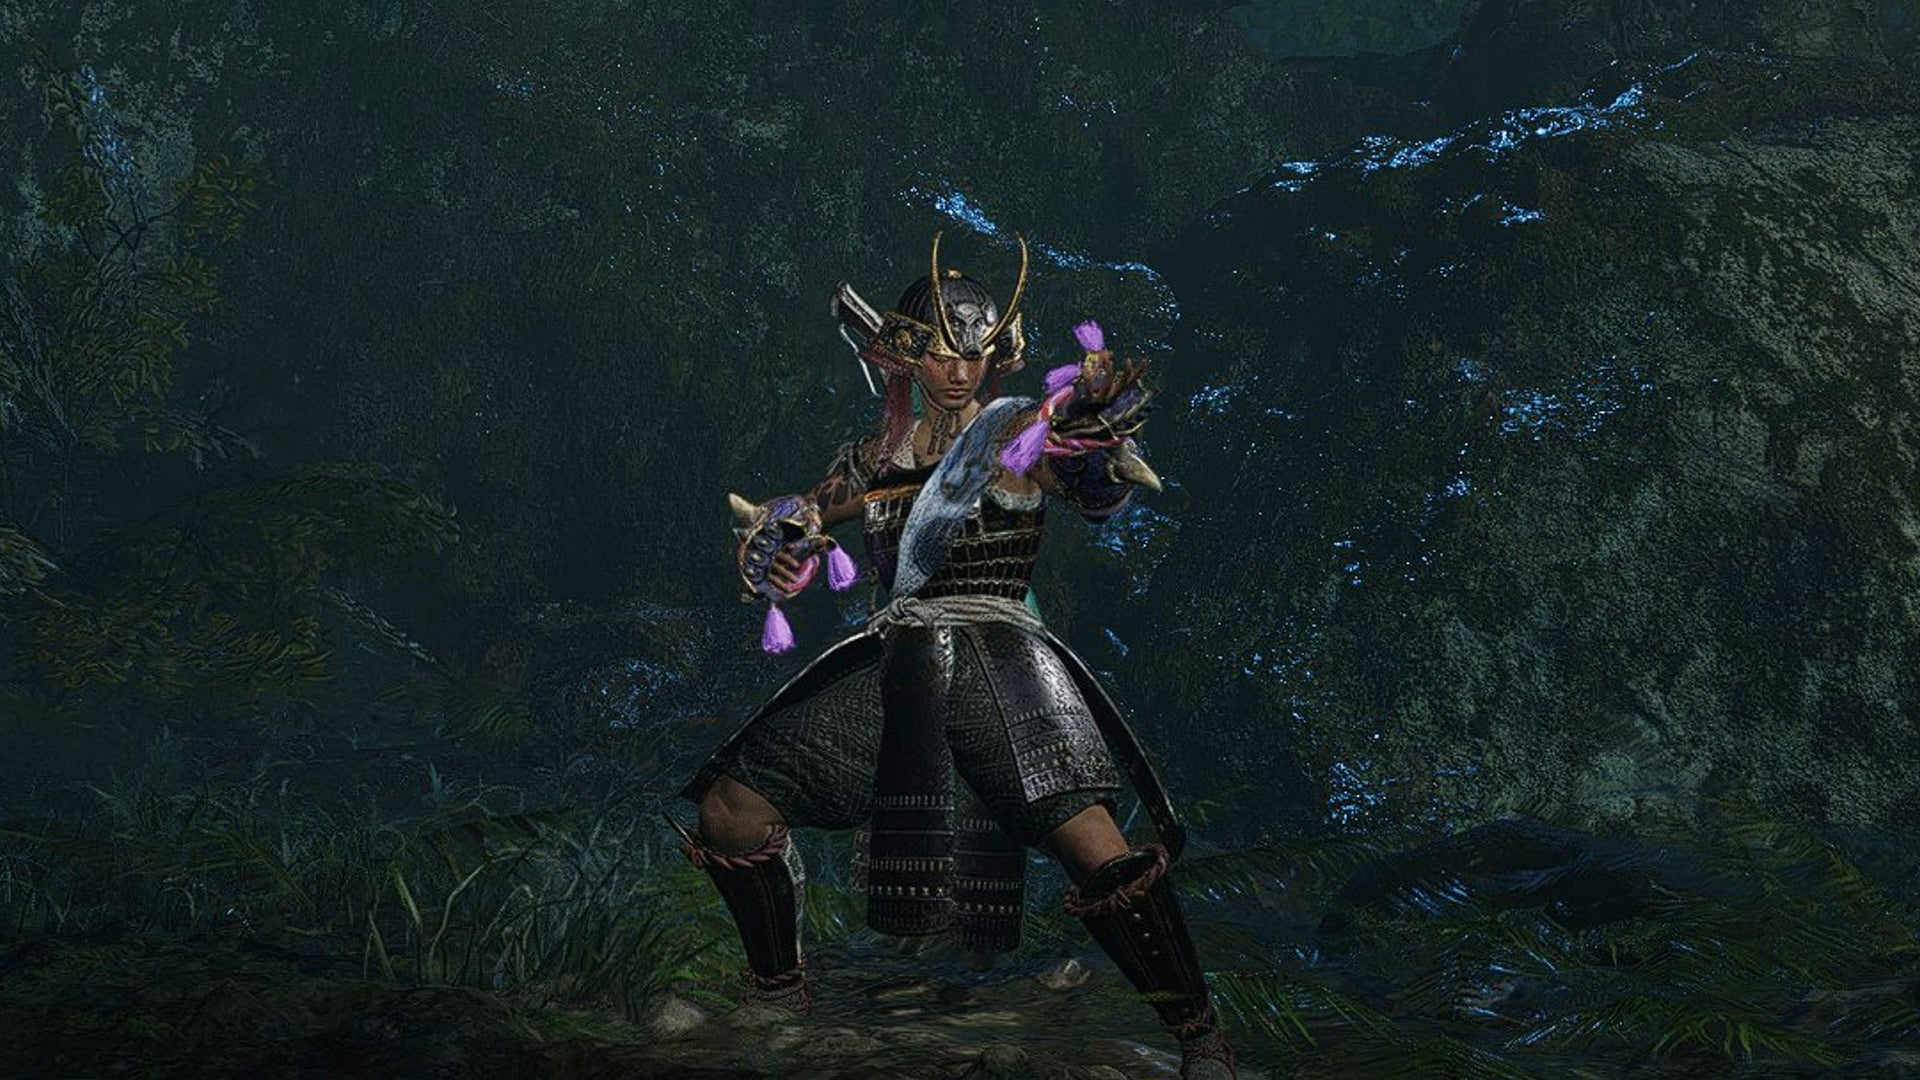
Wasn’t the Cestus a Roman weapon rather than a Japanese one? Ah well, punching is punching! |Image credit:Rock Paper Shotgun/Koei Tecmo
Cestuses
The Cestus is a welcome addition to the Samurai’s roster. It’s a fast-moving, heavy-hitting fist (and kicking) weapon, and you can stack multiple Martial Art combos via Unbroken for effective damage. Similar weapons (the Talons and Tonfas) are confined to the Ninja, so if you already use those, these armoured gloves become a fun way to link a vaguely similar style with your Samurai form, as long as you don’t mind the low range. Alas, loot drops for the Cestus feel pretty rare, making forging at the blacksmith the most reliable way to get ’em.
- Stat: Heart, Stamina, Strength
- Recommended Martial Arts: Stomp, Takedown II, Unbroken
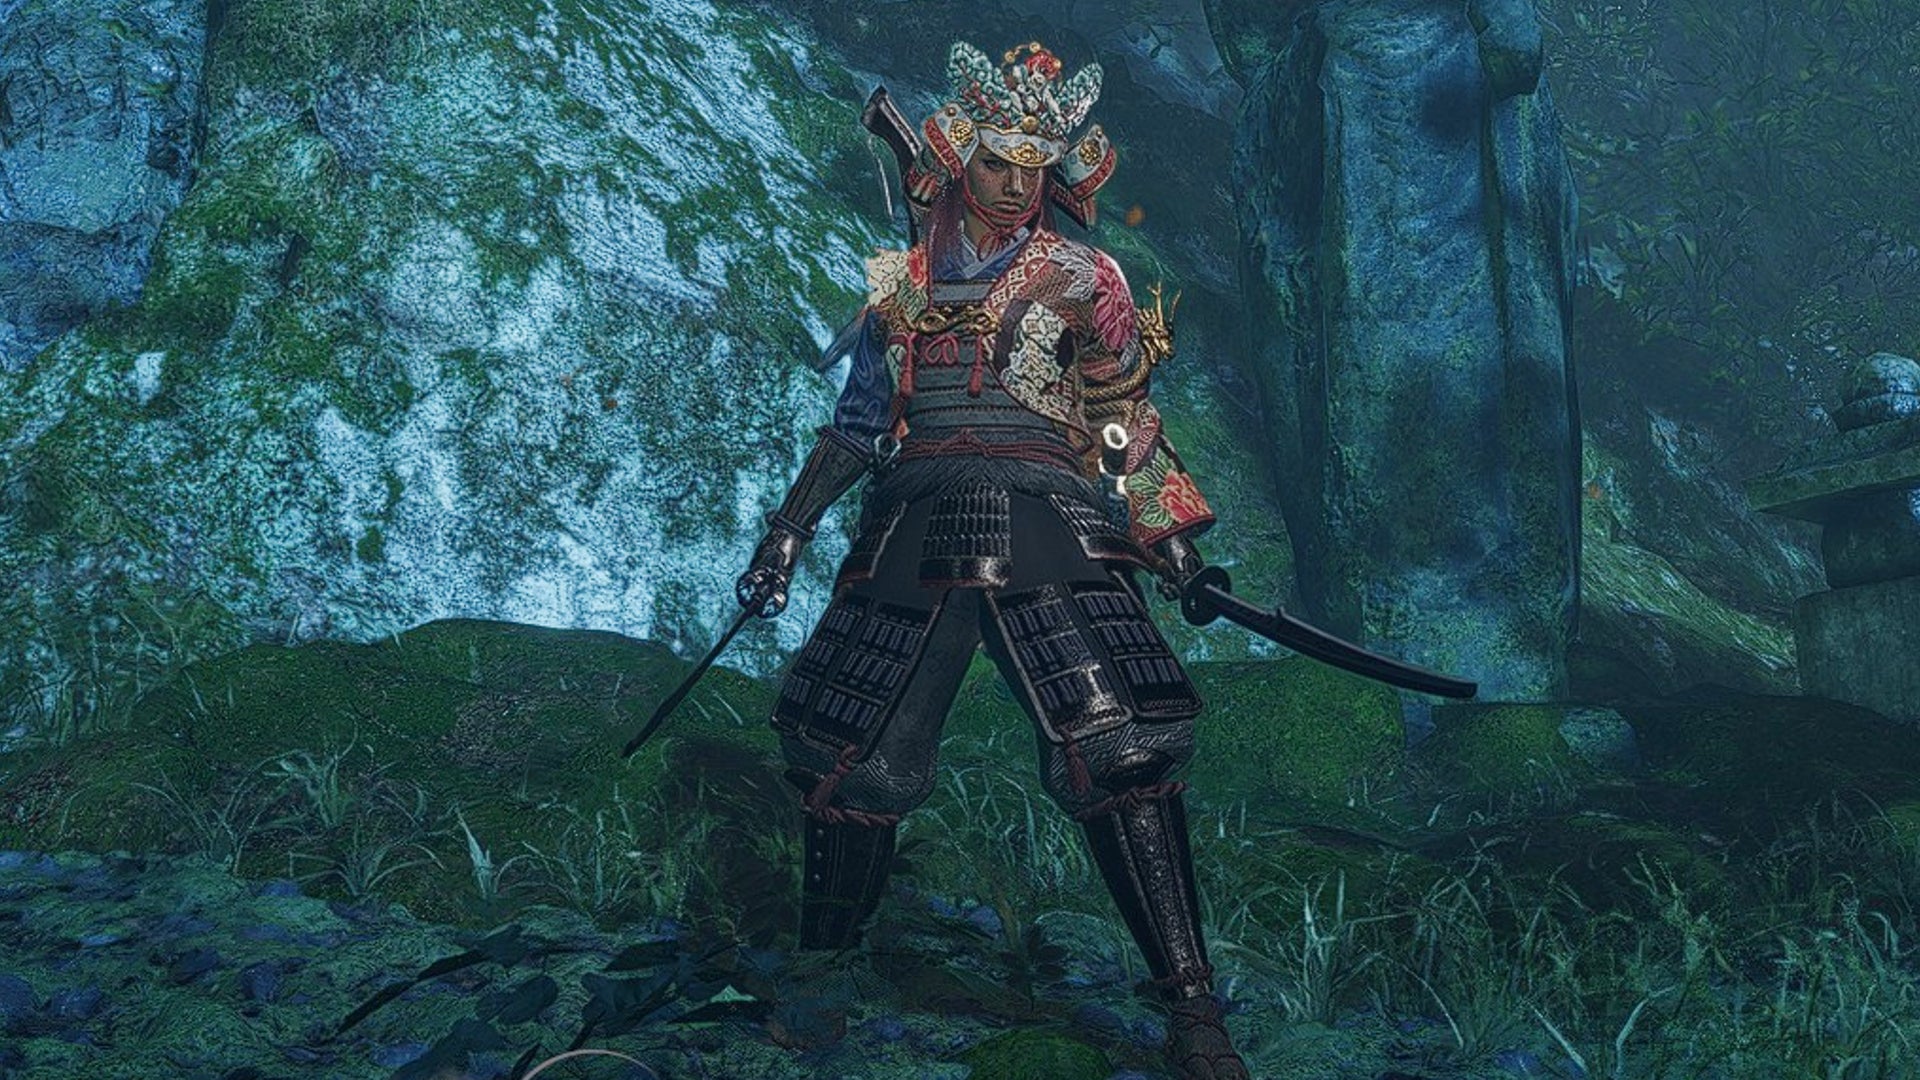
Samurai sure look awesome with two swords in hand. |Image credit:Rock Paper Shotgun/Koei Tecmo
Dual Swords
The Samurai’s Dual Swords slice and dice, and are a good in-between option for a player who wants something a little faster and more exciting than the regular Sword while avoiding the low range problems that the Cestus present. These twin katanas also offer up a variety of Martial Arts that let you build upon your blocking tactics and Deflect parries, and you can unleash a barrage of elemental attacks with practice. Plus, the Samurai looks absolutely cool holding both of these blades in all of their stances - which isn’t the case with every weapon! (Spear in the High Stance looks a little goofy, IMO.)
- Stat: Heart, Strength, Magic
- Recommended Martial Arts: Deflecting Cut, Moon Shadow, Water Sword
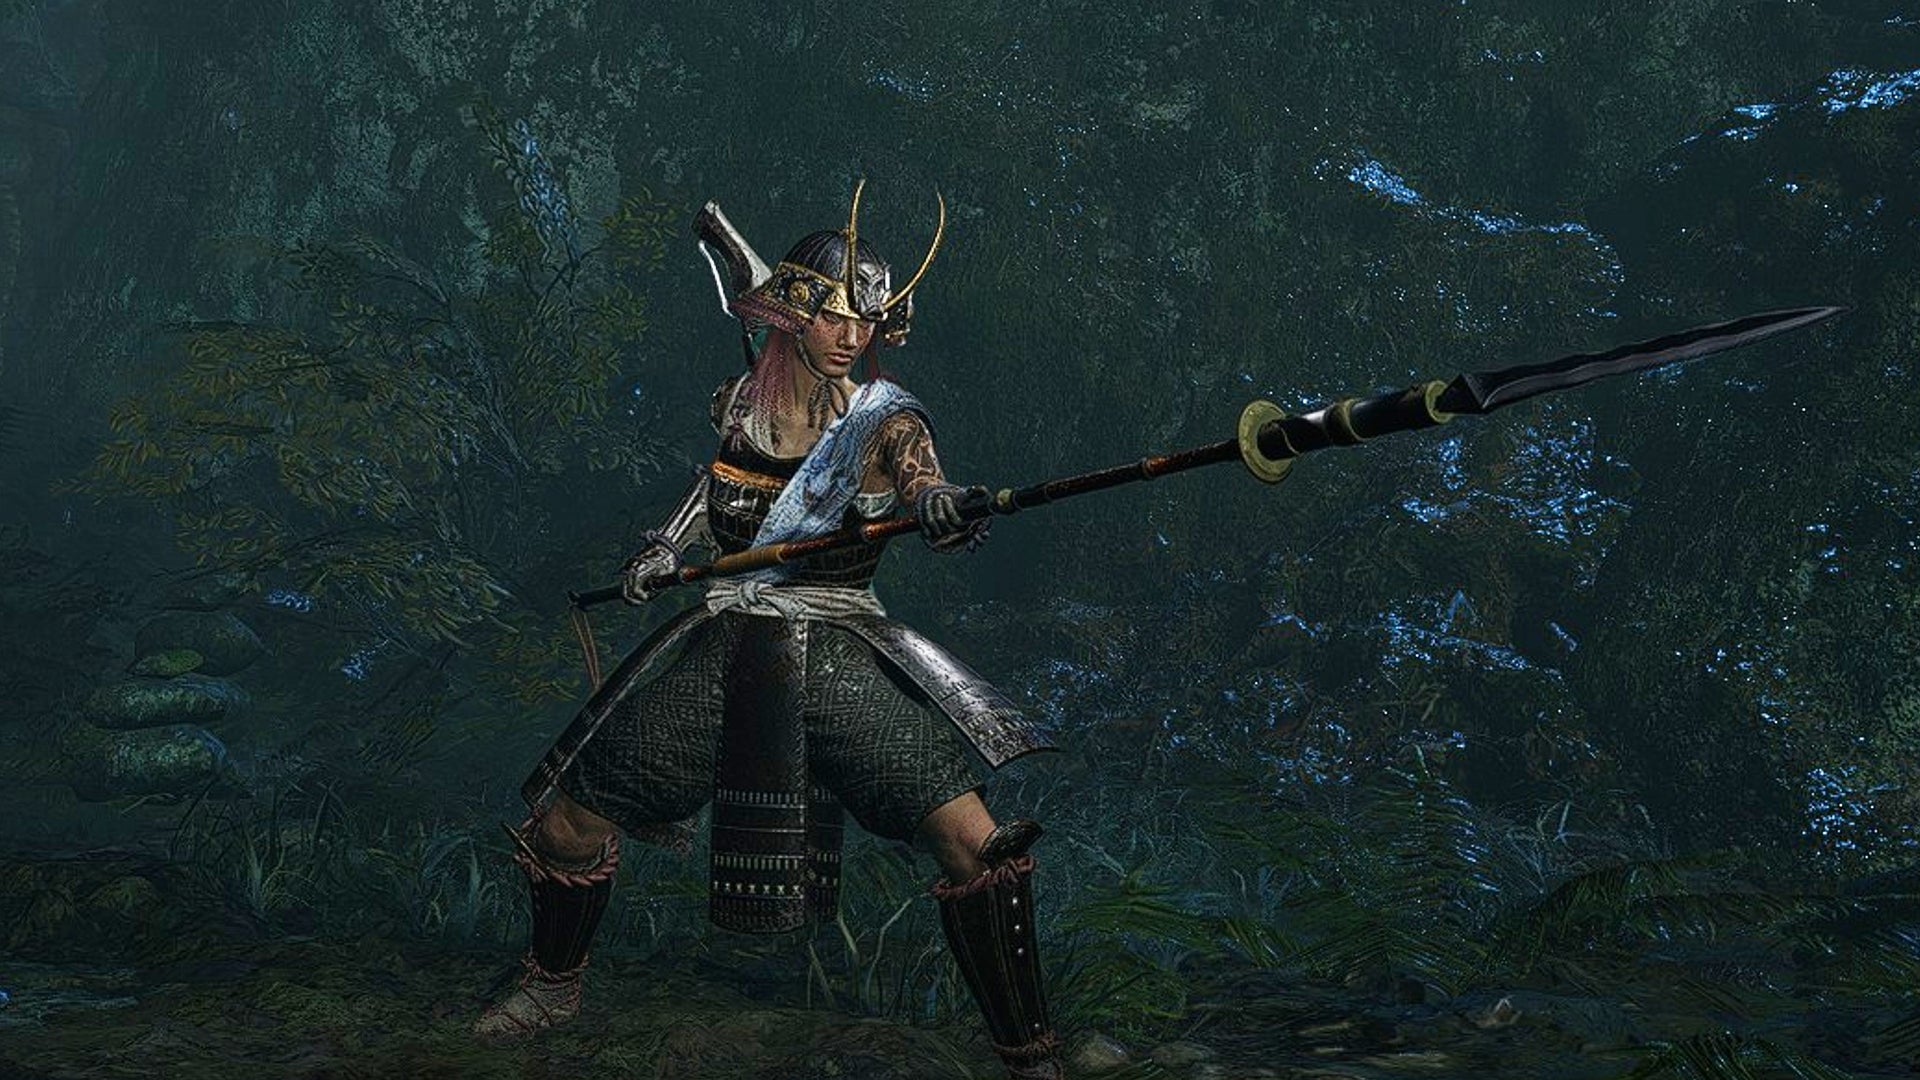
Fancy it might not be, but the Spear is a rock solid weapon choice. |Image credit:Rock Paper Shotgun/Koei Tecmo
Spears
If you want a weapon that’s consistent with high offensive output, pick up the Spear. This is a no-nonsense, non-flashy choice for anyone who wants a simple and clean piece of wood to skewer yokai on. With easy-to-chain combos that balance damage and speed, not to mention useful range, the Spear is worth a look for those who dig the offensive power of the Axe or Switchglaive, but would rather not spin all over the place or resort to constant Stance switches. Not the most exciting weapon perhaps, but a reliable one.
- Stat: Constitution, Heart, Skill
- Recommended Martial Arts: Chidori, Triple Threat, Windmill Wind
B-Tier
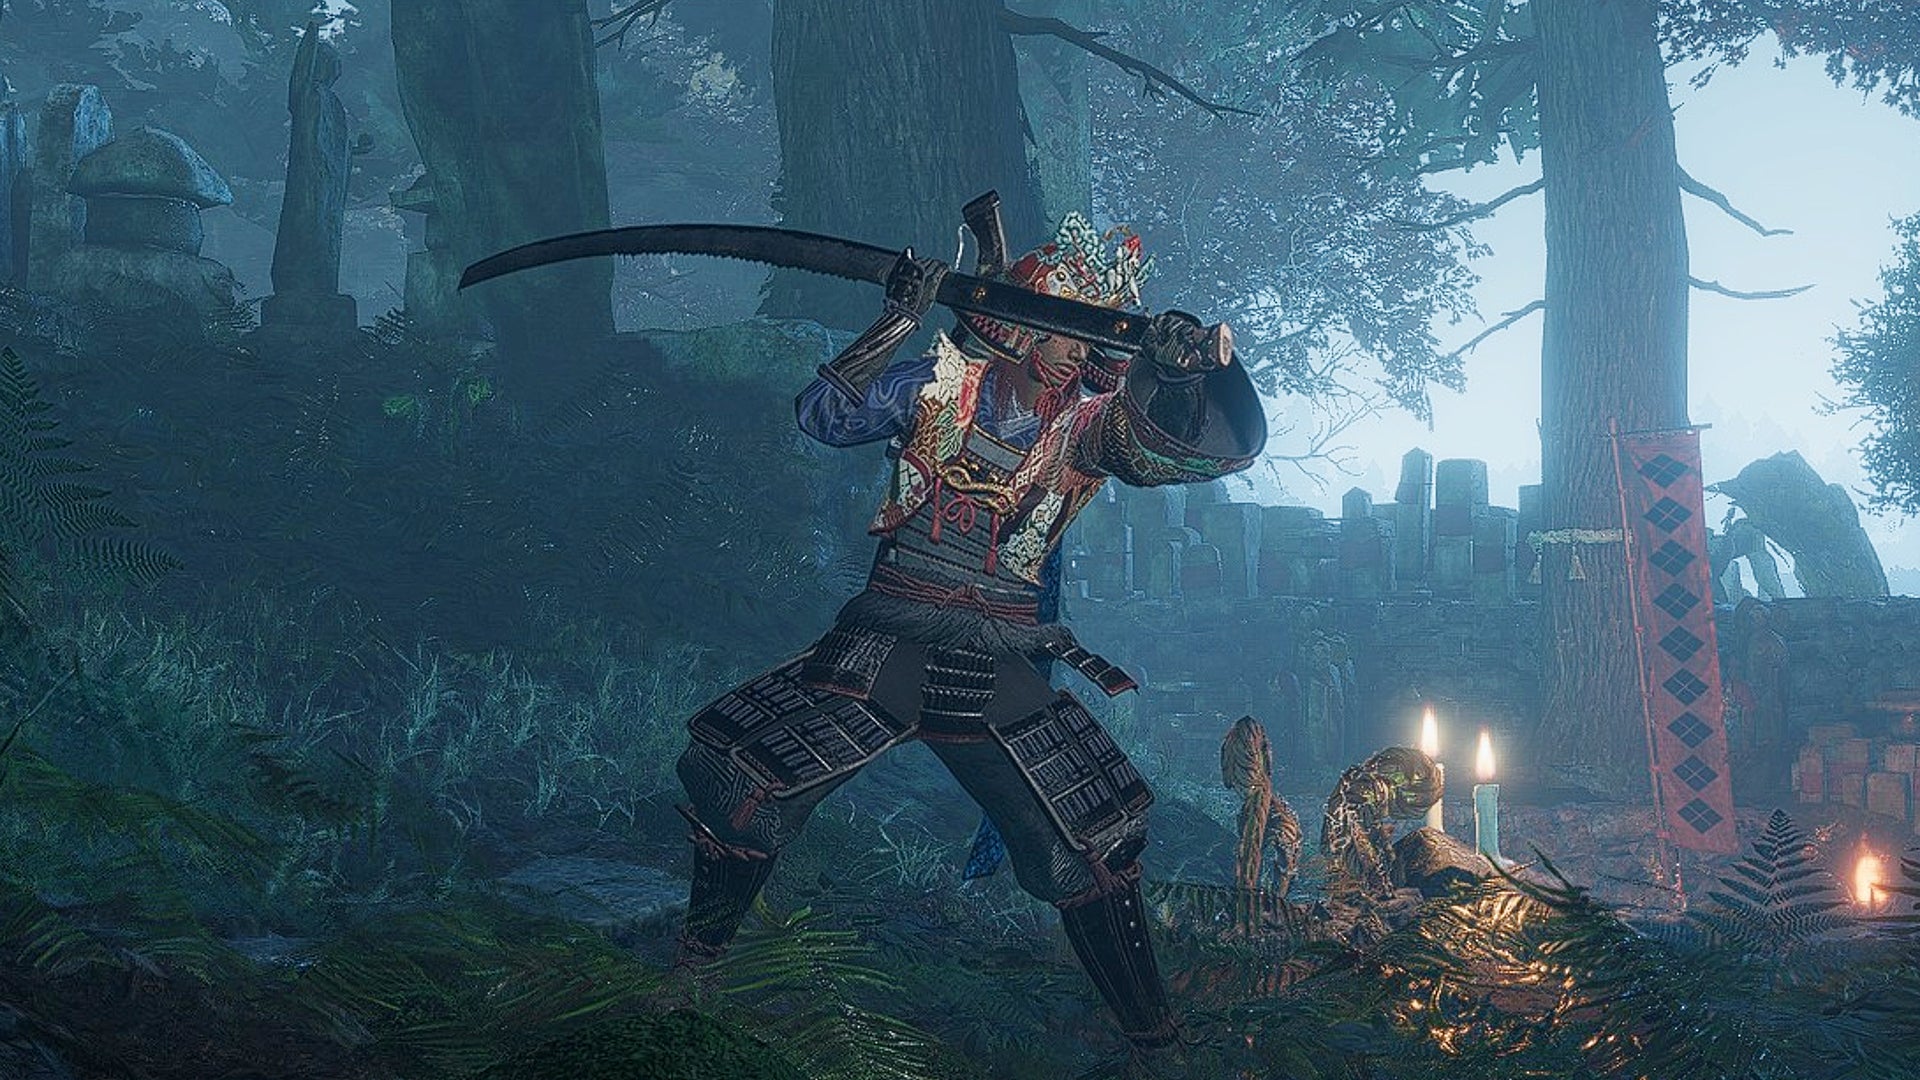
That’s one big knife, for sure. |Image credit:Rock Paper Shotgun/Koei Tecmo
Odachi
There’s a select group of Nioh players who swear by the Odachi, and while it’s not my preferred weapon by any means, you might be one of them. This huge blade can carve off chunks from any boss’ health bar and is excellent at crowd control. It’s slow, and in my eyes it isn’t as consistent as the Spear nor as strong as the Axe to make up for this slowness. Your mileage may vary, however, especially if you excel at poking attacks with Low Stance and can pull off a quick switch into a High Stance charged strike.
- Stat: Stamina, Strength, Magic
- Recommended Martial Arts: Bolting Boar, Clarity, Severing Blade
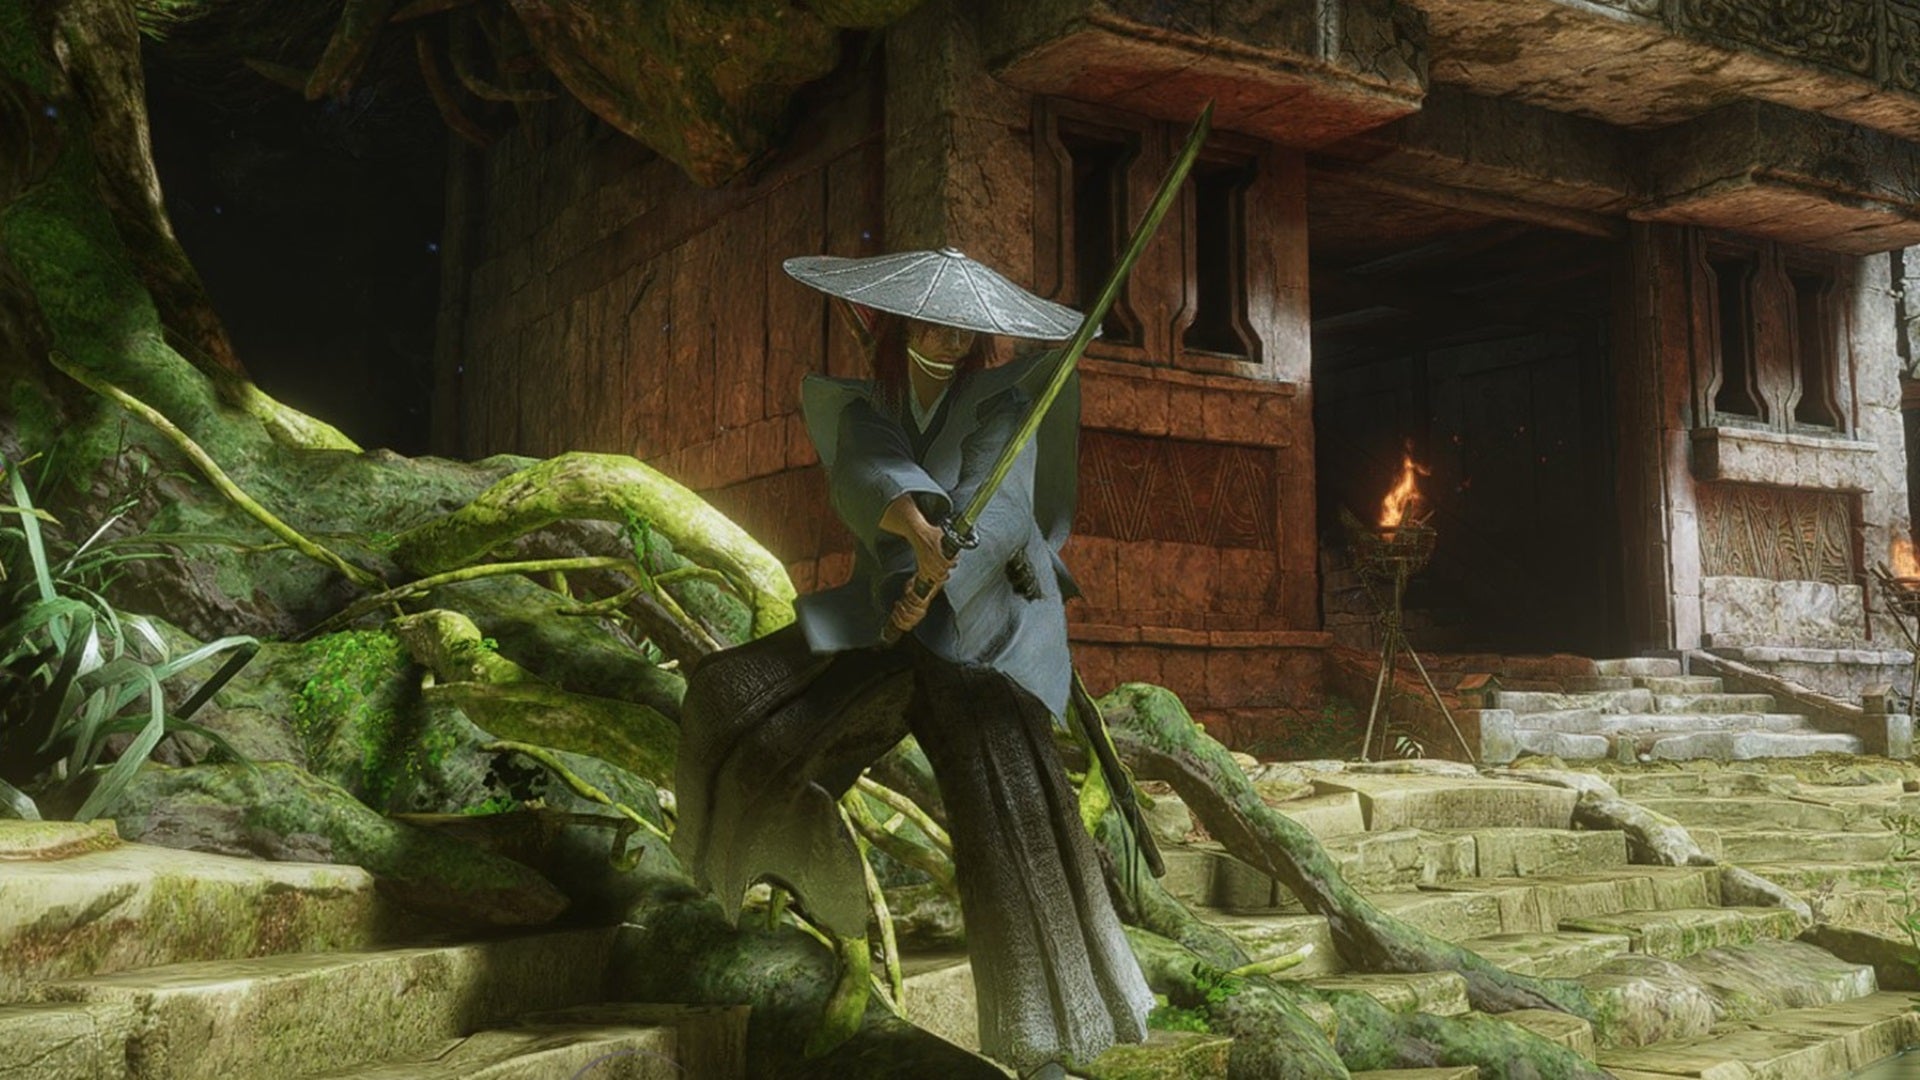
It’s a katana - simple to learn, pretty hard to master. |Image credit:Rock Paper Shotgun/Koei Tecmo
Swords
The Sword serves as your Samurai’s starting weapon, and many Nioh fans have speculated that Team Ninja loves this seemingly basic katana, since it arguably offers the most versatility and balance of your entire kit. I still prefer the other weapons, but if you’re a beginner to Nioh’s combo-heavy gameplay, the Sword serves a useful purpose in teaching you how to link together attacks while Deflecting and fitting in your Ki Pulses. As far as Stance switches go, the Sword also boasts the most straightforwardness and consistency between all three Stances. Just don’t expect anything too over-the-top.
- Stat: Heart, Strength, Intellect
- Recommended Martial Arts: Backwave, Iai Quickdraw, Sword of Salvation
Ninja weapon tier list
Ninja weapons all tend to be swifter than their Samurai counterparts, and are designed to complement a shinobi’s Ninjutsu tactics or endless array of projectiles. For better or for worse, Nioh veterans will find that many of their old go-tos have been confined solely to the Ninja playstyle and feel a little different.
| S-Tier | Talons, Tonfa |
|---|---|
| A-Tier | Dual Ninja Swords, Hatchets, Ninja Swords |
| B-Tier | Kusarigama, Splitstaves |
S-Tier
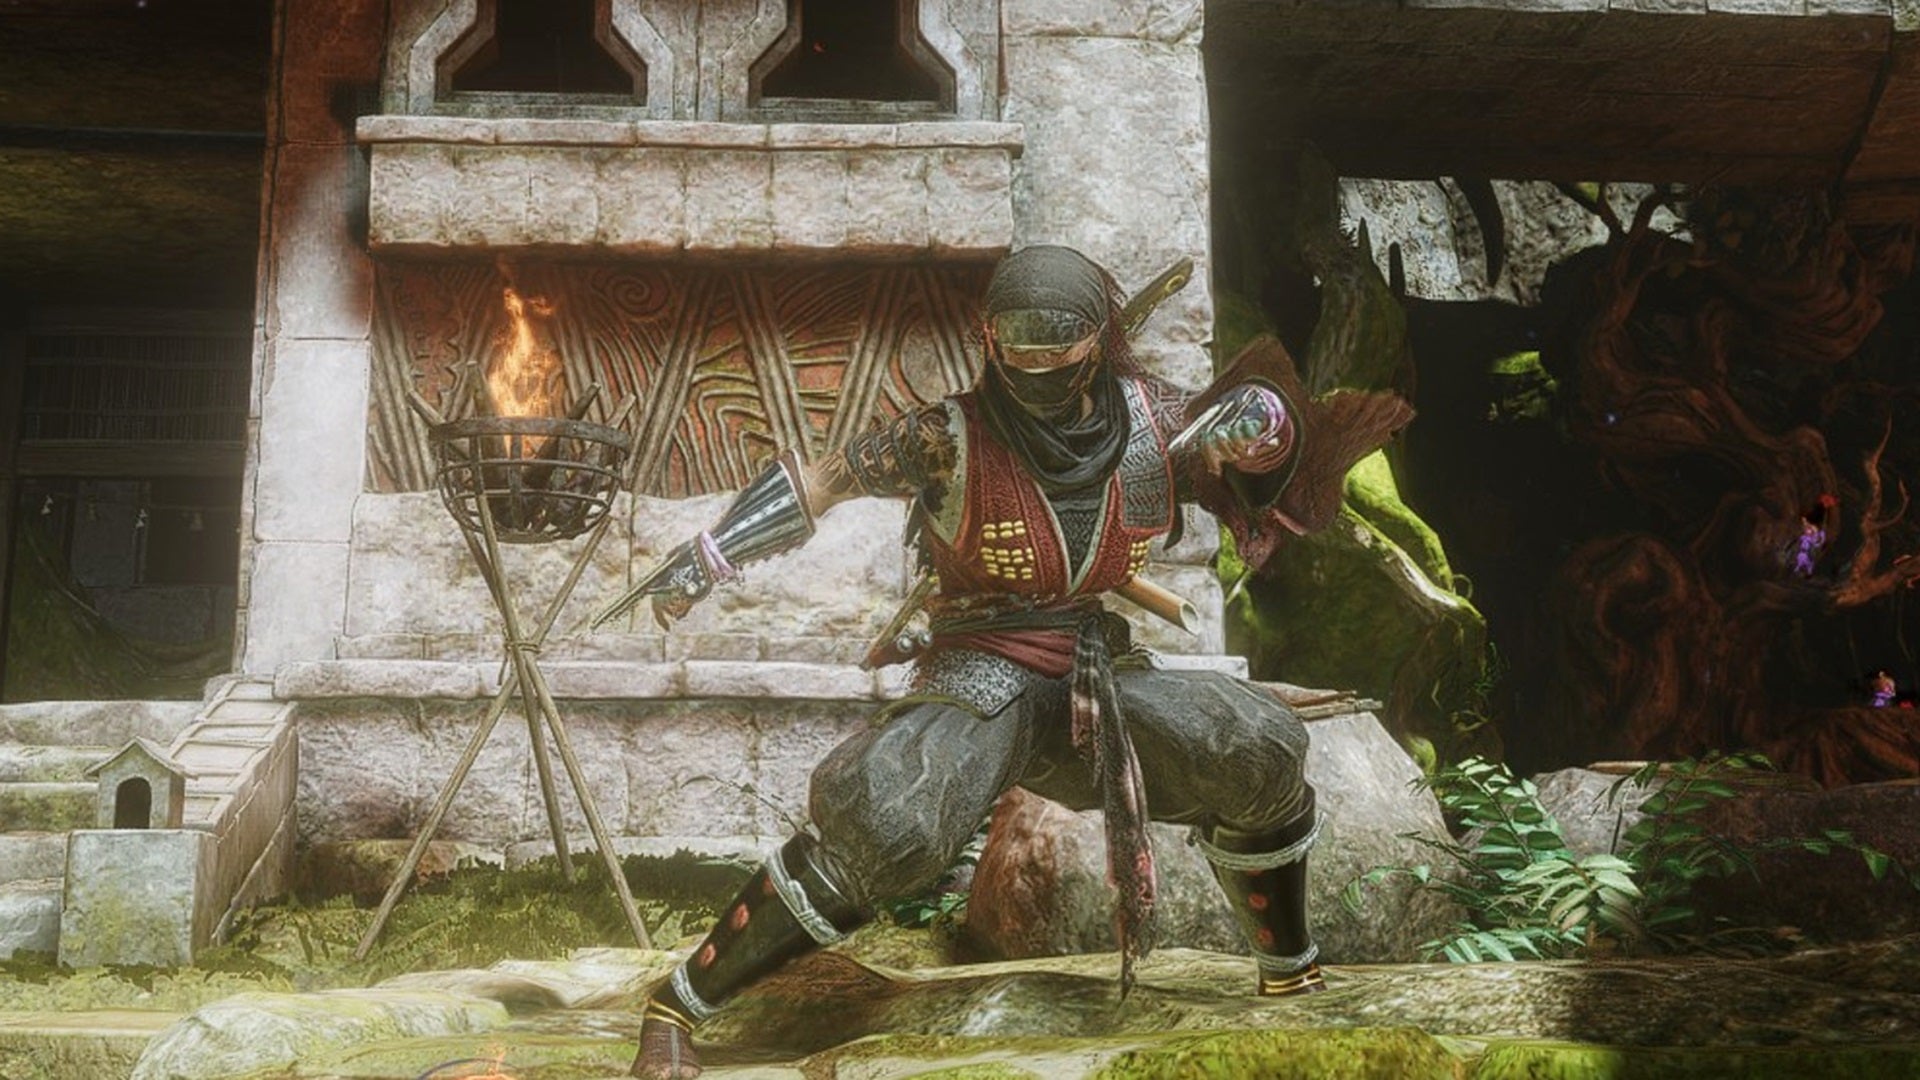
Ever wanted to be Wolverine? Pick up a pair of Talons and start clawing away at whatever’s in front of you. |Image credit:Rock Paper Shotgun/Koei Tecmo
Talons
I love clawing people to death, I do! These weapons seem tailor-made for the Ninja’s hit-and-run style, and are versatile both on the ground, for delivering very fast and potent combos, and when you’re jumping above and around your foe. Equipping the Talons also lets you end your flurry of blows with an Izuna Drop, picking a Ki-depleted enemy up, pulling them into the sky, and whomping them into the earth with a tremendous thud. Ninja Gaiden fans know how awesome this is.
- Stat: Heart, Stamina, Intellect
- Recommended Ninjutsu: Chaotic Cleave, Izuna Drop, Whirling Tiger
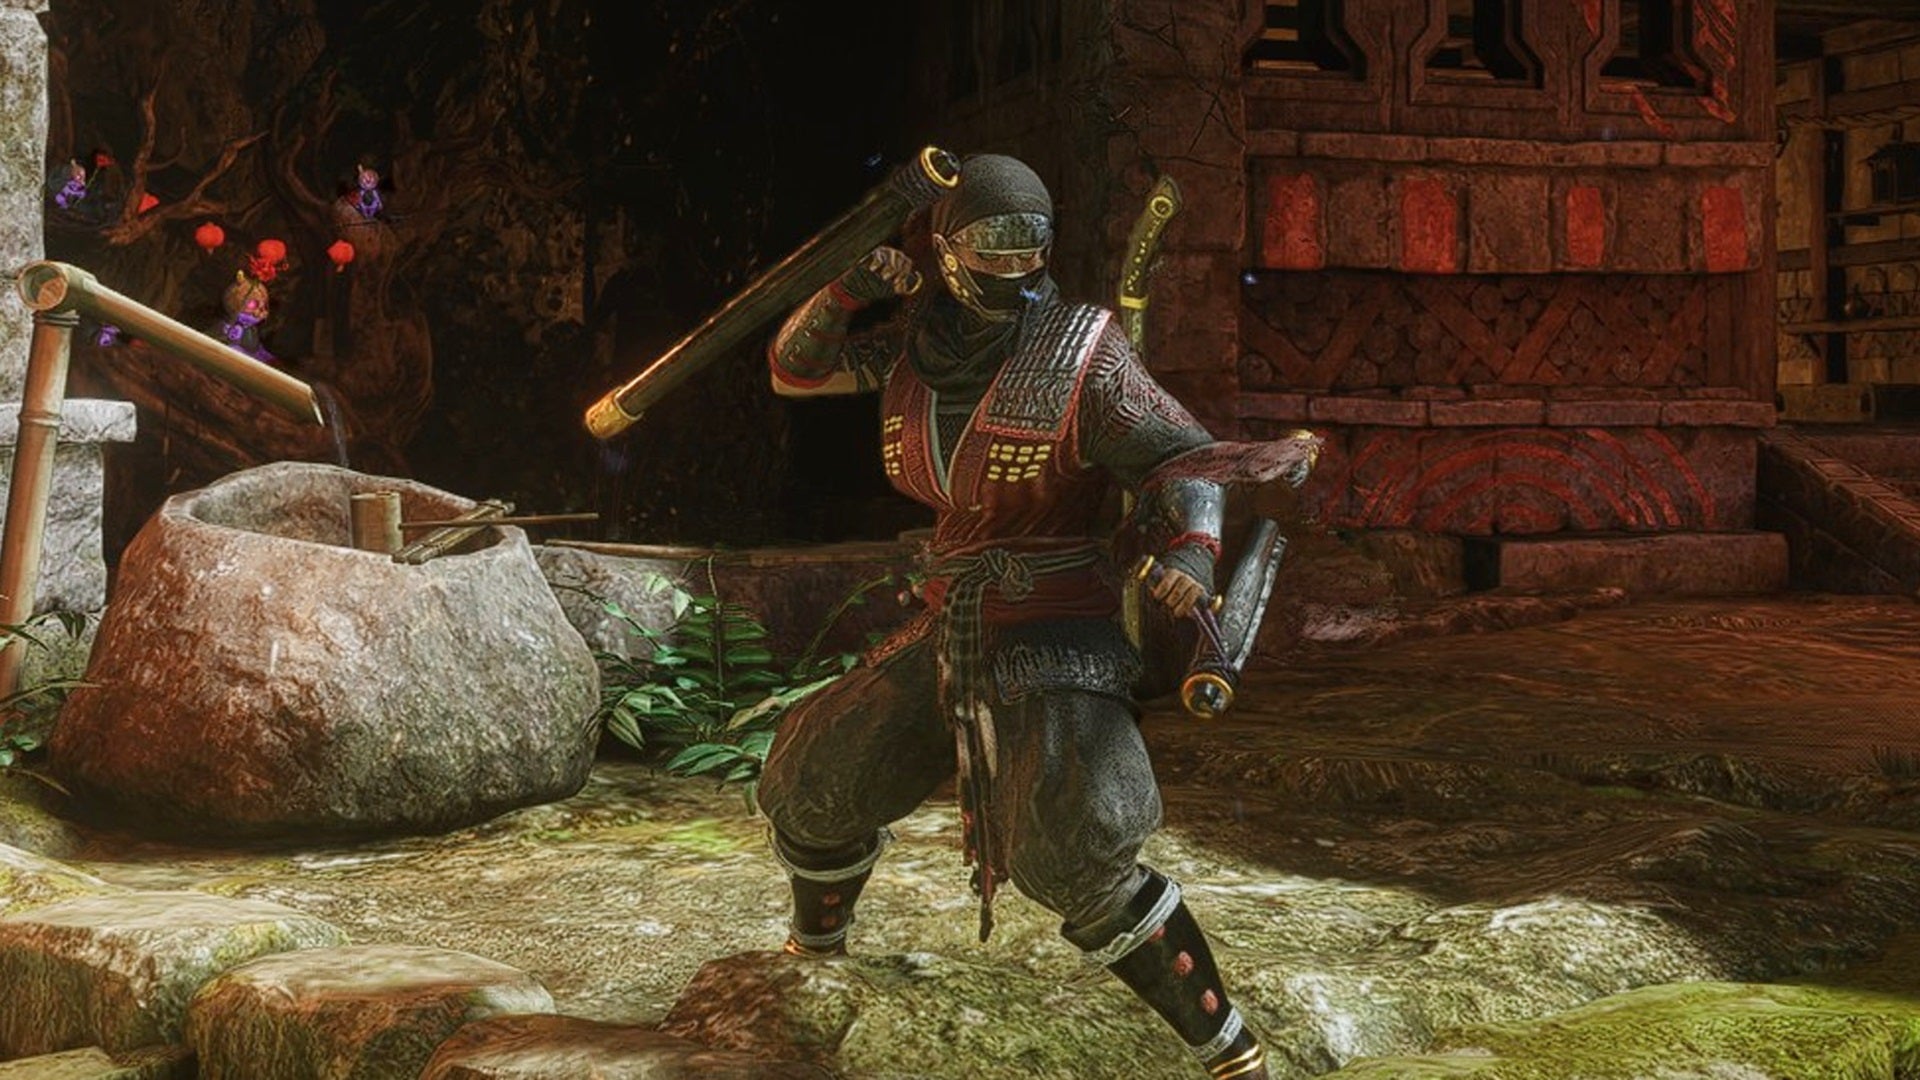
Try switching to Tonfa if you haven’t already - chances are, you’ll see the appeal fast. |Image credit:Rock Paper Shotgun/Koei Tecmo
Tonfa
If Talons are all about slashing an enemy rapidly, Tonfa are about bonking them so hard from behind at close range that it sometimes feels like you’re using the Assassinate ability. “Tonfa are OP” has been echoed in the past, especially for fans of Nioh 2 , but in this game it seems like they’re even better at wrecking enemy poise. Additionally, Impenetrability is a vital Tonfa Ninjutsu that works the same way as the Samurai’s Deflect, effectively giving Ninja the ability to parry and making them unstoppable.
- Stat: Constitution, Strength, Skill
- Recommended Ninjutsu: Dragon Slayer, Demon Dance, Impenetrability
A-Tier
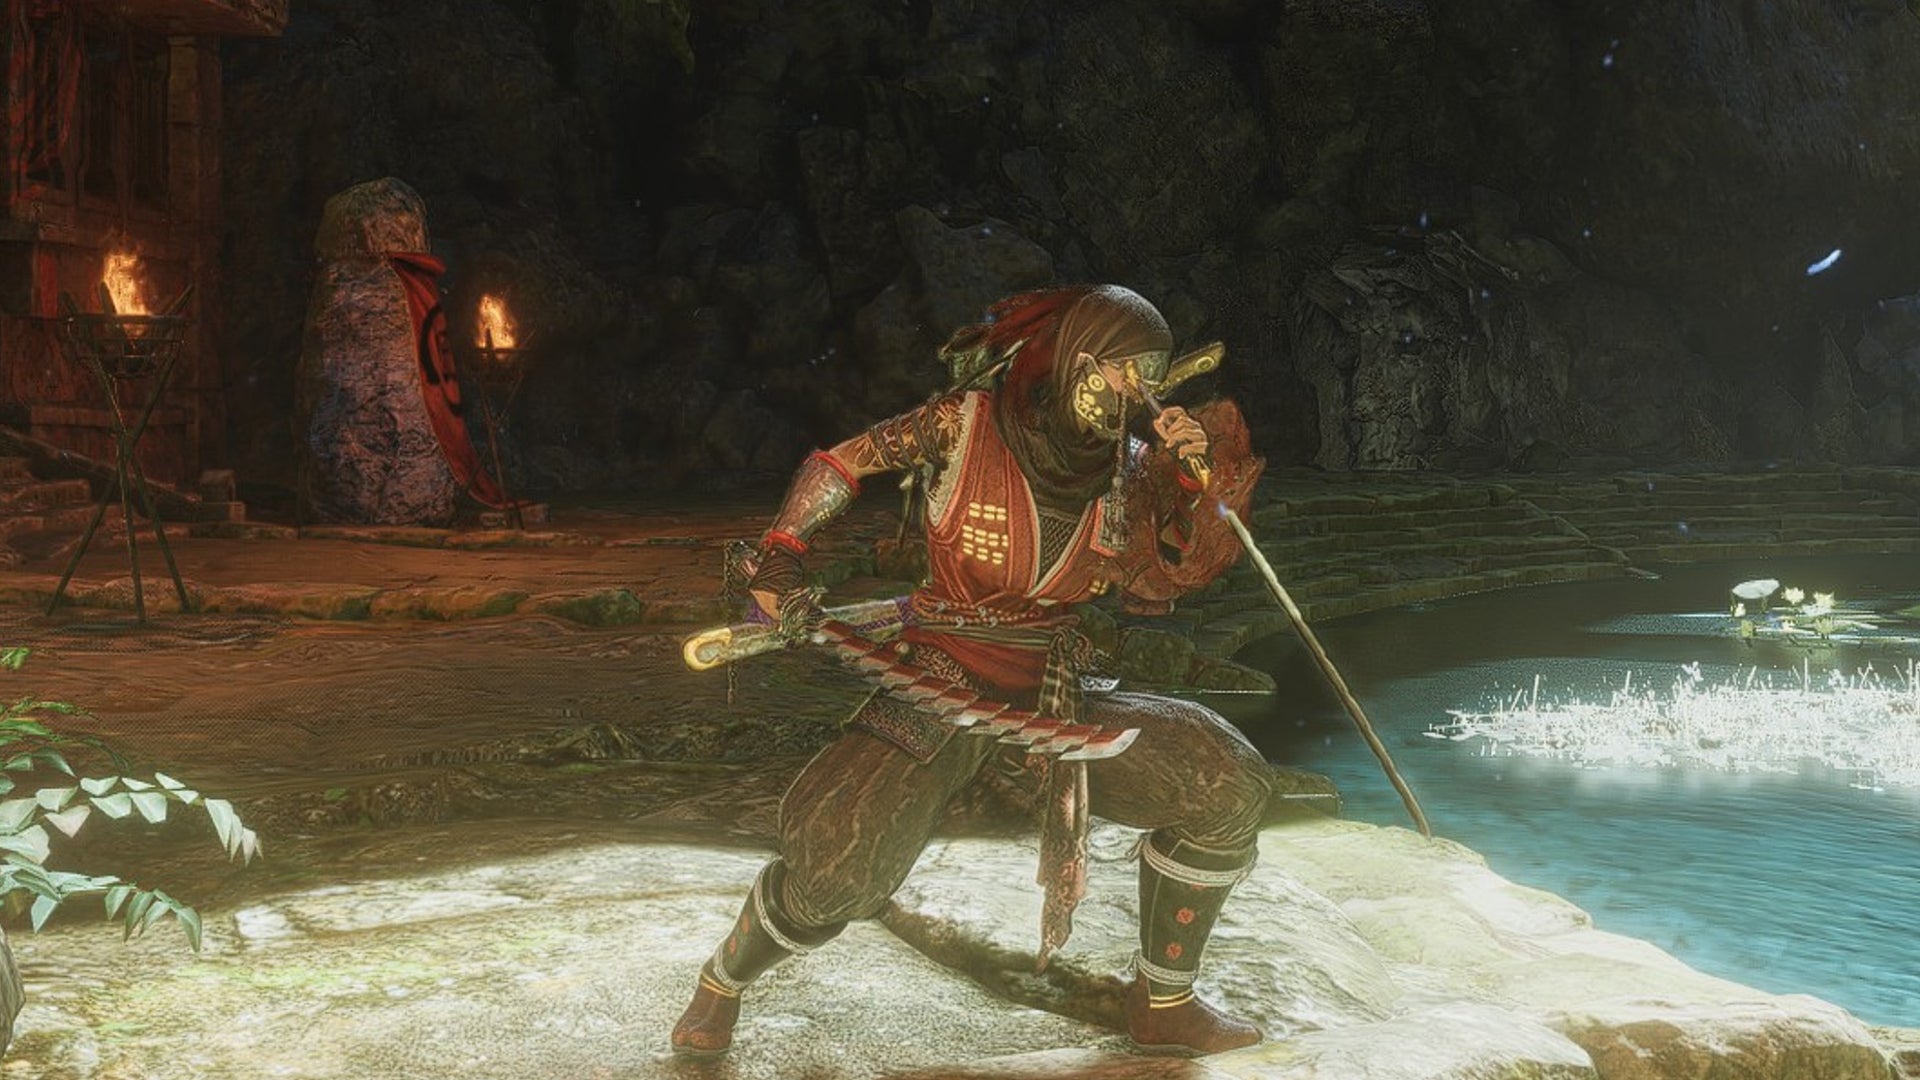
Reminiscent of the Samurai’s, but with a dash of stealthy edgelord. |Image credit:Rock Paper Shotgun/Koei Tecmo
Dual Ninja Swords
Similar to the Samurai’s twin katanas but faster and more vicious, the Dual Ninja Swords are a fine option for effective tactics that can chip away at a boss with ease. The mobility involved while using the Dual Ninja Swords is also very striking, as techniques like Abscission are good for clearing distance, while Spinning Drill lets you perform a series of slashes while tumbling upside down. Endless Rain, which performs constant kicks while in mid-air, is also radical. Just don’t miss!
- Stat: Heart, Intellect, Magic
- Recommended Ninjutsu: Abscission, Spinning Drill, Endless Rain
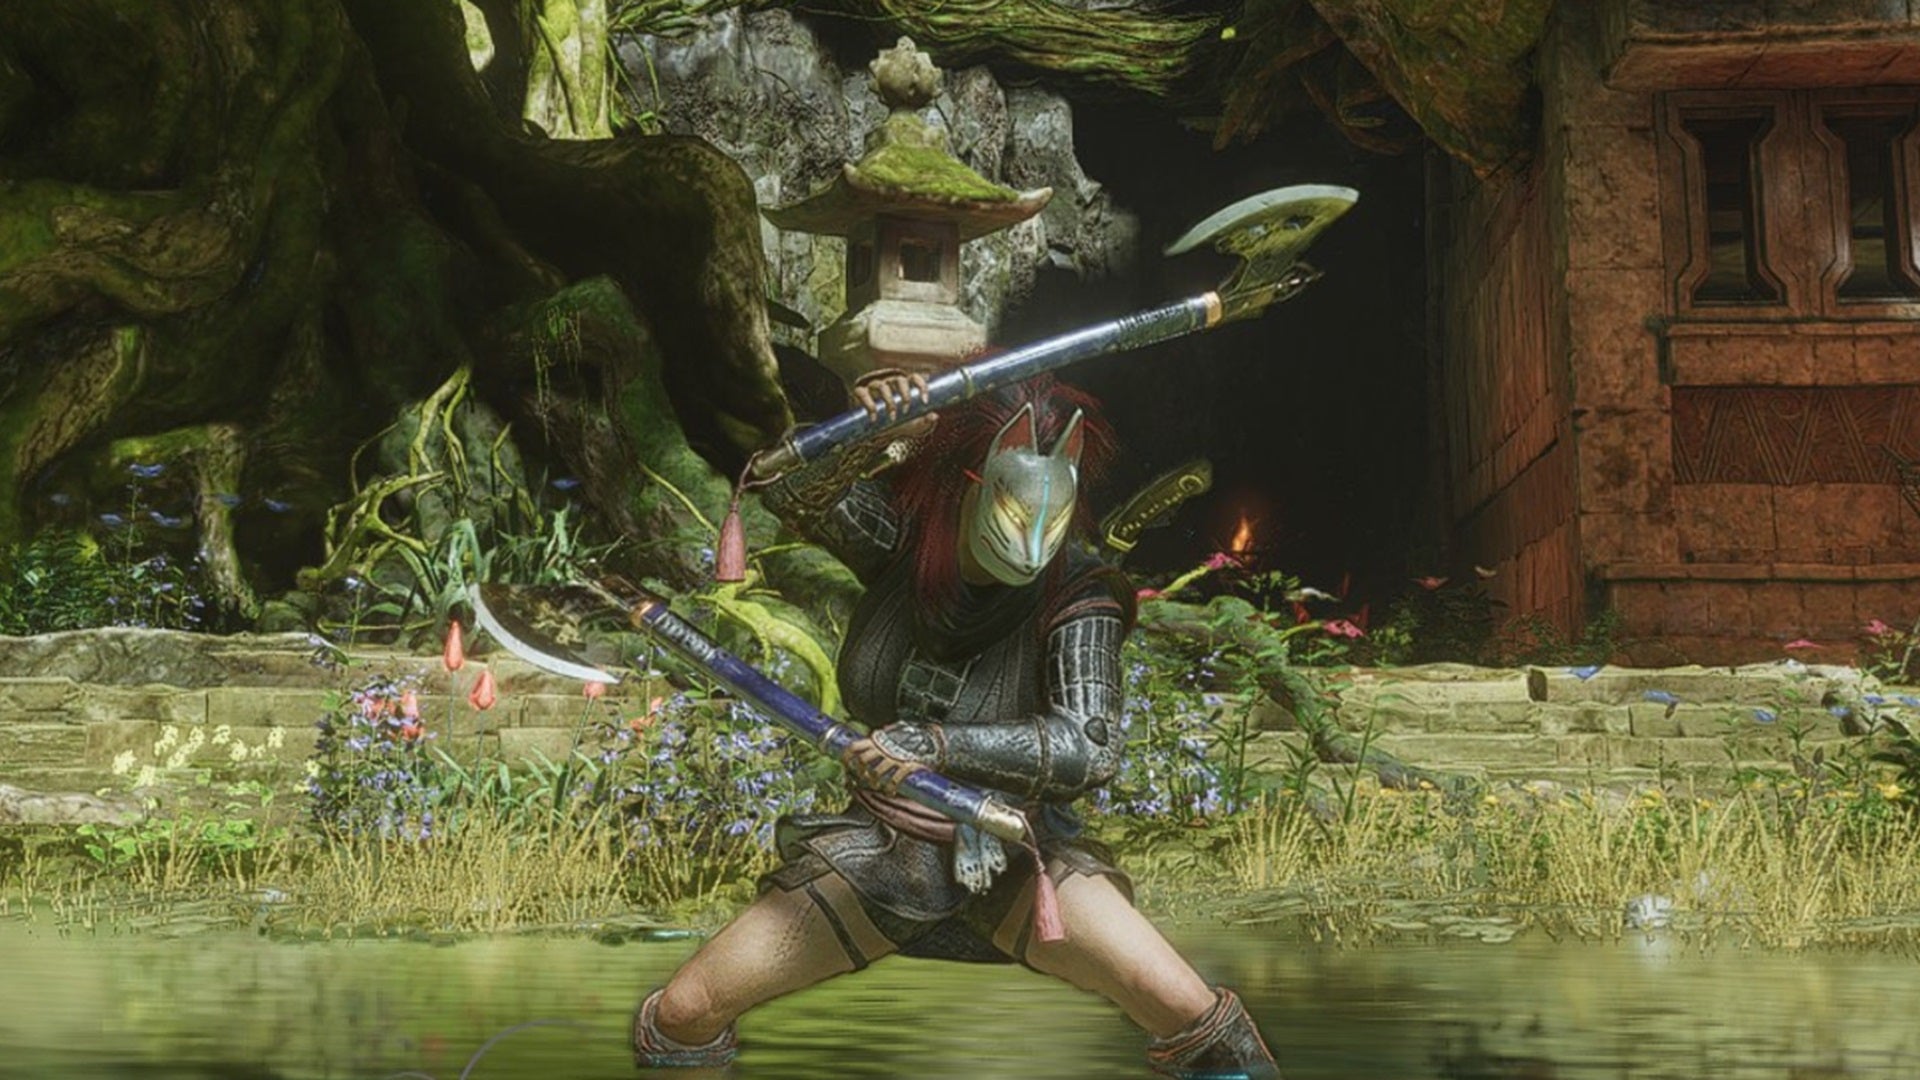
This is what you get when you mix some backwoodsman in with your Ninja. |Image credit:Rock Paper Shotgun/Koei Tecmo
Hatchets
Want ranged hack and slash action that’s a little grittier than the Dual Ninja Swords? Want to also chuck an axe across the screen at an enemy’s skull? Go with the Hatchets. These are fun weapons, albeit a little erratic, since their best tactics involve tossing them, occasionally from mid-air. But if you don’t mind being weaponless for a split second as your axes soar through the sky, and if you’re also keen to utilise your own version of parrying (here named Tile Shaker), Hatchets are a grand old time.
- Stat: Stamina, Skill, Intellect
- Recommended Ninjutsu: Piercing Hurl, Tile Shaker, Wolf’s Rage
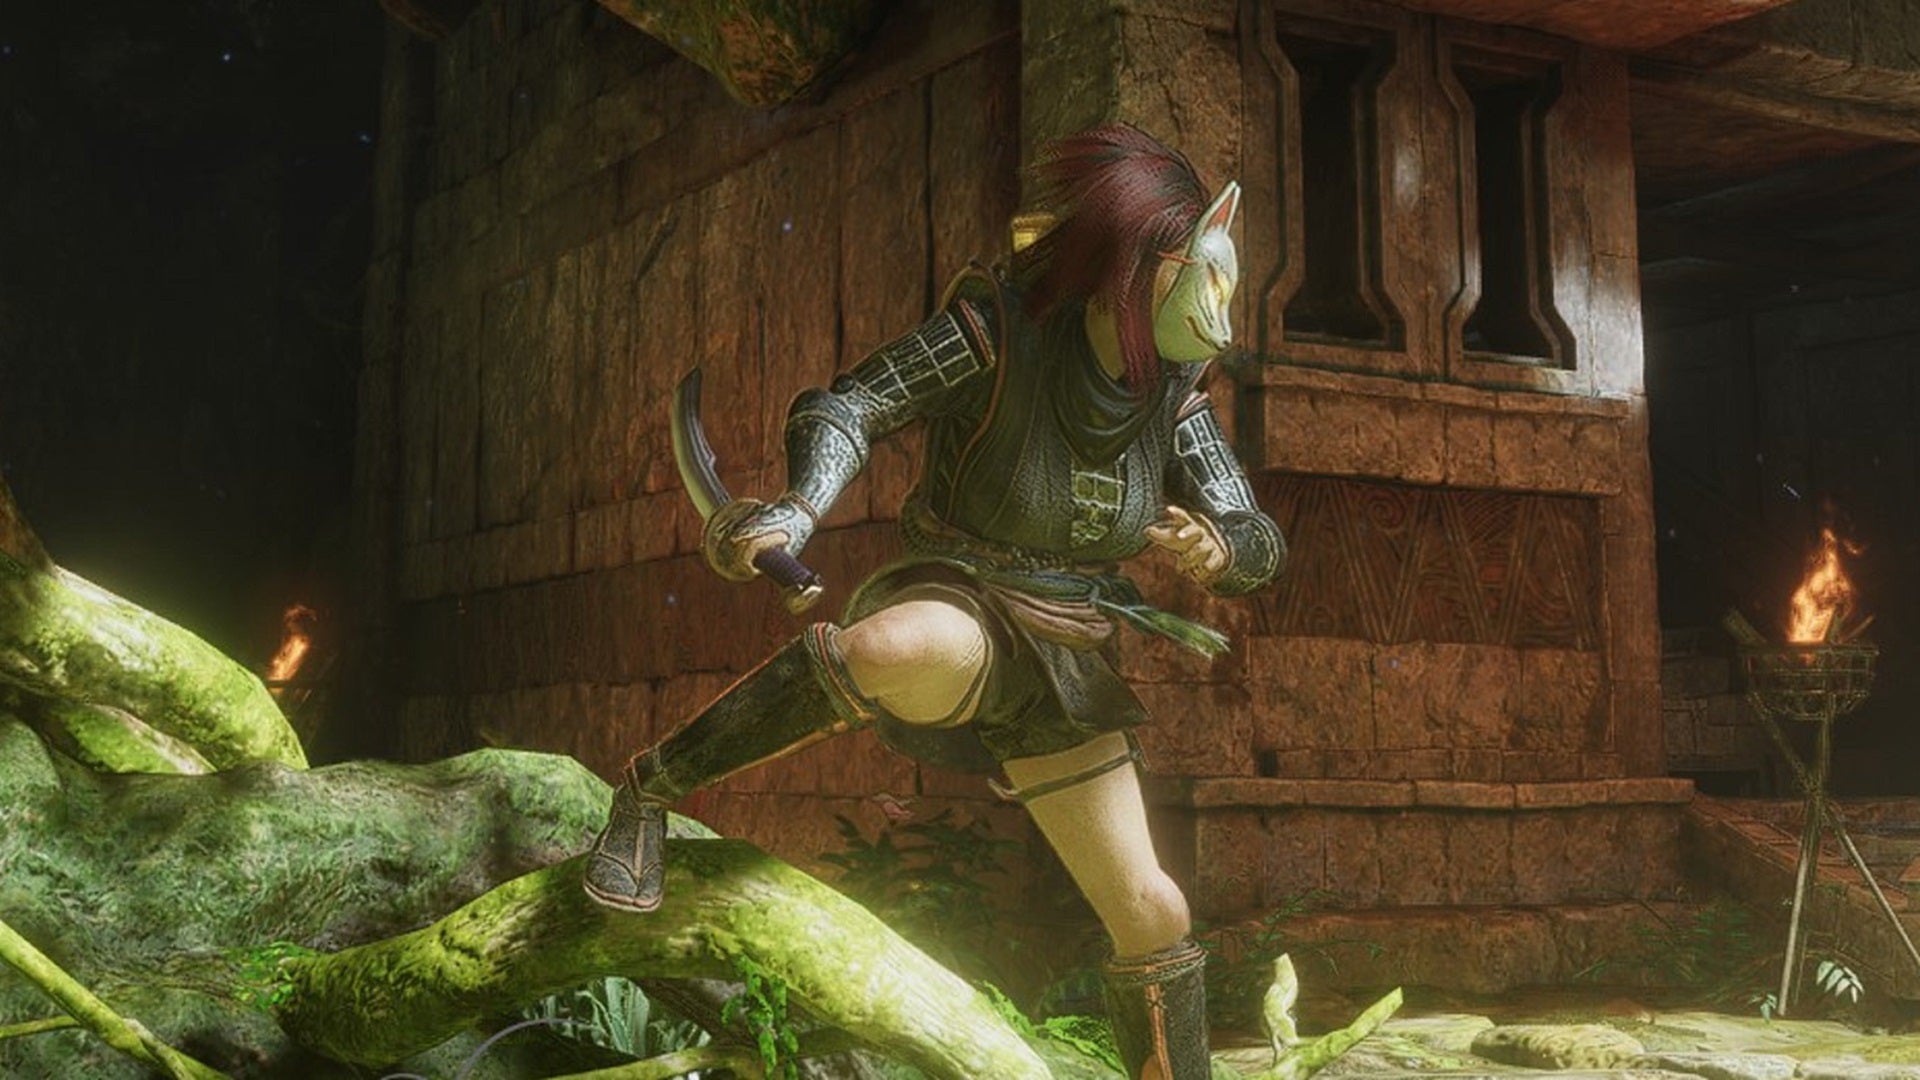
Think a wakizashi as opposed to a katana. |Image credit:Rock Paper Shotgun/Koei Tecmo
Ninja Swords
I like the Ninja Sword more than the regular Sword the Samurai gets, mostly because its additional speed makes it feel a lot less vanilla. This one served me well when I was learning the patterns of Yamagata Masakage , the first boss, and is a reliable option when you’d rather have something no-nonsense to carry out your assassinations. Also, you can link your sword strikes up with an Izuna Drop, just like Ryu Hayabusa! (Even if the Talons Izuna Drop is a little more fun, in my opinion.)
- Stat: Strength, Skill, Intellect
- Recommended Ninjutsu: Leaf Glide, Haze, Izuna Drop
B-Tier
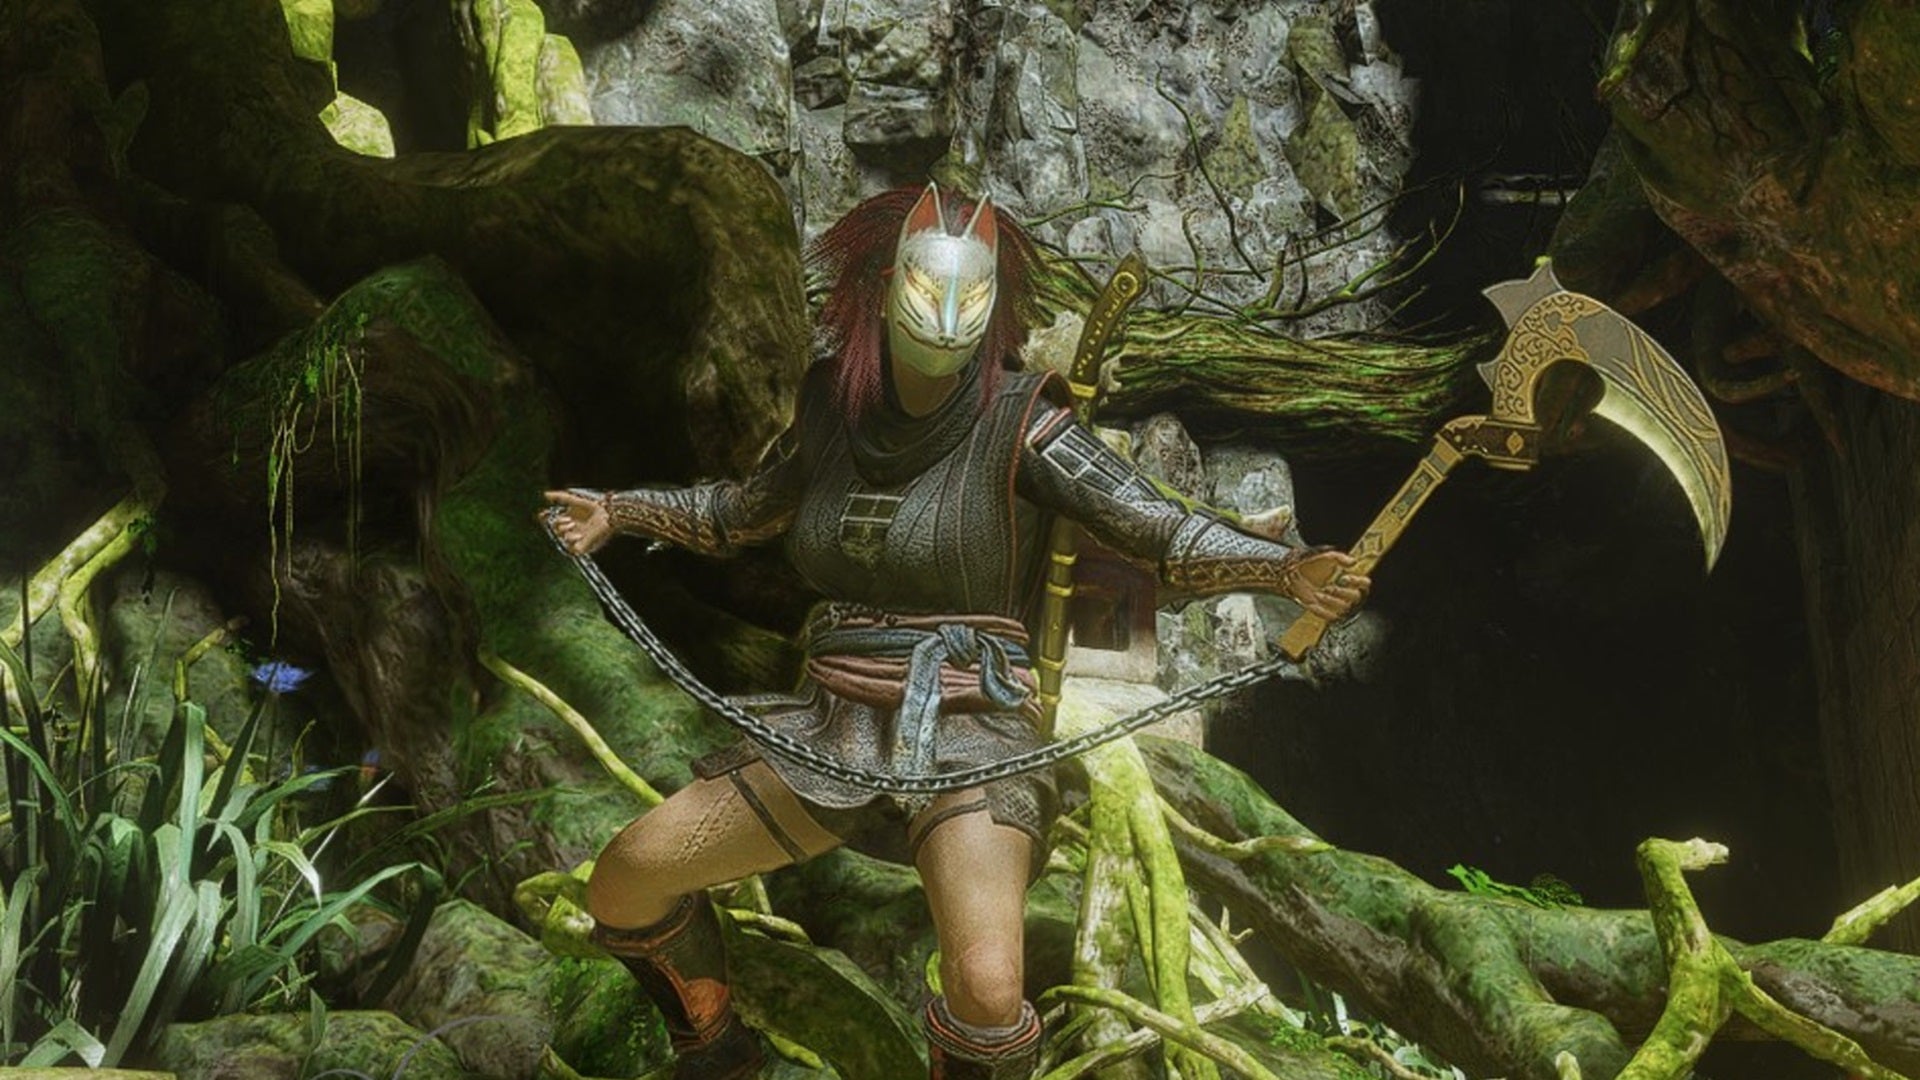
Hook and sickle action. Get over here! |Image credit:Rock Paper Shotgun/Koei Tecmo
Kusarigama
A sickle attached to a very long chain, the Kusarigama is a vicious shinobi tool. I wish I liked it a little more in practice, however. You get it early on, but it’s tricky to learn when compared to more straightforward weapons, as its best usages come from hooking an opponent to bring them closer to you, or you closer to them. Not one for the faint of heart, and it always felt a little weak to me in boss fights, but if you want to be like Scorpion in Mortal Kombat, the Kusarigama gets you close.
- Stat: Constitution, Skill, Magic
- Recommended Ninjutsu: Flying Top, Foot Sweep, Serpent Strike
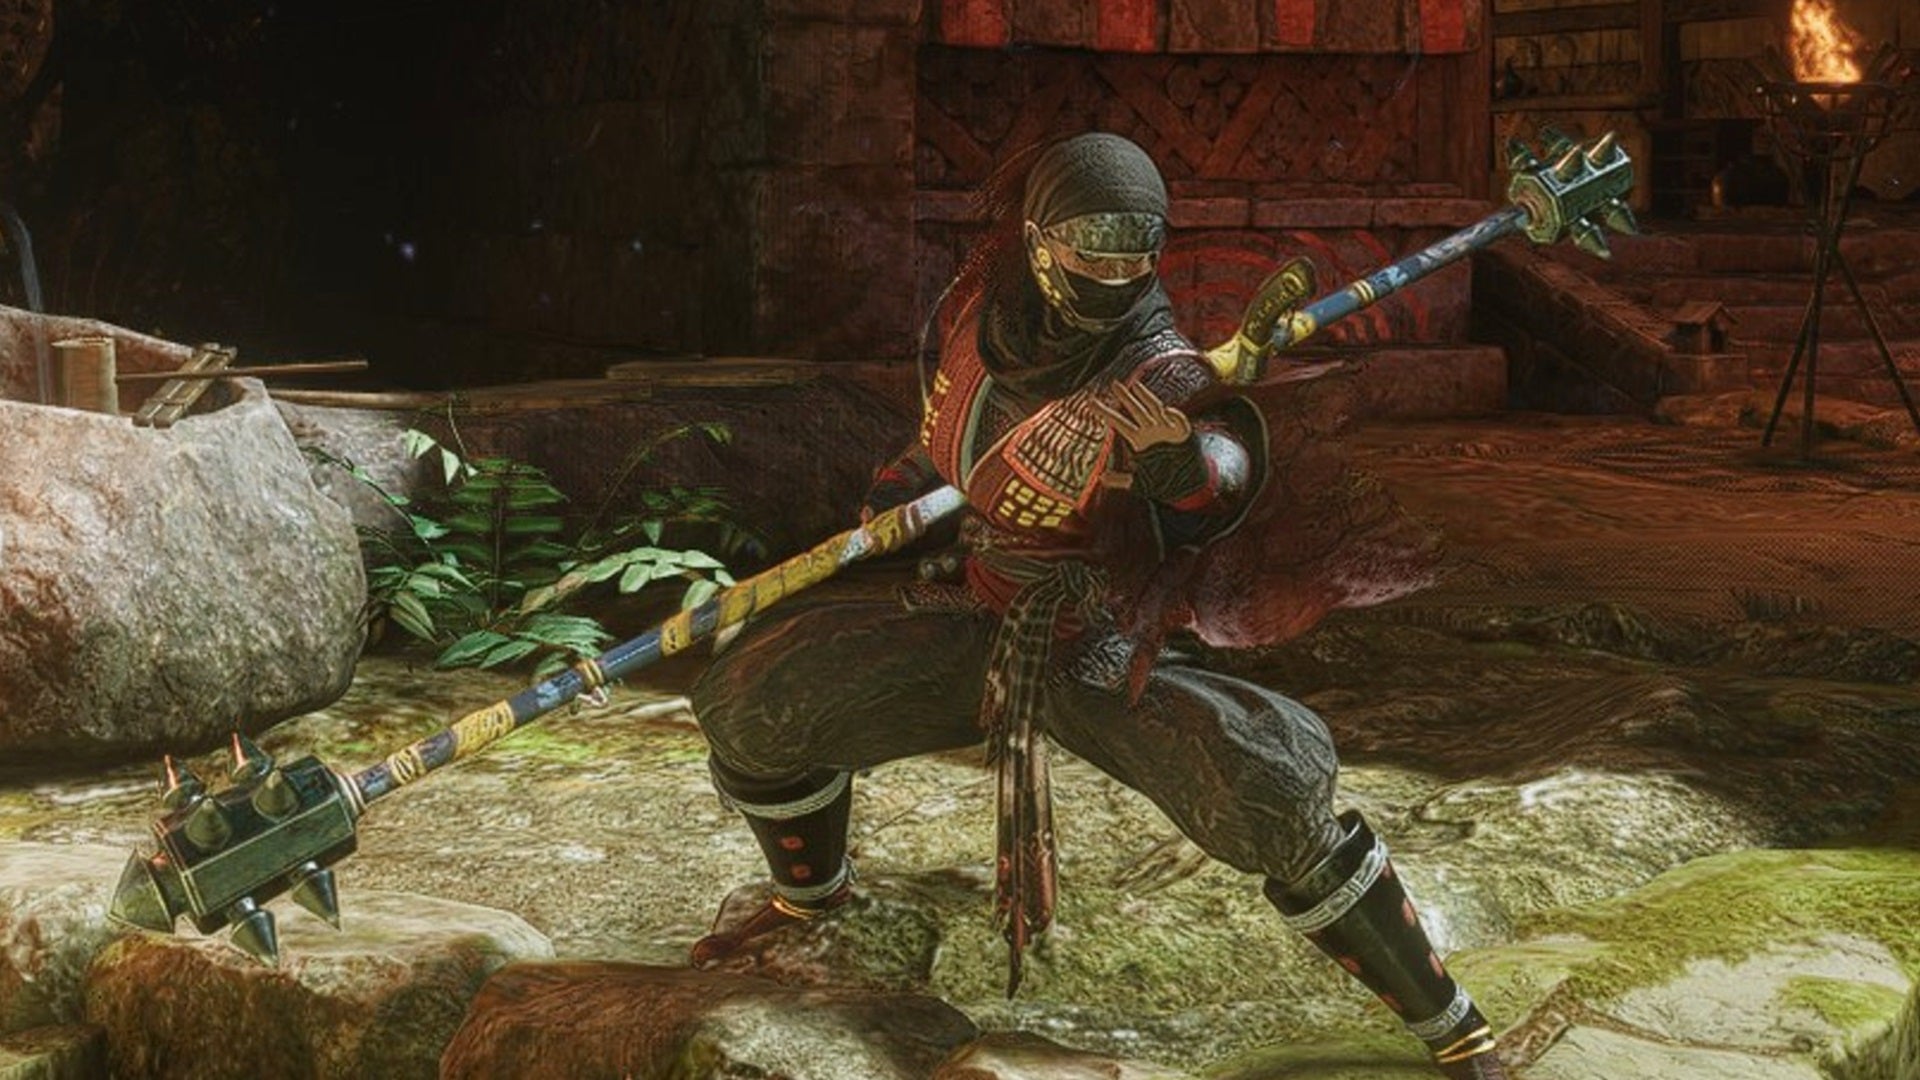
From staff to whip to back again. |Image credit:Rock Paper Shotgun/Koei Tecmo
Splitstaves
Just like Kusarigama, I wish I had the skill to make full usage of Splitstaves, which break apart like nunchaku to whip around foes if you time your button presses correctly. Returning Nioh players have complained that Splitstaves feel a little weaker now that they’re confined to the Ninja and no longer have the Stances that made them shine in previous games. That said, if you can master Fluid Form and switch your Splitstaff back and forth as you combine attacks, you’ll be darn effective on the battlefield.
- Stat: Strength, Intellect, Magic
- Recommended Ninjutsu: Changing Ways, Dragon Dance, Fluid Form
That finishes our best weapons tier list for Nioh 3, covering the best Samurai weapons and best Ninja weapons. For more on understanding the intricacies of Team Ninja’s latest huge Soulslike, see our guides on how to level up fast and farm Amrita , how to get Ochoko Cups to summon Acolytes , how to use Gestures , and how to beat the secret Bloodedge Demon boss . Also, give our Nioh 3 review a read while you’re at it, in case you’re still on the fence regarding what is arguably one of the best Soulslikes to come out in recent memory!

Nioh 3
PS5 , PC
Rock Paper Shotgun is better when you sign in
Sign in and join us on our journey to discover strange and compelling PC games.

All 75 Arc Raiders Blueprints and where to get them
These areas have the highest chance of giving you Blueprints

Image credit:Rock Paper Shotgun/Embark Studios

Looking for more Arc Raiders Blueprints? It’s a special day when you find a Blueprint, as they’re among the most valuable items in Arc Raiders. If you find a Blueprint that you haven’t already found, then you must make sure you hold onto it at all costs, because Blueprints are the key to one of the most important and powerful systems of meta-progression in the game.
This guide aims to be the very best guide on Blueprints you can find, starting with a primer on what exactly they are and how they work in Arc Raiders, before delving into exactly where to get Blueprints and the very best farming spots for you to take in your search.
We’ll also go over how to get Blueprints from other unlikely activities, such as destroying Surveyors and completing specific quests. And you’ll also find the full list of all 75 Blueprints in Arc Raiders on this page (including the newest Blueprints added with the Cold Snap update , such as the Deadline Blueprint and Firework Box Blueprint), giving you all the information you need to expand your own crafting repertoire.
In this guide:
- What are Blueprints in Arc Raiders?
- Full Blueprint list: All crafting recipes
- Where to find Blueprints in Arc Raiders Blueprints obtained from quests Blueprints obtained from Trials Best Blueprint farming locations

What are Blueprints in Arc Raiders?
Blueprints in Arc Raiders are special items which, if you manage to extract with them, you can expend to permanently unlock a new crafting recipe in your Workshop. If you manage to extract from a raid with an Anvil Blueprint, for example, you can unlock the ability to craft your very own Anvil Pistol, as many times as you like (as long as you have the crafting materials).
To use a Blueprint, simply open your Inventory while in the lobby, then right-click on the Blueprint and click “Learn And Consume” . This will permanently unlock the recipe for that item in your Workshop. As of the Stella Montis update, there are allegedly 75 different Blueprints to unlock - although only 68 are confirmed to be in the game so far. You can see all the Blueprints you’ve found and unlocked by going to the Workshop menu, and hitting “R” to bring up the Blueprint screen.
It’s possible to find duplicates of past Blueprints you’ve already unlocked. If you find these, then you can either sell them, or - if you like to play with friends - you can take it into a match and gift it to your friend so they can unlock that recipe for themselves. Another option is to keep hold of them until the time comes to donate them to the Expedition.
Full Blueprint list: All crafting recipes
Below is the full list of all the Blueprints that are currently available to find in Arc Raiders, and the crafting recipe required for each item:
| Blueprint | Type | Recipe | Crafted At |
|---|---|---|---|
| Bettina | Weapon | 3x Advanced Mechanical Components 3x Heavy Gun Parts 3x Canister | Gunsmith 3 |
| Blue Light Stick | Quick Use | 3x Chemicals | Utility Station 1 |
| Aphelion | Weapon | 3x Magnetic Accelerator 3x Complex Gun Parts 1x Matriarch Reactor | Gunsmith 3 |
| Combat Mk. 3 (Flanking) | Augment | 2x Advanced Electrical Components 3x Processor | Gear Bench 3 |
| Combat Mk. 3 (Aggressive) | Augment | 2x Advanced Electrical Components 3x Processor | Gear Bench 3 |
| Complex Gun Parts | Material | 2x Light Gun Parts 2x Medium Gun Parts 2x Heavy Gun Parts | Refiner 3 |
| Fireworks Box | Quick Use | 1x Explosive Compound 3x Pop Trigger | Explosives Station 2 |
| Gas Mine | Mine | 4x Chemicals 2x Rubber Parts | Explosives Station 1 |
| Green Light Stick | Quick Use | 3x Chemicals | Utility Station 1 |
| Pulse Mine | Mine | 1x Crude Explosives 1x Wires | Explosives Station 1 |
| Seeker Grenade | Grenade | 1x Crude Explosives 2x ARC Alloy | Explosives Station 1 |
| Looting Mk. 3 (Survivor) | Augment | 2x Advanced Electrical Components 3x Processor | Gear Bench 3 |
| Angled Grip II | Mod | 2x Mechanical Components 3x Duct Tape | Gunsmith 2 |
| Angled Grip III | Mod | 2x Mod Components 5x Duct Tape | Gunsmith 3 |
| Hullcracker | Weapon | 1x Magnetic Accelerator 3x Heavy Gun Parts 1x Exodus Modules | Gunsmith 3 |
| Launcher Ammo | Ammo | 5x Metal Parts 1x Crude Explosives | Workbench 1 |
| Anvil | Weapon | 5x Mechanical Components 5x Simple Gun Parts | Gunsmith 2 |
| Anvil Splitter | Mod | 2x Mod Components 3x Processor | Gunsmith 3 |
| ??? | ??? | ??? | ??? |
| Barricade Kit | Quick Use | 1x Mechanical Components | Utility Station 2 |
| Blaze Grenade | Grenade | 1x Explosive Compound 2x Oil | Explosives Station 3 |
| Bobcat | Weapon | 3x Advanced Mechanical Components 3x Light Gun Parts | Gunsmith 3 |
| Osprey | Weapon | 2x Advanced Mechanical Components 3x Medium Gun Parts 7x Wires | Gunsmith 3 |
| Burletta | Weapon | 3x Mechanical Components 3x Simple Gun Parts | Gunsmith 1 |
| Compensator II | Mod | 2x Mechanical Components 4x Wires | Gunsmith 2 |
| Compensator III | Mod | 2x Mod Components 8x Wires | Gunsmith 3 |
| Defibrillator | Quick Use | 9x Plastic Parts 1x Moss | Medical Lab 2 |
| ??? | ??? | ??? | ??? |
| Equalizer | Weapon | 3x Magnetic Accelerator 3x Complex Gun Parts 1x Queen Reactor | Gunsmith 3 |
| Extended Barrel | Mod | 2x Mod Components 8x Wires | Gunsmith 3 |
| Extended Light Mag II | Mod | 2x Mechanical Components 3x Steel Spring | Gunsmith 2 |
| Extended Light Mag III | Mod | 2x Mod Components 5x Steel Spring | Gunsmith 3 |
| Extended Medium Mag II | Mod | 2x Mechanical Components 3x Steel Spring | Gunsmith 2 |
| Extended Medium Mag III | Mod | 2x Mod Components 5x Steel Spring | Gunsmith 3 |
| Extended Shotgun Mag II | Mod | 2x Mechanical Components 3x Steel Spring | Gunsmith 2 |
| Extended Shotgun Mag III | Mod | 2x Mod Components 5x Steel Spring | Gunsmith 3 |
| Remote Raider Flare | Quick Use | 2x Chemicals 4x Rubber Parts | Utility Station 1 |
| Heavy Gun Parts | Material | 4x Simple Gun Parts | Refiner 2 |
| Venator | Weapon | 2x Advanced Mechanical Components 3x Medium Gun Parts 5x Magnet | Gunsmith 3 |
| Il Toro | Weapon | 5x Mechanical Components 6x Simple Gun Parts | Gunsmith 1 |
| Jolt Mine | Mine | 1x Electrical Components 1x Battery | Explosives Station 2 |
| Explosive Mine | Mine | 1x Explosive Compound 1x Sensors | Explosives Station 3 |
| Jupiter | Weapon | 3x Magnetic Accelerator 3x Complex Gun Parts 1x Queen Reactor | Gunsmith 3 |
| Light Gun Parts | Material | 4x Simple Gun Parts | Refiner 2 |
| Lightweight Stock | Mod | 2x Mod Components 5x Duct Tape | Gunsmith 3 |
| Lure Grenade | Grenade | 1x Speaker Component 1x Electrical Components | Utility Station 2 |
| Medium Gun Parts | Material | 4x Simple Gun Parts | Refiner 2 |
| Torrente | Weapon | 2x Advanced Mechanical Components 3x Medium Gun Parts 6x Steel Spring | Gunsmith 3 |
| Muzzle Brake II | Mod | 2x Mechanical Components 4x Wires | Gunsmith 2 |
| Muzzle Brake III | Mod | 2x Mod Components 8x Wires | Gunsmith 3 |
| Padded Stock | Mod | 2x Mod Components 5x Duct Tape | Gunsmith 3 |
| Shotgun Choke II | Mod | 2x Mechanical Components 4x Wires | Gunsmith 2 |
| Shotgun Choke III | Mod | 2x Mod Components 8x Wires | Gunsmith 3 |
| Shotgun Silencer | Mod | 2x Mod Components 8x Wires | Gunsmith 3 |
| Showstopper | Grenade | 1x Advanced Electrical Components 1x Voltage Converter | Explosives Station 3 |
| Silencer I | Mod | 2x Mechanical Components 4x Wires | Gunsmith 2 |
| Silencer II | Mod | 2x Mod Components 8x Wires | Gunsmith 3 |
| Snap Hook | Quick Use | 2x Power Rod 3x Rope 1x Exodus Modules | Utility Station 3 |
| Stable Stock II | Mod | 2x Mechanical Components 3x Duct Tape | Gunsmith 2 |
| Stable Stock III | Mod | 2x Mod Components 5x Duct Tape | Gunsmith 3 |
| Tagging Grenade | Grenade | 1x Electrical Components 1x Sensors | Utility Station 3 |
| Tempest | Weapon | 3x Advanced Mechanical Components 3x Medium Gun Parts 3x Canister | Gunsmith 3 |
| Trigger Nade | Grenade | 2x Crude Explosives 1x Processor | Explosives Station 2 |
| Vertical Grip II | Mod | 2x Mechanical Components 3x Duct Tape | Gunsmith 2 |
| Vertical Grip III | Mod | 2x Mod Components 5x Duct Tape | Gunsmith 3 |
| Vita Shot | Quick Use | 2x Antiseptic 1x Syringe | Medical Lab 3 |
| Vita Spray | Quick Use | 3x Antiseptic 1x Canister | Medical Lab 3 |
| Vulcano | Weapon | 1x Magnetic Accelerator 3x Heavy Gun Parts 1x Exodus Modules | Gunsmith 3 |
| Wolfpack | Grenade | 2x Explosive Compound 2x Sensors | Explosives Station 3 |
| Red Light Stick | Quick Use | 3x Chemicals | Utility Station 1 |
| Smoke Grenade | Grenade | 14x Chemicals 1x Canister | Utility Station 2 |
| Deadline | Mine | 3x Explosive Compound 2x ARC Circuitry | Explosives Station 3 |
| Trailblazer | Grenade | 1x Explosive Compound 1x Synthesized Fuel | Explosives Station 3 |
| Tactical Mk. 3 (Defensive) | Augment | 2x Advanced Electrical Components 3x Processor | Gear Bench 3 |
| Tactical Mk. 3 (Healing) | Augment | 2x Advanced Electrical Components 3x Processor | Gear Bench 3 |
| Yellow Light Stick | Quick Use | 3x Chemicals | Utility Station 1 |
Note: The missing Blueprints in this list likely have not actually been added to the game at the time of writing, because none of the playerbase has managed to find any of them. As they are added to the game, I will update this page with the most relevant information so you know exactly how to get all 75 Arc Raiders Blueprints.
Where to find Blueprints in Arc Raiders
Below is a list of all containers, modifiers, and events which maximise your chances of finding Blueprints:
- Certain quests reward you with specific Blueprints .
- Completing Trials has a high chance of offering Blueprints as rewards.
- Surveyors have a decent chance of dropping Blueprints on death.
- High loot value areas tend to have a greater chance of spawning Blueprints.
- Night Raids and Storms may increase rare Blueprint spawn chances in containers.
- Containers with higher numbers of items may have a higher tendency to spawn Blueprints. As a result, Blue Gate (which has many “large” containers containing multiple items) may give you a higher chance of spawning Blueprints.
- Raider containers (Raider Caches, Weapon Boxes, Medical Bags, Grenade Tubes) have increased Blueprint drop rates. As a result, the Uncovered Caches event gives you a high chance of finding Blueprints.
- Security Lockers have a higher than average chance of containing Blueprints.
- Certain Blueprints only seem to spawn under specific circumstances: Tempest Blueprint only spawns during Night Raid events. Vulcano Blueprint only spawns during Hidden Bunker events. Jupiter and Equaliser Blueprints only spawn during Harvester events.

Raider Caches, Weapon Boxes, and other raider-oriented container types have a good chance of offering Blueprints. |Image credit:Rock Paper Shotgun/Embark Studios
Blueprints have a very low chance of spawning in any container in Arc Raiders, around 1-2% on average. However, there is a higher chance of finding Blueprints in particular container types. Specifically, you can find more Blueprints in Raider containers and security lockers.
Beyond this, if you’re looking for Blueprints you should focus on regions of the map which are marked as having particularly high-value loot. Areas such as the Control Tower in Dam Battlegrounds, the Arrival and Departure Buildings in Spaceport, and Pilgrim’s Peak in Blue Gate all have a better-than-average chance of spawning Blueprints somewhere amongst all their containers. Night Raids and Electromagnetic Storm events also increase the drop chances of certain Blueprints .
In addition to these containers, you can often loot Blueprints from destroyed Surveyors - the largest of the rolling ball ARC. Surveyors are more commonly found on the later maps - Spaceport and Blue Gate - and if one spawns in your match, you’ll likely see it by the blue laser beam that it casts into the sky while “surveying”.
Surveyors are quite well-armoured and will very speedily run away from you once it notices you, but if you can take one down then make sure you loot all its parts for a chance of obtaining certain unusual Blueprints.
Blueprints obtained from quests
One way in which you can get Blueprints is by completing certain quests for the vendors in Speranza. Some quests will reward you with a specific item Blueprint upon completion, so as long as you work through all the quests in Arc Raiders, you are guaranteed those Blueprints.
Here is the full list of all Blueprints you can get from quest rewards:
- Trigger Nade Blueprint: Rewarded after completing “Sparks Fly”.
- Lure Grenade Blueprint: Rewarded after completing “Greasing Her Palms”.
- Burletta Blueprint: Rewarded after completing “Industrial Espionage”.
- Hullcracker Blueprint (and Launcher Ammo Blueprint): Rewarded after completing “The Major’s Footlocker”.
Alas, that’s only 4 Blueprints out of a total of 75 to unlock, so for the vast majority you will need to find them yourself during a raid. If you’re intent on farming Blueprints, then it’s best to equip yourself with cheap gear in case you lose it, but don’t use a free loadout because then you won’t get a safe pocket to stash any new Blueprint you find. No pain in Arc Raiders is sharper than failing to extract with a new Blueprint you’ve been after for a dozen hours already.

One of the best ways to get Blueprints is by hitting three stars on all five Trials every week. |Image credit:Rock Paper Shotgun/Embark Studios
Blueprints obtained from Trials
One of the very best ways to get Blueprints is as rewards for completing Trials in Arc Raiders. Trials are unlocked from Level 15 onwards, and allow you to earn rewards by focusing on certain tasks over the course of several raids. For example, one Trial might task you with dealing damage to Hornets, while another might challenge you to loot Supply Drops.
Trials refresh on a weekly basis, with a new week bringing five new Trials. Each Trial can offer up to three rewards after passing certain score milestones, and it’s possible to receive very high level loot from these reward crates - including Blueprints. So if you want to unlock as many Blueprints as possible, you should make a point of completing as many Trials as possible each week.
Best Blueprint farming locations
The very best way to get Blueprints is to frequent specific areas of the maps which combine high-tier loot pools with the right types of containers to search. Here are my recommendations for where to find Blueprints on every map, so you can always keep the search going for new crafting recipes to unlock.

Image credit:Rock Paper Shotgun/Embark Studios
Dam Battlegrounds
The best places to farm Blueprints on Dam Battlegrounds are the Control Tower, Power Generation Complex, Ruby Residence, and Pale Apartments . The first two regions, despite only being marked on the map as mid-tier loot, contain a phenomenal number of containers to loot. The Control Tower can also contain a couple of high-tier Security Lockers - though of course, you’ll need to have unlocked the Security Breach skill at the end of the Survival tree.
There’s also a lot of reporting amongst the playerbase that the Residential areas in the top-left of the map - Pale Apartments and Ruby Residence - give you a comparatively strong chance of finding Blueprints. Considering their size, there’s a high density of containers to loot in both locations, and they also have the benefit of being fairly out of the way. So you’re more likely to have all the containers to yourself.
Buried City
The best Blueprint farming locations on Buried City are the Santa Maria Houses, Grandioso Apartments, Town Hall, and the various buildings of the New District . Grandioso Apartments has a lower number of containers than the rest, but a high chance of spawning weapon cases - which have good Blueprint drop rates. The others are high-tier loot areas, with plenty of lootable containers - including Security Lockers.
Spaceport
The best places to find Blueprints on Spaceport are the Arrival and Departure Buildings, as well as Control Tower A6 and the Launch Towers . All these areas are labelled as high-value loot regions, and many of them are also very handily connected to one another by the Spaceport wall, which you can use to quickly run from one area to the next. At the tops of most of these buildings you’ll find at least one Security Locker, so this is an excellent farming route for players looking to find Blueprints.
The downside to looting Blueprints on Spaceport is that all these areas are hotly contested, particularly in Duos and Squads. You’ll need to be very focused and fast in order to complete the full farming route.

Image credit:Rock Paper Shotgun/Embark Studios
Blue Gate
Blue Gate tends to have a good chance of dropping Blueprints, potentially because it generally has a high number of containers which can hold lots of items; so there’s a higher chance of a Blueprint spawning in each container. In my experience, the best Blueprint farming spots on Blue Gate are Pilgrim’s Peak, Raider’s Refuge, the Ancient Fort, and the Underground Complex beneath the Warehouse .
All of these areas contain a wealth of containers to loot. Raider’s Refuge has less to loot, but the majority of the containers in and around the Refuge are raider containers, which have a high chance of containing Blueprints - particularly during major events.
Stella Montis
On the whole, Stella Montis seems to have a very low drop rate for Blueprints (though a high chance of dropping other high-tier loot). If you do want to try farming Blueprints on this map, the best places to find Blueprints in Stella Montis are Medical Research, Assembly Workshop, and the Business Center . These areas have the highest density of containers to loot on the map.
In addition to this, the Western Tunnel has a few different Security Lockers to loot, so while there’s very little to loot elsewhere in this area of the map, it’s worth hitting those Security Lockers if you spawn there at the start of a match.
That wraps up this primer on how to get all the Blueprints in Arc Raiders as quickly as possible. With the Expedition system constantly resetting a large number of players’ Blueprints, it’s more important than ever to have the most up-to-date information on where to find all these Blueprints.
While you’re here, be sure to check out our Arc Raiders best guns tier list , as well as our primers on the best skills to unlock and all the different Field Depot locations on every map.


ARC Raiders
PS5 , Xbox Series X/S , PC
Rock Paper Shotgun is better when you sign in
Sign in and join us on our journey to discover strange and compelling PC games.
