Nioh 3 beginner’s guide: 8 tips for new players
How to play as a Ninja/Samurai, use Onmyo magic, and more

Image credit:Rock Paper Shotgun/Koei Tecmo

Looking for some tips to get you started in Nioh 3? Koei Tecmo’s latest Nioh is their biggest adventure yet, featuring an expansive open world across multiple time periods that will see you facing dangerous yokai in the Warring States period, Japanese Antiquity, and beyond.
This is a big, bold experience full of combat systems to master, weapons to learn, and intricate secrets to discover. In many ways, it’s probably the largest Soulslike to come along since Elden Ring , and that might be intimidating for some, particularly if you’ve never played any of the other Nioh titles.
In this guide, we’ll present 8 handy tips and tricks for beginners in Nioh 3 so that you can ease into your journey and step on the road to martial mastery a little bit faster.

1. Pick a few key weapons and learn them
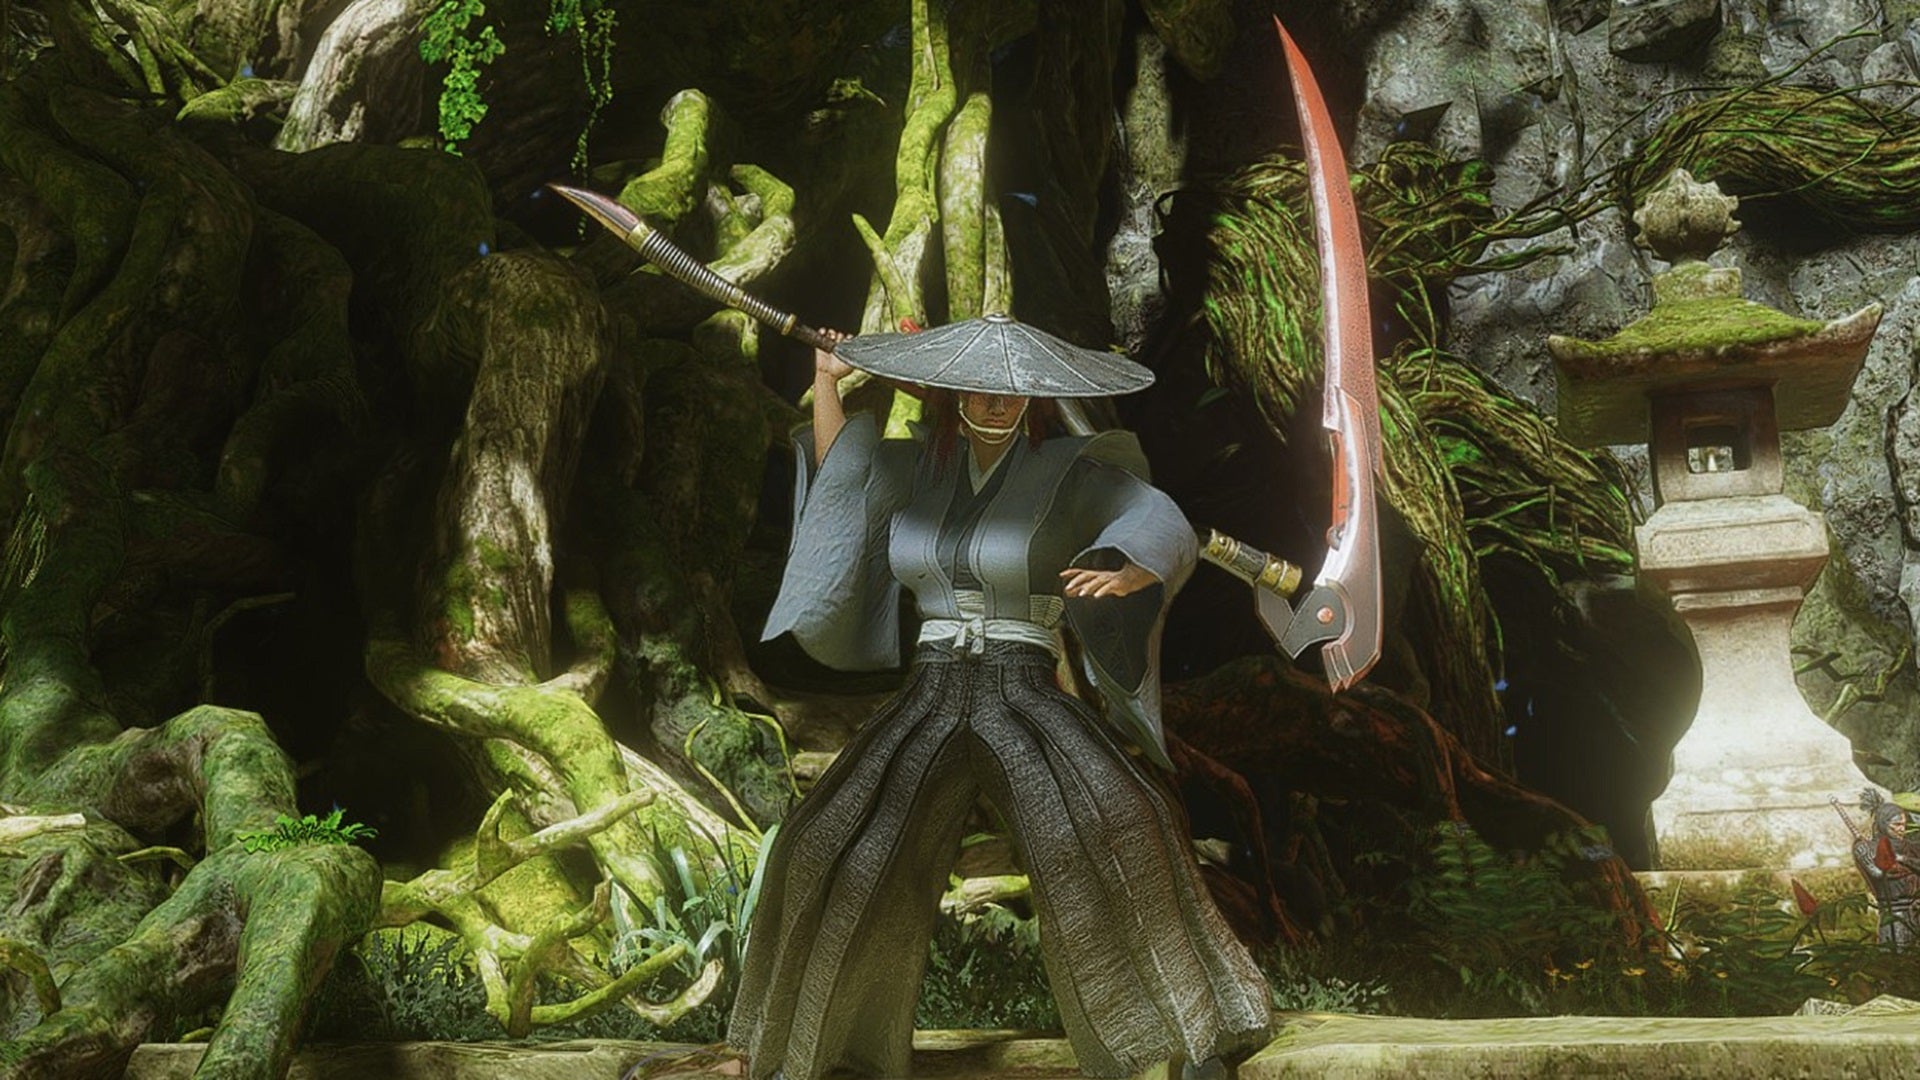
From simple implements like the Sword to the more complex Switchglaive (pictured here), there’s much choice available. But you needn’t learn them all. |Image credit:Rock Paper Shotgun/Koei Tecmo
There are 14 weapon types in Nioh 3 , with seven for the Samurai and seven for the Ninja. Most of these types will be familiar to returning players, but many are now gated to the Ninja playstyle and require relearning, which will be a test of how well veterans can adapt to new moves and the lack of Stances.
For everyone else, refer to our best weapons tier list , and then pick two to four weapons at most and practise those. I’m currently running with the Axe and Cestus for my Samurai form and the Talons and Tonfa for my Ninja. Each weapon has a prodigious skill tree, dubbed Martial Arts for the Samurai and Ninjutsu for the Ninja. Experiment and find what abilities feel most intuitive for you, and know that respeccing is free if you don’t like the way your sword handles.
2. Deflect and Evade until it’s second nature

Use that hefty Axe to the fullest and deflect enemy attacks galore! |Image credit:Rock Paper Shotgun/Koei Tecmo
You can’t parry during the Nioh 3 tutorial, and in fact you need to unlock parry via the Samurai Martial Arts skill tree. It’s called Deflect, and it will be a vital companion during your travels as you time your strikes to bash against the oncoming attacks of enemies with expert precision. Soulslike players know what the deal is - persistence and lots of trial and error is the key.
If you’re the type who prefers dodging, grab the Evade ability from the Ninja’s Ninjutsu tree. This moves the Ninja behind an enemy and lets them get a backstab, which is always excellent damage. It’s also worth searching the Ninjutsu skill trees of certain Ninja weapons to see if they have own version of a more straightforward parry, such as the Talons skill Impenetrability.
3. Work on perfecting Samurai and Ninja playstyles

Armour differences aside, Samurai and Ninja are definitely not the same. |Image credit:Rock Paper Shotgun/Koei Tecmo
There’s a sharp difference between playing as a Samurai and a Ninja in this game. Samurai are all about deliberate strikes, and are best suited for tanking a boss or maximising damage output. You’ll also need to practise Ki Pulse, which is a technique that requires tapping the right button immediately after you attack to refresh your stamina. It’s a rhythmic affair, but eventually you’ll get the hang of it.
Samurai also have three Stances. High Stance is great for powerhouse attacks that use lots of Ki, Mid Stance is moderate damage that conserves Ki, and Low Stance is good for poking attacks that hurt the enemy less but save the most Ki. You’ll need to unlock all of these Stances on the Samurai Martial Arts tree to make the most of your warrior, and it takes time to learn which Stance is best. I tend to stick to Low Stance when I’m cautious against a boss, swapping into High Stance for big charged hits.
In contrast to Samurai, Ninja are easier to learn at first, and are all about hit and run tactics, using Mist and Evade to dart behind an enemy for a backstab, and tossing tonnes of projectiles and Ninjutsu magics from afar. However, Ninjas are awfully squishy, and when it comes to certain bosses, these easier-but-weaker tactics won’t always do the trick.
4. Raise your Exploration Level
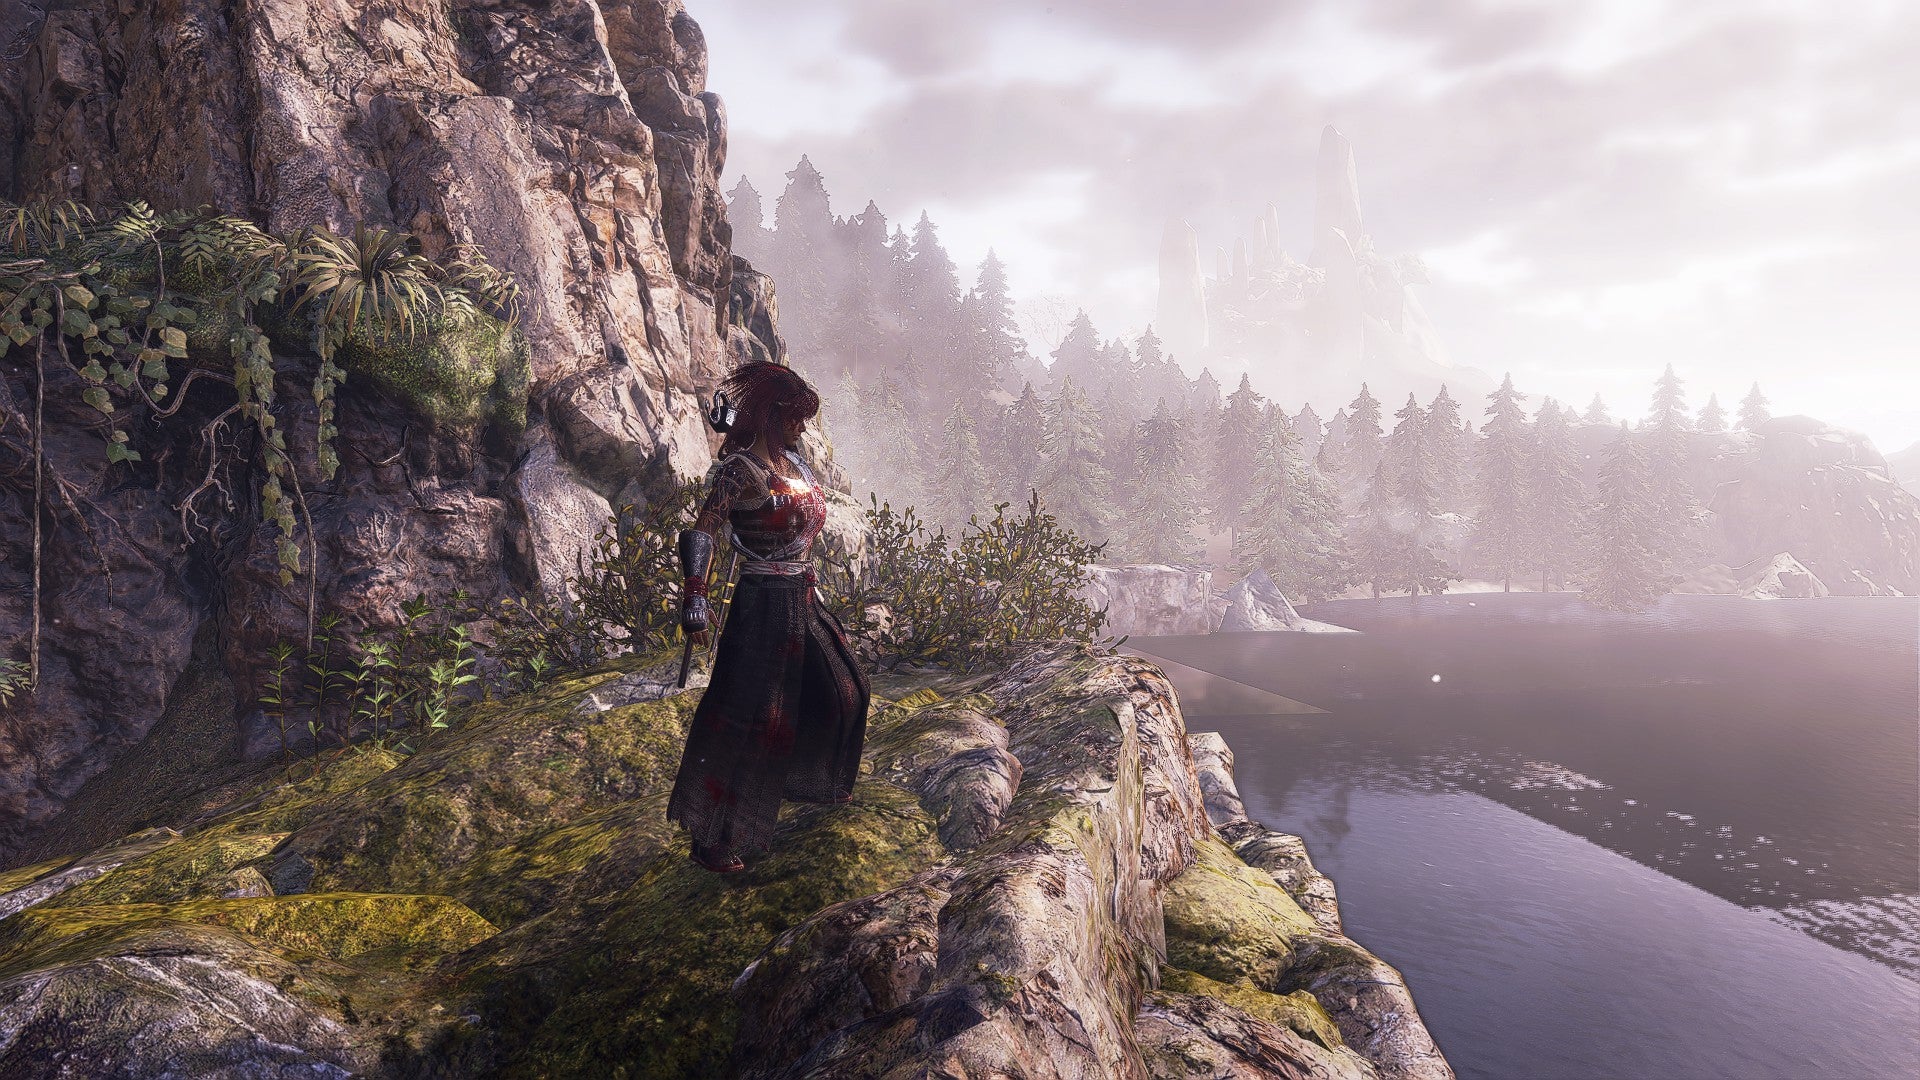
There’s lots to do in this vast game, and that’s not even touching upon the different time periods! |Image credit:Rock Paper Shotgun/Koei Tecmo
It’s a big open world out there, but thankfully Nioh 3 doesn’t overwhelm you with dozens of map markers and quests from the get-go. Instead, there’s a gradual rollout of Myths (the term for sidequests) and icons as you naturally navigate an area, which ups its Exploration Level. So when you first start playing, don’t feel like you need to cross a million things off of your to-do checklist. Simply wander an area naturally, and that Exploration Level will slowly go up and give you more assignments bit-by-bit.
Additionally, it’s worth hunting down lost Kodama, chasing fat Scampusses, and shooting floating Chijiko out of the sky as you explore a map. These friendly yokai are not only adorable, but locating them raises your Exploration Level, gives you options for buffs at save shrines, and also rewards you with Samurai/Ninja Locks, which are a currency used for unlocking new Martial Arts and Ninjutsu. On that note, it’s also worthwhile to look for Jizo statues (small stone figures that resemble squat children) in the wilderness, as these will offer additional buffs.
5. Return to old areas with Guardian Spirits

Kurama Tengu will let you wall jump up difficult spots once you find her. |Image credit:Rock Paper Shotgun/Koei Tecmo
Nioh 3’s maps are designed for backtracking, and the most notable example of this at the start of the game is a cliff wall with a Crucible Wraith atop it. This foe is not accessible until you come back with the correct Guardian Spirit - in this case, Kurama Tengu, who you’ll acquire later. (We’ve got a guide on exactly how to get the Tenryu River Crucible Wraith if you’re so inclined.)
Guardian Spirits are the glowing animals that accompany major characters in Nioh lore. Your protagonist starts with Kusanagi, a friendly dog-like Guardian Spirit (who conveniently transforms into a deadly blade for assassinations), and you’ll gather more as you progress through the campaign. Each Guardian Spirit has a unique traversal ability that you’ll use to navigate Spirit Veins , which are environmental obstacles such as the cliff wall described above.
6. Grab Soul Cores for potent Onmyo magic

It’s all about the Yang and Yin positions here, and if it helps, think of the Onmyo Box as a big ol’ chest for holding and bringing out the energies of your Pocket Monsters. |Image credit:Rock Paper Shotgun/Koei Tecmo
Guardian Spirits are kind of like Pokémon if you think about it, but there’s another “gotta catch ’em all” aspect of Nioh 3 - Soul Cores. These return from Nioh 2 , and they’re basically fragments of a monster’s essence. You’ll naturally pick up Soul Cores as you beat bosses and other enemies, and once you’ve got them you can customise your Onmyo Box by selecting the “Manage Soul Cores” option at a save shrine.
The Onmyo Box is confusing at first, but all you need to remember is that it has two positions: Yang and Yin. Any Soul Cores put in the Yang position will grant you items that work offensively in combat. For example, the Jailer Oni Soul Core, when put in the Yang position, summons the oni to attack enemies. When put in the Yin position, Soul Cores give you items that provide buffs and are usually defensive or passive. For instance, that same Jailer Oni Soul Core will give you Firestop Talismans in the Yin position, which raise your fire resistance.
7. Defeat Revenants for good loot

Gotta kill these other players to get the good loot and summon friendlies to my side! |Image credit:Rock Paper Shotgun/Koei Tecmo
Revenants are the spirits of other players (or NPCs if you’re not playing Nioh 3 online) that can be summoned from Bloody Graves, which are those large red markers sticking out of the earth. If you’ve played Elden Ring and have dealt with invaders, or fought the Inner Demon in Wuchang: Fallen Feathers, you know the deal. It’s worth picking a fight with Revenants, because their loot drops are pretty swell, and beating them up is also a fine way to farm Ochoko Cups .
Ochoko Cups are a resource that you’ll turn in to summon Acolytes, who are reverse-Revenants. Acolytes emerge from Benevolent Graves (the blue markers in the ground) and are a good asset to bring with you to a tricky fight. Even if they go down, they’ll help hold aggro and distract a boss long enough for you to chuck an array of Ninja projectiles.
8. Don’t worry about forging new gear at first
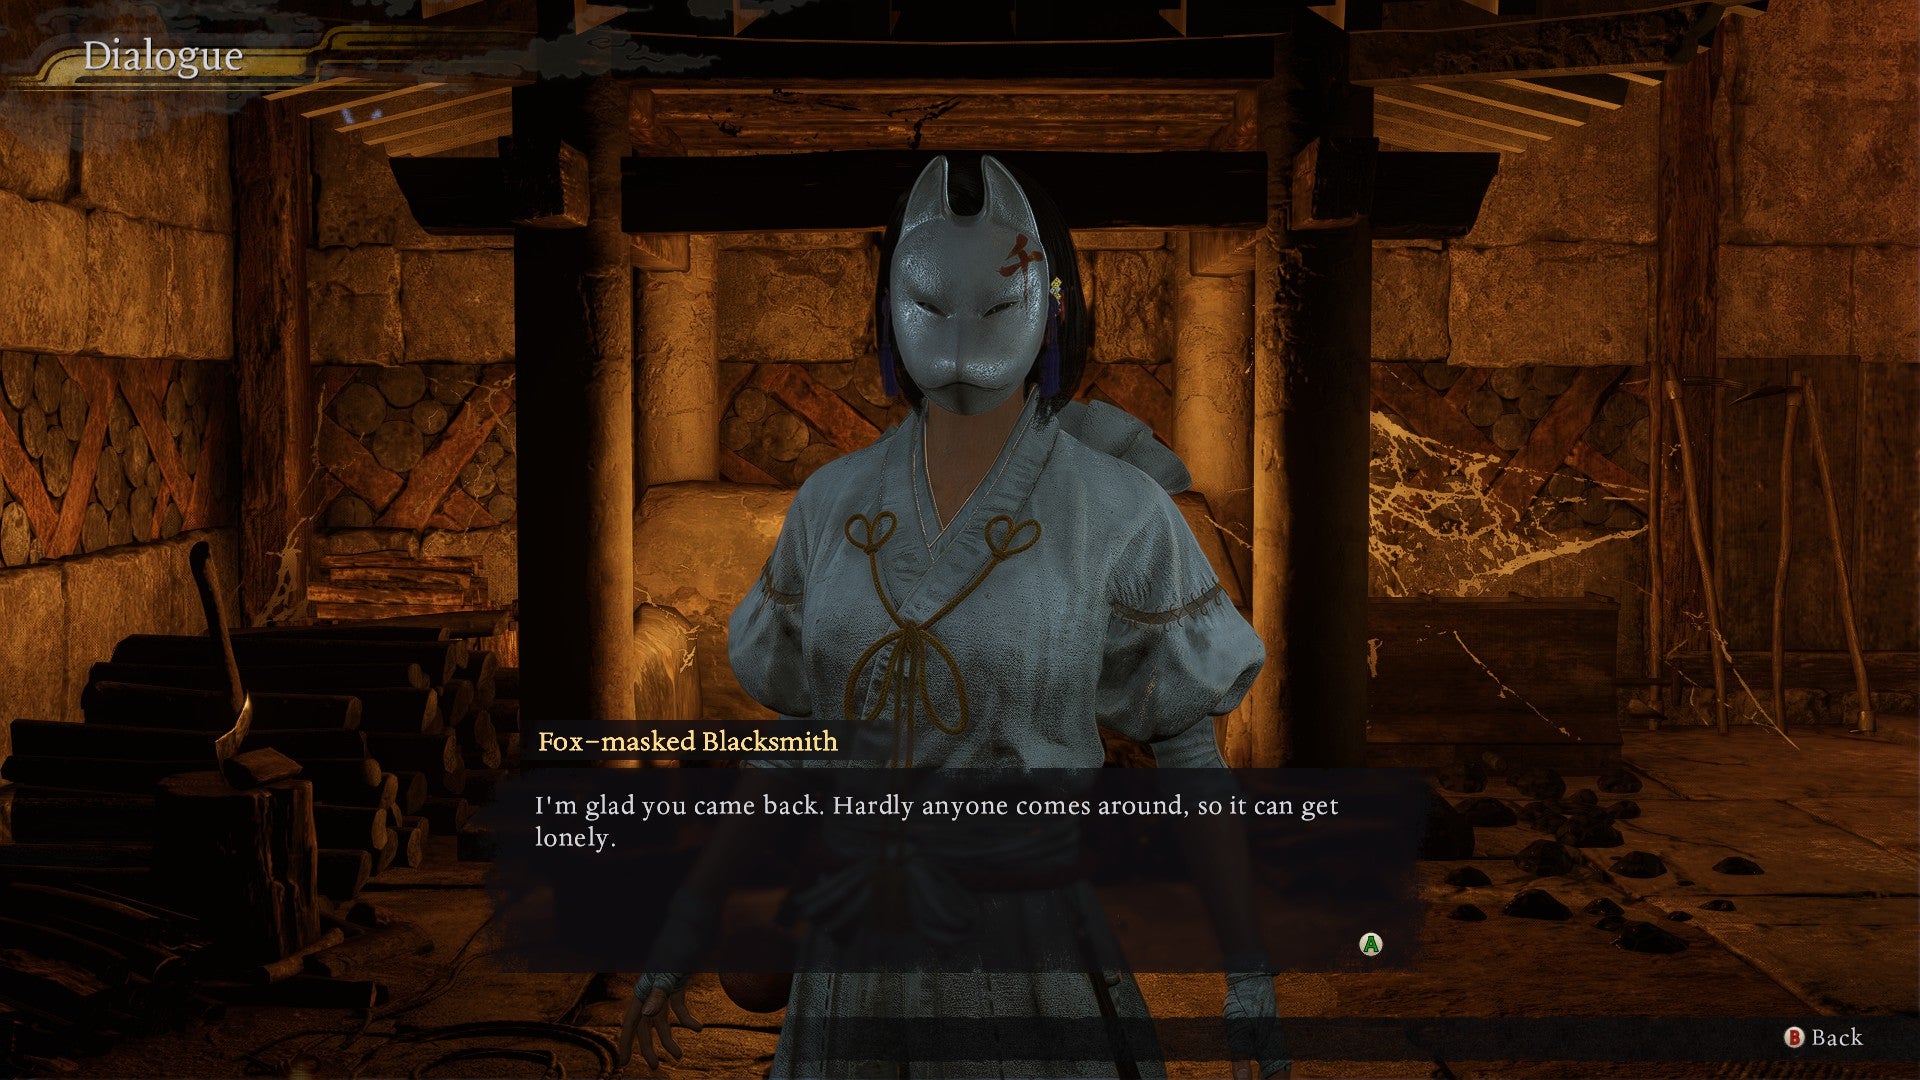
The Blacksmith’s a nice gal; don’t let her stress you out. |Image credit:Rock Paper Shotgun/Koei Tecmo
Once you unlock the Eternal Rift in Nioh 3, a hub world that houses some friendly NPCs (as well as a spot where you can transmog your gear and change your appearance via character creation codes ), you’ll also have access to a Blacksmith. She’s a good way to disassemble and forge new gear, and certain weapons, like the Cestus, are more easily obtained via the Blacksmith, as their drops seem very rare.
All that said, you don’t need to fuss with forging fancy gear on your first playthrough. Nioh oldies know that this stuff is best saved for New Game +, as you’ll get so much loot during a regular run through the game. Simply equip the weapons that are appropriate for your chosen playstyle, slap the equipment with the highest numbers on yourself, and save the tinkering until the endgame. Any gear that you don’t want can be exchanged at a save shrine for additional Amrita, the currency used to level up. We’ve got a guide on how to farm Amrita which has more tips.
That finishes our selection of beginner’s tips for Nioh 3! For additional advice, check out our guides on how to use Titles to get Prestige , how to emote and use gestures , and how to beat the deadly Bloodedge Demon . And while you’re at it, why not read our glowing review of Nioh 3 ?

Nioh 3
PS5 , PC
Rock Paper Shotgun is better when you sign in
Sign in and join us on our journey to discover strange and compelling PC games.

All 75 Arc Raiders Blueprints and where to get them
These areas have the highest chance of giving you Blueprints

Image credit:Rock Paper Shotgun/Embark Studios

Looking for more Arc Raiders Blueprints? It’s a special day when you find a Blueprint, as they’re among the most valuable items in Arc Raiders. If you find a Blueprint that you haven’t already found, then you must make sure you hold onto it at all costs, because Blueprints are the key to one of the most important and powerful systems of meta-progression in the game.
This guide aims to be the very best guide on Blueprints you can find, starting with a primer on what exactly they are and how they work in Arc Raiders, before delving into exactly where to get Blueprints and the very best farming spots for you to take in your search.
We’ll also go over how to get Blueprints from other unlikely activities, such as destroying Surveyors and completing specific quests. And you’ll also find the full list of all 75 Blueprints in Arc Raiders on this page (including the newest Blueprints added with the Cold Snap update , such as the Deadline Blueprint and Firework Box Blueprint), giving you all the information you need to expand your own crafting repertoire.
In this guide:
- What are Blueprints in Arc Raiders?
- Full Blueprint list: All crafting recipes
- Where to find Blueprints in Arc Raiders Blueprints obtained from quests Blueprints obtained from Trials Best Blueprint farming locations

What are Blueprints in Arc Raiders?
Blueprints in Arc Raiders are special items which, if you manage to extract with them, you can expend to permanently unlock a new crafting recipe in your Workshop. If you manage to extract from a raid with an Anvil Blueprint, for example, you can unlock the ability to craft your very own Anvil Pistol, as many times as you like (as long as you have the crafting materials).
To use a Blueprint, simply open your Inventory while in the lobby, then right-click on the Blueprint and click “Learn And Consume” . This will permanently unlock the recipe for that item in your Workshop. As of the Stella Montis update, there are allegedly 75 different Blueprints to unlock - although only 68 are confirmed to be in the game so far. You can see all the Blueprints you’ve found and unlocked by going to the Workshop menu, and hitting “R” to bring up the Blueprint screen.
It’s possible to find duplicates of past Blueprints you’ve already unlocked. If you find these, then you can either sell them, or - if you like to play with friends - you can take it into a match and gift it to your friend so they can unlock that recipe for themselves. Another option is to keep hold of them until the time comes to donate them to the Expedition.
Full Blueprint list: All crafting recipes
Below is the full list of all the Blueprints that are currently available to find in Arc Raiders, and the crafting recipe required for each item:
| Blueprint | Type | Recipe | Crafted At |
|---|---|---|---|
| Bettina | Weapon | 3x Advanced Mechanical Components 3x Heavy Gun Parts 3x Canister | Gunsmith 3 |
| Blue Light Stick | Quick Use | 3x Chemicals | Utility Station 1 |
| Aphelion | Weapon | 3x Magnetic Accelerator 3x Complex Gun Parts 1x Matriarch Reactor | Gunsmith 3 |
| Combat Mk. 3 (Flanking) | Augment | 2x Advanced Electrical Components 3x Processor | Gear Bench 3 |
| Combat Mk. 3 (Aggressive) | Augment | 2x Advanced Electrical Components 3x Processor | Gear Bench 3 |
| Complex Gun Parts | Material | 2x Light Gun Parts 2x Medium Gun Parts 2x Heavy Gun Parts | Refiner 3 |
| Fireworks Box | Quick Use | 1x Explosive Compound 3x Pop Trigger | Explosives Station 2 |
| Gas Mine | Mine | 4x Chemicals 2x Rubber Parts | Explosives Station 1 |
| Green Light Stick | Quick Use | 3x Chemicals | Utility Station 1 |
| Pulse Mine | Mine | 1x Crude Explosives 1x Wires | Explosives Station 1 |
| Seeker Grenade | Grenade | 1x Crude Explosives 2x ARC Alloy | Explosives Station 1 |
| Looting Mk. 3 (Survivor) | Augment | 2x Advanced Electrical Components 3x Processor | Gear Bench 3 |
| Angled Grip II | Mod | 2x Mechanical Components 3x Duct Tape | Gunsmith 2 |
| Angled Grip III | Mod | 2x Mod Components 5x Duct Tape | Gunsmith 3 |
| Hullcracker | Weapon | 1x Magnetic Accelerator 3x Heavy Gun Parts 1x Exodus Modules | Gunsmith 3 |
| Launcher Ammo | Ammo | 5x Metal Parts 1x Crude Explosives | Workbench 1 |
| Anvil | Weapon | 5x Mechanical Components 5x Simple Gun Parts | Gunsmith 2 |
| Anvil Splitter | Mod | 2x Mod Components 3x Processor | Gunsmith 3 |
| ??? | ??? | ??? | ??? |
| Barricade Kit | Quick Use | 1x Mechanical Components | Utility Station 2 |
| Blaze Grenade | Grenade | 1x Explosive Compound 2x Oil | Explosives Station 3 |
| Bobcat | Weapon | 3x Advanced Mechanical Components 3x Light Gun Parts | Gunsmith 3 |
| Osprey | Weapon | 2x Advanced Mechanical Components 3x Medium Gun Parts 7x Wires | Gunsmith 3 |
| Burletta | Weapon | 3x Mechanical Components 3x Simple Gun Parts | Gunsmith 1 |
| Compensator II | Mod | 2x Mechanical Components 4x Wires | Gunsmith 2 |
| Compensator III | Mod | 2x Mod Components 8x Wires | Gunsmith 3 |
| Defibrillator | Quick Use | 9x Plastic Parts 1x Moss | Medical Lab 2 |
| ??? | ??? | ??? | ??? |
| Equalizer | Weapon | 3x Magnetic Accelerator 3x Complex Gun Parts 1x Queen Reactor | Gunsmith 3 |
| Extended Barrel | Mod | 2x Mod Components 8x Wires | Gunsmith 3 |
| Extended Light Mag II | Mod | 2x Mechanical Components 3x Steel Spring | Gunsmith 2 |
| Extended Light Mag III | Mod | 2x Mod Components 5x Steel Spring | Gunsmith 3 |
| Extended Medium Mag II | Mod | 2x Mechanical Components 3x Steel Spring | Gunsmith 2 |
| Extended Medium Mag III | Mod | 2x Mod Components 5x Steel Spring | Gunsmith 3 |
| Extended Shotgun Mag II | Mod | 2x Mechanical Components 3x Steel Spring | Gunsmith 2 |
| Extended Shotgun Mag III | Mod | 2x Mod Components 5x Steel Spring | Gunsmith 3 |
| Remote Raider Flare | Quick Use | 2x Chemicals 4x Rubber Parts | Utility Station 1 |
| Heavy Gun Parts | Material | 4x Simple Gun Parts | Refiner 2 |
| Venator | Weapon | 2x Advanced Mechanical Components 3x Medium Gun Parts 5x Magnet | Gunsmith 3 |
| Il Toro | Weapon | 5x Mechanical Components 6x Simple Gun Parts | Gunsmith 1 |
| Jolt Mine | Mine | 1x Electrical Components 1x Battery | Explosives Station 2 |
| Explosive Mine | Mine | 1x Explosive Compound 1x Sensors | Explosives Station 3 |
| Jupiter | Weapon | 3x Magnetic Accelerator 3x Complex Gun Parts 1x Queen Reactor | Gunsmith 3 |
| Light Gun Parts | Material | 4x Simple Gun Parts | Refiner 2 |
| Lightweight Stock | Mod | 2x Mod Components 5x Duct Tape | Gunsmith 3 |
| Lure Grenade | Grenade | 1x Speaker Component 1x Electrical Components | Utility Station 2 |
| Medium Gun Parts | Material | 4x Simple Gun Parts | Refiner 2 |
| Torrente | Weapon | 2x Advanced Mechanical Components 3x Medium Gun Parts 6x Steel Spring | Gunsmith 3 |
| Muzzle Brake II | Mod | 2x Mechanical Components 4x Wires | Gunsmith 2 |
| Muzzle Brake III | Mod | 2x Mod Components 8x Wires | Gunsmith 3 |
| Padded Stock | Mod | 2x Mod Components 5x Duct Tape | Gunsmith 3 |
| Shotgun Choke II | Mod | 2x Mechanical Components 4x Wires | Gunsmith 2 |
| Shotgun Choke III | Mod | 2x Mod Components 8x Wires | Gunsmith 3 |
| Shotgun Silencer | Mod | 2x Mod Components 8x Wires | Gunsmith 3 |
| Showstopper | Grenade | 1x Advanced Electrical Components 1x Voltage Converter | Explosives Station 3 |
| Silencer I | Mod | 2x Mechanical Components 4x Wires | Gunsmith 2 |
| Silencer II | Mod | 2x Mod Components 8x Wires | Gunsmith 3 |
| Snap Hook | Quick Use | 2x Power Rod 3x Rope 1x Exodus Modules | Utility Station 3 |
| Stable Stock II | Mod | 2x Mechanical Components 3x Duct Tape | Gunsmith 2 |
| Stable Stock III | Mod | 2x Mod Components 5x Duct Tape | Gunsmith 3 |
| Tagging Grenade | Grenade | 1x Electrical Components 1x Sensors | Utility Station 3 |
| Tempest | Weapon | 3x Advanced Mechanical Components 3x Medium Gun Parts 3x Canister | Gunsmith 3 |
| Trigger Nade | Grenade | 2x Crude Explosives 1x Processor | Explosives Station 2 |
| Vertical Grip II | Mod | 2x Mechanical Components 3x Duct Tape | Gunsmith 2 |
| Vertical Grip III | Mod | 2x Mod Components 5x Duct Tape | Gunsmith 3 |
| Vita Shot | Quick Use | 2x Antiseptic 1x Syringe | Medical Lab 3 |
| Vita Spray | Quick Use | 3x Antiseptic 1x Canister | Medical Lab 3 |
| Vulcano | Weapon | 1x Magnetic Accelerator 3x Heavy Gun Parts 1x Exodus Modules | Gunsmith 3 |
| Wolfpack | Grenade | 2x Explosive Compound 2x Sensors | Explosives Station 3 |
| Red Light Stick | Quick Use | 3x Chemicals | Utility Station 1 |
| Smoke Grenade | Grenade | 14x Chemicals 1x Canister | Utility Station 2 |
| Deadline | Mine | 3x Explosive Compound 2x ARC Circuitry | Explosives Station 3 |
| Trailblazer | Grenade | 1x Explosive Compound 1x Synthesized Fuel | Explosives Station 3 |
| Tactical Mk. 3 (Defensive) | Augment | 2x Advanced Electrical Components 3x Processor | Gear Bench 3 |
| Tactical Mk. 3 (Healing) | Augment | 2x Advanced Electrical Components 3x Processor | Gear Bench 3 |
| Yellow Light Stick | Quick Use | 3x Chemicals | Utility Station 1 |
Note: The missing Blueprints in this list likely have not actually been added to the game at the time of writing, because none of the playerbase has managed to find any of them. As they are added to the game, I will update this page with the most relevant information so you know exactly how to get all 75 Arc Raiders Blueprints.
Where to find Blueprints in Arc Raiders
Below is a list of all containers, modifiers, and events which maximise your chances of finding Blueprints:
- Certain quests reward you with specific Blueprints .
- Completing Trials has a high chance of offering Blueprints as rewards.
- Surveyors have a decent chance of dropping Blueprints on death.
- High loot value areas tend to have a greater chance of spawning Blueprints.
- Night Raids and Storms may increase rare Blueprint spawn chances in containers.
- Containers with higher numbers of items may have a higher tendency to spawn Blueprints. As a result, Blue Gate (which has many “large” containers containing multiple items) may give you a higher chance of spawning Blueprints.
- Raider containers (Raider Caches, Weapon Boxes, Medical Bags, Grenade Tubes) have increased Blueprint drop rates. As a result, the Uncovered Caches event gives you a high chance of finding Blueprints.
- Security Lockers have a higher than average chance of containing Blueprints.
- Certain Blueprints only seem to spawn under specific circumstances: Tempest Blueprint only spawns during Night Raid events. Vulcano Blueprint only spawns during Hidden Bunker events. Jupiter and Equaliser Blueprints only spawn during Harvester events.

Raider Caches, Weapon Boxes, and other raider-oriented container types have a good chance of offering Blueprints. |Image credit:Rock Paper Shotgun/Embark Studios
Blueprints have a very low chance of spawning in any container in Arc Raiders, around 1-2% on average. However, there is a higher chance of finding Blueprints in particular container types. Specifically, you can find more Blueprints in Raider containers and security lockers.
Beyond this, if you’re looking for Blueprints you should focus on regions of the map which are marked as having particularly high-value loot. Areas such as the Control Tower in Dam Battlegrounds, the Arrival and Departure Buildings in Spaceport, and Pilgrim’s Peak in Blue Gate all have a better-than-average chance of spawning Blueprints somewhere amongst all their containers. Night Raids and Electromagnetic Storm events also increase the drop chances of certain Blueprints .
In addition to these containers, you can often loot Blueprints from destroyed Surveyors - the largest of the rolling ball ARC. Surveyors are more commonly found on the later maps - Spaceport and Blue Gate - and if one spawns in your match, you’ll likely see it by the blue laser beam that it casts into the sky while “surveying”.
Surveyors are quite well-armoured and will very speedily run away from you once it notices you, but if you can take one down then make sure you loot all its parts for a chance of obtaining certain unusual Blueprints.
Blueprints obtained from quests
One way in which you can get Blueprints is by completing certain quests for the vendors in Speranza. Some quests will reward you with a specific item Blueprint upon completion, so as long as you work through all the quests in Arc Raiders, you are guaranteed those Blueprints.
Here is the full list of all Blueprints you can get from quest rewards:
- Trigger Nade Blueprint: Rewarded after completing “Sparks Fly”.
- Lure Grenade Blueprint: Rewarded after completing “Greasing Her Palms”.
- Burletta Blueprint: Rewarded after completing “Industrial Espionage”.
- Hullcracker Blueprint (and Launcher Ammo Blueprint): Rewarded after completing “The Major’s Footlocker”.
Alas, that’s only 4 Blueprints out of a total of 75 to unlock, so for the vast majority you will need to find them yourself during a raid. If you’re intent on farming Blueprints, then it’s best to equip yourself with cheap gear in case you lose it, but don’t use a free loadout because then you won’t get a safe pocket to stash any new Blueprint you find. No pain in Arc Raiders is sharper than failing to extract with a new Blueprint you’ve been after for a dozen hours already.

One of the best ways to get Blueprints is by hitting three stars on all five Trials every week. |Image credit:Rock Paper Shotgun/Embark Studios
Blueprints obtained from Trials
One of the very best ways to get Blueprints is as rewards for completing Trials in Arc Raiders. Trials are unlocked from Level 15 onwards, and allow you to earn rewards by focusing on certain tasks over the course of several raids. For example, one Trial might task you with dealing damage to Hornets, while another might challenge you to loot Supply Drops.
Trials refresh on a weekly basis, with a new week bringing five new Trials. Each Trial can offer up to three rewards after passing certain score milestones, and it’s possible to receive very high level loot from these reward crates - including Blueprints. So if you want to unlock as many Blueprints as possible, you should make a point of completing as many Trials as possible each week.
Best Blueprint farming locations
The very best way to get Blueprints is to frequent specific areas of the maps which combine high-tier loot pools with the right types of containers to search. Here are my recommendations for where to find Blueprints on every map, so you can always keep the search going for new crafting recipes to unlock.

Image credit:Rock Paper Shotgun/Embark Studios
Dam Battlegrounds
The best places to farm Blueprints on Dam Battlegrounds are the Control Tower, Power Generation Complex, Ruby Residence, and Pale Apartments . The first two regions, despite only being marked on the map as mid-tier loot, contain a phenomenal number of containers to loot. The Control Tower can also contain a couple of high-tier Security Lockers - though of course, you’ll need to have unlocked the Security Breach skill at the end of the Survival tree.
There’s also a lot of reporting amongst the playerbase that the Residential areas in the top-left of the map - Pale Apartments and Ruby Residence - give you a comparatively strong chance of finding Blueprints. Considering their size, there’s a high density of containers to loot in both locations, and they also have the benefit of being fairly out of the way. So you’re more likely to have all the containers to yourself.
Buried City
The best Blueprint farming locations on Buried City are the Santa Maria Houses, Grandioso Apartments, Town Hall, and the various buildings of the New District . Grandioso Apartments has a lower number of containers than the rest, but a high chance of spawning weapon cases - which have good Blueprint drop rates. The others are high-tier loot areas, with plenty of lootable containers - including Security Lockers.
Spaceport
The best places to find Blueprints on Spaceport are the Arrival and Departure Buildings, as well as Control Tower A6 and the Launch Towers . All these areas are labelled as high-value loot regions, and many of them are also very handily connected to one another by the Spaceport wall, which you can use to quickly run from one area to the next. At the tops of most of these buildings you’ll find at least one Security Locker, so this is an excellent farming route for players looking to find Blueprints.
The downside to looting Blueprints on Spaceport is that all these areas are hotly contested, particularly in Duos and Squads. You’ll need to be very focused and fast in order to complete the full farming route.

Image credit:Rock Paper Shotgun/Embark Studios
Blue Gate
Blue Gate tends to have a good chance of dropping Blueprints, potentially because it generally has a high number of containers which can hold lots of items; so there’s a higher chance of a Blueprint spawning in each container. In my experience, the best Blueprint farming spots on Blue Gate are Pilgrim’s Peak, Raider’s Refuge, the Ancient Fort, and the Underground Complex beneath the Warehouse .
All of these areas contain a wealth of containers to loot. Raider’s Refuge has less to loot, but the majority of the containers in and around the Refuge are raider containers, which have a high chance of containing Blueprints - particularly during major events.
Stella Montis
On the whole, Stella Montis seems to have a very low drop rate for Blueprints (though a high chance of dropping other high-tier loot). If you do want to try farming Blueprints on this map, the best places to find Blueprints in Stella Montis are Medical Research, Assembly Workshop, and the Business Center . These areas have the highest density of containers to loot on the map.
In addition to this, the Western Tunnel has a few different Security Lockers to loot, so while there’s very little to loot elsewhere in this area of the map, it’s worth hitting those Security Lockers if you spawn there at the start of a match.
That wraps up this primer on how to get all the Blueprints in Arc Raiders as quickly as possible. With the Expedition system constantly resetting a large number of players’ Blueprints, it’s more important than ever to have the most up-to-date information on where to find all these Blueprints.
While you’re here, be sure to check out our Arc Raiders best guns tier list , as well as our primers on the best skills to unlock and all the different Field Depot locations on every map.


ARC Raiders
PS5 , Xbox Series X/S , PC
Rock Paper Shotgun is better when you sign in
Sign in and join us on our journey to discover strange and compelling PC games.
