Nightingale early access review: a numbers grind disguised as a gaslamp survival game
I simply can’t escape the rarity rainbow

Image credit:Rock Paper Shotgun/Inflexion Games

- Developer: Inflexion Games
- Publisher: Inflexion Games
- Release: Out now
- On: Windows
- From: Steam , Epic Games Store
- Price: £25/€30/$30
- Reviewed on: Intel Core i7-12700F, 16GB RAM, Nvidia RTX 3080, Windows 11
Not long ago, a few of us from the RPS Treehouse wandered through first-person survival ’em up Nightingale with its boss Aaryn Flynn, and then had it out about the game’s crafting menus. I was one of the folks who wasn’t so hot on what we’d played, and I’d hoped that the early access version would prove me wrong.
Alas, I am sad to report that I still do not like Nightingale . From what I’ve played so far, the game is an awkward marriage of survival game and live service loot grind, which makes you feel divorced from the very world you inhabit.
For full transparency, I haven’t reached the endgame, but I’ve tried to pack in as much play time as I can. This review isn’t from someone who’s built a second life in the magic woods, but from the perspective of an individual who gave it an honest go. I suppose the question I can answer is: would I have wanted to spend hundreds of hours with Nightingale and push through to its endgame? And that’s a hard no from me, chief.

Image credit:Rock Paper Shotgun/Inflexion Games
Nightingale’s setup is, initially, quite compelling. Humans had this arcane portal network where they could travel between realms and be merry, but it collapsed because of a mysterious cataclysm called The Pale. So you’re one of many, dubbed Realmwalkers, who’ve been left scattered in the portal network and who’d like to reach the safety of a steampunk, Victorian era-esque city called Nightingale.
Off the bat you meet Puck, a floating lad with a mask who speaks in teapot English. He’s basically a helpful guide who teaches you how to craft workbenches and structures the survival activities you partake in. Quickly, though, you realise that Nightingale and its realm-hopping premise are a bundle of wood logs in a trench coat. The fun Victorian gear you started off with? That cool waistcoat? The nice tie? Get it off! Puck wants you to make a campfire, pick up some rocks, and outfit yourself like a caveman.
The vast majority of your time with Nightingale’s early game plays like the blurb of any other middling survival offering. You are to gather wood, gather stones, and otherwise perform all the manual labour necessary to ensure your rest and hunger bars don’t fall too low. Otherwise, an early quest advises you to raise your gear score by crafting things of a certain level, then popping them on. It’s the first sign that the portal network isn’t actually an interconnected series of zany realms with loads to discover, but moreso a series of level gates.
Eventually, the rhythm of the game establishes itself. You select one realm as your ‘ome (plonk down a marker and it’ll become your “respite realm”), which you can fast travel to it from wherever you might be. And it’s at your respite realm where you set up your base, storage, and things like that. To progress, you unlock and craft cards that generate progressively trickier worlds based on the combinations you’ve slapped into the portals you’ve built. One card determines the biome (desert, swamp, forest), while the other is called something fancy like Astrolabe or Herbarium, but actually just determines the difficulty level of its inhabitants.

Image credit:Rock Paper Shotgun/Inflexion Games
What progression means is an endless exercise in upping your gear score through a constant back and forth, like some mother blue tit who returns to her nest periodically to vomit food into her children’s gullets. Except the vomit here is lumber and the gullets are sawmills. By virtue of the gear score chase, you’ll view realms as resource-scapes to be gleaned of higher value rocks, to make higher value things. There are moments, though, where biomes do take your breath away, like when a tower acts as a mysterious beacon amidst a quiet desert, or a spectral elk’s magic call rejuvenates felled trees.
Perhaps Nightingale’s greatest crime is how it divorces discovery from exploration. Where other survival games integrate progression into the minerals and materials of the very earth you walk, Nightingale’s unlocks come from… vendors. In Valheim , for instance, survival and discovery intertwine as iron ore outfits you with the armour and tools you need to mine or chop whatever’s next in line: rags, iron, carapace, Louis Vuitton. There’s a sense you’re shaping the landscape into a series of stepping stones. With Nightingale, discovery is reliant on a shopkeeper and whether you’ve got enough of a currency called Essence to give them.
Essence is broken down into tiers and it’s what you’ll need to repair your things, buy new recipes, and upgrade your equipment. The better the equipment you want to unlock and upgrade, the higher the tier of Essence you’ll be working with. And to get large amounts of the stuff, you need to complete activities dotted around the map that further reinforce grind.
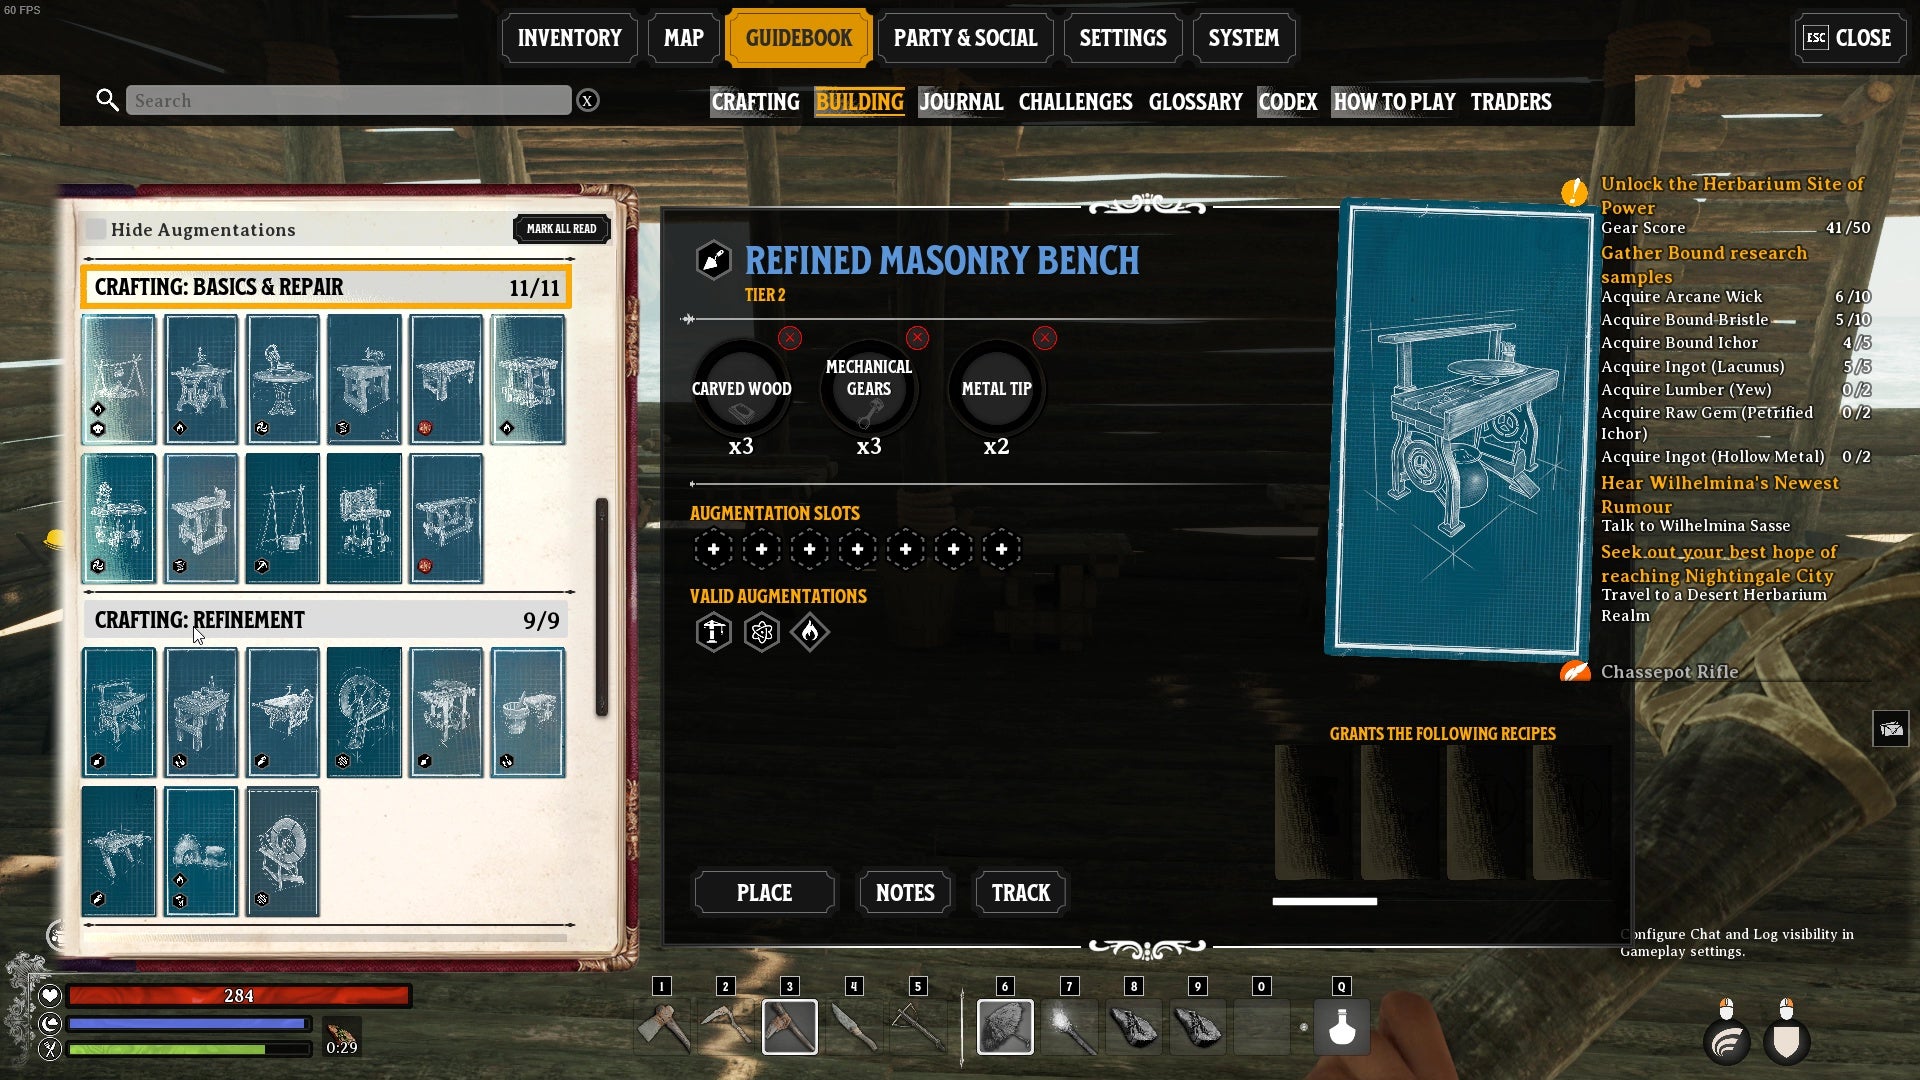
Image credit:Rock Paper Shotgun/Inflexion Games
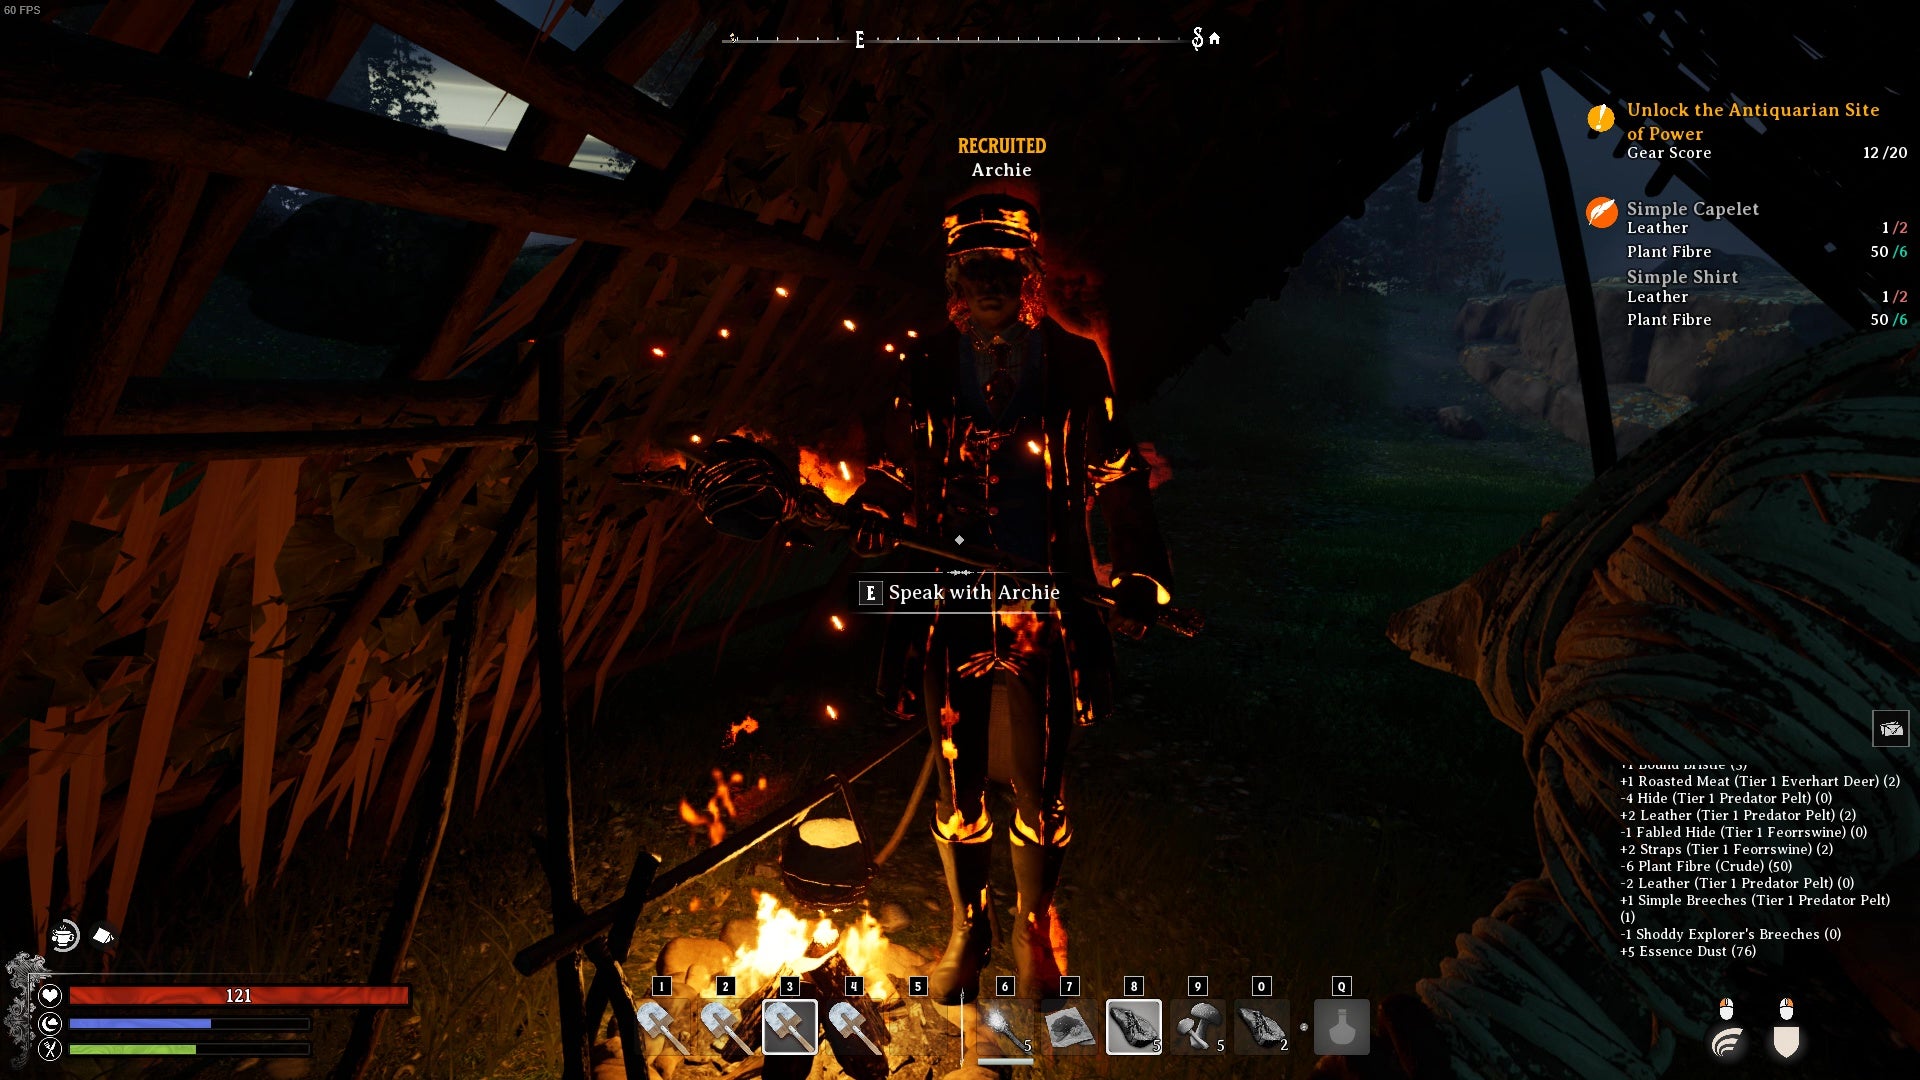
Image credit:Rock Paper Shotgun/Inflexion Games
No matter where you are - desert, forest, swamp - the activities remain largely the same. There are small parkour puzzles where you awkwardly mantle up to an Essence paycheck. “Occupations”, where you batter enemies who awkwardly spawn into small caverns or huts. “Puzzle towers” where you’ve got to awkwardly memorise certain tunes in order, awkwardly find some glyphs scrawled on the walls.
You can also recruit NPC companions (despite belonging to factions that dress differently, they are all the same) by helping them build certain structures, or helping them defend little outposts. I spent an age helping one fella build a house, only to realise he wasn’t any different to my current companion (Archie, a guy who holds my ore, draws aggro, and hits trees at random) and paid me less Essence than I would’ve got for completing a pissing obstacle course. Still, it’s nice that solo players have the option of an AI companion who can take a little heat in battle and make it a bit easier to collect resources, I suppose.
My faves are the Occupations that see you transported through a portal into a puzzle zone, where you’ve got to do battle with enemies and maybe find some glyphs. “Favourite” might be a strong descriptor here, but they at least offered a slight sense of adventure. Each biome is also home to a big Fae Tower, which looks quite the part but devolves into what’s actually a sequence of mini events ripped from the other activities, except there’s a boss fight against a big robot at the end. The robot is basically the same every time.
Manage to complete a Fae Tower and you’ll unlock all the activity icons across the map, making it easier to barrel between them in your quest for Essence. Not only that, but you can bang a Minor card into the tower to alter the world a bit more. Many of these curl the monkey’s paw, in that you might benefit from extra resources but your stamina tanks a little to compensate. Some are genuinely quite fun, like one that makes it so you harvest meat from trees, or another where you’re able to jump and float high in the air. Skyboxes react in novel ways, too, glistening with fractures or turning deep crimson.

Image credit:Rock Paper Shotgun/Inflexion Games
Fighting your way to the top isn’t great, at least early to mid game. Combat is Elder Scrolls: Oblivion levels of floatiness, but somehow worse, with hits that rarely register and little strategy needed to overcome dunce AI. Double-barrel shotguns and large hammers with magical powers do lend later fights extra crunch, but you’re forever wrangling with jank that tires more than it amuses.
Elsewhere, much of your time is spent grinding out Essence to feed a clunky crafting system with a UI in desperate need of a retooling. Everything, like your benches and whatnot are all organised into separate drop down menus. Click on each individual thing and you can see what material is required to build them; all intuitive and useful for a beginner who hasn’t unlocked much. But as you progress the drop down menus expand into a confusing sprawl of lists that would fry even the hardiest supercomputer. Knowing what to get, which vendor you might need to buy it from, and what biome you need to have unlocked, eventually muddies the game’s clear quest progression.
The endless lists speak to a bigger issue, which is the game’s obsession with materials. There are different types of hide, like predator hide, or prey hide, or special hide from a boar with a name, or the hide you’ve snipped off seek’s back. Not only do they all share the same icon, making them a nightmare to organise or craft with, but they’re only the beginning.
While I think survival games have stagnated, I believe there’s some fundamentals to the formula that aren’t worth straying from, i.e., work benches. Again, good survival games have you upgrade rickety benches into arcane benches that churn out starter things, but also do better versions of the starter thing. Clutter is kept to a minimum because you’re bettering foundations. Nightingale largely does away with this system, forcing you to turn your home into a maze of contraptions, all of which do a handful of very specific things.

Image credit:Rock Paper Shotgun/Inflexion Games
Not everything about building is agony, though. There’s some nuance to crafting armour or weaponry using special versions of a material, like getting extra bonuses or a unique colour combination from an insect’s shell. And at times, there’s a real sense of accomplishment when you craft a buffed piece of armour or pop down a station you’ve worked hard towards. Like other games where numbers go up, it’s hard not to ignore the hungry gnats in your brain who clamour for those sweet percentage increases.
And I’d say that snapping together a base is intuitive and relatively simple, bypassing the pain of the lists. I like how blue silhouettes let you preview how things are going to look before you inject resources into them. Sadly I didn’t get the chance to experience these little moments of magic with pals, but joining each other’s servers seemed like a doozy in the preview. In a way, it does show that Nightingale’s happy to operate as a perfectly doable solo experience.
While I understand Nightingale’s in early access and things are subject to a tweaking, I can’t help but feel that its problems lie deeper than surface level numbers and UI. I respect how it’s tried to push the survival genre forward with its realm-hops and gear scoring, but both of these fundamentals aren’t implemented very well. The realms strike me as re-skins once the novelty’s worn off, and the way progress is tied to numbers only serves to make survival feel like a grind. Unless things change dramatically, I think I’ll pass on reaching Nightingale.
This review is based on a retail build of the game, provided by developers Inflexion Games.
Find out how we conduct our reviews by reading our review policy .

Nightingale
PC
Rock Paper Shotgun is better when you sign in
Sign in and join us on our journey to discover strange and compelling PC games.

All 75 Arc Raiders Blueprints and where to get them
These areas have the highest chance of giving you Blueprints

Image credit:Rock Paper Shotgun/Embark Studios

Looking for more Arc Raiders Blueprints? It’s a special day when you find a Blueprint, as they’re among the most valuable items in Arc Raiders. If you find a Blueprint that you haven’t already found, then you must make sure you hold onto it at all costs, because Blueprints are the key to one of the most important and powerful systems of meta-progression in the game.
This guide aims to be the very best guide on Blueprints you can find, starting with a primer on what exactly they are and how they work in Arc Raiders, before delving into exactly where to get Blueprints and the very best farming spots for you to take in your search.
We’ll also go over how to get Blueprints from other unlikely activities, such as destroying Surveyors and completing specific quests. And you’ll also find the full list of all 75 Blueprints in Arc Raiders on this page (including the newest Blueprints added with the Cold Snap update , such as the Deadline Blueprint and Firework Box Blueprint), giving you all the information you need to expand your own crafting repertoire.
In this guide:
- What are Blueprints in Arc Raiders?
- Full Blueprint list: All crafting recipes
- Where to find Blueprints in Arc Raiders Blueprints obtained from quests Blueprints obtained from Trials Best Blueprint farming locations

What are Blueprints in Arc Raiders?
Blueprints in Arc Raiders are special items which, if you manage to extract with them, you can expend to permanently unlock a new crafting recipe in your Workshop. If you manage to extract from a raid with an Anvil Blueprint, for example, you can unlock the ability to craft your very own Anvil Pistol, as many times as you like (as long as you have the crafting materials).
To use a Blueprint, simply open your Inventory while in the lobby, then right-click on the Blueprint and click “Learn And Consume” . This will permanently unlock the recipe for that item in your Workshop. As of the Stella Montis update, there are allegedly 75 different Blueprints to unlock - although only 68 are confirmed to be in the game so far. You can see all the Blueprints you’ve found and unlocked by going to the Workshop menu, and hitting “R” to bring up the Blueprint screen.
It’s possible to find duplicates of past Blueprints you’ve already unlocked. If you find these, then you can either sell them, or - if you like to play with friends - you can take it into a match and gift it to your friend so they can unlock that recipe for themselves. Another option is to keep hold of them until the time comes to donate them to the Expedition.
Full Blueprint list: All crafting recipes
Below is the full list of all the Blueprints that are currently available to find in Arc Raiders, and the crafting recipe required for each item:
| Blueprint | Type | Recipe | Crafted At |
|---|---|---|---|
| Bettina | Weapon | 3x Advanced Mechanical Components 3x Heavy Gun Parts 3x Canister | Gunsmith 3 |
| Blue Light Stick | Quick Use | 3x Chemicals | Utility Station 1 |
| Aphelion | Weapon | 3x Magnetic Accelerator 3x Complex Gun Parts 1x Matriarch Reactor | Gunsmith 3 |
| Combat Mk. 3 (Flanking) | Augment | 2x Advanced Electrical Components 3x Processor | Gear Bench 3 |
| Combat Mk. 3 (Aggressive) | Augment | 2x Advanced Electrical Components 3x Processor | Gear Bench 3 |
| Complex Gun Parts | Material | 2x Light Gun Parts 2x Medium Gun Parts 2x Heavy Gun Parts | Refiner 3 |
| Fireworks Box | Quick Use | 1x Explosive Compound 3x Pop Trigger | Explosives Station 2 |
| Gas Mine | Mine | 4x Chemicals 2x Rubber Parts | Explosives Station 1 |
| Green Light Stick | Quick Use | 3x Chemicals | Utility Station 1 |
| Pulse Mine | Mine | 1x Crude Explosives 1x Wires | Explosives Station 1 |
| Seeker Grenade | Grenade | 1x Crude Explosives 2x ARC Alloy | Explosives Station 1 |
| Looting Mk. 3 (Survivor) | Augment | 2x Advanced Electrical Components 3x Processor | Gear Bench 3 |
| Angled Grip II | Mod | 2x Mechanical Components 3x Duct Tape | Gunsmith 2 |
| Angled Grip III | Mod | 2x Mod Components 5x Duct Tape | Gunsmith 3 |
| Hullcracker | Weapon | 1x Magnetic Accelerator 3x Heavy Gun Parts 1x Exodus Modules | Gunsmith 3 |
| Launcher Ammo | Ammo | 5x Metal Parts 1x Crude Explosives | Workbench 1 |
| Anvil | Weapon | 5x Mechanical Components 5x Simple Gun Parts | Gunsmith 2 |
| Anvil Splitter | Mod | 2x Mod Components 3x Processor | Gunsmith 3 |
| ??? | ??? | ??? | ??? |
| Barricade Kit | Quick Use | 1x Mechanical Components | Utility Station 2 |
| Blaze Grenade | Grenade | 1x Explosive Compound 2x Oil | Explosives Station 3 |
| Bobcat | Weapon | 3x Advanced Mechanical Components 3x Light Gun Parts | Gunsmith 3 |
| Osprey | Weapon | 2x Advanced Mechanical Components 3x Medium Gun Parts 7x Wires | Gunsmith 3 |
| Burletta | Weapon | 3x Mechanical Components 3x Simple Gun Parts | Gunsmith 1 |
| Compensator II | Mod | 2x Mechanical Components 4x Wires | Gunsmith 2 |
| Compensator III | Mod | 2x Mod Components 8x Wires | Gunsmith 3 |
| Defibrillator | Quick Use | 9x Plastic Parts 1x Moss | Medical Lab 2 |
| ??? | ??? | ??? | ??? |
| Equalizer | Weapon | 3x Magnetic Accelerator 3x Complex Gun Parts 1x Queen Reactor | Gunsmith 3 |
| Extended Barrel | Mod | 2x Mod Components 8x Wires | Gunsmith 3 |
| Extended Light Mag II | Mod | 2x Mechanical Components 3x Steel Spring | Gunsmith 2 |
| Extended Light Mag III | Mod | 2x Mod Components 5x Steel Spring | Gunsmith 3 |
| Extended Medium Mag II | Mod | 2x Mechanical Components 3x Steel Spring | Gunsmith 2 |
| Extended Medium Mag III | Mod | 2x Mod Components 5x Steel Spring | Gunsmith 3 |
| Extended Shotgun Mag II | Mod | 2x Mechanical Components 3x Steel Spring | Gunsmith 2 |
| Extended Shotgun Mag III | Mod | 2x Mod Components 5x Steel Spring | Gunsmith 3 |
| Remote Raider Flare | Quick Use | 2x Chemicals 4x Rubber Parts | Utility Station 1 |
| Heavy Gun Parts | Material | 4x Simple Gun Parts | Refiner 2 |
| Venator | Weapon | 2x Advanced Mechanical Components 3x Medium Gun Parts 5x Magnet | Gunsmith 3 |
| Il Toro | Weapon | 5x Mechanical Components 6x Simple Gun Parts | Gunsmith 1 |
| Jolt Mine | Mine | 1x Electrical Components 1x Battery | Explosives Station 2 |
| Explosive Mine | Mine | 1x Explosive Compound 1x Sensors | Explosives Station 3 |
| Jupiter | Weapon | 3x Magnetic Accelerator 3x Complex Gun Parts 1x Queen Reactor | Gunsmith 3 |
| Light Gun Parts | Material | 4x Simple Gun Parts | Refiner 2 |
| Lightweight Stock | Mod | 2x Mod Components 5x Duct Tape | Gunsmith 3 |
| Lure Grenade | Grenade | 1x Speaker Component 1x Electrical Components | Utility Station 2 |
| Medium Gun Parts | Material | 4x Simple Gun Parts | Refiner 2 |
| Torrente | Weapon | 2x Advanced Mechanical Components 3x Medium Gun Parts 6x Steel Spring | Gunsmith 3 |
| Muzzle Brake II | Mod | 2x Mechanical Components 4x Wires | Gunsmith 2 |
| Muzzle Brake III | Mod | 2x Mod Components 8x Wires | Gunsmith 3 |
| Padded Stock | Mod | 2x Mod Components 5x Duct Tape | Gunsmith 3 |
| Shotgun Choke II | Mod | 2x Mechanical Components 4x Wires | Gunsmith 2 |
| Shotgun Choke III | Mod | 2x Mod Components 8x Wires | Gunsmith 3 |
| Shotgun Silencer | Mod | 2x Mod Components 8x Wires | Gunsmith 3 |
| Showstopper | Grenade | 1x Advanced Electrical Components 1x Voltage Converter | Explosives Station 3 |
| Silencer I | Mod | 2x Mechanical Components 4x Wires | Gunsmith 2 |
| Silencer II | Mod | 2x Mod Components 8x Wires | Gunsmith 3 |
| Snap Hook | Quick Use | 2x Power Rod 3x Rope 1x Exodus Modules | Utility Station 3 |
| Stable Stock II | Mod | 2x Mechanical Components 3x Duct Tape | Gunsmith 2 |
| Stable Stock III | Mod | 2x Mod Components 5x Duct Tape | Gunsmith 3 |
| Tagging Grenade | Grenade | 1x Electrical Components 1x Sensors | Utility Station 3 |
| Tempest | Weapon | 3x Advanced Mechanical Components 3x Medium Gun Parts 3x Canister | Gunsmith 3 |
| Trigger Nade | Grenade | 2x Crude Explosives 1x Processor | Explosives Station 2 |
| Vertical Grip II | Mod | 2x Mechanical Components 3x Duct Tape | Gunsmith 2 |
| Vertical Grip III | Mod | 2x Mod Components 5x Duct Tape | Gunsmith 3 |
| Vita Shot | Quick Use | 2x Antiseptic 1x Syringe | Medical Lab 3 |
| Vita Spray | Quick Use | 3x Antiseptic 1x Canister | Medical Lab 3 |
| Vulcano | Weapon | 1x Magnetic Accelerator 3x Heavy Gun Parts 1x Exodus Modules | Gunsmith 3 |
| Wolfpack | Grenade | 2x Explosive Compound 2x Sensors | Explosives Station 3 |
| Red Light Stick | Quick Use | 3x Chemicals | Utility Station 1 |
| Smoke Grenade | Grenade | 14x Chemicals 1x Canister | Utility Station 2 |
| Deadline | Mine | 3x Explosive Compound 2x ARC Circuitry | Explosives Station 3 |
| Trailblazer | Grenade | 1x Explosive Compound 1x Synthesized Fuel | Explosives Station 3 |
| Tactical Mk. 3 (Defensive) | Augment | 2x Advanced Electrical Components 3x Processor | Gear Bench 3 |
| Tactical Mk. 3 (Healing) | Augment | 2x Advanced Electrical Components 3x Processor | Gear Bench 3 |
| Yellow Light Stick | Quick Use | 3x Chemicals | Utility Station 1 |
Note: The missing Blueprints in this list likely have not actually been added to the game at the time of writing, because none of the playerbase has managed to find any of them. As they are added to the game, I will update this page with the most relevant information so you know exactly how to get all 75 Arc Raiders Blueprints.
Where to find Blueprints in Arc Raiders
Below is a list of all containers, modifiers, and events which maximise your chances of finding Blueprints:
- Certain quests reward you with specific Blueprints .
- Completing Trials has a high chance of offering Blueprints as rewards.
- Surveyors have a decent chance of dropping Blueprints on death.
- High loot value areas tend to have a greater chance of spawning Blueprints.
- Night Raids and Storms may increase rare Blueprint spawn chances in containers.
- Containers with higher numbers of items may have a higher tendency to spawn Blueprints. As a result, Blue Gate (which has many “large” containers containing multiple items) may give you a higher chance of spawning Blueprints.
- Raider containers (Raider Caches, Weapon Boxes, Medical Bags, Grenade Tubes) have increased Blueprint drop rates. As a result, the Uncovered Caches event gives you a high chance of finding Blueprints.
- Security Lockers have a higher than average chance of containing Blueprints.
- Certain Blueprints only seem to spawn under specific circumstances: Tempest Blueprint only spawns during Night Raid events. Vulcano Blueprint only spawns during Hidden Bunker events. Jupiter and Equaliser Blueprints only spawn during Harvester events.

Raider Caches, Weapon Boxes, and other raider-oriented container types have a good chance of offering Blueprints. |Image credit:Rock Paper Shotgun/Embark Studios
Blueprints have a very low chance of spawning in any container in Arc Raiders, around 1-2% on average. However, there is a higher chance of finding Blueprints in particular container types. Specifically, you can find more Blueprints in Raider containers and security lockers.
Beyond this, if you’re looking for Blueprints you should focus on regions of the map which are marked as having particularly high-value loot. Areas such as the Control Tower in Dam Battlegrounds, the Arrival and Departure Buildings in Spaceport, and Pilgrim’s Peak in Blue Gate all have a better-than-average chance of spawning Blueprints somewhere amongst all their containers. Night Raids and Electromagnetic Storm events also increase the drop chances of certain Blueprints .
In addition to these containers, you can often loot Blueprints from destroyed Surveyors - the largest of the rolling ball ARC. Surveyors are more commonly found on the later maps - Spaceport and Blue Gate - and if one spawns in your match, you’ll likely see it by the blue laser beam that it casts into the sky while “surveying”.
Surveyors are quite well-armoured and will very speedily run away from you once it notices you, but if you can take one down then make sure you loot all its parts for a chance of obtaining certain unusual Blueprints.
Blueprints obtained from quests
One way in which you can get Blueprints is by completing certain quests for the vendors in Speranza. Some quests will reward you with a specific item Blueprint upon completion, so as long as you work through all the quests in Arc Raiders, you are guaranteed those Blueprints.
Here is the full list of all Blueprints you can get from quest rewards:
- Trigger Nade Blueprint: Rewarded after completing “Sparks Fly”.
- Lure Grenade Blueprint: Rewarded after completing “Greasing Her Palms”.
- Burletta Blueprint: Rewarded after completing “Industrial Espionage”.
- Hullcracker Blueprint (and Launcher Ammo Blueprint): Rewarded after completing “The Major’s Footlocker”.
Alas, that’s only 4 Blueprints out of a total of 75 to unlock, so for the vast majority you will need to find them yourself during a raid. If you’re intent on farming Blueprints, then it’s best to equip yourself with cheap gear in case you lose it, but don’t use a free loadout because then you won’t get a safe pocket to stash any new Blueprint you find. No pain in Arc Raiders is sharper than failing to extract with a new Blueprint you’ve been after for a dozen hours already.

One of the best ways to get Blueprints is by hitting three stars on all five Trials every week. |Image credit:Rock Paper Shotgun/Embark Studios
Blueprints obtained from Trials
One of the very best ways to get Blueprints is as rewards for completing Trials in Arc Raiders. Trials are unlocked from Level 15 onwards, and allow you to earn rewards by focusing on certain tasks over the course of several raids. For example, one Trial might task you with dealing damage to Hornets, while another might challenge you to loot Supply Drops.
Trials refresh on a weekly basis, with a new week bringing five new Trials. Each Trial can offer up to three rewards after passing certain score milestones, and it’s possible to receive very high level loot from these reward crates - including Blueprints. So if you want to unlock as many Blueprints as possible, you should make a point of completing as many Trials as possible each week.
Best Blueprint farming locations
The very best way to get Blueprints is to frequent specific areas of the maps which combine high-tier loot pools with the right types of containers to search. Here are my recommendations for where to find Blueprints on every map, so you can always keep the search going for new crafting recipes to unlock.

Image credit:Rock Paper Shotgun/Embark Studios
Dam Battlegrounds
The best places to farm Blueprints on Dam Battlegrounds are the Control Tower, Power Generation Complex, Ruby Residence, and Pale Apartments . The first two regions, despite only being marked on the map as mid-tier loot, contain a phenomenal number of containers to loot. The Control Tower can also contain a couple of high-tier Security Lockers - though of course, you’ll need to have unlocked the Security Breach skill at the end of the Survival tree.
There’s also a lot of reporting amongst the playerbase that the Residential areas in the top-left of the map - Pale Apartments and Ruby Residence - give you a comparatively strong chance of finding Blueprints. Considering their size, there’s a high density of containers to loot in both locations, and they also have the benefit of being fairly out of the way. So you’re more likely to have all the containers to yourself.
Buried City
The best Blueprint farming locations on Buried City are the Santa Maria Houses, Grandioso Apartments, Town Hall, and the various buildings of the New District . Grandioso Apartments has a lower number of containers than the rest, but a high chance of spawning weapon cases - which have good Blueprint drop rates. The others are high-tier loot areas, with plenty of lootable containers - including Security Lockers.
Spaceport
The best places to find Blueprints on Spaceport are the Arrival and Departure Buildings, as well as Control Tower A6 and the Launch Towers . All these areas are labelled as high-value loot regions, and many of them are also very handily connected to one another by the Spaceport wall, which you can use to quickly run from one area to the next. At the tops of most of these buildings you’ll find at least one Security Locker, so this is an excellent farming route for players looking to find Blueprints.
The downside to looting Blueprints on Spaceport is that all these areas are hotly contested, particularly in Duos and Squads. You’ll need to be very focused and fast in order to complete the full farming route.

Image credit:Rock Paper Shotgun/Embark Studios
Blue Gate
Blue Gate tends to have a good chance of dropping Blueprints, potentially because it generally has a high number of containers which can hold lots of items; so there’s a higher chance of a Blueprint spawning in each container. In my experience, the best Blueprint farming spots on Blue Gate are Pilgrim’s Peak, Raider’s Refuge, the Ancient Fort, and the Underground Complex beneath the Warehouse .
All of these areas contain a wealth of containers to loot. Raider’s Refuge has less to loot, but the majority of the containers in and around the Refuge are raider containers, which have a high chance of containing Blueprints - particularly during major events.
Stella Montis
On the whole, Stella Montis seems to have a very low drop rate for Blueprints (though a high chance of dropping other high-tier loot). If you do want to try farming Blueprints on this map, the best places to find Blueprints in Stella Montis are Medical Research, Assembly Workshop, and the Business Center . These areas have the highest density of containers to loot on the map.
In addition to this, the Western Tunnel has a few different Security Lockers to loot, so while there’s very little to loot elsewhere in this area of the map, it’s worth hitting those Security Lockers if you spawn there at the start of a match.
That wraps up this primer on how to get all the Blueprints in Arc Raiders as quickly as possible. With the Expedition system constantly resetting a large number of players’ Blueprints, it’s more important than ever to have the most up-to-date information on where to find all these Blueprints.
While you’re here, be sure to check out our Arc Raiders best guns tier list , as well as our primers on the best skills to unlock and all the different Field Depot locations on every map.

ARC Raiders
PS5 , Xbox Series X/S , PC
Rock Paper Shotgun is better when you sign in
Sign in and join us on our journey to discover strange and compelling PC games.
