Monster Train 2 review
Make it stop
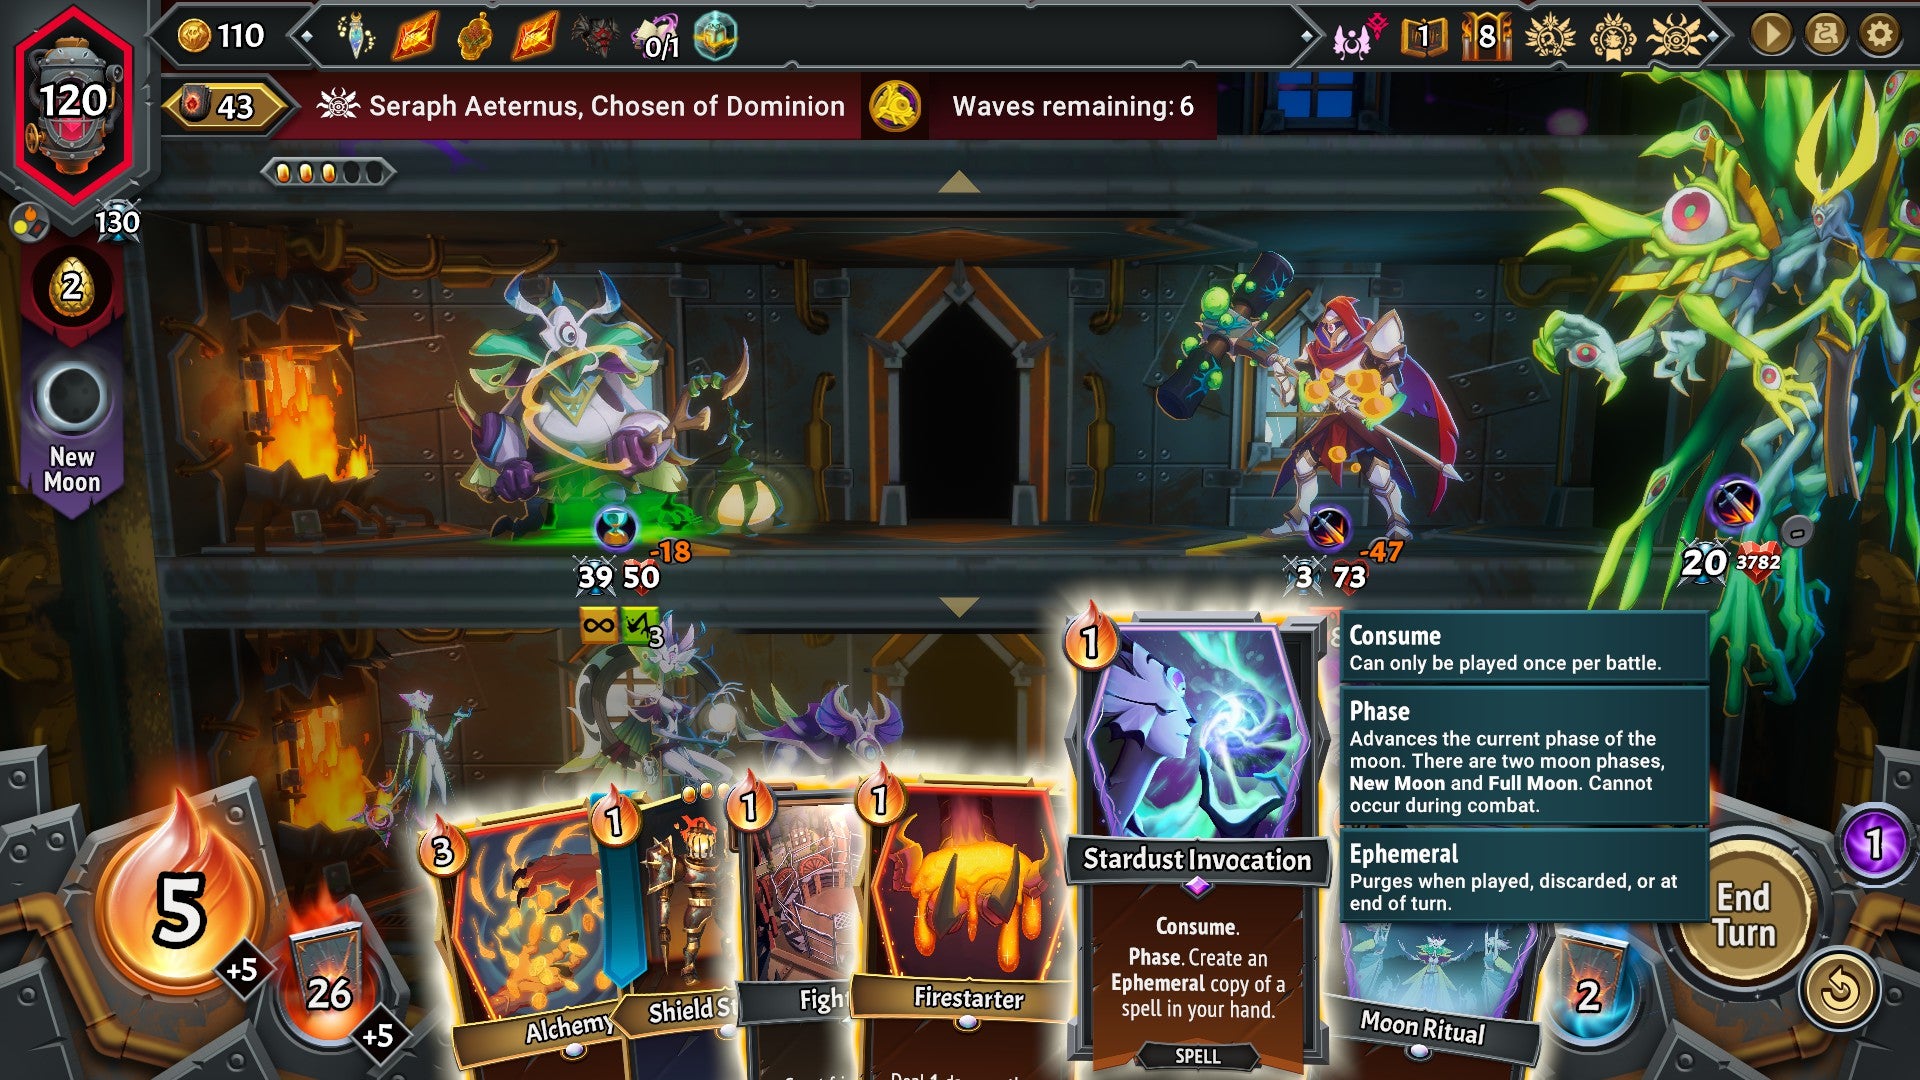
Image credit:Rock Paper Shotgun / Big Fan Games

- Developer: Shiny Shoe
- Publisher: Big Fan Games
- Release: May 21st 2025
- On: Windows
- From: Steam
- Price: $25/£21/€20
- Reviewed on: Intel Core-i7 12700F, 16GB RAM, Nvidia RTX 3060, Windows 11
The roguelike deckbuilder is a remorseless evil that strives to colonise every dream ever dreamt by the human brain. It is a sparkling, shuffling plague, germinated by Slay The Spire , that threatens to absorb every other mortal pastime, from space travel through poker to carpentry . We must find a way to neutralise the entity before it assimilates us all. But in the words of the oldest proverb: just one more go. Just one more go, before I dissipate raging into that goodnight. Just one more run, before I play all those shortform avant garde releases in my Itch.io wallet.
If Monster Train 2 were the last roguelike deckbuilder I ever played, I would consider myself fairly pleased, and also very relieved. While not a huge departure from the game that plunged Matt Cox (RPS in peace) into unholy raptures , it’s a great pick if you’re fond of numbers going up and realising it’s 1.30am and that you are now too addled by card synergies to sleep. You do not have to like or understand trains, but it’s a plus.
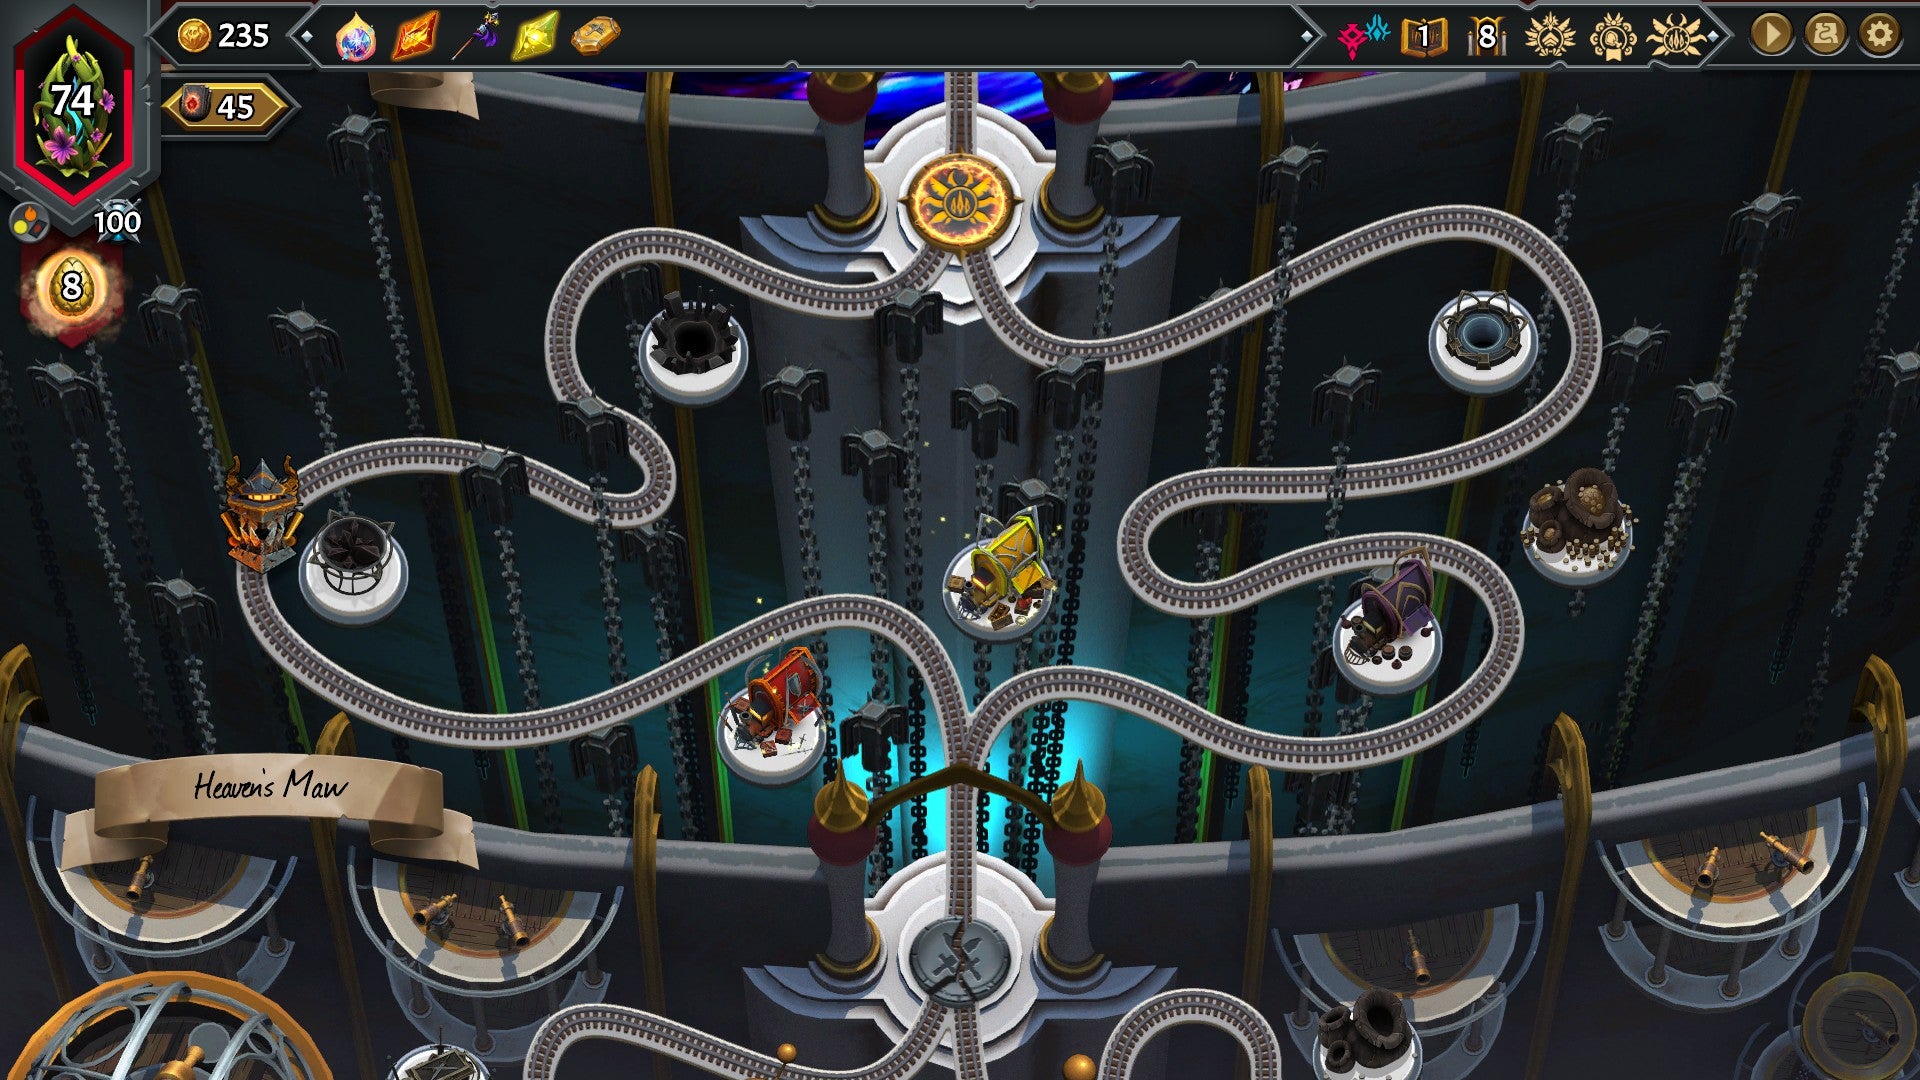
As with Monster Train , Monster Train 2 is about riding a demon locomotive through an alternating series of battles and upgrade or customisation opportunities. In the first game, you were trying to oust the angelic hosts from the heart of hell. In this one, the angels and devils have bandied together to chase off the Titans, who’ve taken possession of Heaven.
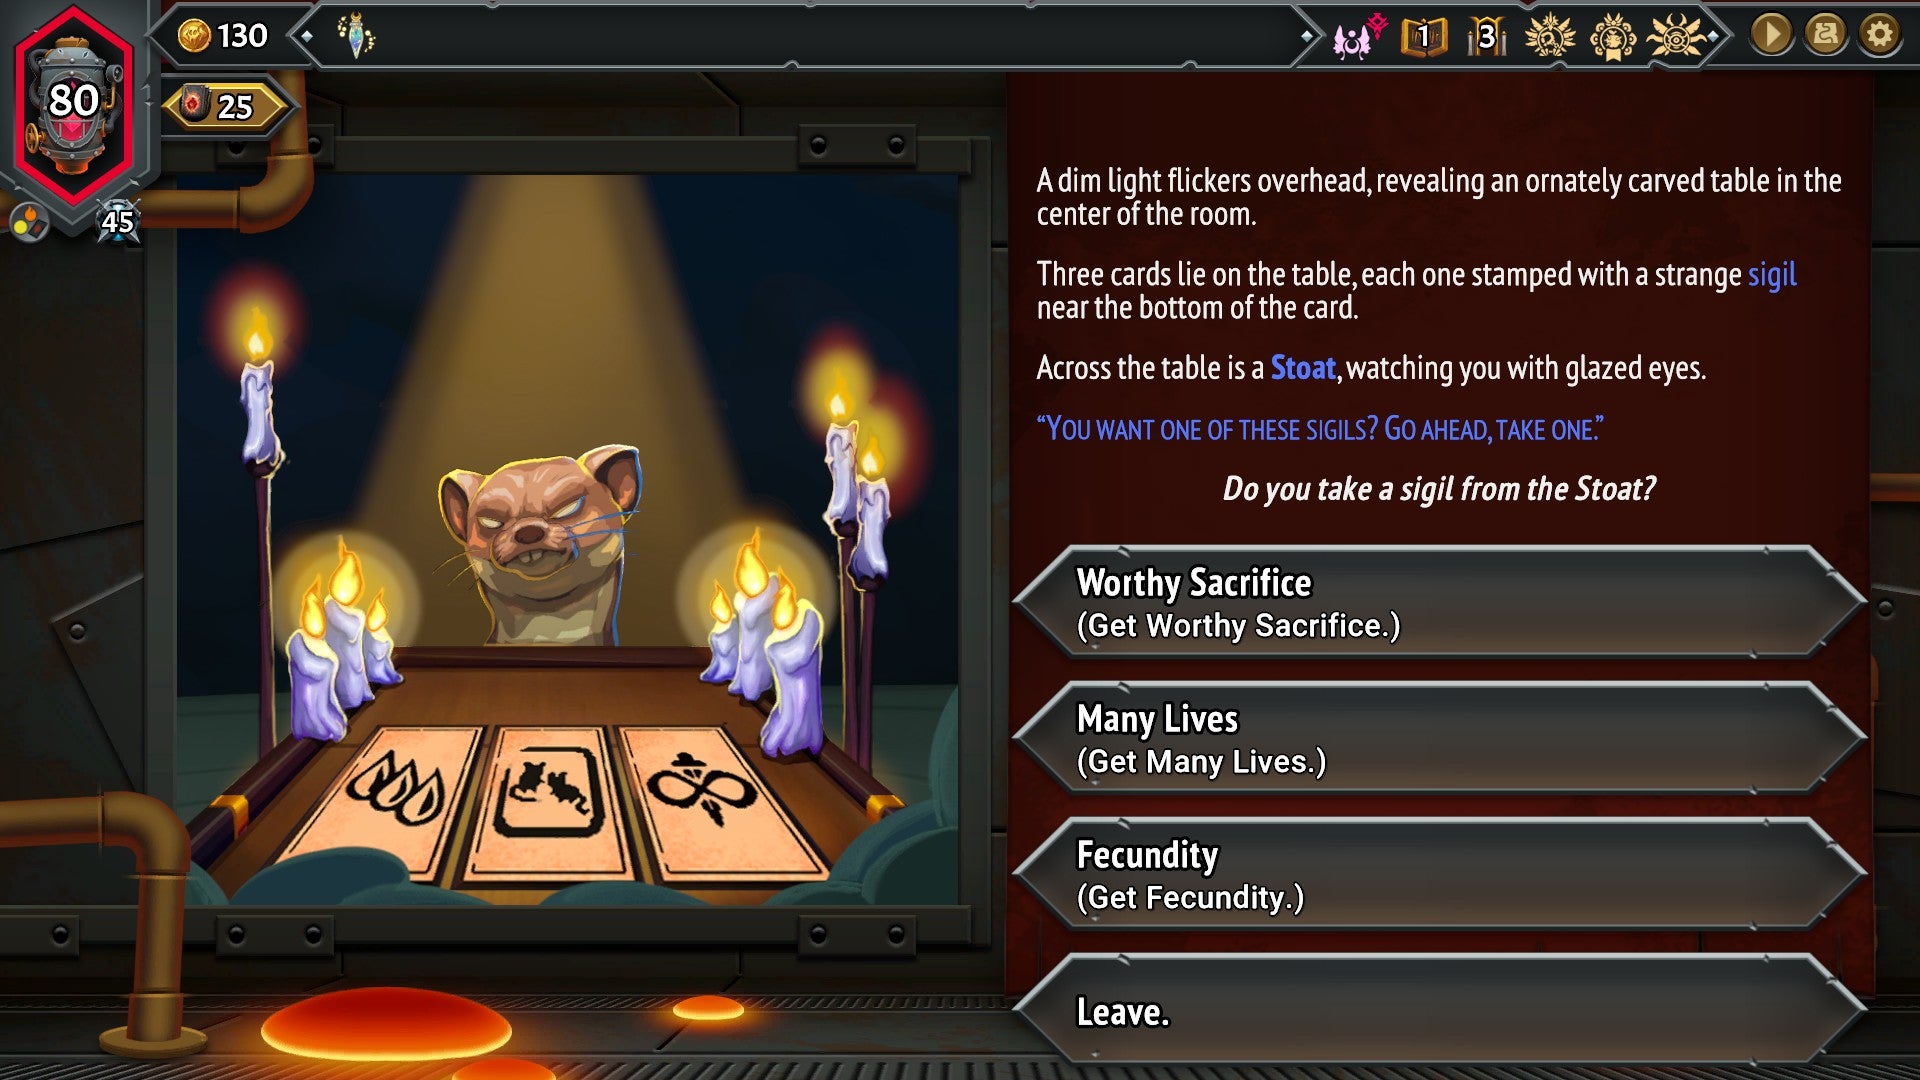
There’s a certain amount of plot lodged in the crevices of the lobby town. This worried me at first - character development? In my progression system? - but it mostly consists of gentle sitcom sketches in which dragons complain about their husbands. Rest assured that none of it will keep you from your precious synergies. While embarked on your celestial commute, you will also bumble into random storylets that sometimes offer boons plucked from other roguelike deckbuilders, such as Balatro. The roguebuilding decklike singularity is nigh.

The game’s big draw versus those other turn-based card battlers is that it’s actually three card battles in parallel, each feeding into the next like cunningly enfolded lanes in a tower defence game. During each skirmish, you pop unit cards on the lower three floors of your train to protect the all-important pyre on your fourth floor. The pyre is the source of points you’ll spend to play cards each turn. If it gets smashed to bits, your run is over.
Following a deployment phase, waves of enemies appear at the bottom (mostly) and travel upwards through the train, fighting a single round of combat per floor. This continues until the final assault from the local boss, which dispenses with the single-round-per-floor parameter - the boss must clear each floor of defenders before moving on. While units do battle automatically at the end of each turn, generally targeting the first enemy in the opposing line-up, you can intervene manually using spell cards that, for example, coat critters in Pyrogel to multiply damage received, or dazzle them with stardust so that they miss a turn.
It may seem a rickety, unintuitive format on paper. In practice, it’s wonderful. The overall challenge is to divide your cards and points scientifically between floors. An obvious gambit is to stock the bottom floor with your tankiest, most damaging cards to bollard the onslaught and saddle enemies with debuffs early on - there are plenty of attackers that power-up as they fight or climb. But the one-round-per-floor setup ensures that you can’t rely on any single floor. Besides, if that over-fortified foundation crumbles, the other, under-crewed layers will probably fall as well.
Enemy waves also form deviously alternating combinations of unit types, which thwart efforts to optimise any particular floor. Your heavies in Second Class might excel at melting juggernauts, but they’ll struggle against the hordes of fungus making their way back from the cafeteria.
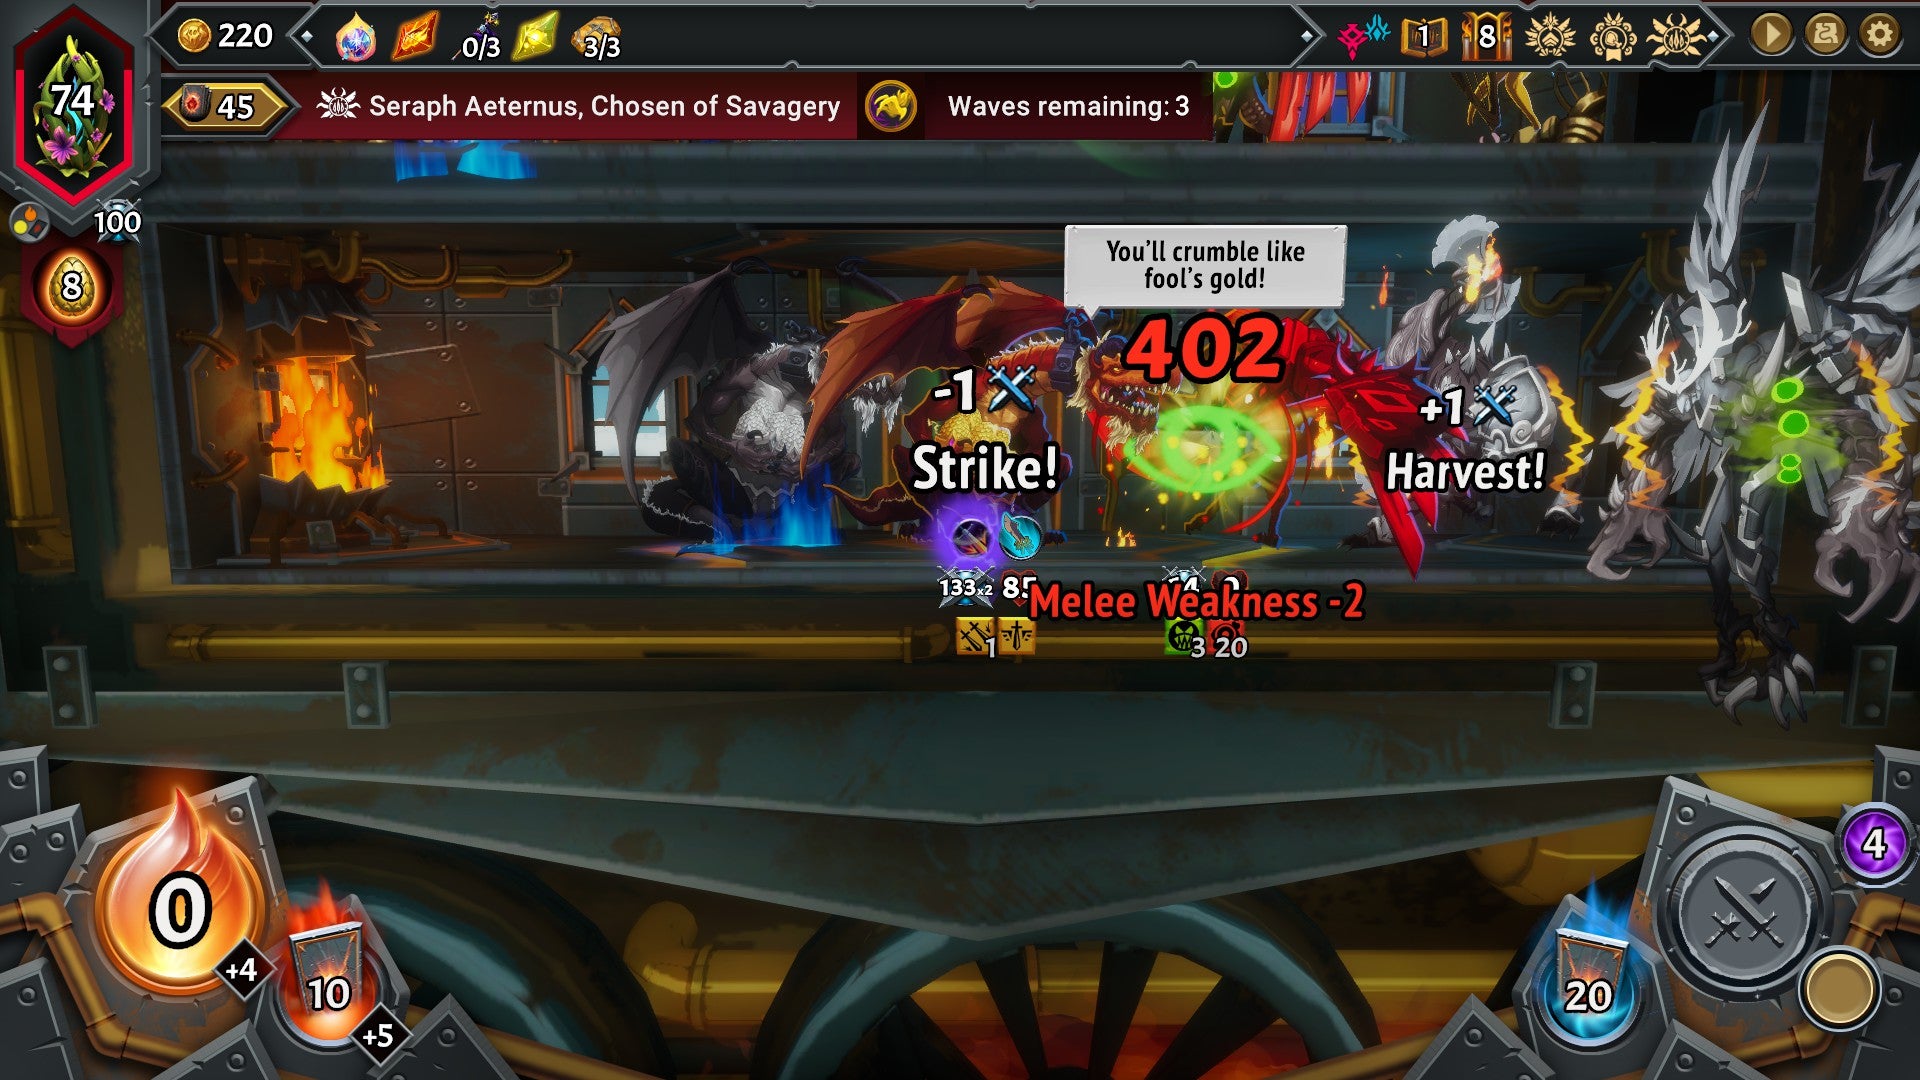
Image credit:Rock Paper Shotgun / Big Fan Games
Monster Train 2 retains all this curious, rattling magic, but fills out the gaps with a bunch of new card categories and interactables, probably derived from careful observation of the first game’s players. There’s now a choice of starting pyres, with varying stats and modifiers. Some unit cards have or may acquire abilities, which essentially give you a free move: these include conjuring back the last spell you cast, and body-slamming targets into the rearguard.
New equipment cards can be clapped on friend and foe alike to, for example, harm assailants based on the wearer’s max health, or chip-damage a unit when they shift between floors. I’ve found that last one especially useful in the case of more agile bosses, who roam around like disgruntled ticket collectors before committing to the push.
Room cards, meanwhile, help you specialise floors. Turn one into a fighting arena and you can farm the small fry for easy pyre points to spend on expensive cards elsewhere. Introduce a planetarium and you’ll amplify any magic you weave within. I have never been brave enough to play the burning room that does 50 points of damage to units inside, but there’s probably a way to hack the card chemistry so that the incendiary conditions actually benefit your defenders.
All of these ins and outs are shaped by the five factions, each a reworking and elaboration of elements from the original game. You pick two as your primary and secondary clan for each run, which dictates your starting champion card - a named unit with a choice of upgrade paths - and the kinds of cards you’ll acquire at rest stops between battles.
The factions are a treat, each a verdant entanglement of playstyles. I will spoil the workings of just two. The strength of the Lunar Coven waxes and wanes with the phases of the moon. As such, victory often comes from delicately timing your most powerful cards, but the hitch is that some cards are more potent when the moon is full, others when it’s in shadow.
The dragons of Pyreborn, meanwhile, are all about gold - grabbing fat stacks early in the run, melting it down into lobbable slag (“Make It Rain”), or jealously hoarding it for buffs. The first time I beat Monster Train 2 it was thanks to the Pyreborn’s Greed Dragons, who accrue health and attack points based on how many dragon eggs you’ve acquired. You can hatch those eggs for artifacts, which may be sensible when you’re trundling up to the last boss, but I consider that a poor return for sacrificing a train’s worth of Smaughs.
Buffs! Buffs? Buffs. As with many a Spirelike, much of Monster Train 2’s enchantment comes from “breaking” the combat, which is to say, violently skewing the starting card capacities in ways doubtless envisaged by the designers using an artful compound of hallucinogens and spreadsheets. A case study: here is how you transform Ekka, High Witch of the Coven with a proud total of five attack and health points, into a titan slayer. First, you’ll want to pick either the Celestial Spellweaver or Silver Empress upgrade paths, each of which steadily accrues magical power, or Conduit. The Spellweaver gains it for every spell you cast on the same floor, while the Empress gets a massive boost while the moon is full.
You’ll probably want to deploy Ekka alongside a Lunar Priestess, who performs a ritual each turn that slops yet more spelljuice over friendly units. Now, hand the High Witch a Moonlit Glaive that confers a “mageblade” multiplier based on all that pent-up sorcery. The result should be a champion who looks like an ailing fortune teller yet can somehow dish out 300+ damage a turn, mulching the chewiest of chthonic crusaders in a single hit - and that’s before you exploit the ludicrous multipliers for your spells on Ekka’s floor, afforded by her conduit level.
True, she still has a glass jaw, and true, if she cops it, your wizardly arsenal will be proportionately punier. But you can head off those risks by wedging her behind a Silent Sentinel that absorbs damage while making foes even more susceptible to spells.
I gaze upon my willowy Wiccan wrecking ball with boundless, aching pride and satisfaction. And then I start to feel like Bilbo Baggins regaining his senses after beating a large woodlouse to death in Mirkwood . The appeal of the roguelite deckbuilder is the joy of expressing your wit and invention through alchemical mastery of maths. At best, it is like improvising a tune in response to haphazard melodies, dancing your own composition into the cadences of enemies and bosses.
At worst, it is like doing times-tables with fancier graphics - not that much fancier, in the case of Monster Train 2, which is readable and digestible, but badly needs a more interesting colour scheme and some more creative character designs. And even at its best, there’s a necessary hollowness to it, as anybody who’s ever yielded 100 hours of day and night to such games will know. The randomisation element sinks its blood-crusted hook, even as the glittery card effects make no bones of the genre’s adjacency to casino slot machines. Run gives way to run gives way to run.
Still, that’s more of a wider, philosophical objection to the genre than a criticism of Monster Train 2 in particular. If you have no such hoity-toity qualms, this is as bountiful an experience as you could ask for. Each victorious raid on heaven produces a shower of unlockable cards and items that you can put immediately to the test. If you’re weary of raiding the main campaign for cards, there are bespoke puzzle-campaigns via dimensional portal back at the starting depot, where you can test out various overarching modifiers. Or, if you really trust the hand you’ve amassed, you can segue your victory directly into Endless mode and extend this roguelike railway unto infinity. Heaven is only a fleeting fiction, next to the protean immensity of the deck.
Find out how we conduct our reviews by reading our review policy .
Monster Train 2
PC
Rock Paper Shotgun is better when you sign in
Sign in and join us on our journey to discover strange and compelling PC games.

All 75 Arc Raiders Blueprints and where to get them
These areas have the highest chance of giving you Blueprints

Image credit:Rock Paper Shotgun/Embark Studios

Looking for more Arc Raiders Blueprints? It’s a special day when you find a Blueprint, as they’re among the most valuable items in Arc Raiders. If you find a Blueprint that you haven’t already found, then you must make sure you hold onto it at all costs, because Blueprints are the key to one of the most important and powerful systems of meta-progression in the game.
This guide aims to be the very best guide on Blueprints you can find, starting with a primer on what exactly they are and how they work in Arc Raiders, before delving into exactly where to get Blueprints and the very best farming spots for you to take in your search.
We’ll also go over how to get Blueprints from other unlikely activities, such as destroying Surveyors and completing specific quests. And you’ll also find the full list of all 75 Blueprints in Arc Raiders on this page (including the newest Blueprints added with the Cold Snap update , such as the Deadline Blueprint and Firework Box Blueprint), giving you all the information you need to expand your own crafting repertoire.
In this guide:
- What are Blueprints in Arc Raiders?
- Full Blueprint list: All crafting recipes
- Where to find Blueprints in Arc Raiders Blueprints obtained from quests Blueprints obtained from Trials Best Blueprint farming locations

What are Blueprints in Arc Raiders?
Blueprints in Arc Raiders are special items which, if you manage to extract with them, you can expend to permanently unlock a new crafting recipe in your Workshop. If you manage to extract from a raid with an Anvil Blueprint, for example, you can unlock the ability to craft your very own Anvil Pistol, as many times as you like (as long as you have the crafting materials).
To use a Blueprint, simply open your Inventory while in the lobby, then right-click on the Blueprint and click “Learn And Consume” . This will permanently unlock the recipe for that item in your Workshop. As of the Stella Montis update, there are allegedly 75 different Blueprints to unlock - although only 68 are confirmed to be in the game so far. You can see all the Blueprints you’ve found and unlocked by going to the Workshop menu, and hitting “R” to bring up the Blueprint screen.
It’s possible to find duplicates of past Blueprints you’ve already unlocked. If you find these, then you can either sell them, or - if you like to play with friends - you can take it into a match and gift it to your friend so they can unlock that recipe for themselves. Another option is to keep hold of them until the time comes to donate them to the Expedition.
Full Blueprint list: All crafting recipes
Below is the full list of all the Blueprints that are currently available to find in Arc Raiders, and the crafting recipe required for each item:
| Blueprint | Type | Recipe | Crafted At |
|---|---|---|---|
| Bettina | Weapon | 3x Advanced Mechanical Components 3x Heavy Gun Parts 3x Canister | Gunsmith 3 |
| Blue Light Stick | Quick Use | 3x Chemicals | Utility Station 1 |
| Aphelion | Weapon | 3x Magnetic Accelerator 3x Complex Gun Parts 1x Matriarch Reactor | Gunsmith 3 |
| Combat Mk. 3 (Flanking) | Augment | 2x Advanced Electrical Components 3x Processor | Gear Bench 3 |
| Combat Mk. 3 (Aggressive) | Augment | 2x Advanced Electrical Components 3x Processor | Gear Bench 3 |
| Complex Gun Parts | Material | 2x Light Gun Parts 2x Medium Gun Parts 2x Heavy Gun Parts | Refiner 3 |
| Fireworks Box | Quick Use | 1x Explosive Compound 3x Pop Trigger | Explosives Station 2 |
| Gas Mine | Mine | 4x Chemicals 2x Rubber Parts | Explosives Station 1 |
| Green Light Stick | Quick Use | 3x Chemicals | Utility Station 1 |
| Pulse Mine | Mine | 1x Crude Explosives 1x Wires | Explosives Station 1 |
| Seeker Grenade | Grenade | 1x Crude Explosives 2x ARC Alloy | Explosives Station 1 |
| Looting Mk. 3 (Survivor) | Augment | 2x Advanced Electrical Components 3x Processor | Gear Bench 3 |
| Angled Grip II | Mod | 2x Mechanical Components 3x Duct Tape | Gunsmith 2 |
| Angled Grip III | Mod | 2x Mod Components 5x Duct Tape | Gunsmith 3 |
| Hullcracker | Weapon | 1x Magnetic Accelerator 3x Heavy Gun Parts 1x Exodus Modules | Gunsmith 3 |
| Launcher Ammo | Ammo | 5x Metal Parts 1x Crude Explosives | Workbench 1 |
| Anvil | Weapon | 5x Mechanical Components 5x Simple Gun Parts | Gunsmith 2 |
| Anvil Splitter | Mod | 2x Mod Components 3x Processor | Gunsmith 3 |
| ??? | ??? | ??? | ??? |
| Barricade Kit | Quick Use | 1x Mechanical Components | Utility Station 2 |
| Blaze Grenade | Grenade | 1x Explosive Compound 2x Oil | Explosives Station 3 |
| Bobcat | Weapon | 3x Advanced Mechanical Components 3x Light Gun Parts | Gunsmith 3 |
| Osprey | Weapon | 2x Advanced Mechanical Components 3x Medium Gun Parts 7x Wires | Gunsmith 3 |
| Burletta | Weapon | 3x Mechanical Components 3x Simple Gun Parts | Gunsmith 1 |
| Compensator II | Mod | 2x Mechanical Components 4x Wires | Gunsmith 2 |
| Compensator III | Mod | 2x Mod Components 8x Wires | Gunsmith 3 |
| Defibrillator | Quick Use | 9x Plastic Parts 1x Moss | Medical Lab 2 |
| ??? | ??? | ??? | ??? |
| Equalizer | Weapon | 3x Magnetic Accelerator 3x Complex Gun Parts 1x Queen Reactor | Gunsmith 3 |
| Extended Barrel | Mod | 2x Mod Components 8x Wires | Gunsmith 3 |
| Extended Light Mag II | Mod | 2x Mechanical Components 3x Steel Spring | Gunsmith 2 |
| Extended Light Mag III | Mod | 2x Mod Components 5x Steel Spring | Gunsmith 3 |
| Extended Medium Mag II | Mod | 2x Mechanical Components 3x Steel Spring | Gunsmith 2 |
| Extended Medium Mag III | Mod | 2x Mod Components 5x Steel Spring | Gunsmith 3 |
| Extended Shotgun Mag II | Mod | 2x Mechanical Components 3x Steel Spring | Gunsmith 2 |
| Extended Shotgun Mag III | Mod | 2x Mod Components 5x Steel Spring | Gunsmith 3 |
| Remote Raider Flare | Quick Use | 2x Chemicals 4x Rubber Parts | Utility Station 1 |
| Heavy Gun Parts | Material | 4x Simple Gun Parts | Refiner 2 |
| Venator | Weapon | 2x Advanced Mechanical Components 3x Medium Gun Parts 5x Magnet | Gunsmith 3 |
| Il Toro | Weapon | 5x Mechanical Components 6x Simple Gun Parts | Gunsmith 1 |
| Jolt Mine | Mine | 1x Electrical Components 1x Battery | Explosives Station 2 |
| Explosive Mine | Mine | 1x Explosive Compound 1x Sensors | Explosives Station 3 |
| Jupiter | Weapon | 3x Magnetic Accelerator 3x Complex Gun Parts 1x Queen Reactor | Gunsmith 3 |
| Light Gun Parts | Material | 4x Simple Gun Parts | Refiner 2 |
| Lightweight Stock | Mod | 2x Mod Components 5x Duct Tape | Gunsmith 3 |
| Lure Grenade | Grenade | 1x Speaker Component 1x Electrical Components | Utility Station 2 |
| Medium Gun Parts | Material | 4x Simple Gun Parts | Refiner 2 |
| Torrente | Weapon | 2x Advanced Mechanical Components 3x Medium Gun Parts 6x Steel Spring | Gunsmith 3 |
| Muzzle Brake II | Mod | 2x Mechanical Components 4x Wires | Gunsmith 2 |
| Muzzle Brake III | Mod | 2x Mod Components 8x Wires | Gunsmith 3 |
| Padded Stock | Mod | 2x Mod Components 5x Duct Tape | Gunsmith 3 |
| Shotgun Choke II | Mod | 2x Mechanical Components 4x Wires | Gunsmith 2 |
| Shotgun Choke III | Mod | 2x Mod Components 8x Wires | Gunsmith 3 |
| Shotgun Silencer | Mod | 2x Mod Components 8x Wires | Gunsmith 3 |
| Showstopper | Grenade | 1x Advanced Electrical Components 1x Voltage Converter | Explosives Station 3 |
| Silencer I | Mod | 2x Mechanical Components 4x Wires | Gunsmith 2 |
| Silencer II | Mod | 2x Mod Components 8x Wires | Gunsmith 3 |
| Snap Hook | Quick Use | 2x Power Rod 3x Rope 1x Exodus Modules | Utility Station 3 |
| Stable Stock II | Mod | 2x Mechanical Components 3x Duct Tape | Gunsmith 2 |
| Stable Stock III | Mod | 2x Mod Components 5x Duct Tape | Gunsmith 3 |
| Tagging Grenade | Grenade | 1x Electrical Components 1x Sensors | Utility Station 3 |
| Tempest | Weapon | 3x Advanced Mechanical Components 3x Medium Gun Parts 3x Canister | Gunsmith 3 |
| Trigger Nade | Grenade | 2x Crude Explosives 1x Processor | Explosives Station 2 |
| Vertical Grip II | Mod | 2x Mechanical Components 3x Duct Tape | Gunsmith 2 |
| Vertical Grip III | Mod | 2x Mod Components 5x Duct Tape | Gunsmith 3 |
| Vita Shot | Quick Use | 2x Antiseptic 1x Syringe | Medical Lab 3 |
| Vita Spray | Quick Use | 3x Antiseptic 1x Canister | Medical Lab 3 |
| Vulcano | Weapon | 1x Magnetic Accelerator 3x Heavy Gun Parts 1x Exodus Modules | Gunsmith 3 |
| Wolfpack | Grenade | 2x Explosive Compound 2x Sensors | Explosives Station 3 |
| Red Light Stick | Quick Use | 3x Chemicals | Utility Station 1 |
| Smoke Grenade | Grenade | 14x Chemicals 1x Canister | Utility Station 2 |
| Deadline | Mine | 3x Explosive Compound 2x ARC Circuitry | Explosives Station 3 |
| Trailblazer | Grenade | 1x Explosive Compound 1x Synthesized Fuel | Explosives Station 3 |
| Tactical Mk. 3 (Defensive) | Augment | 2x Advanced Electrical Components 3x Processor | Gear Bench 3 |
| Tactical Mk. 3 (Healing) | Augment | 2x Advanced Electrical Components 3x Processor | Gear Bench 3 |
| Yellow Light Stick | Quick Use | 3x Chemicals | Utility Station 1 |
Note: The missing Blueprints in this list likely have not actually been added to the game at the time of writing, because none of the playerbase has managed to find any of them. As they are added to the game, I will update this page with the most relevant information so you know exactly how to get all 75 Arc Raiders Blueprints.
Where to find Blueprints in Arc Raiders
Below is a list of all containers, modifiers, and events which maximise your chances of finding Blueprints:
- Certain quests reward you with specific Blueprints .
- Completing Trials has a high chance of offering Blueprints as rewards.
- Surveyors have a decent chance of dropping Blueprints on death.
- High loot value areas tend to have a greater chance of spawning Blueprints.
- Night Raids and Storms may increase rare Blueprint spawn chances in containers.
- Containers with higher numbers of items may have a higher tendency to spawn Blueprints. As a result, Blue Gate (which has many “large” containers containing multiple items) may give you a higher chance of spawning Blueprints.
- Raider containers (Raider Caches, Weapon Boxes, Medical Bags, Grenade Tubes) have increased Blueprint drop rates. As a result, the Uncovered Caches event gives you a high chance of finding Blueprints.
- Security Lockers have a higher than average chance of containing Blueprints.
- Certain Blueprints only seem to spawn under specific circumstances: Tempest Blueprint only spawns during Night Raid events. Vulcano Blueprint only spawns during Hidden Bunker events. Jupiter and Equaliser Blueprints only spawn during Harvester events.

Raider Caches, Weapon Boxes, and other raider-oriented container types have a good chance of offering Blueprints. |Image credit:Rock Paper Shotgun/Embark Studios
Blueprints have a very low chance of spawning in any container in Arc Raiders, around 1-2% on average. However, there is a higher chance of finding Blueprints in particular container types. Specifically, you can find more Blueprints in Raider containers and security lockers.
Beyond this, if you’re looking for Blueprints you should focus on regions of the map which are marked as having particularly high-value loot. Areas such as the Control Tower in Dam Battlegrounds, the Arrival and Departure Buildings in Spaceport, and Pilgrim’s Peak in Blue Gate all have a better-than-average chance of spawning Blueprints somewhere amongst all their containers. Night Raids and Electromagnetic Storm events also increase the drop chances of certain Blueprints .
In addition to these containers, you can often loot Blueprints from destroyed Surveyors - the largest of the rolling ball ARC. Surveyors are more commonly found on the later maps - Spaceport and Blue Gate - and if one spawns in your match, you’ll likely see it by the blue laser beam that it casts into the sky while “surveying”.
Surveyors are quite well-armoured and will very speedily run away from you once it notices you, but if you can take one down then make sure you loot all its parts for a chance of obtaining certain unusual Blueprints.
Blueprints obtained from quests
One way in which you can get Blueprints is by completing certain quests for the vendors in Speranza. Some quests will reward you with a specific item Blueprint upon completion, so as long as you work through all the quests in Arc Raiders, you are guaranteed those Blueprints.
Here is the full list of all Blueprints you can get from quest rewards:
- Trigger Nade Blueprint: Rewarded after completing “Sparks Fly”.
- Lure Grenade Blueprint: Rewarded after completing “Greasing Her Palms”.
- Burletta Blueprint: Rewarded after completing “Industrial Espionage”.
- Hullcracker Blueprint (and Launcher Ammo Blueprint): Rewarded after completing “The Major’s Footlocker”.
Alas, that’s only 4 Blueprints out of a total of 75 to unlock, so for the vast majority you will need to find them yourself during a raid. If you’re intent on farming Blueprints, then it’s best to equip yourself with cheap gear in case you lose it, but don’t use a free loadout because then you won’t get a safe pocket to stash any new Blueprint you find. No pain in Arc Raiders is sharper than failing to extract with a new Blueprint you’ve been after for a dozen hours already.

One of the best ways to get Blueprints is by hitting three stars on all five Trials every week. |Image credit:Rock Paper Shotgun/Embark Studios
Blueprints obtained from Trials
One of the very best ways to get Blueprints is as rewards for completing Trials in Arc Raiders. Trials are unlocked from Level 15 onwards, and allow you to earn rewards by focusing on certain tasks over the course of several raids. For example, one Trial might task you with dealing damage to Hornets, while another might challenge you to loot Supply Drops.
Trials refresh on a weekly basis, with a new week bringing five new Trials. Each Trial can offer up to three rewards after passing certain score milestones, and it’s possible to receive very high level loot from these reward crates - including Blueprints. So if you want to unlock as many Blueprints as possible, you should make a point of completing as many Trials as possible each week.
Best Blueprint farming locations
The very best way to get Blueprints is to frequent specific areas of the maps which combine high-tier loot pools with the right types of containers to search. Here are my recommendations for where to find Blueprints on every map, so you can always keep the search going for new crafting recipes to unlock.

Image credit:Rock Paper Shotgun/Embark Studios
Dam Battlegrounds
The best places to farm Blueprints on Dam Battlegrounds are the Control Tower, Power Generation Complex, Ruby Residence, and Pale Apartments . The first two regions, despite only being marked on the map as mid-tier loot, contain a phenomenal number of containers to loot. The Control Tower can also contain a couple of high-tier Security Lockers - though of course, you’ll need to have unlocked the Security Breach skill at the end of the Survival tree.
There’s also a lot of reporting amongst the playerbase that the Residential areas in the top-left of the map - Pale Apartments and Ruby Residence - give you a comparatively strong chance of finding Blueprints. Considering their size, there’s a high density of containers to loot in both locations, and they also have the benefit of being fairly out of the way. So you’re more likely to have all the containers to yourself.
Buried City
The best Blueprint farming locations on Buried City are the Santa Maria Houses, Grandioso Apartments, Town Hall, and the various buildings of the New District . Grandioso Apartments has a lower number of containers than the rest, but a high chance of spawning weapon cases - which have good Blueprint drop rates. The others are high-tier loot areas, with plenty of lootable containers - including Security Lockers.
Spaceport
The best places to find Blueprints on Spaceport are the Arrival and Departure Buildings, as well as Control Tower A6 and the Launch Towers . All these areas are labelled as high-value loot regions, and many of them are also very handily connected to one another by the Spaceport wall, which you can use to quickly run from one area to the next. At the tops of most of these buildings you’ll find at least one Security Locker, so this is an excellent farming route for players looking to find Blueprints.
The downside to looting Blueprints on Spaceport is that all these areas are hotly contested, particularly in Duos and Squads. You’ll need to be very focused and fast in order to complete the full farming route.

Image credit:Rock Paper Shotgun/Embark Studios
Blue Gate
Blue Gate tends to have a good chance of dropping Blueprints, potentially because it generally has a high number of containers which can hold lots of items; so there’s a higher chance of a Blueprint spawning in each container. In my experience, the best Blueprint farming spots on Blue Gate are Pilgrim’s Peak, Raider’s Refuge, the Ancient Fort, and the Underground Complex beneath the Warehouse .
All of these areas contain a wealth of containers to loot. Raider’s Refuge has less to loot, but the majority of the containers in and around the Refuge are raider containers, which have a high chance of containing Blueprints - particularly during major events.
Stella Montis
On the whole, Stella Montis seems to have a very low drop rate for Blueprints (though a high chance of dropping other high-tier loot). If you do want to try farming Blueprints on this map, the best places to find Blueprints in Stella Montis are Medical Research, Assembly Workshop, and the Business Center . These areas have the highest density of containers to loot on the map.
In addition to this, the Western Tunnel has a few different Security Lockers to loot, so while there’s very little to loot elsewhere in this area of the map, it’s worth hitting those Security Lockers if you spawn there at the start of a match.
That wraps up this primer on how to get all the Blueprints in Arc Raiders as quickly as possible. With the Expedition system constantly resetting a large number of players’ Blueprints, it’s more important than ever to have the most up-to-date information on where to find all these Blueprints.
While you’re here, be sure to check out our Arc Raiders best guns tier list , as well as our primers on the best skills to unlock and all the different Field Depot locations on every map.

ARC Raiders
PS5 , Xbox Series X/S , PC
Rock Paper Shotgun is better when you sign in
Sign in and join us on our journey to discover strange and compelling PC games.
