Monster Hunter Wilds: Insect Glaive weapon tree
The full list of all Insect Glaives in Monster Hunter Wilds
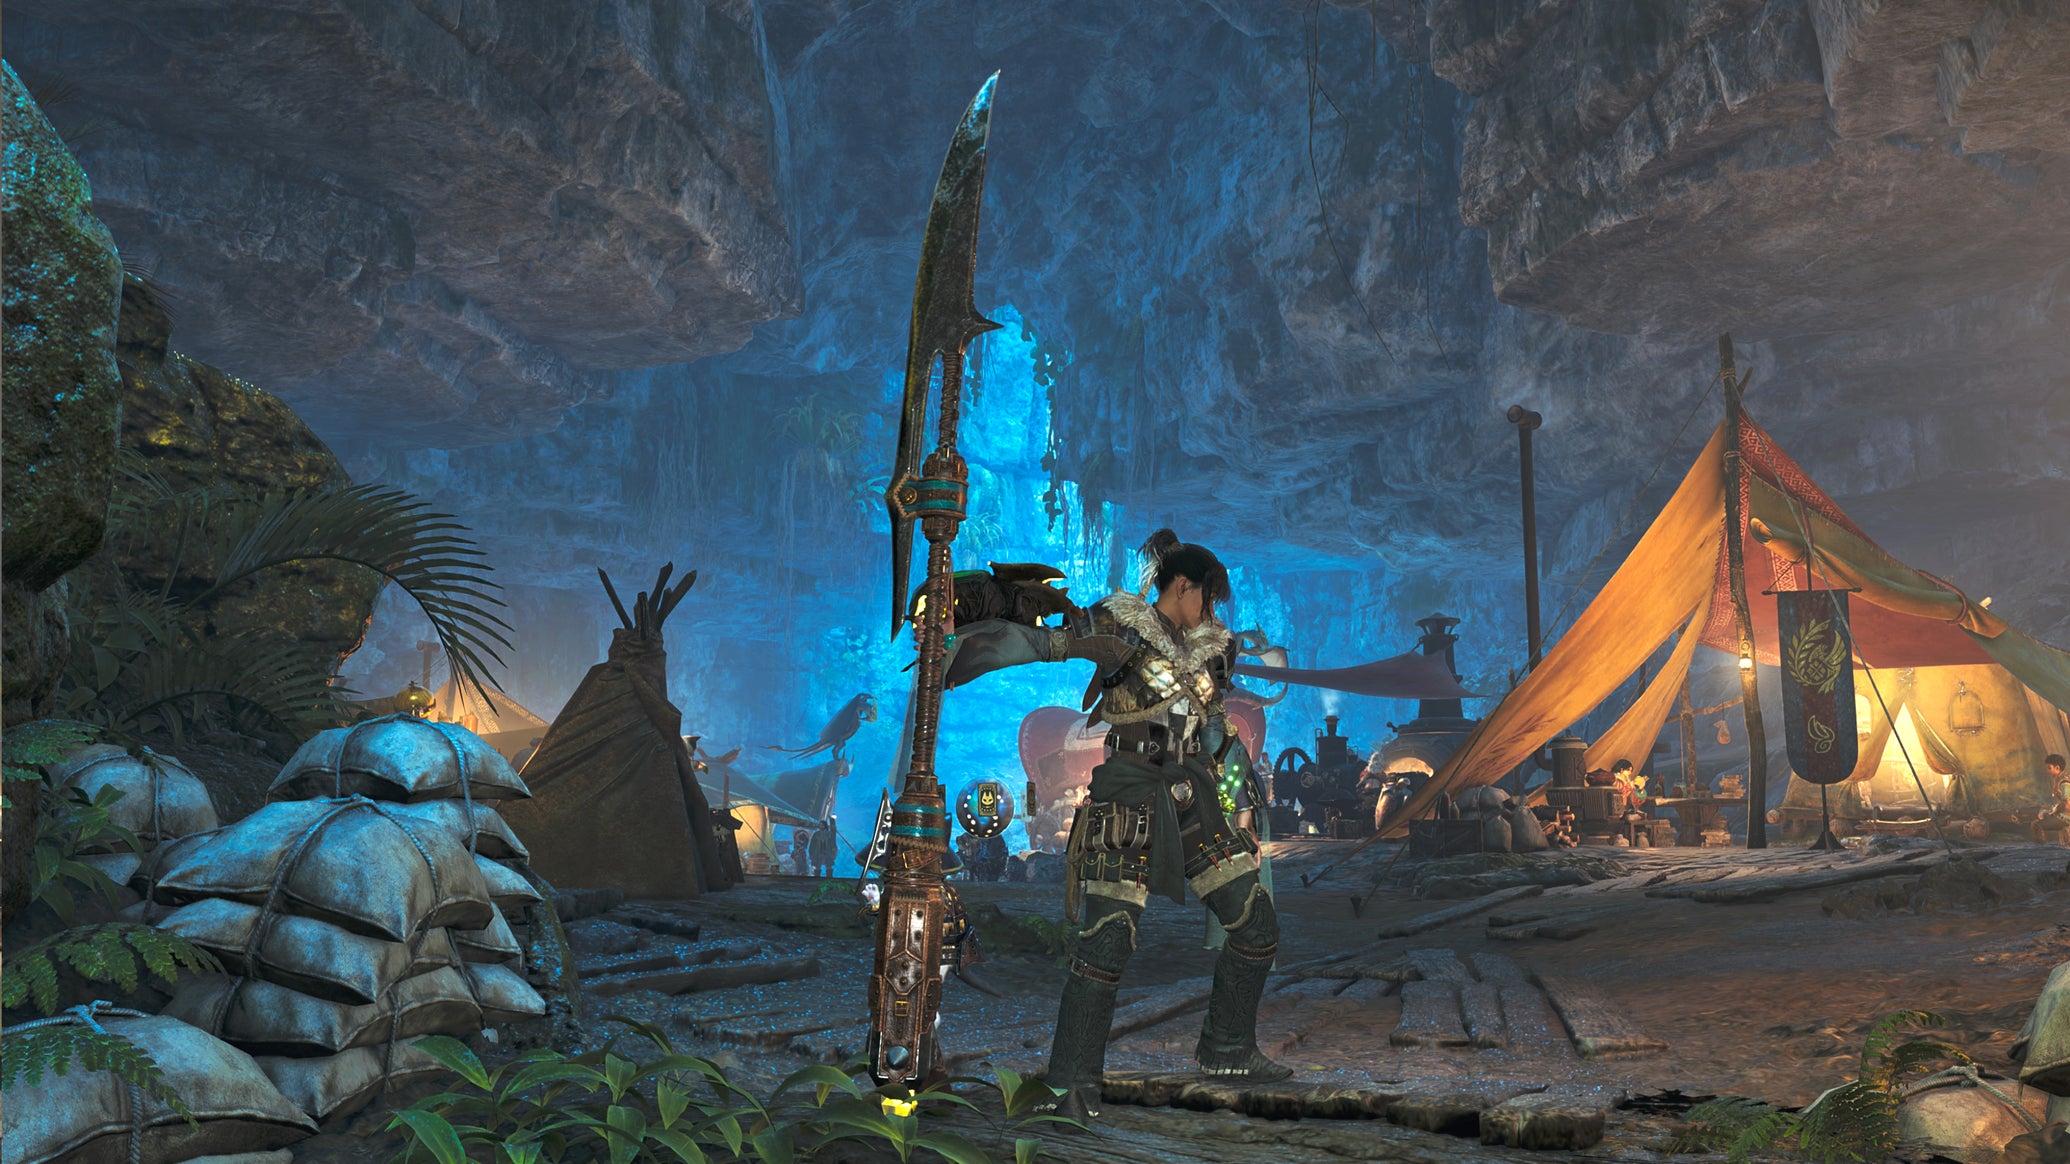
Image credit:Rock Paper Shotgun/Capcom

Want to inspect the full Insect Glaive weapon tree for Monster Hunter Wilds? There’s a grand total of 75 different Insect Glaives in Monster Hunter Wilds (not including the Artian weapons you can craft yourself), which is quite a stunning amount of choice for such a niche weapon type. Though there’s no denying Insect Glaives are very fun (and fascinating) to use. And if you’re here, you clearly think so too.
By default, you can only see a small portion of the Insect Glaive weapon tree at the start of Monster Hunter Wilds, with the rest hidden until you unlock specific materials. To help you plan your upgrade path, below we’ve detailed the entire Insect Glaive tree, along with tables of stats for every single Insect Glaive in the game.

Insect Glaive weapon tree
The various Insect Glaives in Monster Hunter Wilds are divided into a single giant weapon tree, which itself is organised into 23 distinct rows (also confusingly called “trees”). Here’s the entire Insect Glaive tree, including the new weapons added with Title Update 1:
| Tree | Element | Weapons | Final Form |
|---|---|---|---|
| Expedition Tree | None | Hope Glaive I-V | Esperanza Glaive |
| G. Rathalos Tree | Fire | Guardian Rathmaul I-II | Alabaster Rathmaul |
| Ore Tree | None | Iron Gale I-III | Chrome Gale |
| Jin Dahaad Tree | Ice | Jin Dhachhad | Precipice Geumgel |
| G. Ebony Tree | Dragon | Chthonian Vajra I-II | Bequeathed Testament |
| Balahara Tree | Water | Balahara Glaive I-IV | Sandsea Uchaltiya |
| Rey Dau Tree | Thunder | Rey Halilintar I-III | Halilintar Clairglaive |
| Chatacabra Tree | None | Chata Glaive I-IV | Shrouded Laphoka |
| G. Arkveld Tree | Dragon | G. Veldian Trudis I-II | G. Enduring Tor |
| Arkveld Tree | Dragon | Veldian Trudis I | Enduring Tor |
| Bone Tree | None | Bone Staff I-IV | Aerial Glaive |
| Ajarakan Tree | Blast | Ajara Trident I-II | Ajara-Bhadra |
| Lala Barina Tree | Paralysis | Barina Perche I-IV | Lala Stromatopelm |
| Nerscylla Tree | Sleep | Stealth Glaive I-III | Stealth Glaive Redux |
| Yian Kut-Ku Tree | Fire | Kut-Ku Pike I-II | Toucan Pike |
| G. Fulgur Tree | Thunder | Rising Fulgur I | Fulgurglaive Guardiana |
| Rathian Tree | Poison | Princess Regalia I-II | Queen Regalia |
| Rathalos Tree | Fire | Rathmaul I | Firedance Rathmaul |
| Gore Magala Tree | Dragon | Leumundslist | Leumundsgift |
| Blangonga Tree | Ice | Blizzard Glaive I | Immaculate Blizzard |
| Gravios Tree | Blast | Graviafaren I | Gravordius |
| Zoh Shia Tree | Dragon | Zoh Katir I | Blazing Katir |
| Mizutsune Tree | Water | Fox Halberd I | Curved Naganagi |
Below we’ll go over all 75 Insect Glaives in the Monster Hunter Wilds weapon tree, complete with damage stats, sharpness, crafting recipes, and more.
If you’re looking to cut through the noise of the upgrade tree and find out which are the most powerful weapons on offer, check out our guide to the best Insect Glaives in Monster Hunter Wilds !
All Monster Hunter Wilds Insect Glaives
Below we’ve listed the full stats of all 75 Insect Glaives in Monster Hunter Wilds, organised by their weapon trees. Click on each weapon to expand the details further, showing useful extra information like crafting materials required, branching upgrade paths, and the skills offered by each weapon.
Expedition Tree Insect Glaives
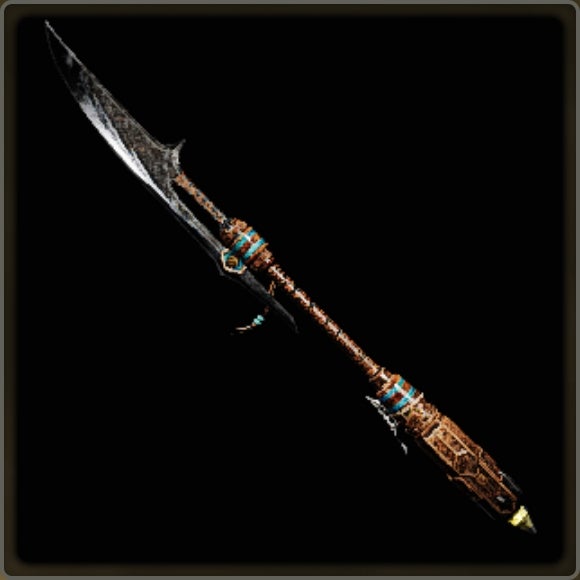
Hope Glaive I-V
| Insect Glaive | Damage | Element | Affinity | Sharpness | Slots | Def |
|---|---|---|---|---|---|---|
| ▶ Hope Glaive I | 279 | None | 0% | 0 | 0 | |
| Kinsect Level: 1 | ||||||
| Skills: None | ||||||
| Crafting Materials: 200z | ||||||
| Branching Upgrades: Chata Glaive I | ||||||
| ▶ Hope Glaive II | 310 | None | 0% | 0 | 0 | |
| Kinsect Level: 1 | ||||||
| Skills: Speed Sharpening [1] | ||||||
| Crafting Materials: 2x Iron Ore, 500z | ||||||
| Branching Upgrades: Iron Gale I , Balahara Glaive I | ||||||
| ▶ Hope Glaive III | 403 | None | 0% | 0 | 0 | |
| Kinsect Level: 3 | ||||||
| Skills: Speed Sharpening [1], Critical Eye [1] | ||||||
| Crafting Materials: 3x Dragonite Ore, 2x Machalite Ore, 1500z | ||||||
| Branching Upgrades: Guardian Rathmaul I | ||||||
| ▶ Hope Glaive IV | 496 | None | 0% | 2-1 | 0 | |
| Kinsect Level: 5 | ||||||
| Skills: Speed Sharpening [2], Critical Eye [1] | ||||||
| Crafting Materials: 4x Carbalite Ore, 4000z | ||||||
| ▶ Hope Glaive V | 589 | None | 0% | 3-2 | 0 | |
| Kinsect Level: 7 | ||||||
| Skills: Speed Sharpening [2], Critical Eye [1] | ||||||
| Crafting Materials: 4x Monster Hardbone, 5x Fucium Ore, 14000z | ||||||
| ▶ Esperanza Glaive | 651 | None | 0% | 3-2-1 | 0 | |
| Kinsect Level: 8 | ||||||
| Skills: Speed Sharpening [2], Critical Eye [2] | ||||||
| Crafting Materials: 5x Hunter Symbol I, 1x Bird Wyvern Gem, 20000z |
G. Rathalos Tree Insect Glaives
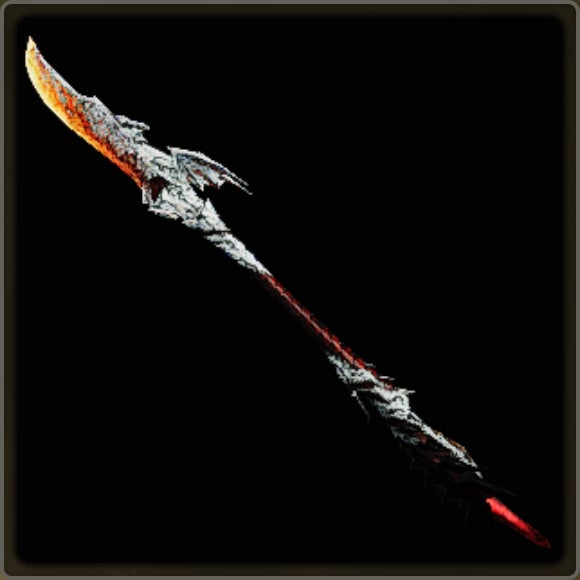
Guardian Rathmaul I-II
| Insect Glaive | Damage | Element | Affinity | Sharpness | Slots | Def |
|---|---|---|---|---|---|---|
| ▶ Guardian Rathmaul I | 496 | Fire (120) | 15% | 1 | 0 | |
| Kinsect Level: 4 | ||||||
| Skills: Critical Element [1], Master’s Touch [1] | ||||||
| Crafting Materials: 3x Guardian Rathalos Scale, 2x Guardian Rathalos Webbing, 1x Flame Sac, 2600z | ||||||
| Upgrades From: Hope Glaive III | ||||||
| ▶ Guardian Rathmaul II | 558 | Fire (170) | 15% | 2-1 | 0 | |
| Kinsect Level: 6 | ||||||
| Skills: Critical Element [1], Master’s Touch [1] | ||||||
| Crafting Materials: 2x G. Rathalos Certificate S, 5x Guardian Rathalos Wing, 1x Guardian Rathalos Plate, 1x Guardian Blood+, 10000z | ||||||
| ▶ Alabaster Rathmaul | 651 | Fire (200) | 15% | 3-2-1 | 0 | |
| Kinsect Level: 8 | ||||||
| Skills: Critical Element [1], Master’s Touch [1] | ||||||
| Crafting Materials: 5x Hunter Symbol II, 6x Guardian Rathalos Carapace, 1x Guardian Rathalos Ruby, 6x Guardian Scale+, 20000z |
Ore Tree Insect Glaives
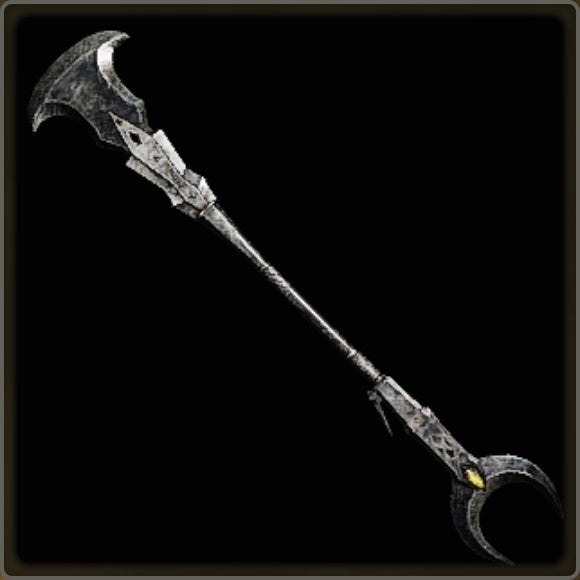
Iron Gale I-III
| Insect Glaive | Damage | Element | Affinity | Sharpness | Slots | Def |
|---|---|---|---|---|---|---|
| ▶ Iron Gale I | 372 | None | 0% | 0 | 0 | |
| Kinsect Level: 2 | ||||||
| Skills: Critical Draw [1] | ||||||
| Crafting Materials: 1x Machalite Ore, 2x Earth Crystal, 800z | ||||||
| Upgrades From: Hope Glaive II | ||||||
| Branching Upgrades: Chthonian Vajra I | ||||||
| ▶ Iron Gale II | 496 | None | 0% | 1 | 0 | |
| Kinsect Level: 4 | ||||||
| Skills: Critical Draw [2] | ||||||
| Crafting Materials: 1x Lightcrystal, 2x Icium, 2600z | ||||||
| ▶ Iron Gale III | 589 | None | 0% | 2 | 0 | |
| Kinsect Level: 6 | ||||||
| Skills: Critical Draw [2] | ||||||
| Crafting Materials: 4x Fucium Ore, 3x Gracium, 3x Monster Keenbone, 10000z | ||||||
| Branching Upgrades: Jin Dhachhad | ||||||
| ▶ Chrome Gale | 682 | None | 0% | 3-1 | 0 | |
| Kinsect Level: 8 | ||||||
| Skills: Critical Draw [3] | ||||||
| Crafting Materials: 5x Hunter Symbol I, 1x Novacrystal, 1x Wyvern Gem, 20000z |
Jin Dahaad Tree Insect Glaives
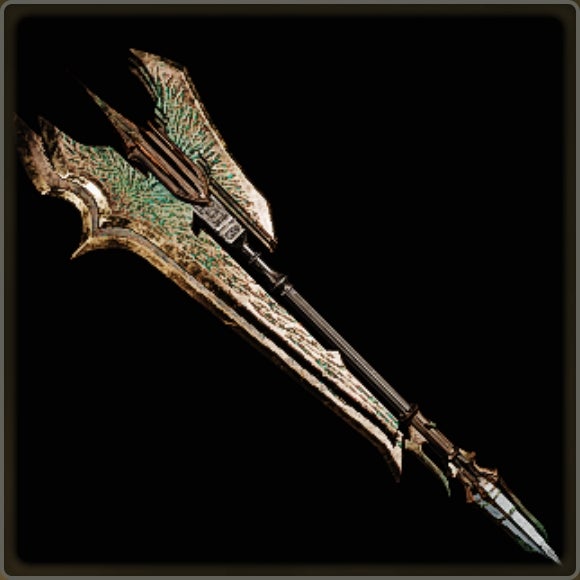
Jin Dhachhad
| Insect Glaive | Damage | Element | Affinity | Sharpness | Slots | Def |
|---|---|---|---|---|---|---|
| ▶ Jin Dhachhad | 589 | Ice (320) | 0% | 3-2 | 0 | |
| Kinsect Level: 7 | ||||||
| Skills: Power Prolonger [3] | ||||||
| Crafting Materials: 1x Jin Dahaad Certificate S, 5x Jin Dahaad Claw+, 4x Jin Dahaad Iceplate, 1x Jin Dahaad Tail, 14000z | ||||||
| Upgrades From: Iron Gale III | ||||||
| ▶ Precipice Geumgel | 651 | Ice (350) | 0% | 3-2-1 | 0 | |
| Kinsect Level: 8 | ||||||
| Skills: Power Prolonger [3] | ||||||
| Crafting Materials: 5x Hunter Symbol III, 4x Jin Dahaad Horn, 4x Jin Dahaad Carapace, 1x Jin Dahaad Icegem, 20000z |
G. Ebony Tree Insect Glaives
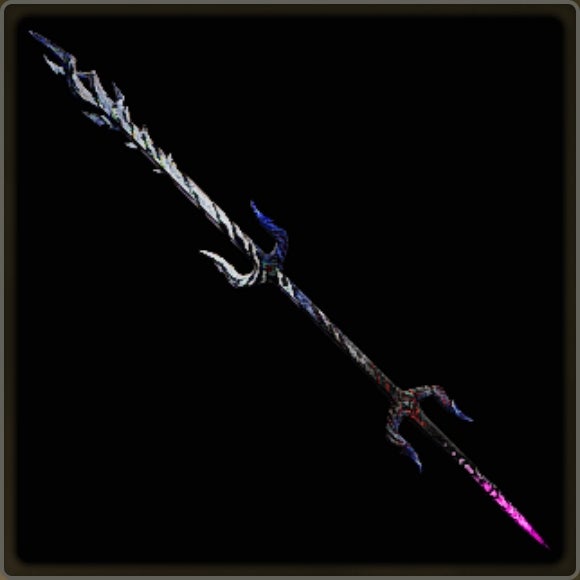
Chthonian Vajra I-II
| Insect Glaive | Damage | Element | Affinity | Sharpness | Slots | Def |
|---|---|---|---|---|---|---|
| ▶ Chthonian Vajra I | 434 | Dragon (160) | 10% | 1 | 0 | |
| Kinsect Level: 4 | ||||||
| Skills: Focus [2] | ||||||
| Crafting Materials: 3x Guardian Ebony Scale, 2x Guardian Ebony Claw, 1x Guardian Ebony Fang, 2600z | ||||||
| Upgrades From: Iron Gale I | ||||||
| ▶ Chthonian Vajra II | 527 | Dragon (210) | 10% | 2-1 | 0 | |
| Kinsect Level: 6 | ||||||
| Skills: Focus [3] | ||||||
| Crafting Materials: 2x G. Ebony Odogaron Certificate S, 6x Guardian Ebony Claw+, 1x Guardian Ebony Plate, 1x Guardian Blood+, 10000z | ||||||
| ▶ Bequeathed Testament | 651 | Dragon (250) | 10% | 3-2-1 | 0 | |
| Kinsect Level: 8 | ||||||
| Skills: Focus [3] | ||||||
| Crafting Materials: 5x Hunter Symbol II, 6x Guardian Ebony Fang+, 1x Guardian Ebony Gem, 6x Guardian Scale+, 20000z |
Balahara Tree Insect Glaives
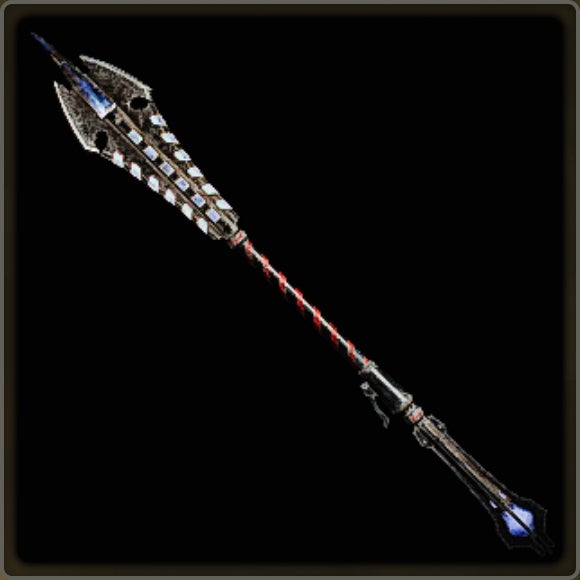
Balahara Glaive I-IV
| Insect Glaive | Damage | Element | Affinity | Sharpness | Slots | Def |
|---|---|---|---|---|---|---|
| ▶ Balahara Glaive I | 341 | Water (100) | 10% | 0 | 0 | |
| Kinsect Level: 2 | ||||||
| Skills: Power Prolonger [1] | ||||||
| Crafting Materials: 3x Balahara Scale, 1x Balahara Skull, 1x Aqua Sac, 800z | ||||||
| Upgrades From: Hope Glaive II | ||||||
| Branching Upgrades: Rey Halilintar I | ||||||
| ▶ Balahara Glaive II | 465 | Water (120) | 10% | 1 | 0 | |
| Kinsect Level: 4 | ||||||
| Skills: Power Prolonger [2] | ||||||
| Crafting Materials: 1x Guardian Doshaguma Claw, 2x Balahara Shell, 1x Balahara Tail, 2600z | ||||||
| ▶ Balahara Glaive III | 496 | Water (150) | 10% | 2-1 | 0 | |
| Kinsect Level: 5 | ||||||
| Skills: Power Prolonger [2] | ||||||
| Crafting Materials: 4x Balahara Certificate S, 4x Balahara Skull+, 4x Torrent Sac, 2x Balahara Black Pearl, 10000z | ||||||
| ▶ Balahara Glaive IV | 589 | Water (170) | 10% | 3-2 | 0 | |
| Kinsect Level: 7 | ||||||
| Skills: Power Prolonger [3] | ||||||
| Crafting Materials: 3x Uth Duna Certificate S, 5x Balahara Carapace, 1x Wyvern Gem, 14000z | ||||||
| ▶ Sandsea Uchaltiya | 651 | Water (200) | 10% | 3-2-1 | 0 | |
| Kinsect Level: 8 | ||||||
| Skills: Power Prolonger [3] | ||||||
| Crafting Materials: 5x Hunter Symbol I, 6x Balahara Scale+, 1x Uth Duna Watergem, 20000z |
Rey Dau Tree Insect Glaives
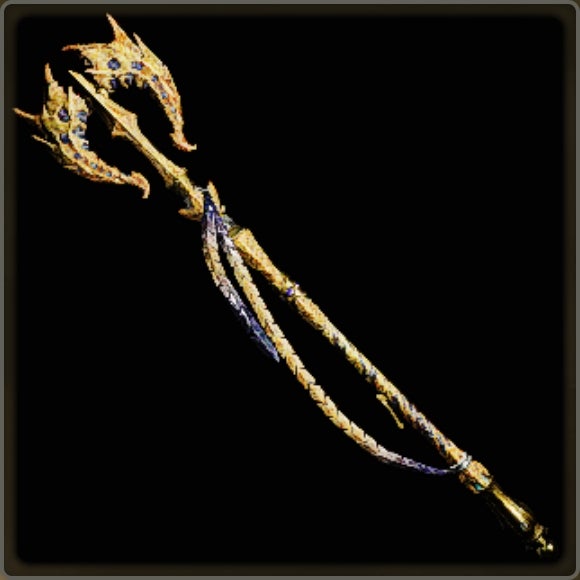
Rey Halilintar I-III
| Insect Glaive | Damage | Element | Affinity | Sharpness | Slots | Def |
|---|---|---|---|---|---|---|
| ▶ Rey Halilintar I | 434 | Thunder (120) | 0% | 0 | 0 | |
| Kinsect Level: 3 | ||||||
| Skills: Charge Master [1], Focus [1] | ||||||
| Crafting Materials: 3x Rey Dau Scale, 2x Rey Dau Wingtalon, 1x Rey Dau Thunderhorn, 2000z | ||||||
| Upgrades From: Balahara Glaive I | ||||||
| ▶ Rey Halilintar II | 527 | Thunder (150) | 0% | 2-1 | 0 | |
| Kinsect Level: 5 | ||||||
| Skills: Charge Master [1], Focus [1] | ||||||
| Crafting Materials: 2x Rathian Certificate S, 3x Rathian Webbing, 1x Novacrystal, 4000z | ||||||
| ▶ Rey Halilintar III | 620 | Thunder (170) | 0% | 3-2 | 0 | |
| Kinsect Level: 7 | ||||||
| Skills: Focus [2], Charge Master [1] | ||||||
| Crafting Materials: 3x Rey Dau Certificate S, 4x Rey Dau Fulgurtalon, 1x Rey Dau Tail, 1x Rey Dau Plate, 14000z | ||||||
| ▶ Halilintar Clairglaive | 682 | Thunder (200) | 0% | 3-2-1 | 0 | |
| Kinsect Level: 8 | ||||||
| Skills: Focus [2], Charge Master [1] | ||||||
| Crafting Materials: 5x Hunter Symbol III, 6x Rey Dau Carapace, 4x Rey Dau Bolthorn, 1x Rey Dau Boltgem, 20000z |
Chatacabra Tree Insect Glaives
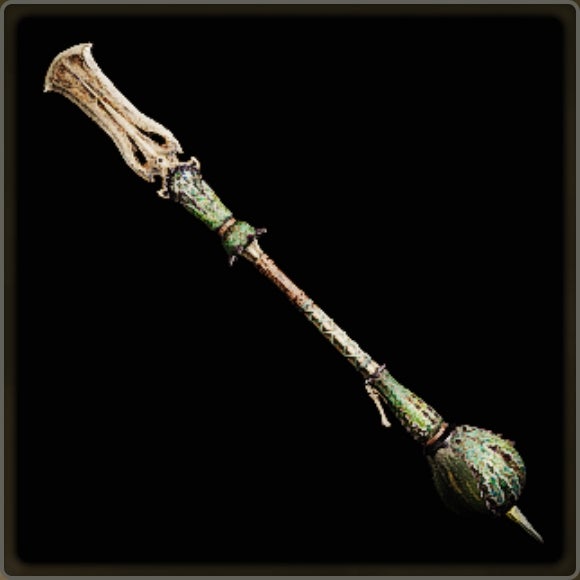
Chata Glaive I-IV
| Insect Glaive | Damage | Element | Affinity | Sharpness | Slots | Def |
|---|---|---|---|---|---|---|
| ▶ Chata Glaive I | 341 | None | 0% | 0 | 15 | |
| Kinsect Level: 1 | ||||||
| Skills: Power Prolonger [1] | ||||||
| Crafting Materials: 3x Chatacabra Scale, 2x Chatacabra Hide, 1x Chatacabra Jaw, 500z | ||||||
| Upgrades From: Hope Glaive I | ||||||
| ▶ Chata Glaive II | 465 | None | 0% | 0 | 15 | |
| Kinsect Level: 3 | ||||||
| Skills: Power Prolonger [2] | ||||||
| Crafting Materials: 1x Rompopolo Claw, 2x Chatacabra Shell, 1500z | ||||||
| Branching Upgrades: G. Veldian Trudis I | ||||||
| ▶ Chata Glaive III | 558 | None | 0% | 2-1 | 15 | |
| Kinsect Level: 5 | ||||||
| Skills: Power Prolonger [2] | ||||||
| Crafting Materials: 2x Chatacabra Certificate S, 5x Chatacabra Scale+, 3x Chatacabra Jaw+, 4000z | ||||||
| ▶ Chata Glaive IV | 651 | None | 0% | 3-2 | 15 | |
| Kinsect Level: 7 | ||||||
| Skills: Power Prolonger [3] | ||||||
| Crafting Materials: 3x Uth Duna Certificate S, 6x Chatacabra Carapace, 6x Acute Fang, 14000z | ||||||
| ▶ Shrouded Laphoka | 713 | None | 0% | 3-2-1 | 15 | |
| Kinsect Level: 8 | ||||||
| Skills: Power Prolonger [3] | ||||||
| Crafting Materials: 5x Hunter Symbol I, 6x Chatacabra Hide+, 1x Beast Gem, 20000z |
G. Arkveld Tree Insect Glaives
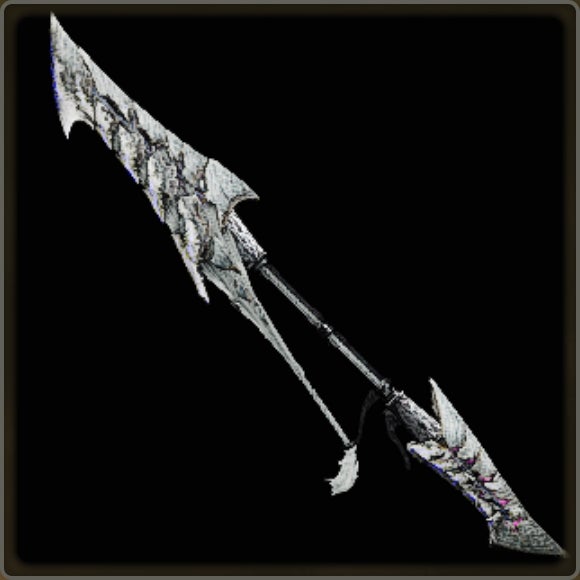
G. Veldian Trudis I-II
| Insect Glaive | Damage | Element | Affinity | Sharpness | Slots | Def |
|---|---|---|---|---|---|---|
| ▶ G. Veldian Trudis I | 527 | Dragon (120) | -10% | 1-1 | 0 | |
| Kinsect Level: 4 | ||||||
| Skills: Power Prolonger [2] | ||||||
| Crafting Materials: 3x Guardian Scale, 3x Guardian Pelt, 1x Guardian Blood, 2x Tough Guardian Bone, 2600z | ||||||
| Upgrades From: Chata Glaive II | ||||||
| ▶ G. Veldian Trudis II | 651 | Dragon (150) | -10% | 2-2 | 0 | |
| Kinsect Level: 6 | ||||||
| Skills: Power Prolonger [2] | ||||||
| Crafting Materials: 6x Guardian Scale+, 6x Guardian Pelt+, 3x Guardian Blood+, 1x Dragonbone Relic, 10000z | ||||||
| Branching Upgrades: Veldian Trudis I | ||||||
| ▶ G. Enduring Tor | 744 | Dragon (180) | -10% | 3-3-1 | 0 | |
| Kinsect Level: 8 | ||||||
| Skills: Power Prolonger [2] | ||||||
| Crafting Materials: 5x Hunter Symbol III, 4x Arkveld Calloushell, 2x Arkveld Tail, 1x Arkveld Gem, 20000z |
Arkveld Tree Insect Glaives
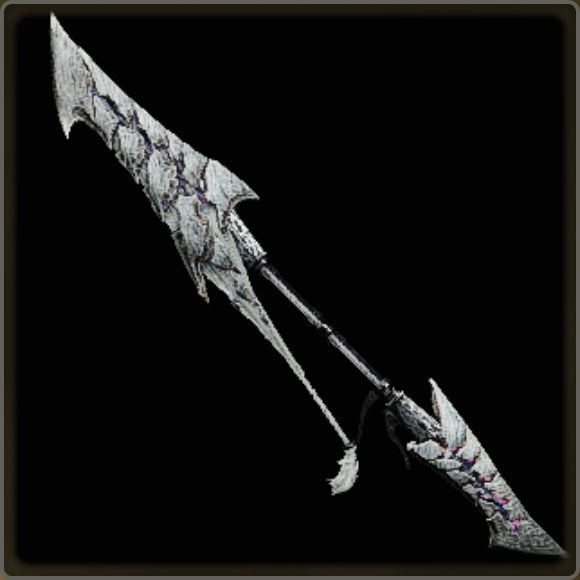
Veldian Trudis I
| Insect Glaive | Damage | Element | Affinity | Sharpness | Slots | Def |
|---|---|---|---|---|---|---|
| ▶ Veldian Trudis I | 620 | Dragon (220) | 0% | 3-2 | 0 | |
| Kinsect Level: 7 | ||||||
| Skills: Power Prolonger [3] | ||||||
| Crafting Materials: 3x Arkveld Certificate S, 4x Arkveld Scale+, 2x White Arkveld Pelt, 1x Wyvern Gem, 14000z | ||||||
| Upgrades From: G. Veldian Trudis II | ||||||
| ▶ Enduring Tor | 682 | Dragon (250) | 0% | 3-2-1 | 0 | |
| Kinsect Level: 9 | ||||||
| Skills: Power Prolonger [3] | ||||||
| Crafting Materials: 5x Hunter Symbol III, 5x Arkveld Armorplate, 3x Arkveld Horn+, 1x Arkveld Gem, 20000z |
Bone Tree Insect Glaives
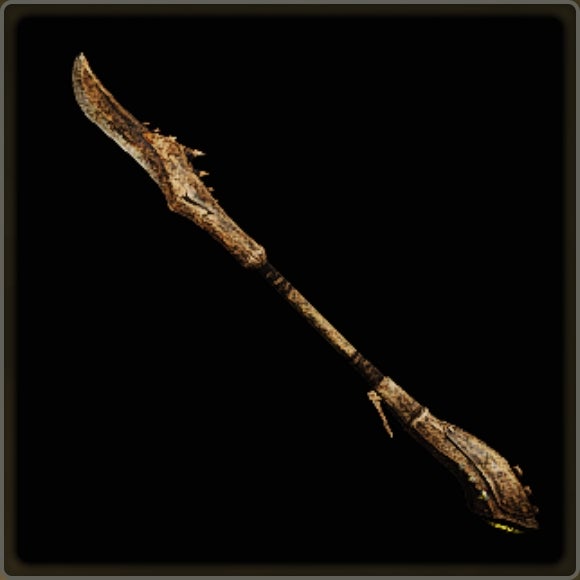
Bone Staff I-IV
| Insect Glaive | Damage | Element | Affinity | Sharpness | Slots | Def |
|---|---|---|---|---|---|---|
| ▶ Bone Staff I | 341 | None | 0% | 0 | 0 | |
| Kinsect Level: 1 | ||||||
| Skills: Focus [1] | ||||||
| Crafting Materials: 2x Mystery Bone, 500z | ||||||
| Branching Upgrades: Barina Perche I | ||||||
| ▶ Bone Staff II | 403 | None | 0% | 0 | 0 | |
| Kinsect Level: 3 | ||||||
| Skills: Focus [1], Attack Boost [1] | ||||||
| Crafting Materials: 2x Sturdy Bone, 1x Monster Fluid, 800z | ||||||
| Branching Upgrades: Ajara Trident I | ||||||
| ▶ Bone Staff III | 527 | None | 0% | 1 | 0 | |
| Kinsect Level: 5 | ||||||
| Skills: Focus [2], Attack Boost [1] | ||||||
| Crafting Materials: 2x Tough Guardian Bone, 2600z | ||||||
| ▶ Bone Staff IV | 620 | None | 0% | 2-1 | 0 | |
| Kinsect Level: 7 | ||||||
| Skills: Focus [3], Attack Boost [1] | ||||||
| Crafting Materials: 4x Great Stoutbone, 2x Colossal Bone, 10000z | ||||||
| ▶ Aerial Glaive | 713 | None | 0% | 3-2-1 | 0 | |
| Kinsect Level: 10 | ||||||
| Skills: Focus [3], Attack Boost [1] | ||||||
| Crafting Materials: 5x Hunter Symbol I, 5x Monster Hardbone, 1x Dragonbone Relic, 1x Beast Gem, 20000z |
Ajarakan Tree Insect Glaives
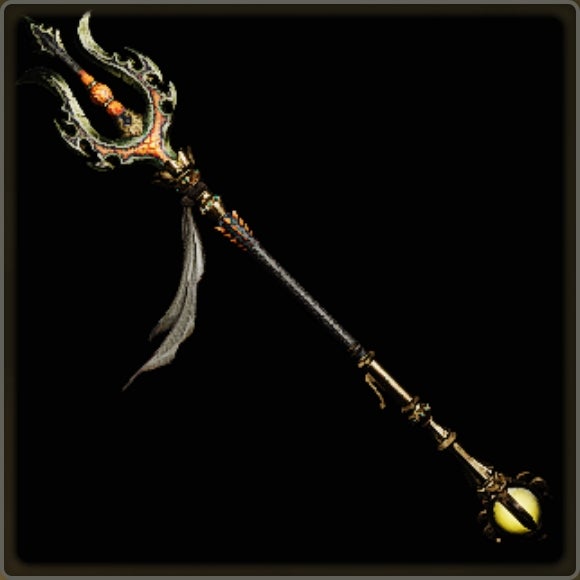
Ajara Trident I-II
| Insect Glaive | Damage | Element | Affinity | Sharpness | Slots | Def |
|---|---|---|---|---|---|---|
| ▶ Ajara Trident I | 403 | Blast (120) | 10% | 0 | 0 | |
| Kinsect Level: 3 | ||||||
| Skills: Power Prolonger [2] | ||||||
| Crafting Materials: 3x Ajarakan Scale, 2x Ajarakan Ridge, 1x Ajarakan Jewel, 1500z | ||||||
| Upgrades From: Bone Staff II | ||||||
| ▶ Ajara Trident II | 558 | Blast (150) | 10% | 2-1 | 0 | |
| Kinsect Level: 6 | ||||||
| Skills: Power Prolonger [3] | ||||||
| Crafting Materials: 2x Ajarakan Certificate S, 3x Ajarakan Ridge+, 2x Ajarakan Jewel+, 1x Ajarakan Marrow, 10000z | ||||||
| ▶ Ajara-Bhadra | 651 | Blast (180) | 10% | 3-2-1 | 0 | |
| Kinsect Level: 8 | ||||||
| Skills: Power Prolonger [3] | ||||||
| Crafting Materials: 5x Hunter Symbol II, 6x Ajarakan Carapace, 1x Ajarakan Medulla, 20000z |
Lala Barina Tree Insect Glaives
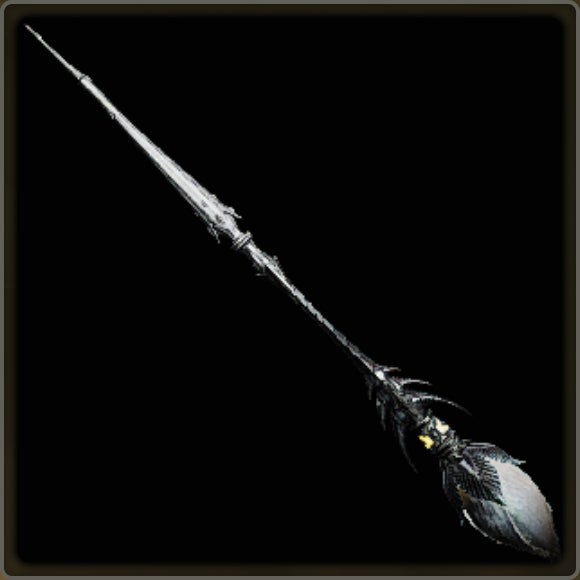
Barina Perche I-IV
| Insect Glaive | Damage | Element | Affinity | Sharpness | Slots | Def |
|---|---|---|---|---|---|---|
| ▶ Barina Perche I | 310 | Paralysis (100) | 10% | 0 | 0 | |
| Kinsect Level: 1 | ||||||
| Skills: Critical Draw [1] | ||||||
| Crafting Materials: 3x Lala Barina Shell, 2x Lala Barina Mucus, 1x Lala Barina Claw, 500z | ||||||
| Upgrades From: Bone Staff I | ||||||
| Branching Upgrades: Stealth Glaive I | ||||||
| ▶ Barina Perche II | 372 | Paralysis (120) | 10% | 0 | 0 | |
| Kinsect Level: 4 | ||||||
| Skills: Critical Draw [1], Critical Status [1] | ||||||
| Crafting Materials: 1x Nerscylla Claw, 2x Lala Barina Floret, 1x Lala Barina Stinger, 1500z | ||||||
| ▶ Barina Perche III | 465 | Paralysis (150) | 15% | 2-1 | 0 | |
| Kinsect Level: 6 | ||||||
| Skills: Critical Draw [1], Critical Status [1] | ||||||
| Crafting Materials: 2x Lala Barina Certificate S, 5x Lala Barina Mucus+, 3x Lala Barina Claw+, 4000z | ||||||
| ▶ Barina Perche IV | 558 | Paralysis (170) | 15% | 3-2 | 0 | |
| Kinsect Level: 9 | ||||||
| Skills: Critical Draw [2], Critical Status [1] | ||||||
| Crafting Materials: 3x Monster Hardbone, 6x Lala Barina Floret+, 4x Lala Barina Stinger+, 14000z | ||||||
| ▶ Lala Stromatopelm | 620 | Paralysis (200) | 15% | 3-2-1 | 0 | |
| Kinsect Level: 10 | ||||||
| Skills: Critical Draw [2], Critical Status [1] | ||||||
| Crafting Materials: 5x Hunter Symbol I, 6x Lala Barina Carapace, 4x Monster Broth, 1x Bird Wyvern Gem, 20000z |
Nerscylla Tree Insect Glaives
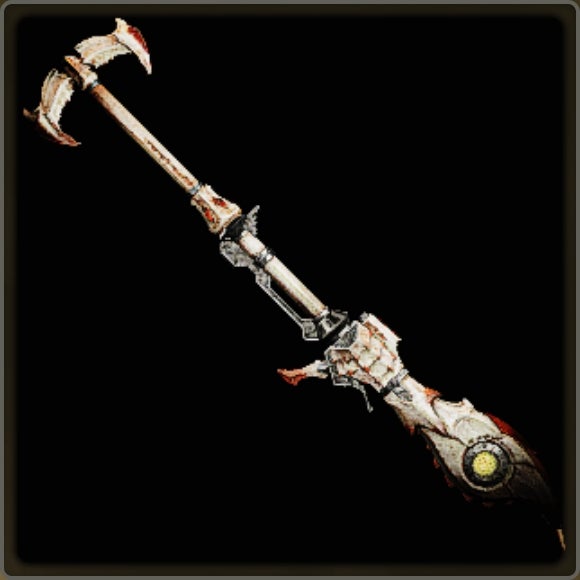
Stealth Glaive I-III
| Insect Glaive | Damage | Element | Affinity | Sharpness | Slots | Def |
|---|---|---|---|---|---|---|
| ▶ Stealth Glaive I | 372 | Sleep (120) | 10% | 0 | 0 | |
| Kinsect Level: 4 | ||||||
| Skills: Charge Master [1], Focus [1] | ||||||
| Crafting Materials: 3x Nerscylla Shell, 2x Nerscylla Claw, 1x Sleep Sac, 1500z | ||||||
| Upgrades From: Barina Perche I | ||||||
| ▶ Stealth Glaive II | 465 | Sleep (150) | 15% | 2-1 | 0 | |
| Kinsect Level: 6 | ||||||
| Skills: Charge Master [1], Focus [1] | ||||||
| Crafting Materials: 1x Nerscylla Certificate S, 3x Nerscylla Claw+, 3x Coma Sac, 5000z | ||||||
| ▶ Stealth Glaive III | 558 | Sleep (170) | 15% | 3-2 | 0 | |
| Kinsect Level: 9 | ||||||
| Skills: Charge Master [2], Focus [1] | ||||||
| Crafting Materials: 3x Jin Dahaad Certificate S, 5x Nerscylla Spike+, 2x Nerscylla Shear, 3x Monster Broth, 14000z | ||||||
| ▶ Stealth Glaive Redux | 620 | Sleep (200) | 15% | 3-2-1 | 0 | |
| Kinsect Level: 10 | ||||||
| Skills: Charge Master [2], Focus [1] | ||||||
| Crafting Materials: 5x Hunter Symbol I, 6x Nerscylla Carapace, 1x Bird Wyvern Gem, 20000z |
Yian Kut-Ku Tree Insect Glaives
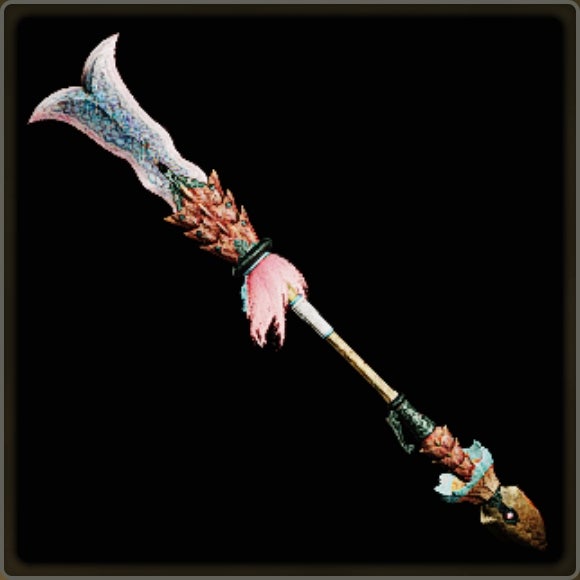
Kut-Ku Pike I-II
| Insect Glaive | Damage | Element | Affinity | Sharpness | Slots | Def |
|---|---|---|---|---|---|---|
| ▶ Kut-Ku Pike I | 558 | Fire (260) | 0% | 2-1 | 0 | |
| Kinsect Level: 6 | ||||||
| Skills: Power Prolonger [2] | ||||||
| Crafting Materials: 1x Yian Kut-Ku Certificate S, 3x Kut-Ku Wing, 2x Kut-Ku Ear, 5x Kut-Ku Scale+, 4000z | ||||||
| Branching Upgrades: Rising Fulgur I | ||||||
| ▶ Kut-Ku Pike II | 651 | Fire (320) | 0% | 3-2 | 0 | |
| Kinsect Level: 9 | ||||||
| Skills: Power Prolonger [3] | ||||||
| Crafting Materials: 2x Nu Udra Certificate S, 4x Giant Beak, 4x Inferno Sac, 1x Bird Wyvern Gem, 14000z | ||||||
| ▶ Toucan Pike | 682 | Fire (350) | 0% | 3-2-1 | 0 | |
| Kinsect Level: 10 | ||||||
| Skills: Power Prolonger [3] | ||||||
| Crafting Materials: 5x Hunter Symbol I, 6x Kut-Ku Carapace, 1x Nu Udra Flamegem, 20000z |
G. Fulgur Tree Insect Glaives
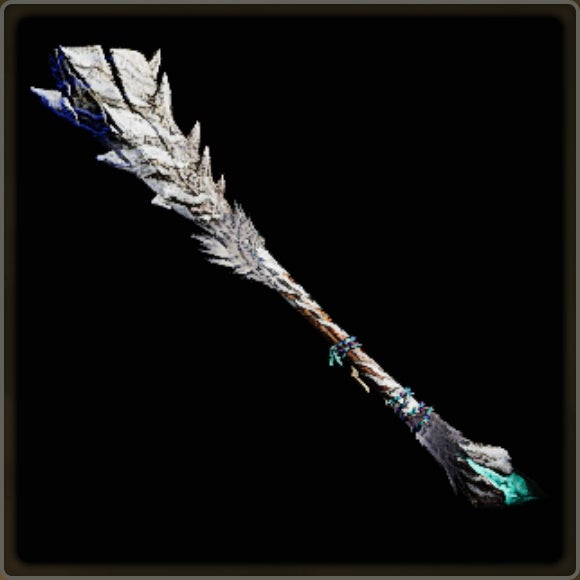
Rising Fulgur I
| Insect Glaive | Damage | Element | Affinity | Sharpness | Slots | Def |
|---|---|---|---|---|---|---|
| ▶ Rising Fulgur I | 558 | Thunder (210) | 15% | 2-1 | 0 | |
| Kinsect Level: 6 | ||||||
| Skills: Critical Element [3] | ||||||
| Crafting Materials: 2x Guardian Fulgur Certificate S, 5x Guardian Fulgur Fang+, 1x Guardian Fulgur Tail, 4x Thunder Sac, 10000z | ||||||
| Upgrades From: Kut-Ku Pike I | ||||||
| ▶ Fulgurglaive Guardiana | 651 | Thunder (250) | 15% | 3-2-1 | 0 | |
| Kinsect Level: 8 | ||||||
| Skills: Critical Element [3] | ||||||
| Crafting Materials: 5x Hunter Symbol II, 4x Guardian Fulgur Nosebone+, 6x Guardian Fulgur Pelt+, 1x Guardian Fulgur Gem, 20000z |
Rathian Tree Insect Glaives
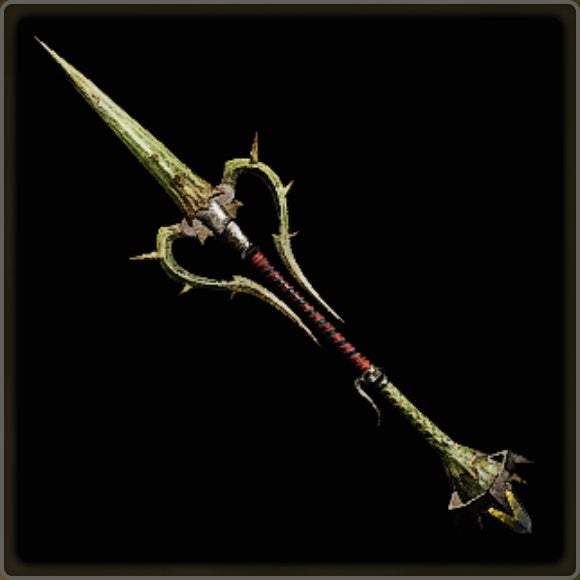
Princess Regalia I-II
| Insect Glaive | Damage | Element | Affinity | Sharpness | Slots | Def |
|---|---|---|---|---|---|---|
| ▶ Princess Regalia I | 496 | Poison (120) | 15% | 2-1 | 0 | |
| Kinsect Level: 5 | ||||||
| Skills: Critical Status [2], Poison Duration Up [1] | ||||||
| Crafting Materials: 1x Rathian Certificate S, 3x Rathian Webbing, 2x Rathian Spike+, 5x Rathian Scale+, 5000z | ||||||
| Branching Upgrades: Rathmaul I | ||||||
| ▶ Princess Regalia II | 589 | Poison (150) | 15% | 3-2 | 0 | |
| Kinsect Level: 7 | ||||||
| Skills: Critical Status [3], Poison Duration Up [1] | ||||||
| Crafting Materials: 2x Rey Dau Certificate S, 6x Rathian Carapace, 1x Rath Medulla, 1x Wyvern Gem, 14000z | ||||||
| ▶ Queen Regalia | 651 | Poison (180) | 15% | 3-2-1 | 0 | |
| Kinsect Level: 8 | ||||||
| Skills: Critical Status [3], Poison Duration Up [1] | ||||||
| Crafting Materials: 5x Hunter Symbol I, 5x Rathian Scale+, 1x Rathian Ruby, 20000z |
Rathalos Tree Insect Glaives
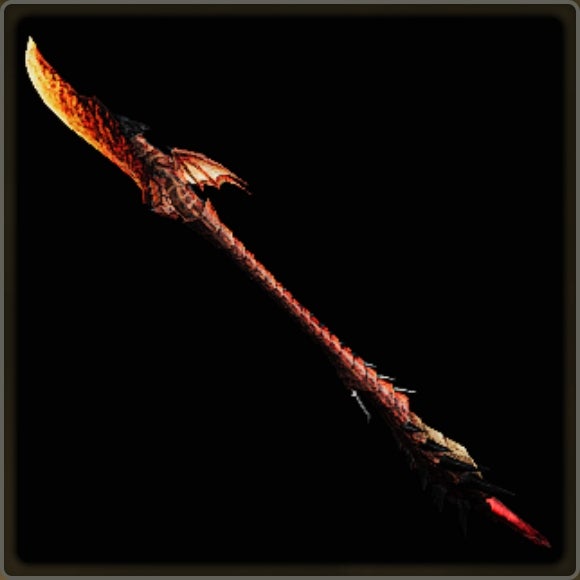
Rathmaul I
| Insect Glaive | Damage | Element | Affinity | Sharpness | Slots | Def |
|---|---|---|---|---|---|---|
| ▶ Rathmaul I | 558 | Fire (210) | 10% | 2-1 | 0 | |
| Kinsect Level: 6 | ||||||
| Skills: Critical Boost [3] | ||||||
| Crafting Materials: 2x Rathalos Certificate S, 5x Rathalos Carapace, 4x Rathalos Wing, 1x Rath Medulla, 10000z | ||||||
| Upgrades From: Princess Regalia I | ||||||
| Branching Upgrades: Leumundslist | ||||||
| ▶ Firedance Rathmaul | 620 | Fire (250) | 10% | 3-2-1 | 0 | |
| Kinsect Level: 8 | ||||||
| Skills: Critical Boost [3] | ||||||
| Crafting Materials: 5x Hunter Symbol II, 6x Rathalos Scale+, 1x Rathalos Tail, 1x Rathalos Ruby, 20000z |
Gore Magala Tree Insect Glaives
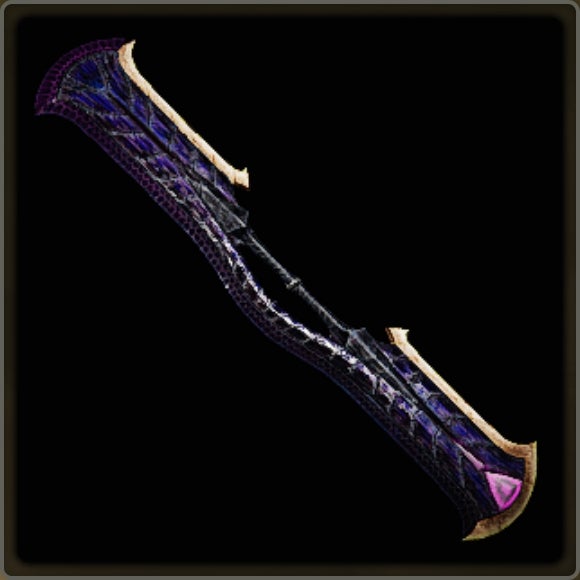
Leumundslist
| Insect Glaive | Damage | Element | Affinity | Sharpness | Slots | Def |
|---|---|---|---|---|---|---|
| ▶ Leumundslist | 558 | Dragon (160) | 20% | 3-2 | 0 | |
| Kinsect Level: 9 | ||||||
| Skills: Critical Element [3] | ||||||
| Crafting Materials: 3x Gore Magala Certificate S, 4x Gore Magala Ripclaw+, 1x Gore Magala Tail, 5x Frenzy Shard, 14000z | ||||||
| Upgrades From: Rathmaul I | ||||||
| ▶ Leumundsgift | 620 | Dragon (200) | 20% | 3-2-1 | 0 | |
| Kinsect Level: 10 | ||||||
| Skills: Critical Element [3] | ||||||
| Crafting Materials: 5x Hunter Symbol III, 2x Gore Magala Feeler+, 1x Gore Magala Nyctgem, 5x Frenzy Crystal, 20000z |
Blangonga Tree Insect Glaives
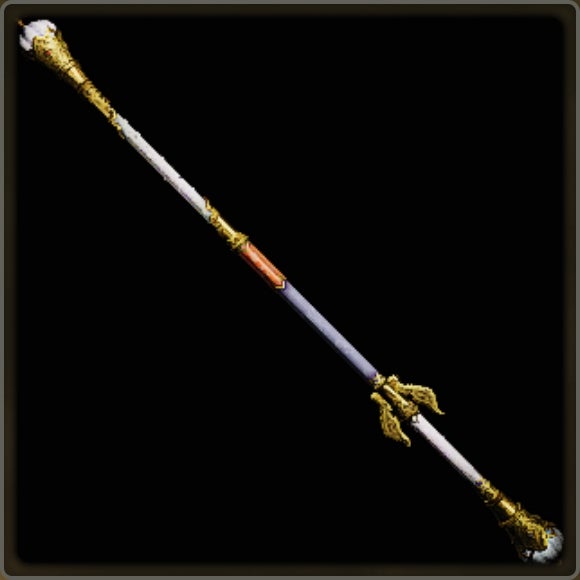
Blizzard Glaive I
| Insect Glaive | Damage | Element | Affinity | Sharpness | Slots | Def |
|---|---|---|---|---|---|---|
| ▶ Blizzard Glaive I | 620 | Ice (140) | -10% | 2-1 | 0 | |
| Kinsect Level: 7 | ||||||
| Skills: Focus [3] | ||||||
| Crafting Materials: 2x Blangonga Certificate S, 5x Blangonga Fang+, 4x Blangonga Whisker, 4x Blango Pelt+, 10000z | ||||||
| ▶ Immaculate Blizzard | 713 | Ice (180) | -10% | 3-2-1 | 0 | |
| Kinsect Level: 10 | ||||||
| Skills: Focus [3] | ||||||
| Crafting Materials: 5x Hunter Symbol II, 6x Blangonga Pelt+, 4x Blangonga Tail, 1x Jin Dahaad Icegem, 20000z |
Gravios Tree Insect Glaives
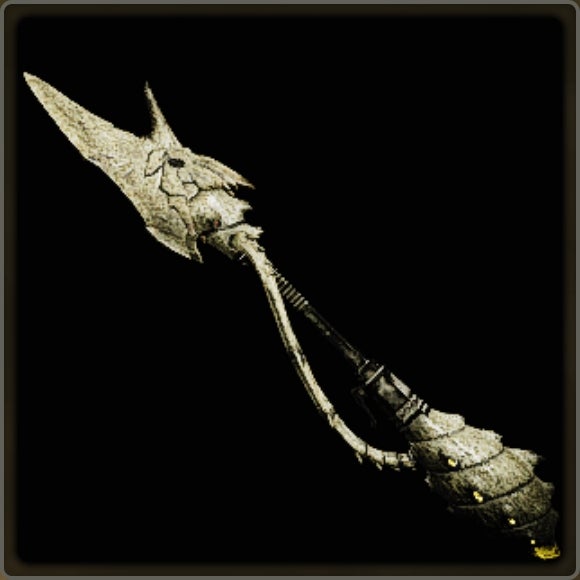
Graviafaren I
| Insect Glaive | Damage | Element | Affinity | Sharpness | Slots | Def |
|---|---|---|---|---|---|---|
| ▶ Graviafaren I | 682 | Blast (190) | -15% | 2 | 30 | |
| Kinsect Level: 5 | ||||||
| Skills: Punishing Draw [3] | ||||||
| Crafting Materials: 2x Gravios Certificate S, 5x Gravios Wing, 3x Gravios Skull, 4x Gravios Pleura+, 10000z | ||||||
| ▶ Gravordius | 775 | Blast (250) | -15% | 3-1 | 30 | |
| Kinsect Level: 6 | ||||||
| Skills: Punishing Draw [3] | ||||||
| Crafting Materials: 5x Hunter Symbol II, 6x Gravios Carapace, 1x Gravios Medulla, 1x Wyvern Gem, 20000z |
Zoh Shia Tree Insect Glaives
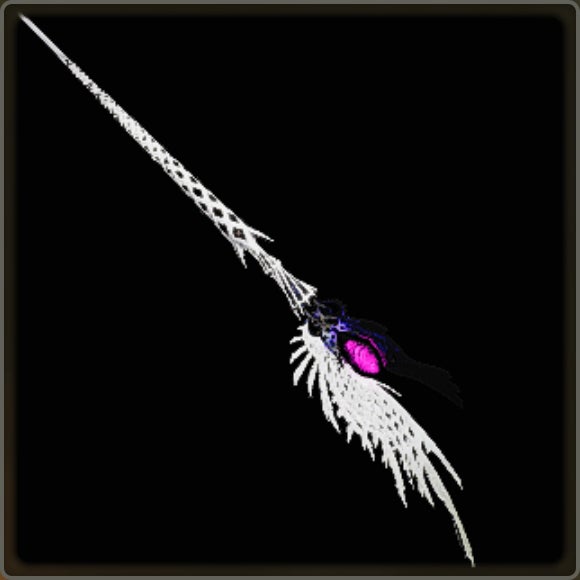
Zoh Katir I
| Insect Glaive | Damage | Element | Affinity | Sharpness | Slots | Def |
|---|---|---|---|---|---|---|
| ▶ Zoh Katir I | 651 | Dragon (100) | 5% | 3-2 | 0 | |
| Kinsect Level: 6 | ||||||
| Skills: Whiteflame Torrent [1] | ||||||
| Crafting Materials: 1x Zoh Shia Certificate S, 5x Zoh Shia Layershell, 4x Zoh Shia Stakeclaw, 1x Zoh Shia Crystaltail, 14000z | ||||||
| ▶ Blazing Katir | 682 | Dragon (150) | 5% | 3-2-1 | 0 | |
| Kinsect Level: 8 | ||||||
| Skills: Whiteflame Torrent [1] | ||||||
| Crafting Materials: 5x Hunter Symbol III, 3x Zoh Shia Crystalhorn, 4x Blackember Mass, 1x Faux Whitegleam Orb, 20000z |
Mizutsune Tree Insect Glaives
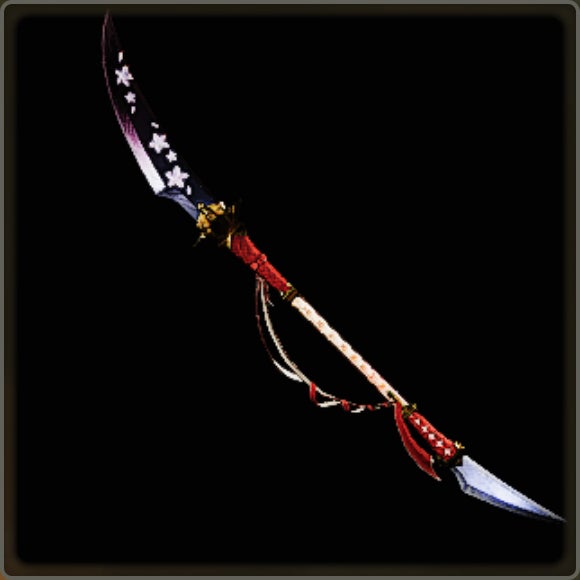
Fox Halberd I
| Insect Glaive | Damage | Element | Affinity | Sharpness | Slots | Def |
|---|---|---|---|---|---|---|
| ▶ Fox Halberd I | 558 | Water (180) | 15% | 2-1 | 0 | |
| Kinsect Level: 7 | ||||||
| Skills: Slicked Blade [2], Critical Element [1] | ||||||
| Crafting Materials: 2x Mizutsune Certificate S, 5x Mizutsune Purplefur+, 3x Mizutsune Claw+, 1x Mizutsune Tail, 10000z | ||||||
| ▶ Curved Naganagi | 651 | Water (230) | 15% | 3-2-1 | 0 | |
| Kinsect Level: 9 | ||||||
| Skills: Slicked Blade [3], Critical Element [1] | ||||||
| Crafting Materials: 5x Hunter Symbol III, 4x Mizutsune Fin+, 4x Bubblefoam+, 1x Mizutsune Water Orb, 20000z |
That wraps up our overview of the entire Insect Glaive weapon tree available in Monster Hunter Wilds. For more help with the game’s arsenal of weaponry, head to our pages on the best solo weapon and best starting weapon for beginners . Our Monster Hunter Wilds walkthrough and our guide on how long it takes to beat MHWilds should help you out if you get stuck in the campaign too. And don’t forget to check out our list of all the monsters in Monster Hunter Wilds as well.


Monster Hunter Wilds
Video Game
Rock Paper Shotgun is better when you sign in
Sign in and join us on our journey to discover strange and compelling PC games.

All 75 Arc Raiders Blueprints and where to get them
These areas have the highest chance of giving you Blueprints

Image credit:Rock Paper Shotgun/Embark Studios

Looking for more Arc Raiders Blueprints? It’s a special day when you find a Blueprint, as they’re among the most valuable items in Arc Raiders. If you find a Blueprint that you haven’t already found, then you must make sure you hold onto it at all costs, because Blueprints are the key to one of the most important and powerful systems of meta-progression in the game.
This guide aims to be the very best guide on Blueprints you can find, starting with a primer on what exactly they are and how they work in Arc Raiders, before delving into exactly where to get Blueprints and the very best farming spots for you to take in your search.
We’ll also go over how to get Blueprints from other unlikely activities, such as destroying Surveyors and completing specific quests. And you’ll also find the full list of all 75 Blueprints in Arc Raiders on this page (including the newest Blueprints added with the Cold Snap update , such as the Deadline Blueprint and Firework Box Blueprint), giving you all the information you need to expand your own crafting repertoire.
In this guide:
- What are Blueprints in Arc Raiders?
- Full Blueprint list: All crafting recipes
- Where to find Blueprints in Arc Raiders Blueprints obtained from quests Blueprints obtained from Trials Best Blueprint farming locations

What are Blueprints in Arc Raiders?
Blueprints in Arc Raiders are special items which, if you manage to extract with them, you can expend to permanently unlock a new crafting recipe in your Workshop. If you manage to extract from a raid with an Anvil Blueprint, for example, you can unlock the ability to craft your very own Anvil Pistol, as many times as you like (as long as you have the crafting materials).
To use a Blueprint, simply open your Inventory while in the lobby, then right-click on the Blueprint and click “Learn And Consume” . This will permanently unlock the recipe for that item in your Workshop. As of the Stella Montis update, there are allegedly 75 different Blueprints to unlock - although only 68 are confirmed to be in the game so far. You can see all the Blueprints you’ve found and unlocked by going to the Workshop menu, and hitting “R” to bring up the Blueprint screen.
It’s possible to find duplicates of past Blueprints you’ve already unlocked. If you find these, then you can either sell them, or - if you like to play with friends - you can take it into a match and gift it to your friend so they can unlock that recipe for themselves. Another option is to keep hold of them until the time comes to donate them to the Expedition.
Full Blueprint list: All crafting recipes
Below is the full list of all the Blueprints that are currently available to find in Arc Raiders, and the crafting recipe required for each item:
| Blueprint | Type | Recipe | Crafted At |
|---|---|---|---|
| Bettina | Weapon | 3x Advanced Mechanical Components 3x Heavy Gun Parts 3x Canister | Gunsmith 3 |
| Blue Light Stick | Quick Use | 3x Chemicals | Utility Station 1 |
| Aphelion | Weapon | 3x Magnetic Accelerator 3x Complex Gun Parts 1x Matriarch Reactor | Gunsmith 3 |
| Combat Mk. 3 (Flanking) | Augment | 2x Advanced Electrical Components 3x Processor | Gear Bench 3 |
| Combat Mk. 3 (Aggressive) | Augment | 2x Advanced Electrical Components 3x Processor | Gear Bench 3 |
| Complex Gun Parts | Material | 2x Light Gun Parts 2x Medium Gun Parts 2x Heavy Gun Parts | Refiner 3 |
| Fireworks Box | Quick Use | 1x Explosive Compound 3x Pop Trigger | Explosives Station 2 |
| Gas Mine | Mine | 4x Chemicals 2x Rubber Parts | Explosives Station 1 |
| Green Light Stick | Quick Use | 3x Chemicals | Utility Station 1 |
| Pulse Mine | Mine | 1x Crude Explosives 1x Wires | Explosives Station 1 |
| Seeker Grenade | Grenade | 1x Crude Explosives 2x ARC Alloy | Explosives Station 1 |
| Looting Mk. 3 (Survivor) | Augment | 2x Advanced Electrical Components 3x Processor | Gear Bench 3 |
| Angled Grip II | Mod | 2x Mechanical Components 3x Duct Tape | Gunsmith 2 |
| Angled Grip III | Mod | 2x Mod Components 5x Duct Tape | Gunsmith 3 |
| Hullcracker | Weapon | 1x Magnetic Accelerator 3x Heavy Gun Parts 1x Exodus Modules | Gunsmith 3 |
| Launcher Ammo | Ammo | 5x Metal Parts 1x Crude Explosives | Workbench 1 |
| Anvil | Weapon | 5x Mechanical Components 5x Simple Gun Parts | Gunsmith 2 |
| Anvil Splitter | Mod | 2x Mod Components 3x Processor | Gunsmith 3 |
| ??? | ??? | ??? | ??? |
| Barricade Kit | Quick Use | 1x Mechanical Components | Utility Station 2 |
| Blaze Grenade | Grenade | 1x Explosive Compound 2x Oil | Explosives Station 3 |
| Bobcat | Weapon | 3x Advanced Mechanical Components 3x Light Gun Parts | Gunsmith 3 |
| Osprey | Weapon | 2x Advanced Mechanical Components 3x Medium Gun Parts 7x Wires | Gunsmith 3 |
| Burletta | Weapon | 3x Mechanical Components 3x Simple Gun Parts | Gunsmith 1 |
| Compensator II | Mod | 2x Mechanical Components 4x Wires | Gunsmith 2 |
| Compensator III | Mod | 2x Mod Components 8x Wires | Gunsmith 3 |
| Defibrillator | Quick Use | 9x Plastic Parts 1x Moss | Medical Lab 2 |
| ??? | ??? | ??? | ??? |
| Equalizer | Weapon | 3x Magnetic Accelerator 3x Complex Gun Parts 1x Queen Reactor | Gunsmith 3 |
| Extended Barrel | Mod | 2x Mod Components 8x Wires | Gunsmith 3 |
| Extended Light Mag II | Mod | 2x Mechanical Components 3x Steel Spring | Gunsmith 2 |
| Extended Light Mag III | Mod | 2x Mod Components 5x Steel Spring | Gunsmith 3 |
| Extended Medium Mag II | Mod | 2x Mechanical Components 3x Steel Spring | Gunsmith 2 |
| Extended Medium Mag III | Mod | 2x Mod Components 5x Steel Spring | Gunsmith 3 |
| Extended Shotgun Mag II | Mod | 2x Mechanical Components 3x Steel Spring | Gunsmith 2 |
| Extended Shotgun Mag III | Mod | 2x Mod Components 5x Steel Spring | Gunsmith 3 |
| Remote Raider Flare | Quick Use | 2x Chemicals 4x Rubber Parts | Utility Station 1 |
| Heavy Gun Parts | Material | 4x Simple Gun Parts | Refiner 2 |
| Venator | Weapon | 2x Advanced Mechanical Components 3x Medium Gun Parts 5x Magnet | Gunsmith 3 |
| Il Toro | Weapon | 5x Mechanical Components 6x Simple Gun Parts | Gunsmith 1 |
| Jolt Mine | Mine | 1x Electrical Components 1x Battery | Explosives Station 2 |
| Explosive Mine | Mine | 1x Explosive Compound 1x Sensors | Explosives Station 3 |
| Jupiter | Weapon | 3x Magnetic Accelerator 3x Complex Gun Parts 1x Queen Reactor | Gunsmith 3 |
| Light Gun Parts | Material | 4x Simple Gun Parts | Refiner 2 |
| Lightweight Stock | Mod | 2x Mod Components 5x Duct Tape | Gunsmith 3 |
| Lure Grenade | Grenade | 1x Speaker Component 1x Electrical Components | Utility Station 2 |
| Medium Gun Parts | Material | 4x Simple Gun Parts | Refiner 2 |
| Torrente | Weapon | 2x Advanced Mechanical Components 3x Medium Gun Parts 6x Steel Spring | Gunsmith 3 |
| Muzzle Brake II | Mod | 2x Mechanical Components 4x Wires | Gunsmith 2 |
| Muzzle Brake III | Mod | 2x Mod Components 8x Wires | Gunsmith 3 |
| Padded Stock | Mod | 2x Mod Components 5x Duct Tape | Gunsmith 3 |
| Shotgun Choke II | Mod | 2x Mechanical Components 4x Wires | Gunsmith 2 |
| Shotgun Choke III | Mod | 2x Mod Components 8x Wires | Gunsmith 3 |
| Shotgun Silencer | Mod | 2x Mod Components 8x Wires | Gunsmith 3 |
| Showstopper | Grenade | 1x Advanced Electrical Components 1x Voltage Converter | Explosives Station 3 |
| Silencer I | Mod | 2x Mechanical Components 4x Wires | Gunsmith 2 |
| Silencer II | Mod | 2x Mod Components 8x Wires | Gunsmith 3 |
| Snap Hook | Quick Use | 2x Power Rod 3x Rope 1x Exodus Modules | Utility Station 3 |
| Stable Stock II | Mod | 2x Mechanical Components 3x Duct Tape | Gunsmith 2 |
| Stable Stock III | Mod | 2x Mod Components 5x Duct Tape | Gunsmith 3 |
| Tagging Grenade | Grenade | 1x Electrical Components 1x Sensors | Utility Station 3 |
| Tempest | Weapon | 3x Advanced Mechanical Components 3x Medium Gun Parts 3x Canister | Gunsmith 3 |
| Trigger Nade | Grenade | 2x Crude Explosives 1x Processor | Explosives Station 2 |
| Vertical Grip II | Mod | 2x Mechanical Components 3x Duct Tape | Gunsmith 2 |
| Vertical Grip III | Mod | 2x Mod Components 5x Duct Tape | Gunsmith 3 |
| Vita Shot | Quick Use | 2x Antiseptic 1x Syringe | Medical Lab 3 |
| Vita Spray | Quick Use | 3x Antiseptic 1x Canister | Medical Lab 3 |
| Vulcano | Weapon | 1x Magnetic Accelerator 3x Heavy Gun Parts 1x Exodus Modules | Gunsmith 3 |
| Wolfpack | Grenade | 2x Explosive Compound 2x Sensors | Explosives Station 3 |
| Red Light Stick | Quick Use | 3x Chemicals | Utility Station 1 |
| Smoke Grenade | Grenade | 14x Chemicals 1x Canister | Utility Station 2 |
| Deadline | Mine | 3x Explosive Compound 2x ARC Circuitry | Explosives Station 3 |
| Trailblazer | Grenade | 1x Explosive Compound 1x Synthesized Fuel | Explosives Station 3 |
| Tactical Mk. 3 (Defensive) | Augment | 2x Advanced Electrical Components 3x Processor | Gear Bench 3 |
| Tactical Mk. 3 (Healing) | Augment | 2x Advanced Electrical Components 3x Processor | Gear Bench 3 |
| Yellow Light Stick | Quick Use | 3x Chemicals | Utility Station 1 |
Note: The missing Blueprints in this list likely have not actually been added to the game at the time of writing, because none of the playerbase has managed to find any of them. As they are added to the game, I will update this page with the most relevant information so you know exactly how to get all 75 Arc Raiders Blueprints.
Where to find Blueprints in Arc Raiders
Below is a list of all containers, modifiers, and events which maximise your chances of finding Blueprints:
- Certain quests reward you with specific Blueprints .
- Completing Trials has a high chance of offering Blueprints as rewards.
- Surveyors have a decent chance of dropping Blueprints on death.
- High loot value areas tend to have a greater chance of spawning Blueprints.
- Night Raids and Storms may increase rare Blueprint spawn chances in containers.
- Containers with higher numbers of items may have a higher tendency to spawn Blueprints. As a result, Blue Gate (which has many “large” containers containing multiple items) may give you a higher chance of spawning Blueprints.
- Raider containers (Raider Caches, Weapon Boxes, Medical Bags, Grenade Tubes) have increased Blueprint drop rates. As a result, the Uncovered Caches event gives you a high chance of finding Blueprints.
- Security Lockers have a higher than average chance of containing Blueprints.
- Certain Blueprints only seem to spawn under specific circumstances: Tempest Blueprint only spawns during Night Raid events. Vulcano Blueprint only spawns during Hidden Bunker events. Jupiter and Equaliser Blueprints only spawn during Harvester events.

Raider Caches, Weapon Boxes, and other raider-oriented container types have a good chance of offering Blueprints. |Image credit:Rock Paper Shotgun/Embark Studios
Blueprints have a very low chance of spawning in any container in Arc Raiders, around 1-2% on average. However, there is a higher chance of finding Blueprints in particular container types. Specifically, you can find more Blueprints in Raider containers and security lockers.
Beyond this, if you’re looking for Blueprints you should focus on regions of the map which are marked as having particularly high-value loot. Areas such as the Control Tower in Dam Battlegrounds, the Arrival and Departure Buildings in Spaceport, and Pilgrim’s Peak in Blue Gate all have a better-than-average chance of spawning Blueprints somewhere amongst all their containers. Night Raids and Electromagnetic Storm events also increase the drop chances of certain Blueprints .
In addition to these containers, you can often loot Blueprints from destroyed Surveyors - the largest of the rolling ball ARC. Surveyors are more commonly found on the later maps - Spaceport and Blue Gate - and if one spawns in your match, you’ll likely see it by the blue laser beam that it casts into the sky while “surveying”.
Surveyors are quite well-armoured and will very speedily run away from you once it notices you, but if you can take one down then make sure you loot all its parts for a chance of obtaining certain unusual Blueprints.
Blueprints obtained from quests
One way in which you can get Blueprints is by completing certain quests for the vendors in Speranza. Some quests will reward you with a specific item Blueprint upon completion, so as long as you work through all the quests in Arc Raiders, you are guaranteed those Blueprints.
Here is the full list of all Blueprints you can get from quest rewards:
- Trigger Nade Blueprint: Rewarded after completing “Sparks Fly”.
- Lure Grenade Blueprint: Rewarded after completing “Greasing Her Palms”.
- Burletta Blueprint: Rewarded after completing “Industrial Espionage”.
- Hullcracker Blueprint (and Launcher Ammo Blueprint): Rewarded after completing “The Major’s Footlocker”.
Alas, that’s only 4 Blueprints out of a total of 75 to unlock, so for the vast majority you will need to find them yourself during a raid. If you’re intent on farming Blueprints, then it’s best to equip yourself with cheap gear in case you lose it, but don’t use a free loadout because then you won’t get a safe pocket to stash any new Blueprint you find. No pain in Arc Raiders is sharper than failing to extract with a new Blueprint you’ve been after for a dozen hours already.

One of the best ways to get Blueprints is by hitting three stars on all five Trials every week. |Image credit:Rock Paper Shotgun/Embark Studios
Blueprints obtained from Trials
One of the very best ways to get Blueprints is as rewards for completing Trials in Arc Raiders. Trials are unlocked from Level 15 onwards, and allow you to earn rewards by focusing on certain tasks over the course of several raids. For example, one Trial might task you with dealing damage to Hornets, while another might challenge you to loot Supply Drops.
Trials refresh on a weekly basis, with a new week bringing five new Trials. Each Trial can offer up to three rewards after passing certain score milestones, and it’s possible to receive very high level loot from these reward crates - including Blueprints. So if you want to unlock as many Blueprints as possible, you should make a point of completing as many Trials as possible each week.
Best Blueprint farming locations
The very best way to get Blueprints is to frequent specific areas of the maps which combine high-tier loot pools with the right types of containers to search. Here are my recommendations for where to find Blueprints on every map, so you can always keep the search going for new crafting recipes to unlock.

Image credit:Rock Paper Shotgun/Embark Studios
Dam Battlegrounds
The best places to farm Blueprints on Dam Battlegrounds are the Control Tower, Power Generation Complex, Ruby Residence, and Pale Apartments . The first two regions, despite only being marked on the map as mid-tier loot, contain a phenomenal number of containers to loot. The Control Tower can also contain a couple of high-tier Security Lockers - though of course, you’ll need to have unlocked the Security Breach skill at the end of the Survival tree.
There’s also a lot of reporting amongst the playerbase that the Residential areas in the top-left of the map - Pale Apartments and Ruby Residence - give you a comparatively strong chance of finding Blueprints. Considering their size, there’s a high density of containers to loot in both locations, and they also have the benefit of being fairly out of the way. So you’re more likely to have all the containers to yourself.
Buried City
The best Blueprint farming locations on Buried City are the Santa Maria Houses, Grandioso Apartments, Town Hall, and the various buildings of the New District . Grandioso Apartments has a lower number of containers than the rest, but a high chance of spawning weapon cases - which have good Blueprint drop rates. The others are high-tier loot areas, with plenty of lootable containers - including Security Lockers.
Spaceport
The best places to find Blueprints on Spaceport are the Arrival and Departure Buildings, as well as Control Tower A6 and the Launch Towers . All these areas are labelled as high-value loot regions, and many of them are also very handily connected to one another by the Spaceport wall, which you can use to quickly run from one area to the next. At the tops of most of these buildings you’ll find at least one Security Locker, so this is an excellent farming route for players looking to find Blueprints.
The downside to looting Blueprints on Spaceport is that all these areas are hotly contested, particularly in Duos and Squads. You’ll need to be very focused and fast in order to complete the full farming route.

Image credit:Rock Paper Shotgun/Embark Studios
Blue Gate
Blue Gate tends to have a good chance of dropping Blueprints, potentially because it generally has a high number of containers which can hold lots of items; so there’s a higher chance of a Blueprint spawning in each container. In my experience, the best Blueprint farming spots on Blue Gate are Pilgrim’s Peak, Raider’s Refuge, the Ancient Fort, and the Underground Complex beneath the Warehouse .
All of these areas contain a wealth of containers to loot. Raider’s Refuge has less to loot, but the majority of the containers in and around the Refuge are raider containers, which have a high chance of containing Blueprints - particularly during major events.
Stella Montis
On the whole, Stella Montis seems to have a very low drop rate for Blueprints (though a high chance of dropping other high-tier loot). If you do want to try farming Blueprints on this map, the best places to find Blueprints in Stella Montis are Medical Research, Assembly Workshop, and the Business Center . These areas have the highest density of containers to loot on the map.
In addition to this, the Western Tunnel has a few different Security Lockers to loot, so while there’s very little to loot elsewhere in this area of the map, it’s worth hitting those Security Lockers if you spawn there at the start of a match.
That wraps up this primer on how to get all the Blueprints in Arc Raiders as quickly as possible. With the Expedition system constantly resetting a large number of players’ Blueprints, it’s more important than ever to have the most up-to-date information on where to find all these Blueprints.
While you’re here, be sure to check out our Arc Raiders best guns tier list , as well as our primers on the best skills to unlock and all the different Field Depot locations on every map.


ARC Raiders
PS5 , Xbox Series X/S , PC
Rock Paper Shotgun is better when you sign in
Sign in and join us on our journey to discover strange and compelling PC games.
