Monster Hunter Wilds best weapons tier list
Our MH Wilds weapon tier list ranks all 14 types to help you decide on the best weapon for you

Image credit:Rock Paper Shotgun/Capcom

What is the best weapon in Monster Hunter Wilds? The most important decisions in any Monster Hunter game are always related to your weapons. Monster Hunter Wilds , like its recent predecessors, gives you access to 14 distinct weapon types from the very beginning. So to aid you in figuring out which weapon to choose, in our guide below we’ve ranked all weapons from best to worst in the current post-launch meta.
Read on, and you’ll find our definitive Monster Hunter Wilds weapon tier list ranking everything from the mighty Great Sword to the melodic Hunting Horn, including every melee and ranged option in the same tier list, and fully accounting for all the latest weapon balance changes in Title Update 1 . All 14 weapons are extremely powerful in the right hands, and more than capable of seeing you through the entirety of Monster Hunter Wilds. But if you want the very best weapons in the game for sheer destructive power and finishing hunts in record time, these are the ones to pick.

Monster Hunter Wilds best weapons tier list
As of Title Update 1, The best weapons in Monster Hunter Wilds are the Long Sword, the Bow, and the Sword And Shield , each of which is placed in the top SS-Tier rank of our tier list. The Long Sword reigns supreme as a remarkably well-balanced weapon that makes use of counters and dodges to completely nullify dangerous attacks. The Bow packs amazing damage potential into a fast-firing package, can be very easily used to decimate any monster in the game. And the Sword And Shield gives you amazing mobility and versatility, allowing you to block, dodge, and carve up enemies with either brute force or elemental status effects. All three are exquisitely powerful in the right hands, and deserve their spots at the top of our tier list.
Below you can see our Monster Hunter Wilds tier list of best weapons in full. Keep scrolling beyond that and you can read in more detail about each of our rankings, as well as some notes on the best weapons in each category.
Monster Hunter Wilds weapon tier list
SS-Tier :
- Long Sword
- Bow
- Sword And Shield
S-Tier:
- Gunlance
- Great Sword
- Dual Blades
- Insect Glaive
A-Tier:
- Charge Blade
- Heavy Bowgun
- Hunting Horn
- Hammer
B-Tier:
- Lance
- Switch Axe
- Light Bowgun
This tier list reflects the current weapon meta in Monster Hunter Wilds, but it’s important to remember that things may change over time as new content updates and balance changes are added to the game by Capcom. Specifically, we’ve taken into account the recent weapon balance changes introduced in Title Update 1 - more info on those exact balance changes below.
Our tier list takes into account the following weapon balance changes from Title Update 1:
- Bow : Dragon Piercer damage has been decreased.
- Bow : Power Volley elemental values have been increased.
- Bow : Thousand Dragons damage has been increased. This includes when using Close-range Coating and Power Coating.
- Bow : Power Shot and Power Volley are now affected by the skill Charge Master.
- Hammer : Fixed an issue where Focus Strikes could not be used quickly after coming to a stop after moving during a charge.
- Heavy Bowgun and Light Bowgun : Ranged attack capabilities have been adjusted when riding a Seikret.
- Hunting Horn : Fixed an issue where certain actions that required simultaneous inputs were not behaving correctly.
- Lance : Made it easier to land thrust attack finishers after a focus strike in which the first hit causes large knockback.
- Light Bowgun : Fixed an issue that caused Wyvernblast to react to Palico attacks.
Before you protest: even B-Tier weapons, in the right hands, and with enough practice, can hit every bit as hard as SS-Tier weapons. They’re still very much worth trying to see if you get on with them, because all 14 weapon types can be astoundingly strong. We’re splitting hairs by necessity here in order to make a tier list in the first place. The weapon you should use is the one that you enjoy using most, full stop.
However, for a lot of people, it’s good to know that you’ll be spending your time learning the very best weapons that Monster Hunter Wilds has to offer. Below we’ll explore each of our tier list rankings in greater detail, explaining why each weapon is ranked in the position it is.
1. Long Sword
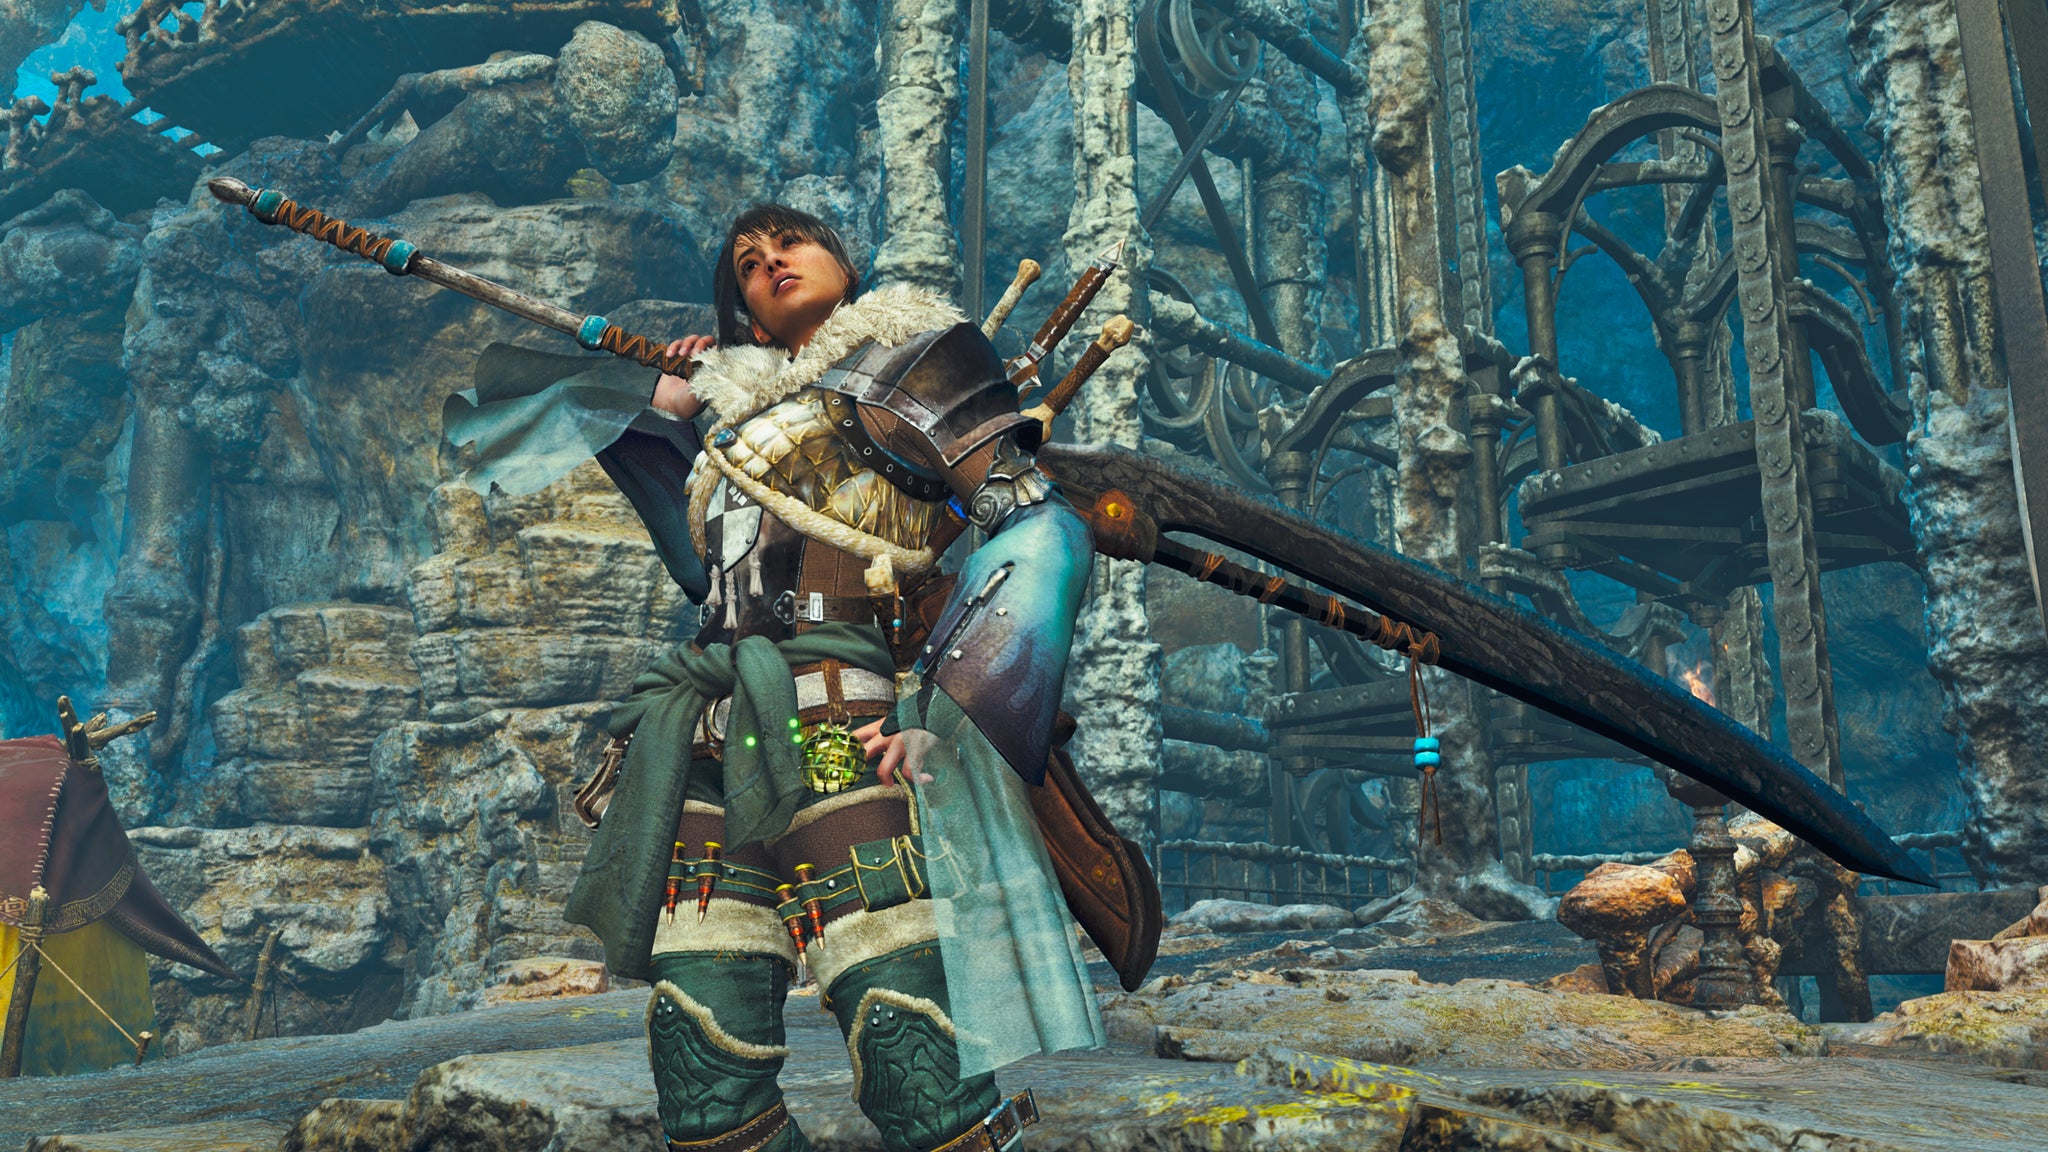
Image credit:Rock Paper Shotgun/Capcom
The Long Sword is quite simply phenomenal. In its current state it surpasses every other melee weapon in the game, boasting the massive reach of a Great Sword, but in a far less clunky and unwieldy package. Unlike most other weapons of its size, it’s fast enough to deal great elemental damage, particularly once you max out your Spirit Gauge. The Long Sword allows easy access to every part of a monster, and keeps you mobile even while you’re delivering tremendous amounts of damage. The best part, though, is the Foresight Slash, which acts as a counterattack that completely negates all damage when you time it right. With practice, you can feel utterly invincible with a Long Sword, which makes it a phenomenal choice whether in solo or as part of a hunting party, right up to endgame fights against Arch-Tempered monsters.
For more info, check out the Long Sword weapon tree , or consult our guide to the best Long Sword in Monster Hunter Wilds.
2. Bow
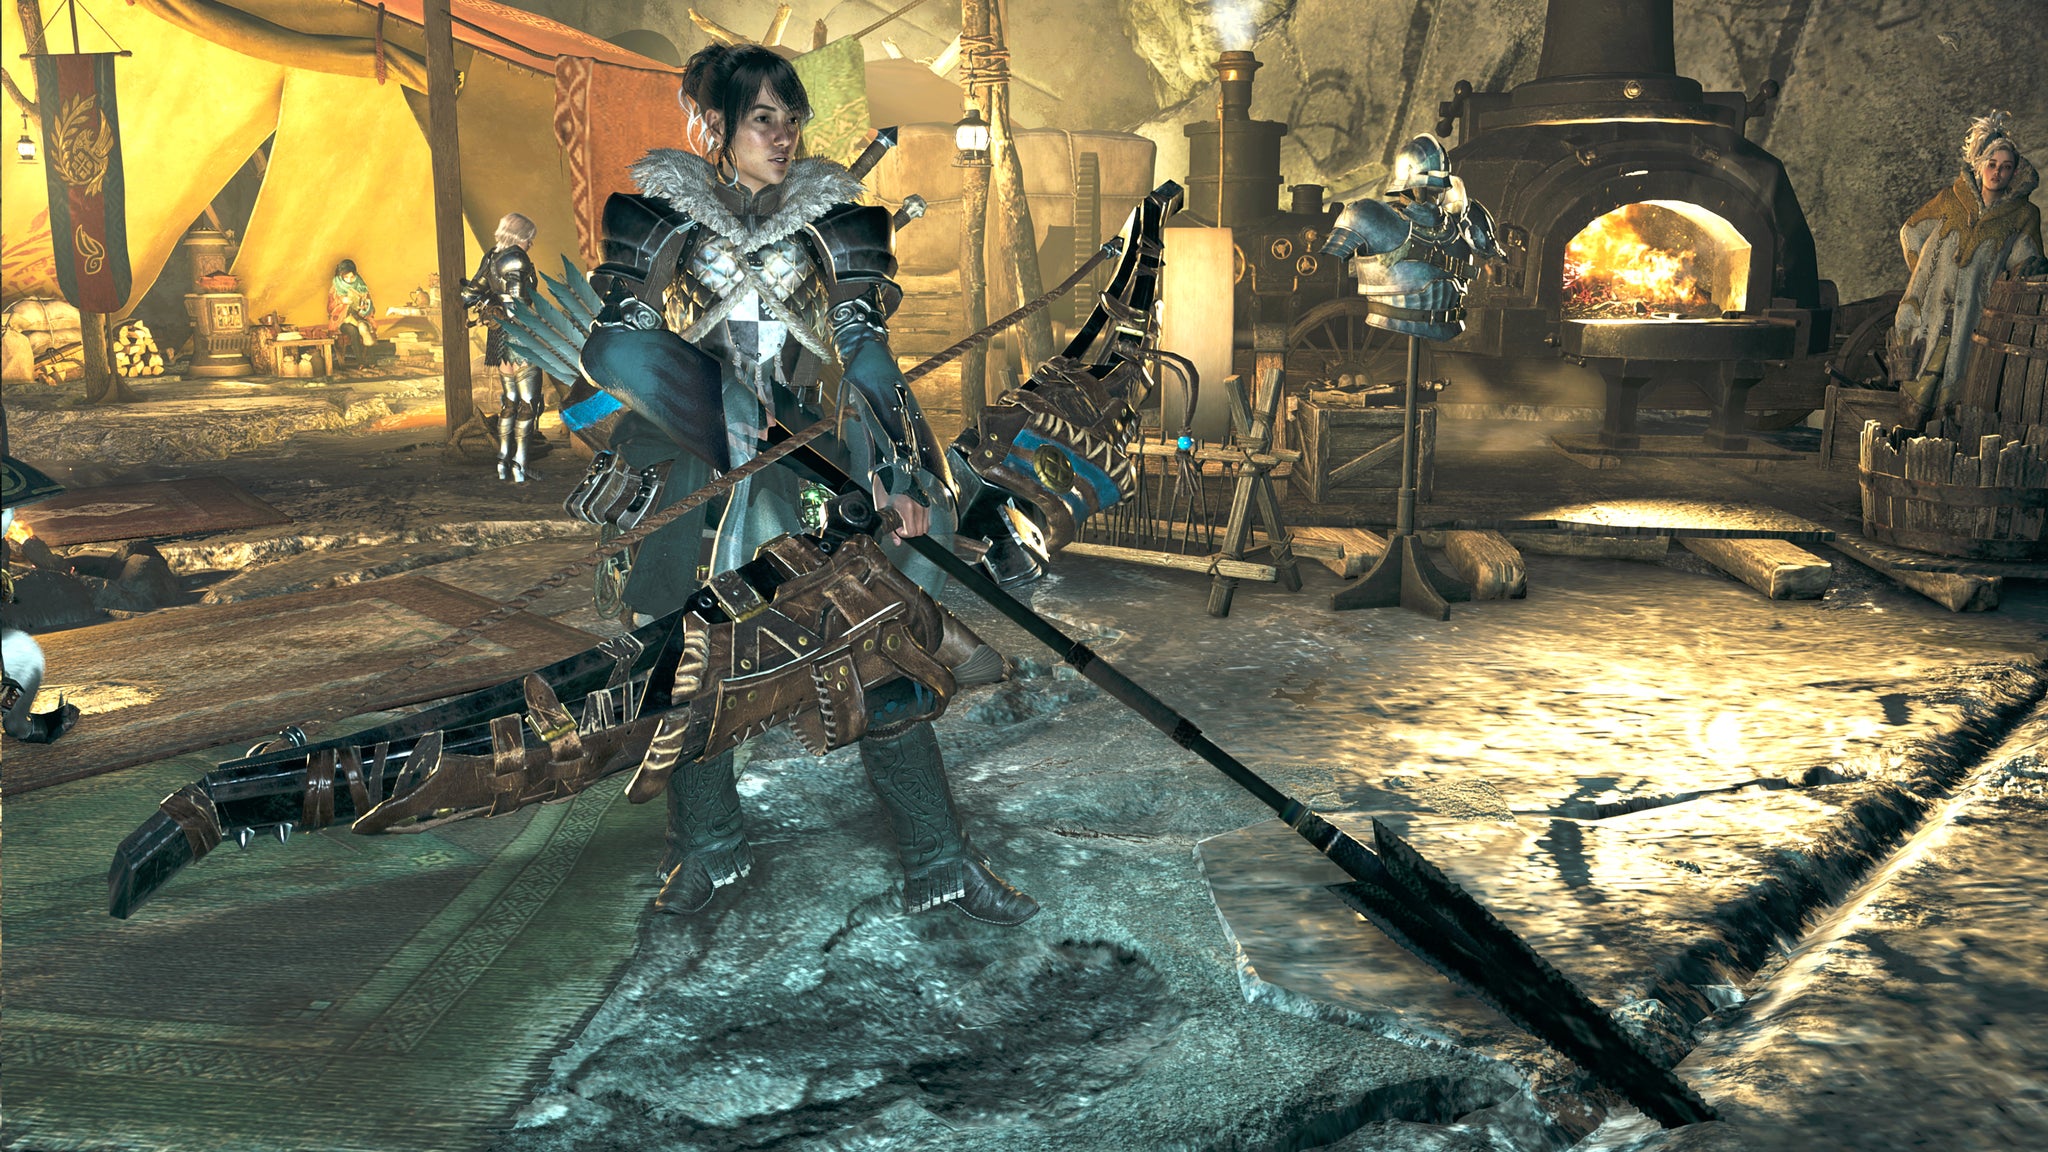
Image credit:Rock Paper Shotgun/Capcom
Even among the SS-Tier rank weapons in Monster Hunter Wilds, the Bow is quite special. With a Bow, you have easy access to amazing amounts of very precisely targeted damage thanks to the Tracers and Focus Strikes; and you’re also highly mobile, capable of completely negating damage with a well-timed Charging Sidestep. It’s a simple weapon that delivers outstanding damage, applies status effects easily, and gives you lots of tools for staying safe throughout a fight. The changes in Title Update 1 have shifted its balance slightly, lessening the strength of Dragon Piercer but increasing the power of Thousand Dragons and Power Volley - and all in all, we don’t think these changes have really hurt or hindered the Bow in any massive way, so it’s still one of the very best weapons around.
3. Sword And Shield

Image credit:Rock Paper Shotgun/Capcom
The Sword And Shield has never been stronger than it is in Monster Hunter Wilds. It’s the most versatile weapon of all, and I believe it outclasses the Dual Blades - the other very fast-attacking melee weapon. With the Sword And Shield equipped you are extremely mobile, particularly with the incredible utility of the Sliding Swipe; and if you find yourself in harm’s way, you can use your tiny little shield to block or even perform a full-blown Power Clash against a large monster. Add to this the great consistent DPS and status effect procs you get with the SNS, and it well deserves its spot in the SS-Tier rank.
4. Gunlance

Image credit:Rock Paper Shotgun/Capcom
The Gunlance can hit like an absolute truck, and can end some fights quicker than nearly anything else. Its lack of mobility can lead you into difficult situations unless you are very well practiced with the weapon, which is the only reason why it isn’t SS-Tier, instead topping our list of S-Tier weapons. It was always a very hard-hitting weapon that can also keep you about as protected as the Lance, but in Wilds it’s even more devastating thanks to Wyrmstake Full Blast, the special attack you can unleash after your main Wide Sweep combo. Gunlance has a faster clear time than almost any other weapon on average - it’s a truly fearsome weapon, provided you can tolerate its Lance-like heft and playstyle.
For more on this destructive hybrid weapon, you can check out the Gunlance weapon tree here, or browse our list of the best Gunlance options.
5. Great Sword

Image credit:Rock Paper Shotgun/Capcom
The monumental Great Sword can deliver the highest raw damage per strike of any weapon in Monster Hunter Wilds, provided you charge it up first. The most iconic weapon type in the series, the Great Sword is a little easier to use in Wilds thanks to the addition of Focus Mode, which helps you to aim those massive swings at exactly the right angle. The reason it’s not quite top-tier and other large weapons like the Long Sword outclass it is simply because of how unwieldy and slow the Great Sword is, and how punishing it is when you miss an attack. It’s a simple moveset, but a very tricky weapon to master.
6. Dual Blades
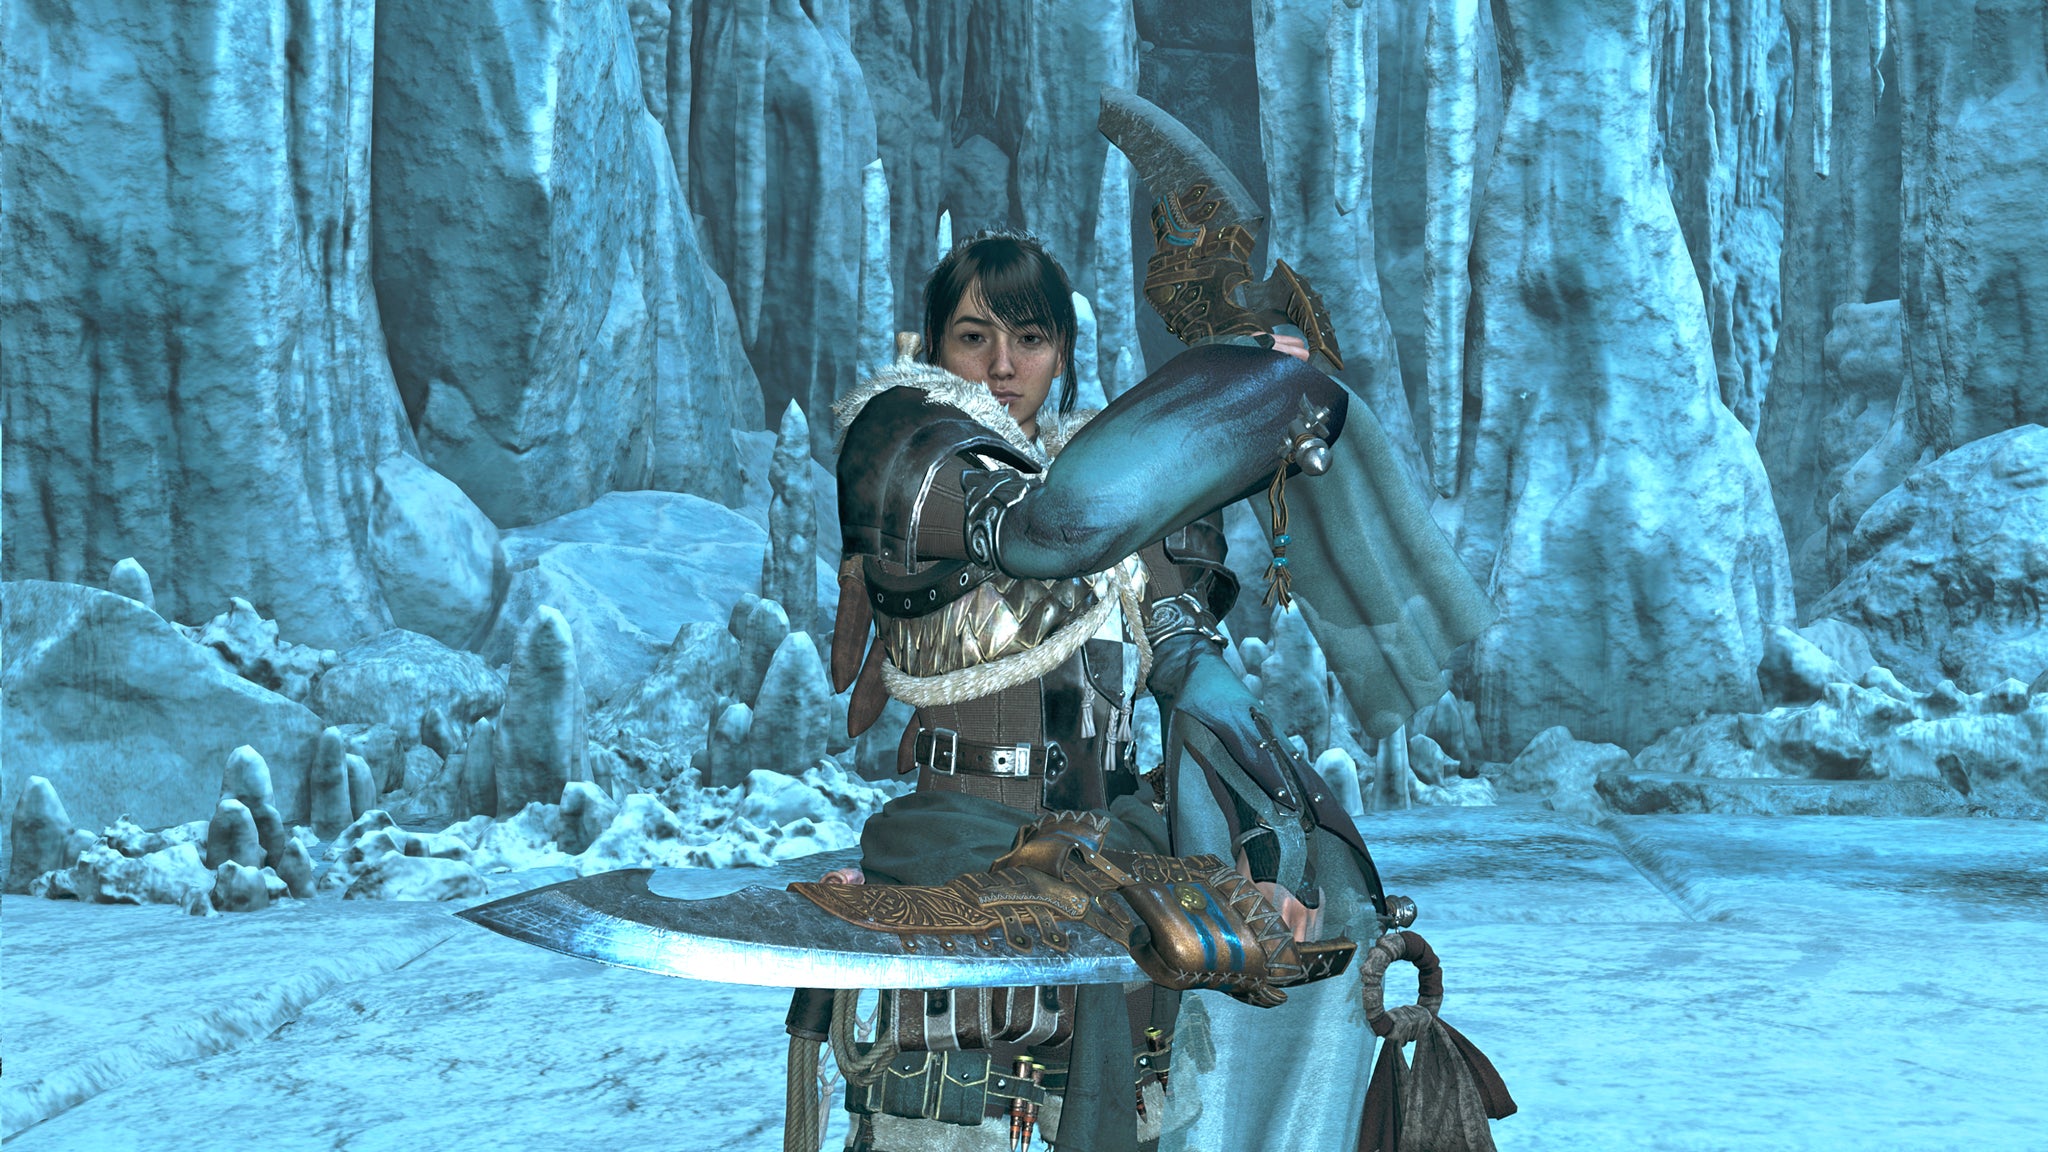
Image credit:Rock Paper Shotgun/Capcom
The lightning-fast Dual Blades have one strategy: aggression. As the fastest-attacking weapons in Monster Hunter Wilds, they are of course excellent at inflicting element damage and building up status effects, so they’re a great pick against enemies that are particularly weak to a certain status. Demon Mode is easy to misuse and the stamina management involved makes the Dual Blades surprisingly finnicky, but there’s no denying the attack power when you’re diving between a monster’s legs, evading attacks and letting loose with massive, seconds-long combos.
For more info, check out the Dual Blades weapon tree here, or read our best Dual Blades ranking list.
7. Insect Glaive
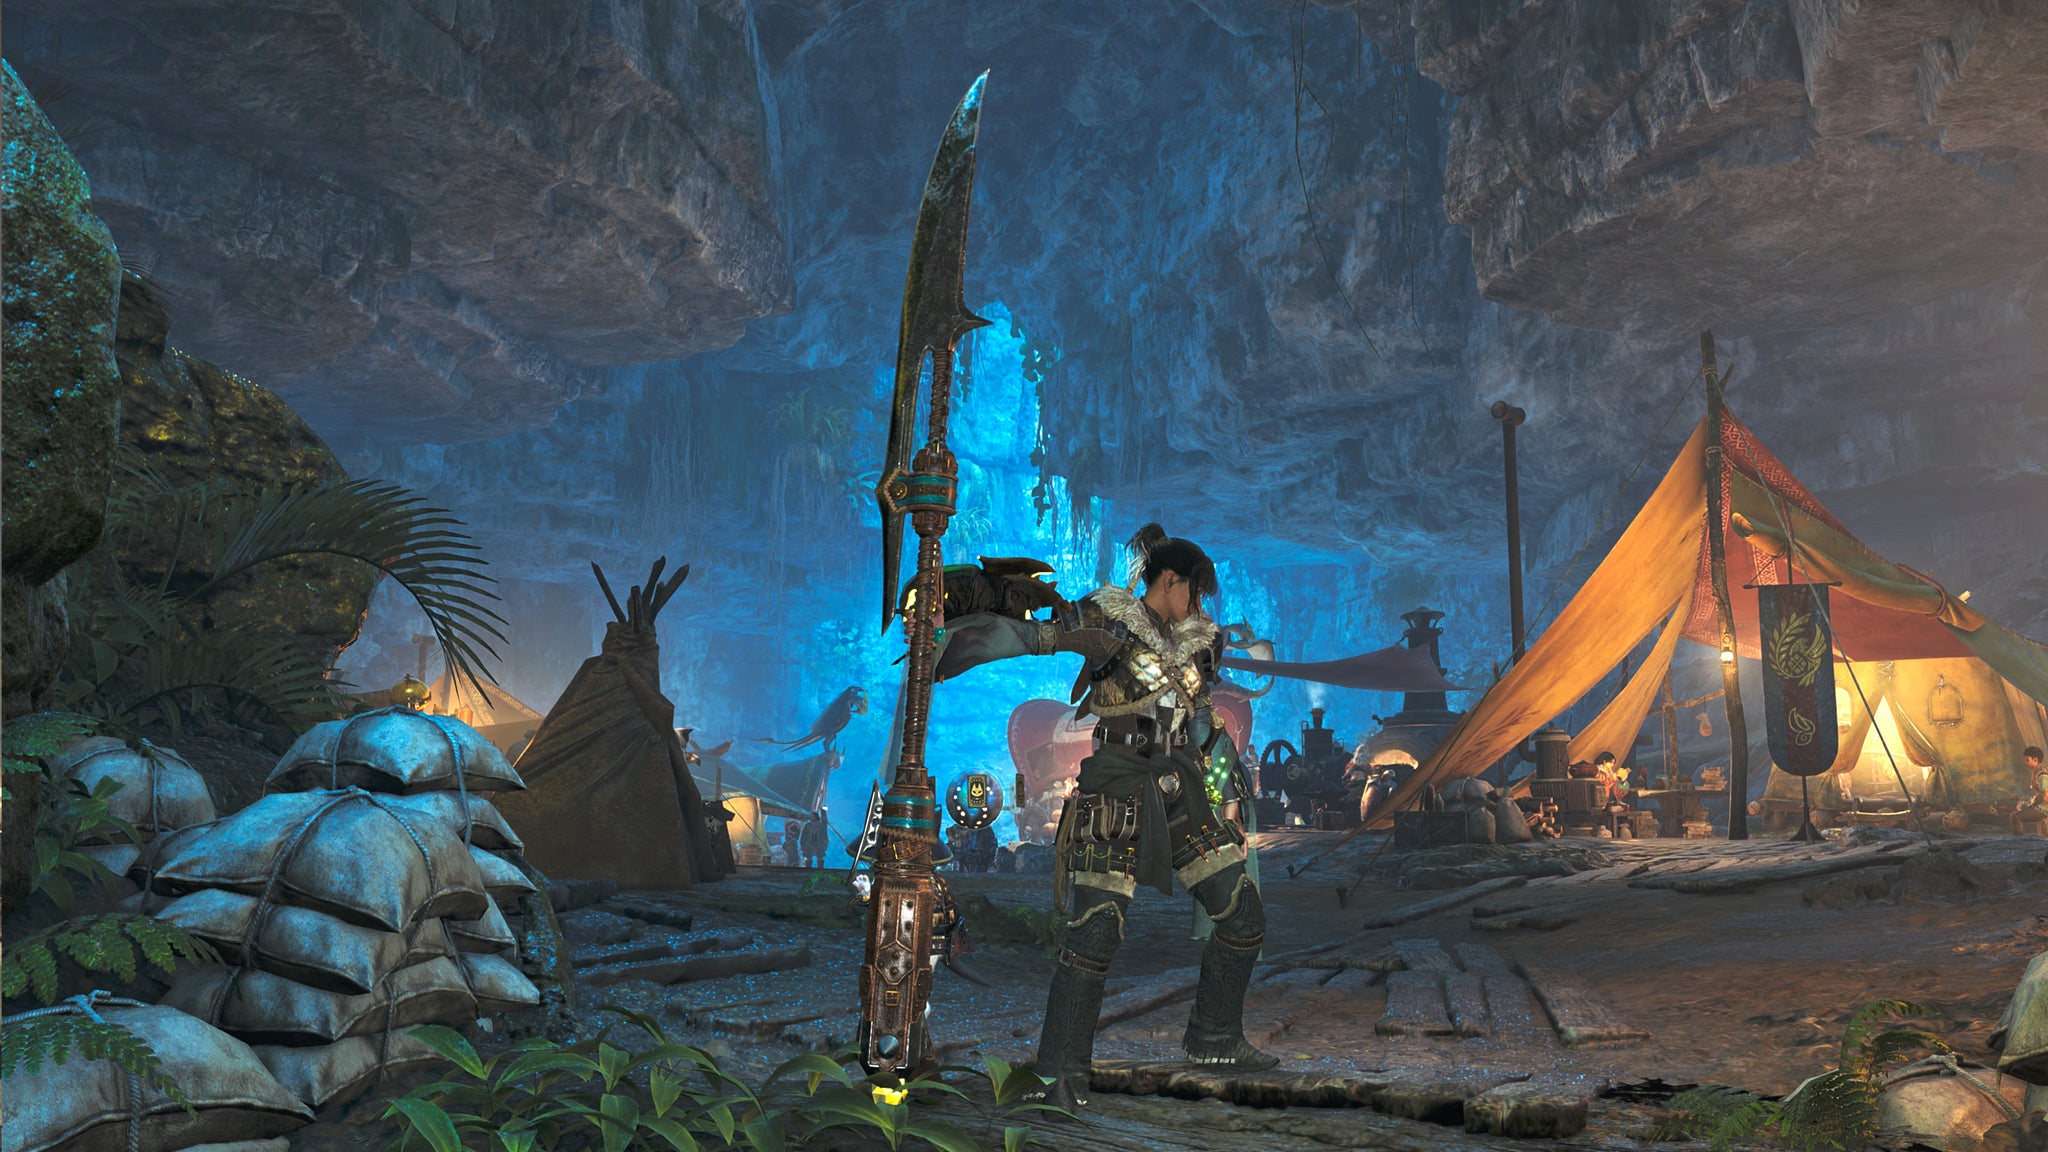
Image credit:Rock Paper Shotgun/Capcom
If this were a tier list based on how fun and satisfying each weapon is, then the Insect Glaive may well sit at the top thanks to those marvellous aerial attacks. Kinsect management is of course essential with the Insect Glaive, and the micromanagement involved can be to your disadvantage in some cases. It’s a lot to get used to. But it also provides a lot of versatility and power to a weapon which feels almost as freeing and mobile as the SNS. That’s a very powerful combo which will appeal to an awful lot of players. It certainly does to me.
8. Charge Blade
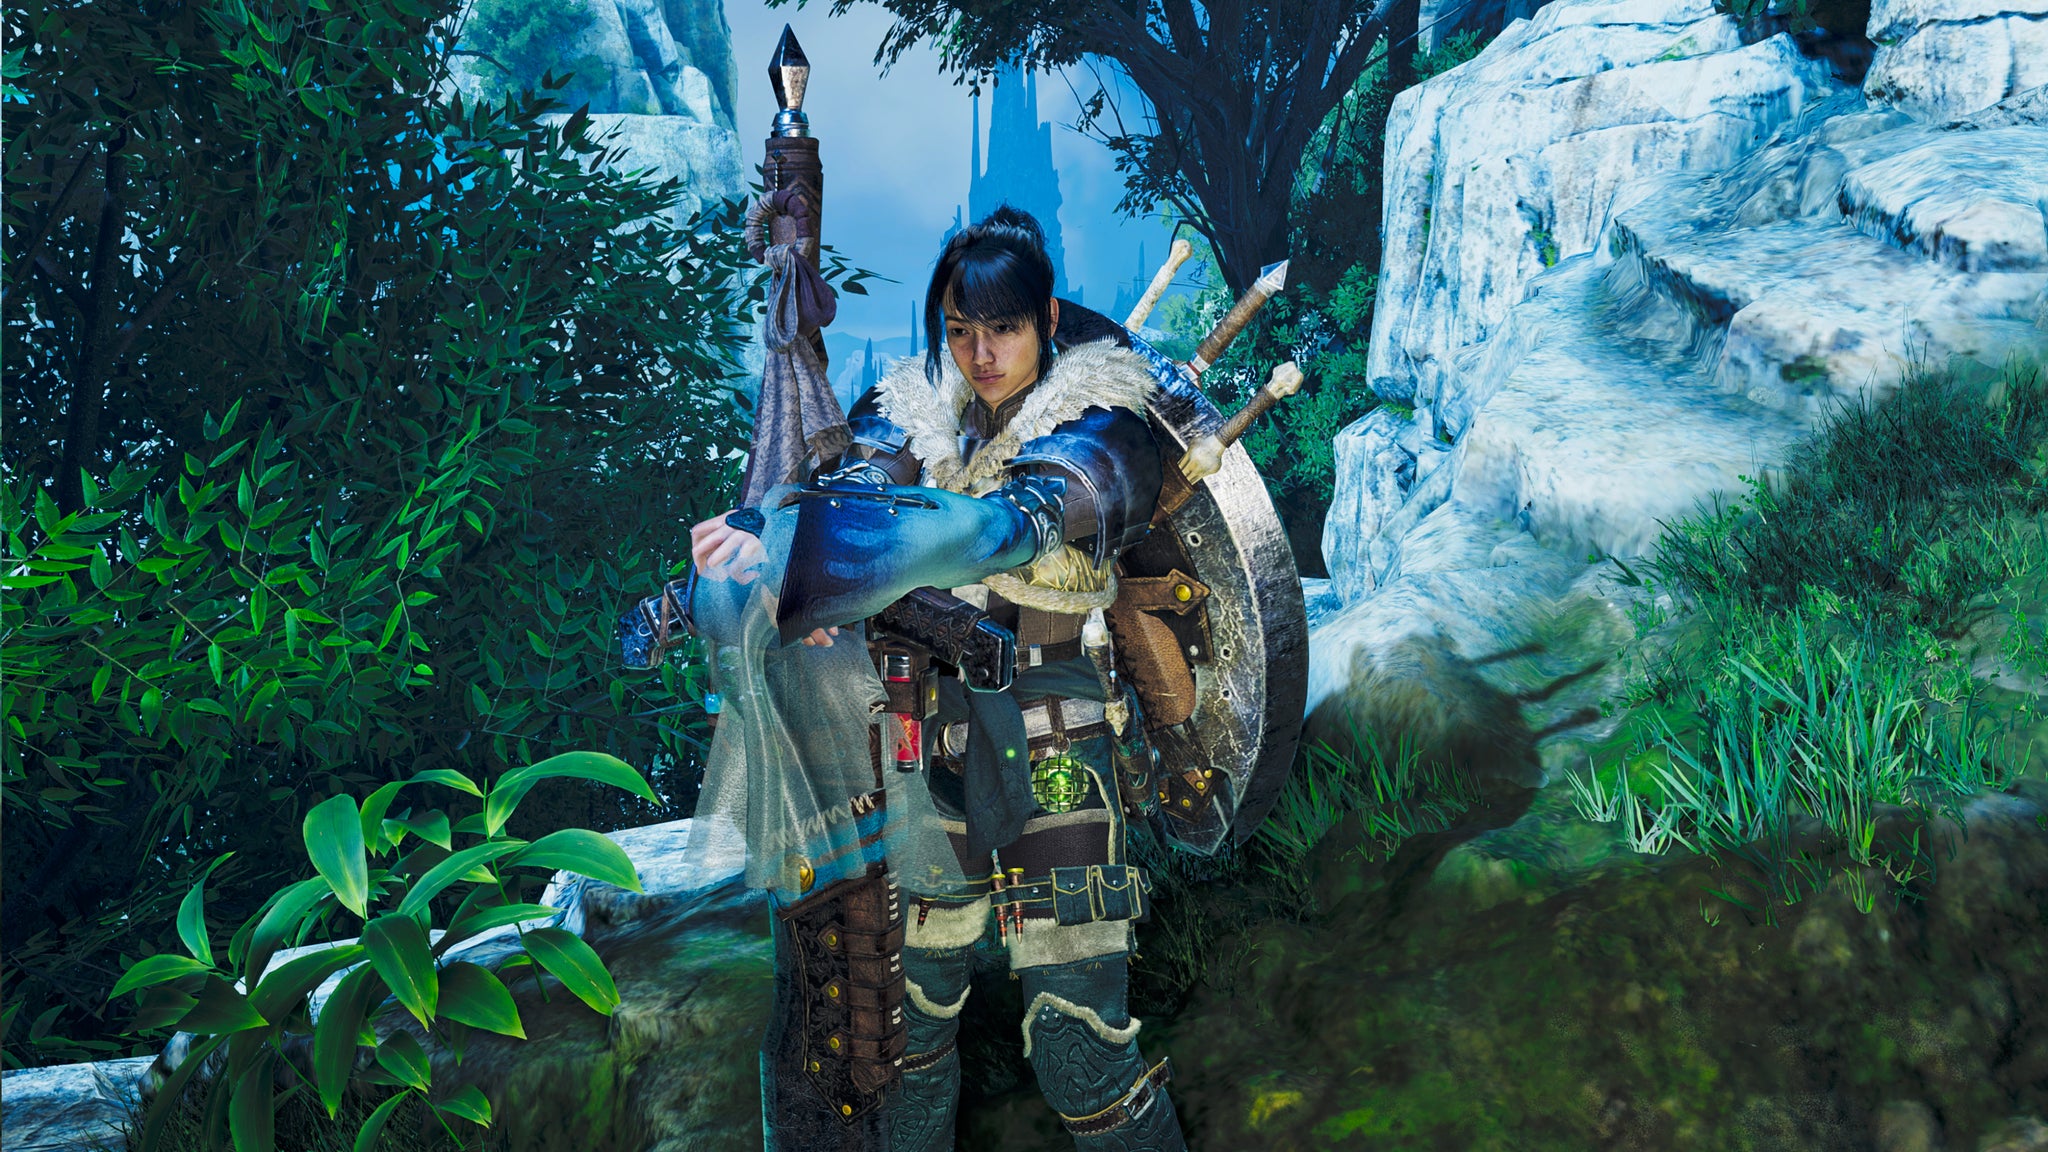
Image credit:Rock Paper Shotgun/Capcom
The complexity of the Charge Blade is its major drawback, when all’s said and done. It’s long been said that the Charge Blade is the most complex weapon in the Monster Hunter series (which is saying something when the Hunting Horn exists), so it’ll take quite some getting used to before you can make it shine under fretful circumstances. That said, this unusual hybrid can deliver excellent burst damage with the sword, and even more so with the axe once it’s charged up fully. It has middling weight, so don’t expect to be the most mobile of hunters, but the Perfect Guard ability allows you to stand your ground and retaliate against dangerous attacks, as long as your timing is sound.
9. Heavy Bowgun

Image credit:Rock Paper Shotgun/Capcom
The Heavy Bowgun, much like the Gunlance, can deliver stupendous damage from afar once you know what you’re doing. It’s hard to recommend a Light Bowgun when you have its heavier cousin as an option, simply because of the damage output available here, as well as the versatility of all the different ammo types and the ability to Offset Attack. But similarly, it’s tricky to recommend the Heavy Bowgun when the Gunlance exists! As is common in this lower half of our tier list, the Heavy Bowgun is brought down by its clunkiness and complexity, and you should definitely pair it with a faster melee weapon to counteract its shortcomings.
If you’re looking for more info, consult the Heavy Bowgun weapon tree here, or check out our best Heavy Bowgun guide.
10. Hunting Horn

Image credit:Rock Paper Shotgun/Capcom
Despite placing 10th in our tier list, Hunting Horn players are eating well with Monster Hunter Wilds. This buff-oriented blunt damage support weapon shines in multiplayer , and with the addition of Echo Bubbles and the ability to perform an Offset Attack or other powerful 4-step melodies, the Hunting Horn is the best it’s been yet Even so, it can’t match up to the power of certain other similarly-sized weapons. You can argue that it isn’t meant to, as it’s a support-focused weapon. And yes, it’s still a solid choice - but in the current meta, this is where we think the Hunting Horn lies.
For further guidance, you can check out the Hunting Horn weapon tree , and consult our list of the very best Hunting Horns .
11. Hammer

Image credit:Rock Paper Shotgun/Capcom
The straightforward Hammer is capable of brute-force-bonking its way into even the most armoured Monster Hunter player’s heart. The main lure of the Hammer is its massive stun potential: aim at a monster’s head and you’ll be stunning them with ease (particularly with the right Skills), leading to some very easy fights if things go your way. It’s got some massively powerful charge attacks that maintain your mobility while you’re charging, making it one of the simplest and most forgiving weapons in the game to learn. There’s a reason we pick the Hammer as one of our best starter weapons for Monster Hunter Wilds beginners . Its major drawback is its tiny range (far lower than similarly bulky weapons like the Great Sword and Long Sword), its general lack of versatility, and the fact that it just can’t quite clear monsters as quickly as certain other weapons higher up in this tier list.
For more info, check out the Hammer weapon tree here, or read our list on the best Hammer in the game.
12. Lance

Image credit:Rock Paper Shotgun/Capcom
The Lance is a slow and steady defensive powerhouse, an endless redoubt of charged pokes and giggling from behind a gigantic shield. The Lance can deal good damage in capable hands, and it’s of course strong enough to take into the endgame, as is every other weapon. But you certainly won’t be breaking any speed records with a Lance as your primary. It’s a good option for sustained and safe raw damage, but it can’t cope with the mobility and power of certain of its rivals.
For more details, check out the Lance weapon tree , or read our list of the best Lance in the game.
13. Switch Axe
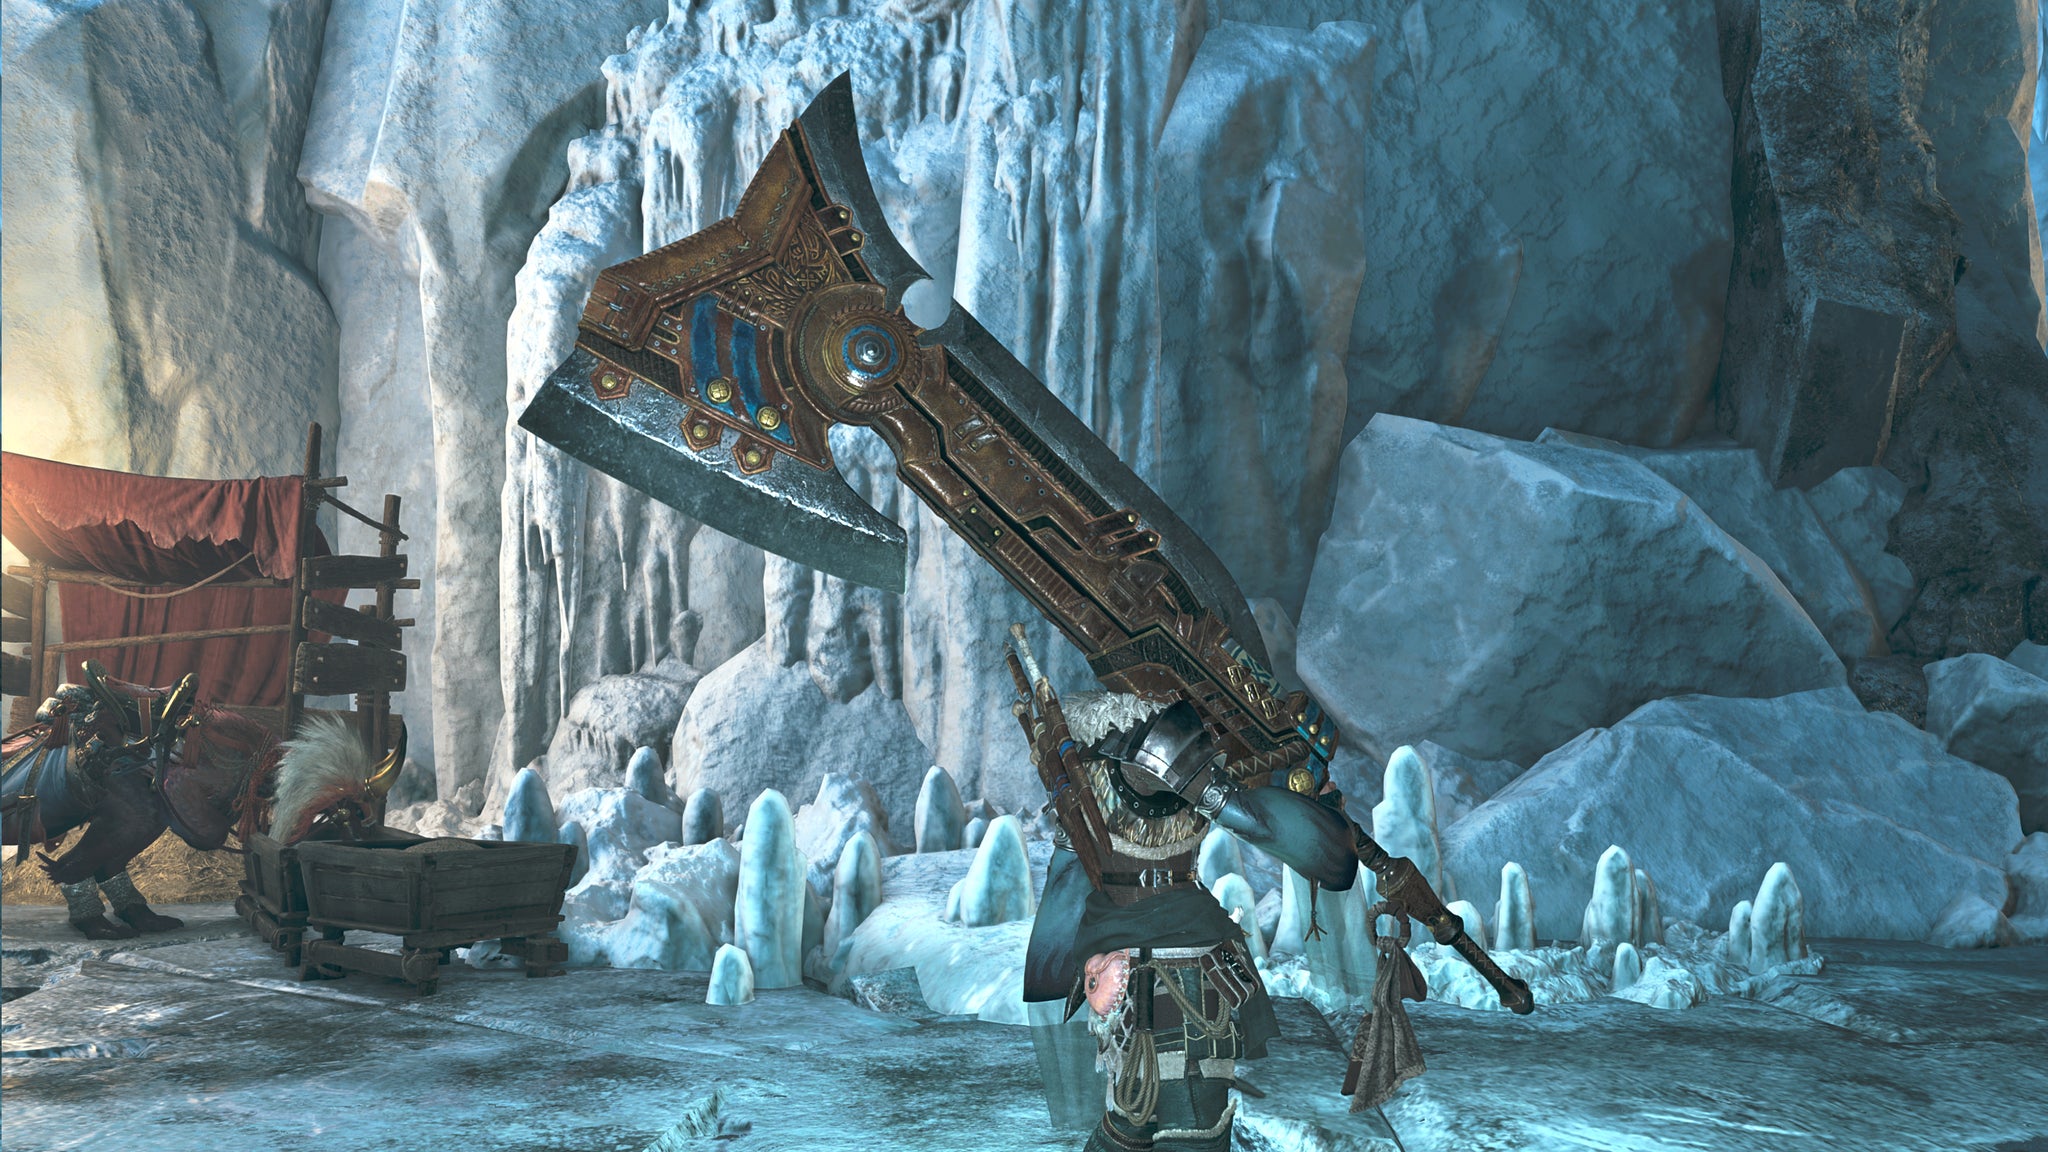
Image credit:Rock Paper Shotgun/Capcom
The Switch Axe looks cool, and feels cool, particularly in the gigantic axe form. But while not as complex as the Charge Blade, it still feels like the Switch Axe comes off a little worse compared to other weapons when you consider how much goes into learning the best ways to deliver the strongest combos, and what you get out of it in raw damage. It’s a hard sell for beginners, a punishing and unwieldy option even in its more nimble form.
For more guidance, read up on the Switch Axe weapon tree here, or check out our best Switch Axe shortlist.
14. Light Bowgun

Image credit:Rock Paper Shotgun/Capcom
The Light Bowgun is by no means a bad weapon, but personally I don’t think sacrificing damage for mobility is really all that beneficial in Monster Hunter Wilds. It does much of what the Heavy Bowgun does, and there are times when the extra manoeuvrability is useful, but in most cases you may find yourself pining for the greater damage potential to get the fights over and done with quicker.
For more details on this weapon type, you can check out the Light Bowgun weapon tree , or read our list on the best Light Bowguns .
Best weapons for each type
Here’s a quick rundown of the individual weapons we consider to be the very best in Monster Hunter Wilds, organised by the 14 different weapon types. All of these weapons are endgame weapons, found at the very end of their respective trees.
Great Swords
| Great Sword | Damage | Element | Affinity | Sharpness | Slots | Def |
|---|---|---|---|---|---|---|
| ▶ Esperanza Blade | 1008 | None | 0% | 3-2-1 | 0 | |
| Tree: Expedition Tree | ||||||
| Skills: Critical Eye [2], Speed Sharpening [2] | ||||||
| Crafting Materials: 5x Hunter Symbol I, 1x Bird Wyvern Gem, 20000z | ||||||
| ▶ Grimslayer Urgeom | 1200 | None | -20% | 3-1 | 0 | |
| Tree: G. Doshaguma Tree | ||||||
| Skills: Focus [2] | ||||||
| Crafting Materials: 5x Hunter Symbol II, 6x Guardian Doshaguma Fur+, 6x Guardian Pelt+, 1x Beast Gem, 20000z | ||||||
| ▶ Düsterstolz | 1008 | Dragon (400) | 20% | 3-2-1 | 0 | |
| Tree: Gore Magala Tree | ||||||
| Skills: Critical Element [3] | ||||||
| Crafting Materials: 5x Hunter Symbol III, 2x Gore Magala Feeler+, 1x Gore Magala Nyctgem, 5x Frenzy Crystal, 20000z |
Long Swords
| Long Sword | Damage | Element | Affinity | Sharpness | Slots | Def |
|---|---|---|---|---|---|---|
| ▶ Esperanza Edge | 693 | None | 0% | 3-2-1 | 0 | |
| Tree: Expedition Tree | ||||||
| Skills: Critical Eye [2], Speed Sharpening [2] | ||||||
| Crafting Materials: 5x Hunter Symbol I, 1x Bird Wyvern Gem, 20000z | ||||||
| ▶ Blood Scream | 660 | Sleep (250) | 15% | 3-2-1 | 0 | |
| Tree: Nerscylla Tree | ||||||
| Skills: Power Prolonger [3] | ||||||
| Crafting Materials: 5x Hunter Symbol I, 6x Nerscylla Carapace, 1x Bird Wyvern Gem, 20000z | ||||||
| ▶ Gravecleaver Urkemush | 825 | None | -15% | 3-2-1 | 0 | |
| Tree: G. Doshaguma Tree | ||||||
| Skills: Power Prolonger [3] | ||||||
| Crafting Materials: 5x Hunter Symbol II, 6x Guardian Doshaguma Fur+, Guardian Pelt+, 1x Beast Gem, 20000z |
Sword And Shields
| Sword And Shield | Damage | Element | Affinity | Sharpness | Slots | Def |
|---|---|---|---|---|---|---|
| ▶ Lala Acanthopelm | 280 | Paralysis (200) | 10% | 3-2-1 | 0 | |
| Tree: Lala Barina Tree | ||||||
| Skills: Critical Draw [2], Critical Status [1] | ||||||
| Crafting Materials: 5x Hunter Symbol I, 6x Lala Barina Carapace, 4x Monster Broth, 1x Bird Wyvern Gem, 20000z | ||||||
| ▶ Queen Rapier | 294 | Poison (180) | 15% | 3-2-1 | 0 | |
| Tree: Rathian Tree | ||||||
| Skills: Critical Status [3], Poison Duration Up [1] | ||||||
| Crafting Materials: 5x Hunter Symbol I, 5x Rathian Scale+, 1x Rathian Ruby, 20000z | ||||||
| ▶ Titan’s Armament | 336 | Blast (250) | -15% | 3-1 | 30 | |
| Tree: Gravios Tree | ||||||
| Skills: Guard Up [3] | ||||||
| Crafting Materials: 5x Hunter Symbol II, 6x Gravios Carapace, 1x Gravios Medulla, 1x Wyvern Gem, 20000z |
Dual Blades
| Dual Blades | Damage | Element | Affinity | Sharpness | Slots | Def |
|---|---|---|---|---|---|---|
| ▶ Esperanza Daggers | 294 | None | 0% | 3-2-1 | 0 | |
| Tree: Expedition Tree | ||||||
| Skills: Critical Eye [2], Speed Sharpening [2] | ||||||
| Crafting Materials: 5x Hunter Symbol I, 1x Bird Wyvern Gem, 20000z | ||||||
| ▶ Hungerklauen | 280 | Dragon (150) | 20% | 3-2-1 | 0 | |
| Tree: Gore Magala Tree | ||||||
| Skills: Critical Element [3] | ||||||
| Crafting Materials: 5x Hunter Symbol III, 2x Gore Magala Feeler+, 1x Gore Magala Nyctgem, 5x Frenzy Crystal, 20000z | ||||||
| ▶ Wyvern Lovers | 280 | Fire (200) | 10% | 3-2-1 | 0 | |
| Tree: Rathalos Tree | ||||||
| Skills: Critical Boost [3] | ||||||
| Crafting Materials: 5x Hunter Symbol II, 1x Rathian Ruby, 1x Rathalos Ruby, 20000z |
Hammers
| Hammer | Damage | Element | Affinity | Sharpness | Slots | Def |
|---|---|---|---|---|---|---|
| ▶ G. Exultant Bedivere | 1248 | Dragon (250) | -10% | 3-3-1 | 0 | |
| Tree: G. Arkveld Tree | ||||||
| Skills: Focus [2] | ||||||
| Crafting Materials: 5x Hunter Symbol III, 4x Arkveld Calloushell, 2x Arkveld Tail, 1x Arkveld Gem, 20000z | ||||||
| ▶ Singha Gada | 1196 | Ice (250) | -10% | 3-2-1 | 0 | |
| Tree: Blangonga Tree | ||||||
| Skills: Slugger [3] | ||||||
| Crafting Materials: 5x Hunter Symbol II, 6x Blangonga Pelt+, 4x Blangonga Tail, 1x Jin Dahaad Icegem, 20000z | ||||||
| ▶ Precipice Logamtu | 1092 | Ice (500) | 0% | 3-2-1 | 0 | |
| Tree: Jin Dahaad Tree | ||||||
| Skills: Focus [3] | ||||||
| Crafting Materials: 5x Hunter Symbol III, 4x Jin Dahaad Horn, 4x Jin Dahaad Carapace, 1x Jin Dahaad Icegem, 20000z |
Hunting Horns
| Hunting Horn | Damage | Element | Affinity | Sharpness | Slots | Def |
|---|---|---|---|---|---|---|
| ▶ G. Rathalos Feroce | 840 | Fire (300) | 15% | 3-2-1 | 0 | |
| Tree: G. Rathalos Tree | ||||||
| Note Colours: Purple, Red, Dark Blue | ||||||
| Echo Bubble: Stamina Regeneration | ||||||
| Skills: Critical Element [1], Master’s Touch [1] | ||||||
| Crafting Materials: 5x Hunter Symbol II, 6x Guardian Rathalos Carapace, 1x Guardian Rathalos Ruby, 6x Guardian Scale+, 20000z | ||||||
| ▶ Gramklang | 840 | Dragon (300) | 20% | 3-2-1 | 0 | |
| Tree: Gore Magala Tree | ||||||
| Note Colours: Purple, Green, Orange | ||||||
| Echo Bubble: Evasion & Movement Speed Up | ||||||
| Skills: Critical Element [3] | ||||||
| Crafting Materials: 5x Hunter Symbol III, 2x Gore Magala Feeler+, 1x Gore Magala Nyctgem, 5x Frenzy Crystal, 20000z | ||||||
| ▶ War Conga | 882 | None | 5% | 3-1 | 0 | |
| Tree: Congalala Tree | ||||||
| Note Colours: Purple, Dark Blue, Green | ||||||
| Echo Bubble: Attack & Affinity Up | ||||||
| Skills: Horn Maestro [2], Speed Sharpening [1] | ||||||
| Crafting Materials: 5x Hunter Symbol I, 2x Vibrant Pelt+, 1x Beast Gem, 20000z |
Lances
| Lance | Damage | Element | Affinity | Sharpness | Slots | Def |
|---|---|---|---|---|---|---|
| ▶ Fierceborer Dubhanith | 552 | None | -5% | 3-1 | 20 | |
| Tree: Doshaguma Tree | ||||||
| Skills: Punishing Draw [3] | ||||||
| Crafting Materials: 5x Hunter Symbol II, 6x Doshaguma Hide+, 1x Beast Gem, 20000x | ||||||
| ▶ Gravios Lance | 575 | Blast (350) | -15% | 3-2-1 | 30 | |
| Tree: Gravios Tree | ||||||
| Skills: Guard Up [3] | ||||||
| Crafting Materials: 5x Hunter Symbol II, 6x Gravios Carapace, 1x Gravios Medulla, 1x Wyvern Gem, 20000z | ||||||
| ▶ Indra Clairlance | 506 | Thunder (250) | 0% | 3-2-1 | 0 | |
| Tree: Rey Dau Tree | ||||||
| Skills: Guard [2], Offensive Guard [1] | ||||||
| Crafting Materials: 5x Hunter Symbol III, 6x Rey Dau Carapace, 4x Rey Dau Bolthorn, 1x Rey Dau Boltgem, 20000z |
Gunlances
| Gunlance | Damage | Element | Affinity | Sharpness | Slots | Def |
|---|---|---|---|---|---|---|
| ▶ Ajara-Kalika | 483 | Blast (250) | 10% | 3-2-1 | 0 | |
| Tree: Ajarakan Tree | ||||||
| Shelling Type/Power: Wide/Normal | ||||||
| Skills: Load Shells [2], Offensive Guard [1] | ||||||
| Crafting Materials: 5x Hunter Symbol II, 6x Ajarakan Carapace, 1x Ajarakan Medulla, 20000z | ||||||
| ▶ G. Lawful Bors | 552 | Dragon (250) | -10% | 3-2-1 | 0 | |
| Tree: G. Arkveld Tree | ||||||
| Shelling Type/Power: Wide/Slightly Strong | ||||||
| Skills: Guard [2] | ||||||
| Crafting Materials: 5x Hunter Symbol III, 4x Arkveld Calloushell, 2x Arkveld Tail, 1x Arkveld Gem, 20000z | ||||||
| ▶ White Cannon | 552 | Blast (400) | -15% | 3-2-1 | 30 | |
| Tree: Gravios Tree | ||||||
| Shelling Type/Power: Long/Slightly Strong | ||||||
| Skills: Guard Up [3] | ||||||
| Crafting Materials: 5x Hunter Symbol II, 6x Gravios Carapace, 1x Gravios Medulla, 1x Wyvern Gem, 20000z |
Switch Axes
| Switch Axe | Damage | Element | Affinity | Sharpness | Slots | Def |
|---|---|---|---|---|---|---|
| ▶ Bone Smasher | 805 | None | 0% | 3-2-1 | 0 | |
| Tree: Bone Tree | ||||||
| Phial Type: Exhaust Phial (250) | ||||||
| Skills: Focus [3], Attack Boost [1] | ||||||
| Crafting Materials: 5x Hunter Symbol I, 5x Monster Hardbone, 1x Dragonbone Relic, 1x Beast Gem, 20000z | ||||||
| ▶ Sawbill Axe | 770 | Fire (350) | 0% | 3-2-1 | 0 | |
| Tree: Yian Kut-Ku Tree | ||||||
| Phial Type: Element Phial | ||||||
| Skills: Power Prolonger [3] | ||||||
| Crafting Materials: 5x Hunter Symbol I, 6x Kut-Ku Carapace, 1x Nu Udra Flamegem, 20000z | ||||||
| ▶ Gorehacker Urgahaac | 875 | None | -15% | 3-1 | 0 | |
| Tree: G. Doshaguma Tree | ||||||
| Phial Type: Dragon Phial (400) | ||||||
| Skills: Focus [2] | ||||||
| Crafting Materials: 5x Hunter Symbol II, 6x Guardian Doshaguma Fur+, 6x Guardian Pelt+, 1x Beast Gem, 20000z |
Charge Blades
| Charge Blade | Damage | Element | Affinity | Sharpness | Slots | Def |
|---|---|---|---|---|---|---|
| ▶ Regas Hyper | 792 | None | 0% | 3-2-1 | 0 | |
| Tree: Ore Tree | ||||||
| Phial Type: Impact Phial | ||||||
| Skills: Rapid Morph [3] | ||||||
| Crafting Materials: 5x Hunter Symbol I, 1x Novacrystal, 1x Wyvern Gem, 20000z | ||||||
| ▶ Valeroje-of-the-Waves | 864 | Water (350) | -15% | 3-2-1 | 0 | |
| Tree: Uth Duna Tree | ||||||
| Phial Type: Element Phial | ||||||
| Skills: Power Prolonger [3] | ||||||
| Crafting Materials: 5x Hunter Symbol III, 6x Uth Duna Tentacle+, 6x Uth Duna Hide+, 1x Uth Duna Watergem, 20000z | ||||||
| ▶ Venom’s Kiss | 828 | Poison (350) | 0% | 3-2-1 | 0 | |
| Tree: Gypceros Tree | ||||||
| Phial Type: Impact Phial | ||||||
| Skills: Punishing Draw [3], Critical Draw [2] | ||||||
| Crafting Materials: 5x Hunter Symbol I, 6x Rubbery Hide+, 1x Bird Wyvern Gem, 1x Novacrystal, 20000z |
Insect Glaives
| Insect Glaive | Damage | Element | Affinity | Sharpness | Slots | Def |
|---|---|---|---|---|---|---|
| ▶ Stealth Glaive Redux | 620 | Sleep (200) | 15% | 3-2-1 | 0 | |
| Tree: Nerscylla Tree | ||||||
| Kinsect Level: 10 | ||||||
| Skills: Charge Master [2], Focus [1] | ||||||
| Crafting Materials: 5x Hunter Symbol I, 6x Nerscylla Carapace, 1x Bird Wyvern Gem, 20000z | ||||||
| ▶ Immaculate Blizzard | 713 | Ice (180) | -10% | 3-2-1 | 0 | |
| Tree: Blangonga Tree | ||||||
| Kinsect Level: 10 | ||||||
| Skills: Focus [3] | ||||||
| Crafting Materials: 5x Hunter Symbol II, 6x Blangonga Pelt+, 4x Blangonga Tail, 1x Jin Dahaad Icegem, 20000z | ||||||
| ▶ Gravordius | 775 | Blast (250) | -15% | 3-1 | 30 | |
| Tree: Gravios Tree | ||||||
| Kinsect Level: 6 | ||||||
| Skills: Punishing Draw [3] | ||||||
| Crafting Materials: 5x Hunter Symbol II, 6x Gravios Carapace, 1x Gravios Medulla, 1x Wyvern Gem, 20000z |
Light Bowguns
| Light Bowgun | Damage | Affinity | Slots | Def | Special Ammo |
|---|---|---|---|---|---|
| ▶ Gigasbreaker Urbolkule | 325 | -15% | 3-1 | 0 | Adhesive |
| Tree: G. Doshaguma Tree | |||||
| Ammo Levels: Normal Lv 1, Pierce Lv 1, Spread Lv 3 | |||||
| Magazines: Elemental Boost Magazine/Special Ammo Magazine | |||||
| Skills: Slugger [3] | |||||
| Crafting Materials: 5x Hunter Symbol II, 6x Guardian Doshaguma Fur+, 6x Guardian Pelt+, 1x Beast Gem, 20000z | |||||
| ▶ Faithbreaker Leibolkule | 312 | -5% | 3-2-1 | 20 | Wyvernblast |
| Tree: Doshaguma Tree | |||||
| Ammo Levels: Normal Lv 3, Pierce Lv 1, Spread Lv 1 | |||||
| Magazines: Normal Ammo Magazine/Special Ammo Magazine | |||||
| Skills: Opening Shot [3] | |||||
| Crafting Materials: 5x Hunter Symbol II, 6x Doshaguma Hide+, 1x Beast Gem, 20000z | |||||
| ▶ Wahnschleuder | 260 | 20% | 3-2-1 | 0 | Wyvernblast |
| Tree: Gore Magala Tree | |||||
| Ammo Levels: Normal Lv 3, Pierce Lv 1, Spread Lv 1 | |||||
| Magazines: Elemental Boost Magazine/Rapid Fire Mod | |||||
| Skills: Critical Element [3] | |||||
| Crafting Materials: 5x Hunter Symbol III, 2x Gore Magala Feeler+, 1x Gore Magala Nyctgem, 5x Frenzy Crystal, 20000z |
Heavy Bowguns
| Heavy Bowgun | Damage | Affinity | Slots | Def | Special Ammo |
|---|---|---|---|---|---|
| ▶ Ableben Abzug | 300 | 20% | 3-2-1 | 0 | Wyvernheart/Wyverncounter |
| Tree: Gore Magala Tree | |||||
| Ammo Levels: Normal Lv 1, Pierce Lv 3, Spread Lv 1 | |||||
| Magazines: Pierce Ammo Magazine/Standard Mode Upgrade | |||||
| Type: Standard/Ignition Base Type (Recovery Lv 1) | |||||
| Skills: Critical Element [3] | |||||
| Crafting Materials: 5x Hunter Symbol III, 2x Gore Magala Feeler+, 1x Gore Magala Nyctgem, 5x Frenzy Crystal, 20000z | |||||
| ▶ G. Aeternal Palamedes | 360 | -10% | 3-3-1 | 0 | Wyvernpiercer/Wyvernblast |
| Tree: G. Arkveld Tree | |||||
| Ammo Levels: Normal Lv 3, Pierce Lv 1, Spread Lv 1 | |||||
| Magazines: Normal Ammo Magazine/Normal Ammo Magazine | |||||
| Type: Standard/Ignition Base Type (Recovery Lv 1) | |||||
| Skills: Tetrad Shot [2] | |||||
| Crafting Materials: 5x Hunter Symbol III, 4x Arkveld Calloushell, 2x Arkveld Tail, 1x Arkveld Gem, 20000z | |||||
| ▶ Gravios Gigahowl | 360 | -15% | 3-2-1 | 30 | Wyvernpiercer/Wyvernblast |
| Tree: Gravios Tree | |||||
| Ammo Levels: Normal Lv 1, Pierce Lv 1, Spread Lv 3 | |||||
| Magazines: Spread Ammo Powder/Ignition Mode Upgrade | |||||
| Type: Standard/Ignition Base Type (Recovery Lv 1) | |||||
| Skills: Guard Up [3] | |||||
| Crafting Materials: 5x Hunter Symbol II, 6x Gravios Carapace, 1x Gravios Medulla, 1x Wyvern Gem, 20000z |
Bows
| Bow | Damage | Element | Affinity | Slots | Def |
|---|---|---|---|---|---|
| ▶ Hunter’s Stoutbow | 276 | None | 0% | 3-2-1 | 0 |
| Tree: Bone Tree | |||||
| Skills: Focus [3], Attack Boost [1] | |||||
| Crafting Materials: 5x Hunter Symbol I, 5x Monster Hardbone, 1x Dragonbone Relic, 1x Beast Gem, 20000z | |||||
| ▶ Griefbringer Urstox | 300 | None | -15% | 3-1 | 0 |
| Tree: G. Doshaguma Tree | |||||
| Skills: Ballistics [2], Special Ammo Boost [1] | |||||
| Crafting Materials: 5x Hunter Symbol II, 6x Guardian Doshaguma Fur+, 6x Guardian Pelt+, 1x Beast Gem, 20000z | |||||
| ▶ Strange Kut-Ku Stave | 240 | Fire (300) | 0% | 3-2-1 | 0 |
| Tree: Yian Kut-Ku Tree | |||||
| Skills: Charge Master [3] | |||||
| Crafting Materials: 5x Hunter Symbol I, 6x Kut-Ku Carapace, 1x Nu Udra Flamegem, 20000z |
Which weapon should you use?
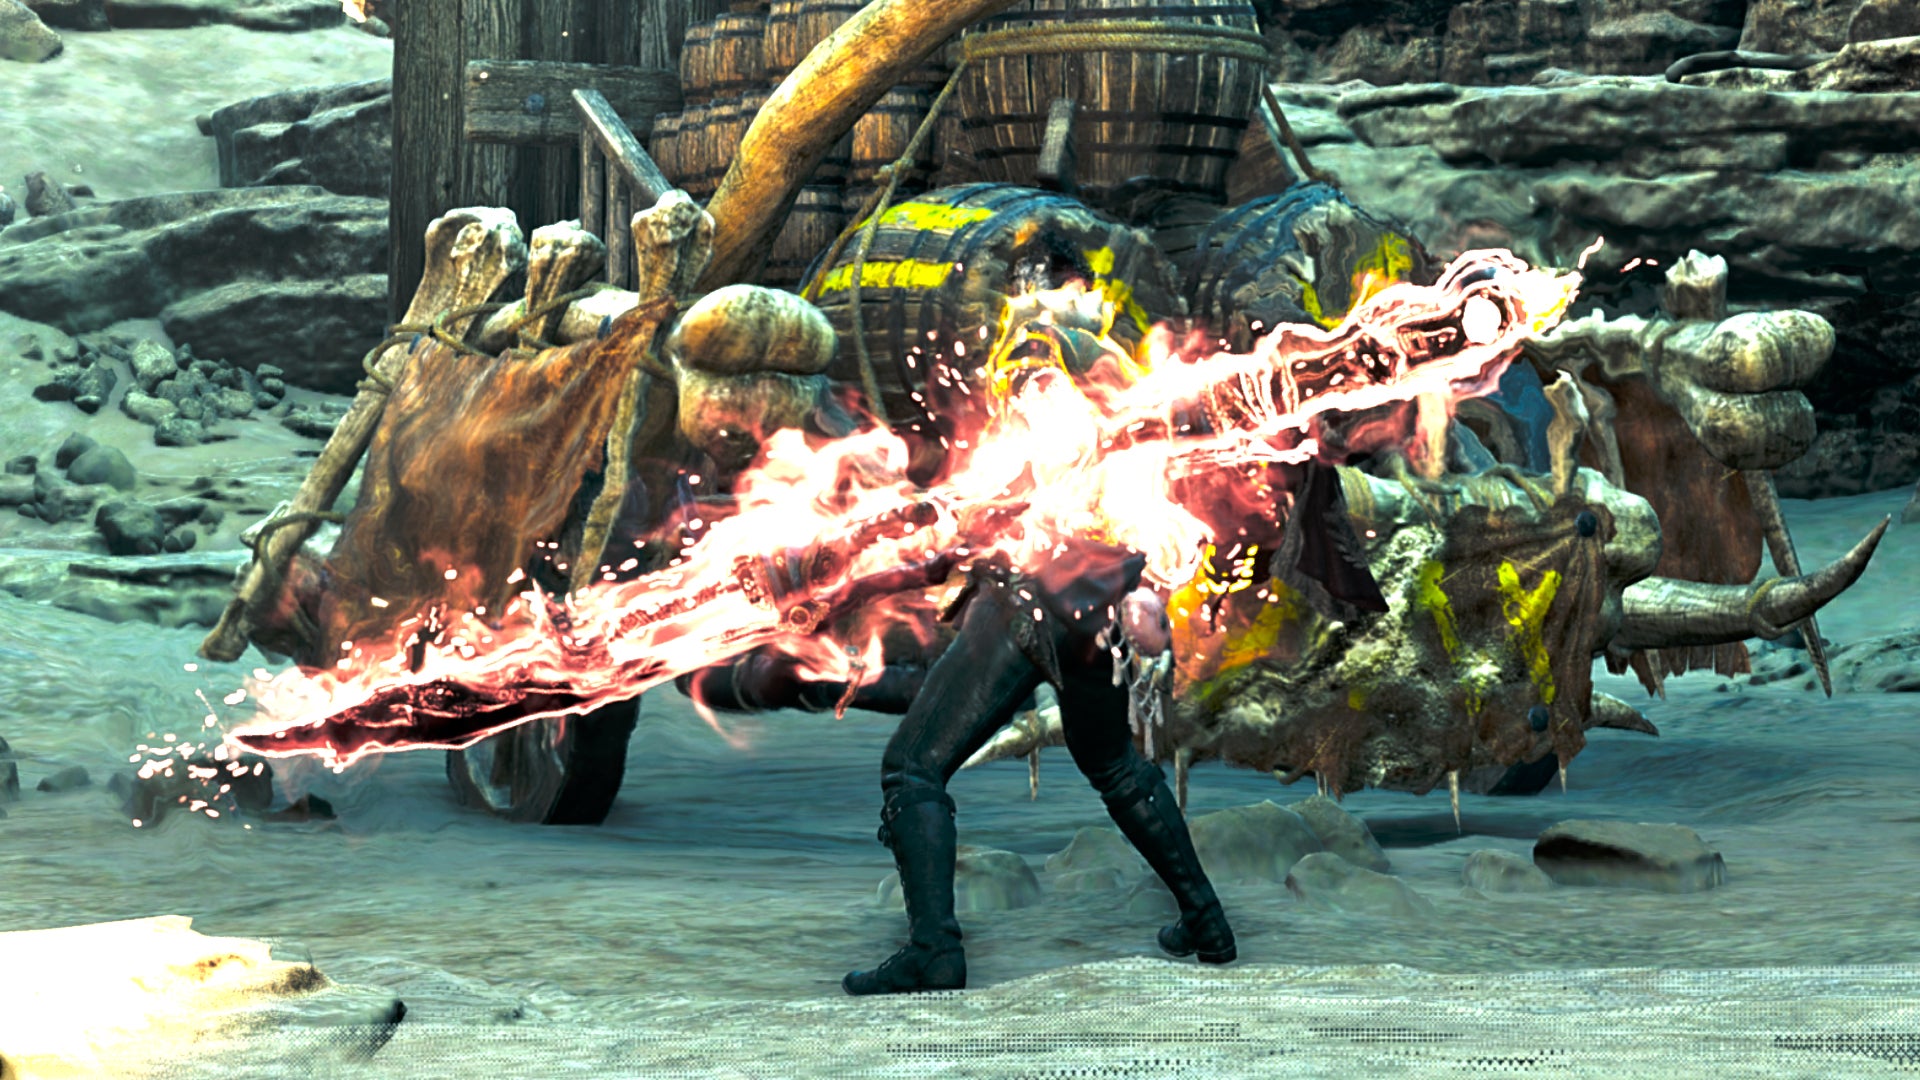
Image credit:Rock Paper Shotgun/Capcom
Monster Hunter Wilds is exclusively PvE, so it needn’t matter so much which weapon is the absolute best. All of them are phenomenally powerful if you learn them, and each one is more than capable of seeing you through to the endgame.
But if you’re stuck trying to figure out which weapon to use, then here are our recommendations depending on what you’re after:
- Pick Sword And Shield for a balance of mobility, strength, and complexity.
- Pick Long Sword if you prefer dodging to blocking, and want good reach.
- Pick Great Sword if you want the most amazingly powerful charge-up attacks.
- Pick Hammer if you need a lot of blunt damage and enjoy stunning monsters.
- Pick Dual Blades if you want high speed, evasion, and the elements as your ally.
- Pick Lance if impenetrable defence and counterattacking appeals to you.
- Pick Gunlance if you can handle a slower Lance that gives you strong ranged attacks.
- Pick Hunting Horn if you naturally gravitate towards support and buff-based combat.
- Pick Insect Glaive if you like a smart approach to hunts, and lots of aerial combat.
- Pick Switch Axe if you like counterattacks, and the Lance is too constricting.
- Pick Charge Blade if you don’t mind a steep learning curve in exchange for versatility.
- Pick Bow if you want to stay light on your feet while destroying wounds at a range.
- Pick Heavy Bowgun if you want to deliver the highest damage from a safe distance.
- Pick Light Bowgun if charging monsters scare you too much to use the Heavy Bowgun.
That wraps up our tier list ranking all the best weapons in Monster Hunter Wilds. If you’re more interested in what you’ll be fighting against , then check out our full Monster Hunter Wilds monster list for details of everything you’ll face. You can also consult our Monster Hunter Wilds walkthrough for a full overview of every main quest, or find the answers to more specific questions like how to capture monsters , how to get Layered Armor , how to get Hunter Symbols , and how to get Monster Fluid .
Monster Hunter Wilds
Video Game
Rock Paper Shotgun is better when you sign in
Sign in and join us on our journey to discover strange and compelling PC games.

All 75 Arc Raiders Blueprints and where to get them
These areas have the highest chance of giving you Blueprints

Image credit:Rock Paper Shotgun/Embark Studios
Looking for more Arc Raiders Blueprints? It’s a special day when you find a Blueprint, as they’re among the most valuable items in Arc Raiders. If you find a Blueprint that you haven’t already found, then you must make sure you hold onto it at all costs, because Blueprints are the key to one of the most important and powerful systems of meta-progression in the game.
This guide aims to be the very best guide on Blueprints you can find, starting with a primer on what exactly they are and how they work in Arc Raiders, before delving into exactly where to get Blueprints and the very best farming spots for you to take in your search.
We’ll also go over how to get Blueprints from other unlikely activities, such as destroying Surveyors and completing specific quests. And you’ll also find the full list of all 75 Blueprints in Arc Raiders on this page (including the newest Blueprints added with the Cold Snap update , such as the Deadline Blueprint and Firework Box Blueprint), giving you all the information you need to expand your own crafting repertoire.
In this guide:
- What are Blueprints in Arc Raiders?
- Full Blueprint list: All crafting recipes
- Where to find Blueprints in Arc Raiders Blueprints obtained from quests Blueprints obtained from Trials Best Blueprint farming locations

What are Blueprints in Arc Raiders?
Blueprints in Arc Raiders are special items which, if you manage to extract with them, you can expend to permanently unlock a new crafting recipe in your Workshop. If you manage to extract from a raid with an Anvil Blueprint, for example, you can unlock the ability to craft your very own Anvil Pistol, as many times as you like (as long as you have the crafting materials).
To use a Blueprint, simply open your Inventory while in the lobby, then right-click on the Blueprint and click “Learn And Consume” . This will permanently unlock the recipe for that item in your Workshop. As of the Stella Montis update, there are allegedly 75 different Blueprints to unlock - although only 68 are confirmed to be in the game so far. You can see all the Blueprints you’ve found and unlocked by going to the Workshop menu, and hitting “R” to bring up the Blueprint screen.
It’s possible to find duplicates of past Blueprints you’ve already unlocked. If you find these, then you can either sell them, or - if you like to play with friends - you can take it into a match and gift it to your friend so they can unlock that recipe for themselves. Another option is to keep hold of them until the time comes to donate them to the Expedition.
Full Blueprint list: All crafting recipes
Below is the full list of all the Blueprints that are currently available to find in Arc Raiders, and the crafting recipe required for each item:
| Blueprint | Type | Recipe | Crafted At |
|---|---|---|---|
| Bettina | Weapon | 3x Advanced Mechanical Components 3x Heavy Gun Parts 3x Canister | Gunsmith 3 |
| Blue Light Stick | Quick Use | 3x Chemicals | Utility Station 1 |
| Aphelion | Weapon | 3x Magnetic Accelerator 3x Complex Gun Parts 1x Matriarch Reactor | Gunsmith 3 |
| Combat Mk. 3 (Flanking) | Augment | 2x Advanced Electrical Components 3x Processor | Gear Bench 3 |
| Combat Mk. 3 (Aggressive) | Augment | 2x Advanced Electrical Components 3x Processor | Gear Bench 3 |
| Complex Gun Parts | Material | 2x Light Gun Parts 2x Medium Gun Parts 2x Heavy Gun Parts | Refiner 3 |
| Fireworks Box | Quick Use | 1x Explosive Compound 3x Pop Trigger | Explosives Station 2 |
| Gas Mine | Mine | 4x Chemicals 2x Rubber Parts | Explosives Station 1 |
| Green Light Stick | Quick Use | 3x Chemicals | Utility Station 1 |
| Pulse Mine | Mine | 1x Crude Explosives 1x Wires | Explosives Station 1 |
| Seeker Grenade | Grenade | 1x Crude Explosives 2x ARC Alloy | Explosives Station 1 |
| Looting Mk. 3 (Survivor) | Augment | 2x Advanced Electrical Components 3x Processor | Gear Bench 3 |
| Angled Grip II | Mod | 2x Mechanical Components 3x Duct Tape | Gunsmith 2 |
| Angled Grip III | Mod | 2x Mod Components 5x Duct Tape | Gunsmith 3 |
| Hullcracker | Weapon | 1x Magnetic Accelerator 3x Heavy Gun Parts 1x Exodus Modules | Gunsmith 3 |
| Launcher Ammo | Ammo | 5x Metal Parts 1x Crude Explosives | Workbench 1 |
| Anvil | Weapon | 5x Mechanical Components 5x Simple Gun Parts | Gunsmith 2 |
| Anvil Splitter | Mod | 2x Mod Components 3x Processor | Gunsmith 3 |
| ??? | ??? | ??? | ??? |
| Barricade Kit | Quick Use | 1x Mechanical Components | Utility Station 2 |
| Blaze Grenade | Grenade | 1x Explosive Compound 2x Oil | Explosives Station 3 |
| Bobcat | Weapon | 3x Advanced Mechanical Components 3x Light Gun Parts | Gunsmith 3 |
| Osprey | Weapon | 2x Advanced Mechanical Components 3x Medium Gun Parts 7x Wires | Gunsmith 3 |
| Burletta | Weapon | 3x Mechanical Components 3x Simple Gun Parts | Gunsmith 1 |
| Compensator II | Mod | 2x Mechanical Components 4x Wires | Gunsmith 2 |
| Compensator III | Mod | 2x Mod Components 8x Wires | Gunsmith 3 |
| Defibrillator | Quick Use | 9x Plastic Parts 1x Moss | Medical Lab 2 |
| ??? | ??? | ??? | ??? |
| Equalizer | Weapon | 3x Magnetic Accelerator 3x Complex Gun Parts 1x Queen Reactor | Gunsmith 3 |
| Extended Barrel | Mod | 2x Mod Components 8x Wires | Gunsmith 3 |
| Extended Light Mag II | Mod | 2x Mechanical Components 3x Steel Spring | Gunsmith 2 |
| Extended Light Mag III | Mod | 2x Mod Components 5x Steel Spring | Gunsmith 3 |
| Extended Medium Mag II | Mod | 2x Mechanical Components 3x Steel Spring | Gunsmith 2 |
| Extended Medium Mag III | Mod | 2x Mod Components 5x Steel Spring | Gunsmith 3 |
| Extended Shotgun Mag II | Mod | 2x Mechanical Components 3x Steel Spring | Gunsmith 2 |
| Extended Shotgun Mag III | Mod | 2x Mod Components 5x Steel Spring | Gunsmith 3 |
| Remote Raider Flare | Quick Use | 2x Chemicals 4x Rubber Parts | Utility Station 1 |
| Heavy Gun Parts | Material | 4x Simple Gun Parts | Refiner 2 |
| Venator | Weapon | 2x Advanced Mechanical Components 3x Medium Gun Parts 5x Magnet | Gunsmith 3 |
| Il Toro | Weapon | 5x Mechanical Components 6x Simple Gun Parts | Gunsmith 1 |
| Jolt Mine | Mine | 1x Electrical Components 1x Battery | Explosives Station 2 |
| Explosive Mine | Mine | 1x Explosive Compound 1x Sensors | Explosives Station 3 |
| Jupiter | Weapon | 3x Magnetic Accelerator 3x Complex Gun Parts 1x Queen Reactor | Gunsmith 3 |
| Light Gun Parts | Material | 4x Simple Gun Parts | Refiner 2 |
| Lightweight Stock | Mod | 2x Mod Components 5x Duct Tape | Gunsmith 3 |
| Lure Grenade | Grenade | 1x Speaker Component 1x Electrical Components | Utility Station 2 |
| Medium Gun Parts | Material | 4x Simple Gun Parts | Refiner 2 |
| Torrente | Weapon | 2x Advanced Mechanical Components 3x Medium Gun Parts 6x Steel Spring | Gunsmith 3 |
| Muzzle Brake II | Mod | 2x Mechanical Components 4x Wires | Gunsmith 2 |
| Muzzle Brake III | Mod | 2x Mod Components 8x Wires | Gunsmith 3 |
| Padded Stock | Mod | 2x Mod Components 5x Duct Tape | Gunsmith 3 |
| Shotgun Choke II | Mod | 2x Mechanical Components 4x Wires | Gunsmith 2 |
| Shotgun Choke III | Mod | 2x Mod Components 8x Wires | Gunsmith 3 |
| Shotgun Silencer | Mod | 2x Mod Components 8x Wires | Gunsmith 3 |
| Showstopper | Grenade | 1x Advanced Electrical Components 1x Voltage Converter | Explosives Station 3 |
| Silencer I | Mod | 2x Mechanical Components 4x Wires | Gunsmith 2 |
| Silencer II | Mod | 2x Mod Components 8x Wires | Gunsmith 3 |
| Snap Hook | Quick Use | 2x Power Rod 3x Rope 1x Exodus Modules | Utility Station 3 |
| Stable Stock II | Mod | 2x Mechanical Components 3x Duct Tape | Gunsmith 2 |
| Stable Stock III | Mod | 2x Mod Components 5x Duct Tape | Gunsmith 3 |
| Tagging Grenade | Grenade | 1x Electrical Components 1x Sensors | Utility Station 3 |
| Tempest | Weapon | 3x Advanced Mechanical Components 3x Medium Gun Parts 3x Canister | Gunsmith 3 |
| Trigger Nade | Grenade | 2x Crude Explosives 1x Processor | Explosives Station 2 |
| Vertical Grip II | Mod | 2x Mechanical Components 3x Duct Tape | Gunsmith 2 |
| Vertical Grip III | Mod | 2x Mod Components 5x Duct Tape | Gunsmith 3 |
| Vita Shot | Quick Use | 2x Antiseptic 1x Syringe | Medical Lab 3 |
| Vita Spray | Quick Use | 3x Antiseptic 1x Canister | Medical Lab 3 |
| Vulcano | Weapon | 1x Magnetic Accelerator 3x Heavy Gun Parts 1x Exodus Modules | Gunsmith 3 |
| Wolfpack | Grenade | 2x Explosive Compound 2x Sensors | Explosives Station 3 |
| Red Light Stick | Quick Use | 3x Chemicals | Utility Station 1 |
| Smoke Grenade | Grenade | 14x Chemicals 1x Canister | Utility Station 2 |
| Deadline | Mine | 3x Explosive Compound 2x ARC Circuitry | Explosives Station 3 |
| Trailblazer | Grenade | 1x Explosive Compound 1x Synthesized Fuel | Explosives Station 3 |
| Tactical Mk. 3 (Defensive) | Augment | 2x Advanced Electrical Components 3x Processor | Gear Bench 3 |
| Tactical Mk. 3 (Healing) | Augment | 2x Advanced Electrical Components 3x Processor | Gear Bench 3 |
| Yellow Light Stick | Quick Use | 3x Chemicals | Utility Station 1 |
Note: The missing Blueprints in this list likely have not actually been added to the game at the time of writing, because none of the playerbase has managed to find any of them. As they are added to the game, I will update this page with the most relevant information so you know exactly how to get all 75 Arc Raiders Blueprints.
Where to find Blueprints in Arc Raiders
Below is a list of all containers, modifiers, and events which maximise your chances of finding Blueprints:
- Certain quests reward you with specific Blueprints .
- Completing Trials has a high chance of offering Blueprints as rewards.
- Surveyors have a decent chance of dropping Blueprints on death.
- High loot value areas tend to have a greater chance of spawning Blueprints.
- Night Raids and Storms may increase rare Blueprint spawn chances in containers.
- Containers with higher numbers of items may have a higher tendency to spawn Blueprints. As a result, Blue Gate (which has many “large” containers containing multiple items) may give you a higher chance of spawning Blueprints.
- Raider containers (Raider Caches, Weapon Boxes, Medical Bags, Grenade Tubes) have increased Blueprint drop rates. As a result, the Uncovered Caches event gives you a high chance of finding Blueprints.
- Security Lockers have a higher than average chance of containing Blueprints.
- Certain Blueprints only seem to spawn under specific circumstances: Tempest Blueprint only spawns during Night Raid events. Vulcano Blueprint only spawns during Hidden Bunker events. Jupiter and Equaliser Blueprints only spawn during Harvester events.

Raider Caches, Weapon Boxes, and other raider-oriented container types have a good chance of offering Blueprints. |Image credit:Rock Paper Shotgun/Embark Studios
Blueprints have a very low chance of spawning in any container in Arc Raiders, around 1-2% on average. However, there is a higher chance of finding Blueprints in particular container types. Specifically, you can find more Blueprints in Raider containers and security lockers.
Beyond this, if you’re looking for Blueprints you should focus on regions of the map which are marked as having particularly high-value loot. Areas such as the Control Tower in Dam Battlegrounds, the Arrival and Departure Buildings in Spaceport, and Pilgrim’s Peak in Blue Gate all have a better-than-average chance of spawning Blueprints somewhere amongst all their containers. Night Raids and Electromagnetic Storm events also increase the drop chances of certain Blueprints .
In addition to these containers, you can often loot Blueprints from destroyed Surveyors - the largest of the rolling ball ARC. Surveyors are more commonly found on the later maps - Spaceport and Blue Gate - and if one spawns in your match, you’ll likely see it by the blue laser beam that it casts into the sky while “surveying”.
Surveyors are quite well-armoured and will very speedily run away from you once it notices you, but if you can take one down then make sure you loot all its parts for a chance of obtaining certain unusual Blueprints.
Blueprints obtained from quests
One way in which you can get Blueprints is by completing certain quests for the vendors in Speranza. Some quests will reward you with a specific item Blueprint upon completion, so as long as you work through all the quests in Arc Raiders, you are guaranteed those Blueprints.
Here is the full list of all Blueprints you can get from quest rewards:
- Trigger Nade Blueprint: Rewarded after completing “Sparks Fly”.
- Lure Grenade Blueprint: Rewarded after completing “Greasing Her Palms”.
- Burletta Blueprint: Rewarded after completing “Industrial Espionage”.
- Hullcracker Blueprint (and Launcher Ammo Blueprint): Rewarded after completing “The Major’s Footlocker”.
Alas, that’s only 4 Blueprints out of a total of 75 to unlock, so for the vast majority you will need to find them yourself during a raid. If you’re intent on farming Blueprints, then it’s best to equip yourself with cheap gear in case you lose it, but don’t use a free loadout because then you won’t get a safe pocket to stash any new Blueprint you find. No pain in Arc Raiders is sharper than failing to extract with a new Blueprint you’ve been after for a dozen hours already.

One of the best ways to get Blueprints is by hitting three stars on all five Trials every week. |Image credit:Rock Paper Shotgun/Embark Studios
Blueprints obtained from Trials
One of the very best ways to get Blueprints is as rewards for completing Trials in Arc Raiders. Trials are unlocked from Level 15 onwards, and allow you to earn rewards by focusing on certain tasks over the course of several raids. For example, one Trial might task you with dealing damage to Hornets, while another might challenge you to loot Supply Drops.
Trials refresh on a weekly basis, with a new week bringing five new Trials. Each Trial can offer up to three rewards after passing certain score milestones, and it’s possible to receive very high level loot from these reward crates - including Blueprints. So if you want to unlock as many Blueprints as possible, you should make a point of completing as many Trials as possible each week.
Best Blueprint farming locations
The very best way to get Blueprints is to frequent specific areas of the maps which combine high-tier loot pools with the right types of containers to search. Here are my recommendations for where to find Blueprints on every map, so you can always keep the search going for new crafting recipes to unlock.

Image credit:Rock Paper Shotgun/Embark Studios
Dam Battlegrounds
The best places to farm Blueprints on Dam Battlegrounds are the Control Tower, Power Generation Complex, Ruby Residence, and Pale Apartments . The first two regions, despite only being marked on the map as mid-tier loot, contain a phenomenal number of containers to loot. The Control Tower can also contain a couple of high-tier Security Lockers - though of course, you’ll need to have unlocked the Security Breach skill at the end of the Survival tree.
There’s also a lot of reporting amongst the playerbase that the Residential areas in the top-left of the map - Pale Apartments and Ruby Residence - give you a comparatively strong chance of finding Blueprints. Considering their size, there’s a high density of containers to loot in both locations, and they also have the benefit of being fairly out of the way. So you’re more likely to have all the containers to yourself.
Buried City
The best Blueprint farming locations on Buried City are the Santa Maria Houses, Grandioso Apartments, Town Hall, and the various buildings of the New District . Grandioso Apartments has a lower number of containers than the rest, but a high chance of spawning weapon cases - which have good Blueprint drop rates. The others are high-tier loot areas, with plenty of lootable containers - including Security Lockers.
Spaceport
The best places to find Blueprints on Spaceport are the Arrival and Departure Buildings, as well as Control Tower A6 and the Launch Towers . All these areas are labelled as high-value loot regions, and many of them are also very handily connected to one another by the Spaceport wall, which you can use to quickly run from one area to the next. At the tops of most of these buildings you’ll find at least one Security Locker, so this is an excellent farming route for players looking to find Blueprints.
The downside to looting Blueprints on Spaceport is that all these areas are hotly contested, particularly in Duos and Squads. You’ll need to be very focused and fast in order to complete the full farming route.

Image credit:Rock Paper Shotgun/Embark Studios
Blue Gate
Blue Gate tends to have a good chance of dropping Blueprints, potentially because it generally has a high number of containers which can hold lots of items; so there’s a higher chance of a Blueprint spawning in each container. In my experience, the best Blueprint farming spots on Blue Gate are Pilgrim’s Peak, Raider’s Refuge, the Ancient Fort, and the Underground Complex beneath the Warehouse .
All of these areas contain a wealth of containers to loot. Raider’s Refuge has less to loot, but the majority of the containers in and around the Refuge are raider containers, which have a high chance of containing Blueprints - particularly during major events.
Stella Montis
On the whole, Stella Montis seems to have a very low drop rate for Blueprints (though a high chance of dropping other high-tier loot). If you do want to try farming Blueprints on this map, the best places to find Blueprints in Stella Montis are Medical Research, Assembly Workshop, and the Business Center . These areas have the highest density of containers to loot on the map.
In addition to this, the Western Tunnel has a few different Security Lockers to loot, so while there’s very little to loot elsewhere in this area of the map, it’s worth hitting those Security Lockers if you spawn there at the start of a match.
That wraps up this primer on how to get all the Blueprints in Arc Raiders as quickly as possible. With the Expedition system constantly resetting a large number of players’ Blueprints, it’s more important than ever to have the most up-to-date information on where to find all these Blueprints.
While you’re here, be sure to check out our Arc Raiders best guns tier list , as well as our primers on the best skills to unlock and all the different Field Depot locations on every map.

ARC Raiders
PS5 , Xbox Series X/S , PC
Rock Paper Shotgun is better when you sign in
Sign in and join us on our journey to discover strange and compelling PC games.
