Mewgenics review - a roguelite where sacrificial arse maggots and frightful defecation are the keys to success
Flatulent feline squad, assemble!
Image credit:Rock Paper Shotgun / Edmund McMillen and Tyler Glaiel

Mewgenics review: A strategy roguelite where you breed cats, send them on DnD campaigns, and try to come home with your loot (and limbs) in one piece.
- Developer: Edmund McMillen and Tyler Glaiel
- Publisher: Edmund McMillen and Tyler Glaiel
- Release: Feb 10th, 2026
- On: Windows
- From: Steam
- Price: TBC
- Reviewed on: Intel Core i5-12600, 32GB RAM, Nvidia GeForce RTX 3060, Windows 11
I can’t get Fish Sticks out of my head. Not the food, but the stray cat with a squished face and stubby legs that I wrangled into my shack in Edmund McMillen and Tyler Glaiel’s new roguelite strategy game, Mewgenics . The shop, the pub, the dentist; no matter where I go, I see his beady peepers deep in my subconscious. It’s the loss.
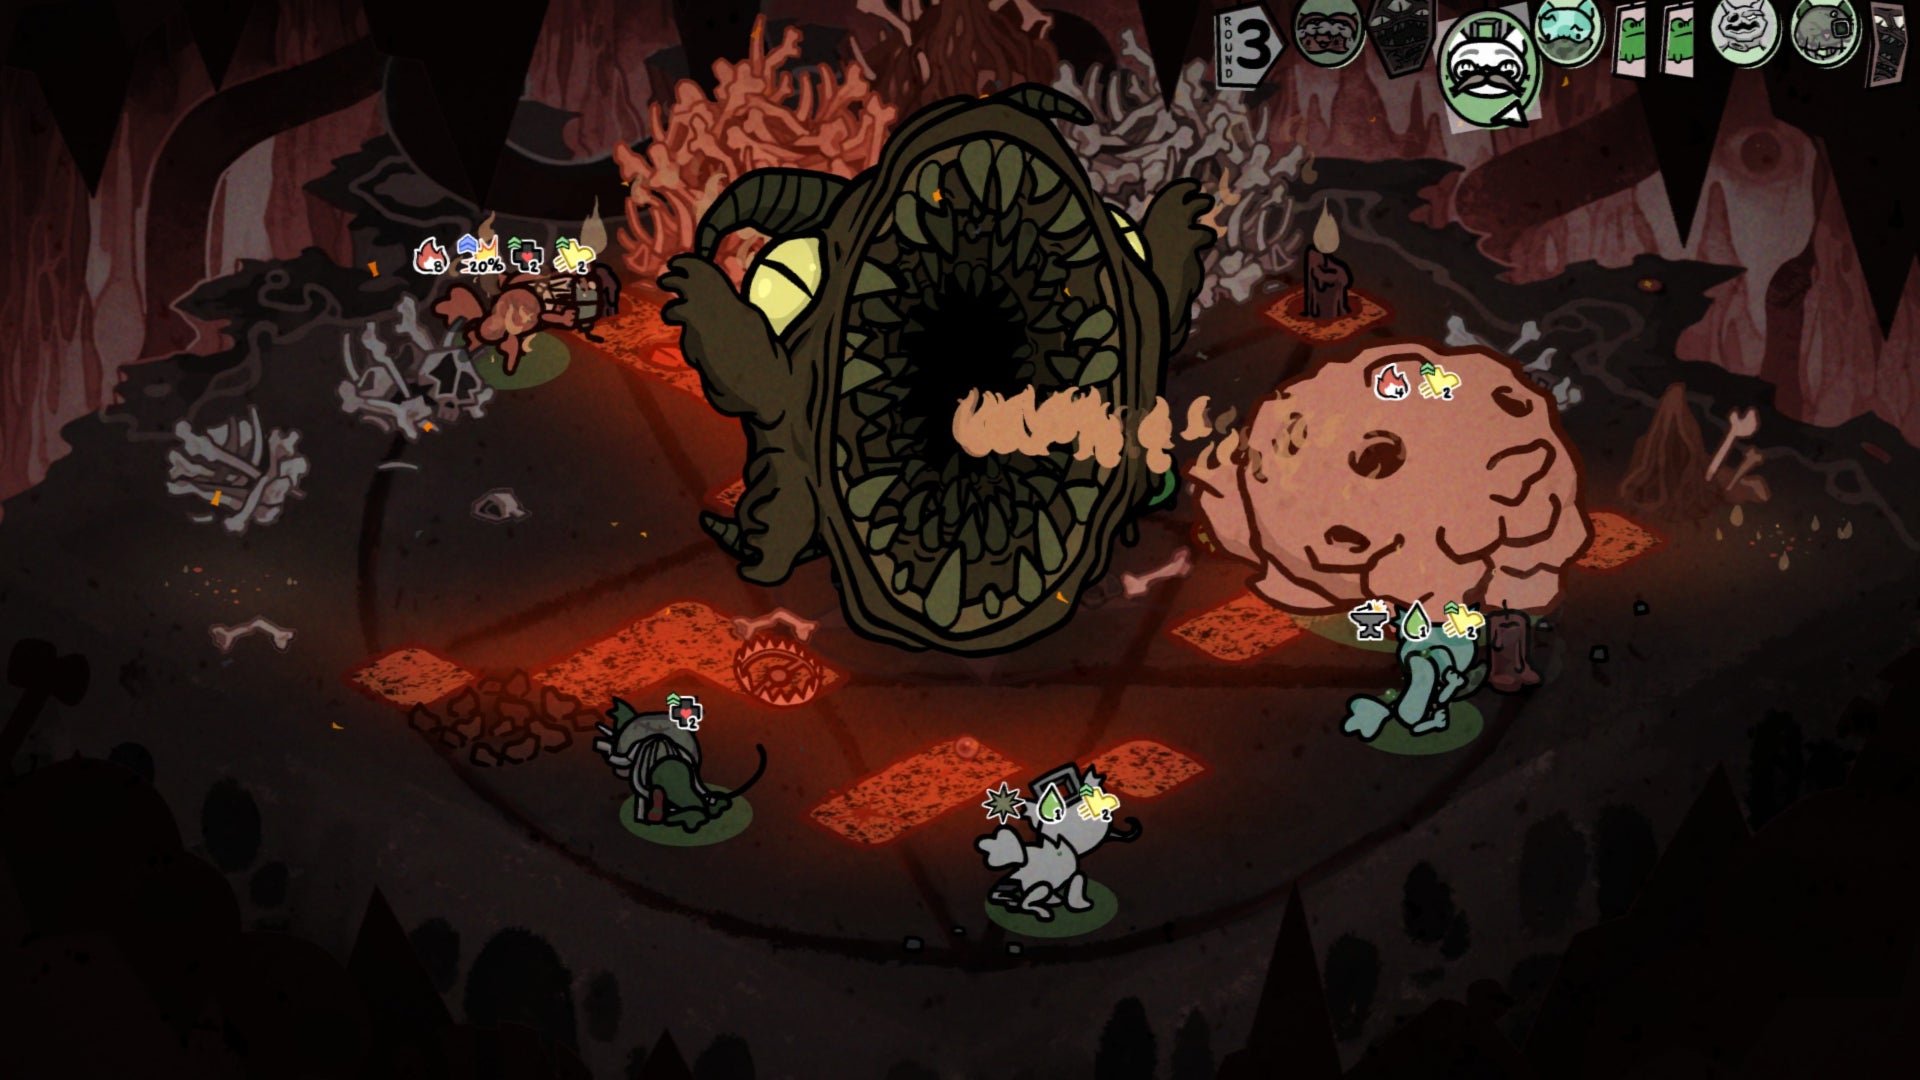
I sent Fish Sticks to the pits of hell to face the armies of Satan. Even though he had a nasty case of gastritis. Even though he slurped green goo that made his eyeballs bulge from his face. And he would’ve made it home, too, if it weren’t for a particularly pissed-off frog. The amphibian dragged him kicking and screaming into the path of the vacuuming jaws of a floating demon. The bastard gobbled him up. Him and his ability to pluck maggots from his allies’ rectums and swallow their souls. As he vanished into the demon’s belly, so too did my chances of passing his rectal soul-sucking powers to a new generation of adventuring cats.

Image credit:Rock Paper Shotgun / Edmund McMillen and Tyler Glaiel
All I’ve thought about for the last month is cats like Fish Sticks. Fat cats. Farting cats. Cats with cube heads. And cats with no head at all, but a giant beholder-style eyeball for a cranium. McMillen and Glaiel’s brand has long been stapling together obsessive gameplay loops with juvenile potty humour and more than a sprinkle of morbid horror. McMillen’s behind Super Meat Boy and The Binding of Isaac , and the pair made 2017’s The End Is Nigh – and I’ve liked them all. But Mewgenics, with its XCOM-like squads of mutant cats, has wormed its maggot-filled husk more deeply into my heart than any of them.
Mewgenics is a chaotic blend of so many genres. It’s a roguelite that strings together encounters into a multipart adventure, but it also has turn-based combat that plays like a streamlined version of Divinity: Original Sin , not to mention it’s also both a punishing dungeon crawler and a frighteningly deep hierarchical cat breeding simulator. Yet its systems coalesce into a cocktail that I can’t help sipping on until “10 more minutes” turns to “oh shit, I have to be up in four hours.”
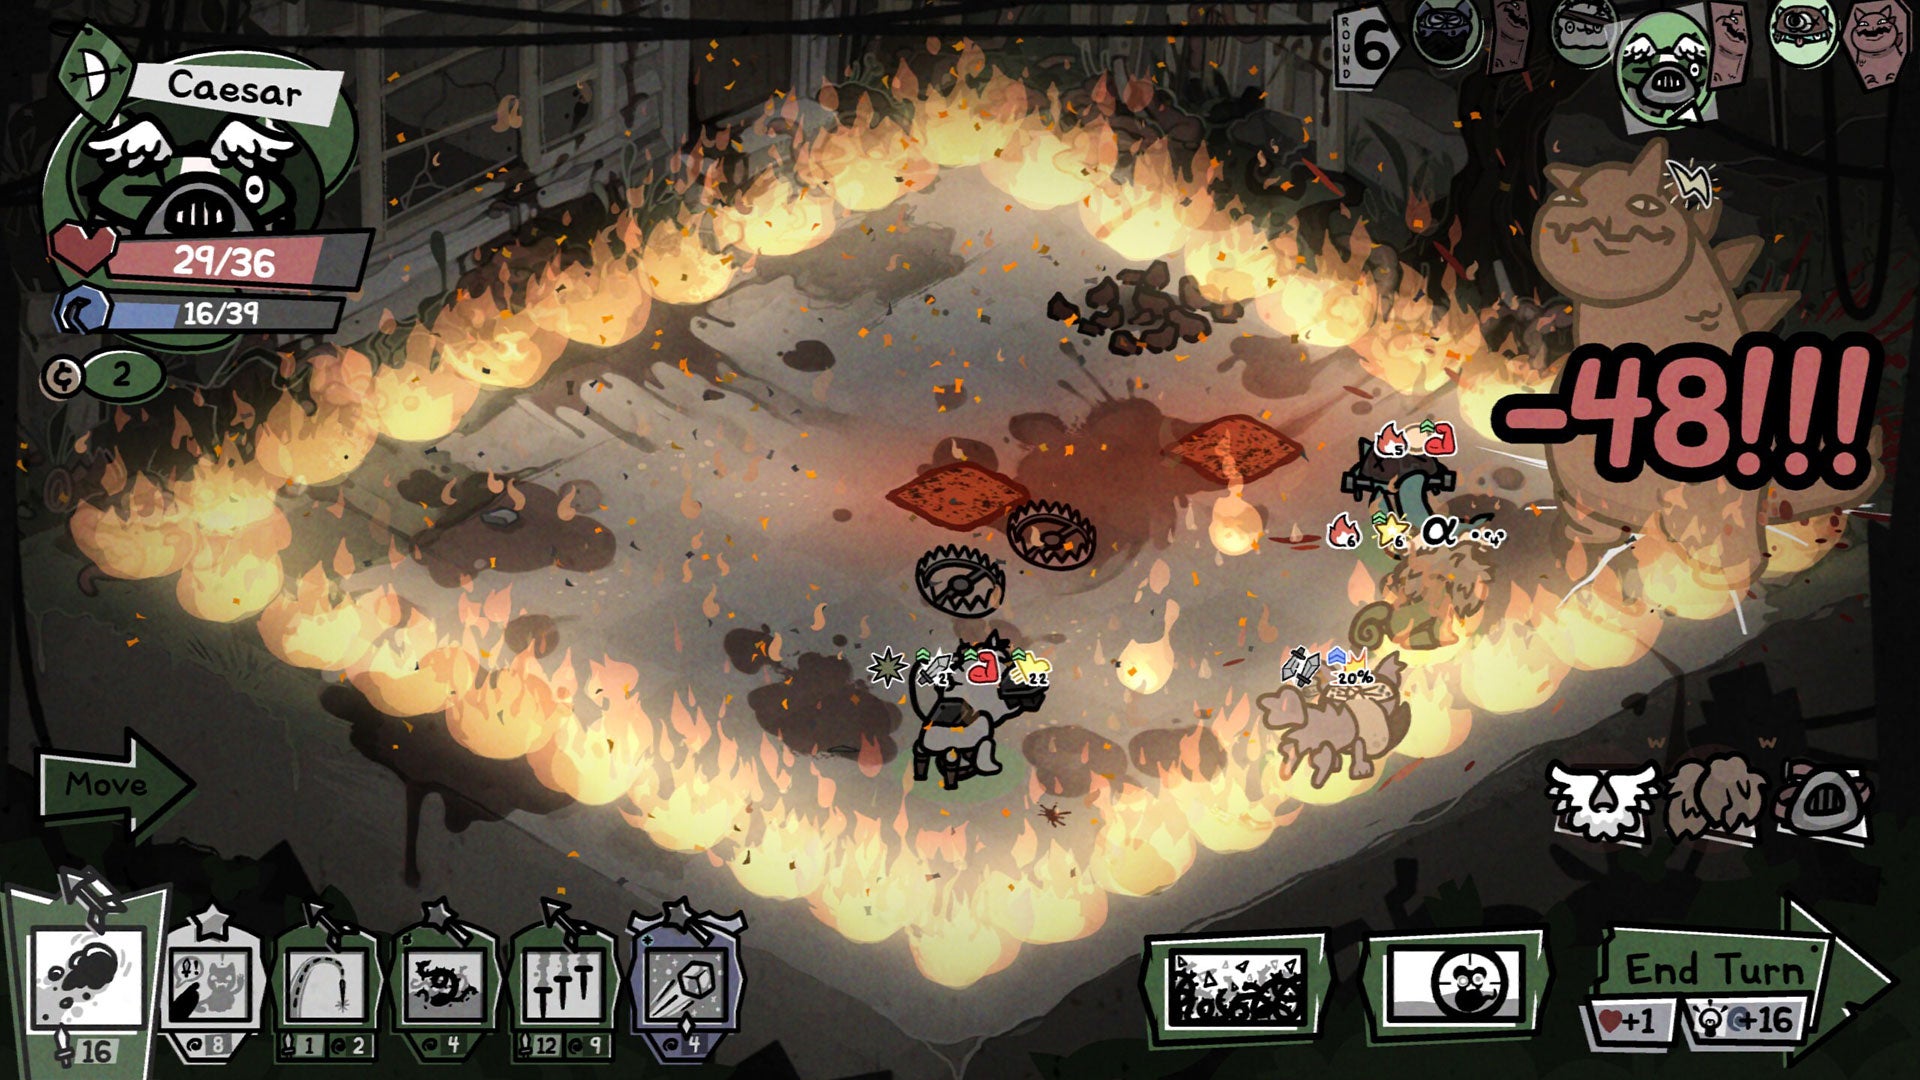
Image credit:Rock Paper Shotgun / Edmund McMillen and Tyler Glaiel
As you’d expect from a game where you micromanage cat breeding, it’s weird from the off. You awaken on the examining table of local crackpot/genius, Doctor Beanies, who specialises in the most important pillar of modern science: felineology. Beanies has brought you here for a single purpose: collect the stray cat population of local town, Boon County, so he can conduct routine experiments, like time travel. The doctor tosses you the keys to a beat-up shack, your main base, and gives you two cats with which to cultivate a tribe.
But first, you’re in for a brief tutorial given by local cat-fight-club enthusiast, Butch. As you soak up his sage words, you’ll learn that Mewgenics is essentially DnD. Your cats embark on harrowing adventures, picking a route along Slay The Spire-style paths of battles, events, and loot. Your main goal, at least initially, is to get your cats across town and bag enough food from winning battles to feed the hungry kitties crashing at your shack.

Image credit:Rock Paper Shotgun / Edmund McMillen and Tyler Glaiel
When your two starter cats return from Butch’s guided tour, you’ll shift into the game’s other core loop: cat management. Cats retire after taking part in a single adventure, so you’ll need more of them to venture out again. How do you get more cats? By letting them bone. Switch off the lights to go to bed, and your founding felines will instantly get it on, producing a new cat that will become the first unit you send into the throngs of war.
The more you play, though, the deeper both gameplay loops become. Your first proper expedition introduces class collars, which let you assign roles to your cats that boost their stats, and you’ll quickly notice they’ve gained a random selection of traits and abilities, too. The short romp of the tutorial zone’s gone, transforming into a hellish gauntlet of Boon County’s alleyways, filled with bile-spitting fleas and a rat with sunglasses that throws exploding mouse bombs. But that’s just the appetiser. A few hours later, campaigns have transformed into three-stage adventures, offering a 90-minute DnD one-shot that, depending on what act you’re playing and which route you choose, could have you crawling through the depths of hell, squaring off against fire-spitting warlocks, or throwing hands with little green men on the surface of the moon. And the skirmishes you’ll have are equally unconventional.
It’s safe to say fights can get a little chaotic… |Image credit:Rock Paper Shotgun / Edmund McMillen and Tyler Glaiel
Mewgenics’ combat is like a smaller-scale remix of the battles you’ll find in RPGs like Baldur’s Gate, Divinity or Wasteland. Like those games, its rigid rules are a foundation for creative freedom, while also being utterly ruthless. You and the enemy take turns, using your abilities to beat the ever-loving tar out of each other. But every ability, stage and enemy revolves around dynamic systems that you must obey. Some of these rules are obvious. If you’re standing in a puddle, using an electric spell is a bad call. But others caught me off guard by how intricately they overlapped. A personal favourite came when I thoughtlessly glued a superhero mask to my Cleric’s face, adding the ability to knock enemies into the air when he attacked. What I didn’t consider was that Clerics’ basic attacks also heal allies, so when I sent him to heal my Mage, he knocked her across the room. She landed right in front of a deranged cult member and, because she had an eternally dicky tummy, defecated on her new neighbour. The commotion riled up a robot nearby, which attacked the Mage, causing the defensive cross stapled to her head to launch magical heat-seeking missiles that turned everything in the vicinity to piles of flesh and metal.
These moments in combat, where rules butt against other rules, don’t always play out in your favour, but they make for wild and wonderful stories. It’s easy to concoct bizarre and powerful builds with innocuous abilities. Fish Stick’s maggot ability, Soul Link, is meant to connect units so they all take the same damage. After some tinkering, I realised I could use Soul Link to connect the maggots from his ally’s arse, and the battalion of very adorable squirrels my Druid could summon, to enemies, crushing the helpless critters to eviscerate foes. This realisation wasn’t a one-off event: As I have to bring new cats on every run, each adventure lets me concoct new bizarre builds.
Image credit:Rock Paper Shotgun / Edmund McMillen and Tyler Glaiel
Even if you wanted to rely on a solid build to carry you through multiple trips, you’d struggle, considering two trips are never the same. Mewgenics is quintessentially a roguelite, and that means every run is randomised. Enemy placements. Mini-bosses. Gear pick-ups. The abilities you pick between for your cats when they level up. Outside of main boss encounters, your adventure is beholden to the RNG gods. Mewgenics’ random events are particularly ruthless. One of your cats is selected to make a skill check on an event, such as opening a rubbish bin. Success might mean a rare item or a new passive ability, but failure can be brutal. I’ll always remember the fall of Bumbum, my Tank, who failed his skill check and had a parasite crawl into his ear and begin munching on his brain, gradually lowering all of his stats until he entered every fight as an unconscious, twitching pile of fur.
However, if you can avoid brain slugs, escape feline-hunting extraterrestrials and defeat the main boss of the run, all your surviving cats return to the shack, stashing their food and loot, then settling down for early retirement. Their days of venturing beyond the shack are done. Well, outside of special boss events that crop up throughout the story. With all that free time on their hands, they start getting very… frisky.

This was moments before one of my great overpopulation cleanses, where any cat deemed neither powerful or cool enough met the dirty sewer pipe. |Image credit:Rock Paper Shotgun / Edmund McMillen and Tyler Glaiel
If you’re lucky, the cats in each litter will inherit the stats, traits and abilities from their adventuring parents. What could be a gimmick is an absurdly deep and complex management game I’ve now sunk hours into. By altering your shack’s stats with furniture you acquire from Boon County’s most sadistic prepubescent salesman, Baby Jack, you affect how much your cats want to jump each other’s bones, heal from injuries, or mutate into biohazard abominations only John Carpenter could love. I didn’t realise how deep down the rabbit hole I was until my flatmate asked why I was throwing adorable cats down a grimy sewer pipe. I explained that my retired veteran, Soup, had contracted Blood Frenzy, which makes her go on crazed, friendly-fire murder sprees, so now I was culling her entire bloodline before her descendants started humping it into the general cat population.
Regardless, all of this is just scratching the surface. I was shocked at how much there was to Mewgenics, and how frequently I was inundated with new mechanics to play around with. Its eclectic events, gear drops, cat abilities, hidden areas, bosses and main base upgrades mean, even after 100 hours, I’m still encountering new mechanics. But it all feeds into the fact that the game never settles for being more of the same. I never come back to my shack without a tall tale to tell.
The bump on the white cat’s head was a spider egg. If any of my units got downed, it made creepy crawlies burst from their bodies. Now that’s a good pub story. |Image credit:Rock Paper Shotgun / Edmund McMillen and Tyler Glaiel
It’s one of the first roguelites I’ve played where a bad roll of the dice leaves me excited, not deflated. Whether RNG blazes a path to success, or I’m handed Blasto, my chirpy Hunter cursed with a trait that gave him a zero movement stat, essentially paralysing him, I love the weird odyssey it sends me on. Whatever happens, I know I’ll come back with a corker of a story. And it’ll almost certainly involve poo.
Find out how we conduct our reviews by reading our review policy .

Mewgenics
PC
Rock Paper Shotgun is better when you sign in
Sign in and join us on our journey to discover strange and compelling PC games.

All 75 Arc Raiders Blueprints and where to get them
These areas have the highest chance of giving you Blueprints

Image credit:Rock Paper Shotgun/Embark Studios

Looking for more Arc Raiders Blueprints? It’s a special day when you find a Blueprint, as they’re among the most valuable items in Arc Raiders. If you find a Blueprint that you haven’t already found, then you must make sure you hold onto it at all costs, because Blueprints are the key to one of the most important and powerful systems of meta-progression in the game.
This guide aims to be the very best guide on Blueprints you can find, starting with a primer on what exactly they are and how they work in Arc Raiders, before delving into exactly where to get Blueprints and the very best farming spots for you to take in your search.
We’ll also go over how to get Blueprints from other unlikely activities, such as destroying Surveyors and completing specific quests. And you’ll also find the full list of all 75 Blueprints in Arc Raiders on this page (including the newest Blueprints added with the Cold Snap update , such as the Deadline Blueprint and Firework Box Blueprint), giving you all the information you need to expand your own crafting repertoire.
In this guide:
- What are Blueprints in Arc Raiders?
- Full Blueprint list: All crafting recipes
- Where to find Blueprints in Arc Raiders Blueprints obtained from quests Blueprints obtained from Trials Best Blueprint farming locations

What are Blueprints in Arc Raiders?
Blueprints in Arc Raiders are special items which, if you manage to extract with them, you can expend to permanently unlock a new crafting recipe in your Workshop. If you manage to extract from a raid with an Anvil Blueprint, for example, you can unlock the ability to craft your very own Anvil Pistol, as many times as you like (as long as you have the crafting materials).
To use a Blueprint, simply open your Inventory while in the lobby, then right-click on the Blueprint and click “Learn And Consume” . This will permanently unlock the recipe for that item in your Workshop. As of the Stella Montis update, there are allegedly 75 different Blueprints to unlock - although only 68 are confirmed to be in the game so far. You can see all the Blueprints you’ve found and unlocked by going to the Workshop menu, and hitting “R” to bring up the Blueprint screen.
It’s possible to find duplicates of past Blueprints you’ve already unlocked. If you find these, then you can either sell them, or - if you like to play with friends - you can take it into a match and gift it to your friend so they can unlock that recipe for themselves. Another option is to keep hold of them until the time comes to donate them to the Expedition.
Full Blueprint list: All crafting recipes
Below is the full list of all the Blueprints that are currently available to find in Arc Raiders, and the crafting recipe required for each item:
| Blueprint | Type | Recipe | Crafted At |
|---|---|---|---|
| Bettina | Weapon | 3x Advanced Mechanical Components 3x Heavy Gun Parts 3x Canister | Gunsmith 3 |
| Blue Light Stick | Quick Use | 3x Chemicals | Utility Station 1 |
| Aphelion | Weapon | 3x Magnetic Accelerator 3x Complex Gun Parts 1x Matriarch Reactor | Gunsmith 3 |
| Combat Mk. 3 (Flanking) | Augment | 2x Advanced Electrical Components 3x Processor | Gear Bench 3 |
| Combat Mk. 3 (Aggressive) | Augment | 2x Advanced Electrical Components 3x Processor | Gear Bench 3 |
| Complex Gun Parts | Material | 2x Light Gun Parts 2x Medium Gun Parts 2x Heavy Gun Parts | Refiner 3 |
| Fireworks Box | Quick Use | 1x Explosive Compound 3x Pop Trigger | Explosives Station 2 |
| Gas Mine | Mine | 4x Chemicals 2x Rubber Parts | Explosives Station 1 |
| Green Light Stick | Quick Use | 3x Chemicals | Utility Station 1 |
| Pulse Mine | Mine | 1x Crude Explosives 1x Wires | Explosives Station 1 |
| Seeker Grenade | Grenade | 1x Crude Explosives 2x ARC Alloy | Explosives Station 1 |
| Looting Mk. 3 (Survivor) | Augment | 2x Advanced Electrical Components 3x Processor | Gear Bench 3 |
| Angled Grip II | Mod | 2x Mechanical Components 3x Duct Tape | Gunsmith 2 |
| Angled Grip III | Mod | 2x Mod Components 5x Duct Tape | Gunsmith 3 |
| Hullcracker | Weapon | 1x Magnetic Accelerator 3x Heavy Gun Parts 1x Exodus Modules | Gunsmith 3 |
| Launcher Ammo | Ammo | 5x Metal Parts 1x Crude Explosives | Workbench 1 |
| Anvil | Weapon | 5x Mechanical Components 5x Simple Gun Parts | Gunsmith 2 |
| Anvil Splitter | Mod | 2x Mod Components 3x Processor | Gunsmith 3 |
| ??? | ??? | ??? | ??? |
| Barricade Kit | Quick Use | 1x Mechanical Components | Utility Station 2 |
| Blaze Grenade | Grenade | 1x Explosive Compound 2x Oil | Explosives Station 3 |
| Bobcat | Weapon | 3x Advanced Mechanical Components 3x Light Gun Parts | Gunsmith 3 |
| Osprey | Weapon | 2x Advanced Mechanical Components 3x Medium Gun Parts 7x Wires | Gunsmith 3 |
| Burletta | Weapon | 3x Mechanical Components 3x Simple Gun Parts | Gunsmith 1 |
| Compensator II | Mod | 2x Mechanical Components 4x Wires | Gunsmith 2 |
| Compensator III | Mod | 2x Mod Components 8x Wires | Gunsmith 3 |
| Defibrillator | Quick Use | 9x Plastic Parts 1x Moss | Medical Lab 2 |
| ??? | ??? | ??? | ??? |
| Equalizer | Weapon | 3x Magnetic Accelerator 3x Complex Gun Parts 1x Queen Reactor | Gunsmith 3 |
| Extended Barrel | Mod | 2x Mod Components 8x Wires | Gunsmith 3 |
| Extended Light Mag II | Mod | 2x Mechanical Components 3x Steel Spring | Gunsmith 2 |
| Extended Light Mag III | Mod | 2x Mod Components 5x Steel Spring | Gunsmith 3 |
| Extended Medium Mag II | Mod | 2x Mechanical Components 3x Steel Spring | Gunsmith 2 |
| Extended Medium Mag III | Mod | 2x Mod Components 5x Steel Spring | Gunsmith 3 |
| Extended Shotgun Mag II | Mod | 2x Mechanical Components 3x Steel Spring | Gunsmith 2 |
| Extended Shotgun Mag III | Mod | 2x Mod Components 5x Steel Spring | Gunsmith 3 |
| Remote Raider Flare | Quick Use | 2x Chemicals 4x Rubber Parts | Utility Station 1 |
| Heavy Gun Parts | Material | 4x Simple Gun Parts | Refiner 2 |
| Venator | Weapon | 2x Advanced Mechanical Components 3x Medium Gun Parts 5x Magnet | Gunsmith 3 |
| Il Toro | Weapon | 5x Mechanical Components 6x Simple Gun Parts | Gunsmith 1 |
| Jolt Mine | Mine | 1x Electrical Components 1x Battery | Explosives Station 2 |
| Explosive Mine | Mine | 1x Explosive Compound 1x Sensors | Explosives Station 3 |
| Jupiter | Weapon | 3x Magnetic Accelerator 3x Complex Gun Parts 1x Queen Reactor | Gunsmith 3 |
| Light Gun Parts | Material | 4x Simple Gun Parts | Refiner 2 |
| Lightweight Stock | Mod | 2x Mod Components 5x Duct Tape | Gunsmith 3 |
| Lure Grenade | Grenade | 1x Speaker Component 1x Electrical Components | Utility Station 2 |
| Medium Gun Parts | Material | 4x Simple Gun Parts | Refiner 2 |
| Torrente | Weapon | 2x Advanced Mechanical Components 3x Medium Gun Parts 6x Steel Spring | Gunsmith 3 |
| Muzzle Brake II | Mod | 2x Mechanical Components 4x Wires | Gunsmith 2 |
| Muzzle Brake III | Mod | 2x Mod Components 8x Wires | Gunsmith 3 |
| Padded Stock | Mod | 2x Mod Components 5x Duct Tape | Gunsmith 3 |
| Shotgun Choke II | Mod | 2x Mechanical Components 4x Wires | Gunsmith 2 |
| Shotgun Choke III | Mod | 2x Mod Components 8x Wires | Gunsmith 3 |
| Shotgun Silencer | Mod | 2x Mod Components 8x Wires | Gunsmith 3 |
| Showstopper | Grenade | 1x Advanced Electrical Components 1x Voltage Converter | Explosives Station 3 |
| Silencer I | Mod | 2x Mechanical Components 4x Wires | Gunsmith 2 |
| Silencer II | Mod | 2x Mod Components 8x Wires | Gunsmith 3 |
| Snap Hook | Quick Use | 2x Power Rod 3x Rope 1x Exodus Modules | Utility Station 3 |
| Stable Stock II | Mod | 2x Mechanical Components 3x Duct Tape | Gunsmith 2 |
| Stable Stock III | Mod | 2x Mod Components 5x Duct Tape | Gunsmith 3 |
| Tagging Grenade | Grenade | 1x Electrical Components 1x Sensors | Utility Station 3 |
| Tempest | Weapon | 3x Advanced Mechanical Components 3x Medium Gun Parts 3x Canister | Gunsmith 3 |
| Trigger Nade | Grenade | 2x Crude Explosives 1x Processor | Explosives Station 2 |
| Vertical Grip II | Mod | 2x Mechanical Components 3x Duct Tape | Gunsmith 2 |
| Vertical Grip III | Mod | 2x Mod Components 5x Duct Tape | Gunsmith 3 |
| Vita Shot | Quick Use | 2x Antiseptic 1x Syringe | Medical Lab 3 |
| Vita Spray | Quick Use | 3x Antiseptic 1x Canister | Medical Lab 3 |
| Vulcano | Weapon | 1x Magnetic Accelerator 3x Heavy Gun Parts 1x Exodus Modules | Gunsmith 3 |
| Wolfpack | Grenade | 2x Explosive Compound 2x Sensors | Explosives Station 3 |
| Red Light Stick | Quick Use | 3x Chemicals | Utility Station 1 |
| Smoke Grenade | Grenade | 14x Chemicals 1x Canister | Utility Station 2 |
| Deadline | Mine | 3x Explosive Compound 2x ARC Circuitry | Explosives Station 3 |
| Trailblazer | Grenade | 1x Explosive Compound 1x Synthesized Fuel | Explosives Station 3 |
| Tactical Mk. 3 (Defensive) | Augment | 2x Advanced Electrical Components 3x Processor | Gear Bench 3 |
| Tactical Mk. 3 (Healing) | Augment | 2x Advanced Electrical Components 3x Processor | Gear Bench 3 |
| Yellow Light Stick | Quick Use | 3x Chemicals | Utility Station 1 |
Note: The missing Blueprints in this list likely have not actually been added to the game at the time of writing, because none of the playerbase has managed to find any of them. As they are added to the game, I will update this page with the most relevant information so you know exactly how to get all 75 Arc Raiders Blueprints.
Where to find Blueprints in Arc Raiders
Below is a list of all containers, modifiers, and events which maximise your chances of finding Blueprints:
- Certain quests reward you with specific Blueprints .
- Completing Trials has a high chance of offering Blueprints as rewards.
- Surveyors have a decent chance of dropping Blueprints on death.
- High loot value areas tend to have a greater chance of spawning Blueprints.
- Night Raids and Storms may increase rare Blueprint spawn chances in containers.
- Containers with higher numbers of items may have a higher tendency to spawn Blueprints. As a result, Blue Gate (which has many “large” containers containing multiple items) may give you a higher chance of spawning Blueprints.
- Raider containers (Raider Caches, Weapon Boxes, Medical Bags, Grenade Tubes) have increased Blueprint drop rates. As a result, the Uncovered Caches event gives you a high chance of finding Blueprints.
- Security Lockers have a higher than average chance of containing Blueprints.
- Certain Blueprints only seem to spawn under specific circumstances: Tempest Blueprint only spawns during Night Raid events. Vulcano Blueprint only spawns during Hidden Bunker events. Jupiter and Equaliser Blueprints only spawn during Harvester events.

Raider Caches, Weapon Boxes, and other raider-oriented container types have a good chance of offering Blueprints. |Image credit:Rock Paper Shotgun/Embark Studios
Blueprints have a very low chance of spawning in any container in Arc Raiders, around 1-2% on average. However, there is a higher chance of finding Blueprints in particular container types. Specifically, you can find more Blueprints in Raider containers and security lockers.
Beyond this, if you’re looking for Blueprints you should focus on regions of the map which are marked as having particularly high-value loot. Areas such as the Control Tower in Dam Battlegrounds, the Arrival and Departure Buildings in Spaceport, and Pilgrim’s Peak in Blue Gate all have a better-than-average chance of spawning Blueprints somewhere amongst all their containers. Night Raids and Electromagnetic Storm events also increase the drop chances of certain Blueprints .
In addition to these containers, you can often loot Blueprints from destroyed Surveyors - the largest of the rolling ball ARC. Surveyors are more commonly found on the later maps - Spaceport and Blue Gate - and if one spawns in your match, you’ll likely see it by the blue laser beam that it casts into the sky while “surveying”.
Surveyors are quite well-armoured and will very speedily run away from you once it notices you, but if you can take one down then make sure you loot all its parts for a chance of obtaining certain unusual Blueprints.
Blueprints obtained from quests
One way in which you can get Blueprints is by completing certain quests for the vendors in Speranza. Some quests will reward you with a specific item Blueprint upon completion, so as long as you work through all the quests in Arc Raiders, you are guaranteed those Blueprints.
Here is the full list of all Blueprints you can get from quest rewards:
- Trigger Nade Blueprint: Rewarded after completing “Sparks Fly”.
- Lure Grenade Blueprint: Rewarded after completing “Greasing Her Palms”.
- Burletta Blueprint: Rewarded after completing “Industrial Espionage”.
- Hullcracker Blueprint (and Launcher Ammo Blueprint): Rewarded after completing “The Major’s Footlocker”.
Alas, that’s only 4 Blueprints out of a total of 75 to unlock, so for the vast majority you will need to find them yourself during a raid. If you’re intent on farming Blueprints, then it’s best to equip yourself with cheap gear in case you lose it, but don’t use a free loadout because then you won’t get a safe pocket to stash any new Blueprint you find. No pain in Arc Raiders is sharper than failing to extract with a new Blueprint you’ve been after for a dozen hours already.

One of the best ways to get Blueprints is by hitting three stars on all five Trials every week. |Image credit:Rock Paper Shotgun/Embark Studios
Blueprints obtained from Trials
One of the very best ways to get Blueprints is as rewards for completing Trials in Arc Raiders. Trials are unlocked from Level 15 onwards, and allow you to earn rewards by focusing on certain tasks over the course of several raids. For example, one Trial might task you with dealing damage to Hornets, while another might challenge you to loot Supply Drops.
Trials refresh on a weekly basis, with a new week bringing five new Trials. Each Trial can offer up to three rewards after passing certain score milestones, and it’s possible to receive very high level loot from these reward crates - including Blueprints. So if you want to unlock as many Blueprints as possible, you should make a point of completing as many Trials as possible each week.
Best Blueprint farming locations
The very best way to get Blueprints is to frequent specific areas of the maps which combine high-tier loot pools with the right types of containers to search. Here are my recommendations for where to find Blueprints on every map, so you can always keep the search going for new crafting recipes to unlock.

Image credit:Rock Paper Shotgun/Embark Studios
Dam Battlegrounds
The best places to farm Blueprints on Dam Battlegrounds are the Control Tower, Power Generation Complex, Ruby Residence, and Pale Apartments . The first two regions, despite only being marked on the map as mid-tier loot, contain a phenomenal number of containers to loot. The Control Tower can also contain a couple of high-tier Security Lockers - though of course, you’ll need to have unlocked the Security Breach skill at the end of the Survival tree.
There’s also a lot of reporting amongst the playerbase that the Residential areas in the top-left of the map - Pale Apartments and Ruby Residence - give you a comparatively strong chance of finding Blueprints. Considering their size, there’s a high density of containers to loot in both locations, and they also have the benefit of being fairly out of the way. So you’re more likely to have all the containers to yourself.
Buried City
The best Blueprint farming locations on Buried City are the Santa Maria Houses, Grandioso Apartments, Town Hall, and the various buildings of the New District . Grandioso Apartments has a lower number of containers than the rest, but a high chance of spawning weapon cases - which have good Blueprint drop rates. The others are high-tier loot areas, with plenty of lootable containers - including Security Lockers.
Spaceport
The best places to find Blueprints on Spaceport are the Arrival and Departure Buildings, as well as Control Tower A6 and the Launch Towers . All these areas are labelled as high-value loot regions, and many of them are also very handily connected to one another by the Spaceport wall, which you can use to quickly run from one area to the next. At the tops of most of these buildings you’ll find at least one Security Locker, so this is an excellent farming route for players looking to find Blueprints.
The downside to looting Blueprints on Spaceport is that all these areas are hotly contested, particularly in Duos and Squads. You’ll need to be very focused and fast in order to complete the full farming route.

Image credit:Rock Paper Shotgun/Embark Studios
Blue Gate
Blue Gate tends to have a good chance of dropping Blueprints, potentially because it generally has a high number of containers which can hold lots of items; so there’s a higher chance of a Blueprint spawning in each container. In my experience, the best Blueprint farming spots on Blue Gate are Pilgrim’s Peak, Raider’s Refuge, the Ancient Fort, and the Underground Complex beneath the Warehouse .
All of these areas contain a wealth of containers to loot. Raider’s Refuge has less to loot, but the majority of the containers in and around the Refuge are raider containers, which have a high chance of containing Blueprints - particularly during major events.
Stella Montis
On the whole, Stella Montis seems to have a very low drop rate for Blueprints (though a high chance of dropping other high-tier loot). If you do want to try farming Blueprints on this map, the best places to find Blueprints in Stella Montis are Medical Research, Assembly Workshop, and the Business Center . These areas have the highest density of containers to loot on the map.
In addition to this, the Western Tunnel has a few different Security Lockers to loot, so while there’s very little to loot elsewhere in this area of the map, it’s worth hitting those Security Lockers if you spawn there at the start of a match.
That wraps up this primer on how to get all the Blueprints in Arc Raiders as quickly as possible. With the Expedition system constantly resetting a large number of players’ Blueprints, it’s more important than ever to have the most up-to-date information on where to find all these Blueprints.
While you’re here, be sure to check out our Arc Raiders best guns tier list , as well as our primers on the best skills to unlock and all the different Field Depot locations on every map.

ARC Raiders
PS5 , Xbox Series X/S , PC
Rock Paper Shotgun is better when you sign in
Sign in and join us on our journey to discover strange and compelling PC games.
