Metaphor ReFantazio best Archetypes for each character
Here are the best Archetypes for each player out of the 46 on offer

Image credit:Rock Paper Shotgun/Sega

Looking for the best Archetypes in Metaphor ReFantazio? There are a whopping total of 46 Archetypes in Metaphor ReFantazio and 7 playable characters who can wield them. This means you may have a tough time narrowing down your options and choosing the best Archetypes for each character.
Archetypes are essentially forms that your party can transform into during battle in order to unlock unique magic skills and attacks. Archetypes also have access to ’ Synthesis skills ’ depending on your party loadout.
Below we’ll go through the best Archetypes for each playable character in the game as well as Synthesis options so you can build the perfect party for your adventures. If you want a broader list of all 46 Archetypes and how to unlock them all, as well as a rundown of Royal Archetypes, see our comprehensive Archetype list .
Metaphor ReFantazio best Archetypes for each character
The following are the best Archetypes in Metaphor ReFantazio for each playable character. Be sure to click or scroll to see more information about the loadout, best Synthesis skills and how to unlock them.
- The Protagonist: Prince Archetype
- Strohl: Royal Warrior Archetype
- Hulkenberg: Royal Knight Archetype
- Heismay: Royal Thief Archetype
- Junah: Royal Masked Dancer Archetype
- Eupha: Royal Summoner Archetype
- Basilio: Royal Berserker Archetype
Best Protagonist Archetype
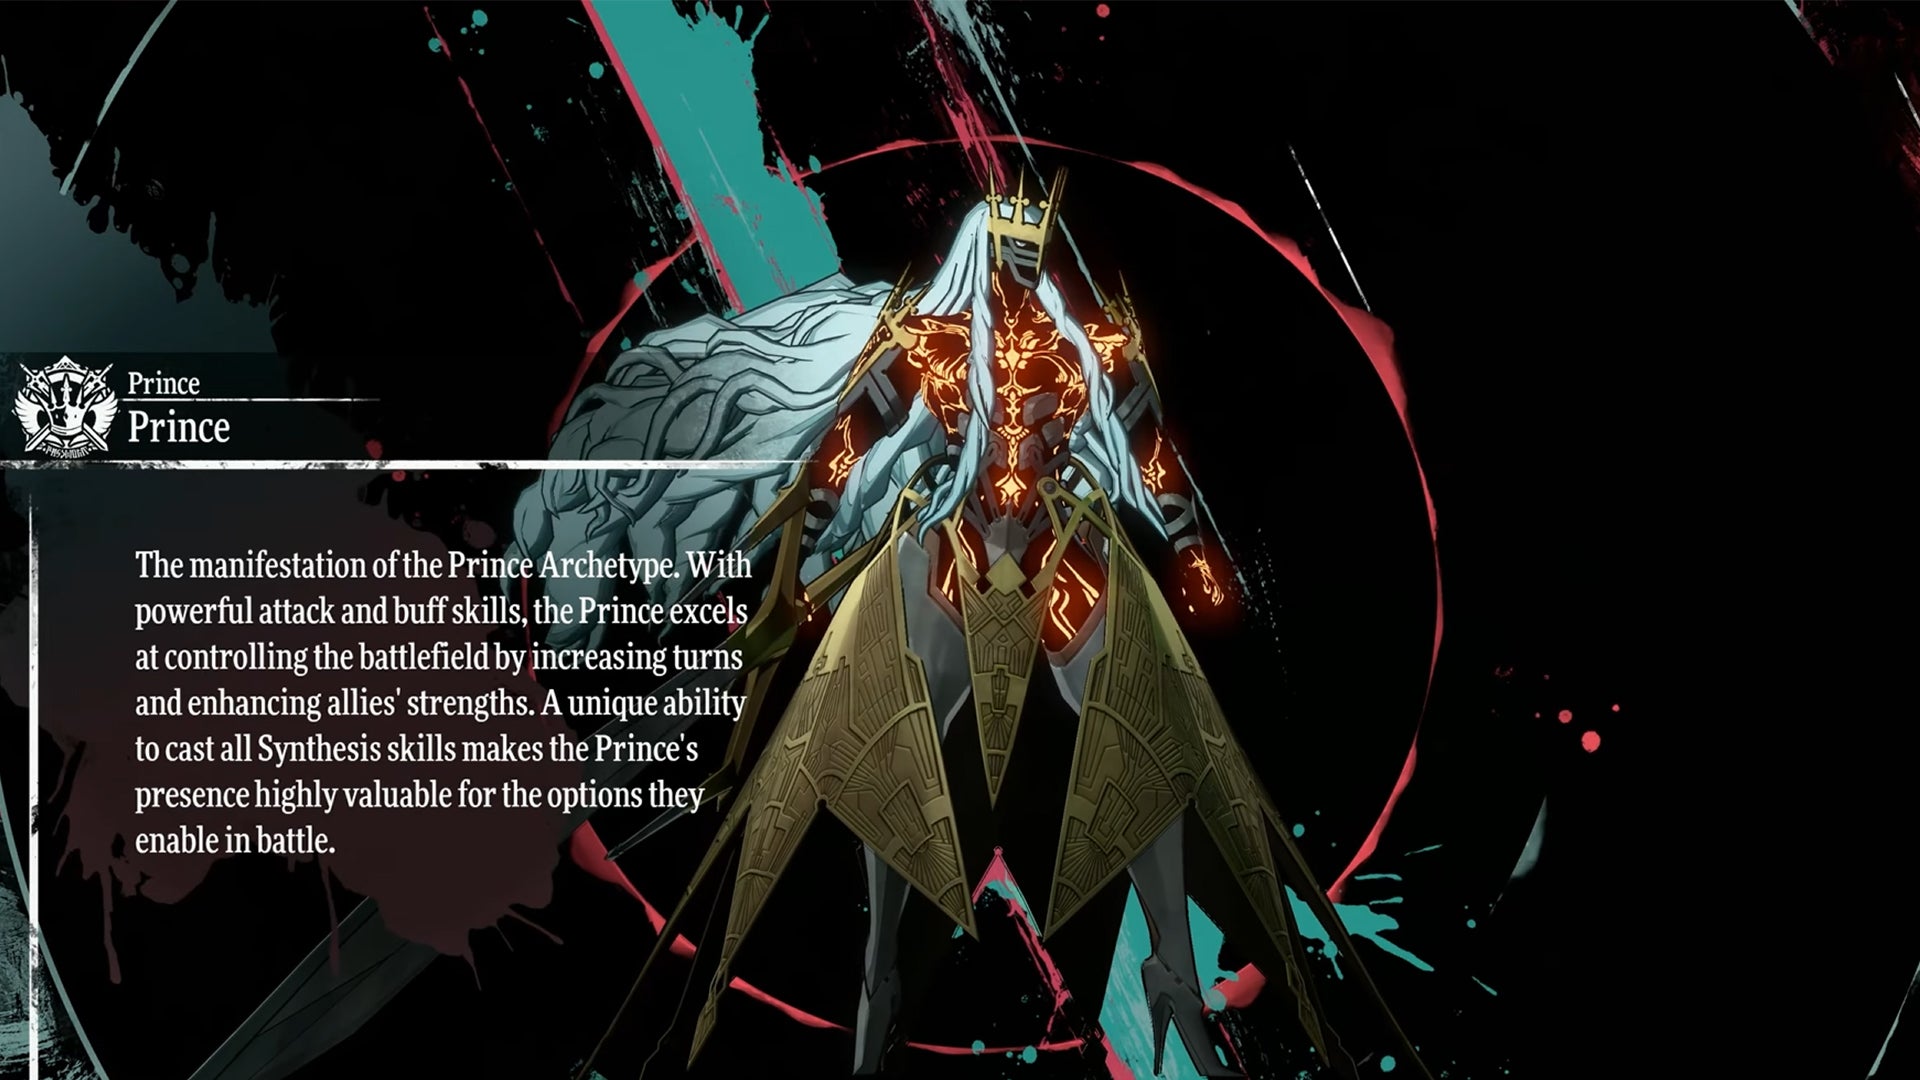
Image credit:Rock Paper Shotgun/Sega
The end-game Archetype that Metaphor ReFantazio players should aim for is the Prince Archetype . This is arguably the most powerful Archetype of the game and as such, you’ll have to advance to the later stages of the main questline to unlock it.
Technically the Prince is a Royal Archetype, one of 8 elite profiles that you’ll become increasingly familiar with as this list progresses. If you manage to collect a party of Royal Archetypes, the Prince will unlock a skill called Armageddon’s Final Sire which has the power to deal 9,999 damage to all enemies. This is the supreme skill in the game and most player’s end goal.
In the meantime, the starting Seeker Archetype lineage is a fantastic option to stick with for The Protagonist. The Seeker offers a range of support, magic (Wind) and Slash damage. It also has access to a large range of Synthesis skills, meaning you’ll be more likely to trigger these depending on your party setup.
The most powerful Archetype within the Seeker lineage is the Soul Hacker Archetype , which can be unlocked once you have achieved Bond Rank 7 with More.
How to unlock the Prince Archetype
As mentioned above, you’ll only gain access to the Prince Archetype within the latter stages of Metaphor ReFantazio. Specifically, you’ll need to unlock the other Royal Archetypes through their associated lineages. Then, return to Akademia and obtain the Chronicle of the End from More.
Best Strohl Archetype
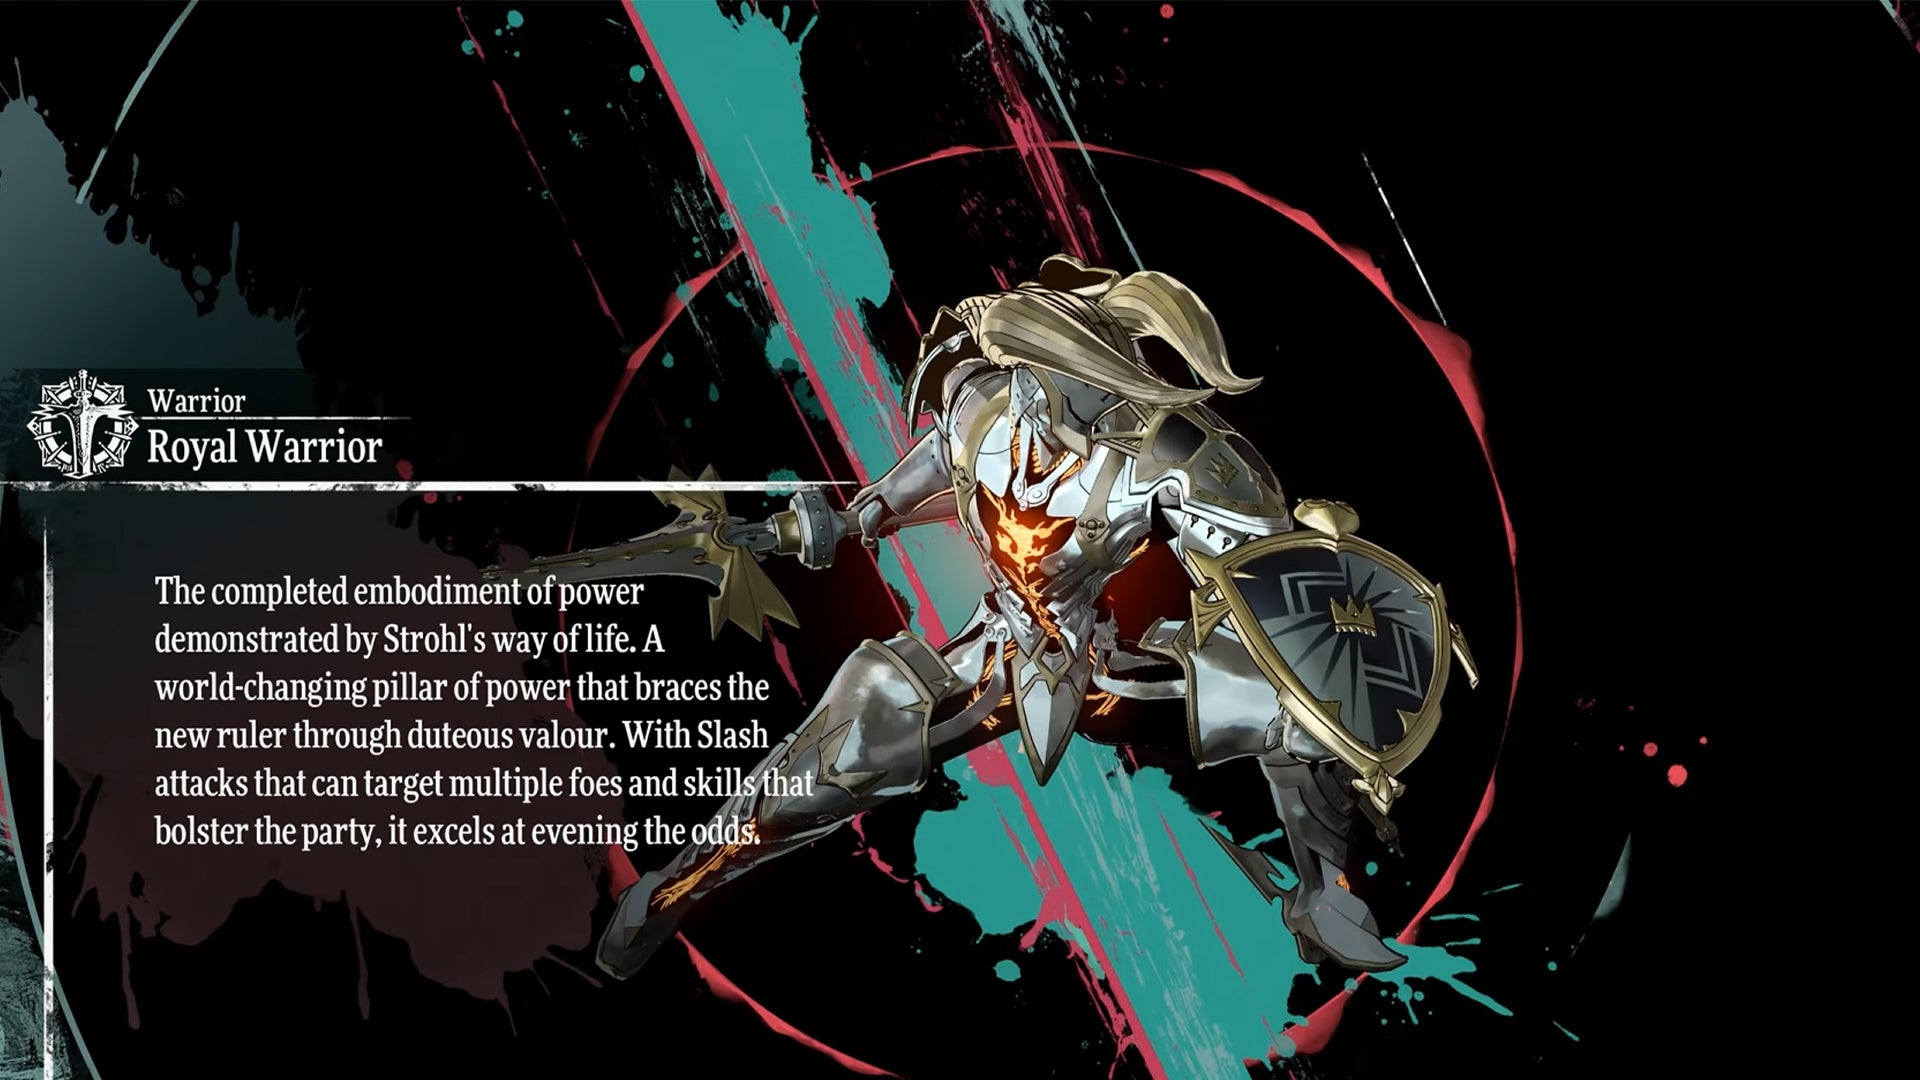
Image credit:Rock Paper Shotgun/Sega
The best Archetype for Strohl is the Royal Warrior . Luckily, you’ll unlock the Warrior lineage from Strohl within the opening hours of Metaphor ReFantazio. This Archetype is known for its front-row attack damage and strong Strike attacks.
The Warrior will excel further when paired with either a Warrior, Thief or Masked Dancer lineage as this will enable them to use the Peerless Stonecleaver Synthesis skill, capable of dealing severe Slash damage to one enemy. Additionally, if that attack kills the enemy an extra turn will be given to your party.
How to unlock the Royal Warrior Archetype
To unlock this Archetype from the Warrior lineage you’ll need to complete the following:
- Warrior (Rank 20)
- General (Rank 20)
- Samurai (Rank 20)
- Commander (Rank 20)
- Swordmaster (Rank 20)
- Warlord (Rank 20)
To unlock the above Archetypes and pave the way to the Royal Warrior, you’ll also need to form a Rank 8 bond with both Strohl and Bardon (he can be recruited as a follower once you complete the dungeon in Martira).
Best Hulkenberg Archetype
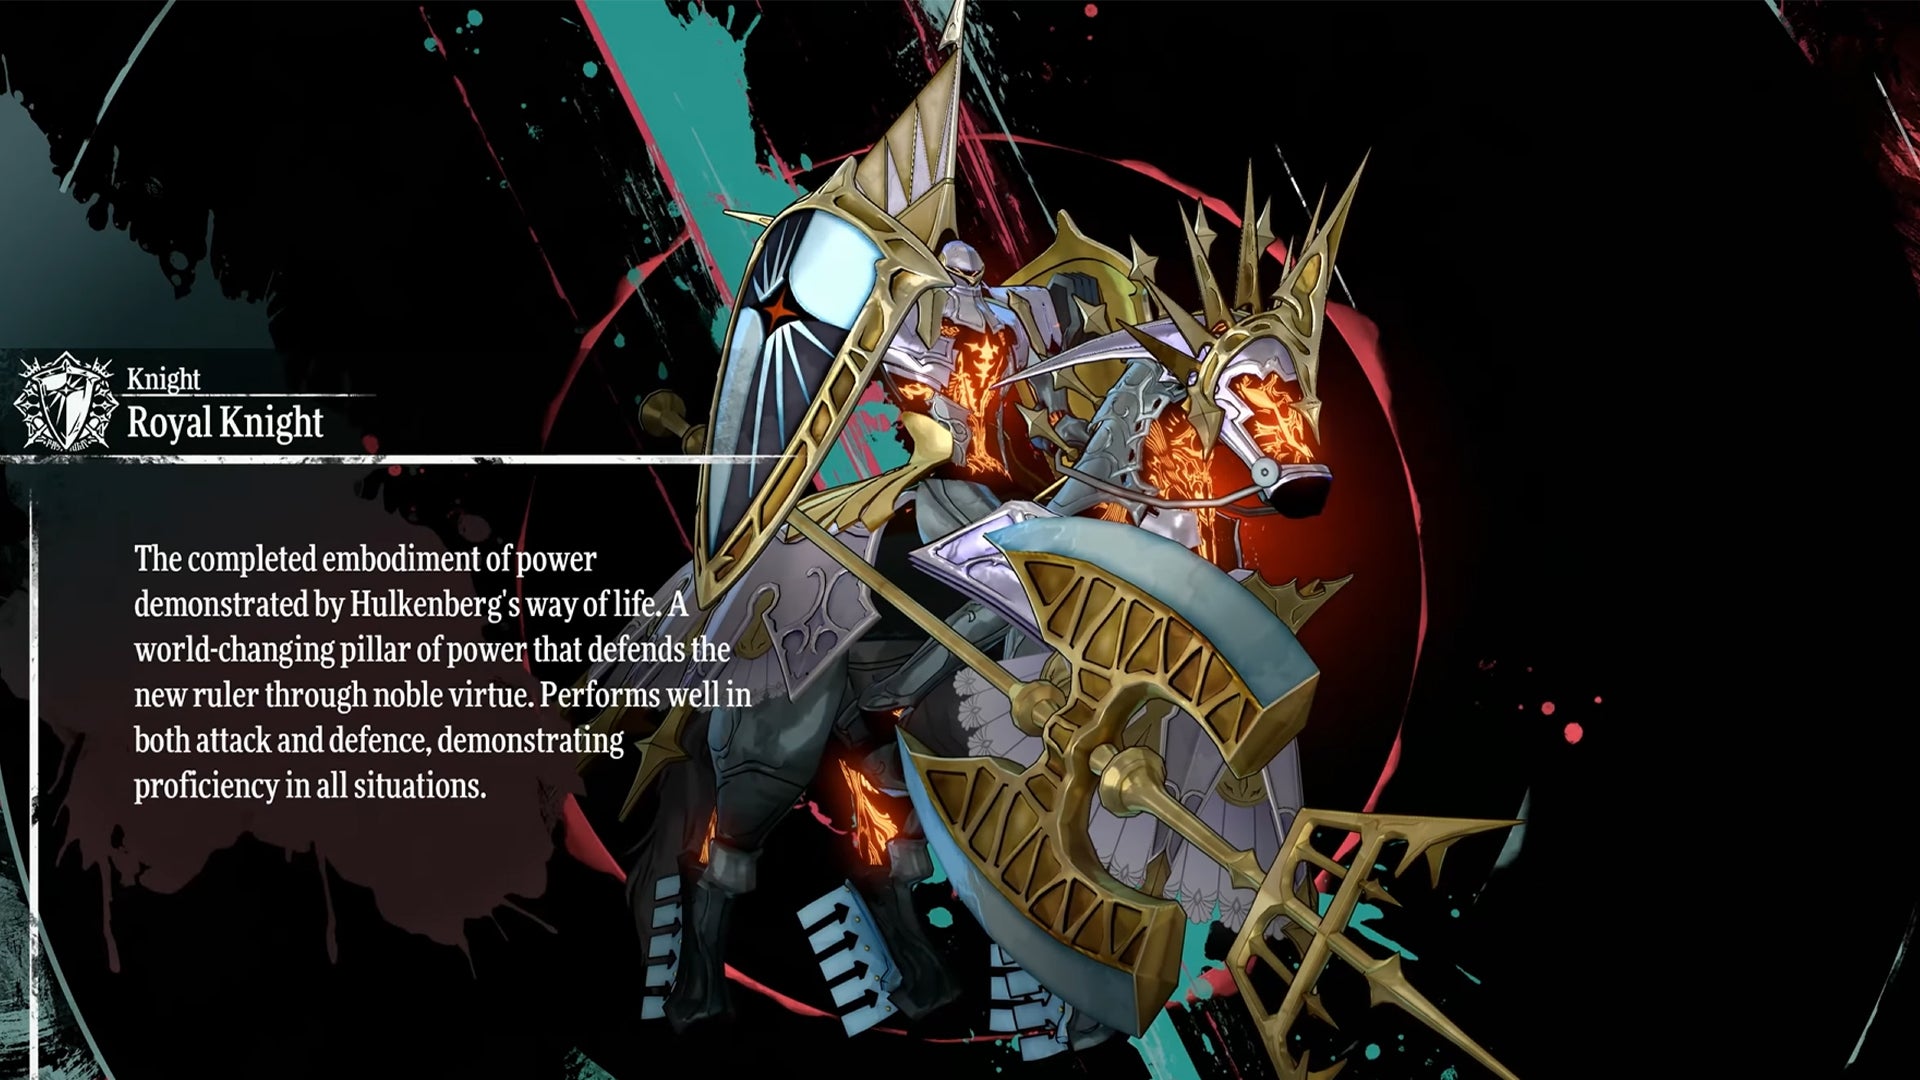
Image credit:Rock Paper Shotgun/Sega
If you’re going for a full set, then the Royal Knight Archetype is best suited for Hulkenberg. The Knight lineage is something of a tank, meaning it has a high health pool and can direct attacks away from weaker party members onto itself.
If you have time to play around, however, I would recommend either the Mage or Commander Archetypes for Hulkenberg. Whilst the Knight’s defensive gameplay can be useful, it’s just less powerful than other Archetypes on the roster and relies heavily on Synthesis skills.
The Mage Archetype has access to a range of elemental magic that can specifically target enemy weak points. This damage can be expanded to groups of enemies with the right Synthesis lineup. The Commander can offer highly effective Fire damage to targets and has passive abilities that can buff the attack output and critical hit chance of party members. As such, it may be worth freeing Hulkenberg up for some of these punchier Archetypes (depending on your playstyle, of course).
How to unlock the Royal Knight Archetype
To unlock the Royal Knight Archetype, you must gain the following:
- Paladin (Rank 20)
- Magic Knight (Rank 20)
- Knight (Rank 20)
- Mage (Rank 20)
- Dark Knight (Rank 20)
- Wizard (Rank 10)
Additionally, you’ll need at least Bond Rank 8 with Hulkenberg and Rank 3 with Gallica. Alternatively, the Mage lineage can be unlocked within the opening sections of Metaphor ReFantazio via Gallica and the Commander lineage can be unlocked after forming a Bond Rank 1 with Bardon (must complete the dungeon in Martira).
Best Heismay Archetype
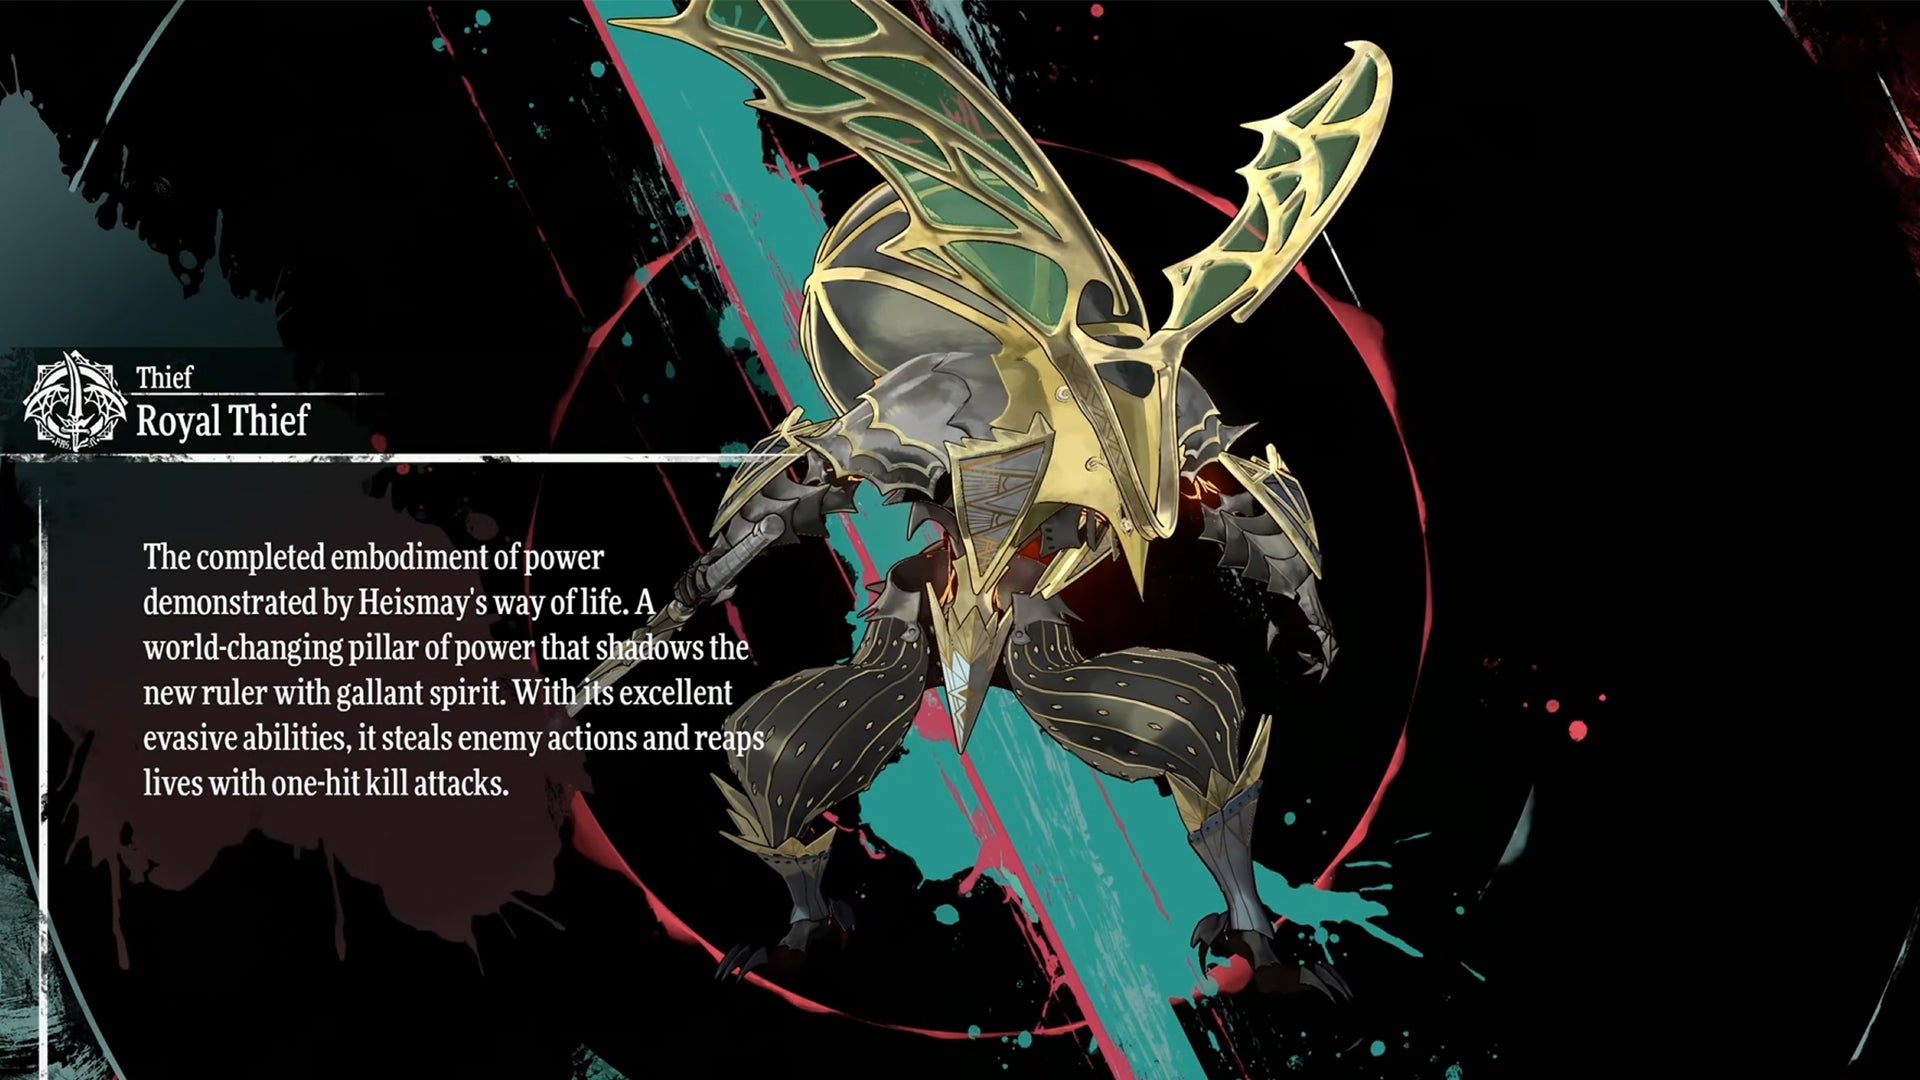
Image credit:Rock Paper Shotgun/Sega
As will be obvious at this point, the optimal Archetype for Heismay is the Royal Thief Archetype. The Thief lineage itself isn’t the strongest, although, it does offer a mix of Dark attack skills, support and interesting ’thief mechanics’ like robbing enemy loot, MP and HP. The Royal Thief, however, has access to some upgraded powers.
One such power is a Synthesis skill called Godkiller which has a chance to one-hit enemies if you also have either a Gunner, Masked Dancer, or Berserker lineage in your party. I recommend shopping around for Heismay as you play and work toward the Royal Thief, however. In particular, choose the Brawler if you need some additional melee support, or the Healer if you need some help with HP recovery.
How to unlock the Royal Thief Archetype
To unlock the Royal Thief Archetype, you’ll need to complete the following levels:
- Ninja (Rank 20)
- Assassin (Rank 20)
- Sniper (Rank 20)
- Thief (Rank 20)
- Gunner (Rank 20)
- Seeker (Rank 10)
- Dragoon (Rank 15)
- Magic Knight (Rank 10)
- Knight (Rank 20)
- Mage (Rank 10)
Due to these prerequisites, you’ll also need a Bond Rank of 8 with Heismay and Neuras, a Bond Rank of at least 3 with Hulkenberg and level 1 with More and Gallica.
Best Junah Archetype
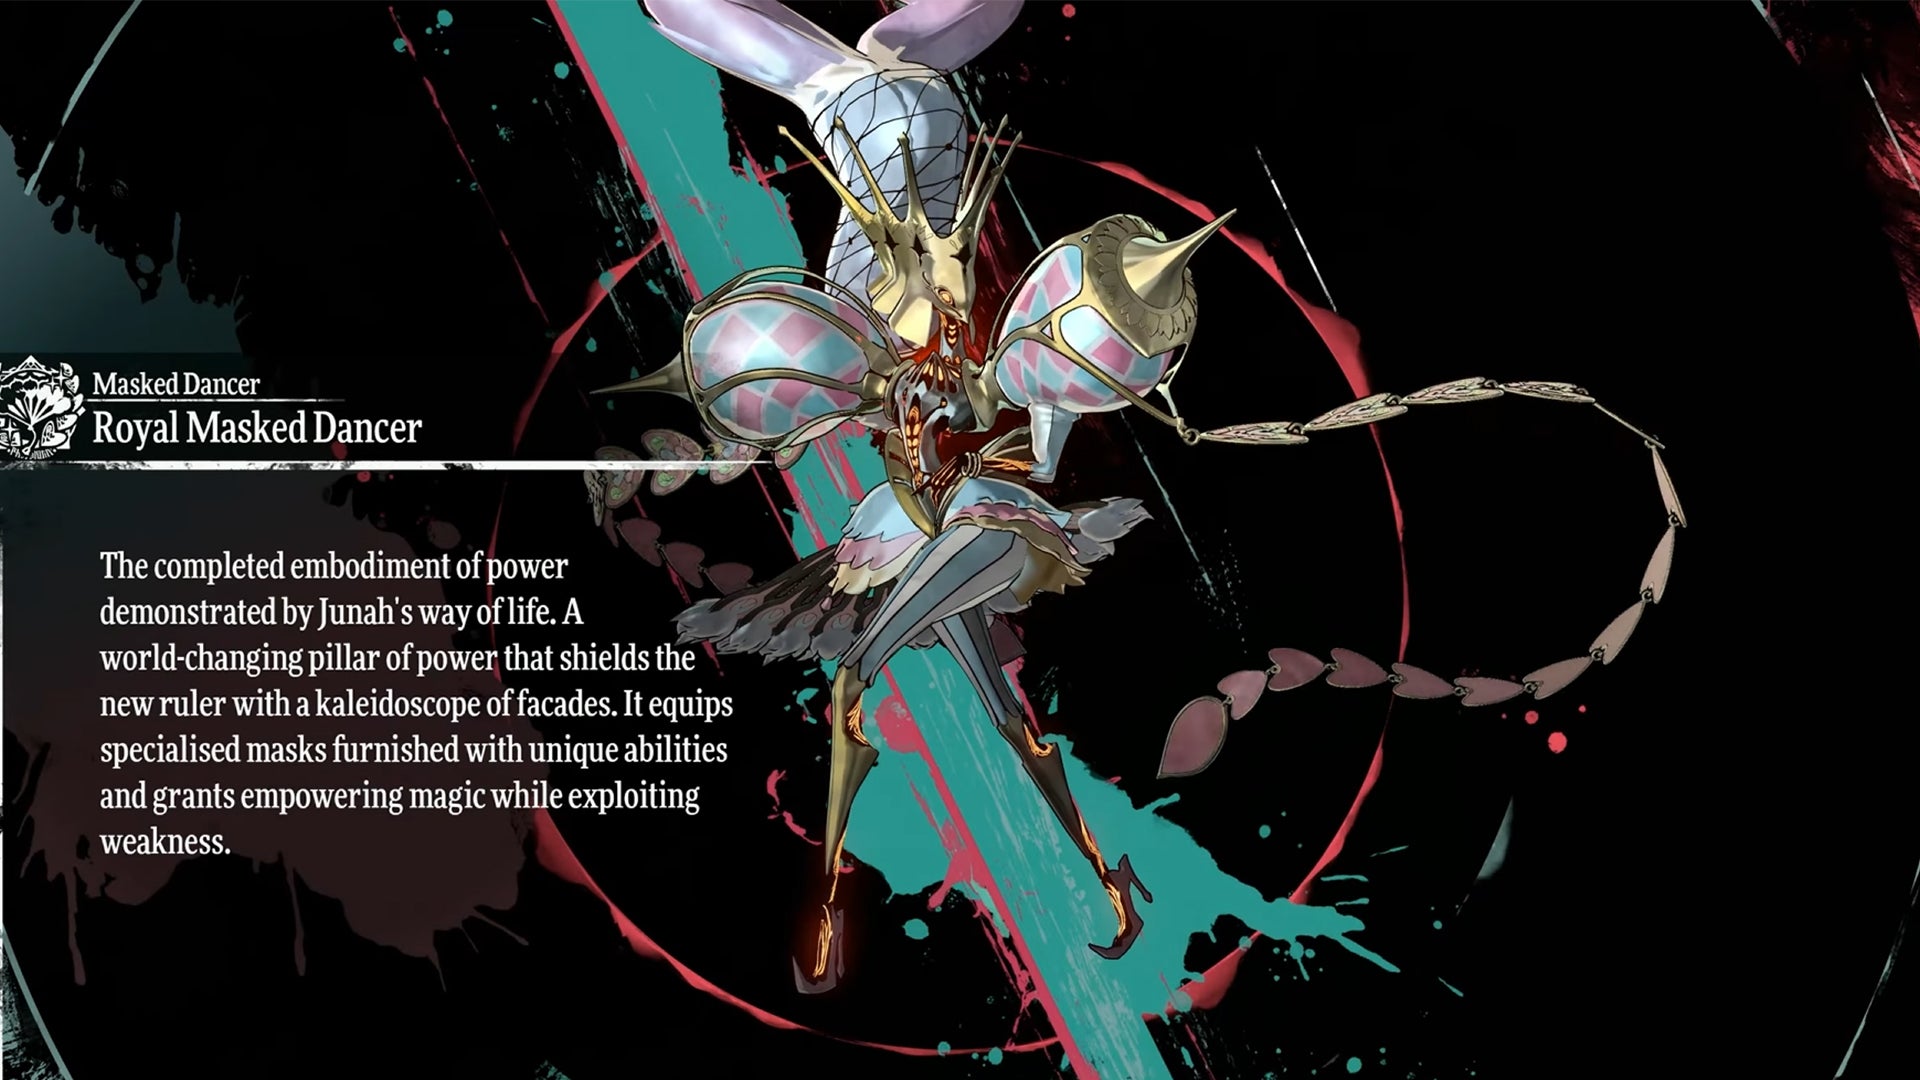
Image credit:Rock Paper Shotgun/Sega
With Junah, you can unlock the Masked Dancer Archetype and the ultimate form from this lineage, the Royal Masked Dancer . The Masked Dancer starts with a powerful Synthesis skill called the Danse Macabre which has a chance to one-hit enemies. To have this option, you’ll need a Thief, Faker, or Merchant lineage in your party, however.
If you get to the level of a Royal Masked Dancer, you’ll have the opportunity to emit a mixture of Fire magic, magic buffs and even the chance to retain a turn if an enemy is killed with an element (when level 20 is reached). This Royal Archetype may also perform the Danse Macabre with the right party set-up.
How to unlock the Royal Masked Dancer Archetype
To unlock the Royal Masked Dancer Archetype, you’ll need the following levels:
- Persona Master (Rank 20)
- Masked Dancer (Rank 20)
- Faker (Rank 20)
- Mage (Rank 15)
- Thief (Rank 10)
- Trickster (Rank 20)
To get these Archetypes, you’ll also need to form a Bond Rank of 8 with Junah and Alonzo, as well as a Bond Rank of 1 with Heismay and Gallica.
Best Eupha Archetype
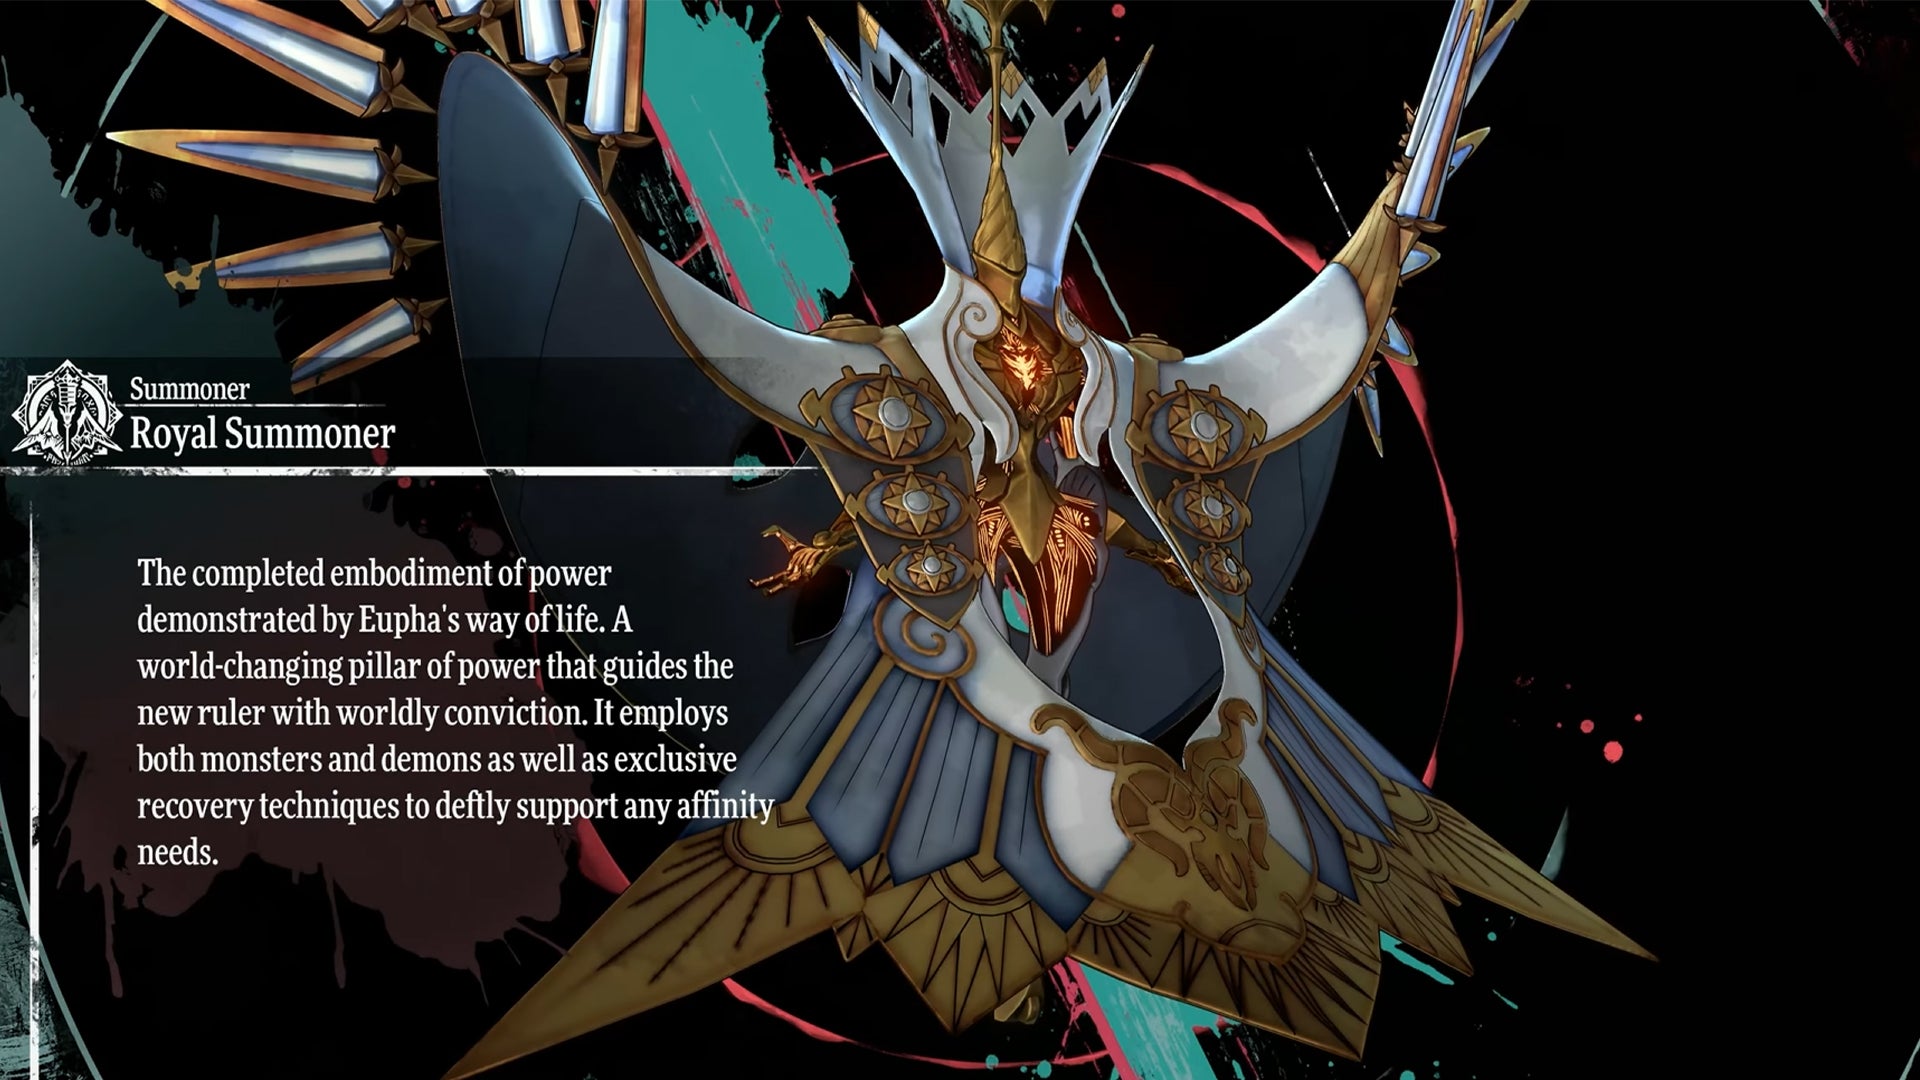
Image credit:Rock Paper Shotgun/Sega
To get all Royal Archetypes, it’s worth aiming for the Royal Summoner Archetype with Eupha. The Summoner lineage may seem weaker than some but it all depends on your party setup as the Synthesis skills allow the Summoner to summon different monsters into battle to fight alongside your party.
Of the summons available, the most powerful are the Summon Undead King which emits high Dark damage (requires Thief, Faker, or Merchant lineages) and the Summon Dragon God which has access to high damage Fire (requires Mage, Masked Dancer, or Summoner Lineages).
By the time you can unlock the Royal Summoner, you’ll have access to Electric, Light, Ice and Fire attacks along with a more powerful version of the Summon Dragon God Synthesis Skill. You’ll also have several more summon options that can deal with different magic attacks depending on the Synthesis party setup.
In other words, Synthesis skills and party set-up are vital to unlocking the true potential of the Summoner Archetype.
How to unlock the Royal Summoner Archetype
The Royal Summoner Archetype requires progress through the following Archetype lineages:
- Devil Summoner (Rank 20)
- Summoner (Rank 20)
- Seeker (Rank 20)
- Faker (Rank 10)
- Magic Seeker (Rank 20)
- Soul Hacker (Rank 20)
To unlock the Royal Summoner, you’ll also need to form a Bond Rank 8 with Eupha, 7 with More and 1 with Alonzo.
Best Basilio Archetype

Image credit:Rock Paper Shotgun/Sega
When forming a bond with Basilio, you’ll unlock the Berserker Archetype lineage. As such, to gather the full collection, we recommend aiming for the Royal Berserker Archetype . Berserkers specialise in aggressive, front-line combat and as such, have high resistance.
If you’re short of a tank in your party, the Berserker is a fantastic choice for offering Strike damage and attack buffs. These perks are increased with the Royal Berserker which can offer a 30% raise in HP and Strike Attack damage as well as a range of Synthesis skills with the potential to deliver even more damage.
The Berserker is a melee class through and through, but it can be argued that it is not as effective as the Warrior. I’d recommend playing around with other melee classes for Basilio, like the Martial Artist , a Brawler lineage and Archetype you’ll need to progress through anyway to unlock the Royal Berserker.
How to unlock the Royal Berserker Archetype
To unlock the Royal Berserker, you’ll need:
- Destroyer (Rank 20)
- Berserker (Rank 20)
- Warrior (Rank 10)
- Brawler (Rank 20)
- Martial Artist (Rank 20)
- Pugilist (Rank 20)
You’ll also need at least a Bond Rank of 8 with Basilio and Catherina and a Bond Rank of 1 with Strohl to unlock this Archetype in Metaphor ReFantazio.
That rounds up our guide on the best Archetypes in Metaphor ReFantazio. For more tips and tricks, see our guide to all cooking answers needed when helping Fabienne out in the kitchen, or see our guide to all Regrass Roasted Bidou ingredients here.


Metaphor: ReFantazio
Video Game
Rock Paper Shotgun is better when you sign in
Sign in and join us on our journey to discover strange and compelling PC games.

All 75 Arc Raiders Blueprints and where to get them
These areas have the highest chance of giving you Blueprints

Image credit:Rock Paper Shotgun/Embark Studios

Looking for more Arc Raiders Blueprints? It’s a special day when you find a Blueprint, as they’re among the most valuable items in Arc Raiders. If you find a Blueprint that you haven’t already found, then you must make sure you hold onto it at all costs, because Blueprints are the key to one of the most important and powerful systems of meta-progression in the game.
This guide aims to be the very best guide on Blueprints you can find, starting with a primer on what exactly they are and how they work in Arc Raiders, before delving into exactly where to get Blueprints and the very best farming spots for you to take in your search.
We’ll also go over how to get Blueprints from other unlikely activities, such as destroying Surveyors and completing specific quests. And you’ll also find the full list of all 75 Blueprints in Arc Raiders on this page (including the newest Blueprints added with the Cold Snap update , such as the Deadline Blueprint and Firework Box Blueprint), giving you all the information you need to expand your own crafting repertoire.
In this guide:
- What are Blueprints in Arc Raiders?
- Full Blueprint list: All crafting recipes
- Where to find Blueprints in Arc Raiders Blueprints obtained from quests Blueprints obtained from Trials Best Blueprint farming locations

What are Blueprints in Arc Raiders?
Blueprints in Arc Raiders are special items which, if you manage to extract with them, you can expend to permanently unlock a new crafting recipe in your Workshop. If you manage to extract from a raid with an Anvil Blueprint, for example, you can unlock the ability to craft your very own Anvil Pistol, as many times as you like (as long as you have the crafting materials).
To use a Blueprint, simply open your Inventory while in the lobby, then right-click on the Blueprint and click “Learn And Consume” . This will permanently unlock the recipe for that item in your Workshop. As of the Stella Montis update, there are allegedly 75 different Blueprints to unlock - although only 68 are confirmed to be in the game so far. You can see all the Blueprints you’ve found and unlocked by going to the Workshop menu, and hitting “R” to bring up the Blueprint screen.
It’s possible to find duplicates of past Blueprints you’ve already unlocked. If you find these, then you can either sell them, or - if you like to play with friends - you can take it into a match and gift it to your friend so they can unlock that recipe for themselves. Another option is to keep hold of them until the time comes to donate them to the Expedition.
Full Blueprint list: All crafting recipes
Below is the full list of all the Blueprints that are currently available to find in Arc Raiders, and the crafting recipe required for each item:
| Blueprint | Type | Recipe | Crafted At |
|---|---|---|---|
| Bettina | Weapon | 3x Advanced Mechanical Components 3x Heavy Gun Parts 3x Canister | Gunsmith 3 |
| Blue Light Stick | Quick Use | 3x Chemicals | Utility Station 1 |
| Aphelion | Weapon | 3x Magnetic Accelerator 3x Complex Gun Parts 1x Matriarch Reactor | Gunsmith 3 |
| Combat Mk. 3 (Flanking) | Augment | 2x Advanced Electrical Components 3x Processor | Gear Bench 3 |
| Combat Mk. 3 (Aggressive) | Augment | 2x Advanced Electrical Components 3x Processor | Gear Bench 3 |
| Complex Gun Parts | Material | 2x Light Gun Parts 2x Medium Gun Parts 2x Heavy Gun Parts | Refiner 3 |
| Fireworks Box | Quick Use | 1x Explosive Compound 3x Pop Trigger | Explosives Station 2 |
| Gas Mine | Mine | 4x Chemicals 2x Rubber Parts | Explosives Station 1 |
| Green Light Stick | Quick Use | 3x Chemicals | Utility Station 1 |
| Pulse Mine | Mine | 1x Crude Explosives 1x Wires | Explosives Station 1 |
| Seeker Grenade | Grenade | 1x Crude Explosives 2x ARC Alloy | Explosives Station 1 |
| Looting Mk. 3 (Survivor) | Augment | 2x Advanced Electrical Components 3x Processor | Gear Bench 3 |
| Angled Grip II | Mod | 2x Mechanical Components 3x Duct Tape | Gunsmith 2 |
| Angled Grip III | Mod | 2x Mod Components 5x Duct Tape | Gunsmith 3 |
| Hullcracker | Weapon | 1x Magnetic Accelerator 3x Heavy Gun Parts 1x Exodus Modules | Gunsmith 3 |
| Launcher Ammo | Ammo | 5x Metal Parts 1x Crude Explosives | Workbench 1 |
| Anvil | Weapon | 5x Mechanical Components 5x Simple Gun Parts | Gunsmith 2 |
| Anvil Splitter | Mod | 2x Mod Components 3x Processor | Gunsmith 3 |
| ??? | ??? | ??? | ??? |
| Barricade Kit | Quick Use | 1x Mechanical Components | Utility Station 2 |
| Blaze Grenade | Grenade | 1x Explosive Compound 2x Oil | Explosives Station 3 |
| Bobcat | Weapon | 3x Advanced Mechanical Components 3x Light Gun Parts | Gunsmith 3 |
| Osprey | Weapon | 2x Advanced Mechanical Components 3x Medium Gun Parts 7x Wires | Gunsmith 3 |
| Burletta | Weapon | 3x Mechanical Components 3x Simple Gun Parts | Gunsmith 1 |
| Compensator II | Mod | 2x Mechanical Components 4x Wires | Gunsmith 2 |
| Compensator III | Mod | 2x Mod Components 8x Wires | Gunsmith 3 |
| Defibrillator | Quick Use | 9x Plastic Parts 1x Moss | Medical Lab 2 |
| ??? | ??? | ??? | ??? |
| Equalizer | Weapon | 3x Magnetic Accelerator 3x Complex Gun Parts 1x Queen Reactor | Gunsmith 3 |
| Extended Barrel | Mod | 2x Mod Components 8x Wires | Gunsmith 3 |
| Extended Light Mag II | Mod | 2x Mechanical Components 3x Steel Spring | Gunsmith 2 |
| Extended Light Mag III | Mod | 2x Mod Components 5x Steel Spring | Gunsmith 3 |
| Extended Medium Mag II | Mod | 2x Mechanical Components 3x Steel Spring | Gunsmith 2 |
| Extended Medium Mag III | Mod | 2x Mod Components 5x Steel Spring | Gunsmith 3 |
| Extended Shotgun Mag II | Mod | 2x Mechanical Components 3x Steel Spring | Gunsmith 2 |
| Extended Shotgun Mag III | Mod | 2x Mod Components 5x Steel Spring | Gunsmith 3 |
| Remote Raider Flare | Quick Use | 2x Chemicals 4x Rubber Parts | Utility Station 1 |
| Heavy Gun Parts | Material | 4x Simple Gun Parts | Refiner 2 |
| Venator | Weapon | 2x Advanced Mechanical Components 3x Medium Gun Parts 5x Magnet | Gunsmith 3 |
| Il Toro | Weapon | 5x Mechanical Components 6x Simple Gun Parts | Gunsmith 1 |
| Jolt Mine | Mine | 1x Electrical Components 1x Battery | Explosives Station 2 |
| Explosive Mine | Mine | 1x Explosive Compound 1x Sensors | Explosives Station 3 |
| Jupiter | Weapon | 3x Magnetic Accelerator 3x Complex Gun Parts 1x Queen Reactor | Gunsmith 3 |
| Light Gun Parts | Material | 4x Simple Gun Parts | Refiner 2 |
| Lightweight Stock | Mod | 2x Mod Components 5x Duct Tape | Gunsmith 3 |
| Lure Grenade | Grenade | 1x Speaker Component 1x Electrical Components | Utility Station 2 |
| Medium Gun Parts | Material | 4x Simple Gun Parts | Refiner 2 |
| Torrente | Weapon | 2x Advanced Mechanical Components 3x Medium Gun Parts 6x Steel Spring | Gunsmith 3 |
| Muzzle Brake II | Mod | 2x Mechanical Components 4x Wires | Gunsmith 2 |
| Muzzle Brake III | Mod | 2x Mod Components 8x Wires | Gunsmith 3 |
| Padded Stock | Mod | 2x Mod Components 5x Duct Tape | Gunsmith 3 |
| Shotgun Choke II | Mod | 2x Mechanical Components 4x Wires | Gunsmith 2 |
| Shotgun Choke III | Mod | 2x Mod Components 8x Wires | Gunsmith 3 |
| Shotgun Silencer | Mod | 2x Mod Components 8x Wires | Gunsmith 3 |
| Showstopper | Grenade | 1x Advanced Electrical Components 1x Voltage Converter | Explosives Station 3 |
| Silencer I | Mod | 2x Mechanical Components 4x Wires | Gunsmith 2 |
| Silencer II | Mod | 2x Mod Components 8x Wires | Gunsmith 3 |
| Snap Hook | Quick Use | 2x Power Rod 3x Rope 1x Exodus Modules | Utility Station 3 |
| Stable Stock II | Mod | 2x Mechanical Components 3x Duct Tape | Gunsmith 2 |
| Stable Stock III | Mod | 2x Mod Components 5x Duct Tape | Gunsmith 3 |
| Tagging Grenade | Grenade | 1x Electrical Components 1x Sensors | Utility Station 3 |
| Tempest | Weapon | 3x Advanced Mechanical Components 3x Medium Gun Parts 3x Canister | Gunsmith 3 |
| Trigger Nade | Grenade | 2x Crude Explosives 1x Processor | Explosives Station 2 |
| Vertical Grip II | Mod | 2x Mechanical Components 3x Duct Tape | Gunsmith 2 |
| Vertical Grip III | Mod | 2x Mod Components 5x Duct Tape | Gunsmith 3 |
| Vita Shot | Quick Use | 2x Antiseptic 1x Syringe | Medical Lab 3 |
| Vita Spray | Quick Use | 3x Antiseptic 1x Canister | Medical Lab 3 |
| Vulcano | Weapon | 1x Magnetic Accelerator 3x Heavy Gun Parts 1x Exodus Modules | Gunsmith 3 |
| Wolfpack | Grenade | 2x Explosive Compound 2x Sensors | Explosives Station 3 |
| Red Light Stick | Quick Use | 3x Chemicals | Utility Station 1 |
| Smoke Grenade | Grenade | 14x Chemicals 1x Canister | Utility Station 2 |
| Deadline | Mine | 3x Explosive Compound 2x ARC Circuitry | Explosives Station 3 |
| Trailblazer | Grenade | 1x Explosive Compound 1x Synthesized Fuel | Explosives Station 3 |
| Tactical Mk. 3 (Defensive) | Augment | 2x Advanced Electrical Components 3x Processor | Gear Bench 3 |
| Tactical Mk. 3 (Healing) | Augment | 2x Advanced Electrical Components 3x Processor | Gear Bench 3 |
| Yellow Light Stick | Quick Use | 3x Chemicals | Utility Station 1 |
Note: The missing Blueprints in this list likely have not actually been added to the game at the time of writing, because none of the playerbase has managed to find any of them. As they are added to the game, I will update this page with the most relevant information so you know exactly how to get all 75 Arc Raiders Blueprints.
Where to find Blueprints in Arc Raiders
Below is a list of all containers, modifiers, and events which maximise your chances of finding Blueprints:
- Certain quests reward you with specific Blueprints .
- Completing Trials has a high chance of offering Blueprints as rewards.
- Surveyors have a decent chance of dropping Blueprints on death.
- High loot value areas tend to have a greater chance of spawning Blueprints.
- Night Raids and Storms may increase rare Blueprint spawn chances in containers.
- Containers with higher numbers of items may have a higher tendency to spawn Blueprints. As a result, Blue Gate (which has many “large” containers containing multiple items) may give you a higher chance of spawning Blueprints.
- Raider containers (Raider Caches, Weapon Boxes, Medical Bags, Grenade Tubes) have increased Blueprint drop rates. As a result, the Uncovered Caches event gives you a high chance of finding Blueprints.
- Security Lockers have a higher than average chance of containing Blueprints.
- Certain Blueprints only seem to spawn under specific circumstances: Tempest Blueprint only spawns during Night Raid events. Vulcano Blueprint only spawns during Hidden Bunker events. Jupiter and Equaliser Blueprints only spawn during Harvester events.

Raider Caches, Weapon Boxes, and other raider-oriented container types have a good chance of offering Blueprints. |Image credit:Rock Paper Shotgun/Embark Studios
Blueprints have a very low chance of spawning in any container in Arc Raiders, around 1-2% on average. However, there is a higher chance of finding Blueprints in particular container types. Specifically, you can find more Blueprints in Raider containers and security lockers.
Beyond this, if you’re looking for Blueprints you should focus on regions of the map which are marked as having particularly high-value loot. Areas such as the Control Tower in Dam Battlegrounds, the Arrival and Departure Buildings in Spaceport, and Pilgrim’s Peak in Blue Gate all have a better-than-average chance of spawning Blueprints somewhere amongst all their containers. Night Raids and Electromagnetic Storm events also increase the drop chances of certain Blueprints .
In addition to these containers, you can often loot Blueprints from destroyed Surveyors - the largest of the rolling ball ARC. Surveyors are more commonly found on the later maps - Spaceport and Blue Gate - and if one spawns in your match, you’ll likely see it by the blue laser beam that it casts into the sky while “surveying”.
Surveyors are quite well-armoured and will very speedily run away from you once it notices you, but if you can take one down then make sure you loot all its parts for a chance of obtaining certain unusual Blueprints.
Blueprints obtained from quests
One way in which you can get Blueprints is by completing certain quests for the vendors in Speranza. Some quests will reward you with a specific item Blueprint upon completion, so as long as you work through all the quests in Arc Raiders, you are guaranteed those Blueprints.
Here is the full list of all Blueprints you can get from quest rewards:
- Trigger Nade Blueprint: Rewarded after completing “Sparks Fly”.
- Lure Grenade Blueprint: Rewarded after completing “Greasing Her Palms”.
- Burletta Blueprint: Rewarded after completing “Industrial Espionage”.
- Hullcracker Blueprint (and Launcher Ammo Blueprint): Rewarded after completing “The Major’s Footlocker”.
Alas, that’s only 4 Blueprints out of a total of 75 to unlock, so for the vast majority you will need to find them yourself during a raid. If you’re intent on farming Blueprints, then it’s best to equip yourself with cheap gear in case you lose it, but don’t use a free loadout because then you won’t get a safe pocket to stash any new Blueprint you find. No pain in Arc Raiders is sharper than failing to extract with a new Blueprint you’ve been after for a dozen hours already.

One of the best ways to get Blueprints is by hitting three stars on all five Trials every week. |Image credit:Rock Paper Shotgun/Embark Studios
Blueprints obtained from Trials
One of the very best ways to get Blueprints is as rewards for completing Trials in Arc Raiders. Trials are unlocked from Level 15 onwards, and allow you to earn rewards by focusing on certain tasks over the course of several raids. For example, one Trial might task you with dealing damage to Hornets, while another might challenge you to loot Supply Drops.
Trials refresh on a weekly basis, with a new week bringing five new Trials. Each Trial can offer up to three rewards after passing certain score milestones, and it’s possible to receive very high level loot from these reward crates - including Blueprints. So if you want to unlock as many Blueprints as possible, you should make a point of completing as many Trials as possible each week.
Best Blueprint farming locations
The very best way to get Blueprints is to frequent specific areas of the maps which combine high-tier loot pools with the right types of containers to search. Here are my recommendations for where to find Blueprints on every map, so you can always keep the search going for new crafting recipes to unlock.

Image credit:Rock Paper Shotgun/Embark Studios
Dam Battlegrounds
The best places to farm Blueprints on Dam Battlegrounds are the Control Tower, Power Generation Complex, Ruby Residence, and Pale Apartments . The first two regions, despite only being marked on the map as mid-tier loot, contain a phenomenal number of containers to loot. The Control Tower can also contain a couple of high-tier Security Lockers - though of course, you’ll need to have unlocked the Security Breach skill at the end of the Survival tree.
There’s also a lot of reporting amongst the playerbase that the Residential areas in the top-left of the map - Pale Apartments and Ruby Residence - give you a comparatively strong chance of finding Blueprints. Considering their size, there’s a high density of containers to loot in both locations, and they also have the benefit of being fairly out of the way. So you’re more likely to have all the containers to yourself.
Buried City
The best Blueprint farming locations on Buried City are the Santa Maria Houses, Grandioso Apartments, Town Hall, and the various buildings of the New District . Grandioso Apartments has a lower number of containers than the rest, but a high chance of spawning weapon cases - which have good Blueprint drop rates. The others are high-tier loot areas, with plenty of lootable containers - including Security Lockers.
Spaceport
The best places to find Blueprints on Spaceport are the Arrival and Departure Buildings, as well as Control Tower A6 and the Launch Towers . All these areas are labelled as high-value loot regions, and many of them are also very handily connected to one another by the Spaceport wall, which you can use to quickly run from one area to the next. At the tops of most of these buildings you’ll find at least one Security Locker, so this is an excellent farming route for players looking to find Blueprints.
The downside to looting Blueprints on Spaceport is that all these areas are hotly contested, particularly in Duos and Squads. You’ll need to be very focused and fast in order to complete the full farming route.

Image credit:Rock Paper Shotgun/Embark Studios
Blue Gate
Blue Gate tends to have a good chance of dropping Blueprints, potentially because it generally has a high number of containers which can hold lots of items; so there’s a higher chance of a Blueprint spawning in each container. In my experience, the best Blueprint farming spots on Blue Gate are Pilgrim’s Peak, Raider’s Refuge, the Ancient Fort, and the Underground Complex beneath the Warehouse .
All of these areas contain a wealth of containers to loot. Raider’s Refuge has less to loot, but the majority of the containers in and around the Refuge are raider containers, which have a high chance of containing Blueprints - particularly during major events.
Stella Montis
On the whole, Stella Montis seems to have a very low drop rate for Blueprints (though a high chance of dropping other high-tier loot). If you do want to try farming Blueprints on this map, the best places to find Blueprints in Stella Montis are Medical Research, Assembly Workshop, and the Business Center . These areas have the highest density of containers to loot on the map.
In addition to this, the Western Tunnel has a few different Security Lockers to loot, so while there’s very little to loot elsewhere in this area of the map, it’s worth hitting those Security Lockers if you spawn there at the start of a match.
That wraps up this primer on how to get all the Blueprints in Arc Raiders as quickly as possible. With the Expedition system constantly resetting a large number of players’ Blueprints, it’s more important than ever to have the most up-to-date information on where to find all these Blueprints.
While you’re here, be sure to check out our Arc Raiders best guns tier list , as well as our primers on the best skills to unlock and all the different Field Depot locations on every map.


ARC Raiders
PS5 , Xbox Series X/S , PC
Rock Paper Shotgun is better when you sign in
Sign in and join us on our journey to discover strange and compelling PC games.
