Metal Slug Tactics review: the crunchy arcade run ’n’ gun pauses to have a tactical think
Once more Into The Breach?
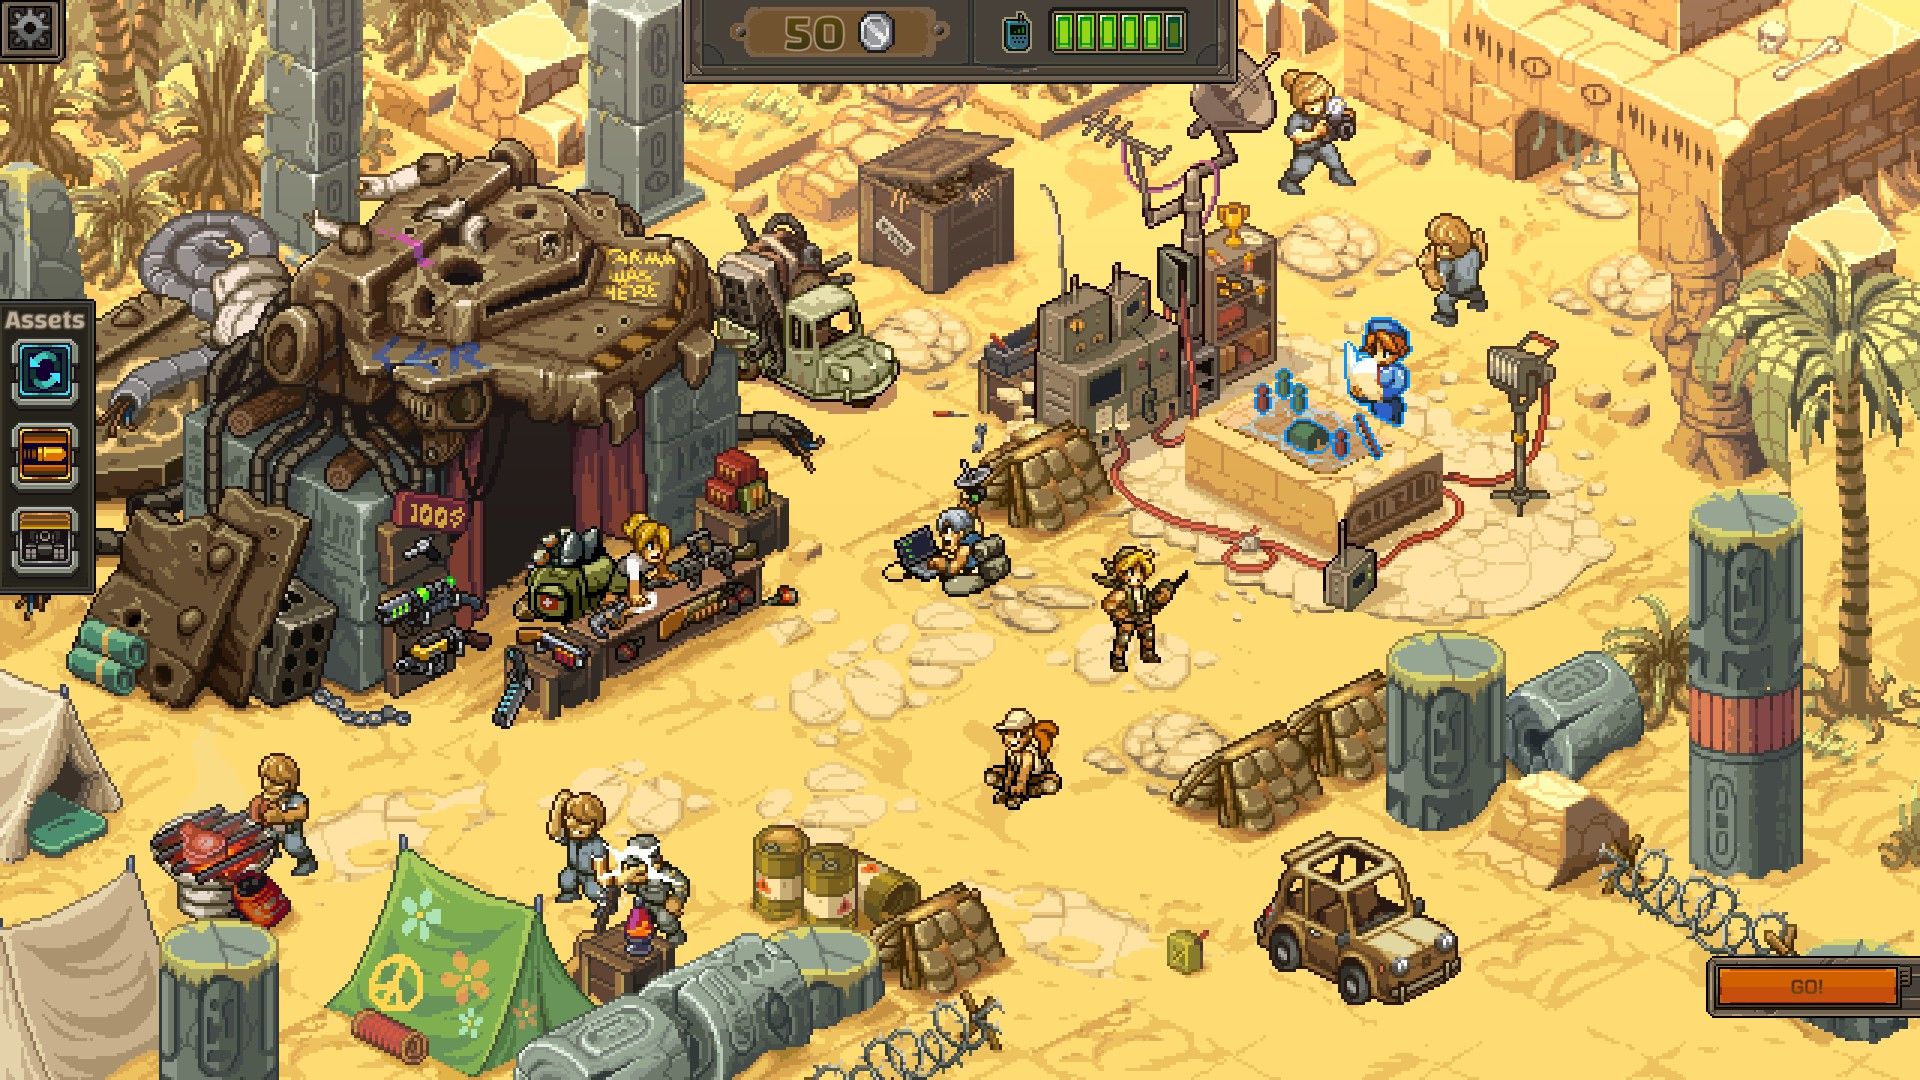
Image credit:Rock Paper Shotgun / Dotemu / Gamera Games

- Developer: Leikir Studio
- Publisher: Dotemu, Gamera Games
- Release: Nov 5th
- On: Windows
- From: Steam
- Price: £21/$25/€25
- Reviewed on: Intel Core-i7-11700F, 16GB RAM, Nvidia GeForce RTX 3060, Windows 10
I am a very casual enjoyer of Metal Slug games. I’ve never actually paid for one of these side-scrolling shoot ’em ups, except for all the countless coins I happily pumped into arcade machines as a child. To this day, if I see a rare glittering cabinet running one of these crunchy shmups, I will go ham for twenty or thirty minutes, and walk away satisfied that I have seen a lot of very good pixels. These games, I am convinced, were never really designed to be completed, but to be played exactly like this, as a coin-gobbling invitation to become a bandana-wearing sisyphus, a tiny Rambo pushing a bouncy, juddering tank up a hill occupied by cartoon nazis. You die a bunch and say: “ah, that was good.”
So what happens when you rearrange the molecules of this run and/or gun ’em up into an isometric turn-based strategy game? You get Metal Slug Tactics , an off-kilter nod to Into The Breach and other grid-based turn-takers, but secretly housing the aggressive notions of an unhinged pyromaniac. You still die a lot. And you still walk away feeling fairly happy about it.

Well, I did at least. It really depends on your tolerance for roguelikey restarts. As the team of Metal Sluggers you are sent to stop known mischief maker Morden (first name Donald), who is very classically up to no good. But it can be a tough war, and the conflict is designed to be restarted again and again, with new goodies getting unlocked as you slowly chip away at the list of weapons mods and nine-strong character roster.
Fights take place on griddy battlefields. You get three characters, each with their own weapon loadouts and special skills. Some tote lasers that can zap right through multiple enemies in a straight line. Others have devices that let you grab enemies by the hair and hoist them to a distant tile. Some characters throw grenades, allowing you to lob your painmakers over the top of your fellow freedom fighters without committing to friendly fire (you’ll be hitting your own troops a lot - it’s fine).
To the tactics fiends among us, it seems straightforward to begin with. Its similarities to Into The Breach in particular feel helpful in establishing what the game wants from you. You can undo movement as many times as you like, for example (provided you haven’t altered the environment by knocking down a crane or waking a mummified corpse). You also have two turn resets per battle. Meaning that if you mess up a manoeuvre with multiple troops, you can rethink it entirely.
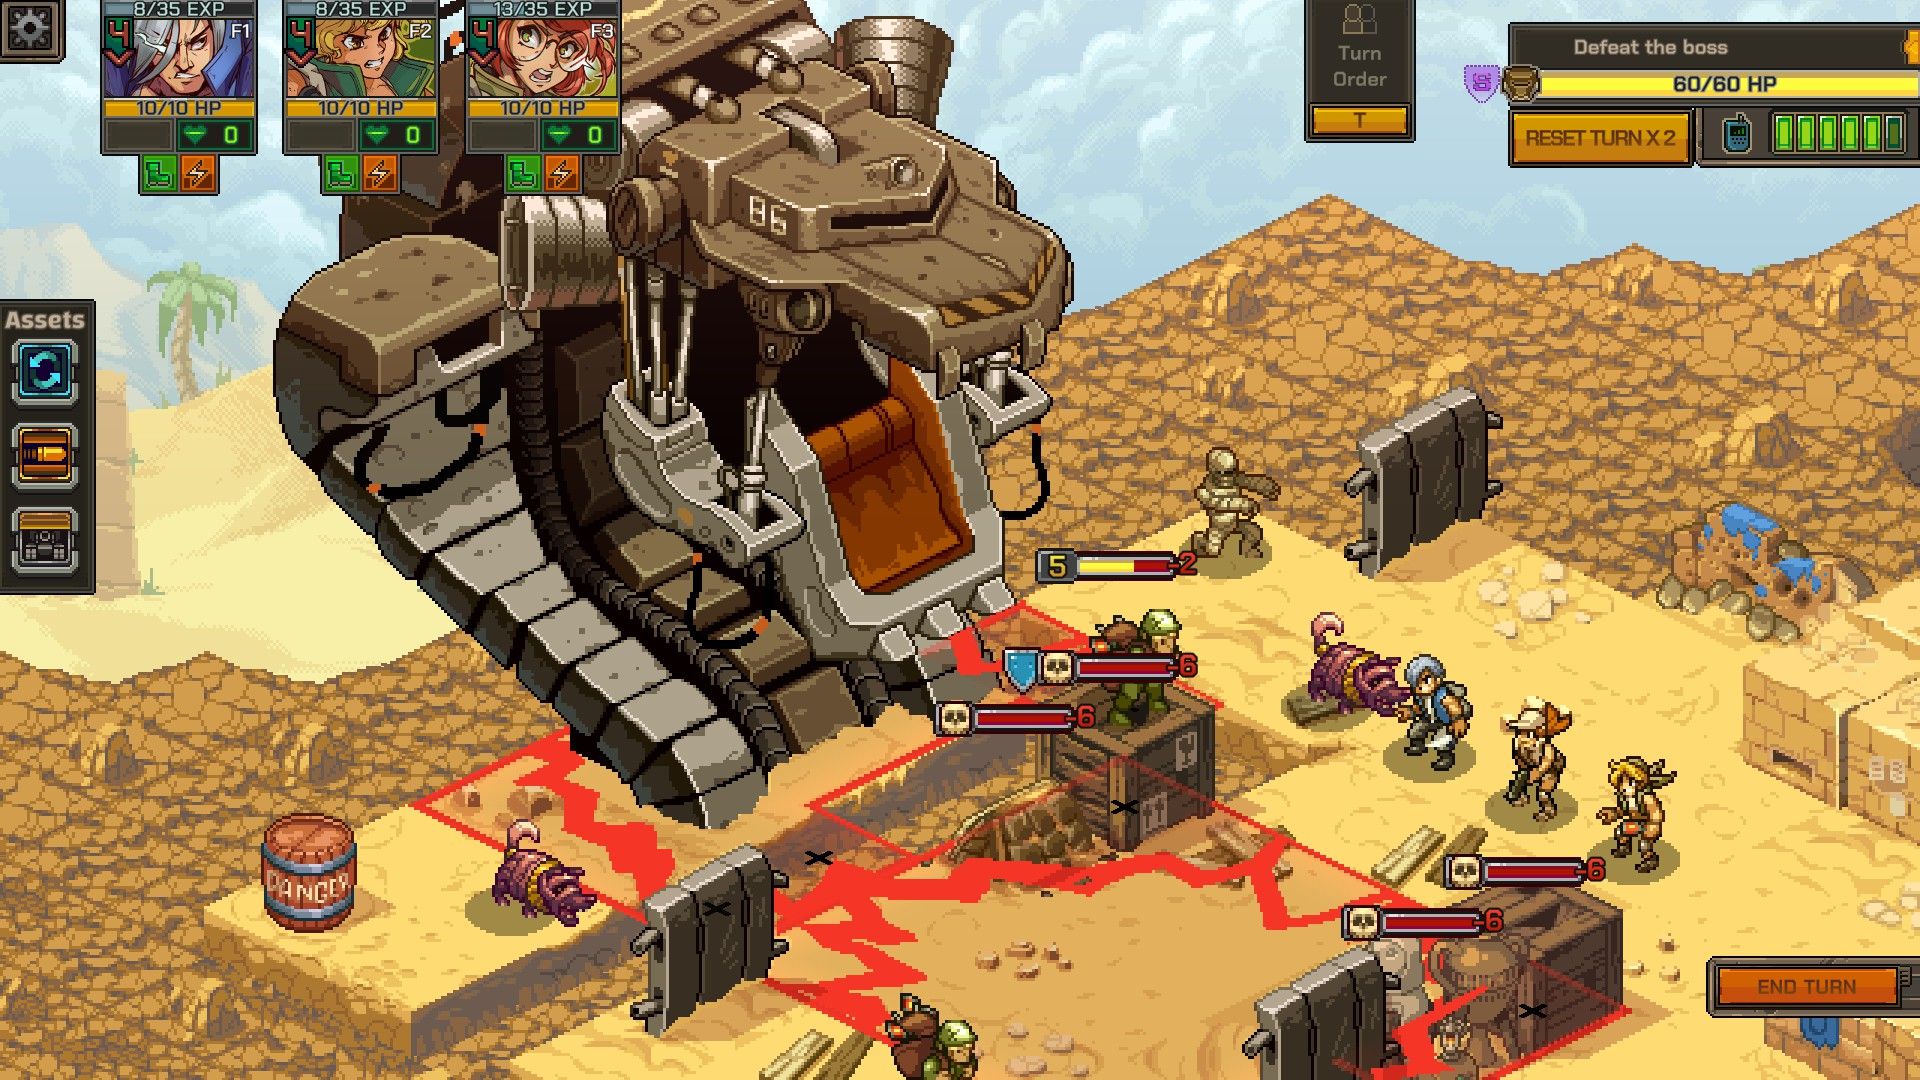
Image credit:Rock Paper Shotgun / Dotemu / Gamera Games
But quickly you see that you’re expected to be a little more aggressive than your average tactical trouncer. Cover is sometimes helpful but staying still is not. You only generate “dodge” points by moving, basically granting extra protection from incoming fire by constantly changing position. And you only generate “adrenaline” points in the same way. These adrenaline points are needed to perform your more powerful special actions, like teleporting two enemies in a silly swaperoo, or chasing down a swordsman on a motorcycle.
Since moving around a lot is the only way you farm the points needed for these essential moves, it becomes a strong incentive to stay mobile. “Remember,” the game teaches you, “we always run and gun”. The stacking power of dodge and cover bonuses means you can get into some funny positions of power through scrappy and aggressive play, like being surrounded by melee attacking enemies on every side but still able to dodge each and every swing, then use your fiery jump boots to set everyone around you ablaze in a daring act of escape.
It’s also somewhat hard to get your head around, speaking as a traditionally tactical turtler. Battles are often replete with enemies - far more than you can feasibly handle - and you’re forced against your baddie-squashing instincts to play the objective. Your goal might be to only kill a handful of special targets. Or you might be asked to get two of your soldiers to a certain spot within three or four turns (the implication here is: which of your three troopers will make the best meat shield while the others escape?)


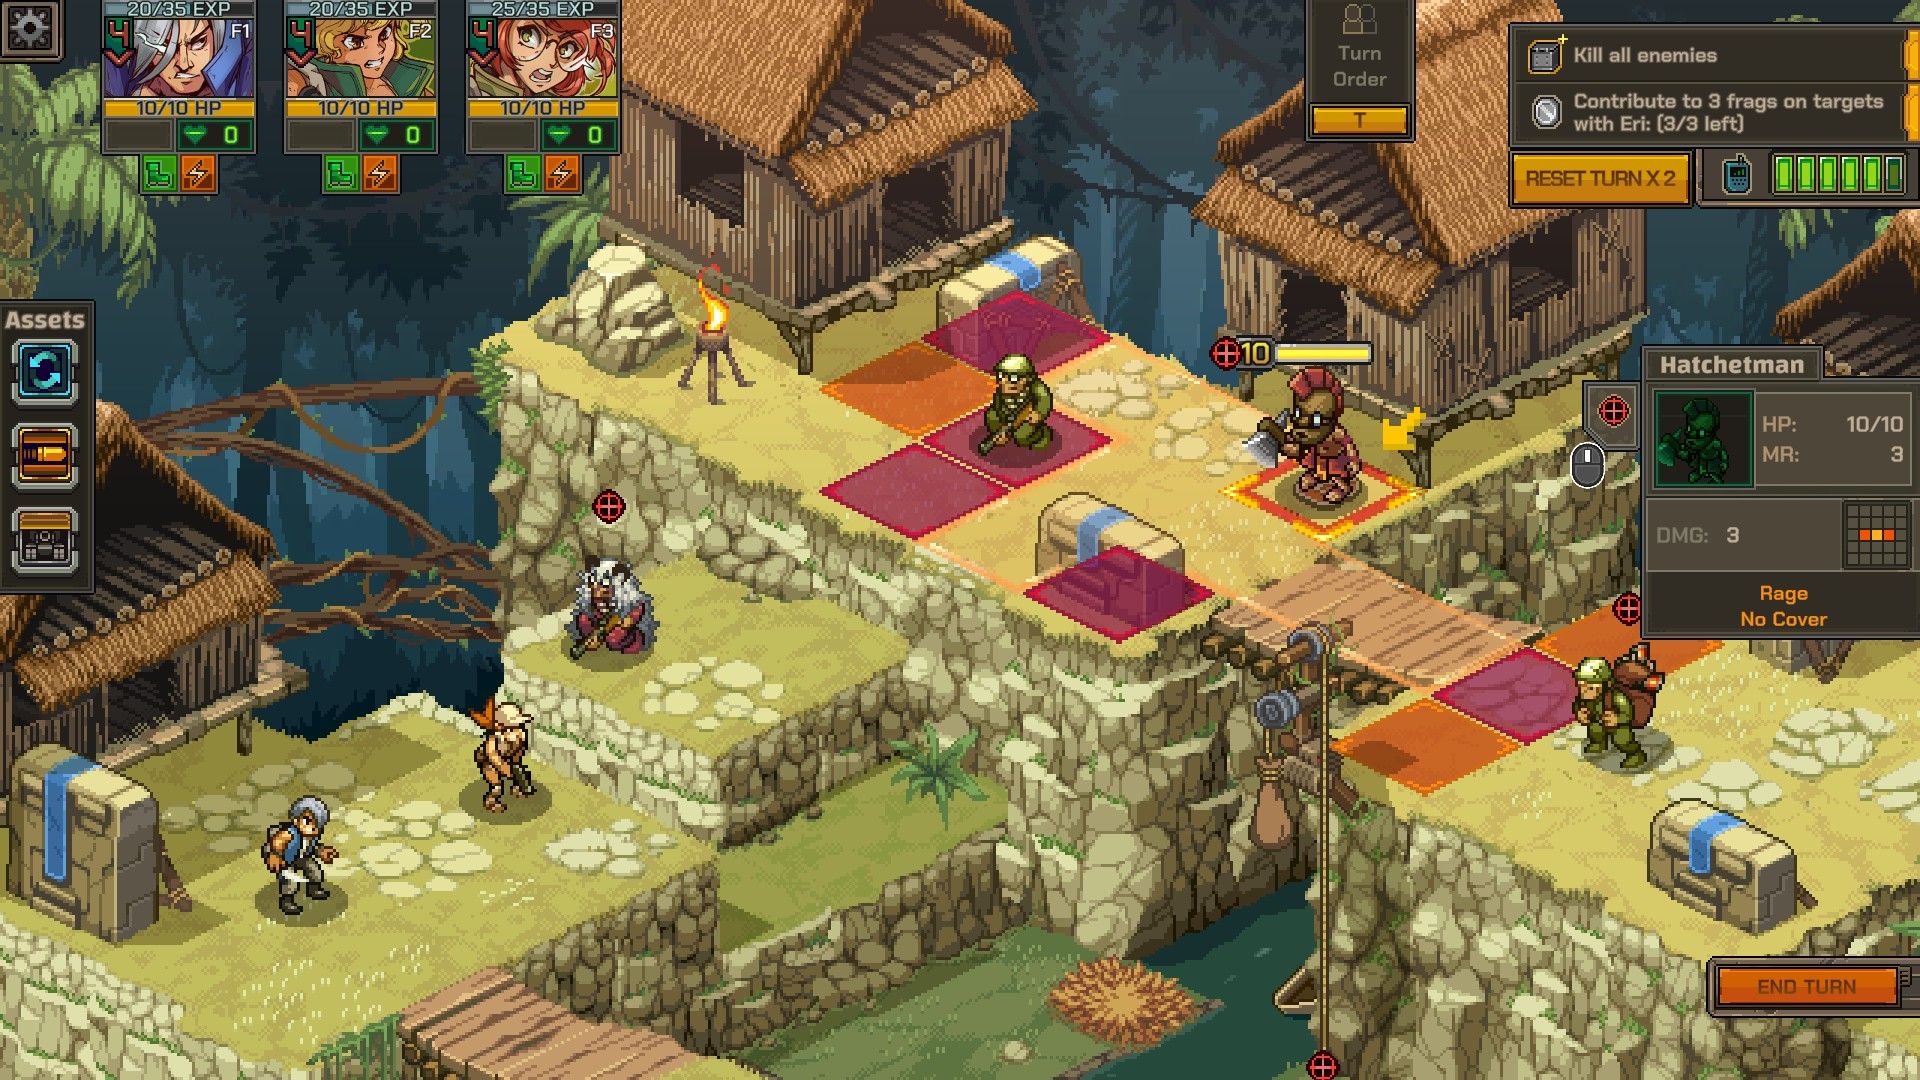
There is another layer to battlin’ that can help you out. Basically, if you arrange your troops so they all line up with the same enemy, then launch an attack with one of your fighters, the other two heroes will follow suit in a dogpiling act of “syncronization”. This too means more gritty decisions: which enemy should you work as a team to eliminate, and which should you pick off as individuals? Some enemies you’ll just disregard entirely, writing them off as lesser pests in a grander game of grenade tossing.
It’s an interesting extra layer that you’ll need to exploit to get out of most scrapes alive. But it’s also hard to physically plan, with a lot of moving into position just to check if a shot is viable, then undoing it and checking from another angle. I never felt like I truly got the hang of syncing up my attacks perfectly. In the end, I often just went with my gut out of impatience. I died a lot.
But not as much as Rumi, the suicidal trader that features in a few of the game’s difficult escort missions. These protective jaunts are among the roughest in the game, I found, along with other mission types that see you protecting miners from a gang of mummies that can kill in a single hit. It can be likewise annoying when an enemy reinforcement randomly falls in exactly a spot where it will do most damage next turn, scuppering well-laid last stands all because of a little randomness.
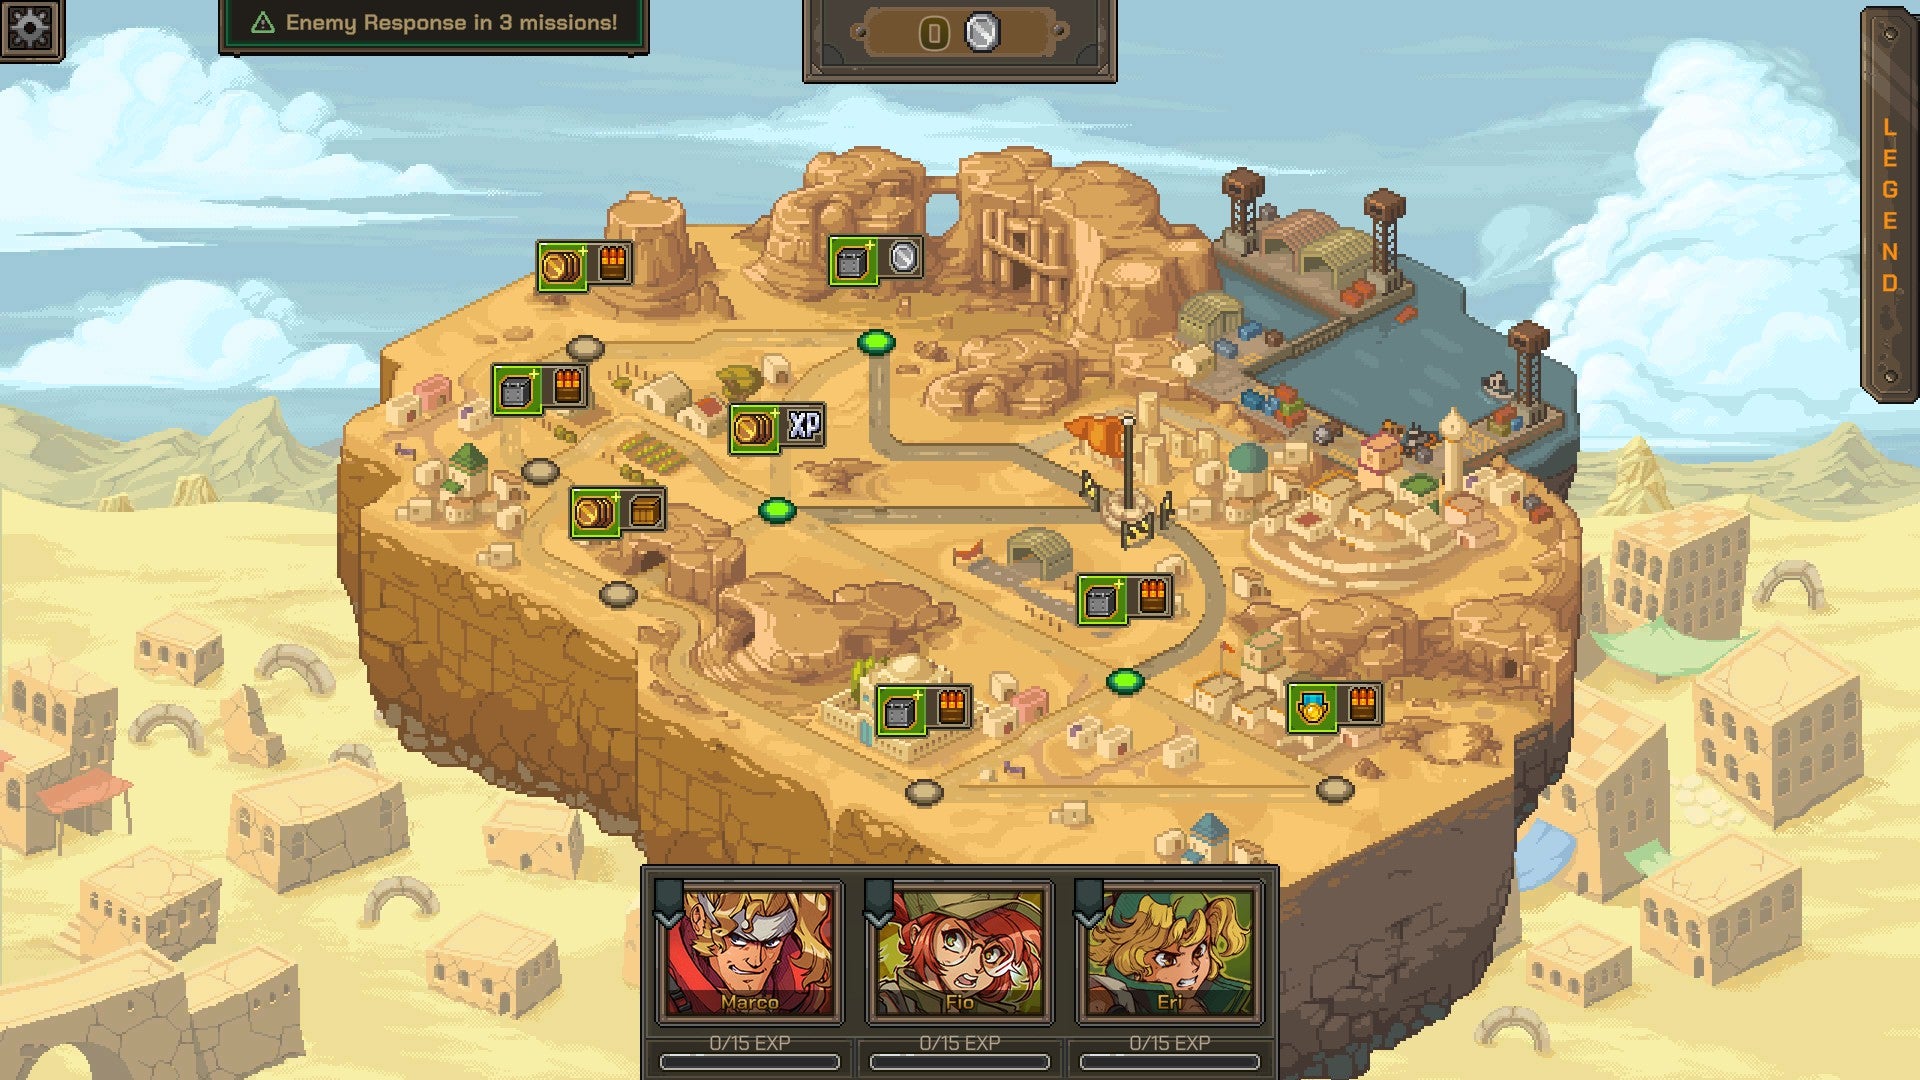
Image credit:Rock Paper Shotgun / Dotemu / Gamera Games
This is where the comparison with Into The Breach becomes unflattering. That masterpiece of turny tactics was set on such a small, finely tuned diorama, that each round became an almost-always solvable puzzle; a bit of kaiju chess. Your options for both movement and combat were limited, and each enemy had its upcoming attacks clearly signalled. It was just up to you to escape the checkmate.
Metal Slug Tactics doesn’t want to be so obvious, keeping most enemy movements to itself. This makes the elimination-style levels more open-ended, but it also makes the escort and protection missions unpredictable and irritating in the way escort missions so often are. You are not even told where Rumi, the gung-ho death-enjoyer, is going to move to next. I started avoiding these missions completely by choosing the simpler “kill stuff” missions, ignoring even the tastiest of rewards the game would dangle in front of me. Character XP, coins to buy weapon parts, instantly deployable tanks - none of it matters if you lose an entire run because a mummy chose to hit a miner insead of the explosive decoy dummy you put down nearby.
The world map sees you do all this fighting across various locales (Egyptian desert, Middle Eastern villages, South American jungles, and North American cities) each with enemy types and bosses that perform distinct attacks (and appearances which sadly adhere to the childish stereotypes Metal Slug has been running with since the 1990s, as Nic previously pointed out when he played the demo ). Eventually, you hit the boss fights, which are roundly enjoyable and challenging wreck sessions in which huge patches of the map will become red with incoming fire, hot lava, or sandy destruction.
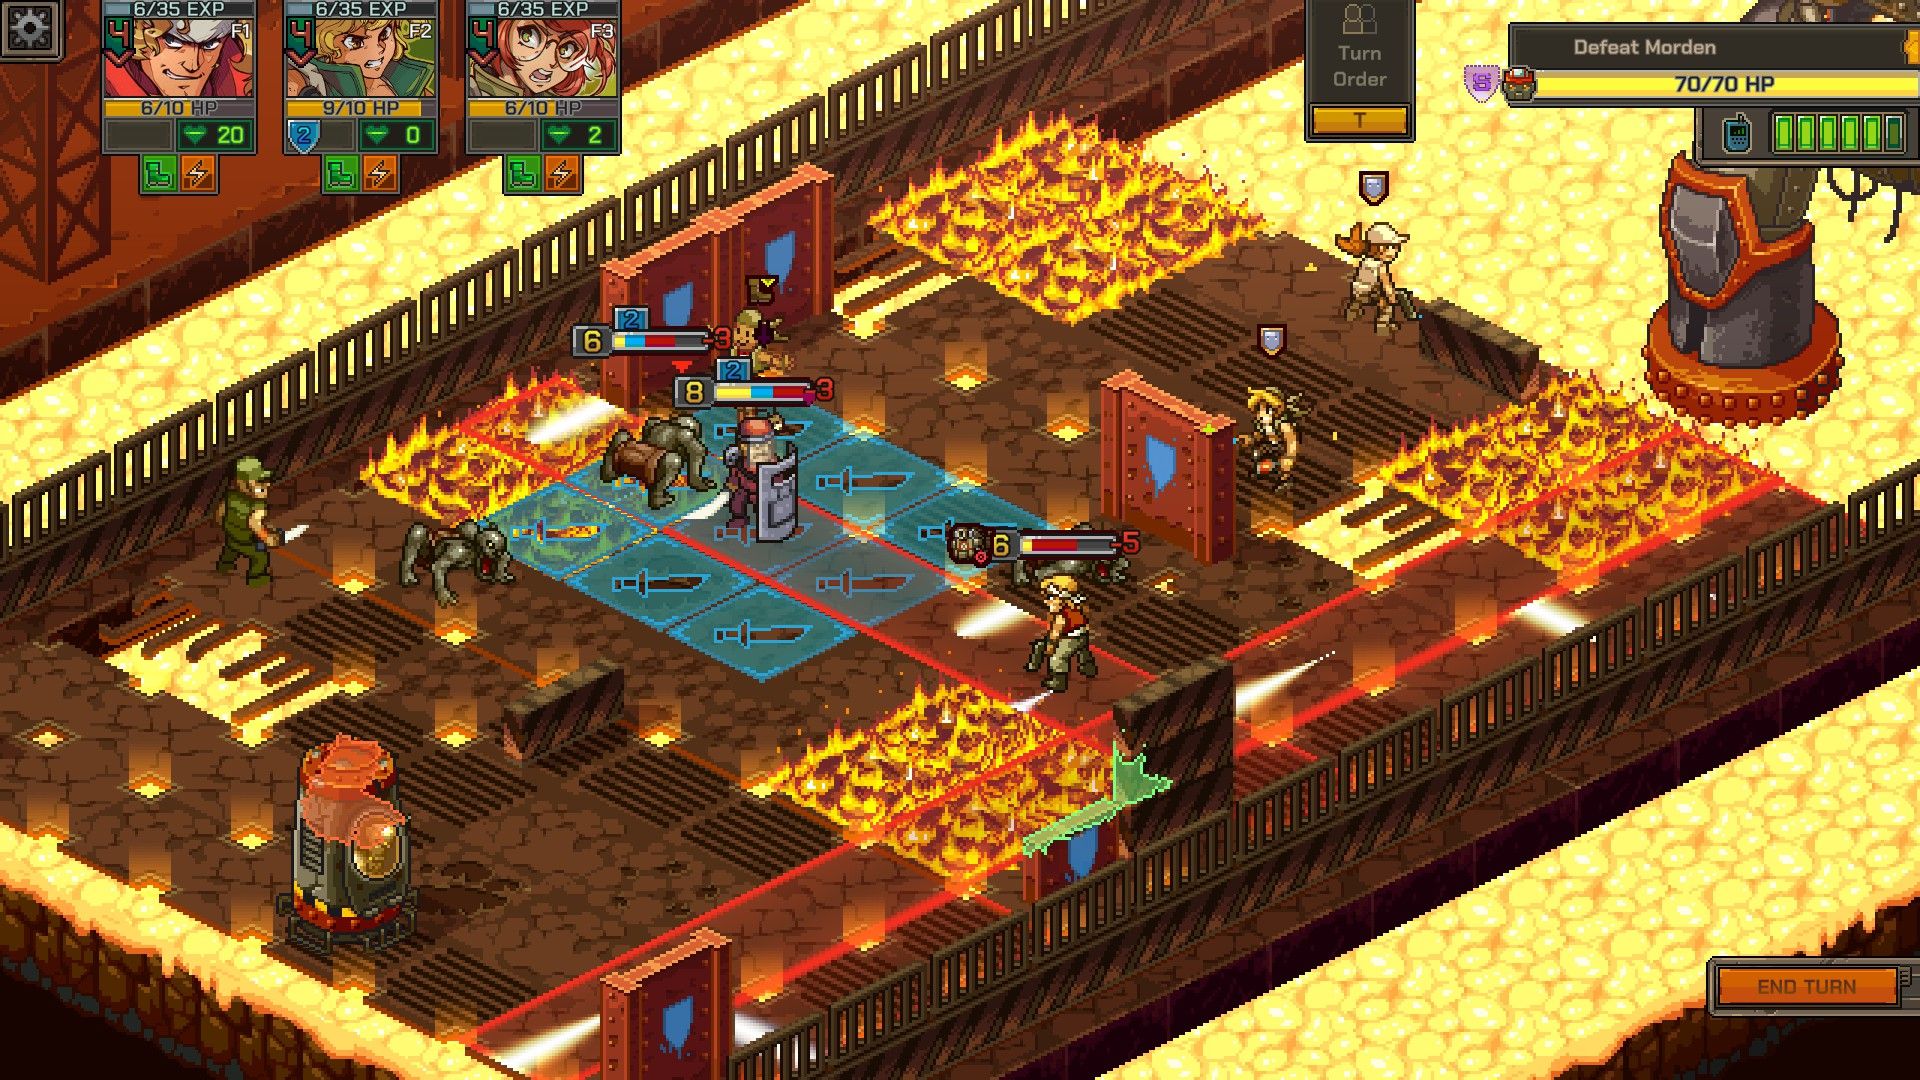
Image credit:Rock Paper Shotgun / Dotemu / Gamera Games
It really starts to come into its own when new characters are unlocked following successful runs. Knifey ninja Trevor can confuse enemies into attacking their own pals. Beefcake Clark throws enemies around, making it easier to line up synchronised shots. Nadia summons self-destructive robots that can cause a handy distraction but risk a lot of friendly fire damage.
They’re great additions. But it did feel like these characters are slow to appear thanks to the challenging nature of some missions. A slow drip of progression doesn’t feel sluggish in something like (again) Into The Breach, because few fights last long. But some battles in Slugtac can become drawn out, especially the boss battles, even with the handy “hold spacebar to fast forward” button. The repetitive radio chatter of your off-screen commander, Margaret, also slows things down considerably. For everything this game adds in mods, upgrades, character abilities, and unusual enemy tricks, it also clutters up the elegance and simplicity that makes the grid-based fighting of Into The Breach so compelling and tight.
But maybe I shouldn’t keep comparing this to Subset’s masterwork. Maybe we should instead compare it to other Metal Slug games. In that case, I almost prefer this incarnation of the pixel pistoleers. The arcade difficulty of those shooters was forged in the quarter-swallowing era in which games were difficult as a de facto means of extracting more coins from your little pockets. And as much as I like those twenty-minute sessions, I will never see these games through. Whereas the difficulty of a tough escort mission feels more true to the tactical genre of “end turn” button-pushing. Plus all the undos, resets, and pauseful pondering makes things more manageable, to the point where I have - shock horror - actually completed multiple runs.
I especially like how the arcade game’s soul has been transplanted not just in the art style but also the sound design. The character select screen yells each character’s name with the tinny echo of arcade enthusiasm. “Marco!” - “Fio!” - “Echo!” It is so married to its arcade roots that even the currency you use to unlock post-campaign upgrades is called “credits”. I’ve accrued a fistful of these digi-quarters. But you know what? I’m content with what I’ve played. Like a good Metal Slug game, I can happily walk away from it without seeing every last battlefield. I’m fully satisfied with the time and quarters I’ve already spent.

Find out how we conduct our reviews by reading our review policy .
Metal Slug Tactics
PC , Nintendo Switch
Rock Paper Shotgun is better when you sign in
Sign in and join us on our journey to discover strange and compelling PC games.

All 75 Arc Raiders Blueprints and where to get them
These areas have the highest chance of giving you Blueprints

Image credit:Rock Paper Shotgun/Embark Studios

Looking for more Arc Raiders Blueprints? It’s a special day when you find a Blueprint, as they’re among the most valuable items in Arc Raiders. If you find a Blueprint that you haven’t already found, then you must make sure you hold onto it at all costs, because Blueprints are the key to one of the most important and powerful systems of meta-progression in the game.
This guide aims to be the very best guide on Blueprints you can find, starting with a primer on what exactly they are and how they work in Arc Raiders, before delving into exactly where to get Blueprints and the very best farming spots for you to take in your search.
We’ll also go over how to get Blueprints from other unlikely activities, such as destroying Surveyors and completing specific quests. And you’ll also find the full list of all 75 Blueprints in Arc Raiders on this page (including the newest Blueprints added with the Cold Snap update , such as the Deadline Blueprint and Firework Box Blueprint), giving you all the information you need to expand your own crafting repertoire.
In this guide:
- What are Blueprints in Arc Raiders?
- Full Blueprint list: All crafting recipes
- Where to find Blueprints in Arc Raiders Blueprints obtained from quests Blueprints obtained from Trials Best Blueprint farming locations

What are Blueprints in Arc Raiders?
Blueprints in Arc Raiders are special items which, if you manage to extract with them, you can expend to permanently unlock a new crafting recipe in your Workshop. If you manage to extract from a raid with an Anvil Blueprint, for example, you can unlock the ability to craft your very own Anvil Pistol, as many times as you like (as long as you have the crafting materials).
To use a Blueprint, simply open your Inventory while in the lobby, then right-click on the Blueprint and click “Learn And Consume” . This will permanently unlock the recipe for that item in your Workshop. As of the Stella Montis update, there are allegedly 75 different Blueprints to unlock - although only 68 are confirmed to be in the game so far. You can see all the Blueprints you’ve found and unlocked by going to the Workshop menu, and hitting “R” to bring up the Blueprint screen.
It’s possible to find duplicates of past Blueprints you’ve already unlocked. If you find these, then you can either sell them, or - if you like to play with friends - you can take it into a match and gift it to your friend so they can unlock that recipe for themselves. Another option is to keep hold of them until the time comes to donate them to the Expedition.
Full Blueprint list: All crafting recipes
Below is the full list of all the Blueprints that are currently available to find in Arc Raiders, and the crafting recipe required for each item:
| Blueprint | Type | Recipe | Crafted At |
|---|---|---|---|
| Bettina | Weapon | 3x Advanced Mechanical Components 3x Heavy Gun Parts 3x Canister | Gunsmith 3 |
| Blue Light Stick | Quick Use | 3x Chemicals | Utility Station 1 |
| Aphelion | Weapon | 3x Magnetic Accelerator 3x Complex Gun Parts 1x Matriarch Reactor | Gunsmith 3 |
| Combat Mk. 3 (Flanking) | Augment | 2x Advanced Electrical Components 3x Processor | Gear Bench 3 |
| Combat Mk. 3 (Aggressive) | Augment | 2x Advanced Electrical Components 3x Processor | Gear Bench 3 |
| Complex Gun Parts | Material | 2x Light Gun Parts 2x Medium Gun Parts 2x Heavy Gun Parts | Refiner 3 |
| Fireworks Box | Quick Use | 1x Explosive Compound 3x Pop Trigger | Explosives Station 2 |
| Gas Mine | Mine | 4x Chemicals 2x Rubber Parts | Explosives Station 1 |
| Green Light Stick | Quick Use | 3x Chemicals | Utility Station 1 |
| Pulse Mine | Mine | 1x Crude Explosives 1x Wires | Explosives Station 1 |
| Seeker Grenade | Grenade | 1x Crude Explosives 2x ARC Alloy | Explosives Station 1 |
| Looting Mk. 3 (Survivor) | Augment | 2x Advanced Electrical Components 3x Processor | Gear Bench 3 |
| Angled Grip II | Mod | 2x Mechanical Components 3x Duct Tape | Gunsmith 2 |
| Angled Grip III | Mod | 2x Mod Components 5x Duct Tape | Gunsmith 3 |
| Hullcracker | Weapon | 1x Magnetic Accelerator 3x Heavy Gun Parts 1x Exodus Modules | Gunsmith 3 |
| Launcher Ammo | Ammo | 5x Metal Parts 1x Crude Explosives | Workbench 1 |
| Anvil | Weapon | 5x Mechanical Components 5x Simple Gun Parts | Gunsmith 2 |
| Anvil Splitter | Mod | 2x Mod Components 3x Processor | Gunsmith 3 |
| ??? | ??? | ??? | ??? |
| Barricade Kit | Quick Use | 1x Mechanical Components | Utility Station 2 |
| Blaze Grenade | Grenade | 1x Explosive Compound 2x Oil | Explosives Station 3 |
| Bobcat | Weapon | 3x Advanced Mechanical Components 3x Light Gun Parts | Gunsmith 3 |
| Osprey | Weapon | 2x Advanced Mechanical Components 3x Medium Gun Parts 7x Wires | Gunsmith 3 |
| Burletta | Weapon | 3x Mechanical Components 3x Simple Gun Parts | Gunsmith 1 |
| Compensator II | Mod | 2x Mechanical Components 4x Wires | Gunsmith 2 |
| Compensator III | Mod | 2x Mod Components 8x Wires | Gunsmith 3 |
| Defibrillator | Quick Use | 9x Plastic Parts 1x Moss | Medical Lab 2 |
| ??? | ??? | ??? | ??? |
| Equalizer | Weapon | 3x Magnetic Accelerator 3x Complex Gun Parts 1x Queen Reactor | Gunsmith 3 |
| Extended Barrel | Mod | 2x Mod Components 8x Wires | Gunsmith 3 |
| Extended Light Mag II | Mod | 2x Mechanical Components 3x Steel Spring | Gunsmith 2 |
| Extended Light Mag III | Mod | 2x Mod Components 5x Steel Spring | Gunsmith 3 |
| Extended Medium Mag II | Mod | 2x Mechanical Components 3x Steel Spring | Gunsmith 2 |
| Extended Medium Mag III | Mod | 2x Mod Components 5x Steel Spring | Gunsmith 3 |
| Extended Shotgun Mag II | Mod | 2x Mechanical Components 3x Steel Spring | Gunsmith 2 |
| Extended Shotgun Mag III | Mod | 2x Mod Components 5x Steel Spring | Gunsmith 3 |
| Remote Raider Flare | Quick Use | 2x Chemicals 4x Rubber Parts | Utility Station 1 |
| Heavy Gun Parts | Material | 4x Simple Gun Parts | Refiner 2 |
| Venator | Weapon | 2x Advanced Mechanical Components 3x Medium Gun Parts 5x Magnet | Gunsmith 3 |
| Il Toro | Weapon | 5x Mechanical Components 6x Simple Gun Parts | Gunsmith 1 |
| Jolt Mine | Mine | 1x Electrical Components 1x Battery | Explosives Station 2 |
| Explosive Mine | Mine | 1x Explosive Compound 1x Sensors | Explosives Station 3 |
| Jupiter | Weapon | 3x Magnetic Accelerator 3x Complex Gun Parts 1x Queen Reactor | Gunsmith 3 |
| Light Gun Parts | Material | 4x Simple Gun Parts | Refiner 2 |
| Lightweight Stock | Mod | 2x Mod Components 5x Duct Tape | Gunsmith 3 |
| Lure Grenade | Grenade | 1x Speaker Component 1x Electrical Components | Utility Station 2 |
| Medium Gun Parts | Material | 4x Simple Gun Parts | Refiner 2 |
| Torrente | Weapon | 2x Advanced Mechanical Components 3x Medium Gun Parts 6x Steel Spring | Gunsmith 3 |
| Muzzle Brake II | Mod | 2x Mechanical Components 4x Wires | Gunsmith 2 |
| Muzzle Brake III | Mod | 2x Mod Components 8x Wires | Gunsmith 3 |
| Padded Stock | Mod | 2x Mod Components 5x Duct Tape | Gunsmith 3 |
| Shotgun Choke II | Mod | 2x Mechanical Components 4x Wires | Gunsmith 2 |
| Shotgun Choke III | Mod | 2x Mod Components 8x Wires | Gunsmith 3 |
| Shotgun Silencer | Mod | 2x Mod Components 8x Wires | Gunsmith 3 |
| Showstopper | Grenade | 1x Advanced Electrical Components 1x Voltage Converter | Explosives Station 3 |
| Silencer I | Mod | 2x Mechanical Components 4x Wires | Gunsmith 2 |
| Silencer II | Mod | 2x Mod Components 8x Wires | Gunsmith 3 |
| Snap Hook | Quick Use | 2x Power Rod 3x Rope 1x Exodus Modules | Utility Station 3 |
| Stable Stock II | Mod | 2x Mechanical Components 3x Duct Tape | Gunsmith 2 |
| Stable Stock III | Mod | 2x Mod Components 5x Duct Tape | Gunsmith 3 |
| Tagging Grenade | Grenade | 1x Electrical Components 1x Sensors | Utility Station 3 |
| Tempest | Weapon | 3x Advanced Mechanical Components 3x Medium Gun Parts 3x Canister | Gunsmith 3 |
| Trigger Nade | Grenade | 2x Crude Explosives 1x Processor | Explosives Station 2 |
| Vertical Grip II | Mod | 2x Mechanical Components 3x Duct Tape | Gunsmith 2 |
| Vertical Grip III | Mod | 2x Mod Components 5x Duct Tape | Gunsmith 3 |
| Vita Shot | Quick Use | 2x Antiseptic 1x Syringe | Medical Lab 3 |
| Vita Spray | Quick Use | 3x Antiseptic 1x Canister | Medical Lab 3 |
| Vulcano | Weapon | 1x Magnetic Accelerator 3x Heavy Gun Parts 1x Exodus Modules | Gunsmith 3 |
| Wolfpack | Grenade | 2x Explosive Compound 2x Sensors | Explosives Station 3 |
| Red Light Stick | Quick Use | 3x Chemicals | Utility Station 1 |
| Smoke Grenade | Grenade | 14x Chemicals 1x Canister | Utility Station 2 |
| Deadline | Mine | 3x Explosive Compound 2x ARC Circuitry | Explosives Station 3 |
| Trailblazer | Grenade | 1x Explosive Compound 1x Synthesized Fuel | Explosives Station 3 |
| Tactical Mk. 3 (Defensive) | Augment | 2x Advanced Electrical Components 3x Processor | Gear Bench 3 |
| Tactical Mk. 3 (Healing) | Augment | 2x Advanced Electrical Components 3x Processor | Gear Bench 3 |
| Yellow Light Stick | Quick Use | 3x Chemicals | Utility Station 1 |
Note: The missing Blueprints in this list likely have not actually been added to the game at the time of writing, because none of the playerbase has managed to find any of them. As they are added to the game, I will update this page with the most relevant information so you know exactly how to get all 75 Arc Raiders Blueprints.
Where to find Blueprints in Arc Raiders
Below is a list of all containers, modifiers, and events which maximise your chances of finding Blueprints:
- Certain quests reward you with specific Blueprints .
- Completing Trials has a high chance of offering Blueprints as rewards.
- Surveyors have a decent chance of dropping Blueprints on death.
- High loot value areas tend to have a greater chance of spawning Blueprints.
- Night Raids and Storms may increase rare Blueprint spawn chances in containers.
- Containers with higher numbers of items may have a higher tendency to spawn Blueprints. As a result, Blue Gate (which has many “large” containers containing multiple items) may give you a higher chance of spawning Blueprints.
- Raider containers (Raider Caches, Weapon Boxes, Medical Bags, Grenade Tubes) have increased Blueprint drop rates. As a result, the Uncovered Caches event gives you a high chance of finding Blueprints.
- Security Lockers have a higher than average chance of containing Blueprints.
- Certain Blueprints only seem to spawn under specific circumstances: Tempest Blueprint only spawns during Night Raid events. Vulcano Blueprint only spawns during Hidden Bunker events. Jupiter and Equaliser Blueprints only spawn during Harvester events.

Raider Caches, Weapon Boxes, and other raider-oriented container types have a good chance of offering Blueprints. |Image credit:Rock Paper Shotgun/Embark Studios
Blueprints have a very low chance of spawning in any container in Arc Raiders, around 1-2% on average. However, there is a higher chance of finding Blueprints in particular container types. Specifically, you can find more Blueprints in Raider containers and security lockers.
Beyond this, if you’re looking for Blueprints you should focus on regions of the map which are marked as having particularly high-value loot. Areas such as the Control Tower in Dam Battlegrounds, the Arrival and Departure Buildings in Spaceport, and Pilgrim’s Peak in Blue Gate all have a better-than-average chance of spawning Blueprints somewhere amongst all their containers. Night Raids and Electromagnetic Storm events also increase the drop chances of certain Blueprints .
In addition to these containers, you can often loot Blueprints from destroyed Surveyors - the largest of the rolling ball ARC. Surveyors are more commonly found on the later maps - Spaceport and Blue Gate - and if one spawns in your match, you’ll likely see it by the blue laser beam that it casts into the sky while “surveying”.
Surveyors are quite well-armoured and will very speedily run away from you once it notices you, but if you can take one down then make sure you loot all its parts for a chance of obtaining certain unusual Blueprints.
Blueprints obtained from quests
One way in which you can get Blueprints is by completing certain quests for the vendors in Speranza. Some quests will reward you with a specific item Blueprint upon completion, so as long as you work through all the quests in Arc Raiders, you are guaranteed those Blueprints.
Here is the full list of all Blueprints you can get from quest rewards:
- Trigger Nade Blueprint: Rewarded after completing “Sparks Fly”.
- Lure Grenade Blueprint: Rewarded after completing “Greasing Her Palms”.
- Burletta Blueprint: Rewarded after completing “Industrial Espionage”.
- Hullcracker Blueprint (and Launcher Ammo Blueprint): Rewarded after completing “The Major’s Footlocker”.
Alas, that’s only 4 Blueprints out of a total of 75 to unlock, so for the vast majority you will need to find them yourself during a raid. If you’re intent on farming Blueprints, then it’s best to equip yourself with cheap gear in case you lose it, but don’t use a free loadout because then you won’t get a safe pocket to stash any new Blueprint you find. No pain in Arc Raiders is sharper than failing to extract with a new Blueprint you’ve been after for a dozen hours already.

One of the best ways to get Blueprints is by hitting three stars on all five Trials every week. |Image credit:Rock Paper Shotgun/Embark Studios
Blueprints obtained from Trials
One of the very best ways to get Blueprints is as rewards for completing Trials in Arc Raiders. Trials are unlocked from Level 15 onwards, and allow you to earn rewards by focusing on certain tasks over the course of several raids. For example, one Trial might task you with dealing damage to Hornets, while another might challenge you to loot Supply Drops.
Trials refresh on a weekly basis, with a new week bringing five new Trials. Each Trial can offer up to three rewards after passing certain score milestones, and it’s possible to receive very high level loot from these reward crates - including Blueprints. So if you want to unlock as many Blueprints as possible, you should make a point of completing as many Trials as possible each week.
Best Blueprint farming locations
The very best way to get Blueprints is to frequent specific areas of the maps which combine high-tier loot pools with the right types of containers to search. Here are my recommendations for where to find Blueprints on every map, so you can always keep the search going for new crafting recipes to unlock.

Image credit:Rock Paper Shotgun/Embark Studios
Dam Battlegrounds
The best places to farm Blueprints on Dam Battlegrounds are the Control Tower, Power Generation Complex, Ruby Residence, and Pale Apartments . The first two regions, despite only being marked on the map as mid-tier loot, contain a phenomenal number of containers to loot. The Control Tower can also contain a couple of high-tier Security Lockers - though of course, you’ll need to have unlocked the Security Breach skill at the end of the Survival tree.
There’s also a lot of reporting amongst the playerbase that the Residential areas in the top-left of the map - Pale Apartments and Ruby Residence - give you a comparatively strong chance of finding Blueprints. Considering their size, there’s a high density of containers to loot in both locations, and they also have the benefit of being fairly out of the way. So you’re more likely to have all the containers to yourself.
Buried City
The best Blueprint farming locations on Buried City are the Santa Maria Houses, Grandioso Apartments, Town Hall, and the various buildings of the New District . Grandioso Apartments has a lower number of containers than the rest, but a high chance of spawning weapon cases - which have good Blueprint drop rates. The others are high-tier loot areas, with plenty of lootable containers - including Security Lockers.
Spaceport
The best places to find Blueprints on Spaceport are the Arrival and Departure Buildings, as well as Control Tower A6 and the Launch Towers . All these areas are labelled as high-value loot regions, and many of them are also very handily connected to one another by the Spaceport wall, which you can use to quickly run from one area to the next. At the tops of most of these buildings you’ll find at least one Security Locker, so this is an excellent farming route for players looking to find Blueprints.
The downside to looting Blueprints on Spaceport is that all these areas are hotly contested, particularly in Duos and Squads. You’ll need to be very focused and fast in order to complete the full farming route.

Image credit:Rock Paper Shotgun/Embark Studios
Blue Gate
Blue Gate tends to have a good chance of dropping Blueprints, potentially because it generally has a high number of containers which can hold lots of items; so there’s a higher chance of a Blueprint spawning in each container. In my experience, the best Blueprint farming spots on Blue Gate are Pilgrim’s Peak, Raider’s Refuge, the Ancient Fort, and the Underground Complex beneath the Warehouse .
All of these areas contain a wealth of containers to loot. Raider’s Refuge has less to loot, but the majority of the containers in and around the Refuge are raider containers, which have a high chance of containing Blueprints - particularly during major events.
Stella Montis
On the whole, Stella Montis seems to have a very low drop rate for Blueprints (though a high chance of dropping other high-tier loot). If you do want to try farming Blueprints on this map, the best places to find Blueprints in Stella Montis are Medical Research, Assembly Workshop, and the Business Center . These areas have the highest density of containers to loot on the map.
In addition to this, the Western Tunnel has a few different Security Lockers to loot, so while there’s very little to loot elsewhere in this area of the map, it’s worth hitting those Security Lockers if you spawn there at the start of a match.
That wraps up this primer on how to get all the Blueprints in Arc Raiders as quickly as possible. With the Expedition system constantly resetting a large number of players’ Blueprints, it’s more important than ever to have the most up-to-date information on where to find all these Blueprints.
While you’re here, be sure to check out our Arc Raiders best guns tier list , as well as our primers on the best skills to unlock and all the different Field Depot locations on every map.


ARC Raiders
PS5 , Xbox Series X/S , PC
Rock Paper Shotgun is better when you sign in
Sign in and join us on our journey to discover strange and compelling PC games.
