Manor Lords’ early access launch is built on solid technical ground, mostly
Mind your manors with this performance and settings guide

Image credit:Rock Paper Shotgun/Hooded Horse

My most recent experiences with performance-testing strategy games have been defined by miserable sluggishness and dental drama , so it’s been a relief to find that citybuilding/RTS hybrid Manor Lords is set to launch in a relatively fine state. As an early access game, no less.
Having dug into the latest build’s GPU performance and graphics settings, I have found a few loose strands of technical flax that Manor Lords could do with snipping away. Yet it’s generally in good shape, both for early access and a solo developer project, successfully balancing strong visuals with relatively light hardware demands that should help it run on older PCs (or handhelds like the Steam Deck ). Several hours in, the ugliest things I’ve seen are my road layouts.
There’s also support for FSR and DLSS upscaling, the latter doing a particularly excellent job of lifting framerates even higher. Scroll down for my full best settings guide, which you can keep to hand for the early access launch on April 26th, or if you want to know how Manor Lords performs on various graphics cards… uh, also scroll down, just not as far.
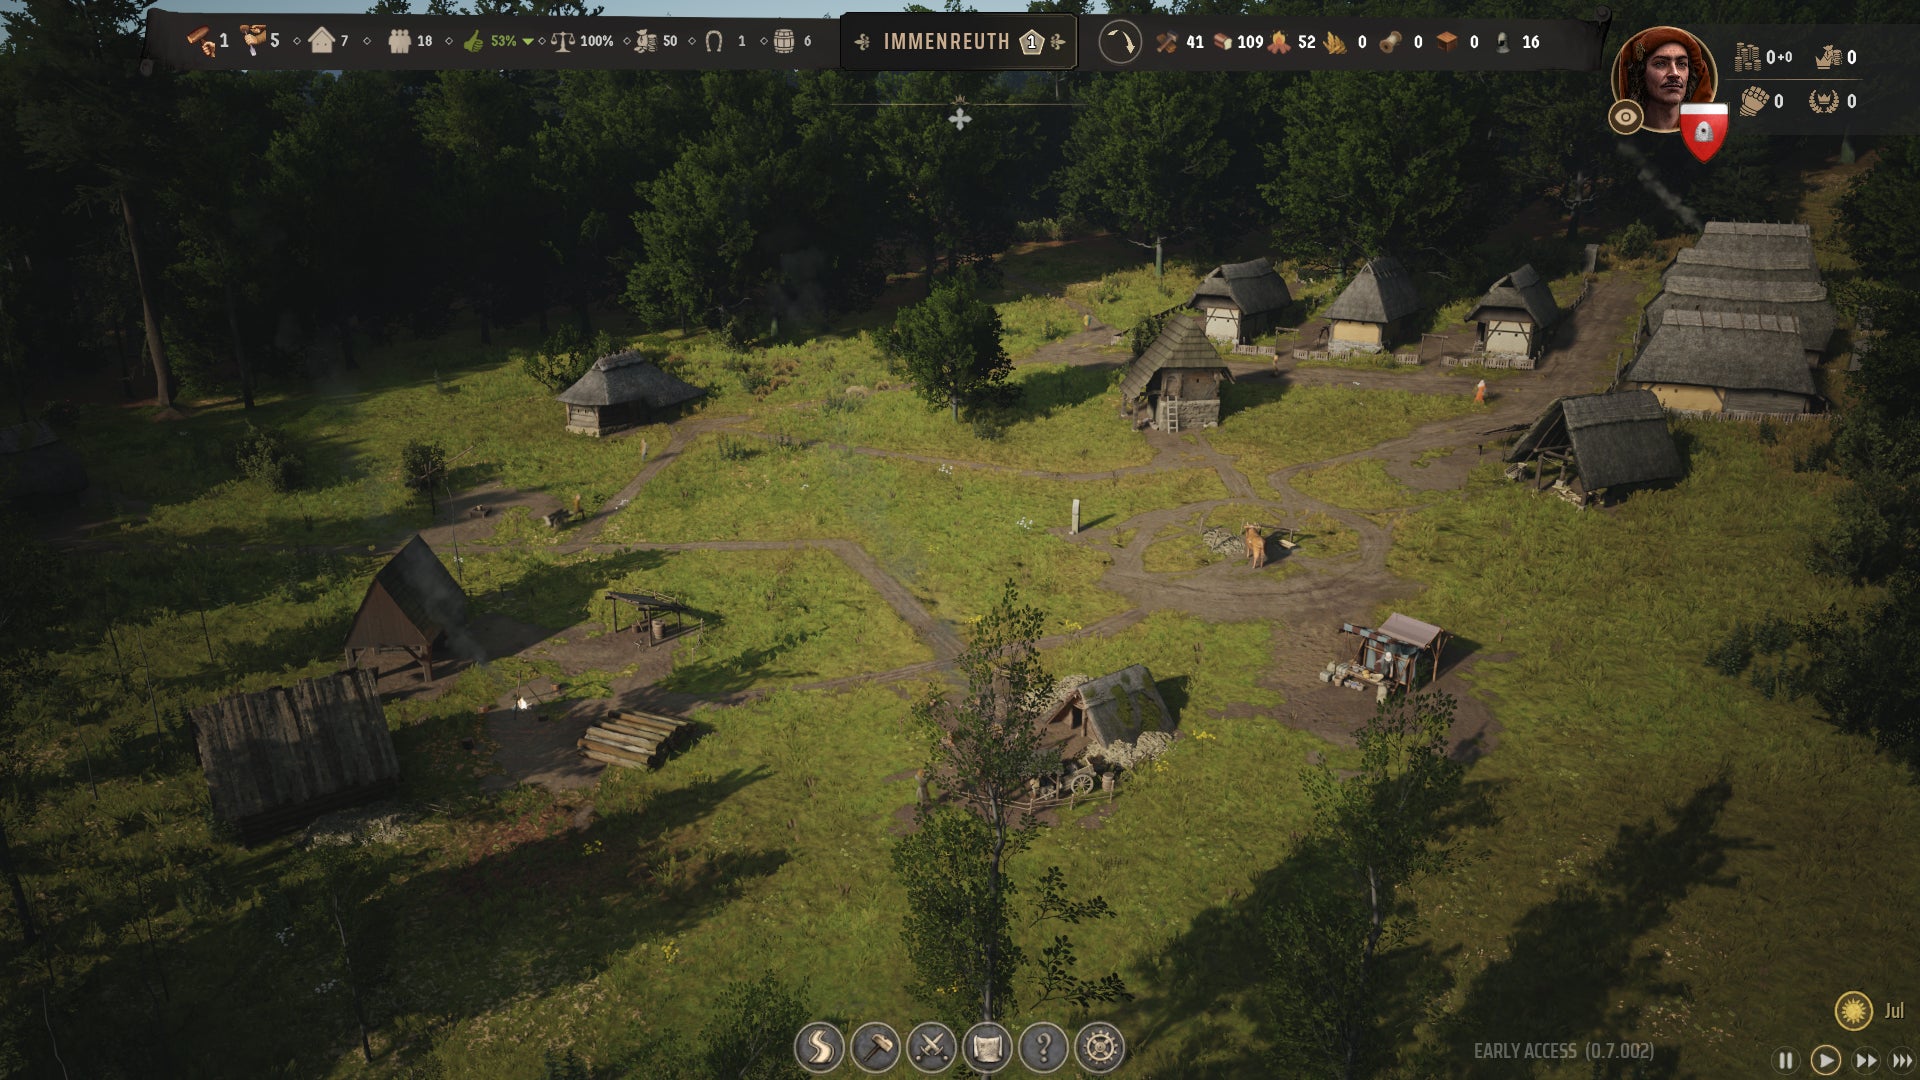
Image credit:Rock Paper Shotgun/Hooded Horse
Manor Lords system requirements and PC performance
Just like the Total War series from which its fiefdom vs. fiefdom battles are inspired, Manor Lords avoids making big demands of your PC parts. The minimum spec lists GPUs as humble as the 2GB GeForce GTX 1050, with only 8GB of RAM needed, and even the recommended specs only suggest CPUs and graphics cards that are nearly as old as the bricks in my village well. It’s a small install, too, with no explicit need for an SSD over a hard drive.
Manor Lords minimum PC specs
- OS: Windows 10 (64-bit)
- CPU: Intel Core i5-4590 / AMD FX-Series FX-4350
- RAM: 8GB
- GPU: Nvidia GeForce GTX 1050 / AMD Radeon RX 460 (4 GB)
- DirectX: Version 12
- Storage: 16GB available space
Manor Lords recommended PC specs
- OS: Windows 10 (64-bit)
- CPU: Intel Core i5-6600 / AMD FX-Series FX-9590
- RAM: 12GB
- Graphics: Nvidia GeForce GTX 960 (4 GB) / AMD Radeon™ RX 570 (8 GB)
- DirectX: Version 12
- Storage: 16GB available space
So consigned to history are most of these components that I didn’t actually have any to test, the closest being a 4GB version of the RX 570 that I quickly found was broken (RIP). I did have a GTX 1050 Ti, though, so plugged it into the RPS test rig and saw it cruise to 80fps at native 1080p with Low settings.
That, it should be noted, is with the help of a very much above-spec Intel Core i5-11600K and 16GB of RAM, but it bodes well nonetheless. The GTX 1050 Ti could also handle Medium settings, averaging 46fps, though that comes with a noticeable drop in motion smoothness.
Taking the GPU up a level, while still on 1080p, the GTX 1060 produced 72fps on Medium and 58fps on High. Again, good results for such long-in-the-tooth hardware. And a more modern low-end card, Intel’s Arc A750 , had no trouble achieving 65fps on Ultra settings and 97fps on High. The GTX 1060’s youngest descendent, the RTX 4060 , also scored 83fps on Ultra, though there’s no DLSS 3 support to add some AI-generated frames on top of that.

Image credit:Rock Paper Shotgun/Hooded Horse
Looking to 1440p, the RTX 4060 could still keep its cool, averaging 55fps on Ultra – and bumping that all the way up to 84fps by switching TAA for DLSS upscaling on Quality. This addition also improved the RTX 3070’s Ultra/440p performance from 83fps to 112fps, and the RTX 4070 Ti’s from 126fps to 170fps, all while beating TAA on sharpness and visual detailing.
Upscaling – be it DLSS or FSR – is even more useful on ultrawide resolutions, which Manor Lords appears to ably accommodate, as well as 4K. Here, the RTX 4070 Ti could do 70fps on Ultra with native TAA, but Quality DLSS punched that up to 122fps. The RTX 4090 , Nvidia’s most 4Kish of all their 4K GPUs, also turned a 125fps result with TAA into 168fps with Quality DLSS.
Manor Lords, therefore, does a jolly good job of both opening itself up to entry-level PCs while letting premium rigs off the leash. That goes for non-desktops, too. At its native 1080p, my RTX 4050 -powered MSI Thin GF63 gaming laptop could run High settings at 84fps, or 126fps with DLSS on Quality. Ultra was playable too, averaging 48fps with TAA and 70fps with DLSS Quality.
Meanwhile, the Steam Deck can’t quite deal with a full set of High settings, but turning everything down to Medium was enough to get it within the 30-40fps range. It’s still not the smoothest citybuilding experience you can have on the Deck, though that’s mainly for non-performance reasons: Manor Lords’ gamepad support is functional but not especially fleshed out, relying heavily on the Deck’s right trackpad and failing to replace on-screen mouse and keyboard prompts with face button or thumsticks equivalents. It kinda works, but you’ll need to engage in some trial and error to figure out the more complex commands.

Image credit:Rock Paper Shotgun/Hooded Horse
Maybe handheld and controller support will be among the changes that Manor Lords makes in its early access phase. Right now, it seems fairly solid – not at all the kind of early access game that will crash on the spot upon an errant mouse swish – though I’m hoping that means that the issues that do exist can be identified and stamped out quicker. For one, there’s some nasty stuttering when you load up a save. It’s not sustained beyond that, hence why I haven’t moaned about it until about 900 words into this piece, but some polish there would be appreciated.
Ironically, the settings menu itself could also use some tightening up. You probably shouldn’t be able to select DLSS on non-RTX graphics cards, as you can now – it doesn’t do anything, except perhaps give Radeon owners false hope – and I’ve noticed that some graphics options occasionally stop highlighting which precise setting is enabled. The bounced light approximation option also has a habit of switching back to Ultra immediately after you’ve lowered it, meaning that for now, it’s effectively impossible to decrease or switch off.
That needs fixing, but still, I don’t think there’s anything too worrying here. Manor Lords evidently runs well on weak kit even with maximum light bounciness, and with the right settings, it’s possible to stay mostly stutter-free beyond the initial burst.
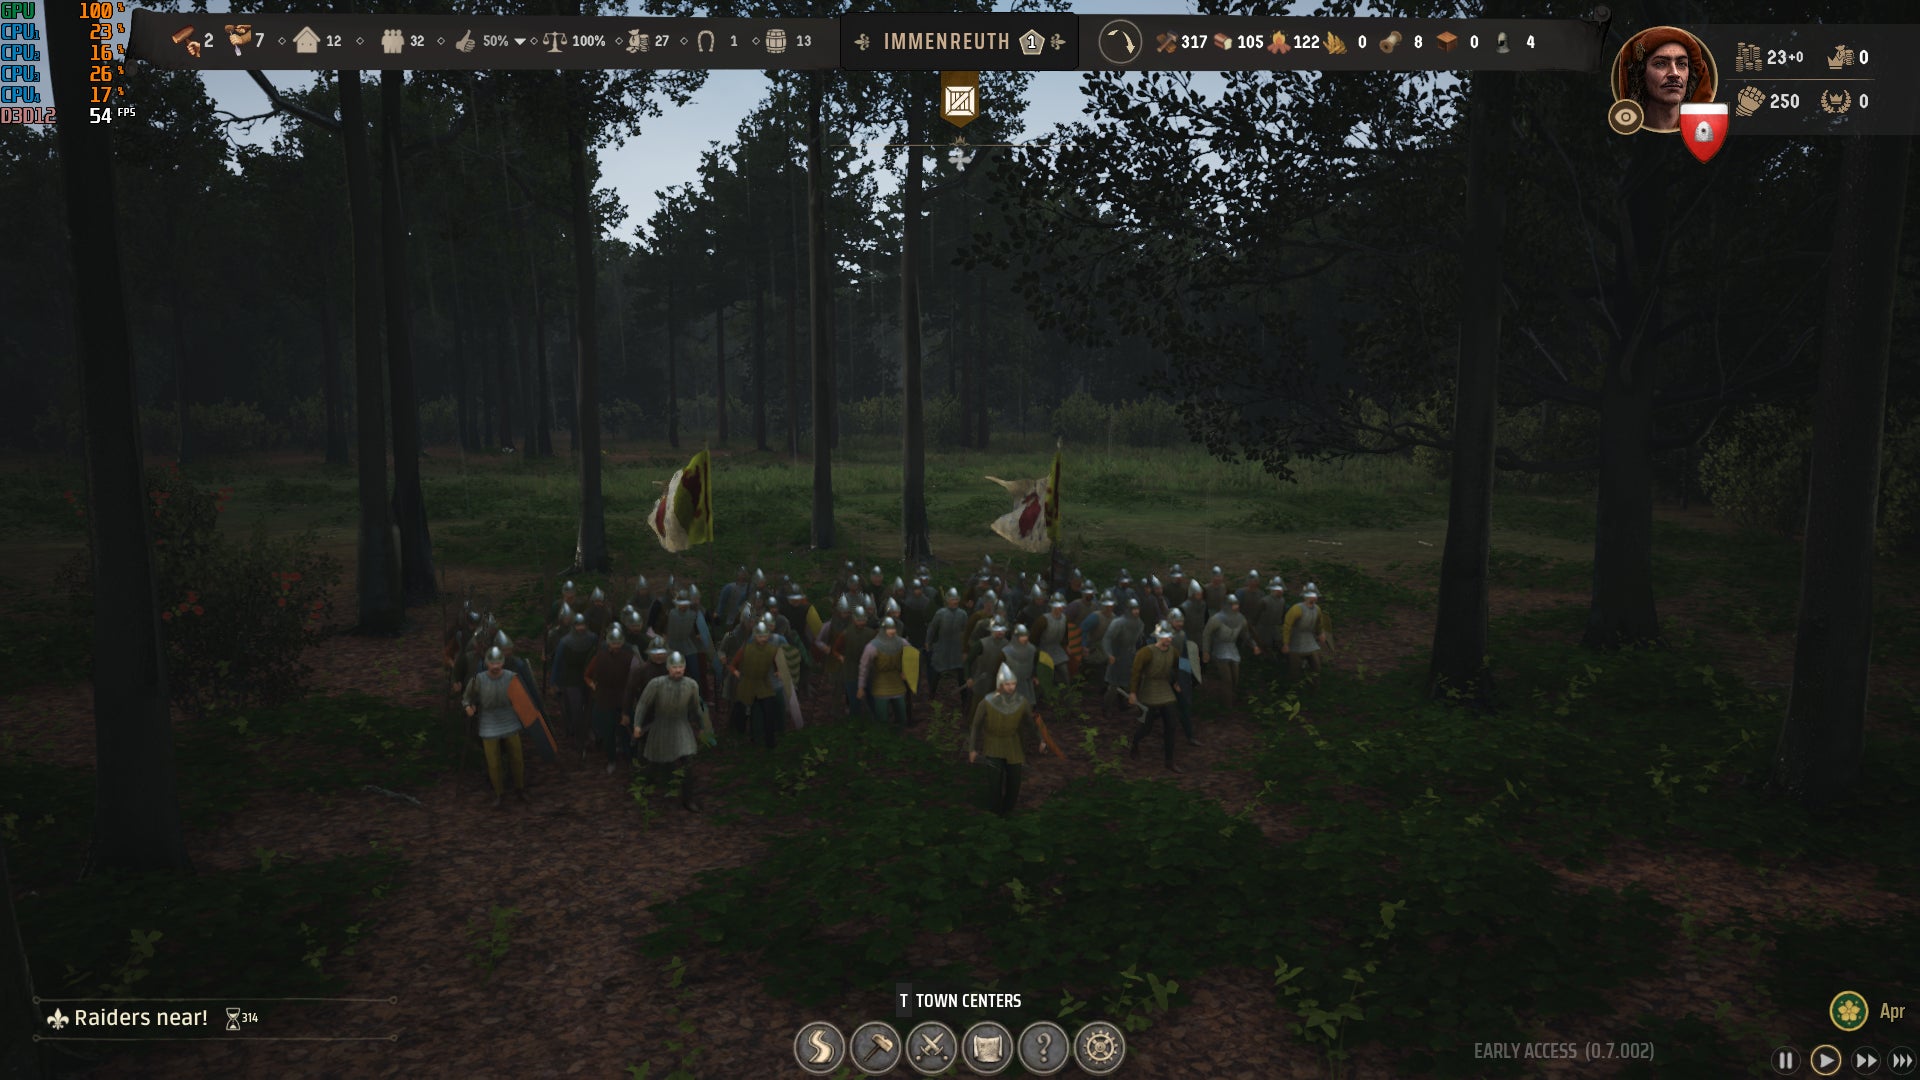
Image credit:Rock Paper Shotgun/Hooded Horse
Manor Lords best settings guide
Most reasonably up-to-date PCs can, in all likelihood, get good framerates out of Manor Lords on its highest settings. The really lordly thing to do, however, would be to sacrifice a few quality options in exchange for a disproportionately bountiful improvement to performance. Like if framerates were firewood, and foliage quality was the peasant family I casually yanked from their berry foraging business to spend eighteen hours a day chopping logs. Good of the many, innit.
Making these cuts is easier knowing that, unless you’re absolutely scraping the bottom of the minimum spec barrel, you don’t really need to drop as far as Low. Just a handful of Medium settings can seriously speed up Manor Lords, as I found when lowering each one individually to see which are the most performance-determinant.
For these tests, I used an RTX 4060 at 1080p, starting off with full Ultra settings and anti-aliasing set to TAA. That setup averaged 83fps, so any options that significantly improve that can be considered for tweaking. Anything else, you can likely leave on Ultra, except perhaps on the very weakest hardware.
Anti-aliasing: For native rez play, FXAA is an unusually attractive alternative to TAA. With it, I averaged 84fps, so it’s only a teensy bit faster, but then it also doesn’t blur out fine details to the extent that TAA does.
Of course, for 1440p and above, upscaling is even better. FSR on Quality will suffice for non-RTX GPUs, sending performance up to 96fps on its Quality mode, but Nvidia’s DLSS is both the fastest (with 108fps on Quality) and the best-looking.
Dynamic DLSS: Toggling this allows DLSS to automatically switch between different quality modes, depending on whether the framerate is rising or dipping. It can even enable DLAA , which is basically non-upscaled, native-rez anti-aliasing, during periods of smooth running. This was presumably in use for some of my benchmark run, as I averaged 99fps – slower than with Quality DLSS permanently on.
As in Horizon Forbidden West , Dynamic DLSS is pretty good at masking its rendering resolution changes, though to be honest, Quality DLSS looks so good I’m not sure it’s worth the occasional spells of DLAA.
3D Resolution scale: Leave this on 100%. Manor Lords usually runs well enough that you don’t need to reduce the 3D visuals’ resolution, and if you do, using an upscaler at least tries to replicate the look of native rendering.
Sharpening: This can be ignored as well. Adding this sharpening effect hurts Manor Lords’ visuals more than it helps, with even the Medium setting producing an artificial, heavily processed look.
Shader quality: I didn’t get a tangible performance improvement from lowering this on my RTX 4060, though there was a small gain to be had from dropping to Low on the Steam Deck. In other words, keep it high if you’ve got a decent desktop GPU, but consider lowering it if you’re playing fast and loose with the system requirements.
Shadow quality: Worth lowering, this. Medium shadows only look the teensiest bit less detailed than on Ultra, but got my RTX 4060 up to 93fps in a single click.
Postprocess quality: Dropping this had no effect on performance, as far as I could measure.
Bounced light approximation: As mentioned, this setting appears to be bugged at the time of writing, consistently and immediately setting itself to Ultra. Hope you like light rays being simulated with a higher degree of accuracy.
Volumetric clouds: For some reason, disabling these reduced performance, dropping to 81fps. Best leave them on.
Terrain texture resolution: Surprisingly, this also failed to move the performance dial when dropping from Ultra to Medium. Stick to Ultra, I guess!
View distance: The RTX 4060 scooted up to 85fps with view distance on Medium, though that’s not really worth it, given the difference is easily noticeable when zoomed in. Or when pottering about your village in third-person, as Manor Lords lets you do. Go with Ultra to minimise that pop-in.
Grass density: Medium netted me 91fps here, though the loss in quality is easily spotted. High is arguably a better compromise, still delivering a framerate boost (up to 88fps) while still maintaining that rural detail.
Grass distance: This, on the other hand, is one for the Medium pile. High looks a little better but Medium is faster, averaging 87fps to High’s 85fps.
Foliage quality: Lower this to Medium as well. The quality difference from Ultra is easily small enough that the performance gain, up to 88fps in the RTX 4060’s case, justifies it.
Image credit:Rock Paper Shotgun/Hooded Horse
I was worried it would be masses of battle-ready NPCs that would cause Manor Lords’s biggest performance drops, but it turns out it was those dastardly trees all along. Its best settings combination, therefore, focuses heavily on bringing down the impact of framerate-sapping foliage:
- Anti-aliasing: FXAA (native resolution only), or DLSS/FSR on Quality
- Shadow quality: Medium
- Grass density: High
- Grass distance: Medium
- Foliage quality: Medium
- Everything else: Ultra
Still on 1080p, these settings (including FXAA) sent my RTX 4060 rocketing from 83fps to 137fps – a 65% improvement, and without a Low setting in sight. Quality DLSS, with Dynamic DLSS left disabled, turned that into a 110% improvement by scoring 174fps. Not bad, Manor Lords, not bad at all.
I also tested these settings on the GTX 1050 Ti, averaging 43fps, or about the same as using the full suite of Medium settings. That bumped up to 50fps with shader quality on Low, mind, so that’s another change worth making on lower-end PCs Still, that’s literally the only setting that needs to drop all the way to its respective minimum.

Manor Lords
PC
Rock Paper Shotgun is better when you sign in
Sign in and join us on our journey to discover strange and compelling PC games.

All 75 Arc Raiders Blueprints and where to get them
These areas have the highest chance of giving you Blueprints

Image credit:Rock Paper Shotgun/Embark Studios

Looking for more Arc Raiders Blueprints? It’s a special day when you find a Blueprint, as they’re among the most valuable items in Arc Raiders. If you find a Blueprint that you haven’t already found, then you must make sure you hold onto it at all costs, because Blueprints are the key to one of the most important and powerful systems of meta-progression in the game.
This guide aims to be the very best guide on Blueprints you can find, starting with a primer on what exactly they are and how they work in Arc Raiders, before delving into exactly where to get Blueprints and the very best farming spots for you to take in your search.
We’ll also go over how to get Blueprints from other unlikely activities, such as destroying Surveyors and completing specific quests. And you’ll also find the full list of all 75 Blueprints in Arc Raiders on this page (including the newest Blueprints added with the Cold Snap update , such as the Deadline Blueprint and Firework Box Blueprint), giving you all the information you need to expand your own crafting repertoire.
In this guide:
- What are Blueprints in Arc Raiders?
- Full Blueprint list: All crafting recipes
- Where to find Blueprints in Arc Raiders Blueprints obtained from quests Blueprints obtained from Trials Best Blueprint farming locations

What are Blueprints in Arc Raiders?
Blueprints in Arc Raiders are special items which, if you manage to extract with them, you can expend to permanently unlock a new crafting recipe in your Workshop. If you manage to extract from a raid with an Anvil Blueprint, for example, you can unlock the ability to craft your very own Anvil Pistol, as many times as you like (as long as you have the crafting materials).
To use a Blueprint, simply open your Inventory while in the lobby, then right-click on the Blueprint and click “Learn And Consume” . This will permanently unlock the recipe for that item in your Workshop. As of the Stella Montis update, there are allegedly 75 different Blueprints to unlock - although only 68 are confirmed to be in the game so far. You can see all the Blueprints you’ve found and unlocked by going to the Workshop menu, and hitting “R” to bring up the Blueprint screen.
It’s possible to find duplicates of past Blueprints you’ve already unlocked. If you find these, then you can either sell them, or - if you like to play with friends - you can take it into a match and gift it to your friend so they can unlock that recipe for themselves. Another option is to keep hold of them until the time comes to donate them to the Expedition.
Full Blueprint list: All crafting recipes
Below is the full list of all the Blueprints that are currently available to find in Arc Raiders, and the crafting recipe required for each item:
| Blueprint | Type | Recipe | Crafted At |
|---|---|---|---|
| Bettina | Weapon | 3x Advanced Mechanical Components 3x Heavy Gun Parts 3x Canister | Gunsmith 3 |
| Blue Light Stick | Quick Use | 3x Chemicals | Utility Station 1 |
| Aphelion | Weapon | 3x Magnetic Accelerator 3x Complex Gun Parts 1x Matriarch Reactor | Gunsmith 3 |
| Combat Mk. 3 (Flanking) | Augment | 2x Advanced Electrical Components 3x Processor | Gear Bench 3 |
| Combat Mk. 3 (Aggressive) | Augment | 2x Advanced Electrical Components 3x Processor | Gear Bench 3 |
| Complex Gun Parts | Material | 2x Light Gun Parts 2x Medium Gun Parts 2x Heavy Gun Parts | Refiner 3 |
| Fireworks Box | Quick Use | 1x Explosive Compound 3x Pop Trigger | Explosives Station 2 |
| Gas Mine | Mine | 4x Chemicals 2x Rubber Parts | Explosives Station 1 |
| Green Light Stick | Quick Use | 3x Chemicals | Utility Station 1 |
| Pulse Mine | Mine | 1x Crude Explosives 1x Wires | Explosives Station 1 |
| Seeker Grenade | Grenade | 1x Crude Explosives 2x ARC Alloy | Explosives Station 1 |
| Looting Mk. 3 (Survivor) | Augment | 2x Advanced Electrical Components 3x Processor | Gear Bench 3 |
| Angled Grip II | Mod | 2x Mechanical Components 3x Duct Tape | Gunsmith 2 |
| Angled Grip III | Mod | 2x Mod Components 5x Duct Tape | Gunsmith 3 |
| Hullcracker | Weapon | 1x Magnetic Accelerator 3x Heavy Gun Parts 1x Exodus Modules | Gunsmith 3 |
| Launcher Ammo | Ammo | 5x Metal Parts 1x Crude Explosives | Workbench 1 |
| Anvil | Weapon | 5x Mechanical Components 5x Simple Gun Parts | Gunsmith 2 |
| Anvil Splitter | Mod | 2x Mod Components 3x Processor | Gunsmith 3 |
| ??? | ??? | ??? | ??? |
| Barricade Kit | Quick Use | 1x Mechanical Components | Utility Station 2 |
| Blaze Grenade | Grenade | 1x Explosive Compound 2x Oil | Explosives Station 3 |
| Bobcat | Weapon | 3x Advanced Mechanical Components 3x Light Gun Parts | Gunsmith 3 |
| Osprey | Weapon | 2x Advanced Mechanical Components 3x Medium Gun Parts 7x Wires | Gunsmith 3 |
| Burletta | Weapon | 3x Mechanical Components 3x Simple Gun Parts | Gunsmith 1 |
| Compensator II | Mod | 2x Mechanical Components 4x Wires | Gunsmith 2 |
| Compensator III | Mod | 2x Mod Components 8x Wires | Gunsmith 3 |
| Defibrillator | Quick Use | 9x Plastic Parts 1x Moss | Medical Lab 2 |
| ??? | ??? | ??? | ??? |
| Equalizer | Weapon | 3x Magnetic Accelerator 3x Complex Gun Parts 1x Queen Reactor | Gunsmith 3 |
| Extended Barrel | Mod | 2x Mod Components 8x Wires | Gunsmith 3 |
| Extended Light Mag II | Mod | 2x Mechanical Components 3x Steel Spring | Gunsmith 2 |
| Extended Light Mag III | Mod | 2x Mod Components 5x Steel Spring | Gunsmith 3 |
| Extended Medium Mag II | Mod | 2x Mechanical Components 3x Steel Spring | Gunsmith 2 |
| Extended Medium Mag III | Mod | 2x Mod Components 5x Steel Spring | Gunsmith 3 |
| Extended Shotgun Mag II | Mod | 2x Mechanical Components 3x Steel Spring | Gunsmith 2 |
| Extended Shotgun Mag III | Mod | 2x Mod Components 5x Steel Spring | Gunsmith 3 |
| Remote Raider Flare | Quick Use | 2x Chemicals 4x Rubber Parts | Utility Station 1 |
| Heavy Gun Parts | Material | 4x Simple Gun Parts | Refiner 2 |
| Venator | Weapon | 2x Advanced Mechanical Components 3x Medium Gun Parts 5x Magnet | Gunsmith 3 |
| Il Toro | Weapon | 5x Mechanical Components 6x Simple Gun Parts | Gunsmith 1 |
| Jolt Mine | Mine | 1x Electrical Components 1x Battery | Explosives Station 2 |
| Explosive Mine | Mine | 1x Explosive Compound 1x Sensors | Explosives Station 3 |
| Jupiter | Weapon | 3x Magnetic Accelerator 3x Complex Gun Parts 1x Queen Reactor | Gunsmith 3 |
| Light Gun Parts | Material | 4x Simple Gun Parts | Refiner 2 |
| Lightweight Stock | Mod | 2x Mod Components 5x Duct Tape | Gunsmith 3 |
| Lure Grenade | Grenade | 1x Speaker Component 1x Electrical Components | Utility Station 2 |
| Medium Gun Parts | Material | 4x Simple Gun Parts | Refiner 2 |
| Torrente | Weapon | 2x Advanced Mechanical Components 3x Medium Gun Parts 6x Steel Spring | Gunsmith 3 |
| Muzzle Brake II | Mod | 2x Mechanical Components 4x Wires | Gunsmith 2 |
| Muzzle Brake III | Mod | 2x Mod Components 8x Wires | Gunsmith 3 |
| Padded Stock | Mod | 2x Mod Components 5x Duct Tape | Gunsmith 3 |
| Shotgun Choke II | Mod | 2x Mechanical Components 4x Wires | Gunsmith 2 |
| Shotgun Choke III | Mod | 2x Mod Components 8x Wires | Gunsmith 3 |
| Shotgun Silencer | Mod | 2x Mod Components 8x Wires | Gunsmith 3 |
| Showstopper | Grenade | 1x Advanced Electrical Components 1x Voltage Converter | Explosives Station 3 |
| Silencer I | Mod | 2x Mechanical Components 4x Wires | Gunsmith 2 |
| Silencer II | Mod | 2x Mod Components 8x Wires | Gunsmith 3 |
| Snap Hook | Quick Use | 2x Power Rod 3x Rope 1x Exodus Modules | Utility Station 3 |
| Stable Stock II | Mod | 2x Mechanical Components 3x Duct Tape | Gunsmith 2 |
| Stable Stock III | Mod | 2x Mod Components 5x Duct Tape | Gunsmith 3 |
| Tagging Grenade | Grenade | 1x Electrical Components 1x Sensors | Utility Station 3 |
| Tempest | Weapon | 3x Advanced Mechanical Components 3x Medium Gun Parts 3x Canister | Gunsmith 3 |
| Trigger Nade | Grenade | 2x Crude Explosives 1x Processor | Explosives Station 2 |
| Vertical Grip II | Mod | 2x Mechanical Components 3x Duct Tape | Gunsmith 2 |
| Vertical Grip III | Mod | 2x Mod Components 5x Duct Tape | Gunsmith 3 |
| Vita Shot | Quick Use | 2x Antiseptic 1x Syringe | Medical Lab 3 |
| Vita Spray | Quick Use | 3x Antiseptic 1x Canister | Medical Lab 3 |
| Vulcano | Weapon | 1x Magnetic Accelerator 3x Heavy Gun Parts 1x Exodus Modules | Gunsmith 3 |
| Wolfpack | Grenade | 2x Explosive Compound 2x Sensors | Explosives Station 3 |
| Red Light Stick | Quick Use | 3x Chemicals | Utility Station 1 |
| Smoke Grenade | Grenade | 14x Chemicals 1x Canister | Utility Station 2 |
| Deadline | Mine | 3x Explosive Compound 2x ARC Circuitry | Explosives Station 3 |
| Trailblazer | Grenade | 1x Explosive Compound 1x Synthesized Fuel | Explosives Station 3 |
| Tactical Mk. 3 (Defensive) | Augment | 2x Advanced Electrical Components 3x Processor | Gear Bench 3 |
| Tactical Mk. 3 (Healing) | Augment | 2x Advanced Electrical Components 3x Processor | Gear Bench 3 |
| Yellow Light Stick | Quick Use | 3x Chemicals | Utility Station 1 |
Note: The missing Blueprints in this list likely have not actually been added to the game at the time of writing, because none of the playerbase has managed to find any of them. As they are added to the game, I will update this page with the most relevant information so you know exactly how to get all 75 Arc Raiders Blueprints.
Where to find Blueprints in Arc Raiders
Below is a list of all containers, modifiers, and events which maximise your chances of finding Blueprints:
- Certain quests reward you with specific Blueprints .
- Completing Trials has a high chance of offering Blueprints as rewards.
- Surveyors have a decent chance of dropping Blueprints on death.
- High loot value areas tend to have a greater chance of spawning Blueprints.
- Night Raids and Storms may increase rare Blueprint spawn chances in containers.
- Containers with higher numbers of items may have a higher tendency to spawn Blueprints. As a result, Blue Gate (which has many “large” containers containing multiple items) may give you a higher chance of spawning Blueprints.
- Raider containers (Raider Caches, Weapon Boxes, Medical Bags, Grenade Tubes) have increased Blueprint drop rates. As a result, the Uncovered Caches event gives you a high chance of finding Blueprints.
- Security Lockers have a higher than average chance of containing Blueprints.
- Certain Blueprints only seem to spawn under specific circumstances: Tempest Blueprint only spawns during Night Raid events. Vulcano Blueprint only spawns during Hidden Bunker events. Jupiter and Equaliser Blueprints only spawn during Harvester events.

Raider Caches, Weapon Boxes, and other raider-oriented container types have a good chance of offering Blueprints. |Image credit:Rock Paper Shotgun/Embark Studios
Blueprints have a very low chance of spawning in any container in Arc Raiders, around 1-2% on average. However, there is a higher chance of finding Blueprints in particular container types. Specifically, you can find more Blueprints in Raider containers and security lockers.
Beyond this, if you’re looking for Blueprints you should focus on regions of the map which are marked as having particularly high-value loot. Areas such as the Control Tower in Dam Battlegrounds, the Arrival and Departure Buildings in Spaceport, and Pilgrim’s Peak in Blue Gate all have a better-than-average chance of spawning Blueprints somewhere amongst all their containers. Night Raids and Electromagnetic Storm events also increase the drop chances of certain Blueprints .
In addition to these containers, you can often loot Blueprints from destroyed Surveyors - the largest of the rolling ball ARC. Surveyors are more commonly found on the later maps - Spaceport and Blue Gate - and if one spawns in your match, you’ll likely see it by the blue laser beam that it casts into the sky while “surveying”.
Surveyors are quite well-armoured and will very speedily run away from you once it notices you, but if you can take one down then make sure you loot all its parts for a chance of obtaining certain unusual Blueprints.
Blueprints obtained from quests
One way in which you can get Blueprints is by completing certain quests for the vendors in Speranza. Some quests will reward you with a specific item Blueprint upon completion, so as long as you work through all the quests in Arc Raiders, you are guaranteed those Blueprints.
Here is the full list of all Blueprints you can get from quest rewards:
- Trigger Nade Blueprint: Rewarded after completing “Sparks Fly”.
- Lure Grenade Blueprint: Rewarded after completing “Greasing Her Palms”.
- Burletta Blueprint: Rewarded after completing “Industrial Espionage”.
- Hullcracker Blueprint (and Launcher Ammo Blueprint): Rewarded after completing “The Major’s Footlocker”.
Alas, that’s only 4 Blueprints out of a total of 75 to unlock, so for the vast majority you will need to find them yourself during a raid. If you’re intent on farming Blueprints, then it’s best to equip yourself with cheap gear in case you lose it, but don’t use a free loadout because then you won’t get a safe pocket to stash any new Blueprint you find. No pain in Arc Raiders is sharper than failing to extract with a new Blueprint you’ve been after for a dozen hours already.

One of the best ways to get Blueprints is by hitting three stars on all five Trials every week. |Image credit:Rock Paper Shotgun/Embark Studios
Blueprints obtained from Trials
One of the very best ways to get Blueprints is as rewards for completing Trials in Arc Raiders. Trials are unlocked from Level 15 onwards, and allow you to earn rewards by focusing on certain tasks over the course of several raids. For example, one Trial might task you with dealing damage to Hornets, while another might challenge you to loot Supply Drops.
Trials refresh on a weekly basis, with a new week bringing five new Trials. Each Trial can offer up to three rewards after passing certain score milestones, and it’s possible to receive very high level loot from these reward crates - including Blueprints. So if you want to unlock as many Blueprints as possible, you should make a point of completing as many Trials as possible each week.
Best Blueprint farming locations
The very best way to get Blueprints is to frequent specific areas of the maps which combine high-tier loot pools with the right types of containers to search. Here are my recommendations for where to find Blueprints on every map, so you can always keep the search going for new crafting recipes to unlock.

Image credit:Rock Paper Shotgun/Embark Studios
Dam Battlegrounds
The best places to farm Blueprints on Dam Battlegrounds are the Control Tower, Power Generation Complex, Ruby Residence, and Pale Apartments . The first two regions, despite only being marked on the map as mid-tier loot, contain a phenomenal number of containers to loot. The Control Tower can also contain a couple of high-tier Security Lockers - though of course, you’ll need to have unlocked the Security Breach skill at the end of the Survival tree.
There’s also a lot of reporting amongst the playerbase that the Residential areas in the top-left of the map - Pale Apartments and Ruby Residence - give you a comparatively strong chance of finding Blueprints. Considering their size, there’s a high density of containers to loot in both locations, and they also have the benefit of being fairly out of the way. So you’re more likely to have all the containers to yourself.
Buried City
The best Blueprint farming locations on Buried City are the Santa Maria Houses, Grandioso Apartments, Town Hall, and the various buildings of the New District . Grandioso Apartments has a lower number of containers than the rest, but a high chance of spawning weapon cases - which have good Blueprint drop rates. The others are high-tier loot areas, with plenty of lootable containers - including Security Lockers.
Spaceport
The best places to find Blueprints on Spaceport are the Arrival and Departure Buildings, as well as Control Tower A6 and the Launch Towers . All these areas are labelled as high-value loot regions, and many of them are also very handily connected to one another by the Spaceport wall, which you can use to quickly run from one area to the next. At the tops of most of these buildings you’ll find at least one Security Locker, so this is an excellent farming route for players looking to find Blueprints.
The downside to looting Blueprints on Spaceport is that all these areas are hotly contested, particularly in Duos and Squads. You’ll need to be very focused and fast in order to complete the full farming route.

Image credit:Rock Paper Shotgun/Embark Studios
Blue Gate
Blue Gate tends to have a good chance of dropping Blueprints, potentially because it generally has a high number of containers which can hold lots of items; so there’s a higher chance of a Blueprint spawning in each container. In my experience, the best Blueprint farming spots on Blue Gate are Pilgrim’s Peak, Raider’s Refuge, the Ancient Fort, and the Underground Complex beneath the Warehouse .
All of these areas contain a wealth of containers to loot. Raider’s Refuge has less to loot, but the majority of the containers in and around the Refuge are raider containers, which have a high chance of containing Blueprints - particularly during major events.
Stella Montis
On the whole, Stella Montis seems to have a very low drop rate for Blueprints (though a high chance of dropping other high-tier loot). If you do want to try farming Blueprints on this map, the best places to find Blueprints in Stella Montis are Medical Research, Assembly Workshop, and the Business Center . These areas have the highest density of containers to loot on the map.
In addition to this, the Western Tunnel has a few different Security Lockers to loot, so while there’s very little to loot elsewhere in this area of the map, it’s worth hitting those Security Lockers if you spawn there at the start of a match.
That wraps up this primer on how to get all the Blueprints in Arc Raiders as quickly as possible. With the Expedition system constantly resetting a large number of players’ Blueprints, it’s more important than ever to have the most up-to-date information on where to find all these Blueprints.
While you’re here, be sure to check out our Arc Raiders best guns tier list , as well as our primers on the best skills to unlock and all the different Field Depot locations on every map.

ARC Raiders
PS5 , Xbox Series X/S , PC
Rock Paper Shotgun is better when you sign in
Sign in and join us on our journey to discover strange and compelling PC games.
