Manor Lords beginner’s guide: Everything you need to build in your first year
Learn what to build first with this beginner’s guide to Manor Lords
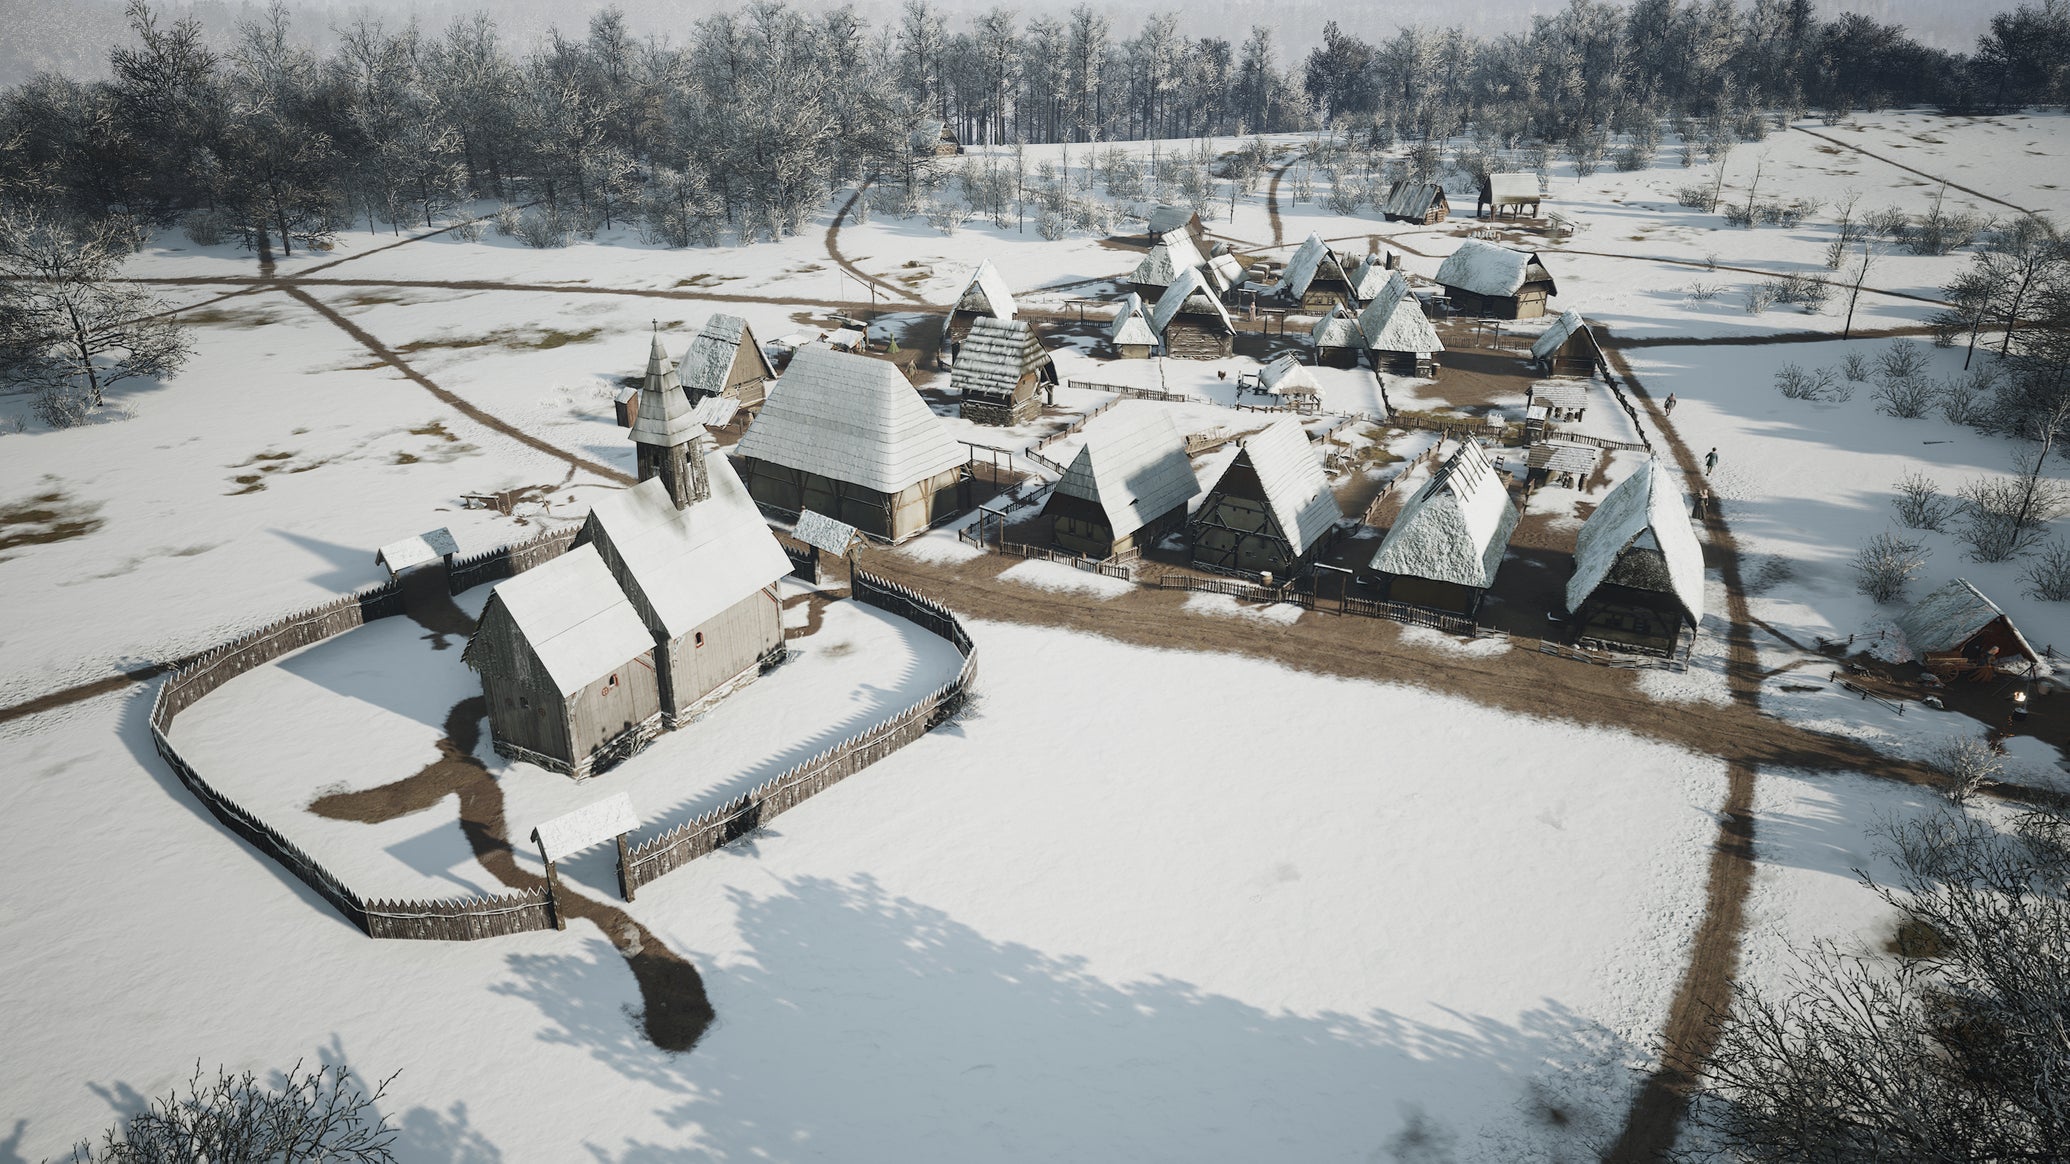
Image credit:Rock Paper Shotgun/Hooded Horse

Not sure how to get started in Manor Lords? It’s a common complaint. I’m of the opinion that solo developer Slavic Magic has made a rather special city-builder with Manor Lords , but it has to be said that the game can be pretty obtuse and confusing at times.
If you’re itching to build your own town in Manor Lords but you’re not sure where to begin or whether you’re doing things right, that’s where we hope to help you. In this beginner’s guide, I will walk you through your first year in Manor Lords, handling everything from the initial few buildings and family assignments to big projects like food production, building your first Church and Manor, and surviving your first Winter. At the end, I’ll also leave you with some key objectives for you to prepare for in Year 2.
So! Here’s how to get off to a roaring start in Manor Lords!
Note: for this walkthrough, I’ll assume that you’ve chosen the default starting scenario : “Restoring The Peace”. But no matter which scenario you choose, this guide should help you through the basics of setting up your town.
1. Pause the game, and construct these buildings
When you first load into the world, immediately pause the game and take a look around your region of the map. You should see a few key resources: Berries and Wild Animals will be the most important, as they’re your early-game food sources. There may also be Stone , Iron , and Clay , which you won’t have to worry about for a while, but it’s good to note their whereabouts ahead of time.
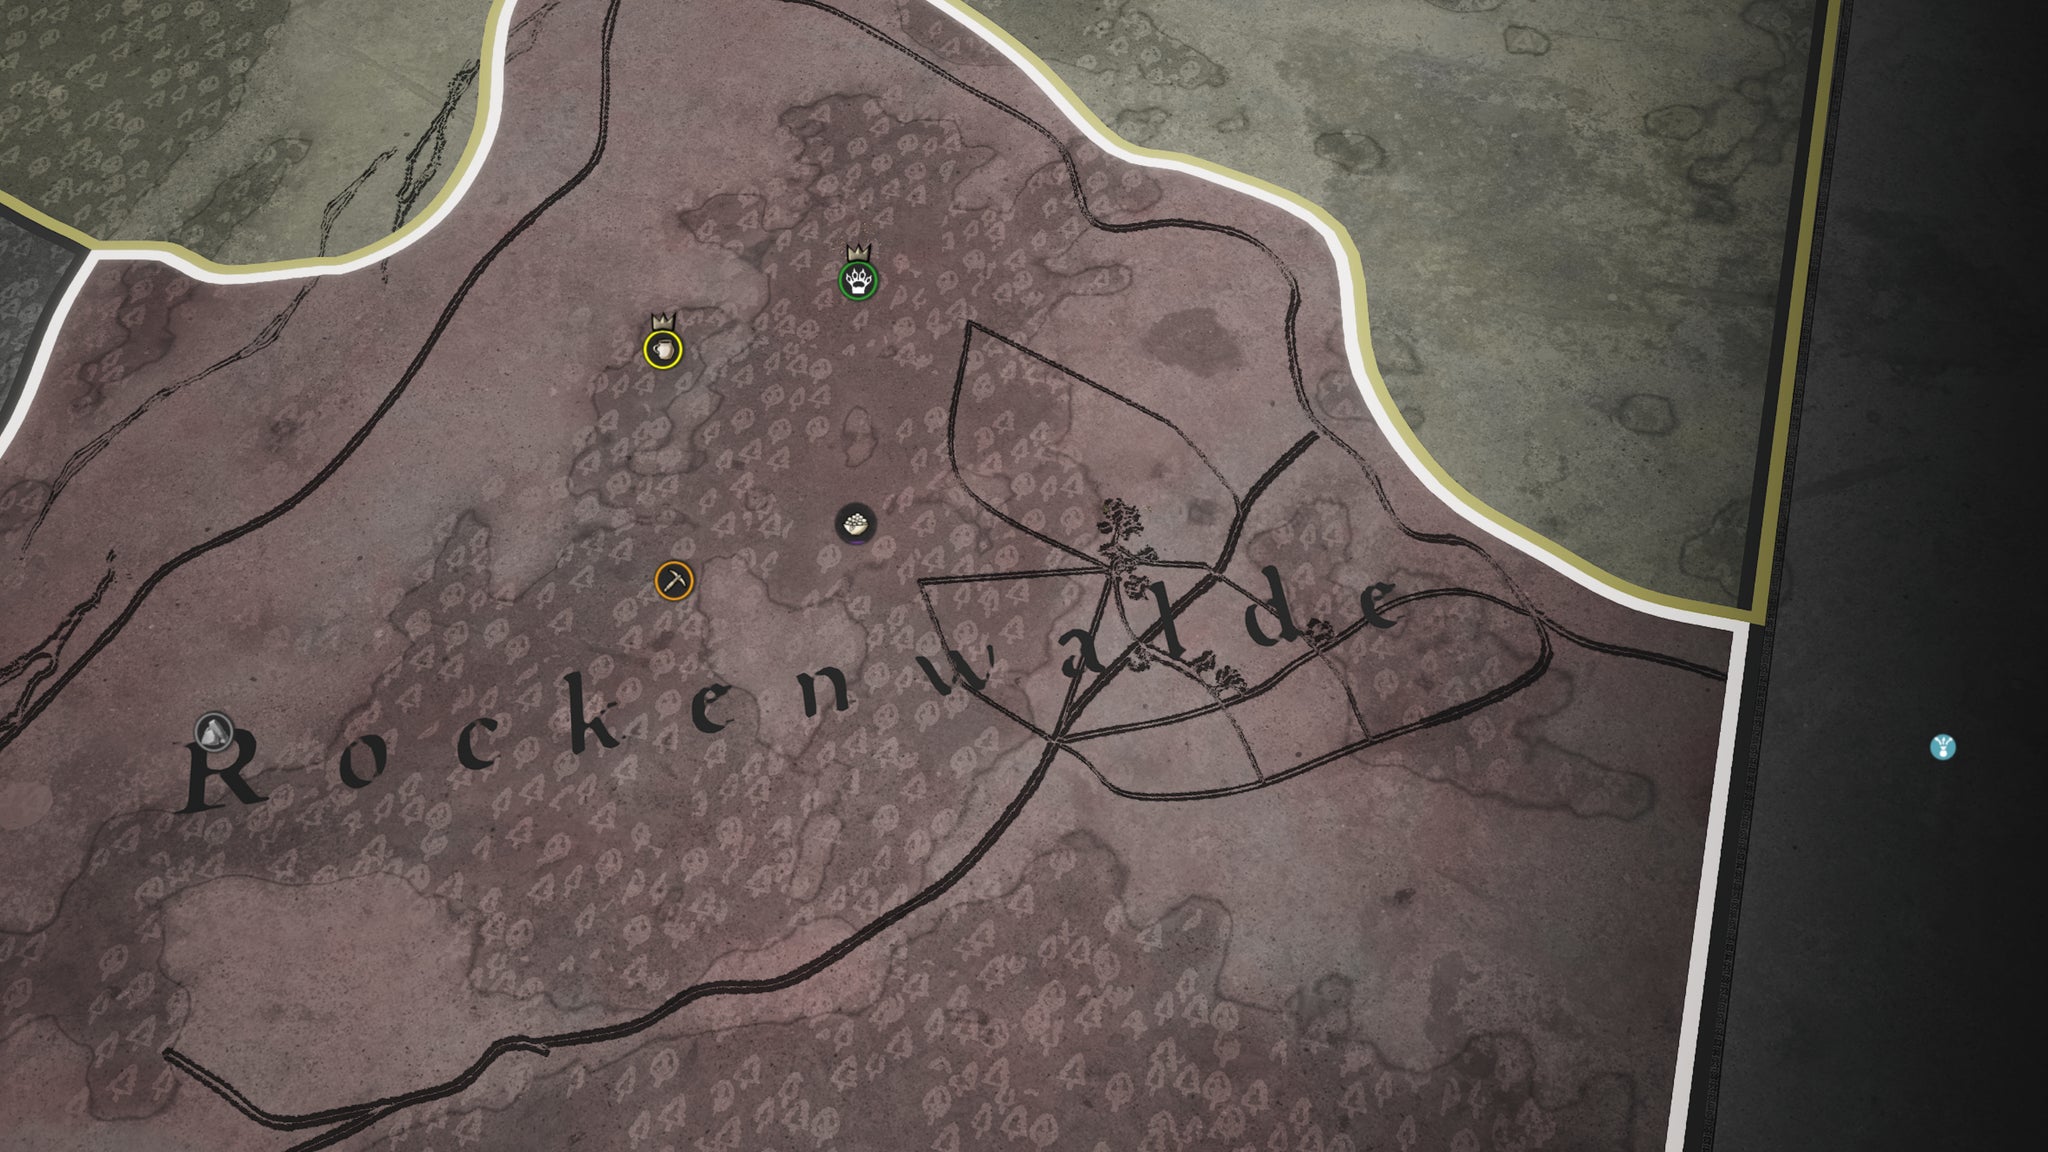
Looks like I’ve got some nearby Berries, some Wild Animals a bit further out, and some distant Iron, Stone, and Clay. Good enough. |Image credit:Rock Paper Shotgun/Hooded Horse
With the game still paused, open up the build menu and construct the following buildings with your starting supplies:
- Logging Camp
- Storehouse
- Granary
- Well
- Marketplace
- (Optional) Woodcutter’s Lodge
It’s important to build the Logging Camp first , to get some early Timber production going as soon as possible.

Here’s where I’m thinking of placing my first few buildings in my new settlement. |Image credit:Rock Paper Shotgun/Hooded Horse
All of the buildings except the Logging Camp and Woodcutter’s Lodge should be near the centre of where you’d like your village to be. The Logging Camp should be placed near a forest, but make sure it isn’t too close to any Wild Animals. I personally like to place down a Woodcutter’s Lodge early on as well so it’s ready when I need it, but it’s not necessary. If you do place one now, you should ideally place it near a different patch of trees to your Logging Camp.
2. Build a basic road network between key areas
With the game still paused, start hashing out a basic road network . Roads in Manor Lords are completely free and instantly built, so it’s always a good idea to build them at the start of the game while paused.

Building a good road system in advance helps you to easily structure your settlement. |Image credit:Rock Paper Shotgun/Hooded Horse
The general idea with these starting roads is to connect all your starting buildings to each other, while also leaving large-ish gaps for Burgage Plots and other buildings later on. It’s particularly important to make sure your Population (and Oxen ) have road access from the Logging Camp to the rest of your village, because the Logging Camp is where you store all the Timber you need for constructing new buildings.
I’d also recommend placing down some longer roads from the centre of your village towards the nearest Berries and Wild Animals. We’ll revisit them in Step 4 .
3. Assigning your families to work
It’s time to unpause the game and let your villagers build those starting buildings you placed down. Feel free to speed up the game or slow it down with the buttons in the bottom-right (hotkeys: Z and X).
Once your Logging Camp is built, click on it and assign 2 families to it immediately. They’ll start chopping wood for more Timber, and meanwhile your other 3 families will continue building.

Two families in the Logging Camp immediately! |Image credit:Rock Paper Shotgun/Hooded Horse
Once your Storehouse and Granary are built, assign 1 family each to them, to start storing resources so they don’t get ruined when it starts to rain. Your one remaining family can deal with the rest of the building for now, but if need be you can take one extra family off the Logging Camp to help out.
The extra benefit of assigning families to work in the Storehouse and Granary is that you’ll quickly get Food and Firewood Stalls set up in your Marketplace . You’ll need these Stalls to keep your people happy after setting them up in Burgage Plots in Step 5 .

Good job, little Firewood Stall. Good job. |Image credit:Rock Paper Shotgun/Hooded Horse
4. Set up food production
Now it’s time to set up food production . At the moment, your families are living off the supplies of bread they brought with them, but that will soon run out.
The type of food production you set up first really depends on which food source is closer to your village: the Berries , or the Wild Animals . In my playthrough the berries were nearby, so I set up a Forager Hut in the wood right next to the Berry bushes.

Berries are my nearest source of food, which is why I’ll prioritise it over Wild Animals. Your mileage may vary! |Image credit:Rock Paper Shotgun/Hooded Horse
But if Wild Animals are in a better spot for you, then I’d recommend building a Hunting Camp near them instead. You don’t need both food sources immediately, so just pick whichever is more convenient.
Once your chosen building (Forager Hut or Hunting Camp) is built, set a family working there, but make sure you still have one family free for building. To recap: your families should now have the following work:
- Logging Camp (1 family)
- Storehouse (1 family)
- Granary (1 family)
- Food building (1 family)
- 1 family unassigned and free for building jobs
5. Build your first Burgage Plots
All this time, your families have been living in their starting tents, and you may have noticed your Approval Rating starting to decline next to the thumbs up arrow at the top of your screen. The solution is to start building Burgage Plots , which are where your families live in Manor Lords.
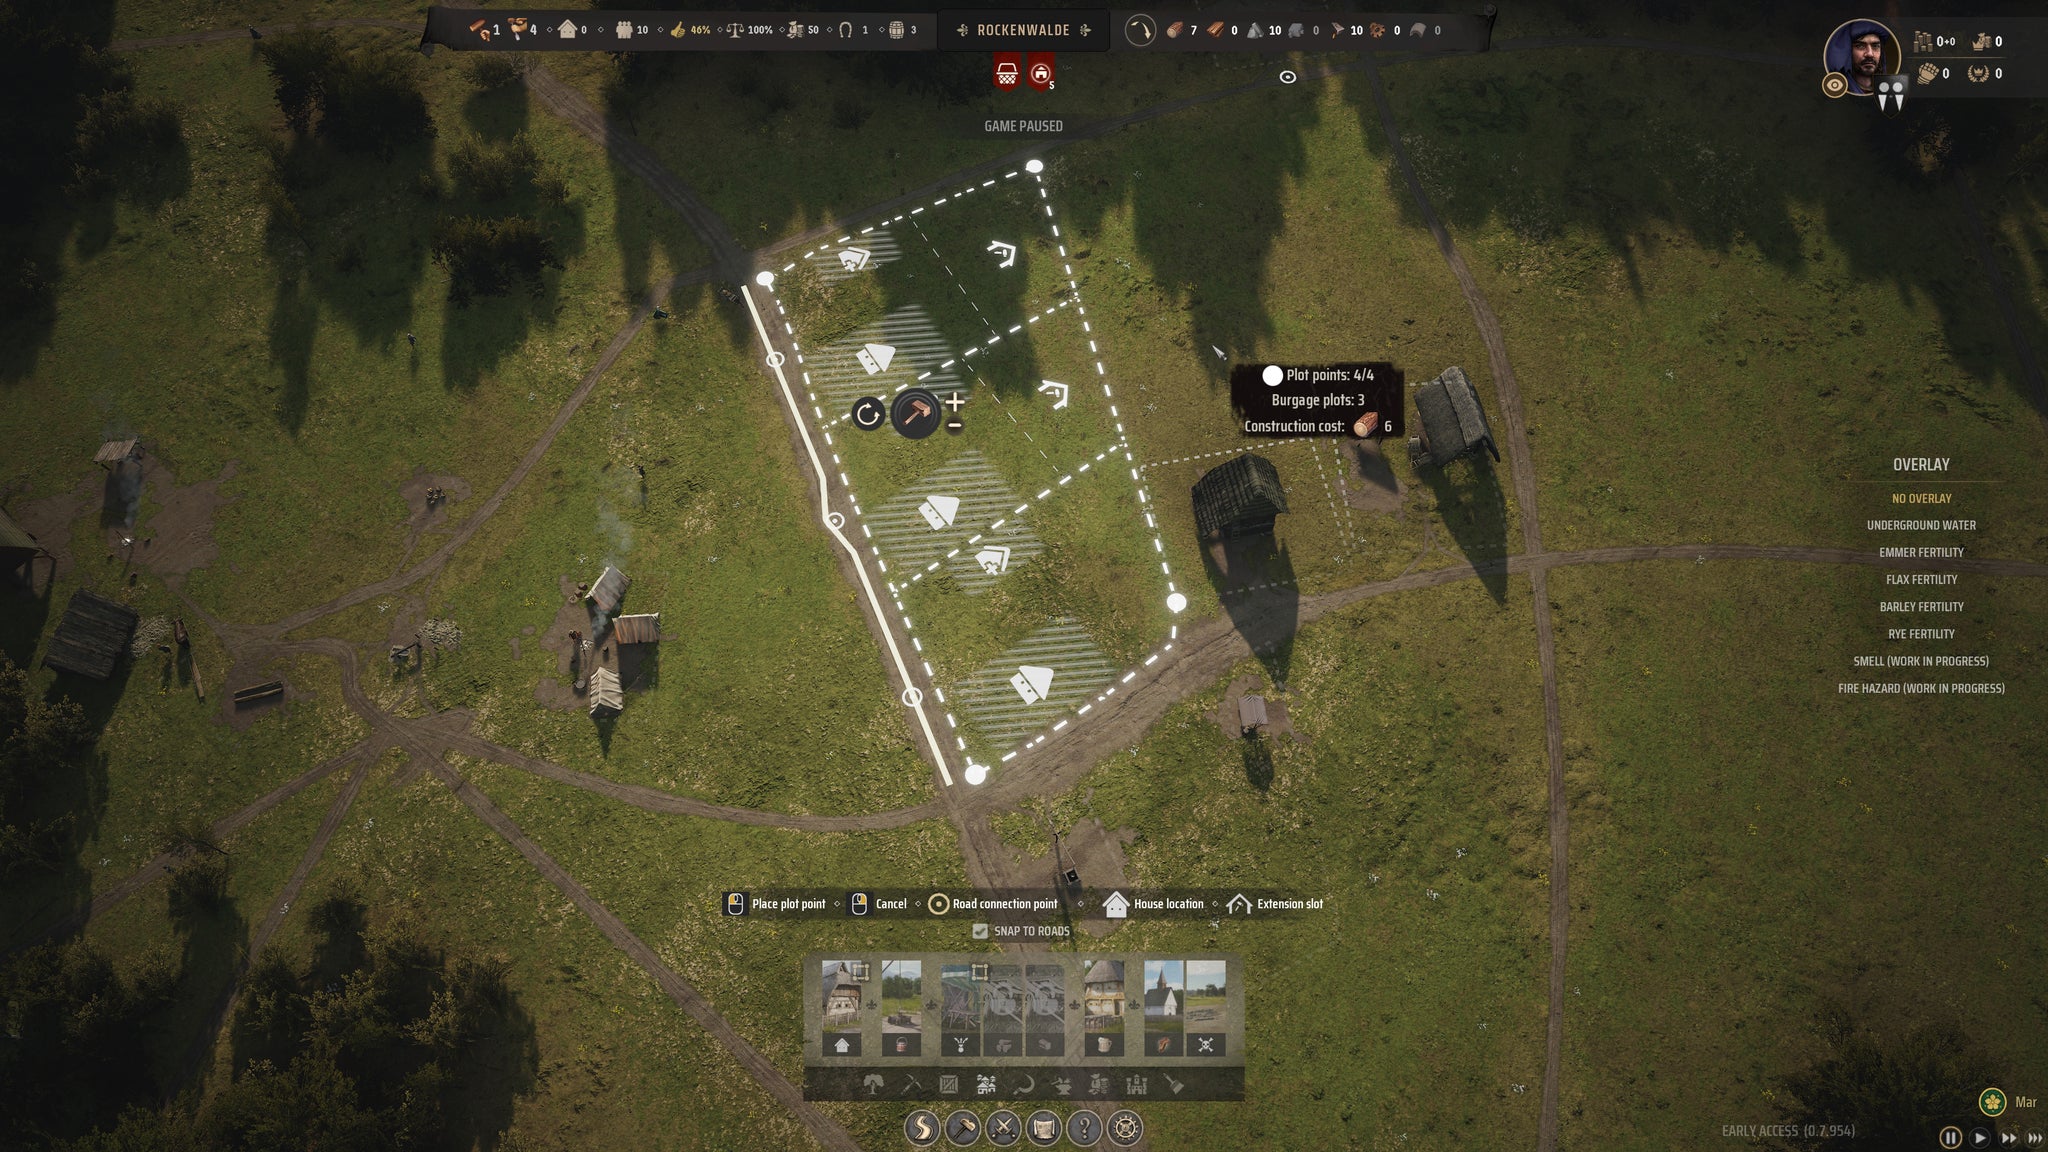
Make sure your first Burgage Plots provide housing right in the thick of all the places you want your villagers to work. |Image credit:Rock Paper Shotgun/Hooded Horse
We’d highly recommend you build your first 3 or so Burgage Plots so that they have extra Living Space Extensions (depicted by the icon of the house with the plus sign). As you’ll know if you’ve read our Manor Lords tips and tricks guide, Living Space Extensions allow you to expand your population more easily, with less overall cost to your Burgage Plots.
Plop down 3 Burgage Plots for now, and let your builders work on them for a while.
6. Get another Ox and Hitching Post

Purchase another Ox at the Hitching Post for 25x Regional Wealth. |Image credit:Rock Paper Shotgun/Hooded Horse
One thing that really slows down a lot of new players in the early game is that they rely heavily on their one starting Ox to ferry all that Timber to and fro. But you can easily double that workrate by ordering another Ox ! To do this, just click on your Htiching Post (which you begin the game with), and click the “Order Another Ox” button. It costs 20x Regional Wealth out of your total 50, but it’s a worthwhile investment.
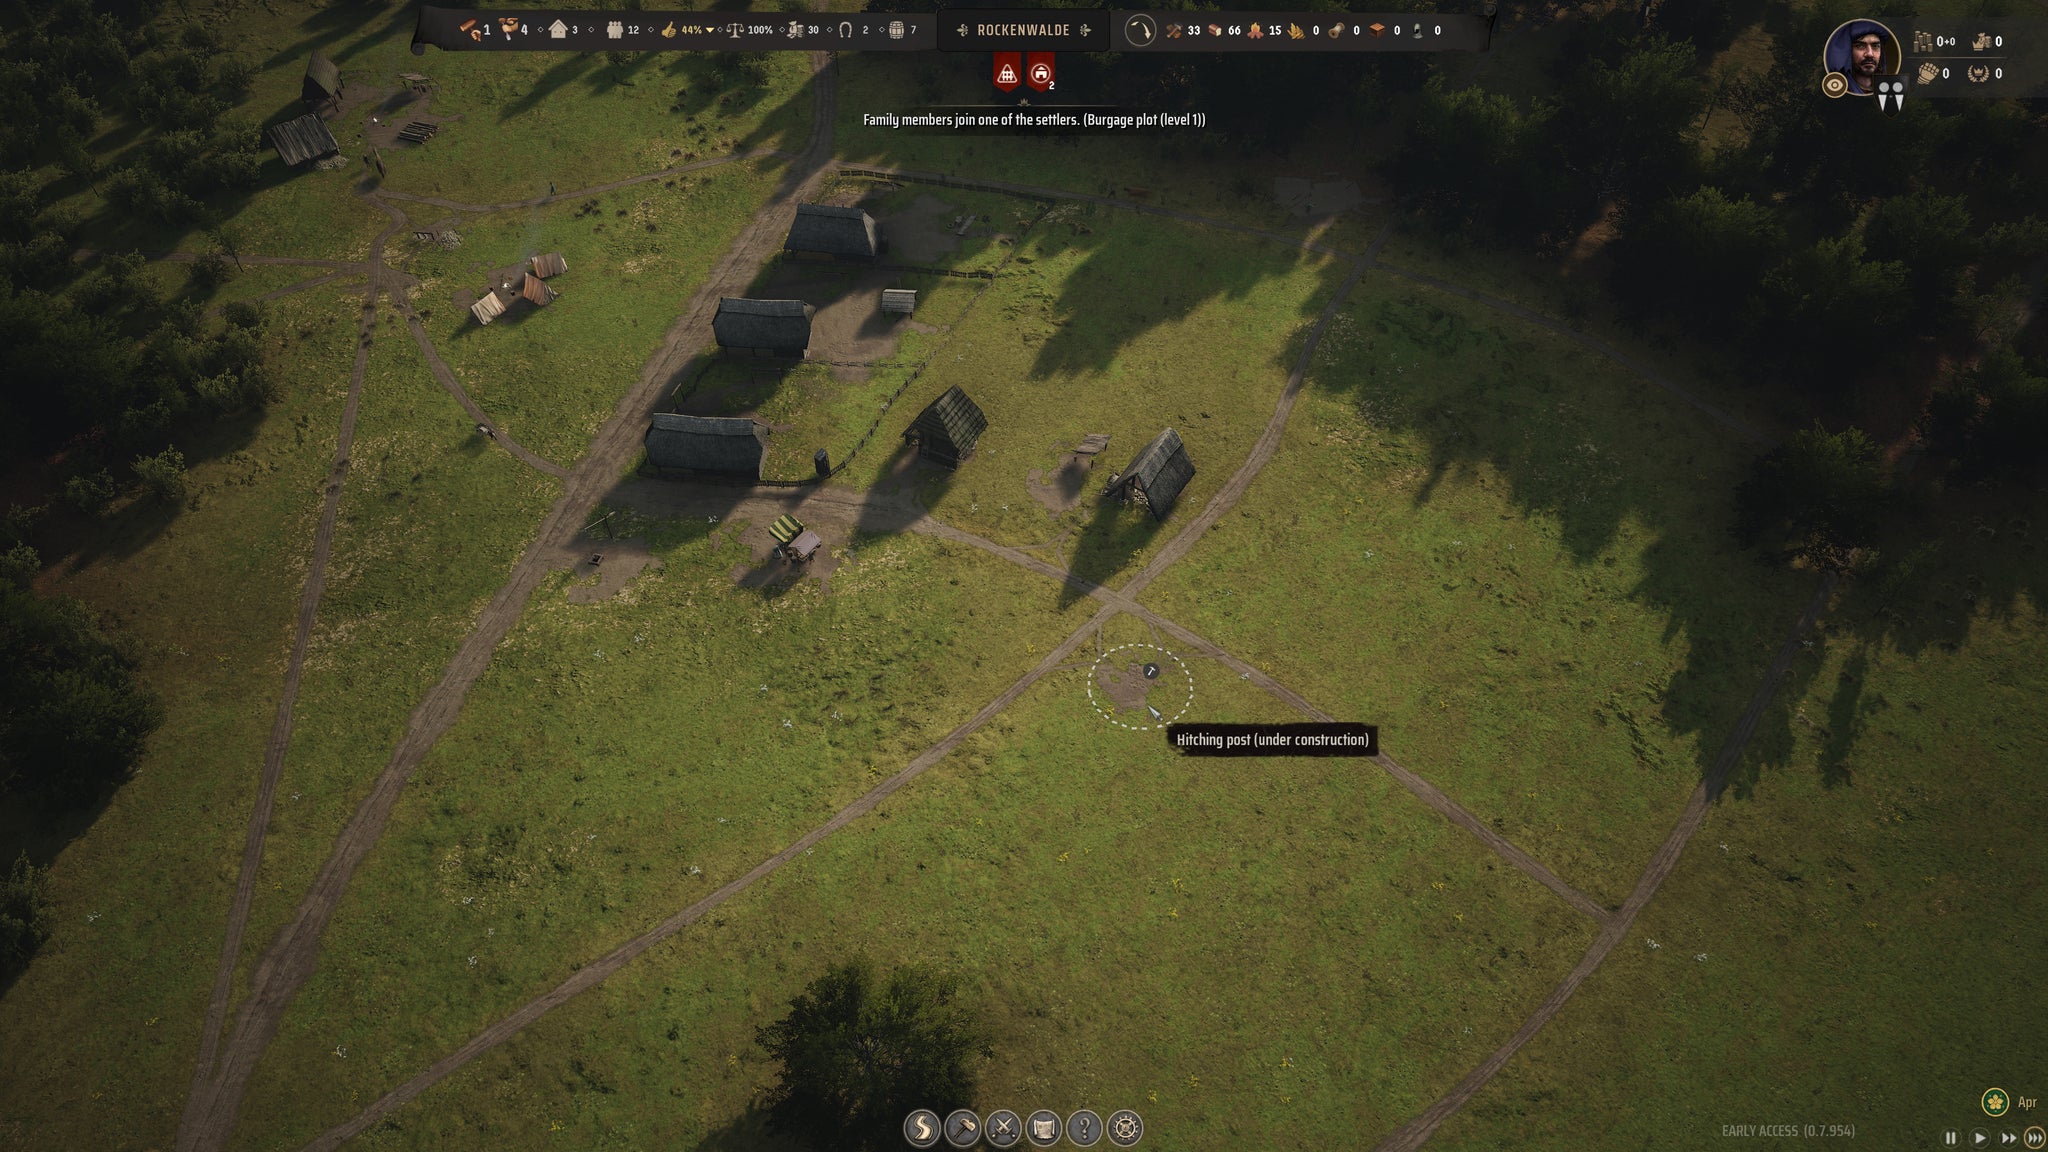
A network of Hitching Posts across your village is essential for healthy growth. |Image credit:Rock Paper Shotgun/Hooded Horse
However, you also need to build another Hitching Post , because each Hitching Post can only handle one Ox. It’s a good idea to build multiple Hitching Posts anyway, so that your Oxen are spread across your settlement and can do transport jobs more quickly. I placed mine pretty much in the centre of my town, and I suggest you do something similar.
7. Time to eliminate homelessness
You should now have 3 Burgage Plots set up, but that still means 2 out of your 5 families are stuck in your starting tents. You can build more Burgage Plots (and indeed, that’s the next step ), but it’s even quicker to make use of those Living Space Extensions you built into your first Plots.

You can expand the living space of certain Burgage Plots with this button. |Image credit:Rock Paper Shotgun/Hooded Horse
Click on a couple of your Burgage Plots and select the " Expand Living Space " button. Each expansion costs 2 Timber (the same as making a new Burgage Plot), but it’s a quicker job and allows you to place two families in a single Plot, which is useful later on because you only have to upgrade one Plot instead of two in order to make both families happy!

Look, Ma! No tents! |Image credit:Rock Paper Shotgun/Hooded Horse
Once those extensions are built, you should see your starting tents disappear, as no one is living in them anymore. No more homelessness! Huzzah!
8. Expand your village with more Plots and Roads
Your overall goal is to expand your town and take over the map, but your smaller goals should really be dictated by your settlement levels. Hover over your settlement name at the top of the screen and you’ll see the requirements needed to upgrade to the next settlement level. In our case, we need 5 Burgage Plots, so let’s build the other two now.
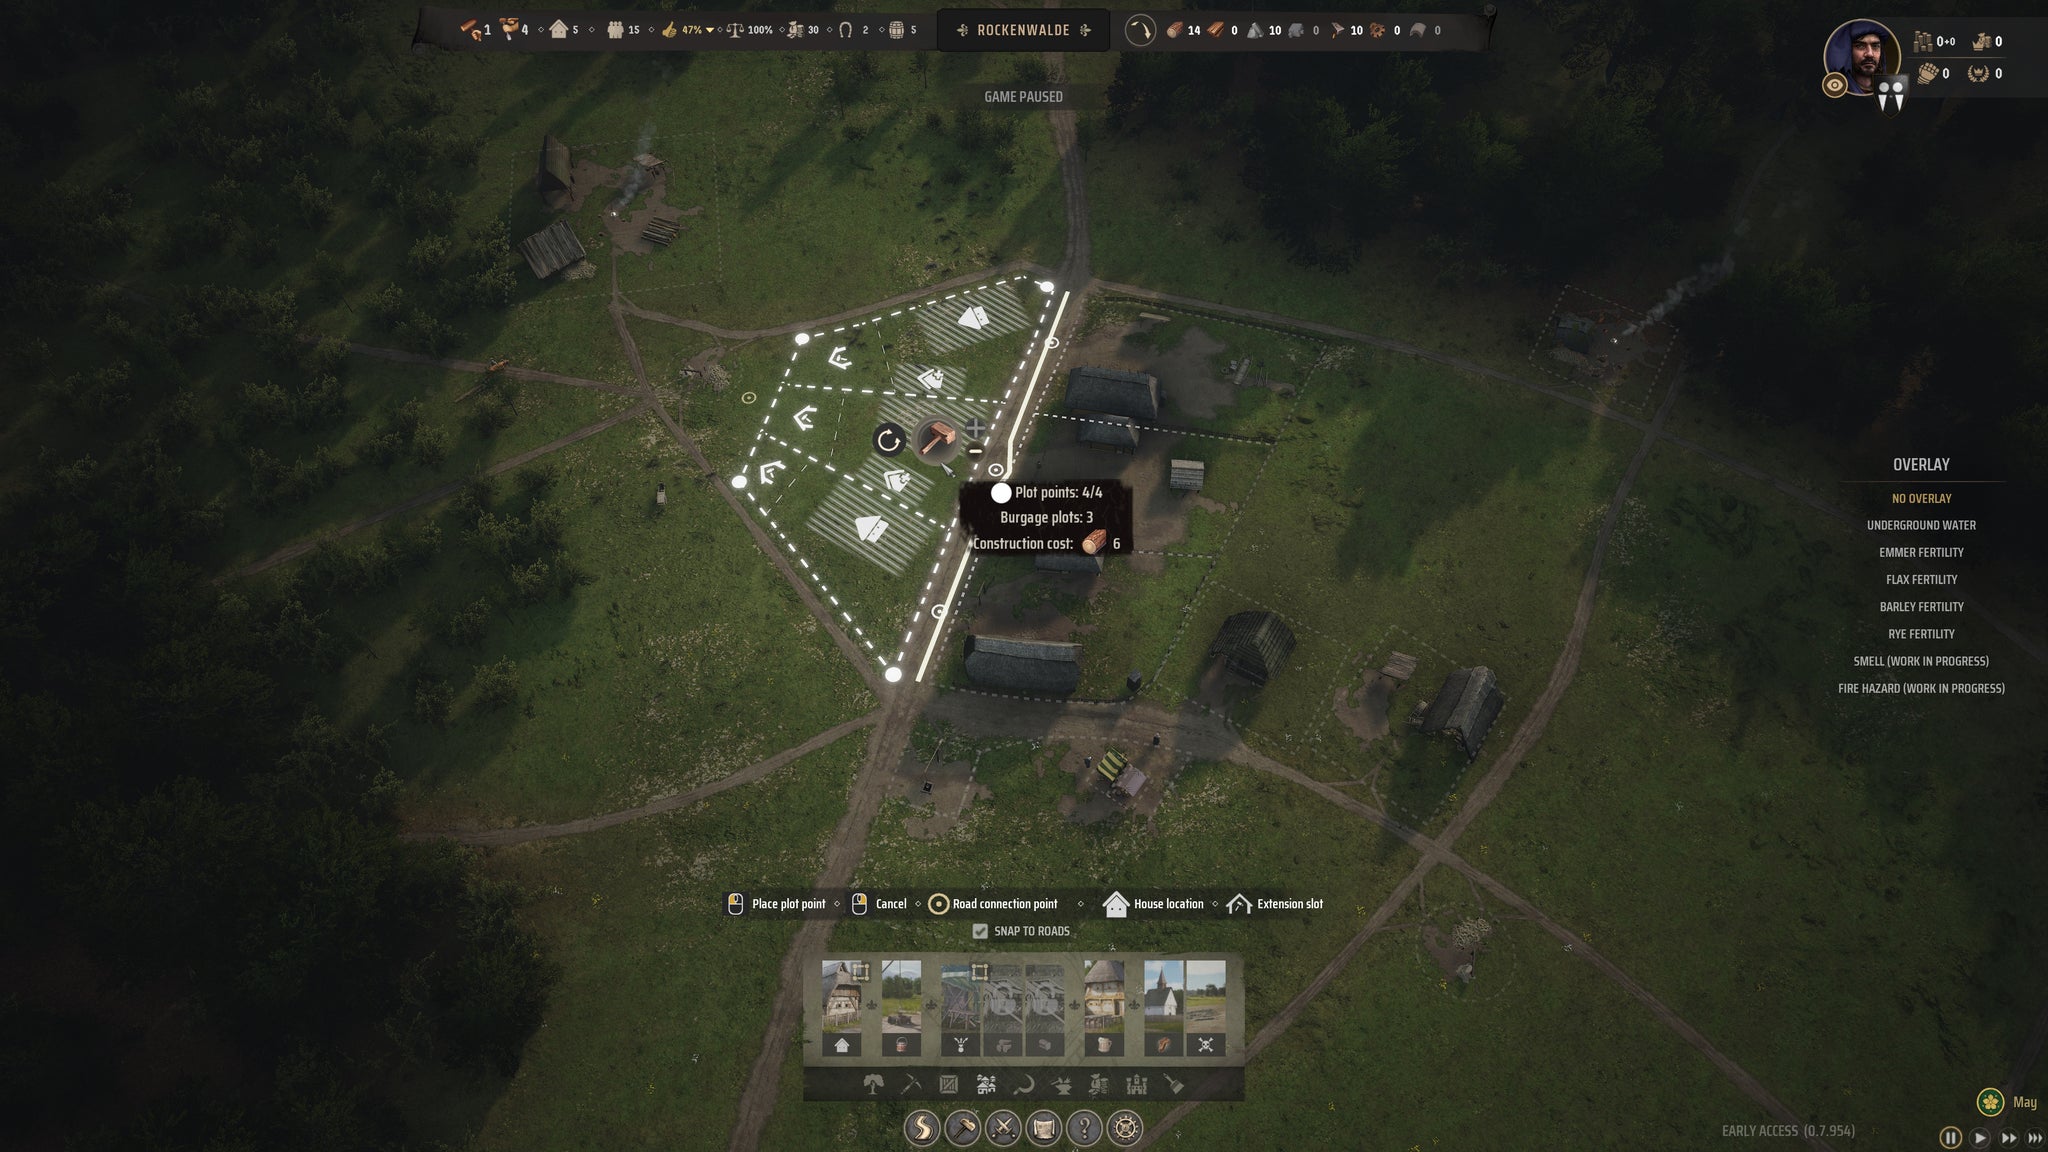
You can never have too many Burgage Plots. Well, unless you run out of Timber. |Image credit:Rock Paper Shotgun/Hooded Horse
Remember to keep your Burgage Plots fairly close to your Well and Marketplace as they’re important for your Approval Rating; and it’s also a good idea to keep them close-ish to the Storehouse, Granary, and Logging Camp.
I also took this opportunity to flesh out my settlement’s road system a bit more. Now that the starting supply areas and tents were gone, I could afford to be a little neater and more efficient with road placement.
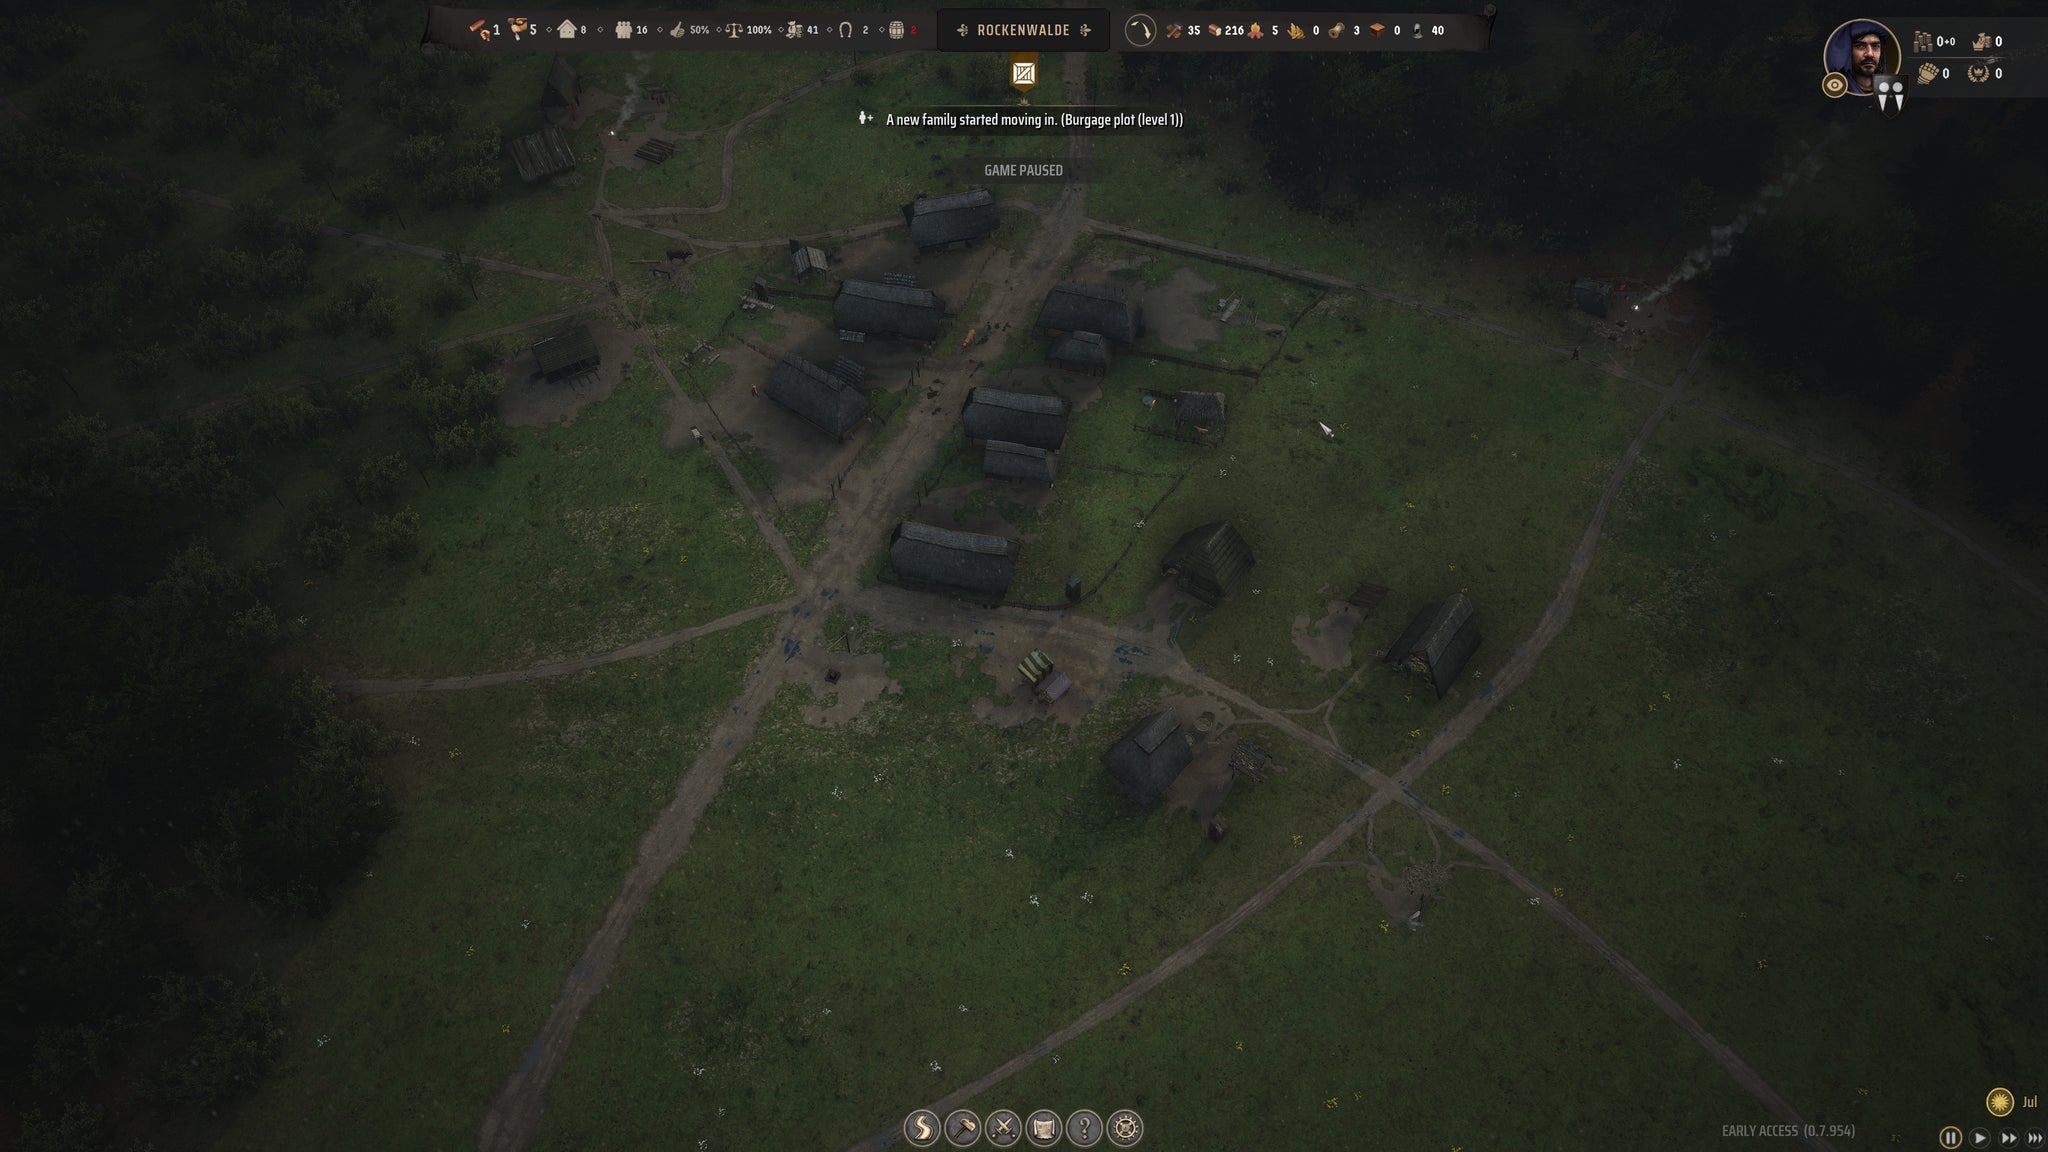
I’ve tried to neaten up my roads a little bit on the left-hand side now that the tents and starting supplies are gone. |Image credit:Rock Paper Shotgun/Hooded Horse
9. Your first Development Point
The moment your fifth Burgage Plot is built, you’ll enter a new settlement level: the Small Village. And you’ll get a shiny new Development Point, to pop wherever you like in the Development Upgrades tech tree. Open up the tree by clicking on the settlement name at the top of the screen.

Trade Logistics is almost always my first pick in the tech tree. |Image credit:Rock Paper Shotgun/Hooded Horse
We’d recommend you put your first Development Point into Trade Logistics. It’s a fantastic early-game tech which will make setting up trade routes much, much less expensive. We’ll be starting up our Trade network very soon in Step 11 , so it’s a good time to get Trade Logistics.
10. Assign your first new families to work
Now that you’ve eliminated homelessness, your Approval Rating should start creeping up above 50%. As long as it’s above 50% and you have empty Burgage Plots, you will periodically get new families joining your village. Which is great, because at the moment we’re basically using all our families already.

Time to get a second source of food going! |Image credit:Rock Paper Shotgun/Hooded Horse
Whenever your next few families arrive, you should assign them to build a second food production building for whichever food source you haven’t already got (Berries or Wild Animals), and start a family working there the moment it’s built.
Your next family to arrive at the settlement should go towards building a Sawpit near your Logging Camp and working there to start making Planks. And your next family after that can start working in the Woodcutter’s Lodge for Firewood production.
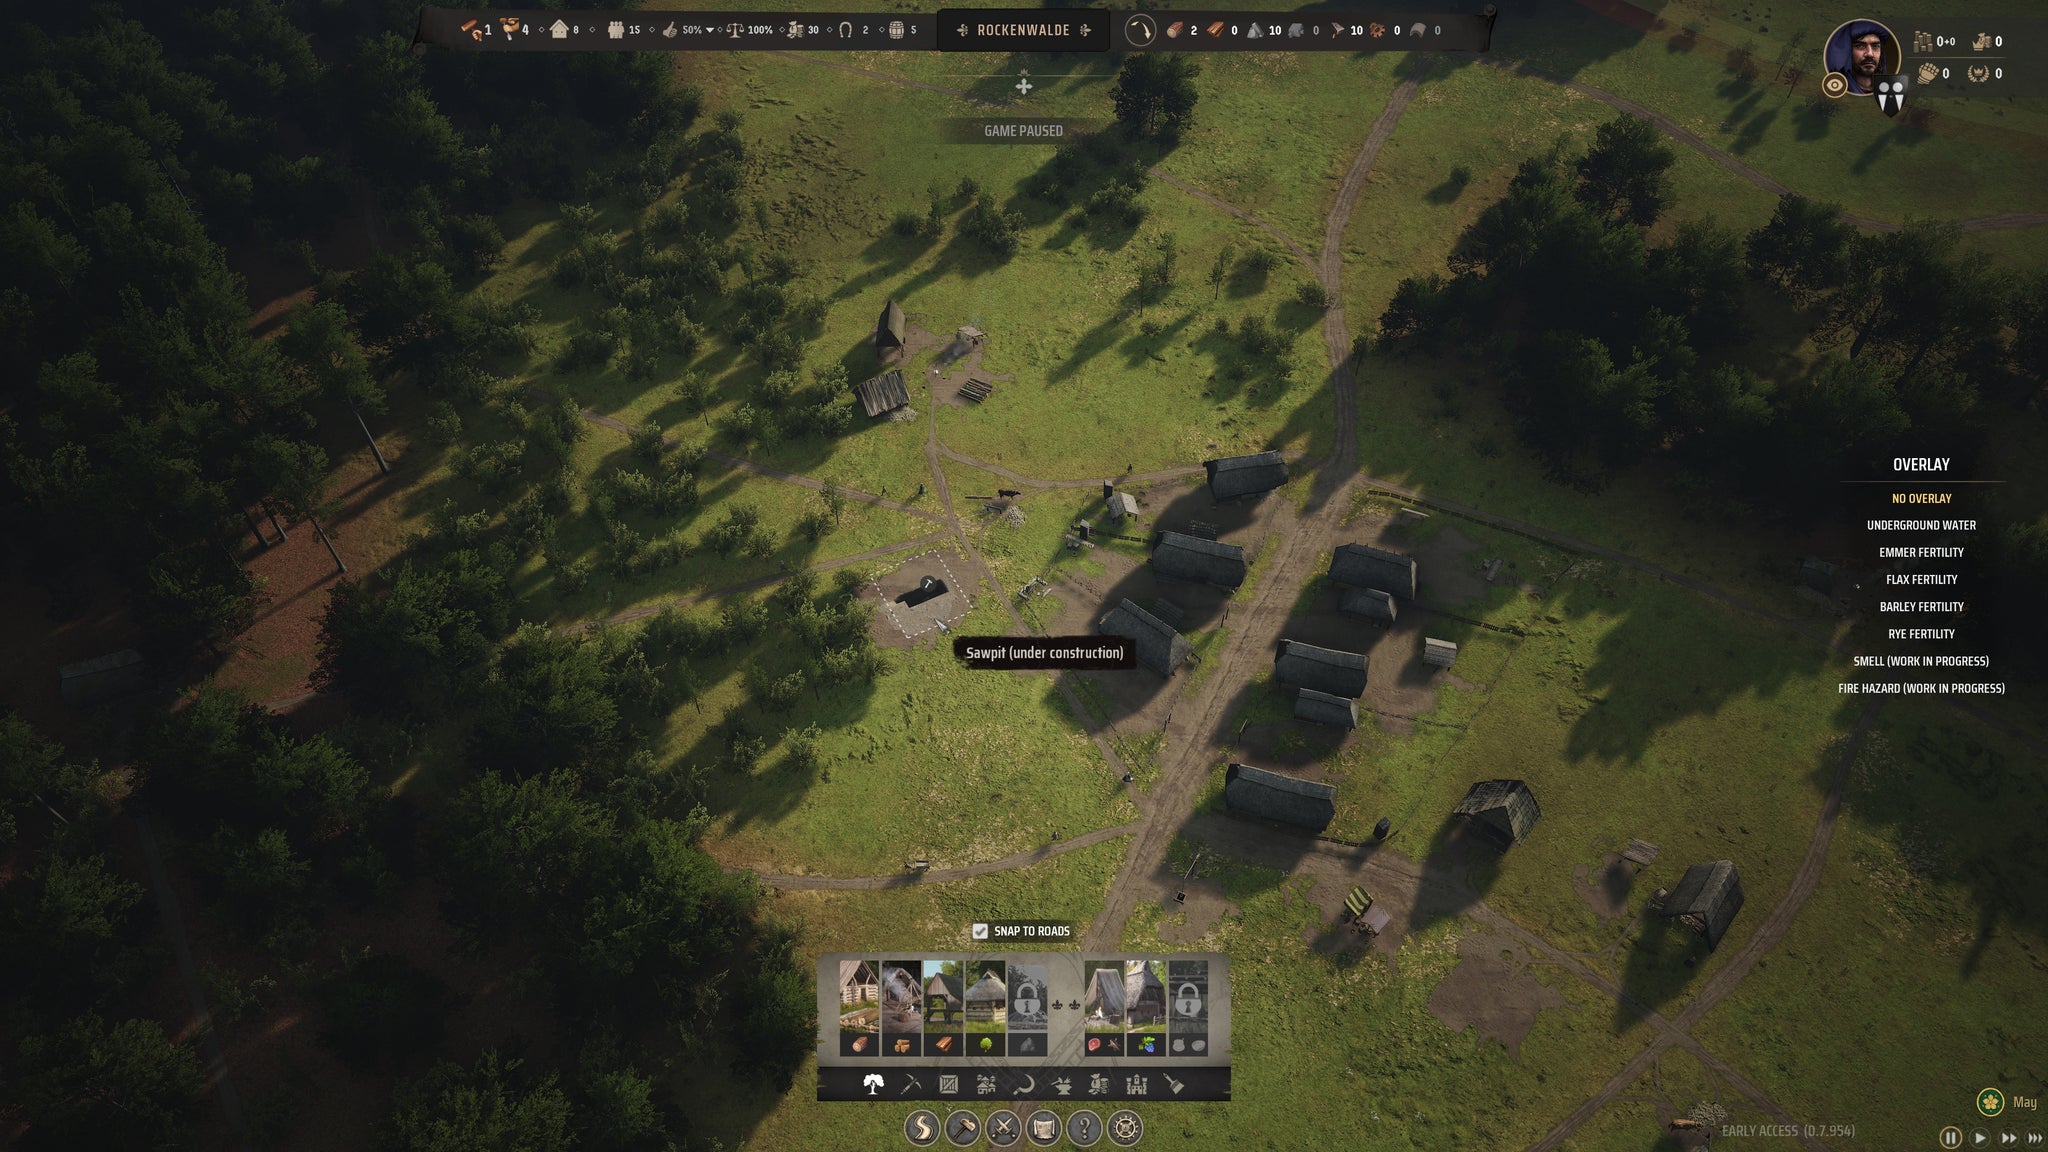
A Sawpit converts Timber into Planks, which are essential for more advanced buildings. |Image credit:Rock Paper Shotgun/Hooded Horse
If you need more Burgage Plots before these families arrive, then go ahead and build them (and it wouldn’t hurt to have a couple of them with Backyard Extension space as well).
11. Build your first Trading Post
It’s time to build your first Trading Post. Traders come from off the edge of the map; there are little icons off the map edge to tell you where they spawn. Try to build your Trading Post fairly close to the edge of the map, connected to the main road.

It doesn’t matter terribly if you build your Trading Post far from your village. Build it close to the map edge for efficient trading! |Image credit:Rock Paper Shotgun/Hooded Horse
Trade is very important in Manor Lords. It’s the easiest and earliest way to get lots of Regional Wealth, which you’ll need for expanding and upgrading your town. Once it’s built, have a look at all your resources in the Trade tab to see if you have any large surpluses of resources.
In my case, I had an awful lot of Berries - enough to feed my village for 35 months, which is rather more than I need. So I started selling my Berries until I was down to just 100 of them, which is still more than enough for the time being.
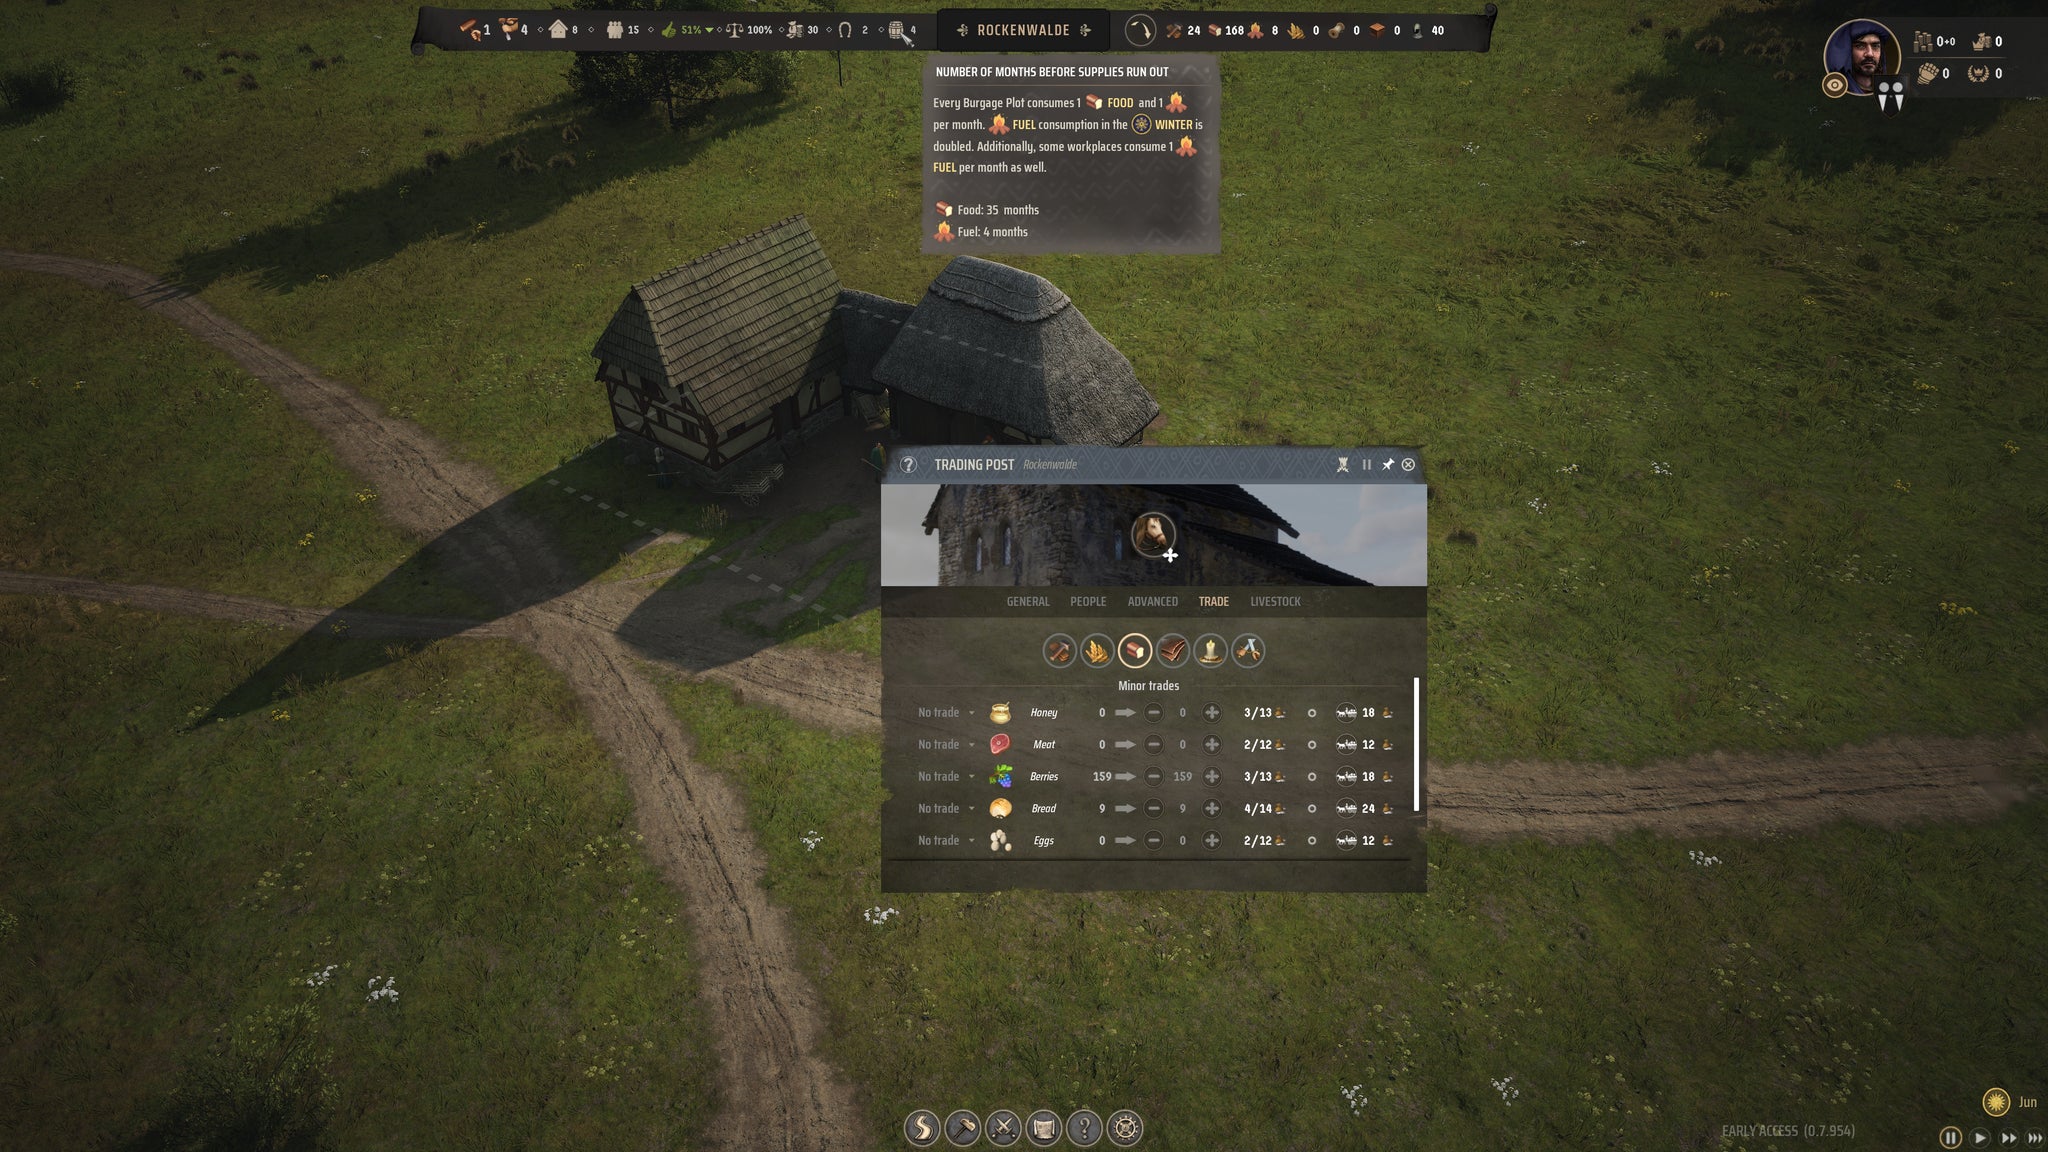
I’ve got a huge surplus of Berries, so I’ll sell some of them for some early Regional Wealth income. |Image credit:Rock Paper Shotgun/Hooded Horse
A brief word on Bandits This isn’t really a step, but at around this point of your playthrough, you may see your first Bandit Camps arise elsewhere on the map. These bandits may periodically steal some resources from your village. There’s nothing you can do about this until you start building up an army and taking them out, which we’d recommend you wait until Year 2 to do. So it’s not a big issue for now, it’s just something to keep in mind going forward!
12. Goats, Hides, and Leather
It may be a strange time to think of Clothing in the summer months, but winter will be on us soon. I recommend taking this time to start producing Leather , so that when winter arrives you’ll be able to start making Shoes .

Sorry about the rain; makes it hard to spot the Tannery I’ve set up at the bottom of the village. But hey! At least none of my supplies are getting soaked! |Image credit:Rock Paper Shotgun/Hooded Horse
You’ll have started getting a few Hides from your Hunting Lodge, but it’s good to get more, and closer to home. Take a couple of Burgage Plots with Backyard Extension Slots, and build some Goat Sheds there (or just one if you don’t yet have the Regional Wealth for it). These will provide a steady supply of Hides for your village.
Meanwhile, construct a Tannery nearby in the centre of town, and assign a family there once it’s built so you can start converting those Hides into Leather.
13. Keep an eye on your Firewood!
It was around this time that I realised my Firewood reserves were dangerously low, so consider this your warning to get a family working in the Woodcutter’s Lodge so that you have a nice healthy stockpile before Winter! Firewood is consumed twice as fast in Winter, so you’ll need a good amount.
14. Even more Burgage Plots
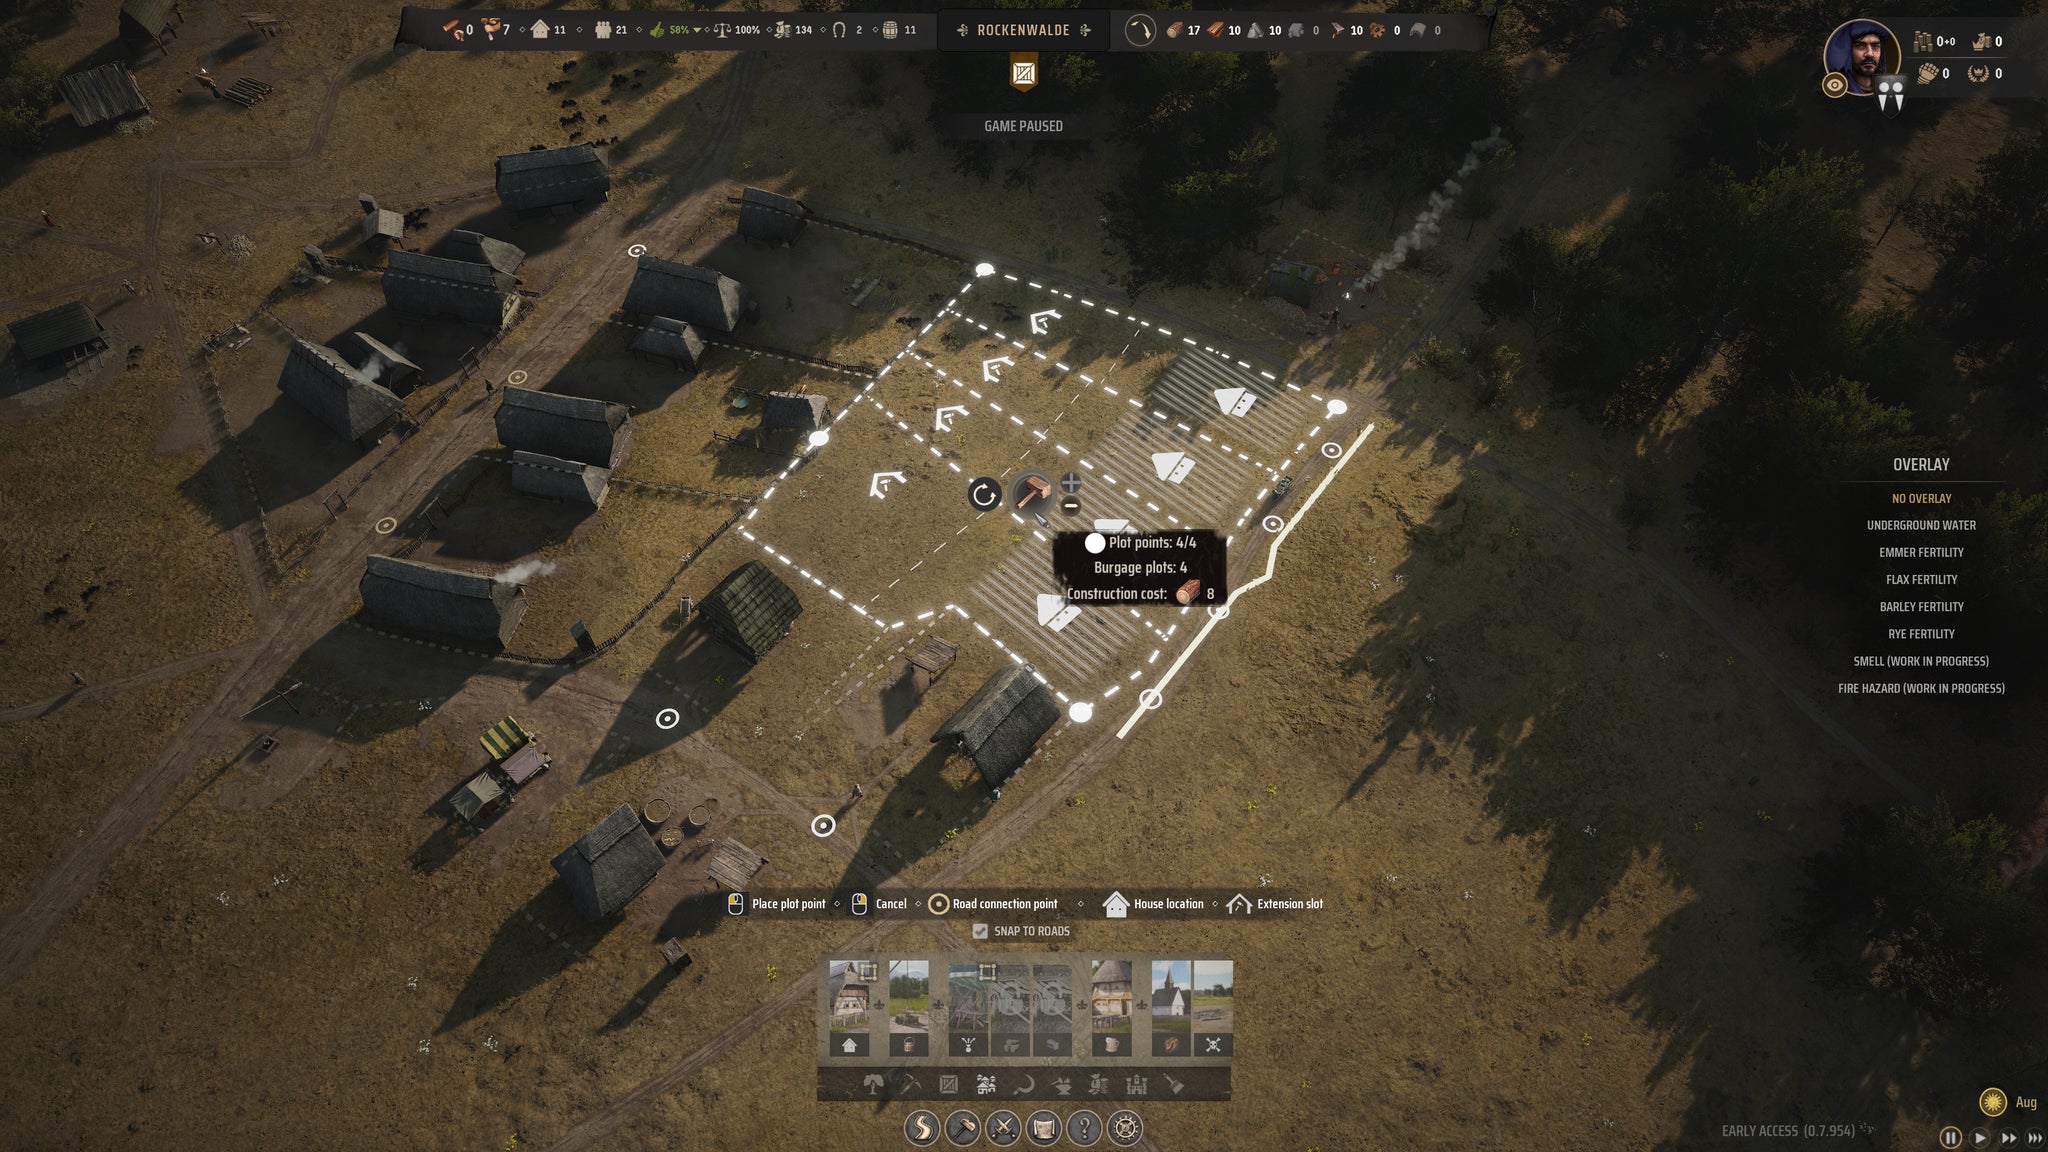
Make sure you have a balance between Plots with Living Space Extensions, and Plots with Backyard Extensions. |Image credit:Rock Paper Shotgun/Hooded Horse
It’s time to build even more Burgage Plots! You need 10 Burgage Plots in total to reach the next settlement level, so I’d recommend building the remaining ones now. Living Space Extensions are always welcome as usual, but even more important at this point is to have some Backyard Extension slots ready for when you need to start creating weapons, Ale , and other more exciting resources.
Once again, keep your Burgage Plots fairly tight around the centre of your village, where your Well and Marketplace Stalls reside.
15. Planning ahead for major builds
It’s time to do a little bit of earmarking of space inside your village for some key buildings. Those buildings are: the Church , for religion; and the Tavern , for a different kind of religion altogether. The Church in particular is quite large, about the equivalent of a couple of decently-sized Burgage Plots. And it has to be fairly close to your Burgage Plots, so try and find a good spot for it.
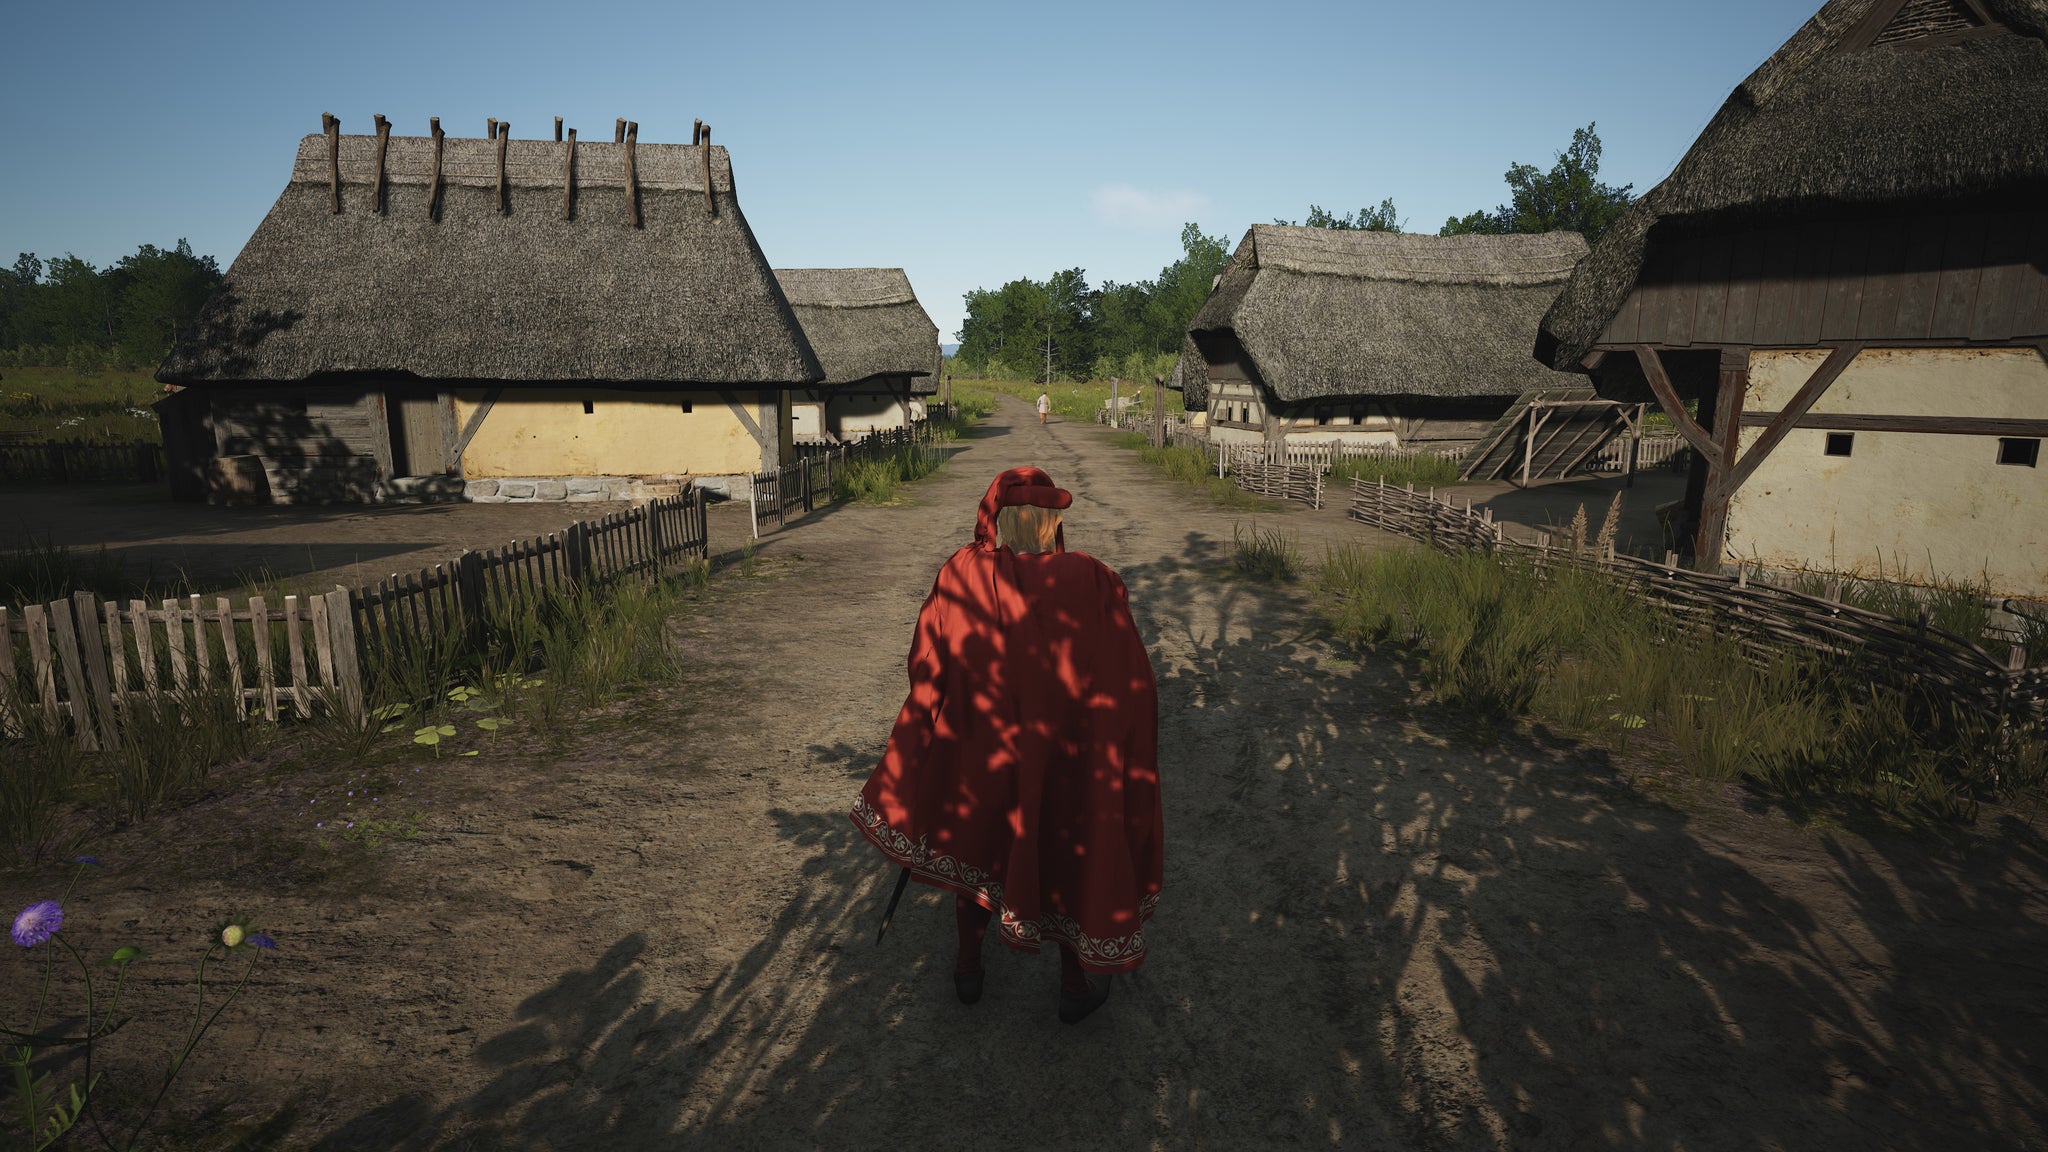
It’s important to take a step back every once in a while and have a stroll round your village. Take in the atmosphere. Feed the chickens. |Image credit:Rock Paper Shotgun/Hooded Horse
It’s also a good idea to earmark one of your Burgage Plots that has a Backyard Extension slot, preferably as near as possible to where your Tavern will go. This Burgage Plot can become your Brewery later on!
16. Lay a couple of Chicken Coops
I like to do what I can to diversify food types in the first year. So to that end, if you’ve got a couple of spare Burgage Plot Backyard Extensions handy, I’d recommend building a couple of Chicken Coops for 25x Regional Wealth each.
These Chicken Coops provide a slow but endless passive supply of Eggs , which will increase the total food offerings available to your Population. Not only does this increase their happiness, but the varied diet also makes your villagers less susceptible to illness .
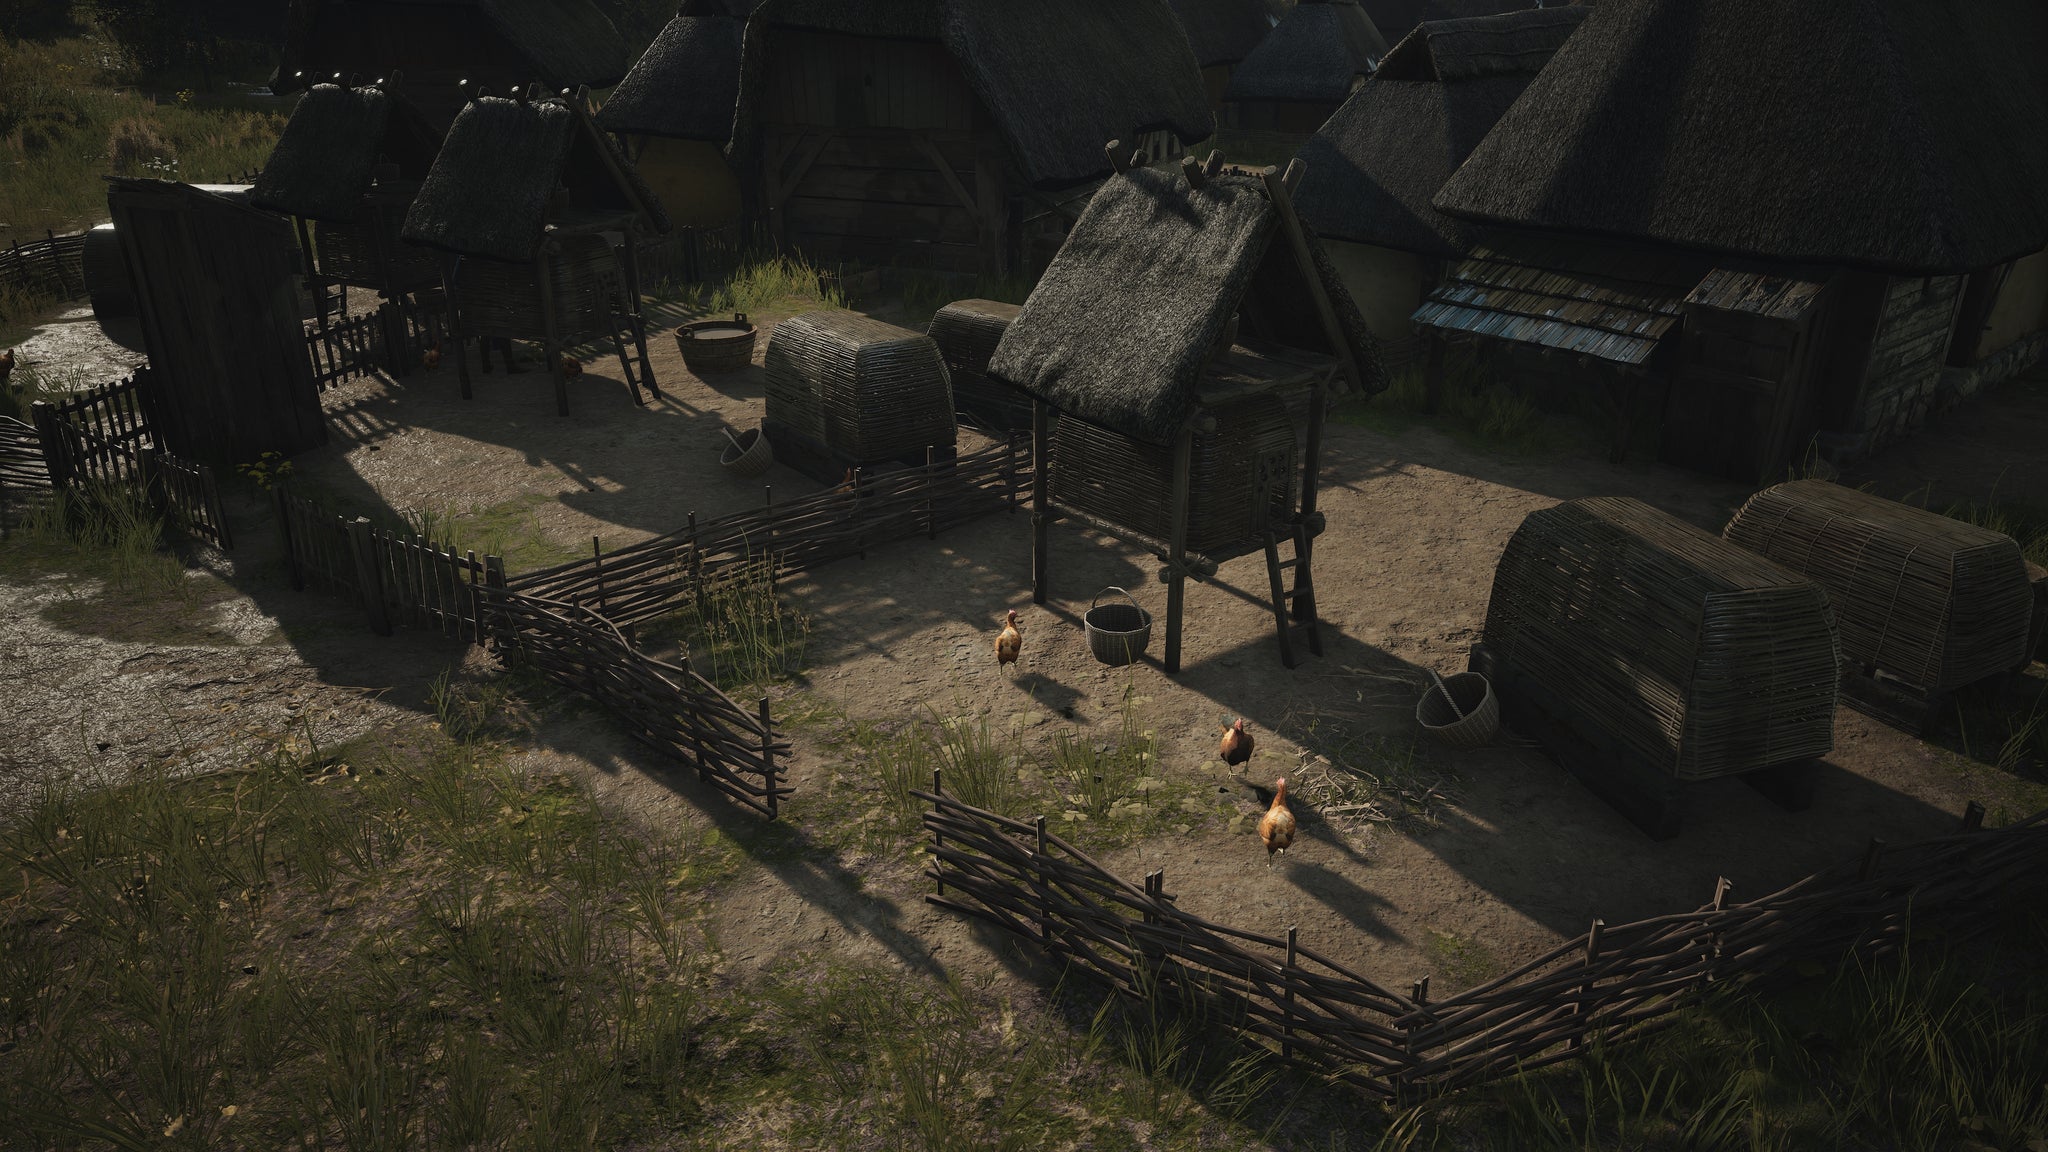
Don’t be alarmed if your chickens phase in and out of their coops. They’re magical realm-hopping chickens. |Image credit:Rock Paper Shotgun/Hooded Horse
Remember: if you need more Regional Wealth, go to your Trading Post and sell off any big surpluses of major resources!
17. And along came religion
With all that work your Sawpit has been doing, you should now have at least 20x Planks (and probably a lot more to be honest). So now is a good time to build your first Church.
The Church is a hefty building, costing those 20x Planks I mentioned, plus 5x Timber and 10x Stone. You won’t have Stone production set up yet, but you should have enough Stone in your starting supplies to get the Church built.

Try to place your Church fairly central. Citizens won’t actually travel there, but it has to be nearby for the effects to be felt. |Image credit:Rock Paper Shotgun/Hooded Horse
Once it’s built, you can set a Family working inside it if you like, but it’s not a requirement. It’ll just give you a little extra Approval Rating boost.
18. Expand your storage
My other recommendation at this Autumnal stage of your first year is to look at expanding your storage, to avoid any annoying " Generic Storage Full " prompts from the game. A Large Storehouse will hold 2,500 items instead of the regular Storehouse’s 250, and it doesn’t cost much at all.
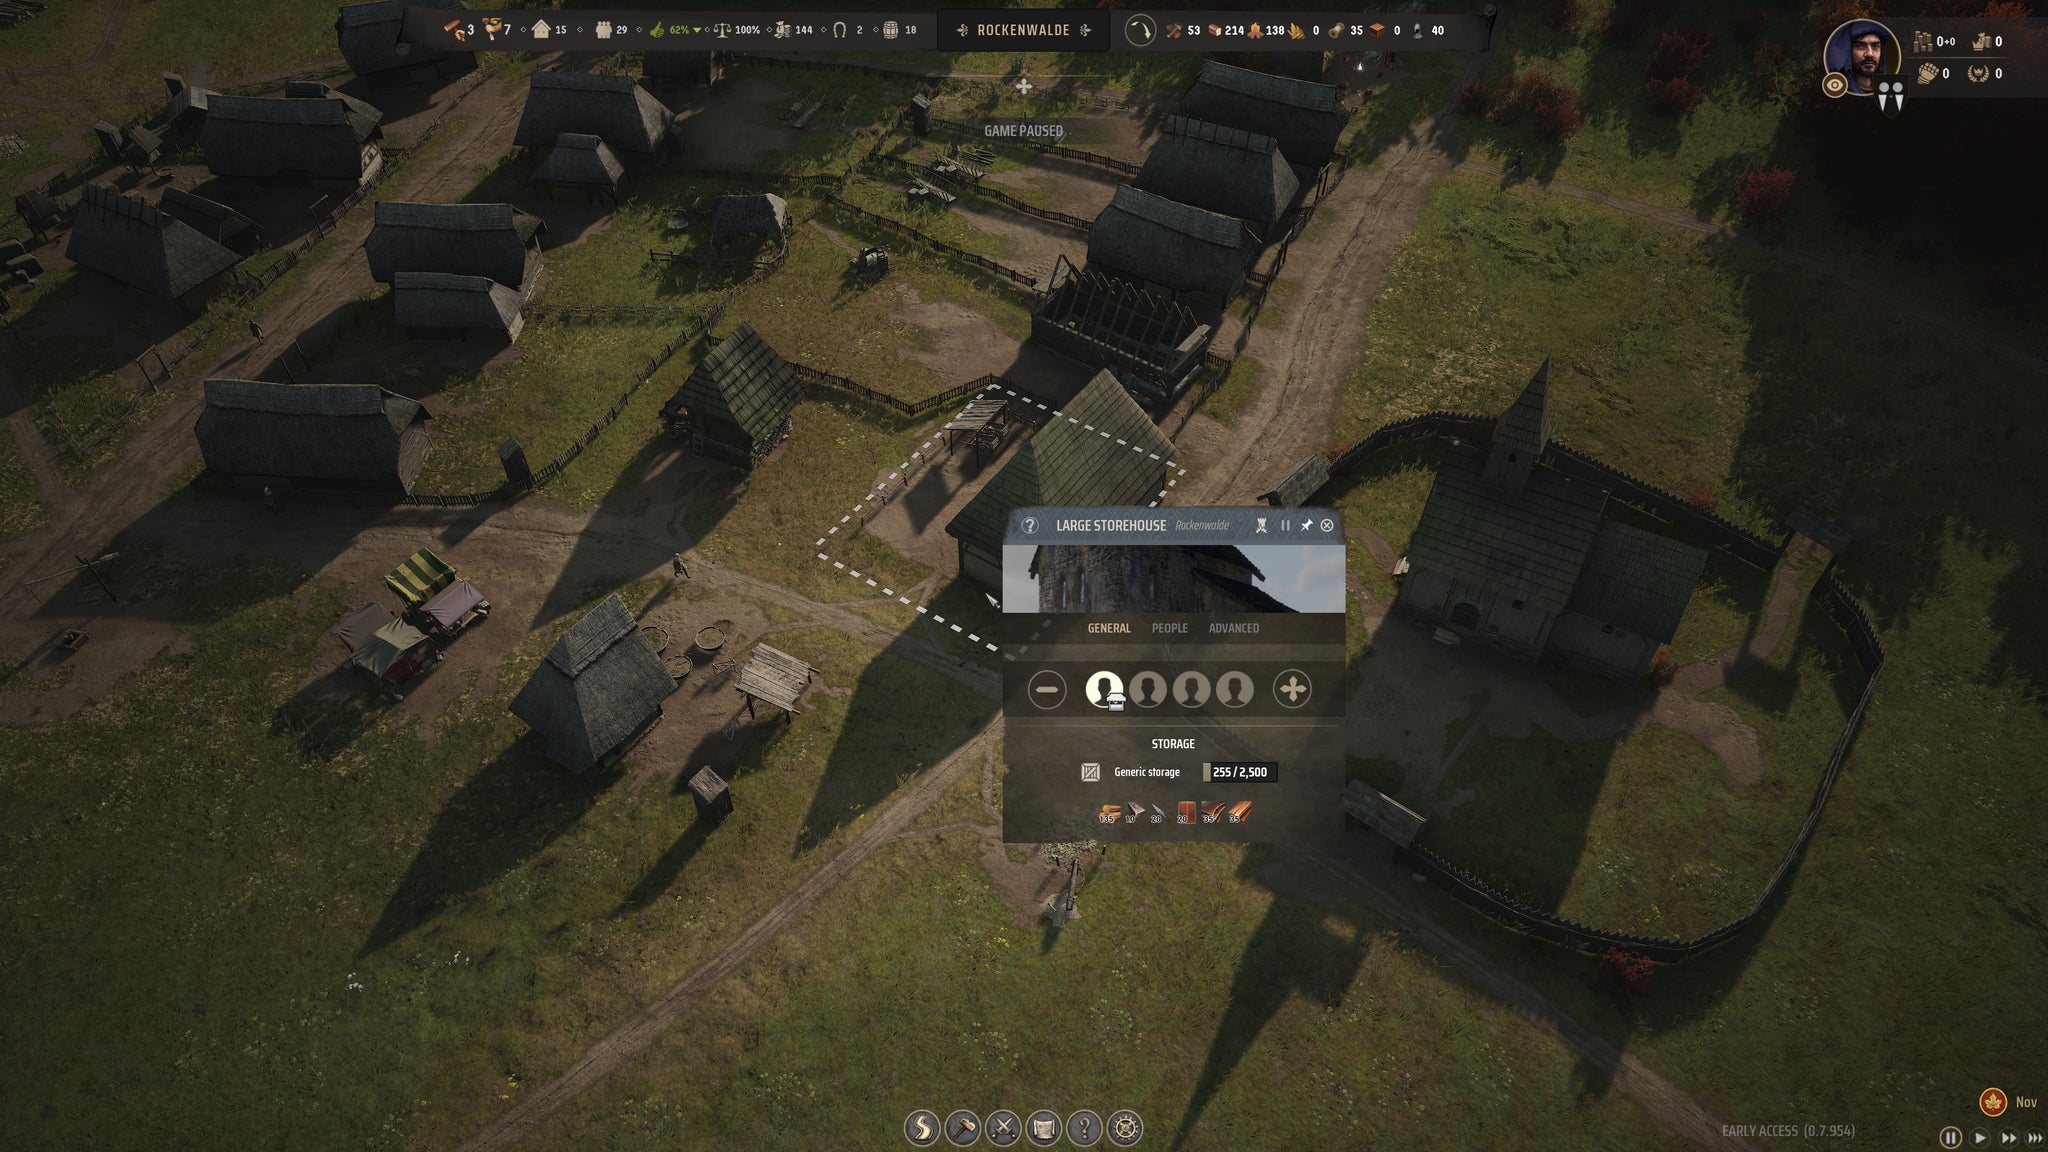
A Large Storehouse can carry 10 times as much as an ordinary Storehouse. |Image credit:Rock Paper Shotgun/Hooded Horse
Just be sure to build it while it isn’t raining , because the moment you begin the upgrade, the entire contents of the Storehouse will be dumped on the ground.
19. Upgrade your first Burgage Plots
We’re getting towards the end of the first year’s major objective: reaching the Medium Village milestone. You should already have at least 10 Burgage Plots in your settlement, so all that remains to hit the settlement level goal is to upgrade at least two Burgage Plots to Level 2 .
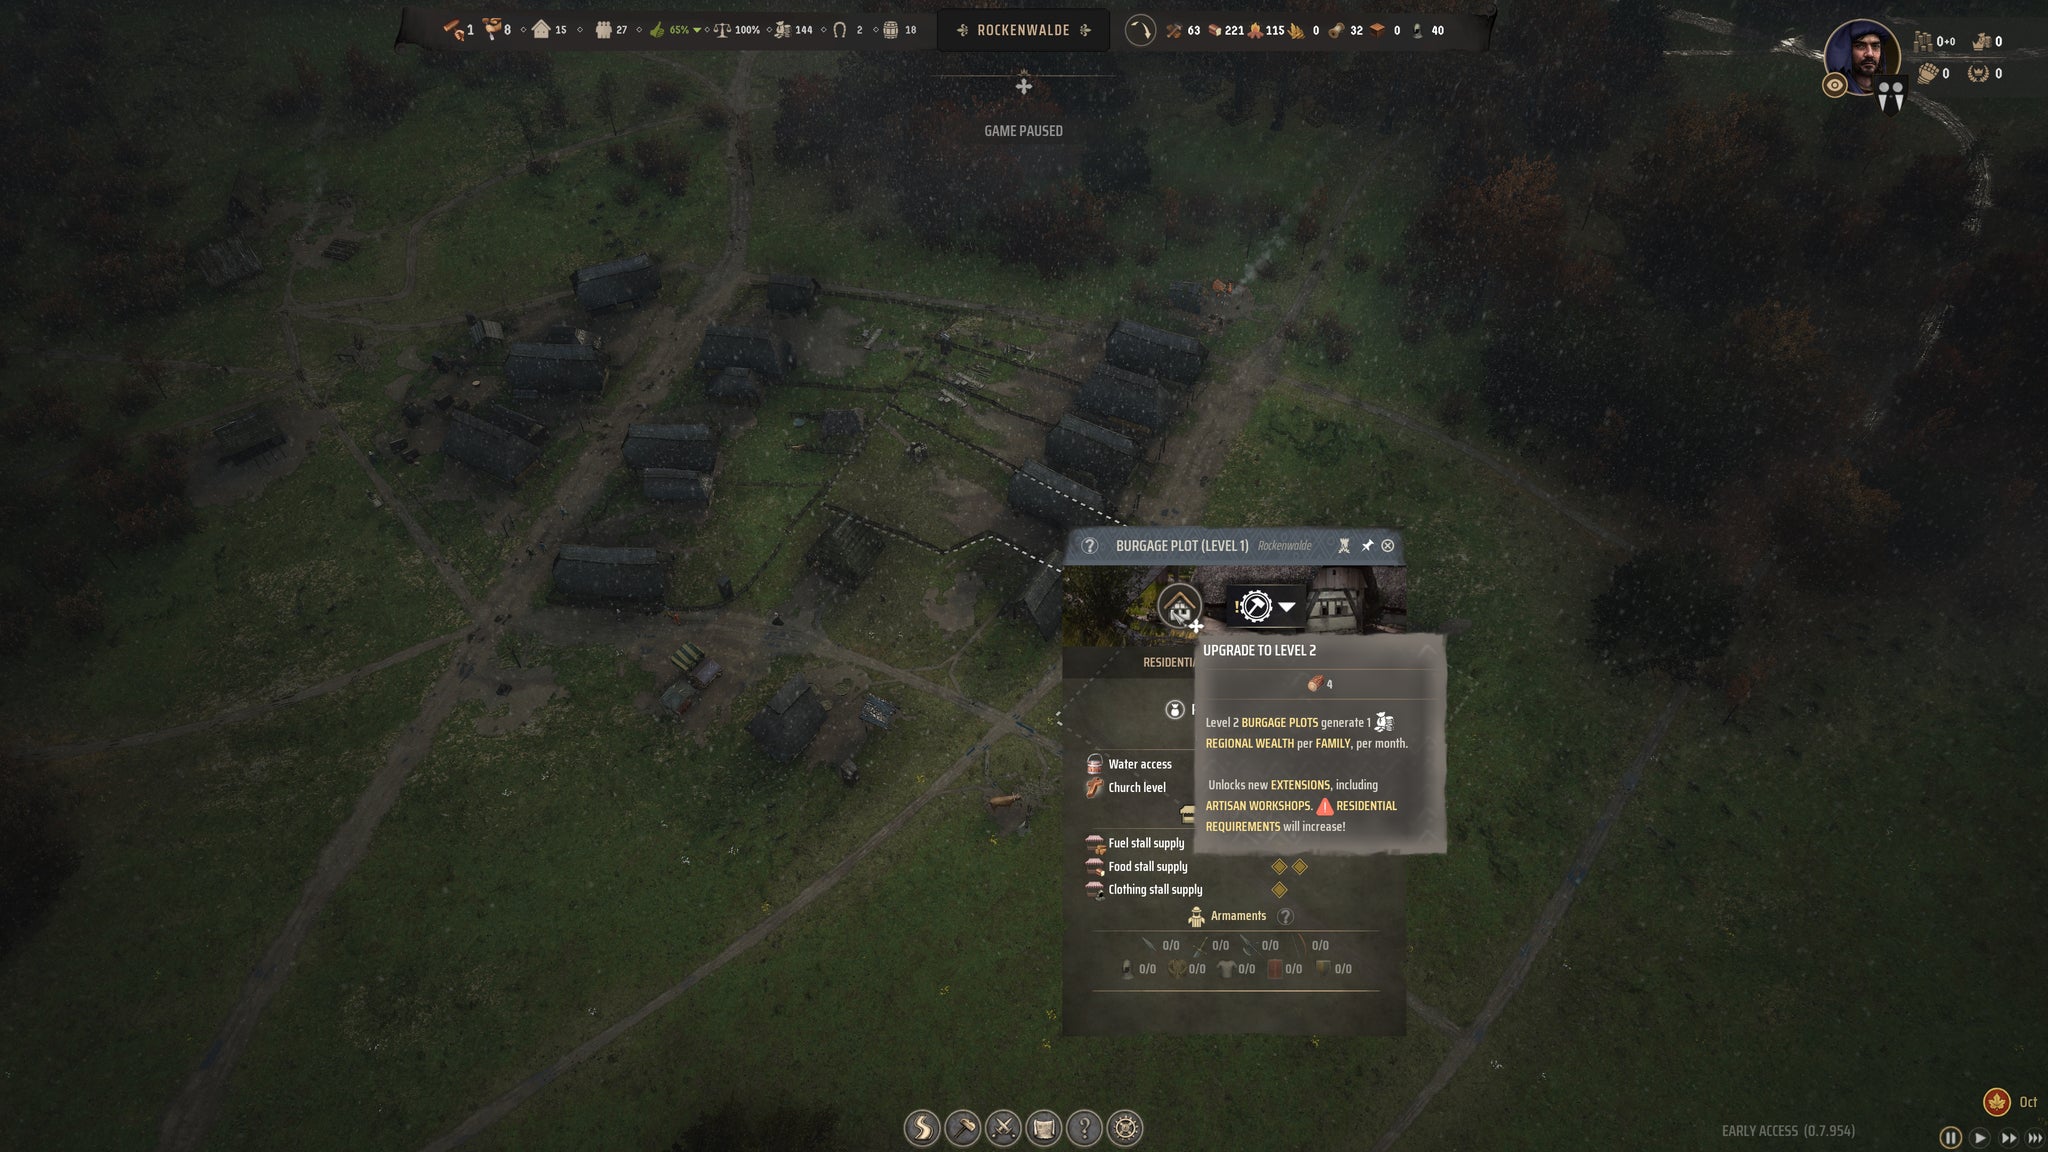
You can upgrade a Burgage Plot as long as all its requirements are met. |Image credit:Rock Paper Shotgun/Hooded Horse
Upgrading only costs 4x Timber . You can only do it once all of the approval requirements in that Burgage Plot are satisfied, but that shouldn’t be an issue if you’ve been following along with this walkthrough! Get those upgrades done, and I’ll see you in the Medium Village era.
20. Your second Development Point
Congratulations! You are now the proud owner of one Medium Village. Your reward? A new Development Point . And I know just where it should go.
So, open up the Development tech tree again by clicking on the village name at the top, and this time select Better Deals , which is the Development Upgrade just on from the Trade Logistics tech you unlocked last time.

Behold, the best Development Ugprade in Manor Lords: Better Deals! |Image credit:Rock Paper Shotgun/Hooded Horse
Better Deals is probably the single most powerful Development Upgrade in Manor Lords right now. It removes the 10x Regional Wealth tariff on all your imports at the Trading Post, which in simple terms means everything can be bought for 10x Regional Wealth cheaper . That’s a huge deal when you’re looking at more expensive items like Polearms and other weapons that you’ll need for raising your first army later on.
21. Start collecting Stone for your Manor
As Winter dawns, there’s just a couple more jobs that I’d recommend squeezing into Year 1 if you can. The first is to construct your Manor , which in some ways (mainly thematic ways) is the most important building in your whole settlement.
Once you construct your Manor, you’ll be able to start taxing your Population for Treasury and Influence , and you can also start hiring Retinue to help you in battle.
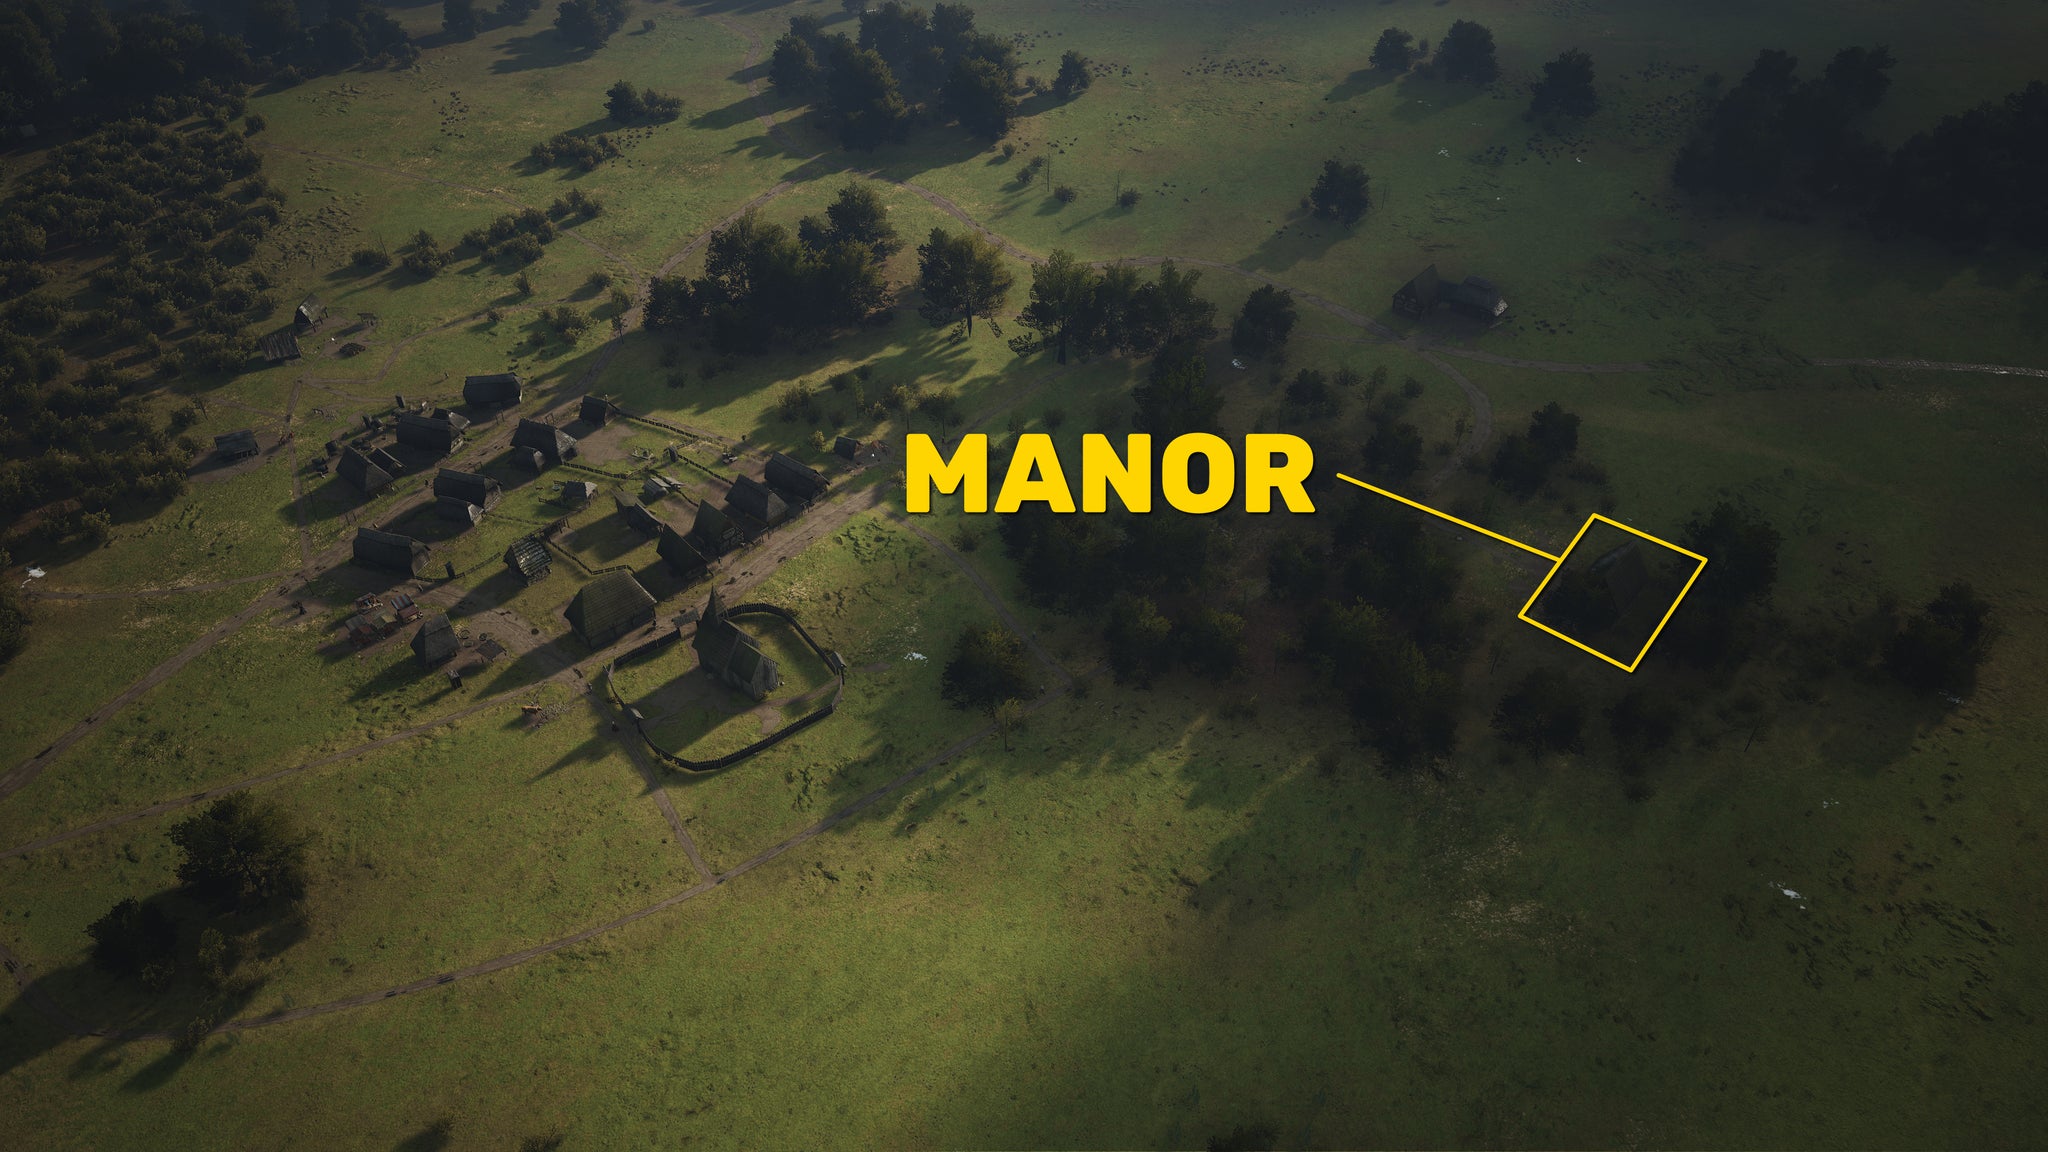
I’ve placed my Manor a fair distance from the main village, up on a hill. There’s no need for it to be central. |Image credit:Rock Paper Shotgun/Hooded Horse
The only issue is that your Manor requires Stone to build, and you probably won’t have enough. You could always purchase the Stone at the Trading Post, but there’s no reason why you can’t start collecting Stone for yourself. Find the nearest Stone patch, build a road out to it, and construct a Stonecutter Camp there. Then set one of your families working in the Stonecutter Camp, and they’ll periodically ferry the Stone back to your base. Soon you’ll have more than enough to build your first Manor.
When the time comes to actually place down your Manor, you’ll enter the Castle Planning screen where you can expand walls, add towers and outposts, and more. But all of that stuff is very costly in materials and time-consuming to build, so we’d recommend just building the basic Manor for now. Once it’s built, you can re-enter the Castle Planning screen at any time to add more walls and gubbins.
22. Start making Shoes from your Leather
Remember all that Leather you’ve been making? Well, your Level 1 citizens may have been happy draping Leather over themselves, but Level 2 citizens want actual Clothes. There are three types of Clothing items in Manor Lords: Clothes, Cloaks, and Shoes . Clothes and Cloaks require Linen and Yarn, neither of which you have yet. So that leaves Shoes, which you can thankfully make out of Leather.
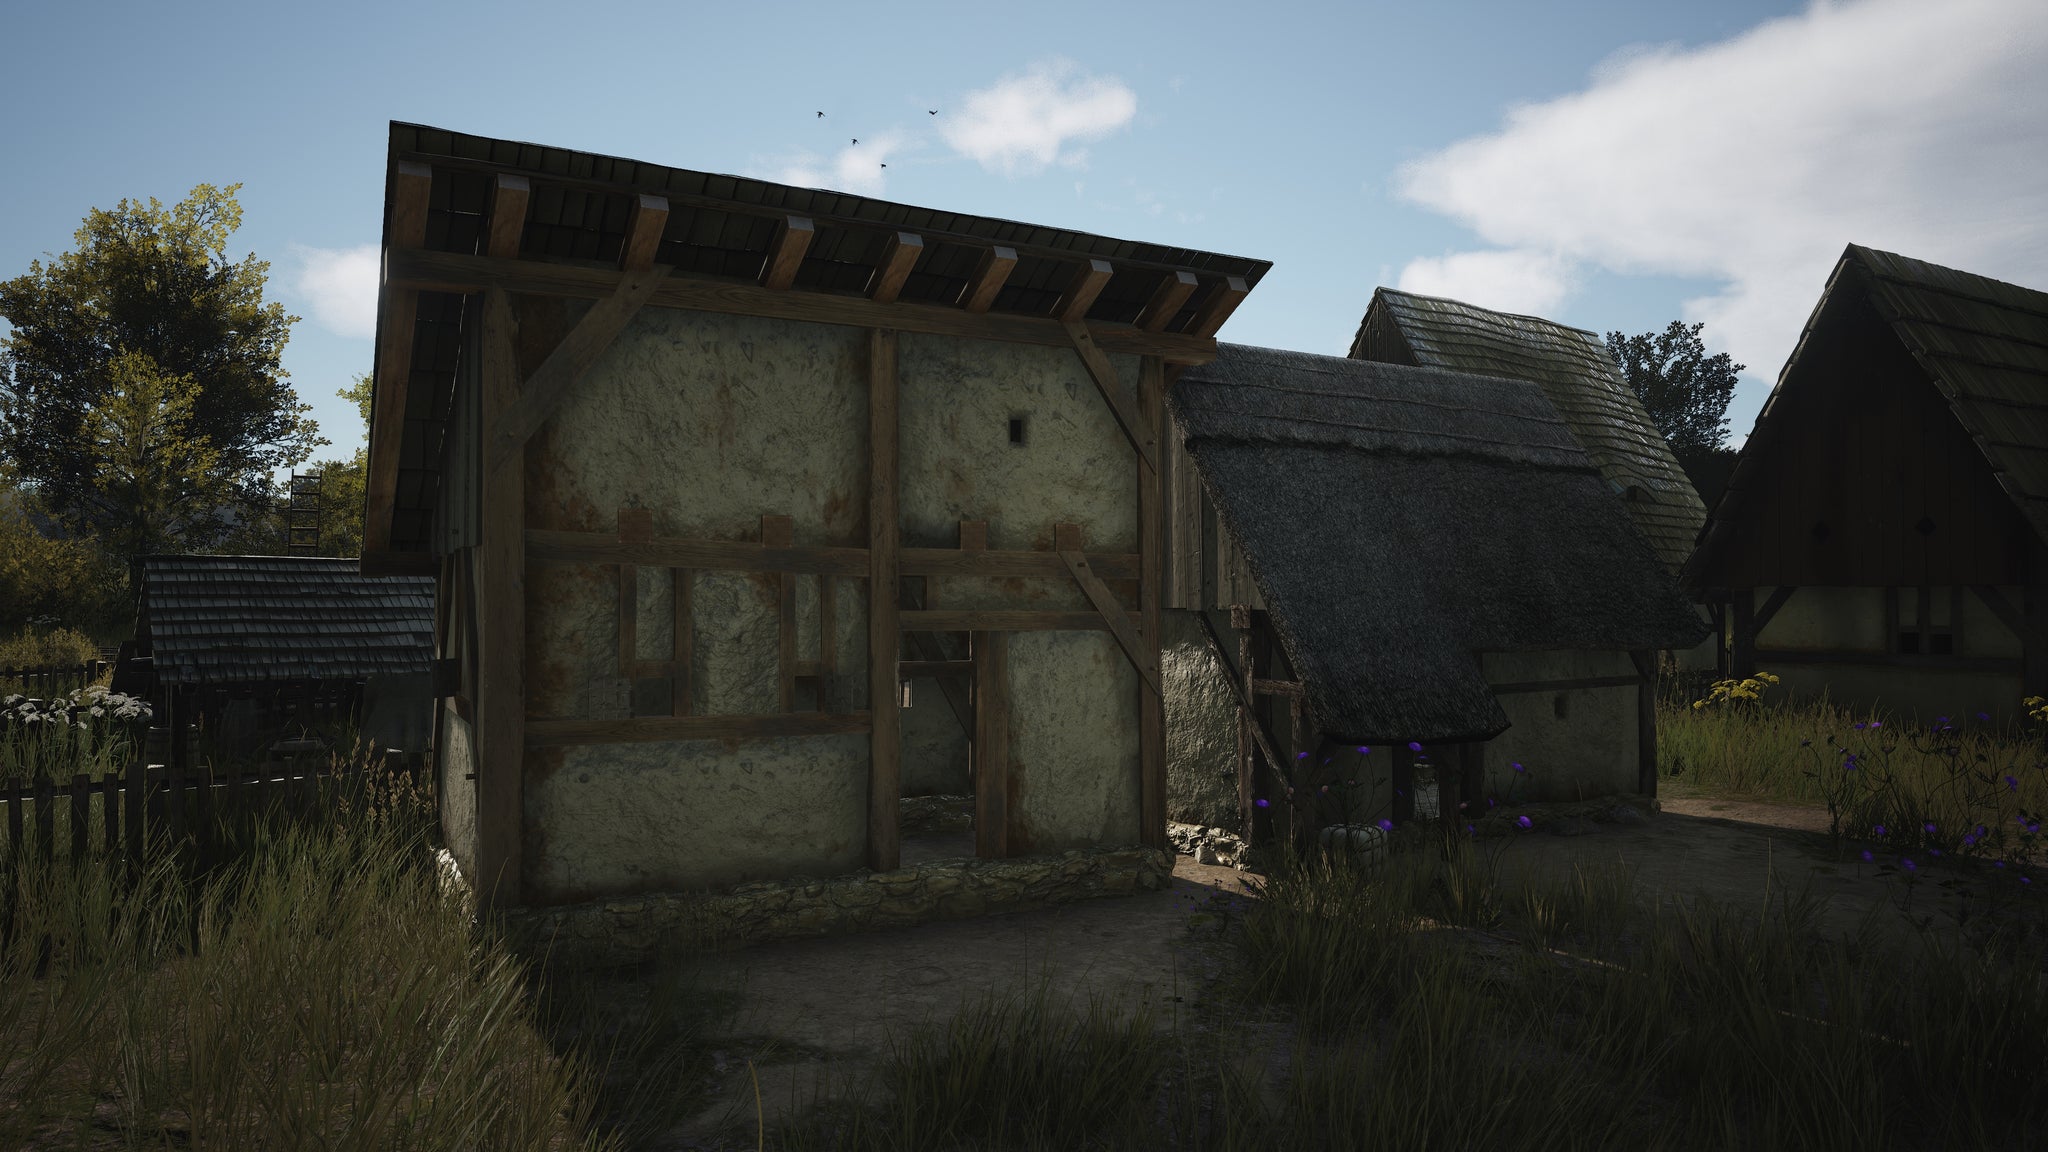
It may not look like much, but this tiny, empty shack is actually where your entire town gets their Shoes. |Image credit:Rock Paper Shotgun/Hooded Horse
To start building Shoes, all you need to do is select one of your Level 2 Burgage Plots with a Backyard Extension Slot (if you don’t have one, build it!), and create a Cobbler’s Workshop . The Workshop costs 5x Regional Wealth and 5x Planks to make, which shouldn’t exactly break the bank. The downside is that you’re effectively locking that family away from any other jobs throughout the village, but that’s okay. You can always get more families.
Once the Cobbler’s Workshop is done, you should begin to see Leather being slowly turned into Shoes and stored in your Large Storehouse (or sold at a Clothing stall). That’s one of the major hurdles for upgrading to Level 3 Burgage Plots already complete!
23. Surviving Winter
By this point in my game, Winter had arrived, and draped my burgeoning settlement in a lovely blanket of white snow. Thankfully, if you’ve followed along with this guide, there’s really nothing to worry about over the Winter period. Your people should have plenty of food (of varying varieties) and lots of Firewood . If need be, you can always set two families working in your Woodcutter’s Lodge at once, for extra Firewood - but it shouldn’t be necessary.
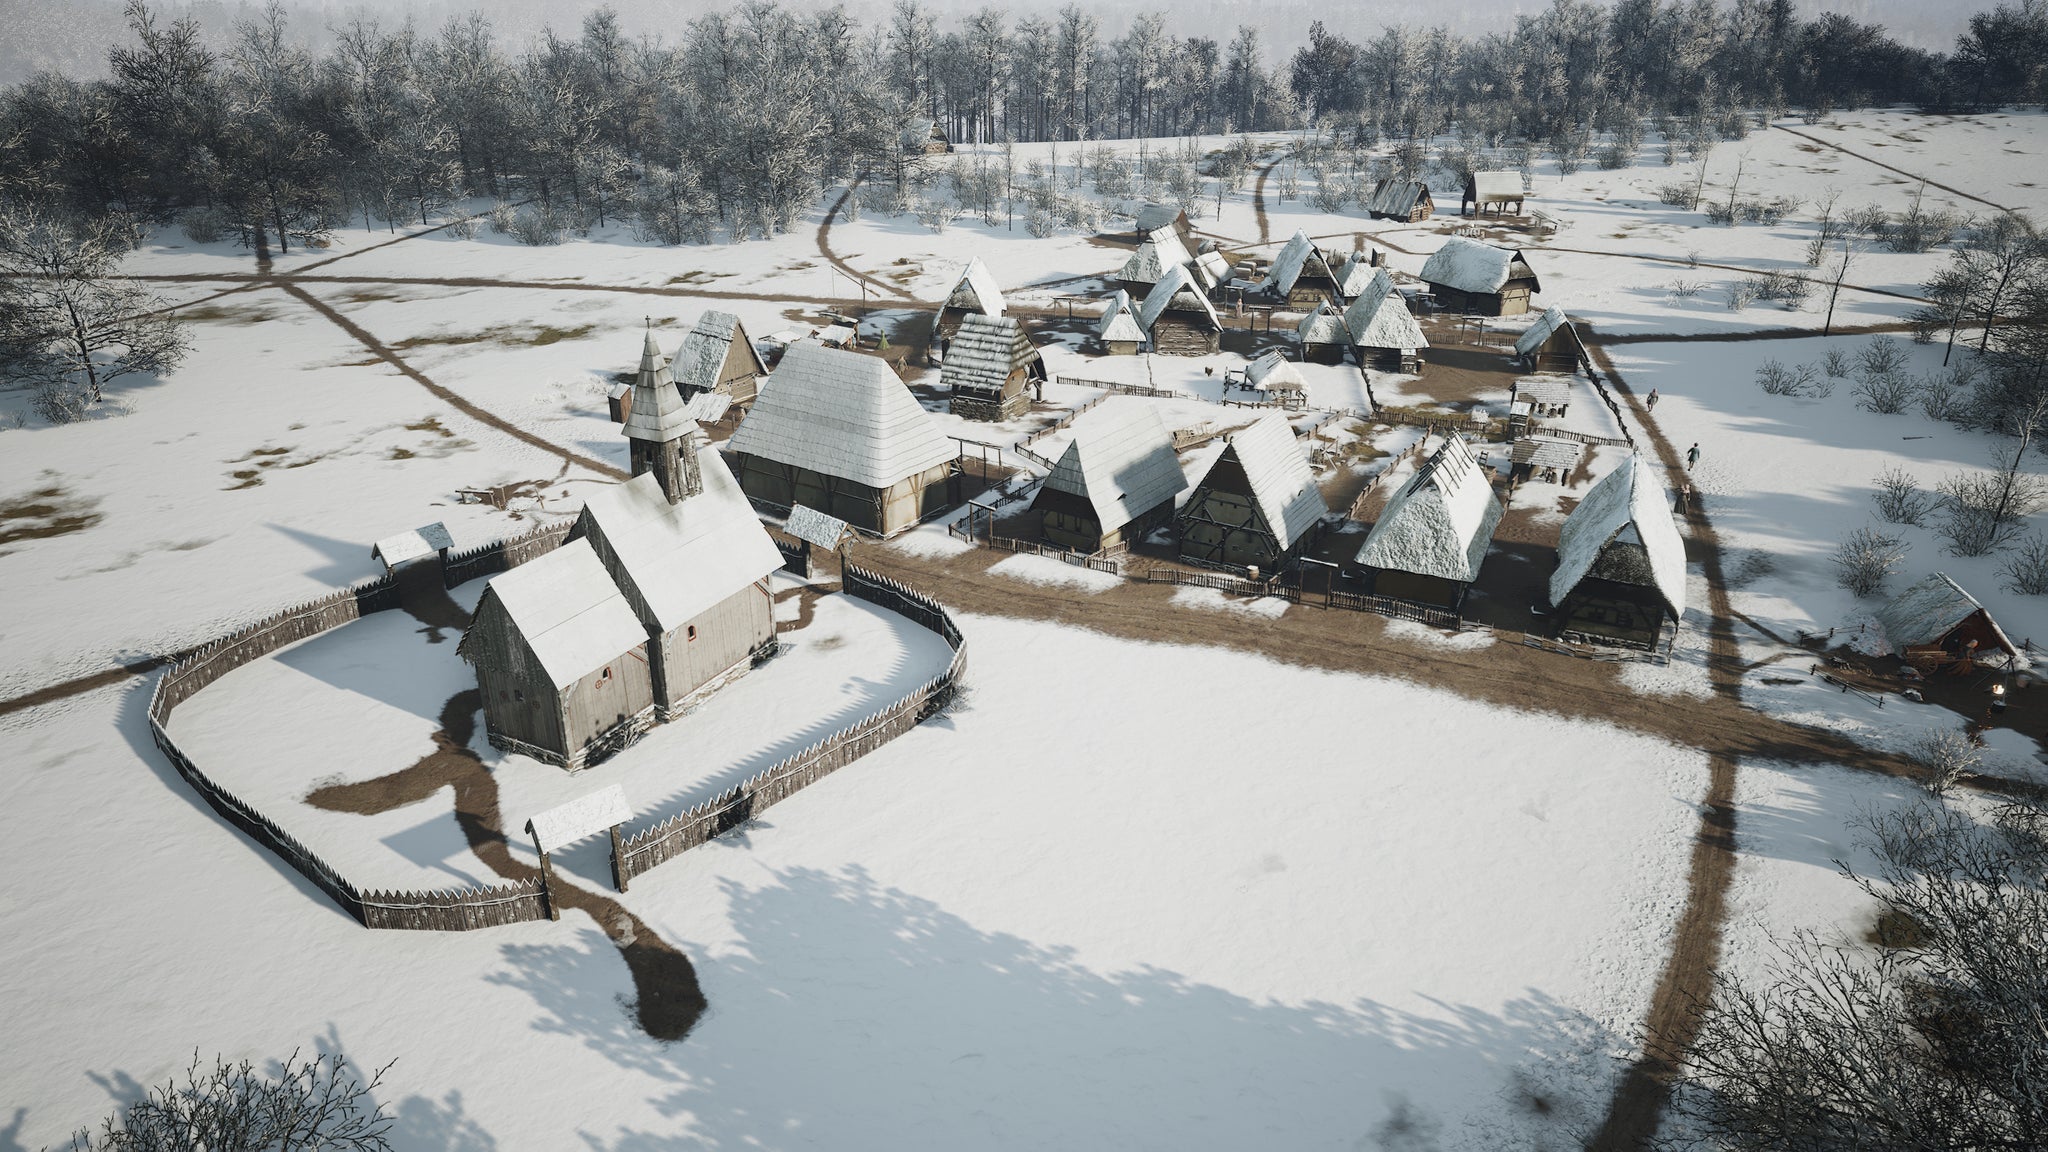
Winter makes things extra pretty. |Image credit:Rock Paper Shotgun/Hooded Horse
You don’t need to take any special precautions during Winter. This isn’t Frostpunk ; your people can take care of themselves as long as they have food, fuel, clothes, and a little bit of religion to help them get through the long nights. And that’s just about the entire first year of Manor Lords sorted! Congratulations on surviving and thriving!
24. Year 2 objectives…
I’ll leave you with a few key objectives to think about for Year 2 of your Manor Lords playthrough:
- Farming: You should start putting down a Farm or two. One for Wheat (Emmer) and one for Barley (for your Ale). For details, check out our Manor Lords Farming guide .
- Rooftiles: To upgrade your Burgage Plots to Level 3, you need to upgrade your Wooden Church to a Stone Church. Apart from all the Stone you’ll obviously need, the upgrade also costs Rooftiles, which are made from Clay. So you’d better build a Mining Pit over your nearest Clay source…
- Bandits: It’s time to start thinking about raising an army and marching them across the map to deal with those Bandits that keep stealing your goods. Bandits are weak in battle, but I’d recommend having an army of at least 20 to take on the standard band of 16 Bandits.
- Ale Production: What’s life without Ale? You need a Tavern to keep your people happy. And for the Tavern to work, you need Ale. And to make Ale, you need Malt. And to make Malt, you need Barley. It’s a fairly long process, so you’d best start early on in your second year.
- Iron Production: Iron is the other key resource you haven’t tapped yet. Iron Ore from your Mine can be refined into Slabs, which can be formed into Tools , weapons, and armor. You won’t be able to handle the incoming Raiders without it.
- Expanding your Town: Aside from everything else, don’t forget to keep expanding your settlement. Build more Burgage Plots whenever you start to fill them up. And when the time comes, you can look at claiming your second territory and starting from scratch there with a new neighbouring settlement.
I’ll let you figure out the details of these Year 2 objectives for yourself, but you should be on very firm footing after such a successful first year. Hopefully you found this beginner’s guide useful, and good luck Manor Lording!

Manor Lords
PC
Rock Paper Shotgun is better when you sign in
Sign in and join us on our journey to discover strange and compelling PC games.

All 75 Arc Raiders Blueprints and where to get them
These areas have the highest chance of giving you Blueprints

Image credit:Rock Paper Shotgun/Embark Studios

Looking for more Arc Raiders Blueprints? It’s a special day when you find a Blueprint, as they’re among the most valuable items in Arc Raiders. If you find a Blueprint that you haven’t already found, then you must make sure you hold onto it at all costs, because Blueprints are the key to one of the most important and powerful systems of meta-progression in the game.
This guide aims to be the very best guide on Blueprints you can find, starting with a primer on what exactly they are and how they work in Arc Raiders, before delving into exactly where to get Blueprints and the very best farming spots for you to take in your search.
We’ll also go over how to get Blueprints from other unlikely activities, such as destroying Surveyors and completing specific quests. And you’ll also find the full list of all 75 Blueprints in Arc Raiders on this page (including the newest Blueprints added with the Cold Snap update , such as the Deadline Blueprint and Firework Box Blueprint), giving you all the information you need to expand your own crafting repertoire.
In this guide:
- What are Blueprints in Arc Raiders?
- Full Blueprint list: All crafting recipes
- Where to find Blueprints in Arc Raiders Blueprints obtained from quests Blueprints obtained from Trials Best Blueprint farming locations

What are Blueprints in Arc Raiders?
Blueprints in Arc Raiders are special items which, if you manage to extract with them, you can expend to permanently unlock a new crafting recipe in your Workshop. If you manage to extract from a raid with an Anvil Blueprint, for example, you can unlock the ability to craft your very own Anvil Pistol, as many times as you like (as long as you have the crafting materials).
To use a Blueprint, simply open your Inventory while in the lobby, then right-click on the Blueprint and click “Learn And Consume” . This will permanently unlock the recipe for that item in your Workshop. As of the Stella Montis update, there are allegedly 75 different Blueprints to unlock - although only 68 are confirmed to be in the game so far. You can see all the Blueprints you’ve found and unlocked by going to the Workshop menu, and hitting “R” to bring up the Blueprint screen.
It’s possible to find duplicates of past Blueprints you’ve already unlocked. If you find these, then you can either sell them, or - if you like to play with friends - you can take it into a match and gift it to your friend so they can unlock that recipe for themselves. Another option is to keep hold of them until the time comes to donate them to the Expedition.
Full Blueprint list: All crafting recipes
Below is the full list of all the Blueprints that are currently available to find in Arc Raiders, and the crafting recipe required for each item:
| Blueprint | Type | Recipe | Crafted At |
|---|---|---|---|
| Bettina | Weapon | 3x Advanced Mechanical Components 3x Heavy Gun Parts 3x Canister | Gunsmith 3 |
| Blue Light Stick | Quick Use | 3x Chemicals | Utility Station 1 |
| Aphelion | Weapon | 3x Magnetic Accelerator 3x Complex Gun Parts 1x Matriarch Reactor | Gunsmith 3 |
| Combat Mk. 3 (Flanking) | Augment | 2x Advanced Electrical Components 3x Processor | Gear Bench 3 |
| Combat Mk. 3 (Aggressive) | Augment | 2x Advanced Electrical Components 3x Processor | Gear Bench 3 |
| Complex Gun Parts | Material | 2x Light Gun Parts 2x Medium Gun Parts 2x Heavy Gun Parts | Refiner 3 |
| Fireworks Box | Quick Use | 1x Explosive Compound 3x Pop Trigger | Explosives Station 2 |
| Gas Mine | Mine | 4x Chemicals 2x Rubber Parts | Explosives Station 1 |
| Green Light Stick | Quick Use | 3x Chemicals | Utility Station 1 |
| Pulse Mine | Mine | 1x Crude Explosives 1x Wires | Explosives Station 1 |
| Seeker Grenade | Grenade | 1x Crude Explosives 2x ARC Alloy | Explosives Station 1 |
| Looting Mk. 3 (Survivor) | Augment | 2x Advanced Electrical Components 3x Processor | Gear Bench 3 |
| Angled Grip II | Mod | 2x Mechanical Components 3x Duct Tape | Gunsmith 2 |
| Angled Grip III | Mod | 2x Mod Components 5x Duct Tape | Gunsmith 3 |
| Hullcracker | Weapon | 1x Magnetic Accelerator 3x Heavy Gun Parts 1x Exodus Modules | Gunsmith 3 |
| Launcher Ammo | Ammo | 5x Metal Parts 1x Crude Explosives | Workbench 1 |
| Anvil | Weapon | 5x Mechanical Components 5x Simple Gun Parts | Gunsmith 2 |
| Anvil Splitter | Mod | 2x Mod Components 3x Processor | Gunsmith 3 |
| ??? | ??? | ??? | ??? |
| Barricade Kit | Quick Use | 1x Mechanical Components | Utility Station 2 |
| Blaze Grenade | Grenade | 1x Explosive Compound 2x Oil | Explosives Station 3 |
| Bobcat | Weapon | 3x Advanced Mechanical Components 3x Light Gun Parts | Gunsmith 3 |
| Osprey | Weapon | 2x Advanced Mechanical Components 3x Medium Gun Parts 7x Wires | Gunsmith 3 |
| Burletta | Weapon | 3x Mechanical Components 3x Simple Gun Parts | Gunsmith 1 |
| Compensator II | Mod | 2x Mechanical Components 4x Wires | Gunsmith 2 |
| Compensator III | Mod | 2x Mod Components 8x Wires | Gunsmith 3 |
| Defibrillator | Quick Use | 9x Plastic Parts 1x Moss | Medical Lab 2 |
| ??? | ??? | ??? | ??? |
| Equalizer | Weapon | 3x Magnetic Accelerator 3x Complex Gun Parts 1x Queen Reactor | Gunsmith 3 |
| Extended Barrel | Mod | 2x Mod Components 8x Wires | Gunsmith 3 |
| Extended Light Mag II | Mod | 2x Mechanical Components 3x Steel Spring | Gunsmith 2 |
| Extended Light Mag III | Mod | 2x Mod Components 5x Steel Spring | Gunsmith 3 |
| Extended Medium Mag II | Mod | 2x Mechanical Components 3x Steel Spring | Gunsmith 2 |
| Extended Medium Mag III | Mod | 2x Mod Components 5x Steel Spring | Gunsmith 3 |
| Extended Shotgun Mag II | Mod | 2x Mechanical Components 3x Steel Spring | Gunsmith 2 |
| Extended Shotgun Mag III | Mod | 2x Mod Components 5x Steel Spring | Gunsmith 3 |
| Remote Raider Flare | Quick Use | 2x Chemicals 4x Rubber Parts | Utility Station 1 |
| Heavy Gun Parts | Material | 4x Simple Gun Parts | Refiner 2 |
| Venator | Weapon | 2x Advanced Mechanical Components 3x Medium Gun Parts 5x Magnet | Gunsmith 3 |
| Il Toro | Weapon | 5x Mechanical Components 6x Simple Gun Parts | Gunsmith 1 |
| Jolt Mine | Mine | 1x Electrical Components 1x Battery | Explosives Station 2 |
| Explosive Mine | Mine | 1x Explosive Compound 1x Sensors | Explosives Station 3 |
| Jupiter | Weapon | 3x Magnetic Accelerator 3x Complex Gun Parts 1x Queen Reactor | Gunsmith 3 |
| Light Gun Parts | Material | 4x Simple Gun Parts | Refiner 2 |
| Lightweight Stock | Mod | 2x Mod Components 5x Duct Tape | Gunsmith 3 |
| Lure Grenade | Grenade | 1x Speaker Component 1x Electrical Components | Utility Station 2 |
| Medium Gun Parts | Material | 4x Simple Gun Parts | Refiner 2 |
| Torrente | Weapon | 2x Advanced Mechanical Components 3x Medium Gun Parts 6x Steel Spring | Gunsmith 3 |
| Muzzle Brake II | Mod | 2x Mechanical Components 4x Wires | Gunsmith 2 |
| Muzzle Brake III | Mod | 2x Mod Components 8x Wires | Gunsmith 3 |
| Padded Stock | Mod | 2x Mod Components 5x Duct Tape | Gunsmith 3 |
| Shotgun Choke II | Mod | 2x Mechanical Components 4x Wires | Gunsmith 2 |
| Shotgun Choke III | Mod | 2x Mod Components 8x Wires | Gunsmith 3 |
| Shotgun Silencer | Mod | 2x Mod Components 8x Wires | Gunsmith 3 |
| Showstopper | Grenade | 1x Advanced Electrical Components 1x Voltage Converter | Explosives Station 3 |
| Silencer I | Mod | 2x Mechanical Components 4x Wires | Gunsmith 2 |
| Silencer II | Mod | 2x Mod Components 8x Wires | Gunsmith 3 |
| Snap Hook | Quick Use | 2x Power Rod 3x Rope 1x Exodus Modules | Utility Station 3 |
| Stable Stock II | Mod | 2x Mechanical Components 3x Duct Tape | Gunsmith 2 |
| Stable Stock III | Mod | 2x Mod Components 5x Duct Tape | Gunsmith 3 |
| Tagging Grenade | Grenade | 1x Electrical Components 1x Sensors | Utility Station 3 |
| Tempest | Weapon | 3x Advanced Mechanical Components 3x Medium Gun Parts 3x Canister | Gunsmith 3 |
| Trigger Nade | Grenade | 2x Crude Explosives 1x Processor | Explosives Station 2 |
| Vertical Grip II | Mod | 2x Mechanical Components 3x Duct Tape | Gunsmith 2 |
| Vertical Grip III | Mod | 2x Mod Components 5x Duct Tape | Gunsmith 3 |
| Vita Shot | Quick Use | 2x Antiseptic 1x Syringe | Medical Lab 3 |
| Vita Spray | Quick Use | 3x Antiseptic 1x Canister | Medical Lab 3 |
| Vulcano | Weapon | 1x Magnetic Accelerator 3x Heavy Gun Parts 1x Exodus Modules | Gunsmith 3 |
| Wolfpack | Grenade | 2x Explosive Compound 2x Sensors | Explosives Station 3 |
| Red Light Stick | Quick Use | 3x Chemicals | Utility Station 1 |
| Smoke Grenade | Grenade | 14x Chemicals 1x Canister | Utility Station 2 |
| Deadline | Mine | 3x Explosive Compound 2x ARC Circuitry | Explosives Station 3 |
| Trailblazer | Grenade | 1x Explosive Compound 1x Synthesized Fuel | Explosives Station 3 |
| Tactical Mk. 3 (Defensive) | Augment | 2x Advanced Electrical Components 3x Processor | Gear Bench 3 |
| Tactical Mk. 3 (Healing) | Augment | 2x Advanced Electrical Components 3x Processor | Gear Bench 3 |
| Yellow Light Stick | Quick Use | 3x Chemicals | Utility Station 1 |
Note: The missing Blueprints in this list likely have not actually been added to the game at the time of writing, because none of the playerbase has managed to find any of them. As they are added to the game, I will update this page with the most relevant information so you know exactly how to get all 75 Arc Raiders Blueprints.
Where to find Blueprints in Arc Raiders
Below is a list of all containers, modifiers, and events which maximise your chances of finding Blueprints:
- Certain quests reward you with specific Blueprints .
- Completing Trials has a high chance of offering Blueprints as rewards.
- Surveyors have a decent chance of dropping Blueprints on death.
- High loot value areas tend to have a greater chance of spawning Blueprints.
- Night Raids and Storms may increase rare Blueprint spawn chances in containers.
- Containers with higher numbers of items may have a higher tendency to spawn Blueprints. As a result, Blue Gate (which has many “large” containers containing multiple items) may give you a higher chance of spawning Blueprints.
- Raider containers (Raider Caches, Weapon Boxes, Medical Bags, Grenade Tubes) have increased Blueprint drop rates. As a result, the Uncovered Caches event gives you a high chance of finding Blueprints.
- Security Lockers have a higher than average chance of containing Blueprints.
- Certain Blueprints only seem to spawn under specific circumstances: Tempest Blueprint only spawns during Night Raid events. Vulcano Blueprint only spawns during Hidden Bunker events. Jupiter and Equaliser Blueprints only spawn during Harvester events.

Raider Caches, Weapon Boxes, and other raider-oriented container types have a good chance of offering Blueprints. |Image credit:Rock Paper Shotgun/Embark Studios
Blueprints have a very low chance of spawning in any container in Arc Raiders, around 1-2% on average. However, there is a higher chance of finding Blueprints in particular container types. Specifically, you can find more Blueprints in Raider containers and security lockers.
Beyond this, if you’re looking for Blueprints you should focus on regions of the map which are marked as having particularly high-value loot. Areas such as the Control Tower in Dam Battlegrounds, the Arrival and Departure Buildings in Spaceport, and Pilgrim’s Peak in Blue Gate all have a better-than-average chance of spawning Blueprints somewhere amongst all their containers. Night Raids and Electromagnetic Storm events also increase the drop chances of certain Blueprints .
In addition to these containers, you can often loot Blueprints from destroyed Surveyors - the largest of the rolling ball ARC. Surveyors are more commonly found on the later maps - Spaceport and Blue Gate - and if one spawns in your match, you’ll likely see it by the blue laser beam that it casts into the sky while “surveying”.
Surveyors are quite well-armoured and will very speedily run away from you once it notices you, but if you can take one down then make sure you loot all its parts for a chance of obtaining certain unusual Blueprints.
Blueprints obtained from quests
One way in which you can get Blueprints is by completing certain quests for the vendors in Speranza. Some quests will reward you with a specific item Blueprint upon completion, so as long as you work through all the quests in Arc Raiders, you are guaranteed those Blueprints.
Here is the full list of all Blueprints you can get from quest rewards:
- Trigger Nade Blueprint: Rewarded after completing “Sparks Fly”.
- Lure Grenade Blueprint: Rewarded after completing “Greasing Her Palms”.
- Burletta Blueprint: Rewarded after completing “Industrial Espionage”.
- Hullcracker Blueprint (and Launcher Ammo Blueprint): Rewarded after completing “The Major’s Footlocker”.
Alas, that’s only 4 Blueprints out of a total of 75 to unlock, so for the vast majority you will need to find them yourself during a raid. If you’re intent on farming Blueprints, then it’s best to equip yourself with cheap gear in case you lose it, but don’t use a free loadout because then you won’t get a safe pocket to stash any new Blueprint you find. No pain in Arc Raiders is sharper than failing to extract with a new Blueprint you’ve been after for a dozen hours already.

One of the best ways to get Blueprints is by hitting three stars on all five Trials every week. |Image credit:Rock Paper Shotgun/Embark Studios
Blueprints obtained from Trials
One of the very best ways to get Blueprints is as rewards for completing Trials in Arc Raiders. Trials are unlocked from Level 15 onwards, and allow you to earn rewards by focusing on certain tasks over the course of several raids. For example, one Trial might task you with dealing damage to Hornets, while another might challenge you to loot Supply Drops.
Trials refresh on a weekly basis, with a new week bringing five new Trials. Each Trial can offer up to three rewards after passing certain score milestones, and it’s possible to receive very high level loot from these reward crates - including Blueprints. So if you want to unlock as many Blueprints as possible, you should make a point of completing as many Trials as possible each week.
Best Blueprint farming locations
The very best way to get Blueprints is to frequent specific areas of the maps which combine high-tier loot pools with the right types of containers to search. Here are my recommendations for where to find Blueprints on every map, so you can always keep the search going for new crafting recipes to unlock.

Image credit:Rock Paper Shotgun/Embark Studios
Dam Battlegrounds
The best places to farm Blueprints on Dam Battlegrounds are the Control Tower, Power Generation Complex, Ruby Residence, and Pale Apartments . The first two regions, despite only being marked on the map as mid-tier loot, contain a phenomenal number of containers to loot. The Control Tower can also contain a couple of high-tier Security Lockers - though of course, you’ll need to have unlocked the Security Breach skill at the end of the Survival tree.
There’s also a lot of reporting amongst the playerbase that the Residential areas in the top-left of the map - Pale Apartments and Ruby Residence - give you a comparatively strong chance of finding Blueprints. Considering their size, there’s a high density of containers to loot in both locations, and they also have the benefit of being fairly out of the way. So you’re more likely to have all the containers to yourself.
Buried City
The best Blueprint farming locations on Buried City are the Santa Maria Houses, Grandioso Apartments, Town Hall, and the various buildings of the New District . Grandioso Apartments has a lower number of containers than the rest, but a high chance of spawning weapon cases - which have good Blueprint drop rates. The others are high-tier loot areas, with plenty of lootable containers - including Security Lockers.
Spaceport
The best places to find Blueprints on Spaceport are the Arrival and Departure Buildings, as well as Control Tower A6 and the Launch Towers . All these areas are labelled as high-value loot regions, and many of them are also very handily connected to one another by the Spaceport wall, which you can use to quickly run from one area to the next. At the tops of most of these buildings you’ll find at least one Security Locker, so this is an excellent farming route for players looking to find Blueprints.
The downside to looting Blueprints on Spaceport is that all these areas are hotly contested, particularly in Duos and Squads. You’ll need to be very focused and fast in order to complete the full farming route.

Image credit:Rock Paper Shotgun/Embark Studios
Blue Gate
Blue Gate tends to have a good chance of dropping Blueprints, potentially because it generally has a high number of containers which can hold lots of items; so there’s a higher chance of a Blueprint spawning in each container. In my experience, the best Blueprint farming spots on Blue Gate are Pilgrim’s Peak, Raider’s Refuge, the Ancient Fort, and the Underground Complex beneath the Warehouse .
All of these areas contain a wealth of containers to loot. Raider’s Refuge has less to loot, but the majority of the containers in and around the Refuge are raider containers, which have a high chance of containing Blueprints - particularly during major events.
Stella Montis
On the whole, Stella Montis seems to have a very low drop rate for Blueprints (though a high chance of dropping other high-tier loot). If you do want to try farming Blueprints on this map, the best places to find Blueprints in Stella Montis are Medical Research, Assembly Workshop, and the Business Center . These areas have the highest density of containers to loot on the map.
In addition to this, the Western Tunnel has a few different Security Lockers to loot, so while there’s very little to loot elsewhere in this area of the map, it’s worth hitting those Security Lockers if you spawn there at the start of a match.
That wraps up this primer on how to get all the Blueprints in Arc Raiders as quickly as possible. With the Expedition system constantly resetting a large number of players’ Blueprints, it’s more important than ever to have the most up-to-date information on where to find all these Blueprints.
While you’re here, be sure to check out our Arc Raiders best guns tier list , as well as our primers on the best skills to unlock and all the different Field Depot locations on every map.


ARC Raiders
PS5 , Xbox Series X/S , PC
Rock Paper Shotgun is better when you sign in
Sign in and join us on our journey to discover strange and compelling PC games.
