Life Is Strange Double Exposure review: be still my irritated heart
Mad at Max

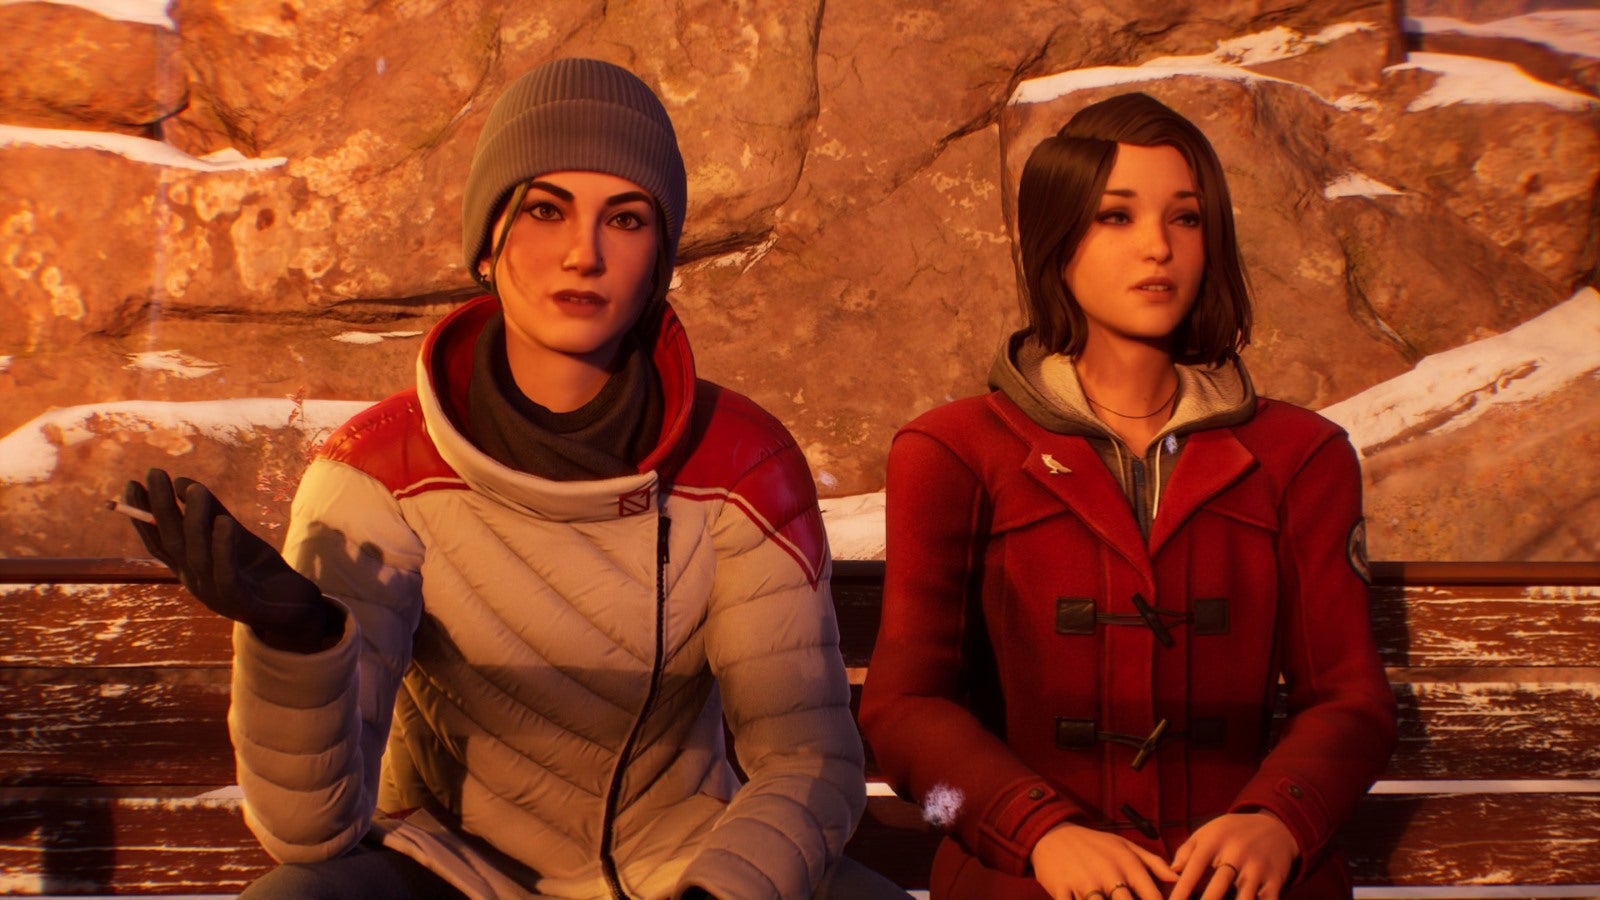
Image credit:Rock Paper Shotgun / Square Enix

- Developer: Deck Nine
- Publisher: Square Enix
- Release: Oct 29th
- On: Windows
- From: Steam
- Price: £50/$50/€50
- Reviewed on: Intel Core-i7-11700F, 16GB RAM, Nvidia GeForce RTX 3060, Windows 10
You can feel two ways about something at the same time. The feuding academics of Life Is Strange: Double Exposure might call this “emotional superposition”. But the word “ambivalent” already exists. So let’s say I’m ambivalent about this new adventure featuring Max Caulfield, the returning hero of Life Is Strange , and time-travelling photographer whose powers have resurfaced after years of off-screen atrophy. I’ve been deeply moved by individual scenes in this sequel. By the end I was sorry to leave its characters behind. At the same time (please now imagine my face is splitting into a second, colour-washed expression with wobbly VFX) I am relieved it’s over, so I don’t have to deal with the inconsistent behaviour of those characters, the flimsy plot, and a convoluted approach to murder mystery.
If you’re allergic to spoilers, take off. To discuss a Life Is Strange game requires spoiling, even a little. For everyone else, let’s recap. The first Life Is Strange followed Max as a high school senior who sees a childhood friend, Chloe, shot dead in the school bathroom. Her mind snaps and she develops time travel powers, leading to all sorts of wibbly rewinding in an effort to save this friend (and possible romantic interest). In the end, you have a choice: sacrifice your hometown to save gal pal Chloe, or let her die back in that bathroom to spare the town.
Double Exposure picks up the pieces many years later. Max is an award-winning photographer and visiting artist at a prestigious university in snowy Vermont. She keeps a photo of Chloe in her wallet, a reminder of the love she lost (to gun violence or a post-disaster break-up, pick your poison). That relationship is over. This game is not out to explore it. Instead, it wants to put Max into a new place, with new friends, new romantic interests, and a new death to rattle her old traumas.

Image credit:Rock Paper Shotgun / Square Enix
That decision has proven contentious with some fans , but I’m on board. I prefer studios to move on from old stories. A huge theme of Life Is Strange is acceptance, learning to accept that those you love may be ripped from you unfairly. To see fans get uproarious about Chloe’s vanishing act is like watching Max herself flail against the stormwinds of time. Yes it hurts, but let’s move on.
Yet even this reopening of wounds is appropriate. Early in this sequel, a major character is killed in mysterious circumstances. Her name is Safi, the outgoing daughter of the university president and new best friend to Max. There is a gunshot, Safi is found bleeding, dead in the snow. Max finds her too late, and the shock of seeing another friend gunned down sees her powers come catapulting back. This time she can move between two distinct timelines - a cheerier world in which her friend still lives, and the downbeat universe in which the friend is dead.
What follows is a five episode jaunt of dimension-hopping detective work (who is the killer?) and much investigating of suspicious professors. At its gameiest you’re snooping through the offices of literature professors for clues, and hopping timelines via twinkling doorways that exist in specific spots (always neatly hidden to avoid pop-in). If you’ve played other Life Is Strange games, you’ll know what to expect - a lot of examining objects and listening to inner monologue.


There’s also a handy little colour circle on every dialogue option that will consistently inform you if you’re in the orange world of the living Safi, or the blue world of the murdered one. You can bring items from one timeline into another (objects as large as stepladders disappear into Max’s magic handbag). This results in exactly the kind of simple “puzzles” you expect from dimension-dippin’. One world has a guard blocking the way, the other does not. A friend in one world requires a spanner - you can grab one from the other world.
But it’d be hard to find someone who plays these games for the adventure game mechanics. Writing and storytelling is the focus. I found it wildly inconsistent, with many touching moments of bottled empathy surrounded by plot-driven wackiness and insensible behaviour. Characters show inconsistencies from the start. Plot holes are plastered over with papier mache reasoning. Many of your own actions as Max will defy common sense.
Then there is the cascade of references. Life Is Strange games have historically filled out their characters by making sure you know that they know the works of Ray Bradbury or Thomas Wolfe, that they listen to Bloc Party or Kings Of Leon. Double Exposure takes reverence for reference to obnoxious new heights. “Life finds a way!” quips Max, evoking Jurassic Park . “Don’t ever talk to me or my sons again” she jests, summoning a meme from 2016. It is not the only allusion to Twitter that makes it into the game.

Image credit:Rock Paper Shotgun / Square Enix
Other characters are weirdly homogenous in their mannerisms and habits of speech. Almost everyone is deeply literate in therapyspeak (some have their reasons, others don’t). Half the cast are Gilmore Girls -level quipsters. Max especially has a real case of jokebrain. She can’t sweep up some broken glass without remarking: “Come here, my sharp little friends!” It can become exhausting.
However, once you’re out of the opening episode, with its forced “we’re definitely friends!” banter, a few characters with distinct voices start to poke through. One pantomimingly impatient detective, for all his trope-fulfilling, is a breath of fresh air, because he’s so annoyed at the case he’s working on (I can relate, sir). Moses, an astronomer friend, is another sigh of relief. He’s a literal-minded guy who quips little and calms often. Gwen is a standoffish professor who doesn’t suffer fools. She is “a hugger” yet holds grudges bitterly. She sits on a high horse some moments, and tumbles from it in others.
Other characters who seemed grating at first quickly grew on me. Amanda, the bartender who I dismissed as “default love interest overfond of fingerguns” indulges you in some cute make-believe in an effort to cheer you up. And Vinh, a looksmaxing sleazeball, is so horny it should immediately be reported to HR. I wrote him off as a rich kid with arrogance and ambition. But later he shows himself to be deeper, certainly not the elite he often pretends to be. Both characters are treated to scenes in which Deck Nine are at their most romantically transparent, dangling the potential romance in front of you like Sebastian the crab singing “you know you want to kiss the girl!”

Image credit:Rock Paper Shotgun / Square Enix
Throughout all this you’ll notice one other thing: the character animation and mo-cap is very good at replicating the bottled micro-expressions of TV actors. The millisecond lip bites of indecision or concentration, the semi-squints of recognition, the mouth tautening of skepticism. Players of Life Is Strange: True Colors will recognise this close attention-to-eyebrows. It’s a little distracting sometimes, in a LA Noire kind of way. And the physical body acting is still sometimes deeply exaggerated. But for a series that long had stiff figures and little boys with ventriloquist dummy faces, the improvements to motion capture continues to impress.
What impresses less are the bugs. Voice lines reactivate long after the characters have left the area. Max’s internal thoughts are sometimes utterly at odds with what is in front of her. Characters sometimes don’t reply, lines get skipped, interactable items are conspicuously absent. One early scene for me included a very funny time shift, where everyone in the “dead” world was T-posing with grief. It’s hard to stay immersed in a fiction when so many things shunt you out of it.
But bugs aren’t the main offender in this regard. That would be the implausibility that flows through the storytelling. We’re asked to believe that Max and Safi are best friends. But it turns out Max knows astoundingly little about her pal, and it is hard to imagine they didn’t talk about much of what later gets revealed. On top of this, people’s sense of urgency and significance is skewed. They will act with severe shock at mild revelations, yet basically shrug at a firearm. I routinely yelled at my screen as characters did the least sensible thing imaginable.

Image credit:Rock Paper Shotgun / Square Enix
This includes some classic annoyances. Max will climb tall shelves instead of clambering easily over a nearby railing. She will use her nose-bleedingly self-harming timewarping power to get past a police barrier rather than simply duck the fuck under it . If the cardinal sin of level design is erecting a thin red rope and assigning it a vault-thick invisible wall, then Double Exposure should be given ten Hail Marys for erecting barriers with tiny signs, and the ever-irksome 180 about-face (“I better go do that other thing first!”)
The first two episodes make up the bulk of the detective-ing, and housed the majority of my frustrations. The middle acts are my favourite, simply because they put some convoluted mysteries to bed and allow you to indulge in downtime with the people you’ve been poking at.

Image credit:Rock Paper Shotgun / Square Enix
The final episode, meanwhile, is close to being one extended cutscene with a few moments of door opening and dialogue-choosing thrown in, just to remind you it’s a game. At this point, I laid back and let the extended trauma metaphors rinse over me. It was interesting; a symbolic insight into Max and the years she spent between games. For all the scenes in which characters act like plot-stringed marionettes, there are those that made me well up. It is at its strongest when it stops being a murder mystery and starts being a story about grief.
Even so, it wildly flip flops between the two. I have growled with annoyance at a gun being stuffed into a back pocket and teared up with sympathy over a gingerbread chimney, all in a three-minute window. It’s an emotional rollercoaster, or (to continue the physics parlance) an emotional particle in a cat state. Said cat is stinking dead in a trashcan of quips, yet also alive and often beautiful. That, alongside the lack of Chloe, will make it a challenging story for some fans to accept. But those seeking a new band of merry, beautiful idiots will find moments to savour, even in this truly spaghettified tale.
Find out how we conduct our reviews by reading our review policy .

Life is Strange: Double Exposure
PS5 , Xbox Series X/S , PC , Nintendo Switch
Rock Paper Shotgun is better when you sign in
Sign in and join us on our journey to discover strange and compelling PC games.

All 75 Arc Raiders Blueprints and where to get them
These areas have the highest chance of giving you Blueprints

Image credit:Rock Paper Shotgun/Embark Studios

Looking for more Arc Raiders Blueprints? It’s a special day when you find a Blueprint, as they’re among the most valuable items in Arc Raiders. If you find a Blueprint that you haven’t already found, then you must make sure you hold onto it at all costs, because Blueprints are the key to one of the most important and powerful systems of meta-progression in the game.
This guide aims to be the very best guide on Blueprints you can find, starting with a primer on what exactly they are and how they work in Arc Raiders, before delving into exactly where to get Blueprints and the very best farming spots for you to take in your search.
We’ll also go over how to get Blueprints from other unlikely activities, such as destroying Surveyors and completing specific quests. And you’ll also find the full list of all 75 Blueprints in Arc Raiders on this page (including the newest Blueprints added with the Cold Snap update , such as the Deadline Blueprint and Firework Box Blueprint), giving you all the information you need to expand your own crafting repertoire.
In this guide:
- What are Blueprints in Arc Raiders?
- Full Blueprint list: All crafting recipes
- Where to find Blueprints in Arc Raiders Blueprints obtained from quests Blueprints obtained from Trials Best Blueprint farming locations

What are Blueprints in Arc Raiders?
Blueprints in Arc Raiders are special items which, if you manage to extract with them, you can expend to permanently unlock a new crafting recipe in your Workshop. If you manage to extract from a raid with an Anvil Blueprint, for example, you can unlock the ability to craft your very own Anvil Pistol, as many times as you like (as long as you have the crafting materials).
To use a Blueprint, simply open your Inventory while in the lobby, then right-click on the Blueprint and click “Learn And Consume” . This will permanently unlock the recipe for that item in your Workshop. As of the Stella Montis update, there are allegedly 75 different Blueprints to unlock - although only 68 are confirmed to be in the game so far. You can see all the Blueprints you’ve found and unlocked by going to the Workshop menu, and hitting “R” to bring up the Blueprint screen.
It’s possible to find duplicates of past Blueprints you’ve already unlocked. If you find these, then you can either sell them, or - if you like to play with friends - you can take it into a match and gift it to your friend so they can unlock that recipe for themselves. Another option is to keep hold of them until the time comes to donate them to the Expedition.
Full Blueprint list: All crafting recipes
Below is the full list of all the Blueprints that are currently available to find in Arc Raiders, and the crafting recipe required for each item:
| Blueprint | Type | Recipe | Crafted At |
|---|---|---|---|
| Bettina | Weapon | 3x Advanced Mechanical Components 3x Heavy Gun Parts 3x Canister | Gunsmith 3 |
| Blue Light Stick | Quick Use | 3x Chemicals | Utility Station 1 |
| Aphelion | Weapon | 3x Magnetic Accelerator 3x Complex Gun Parts 1x Matriarch Reactor | Gunsmith 3 |
| Combat Mk. 3 (Flanking) | Augment | 2x Advanced Electrical Components 3x Processor | Gear Bench 3 |
| Combat Mk. 3 (Aggressive) | Augment | 2x Advanced Electrical Components 3x Processor | Gear Bench 3 |
| Complex Gun Parts | Material | 2x Light Gun Parts 2x Medium Gun Parts 2x Heavy Gun Parts | Refiner 3 |
| Fireworks Box | Quick Use | 1x Explosive Compound 3x Pop Trigger | Explosives Station 2 |
| Gas Mine | Mine | 4x Chemicals 2x Rubber Parts | Explosives Station 1 |
| Green Light Stick | Quick Use | 3x Chemicals | Utility Station 1 |
| Pulse Mine | Mine | 1x Crude Explosives 1x Wires | Explosives Station 1 |
| Seeker Grenade | Grenade | 1x Crude Explosives 2x ARC Alloy | Explosives Station 1 |
| Looting Mk. 3 (Survivor) | Augment | 2x Advanced Electrical Components 3x Processor | Gear Bench 3 |
| Angled Grip II | Mod | 2x Mechanical Components 3x Duct Tape | Gunsmith 2 |
| Angled Grip III | Mod | 2x Mod Components 5x Duct Tape | Gunsmith 3 |
| Hullcracker | Weapon | 1x Magnetic Accelerator 3x Heavy Gun Parts 1x Exodus Modules | Gunsmith 3 |
| Launcher Ammo | Ammo | 5x Metal Parts 1x Crude Explosives | Workbench 1 |
| Anvil | Weapon | 5x Mechanical Components 5x Simple Gun Parts | Gunsmith 2 |
| Anvil Splitter | Mod | 2x Mod Components 3x Processor | Gunsmith 3 |
| ??? | ??? | ??? | ??? |
| Barricade Kit | Quick Use | 1x Mechanical Components | Utility Station 2 |
| Blaze Grenade | Grenade | 1x Explosive Compound 2x Oil | Explosives Station 3 |
| Bobcat | Weapon | 3x Advanced Mechanical Components 3x Light Gun Parts | Gunsmith 3 |
| Osprey | Weapon | 2x Advanced Mechanical Components 3x Medium Gun Parts 7x Wires | Gunsmith 3 |
| Burletta | Weapon | 3x Mechanical Components 3x Simple Gun Parts | Gunsmith 1 |
| Compensator II | Mod | 2x Mechanical Components 4x Wires | Gunsmith 2 |
| Compensator III | Mod | 2x Mod Components 8x Wires | Gunsmith 3 |
| Defibrillator | Quick Use | 9x Plastic Parts 1x Moss | Medical Lab 2 |
| ??? | ??? | ??? | ??? |
| Equalizer | Weapon | 3x Magnetic Accelerator 3x Complex Gun Parts 1x Queen Reactor | Gunsmith 3 |
| Extended Barrel | Mod | 2x Mod Components 8x Wires | Gunsmith 3 |
| Extended Light Mag II | Mod | 2x Mechanical Components 3x Steel Spring | Gunsmith 2 |
| Extended Light Mag III | Mod | 2x Mod Components 5x Steel Spring | Gunsmith 3 |
| Extended Medium Mag II | Mod | 2x Mechanical Components 3x Steel Spring | Gunsmith 2 |
| Extended Medium Mag III | Mod | 2x Mod Components 5x Steel Spring | Gunsmith 3 |
| Extended Shotgun Mag II | Mod | 2x Mechanical Components 3x Steel Spring | Gunsmith 2 |
| Extended Shotgun Mag III | Mod | 2x Mod Components 5x Steel Spring | Gunsmith 3 |
| Remote Raider Flare | Quick Use | 2x Chemicals 4x Rubber Parts | Utility Station 1 |
| Heavy Gun Parts | Material | 4x Simple Gun Parts | Refiner 2 |
| Venator | Weapon | 2x Advanced Mechanical Components 3x Medium Gun Parts 5x Magnet | Gunsmith 3 |
| Il Toro | Weapon | 5x Mechanical Components 6x Simple Gun Parts | Gunsmith 1 |
| Jolt Mine | Mine | 1x Electrical Components 1x Battery | Explosives Station 2 |
| Explosive Mine | Mine | 1x Explosive Compound 1x Sensors | Explosives Station 3 |
| Jupiter | Weapon | 3x Magnetic Accelerator 3x Complex Gun Parts 1x Queen Reactor | Gunsmith 3 |
| Light Gun Parts | Material | 4x Simple Gun Parts | Refiner 2 |
| Lightweight Stock | Mod | 2x Mod Components 5x Duct Tape | Gunsmith 3 |
| Lure Grenade | Grenade | 1x Speaker Component 1x Electrical Components | Utility Station 2 |
| Medium Gun Parts | Material | 4x Simple Gun Parts | Refiner 2 |
| Torrente | Weapon | 2x Advanced Mechanical Components 3x Medium Gun Parts 6x Steel Spring | Gunsmith 3 |
| Muzzle Brake II | Mod | 2x Mechanical Components 4x Wires | Gunsmith 2 |
| Muzzle Brake III | Mod | 2x Mod Components 8x Wires | Gunsmith 3 |
| Padded Stock | Mod | 2x Mod Components 5x Duct Tape | Gunsmith 3 |
| Shotgun Choke II | Mod | 2x Mechanical Components 4x Wires | Gunsmith 2 |
| Shotgun Choke III | Mod | 2x Mod Components 8x Wires | Gunsmith 3 |
| Shotgun Silencer | Mod | 2x Mod Components 8x Wires | Gunsmith 3 |
| Showstopper | Grenade | 1x Advanced Electrical Components 1x Voltage Converter | Explosives Station 3 |
| Silencer I | Mod | 2x Mechanical Components 4x Wires | Gunsmith 2 |
| Silencer II | Mod | 2x Mod Components 8x Wires | Gunsmith 3 |
| Snap Hook | Quick Use | 2x Power Rod 3x Rope 1x Exodus Modules | Utility Station 3 |
| Stable Stock II | Mod | 2x Mechanical Components 3x Duct Tape | Gunsmith 2 |
| Stable Stock III | Mod | 2x Mod Components 5x Duct Tape | Gunsmith 3 |
| Tagging Grenade | Grenade | 1x Electrical Components 1x Sensors | Utility Station 3 |
| Tempest | Weapon | 3x Advanced Mechanical Components 3x Medium Gun Parts 3x Canister | Gunsmith 3 |
| Trigger Nade | Grenade | 2x Crude Explosives 1x Processor | Explosives Station 2 |
| Vertical Grip II | Mod | 2x Mechanical Components 3x Duct Tape | Gunsmith 2 |
| Vertical Grip III | Mod | 2x Mod Components 5x Duct Tape | Gunsmith 3 |
| Vita Shot | Quick Use | 2x Antiseptic 1x Syringe | Medical Lab 3 |
| Vita Spray | Quick Use | 3x Antiseptic 1x Canister | Medical Lab 3 |
| Vulcano | Weapon | 1x Magnetic Accelerator 3x Heavy Gun Parts 1x Exodus Modules | Gunsmith 3 |
| Wolfpack | Grenade | 2x Explosive Compound 2x Sensors | Explosives Station 3 |
| Red Light Stick | Quick Use | 3x Chemicals | Utility Station 1 |
| Smoke Grenade | Grenade | 14x Chemicals 1x Canister | Utility Station 2 |
| Deadline | Mine | 3x Explosive Compound 2x ARC Circuitry | Explosives Station 3 |
| Trailblazer | Grenade | 1x Explosive Compound 1x Synthesized Fuel | Explosives Station 3 |
| Tactical Mk. 3 (Defensive) | Augment | 2x Advanced Electrical Components 3x Processor | Gear Bench 3 |
| Tactical Mk. 3 (Healing) | Augment | 2x Advanced Electrical Components 3x Processor | Gear Bench 3 |
| Yellow Light Stick | Quick Use | 3x Chemicals | Utility Station 1 |
Note: The missing Blueprints in this list likely have not actually been added to the game at the time of writing, because none of the playerbase has managed to find any of them. As they are added to the game, I will update this page with the most relevant information so you know exactly how to get all 75 Arc Raiders Blueprints.
Where to find Blueprints in Arc Raiders
Below is a list of all containers, modifiers, and events which maximise your chances of finding Blueprints:
- Certain quests reward you with specific Blueprints .
- Completing Trials has a high chance of offering Blueprints as rewards.
- Surveyors have a decent chance of dropping Blueprints on death.
- High loot value areas tend to have a greater chance of spawning Blueprints.
- Night Raids and Storms may increase rare Blueprint spawn chances in containers.
- Containers with higher numbers of items may have a higher tendency to spawn Blueprints. As a result, Blue Gate (which has many “large” containers containing multiple items) may give you a higher chance of spawning Blueprints.
- Raider containers (Raider Caches, Weapon Boxes, Medical Bags, Grenade Tubes) have increased Blueprint drop rates. As a result, the Uncovered Caches event gives you a high chance of finding Blueprints.
- Security Lockers have a higher than average chance of containing Blueprints.
- Certain Blueprints only seem to spawn under specific circumstances: Tempest Blueprint only spawns during Night Raid events. Vulcano Blueprint only spawns during Hidden Bunker events. Jupiter and Equaliser Blueprints only spawn during Harvester events.

Raider Caches, Weapon Boxes, and other raider-oriented container types have a good chance of offering Blueprints. |Image credit:Rock Paper Shotgun/Embark Studios
Blueprints have a very low chance of spawning in any container in Arc Raiders, around 1-2% on average. However, there is a higher chance of finding Blueprints in particular container types. Specifically, you can find more Blueprints in Raider containers and security lockers.
Beyond this, if you’re looking for Blueprints you should focus on regions of the map which are marked as having particularly high-value loot. Areas such as the Control Tower in Dam Battlegrounds, the Arrival and Departure Buildings in Spaceport, and Pilgrim’s Peak in Blue Gate all have a better-than-average chance of spawning Blueprints somewhere amongst all their containers. Night Raids and Electromagnetic Storm events also increase the drop chances of certain Blueprints .
In addition to these containers, you can often loot Blueprints from destroyed Surveyors - the largest of the rolling ball ARC. Surveyors are more commonly found on the later maps - Spaceport and Blue Gate - and if one spawns in your match, you’ll likely see it by the blue laser beam that it casts into the sky while “surveying”.
Surveyors are quite well-armoured and will very speedily run away from you once it notices you, but if you can take one down then make sure you loot all its parts for a chance of obtaining certain unusual Blueprints.
Blueprints obtained from quests
One way in which you can get Blueprints is by completing certain quests for the vendors in Speranza. Some quests will reward you with a specific item Blueprint upon completion, so as long as you work through all the quests in Arc Raiders, you are guaranteed those Blueprints.
Here is the full list of all Blueprints you can get from quest rewards:
- Trigger Nade Blueprint: Rewarded after completing “Sparks Fly”.
- Lure Grenade Blueprint: Rewarded after completing “Greasing Her Palms”.
- Burletta Blueprint: Rewarded after completing “Industrial Espionage”.
- Hullcracker Blueprint (and Launcher Ammo Blueprint): Rewarded after completing “The Major’s Footlocker”.
Alas, that’s only 4 Blueprints out of a total of 75 to unlock, so for the vast majority you will need to find them yourself during a raid. If you’re intent on farming Blueprints, then it’s best to equip yourself with cheap gear in case you lose it, but don’t use a free loadout because then you won’t get a safe pocket to stash any new Blueprint you find. No pain in Arc Raiders is sharper than failing to extract with a new Blueprint you’ve been after for a dozen hours already.

One of the best ways to get Blueprints is by hitting three stars on all five Trials every week. |Image credit:Rock Paper Shotgun/Embark Studios
Blueprints obtained from Trials
One of the very best ways to get Blueprints is as rewards for completing Trials in Arc Raiders. Trials are unlocked from Level 15 onwards, and allow you to earn rewards by focusing on certain tasks over the course of several raids. For example, one Trial might task you with dealing damage to Hornets, while another might challenge you to loot Supply Drops.
Trials refresh on a weekly basis, with a new week bringing five new Trials. Each Trial can offer up to three rewards after passing certain score milestones, and it’s possible to receive very high level loot from these reward crates - including Blueprints. So if you want to unlock as many Blueprints as possible, you should make a point of completing as many Trials as possible each week.
Best Blueprint farming locations
The very best way to get Blueprints is to frequent specific areas of the maps which combine high-tier loot pools with the right types of containers to search. Here are my recommendations for where to find Blueprints on every map, so you can always keep the search going for new crafting recipes to unlock.

Image credit:Rock Paper Shotgun/Embark Studios
Dam Battlegrounds
The best places to farm Blueprints on Dam Battlegrounds are the Control Tower, Power Generation Complex, Ruby Residence, and Pale Apartments . The first two regions, despite only being marked on the map as mid-tier loot, contain a phenomenal number of containers to loot. The Control Tower can also contain a couple of high-tier Security Lockers - though of course, you’ll need to have unlocked the Security Breach skill at the end of the Survival tree.
There’s also a lot of reporting amongst the playerbase that the Residential areas in the top-left of the map - Pale Apartments and Ruby Residence - give you a comparatively strong chance of finding Blueprints. Considering their size, there’s a high density of containers to loot in both locations, and they also have the benefit of being fairly out of the way. So you’re more likely to have all the containers to yourself.
Buried City
The best Blueprint farming locations on Buried City are the Santa Maria Houses, Grandioso Apartments, Town Hall, and the various buildings of the New District . Grandioso Apartments has a lower number of containers than the rest, but a high chance of spawning weapon cases - which have good Blueprint drop rates. The others are high-tier loot areas, with plenty of lootable containers - including Security Lockers.
Spaceport
The best places to find Blueprints on Spaceport are the Arrival and Departure Buildings, as well as Control Tower A6 and the Launch Towers . All these areas are labelled as high-value loot regions, and many of them are also very handily connected to one another by the Spaceport wall, which you can use to quickly run from one area to the next. At the tops of most of these buildings you’ll find at least one Security Locker, so this is an excellent farming route for players looking to find Blueprints.
The downside to looting Blueprints on Spaceport is that all these areas are hotly contested, particularly in Duos and Squads. You’ll need to be very focused and fast in order to complete the full farming route.

Image credit:Rock Paper Shotgun/Embark Studios
Blue Gate
Blue Gate tends to have a good chance of dropping Blueprints, potentially because it generally has a high number of containers which can hold lots of items; so there’s a higher chance of a Blueprint spawning in each container. In my experience, the best Blueprint farming spots on Blue Gate are Pilgrim’s Peak, Raider’s Refuge, the Ancient Fort, and the Underground Complex beneath the Warehouse .
All of these areas contain a wealth of containers to loot. Raider’s Refuge has less to loot, but the majority of the containers in and around the Refuge are raider containers, which have a high chance of containing Blueprints - particularly during major events.
Stella Montis
On the whole, Stella Montis seems to have a very low drop rate for Blueprints (though a high chance of dropping other high-tier loot). If you do want to try farming Blueprints on this map, the best places to find Blueprints in Stella Montis are Medical Research, Assembly Workshop, and the Business Center . These areas have the highest density of containers to loot on the map.
In addition to this, the Western Tunnel has a few different Security Lockers to loot, so while there’s very little to loot elsewhere in this area of the map, it’s worth hitting those Security Lockers if you spawn there at the start of a match.
That wraps up this primer on how to get all the Blueprints in Arc Raiders as quickly as possible. With the Expedition system constantly resetting a large number of players’ Blueprints, it’s more important than ever to have the most up-to-date information on where to find all these Blueprints.
While you’re here, be sure to check out our Arc Raiders best guns tier list , as well as our primers on the best skills to unlock and all the different Field Depot locations on every map.

ARC Raiders
PS5 , Xbox Series X/S , PC
Rock Paper Shotgun is better when you sign in
Sign in and join us on our journey to discover strange and compelling PC games.
