Last Epoch: Best Sentinel builds and skills
Learn the best builds and skills for the Sentinel class in Last Epoch

Image credit:Rock Paper Shotgun/Eleventh Hour Games

Wondering what the best Sentinel skills and builds are in Last Epoch? Bordered by the blinding glory of nobleness stands the Sentinel, the holy warrior of Last Epoch . This is the class to play if you want to act as a bulwark against waves upon waves of enemy forces, smashing them into the ground with the fervor of your godly hammer strikes.
The Sentinel has three Masteries, ranging from the armour-commanding Forge Guard to the self explanatory Paladin to the dark-embracing Void Knight. Below, we’ve outlined our preferred builds for each Mastery, along with the right Skills, Specialization Tree nodes, and Passives for each. Read on to stand forever strong against the forces of evil with your shield and sword shining bright!
In this guide:
- Last Epoch Best Sentinel Forge Guard build
- Last Epoch Best Sentinel Paladin build
- Last Epoch Best Sentinel Void Knight build

Last Epoch’s launch trailer shows off the game’s classes as well as its time-travelling theme.Watch on YouTube
Last Epoch Best Sentinel Forge Guard build

With summoned armour by your side, you’ll always have an ally to stand with you atop a mountain of corpses. |Image credit:Rock Paper Shotgun/Eleventh Hour Games
The Manifest Armor Forge Guard build listed here is all about creating an armour construct that follows you around. With this backup bruiser by your side, you’ll never be alone on the battlefield. It truly feels like this version of the Sentinel is an epic blacksmith who one day grew tired of simply making weapons and decided to get started using them, and if that idea appeals to you, give these Skills a try. As a bonus, this is also a very easy build for Last Epoch newbies to master.
Javelin
The Forge Guard throws a Javelin with tremendous force, hitting every creature in its way. This Skill requires a spear for maximum impact, and it can also be used as a traversal ability to pull the Forge Guard immediately to the point on the ground where the spear landed.
Go for the Battle Standard node on the Javelin Specialization Tree to generate an increased damage buff to anyone standing in the radius of the spear when it lands. Follow this up with Surprise Initiative , which causes your Forge Guard to automatically dash to the spear’s point of impact, letting them receive the buff automatically. While you’re at it, take Ardent Symbol to ensure that the buff from Battle Standard lasts longer.
Manifest Armor
Manifest Armor is the trademark of this build, giving you an excellent armour-plated minion who not only looks rad, but also hits like a tank. Your armoured friend will level up alongside your gear, as any stats granted by your body armour, helmet, gloves, and boots also apply to it. This means that by Last Epoch’s endgame when you’re hopefully kitted out in legendary gear, your minion will be similarly powerful.
To better your minion’s armour-scaling potential, grab the Iron Grasp , Platemail , Steel Greaves , and Great Helm nodes as soon as you can. Titan Sword is also a must-have node, since it will grant your animated armour a sword which scales with your equipped weapon’s stats.
Sigils of Hope
With Sigils of Hope , your Sentinel summons several holy symbols, granting both themselves and their allies the chance to deal three additional fire damage with every attack and spell, as well as increased health regeneration by 30%. This is a rock solid buff that’ll help keep both your Forge Guard and their armoured friend in the fight.
Grab all the levels of the Invigorate node to make your sigils more effective at healing. Technically, you can have a maximum of three sigils up at once, but we can boost that number to five by taking Polygram and Tetragram .
Shield Throw
Time to act like Captain America - Shield Throw sees your Sentinel chucking a shield in a mighty arc and richocheting it from target to target! This is probably one of my favourite Sentinel Skills, just for the Cap vibe. It’s also worth noting that you don’t actually need to have a shield equipped to use this Skill, as your Sentinel is cool enough to simply manifest one out of thin air.
While it might not seem obvious at first, Shield Throw can target allies, not just enemies. And the Manifest Inspiration node on the far left of the Specialization Tree is particularly important in this regard, since it activates a sweeping melee attack in your Manifest Armor whenever you hit it with a shield. This means we’re going to utilise Shield Throw not just as a means of bashing enemy skulls, but also as a sly method of ordering our summoned armour to unleash a swiping strike.
Void Cleave
Voice Cleave , which requires a two-handed sword or axe, creates a devastating melee attack that slices through all enemies in front of you. This will be one of your primary damage-dealing moves as a Forge Guard, and it’ll also buff your Manifest Armor.
The Molten Blades and Scorching Path nodes are necessary to give your summoned armour a stack of Molten Infusion whenever you hit them or an enemy with Void Cleave. Molten Infusion grants additional fire damage and a chance to ignite enemies, further supplementing your armoured minion’s strength. You should also take the Nether Charge node for the chance to use Void Cleave one more time before a cooldown.
Passives
To maximise your potential with the Manifest Armor Forge Guard build, we recommend the following Passives:
- Sentinel Passives: Juggernaut , Fearless , and Armour Clad are the Passives you’ll want to make your Forge Guard sturdier and deadlier.
- Forge Guard Passives: The most vital Passive here is Folded Steel , which enables your manifest armor to deal additional damage. You’ll also want to max out Weapons Master to pump up your throwing attack damage, which will come in handy while using Shield Throw. Guardian is another fine Passive for a health increase, while Iron Attunement , Might , and Shield Crafter certainly won’t hurt to boost your arsenal even further.
- Paladin Passives: Valor is worth pouring points into, since it always pays off to have more health and healing effectiveness. Defiance and Holy Icon are also good choices.
- Void Knight Passives: The Void Knight’s Passives aren’t terribly applicable to the Forge Guard aside from Abyssal Endurance , which offers up a nice array of overall health and resistance buffs.
Last Epoch Best Paladin Sentinel build
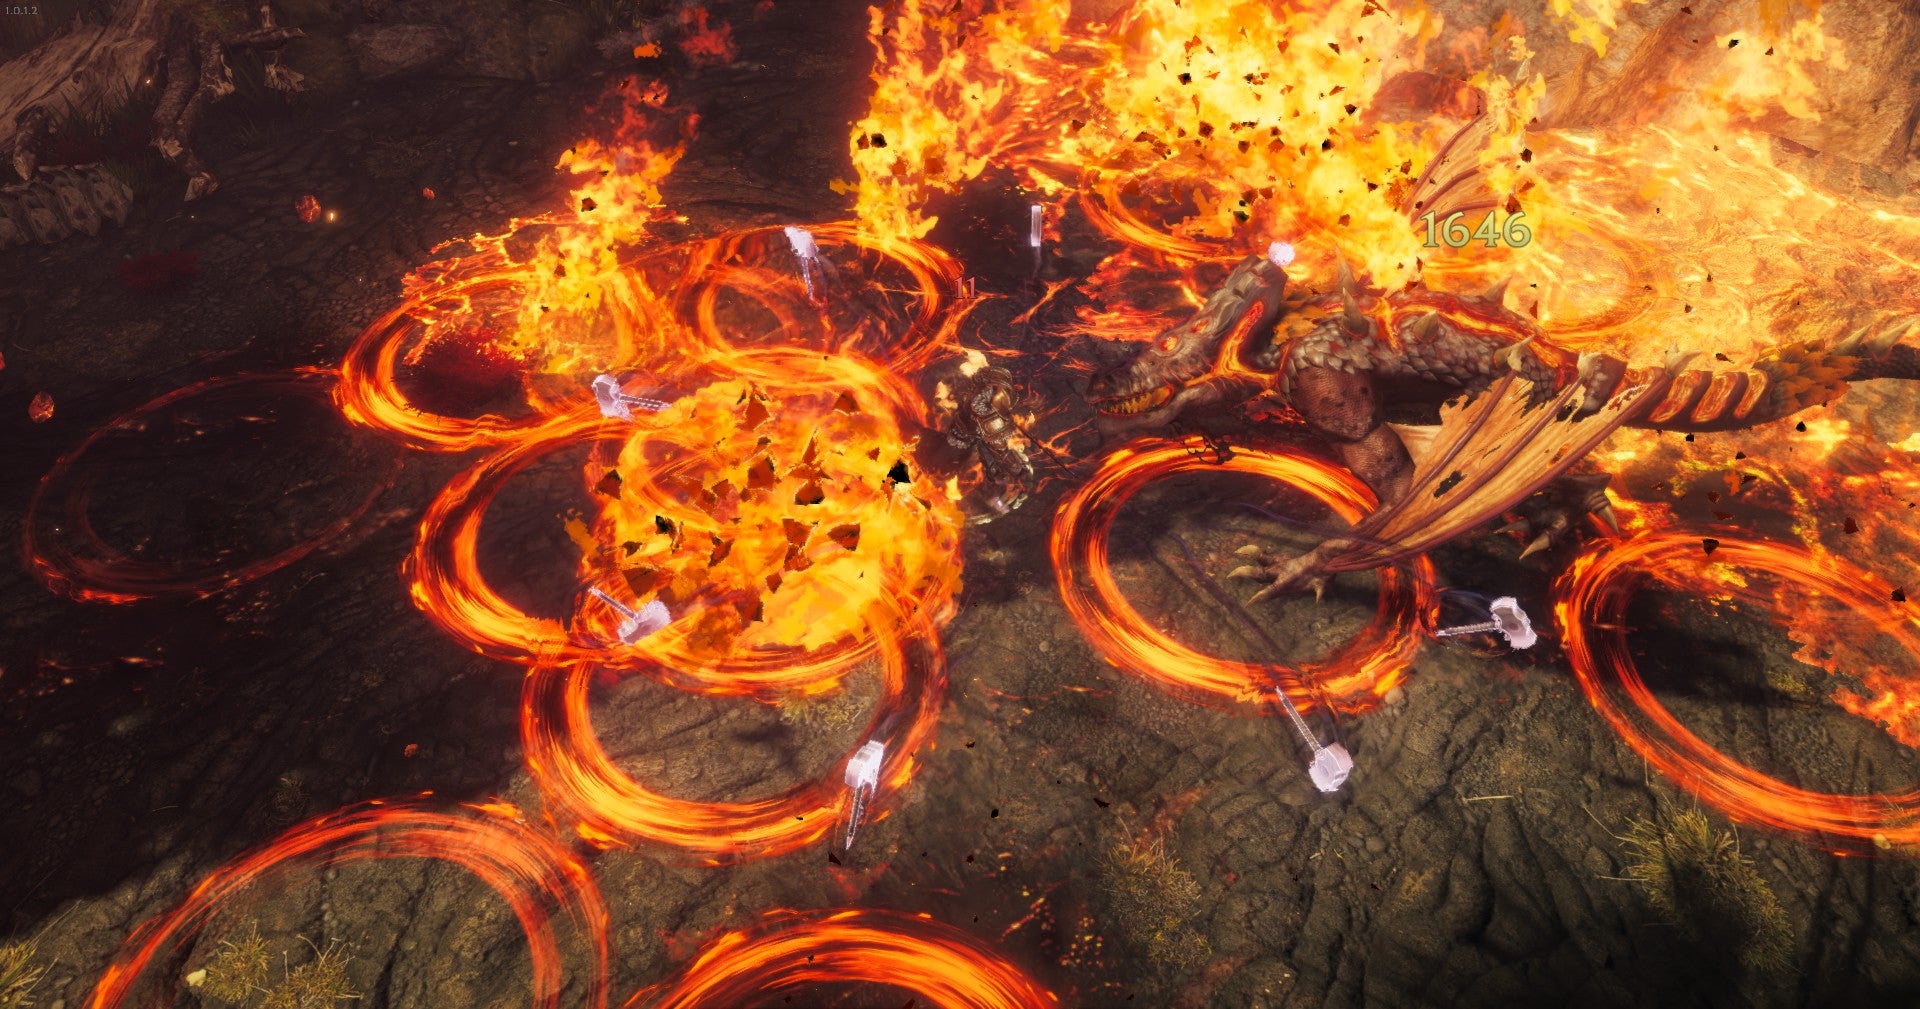
It’s hammer time! Pop that nova-shaped hammer spread and watch all enemies - even primordial dragons - disintegrate into nothingness. |Image credit:Rock Paper Shotgun/Eleventh Hour Games
The Paladin is what most folks will probably think of when they first hear about the Sentinel - a powerful champion of goodness, basked in holy abilities that can clear out evil-doers in a matter of seconds. The Hammer Throw Paladin list of Skills we’ve listed below takes this to a new level by sending a devastating array of hammers exploding out from your Paladin in a nova, and this screen-cleaning build is so popular with the Last Epoch community that it’s been dubbed “Nova Hammerdin.”
Hammer Throw
There’s nothing quite as satisfying as unleashing a wave of projectiles with Hammer Throw , and you’ll constantly be popping this Skill as you wade into the thick of combat. We’ll tweak Hammer Throw on the Specialization Tree to manifest the unique nova-shaped effect that gives this build its affectionate nickname.
Work your way up the Skill tree to Avatar of the Spire to get the nova shape, which also doubles the additional hammers you can chuck. Combine this node with Enra’s Technique to amplify all damage and critical strike chances for your hammers. Then it’s just a matter of piling on the damage - Zealot’s Conviction and Weighted Hammers are my favourite nodes for getting this job done.
Holy Aura
Holy Aura gives your Paladin and nearby allies 30% increased damage and +15% elemental resistance, and is a fantastic insurance policy for a hammer-wielding warrior who’s always in the centre of battle.
Shelter From the Storm is a pivotal choice for granting everyone under Holy Aura’s buff additional elemental resistance, and Call to Arms will elevate their physical damage. We can also tweak Holy Aura’s synergy with Hammer Throw by maxing out the Expedite and Fanaticism nodes for a very nice bump to attack and throwing speed.
Sigils of Hope
Sigils of Hope creates an array of swirling holy symbols that buff your Paladin and allies, conferring fire damage with every attack and spell as well a 30% health regeneration boost. This Skill works well alongside Holy Aura as a potent buffing combo.
Take Empowering Sigils to increase the damage granted per active sigil. Then spec into Iron Sigils , Enduring Hope , Tetragram , Meditation , and finally Sign of the Guardian to summon more sigils, increase their potency, and grant them extra bonuses, including an increased block chance.
Smite
What are Paladins best known for, if not casting Smite ? This Skill burns enemies and heals allies with light from the heavens. It’s a versatile, reliable ability that becomes even better when we modify it to also give our Paladin a traversal edge.
You’re going to want to work your way towards Descend on the Smite Specialization Tree, maxing out Righteous Flurry along the way. Descend allows your Paladin to teleport to Smite’s targeted location, smacking all surrounding enemies as they reappear. Combine this with Forceful Impact to knock thoese enemies away five metres. While you’re at it, you should take Desperate Measures to ease up on Smite’s mana requirements, and Soothing Balm to up Smite’s healing potential.
Volatile Reversal
We’ve already got Smite as a solid movement Skill, but it’s always a good call to have another one at our disposal. Volatile Reversal fits the bill by letting Paladins return to the position they were last at two seconds ago. It reverts changes to their current health and mana, which is handy when you need to get out of a tight spot but also want a quick mana recharge along the way.
To make Volatile Reversal even better, take Terminal Void Rift to leave behind a damage-dealing rift whenever you pop this Skill. Supplement this rift with the Dark Expanse and Harbinger of Dust nodes. To lessen Volatile Reversal’s cooldown and amp up both your movement and attack speed after using it, select the Time Sap , Catching Up , and Warped Time nodes.
Passives
To maximise your potential with Hammer Throw Paladin build, we recommend the following Passives:
- Sentinel Passives: Your priorites here are filling out Juggernaut , Fearless , Armour Clad , and Valiant Charge .
- Forge Guard Passives: The Forge Guard’s Weapons Master Passive is a good one, after which it’s not a bad idea to spec towards Siege Captain , which helps you deal additional physical damage with throwing attacks whenever you have a shield equipped.
- Paladin Passives: Conviction , Valor , Holy Icon , and Holy Precision are all pivotal Passives that I focused on when testing this build. You can also place some points in Sanctuary Guardian for an armour boost, or Reverence of Duality for slight stat increases across the board.
- Void Knight Passives: There’s nothing you need here aside from Abyssal Endurance , which is worth maxing out.
Best Sentinel Void Knight build

You know that this is the dark path of the Sentinel because half of the abilities manifest creepy purple energy. |Image credit:Rock Paper Shotgun/Eleventh Hour Games
Whenever there’s a paladin in fantasy, there’s always an anti-paladin - a warrior who still fights on the side of good, but uses dark forces in the process. In Last Epoch, this role is filled by the Void Knight Mastery. The Devouring Orb Void Knight build is an especially awesome one where your Void Knight essentially uses the power of black holes to damage enemies and open rifts into reality. This is a great option if you want your Sentinel to have a darker edge while dealing extreme AoE damage to everything in close proximity.
Anomaly
Anomaly is an interesting Skill that lets you manipulate enemies by sending them forward in time by five seconds. When you reactivate the Skill, you’ll bring them back into your timeline. In a nutshell, you’re “fast forwarding” and “rewinding” enemies, which can be very handy for thinning out crowded mobs or reorienting foes exactly where you need them to be for the purposes of setting up a combo. This is a tricky Skill to master, but it’s an infinitely useful one once you wrap your head around it.
You can make Anomaly even more versatile via the Time Bubble node, which creates a bubble that slows enemies and shreds any void resistance they might have. Follow up by selecting Temporal Mastery to make your Time Bubble last longer, and Decimation to give you and your allies an increased critical strike chance while Time Bubble is up.
Devouring Orb
Devouring Orb manifests an orb that unleashes a void rift whenever something dies in the nearby area. All enemies around the orb take void damage, and each successive rift deals increasingly larger damage. This is an all-around awesome Skill that really communicates the “kill enemies with the power of black holes” vibe of this Mastery.
Rift Caller is an excellent node to ensure that any damage from Devouring Orb penetrates enemy void resistance. You should also invest in Dark Moon , Abyssal Rush , Cosmic Impact , and the almighty Extinction to ensure that those enemies you suck into the void don’t come back alive for very long.
Shield Rush
Both a charging attack and a quick means of movement, Shield Rush sees the Void Knight dashing forwards through all enemies like a rampaging bull. You’ll use this Skill to zip around the map, and it’s especially satisfying to see a whole cluster of baddies explode after you’ve rushed through them.
Rush Mastery and Consuming Path should both be maxed out to make Shield Rush respectively cost less mana and deal more damage. Warrior’s Entrance , Descent of the Void , Dark Regression and Void Breaker are other good nodes, and if you want to use Shield Rush without actually holding a shield in your hands, grab Dark Rush .
Smite
Paladins aren’t the only ones who can use Smite - it’s a superb damage Skill for Void Knights as well. You’ll be using this as your go-to damage Skill during those moments when Devouring Orb isn’t enough.
Pillars of Light is a good node to pick here, giving you the chance to double cast Smite. Follow up by putting points into all of the nodes branching off from Pillars of Light, but especially Sacrifice , Atonement , and Deep Impact .
Rebuke
Rebuke lets you channel for a few seconds, taking 80% less damage as you do so. Once you stop channeling, you’ll send off a wave at all nearby foes that deals damage dependent on every hit you received while channeling. It’s a solid payback Skill that you’ll rely on as your main means of defense.
To increase Rebuke’s maximum duration, max out Bide . To amplify health regeneration and reduce any incoming damage you might receive while channeling, put some points into Regenerative Shell , Brave the Elements , and Augmented Plating .
Passives
To maximise your potential with the Devouring Orb Void Knight build, we recommend the following Passives:
- Sentinel Passives: Take Fearless , Armour Clad , and Time and Faith for good boosts to health, armour, and mana.
- Forge Guard Passives: Battle Hardened and Steel Aegis are somewhat useful, but you’re probably better off conserving your Passive points and not investing here.
- Paladin Passives: Defiance is nice for greater attunement and elemental resistance. The other Passives won’t supplement your void-heavy damage output.
- Void Knight Passives: There are a lot of Passives to maximise here - focus on Abyssal Endurance and Temporal Corruption first, then go for World Eater . Future Strike supplements this build well, as does Echoing Strikes , Time Legion , Avatar of Regret , and Dread . You may also want to grab Eternal Form for increased vitality and health.
That finishes our look at the best builds available for the do-gooder that is the Sentinel. For more on all the class options available to you in Last Epoch, keep an eye on Rock Paper Shotgun in the coming days as we proceed to delve into the gothic Acolyte , the spell-slinging Mage , and the shifty Rogue .

Last Epoch
Video Game
Rock Paper Shotgun is better when you sign in
Sign in and join us on our journey to discover strange and compelling PC games.

All 75 Arc Raiders Blueprints and where to get them
These areas have the highest chance of giving you Blueprints

Image credit:Rock Paper Shotgun/Embark Studios

Looking for more Arc Raiders Blueprints? It’s a special day when you find a Blueprint, as they’re among the most valuable items in Arc Raiders. If you find a Blueprint that you haven’t already found, then you must make sure you hold onto it at all costs, because Blueprints are the key to one of the most important and powerful systems of meta-progression in the game.
This guide aims to be the very best guide on Blueprints you can find, starting with a primer on what exactly they are and how they work in Arc Raiders, before delving into exactly where to get Blueprints and the very best farming spots for you to take in your search.
We’ll also go over how to get Blueprints from other unlikely activities, such as destroying Surveyors and completing specific quests. And you’ll also find the full list of all 75 Blueprints in Arc Raiders on this page (including the newest Blueprints added with the Cold Snap update , such as the Deadline Blueprint and Firework Box Blueprint), giving you all the information you need to expand your own crafting repertoire.
In this guide:
- What are Blueprints in Arc Raiders?
- Full Blueprint list: All crafting recipes
- Where to find Blueprints in Arc Raiders Blueprints obtained from quests Blueprints obtained from Trials Best Blueprint farming locations

What are Blueprints in Arc Raiders?
Blueprints in Arc Raiders are special items which, if you manage to extract with them, you can expend to permanently unlock a new crafting recipe in your Workshop. If you manage to extract from a raid with an Anvil Blueprint, for example, you can unlock the ability to craft your very own Anvil Pistol, as many times as you like (as long as you have the crafting materials).
To use a Blueprint, simply open your Inventory while in the lobby, then right-click on the Blueprint and click “Learn And Consume” . This will permanently unlock the recipe for that item in your Workshop. As of the Stella Montis update, there are allegedly 75 different Blueprints to unlock - although only 68 are confirmed to be in the game so far. You can see all the Blueprints you’ve found and unlocked by going to the Workshop menu, and hitting “R” to bring up the Blueprint screen.
It’s possible to find duplicates of past Blueprints you’ve already unlocked. If you find these, then you can either sell them, or - if you like to play with friends - you can take it into a match and gift it to your friend so they can unlock that recipe for themselves. Another option is to keep hold of them until the time comes to donate them to the Expedition.
Full Blueprint list: All crafting recipes
Below is the full list of all the Blueprints that are currently available to find in Arc Raiders, and the crafting recipe required for each item:
| Blueprint | Type | Recipe | Crafted At |
|---|---|---|---|
| Bettina | Weapon | 3x Advanced Mechanical Components 3x Heavy Gun Parts 3x Canister | Gunsmith 3 |
| Blue Light Stick | Quick Use | 3x Chemicals | Utility Station 1 |
| Aphelion | Weapon | 3x Magnetic Accelerator 3x Complex Gun Parts 1x Matriarch Reactor | Gunsmith 3 |
| Combat Mk. 3 (Flanking) | Augment | 2x Advanced Electrical Components 3x Processor | Gear Bench 3 |
| Combat Mk. 3 (Aggressive) | Augment | 2x Advanced Electrical Components 3x Processor | Gear Bench 3 |
| Complex Gun Parts | Material | 2x Light Gun Parts 2x Medium Gun Parts 2x Heavy Gun Parts | Refiner 3 |
| Fireworks Box | Quick Use | 1x Explosive Compound 3x Pop Trigger | Explosives Station 2 |
| Gas Mine | Mine | 4x Chemicals 2x Rubber Parts | Explosives Station 1 |
| Green Light Stick | Quick Use | 3x Chemicals | Utility Station 1 |
| Pulse Mine | Mine | 1x Crude Explosives 1x Wires | Explosives Station 1 |
| Seeker Grenade | Grenade | 1x Crude Explosives 2x ARC Alloy | Explosives Station 1 |
| Looting Mk. 3 (Survivor) | Augment | 2x Advanced Electrical Components 3x Processor | Gear Bench 3 |
| Angled Grip II | Mod | 2x Mechanical Components 3x Duct Tape | Gunsmith 2 |
| Angled Grip III | Mod | 2x Mod Components 5x Duct Tape | Gunsmith 3 |
| Hullcracker | Weapon | 1x Magnetic Accelerator 3x Heavy Gun Parts 1x Exodus Modules | Gunsmith 3 |
| Launcher Ammo | Ammo | 5x Metal Parts 1x Crude Explosives | Workbench 1 |
| Anvil | Weapon | 5x Mechanical Components 5x Simple Gun Parts | Gunsmith 2 |
| Anvil Splitter | Mod | 2x Mod Components 3x Processor | Gunsmith 3 |
| ??? | ??? | ??? | ??? |
| Barricade Kit | Quick Use | 1x Mechanical Components | Utility Station 2 |
| Blaze Grenade | Grenade | 1x Explosive Compound 2x Oil | Explosives Station 3 |
| Bobcat | Weapon | 3x Advanced Mechanical Components 3x Light Gun Parts | Gunsmith 3 |
| Osprey | Weapon | 2x Advanced Mechanical Components 3x Medium Gun Parts 7x Wires | Gunsmith 3 |
| Burletta | Weapon | 3x Mechanical Components 3x Simple Gun Parts | Gunsmith 1 |
| Compensator II | Mod | 2x Mechanical Components 4x Wires | Gunsmith 2 |
| Compensator III | Mod | 2x Mod Components 8x Wires | Gunsmith 3 |
| Defibrillator | Quick Use | 9x Plastic Parts 1x Moss | Medical Lab 2 |
| ??? | ??? | ??? | ??? |
| Equalizer | Weapon | 3x Magnetic Accelerator 3x Complex Gun Parts 1x Queen Reactor | Gunsmith 3 |
| Extended Barrel | Mod | 2x Mod Components 8x Wires | Gunsmith 3 |
| Extended Light Mag II | Mod | 2x Mechanical Components 3x Steel Spring | Gunsmith 2 |
| Extended Light Mag III | Mod | 2x Mod Components 5x Steel Spring | Gunsmith 3 |
| Extended Medium Mag II | Mod | 2x Mechanical Components 3x Steel Spring | Gunsmith 2 |
| Extended Medium Mag III | Mod | 2x Mod Components 5x Steel Spring | Gunsmith 3 |
| Extended Shotgun Mag II | Mod | 2x Mechanical Components 3x Steel Spring | Gunsmith 2 |
| Extended Shotgun Mag III | Mod | 2x Mod Components 5x Steel Spring | Gunsmith 3 |
| Remote Raider Flare | Quick Use | 2x Chemicals 4x Rubber Parts | Utility Station 1 |
| Heavy Gun Parts | Material | 4x Simple Gun Parts | Refiner 2 |
| Venator | Weapon | 2x Advanced Mechanical Components 3x Medium Gun Parts 5x Magnet | Gunsmith 3 |
| Il Toro | Weapon | 5x Mechanical Components 6x Simple Gun Parts | Gunsmith 1 |
| Jolt Mine | Mine | 1x Electrical Components 1x Battery | Explosives Station 2 |
| Explosive Mine | Mine | 1x Explosive Compound 1x Sensors | Explosives Station 3 |
| Jupiter | Weapon | 3x Magnetic Accelerator 3x Complex Gun Parts 1x Queen Reactor | Gunsmith 3 |
| Light Gun Parts | Material | 4x Simple Gun Parts | Refiner 2 |
| Lightweight Stock | Mod | 2x Mod Components 5x Duct Tape | Gunsmith 3 |
| Lure Grenade | Grenade | 1x Speaker Component 1x Electrical Components | Utility Station 2 |
| Medium Gun Parts | Material | 4x Simple Gun Parts | Refiner 2 |
| Torrente | Weapon | 2x Advanced Mechanical Components 3x Medium Gun Parts 6x Steel Spring | Gunsmith 3 |
| Muzzle Brake II | Mod | 2x Mechanical Components 4x Wires | Gunsmith 2 |
| Muzzle Brake III | Mod | 2x Mod Components 8x Wires | Gunsmith 3 |
| Padded Stock | Mod | 2x Mod Components 5x Duct Tape | Gunsmith 3 |
| Shotgun Choke II | Mod | 2x Mechanical Components 4x Wires | Gunsmith 2 |
| Shotgun Choke III | Mod | 2x Mod Components 8x Wires | Gunsmith 3 |
| Shotgun Silencer | Mod | 2x Mod Components 8x Wires | Gunsmith 3 |
| Showstopper | Grenade | 1x Advanced Electrical Components 1x Voltage Converter | Explosives Station 3 |
| Silencer I | Mod | 2x Mechanical Components 4x Wires | Gunsmith 2 |
| Silencer II | Mod | 2x Mod Components 8x Wires | Gunsmith 3 |
| Snap Hook | Quick Use | 2x Power Rod 3x Rope 1x Exodus Modules | Utility Station 3 |
| Stable Stock II | Mod | 2x Mechanical Components 3x Duct Tape | Gunsmith 2 |
| Stable Stock III | Mod | 2x Mod Components 5x Duct Tape | Gunsmith 3 |
| Tagging Grenade | Grenade | 1x Electrical Components 1x Sensors | Utility Station 3 |
| Tempest | Weapon | 3x Advanced Mechanical Components 3x Medium Gun Parts 3x Canister | Gunsmith 3 |
| Trigger Nade | Grenade | 2x Crude Explosives 1x Processor | Explosives Station 2 |
| Vertical Grip II | Mod | 2x Mechanical Components 3x Duct Tape | Gunsmith 2 |
| Vertical Grip III | Mod | 2x Mod Components 5x Duct Tape | Gunsmith 3 |
| Vita Shot | Quick Use | 2x Antiseptic 1x Syringe | Medical Lab 3 |
| Vita Spray | Quick Use | 3x Antiseptic 1x Canister | Medical Lab 3 |
| Vulcano | Weapon | 1x Magnetic Accelerator 3x Heavy Gun Parts 1x Exodus Modules | Gunsmith 3 |
| Wolfpack | Grenade | 2x Explosive Compound 2x Sensors | Explosives Station 3 |
| Red Light Stick | Quick Use | 3x Chemicals | Utility Station 1 |
| Smoke Grenade | Grenade | 14x Chemicals 1x Canister | Utility Station 2 |
| Deadline | Mine | 3x Explosive Compound 2x ARC Circuitry | Explosives Station 3 |
| Trailblazer | Grenade | 1x Explosive Compound 1x Synthesized Fuel | Explosives Station 3 |
| Tactical Mk. 3 (Defensive) | Augment | 2x Advanced Electrical Components 3x Processor | Gear Bench 3 |
| Tactical Mk. 3 (Healing) | Augment | 2x Advanced Electrical Components 3x Processor | Gear Bench 3 |
| Yellow Light Stick | Quick Use | 3x Chemicals | Utility Station 1 |
Note: The missing Blueprints in this list likely have not actually been added to the game at the time of writing, because none of the playerbase has managed to find any of them. As they are added to the game, I will update this page with the most relevant information so you know exactly how to get all 75 Arc Raiders Blueprints.
Where to find Blueprints in Arc Raiders
Below is a list of all containers, modifiers, and events which maximise your chances of finding Blueprints:
- Certain quests reward you with specific Blueprints .
- Completing Trials has a high chance of offering Blueprints as rewards.
- Surveyors have a decent chance of dropping Blueprints on death.
- High loot value areas tend to have a greater chance of spawning Blueprints.
- Night Raids and Storms may increase rare Blueprint spawn chances in containers.
- Containers with higher numbers of items may have a higher tendency to spawn Blueprints. As a result, Blue Gate (which has many “large” containers containing multiple items) may give you a higher chance of spawning Blueprints.
- Raider containers (Raider Caches, Weapon Boxes, Medical Bags, Grenade Tubes) have increased Blueprint drop rates. As a result, the Uncovered Caches event gives you a high chance of finding Blueprints.
- Security Lockers have a higher than average chance of containing Blueprints.
- Certain Blueprints only seem to spawn under specific circumstances: Tempest Blueprint only spawns during Night Raid events. Vulcano Blueprint only spawns during Hidden Bunker events. Jupiter and Equaliser Blueprints only spawn during Harvester events.

Raider Caches, Weapon Boxes, and other raider-oriented container types have a good chance of offering Blueprints. |Image credit:Rock Paper Shotgun/Embark Studios
Blueprints have a very low chance of spawning in any container in Arc Raiders, around 1-2% on average. However, there is a higher chance of finding Blueprints in particular container types. Specifically, you can find more Blueprints in Raider containers and security lockers.
Beyond this, if you’re looking for Blueprints you should focus on regions of the map which are marked as having particularly high-value loot. Areas such as the Control Tower in Dam Battlegrounds, the Arrival and Departure Buildings in Spaceport, and Pilgrim’s Peak in Blue Gate all have a better-than-average chance of spawning Blueprints somewhere amongst all their containers. Night Raids and Electromagnetic Storm events also increase the drop chances of certain Blueprints .
In addition to these containers, you can often loot Blueprints from destroyed Surveyors - the largest of the rolling ball ARC. Surveyors are more commonly found on the later maps - Spaceport and Blue Gate - and if one spawns in your match, you’ll likely see it by the blue laser beam that it casts into the sky while “surveying”.
Surveyors are quite well-armoured and will very speedily run away from you once it notices you, but if you can take one down then make sure you loot all its parts for a chance of obtaining certain unusual Blueprints.
Blueprints obtained from quests
One way in which you can get Blueprints is by completing certain quests for the vendors in Speranza. Some quests will reward you with a specific item Blueprint upon completion, so as long as you work through all the quests in Arc Raiders, you are guaranteed those Blueprints.
Here is the full list of all Blueprints you can get from quest rewards:
- Trigger Nade Blueprint: Rewarded after completing “Sparks Fly”.
- Lure Grenade Blueprint: Rewarded after completing “Greasing Her Palms”.
- Burletta Blueprint: Rewarded after completing “Industrial Espionage”.
- Hullcracker Blueprint (and Launcher Ammo Blueprint): Rewarded after completing “The Major’s Footlocker”.
Alas, that’s only 4 Blueprints out of a total of 75 to unlock, so for the vast majority you will need to find them yourself during a raid. If you’re intent on farming Blueprints, then it’s best to equip yourself with cheap gear in case you lose it, but don’t use a free loadout because then you won’t get a safe pocket to stash any new Blueprint you find. No pain in Arc Raiders is sharper than failing to extract with a new Blueprint you’ve been after for a dozen hours already.

One of the best ways to get Blueprints is by hitting three stars on all five Trials every week. |Image credit:Rock Paper Shotgun/Embark Studios
Blueprints obtained from Trials
One of the very best ways to get Blueprints is as rewards for completing Trials in Arc Raiders. Trials are unlocked from Level 15 onwards, and allow you to earn rewards by focusing on certain tasks over the course of several raids. For example, one Trial might task you with dealing damage to Hornets, while another might challenge you to loot Supply Drops.
Trials refresh on a weekly basis, with a new week bringing five new Trials. Each Trial can offer up to three rewards after passing certain score milestones, and it’s possible to receive very high level loot from these reward crates - including Blueprints. So if you want to unlock as many Blueprints as possible, you should make a point of completing as many Trials as possible each week.
Best Blueprint farming locations
The very best way to get Blueprints is to frequent specific areas of the maps which combine high-tier loot pools with the right types of containers to search. Here are my recommendations for where to find Blueprints on every map, so you can always keep the search going for new crafting recipes to unlock.

Image credit:Rock Paper Shotgun/Embark Studios
Dam Battlegrounds
The best places to farm Blueprints on Dam Battlegrounds are the Control Tower, Power Generation Complex, Ruby Residence, and Pale Apartments . The first two regions, despite only being marked on the map as mid-tier loot, contain a phenomenal number of containers to loot. The Control Tower can also contain a couple of high-tier Security Lockers - though of course, you’ll need to have unlocked the Security Breach skill at the end of the Survival tree.
There’s also a lot of reporting amongst the playerbase that the Residential areas in the top-left of the map - Pale Apartments and Ruby Residence - give you a comparatively strong chance of finding Blueprints. Considering their size, there’s a high density of containers to loot in both locations, and they also have the benefit of being fairly out of the way. So you’re more likely to have all the containers to yourself.
Buried City
The best Blueprint farming locations on Buried City are the Santa Maria Houses, Grandioso Apartments, Town Hall, and the various buildings of the New District . Grandioso Apartments has a lower number of containers than the rest, but a high chance of spawning weapon cases - which have good Blueprint drop rates. The others are high-tier loot areas, with plenty of lootable containers - including Security Lockers.
Spaceport
The best places to find Blueprints on Spaceport are the Arrival and Departure Buildings, as well as Control Tower A6 and the Launch Towers . All these areas are labelled as high-value loot regions, and many of them are also very handily connected to one another by the Spaceport wall, which you can use to quickly run from one area to the next. At the tops of most of these buildings you’ll find at least one Security Locker, so this is an excellent farming route for players looking to find Blueprints.
The downside to looting Blueprints on Spaceport is that all these areas are hotly contested, particularly in Duos and Squads. You’ll need to be very focused and fast in order to complete the full farming route.

Image credit:Rock Paper Shotgun/Embark Studios
Blue Gate
Blue Gate tends to have a good chance of dropping Blueprints, potentially because it generally has a high number of containers which can hold lots of items; so there’s a higher chance of a Blueprint spawning in each container. In my experience, the best Blueprint farming spots on Blue Gate are Pilgrim’s Peak, Raider’s Refuge, the Ancient Fort, and the Underground Complex beneath the Warehouse .
All of these areas contain a wealth of containers to loot. Raider’s Refuge has less to loot, but the majority of the containers in and around the Refuge are raider containers, which have a high chance of containing Blueprints - particularly during major events.
Stella Montis
On the whole, Stella Montis seems to have a very low drop rate for Blueprints (though a high chance of dropping other high-tier loot). If you do want to try farming Blueprints on this map, the best places to find Blueprints in Stella Montis are Medical Research, Assembly Workshop, and the Business Center . These areas have the highest density of containers to loot on the map.
In addition to this, the Western Tunnel has a few different Security Lockers to loot, so while there’s very little to loot elsewhere in this area of the map, it’s worth hitting those Security Lockers if you spawn there at the start of a match.
That wraps up this primer on how to get all the Blueprints in Arc Raiders as quickly as possible. With the Expedition system constantly resetting a large number of players’ Blueprints, it’s more important than ever to have the most up-to-date information on where to find all these Blueprints.
While you’re here, be sure to check out our Arc Raiders best guns tier list , as well as our primers on the best skills to unlock and all the different Field Depot locations on every map.

ARC Raiders
PS5 , Xbox Series X/S , PC
Rock Paper Shotgun is better when you sign in
Sign in and join us on our journey to discover strange and compelling PC games.
