Kingdom Come: Deliverance 2 review: a bastard for all seasons
Bromancing the throne
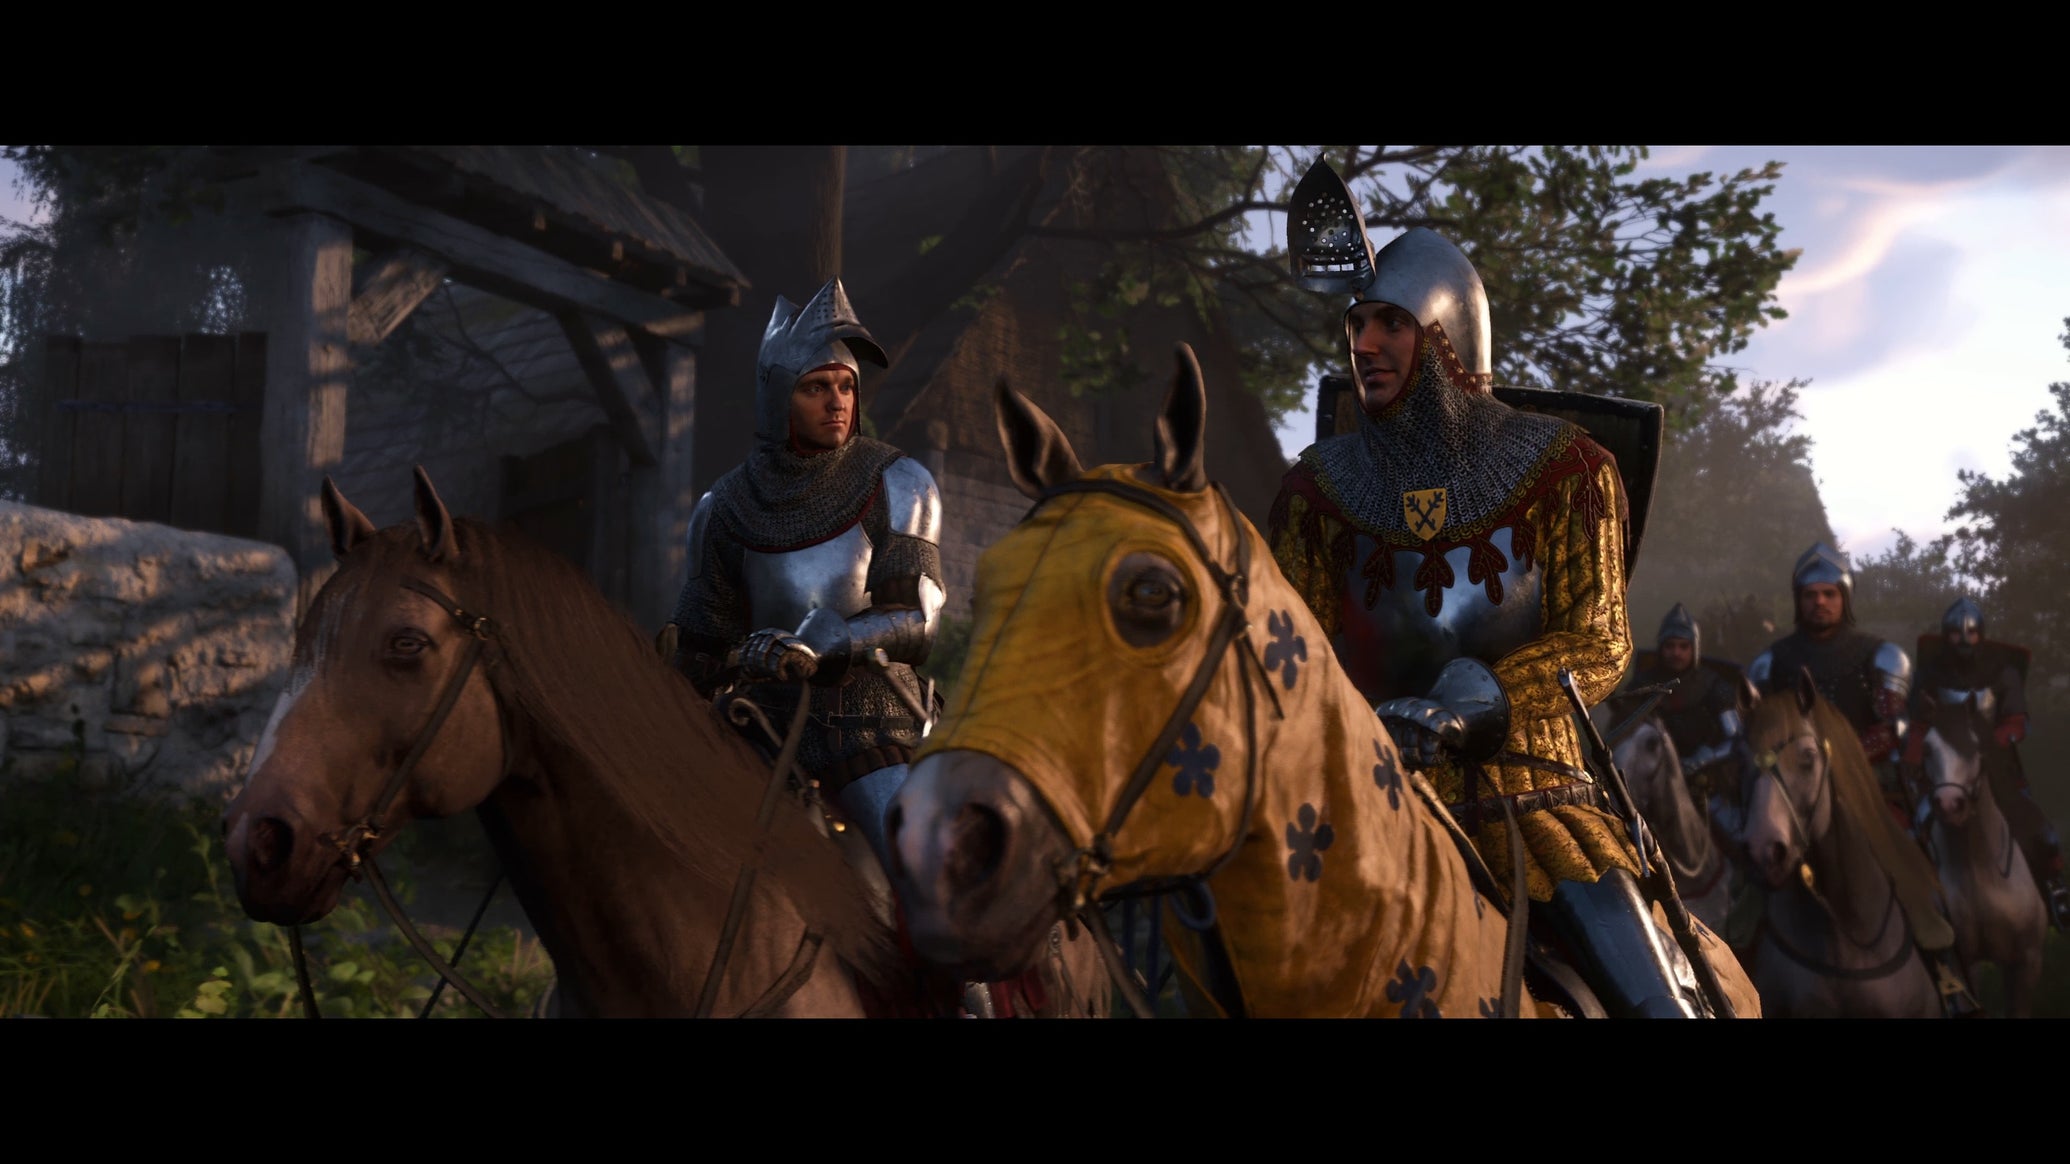
Image credit:Deep Silver / Rock Paper Shotgun

- Developer: Warhorse Studios
- Publisher: Deep Silver
- Release: Feb 4th, 2025
- On: Windows
- From: Steam , Epic , GOG
- Price: £50/$60/€60
- Reviewed on: Intel Core-i7 12700F, 16GB RAM, Nvidia RTX 3060, Windows 11
After several hours of battles, sieges, imprisonment and torture in Kingdom Come: Deliverance 2 , a groggy Henry of Skalitz is woken by a servant girl in a castle outside Kuttenberg. She greets him like a nobleman. I have Henry push back. He’s a blacksmith’s son. He might have some blue blood care of his biological father, but he grew up in the soot and clamour of the forge. The girl nervously insists, however: Henry must be from the upper crust, or he wouldn’t have been welcomed and feasted by the lord of the estate. He wouldn’t be lying in his very own chamber with its very own hole for shitting in - and in any case, it’s more than her job’s worth to treat him otherwise. In a timid, not quite spiteful show of reverse class policing, she refuses to end the dialogue until she’s dismissed in a manner befitting her station.
It’s a passing exchange that captures KCD2 at its most interesting. The game is classless in the RPG sense, yet classbound as a piece of historical fiction. It’s a fantasy of unbridled agency where you can go anywhere and level yourself up into anything, and a game in which you are continually being asked to know your place - at least, until the bloviating plot decides it for you.
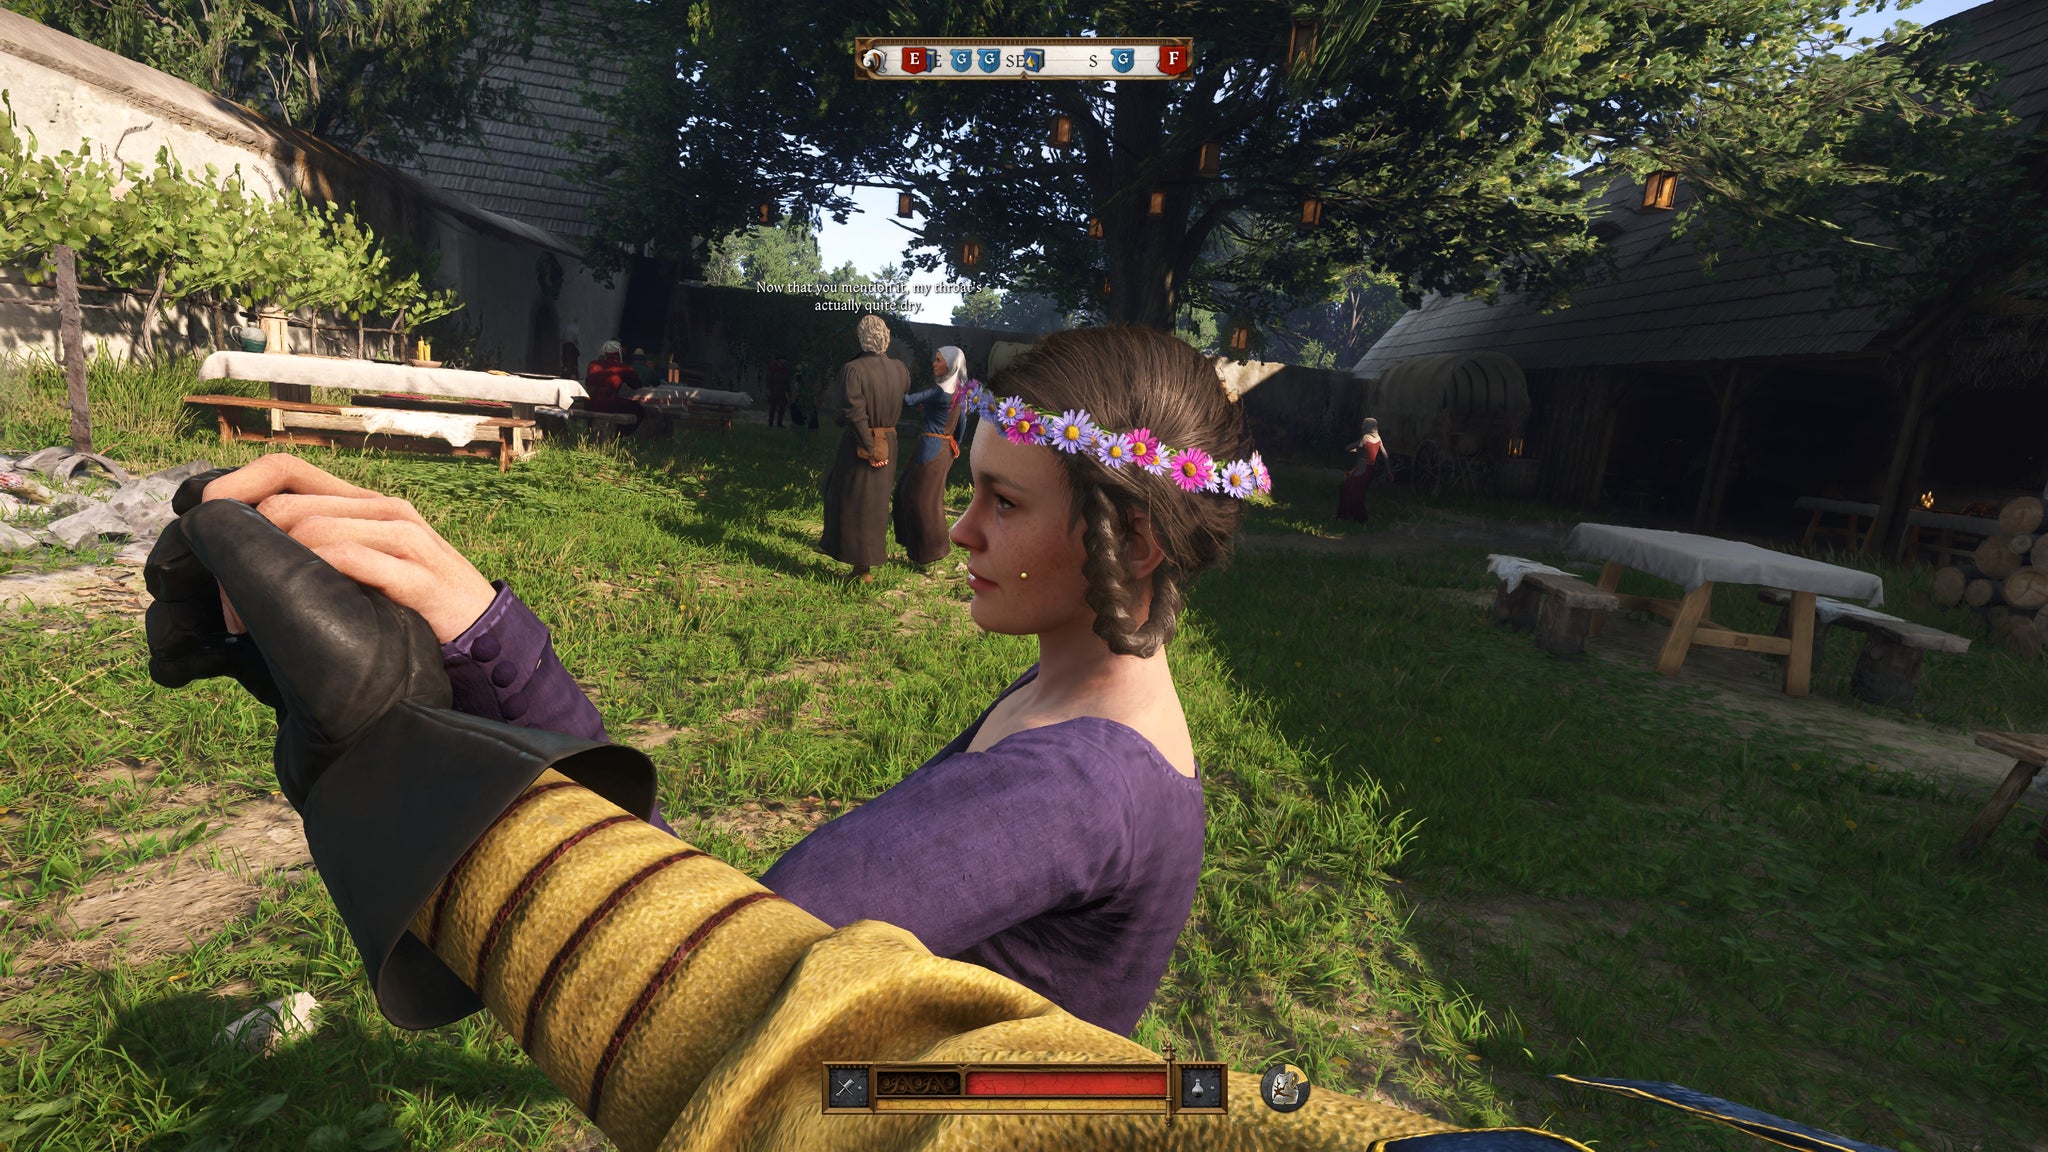
Image credit:Deep Silver / Rock Paper Shotgun
The game inherits much of the morality, reputation and social systems of genre fantasies, like the Elder Scrolls games, but Henry’s undecided class origins characterise KCD2 at every level. Whether you are holding forth at a banquet or interrogating a swineherd in the woods, standing at the head of an army or rotting in a cell, there’s always the opportunity to go up or down a rung on the ladder. It’s all in how and when you speak, how you dress, how you fight, what kind of horse you rode in on, whether you are noticeably injured, how you smell. If you’re armed with a longsword, people might comment that you’re putting on airs and graces; equip yourself with a pike, and you’re positioning yourself as rank-and-file. Dress in silk after a visit to the baths, and you’ll get to hob with the nobs; the serfs, however, may resent you, and you’ll be making yourself a plum target for bandits as you explore the game’s opulently mucky 15th century geography.
The execution of all this can be startlingly subtle for a game that often leans heavily into romance cliches about warring, wenching and wastrelling. I suffered a reputation cut at one point after glamming myself up to escort a courtesan to a wedding because, to be frank, I made her look plain; her flattering response carried a note of derision. The game’s many tradespeople and artisans are especially sensitive to both incompetence and drive-by bullshit artistry, which can be a problem when you’re haggling over the price of a cape. Fail a conversational skill check and they’ll think you’re a poser; ask an unnecessary question and they’ll think you’re a fool.
While it takes a while to layer up negativity to the extent that it seriously inconveniences you, there’s a wonderful prickliness to Deliverance 2’s reputation system, which shapes reactions within individual settlements and communities. As with Telltale’s open-ended “X will remember that” notifications, the HUD’s bluntness (smiley faces when you’ve impressed somebody, frowny faces when you haven’t) proves a strength. Rather than abstracting the process, it leaves you to figure out what, exactly, has earned somebody’s respect or disgust by digging into the detail of the ample writing and characterful - if often hammy - voice performances.
At the heart of KCD2’s class angst is Henry’s brotherly yet awkward relationship with Sir Hans Capon, who is both his partying buddy and class superior. As in the previous Kingdom Come, Hans is a spoilt young fop who pines to be taken seriously, yet is incapable of acting the part. He needs you to step in when he talks or drinks or shags himself into difficulties, but if you do that you’re also overstepping your bounds as manservant. Hans will forgive such impertinence up to a point that is never clearly indicated, and that ambiguity keeps their conversations engrossing - more engrossing than they should be, given that Hans himself is pretty boring. You need to know when to speak as protagonist, and when to play the NPC whose dialogue is all function and obsequy.
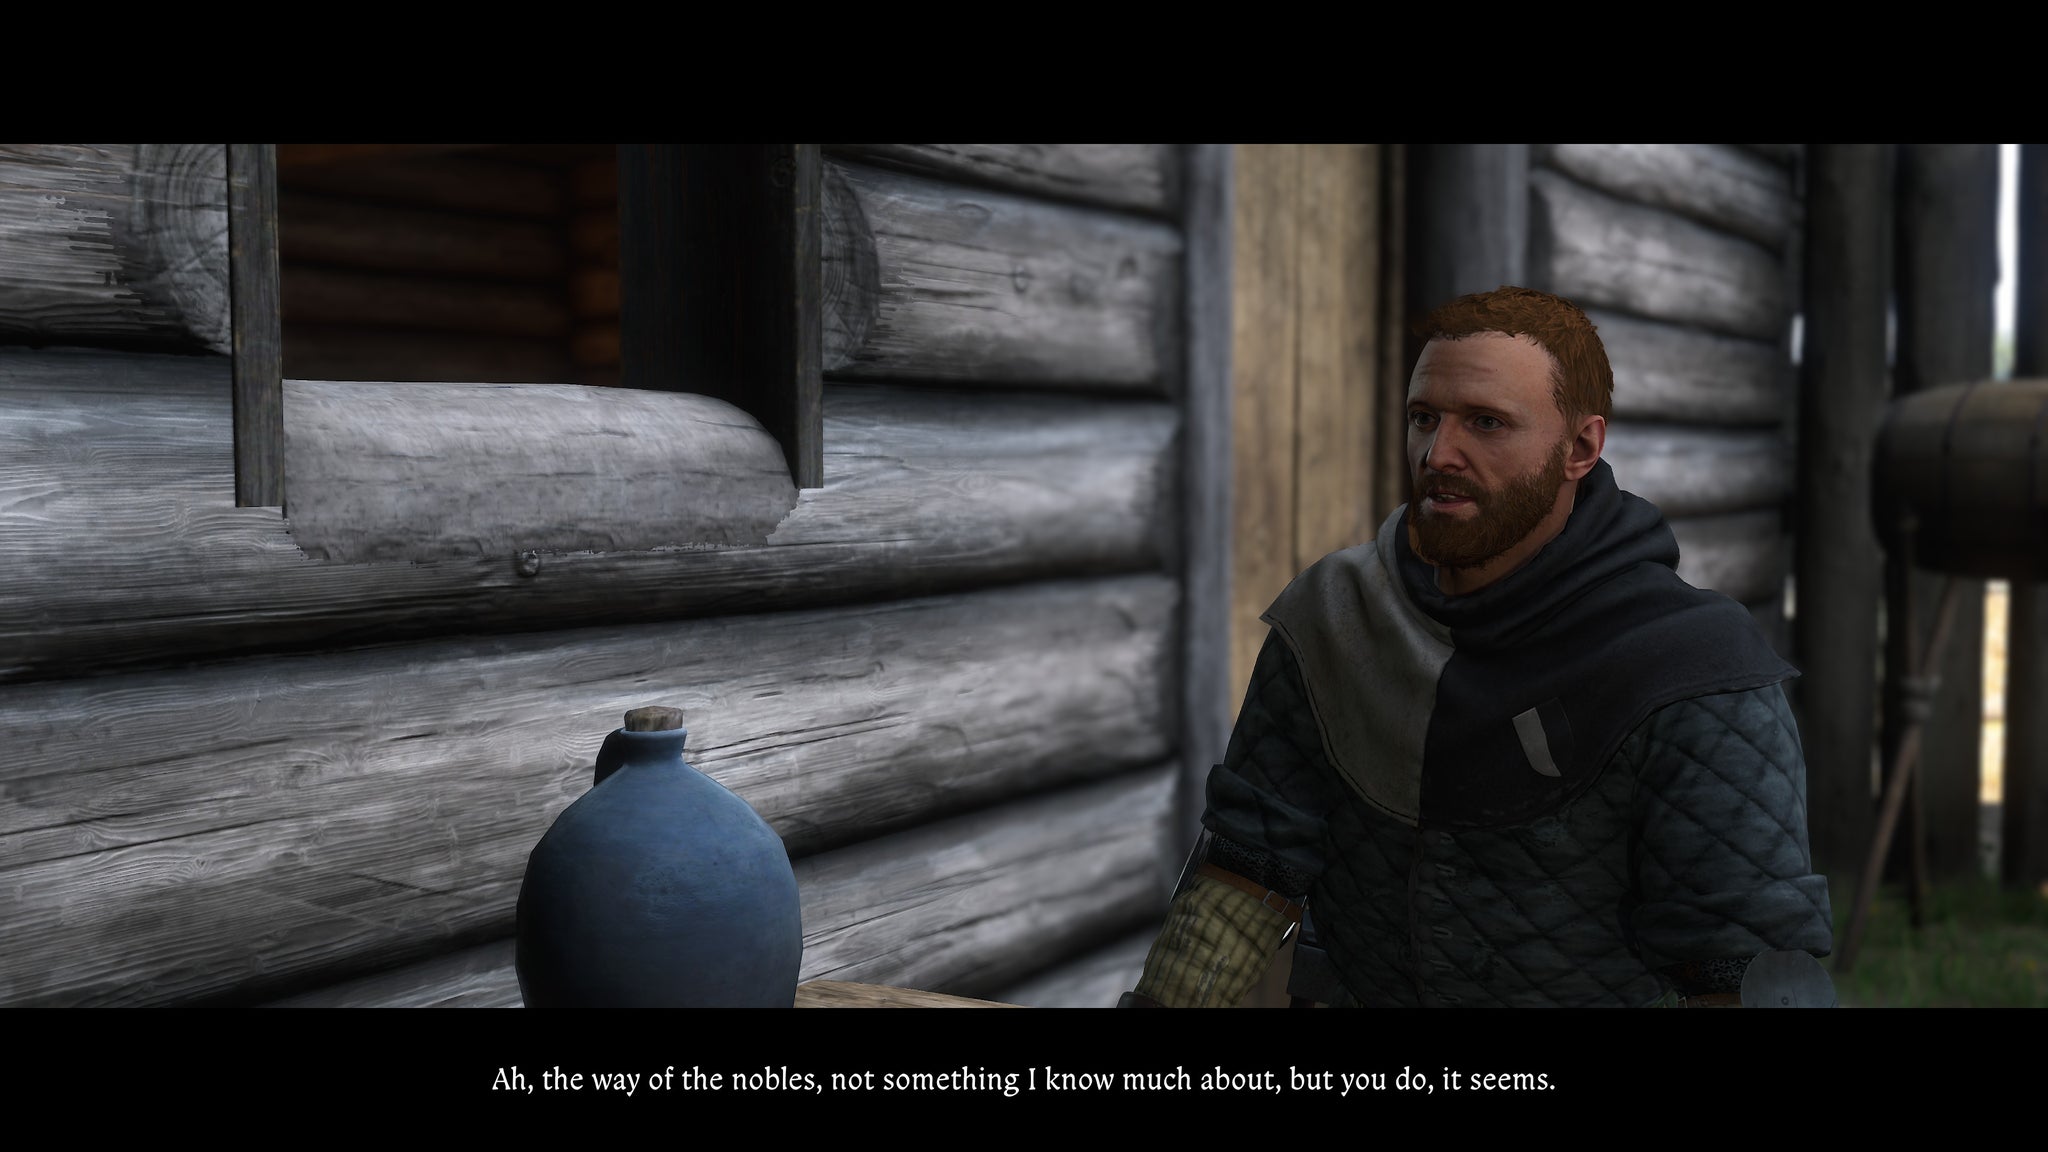
Image credit:Deep Silver / Rock Paper Shotgun
These questions of class sharpen when they form part of a quest intrigue. At one point, you and Hans visit a distant stronghold so that Hans can deliver a request for troops. While Hans haggles with the local lord, the latter’s lieutenant takes you aside and, over cups and dice, smilingly presses you about Hans’s agenda, because after all, us commoners have to stick together. I had Henry go along with this to some degree. Then, I smilingly turned the tables on the other guy: gosh, don’t your chief have a lot of horses! More horses than men, from the looks of things. Where did he come by them? I greatly enjoyed the delicate line the game challenged me to walk here between my conflicting allegiances.
In general, Deliverance 2’s quests are all about navigating the competing perspectives of nicely fleshed-out individuals. They are there to express the game’s society, rather than send you out into the boondocks to pluck herbs or harvest respawning lowlives (though such quest-givers do exist, populating otherwise handy roadside campsites). Most involve trips back and forth between communities, each of which has ideas about the other, and often grant insights you can apply elsewhere. They pull you back through the workings of the setting like a shuttle through a loom, adding to the systemic ambience cultivated by NPCs with day-night routines, myriad trades such as tanning and smithing, and bits of virtuoso set dressing such as maids carrying laundry to the pond. Rather than fraying under your agency, this medieval tapestry is richer for your participation.
Your forays are checked by the game’s touches of survival simulation - fatigue, hunger, equipment wear-and-tear. I don’t think the survivally bits are a total success. The deterioration of clothing and armour feels very videogamey, with shoes evaporating in a matter of days, though the in-world presentation of dents on helmets and faded sleeves is convincing. The game’s representation of saving the game once again walks the line between whimsy and frustration: you’ll need to find, buy or brew Saviour’s Schnapps to save without quitting. Drinking schnapps also gets you drunk, so you won’t want to knock back a flask every 10 minutes, and it’s easy to forget that saving is an in-game item when the game checkpoints itself anyway after more significant quests.
Combine that idiosyncracy with some review build crash bugs and - as in my case - it might cost you a couple hours of progress. Still, practicalities like these impose broad rhythms that, again, add to the feeling of participation. They hamper you just enough to kindle everyday pleasures like the relief of finding a safe place to sleep after a hard day’s travel, without weighing on your mind from moment to moment.
Together with the absence of more generic plundering quests, the pressure to keep yourself clothed, fed and well-equipped also helps you understand the value others place on money and property. A new sword in Skyrim is a non-event: throw it on the pile, delete when you become unable to sprint. A new sword in KCD2 is a big deal, at least to begin with. While there’s the option to amass a fortune through thievery, it’s relatively difficult in KCD2 to just moider the mooks and/or take their stuff. Even the no-name bad ‘uns come from somewhere, and if you slaughter or abuse them, the world will react, directly or indirectly. Filch somebody’s belongings and, assuming you get away with selling or wearing stolen goods in the face of inspections and so on, the locals will become mistrustful. The guard presence will thicken.
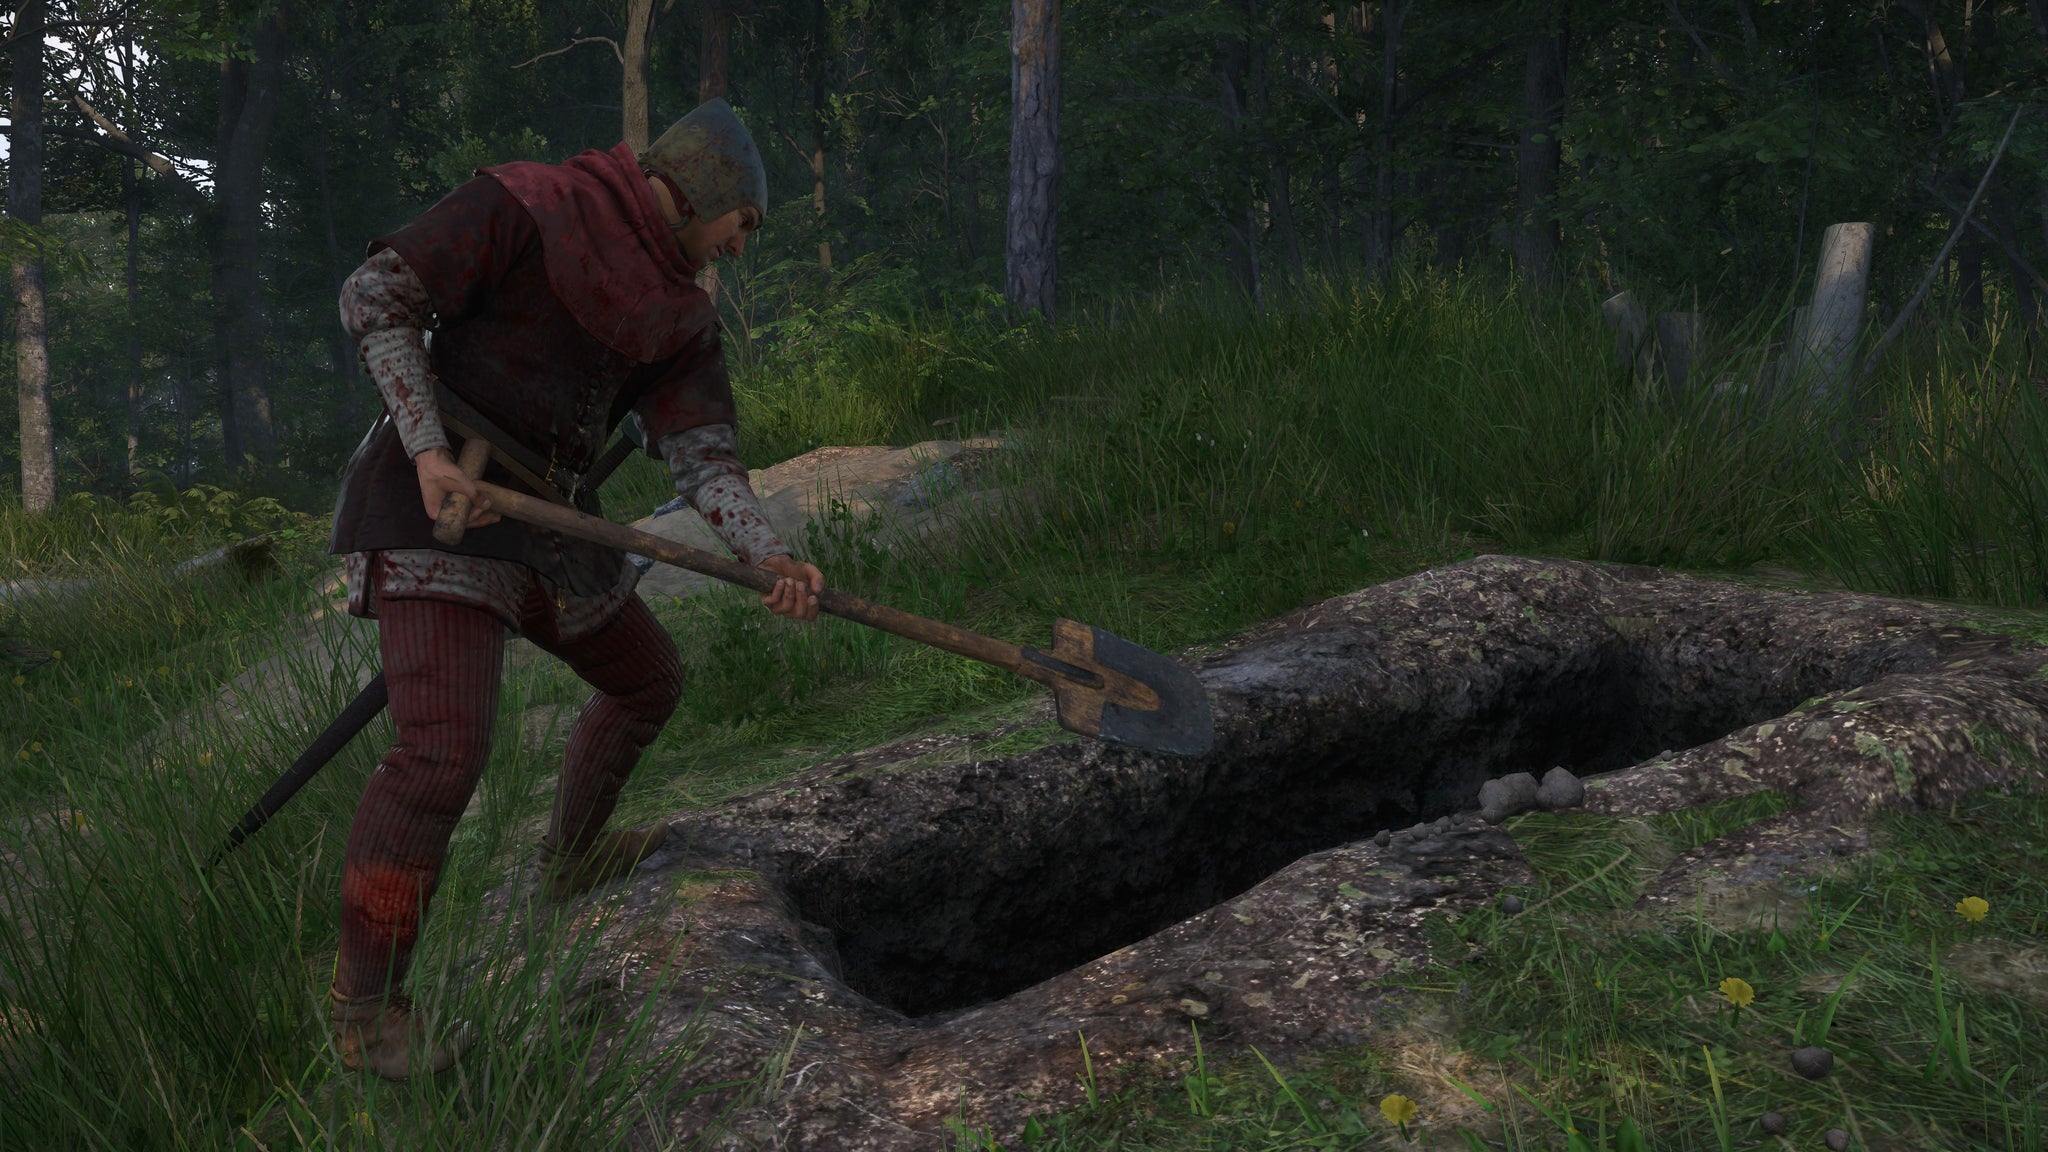
Image credit:Deep Silver / Rock Paper Shotgun
KCD2’s combat also has its simulation elements, offering a spread of ostentatiously authenticky weapon, armour, and attack types, together with a limb damage system and various buffs and debuffs. You can feel and hear the complexities: it’s all in the clatter of a sword from plate armour, versus the reassuring crunch of a mace. But at heart, it’s an approachable question of blocking and countering when you see the associated icons, mixed up with a generous pinch of good luck and knowing when to flee. It feels pleasantly raw and breathless: foes react in stagy but entertaining ways, yelling things like “fuck, I’m [/lookup debuff table]” when they’re hurting. There are passive perks, combos and souped-up “master strikes” to reward technical players, but these are flourishes: the key thing is managing your stamina, being mindful of your blind spots, and not overcommitting.
I am not a technically minded player. My Henry fares best in a pitched battle that gives him the luxury of circling behind people fighting other people. He isn’t some bastion of chivalry, just a guy trying to survive in a world of braying, duplicitous aristocrats. Or at least, that’s how I’ve tried to play him. KCD2’s great weakness is simply that the core hero story and RPG progression curve slowly take priority over the game’s more flexible, ambiguous conception of a bastard making sense of a society that can’t quite make sense of him. After a few main quests - say, 30 hours of play - your Henry should be relatively established with several sets of clothes for combat, daily wear and socialising, some decent weapons and plenty of cash, crafting materials and trinkets. From that moment on, there’s less need to negotiate with the world to make headway.
The game’s unobtrusive, and perhaps overly generous approach to character progression also gradually smears away any RPG playstyle you might cleave to at first. Your stats improve passively when you perform a relevant action: overload yourself (an inevitability, because this is an RPG) and your strength stat will go up; talk to people and you’ll get better at talking to people; spend a lot of time in the woods and you’ll get better at poaching. Combine this with major quests that daisy-chain together a bunch of activities - sneak in here, talk to that guy, make some horseshoes, brew a potion, etcetera - and you’ll grow steadily more capable across the board.
All of which slightly sabotages one of KCD2’s other strengths: it makes failure worthwhile. The biggest compliment I can pay the writers and designers is that I hardly ever save-scummed to obtain a rosier outcome. While a few failures trigger a “game over”, many produce scenarios as winding and gratifying as any victory, and in any case, living life in Henry’s shoes has taught me to take the rain with the shine. In particular, I never wanted to simply overpower people the way blockbuster games teach you to, and Deliverance 2 met me halfway, initially, by having characters dunk on me when I tried to act the tough guy, or applaud me for being a good sport when I got my arse kicked. But after a series of mandatory plot skirmishes, my Henry has become a proficient and well-appointed combatant, because that is what KCD2 fundamentally requires him to be. It’s as though the game had assumed the role of that servant girl from my intro: it won’t let me get on with my day unless I consent to my own greatness.

Image credit:Deep Silver / Rock Paper Shotgun
The more capable Henry is, the more tedious his yarn becomes. At heart, it’s a simple journey to avenge the murder of his father - a motivation that unfolds in familiar ways, with familiar morales and punchlines of the hate-leads-to-suffering and we’re-not-so-different variety. It goes hand in hand with loads of setpiece battles and dynastic jostling, which is bingeable enough until you realise that you can’t picture what the key personalities do when they aren’t yelling variations of “FRESH HORSES!” This is a plot-first, character-second affair. There are some brilliant individual chapters: a quest to prevent an execution by finding your way to a dying person at the top of a well-defended tower, for example, where you use everything you’ve learned to bypass dozens of NPCs. Sometimes, the game also shakes things up with a double-cross that performs a Metroid reset, restoring Henry’s need to haggle with the detail of the world. But a lot of the time, the plot just feels like pageantry.
Inevitably, there is an enormous blank at the centre of my analysis of Deliverance 2 - I know absolutely eff-all about 15th century Bohemia. As such, I also can’t really comment on what this fable says about the present-day Czech Republic - whether it serves a purpose akin to, say, The Crown in British TV. But I can say that KCD2 is a more sensitive, curious and irresolute portrayal than you might guess from either the previous game or from the self-defeating gator-baiting of Warhorse’s co-founder Daniel Vavra. Its society is diverse: during his adventures, Henry gets to pick the brains of a Jewish merchant, speak to a Black noble from Mali, and run errands for a community of Roma travellers. The game portrays bigotry and gives you the opportunity to question it or go along with it. The writing also appears to respond to some of the criticisms levelled at the original Deliverance: there’s an early quest devoted to humanising, if not necessarily redeeming, the Cumans who were once depicted as faceless outsiders.
Still, it’s not above a bit of elementary Othering. There’s a tour-guide feel to how ready people from different cultures are to unpack their traditions for Henry - a willingness to be added to the codex that is perhaps less a feature of Kingdom Come and more the expectation of encyclopaedic transparency attendant on open world RPGs. And yes, it’s still pretty boorish in its portrayal of women. KCD2 has a lot of female characters, many of whom are substantial in terms of both quantity of dialogue and (sub)plot agency, but as a chivalric fable dominated by scenes of macho posturing and bromance, it can only permit itself so much interest in what women do when they’re not being gazed at or mistreated by men. The female cast consists heavily of nags, healers, comely maids, femme fatales, damsels and harlots. If these portrayals draw upon accounts of women’s lives during the period, they are also living stereotypes couched in modern-day English. It feels like the writers have both the will and the chops to get beyond them - my introductory anecdote about the servant girl is one example - but doing that goes against the spirit of the game.
I don’t think Kingdom Come will ever not be a boy’s day out, not while Henry is involved. But after 50 hours, I do feel like it could develop further as a study of feudal class mobility. Confronted with abundance, I’d have liked Henry to get a little spoilt. Or at least, develop preferences or foibles that inconvenience me as the pressures of subsistence fall away. I’m always making him eat cooked cabbage because cabbage is convenient, but perhaps he really hates the stuff. Perhaps it gives him gas. Perhaps hanging around Hans for too long has robbed him of his tolerance for the bare necessities. Likewise, I’m always making him wear yellow hose because I think it brings out his complexion, but perhaps he thinks it makes him look like a giant ornamental banana.
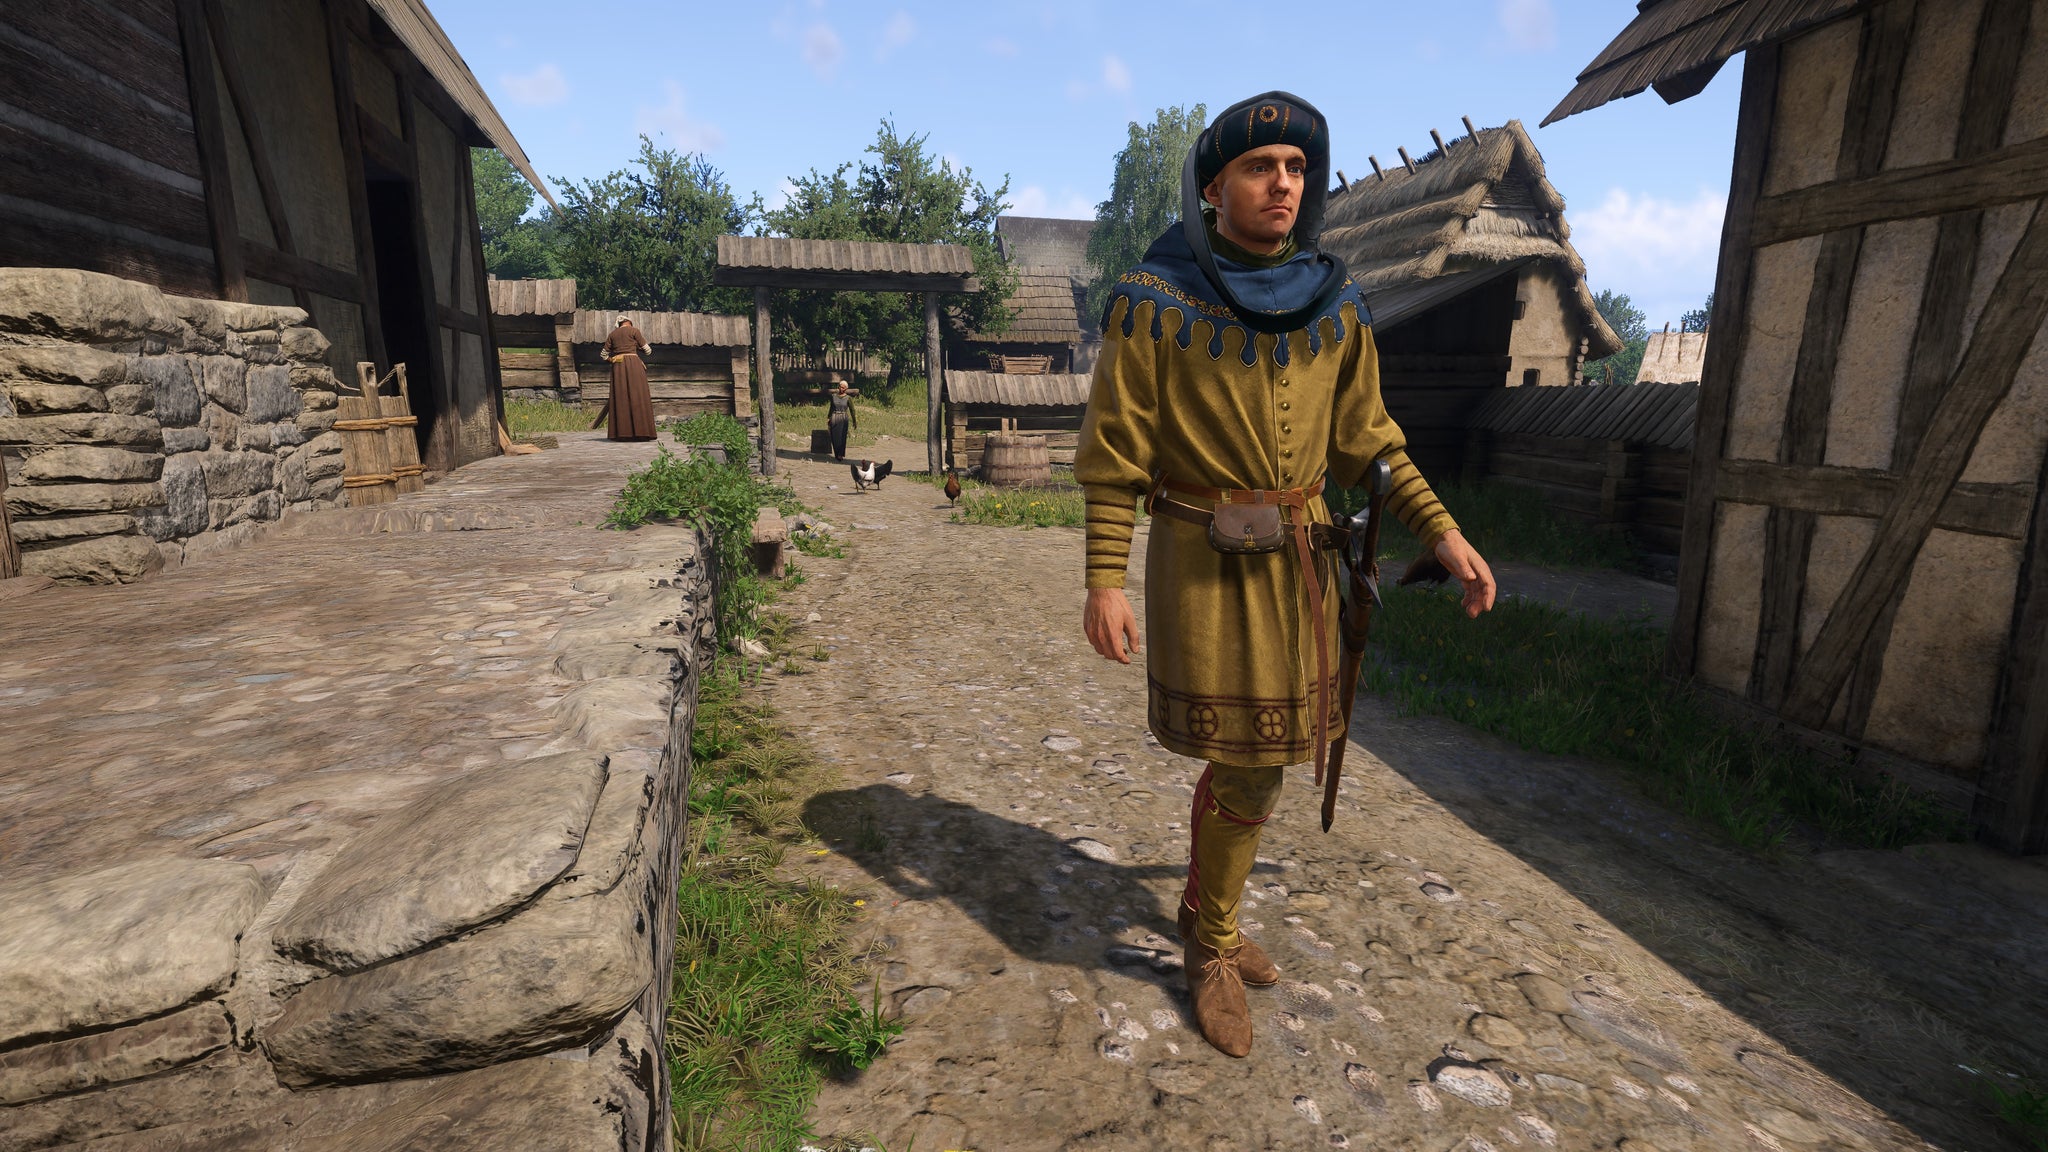
Image credit:Deep Silver / Rock Paper Shotgun
I can’t comment in any depth on Deliverance 2’s portrayal of Bohemia, but I can conclude by talking a little about what the game shares with other historical fantasies. In particular, it frequently reminded me of Hilary Mantel’s Wolf Hall novels, a sympathetic, mythologising account of the rise and fall of the English minister Thomas Cromwell. Like Warhorse’s Henry, Mantel’s Cromwell is a blacksmith’s boy, though not a noble’s bastard. Like Henry, he must dance around the whims of people of higher birth. Like Henry, his value ultimately is that he is man for all seasons, able to turn his hand to anything after a lifetime spent dragging himself from the gutter by any means necessary: soldier, bureaucrat, labourer, merchant, scholar, scribe, marriage-maker, weaver, butcher.
The difference is that when Mantel’s story begins, Cromwell has already levelled up all the associated skilltrees and entered the postgame. Far from being a charming show of tenacity and pluck - the kind of thing that gets you called a “good man” by your betters - his supreme competence makes him both awe-inspiring and sinister, while setting the scene for his undoing. There is, in fact, a closer parallel to Cromwell in Kingdom Come: Deliverance 2, an older man with a gift for the gab who you’ll fleetingly control while pursuing the main quest. Perhaps that’s who Henry needs to become in Kingdom Come: Deliverance 3.
Find out how we conduct our reviews by reading our review policy .
Kingdom Come: Deliverance II
Video Game
Rock Paper Shotgun is better when you sign in
Sign in and join us on our journey to discover strange and compelling PC games.

All 75 Arc Raiders Blueprints and where to get them
These areas have the highest chance of giving you Blueprints

Image credit:Rock Paper Shotgun/Embark Studios

Looking for more Arc Raiders Blueprints? It’s a special day when you find a Blueprint, as they’re among the most valuable items in Arc Raiders. If you find a Blueprint that you haven’t already found, then you must make sure you hold onto it at all costs, because Blueprints are the key to one of the most important and powerful systems of meta-progression in the game.
This guide aims to be the very best guide on Blueprints you can find, starting with a primer on what exactly they are and how they work in Arc Raiders, before delving into exactly where to get Blueprints and the very best farming spots for you to take in your search.
We’ll also go over how to get Blueprints from other unlikely activities, such as destroying Surveyors and completing specific quests. And you’ll also find the full list of all 75 Blueprints in Arc Raiders on this page (including the newest Blueprints added with the Cold Snap update , such as the Deadline Blueprint and Firework Box Blueprint), giving you all the information you need to expand your own crafting repertoire.
In this guide:
- What are Blueprints in Arc Raiders?
- Full Blueprint list: All crafting recipes
- Where to find Blueprints in Arc Raiders Blueprints obtained from quests Blueprints obtained from Trials Best Blueprint farming locations

What are Blueprints in Arc Raiders?
Blueprints in Arc Raiders are special items which, if you manage to extract with them, you can expend to permanently unlock a new crafting recipe in your Workshop. If you manage to extract from a raid with an Anvil Blueprint, for example, you can unlock the ability to craft your very own Anvil Pistol, as many times as you like (as long as you have the crafting materials).
To use a Blueprint, simply open your Inventory while in the lobby, then right-click on the Blueprint and click “Learn And Consume” . This will permanently unlock the recipe for that item in your Workshop. As of the Stella Montis update, there are allegedly 75 different Blueprints to unlock - although only 68 are confirmed to be in the game so far. You can see all the Blueprints you’ve found and unlocked by going to the Workshop menu, and hitting “R” to bring up the Blueprint screen.
It’s possible to find duplicates of past Blueprints you’ve already unlocked. If you find these, then you can either sell them, or - if you like to play with friends - you can take it into a match and gift it to your friend so they can unlock that recipe for themselves. Another option is to keep hold of them until the time comes to donate them to the Expedition.
Full Blueprint list: All crafting recipes
Below is the full list of all the Blueprints that are currently available to find in Arc Raiders, and the crafting recipe required for each item:
| Blueprint | Type | Recipe | Crafted At |
|---|---|---|---|
| Bettina | Weapon | 3x Advanced Mechanical Components 3x Heavy Gun Parts 3x Canister | Gunsmith 3 |
| Blue Light Stick | Quick Use | 3x Chemicals | Utility Station 1 |
| Aphelion | Weapon | 3x Magnetic Accelerator 3x Complex Gun Parts 1x Matriarch Reactor | Gunsmith 3 |
| Combat Mk. 3 (Flanking) | Augment | 2x Advanced Electrical Components 3x Processor | Gear Bench 3 |
| Combat Mk. 3 (Aggressive) | Augment | 2x Advanced Electrical Components 3x Processor | Gear Bench 3 |
| Complex Gun Parts | Material | 2x Light Gun Parts 2x Medium Gun Parts 2x Heavy Gun Parts | Refiner 3 |
| Fireworks Box | Quick Use | 1x Explosive Compound 3x Pop Trigger | Explosives Station 2 |
| Gas Mine | Mine | 4x Chemicals 2x Rubber Parts | Explosives Station 1 |
| Green Light Stick | Quick Use | 3x Chemicals | Utility Station 1 |
| Pulse Mine | Mine | 1x Crude Explosives 1x Wires | Explosives Station 1 |
| Seeker Grenade | Grenade | 1x Crude Explosives 2x ARC Alloy | Explosives Station 1 |
| Looting Mk. 3 (Survivor) | Augment | 2x Advanced Electrical Components 3x Processor | Gear Bench 3 |
| Angled Grip II | Mod | 2x Mechanical Components 3x Duct Tape | Gunsmith 2 |
| Angled Grip III | Mod | 2x Mod Components 5x Duct Tape | Gunsmith 3 |
| Hullcracker | Weapon | 1x Magnetic Accelerator 3x Heavy Gun Parts 1x Exodus Modules | Gunsmith 3 |
| Launcher Ammo | Ammo | 5x Metal Parts 1x Crude Explosives | Workbench 1 |
| Anvil | Weapon | 5x Mechanical Components 5x Simple Gun Parts | Gunsmith 2 |
| Anvil Splitter | Mod | 2x Mod Components 3x Processor | Gunsmith 3 |
| ??? | ??? | ??? | ??? |
| Barricade Kit | Quick Use | 1x Mechanical Components | Utility Station 2 |
| Blaze Grenade | Grenade | 1x Explosive Compound 2x Oil | Explosives Station 3 |
| Bobcat | Weapon | 3x Advanced Mechanical Components 3x Light Gun Parts | Gunsmith 3 |
| Osprey | Weapon | 2x Advanced Mechanical Components 3x Medium Gun Parts 7x Wires | Gunsmith 3 |
| Burletta | Weapon | 3x Mechanical Components 3x Simple Gun Parts | Gunsmith 1 |
| Compensator II | Mod | 2x Mechanical Components 4x Wires | Gunsmith 2 |
| Compensator III | Mod | 2x Mod Components 8x Wires | Gunsmith 3 |
| Defibrillator | Quick Use | 9x Plastic Parts 1x Moss | Medical Lab 2 |
| ??? | ??? | ??? | ??? |
| Equalizer | Weapon | 3x Magnetic Accelerator 3x Complex Gun Parts 1x Queen Reactor | Gunsmith 3 |
| Extended Barrel | Mod | 2x Mod Components 8x Wires | Gunsmith 3 |
| Extended Light Mag II | Mod | 2x Mechanical Components 3x Steel Spring | Gunsmith 2 |
| Extended Light Mag III | Mod | 2x Mod Components 5x Steel Spring | Gunsmith 3 |
| Extended Medium Mag II | Mod | 2x Mechanical Components 3x Steel Spring | Gunsmith 2 |
| Extended Medium Mag III | Mod | 2x Mod Components 5x Steel Spring | Gunsmith 3 |
| Extended Shotgun Mag II | Mod | 2x Mechanical Components 3x Steel Spring | Gunsmith 2 |
| Extended Shotgun Mag III | Mod | 2x Mod Components 5x Steel Spring | Gunsmith 3 |
| Remote Raider Flare | Quick Use | 2x Chemicals 4x Rubber Parts | Utility Station 1 |
| Heavy Gun Parts | Material | 4x Simple Gun Parts | Refiner 2 |
| Venator | Weapon | 2x Advanced Mechanical Components 3x Medium Gun Parts 5x Magnet | Gunsmith 3 |
| Il Toro | Weapon | 5x Mechanical Components 6x Simple Gun Parts | Gunsmith 1 |
| Jolt Mine | Mine | 1x Electrical Components 1x Battery | Explosives Station 2 |
| Explosive Mine | Mine | 1x Explosive Compound 1x Sensors | Explosives Station 3 |
| Jupiter | Weapon | 3x Magnetic Accelerator 3x Complex Gun Parts 1x Queen Reactor | Gunsmith 3 |
| Light Gun Parts | Material | 4x Simple Gun Parts | Refiner 2 |
| Lightweight Stock | Mod | 2x Mod Components 5x Duct Tape | Gunsmith 3 |
| Lure Grenade | Grenade | 1x Speaker Component 1x Electrical Components | Utility Station 2 |
| Medium Gun Parts | Material | 4x Simple Gun Parts | Refiner 2 |
| Torrente | Weapon | 2x Advanced Mechanical Components 3x Medium Gun Parts 6x Steel Spring | Gunsmith 3 |
| Muzzle Brake II | Mod | 2x Mechanical Components 4x Wires | Gunsmith 2 |
| Muzzle Brake III | Mod | 2x Mod Components 8x Wires | Gunsmith 3 |
| Padded Stock | Mod | 2x Mod Components 5x Duct Tape | Gunsmith 3 |
| Shotgun Choke II | Mod | 2x Mechanical Components 4x Wires | Gunsmith 2 |
| Shotgun Choke III | Mod | 2x Mod Components 8x Wires | Gunsmith 3 |
| Shotgun Silencer | Mod | 2x Mod Components 8x Wires | Gunsmith 3 |
| Showstopper | Grenade | 1x Advanced Electrical Components 1x Voltage Converter | Explosives Station 3 |
| Silencer I | Mod | 2x Mechanical Components 4x Wires | Gunsmith 2 |
| Silencer II | Mod | 2x Mod Components 8x Wires | Gunsmith 3 |
| Snap Hook | Quick Use | 2x Power Rod 3x Rope 1x Exodus Modules | Utility Station 3 |
| Stable Stock II | Mod | 2x Mechanical Components 3x Duct Tape | Gunsmith 2 |
| Stable Stock III | Mod | 2x Mod Components 5x Duct Tape | Gunsmith 3 |
| Tagging Grenade | Grenade | 1x Electrical Components 1x Sensors | Utility Station 3 |
| Tempest | Weapon | 3x Advanced Mechanical Components 3x Medium Gun Parts 3x Canister | Gunsmith 3 |
| Trigger Nade | Grenade | 2x Crude Explosives 1x Processor | Explosives Station 2 |
| Vertical Grip II | Mod | 2x Mechanical Components 3x Duct Tape | Gunsmith 2 |
| Vertical Grip III | Mod | 2x Mod Components 5x Duct Tape | Gunsmith 3 |
| Vita Shot | Quick Use | 2x Antiseptic 1x Syringe | Medical Lab 3 |
| Vita Spray | Quick Use | 3x Antiseptic 1x Canister | Medical Lab 3 |
| Vulcano | Weapon | 1x Magnetic Accelerator 3x Heavy Gun Parts 1x Exodus Modules | Gunsmith 3 |
| Wolfpack | Grenade | 2x Explosive Compound 2x Sensors | Explosives Station 3 |
| Red Light Stick | Quick Use | 3x Chemicals | Utility Station 1 |
| Smoke Grenade | Grenade | 14x Chemicals 1x Canister | Utility Station 2 |
| Deadline | Mine | 3x Explosive Compound 2x ARC Circuitry | Explosives Station 3 |
| Trailblazer | Grenade | 1x Explosive Compound 1x Synthesized Fuel | Explosives Station 3 |
| Tactical Mk. 3 (Defensive) | Augment | 2x Advanced Electrical Components 3x Processor | Gear Bench 3 |
| Tactical Mk. 3 (Healing) | Augment | 2x Advanced Electrical Components 3x Processor | Gear Bench 3 |
| Yellow Light Stick | Quick Use | 3x Chemicals | Utility Station 1 |
Note: The missing Blueprints in this list likely have not actually been added to the game at the time of writing, because none of the playerbase has managed to find any of them. As they are added to the game, I will update this page with the most relevant information so you know exactly how to get all 75 Arc Raiders Blueprints.
Where to find Blueprints in Arc Raiders
Below is a list of all containers, modifiers, and events which maximise your chances of finding Blueprints:
- Certain quests reward you with specific Blueprints .
- Completing Trials has a high chance of offering Blueprints as rewards.
- Surveyors have a decent chance of dropping Blueprints on death.
- High loot value areas tend to have a greater chance of spawning Blueprints.
- Night Raids and Storms may increase rare Blueprint spawn chances in containers.
- Containers with higher numbers of items may have a higher tendency to spawn Blueprints. As a result, Blue Gate (which has many “large” containers containing multiple items) may give you a higher chance of spawning Blueprints.
- Raider containers (Raider Caches, Weapon Boxes, Medical Bags, Grenade Tubes) have increased Blueprint drop rates. As a result, the Uncovered Caches event gives you a high chance of finding Blueprints.
- Security Lockers have a higher than average chance of containing Blueprints.
- Certain Blueprints only seem to spawn under specific circumstances: Tempest Blueprint only spawns during Night Raid events. Vulcano Blueprint only spawns during Hidden Bunker events. Jupiter and Equaliser Blueprints only spawn during Harvester events.

Raider Caches, Weapon Boxes, and other raider-oriented container types have a good chance of offering Blueprints. |Image credit:Rock Paper Shotgun/Embark Studios
Blueprints have a very low chance of spawning in any container in Arc Raiders, around 1-2% on average. However, there is a higher chance of finding Blueprints in particular container types. Specifically, you can find more Blueprints in Raider containers and security lockers.
Beyond this, if you’re looking for Blueprints you should focus on regions of the map which are marked as having particularly high-value loot. Areas such as the Control Tower in Dam Battlegrounds, the Arrival and Departure Buildings in Spaceport, and Pilgrim’s Peak in Blue Gate all have a better-than-average chance of spawning Blueprints somewhere amongst all their containers. Night Raids and Electromagnetic Storm events also increase the drop chances of certain Blueprints .
In addition to these containers, you can often loot Blueprints from destroyed Surveyors - the largest of the rolling ball ARC. Surveyors are more commonly found on the later maps - Spaceport and Blue Gate - and if one spawns in your match, you’ll likely see it by the blue laser beam that it casts into the sky while “surveying”.
Surveyors are quite well-armoured and will very speedily run away from you once it notices you, but if you can take one down then make sure you loot all its parts for a chance of obtaining certain unusual Blueprints.
Blueprints obtained from quests
One way in which you can get Blueprints is by completing certain quests for the vendors in Speranza. Some quests will reward you with a specific item Blueprint upon completion, so as long as you work through all the quests in Arc Raiders, you are guaranteed those Blueprints.
Here is the full list of all Blueprints you can get from quest rewards:
- Trigger Nade Blueprint: Rewarded after completing “Sparks Fly”.
- Lure Grenade Blueprint: Rewarded after completing “Greasing Her Palms”.
- Burletta Blueprint: Rewarded after completing “Industrial Espionage”.
- Hullcracker Blueprint (and Launcher Ammo Blueprint): Rewarded after completing “The Major’s Footlocker”.
Alas, that’s only 4 Blueprints out of a total of 75 to unlock, so for the vast majority you will need to find them yourself during a raid. If you’re intent on farming Blueprints, then it’s best to equip yourself with cheap gear in case you lose it, but don’t use a free loadout because then you won’t get a safe pocket to stash any new Blueprint you find. No pain in Arc Raiders is sharper than failing to extract with a new Blueprint you’ve been after for a dozen hours already.

One of the best ways to get Blueprints is by hitting three stars on all five Trials every week. |Image credit:Rock Paper Shotgun/Embark Studios
Blueprints obtained from Trials
One of the very best ways to get Blueprints is as rewards for completing Trials in Arc Raiders. Trials are unlocked from Level 15 onwards, and allow you to earn rewards by focusing on certain tasks over the course of several raids. For example, one Trial might task you with dealing damage to Hornets, while another might challenge you to loot Supply Drops.
Trials refresh on a weekly basis, with a new week bringing five new Trials. Each Trial can offer up to three rewards after passing certain score milestones, and it’s possible to receive very high level loot from these reward crates - including Blueprints. So if you want to unlock as many Blueprints as possible, you should make a point of completing as many Trials as possible each week.
Best Blueprint farming locations
The very best way to get Blueprints is to frequent specific areas of the maps which combine high-tier loot pools with the right types of containers to search. Here are my recommendations for where to find Blueprints on every map, so you can always keep the search going for new crafting recipes to unlock.

Image credit:Rock Paper Shotgun/Embark Studios
Dam Battlegrounds
The best places to farm Blueprints on Dam Battlegrounds are the Control Tower, Power Generation Complex, Ruby Residence, and Pale Apartments . The first two regions, despite only being marked on the map as mid-tier loot, contain a phenomenal number of containers to loot. The Control Tower can also contain a couple of high-tier Security Lockers - though of course, you’ll need to have unlocked the Security Breach skill at the end of the Survival tree.
There’s also a lot of reporting amongst the playerbase that the Residential areas in the top-left of the map - Pale Apartments and Ruby Residence - give you a comparatively strong chance of finding Blueprints. Considering their size, there’s a high density of containers to loot in both locations, and they also have the benefit of being fairly out of the way. So you’re more likely to have all the containers to yourself.
Buried City
The best Blueprint farming locations on Buried City are the Santa Maria Houses, Grandioso Apartments, Town Hall, and the various buildings of the New District . Grandioso Apartments has a lower number of containers than the rest, but a high chance of spawning weapon cases - which have good Blueprint drop rates. The others are high-tier loot areas, with plenty of lootable containers - including Security Lockers.
Spaceport
The best places to find Blueprints on Spaceport are the Arrival and Departure Buildings, as well as Control Tower A6 and the Launch Towers . All these areas are labelled as high-value loot regions, and many of them are also very handily connected to one another by the Spaceport wall, which you can use to quickly run from one area to the next. At the tops of most of these buildings you’ll find at least one Security Locker, so this is an excellent farming route for players looking to find Blueprints.
The downside to looting Blueprints on Spaceport is that all these areas are hotly contested, particularly in Duos and Squads. You’ll need to be very focused and fast in order to complete the full farming route.

Image credit:Rock Paper Shotgun/Embark Studios
Blue Gate
Blue Gate tends to have a good chance of dropping Blueprints, potentially because it generally has a high number of containers which can hold lots of items; so there’s a higher chance of a Blueprint spawning in each container. In my experience, the best Blueprint farming spots on Blue Gate are Pilgrim’s Peak, Raider’s Refuge, the Ancient Fort, and the Underground Complex beneath the Warehouse .
All of these areas contain a wealth of containers to loot. Raider’s Refuge has less to loot, but the majority of the containers in and around the Refuge are raider containers, which have a high chance of containing Blueprints - particularly during major events.
Stella Montis
On the whole, Stella Montis seems to have a very low drop rate for Blueprints (though a high chance of dropping other high-tier loot). If you do want to try farming Blueprints on this map, the best places to find Blueprints in Stella Montis are Medical Research, Assembly Workshop, and the Business Center . These areas have the highest density of containers to loot on the map.
In addition to this, the Western Tunnel has a few different Security Lockers to loot, so while there’s very little to loot elsewhere in this area of the map, it’s worth hitting those Security Lockers if you spawn there at the start of a match.
That wraps up this primer on how to get all the Blueprints in Arc Raiders as quickly as possible. With the Expedition system constantly resetting a large number of players’ Blueprints, it’s more important than ever to have the most up-to-date information on where to find all these Blueprints.
While you’re here, be sure to check out our Arc Raiders best guns tier list , as well as our primers on the best skills to unlock and all the different Field Depot locations on every map.

ARC Raiders
PS5 , Xbox Series X/S , PC
Rock Paper Shotgun is better when you sign in
Sign in and join us on our journey to discover strange and compelling PC games.
