Killing Floor 3 review
I have been in this place be-floor
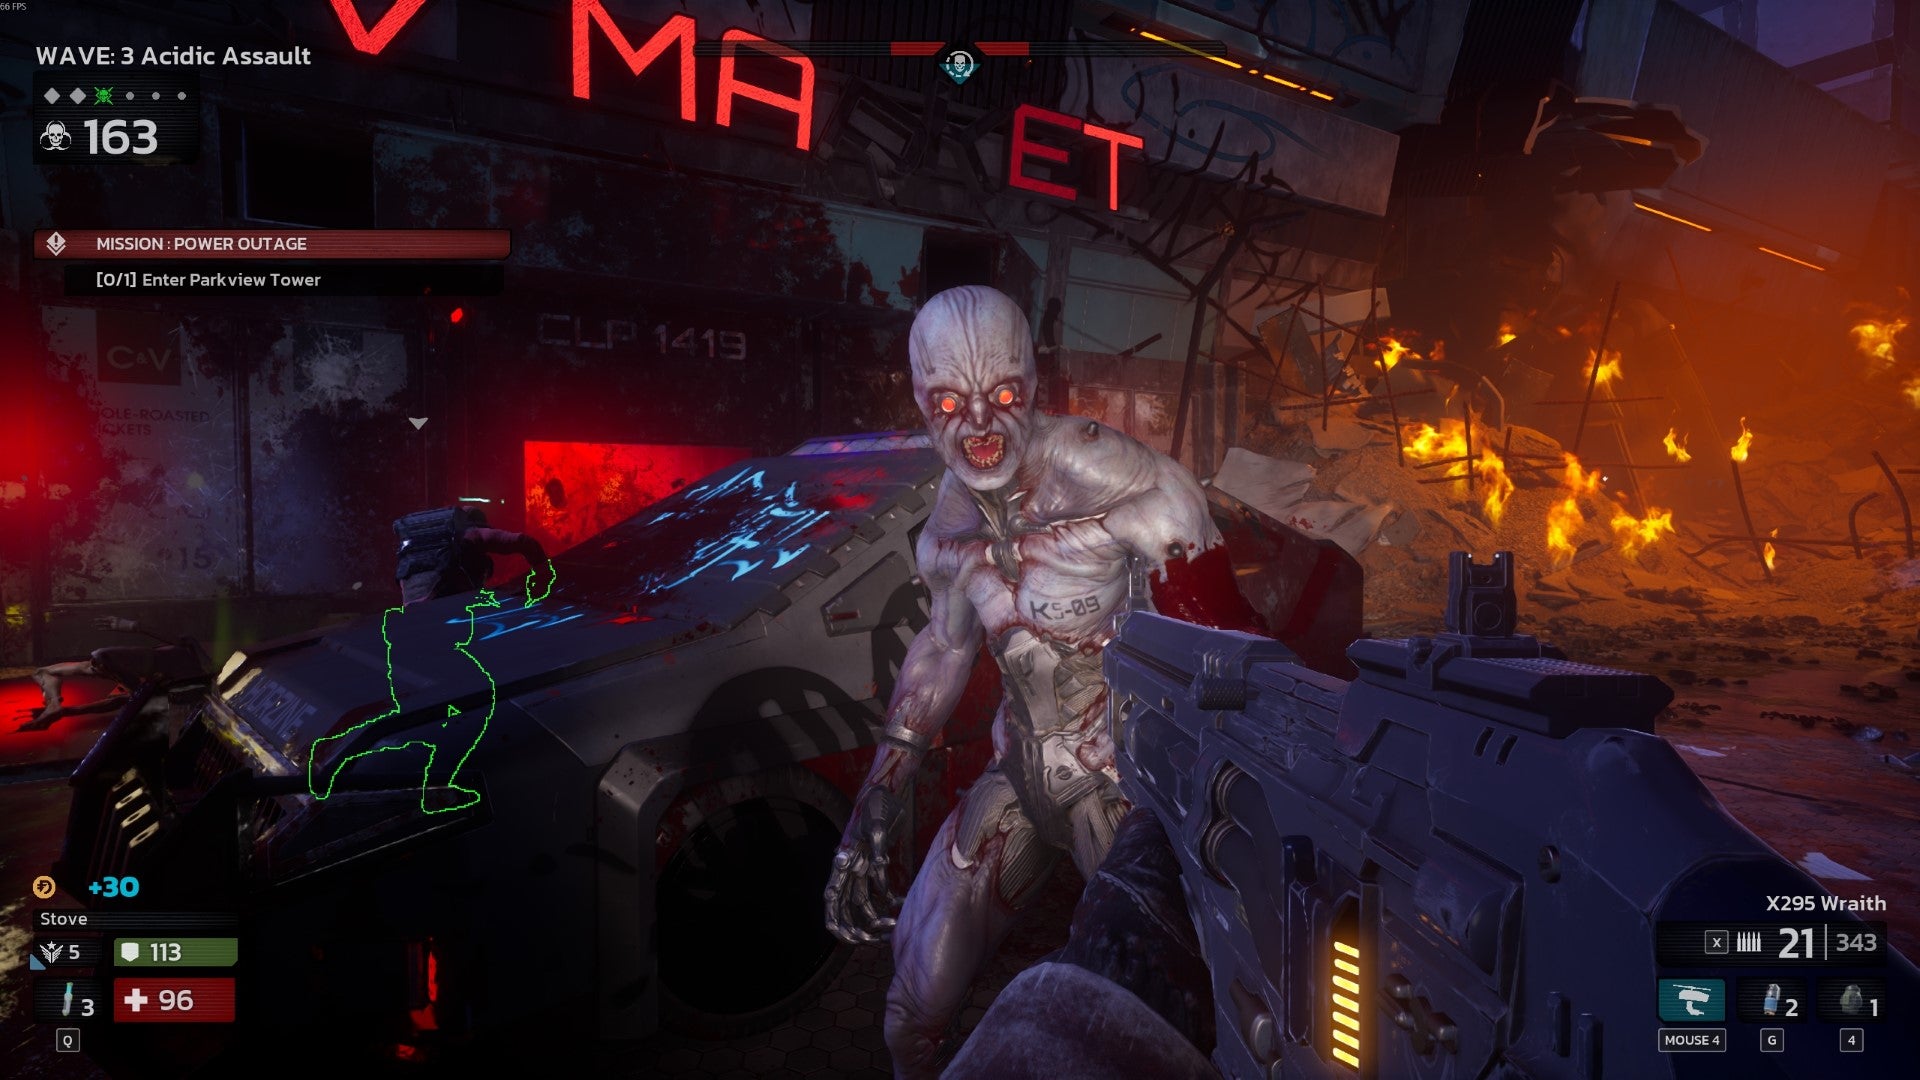
Image credit:Rock Paper Shotgun/Tripwire Interactive

Killing Floor 3’s weighty gunplay sustains it for a time, but papers over a dull progression system and a lack of new ideas.
- Developer: Tripwire Interactive
- Publisher: Tripwire Interactive
- Release: July 24th 2025
- On: Windows
- From: Steam , Epic Games Store
- Price: $40/£35/€40
- Reviewed on: Intel Core i9-10900K, 32GB RAM, Nvidia RTX 3090, Windows 10
Killing Floor 3 has an excellent headshot. It’s the kind of frisson-inducing gun/baddie interaction that most FPS games strive for and fail: somehow crisp and explosive at once, like popping a balloon full of wedding china. There’s a deliciously tangible sense that a metal cylinder has launched out of your hands at several times the speed of sound and shattered the entire existence of the snarling cannibal clone in front of you, a tactile treat that KF3’s waves of mutant men will happily feed you over and over again. Bloody good headshot, I say.
I just wish that, after hours and hours, this game would produce something else that excites as much as its dome-blasting. Or, at least, balances that instant gratification with more enduring reasons to keep tooling up and shipping out. Instead, it ends up coasting on gunfeel, and when asked for something new or something fresh, can only point towards pages of tedious stats.
Out in the field, this sequel treads the same bloodied ground as the first two games: workmanlike shooting of increasingly gruesome Zeds, with a cash-for-gore system that enables the buying of heavier weaponry between waves. Much grumbling has occurred over the switch from the perk system of old to KF3’s new specialists. (Previously, any cosmetic player skins could be matched with any perk, or class. But now each Sharpshooter, Medic and so on is a hero shooter-style named character.)
Yet besides the fact that developers Tripwire plan to undo this change post-release , locking perks to personalities doesn’t actually interfere with the business of Zed slaying to any significant degree. It’d be nice to play Firebug without hearing the Firebug character’s constant, sub-Marvel quipping, sure. But the only real change is each specialist’s rechargeable ultimate ability, such as the Commando’s acid-spitting drone buddy or the Ninja’s grapple gun, and those are only good for a few kills per round, out of potentially hundreds that need clearing.
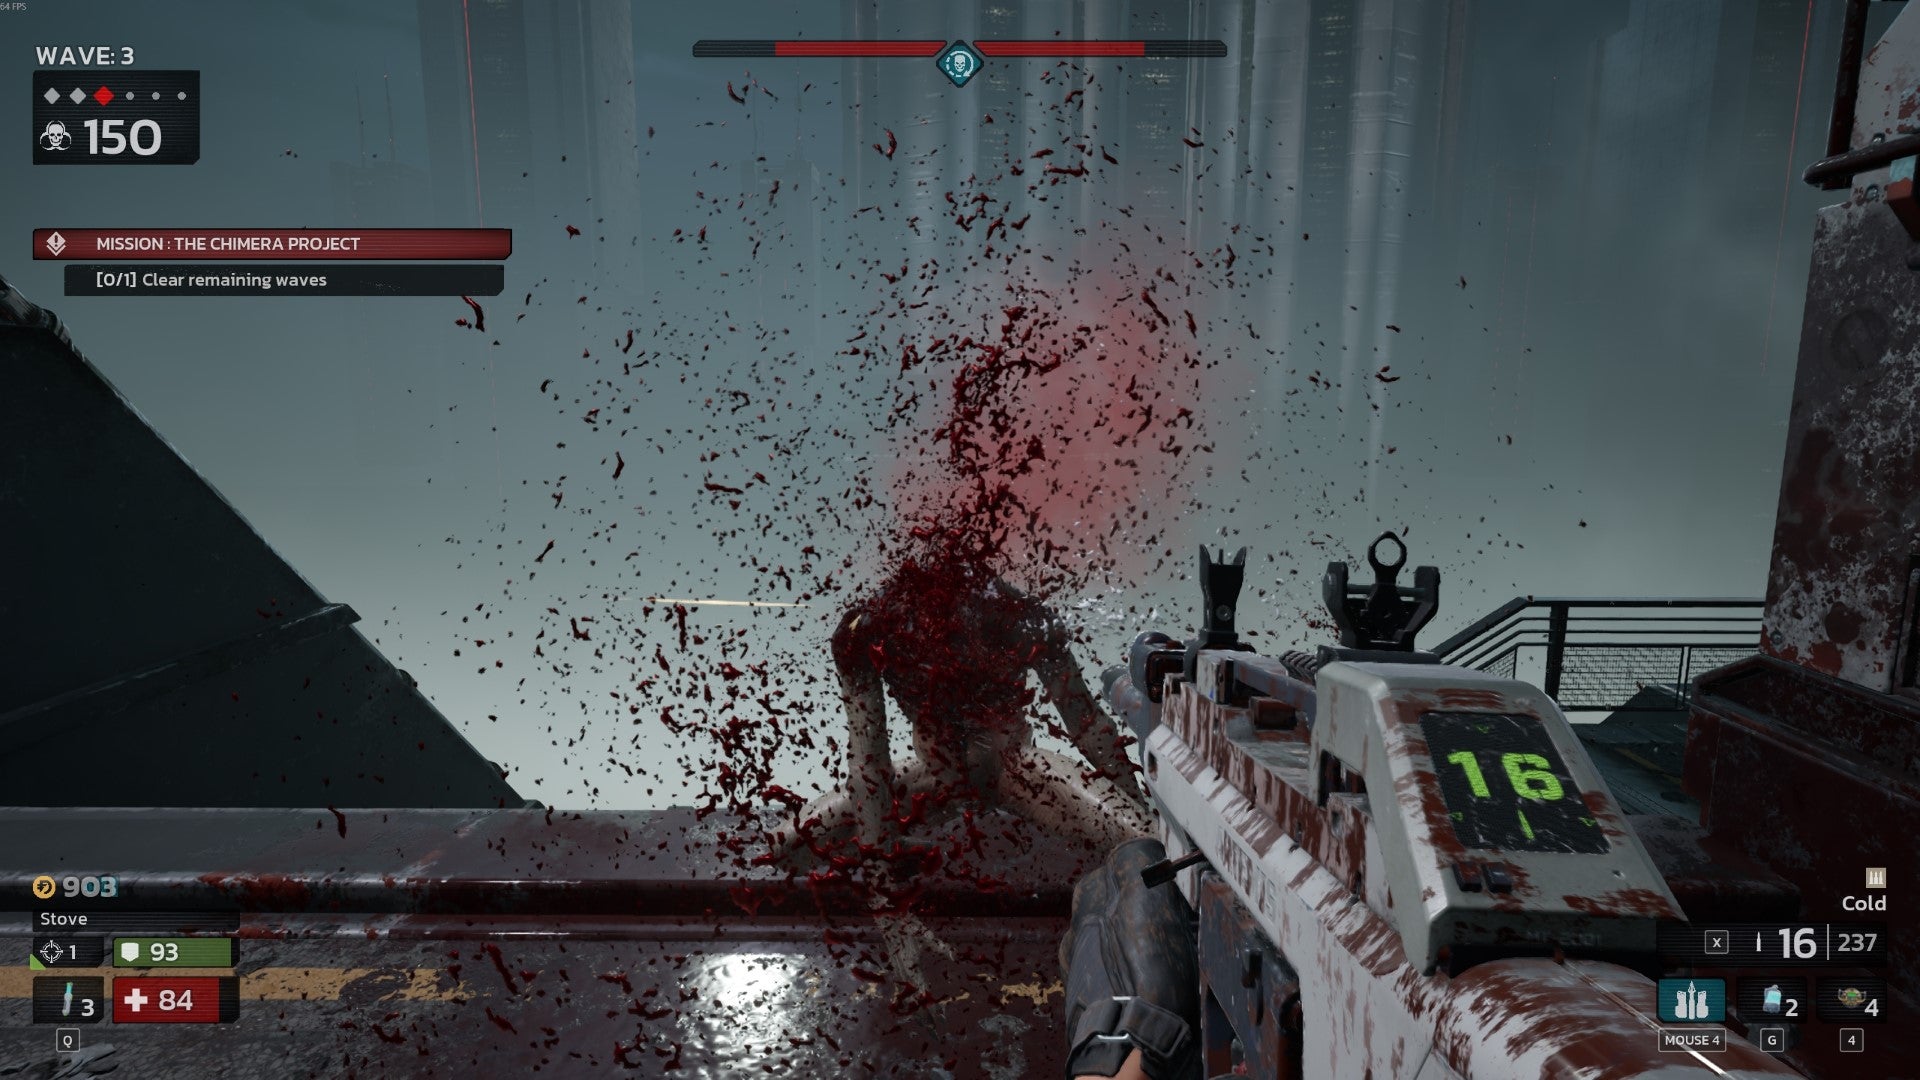
Image credit:Rock Paper Shotgun/Tripwire Interactive
If anything, the specialists are a missed opportunity to make this co-op shooter more co-operative. I’ve spent over a hundred hours in the original Killing Floor , much of it stabbing medical syringes into teammates or helping to weld a door shut as a horde, roughly the size of the population of Wales, batters into the other side. There’s little of that here. Medics are medics, and the Engineer can erect ziplines or open armour lockers for pals to use, but as teamplay has become literally more specialised, it’s also become rarer overall. Most squad comps therefore look like a band with five lead guitarists and one poor Medic on drums, where everyone – including Medics and Engineers, in fact – gets a highly lethal ultimate and a selection of damage-boosting upgrades that make solo play far less risky.
Granted, hardly anyone is daft enough to wander off during a boss fight, and most players have the wherewithal to gang up the chunkier late-wave specimens. The Zeds themselves, though, are an overly familiar bunch at this point. There are fewer total varieties than in Killing Floor 2 and, outside of the three new bosses, none that haven’t appeared before. All three of those climax monsters, meanwhile fit a broadly similar template of ‘Big thing wot jumps at you’. Tripwire have tried to spice up fights by teaching the old Zeds new tricks, most successfully with the flame-chucking Husk: he’ll now jetpack up to vantage points where he can lob fireballs down like a fleshy mortar, deviously escaping the effective range of shotguns and launchers. Unfortunately, that’s the only example I can think of where new Zed tactics might force a change in your own. In the end, Killing Floor 3’s shooting is precision-heavy, yet straightforward: all problems are best solved by booming away at weakpoints, be they the Husk’s unstable backpack or, more likely, a head.


Like I say, there are plenty of occasions when this simple act of clicking on body parts will burst the dopamine banks. Flattening an entire crowd of specimens with successive on-target bang-bang-bangs, say. Or spinning around and reflexively snap-shooting a Zed whose teeth were closing the final few inches on your neck. And it’s not just the guns either: both of the Ninja’s sword options are impressively weighty, and capable of bisecting most Zeds (with almost Metal Gear Rising: Revengeance levels of cutting accuracy) in a single slash. Some of OG Killing Floor’s horror tension is lost with the addition of I-frame bumsliding, though you’re hardly acrobatic, and even sprinting has a sluggishness to it that keeps standing and fighting a more suitably inevitable prospect.
There are, sadly, two ways in which KF3 undermines its own gunplay. The bosses are, excuse the phrase, a big one. Even on normal difficulty, they’re such stolidly absorbent bullet sponges that all the joy of bursting abominations with well-placed shots completely evaporates, replaced by rhythmless, hipfiring, full-auto chaos. These fights are challenging, but they’re rarely fun.
Second is the inconsistency with which specific firearms deliver that headshot satisfaction. Tripwire are up there with the best in the business at crafting arm-breaking rifles and bone-shaking shotguns, and KF3 is rich in both. But pick a specialist that practices in SMGs or beam weapons, and you’ll find them noticeably lacking in the same kind of multisensory punch. Medics, in particular, are forced to start with a dinky machine pistol with all the heft of a Happy Meal toy, and only marginally more life-ending potential than the accompanying chips.
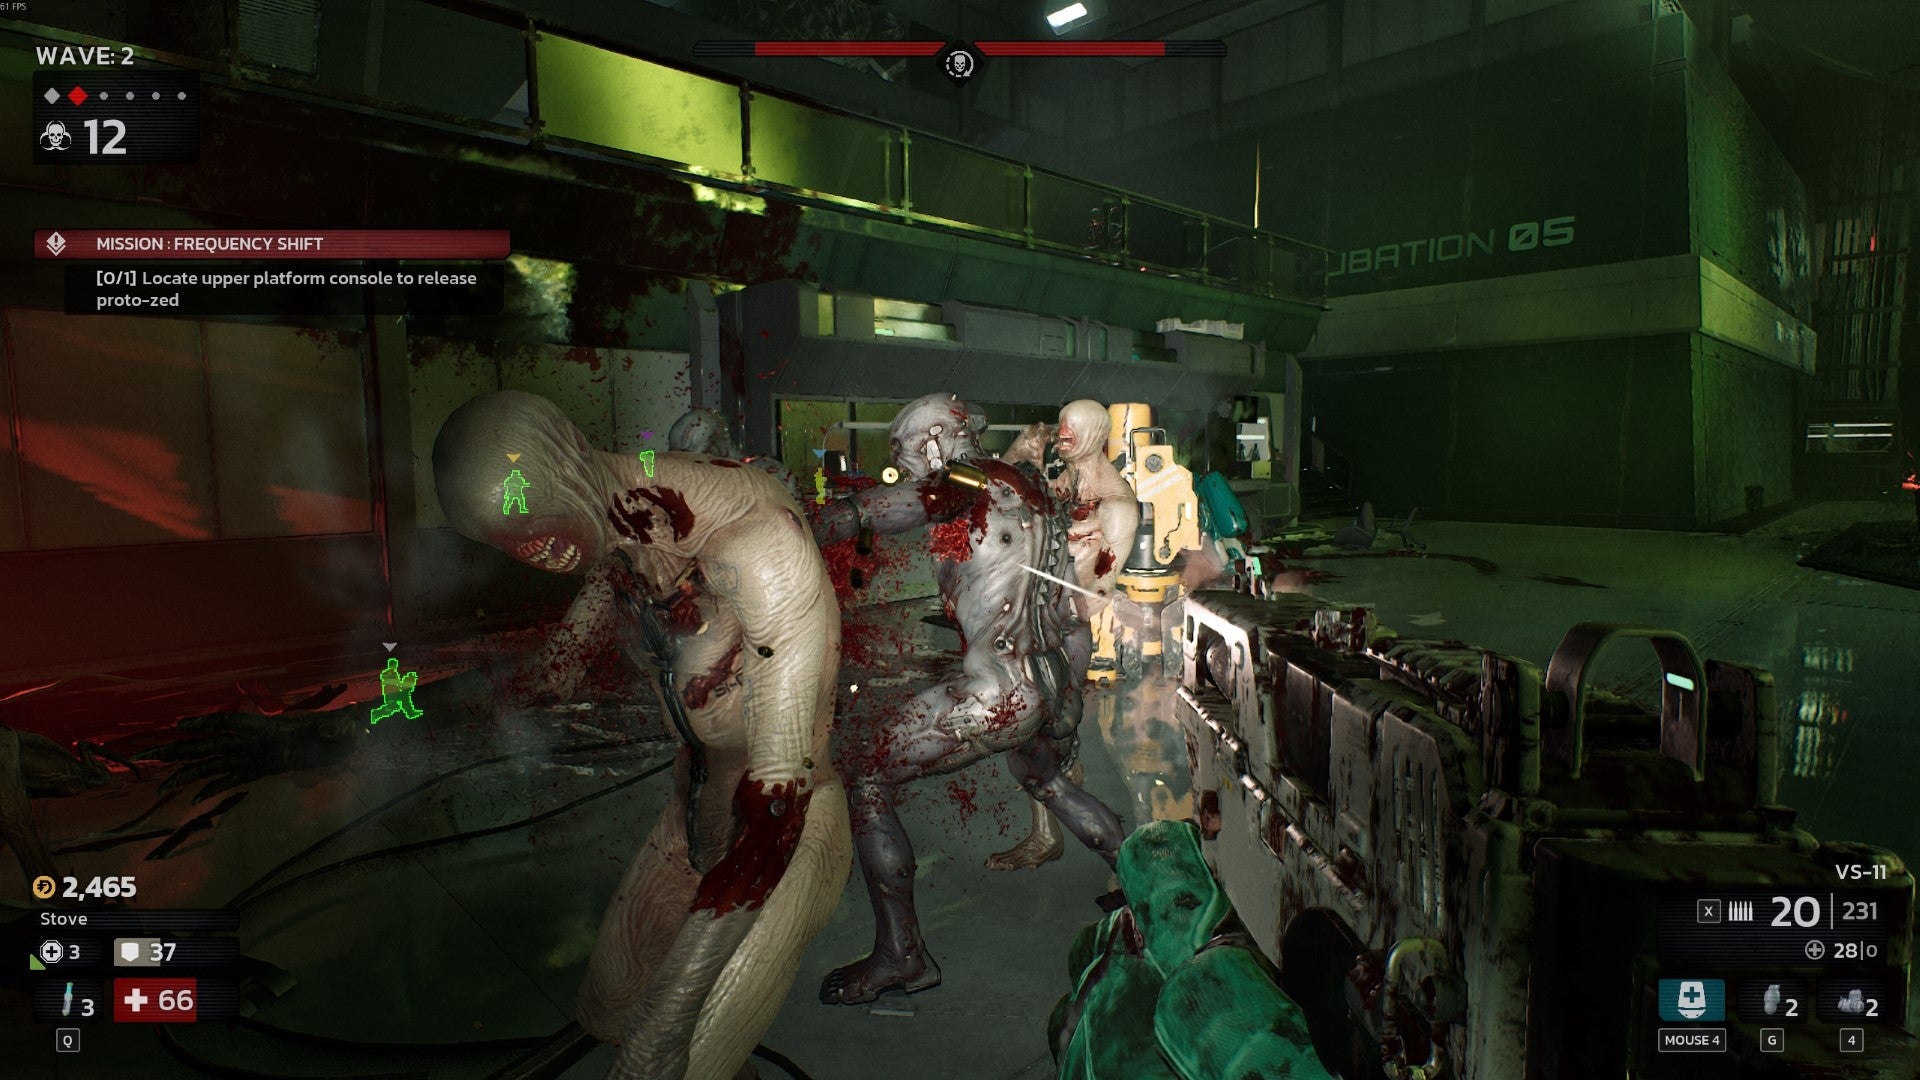
Image credit:Rock Paper Shotgun/Tripwire Interactive
KF3 actually has an answer for its own underwhelming guns: an attachment crafting system. The idea is that just as you earn XP to level up perks, you gather crafting materials across each game, then spend them back at base on stat-boosting hardware customisations. You won’t necessarily spawn in with these tailored pieces, but they’ll take the place of the random upgraded guns you’d otherwise find in the inter-round shop.
I’ve no problem with the general concept, and have happily slapped better sights or extended mags on the weapons I usually buy anyway. But the available add-ons are a weird mix of clear upgrades and gadgets that make such boringly minute stat shifts that I can barely muster the enthusiasm to give an example. How about a laser sight that adds a whole 4% accuracy? Think carefully, though, because it’s either that or a foregrip that only adds 2%, but has a widowmaking -5% recoil bonus.
There are maybe some dedicated, max-difficulty sickos to whom this crafting malarkey might provide an edge. For the rest of us, it’s busywork, with no sense that a juicy powerspike is on the cards if you can just gather up a few more jars of clone goo. And frankly, it’s hard not to feel the same about the perk upgrades too. A lot of these do deliver much more generous bonuses, like boosting your grenade or healing syringe capacity – potential lifesavers, in some scenarios – but moving up through the ranks requires so much experience, and passing through so many more junk skills that only provide measly percentage boosts to existing abilities, that I can’t see them as a reason to keep playing in themselves.
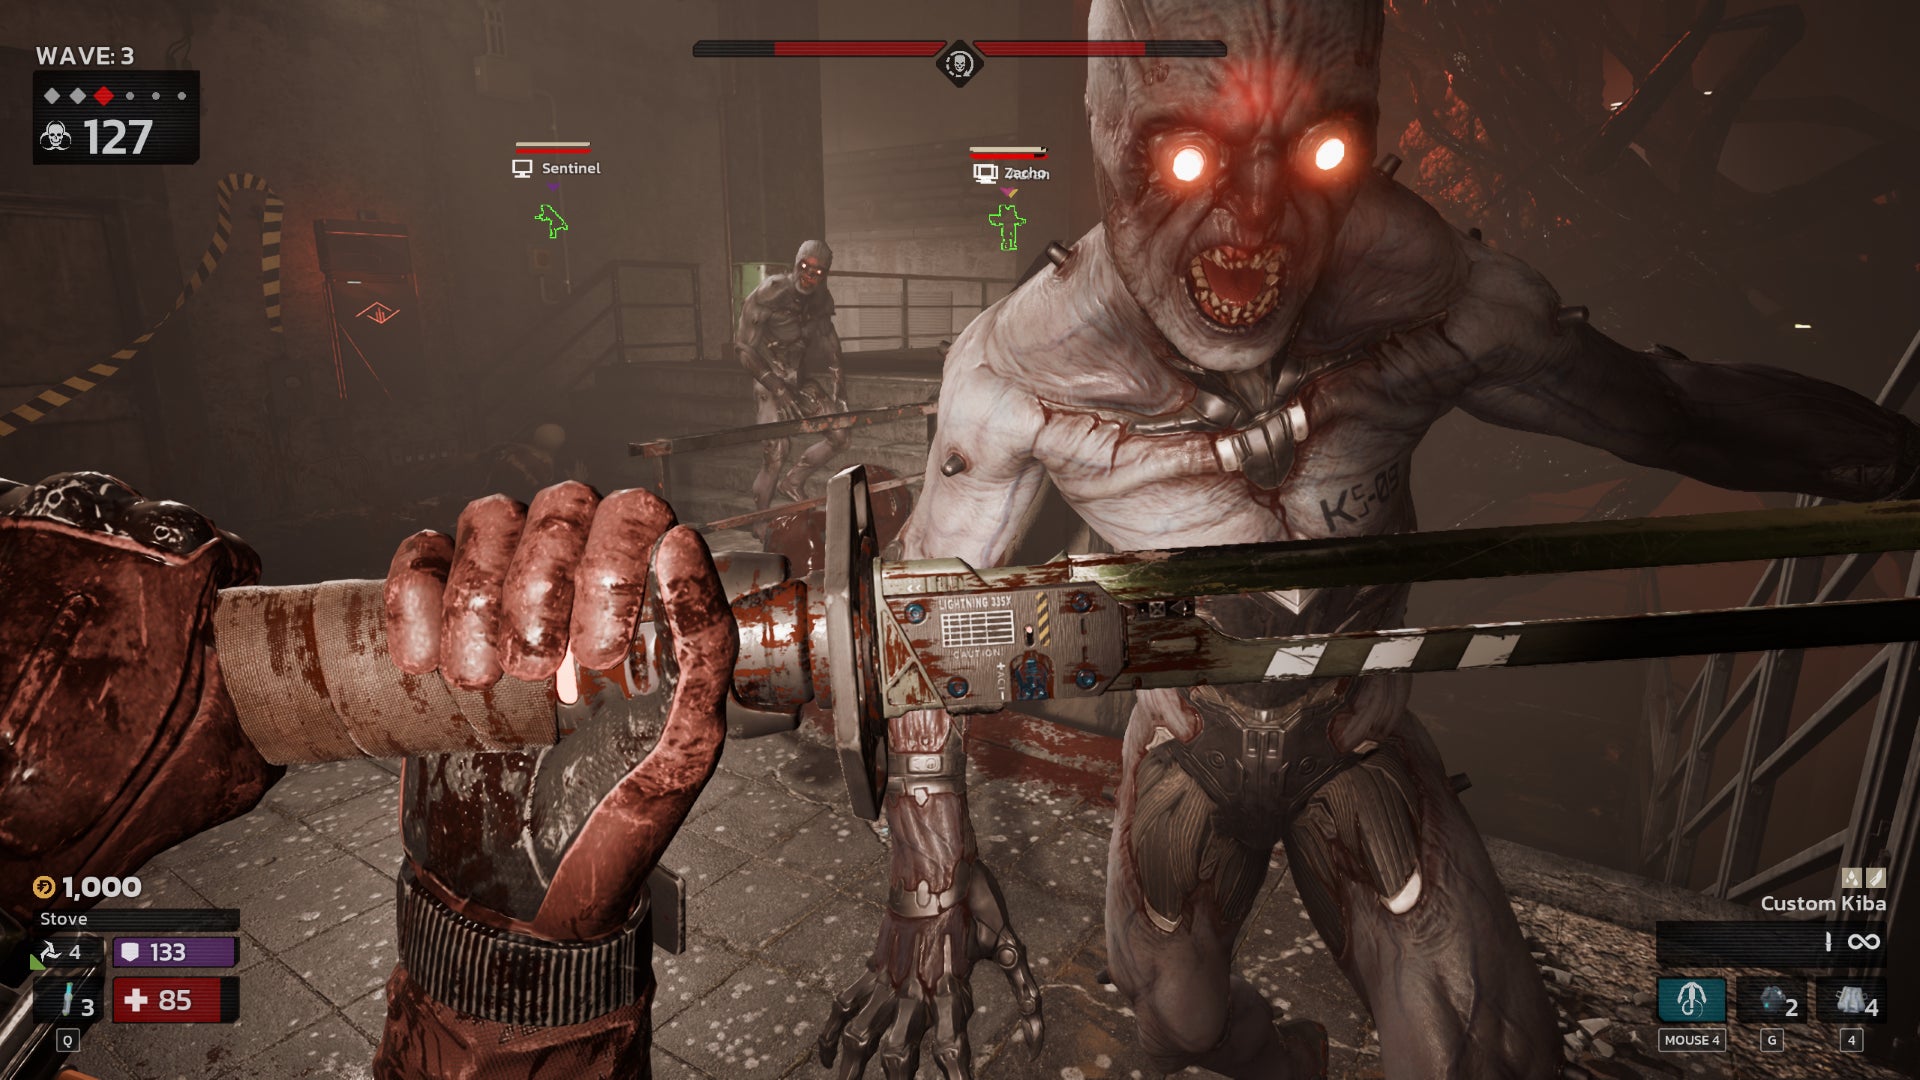
Image credit:Rock Paper Shotgun/Tripwire Interactive
Also feeding the ennui is a medley of technical issues. Performance is languid – I get between 45-60fps using High quality on my RTX 3090, once the god-king of graphics cards , and that’s just on 1440p with Balanced DLSS . On top of that, it’s not uncommon to get sudden, substantial stutters when an enemy wave spawns in. Zeds themselves are frequent glitch victims, too: I’ve seen them pop into being next to spawnpoint vents instead of crawling out, fall through scenery after being nonlethally bashed backwards, and briefly snap into the dreaded A-pose when navigating uneven terrain. “Poor things”, I muse, racking a shotgun with a -3% spread choke.
I appreciate that I’m coming to Killing Floor 3 with the series’ staples firmly entrenched, if not especially fresh, in my mind. Perhaps if all this dosh-earning clone slaughter is new to you, its (mostly) agreeable heaviness will sustain you for longer.
Personally, I look at it and see a game that only barely iterates, even slipping backwards on gun design and tech fidelity, and that’s just not an appealing approach during what often seems like a golden age for more ambitious co-op shooters. Helldivers 2 deftly balances large-scale warfare with slapstick comedy. Warhammer 40,000: Darktide is a deceptively deep and immaculately presented horde brawler. And Deep Rock Galactic has good-natured teamplay down to a science, thanks in part to its own clever arsenal of sci-fi tools and weaponry. Killing Floor 3? That has a good headshot and a plus-2% foregrip.
Find out how we conduct our reviews by reading our review policy .

Killing Floor 3
PS5 , Xbox Series X/S , PC
Rock Paper Shotgun is better when you sign in
Sign in and join us on our journey to discover strange and compelling PC games.

All 75 Arc Raiders Blueprints and where to get them
These areas have the highest chance of giving you Blueprints

Image credit:Rock Paper Shotgun/Embark Studios

Looking for more Arc Raiders Blueprints? It’s a special day when you find a Blueprint, as they’re among the most valuable items in Arc Raiders. If you find a Blueprint that you haven’t already found, then you must make sure you hold onto it at all costs, because Blueprints are the key to one of the most important and powerful systems of meta-progression in the game.
This guide aims to be the very best guide on Blueprints you can find, starting with a primer on what exactly they are and how they work in Arc Raiders, before delving into exactly where to get Blueprints and the very best farming spots for you to take in your search.
We’ll also go over how to get Blueprints from other unlikely activities, such as destroying Surveyors and completing specific quests. And you’ll also find the full list of all 75 Blueprints in Arc Raiders on this page (including the newest Blueprints added with the Cold Snap update , such as the Deadline Blueprint and Firework Box Blueprint), giving you all the information you need to expand your own crafting repertoire.
In this guide:
- What are Blueprints in Arc Raiders?
- Full Blueprint list: All crafting recipes
- Where to find Blueprints in Arc Raiders Blueprints obtained from quests Blueprints obtained from Trials Best Blueprint farming locations

What are Blueprints in Arc Raiders?
Blueprints in Arc Raiders are special items which, if you manage to extract with them, you can expend to permanently unlock a new crafting recipe in your Workshop. If you manage to extract from a raid with an Anvil Blueprint, for example, you can unlock the ability to craft your very own Anvil Pistol, as many times as you like (as long as you have the crafting materials).
To use a Blueprint, simply open your Inventory while in the lobby, then right-click on the Blueprint and click “Learn And Consume” . This will permanently unlock the recipe for that item in your Workshop. As of the Stella Montis update, there are allegedly 75 different Blueprints to unlock - although only 68 are confirmed to be in the game so far. You can see all the Blueprints you’ve found and unlocked by going to the Workshop menu, and hitting “R” to bring up the Blueprint screen.
It’s possible to find duplicates of past Blueprints you’ve already unlocked. If you find these, then you can either sell them, or - if you like to play with friends - you can take it into a match and gift it to your friend so they can unlock that recipe for themselves. Another option is to keep hold of them until the time comes to donate them to the Expedition.
Full Blueprint list: All crafting recipes
Below is the full list of all the Blueprints that are currently available to find in Arc Raiders, and the crafting recipe required for each item:
| Blueprint | Type | Recipe | Crafted At |
|---|---|---|---|
| Bettina | Weapon | 3x Advanced Mechanical Components 3x Heavy Gun Parts 3x Canister | Gunsmith 3 |
| Blue Light Stick | Quick Use | 3x Chemicals | Utility Station 1 |
| Aphelion | Weapon | 3x Magnetic Accelerator 3x Complex Gun Parts 1x Matriarch Reactor | Gunsmith 3 |
| Combat Mk. 3 (Flanking) | Augment | 2x Advanced Electrical Components 3x Processor | Gear Bench 3 |
| Combat Mk. 3 (Aggressive) | Augment | 2x Advanced Electrical Components 3x Processor | Gear Bench 3 |
| Complex Gun Parts | Material | 2x Light Gun Parts 2x Medium Gun Parts 2x Heavy Gun Parts | Refiner 3 |
| Fireworks Box | Quick Use | 1x Explosive Compound 3x Pop Trigger | Explosives Station 2 |
| Gas Mine | Mine | 4x Chemicals 2x Rubber Parts | Explosives Station 1 |
| Green Light Stick | Quick Use | 3x Chemicals | Utility Station 1 |
| Pulse Mine | Mine | 1x Crude Explosives 1x Wires | Explosives Station 1 |
| Seeker Grenade | Grenade | 1x Crude Explosives 2x ARC Alloy | Explosives Station 1 |
| Looting Mk. 3 (Survivor) | Augment | 2x Advanced Electrical Components 3x Processor | Gear Bench 3 |
| Angled Grip II | Mod | 2x Mechanical Components 3x Duct Tape | Gunsmith 2 |
| Angled Grip III | Mod | 2x Mod Components 5x Duct Tape | Gunsmith 3 |
| Hullcracker | Weapon | 1x Magnetic Accelerator 3x Heavy Gun Parts 1x Exodus Modules | Gunsmith 3 |
| Launcher Ammo | Ammo | 5x Metal Parts 1x Crude Explosives | Workbench 1 |
| Anvil | Weapon | 5x Mechanical Components 5x Simple Gun Parts | Gunsmith 2 |
| Anvil Splitter | Mod | 2x Mod Components 3x Processor | Gunsmith 3 |
| ??? | ??? | ??? | ??? |
| Barricade Kit | Quick Use | 1x Mechanical Components | Utility Station 2 |
| Blaze Grenade | Grenade | 1x Explosive Compound 2x Oil | Explosives Station 3 |
| Bobcat | Weapon | 3x Advanced Mechanical Components 3x Light Gun Parts | Gunsmith 3 |
| Osprey | Weapon | 2x Advanced Mechanical Components 3x Medium Gun Parts 7x Wires | Gunsmith 3 |
| Burletta | Weapon | 3x Mechanical Components 3x Simple Gun Parts | Gunsmith 1 |
| Compensator II | Mod | 2x Mechanical Components 4x Wires | Gunsmith 2 |
| Compensator III | Mod | 2x Mod Components 8x Wires | Gunsmith 3 |
| Defibrillator | Quick Use | 9x Plastic Parts 1x Moss | Medical Lab 2 |
| ??? | ??? | ??? | ??? |
| Equalizer | Weapon | 3x Magnetic Accelerator 3x Complex Gun Parts 1x Queen Reactor | Gunsmith 3 |
| Extended Barrel | Mod | 2x Mod Components 8x Wires | Gunsmith 3 |
| Extended Light Mag II | Mod | 2x Mechanical Components 3x Steel Spring | Gunsmith 2 |
| Extended Light Mag III | Mod | 2x Mod Components 5x Steel Spring | Gunsmith 3 |
| Extended Medium Mag II | Mod | 2x Mechanical Components 3x Steel Spring | Gunsmith 2 |
| Extended Medium Mag III | Mod | 2x Mod Components 5x Steel Spring | Gunsmith 3 |
| Extended Shotgun Mag II | Mod | 2x Mechanical Components 3x Steel Spring | Gunsmith 2 |
| Extended Shotgun Mag III | Mod | 2x Mod Components 5x Steel Spring | Gunsmith 3 |
| Remote Raider Flare | Quick Use | 2x Chemicals 4x Rubber Parts | Utility Station 1 |
| Heavy Gun Parts | Material | 4x Simple Gun Parts | Refiner 2 |
| Venator | Weapon | 2x Advanced Mechanical Components 3x Medium Gun Parts 5x Magnet | Gunsmith 3 |
| Il Toro | Weapon | 5x Mechanical Components 6x Simple Gun Parts | Gunsmith 1 |
| Jolt Mine | Mine | 1x Electrical Components 1x Battery | Explosives Station 2 |
| Explosive Mine | Mine | 1x Explosive Compound 1x Sensors | Explosives Station 3 |
| Jupiter | Weapon | 3x Magnetic Accelerator 3x Complex Gun Parts 1x Queen Reactor | Gunsmith 3 |
| Light Gun Parts | Material | 4x Simple Gun Parts | Refiner 2 |
| Lightweight Stock | Mod | 2x Mod Components 5x Duct Tape | Gunsmith 3 |
| Lure Grenade | Grenade | 1x Speaker Component 1x Electrical Components | Utility Station 2 |
| Medium Gun Parts | Material | 4x Simple Gun Parts | Refiner 2 |
| Torrente | Weapon | 2x Advanced Mechanical Components 3x Medium Gun Parts 6x Steel Spring | Gunsmith 3 |
| Muzzle Brake II | Mod | 2x Mechanical Components 4x Wires | Gunsmith 2 |
| Muzzle Brake III | Mod | 2x Mod Components 8x Wires | Gunsmith 3 |
| Padded Stock | Mod | 2x Mod Components 5x Duct Tape | Gunsmith 3 |
| Shotgun Choke II | Mod | 2x Mechanical Components 4x Wires | Gunsmith 2 |
| Shotgun Choke III | Mod | 2x Mod Components 8x Wires | Gunsmith 3 |
| Shotgun Silencer | Mod | 2x Mod Components 8x Wires | Gunsmith 3 |
| Showstopper | Grenade | 1x Advanced Electrical Components 1x Voltage Converter | Explosives Station 3 |
| Silencer I | Mod | 2x Mechanical Components 4x Wires | Gunsmith 2 |
| Silencer II | Mod | 2x Mod Components 8x Wires | Gunsmith 3 |
| Snap Hook | Quick Use | 2x Power Rod 3x Rope 1x Exodus Modules | Utility Station 3 |
| Stable Stock II | Mod | 2x Mechanical Components 3x Duct Tape | Gunsmith 2 |
| Stable Stock III | Mod | 2x Mod Components 5x Duct Tape | Gunsmith 3 |
| Tagging Grenade | Grenade | 1x Electrical Components 1x Sensors | Utility Station 3 |
| Tempest | Weapon | 3x Advanced Mechanical Components 3x Medium Gun Parts 3x Canister | Gunsmith 3 |
| Trigger Nade | Grenade | 2x Crude Explosives 1x Processor | Explosives Station 2 |
| Vertical Grip II | Mod | 2x Mechanical Components 3x Duct Tape | Gunsmith 2 |
| Vertical Grip III | Mod | 2x Mod Components 5x Duct Tape | Gunsmith 3 |
| Vita Shot | Quick Use | 2x Antiseptic 1x Syringe | Medical Lab 3 |
| Vita Spray | Quick Use | 3x Antiseptic 1x Canister | Medical Lab 3 |
| Vulcano | Weapon | 1x Magnetic Accelerator 3x Heavy Gun Parts 1x Exodus Modules | Gunsmith 3 |
| Wolfpack | Grenade | 2x Explosive Compound 2x Sensors | Explosives Station 3 |
| Red Light Stick | Quick Use | 3x Chemicals | Utility Station 1 |
| Smoke Grenade | Grenade | 14x Chemicals 1x Canister | Utility Station 2 |
| Deadline | Mine | 3x Explosive Compound 2x ARC Circuitry | Explosives Station 3 |
| Trailblazer | Grenade | 1x Explosive Compound 1x Synthesized Fuel | Explosives Station 3 |
| Tactical Mk. 3 (Defensive) | Augment | 2x Advanced Electrical Components 3x Processor | Gear Bench 3 |
| Tactical Mk. 3 (Healing) | Augment | 2x Advanced Electrical Components 3x Processor | Gear Bench 3 |
| Yellow Light Stick | Quick Use | 3x Chemicals | Utility Station 1 |
Note: The missing Blueprints in this list likely have not actually been added to the game at the time of writing, because none of the playerbase has managed to find any of them. As they are added to the game, I will update this page with the most relevant information so you know exactly how to get all 75 Arc Raiders Blueprints.
Where to find Blueprints in Arc Raiders
Below is a list of all containers, modifiers, and events which maximise your chances of finding Blueprints:
- Certain quests reward you with specific Blueprints .
- Completing Trials has a high chance of offering Blueprints as rewards.
- Surveyors have a decent chance of dropping Blueprints on death.
- High loot value areas tend to have a greater chance of spawning Blueprints.
- Night Raids and Storms may increase rare Blueprint spawn chances in containers.
- Containers with higher numbers of items may have a higher tendency to spawn Blueprints. As a result, Blue Gate (which has many “large” containers containing multiple items) may give you a higher chance of spawning Blueprints.
- Raider containers (Raider Caches, Weapon Boxes, Medical Bags, Grenade Tubes) have increased Blueprint drop rates. As a result, the Uncovered Caches event gives you a high chance of finding Blueprints.
- Security Lockers have a higher than average chance of containing Blueprints.
- Certain Blueprints only seem to spawn under specific circumstances: Tempest Blueprint only spawns during Night Raid events. Vulcano Blueprint only spawns during Hidden Bunker events. Jupiter and Equaliser Blueprints only spawn during Harvester events.

Raider Caches, Weapon Boxes, and other raider-oriented container types have a good chance of offering Blueprints. |Image credit:Rock Paper Shotgun/Embark Studios
Blueprints have a very low chance of spawning in any container in Arc Raiders, around 1-2% on average. However, there is a higher chance of finding Blueprints in particular container types. Specifically, you can find more Blueprints in Raider containers and security lockers.
Beyond this, if you’re looking for Blueprints you should focus on regions of the map which are marked as having particularly high-value loot. Areas such as the Control Tower in Dam Battlegrounds, the Arrival and Departure Buildings in Spaceport, and Pilgrim’s Peak in Blue Gate all have a better-than-average chance of spawning Blueprints somewhere amongst all their containers. Night Raids and Electromagnetic Storm events also increase the drop chances of certain Blueprints .
In addition to these containers, you can often loot Blueprints from destroyed Surveyors - the largest of the rolling ball ARC. Surveyors are more commonly found on the later maps - Spaceport and Blue Gate - and if one spawns in your match, you’ll likely see it by the blue laser beam that it casts into the sky while “surveying”.
Surveyors are quite well-armoured and will very speedily run away from you once it notices you, but if you can take one down then make sure you loot all its parts for a chance of obtaining certain unusual Blueprints.
Blueprints obtained from quests
One way in which you can get Blueprints is by completing certain quests for the vendors in Speranza. Some quests will reward you with a specific item Blueprint upon completion, so as long as you work through all the quests in Arc Raiders, you are guaranteed those Blueprints.
Here is the full list of all Blueprints you can get from quest rewards:
- Trigger Nade Blueprint: Rewarded after completing “Sparks Fly”.
- Lure Grenade Blueprint: Rewarded after completing “Greasing Her Palms”.
- Burletta Blueprint: Rewarded after completing “Industrial Espionage”.
- Hullcracker Blueprint (and Launcher Ammo Blueprint): Rewarded after completing “The Major’s Footlocker”.
Alas, that’s only 4 Blueprints out of a total of 75 to unlock, so for the vast majority you will need to find them yourself during a raid. If you’re intent on farming Blueprints, then it’s best to equip yourself with cheap gear in case you lose it, but don’t use a free loadout because then you won’t get a safe pocket to stash any new Blueprint you find. No pain in Arc Raiders is sharper than failing to extract with a new Blueprint you’ve been after for a dozen hours already.

One of the best ways to get Blueprints is by hitting three stars on all five Trials every week. |Image credit:Rock Paper Shotgun/Embark Studios
Blueprints obtained from Trials
One of the very best ways to get Blueprints is as rewards for completing Trials in Arc Raiders. Trials are unlocked from Level 15 onwards, and allow you to earn rewards by focusing on certain tasks over the course of several raids. For example, one Trial might task you with dealing damage to Hornets, while another might challenge you to loot Supply Drops.
Trials refresh on a weekly basis, with a new week bringing five new Trials. Each Trial can offer up to three rewards after passing certain score milestones, and it’s possible to receive very high level loot from these reward crates - including Blueprints. So if you want to unlock as many Blueprints as possible, you should make a point of completing as many Trials as possible each week.
Best Blueprint farming locations
The very best way to get Blueprints is to frequent specific areas of the maps which combine high-tier loot pools with the right types of containers to search. Here are my recommendations for where to find Blueprints on every map, so you can always keep the search going for new crafting recipes to unlock.

Image credit:Rock Paper Shotgun/Embark Studios
Dam Battlegrounds
The best places to farm Blueprints on Dam Battlegrounds are the Control Tower, Power Generation Complex, Ruby Residence, and Pale Apartments . The first two regions, despite only being marked on the map as mid-tier loot, contain a phenomenal number of containers to loot. The Control Tower can also contain a couple of high-tier Security Lockers - though of course, you’ll need to have unlocked the Security Breach skill at the end of the Survival tree.
There’s also a lot of reporting amongst the playerbase that the Residential areas in the top-left of the map - Pale Apartments and Ruby Residence - give you a comparatively strong chance of finding Blueprints. Considering their size, there’s a high density of containers to loot in both locations, and they also have the benefit of being fairly out of the way. So you’re more likely to have all the containers to yourself.
Buried City
The best Blueprint farming locations on Buried City are the Santa Maria Houses, Grandioso Apartments, Town Hall, and the various buildings of the New District . Grandioso Apartments has a lower number of containers than the rest, but a high chance of spawning weapon cases - which have good Blueprint drop rates. The others are high-tier loot areas, with plenty of lootable containers - including Security Lockers.
Spaceport
The best places to find Blueprints on Spaceport are the Arrival and Departure Buildings, as well as Control Tower A6 and the Launch Towers . All these areas are labelled as high-value loot regions, and many of them are also very handily connected to one another by the Spaceport wall, which you can use to quickly run from one area to the next. At the tops of most of these buildings you’ll find at least one Security Locker, so this is an excellent farming route for players looking to find Blueprints.
The downside to looting Blueprints on Spaceport is that all these areas are hotly contested, particularly in Duos and Squads. You’ll need to be very focused and fast in order to complete the full farming route.

Image credit:Rock Paper Shotgun/Embark Studios
Blue Gate
Blue Gate tends to have a good chance of dropping Blueprints, potentially because it generally has a high number of containers which can hold lots of items; so there’s a higher chance of a Blueprint spawning in each container. In my experience, the best Blueprint farming spots on Blue Gate are Pilgrim’s Peak, Raider’s Refuge, the Ancient Fort, and the Underground Complex beneath the Warehouse .
All of these areas contain a wealth of containers to loot. Raider’s Refuge has less to loot, but the majority of the containers in and around the Refuge are raider containers, which have a high chance of containing Blueprints - particularly during major events.
Stella Montis
On the whole, Stella Montis seems to have a very low drop rate for Blueprints (though a high chance of dropping other high-tier loot). If you do want to try farming Blueprints on this map, the best places to find Blueprints in Stella Montis are Medical Research, Assembly Workshop, and the Business Center . These areas have the highest density of containers to loot on the map.
In addition to this, the Western Tunnel has a few different Security Lockers to loot, so while there’s very little to loot elsewhere in this area of the map, it’s worth hitting those Security Lockers if you spawn there at the start of a match.
That wraps up this primer on how to get all the Blueprints in Arc Raiders as quickly as possible. With the Expedition system constantly resetting a large number of players’ Blueprints, it’s more important than ever to have the most up-to-date information on where to find all these Blueprints.
While you’re here, be sure to check out our Arc Raiders best guns tier list , as well as our primers on the best skills to unlock and all the different Field Depot locations on every map.

ARC Raiders
PS5 , Xbox Series X/S , PC
Rock Paper Shotgun is better when you sign in
Sign in and join us on our journey to discover strange and compelling PC games.
