KCD2 For Whom The Bell Tolls walkthrough
How to save Sir Hans from execution in Kingdom Come Deliverance 2

Image credit:Rock Paper Shotgun/Deep Silver

Wondering how to save Sir Hans in the Kingdom Come: Deliverance 2 main story quest, “For Whom The Bell Tolls”? This quest is the sixth main story quest in Kingdom Come: Deliverance 2 , and it’s one of the most interesting and complex quests in the whole game.
Built more like a mystery or puzzle game, this KCD2 quest sees you trapped as a prisoner inside Tachov Castle, with none of your gear at hand. You’re tasked with manual labour, and with only limited access to the castle, you must find a way to set things right purely by talking, sneaking, and piecing together what’s happening bit by bit.
But despite Henry’s circumstances, Hans is far worse off. There’s a time limit to this quest ; your aim is to find a way to save Hans from execution before twelve hours are up - hence the quest’s ominous name.
“For Whom The Bell Tolls” is a very open-ended quest, and there’s a huge amount of optional tasks, secrets, and choices buried in nearly every region of Tachov Castle. In this definitive walkthrough, we’ll explain every part of the KCD2 quest, including the fastest way to save Sir Hans , how to gain access to the two towers, how to cure Sir Thomas , and much more besides.

KCD2 For Whom The Bell Tolls walkthrough
You’ll begin “For Whom The Bell Tolls” inside a cell with Hans, and after some tense discussion between the two of you, you’re let out to work off your debt, while Hans - who has been discovered to have been poaching - is sentenced to be executed in 12 hours’ time.
Next up is a conversation outside between Henry and Guardian Kroupa, who tells Henry to start hauling sacks of charcoal up to the shed. You can take this opportunity to ask various questions of Kroupa to help understand what’s what. Once that’s done, the main portion of this very unique and complex KCD2 quest begins.
Since “For Whom The Bell Tolls” is such an open-ended quest, I’ve divided this walkthrough into several sections. Use the links below to navigate through the Kingdom Come: Deliverance 2 guide:
- KCD2 For Whom The Bell Tolls quest steps
- Fastest way to save Sir Hans from execution
- How to access the Crone (Alchemy Tower)
- How to access the Maiden (Chapel Tower)
- How to get Fever Tonic Potion for Sir Thomas
- How to get Feverfew
- How to get Ginger
- How to get Elderberry Leaves
- How to get Lockpicks
- How to get Groschen
- Other things to do in For Whom The Bell Tolls quest
- Final step: Bring the Fever Tonic to Sir Thomas
<img loading=“lazy” src=“https://assetsio.gnwcdn.com/kingdom-come-deliverance-2-for-whom-the-bell-tolls-map.jpg?width=2048&height=2048&fit=bounds&quality=85&format=jpg&auto=webp" onerror=“this.onerror=null;this.src=‘https://blogger.googleusercontent.com/img/a/AVvXsEhe7F7TRXHtjiKvHb5vS7DmnxvpHiDyoYyYvm1nHB3Qp2_w3BnM6A2eq4v7FYxCC9bfZt3a9vIMtAYEKUiaDQbHMg-ViyGmRIj39MLp0bGFfgfYw1Dc9q_H-T0wiTm3l0Uq42dETrN9eC8aGJ9_IORZsxST1AcLR7np1koOfcc7tnHa4S8Mwz_xD9d0=s16000';" alt=“A map of Trosky Castle in Kingdom Come: Deliverance 2, with various locations and positions marked in yellow for help with the main quest, “For Whom The Bell Tolls”. - 4”>
To help you figure out where everything is in this quest, I’ve put together a map of Trosky Castle with all the key locations marked. Refer back to this if you’re lost! |Image credit:Rock Paper Shotgun/Deep Silver
KCD2 For Whom The Bell Tolls quest steps
You have none of your gear in this Kingdom Come: Deliverance 2 quest, so you have to rely on your skills of speaking, sneaking, and understanding that a lot of the information you’re dripfed over the course of the quest is actually very important.
I’ll go over the fastest way to complete the “For Whom The Bell Tolls” quest further into this guide, but if you’re looking for the fullest walkthrough of this fascinating quest, then follow the below steps. There are lots of different ways to complete this quest, so a lot of these steps are entirely optional. But if you want the fullest experience of this KCD2 quest, here’s what to do.
- Haul the three Charcoal Sacks to the shed.
- Speak to Hired Hand Kolda at the gallows about more work.
- Retrieve Kolda’s Axe and sharpen it.
- Talk to Kolda again for info on Ulrich and the well.
- Sneak into the house opposite the gallows.
- Loot the bedroom dressed for 48.2 Groschen.
- Pick Feverfew from behind the barn.
- Speak to the Blacksmith about more work.
- Go to the Smithy and take materials from the chest.
- Craft a Farmer’s Horseshoe and present it to the Blacksmith.
- Take the Horseshoe to Hired Hand Kabat.
- Ask Kabat what he did previously, and about tools.
- Speak to Father Nicodemus about Kabat’s rosary.
- Play the Father at Dice for the rosary (or steal it).
- Return the rosary to Hired Hand Kabat to obtain 3x Lockpicks.
- Pickpocket Kabat for even more Lockpicks if desired.
- Speak to Jarek outside the Smithy and tell him about the rosary.
- Follow Jarek up the Maiden to reach Sir Thomas.
- Speak with Adela, Sir Thomas’s sister.
- Loot the room next to Sir Thomas for valuables.
- Head back to the Smithy and speak to Cook Fanka.
- Speak to the Blacksmith about Cook Fanka.
- Open the red pot in the Smithy for another Lockpick.
- Speak to Cook Fanka and follow her to the kitchen.
- Pick the lock on Fanka’s chest for her.
- Steal the Ginger from Fanka’s chest.
- Steal Elderberry Leaves from the Carpenter’s house.
- Speak to Chamberlain Ulrich in the kitchen.
- Convince Ulrich to let you diagnose him.
- Successfully diagnose Ulrich to gain access to the Crone tower.
- Loot Weak Digestive Potion from the house near Father Nicodemus.
- Give Chamberlain Ulrich the Weak Digestive Potion.
- Take food from the Bathhouse by the Smithy.
- Give food to the hungry guard above the Bathhouse.
- Climb the Crone tower to the surgeon’s study.
- Speak with Katherine at the top of the tower.
- Take the Physician’s Journal from the Alchemy Bench room.
- Read the Physician’s Journal for the Fever Tonicum recipe.
- Loot ingredients from the chest (if you don’t already have them).
- (Option A) Craft Fever Tonicum using the Alchemy Bench.
- (Option B) Steal Fever Tonicum from the locked chest in the other room.
- Go down the well and loot the Gold Emperor’s Badge.
- Speak to Hans in his cell before you leave.
- Take the Fever Tonicum Potion to Sir Thomas.
That’s how I would get the full experience from the “For Whom The Bell Tolls” quest. But if you want to do things a bit quicker, read on for the fastest method!

Your main objective is to save Sir Hans from execution, and to do that, you need to cure Sir Thomas’s fever to allow Thomas to testify that Hans is a noble - and therefore cannot be executed in this manner. |Image credit:Rock Paper Shotgun/Deep Silver
Fastest way to save Sir Hans from execution
If you know what you need to do ahead of time, then you can bypass the vast majority of the above steps, and complete the quest extremely quickly. You’ll need a high Thievery skill (at least 14) to pull it off, but here’s the fastest way to save Sir Hans from execution:
- Pickpocket lockpicks from Hired Hand Kabat.
- Sneak to the top of the Crone tower (above the kitchen).
- Head into the room opposite the Alchemy Bench room.
- Pick the lock of the chest on your left to get Fever Tonicum Potion.
- Sneak to the top of the Maiden tower.
- Speak to Adela and give the potion to Sir Thomas.


If you don’t have very high Thievery, then you can still complete the quest almost as quickly:
- Hide inside the cart next to the barn.
- Once at the Smithy, steal the lockpick from the red pot.
- Sneak to the top of the Crone tower (above the kitchen).
- Head into the Alchemy Bench room and speak to Katherine.
- With Katherine gone, pick the lock of the chest and take the ingredients.
- Use the Alchemy Bench to make the Fever Tonicum Potion.
- Sneak to the top of the Maiden tower.
- Speak to Adela and give the potion to Sir Thomas.
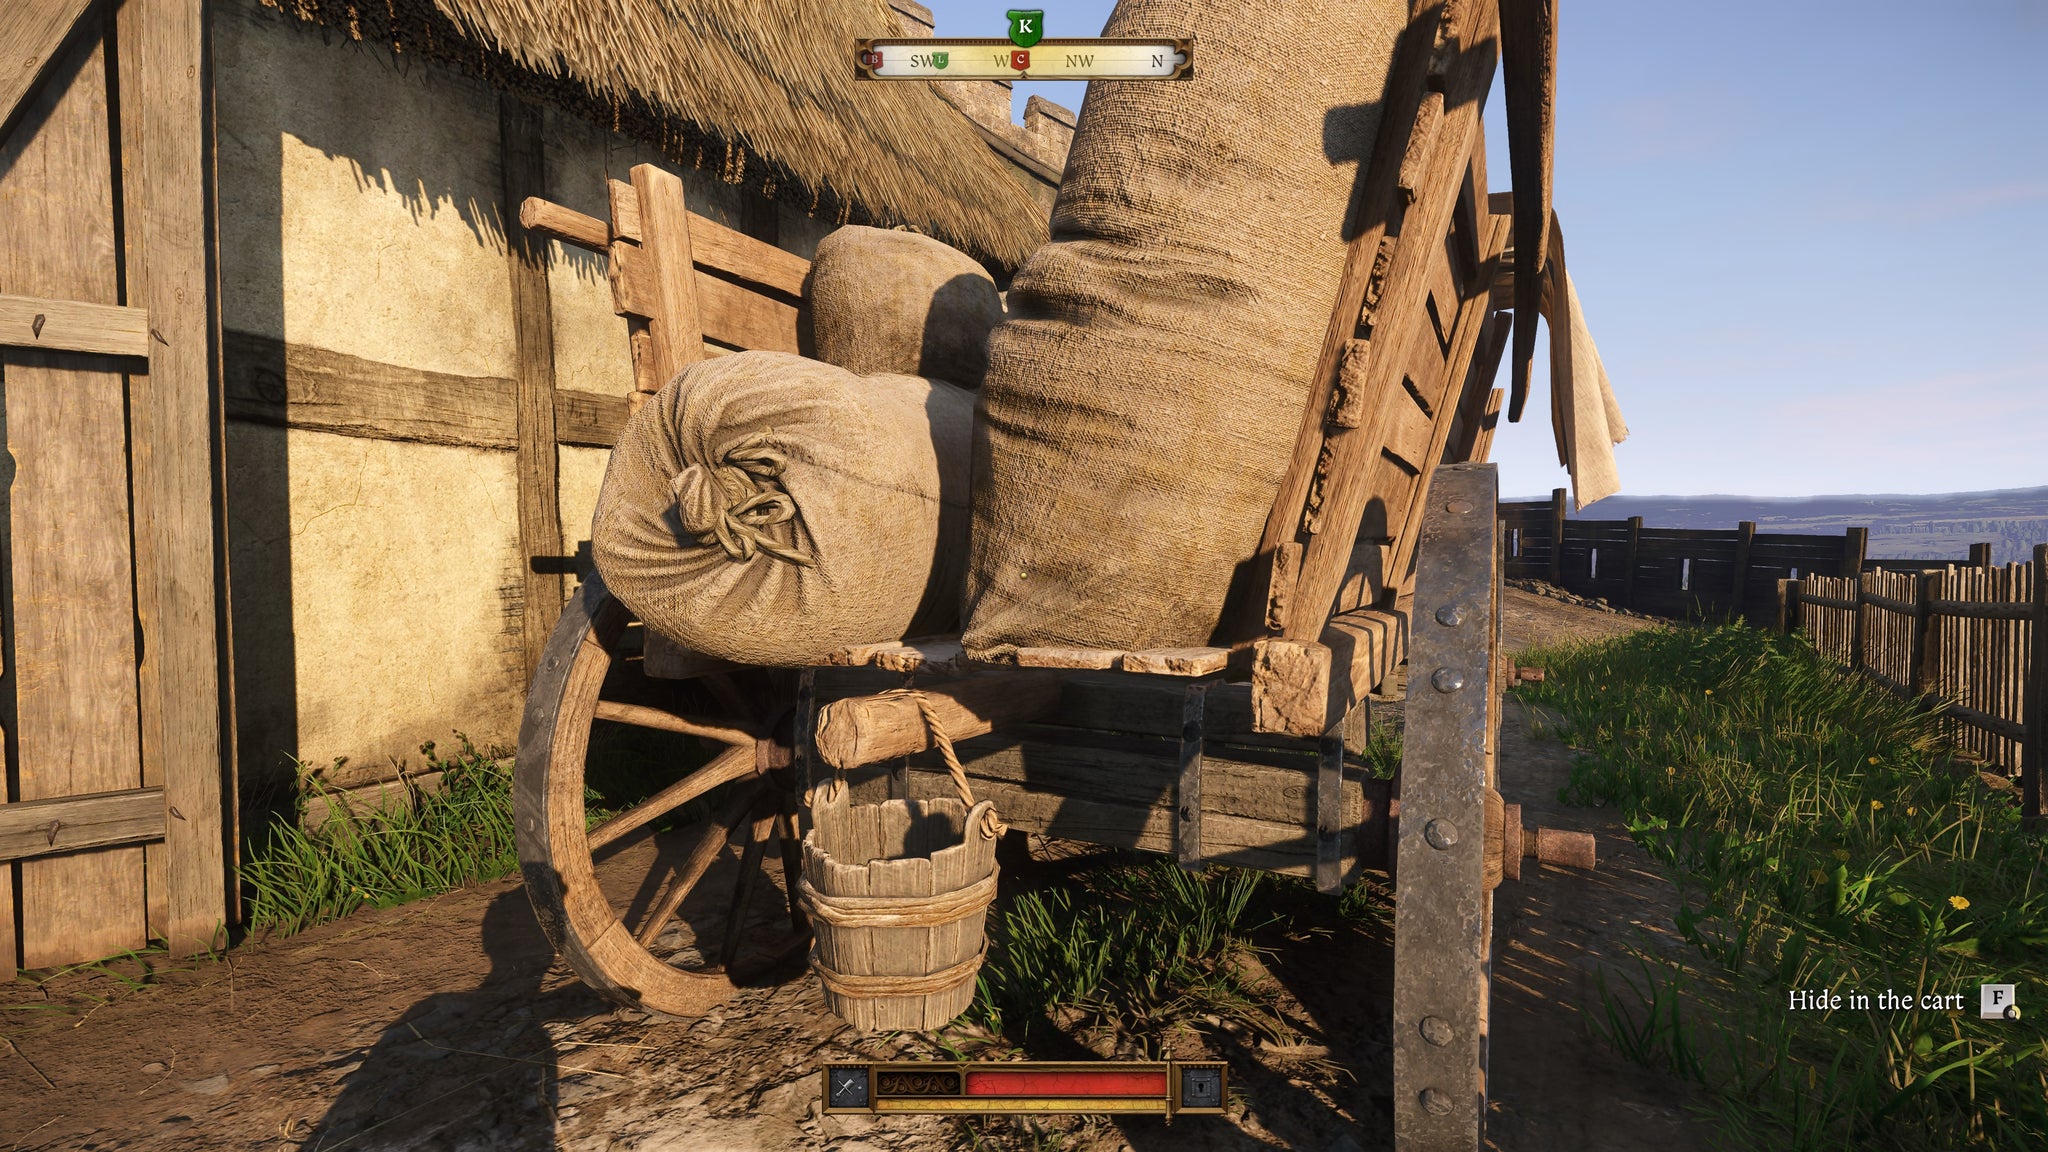
You can hide inside the cart for a free ride to the forge, but it costs you an hour. |Image credit:Rock Paper Shotgun/Deep Silver
These are the two fastest ways to complete “For Whom The Bell Tolls”, but you’ll also miss out on a lot of different encounters with various characters. And it’s also fraught with risk, sneaking through the Castle where you don’t have permission to go. So the next two sections will walk you through how to gain access to the two all-important towers - the Maiden and the Crone - without having to sneak.
How to access the Crone (Alchemy Tower)
Sneaking through Trosky Castle is very risky. Fortunately, the “For Whom The Bell Tolls” questline gives you a couple of different ways to gain admittance to the two main towers - the Crone and the Maiden - without having to sneak anywhere. Let’s cover the smaller of the two towers first: the Crone, where the surgeon’s study and the all-important Alchemy Bench can be found.
To gain admittance to the Crone, you must speak with Chamberlain Ulrich in the kitchen. As you’ll discover if you first speak to Hired Hand Kolda by the gallows, Ulrich is suffering terribly from stomach problems. If you are able to convince him to let you examine him, and make a successful diagnosis, then he’ll give you permission to ascend the Crone to reach the surgeon’s study to prepare a potion for him.
You can find Ulrich by ascending the steps behind the well, right next to the stable. Once you’re up the stairs, go through the door and then immediately turn right and head up the next set of stairs into the kitchen.

If you fail to convince Ulrich or diagnose him, you’ll need to sneak into the Crone. |Image credit:Rock Paper Shotgun/Deep Silver
Ulrich will be in the kitchen, doubled over in pain. Speak with him and tell him “I see you have health issues.” If you’re able to convince him using either Speech or Scholarship to examine you, and then make at least two successful persuasion attempts with different lines of questioning, then you’ll be able to diagnose him with the line, “Your bodily fluids are out of balance”.
Ulrich will ask you to get him a potion for it, to which you can say, “I don’t have the equipment or the recipe for the remedy.” Ulrich will then give you permission to enter the surgeon’s study at the top of the Crone tower.
How to access the Maiden (Chapel Tower)
Just like the Crone, it’s possible to earn permission to explore the Maiden - the larger of the two towers - without having to sneak through it. This is an important step in the “For Whom The Bell Tolls” quest, because at the top of the Maiden is the Chapel, where Sir Thomas is being kept and cared for by his sister, Adela.
Besides sneaking, there are two ways to access the Maiden and its Chapel: either you can present Chamberlain Ulrich with a Digestive Potion to ease his pain, or you can present the soldier Jarek with Sir Thomas’s missing rosary (or at least tell him where to find it).
Option 1: Present Ulrich with a Digestive Potion
If you followed the above steps while speaking to Chamberlain Ulrich, you’ll know that he’s after a Digestive Potion to ease his stomach pains. Either you can make one yourself using the Alchemy Bench at the top of the Crone, or you can steal a Digestive Potion (Ulrich won’t mind).

Whether you steal or brew the Digestive Potion, Ulrich won’t mind. |Image credit:Rock Paper Shotgun/Deep Silver
You can easily steal a Weak Digestive Potion from the bottom floor of the house just beyond Father Nicodemus and the combat arena. Just head into the house via the door under the stairs when no one’s looking. Shut the door behind you, and you’re then free to swipe the Weak Digestive Potion from the table beside you as you enter the room.
Alternatively, craft the Digestive Potion yourself at the Alchemy Bench at the top of the Crone. If you don’t already have the recipe, you can obtain it by reading the physician’s journal in the Alchemy Bench room. It takes 1x Nettle, 2x Thistle, and 1x Charcoal. The first two can be found in the chest next to the Alchemy Bench, while Charcoal can be found in the red pot in the Smithy.
However you do it, once you give the potion to Ulrich in the kitchen, you can ask him for access to the Maiden, and he’ll tell you you’re free to go wherever you like in the castle.
Option 2: Present Jarek with Sir Thomas’s rosary
If you fail to convince Ulrich (or just don’t want to bother with him - I wouldn’t blame you), the other way to gain access to the Maiden is via the soldier, Jarek, who is found praying outside near the Smithy. Here’s what you need to do:
- Haul the three sacks to the wagon.
- Speak to the Blacksmith.
- Loot the chest from the Smithy and craft a Farmer’s Horseshoe.
- Speak to the Blacksmith again, then speak to Hired Hand Kabat.
- Ask Kabat what he did before this, then ask him for tools.
- Ask Kabat if there’s something he’d trade for his tools.
- Speak to Father Nicodemus about Dice and the rosary.
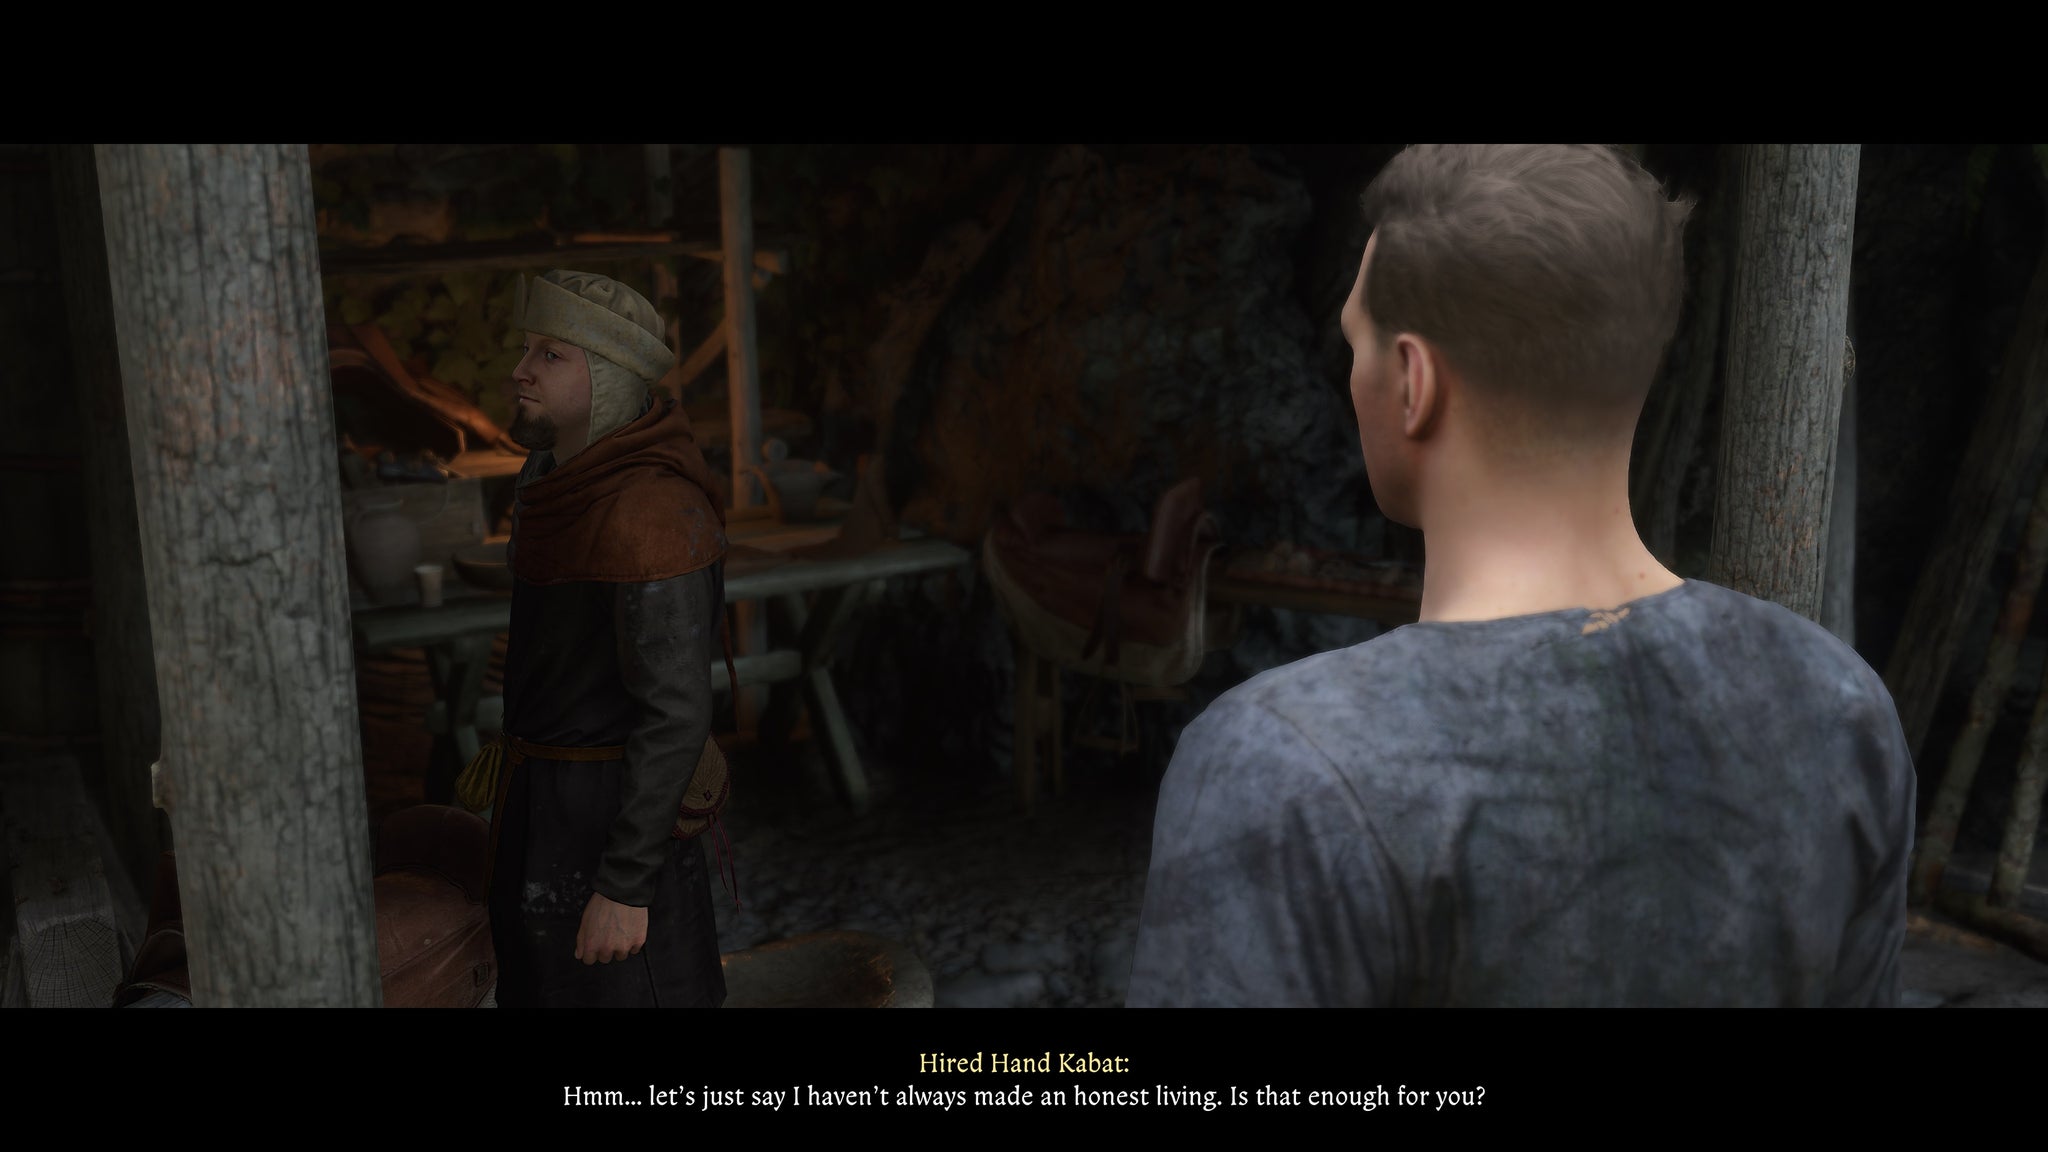
Image credit:Rock Paper Shotgun/Deep Silver
After this point, you can immediately go to Jarek and tell him about the rosary, and he’ll thank you for the information and offer to show you up to Sir Thomas at the top of the Maiden. However, if you want to complete the trade with Kabat first, you can win (or steal) the rosary off Father Nicodemus, give it to Kabat, and then tell Jarek about the rosary for the same outcome, except that this time you get 3 lockpicks from Kabat as a bonus.
You can even win the rosary from the Father and then give it to Jarek yourself, which has exactly the same outcome as simply letting him know where the rosary is, albeit with slightly different dialogue.
How to get Fever Tonic Potion for Sir Thomas
There are two ways to get the Fever Tonicum Potion for Sir Thomas, so that his testimony can save Sir Hans from execution. Either you can brew the potion yourself, or you can steal it.
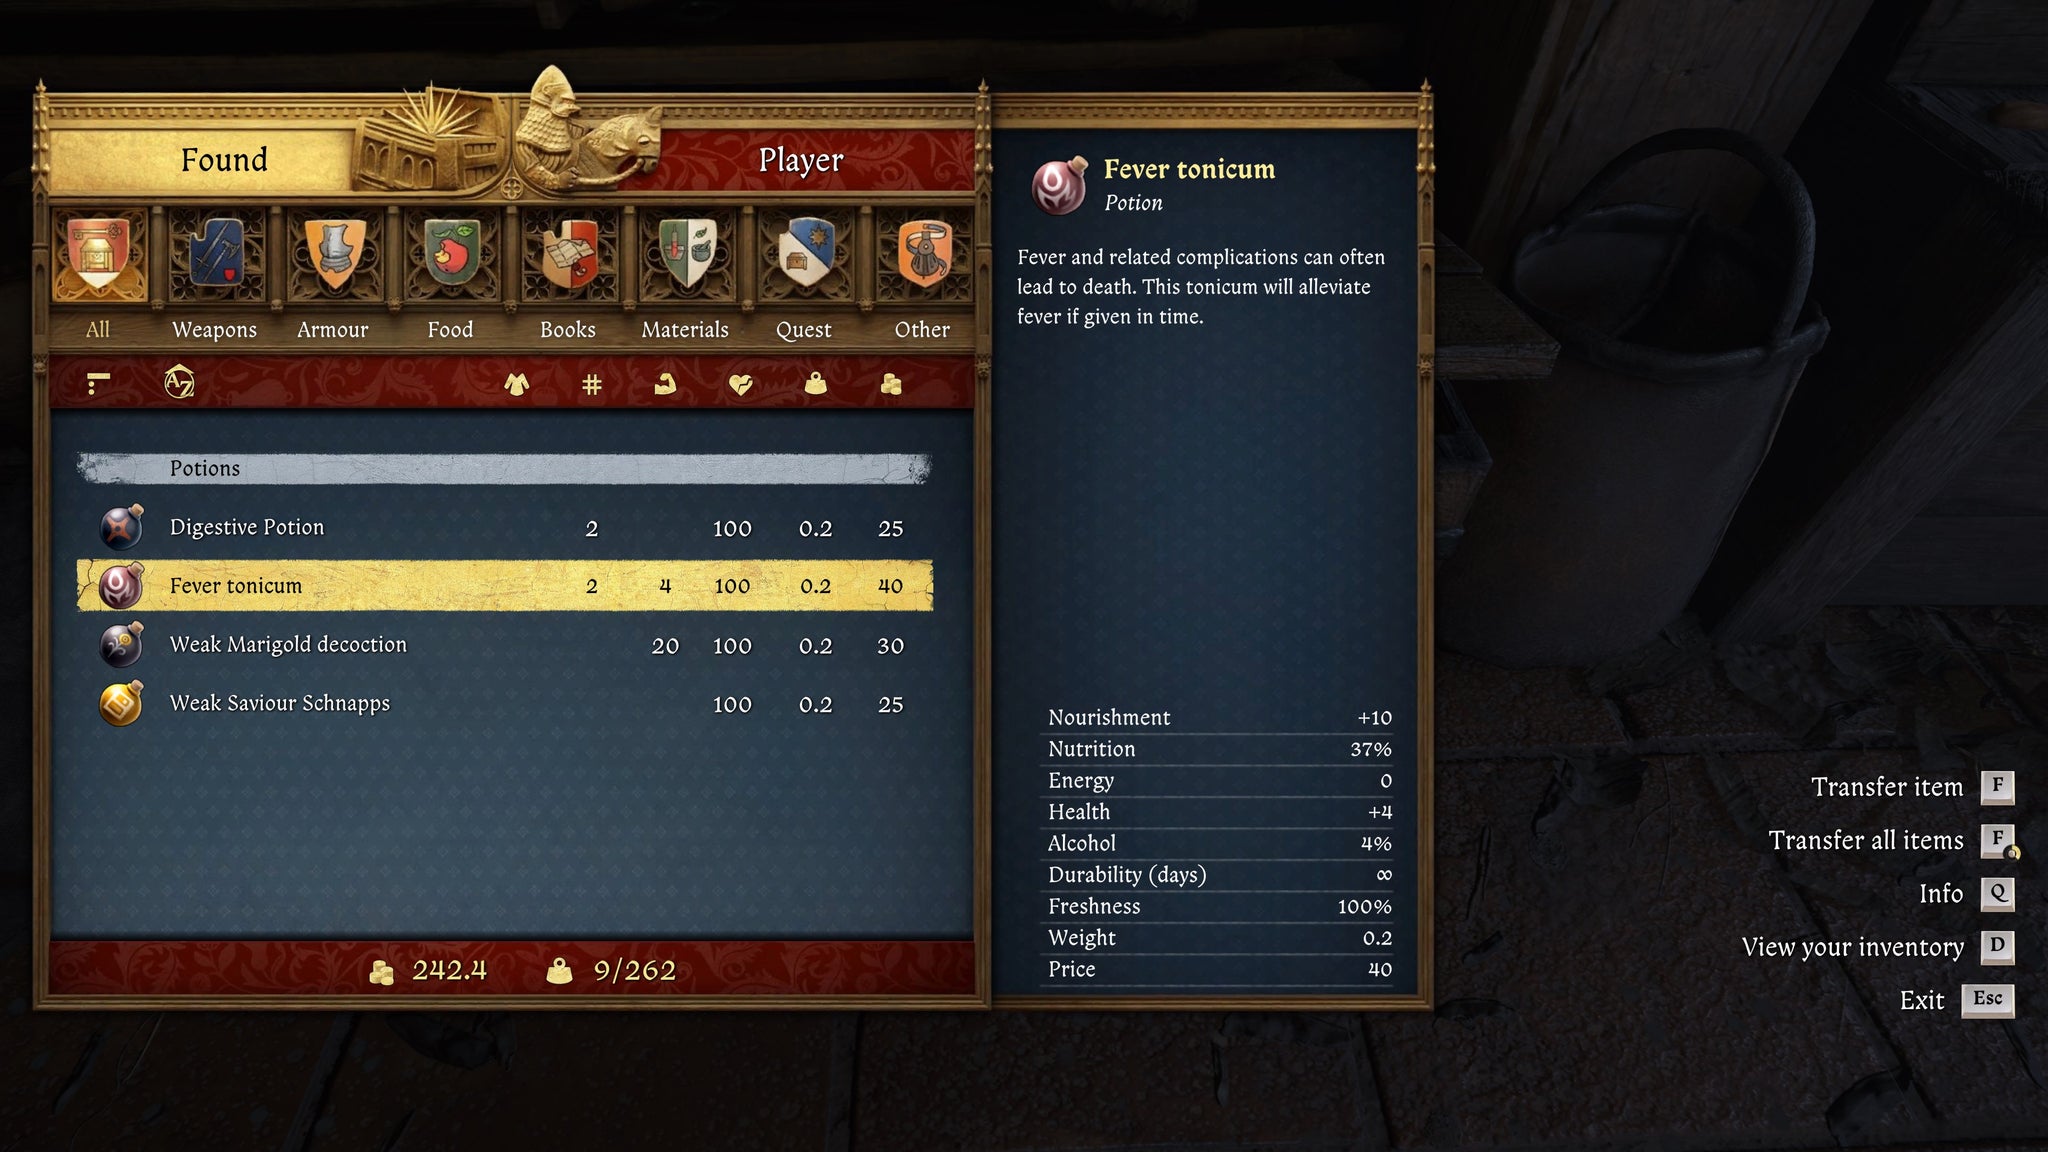
You can only steal the Fever Tonicum if you’re able to pick hard locks. |Image credit:Rock Paper Shotgun/Deep Silver
Steal the Fever Tonic
If you want to steal the potion , you’ll need a very high Thievery Skill - at least Level 14, and preferably higher. You’ll also need at least one lockpick (preferably several). The Fever Tonicum Potion can be looted from the chest inside the surgeon’s study, opposite the Alchemy Bench room at the top of the Crone. The chest is locked, and the lock is " Hard “, so without high Thievery you’ll have no chance of getting in there. But if you can, this is the fastest way to get the Fever Tonic.
Make the Fever Tonic yourself
Using the Alchemy Bench, you can craft the Fever Tonicum Potion from scratch with the right ingredients. Once you’ve found your way to the top of the Crone, you’ll find none other than Katherine, the woman present during the bandit attack on Henry and Hans’s group at the start of the game.

Hey, I recognise you! |Image credit:Rock Paper Shotgun/Deep Silver
You’ll need to speak with Katherine to get her out of the room (which she’ll do even if you fail any of your dialogue checks). After that, you can steal the “Physician’s Journal” book from the bookshelf, and read it to give you the Fever Tonicum Potion recipe if you haven’t already got it. Then, as long as you have at least one lockpick, you can pick the lock of the chest in the same room for all the ingredients you need.
Here’s how to make the Fever Tonicum Potion:
- Prepare 3x Feverfew, 2x Ginger, and 1x Elderberry Leaves.
- Pour wine into the cauldron.
- Add the Feverfew and boil for 2 turns.
- Grind the Elderberry Leaves and add them to the cauldron.
- Add the Ginger.
- Finally, distil.
If you are unable for whatever reason to open the chest in this room to get the ingredients, fear not - there are other ways to get all three ingredients. Read on for details!
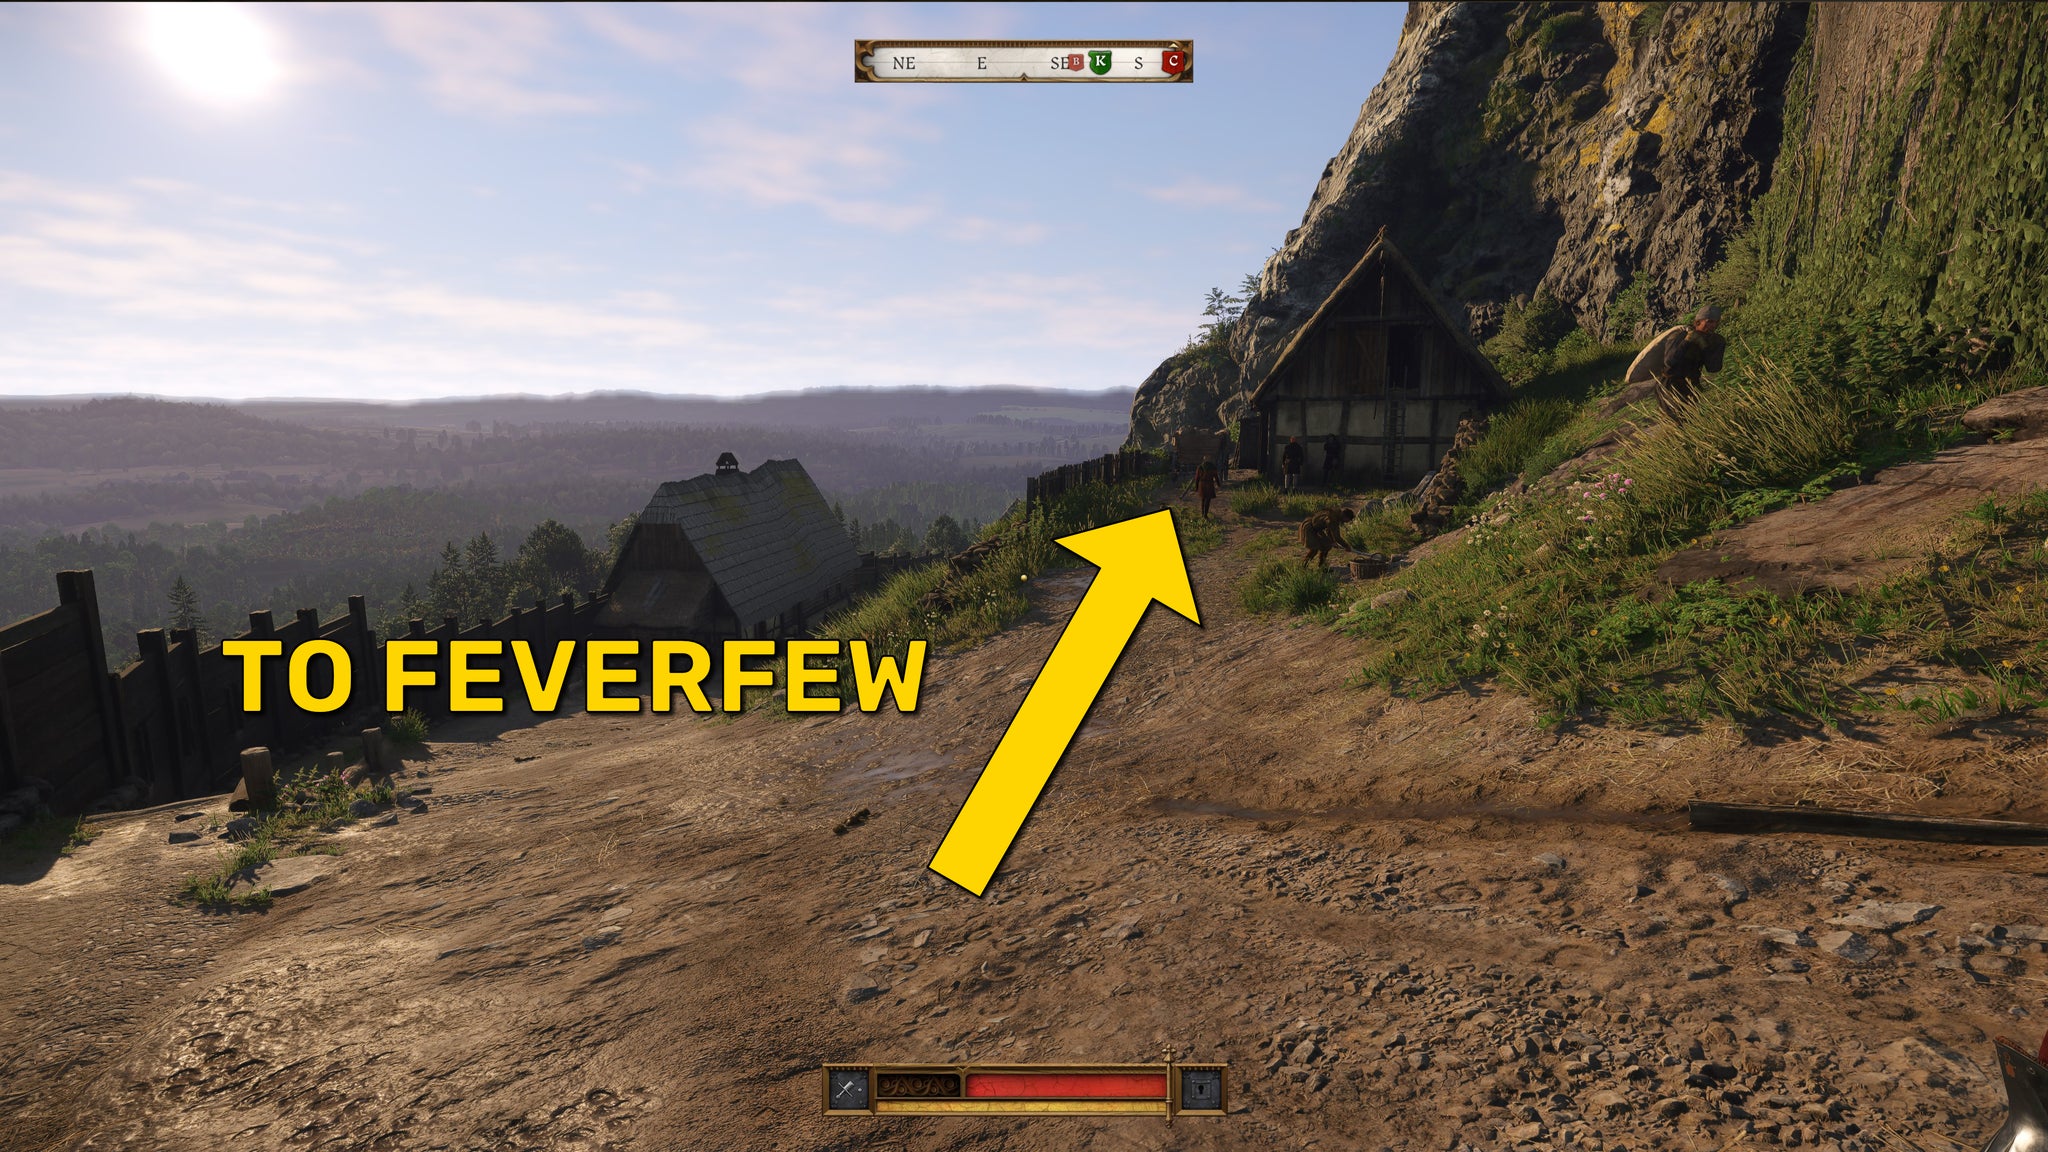
Image credit:Rock Paper Shotgun/Deep Silver
How to get Feverfew
Feverfew is the easiest ingredient to get your hands on. At the very beginning of the quest, simply head east around the corner, and pick as much Feverfew as you like from the garden behind the nearby barn.
How to get Ginger
Ginger can be found inside the Cook’s chest below the kitchen, accessible from the start of the quest via the door above the well. The chest is locked, and you can try to open it with a lockpick, but there’s a guard standing in the room who will likely hear you.
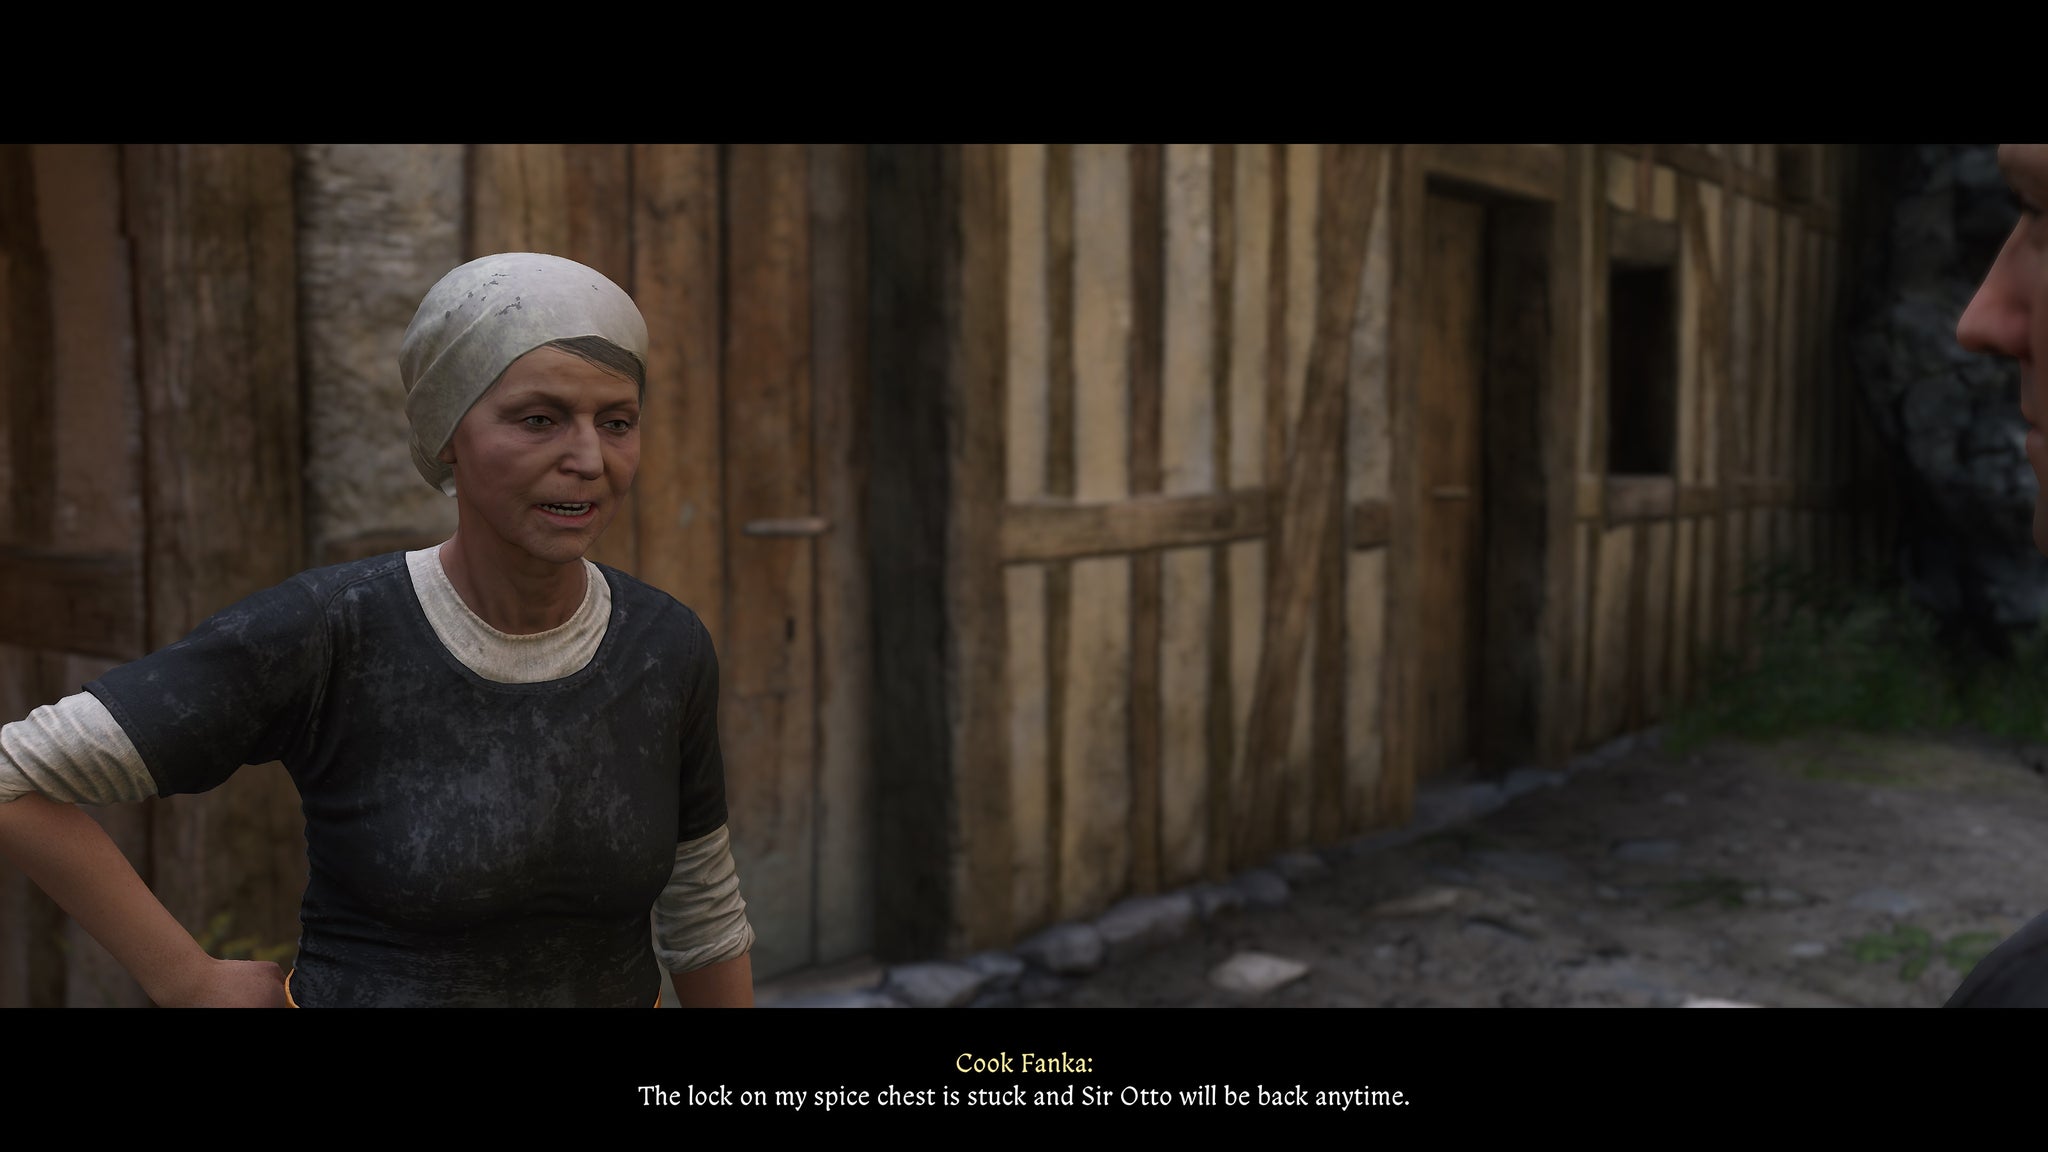
Image credit:Rock Paper Shotgun/Deep Silver
The much better method is to complete the task for Cook Fanka, who’s standing outside the Smithy. She wants the Blacksmith to unlock that chest below the kitchen for her, but he’s “busy”. You can speak to the Blacksmith after speaking to her to get a lockpick, or you can find a lockpick yourself. After that, speak to Cook Fanka and she’ll lead you right to the chest and allow you to pick the lock right there in front of her.
When you open the chest, you can immediately take the Ginger. She won’t notice; she’ll remark on the lack of Ginger either way, blaming it on someone else. Even if you don’t take the Ginger there and then, you can return to the chest later after unlocking it, and even with the guard standing nearby you can steal the Ginger without any raised eyebrows.
<img loading=“lazy” src=“https://assetsio.gnwcdn.com/kingdom-come-deliverance-2-elderberry-location.jpg?width=2048&height=2048&fit=bounds&quality=85&format=jpg&auto=webp" onerror=“this.onerror=null;this.src=‘https://blogger.googleusercontent.com/img/a/AVvXsEhe7F7TRXHtjiKvHb5vS7DmnxvpHiDyoYyYvm1nHB3Qp2_w3BnM6A2eq4v7FYxCC9bfZt3a9vIMtAYEKUiaDQbHMg-ViyGmRIj39MLp0bGFfgfYw1Dc9q_H-T0wiTm3l0Uq42dETrN9eC8aGJ9_IORZsxST1AcLR7np1koOfcc7tnHa4S8Mwz_xD9d0=s16000';" alt=“The player in Kingdom Come: Deliverance 2 walks towards the Carpenter’s house in Trosky Castle. A yellow arrow marked “Elderberry” points towards the house entrance. - 19”>
Image credit:Rock Paper Shotgun/Deep Silver
How to get Elderberry Leaves
To get Elderberry Leaves, you must go to the Carpenter’s house, just behind the wagon of charcoal sacks where you begin the entire questline. If you listen to the Carpenter speaking to housemaid round back, he’ll eventually ask her to fetch some Elderberry Leaves. You can follow her to learn that they keep Elderberry Leaves inside the locked chest in the Carpenter’s house, behind the second door on your left as you enter.
Head into the house when no one’s looking, and pick the lock of the chest with a lockpick to steal the Elderberry Leaves.
How to get Lockpicks
Lockpicks are very useful throughout the “For Whom The Bell Tolls” questline. There are three main ways to get lockpicks in this quest:
- Buy, trade, or steal them from Hired Hand Kabat.
- Take or steal 1 Lockpick from the red pot in the Smithy.
- Use the Locksmith Perk if you have it.
If you have Groschen, you can flat out buy Lockpicks from Kabat after giving him the horseshoe (which only happens after you finish hauling the sacks and completing the task set by the Blacksmith). Alternatively, if you have a decent Thievery skill you can pickpocket Kabat at the start of the quest for 6 Lockpicks. Or you can win/steal the rosary from the Father and trade it with Kabat for 3 Lockpicks.

This red pot contains a single lockpick. |Image credit:Rock Paper Shotgun/Deep Silver
There’s a single Lockpick hidden inside the red pot on the wall of the Smithy. If you speak to Cook Fanka about the broken lock on her chest, you can then speak to the Blacksmith about it and he’ll give you permission to look inside the pot for the Lockpick. Alternatively, you can just steal it from the pot when no one’s looking.
Finally, if you happen to have the Locksmith Perk from the Craftsmanship Skill, then every time you craft anything at the Smithy you’ll gain Lockpicks as a bonus. So just craft whatever you like once you have access to the Smithy (after speaking to the Blacksmith) to get a tonne of Lockpicks.
How to get Groschen
The main use of Groschen in this quest is to purchase Lockpicks from Kabat, or to play Dice against Father Nicodemus. But you can also make use of Groschen in various other ways (including paying off guards if they spot you skulking around the castle).
The best way to get Groschen in the “For Whom The Bell Tolls” quest is by sneaking into a particular house near the eastern gate of Trosky Castle. The house in question is the one facing the stable; there’s a bench by the front door, usually with a woman sitting on it.
<img loading=“lazy” src=“https://assetsio.gnwcdn.com/kingdom-come-deliverance-2-house-with-money.jpg?width=2048&height=2048&fit=bounds&quality=85&format=jpg&auto=webp" onerror=“this.onerror=null;this.src=‘https://blogger.googleusercontent.com/img/a/AVvXsEhe7F7TRXHtjiKvHb5vS7DmnxvpHiDyoYyYvm1nHB3Qp2_w3BnM6A2eq4v7FYxCC9bfZt3a9vIMtAYEKUiaDQbHMg-ViyGmRIj39MLp0bGFfgfYw1Dc9q_H-T0wiTm3l0Uq42dETrN9eC8aGJ9_IORZsxST1AcLR7np1koOfcc7tnHa4S8Mwz_xD9d0=s16000';" alt=“The player in Kingdom Come: Deliverance 2 heads towards a house in Trosky Castle with an exterior staircase, which leads to a door marked “Groschen”. - 21”>
You’ll need to distract the woman (or women) by the staircase to sneak into this house. |Image credit:Rock Paper Shotgun/Deep Silver
Throw a stone from afar to get the woman to look the other way, then ascend the outer staircase and go through the door at the top into the upper floor of the house. Turn left and go through the next two doors into the bedroom. There you can rob the dresser on your right for 48.2 Groschen - more than enough for your needs.
There are plenty of other opportunities to steal small amounts of Groschen throughout the castle if you know where to look, but this is by far the easiest way to get a load of Groschen from the start of the quest.
Other things to do in For Whom The Bell Tolls quest
There are various other things to do, and people to talk to in this quest, and while optional, they’re all interesting extra experiences you might not want to miss out on. Here are a few additional things you can do:
- Speak to Hired Hand Kolda. Kolda can be found at the gallows near the castle’s east gate, and he’ll task you with retrieving and sharpening an axe for him. You can talk with him a fair bit to find out a couple of interesting bits of information, such as Ulrich’s stomach problems, and that there’s a secret tunnel at the bottom of the castle well.
- Speak to Vuytek and Magda. Remember Vuytek? He’s the bastard that started the fight at the wedding that got you into this mess. He’s shirking his prisoner’s duties trying to chat up Magda, the bathhouse owner, near the well. Speak to them and you’ll have various ways of splitting the two of them up and pissing off Vuytek even more if you so wish.
- Speak to Convict Vatava. Convict Vatava can be found hauling charcoal sacks just like you, and he won’t talk to you until he’s done. When he is finally done, however, you can speak to him and he’ll give you the important tip that if you want lockpicks, Hired Hand Kabat is the person to speak to.
- Give food to the hungry guard. If you start making your way up to the Crone, immediately above the bathhouse you’ll find a hungry guard standing around inside a pantry, waiting for food. You can take food from the bathhouse to feed him and get him out of the way if you like. Either way, he bizarrely won’t stop you from going further up, but if you want to try your hand at lockpicking the chest behind him, you’ll need him fed and gone first.
- Go down the well. This is the big one. Hired Hand Kolda gives you the info that the well holds a secret, but even without speaking to him, you can drop down the well. The fall injures your leg and halves your health, but at the bottom you can loot a torch and a Golden Emperor’s Badge. You can then follow the path to reach Hans in his cell. Depending on what else you’ve done before this, you’ll be able to fill him in on the current plan. Then you’ll have to either sneak past the guard in the next room or have Hans distract him so you can leave. This encounter is entirely optional, but it’s fun all the same.
- Loot the Chapel. In the room next to where Sir Thomas and Adela can be found, you can find a Lucky Die and a Holy Trinity Die. You can also steal a very valuable Holy Chalice and and even more valuable Golden Crucifix if you wish.

Image credit:Rock Paper Shotgun/Deep Silver
Final step: Bring the Fever Tonic to Sir Thomas
The final step in the “For Whom The Bell Tolls” questline is to bring your Fever Tonicum Potion to Sir Thomas in the chapel at the top of the Maiden tower. Whether you stole the potion or crafted it yourself, the result will be the same.
Once you reach the top of the Maiden, a series of cutscenes will play where you give Sir Thomas’s sister the tonic, and then the three of you rush to attempt to stop Sir Hans from being executed. Even so, it takes the timely arrival of a certain rather important character before Sir Hans is fully saved.
That wraps up our For Whom The Bell Tolls walkthrough for Kingdom Come: Deliverance 2. If you need more help with KCD2, stick around as we’ve got you covered. Check out other guides on how to get a horse , how to get money fast and how to fast travel in Bohemia. We’ve also got pages on the best class in Kingdom Come Deliverance 2 and how to find the border nail .


Kingdom Come: Deliverance II
Video Game
Rock Paper Shotgun is better when you sign in
Sign in and join us on our journey to discover strange and compelling PC games.

All 75 Arc Raiders Blueprints and where to get them
These areas have the highest chance of giving you Blueprints

Image credit:Rock Paper Shotgun/Embark Studios

Looking for more Arc Raiders Blueprints? It’s a special day when you find a Blueprint, as they’re among the most valuable items in Arc Raiders. If you find a Blueprint that you haven’t already found, then you must make sure you hold onto it at all costs, because Blueprints are the key to one of the most important and powerful systems of meta-progression in the game.
This guide aims to be the very best guide on Blueprints you can find, starting with a primer on what exactly they are and how they work in Arc Raiders, before delving into exactly where to get Blueprints and the very best farming spots for you to take in your search.
We’ll also go over how to get Blueprints from other unlikely activities, such as destroying Surveyors and completing specific quests. And you’ll also find the full list of all 75 Blueprints in Arc Raiders on this page (including the newest Blueprints added with the Cold Snap update , such as the Deadline Blueprint and Firework Box Blueprint), giving you all the information you need to expand your own crafting repertoire.
In this guide:
- What are Blueprints in Arc Raiders?
- Full Blueprint list: All crafting recipes
- Where to find Blueprints in Arc Raiders Blueprints obtained from quests Blueprints obtained from Trials Best Blueprint farming locations

What are Blueprints in Arc Raiders?
Blueprints in Arc Raiders are special items which, if you manage to extract with them, you can expend to permanently unlock a new crafting recipe in your Workshop. If you manage to extract from a raid with an Anvil Blueprint, for example, you can unlock the ability to craft your very own Anvil Pistol, as many times as you like (as long as you have the crafting materials).
To use a Blueprint, simply open your Inventory while in the lobby, then right-click on the Blueprint and click “Learn And Consume” . This will permanently unlock the recipe for that item in your Workshop. As of the Stella Montis update, there are allegedly 75 different Blueprints to unlock - although only 68 are confirmed to be in the game so far. You can see all the Blueprints you’ve found and unlocked by going to the Workshop menu, and hitting “R” to bring up the Blueprint screen.
It’s possible to find duplicates of past Blueprints you’ve already unlocked. If you find these, then you can either sell them, or - if you like to play with friends - you can take it into a match and gift it to your friend so they can unlock that recipe for themselves. Another option is to keep hold of them until the time comes to donate them to the Expedition.
Full Blueprint list: All crafting recipes
Below is the full list of all the Blueprints that are currently available to find in Arc Raiders, and the crafting recipe required for each item:
| Blueprint | Type | Recipe | Crafted At |
|---|---|---|---|
| Bettina | Weapon | 3x Advanced Mechanical Components 3x Heavy Gun Parts 3x Canister | Gunsmith 3 |
| Blue Light Stick | Quick Use | 3x Chemicals | Utility Station 1 |
| Aphelion | Weapon | 3x Magnetic Accelerator 3x Complex Gun Parts 1x Matriarch Reactor | Gunsmith 3 |
| Combat Mk. 3 (Flanking) | Augment | 2x Advanced Electrical Components 3x Processor | Gear Bench 3 |
| Combat Mk. 3 (Aggressive) | Augment | 2x Advanced Electrical Components 3x Processor | Gear Bench 3 |
| Complex Gun Parts | Material | 2x Light Gun Parts 2x Medium Gun Parts 2x Heavy Gun Parts | Refiner 3 |
| Fireworks Box | Quick Use | 1x Explosive Compound 3x Pop Trigger | Explosives Station 2 |
| Gas Mine | Mine | 4x Chemicals 2x Rubber Parts | Explosives Station 1 |
| Green Light Stick | Quick Use | 3x Chemicals | Utility Station 1 |
| Pulse Mine | Mine | 1x Crude Explosives 1x Wires | Explosives Station 1 |
| Seeker Grenade | Grenade | 1x Crude Explosives 2x ARC Alloy | Explosives Station 1 |
| Looting Mk. 3 (Survivor) | Augment | 2x Advanced Electrical Components 3x Processor | Gear Bench 3 |
| Angled Grip II | Mod | 2x Mechanical Components 3x Duct Tape | Gunsmith 2 |
| Angled Grip III | Mod | 2x Mod Components 5x Duct Tape | Gunsmith 3 |
| Hullcracker | Weapon | 1x Magnetic Accelerator 3x Heavy Gun Parts 1x Exodus Modules | Gunsmith 3 |
| Launcher Ammo | Ammo | 5x Metal Parts 1x Crude Explosives | Workbench 1 |
| Anvil | Weapon | 5x Mechanical Components 5x Simple Gun Parts | Gunsmith 2 |
| Anvil Splitter | Mod | 2x Mod Components 3x Processor | Gunsmith 3 |
| ??? | ??? | ??? | ??? |
| Barricade Kit | Quick Use | 1x Mechanical Components | Utility Station 2 |
| Blaze Grenade | Grenade | 1x Explosive Compound 2x Oil | Explosives Station 3 |
| Bobcat | Weapon | 3x Advanced Mechanical Components 3x Light Gun Parts | Gunsmith 3 |
| Osprey | Weapon | 2x Advanced Mechanical Components 3x Medium Gun Parts 7x Wires | Gunsmith 3 |
| Burletta | Weapon | 3x Mechanical Components 3x Simple Gun Parts | Gunsmith 1 |
| Compensator II | Mod | 2x Mechanical Components 4x Wires | Gunsmith 2 |
| Compensator III | Mod | 2x Mod Components 8x Wires | Gunsmith 3 |
| Defibrillator | Quick Use | 9x Plastic Parts 1x Moss | Medical Lab 2 |
| ??? | ??? | ??? | ??? |
| Equalizer | Weapon | 3x Magnetic Accelerator 3x Complex Gun Parts 1x Queen Reactor | Gunsmith 3 |
| Extended Barrel | Mod | 2x Mod Components 8x Wires | Gunsmith 3 |
| Extended Light Mag II | Mod | 2x Mechanical Components 3x Steel Spring | Gunsmith 2 |
| Extended Light Mag III | Mod | 2x Mod Components 5x Steel Spring | Gunsmith 3 |
| Extended Medium Mag II | Mod | 2x Mechanical Components 3x Steel Spring | Gunsmith 2 |
| Extended Medium Mag III | Mod | 2x Mod Components 5x Steel Spring | Gunsmith 3 |
| Extended Shotgun Mag II | Mod | 2x Mechanical Components 3x Steel Spring | Gunsmith 2 |
| Extended Shotgun Mag III | Mod | 2x Mod Components 5x Steel Spring | Gunsmith 3 |
| Remote Raider Flare | Quick Use | 2x Chemicals 4x Rubber Parts | Utility Station 1 |
| Heavy Gun Parts | Material | 4x Simple Gun Parts | Refiner 2 |
| Venator | Weapon | 2x Advanced Mechanical Components 3x Medium Gun Parts 5x Magnet | Gunsmith 3 |
| Il Toro | Weapon | 5x Mechanical Components 6x Simple Gun Parts | Gunsmith 1 |
| Jolt Mine | Mine | 1x Electrical Components 1x Battery | Explosives Station 2 |
| Explosive Mine | Mine | 1x Explosive Compound 1x Sensors | Explosives Station 3 |
| Jupiter | Weapon | 3x Magnetic Accelerator 3x Complex Gun Parts 1x Queen Reactor | Gunsmith 3 |
| Light Gun Parts | Material | 4x Simple Gun Parts | Refiner 2 |
| Lightweight Stock | Mod | 2x Mod Components 5x Duct Tape | Gunsmith 3 |
| Lure Grenade | Grenade | 1x Speaker Component 1x Electrical Components | Utility Station 2 |
| Medium Gun Parts | Material | 4x Simple Gun Parts | Refiner 2 |
| Torrente | Weapon | 2x Advanced Mechanical Components 3x Medium Gun Parts 6x Steel Spring | Gunsmith 3 |
| Muzzle Brake II | Mod | 2x Mechanical Components 4x Wires | Gunsmith 2 |
| Muzzle Brake III | Mod | 2x Mod Components 8x Wires | Gunsmith 3 |
| Padded Stock | Mod | 2x Mod Components 5x Duct Tape | Gunsmith 3 |
| Shotgun Choke II | Mod | 2x Mechanical Components 4x Wires | Gunsmith 2 |
| Shotgun Choke III | Mod | 2x Mod Components 8x Wires | Gunsmith 3 |
| Shotgun Silencer | Mod | 2x Mod Components 8x Wires | Gunsmith 3 |
| Showstopper | Grenade | 1x Advanced Electrical Components 1x Voltage Converter | Explosives Station 3 |
| Silencer I | Mod | 2x Mechanical Components 4x Wires | Gunsmith 2 |
| Silencer II | Mod | 2x Mod Components 8x Wires | Gunsmith 3 |
| Snap Hook | Quick Use | 2x Power Rod 3x Rope 1x Exodus Modules | Utility Station 3 |
| Stable Stock II | Mod | 2x Mechanical Components 3x Duct Tape | Gunsmith 2 |
| Stable Stock III | Mod | 2x Mod Components 5x Duct Tape | Gunsmith 3 |
| Tagging Grenade | Grenade | 1x Electrical Components 1x Sensors | Utility Station 3 |
| Tempest | Weapon | 3x Advanced Mechanical Components 3x Medium Gun Parts 3x Canister | Gunsmith 3 |
| Trigger Nade | Grenade | 2x Crude Explosives 1x Processor | Explosives Station 2 |
| Vertical Grip II | Mod | 2x Mechanical Components 3x Duct Tape | Gunsmith 2 |
| Vertical Grip III | Mod | 2x Mod Components 5x Duct Tape | Gunsmith 3 |
| Vita Shot | Quick Use | 2x Antiseptic 1x Syringe | Medical Lab 3 |
| Vita Spray | Quick Use | 3x Antiseptic 1x Canister | Medical Lab 3 |
| Vulcano | Weapon | 1x Magnetic Accelerator 3x Heavy Gun Parts 1x Exodus Modules | Gunsmith 3 |
| Wolfpack | Grenade | 2x Explosive Compound 2x Sensors | Explosives Station 3 |
| Red Light Stick | Quick Use | 3x Chemicals | Utility Station 1 |
| Smoke Grenade | Grenade | 14x Chemicals 1x Canister | Utility Station 2 |
| Deadline | Mine | 3x Explosive Compound 2x ARC Circuitry | Explosives Station 3 |
| Trailblazer | Grenade | 1x Explosive Compound 1x Synthesized Fuel | Explosives Station 3 |
| Tactical Mk. 3 (Defensive) | Augment | 2x Advanced Electrical Components 3x Processor | Gear Bench 3 |
| Tactical Mk. 3 (Healing) | Augment | 2x Advanced Electrical Components 3x Processor | Gear Bench 3 |
| Yellow Light Stick | Quick Use | 3x Chemicals | Utility Station 1 |
Note: The missing Blueprints in this list likely have not actually been added to the game at the time of writing, because none of the playerbase has managed to find any of them. As they are added to the game, I will update this page with the most relevant information so you know exactly how to get all 75 Arc Raiders Blueprints.
Where to find Blueprints in Arc Raiders
Below is a list of all containers, modifiers, and events which maximise your chances of finding Blueprints:
- Certain quests reward you with specific Blueprints .
- Completing Trials has a high chance of offering Blueprints as rewards.
- Surveyors have a decent chance of dropping Blueprints on death.
- High loot value areas tend to have a greater chance of spawning Blueprints.
- Night Raids and Storms may increase rare Blueprint spawn chances in containers.
- Containers with higher numbers of items may have a higher tendency to spawn Blueprints. As a result, Blue Gate (which has many “large” containers containing multiple items) may give you a higher chance of spawning Blueprints.
- Raider containers (Raider Caches, Weapon Boxes, Medical Bags, Grenade Tubes) have increased Blueprint drop rates. As a result, the Uncovered Caches event gives you a high chance of finding Blueprints.
- Security Lockers have a higher than average chance of containing Blueprints.
- Certain Blueprints only seem to spawn under specific circumstances: Tempest Blueprint only spawns during Night Raid events. Vulcano Blueprint only spawns during Hidden Bunker events. Jupiter and Equaliser Blueprints only spawn during Harvester events.

Raider Caches, Weapon Boxes, and other raider-oriented container types have a good chance of offering Blueprints. |Image credit:Rock Paper Shotgun/Embark Studios
Blueprints have a very low chance of spawning in any container in Arc Raiders, around 1-2% on average. However, there is a higher chance of finding Blueprints in particular container types. Specifically, you can find more Blueprints in Raider containers and security lockers.
Beyond this, if you’re looking for Blueprints you should focus on regions of the map which are marked as having particularly high-value loot. Areas such as the Control Tower in Dam Battlegrounds, the Arrival and Departure Buildings in Spaceport, and Pilgrim’s Peak in Blue Gate all have a better-than-average chance of spawning Blueprints somewhere amongst all their containers. Night Raids and Electromagnetic Storm events also increase the drop chances of certain Blueprints .
In addition to these containers, you can often loot Blueprints from destroyed Surveyors - the largest of the rolling ball ARC. Surveyors are more commonly found on the later maps - Spaceport and Blue Gate - and if one spawns in your match, you’ll likely see it by the blue laser beam that it casts into the sky while “surveying”.
Surveyors are quite well-armoured and will very speedily run away from you once it notices you, but if you can take one down then make sure you loot all its parts for a chance of obtaining certain unusual Blueprints.
Blueprints obtained from quests
One way in which you can get Blueprints is by completing certain quests for the vendors in Speranza. Some quests will reward you with a specific item Blueprint upon completion, so as long as you work through all the quests in Arc Raiders, you are guaranteed those Blueprints.
Here is the full list of all Blueprints you can get from quest rewards:
- Trigger Nade Blueprint: Rewarded after completing “Sparks Fly”.
- Lure Grenade Blueprint: Rewarded after completing “Greasing Her Palms”.
- Burletta Blueprint: Rewarded after completing “Industrial Espionage”.
- Hullcracker Blueprint (and Launcher Ammo Blueprint): Rewarded after completing “The Major’s Footlocker”.
Alas, that’s only 4 Blueprints out of a total of 75 to unlock, so for the vast majority you will need to find them yourself during a raid. If you’re intent on farming Blueprints, then it’s best to equip yourself with cheap gear in case you lose it, but don’t use a free loadout because then you won’t get a safe pocket to stash any new Blueprint you find. No pain in Arc Raiders is sharper than failing to extract with a new Blueprint you’ve been after for a dozen hours already.

One of the best ways to get Blueprints is by hitting three stars on all five Trials every week. |Image credit:Rock Paper Shotgun/Embark Studios
Blueprints obtained from Trials
One of the very best ways to get Blueprints is as rewards for completing Trials in Arc Raiders. Trials are unlocked from Level 15 onwards, and allow you to earn rewards by focusing on certain tasks over the course of several raids. For example, one Trial might task you with dealing damage to Hornets, while another might challenge you to loot Supply Drops.
Trials refresh on a weekly basis, with a new week bringing five new Trials. Each Trial can offer up to three rewards after passing certain score milestones, and it’s possible to receive very high level loot from these reward crates - including Blueprints. So if you want to unlock as many Blueprints as possible, you should make a point of completing as many Trials as possible each week.
Best Blueprint farming locations
The very best way to get Blueprints is to frequent specific areas of the maps which combine high-tier loot pools with the right types of containers to search. Here are my recommendations for where to find Blueprints on every map, so you can always keep the search going for new crafting recipes to unlock.

Image credit:Rock Paper Shotgun/Embark Studios
Dam Battlegrounds
The best places to farm Blueprints on Dam Battlegrounds are the Control Tower, Power Generation Complex, Ruby Residence, and Pale Apartments . The first two regions, despite only being marked on the map as mid-tier loot, contain a phenomenal number of containers to loot. The Control Tower can also contain a couple of high-tier Security Lockers - though of course, you’ll need to have unlocked the Security Breach skill at the end of the Survival tree.
There’s also a lot of reporting amongst the playerbase that the Residential areas in the top-left of the map - Pale Apartments and Ruby Residence - give you a comparatively strong chance of finding Blueprints. Considering their size, there’s a high density of containers to loot in both locations, and they also have the benefit of being fairly out of the way. So you’re more likely to have all the containers to yourself.
Buried City
The best Blueprint farming locations on Buried City are the Santa Maria Houses, Grandioso Apartments, Town Hall, and the various buildings of the New District . Grandioso Apartments has a lower number of containers than the rest, but a high chance of spawning weapon cases - which have good Blueprint drop rates. The others are high-tier loot areas, with plenty of lootable containers - including Security Lockers.
Spaceport
The best places to find Blueprints on Spaceport are the Arrival and Departure Buildings, as well as Control Tower A6 and the Launch Towers . All these areas are labelled as high-value loot regions, and many of them are also very handily connected to one another by the Spaceport wall, which you can use to quickly run from one area to the next. At the tops of most of these buildings you’ll find at least one Security Locker, so this is an excellent farming route for players looking to find Blueprints.
The downside to looting Blueprints on Spaceport is that all these areas are hotly contested, particularly in Duos and Squads. You’ll need to be very focused and fast in order to complete the full farming route.

Image credit:Rock Paper Shotgun/Embark Studios
Blue Gate
Blue Gate tends to have a good chance of dropping Blueprints, potentially because it generally has a high number of containers which can hold lots of items; so there’s a higher chance of a Blueprint spawning in each container. In my experience, the best Blueprint farming spots on Blue Gate are Pilgrim’s Peak, Raider’s Refuge, the Ancient Fort, and the Underground Complex beneath the Warehouse .
All of these areas contain a wealth of containers to loot. Raider’s Refuge has less to loot, but the majority of the containers in and around the Refuge are raider containers, which have a high chance of containing Blueprints - particularly during major events.
Stella Montis
On the whole, Stella Montis seems to have a very low drop rate for Blueprints (though a high chance of dropping other high-tier loot). If you do want to try farming Blueprints on this map, the best places to find Blueprints in Stella Montis are Medical Research, Assembly Workshop, and the Business Center . These areas have the highest density of containers to loot on the map.
In addition to this, the Western Tunnel has a few different Security Lockers to loot, so while there’s very little to loot elsewhere in this area of the map, it’s worth hitting those Security Lockers if you spawn there at the start of a match.
That wraps up this primer on how to get all the Blueprints in Arc Raiders as quickly as possible. With the Expedition system constantly resetting a large number of players’ Blueprints, it’s more important than ever to have the most up-to-date information on where to find all these Blueprints.
While you’re here, be sure to check out our Arc Raiders best guns tier list , as well as our primers on the best skills to unlock and all the different Field Depot locations on every map.


ARC Raiders
PS5 , Xbox Series X/S , PC
Rock Paper Shotgun is better when you sign in
Sign in and join us on our journey to discover strange and compelling PC games.
