Infinity Nikki Whimstar locations: How to find all 366 Whimstars
Find all 366 Whimstars across every region in Miraland!
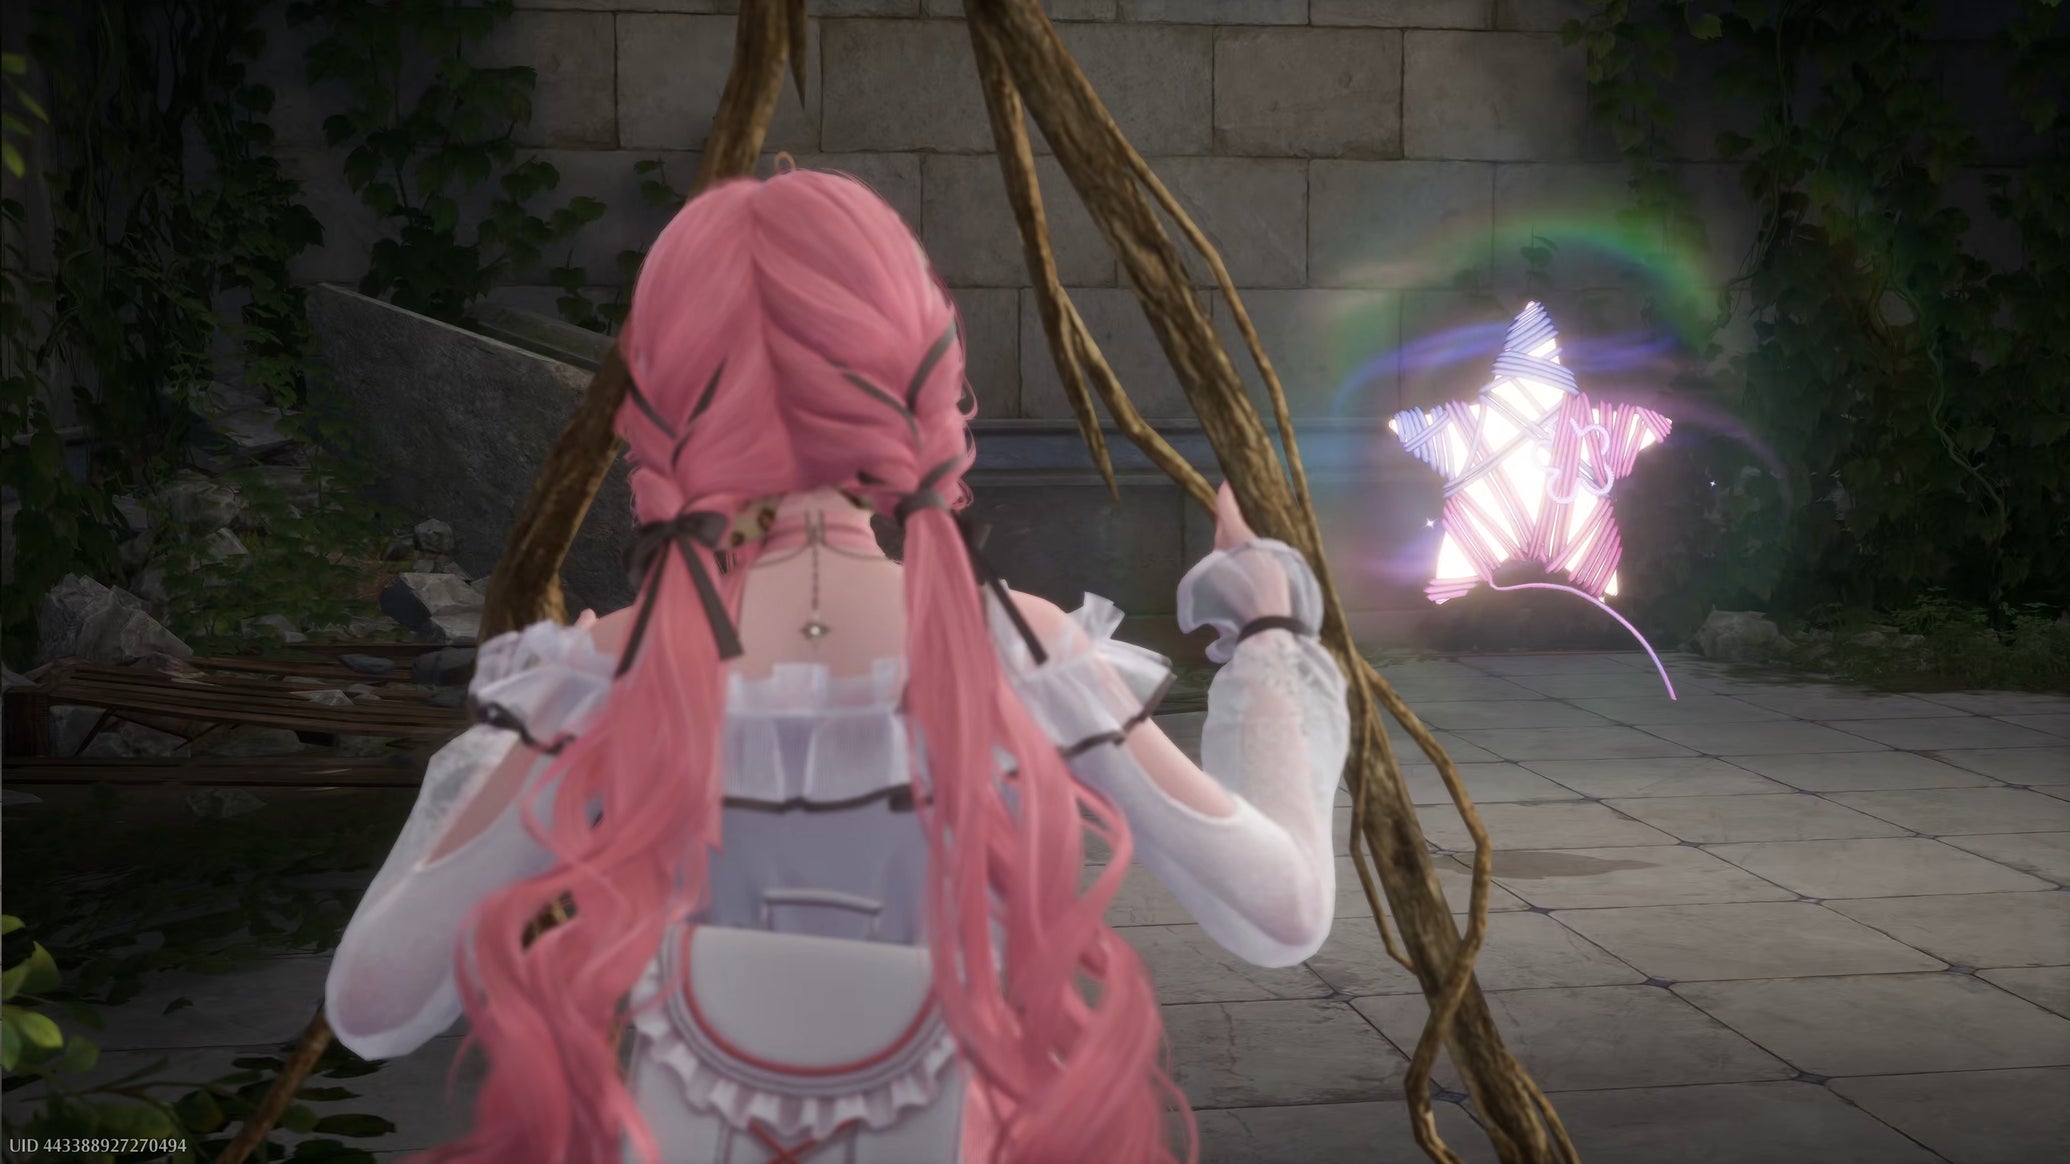
Image credit:Rock Paper Shotgun/Papergames

Looking to collect all 366 Whimstars in Infinity Nikki? There’s a great deal of activities to busy yourself with in the land of Infinity Nikki , from the expansive main storyline to tonnes of side quests, activities, and a vast supply of collectibles. Chief among those collectibles are Whimstars , which you must collect in order to unlock new skills in the Heart Of Infinity.
There’s a grand total of 366 Whimstars to collect across all six regions of Miraland in Infinity Nikki, and below we’ll help you find every last one of them. Follow along with our guide, and we’ll explain everything you need to know about what Whimstars are and how they work, the various different types of Whimstar puzzles you’ll come across during your travels, and - most importantly - where to find all 366 Whimstar locations in Infinity Nikki!
In this guide:
- What are Whimstars?
- All 366 Whimstar locations in Infinity Nikki
- How to solve every type of Whimstar puzzle
What are Whimstars?
Whimstars are large colourful star-shaped collectibles spread across the lands of Infinity Nikki. To collect one, all you need to do is walk into it. But many Whimstars are hidden behind specific challenges and puzzles that you need to solve before the star will reveal itself.
Each region in Miraland contains a certain number of Whimstars, and you can keep track of how many you’ve found so far by looking at the top-right corner of the map screen. Each time you collect a Whimstar, its location will be marked on your map to help you keep track of which Whimstars you’ve already found (if you don’t see the star icons on the map, try zooming in!).
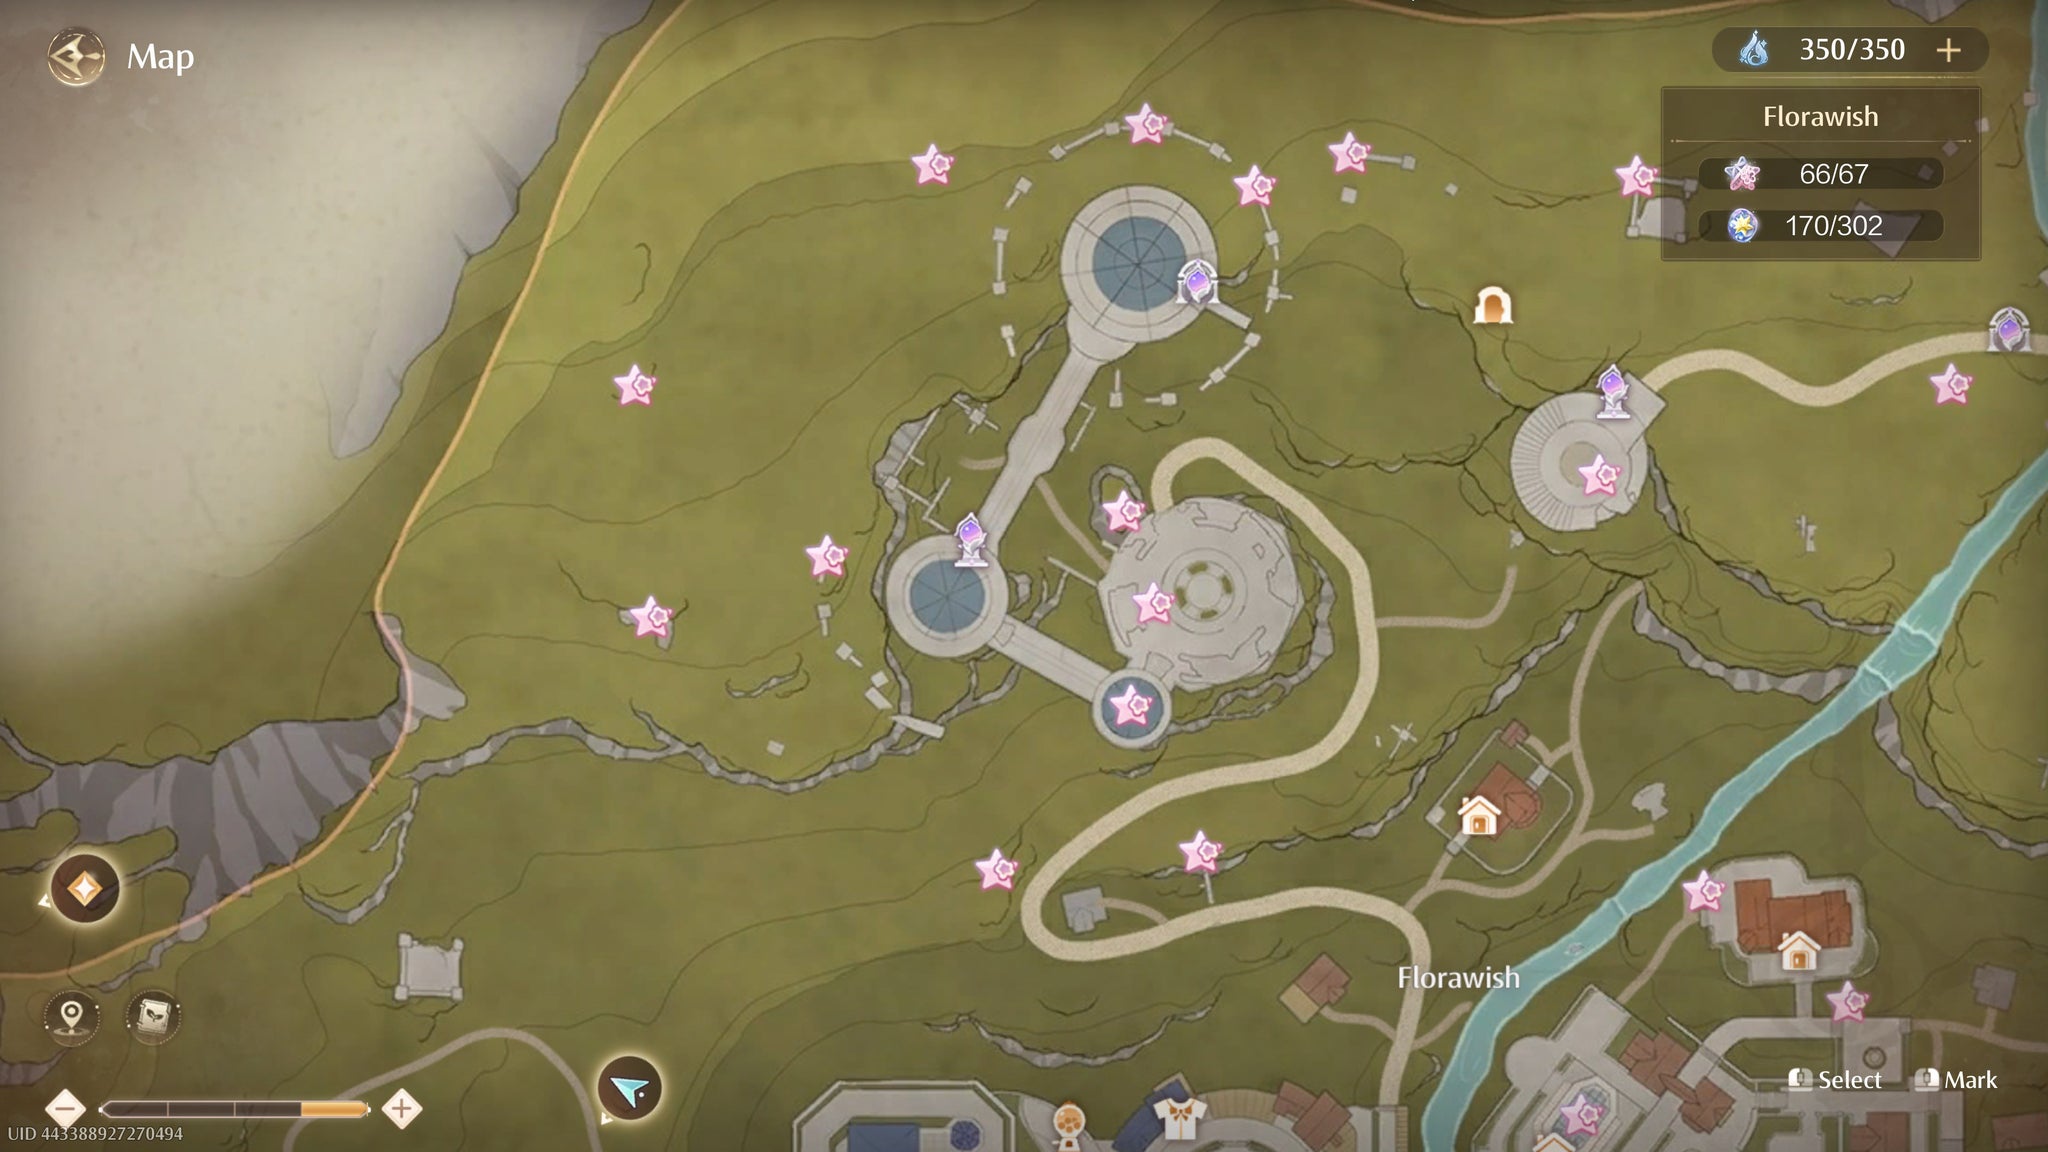
Left: part of the map with the locations of collected Whimstars marked. Right: the Heart Of Infinity. |Image credit:Rock Paper Shotgun/Papergames
Whimstars are the most important collectible in Infinity Nikki, because they are used to unlock new skills in the Heart Of Infinity , the skill unlock system in Infinity Nikki. You can open the Heart Of Infinity at any time by pressing I on the keyboard, or clicking the heart button in the top-right corner of your screen.
The Heart Of Infinity is filled with dozens of clothing items, skills, and even whole new Ability Outfits. To unlock one, click on it and click “Acquire”. Most nodes have certain requirements, and all of them require a bit of Bling and at least one Whimstar .
How to find Whimstars
You can see how many Whimstars you have left to find within a region by looking at the top-right corner of your map. But to actually track down nearby Whimstars, you need the help of your friend Momo. As is shown to you in the prologue, Momo can help you to see the locations of nearby Whimstars (and Dews Of Inspiration) by activating Momo’s View with V (or D-Pad Up on controller).
While using Momo’s View time stands still and you cannot move, but you can see nearby Whimstars through walls and floors. Hover over a nearby Whimstar and you can interact with it to track it, allowing you to exit Momo’s View while still seeing the Whimstar’s location through walls.
Momo will alert you in the top-left corner of your screen whenever a Whimstar is near, so whenever you see the alert, enter Momo’s View to track down the Whimstar’s location.
All 366 Whimstar locations in Infinity Nikki
Below you’ll find maps for each region of Miraland, showing all 366 Whimstar locations in Infinity Nikki. Click on any of the below links to jump ahead to a particular map.
- Memorial Mountains : 7 Whimstars
- Florawish : 67 Whimstars
- Breezy Meadow : 88 Whimstars
- Stoneville : 26 Whimstars
- Abandoned District : 96 Whimstars
- Wishing Woods : 82 Whimstars
Memorial Mountains
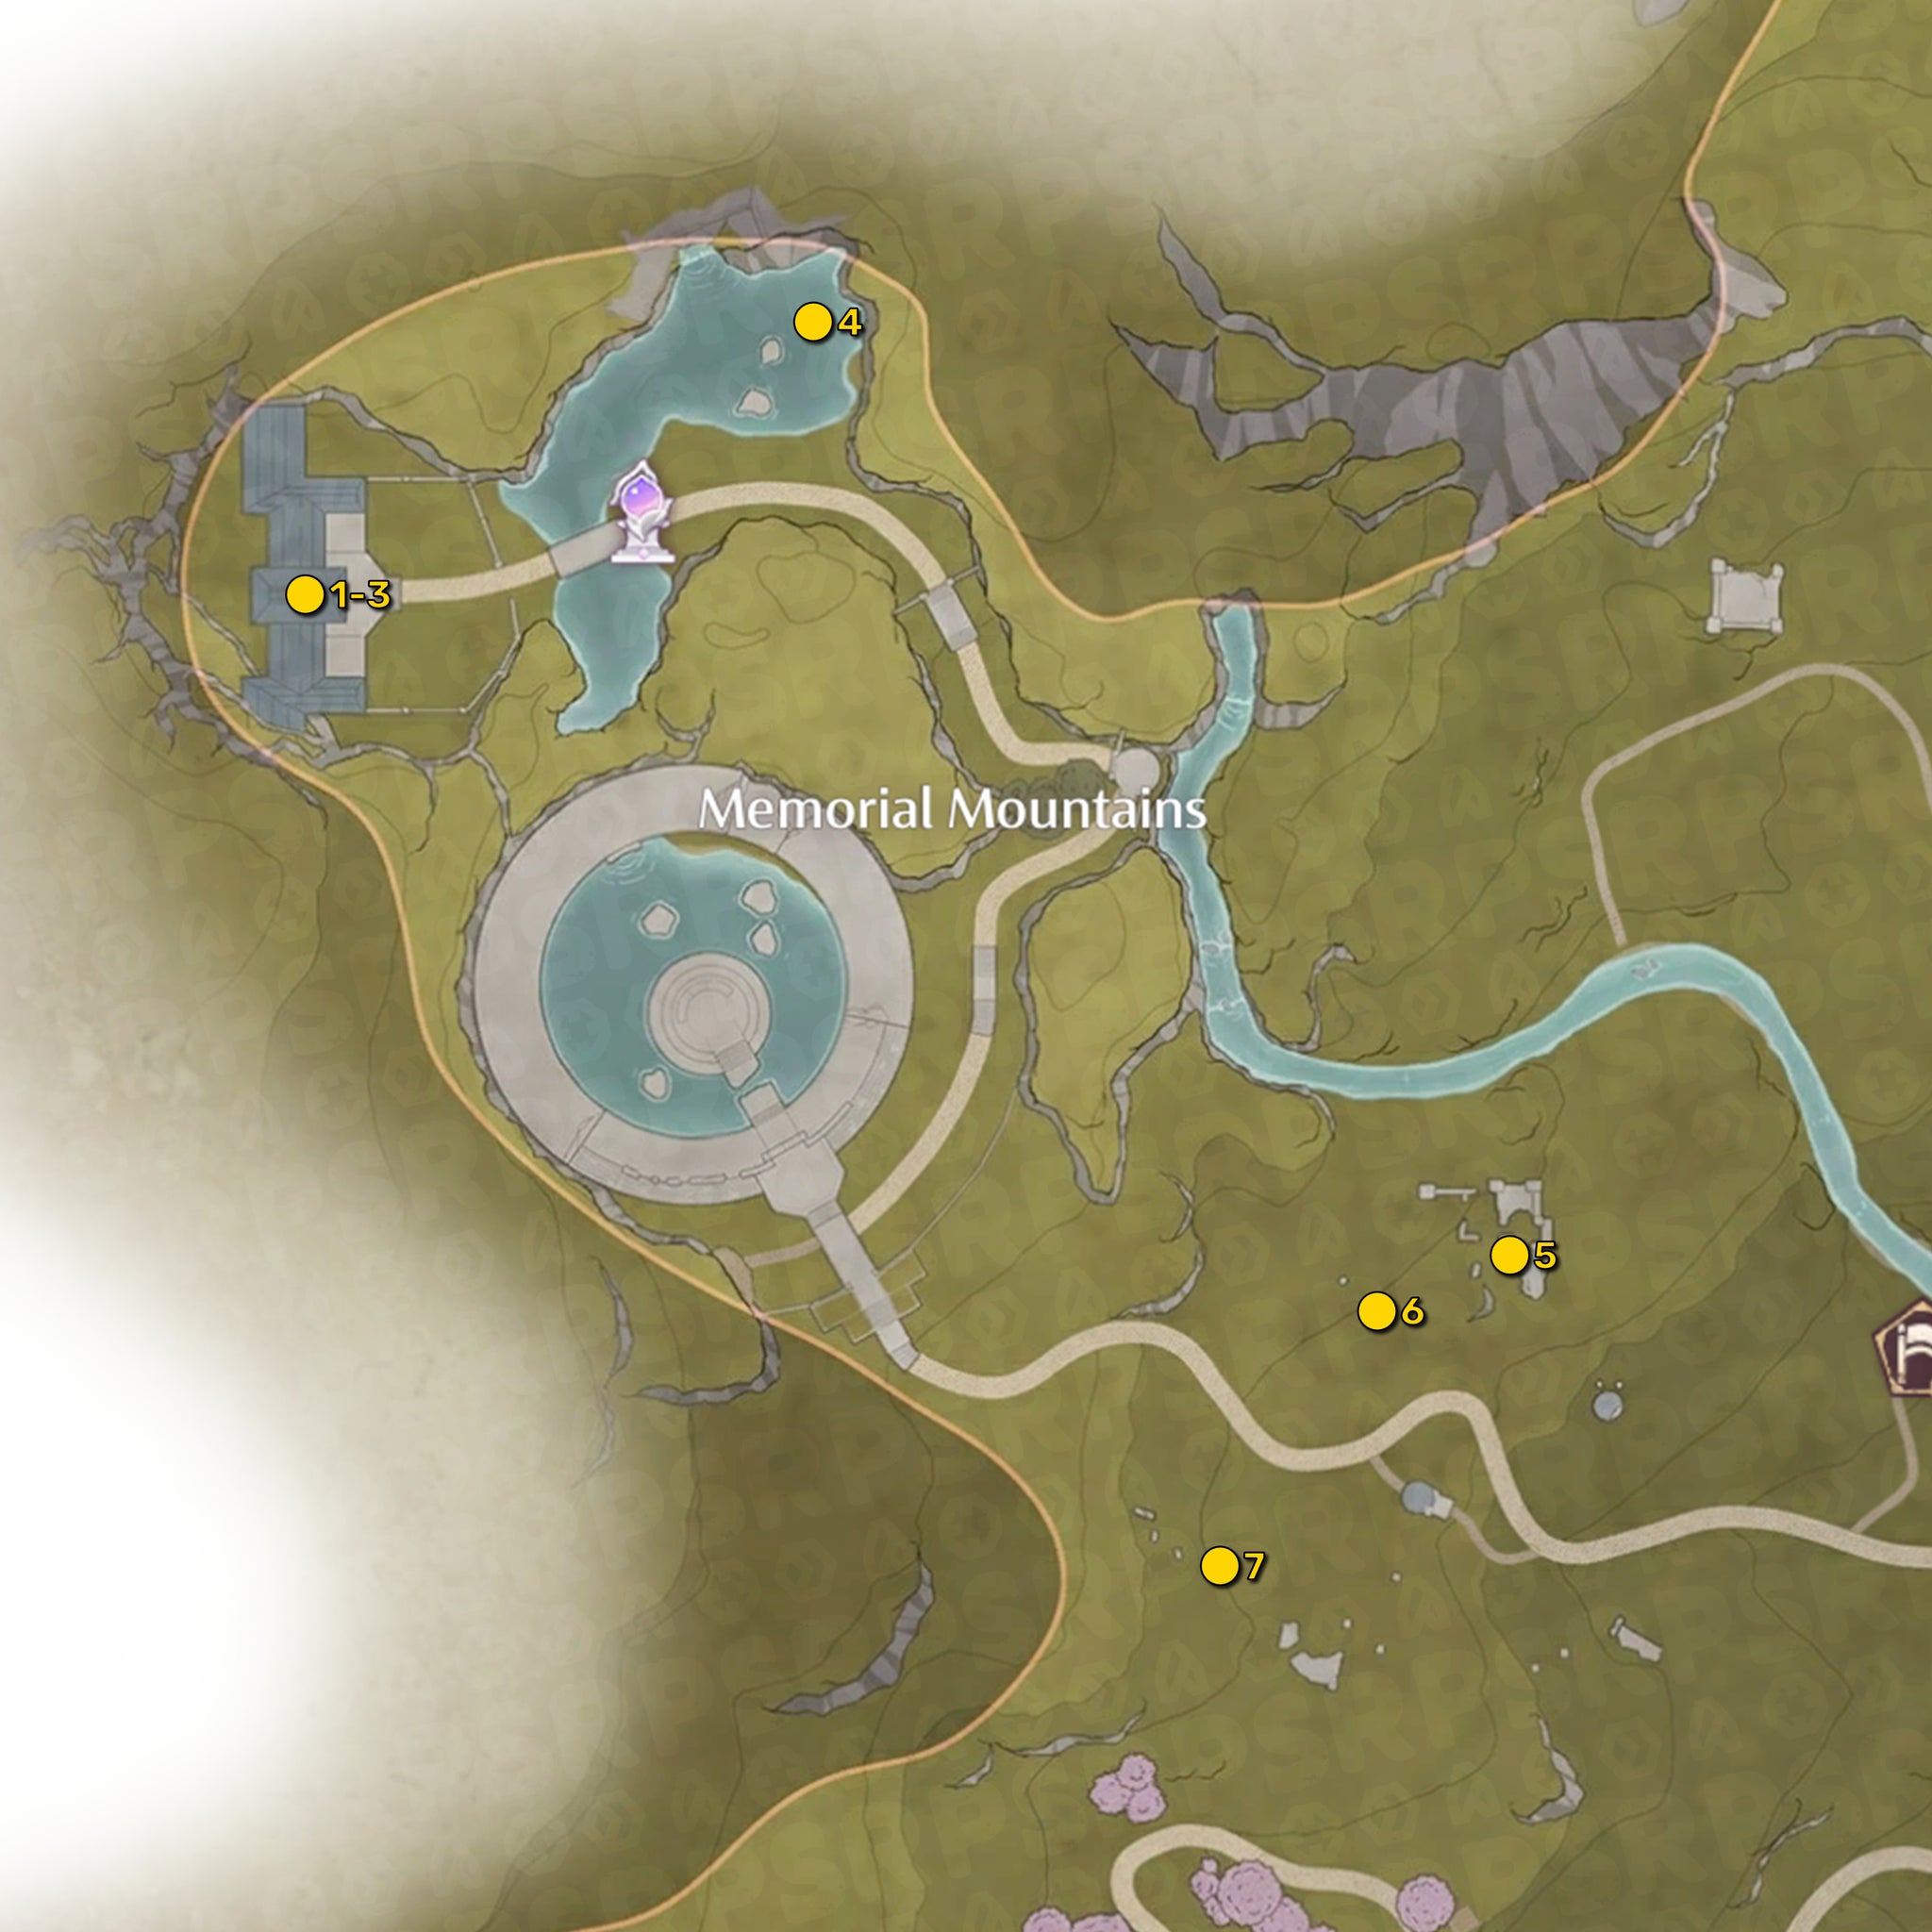
Click here to view this Memorial Mountains map at full resolution!|Image credit:Rock Paper Shotgun/Papergames
There’s a total of 7 Whimstars to be found in the small starting region of Memorial Mountains. If you need help finding them all, check out our Infinity Nikki Memorial Mountains Whimstars guide!
Florawish
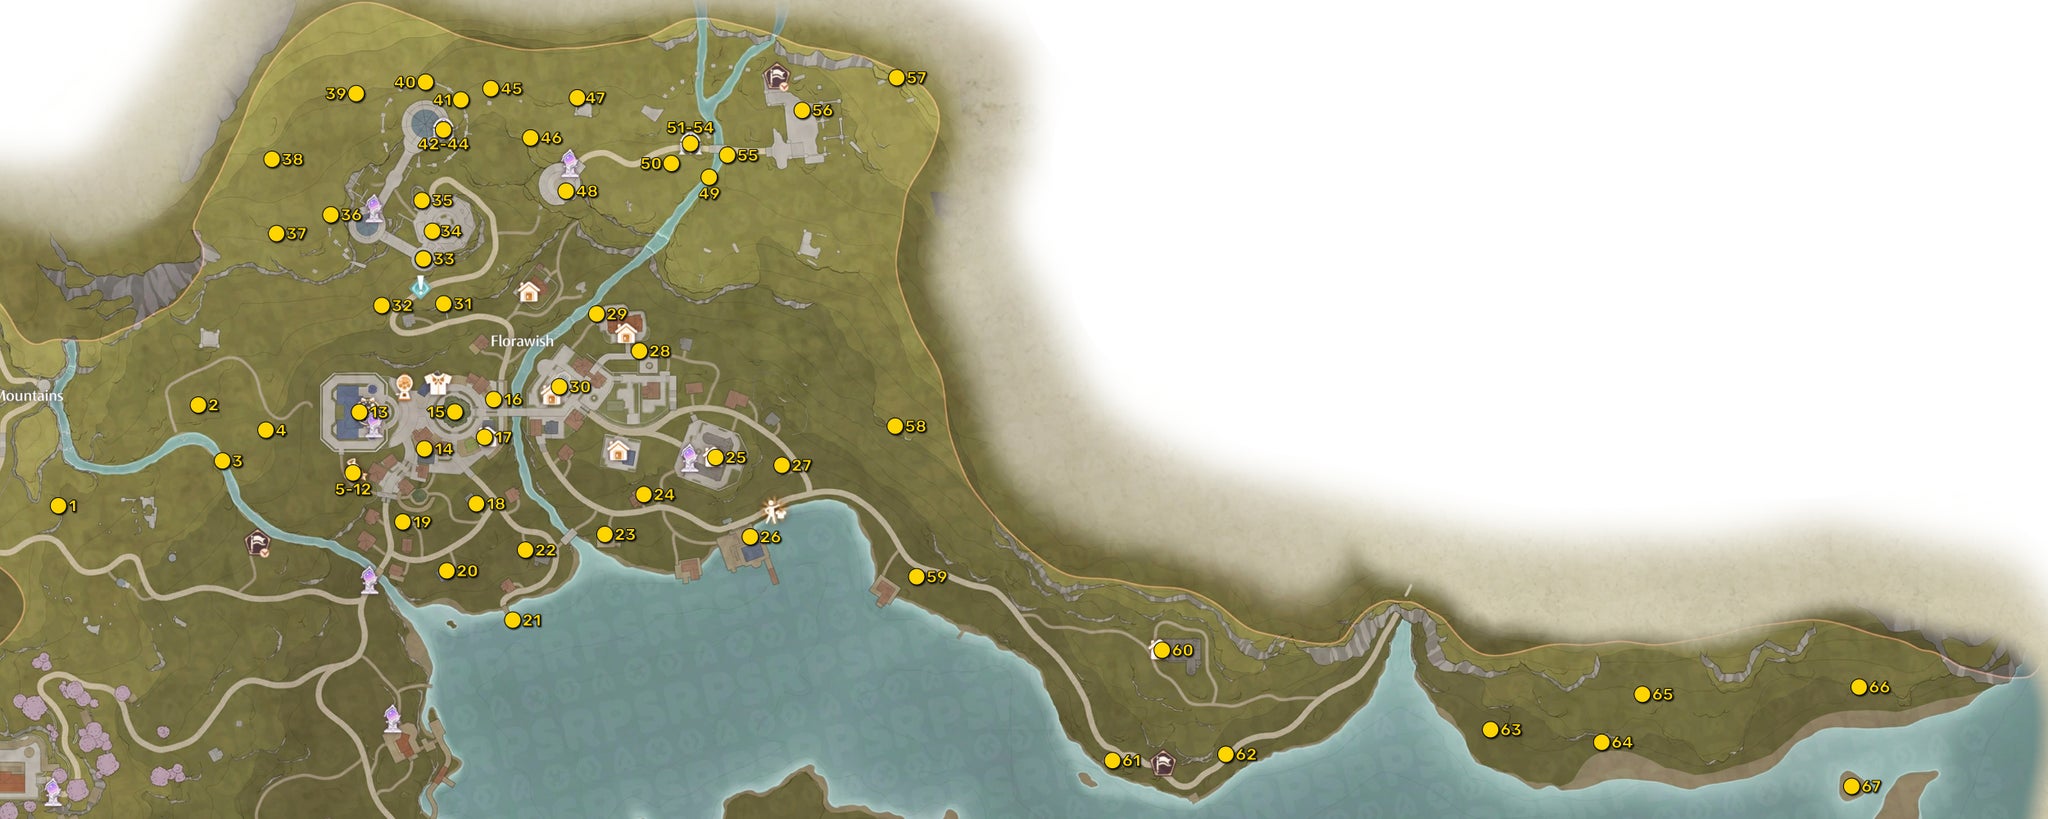
Click here to view this Florawish map at full resolution!|Image credit:Rock Paper Shotgun/Papergames
The Florawish region contains a mighty 67 Whimstars to track down. If you need help solving all the puzzles involved, consult our Infinity Nikki Florawish Whimstars guide.
Breezy Meadow
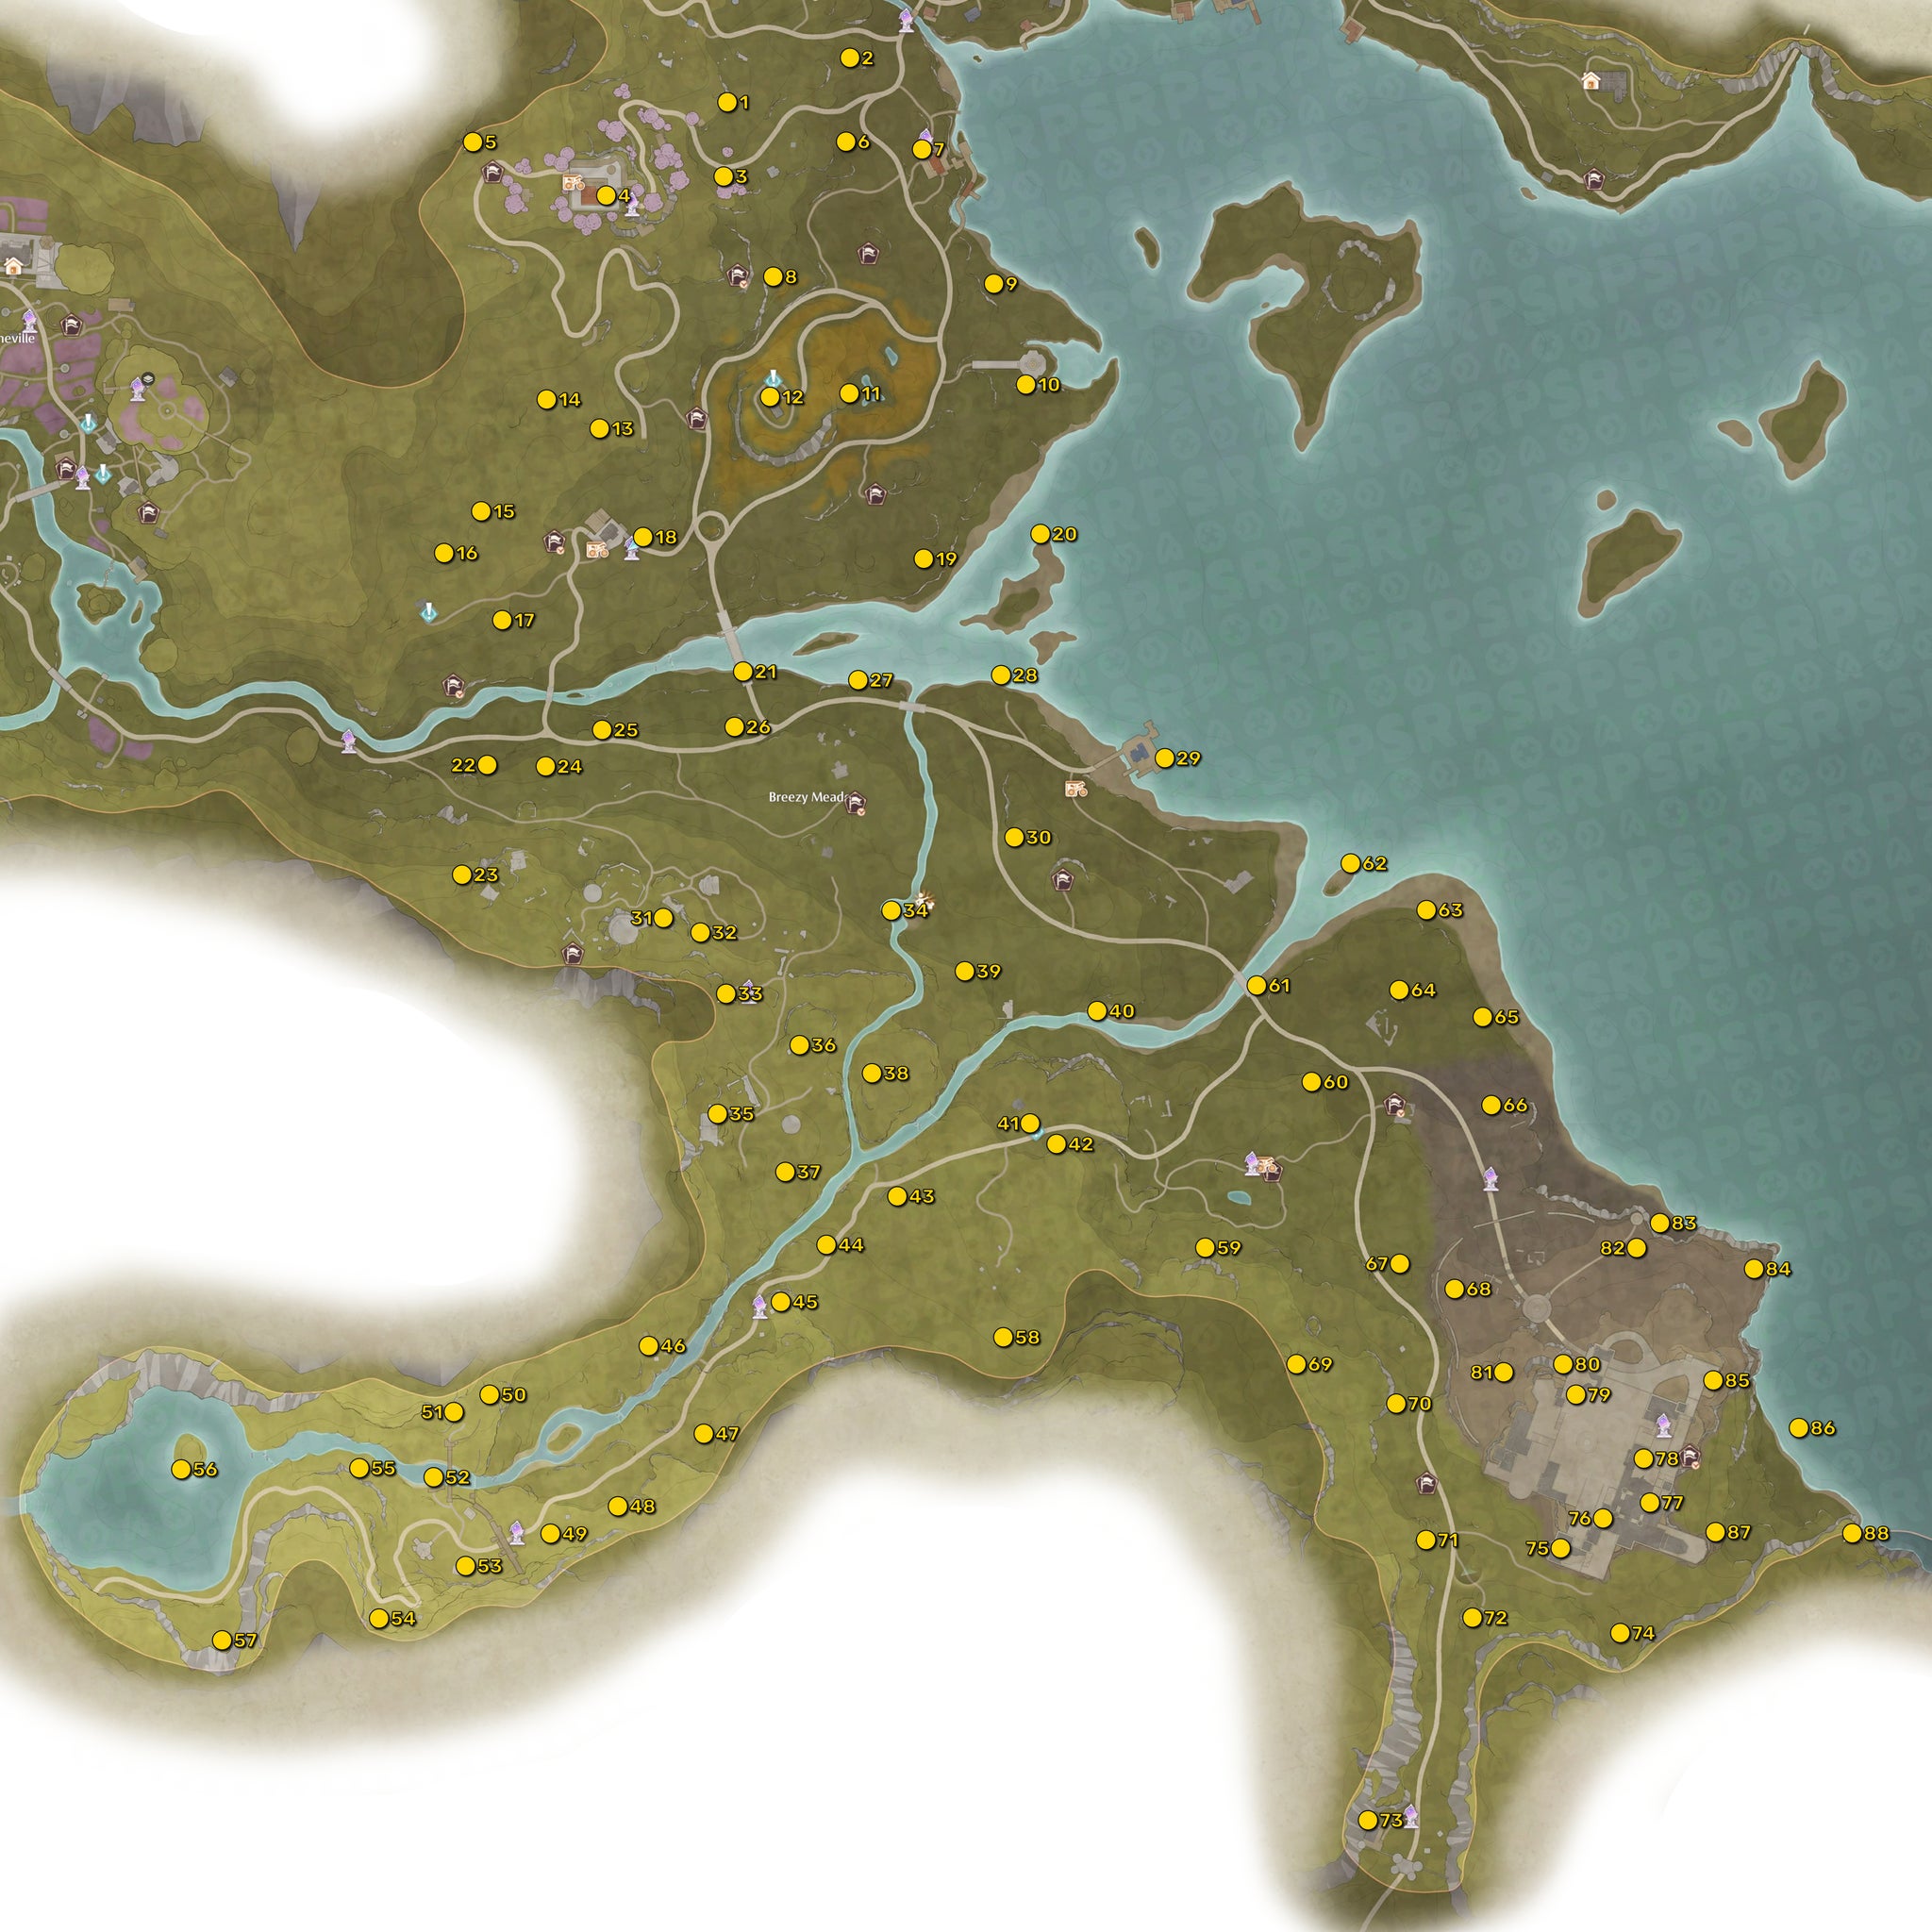
Click here to view this Breezy Meadow map at full resolution!|Image credit:Rock Paper Shotgun/Papergames
Breezy Meadow contains 88 Whimstars across its large landmass. To track them all down, head to our Infinity Nikki Breezy Meadow Whimstars guide.
Stoneville
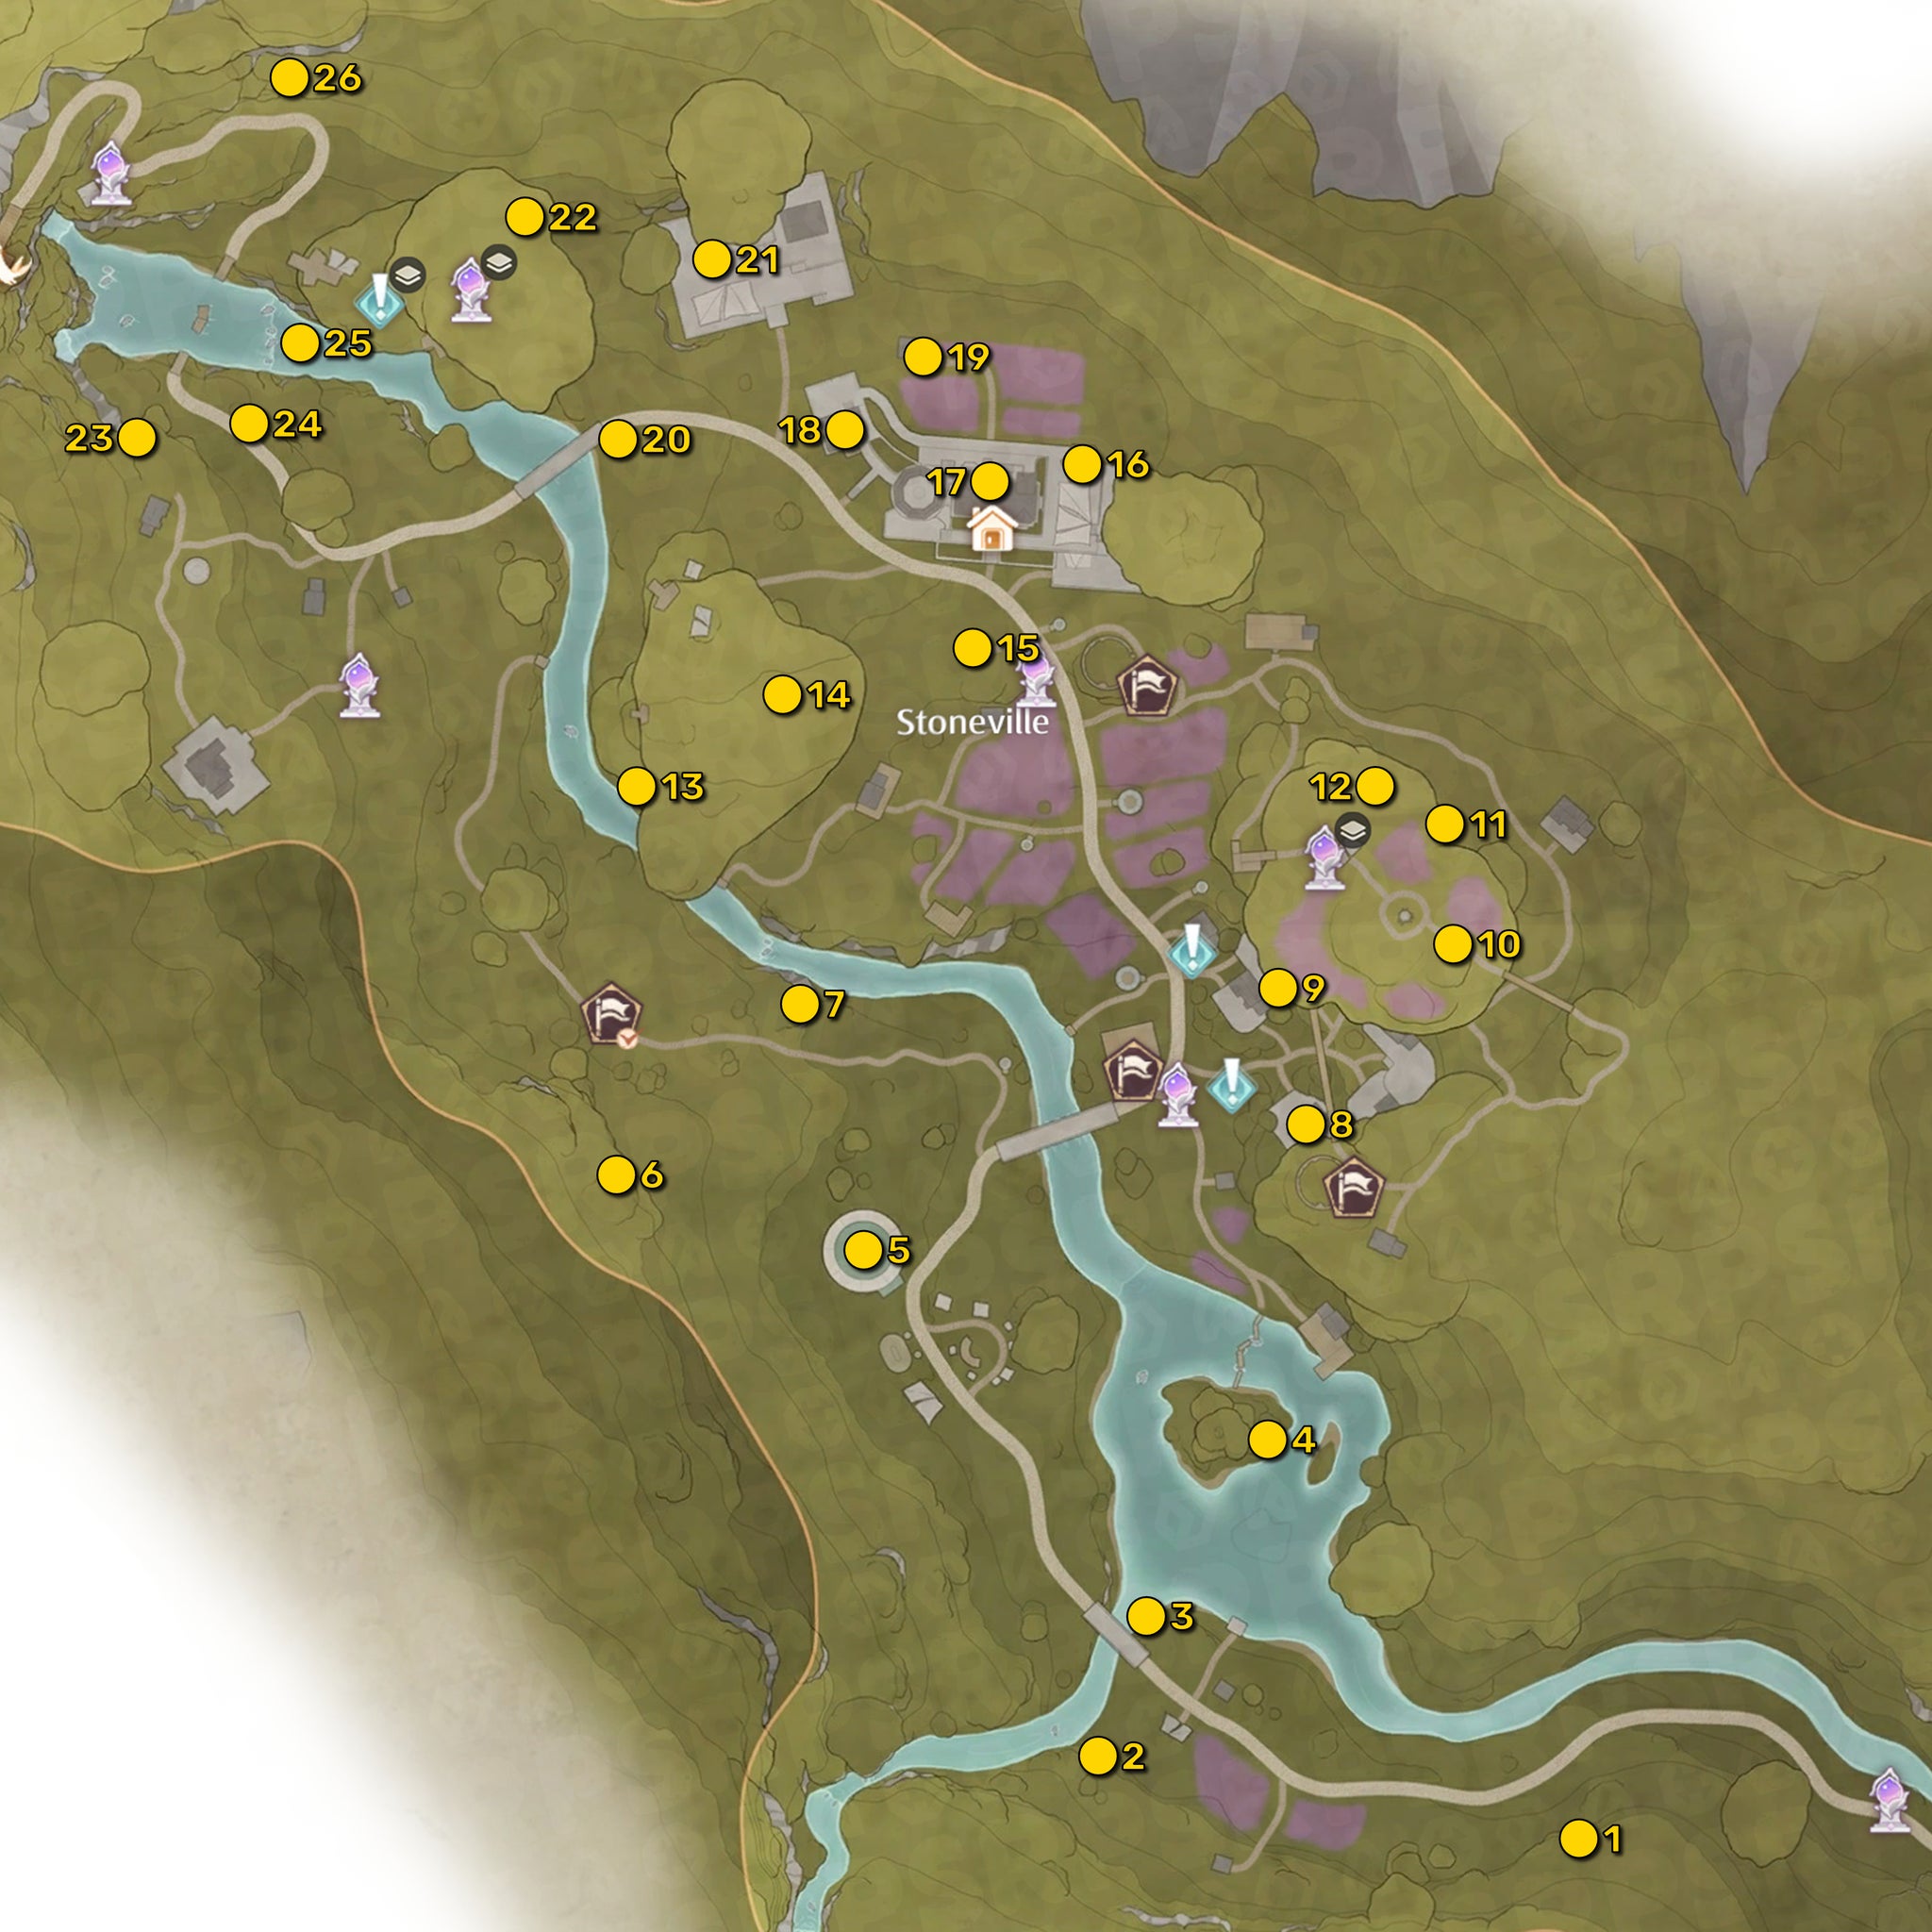
Click here to view this Stoneville map at full resolution!|Image credit:Rock Paper Shotgun/Papergames
Stoneville is a more compact region containing just 26 Whimstars in total. To find them all, head over to our Infinity Nikki Stoneville Whimstars guide.
Abandoned District
The Abandoned District contains a whopping 96 Whimstars , the most of any region in Miraland. If you need some assistance finding every last one, check out our Infinity Nikki Abandoned District Whimstars guide!
Wishing Woods
The Wishing Woods contains a total of 82 Whimstars , bringing the grand total in the world up to 366. To find all of them, look no further than our Infinity Nikki Wishing Woods Whimstars guide.
How to solve every type of Whimstar puzzle
There are many different kinds of Whimstar puzzles in Infinity Nikki, and each one requires a different tactic to solve and obtain the Whimstar. Below we’ve laid out all the different kinds of activities you might need to do to collect a Whimstar.
Regular Whimstars
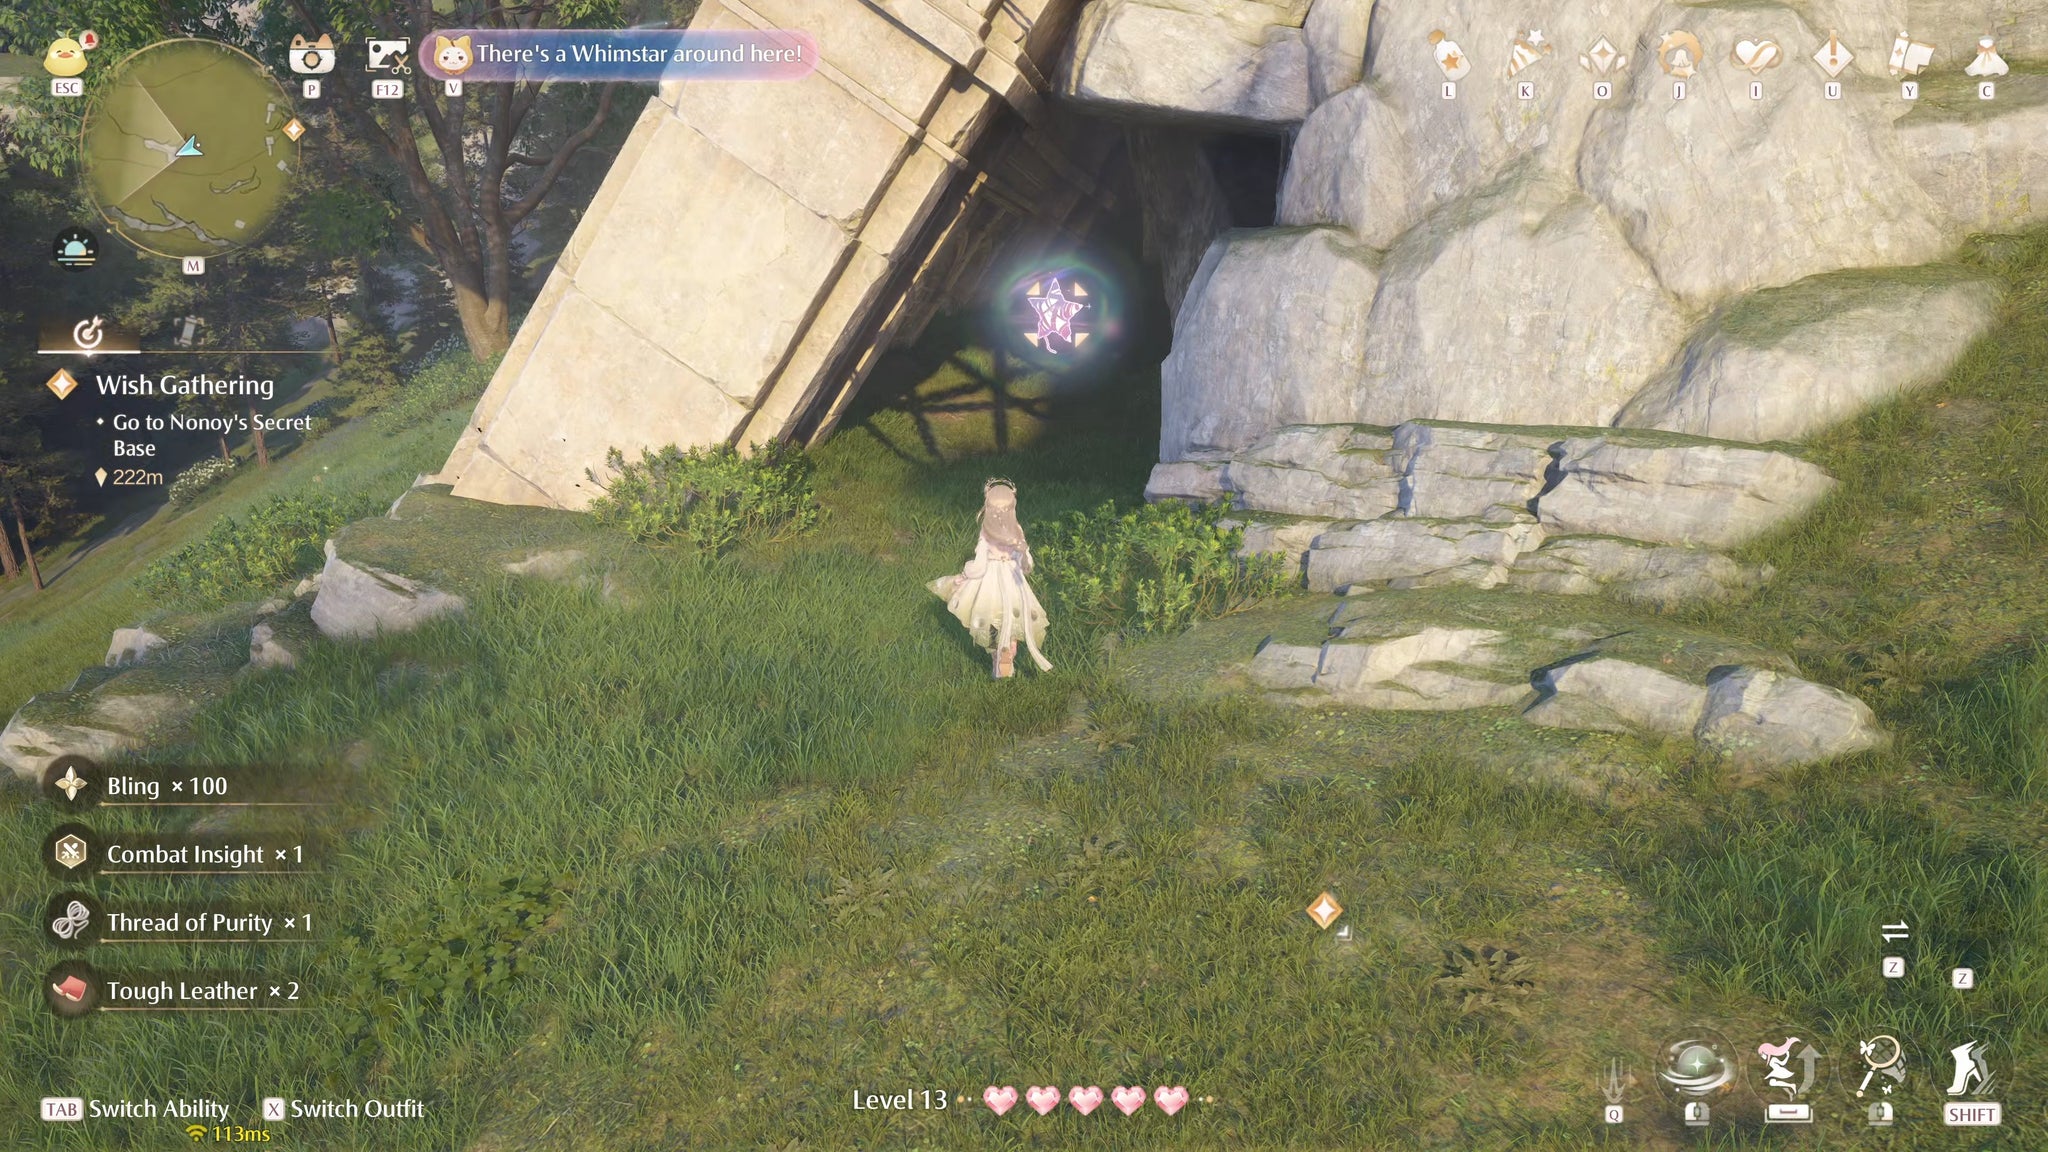
Image credit:Rock Paper Shotgun/Papergames
Regular Whimstars are, in theory, the simplest kind. All you need to do is reach them, and you’ve got the Whimstar! Of course, in most cases, the puzzle part comes from figuring out how to get to them. Usually they’re up high on the tops of pillars or down low inside hard-to-reach areas. In many case you should have a look around nearby, because the solution is often a bounce pad or a piece of destructible flooring in the vicinity.
Time Trial Whimstars
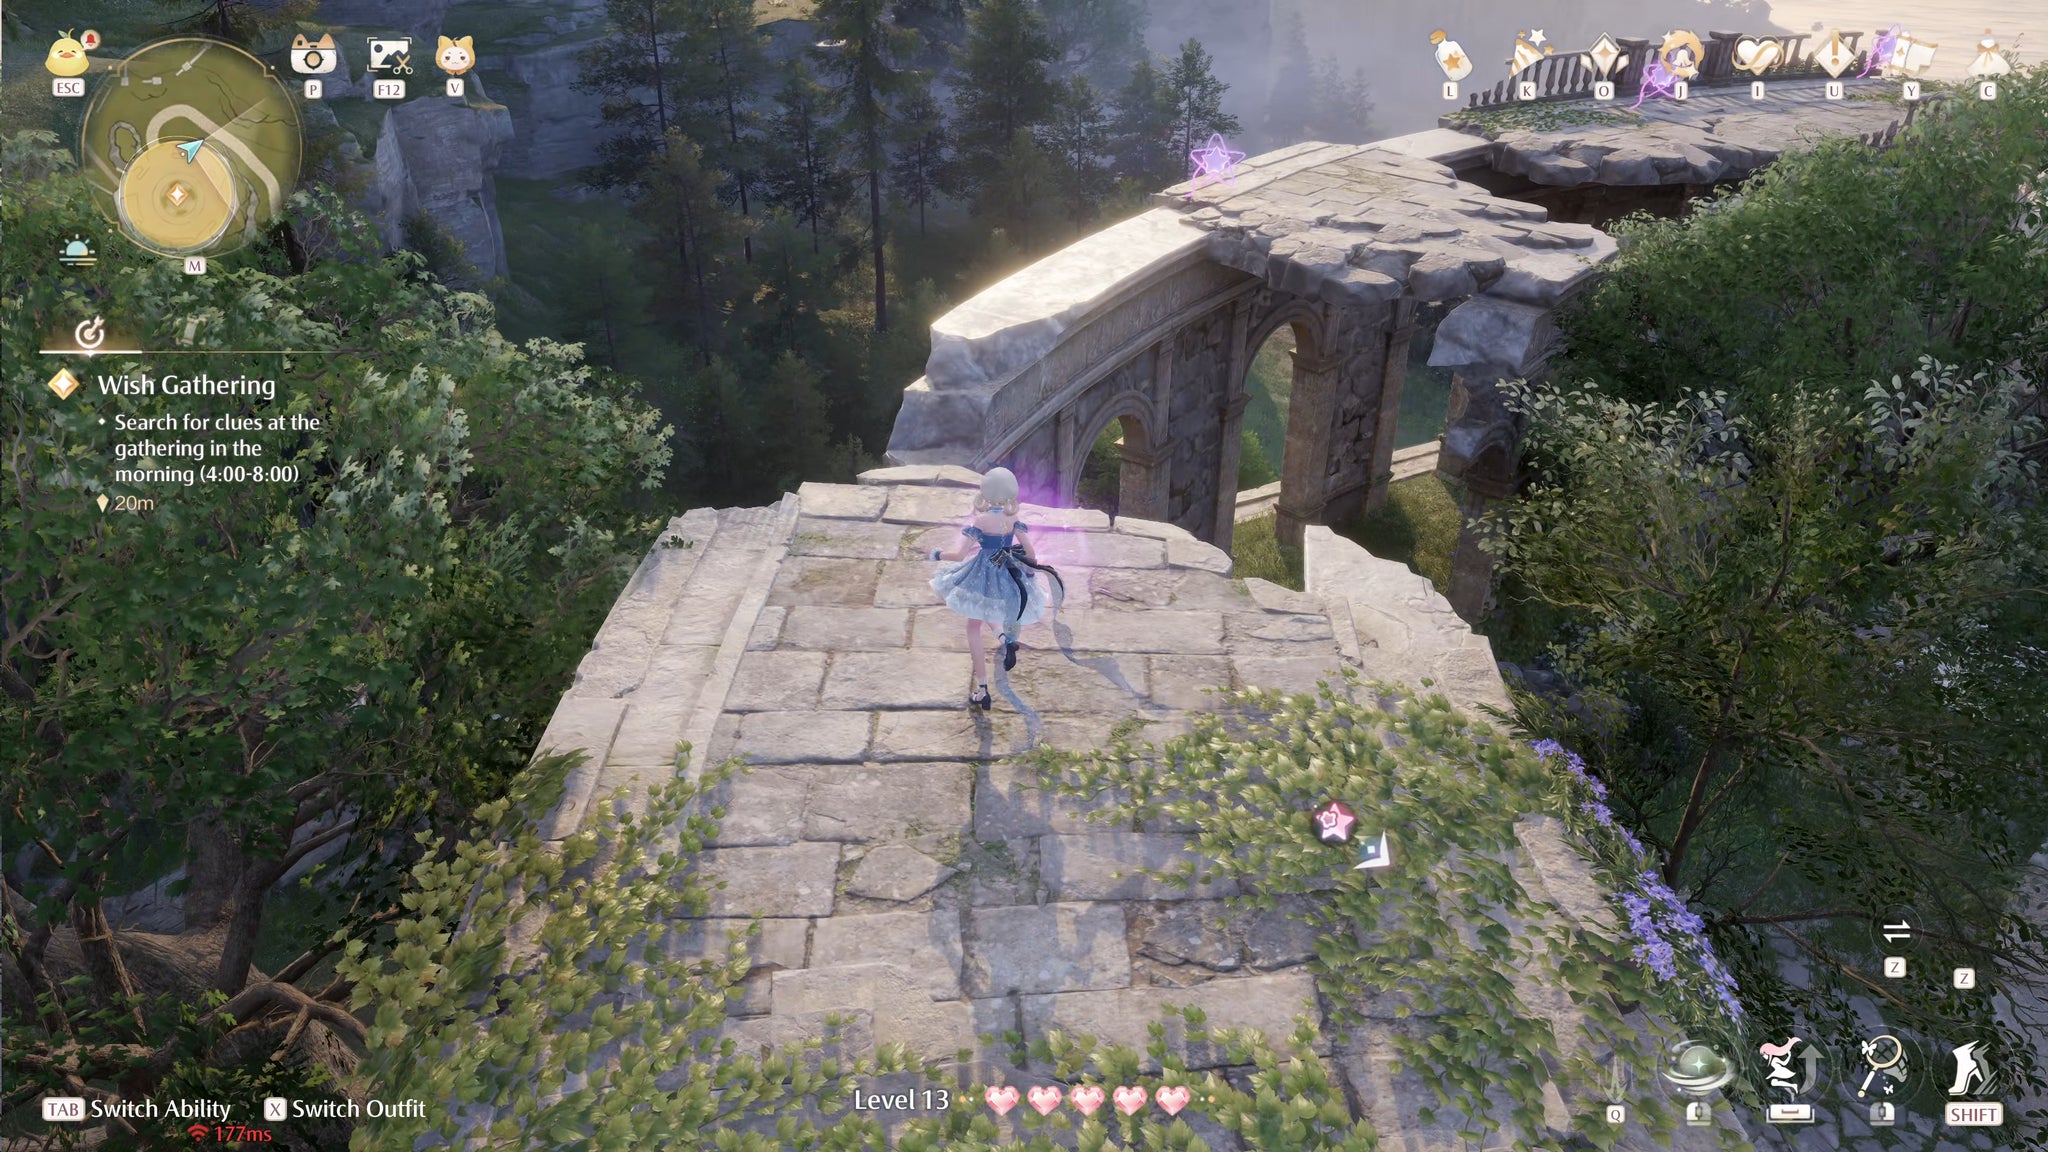
Image credit:Rock Paper Shotgun/Papergames
Time Trial Whimstars are Whimstars which, when collected, will require you to complete a quick time trial in order to earn the Whimstar itself. These time trials involve collecting all of the stars nearby as quickly as possible. Usually they make use of the terrain, forcing you to jump and glide at the right moments to collect all the stars before time runs out.
Cloud Time Trial Whimstars
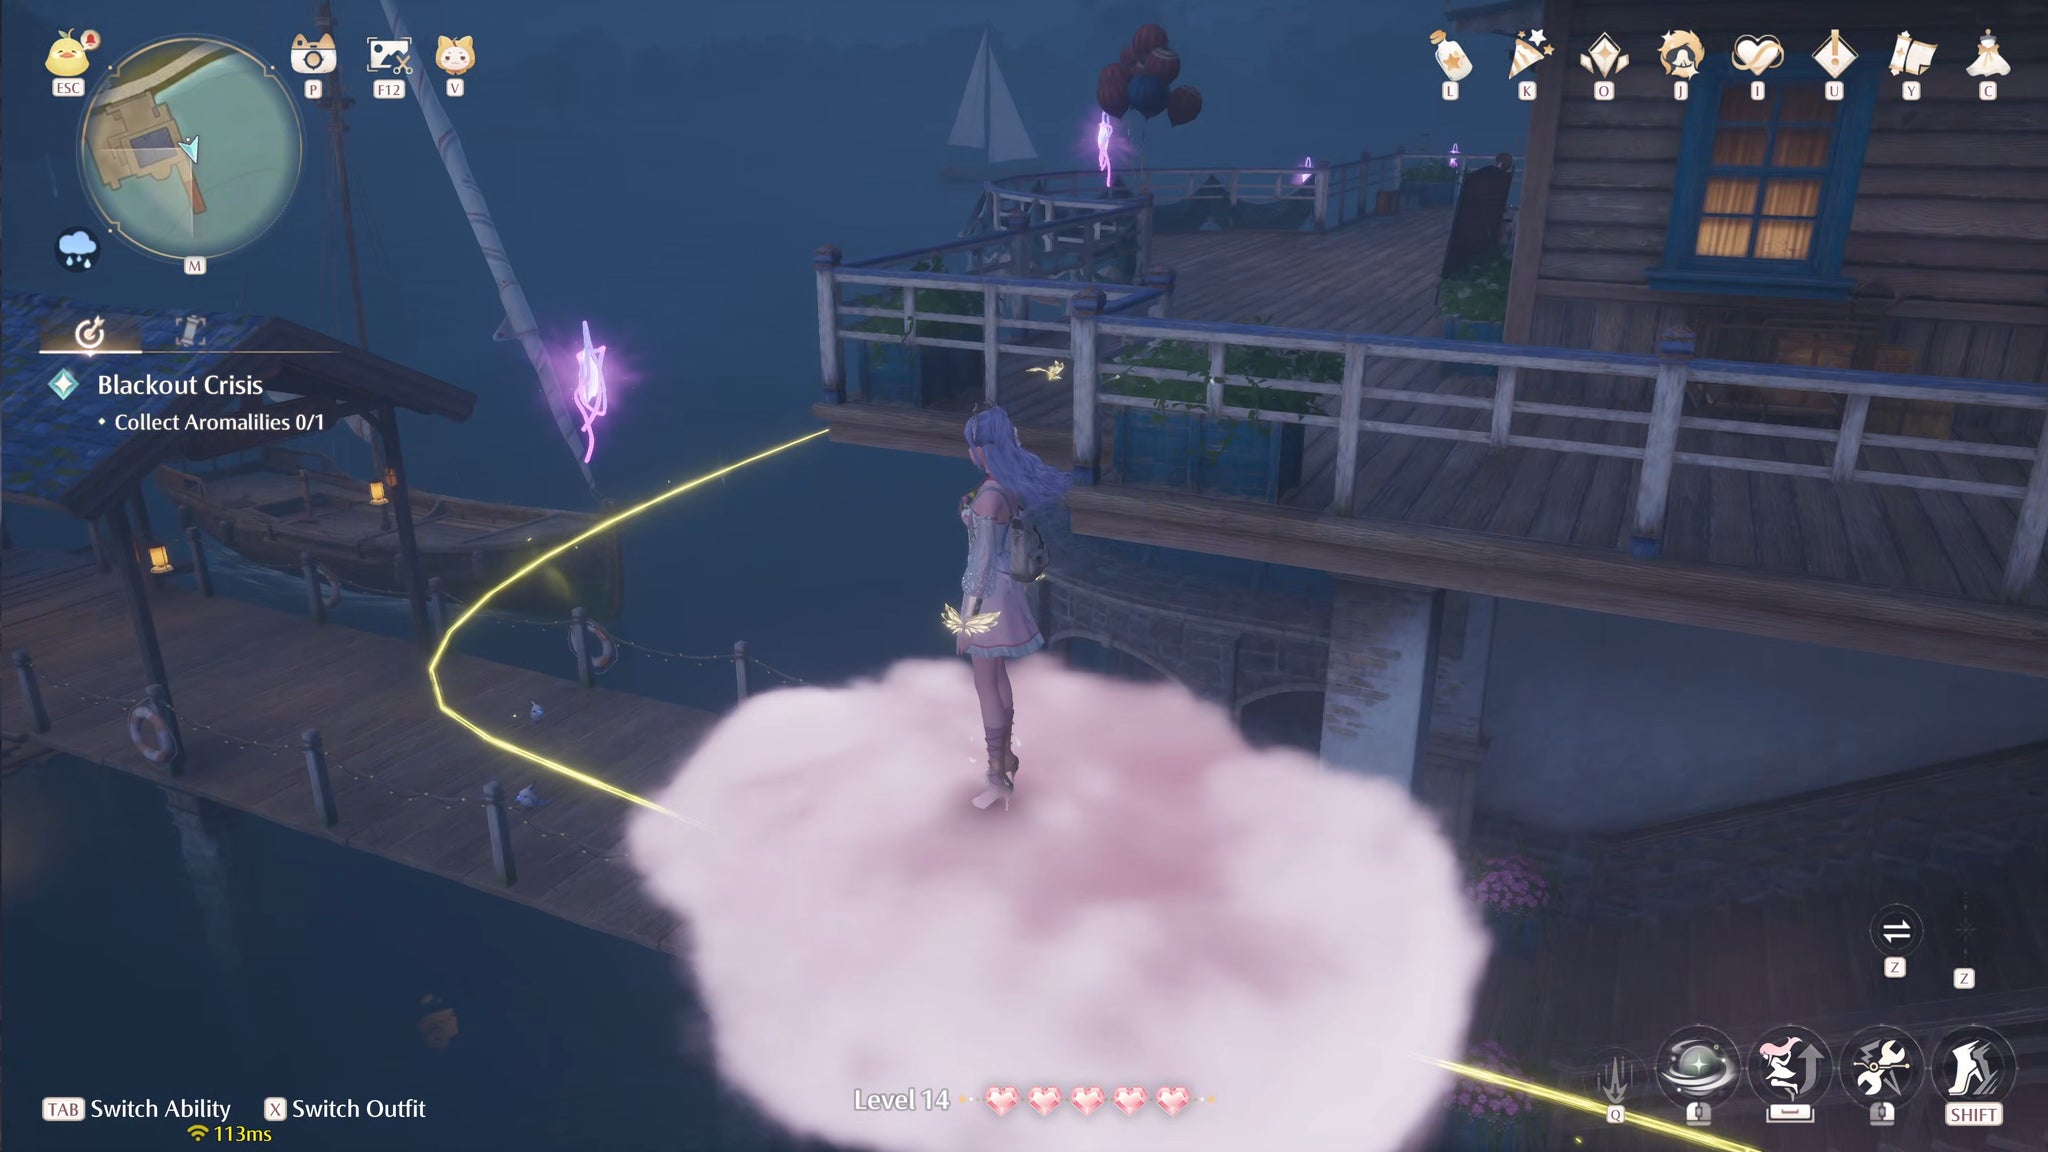
Image credit:Rock Paper Shotgun/Papergames
Cloud Time Trial Whimstars act in the same way as Time Trial Whimstars, except in these cases a small pink cloud appears which acts as a platform you can step on. This cloud will run slowly along a predetermined path, and you have to jump off and back onto the cloud along the way in order to collect all the stars in order to earn the Whimstar at the end of the trial.
Combat Chest Whimstars
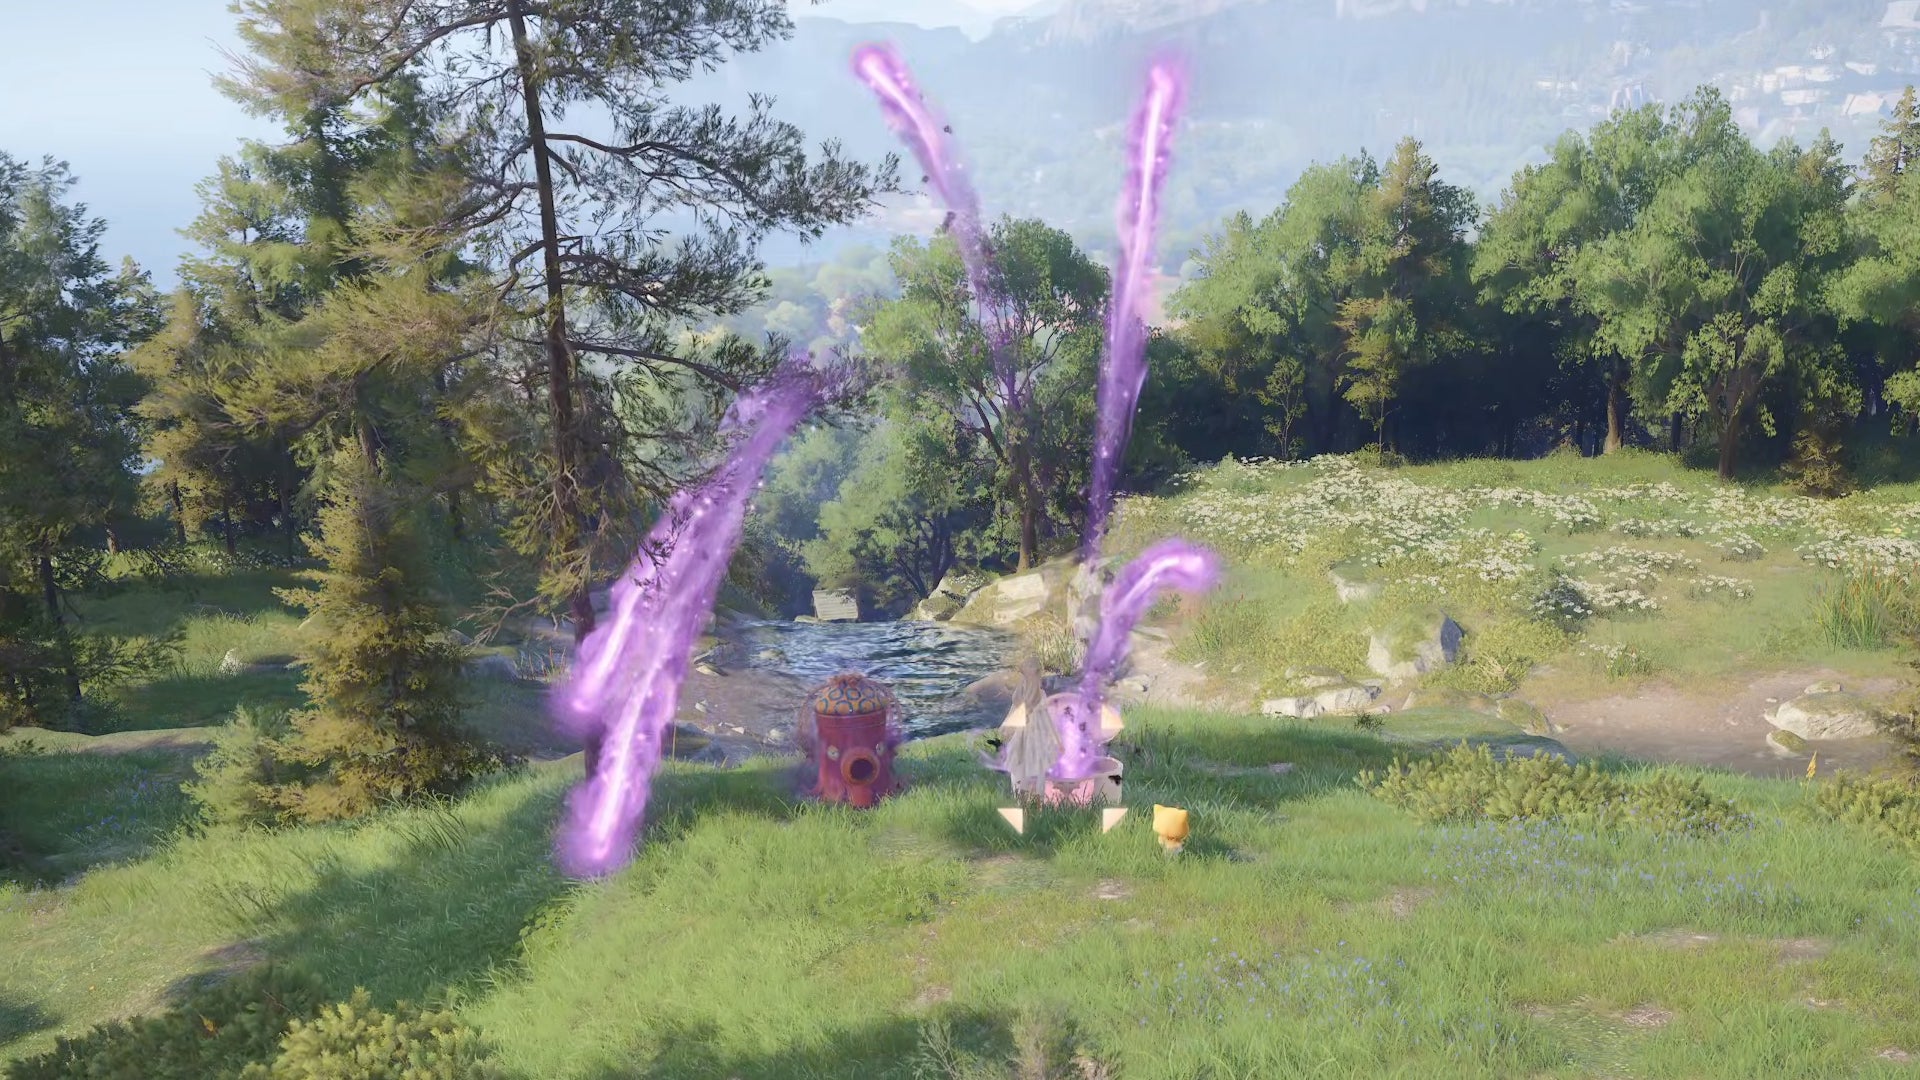
Image credit:Rock Paper Shotgun/Papergames
Combat Chest Whimstars are quite common Whimstar types. They’re also easy to spot and very straightforward, which is handy. When you open the chest, a number of Esseling enemies will spawn out of the chest all around you. You must then defeat all the Esselings in order to summon the Whimstar at the end of it, which you can then collect as normal by walking through it.
Animal Grooming Whimstars
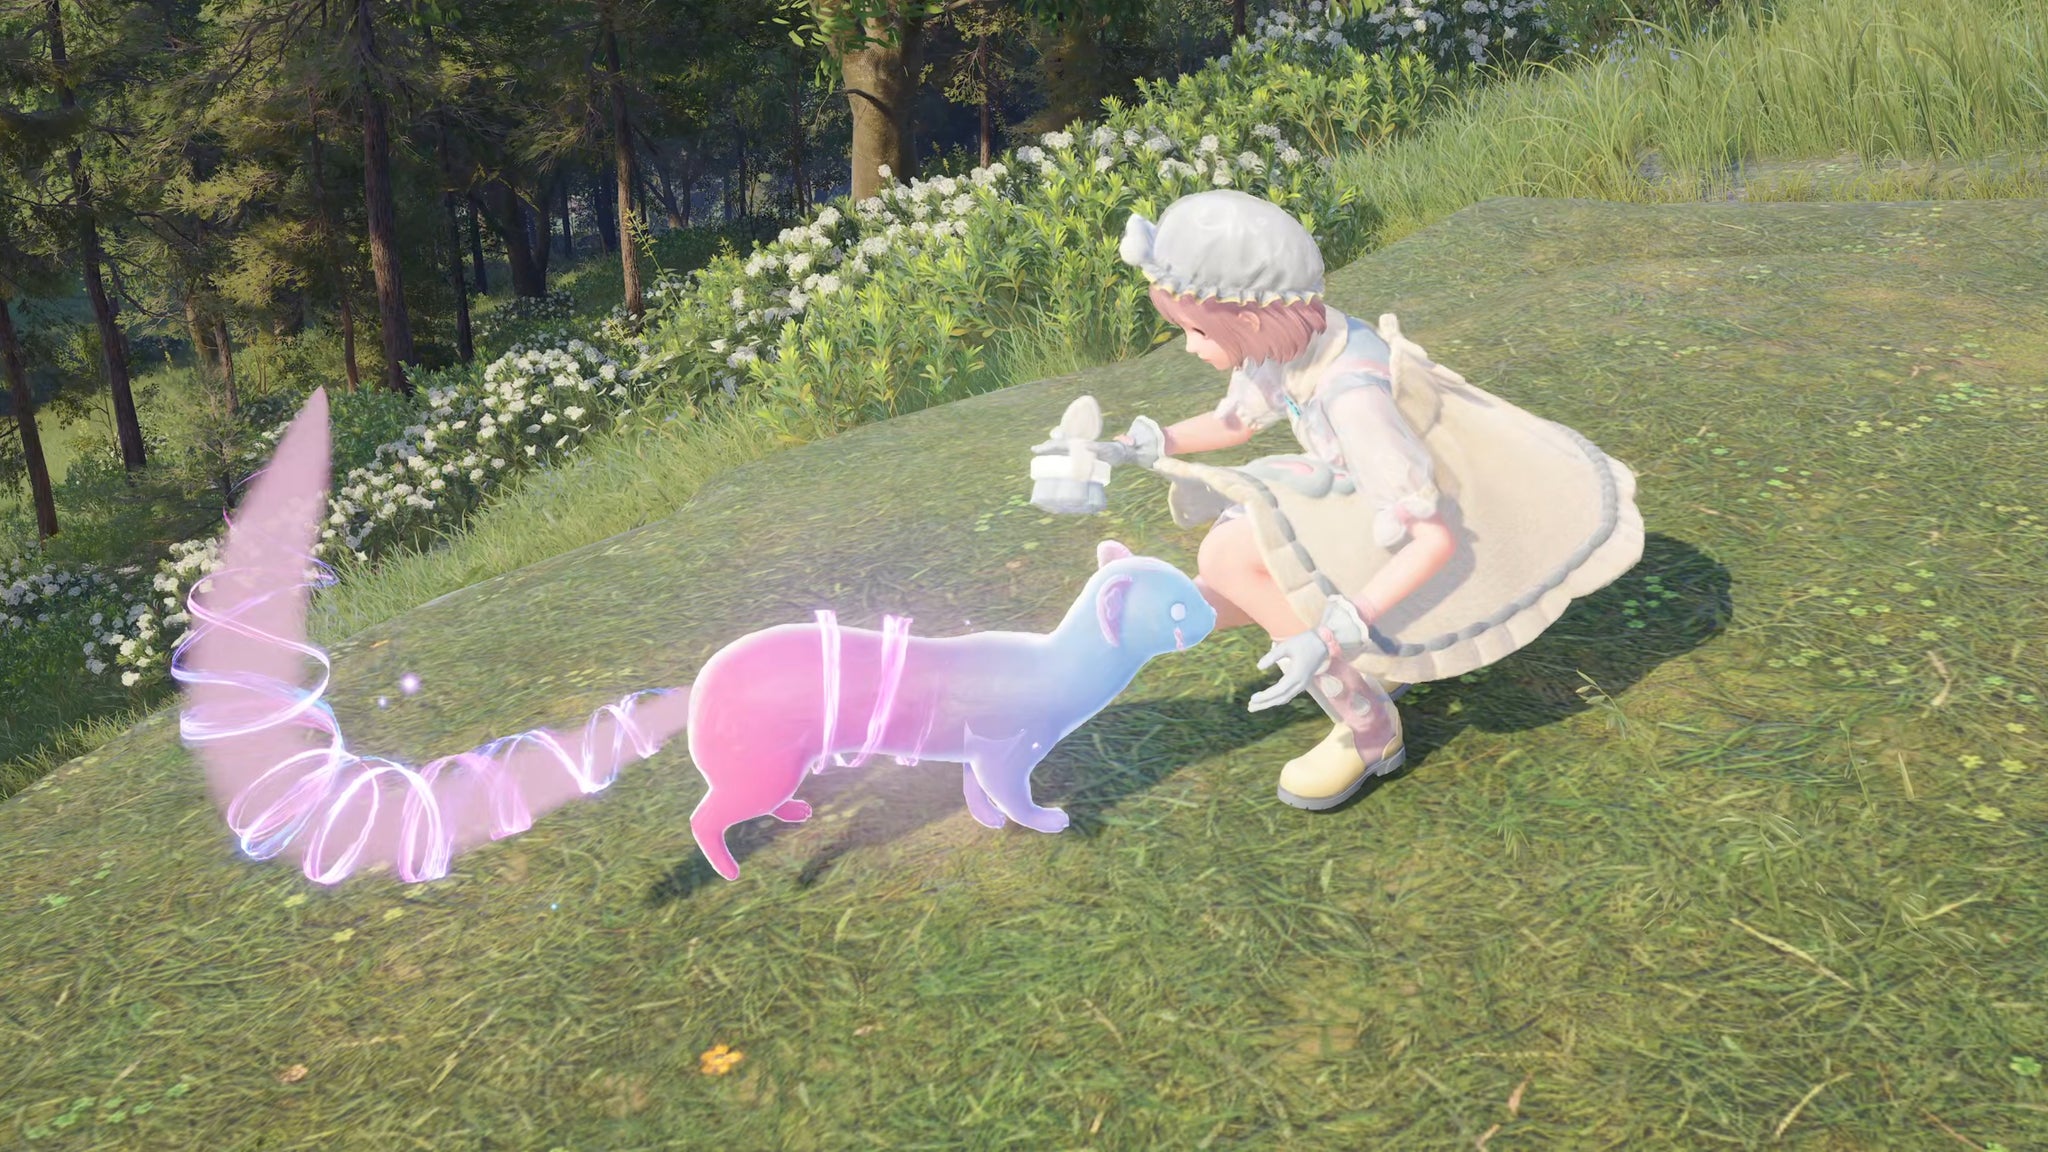
Image credit:Rock Paper Shotgun/Papergames
Animal Grooming Whimstars take the form of small colourful ferret-like animals, and you must groom them using the Animal Grooming Outfit to obtain the Whimstar itself. You’ll get your first Animal Grooming Outfit during the Chapter 1 main story mission “Land Of Wishes”. Once you’ve selected the Animal Grooming ability with TAB , hold down Right-Click to slowly approach the animal, and then release Right-Click when you’re near enough for the grooming icon to appear above the animal’s head.
Bug Catching Whimstars
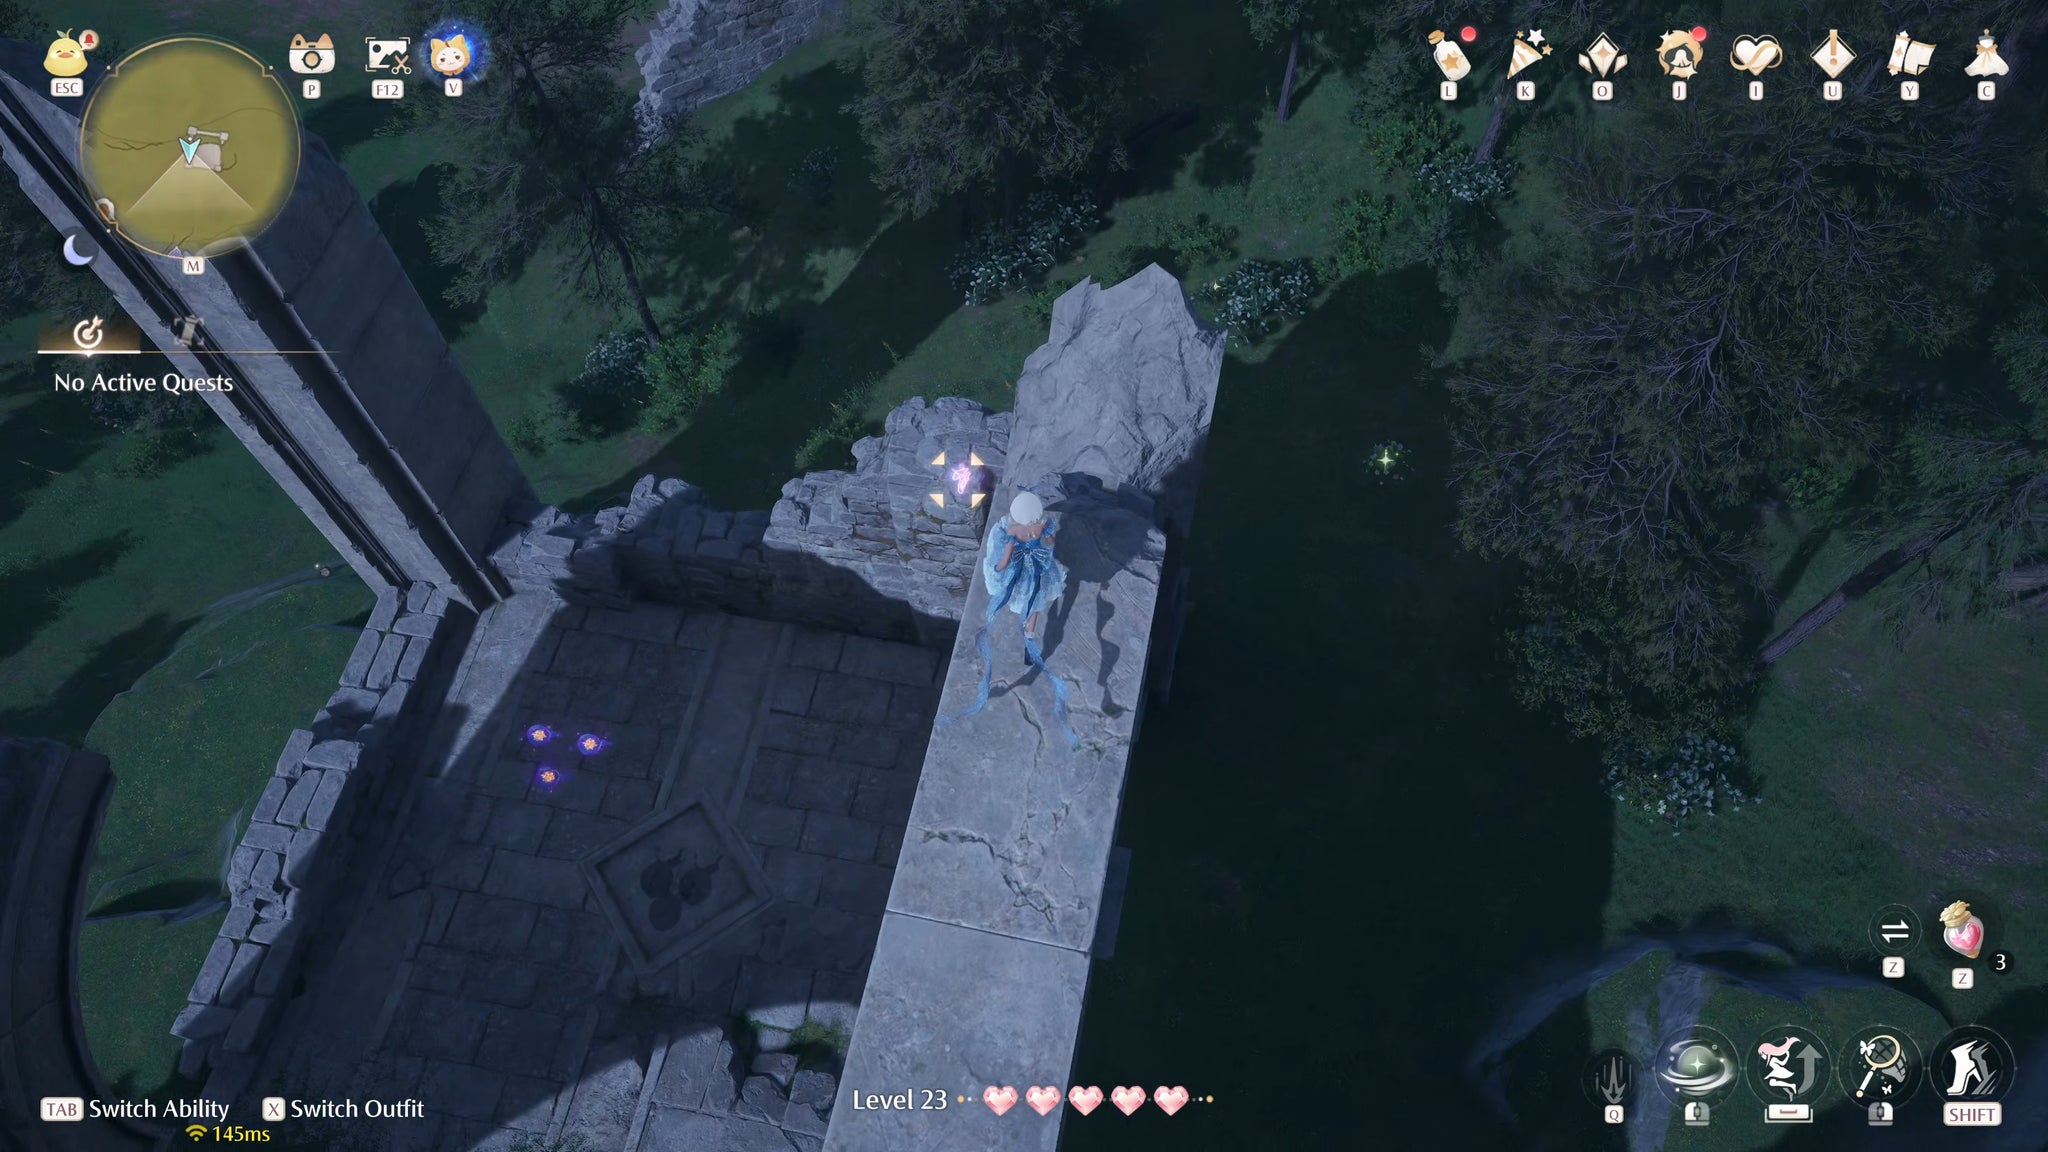
Image credit:Rock Paper Shotgun/Papergames
Bug Catching Whimstars are Whimstars that have taken the form of colourful insects floating around the area. All you need to do to get the Whimstar is catch the bug, but this requires you to use the Bug Catching Outfit unlocked in the Chapter 1 main story mission “Accident At The Clothing Store”. Once you’ve got the Bug Catching Outfit, you can select it with TAB , then Right-Click to catch the bug.
Fishing Whimstars
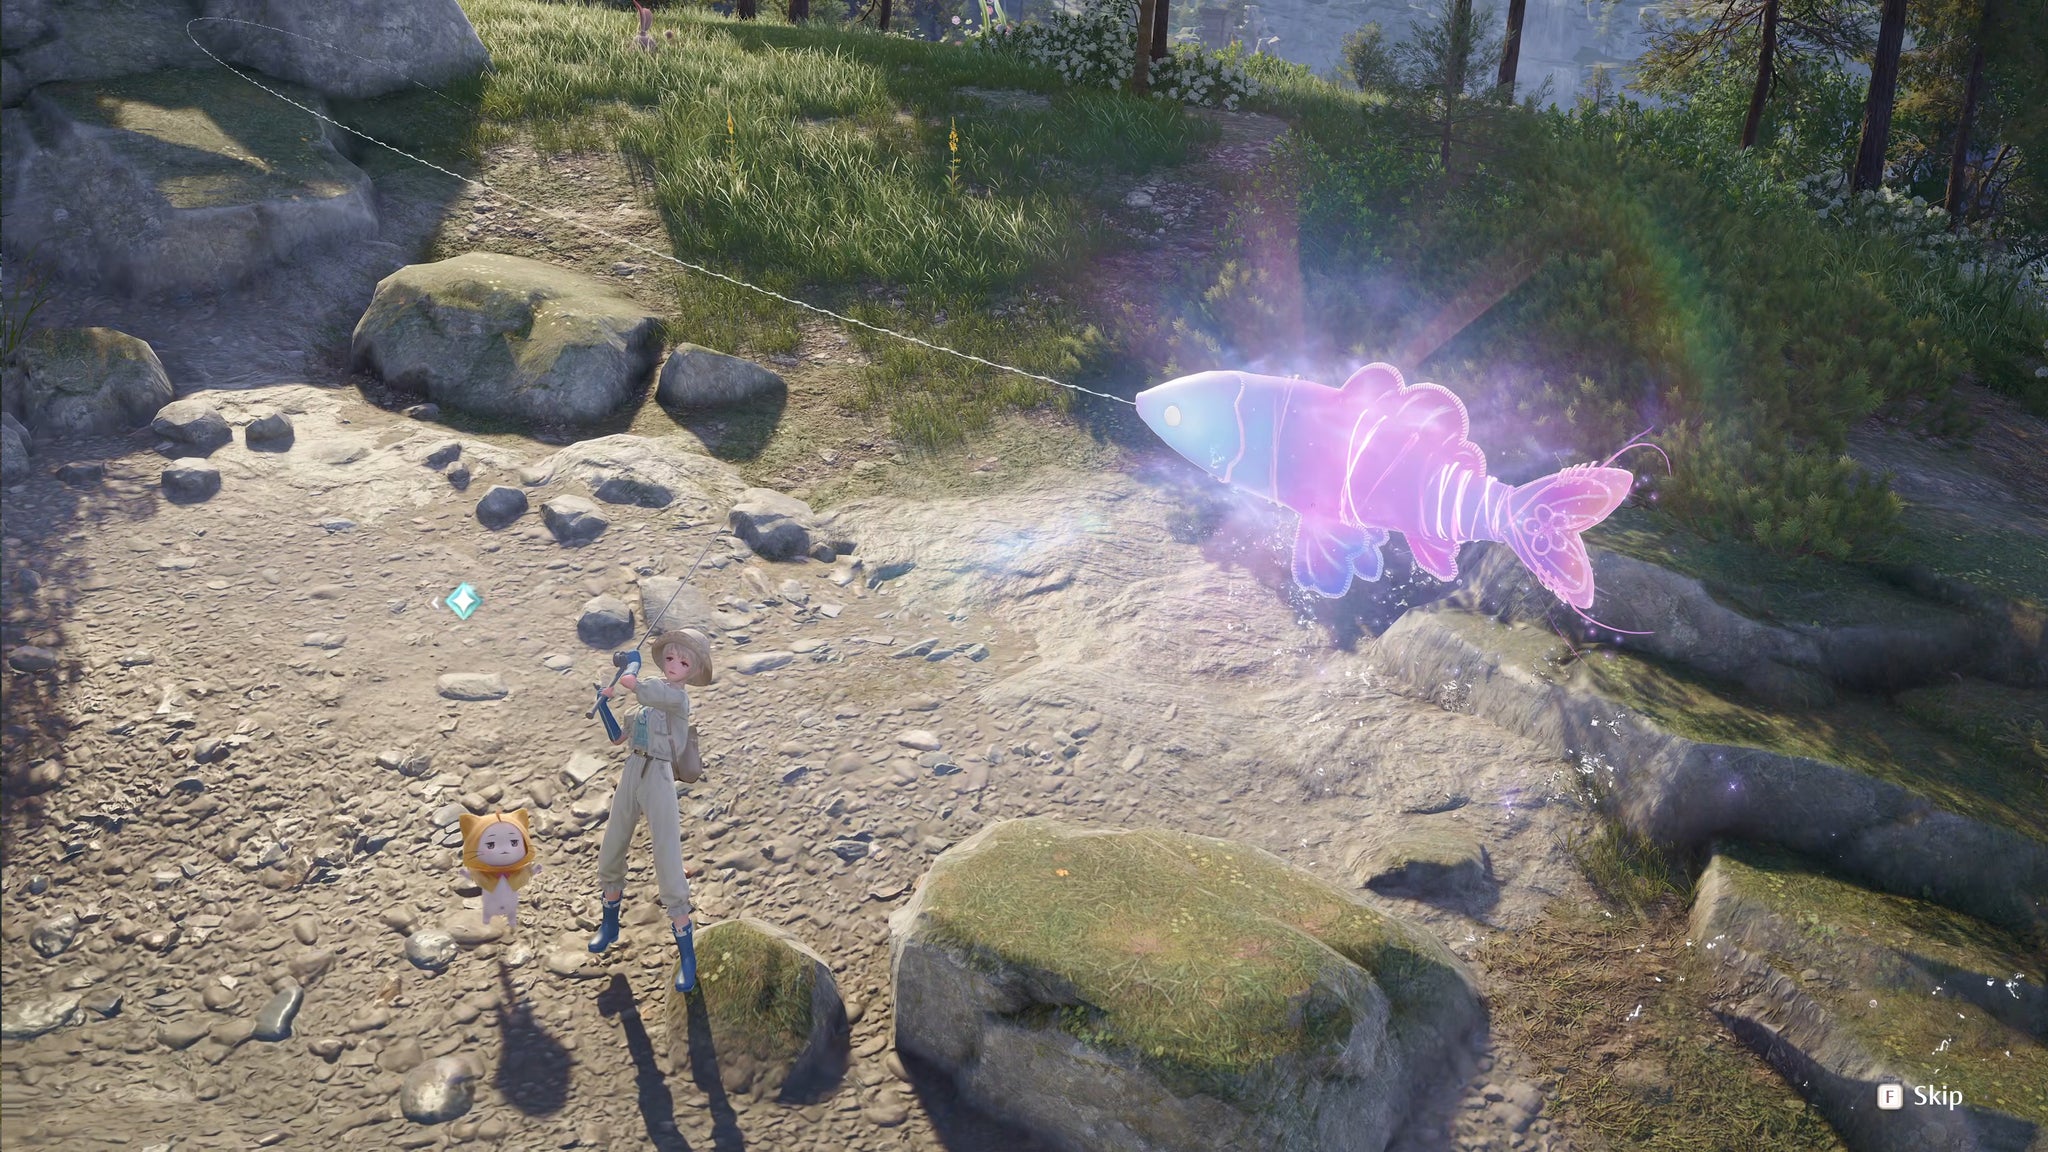
Image credit:Rock Paper Shotgun/Papergames
Fishing Whimstars are Whimstars that have taken the form of fish (called “Whimfish”) at certain fishing points in rivers or in the sea. Once you complete the Chapter 1 main story mission “Unexplained Coma Incidents”, you’ll be able to select your Fishing Outfit using TAB , and go through a fishing minigame in order to catch the fish and obtain the Whimstar.
Rolling Boulder Whimstars
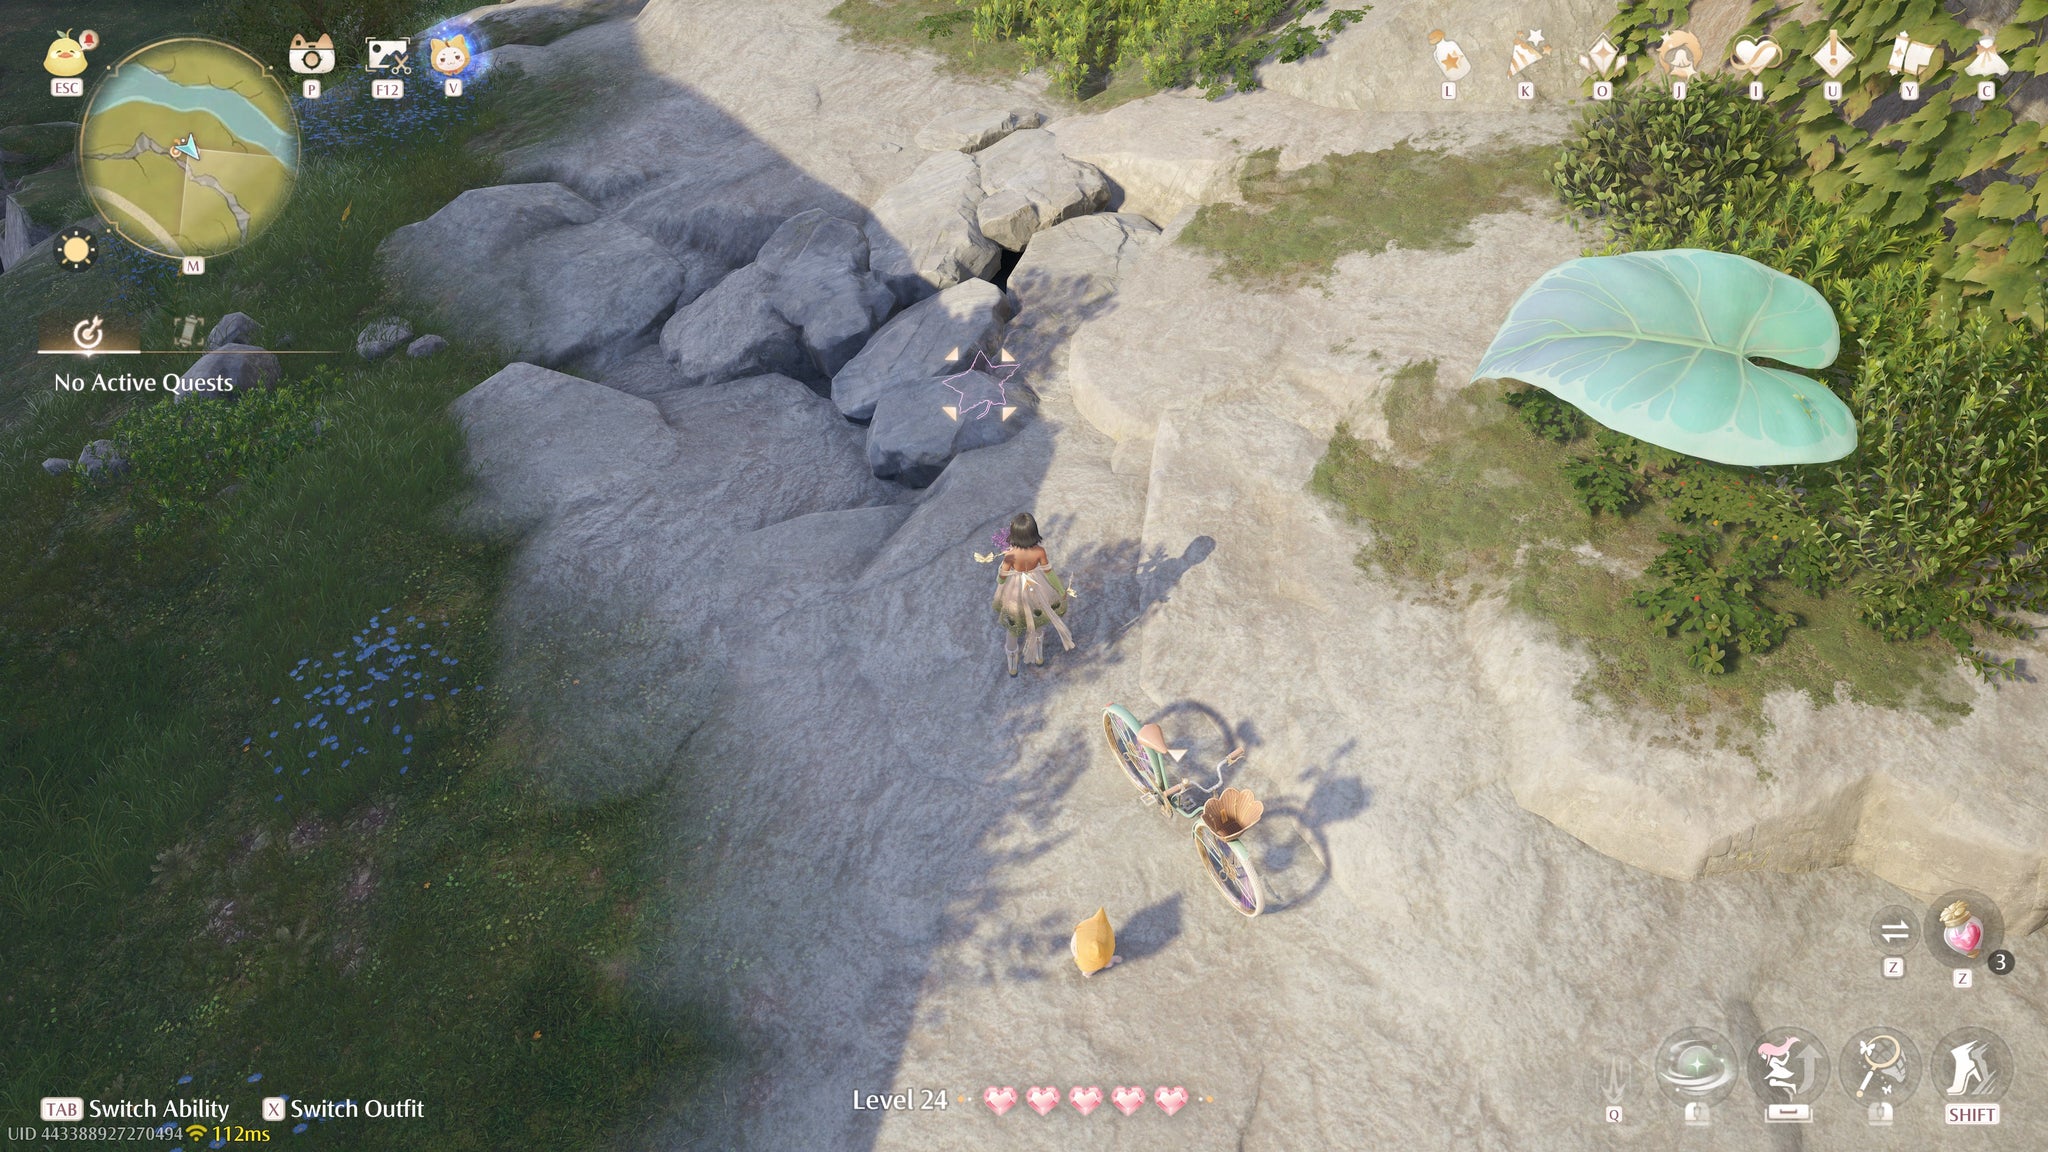
Image credit:Rock Paper Shotgun/Papergames
These Whimstars are generally found inside Stoneville and Breezy Meadow, and you’ll know them because the Whimstars themselves are locked behind a cobbled stone wall or floor which you can’t ground-slam or attack your way through. The answer to these puzzles is to find the nearby stone boulders (there’s usually multiple of them nearby) and roll them down the nearby slope of cliff so that they crash into the breakable stone wall and knock it down. After you’ve done that, the Whimstar will be up for grabs just like normal.
Escaping Whimstars
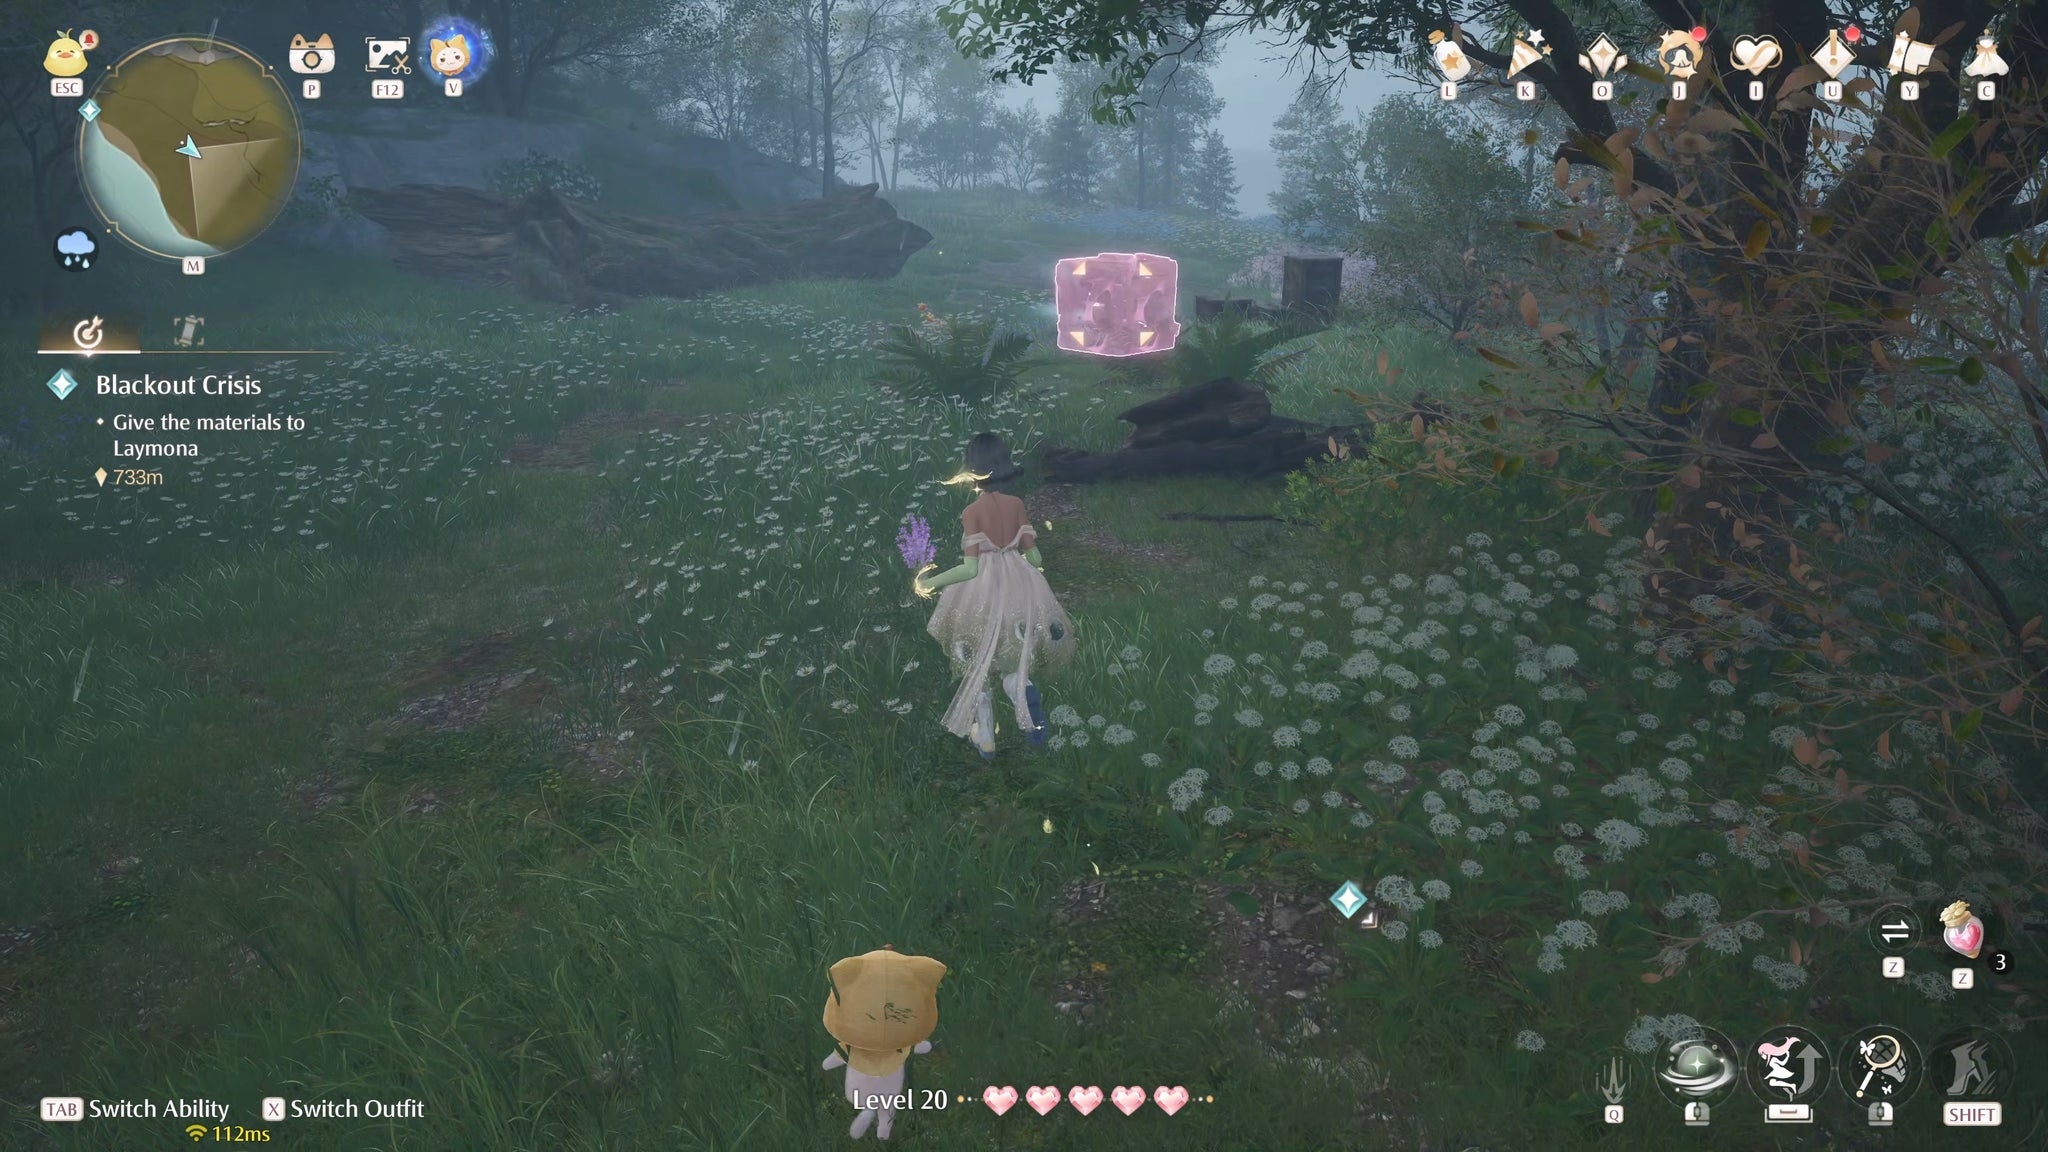
Image credit:Rock Paper Shotgun/Papergames
Escaping Whimstars are flighty Whimstars that are usually trapped inside breakable boxes. You can break the box using a ground-slam (jump over it and then press Q ). Once free, the Whimstar will try to fly away on special wings, and you’ll need to catch it in order to obtain the Whimstar. If you let the Whimstar get away then it will respawn in the box after a time and you’ll need to try again.
Hidden Whimstars
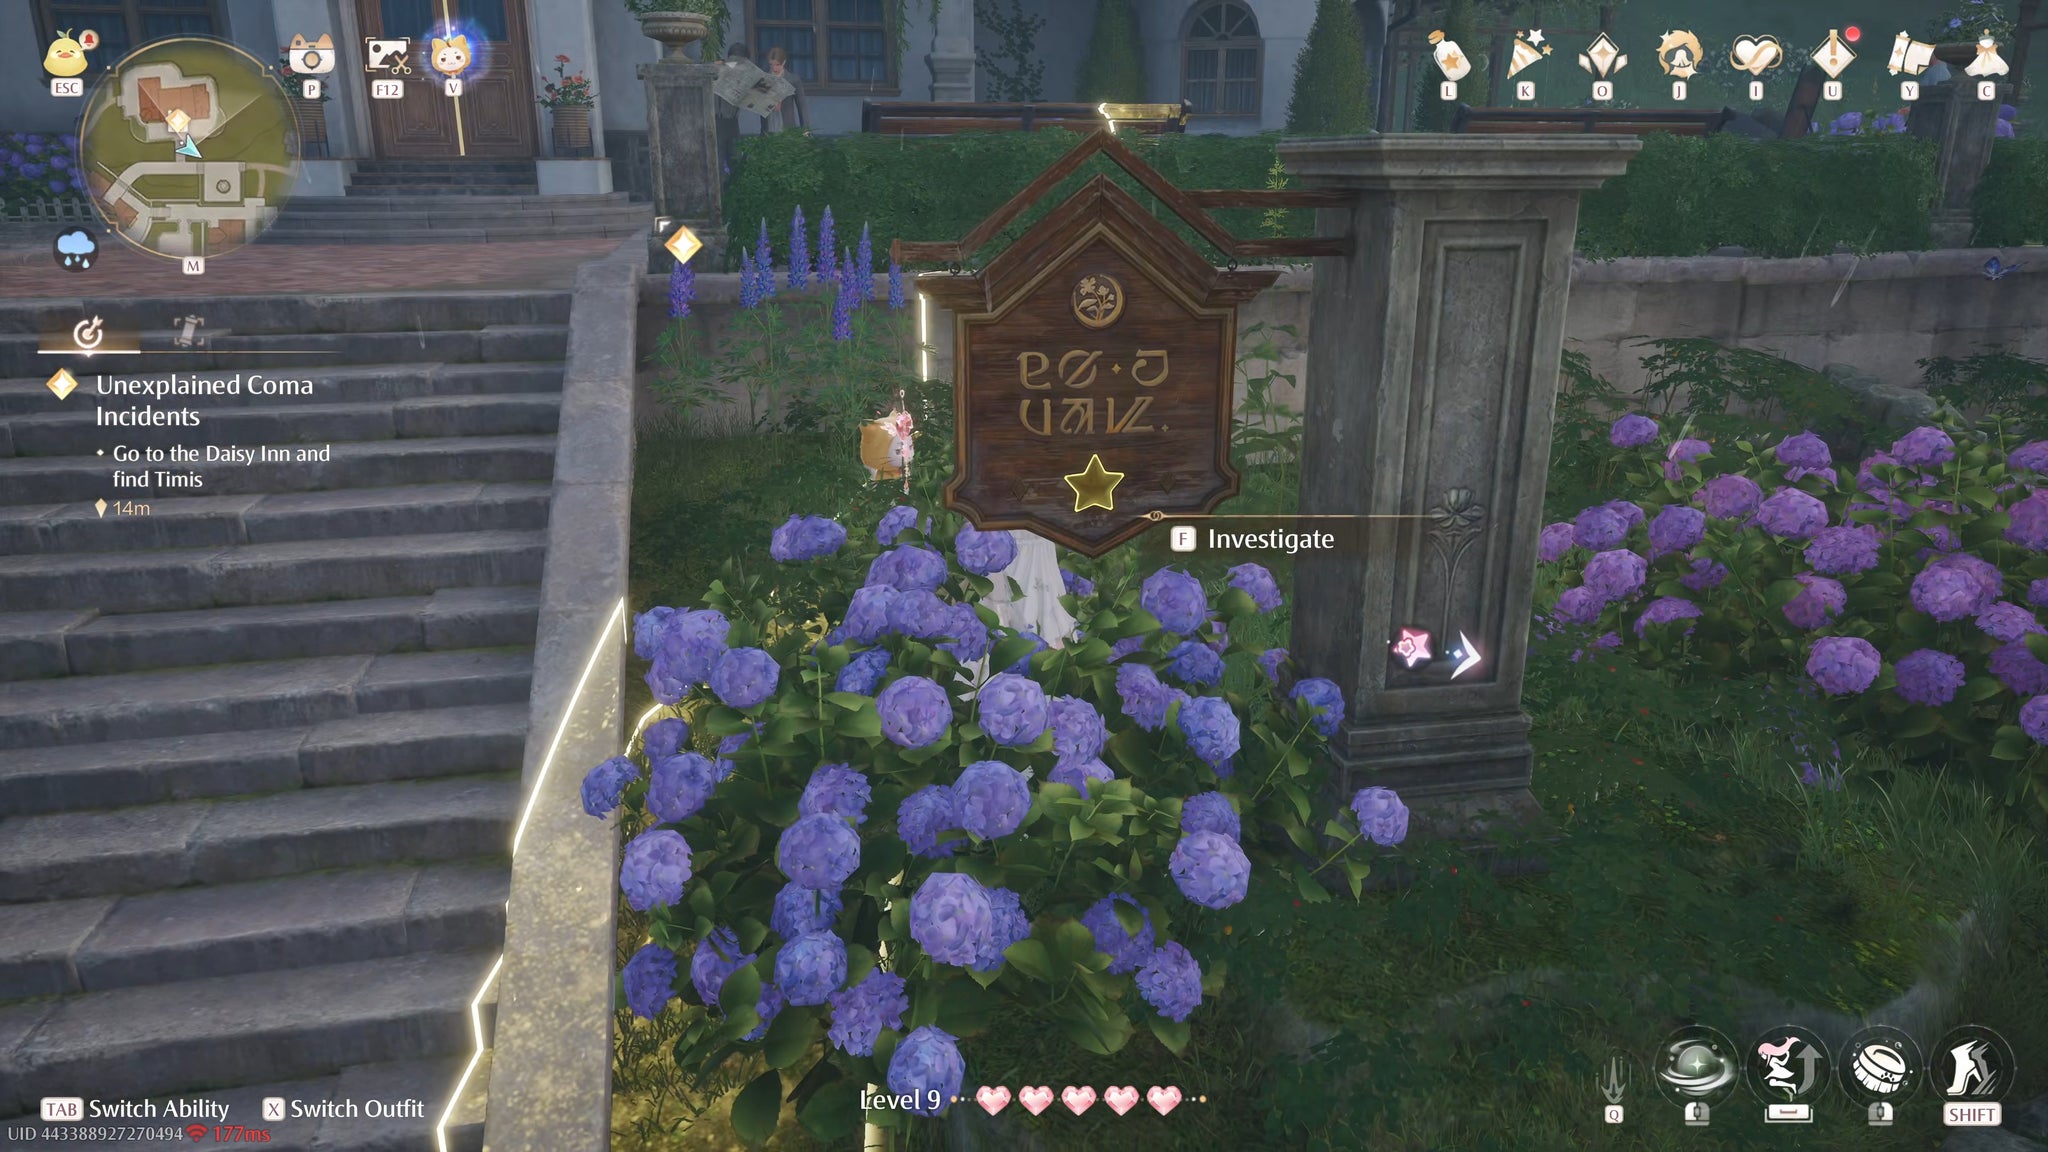
Image credit:Rock Paper Shotgun/Papergames
Hidden Whimstars are the trickiest Whimstars of all. These Whimstars are locked behind visual puzzles where you must find the hidden star-shaped thing in the vicinity. Interact with the Whimstar to begin the challenge, and then a circle will appear around the star. The hidden star-shape is somewhere within this circle, but it’s usually very well hidden. Once you’ve found it, walk right up to it until you get a prompt to interact with it. Doing so will complete the challenge, allowing you to collect the Whimstar from where you first found it.
Curio Domain Whimstars
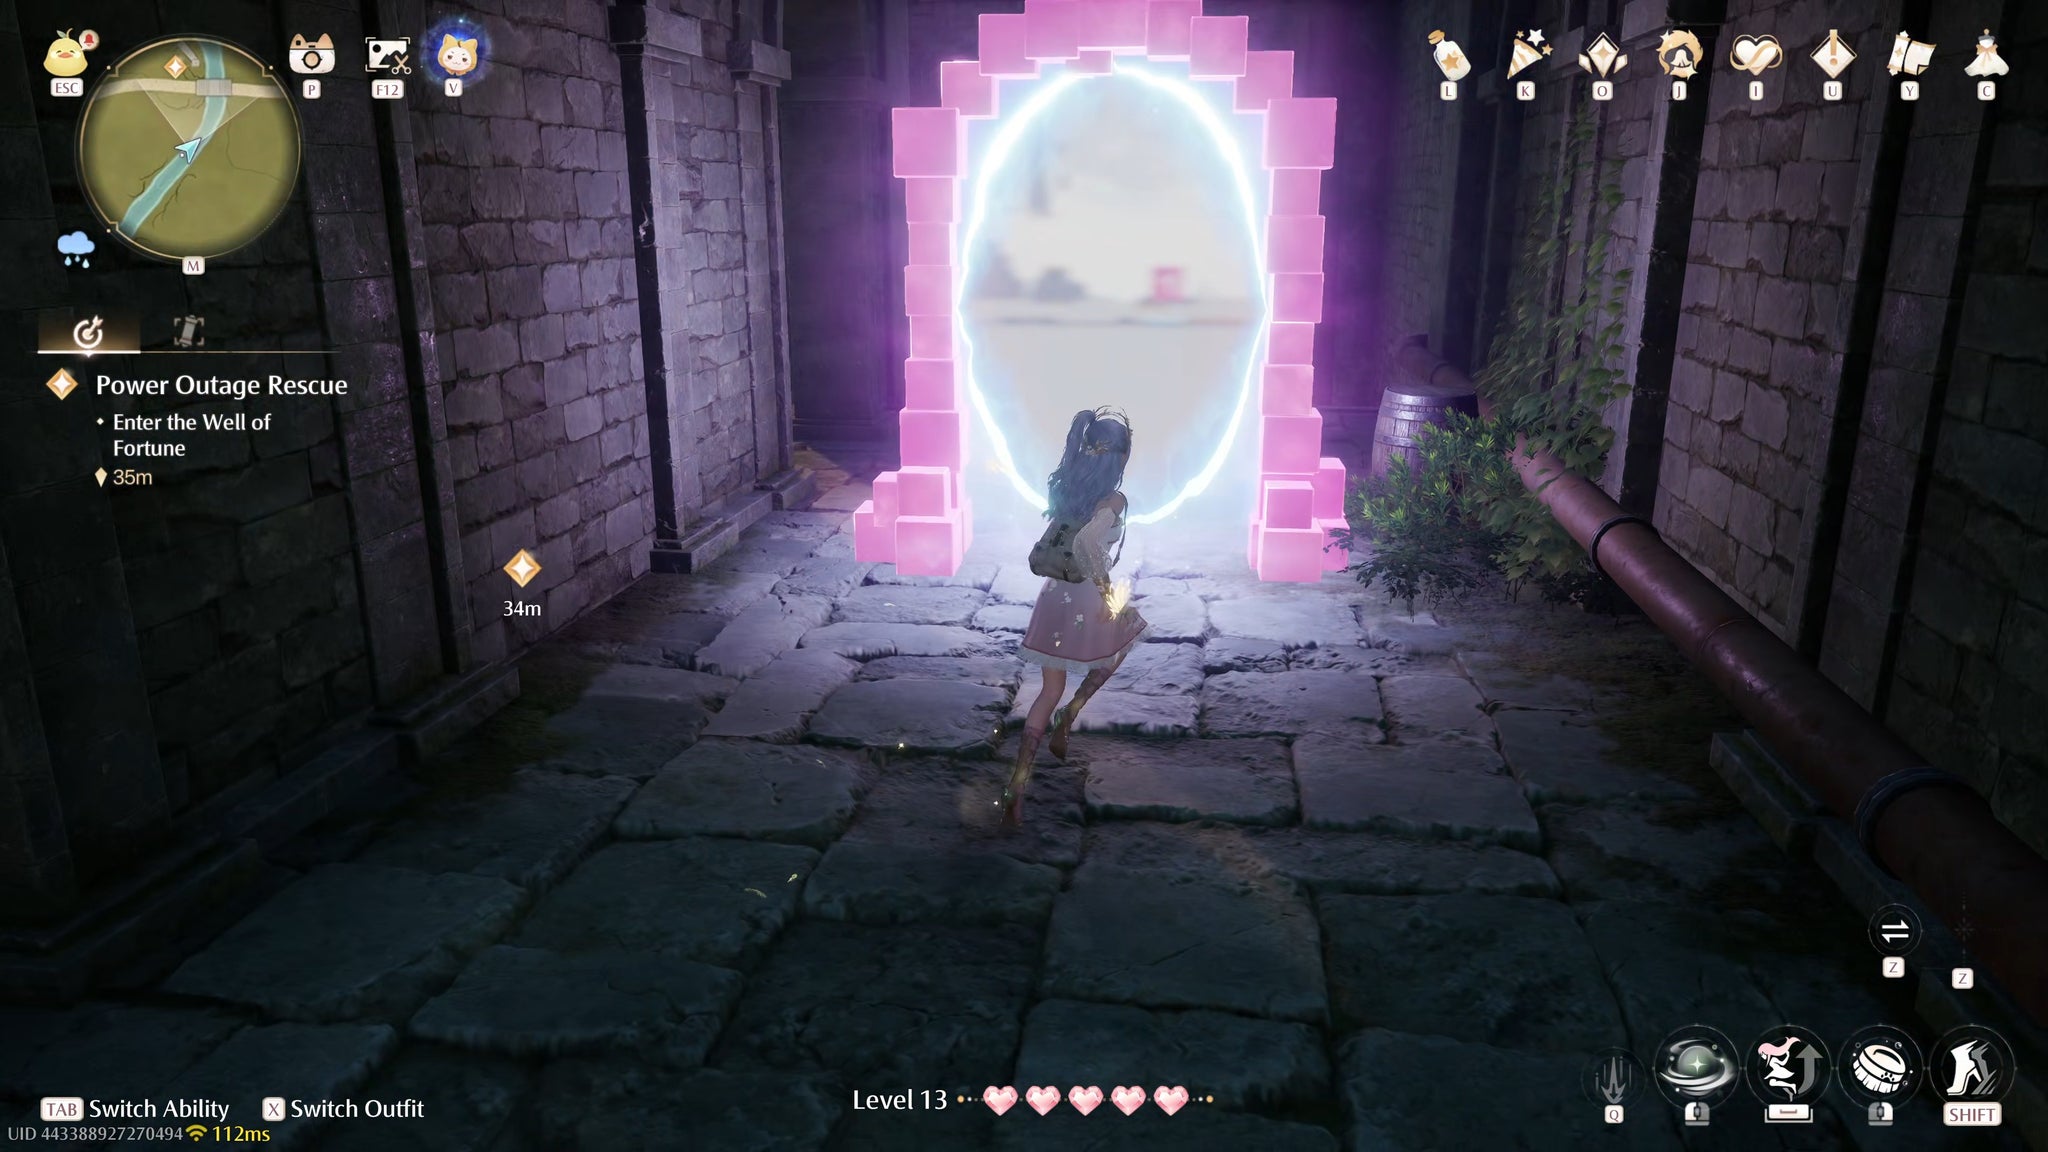
Image credit:Rock Paper Shotgun/Papergames
Curio Domain Whimstars are Whimstars which will temporarily transport you into a different realm called the “Curio Domain”. Inside each Curio Domain is a different puzzle which you must complete to earn the Whimstar. Many of them involve pushing or pulling boxes, or activating levers, or jumping on top of buttons. Each one works in a slightly different way.
Scarfworm Whimstars
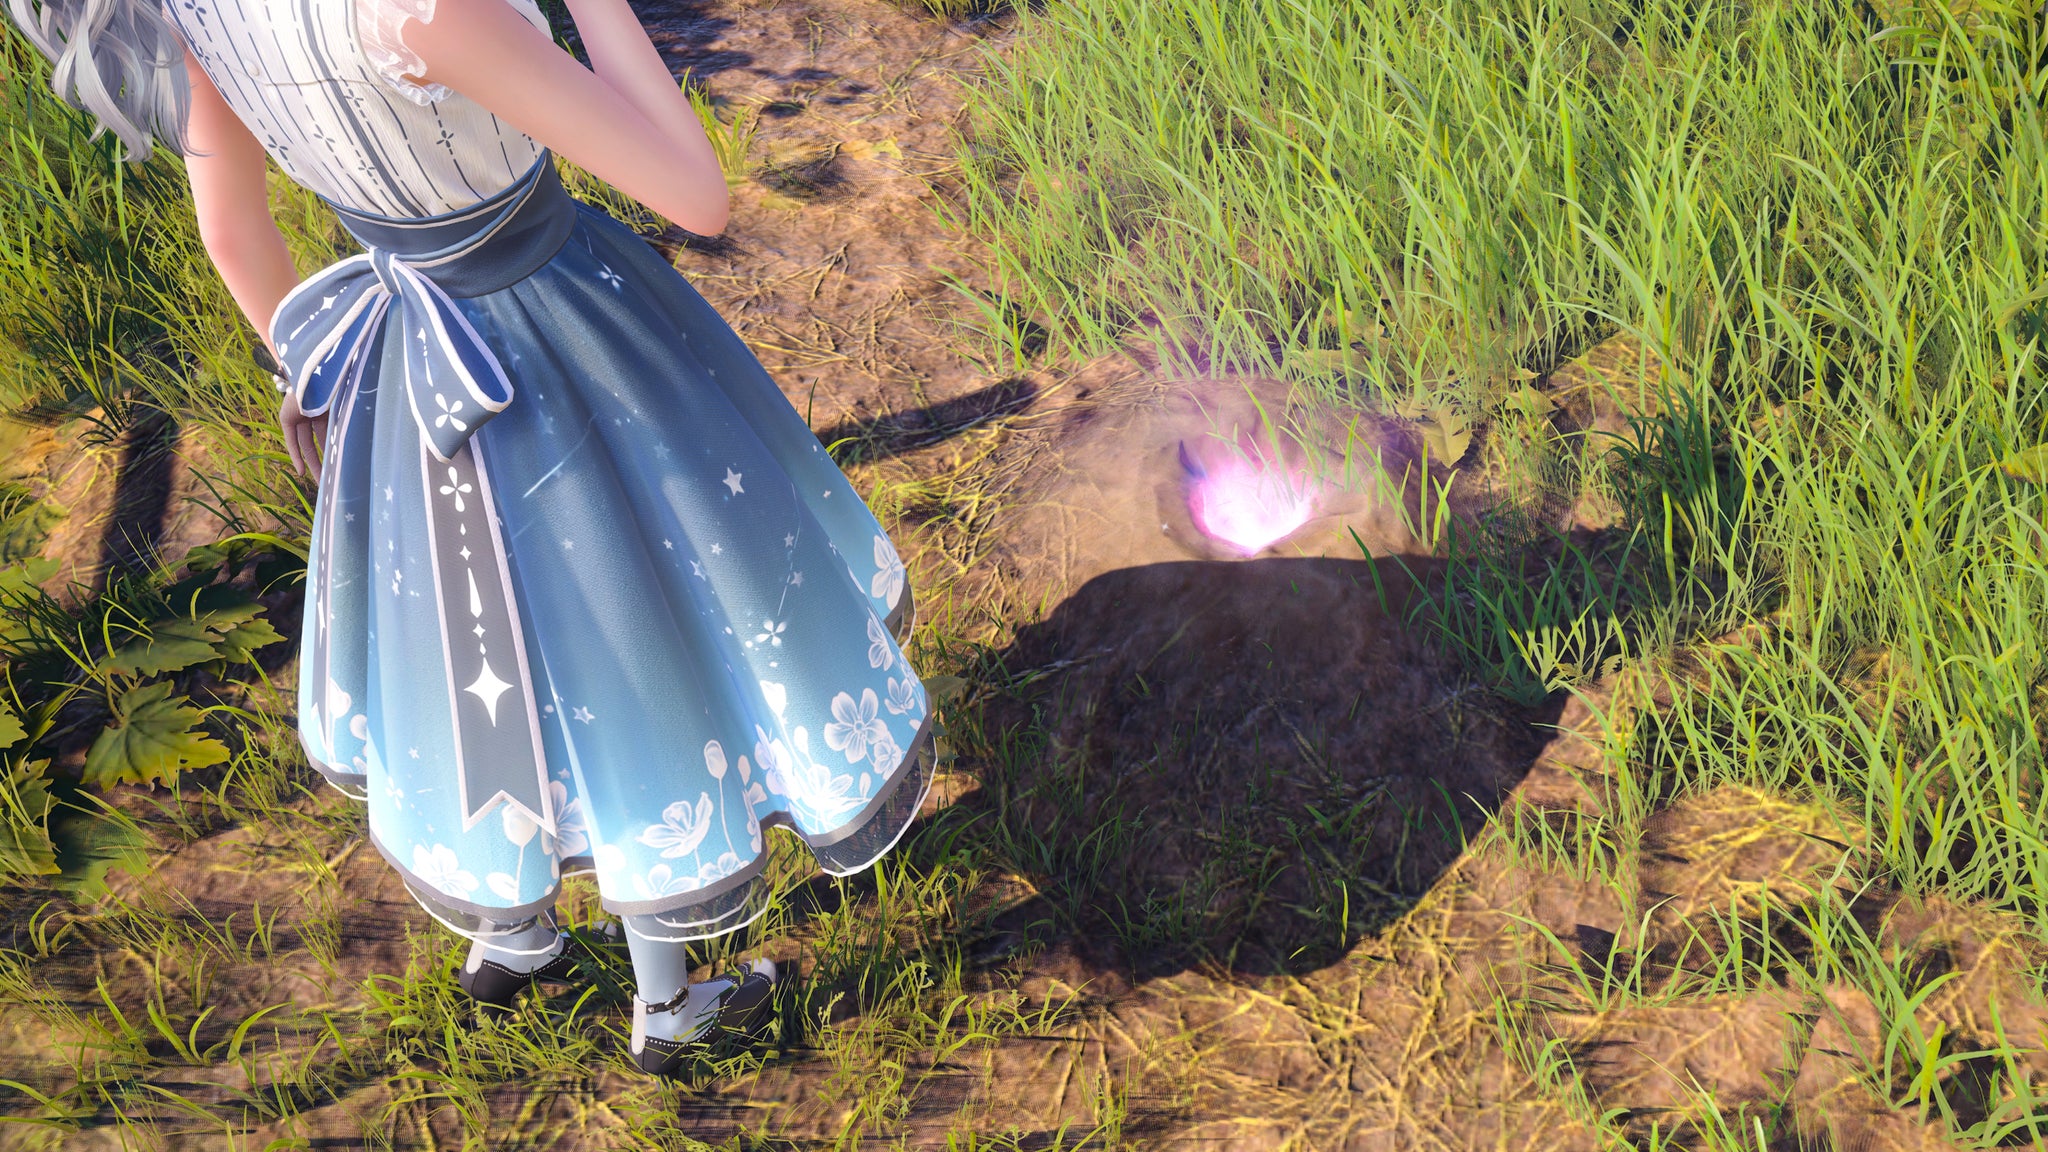
Image credit:Rock Paper Shotgun/Papergames
Scarfworm Whimstars are an unusual kind of Whimstar which you will only encounter in Stoneville and beyond. These Whimstars have taken the form of Scarfworms which hide inside holes in the ground. There are usually several holes nearby, all of them connected, and to get the Scarfworm to show itself near you, you need to position boxes over the other holes so that only one is remaining.
Stray Hatty Whimstars

Image credit:Rock Paper Shotgun/Papergames
Stray Hatty Whimstars are Whimstars that you can simply purchase with Bling from Stray Hatty, an NPC in Florawish. You can find Stray Hatty just to the south of the Stylist’s Guild on the west side of town, and she has a whopping 8 Whimstars to sell - each for ever-increasing amounts of Bling. Each of those Whimstars also counts towards the region total in Florawish.
Cavern Whimstars
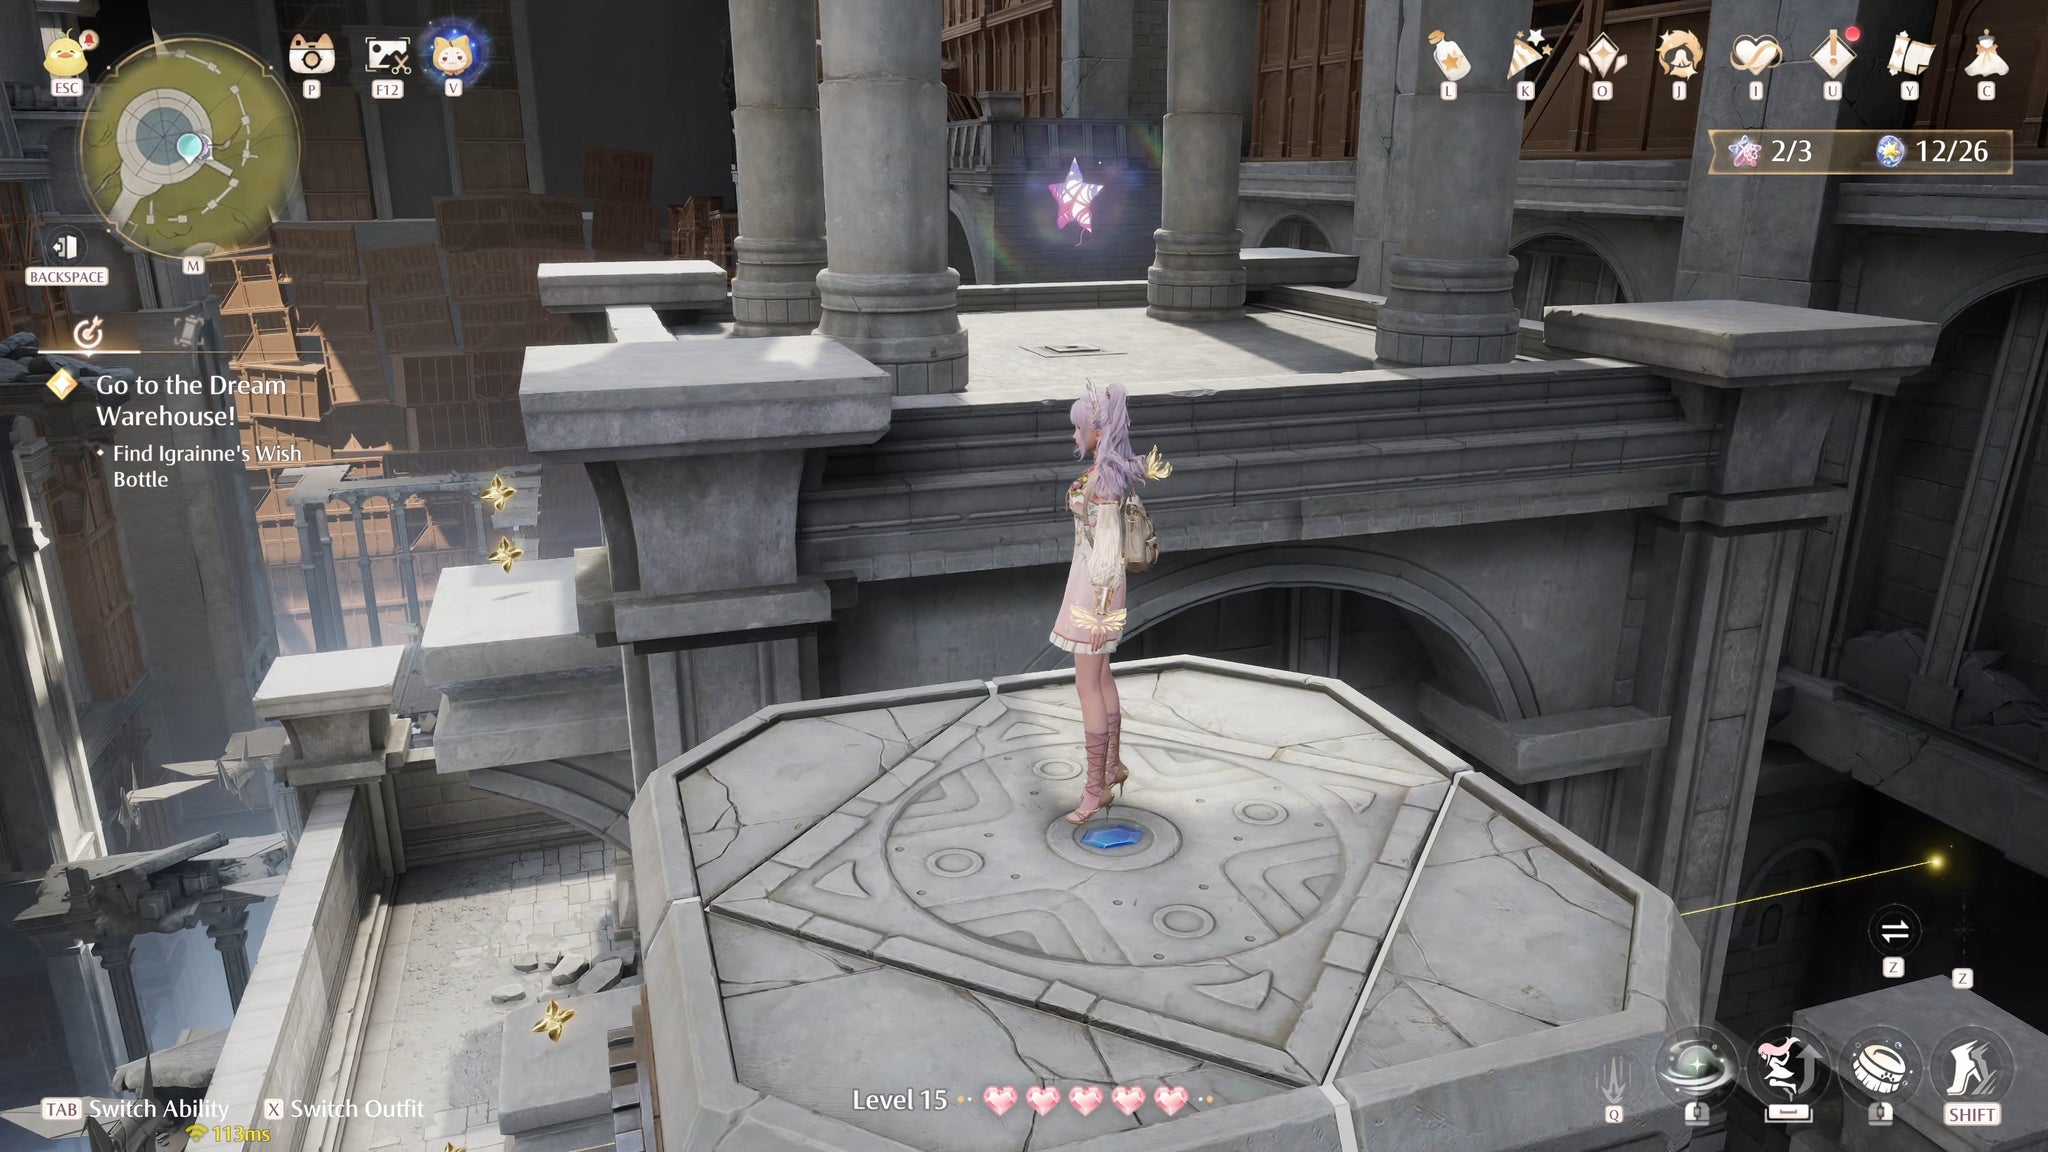
Image credit:Rock Paper Shotgun/Papergames
Cavern Whimstars are technically just regular Whimstars (because all you need to do is walk into them to collect them), but it’s worth mentioning as a different type, because many new players might not realise that Whimstars found inside Caverns also count towards the region total. So if you find a Cavern inside Florawish (for example), and that Cavern contains 3 Whimstars, then each of those Whimstars will count as a Florawish Whimstar.
Story Whimstars

Image credit:Rock Paper Shotgun/Papergames
Finally, there are Story Whimstars, which are the easiest of all, because you automatically obtain them just by progressing through the main story. You still need to collect them sometimes; for example, the very first Whimstar you find in Infinity Nikki is a Story Whimstar because you can’t progress until you’ve collected it; but you also still need to physically walk through it.
Other times though, you’ll just get a Whimstar by default. For example, during the “Land Of Wishes” quest in Chapter 1, Nikki will automatically gain a Whimstar during a cutscene after casting her wish at the Wishing Tree. These types of Whimstars also count towards the region total.
That wraps up our guide on Whimstars in Infinity Nikki and how to get them. Don’t forget to also check out our guides on all the Infinity Nikki Outfits , working Infinity Nikki codes , and the current banner schedule . You can also consult our handy primers on Observation questions and Kindled Inspiration solutions .


Infinity Nikki
Android , iOS , PS5 , PC
Rock Paper Shotgun is better when you sign in
Sign in and join us on our journey to discover strange and compelling PC games.

All 75 Arc Raiders Blueprints and where to get them
These areas have the highest chance of giving you Blueprints

Image credit:Rock Paper Shotgun/Embark Studios

Looking for more Arc Raiders Blueprints? It’s a special day when you find a Blueprint, as they’re among the most valuable items in Arc Raiders. If you find a Blueprint that you haven’t already found, then you must make sure you hold onto it at all costs, because Blueprints are the key to one of the most important and powerful systems of meta-progression in the game.
This guide aims to be the very best guide on Blueprints you can find, starting with a primer on what exactly they are and how they work in Arc Raiders, before delving into exactly where to get Blueprints and the very best farming spots for you to take in your search.
We’ll also go over how to get Blueprints from other unlikely activities, such as destroying Surveyors and completing specific quests. And you’ll also find the full list of all 75 Blueprints in Arc Raiders on this page (including the newest Blueprints added with the Cold Snap update , such as the Deadline Blueprint and Firework Box Blueprint), giving you all the information you need to expand your own crafting repertoire.
In this guide:
- What are Blueprints in Arc Raiders?
- Full Blueprint list: All crafting recipes
- Where to find Blueprints in Arc Raiders Blueprints obtained from quests Blueprints obtained from Trials Best Blueprint farming locations

What are Blueprints in Arc Raiders?
Blueprints in Arc Raiders are special items which, if you manage to extract with them, you can expend to permanently unlock a new crafting recipe in your Workshop. If you manage to extract from a raid with an Anvil Blueprint, for example, you can unlock the ability to craft your very own Anvil Pistol, as many times as you like (as long as you have the crafting materials).
To use a Blueprint, simply open your Inventory while in the lobby, then right-click on the Blueprint and click “Learn And Consume” . This will permanently unlock the recipe for that item in your Workshop. As of the Stella Montis update, there are allegedly 75 different Blueprints to unlock - although only 68 are confirmed to be in the game so far. You can see all the Blueprints you’ve found and unlocked by going to the Workshop menu, and hitting “R” to bring up the Blueprint screen.
It’s possible to find duplicates of past Blueprints you’ve already unlocked. If you find these, then you can either sell them, or - if you like to play with friends - you can take it into a match and gift it to your friend so they can unlock that recipe for themselves. Another option is to keep hold of them until the time comes to donate them to the Expedition.
Full Blueprint list: All crafting recipes
Below is the full list of all the Blueprints that are currently available to find in Arc Raiders, and the crafting recipe required for each item:
| Blueprint | Type | Recipe | Crafted At |
|---|---|---|---|
| Bettina | Weapon | 3x Advanced Mechanical Components 3x Heavy Gun Parts 3x Canister | Gunsmith 3 |
| Blue Light Stick | Quick Use | 3x Chemicals | Utility Station 1 |
| Aphelion | Weapon | 3x Magnetic Accelerator 3x Complex Gun Parts 1x Matriarch Reactor | Gunsmith 3 |
| Combat Mk. 3 (Flanking) | Augment | 2x Advanced Electrical Components 3x Processor | Gear Bench 3 |
| Combat Mk. 3 (Aggressive) | Augment | 2x Advanced Electrical Components 3x Processor | Gear Bench 3 |
| Complex Gun Parts | Material | 2x Light Gun Parts 2x Medium Gun Parts 2x Heavy Gun Parts | Refiner 3 |
| Fireworks Box | Quick Use | 1x Explosive Compound 3x Pop Trigger | Explosives Station 2 |
| Gas Mine | Mine | 4x Chemicals 2x Rubber Parts | Explosives Station 1 |
| Green Light Stick | Quick Use | 3x Chemicals | Utility Station 1 |
| Pulse Mine | Mine | 1x Crude Explosives 1x Wires | Explosives Station 1 |
| Seeker Grenade | Grenade | 1x Crude Explosives 2x ARC Alloy | Explosives Station 1 |
| Looting Mk. 3 (Survivor) | Augment | 2x Advanced Electrical Components 3x Processor | Gear Bench 3 |
| Angled Grip II | Mod | 2x Mechanical Components 3x Duct Tape | Gunsmith 2 |
| Angled Grip III | Mod | 2x Mod Components 5x Duct Tape | Gunsmith 3 |
| Hullcracker | Weapon | 1x Magnetic Accelerator 3x Heavy Gun Parts 1x Exodus Modules | Gunsmith 3 |
| Launcher Ammo | Ammo | 5x Metal Parts 1x Crude Explosives | Workbench 1 |
| Anvil | Weapon | 5x Mechanical Components 5x Simple Gun Parts | Gunsmith 2 |
| Anvil Splitter | Mod | 2x Mod Components 3x Processor | Gunsmith 3 |
| ??? | ??? | ??? | ??? |
| Barricade Kit | Quick Use | 1x Mechanical Components | Utility Station 2 |
| Blaze Grenade | Grenade | 1x Explosive Compound 2x Oil | Explosives Station 3 |
| Bobcat | Weapon | 3x Advanced Mechanical Components 3x Light Gun Parts | Gunsmith 3 |
| Osprey | Weapon | 2x Advanced Mechanical Components 3x Medium Gun Parts 7x Wires | Gunsmith 3 |
| Burletta | Weapon | 3x Mechanical Components 3x Simple Gun Parts | Gunsmith 1 |
| Compensator II | Mod | 2x Mechanical Components 4x Wires | Gunsmith 2 |
| Compensator III | Mod | 2x Mod Components 8x Wires | Gunsmith 3 |
| Defibrillator | Quick Use | 9x Plastic Parts 1x Moss | Medical Lab 2 |
| ??? | ??? | ??? | ??? |
| Equalizer | Weapon | 3x Magnetic Accelerator 3x Complex Gun Parts 1x Queen Reactor | Gunsmith 3 |
| Extended Barrel | Mod | 2x Mod Components 8x Wires | Gunsmith 3 |
| Extended Light Mag II | Mod | 2x Mechanical Components 3x Steel Spring | Gunsmith 2 |
| Extended Light Mag III | Mod | 2x Mod Components 5x Steel Spring | Gunsmith 3 |
| Extended Medium Mag II | Mod | 2x Mechanical Components 3x Steel Spring | Gunsmith 2 |
| Extended Medium Mag III | Mod | 2x Mod Components 5x Steel Spring | Gunsmith 3 |
| Extended Shotgun Mag II | Mod | 2x Mechanical Components 3x Steel Spring | Gunsmith 2 |
| Extended Shotgun Mag III | Mod | 2x Mod Components 5x Steel Spring | Gunsmith 3 |
| Remote Raider Flare | Quick Use | 2x Chemicals 4x Rubber Parts | Utility Station 1 |
| Heavy Gun Parts | Material | 4x Simple Gun Parts | Refiner 2 |
| Venator | Weapon | 2x Advanced Mechanical Components 3x Medium Gun Parts 5x Magnet | Gunsmith 3 |
| Il Toro | Weapon | 5x Mechanical Components 6x Simple Gun Parts | Gunsmith 1 |
| Jolt Mine | Mine | 1x Electrical Components 1x Battery | Explosives Station 2 |
| Explosive Mine | Mine | 1x Explosive Compound 1x Sensors | Explosives Station 3 |
| Jupiter | Weapon | 3x Magnetic Accelerator 3x Complex Gun Parts 1x Queen Reactor | Gunsmith 3 |
| Light Gun Parts | Material | 4x Simple Gun Parts | Refiner 2 |
| Lightweight Stock | Mod | 2x Mod Components 5x Duct Tape | Gunsmith 3 |
| Lure Grenade | Grenade | 1x Speaker Component 1x Electrical Components | Utility Station 2 |
| Medium Gun Parts | Material | 4x Simple Gun Parts | Refiner 2 |
| Torrente | Weapon | 2x Advanced Mechanical Components 3x Medium Gun Parts 6x Steel Spring | Gunsmith 3 |
| Muzzle Brake II | Mod | 2x Mechanical Components 4x Wires | Gunsmith 2 |
| Muzzle Brake III | Mod | 2x Mod Components 8x Wires | Gunsmith 3 |
| Padded Stock | Mod | 2x Mod Components 5x Duct Tape | Gunsmith 3 |
| Shotgun Choke II | Mod | 2x Mechanical Components 4x Wires | Gunsmith 2 |
| Shotgun Choke III | Mod | 2x Mod Components 8x Wires | Gunsmith 3 |
| Shotgun Silencer | Mod | 2x Mod Components 8x Wires | Gunsmith 3 |
| Showstopper | Grenade | 1x Advanced Electrical Components 1x Voltage Converter | Explosives Station 3 |
| Silencer I | Mod | 2x Mechanical Components 4x Wires | Gunsmith 2 |
| Silencer II | Mod | 2x Mod Components 8x Wires | Gunsmith 3 |
| Snap Hook | Quick Use | 2x Power Rod 3x Rope 1x Exodus Modules | Utility Station 3 |
| Stable Stock II | Mod | 2x Mechanical Components 3x Duct Tape | Gunsmith 2 |
| Stable Stock III | Mod | 2x Mod Components 5x Duct Tape | Gunsmith 3 |
| Tagging Grenade | Grenade | 1x Electrical Components 1x Sensors | Utility Station 3 |
| Tempest | Weapon | 3x Advanced Mechanical Components 3x Medium Gun Parts 3x Canister | Gunsmith 3 |
| Trigger Nade | Grenade | 2x Crude Explosives 1x Processor | Explosives Station 2 |
| Vertical Grip II | Mod | 2x Mechanical Components 3x Duct Tape | Gunsmith 2 |
| Vertical Grip III | Mod | 2x Mod Components 5x Duct Tape | Gunsmith 3 |
| Vita Shot | Quick Use | 2x Antiseptic 1x Syringe | Medical Lab 3 |
| Vita Spray | Quick Use | 3x Antiseptic 1x Canister | Medical Lab 3 |
| Vulcano | Weapon | 1x Magnetic Accelerator 3x Heavy Gun Parts 1x Exodus Modules | Gunsmith 3 |
| Wolfpack | Grenade | 2x Explosive Compound 2x Sensors | Explosives Station 3 |
| Red Light Stick | Quick Use | 3x Chemicals | Utility Station 1 |
| Smoke Grenade | Grenade | 14x Chemicals 1x Canister | Utility Station 2 |
| Deadline | Mine | 3x Explosive Compound 2x ARC Circuitry | Explosives Station 3 |
| Trailblazer | Grenade | 1x Explosive Compound 1x Synthesized Fuel | Explosives Station 3 |
| Tactical Mk. 3 (Defensive) | Augment | 2x Advanced Electrical Components 3x Processor | Gear Bench 3 |
| Tactical Mk. 3 (Healing) | Augment | 2x Advanced Electrical Components 3x Processor | Gear Bench 3 |
| Yellow Light Stick | Quick Use | 3x Chemicals | Utility Station 1 |
Note: The missing Blueprints in this list likely have not actually been added to the game at the time of writing, because none of the playerbase has managed to find any of them. As they are added to the game, I will update this page with the most relevant information so you know exactly how to get all 75 Arc Raiders Blueprints.
Where to find Blueprints in Arc Raiders
Below is a list of all containers, modifiers, and events which maximise your chances of finding Blueprints:
- Certain quests reward you with specific Blueprints .
- Completing Trials has a high chance of offering Blueprints as rewards.
- Surveyors have a decent chance of dropping Blueprints on death.
- High loot value areas tend to have a greater chance of spawning Blueprints.
- Night Raids and Storms may increase rare Blueprint spawn chances in containers.
- Containers with higher numbers of items may have a higher tendency to spawn Blueprints. As a result, Blue Gate (which has many “large” containers containing multiple items) may give you a higher chance of spawning Blueprints.
- Raider containers (Raider Caches, Weapon Boxes, Medical Bags, Grenade Tubes) have increased Blueprint drop rates. As a result, the Uncovered Caches event gives you a high chance of finding Blueprints.
- Security Lockers have a higher than average chance of containing Blueprints.
- Certain Blueprints only seem to spawn under specific circumstances: Tempest Blueprint only spawns during Night Raid events. Vulcano Blueprint only spawns during Hidden Bunker events. Jupiter and Equaliser Blueprints only spawn during Harvester events.

Raider Caches, Weapon Boxes, and other raider-oriented container types have a good chance of offering Blueprints. |Image credit:Rock Paper Shotgun/Embark Studios
Blueprints have a very low chance of spawning in any container in Arc Raiders, around 1-2% on average. However, there is a higher chance of finding Blueprints in particular container types. Specifically, you can find more Blueprints in Raider containers and security lockers.
Beyond this, if you’re looking for Blueprints you should focus on regions of the map which are marked as having particularly high-value loot. Areas such as the Control Tower in Dam Battlegrounds, the Arrival and Departure Buildings in Spaceport, and Pilgrim’s Peak in Blue Gate all have a better-than-average chance of spawning Blueprints somewhere amongst all their containers. Night Raids and Electromagnetic Storm events also increase the drop chances of certain Blueprints .
In addition to these containers, you can often loot Blueprints from destroyed Surveyors - the largest of the rolling ball ARC. Surveyors are more commonly found on the later maps - Spaceport and Blue Gate - and if one spawns in your match, you’ll likely see it by the blue laser beam that it casts into the sky while “surveying”.
Surveyors are quite well-armoured and will very speedily run away from you once it notices you, but if you can take one down then make sure you loot all its parts for a chance of obtaining certain unusual Blueprints.
Blueprints obtained from quests
One way in which you can get Blueprints is by completing certain quests for the vendors in Speranza. Some quests will reward you with a specific item Blueprint upon completion, so as long as you work through all the quests in Arc Raiders, you are guaranteed those Blueprints.
Here is the full list of all Blueprints you can get from quest rewards:
- Trigger Nade Blueprint: Rewarded after completing “Sparks Fly”.
- Lure Grenade Blueprint: Rewarded after completing “Greasing Her Palms”.
- Burletta Blueprint: Rewarded after completing “Industrial Espionage”.
- Hullcracker Blueprint (and Launcher Ammo Blueprint): Rewarded after completing “The Major’s Footlocker”.
Alas, that’s only 4 Blueprints out of a total of 75 to unlock, so for the vast majority you will need to find them yourself during a raid. If you’re intent on farming Blueprints, then it’s best to equip yourself with cheap gear in case you lose it, but don’t use a free loadout because then you won’t get a safe pocket to stash any new Blueprint you find. No pain in Arc Raiders is sharper than failing to extract with a new Blueprint you’ve been after for a dozen hours already.

One of the best ways to get Blueprints is by hitting three stars on all five Trials every week. |Image credit:Rock Paper Shotgun/Embark Studios
Blueprints obtained from Trials
One of the very best ways to get Blueprints is as rewards for completing Trials in Arc Raiders. Trials are unlocked from Level 15 onwards, and allow you to earn rewards by focusing on certain tasks over the course of several raids. For example, one Trial might task you with dealing damage to Hornets, while another might challenge you to loot Supply Drops.
Trials refresh on a weekly basis, with a new week bringing five new Trials. Each Trial can offer up to three rewards after passing certain score milestones, and it’s possible to receive very high level loot from these reward crates - including Blueprints. So if you want to unlock as many Blueprints as possible, you should make a point of completing as many Trials as possible each week.
Best Blueprint farming locations
The very best way to get Blueprints is to frequent specific areas of the maps which combine high-tier loot pools with the right types of containers to search. Here are my recommendations for where to find Blueprints on every map, so you can always keep the search going for new crafting recipes to unlock.

Image credit:Rock Paper Shotgun/Embark Studios
Dam Battlegrounds
The best places to farm Blueprints on Dam Battlegrounds are the Control Tower, Power Generation Complex, Ruby Residence, and Pale Apartments . The first two regions, despite only being marked on the map as mid-tier loot, contain a phenomenal number of containers to loot. The Control Tower can also contain a couple of high-tier Security Lockers - though of course, you’ll need to have unlocked the Security Breach skill at the end of the Survival tree.
There’s also a lot of reporting amongst the playerbase that the Residential areas in the top-left of the map - Pale Apartments and Ruby Residence - give you a comparatively strong chance of finding Blueprints. Considering their size, there’s a high density of containers to loot in both locations, and they also have the benefit of being fairly out of the way. So you’re more likely to have all the containers to yourself.
Buried City
The best Blueprint farming locations on Buried City are the Santa Maria Houses, Grandioso Apartments, Town Hall, and the various buildings of the New District . Grandioso Apartments has a lower number of containers than the rest, but a high chance of spawning weapon cases - which have good Blueprint drop rates. The others are high-tier loot areas, with plenty of lootable containers - including Security Lockers.
Spaceport
The best places to find Blueprints on Spaceport are the Arrival and Departure Buildings, as well as Control Tower A6 and the Launch Towers . All these areas are labelled as high-value loot regions, and many of them are also very handily connected to one another by the Spaceport wall, which you can use to quickly run from one area to the next. At the tops of most of these buildings you’ll find at least one Security Locker, so this is an excellent farming route for players looking to find Blueprints.
The downside to looting Blueprints on Spaceport is that all these areas are hotly contested, particularly in Duos and Squads. You’ll need to be very focused and fast in order to complete the full farming route.

Image credit:Rock Paper Shotgun/Embark Studios
Blue Gate
Blue Gate tends to have a good chance of dropping Blueprints, potentially because it generally has a high number of containers which can hold lots of items; so there’s a higher chance of a Blueprint spawning in each container. In my experience, the best Blueprint farming spots on Blue Gate are Pilgrim’s Peak, Raider’s Refuge, the Ancient Fort, and the Underground Complex beneath the Warehouse .
All of these areas contain a wealth of containers to loot. Raider’s Refuge has less to loot, but the majority of the containers in and around the Refuge are raider containers, which have a high chance of containing Blueprints - particularly during major events.
Stella Montis
On the whole, Stella Montis seems to have a very low drop rate for Blueprints (though a high chance of dropping other high-tier loot). If you do want to try farming Blueprints on this map, the best places to find Blueprints in Stella Montis are Medical Research, Assembly Workshop, and the Business Center . These areas have the highest density of containers to loot on the map.
In addition to this, the Western Tunnel has a few different Security Lockers to loot, so while there’s very little to loot elsewhere in this area of the map, it’s worth hitting those Security Lockers if you spawn there at the start of a match.
That wraps up this primer on how to get all the Blueprints in Arc Raiders as quickly as possible. With the Expedition system constantly resetting a large number of players’ Blueprints, it’s more important than ever to have the most up-to-date information on where to find all these Blueprints.
While you’re here, be sure to check out our Arc Raiders best guns tier list , as well as our primers on the best skills to unlock and all the different Field Depot locations on every map.


ARC Raiders
PS5 , Xbox Series X/S , PC
Rock Paper Shotgun is better when you sign in
Sign in and join us on our journey to discover strange and compelling PC games.
