Indiana Jones And The Great Circle review: a grand adventure that keeps faith with the movies
There’s life in this old Gizeh

Image credit:RPS / Machine Games

- Developer: Machine Games
- Publisher: Bethesda
- Release: Nov 5th
- On: Windows
- From: Steam
- Price: £60/$70/€70
- Reviewed on: Intel Core-i7-11700F, 16GB RAM, Nvidia GeForce RTX 3060, Windows 10
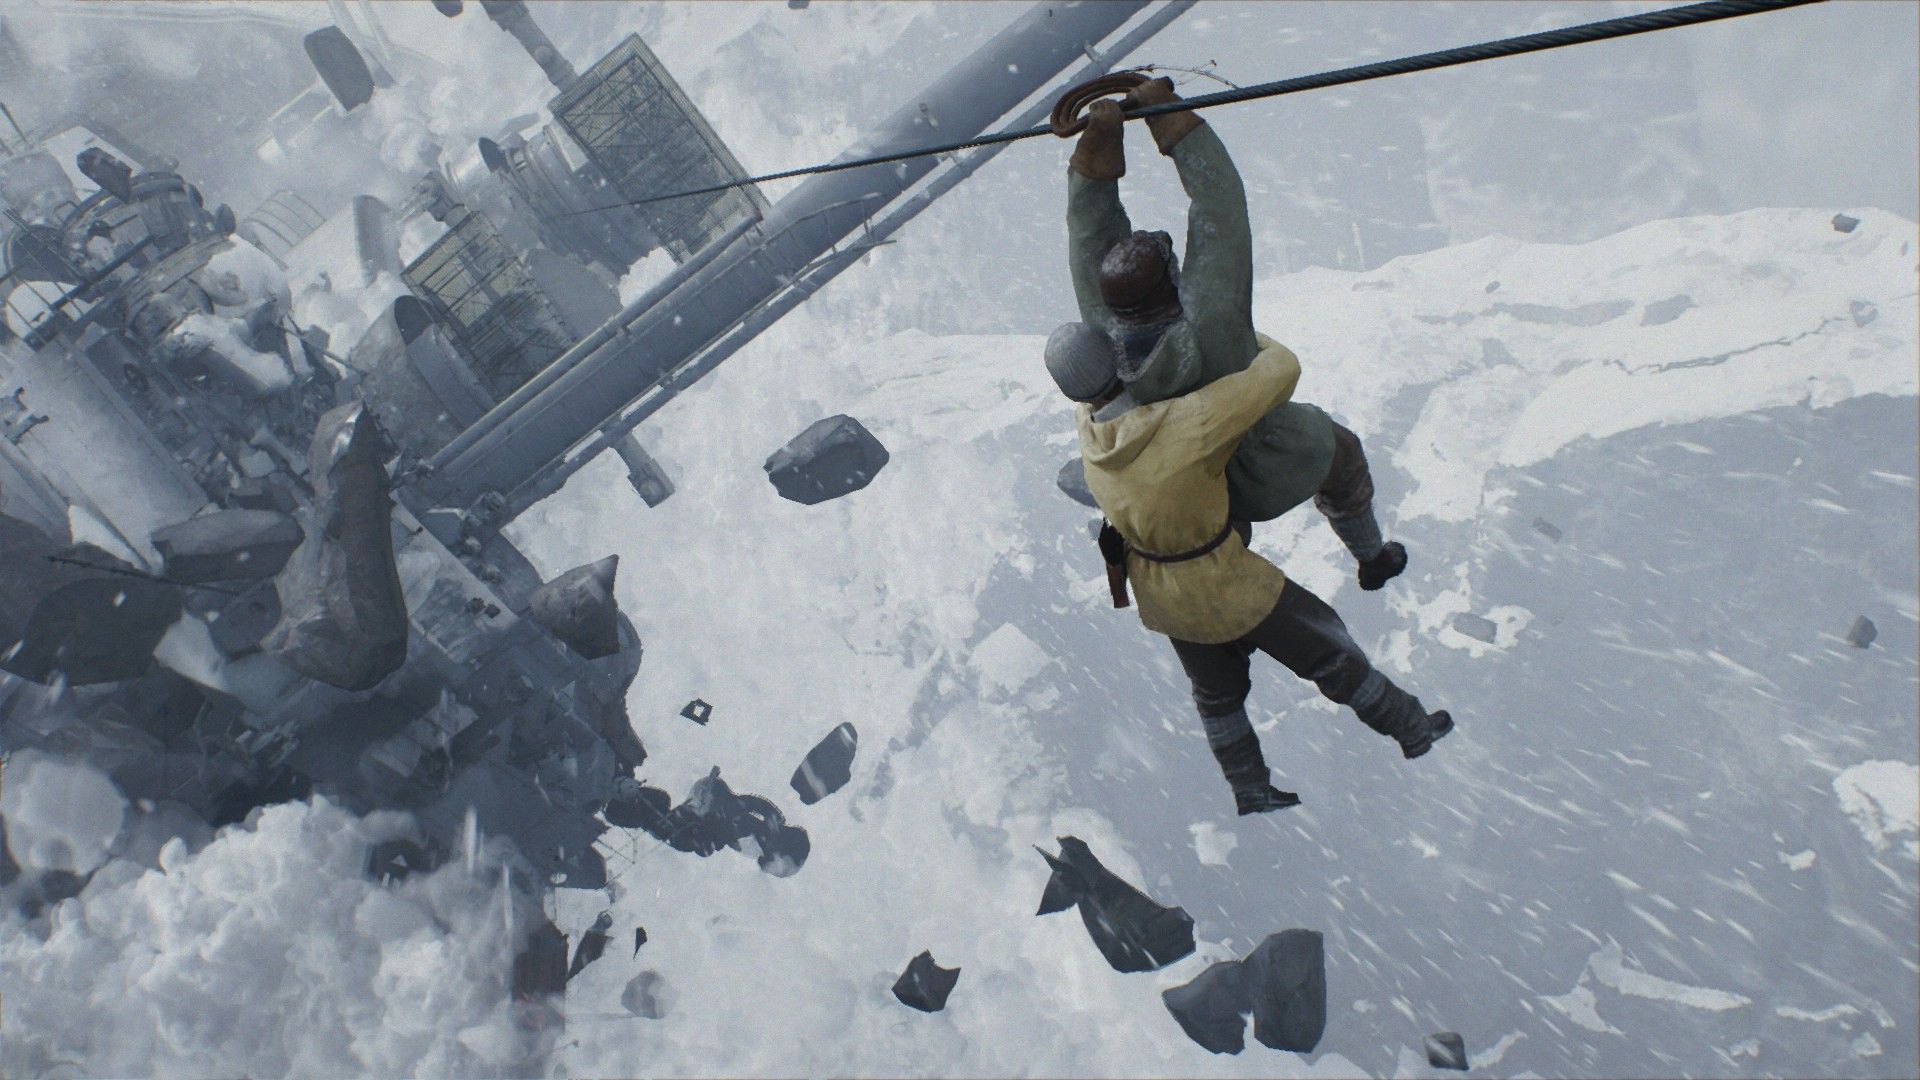
Every fascist in this game has a cold. The Hitlerites and blackshirts of Indiana Jones And The Great Circle sneeze and cough as they patrol the dig sites of Gizeh, or the marble corridors of the Vatican. Although this is the Machine Games’ clever way of letting you know where your enemies are at all times, it is also mildly funny, as if all the Nazis have been secretly kissing each other, spreading the same rhinovirus from Italy to Egypt to Nepal and beyond. More than that, it’s a stubborn reminder that, despite the many hours of perfectly motion-captured cinematics that accompany all this, you are still playing a video game. A snotty tissue that separates the Indy of taut two-hour cinema and the Indy of a sweeping first-person punch ’em up that will take days to complete. All this is to say, you will notice the difference. But that might not matter; they’re both still Indiana Jones.
As is Disney’s wont, the outing is militantly on-brand. The opening recreates Raiders Of The Lost Ark’s boulder-escaping intro sequence with a beat-for-beat loyalty that borders on obsessive. Although it deviates from the movie in one important way: it lets you investigate whether the first waterfall you see has a cave behind it - a good joke, and the first clue we’re playing a game and not just rewatching a scene we may have witnessed countless times.
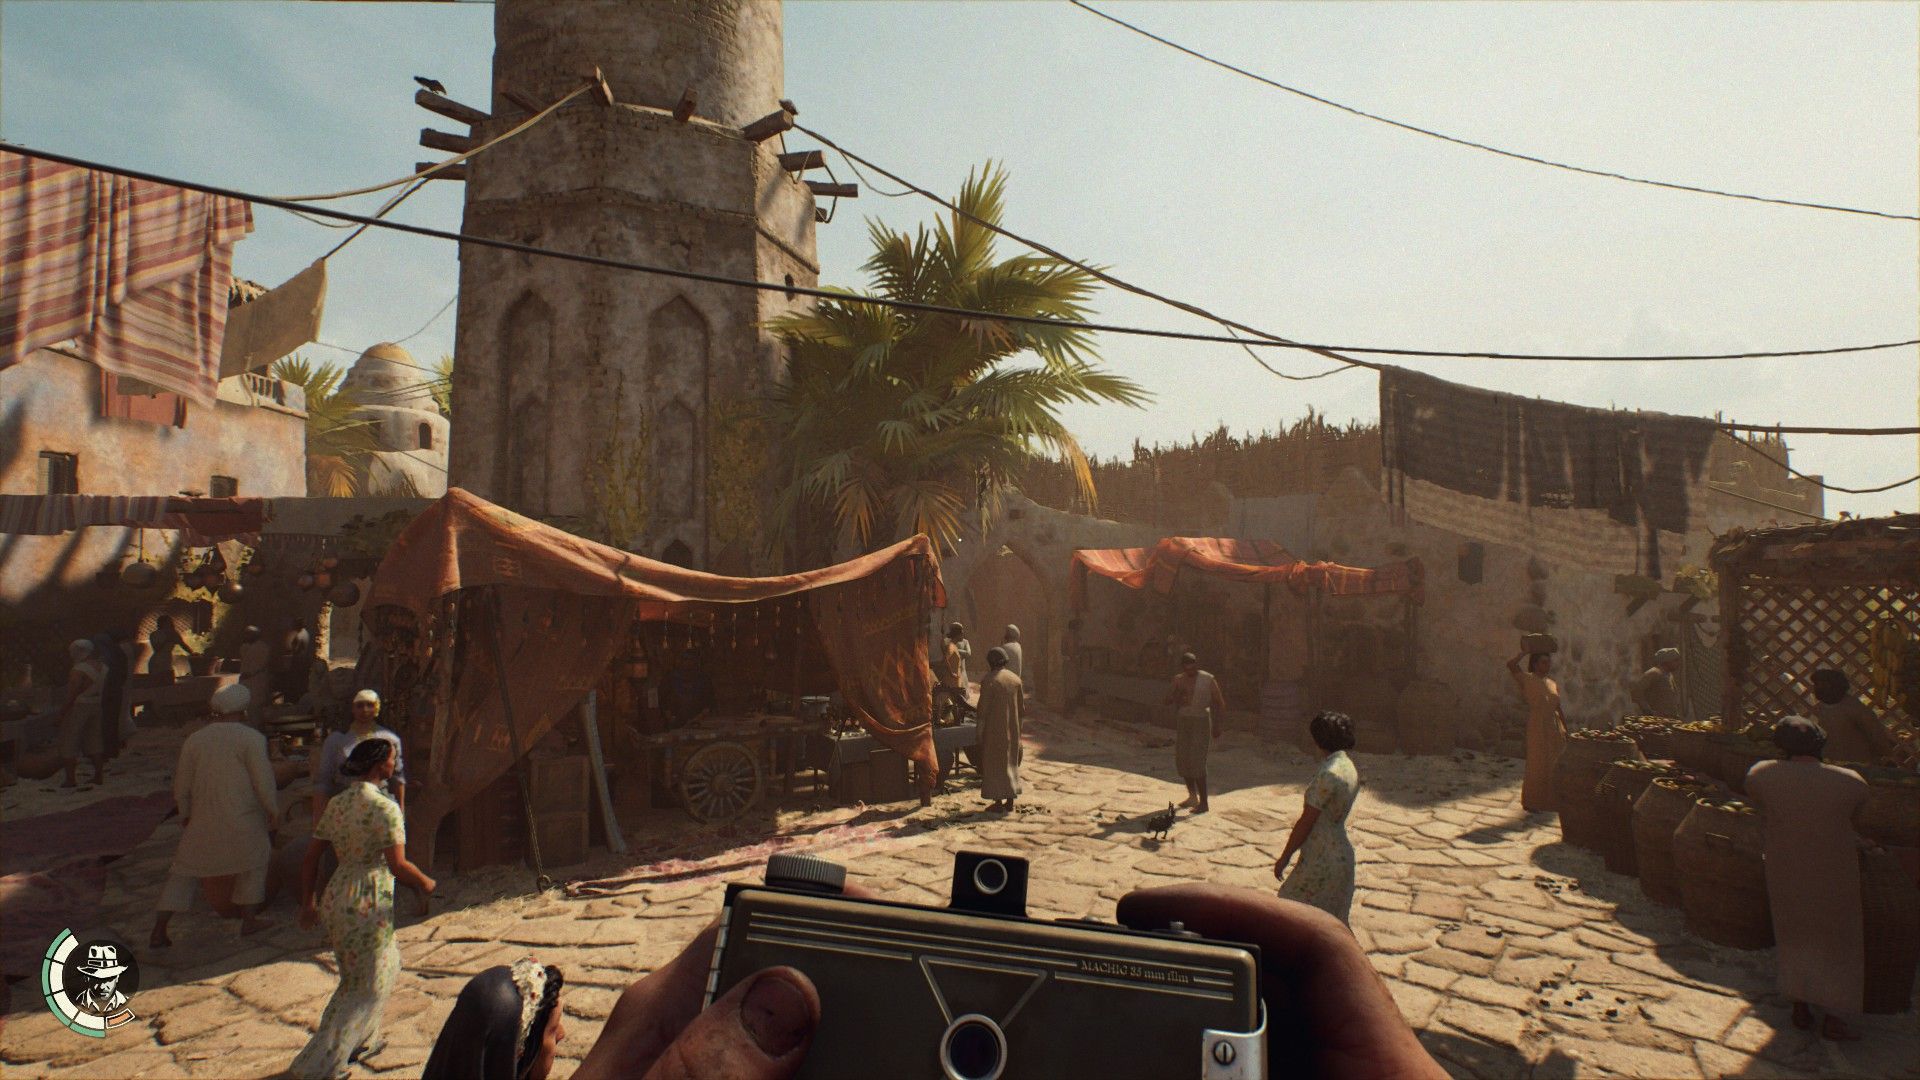
Image credit:Rock Paper Shotgun / Bethesda
It’s thankfully not long until you’re out of this famous scene, and exploring the artifact collections at Indy’s university campus. There’s a break-in, and a mummified cat is stolen straight from its display case, which sends Indy on a round-the-world adventure to find out why this one dead moggy is so important. Also, a mysterious giant knocked the adventurer’s lights out in the process of burglarising said ex-feline, so we must uncover who that guy is too. Soon enough you’re stealthing past guards, solving archaic puzzles, opening hidden safes, getting into knuckle-bruising scrapes, and donning disguises to blend in with the locals.
But I like how Machine Games begin our boy’s journey in the exact space he’s always harping on about - a quiet museum. And the many props that fill its glass cases are representative of the visual attention to detail that will follow for the entirety of his globe-trotting trip. This is a lavish blockbuster with no expense spared on the environment art and set dressing (and no PC spared either ). The amount of props alone - many recreated from actual historical artifacts or real world artworks - is intimidatingly impressive. There are more pots in these tombs than a Dark Souls player could feasibly roll over.
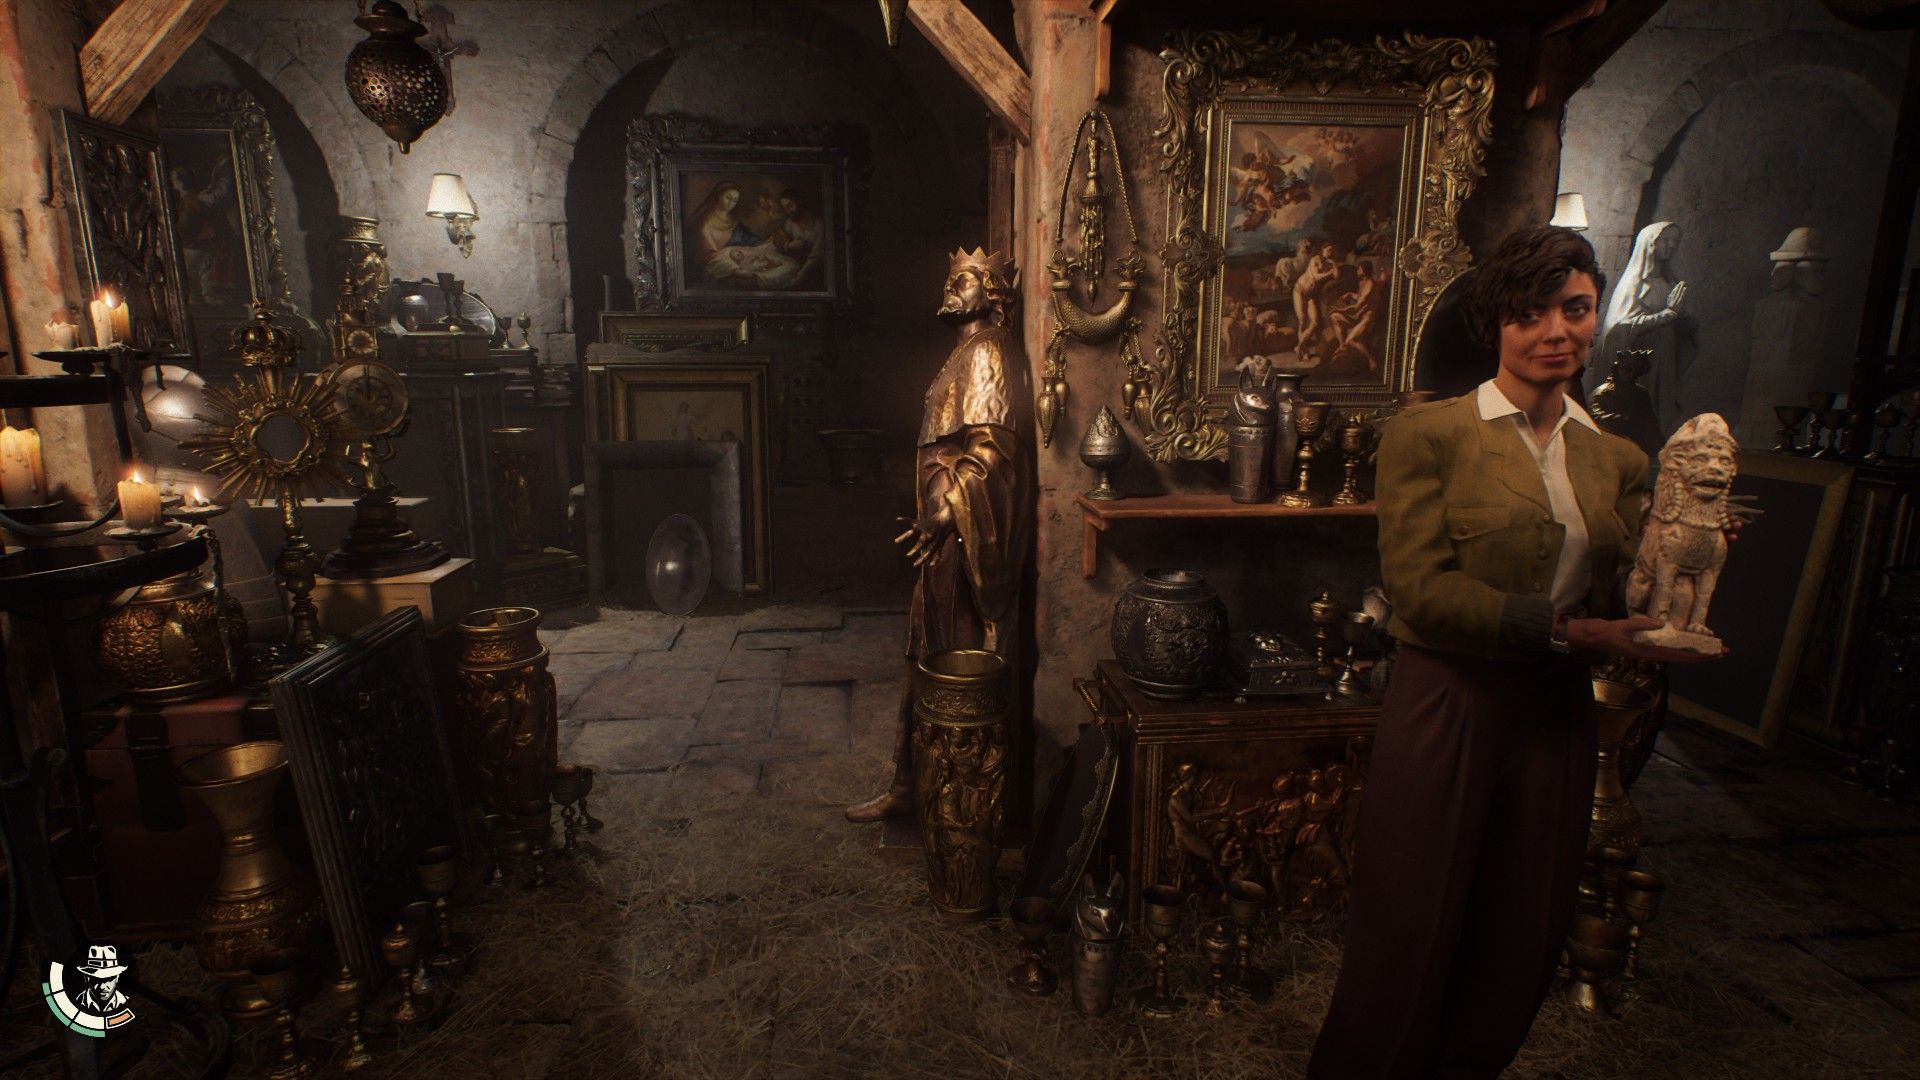
Image credit:Rock Paper Shotgun / Bethesda
That attention also shows in the stray conversations between NPCs in the street, in the heavy snow that leaves a soft trail as your companion wades through it, and in the animated cats that lounge around waiting to be photographed for stray “exploration points” (these will help unlock skills - more on those in a bit). I know “graphix is gud” is to be expected in a multi-million-dollar Bethesda blowout, but it does feel important that a game set around an enduring relic of Hollywood should simply look bloody good . The lighting, in particular, channels the beams and glows of cinema, and likes to lie in familiar dramatic lines across Indiana’s face as he looks up in awe at a statue or hides behind a box from Mussolini.
As both an Indiana Joneser and a fan of guns-down exploration, it also feels purpose-built to make me happy. I often want my first-person shooters to slow down and make good use of their space, to make it explorable and intricate, and to pace out their action with lots of quieter nosying about. Indy’s Big Round Ring satisfies that desire for a wandering playspace. Its levels are grand and open. The Vatican is full of gates and walkways that will bring you back to the place you started with satisfying shortcuts. The sandy dig sites around Egypt’s pyramids contain so many tombs and secrets I had to force myself to focus on the main story just to try and get this review done in time (I failed - this review is late).
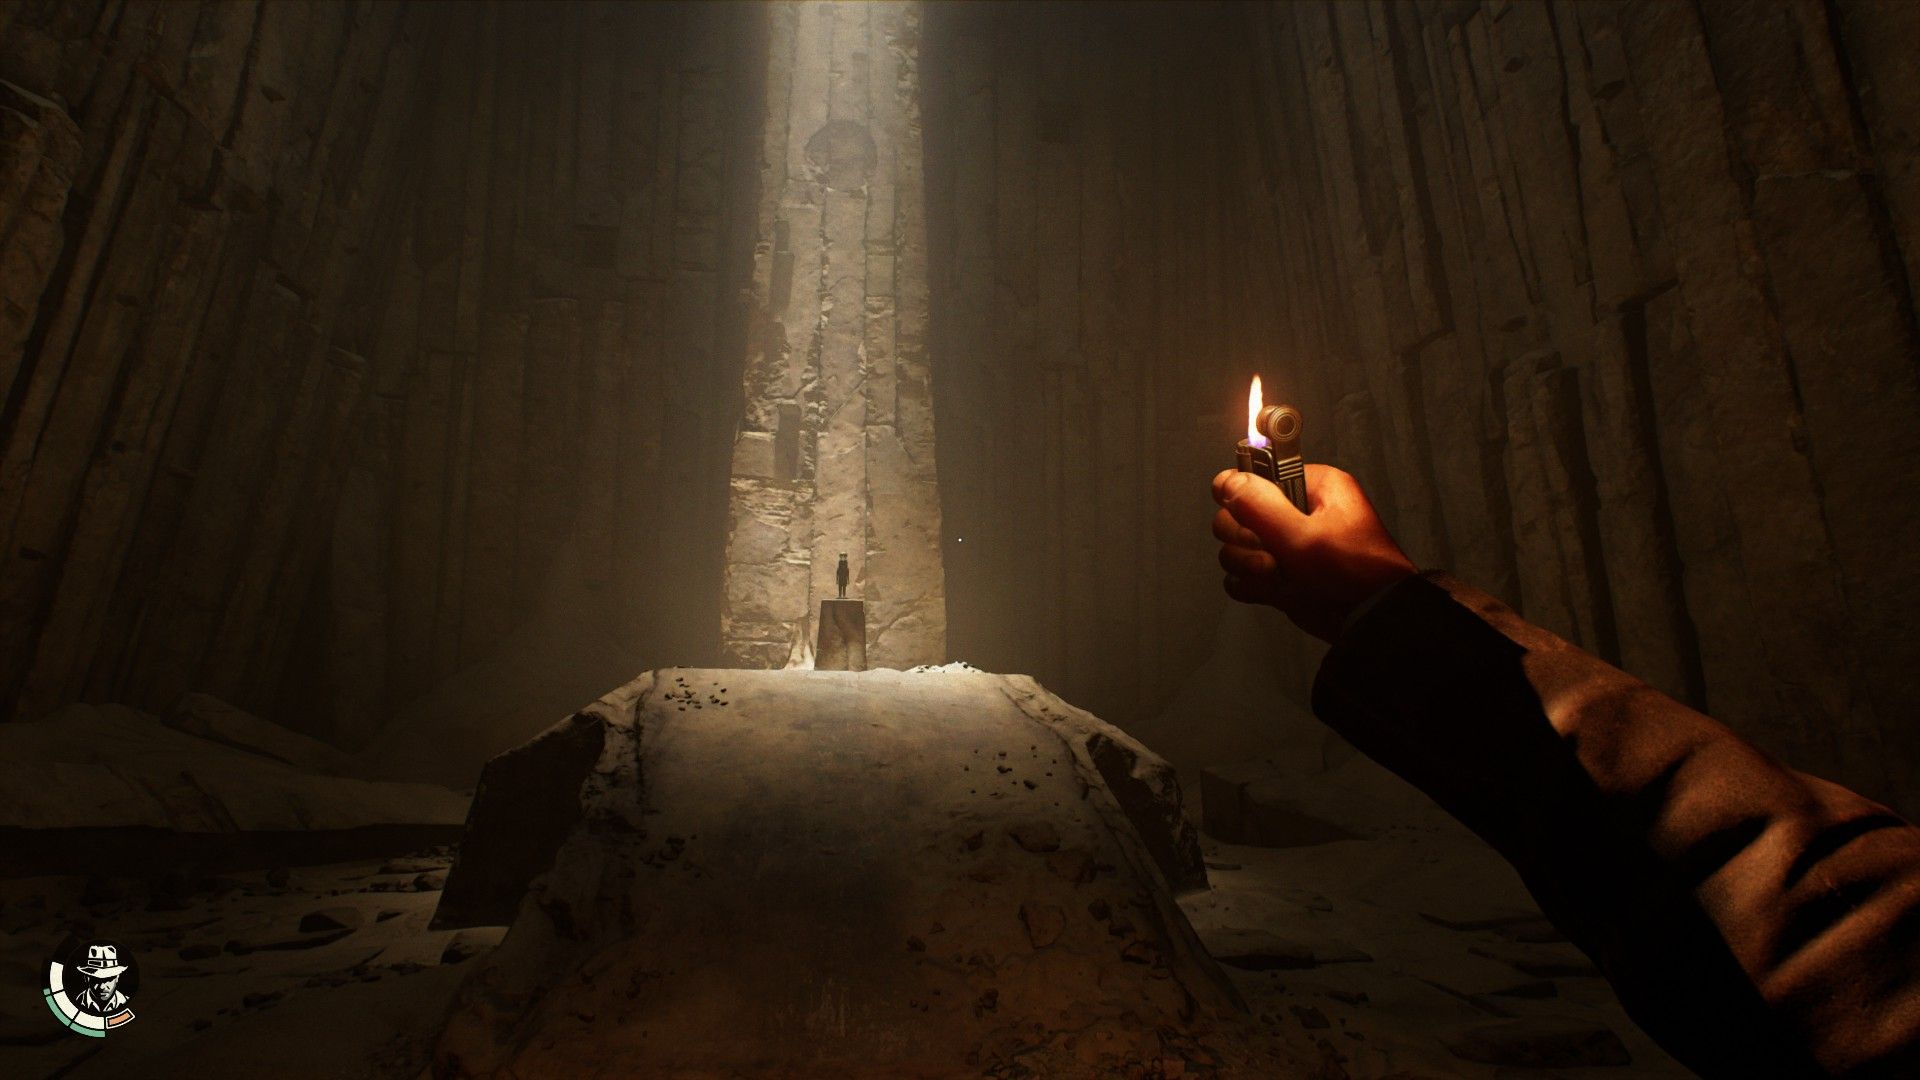
Image credit:Rock Paper Shotgun / Bethesda
It helps that much of it is set in locales where you might yearn to be a tourist in real life. You can fast travel using signposts found throughout the levels - but why would you when learning the layout and going off the most weathered paths make wandering from place to place so gratifying? That exploration gets rewarded not just with the usual collectibles but also with skill books that upgrade Indy in some classic gamey ways. For me, conflict was usually solved by battering backturned fascists with a single good donk on the head with a hammer - a stealthy approach. But some books toughen your fists, increase your stamina bar, or upgrade your whip to let you yank even the biggest, bruisiest enemies toward you. All useful when the fighting breaks out in earnest.
For me, this meant completely ignoring the revolver you always have to hand for emergencies. Instead I relied on the many melee weapons that are scattered in almost every room and desert tent. Crutches, brooms, shovels, whiskey bottles, mallets, rakes, bronze busts of old Popes… weapons are everywhere, it always feels like something useful is within reach, and some skullcrackers are more durable than others. A wine bottle will only do you one desperate smash (they can also be thrown to create a distraction) but a wrench might last five or six solid thwacks. One skill book lets you do more damage with the final smash of a melee weapon - the last donk before a mop splinters or an upturned rifle clatters to bits.
All this adds to the combat’s general sense of weight. you have to punch with left and right triggers on controller, and parry with light taps of the left bumper at precise moments. Melee fisticuffs in first-person has always been a hard thing for action games to pull off, and here too it can get overwhelming. Crowding the player is a hard problem to solve without resorting to obvious enemy turn-taking and Ubi-like warning indicators (a combative crutch Machine Games seem to want to avoid). Here you are a punchbag under pressure, with limited stamina and slow-to-recover biffs that suggest the correct way to play is to not get into open fights at all. Or if you do, to try and make sure you’re only ever fighting one or two people at a time.
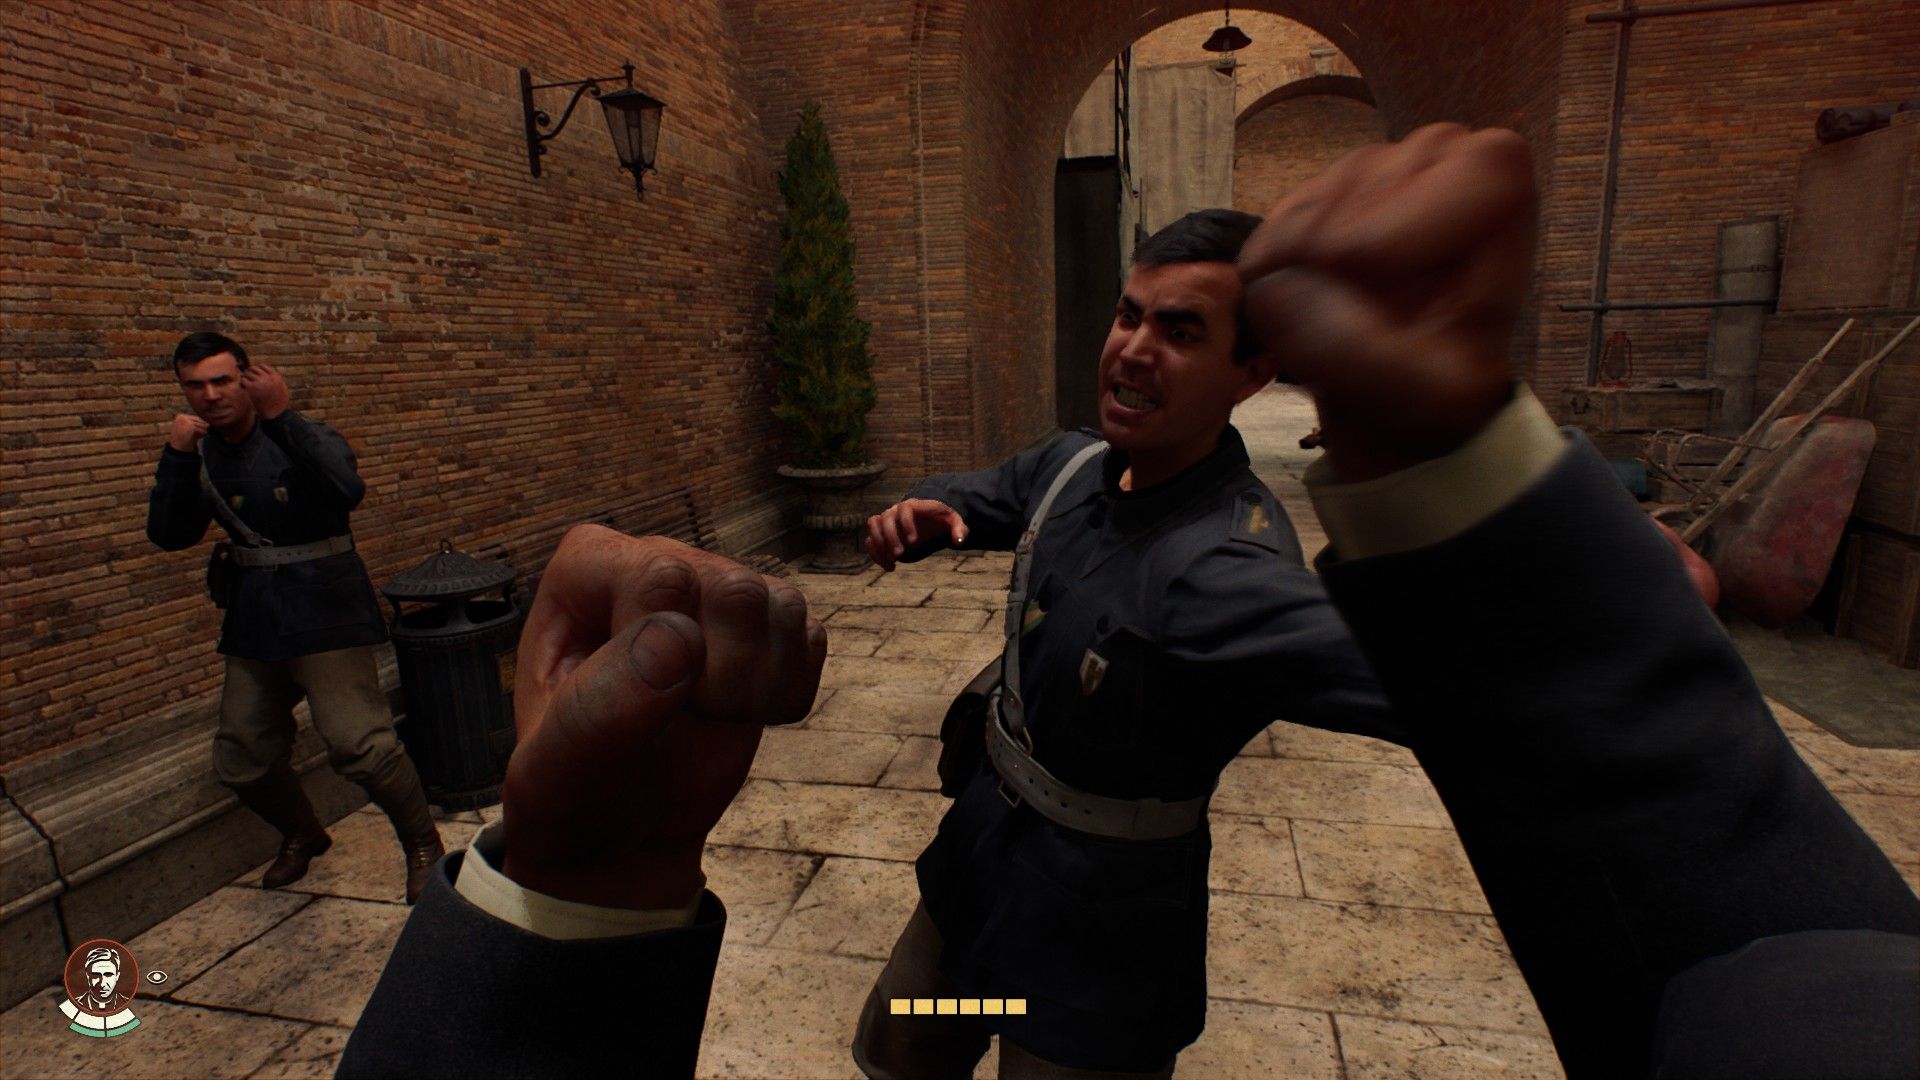
Image credit:Rock Paper Shotgun / Bethesda
All this meant I didn’t find the punching all that enjoyable at first. Yet once I fiddled with combat difficulty options to make things more forgiving (you can set the block to auto-parry incoming hits) I started to enjoy it not as a challenging encounter to overcome but as a mostly risk-free action sequence, dancing around my opponents and admiring the animations, as when Indy shakes off a final painful knucklewhack. Playing this game in “tired parent” mode is viable.
That sense of heft is not just in the fighting though. Carrying bodies to chuck them in a hiding place also drains your stamina bars very quickly. Levers and locks and all sorts of outlandish historical devices need to be yanked or twisted with an extra flick of the controller’s stick, or tap of the whipyank, to get their animation to complete. There are a hell of a lot of satisfying “kerclunk” noises in these catacombs and corridors.


In fact, the sound design in general is very solid. Aside from all the signalling sneezes and conspicuous whistling necessary to keep you alert to all the fash you can bash, Indy’s whip has the crack of a high caliber sniper rifle. And the soundtrack is, once again, chest-pumpingly loyal in its toots and honks. Action sequences get all the triumphant trumpeting you expect, while sneaky moments see Indy accompanied by his coterie of coy flutes and plucked strings tip toeing along with him through the stealth sections. When you smash people on the noggin in surprise the tension is dissipated by a dramatic “wwwWAH!” that you may unconsciously recognise as just one of the game’s many John Williamsisms.
As a work of adaptation, much of this stuff is to be expected. And it’s interesting to see how Machine Games have handled the most video gamey elements. How do you make recovering health feel like Indiana Jones? You let him scoff biscotti and other local foods (technically this gives you “buffer” health, but it still counts). How do you make a “last stand” self-revival skill feel like Indiana Jones? You make the downed player crawl towards his hat and put it back on. How do you make a map screen feel like Indiana Jones? You let him hold the actual map and look down at it even as the player walks around.
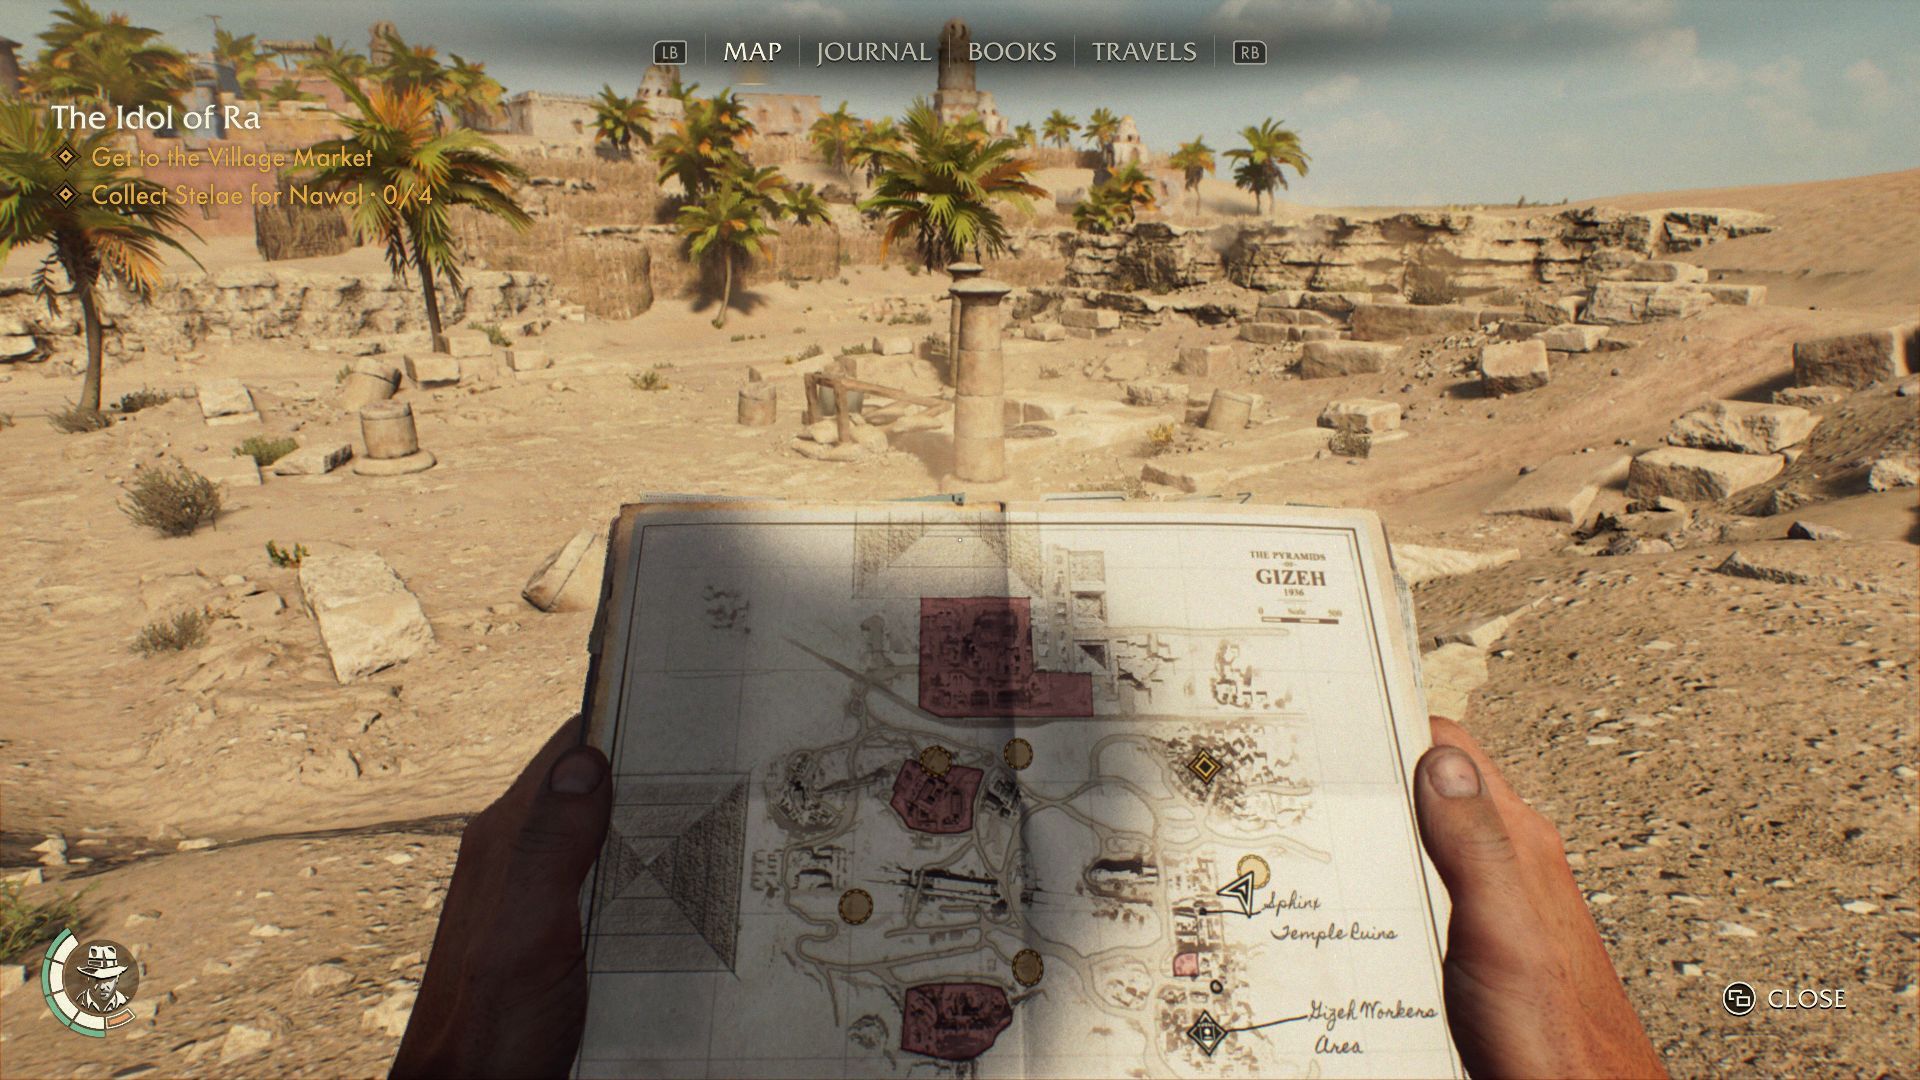
Image credit:Rock Paper Shotgun / Bethesda
None of these are super innovative, but I’m always very happy to see a Far Cry 2 style map in games where it feels right. And it is proof that Machine Games have gone about each system in a thoughtful way. In the same way Creative Assembly finally translated Alien into the medium of games with Alien: Isolation , I feel like this finally understands some of what makes Indiana Jones appealing: solving an ancient riddle by examining old notes in your journal, fumbling for a nearby weapon during a scrap only to grab a fly swatter, cosplaying as a member of the Wehrmacht and throwing a stick of dynamite when your identity is revealed.
In these moments it’s also notable Indiana Jones And The Large Hoop doesn’t offer any classic stealth game means of losing your pursuers in the event of being spotted - no lockers or hay bales here. If you’re sighted, it’s basically time for a big brawl. At first, I found that a little frustrating, I instinctively wanted to save scum. But after embracing the biffing I have realised this too feels truer to the character of the films. Indiana Jones doesn’t hide once he’s caught. He gets into a stupid fight.
Troy Baker has said that Bethesda didn’t ask for a “bang-on impression” of Harrison Ford, but he nonetheless delivers a quietly convincing version of Ford’s adventurer, with all his finger wags and wry side-of-the-mouth smiles. It is a reproduction of Ford’s younger face we’re looking at the whole time, and there are uncanny valley moments in looking at Dr Jones when you feel “this isn’t exactly right”. But the other performances quickly take the heat off (Voss, your principal Nazi antagonist, is particularly fun to dislike). You forget all about Baker.
In the same way, Machine Games have reproduced the experience of the Lucasfilm movies in a 99% accurate form. And they have done so in a manner only a megafunded Bethesda studio with a lot of Nazi-killing experience could. Yes, the video gamey seams stand out as you scarf down croissants for health and hear another bigot coughing behind a wall. But just as I’m not interested in Baker’s performance reaching some unobtainable ledge of authenticity, I also don’t want my adventure to abandon the language of games where it doesn’t make sense to do so. I’m happy for this to be exactly the kind of expensive, cinematic, blockbuster explorathon it seemed predestined to be. Sneeze away, little Nazi. I know where you are.
Find out how we conduct our reviews by reading our review policy .

Indiana Jones and the Great Circle
PS5 , Xbox Series X/S , PC , Nintendo Switch 2
Rock Paper Shotgun is better when you sign in
Sign in and join us on our journey to discover strange and compelling PC games.

All 75 Arc Raiders Blueprints and where to get them
These areas have the highest chance of giving you Blueprints

Image credit:Rock Paper Shotgun/Embark Studios

Looking for more Arc Raiders Blueprints? It’s a special day when you find a Blueprint, as they’re among the most valuable items in Arc Raiders. If you find a Blueprint that you haven’t already found, then you must make sure you hold onto it at all costs, because Blueprints are the key to one of the most important and powerful systems of meta-progression in the game.
This guide aims to be the very best guide on Blueprints you can find, starting with a primer on what exactly they are and how they work in Arc Raiders, before delving into exactly where to get Blueprints and the very best farming spots for you to take in your search.
We’ll also go over how to get Blueprints from other unlikely activities, such as destroying Surveyors and completing specific quests. And you’ll also find the full list of all 75 Blueprints in Arc Raiders on this page (including the newest Blueprints added with the Cold Snap update , such as the Deadline Blueprint and Firework Box Blueprint), giving you all the information you need to expand your own crafting repertoire.
In this guide:
- What are Blueprints in Arc Raiders?
- Full Blueprint list: All crafting recipes
- Where to find Blueprints in Arc Raiders Blueprints obtained from quests Blueprints obtained from Trials Best Blueprint farming locations

What are Blueprints in Arc Raiders?
Blueprints in Arc Raiders are special items which, if you manage to extract with them, you can expend to permanently unlock a new crafting recipe in your Workshop. If you manage to extract from a raid with an Anvil Blueprint, for example, you can unlock the ability to craft your very own Anvil Pistol, as many times as you like (as long as you have the crafting materials).
To use a Blueprint, simply open your Inventory while in the lobby, then right-click on the Blueprint and click “Learn And Consume” . This will permanently unlock the recipe for that item in your Workshop. As of the Stella Montis update, there are allegedly 75 different Blueprints to unlock - although only 68 are confirmed to be in the game so far. You can see all the Blueprints you’ve found and unlocked by going to the Workshop menu, and hitting “R” to bring up the Blueprint screen.
It’s possible to find duplicates of past Blueprints you’ve already unlocked. If you find these, then you can either sell them, or - if you like to play with friends - you can take it into a match and gift it to your friend so they can unlock that recipe for themselves. Another option is to keep hold of them until the time comes to donate them to the Expedition.
Full Blueprint list: All crafting recipes
Below is the full list of all the Blueprints that are currently available to find in Arc Raiders, and the crafting recipe required for each item:
| Blueprint | Type | Recipe | Crafted At |
|---|---|---|---|
| Bettina | Weapon | 3x Advanced Mechanical Components 3x Heavy Gun Parts 3x Canister | Gunsmith 3 |
| Blue Light Stick | Quick Use | 3x Chemicals | Utility Station 1 |
| Aphelion | Weapon | 3x Magnetic Accelerator 3x Complex Gun Parts 1x Matriarch Reactor | Gunsmith 3 |
| Combat Mk. 3 (Flanking) | Augment | 2x Advanced Electrical Components 3x Processor | Gear Bench 3 |
| Combat Mk. 3 (Aggressive) | Augment | 2x Advanced Electrical Components 3x Processor | Gear Bench 3 |
| Complex Gun Parts | Material | 2x Light Gun Parts 2x Medium Gun Parts 2x Heavy Gun Parts | Refiner 3 |
| Fireworks Box | Quick Use | 1x Explosive Compound 3x Pop Trigger | Explosives Station 2 |
| Gas Mine | Mine | 4x Chemicals 2x Rubber Parts | Explosives Station 1 |
| Green Light Stick | Quick Use | 3x Chemicals | Utility Station 1 |
| Pulse Mine | Mine | 1x Crude Explosives 1x Wires | Explosives Station 1 |
| Seeker Grenade | Grenade | 1x Crude Explosives 2x ARC Alloy | Explosives Station 1 |
| Looting Mk. 3 (Survivor) | Augment | 2x Advanced Electrical Components 3x Processor | Gear Bench 3 |
| Angled Grip II | Mod | 2x Mechanical Components 3x Duct Tape | Gunsmith 2 |
| Angled Grip III | Mod | 2x Mod Components 5x Duct Tape | Gunsmith 3 |
| Hullcracker | Weapon | 1x Magnetic Accelerator 3x Heavy Gun Parts 1x Exodus Modules | Gunsmith 3 |
| Launcher Ammo | Ammo | 5x Metal Parts 1x Crude Explosives | Workbench 1 |
| Anvil | Weapon | 5x Mechanical Components 5x Simple Gun Parts | Gunsmith 2 |
| Anvil Splitter | Mod | 2x Mod Components 3x Processor | Gunsmith 3 |
| ??? | ??? | ??? | ??? |
| Barricade Kit | Quick Use | 1x Mechanical Components | Utility Station 2 |
| Blaze Grenade | Grenade | 1x Explosive Compound 2x Oil | Explosives Station 3 |
| Bobcat | Weapon | 3x Advanced Mechanical Components 3x Light Gun Parts | Gunsmith 3 |
| Osprey | Weapon | 2x Advanced Mechanical Components 3x Medium Gun Parts 7x Wires | Gunsmith 3 |
| Burletta | Weapon | 3x Mechanical Components 3x Simple Gun Parts | Gunsmith 1 |
| Compensator II | Mod | 2x Mechanical Components 4x Wires | Gunsmith 2 |
| Compensator III | Mod | 2x Mod Components 8x Wires | Gunsmith 3 |
| Defibrillator | Quick Use | 9x Plastic Parts 1x Moss | Medical Lab 2 |
| ??? | ??? | ??? | ??? |
| Equalizer | Weapon | 3x Magnetic Accelerator 3x Complex Gun Parts 1x Queen Reactor | Gunsmith 3 |
| Extended Barrel | Mod | 2x Mod Components 8x Wires | Gunsmith 3 |
| Extended Light Mag II | Mod | 2x Mechanical Components 3x Steel Spring | Gunsmith 2 |
| Extended Light Mag III | Mod | 2x Mod Components 5x Steel Spring | Gunsmith 3 |
| Extended Medium Mag II | Mod | 2x Mechanical Components 3x Steel Spring | Gunsmith 2 |
| Extended Medium Mag III | Mod | 2x Mod Components 5x Steel Spring | Gunsmith 3 |
| Extended Shotgun Mag II | Mod | 2x Mechanical Components 3x Steel Spring | Gunsmith 2 |
| Extended Shotgun Mag III | Mod | 2x Mod Components 5x Steel Spring | Gunsmith 3 |
| Remote Raider Flare | Quick Use | 2x Chemicals 4x Rubber Parts | Utility Station 1 |
| Heavy Gun Parts | Material | 4x Simple Gun Parts | Refiner 2 |
| Venator | Weapon | 2x Advanced Mechanical Components 3x Medium Gun Parts 5x Magnet | Gunsmith 3 |
| Il Toro | Weapon | 5x Mechanical Components 6x Simple Gun Parts | Gunsmith 1 |
| Jolt Mine | Mine | 1x Electrical Components 1x Battery | Explosives Station 2 |
| Explosive Mine | Mine | 1x Explosive Compound 1x Sensors | Explosives Station 3 |
| Jupiter | Weapon | 3x Magnetic Accelerator 3x Complex Gun Parts 1x Queen Reactor | Gunsmith 3 |
| Light Gun Parts | Material | 4x Simple Gun Parts | Refiner 2 |
| Lightweight Stock | Mod | 2x Mod Components 5x Duct Tape | Gunsmith 3 |
| Lure Grenade | Grenade | 1x Speaker Component 1x Electrical Components | Utility Station 2 |
| Medium Gun Parts | Material | 4x Simple Gun Parts | Refiner 2 |
| Torrente | Weapon | 2x Advanced Mechanical Components 3x Medium Gun Parts 6x Steel Spring | Gunsmith 3 |
| Muzzle Brake II | Mod | 2x Mechanical Components 4x Wires | Gunsmith 2 |
| Muzzle Brake III | Mod | 2x Mod Components 8x Wires | Gunsmith 3 |
| Padded Stock | Mod | 2x Mod Components 5x Duct Tape | Gunsmith 3 |
| Shotgun Choke II | Mod | 2x Mechanical Components 4x Wires | Gunsmith 2 |
| Shotgun Choke III | Mod | 2x Mod Components 8x Wires | Gunsmith 3 |
| Shotgun Silencer | Mod | 2x Mod Components 8x Wires | Gunsmith 3 |
| Showstopper | Grenade | 1x Advanced Electrical Components 1x Voltage Converter | Explosives Station 3 |
| Silencer I | Mod | 2x Mechanical Components 4x Wires | Gunsmith 2 |
| Silencer II | Mod | 2x Mod Components 8x Wires | Gunsmith 3 |
| Snap Hook | Quick Use | 2x Power Rod 3x Rope 1x Exodus Modules | Utility Station 3 |
| Stable Stock II | Mod | 2x Mechanical Components 3x Duct Tape | Gunsmith 2 |
| Stable Stock III | Mod | 2x Mod Components 5x Duct Tape | Gunsmith 3 |
| Tagging Grenade | Grenade | 1x Electrical Components 1x Sensors | Utility Station 3 |
| Tempest | Weapon | 3x Advanced Mechanical Components 3x Medium Gun Parts 3x Canister | Gunsmith 3 |
| Trigger Nade | Grenade | 2x Crude Explosives 1x Processor | Explosives Station 2 |
| Vertical Grip II | Mod | 2x Mechanical Components 3x Duct Tape | Gunsmith 2 |
| Vertical Grip III | Mod | 2x Mod Components 5x Duct Tape | Gunsmith 3 |
| Vita Shot | Quick Use | 2x Antiseptic 1x Syringe | Medical Lab 3 |
| Vita Spray | Quick Use | 3x Antiseptic 1x Canister | Medical Lab 3 |
| Vulcano | Weapon | 1x Magnetic Accelerator 3x Heavy Gun Parts 1x Exodus Modules | Gunsmith 3 |
| Wolfpack | Grenade | 2x Explosive Compound 2x Sensors | Explosives Station 3 |
| Red Light Stick | Quick Use | 3x Chemicals | Utility Station 1 |
| Smoke Grenade | Grenade | 14x Chemicals 1x Canister | Utility Station 2 |
| Deadline | Mine | 3x Explosive Compound 2x ARC Circuitry | Explosives Station 3 |
| Trailblazer | Grenade | 1x Explosive Compound 1x Synthesized Fuel | Explosives Station 3 |
| Tactical Mk. 3 (Defensive) | Augment | 2x Advanced Electrical Components 3x Processor | Gear Bench 3 |
| Tactical Mk. 3 (Healing) | Augment | 2x Advanced Electrical Components 3x Processor | Gear Bench 3 |
| Yellow Light Stick | Quick Use | 3x Chemicals | Utility Station 1 |
Note: The missing Blueprints in this list likely have not actually been added to the game at the time of writing, because none of the playerbase has managed to find any of them. As they are added to the game, I will update this page with the most relevant information so you know exactly how to get all 75 Arc Raiders Blueprints.
Where to find Blueprints in Arc Raiders
Below is a list of all containers, modifiers, and events which maximise your chances of finding Blueprints:
- Certain quests reward you with specific Blueprints .
- Completing Trials has a high chance of offering Blueprints as rewards.
- Surveyors have a decent chance of dropping Blueprints on death.
- High loot value areas tend to have a greater chance of spawning Blueprints.
- Night Raids and Storms may increase rare Blueprint spawn chances in containers.
- Containers with higher numbers of items may have a higher tendency to spawn Blueprints. As a result, Blue Gate (which has many “large” containers containing multiple items) may give you a higher chance of spawning Blueprints.
- Raider containers (Raider Caches, Weapon Boxes, Medical Bags, Grenade Tubes) have increased Blueprint drop rates. As a result, the Uncovered Caches event gives you a high chance of finding Blueprints.
- Security Lockers have a higher than average chance of containing Blueprints.
- Certain Blueprints only seem to spawn under specific circumstances: Tempest Blueprint only spawns during Night Raid events. Vulcano Blueprint only spawns during Hidden Bunker events. Jupiter and Equaliser Blueprints only spawn during Harvester events.

Raider Caches, Weapon Boxes, and other raider-oriented container types have a good chance of offering Blueprints. |Image credit:Rock Paper Shotgun/Embark Studios
Blueprints have a very low chance of spawning in any container in Arc Raiders, around 1-2% on average. However, there is a higher chance of finding Blueprints in particular container types. Specifically, you can find more Blueprints in Raider containers and security lockers.
Beyond this, if you’re looking for Blueprints you should focus on regions of the map which are marked as having particularly high-value loot. Areas such as the Control Tower in Dam Battlegrounds, the Arrival and Departure Buildings in Spaceport, and Pilgrim’s Peak in Blue Gate all have a better-than-average chance of spawning Blueprints somewhere amongst all their containers. Night Raids and Electromagnetic Storm events also increase the drop chances of certain Blueprints .
In addition to these containers, you can often loot Blueprints from destroyed Surveyors - the largest of the rolling ball ARC. Surveyors are more commonly found on the later maps - Spaceport and Blue Gate - and if one spawns in your match, you’ll likely see it by the blue laser beam that it casts into the sky while “surveying”.
Surveyors are quite well-armoured and will very speedily run away from you once it notices you, but if you can take one down then make sure you loot all its parts for a chance of obtaining certain unusual Blueprints.
Blueprints obtained from quests
One way in which you can get Blueprints is by completing certain quests for the vendors in Speranza. Some quests will reward you with a specific item Blueprint upon completion, so as long as you work through all the quests in Arc Raiders, you are guaranteed those Blueprints.
Here is the full list of all Blueprints you can get from quest rewards:
- Trigger Nade Blueprint: Rewarded after completing “Sparks Fly”.
- Lure Grenade Blueprint: Rewarded after completing “Greasing Her Palms”.
- Burletta Blueprint: Rewarded after completing “Industrial Espionage”.
- Hullcracker Blueprint (and Launcher Ammo Blueprint): Rewarded after completing “The Major’s Footlocker”.
Alas, that’s only 4 Blueprints out of a total of 75 to unlock, so for the vast majority you will need to find them yourself during a raid. If you’re intent on farming Blueprints, then it’s best to equip yourself with cheap gear in case you lose it, but don’t use a free loadout because then you won’t get a safe pocket to stash any new Blueprint you find. No pain in Arc Raiders is sharper than failing to extract with a new Blueprint you’ve been after for a dozen hours already.

One of the best ways to get Blueprints is by hitting three stars on all five Trials every week. |Image credit:Rock Paper Shotgun/Embark Studios
Blueprints obtained from Trials
One of the very best ways to get Blueprints is as rewards for completing Trials in Arc Raiders. Trials are unlocked from Level 15 onwards, and allow you to earn rewards by focusing on certain tasks over the course of several raids. For example, one Trial might task you with dealing damage to Hornets, while another might challenge you to loot Supply Drops.
Trials refresh on a weekly basis, with a new week bringing five new Trials. Each Trial can offer up to three rewards after passing certain score milestones, and it’s possible to receive very high level loot from these reward crates - including Blueprints. So if you want to unlock as many Blueprints as possible, you should make a point of completing as many Trials as possible each week.
Best Blueprint farming locations
The very best way to get Blueprints is to frequent specific areas of the maps which combine high-tier loot pools with the right types of containers to search. Here are my recommendations for where to find Blueprints on every map, so you can always keep the search going for new crafting recipes to unlock.

Image credit:Rock Paper Shotgun/Embark Studios
Dam Battlegrounds
The best places to farm Blueprints on Dam Battlegrounds are the Control Tower, Power Generation Complex, Ruby Residence, and Pale Apartments . The first two regions, despite only being marked on the map as mid-tier loot, contain a phenomenal number of containers to loot. The Control Tower can also contain a couple of high-tier Security Lockers - though of course, you’ll need to have unlocked the Security Breach skill at the end of the Survival tree.
There’s also a lot of reporting amongst the playerbase that the Residential areas in the top-left of the map - Pale Apartments and Ruby Residence - give you a comparatively strong chance of finding Blueprints. Considering their size, there’s a high density of containers to loot in both locations, and they also have the benefit of being fairly out of the way. So you’re more likely to have all the containers to yourself.
Buried City
The best Blueprint farming locations on Buried City are the Santa Maria Houses, Grandioso Apartments, Town Hall, and the various buildings of the New District . Grandioso Apartments has a lower number of containers than the rest, but a high chance of spawning weapon cases - which have good Blueprint drop rates. The others are high-tier loot areas, with plenty of lootable containers - including Security Lockers.
Spaceport
The best places to find Blueprints on Spaceport are the Arrival and Departure Buildings, as well as Control Tower A6 and the Launch Towers . All these areas are labelled as high-value loot regions, and many of them are also very handily connected to one another by the Spaceport wall, which you can use to quickly run from one area to the next. At the tops of most of these buildings you’ll find at least one Security Locker, so this is an excellent farming route for players looking to find Blueprints.
The downside to looting Blueprints on Spaceport is that all these areas are hotly contested, particularly in Duos and Squads. You’ll need to be very focused and fast in order to complete the full farming route.

Image credit:Rock Paper Shotgun/Embark Studios
Blue Gate
Blue Gate tends to have a good chance of dropping Blueprints, potentially because it generally has a high number of containers which can hold lots of items; so there’s a higher chance of a Blueprint spawning in each container. In my experience, the best Blueprint farming spots on Blue Gate are Pilgrim’s Peak, Raider’s Refuge, the Ancient Fort, and the Underground Complex beneath the Warehouse .
All of these areas contain a wealth of containers to loot. Raider’s Refuge has less to loot, but the majority of the containers in and around the Refuge are raider containers, which have a high chance of containing Blueprints - particularly during major events.
Stella Montis
On the whole, Stella Montis seems to have a very low drop rate for Blueprints (though a high chance of dropping other high-tier loot). If you do want to try farming Blueprints on this map, the best places to find Blueprints in Stella Montis are Medical Research, Assembly Workshop, and the Business Center . These areas have the highest density of containers to loot on the map.
In addition to this, the Western Tunnel has a few different Security Lockers to loot, so while there’s very little to loot elsewhere in this area of the map, it’s worth hitting those Security Lockers if you spawn there at the start of a match.
That wraps up this primer on how to get all the Blueprints in Arc Raiders as quickly as possible. With the Expedition system constantly resetting a large number of players’ Blueprints, it’s more important than ever to have the most up-to-date information on where to find all these Blueprints.
While you’re here, be sure to check out our Arc Raiders best guns tier list , as well as our primers on the best skills to unlock and all the different Field Depot locations on every map.

ARC Raiders
PS5 , Xbox Series X/S , PC
Rock Paper Shotgun is better when you sign in
Sign in and join us on our journey to discover strange and compelling PC games.
