I set a bishop on fire in Norland and the sicko loved every second of it
Just a little sin

Image credit:Rock Paper Shotgun / Hooded Horse

I am burning the Bishop while he sleeps. I’d say it’s nothing personal, but quite a lot in medieval management sim Norland is personal. He shouldn’t have slept with the Queen’s sister, for example. He shouldn’t have insisted his lover subsequently pay him for a confession to absolve herself of the guilt accrued from sleeping with him. He shouldn’t have felt safe in a room next to the Queen, a woman described as “reckless” in her character traits, and who is perilously close to having a nervous breakdown. This, my holy friend, is how your bed chamber becomes a raging inferno.
By the end of my first game of Norland, the village of Nandos (you can name your own settlements) is covered in more blood than the back end of the bard’s best work. In storytelling terms, it is a tragedy. In terms of fantasy management games? It is great fun. The failure cascade as waterslide.
My test for likening a game to Dwarf Fortress or Rimworld is whether the little dramas that unfold are funny. Are they laced with enough unexpectedness and bitter rivalry to constitute a story generator? Or are they at least a funny anecdote generator? Some management games can simulate a compelling tale of conflict yet feel, at their core, a restricted machine (hi Frostpunk ) while others can offer a lot of moving parts but be quite empty of conflict or humour (hi Clanfolk ). Norland pushes you into a deep pool of fuck-ups and shortages with the smug enthusiasm of a sim containing enough gears and cogs to crack a hundred nuts. I laughed a lot.

Image credit:Rock Paper Shotgun / Hooded Horse
Here you’re asked not only to build new structures - flour mills, rutabaga farms, iron mines - but also to assign a Lord to each building to oversee and give instruction to all the peasants working in that building. These Lords are basically your major cast of characters, each with their own traits, skills, likes, dislikes, and attitudes towards others. If Rimworld is the first big touchstone, then Crusader Kings is the second. You can ask Lords to spend time with one another, go hunting together, duel, play dice, and so on, all in some effort to resolve disputes or improve relationships.
Outside of your own settlement, a larger world map shows other towns with their own Lords, all of which you can trade with or become allied to through marriage. (Yes, you can also conquer them with a bloody fist, calm down.) There are a lot more options involving intrigue and politicking, and here too the royal garb of Paradox’s monarchy sim drags itself across Norland’s shining floor. Even the dark cool palette of the menu boxes, and the painterly loading screens remind me of good times imprisoning the children of rival kings. The map evolves too. In my game, what started as a hodgepodge of states would become a landscape half-dominated by a single alliance, with cheeky Nandos sadly bleeding in the corner. Perhaps I should not have spent so long min-maxing my Lords to be the most off-kilter family of the (fantasy) middle ages.
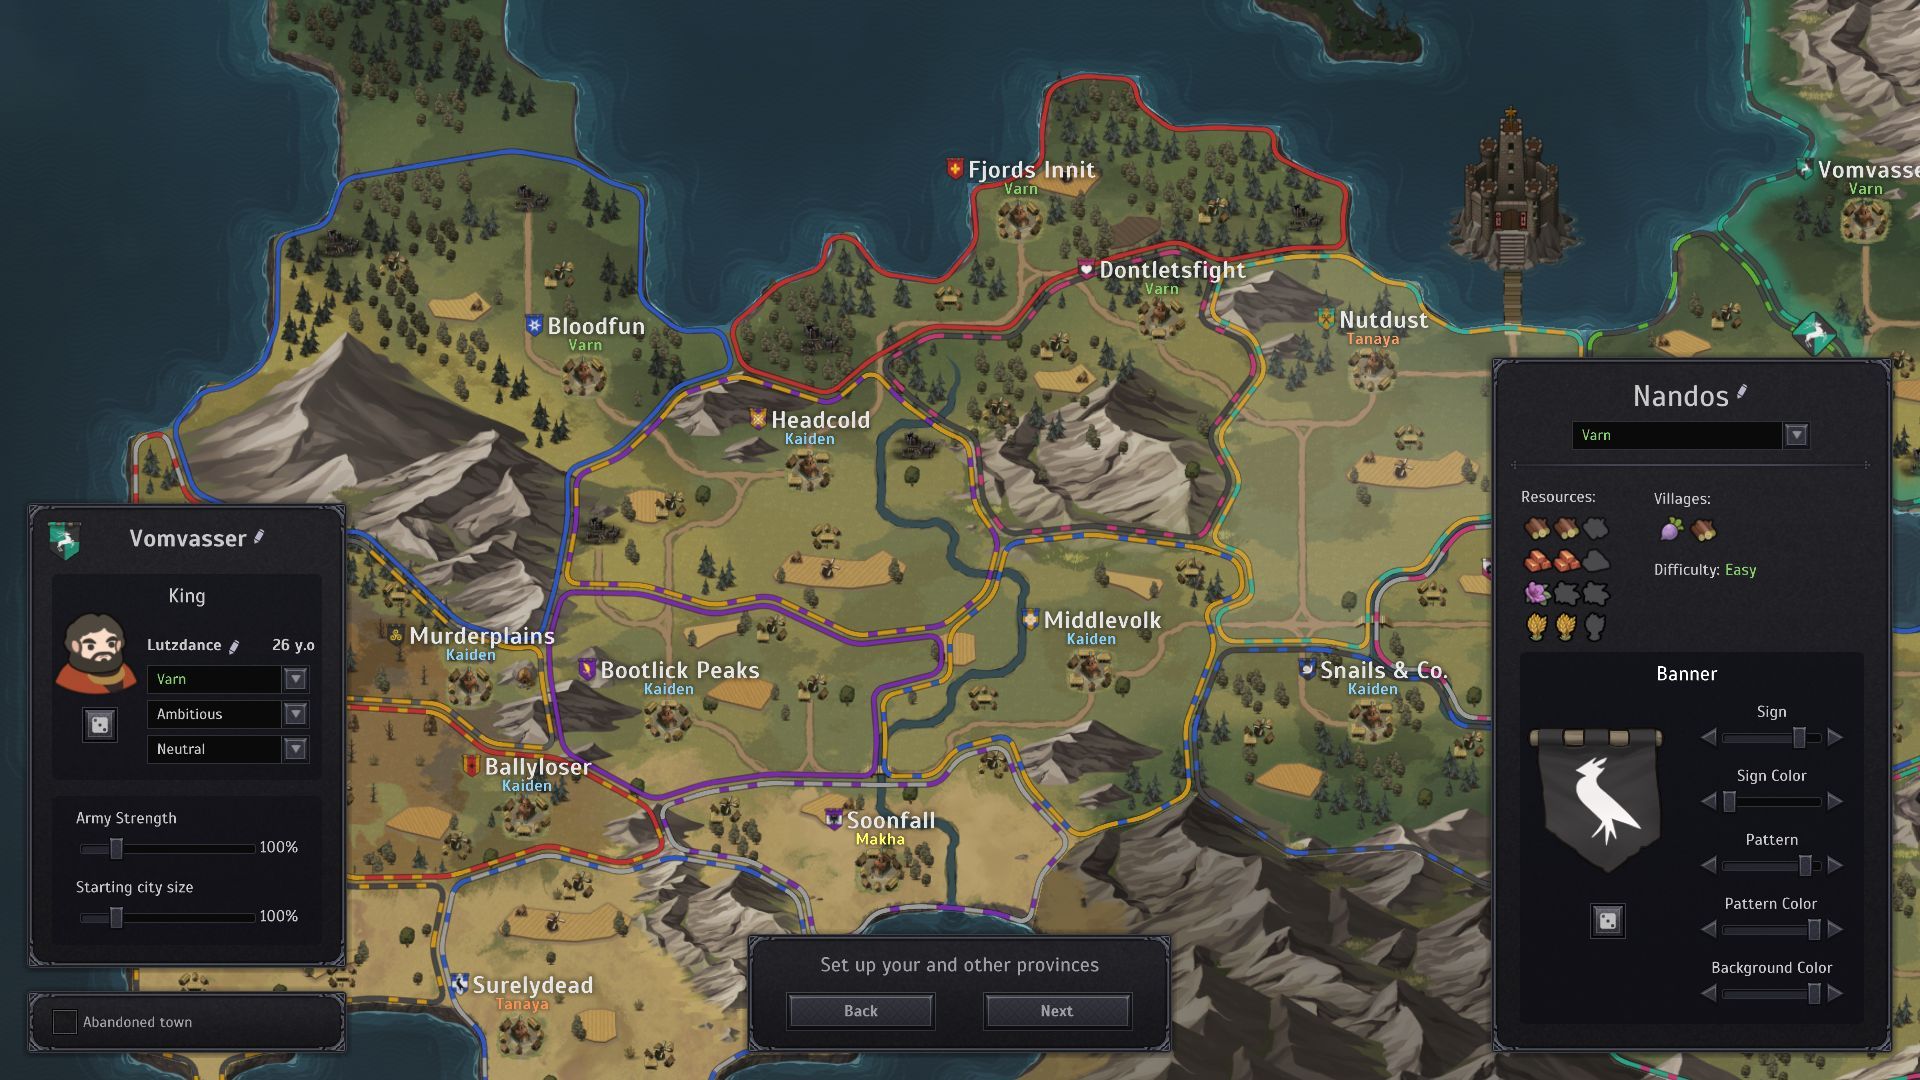
Image credit:Rock Paper Shotgun / Hooded Horse
You see, the Lord creation at the beginning of a game lets you tweak stats and personality quirks. You can rename lots of characters and towns too (something I always appreciate in a management sim like this). My noble family would consist of two sisters bringing up a baby boy, whose parents are nowhere to be found. My Queen is called “Stabbinya”. She is the reckless and militant caretaker of the improbably polite boy, Pinkcheeks. On paper she’ll be good at commanding armies, leading troops, and fighting. In practice, we don’t get that far. Her sister, “Madam MacDrip”, is an intelligent, pedagogically gifted overseer. She has terrible manners.
I spent a similarly long time just naming the provinces and neighbouring kings before the game even kicked off. And I think this is where I understood Norland had some claws. It wasn’t long before I was in the thick of town management, staring down at five peasants sleeping rough in the streets, with a bunch more wandering around the fields in the morning looking clueless because the Lord who was supposed to give them instructions was too busy teaching management to a toddler.

Image credit:Rock Paper Shotgun / Hooded Horse
Progress is quite slow (helped a little by some obligatory fast-forward buttons). Every few days a holy caravan visits and it sells a much-needed commodity - books. To make new buildings or improvements possible, you have to own a book about that topic, then assign a Lord to read that book and slurp up all the knowledge. Some books you can buy include: “Intimidation Of Tramps”, “Fertilize Correctly”, and “How To Deal With Addiction”. Once one of your bigwigs has learned a piece of knowledge, the whole community will benefit. A new hop field, for example, or the basic understanding required to cook meat properly. But, the game warns me, if that knowledge-holder dies, and nobody else knows how to do that thing, then the ability to enjoy these things vanishes. Aha, the disaster machine is all coming together now, isn’t it?
In the end, this is not how my personal disaster unfolds. That begins when the outsiders arrive…
First, a landless Lord called Jula arrives. This is useful, because you can hire these characters as temporary Lords for some costly silver rings. That means more help to tell the peasants what to do. When I hire Jula, I do not know that she completely and utterly loathes the Queen. All I know is that she’s intelligent and can run a good brewery. As a result, Jula will never really make Nandos feel like her own home. There is a way to convince freelance Lords like this to stay, to grant them a title and offer them a permanent place in your weird-ass family. But not Jula. She works for us, but make no mistake - she hates us. The only person Jula hates more than the Queen is the Queen’s new baby, who is inexplicably born one day, fully clothed and walking, in her highness’ bedroom. Ah, little baby Looksmaxx. Remember him. He will die horribly.

Image credit:Rock Paper Shotgun / Hooded Horse
The next visitors to upend the natural order (what little natural order we have established in Nandos) are quick to follow. King No Nose of Pringleton is coming to visit. I can even see him as he trundles towards the settlement on the world map. We are pleased to receive him, because I want to improve my relationship with his kingdom, enough to set up a long-term trade agreement to offload my overabundant stocks of rutabagas in exchange for something better. He actually seems lovely. Unfortunately, he arrives alongside a companion. A Bishop called Ingo, who triggers some tutorials about the mood-destroying effects of sin. Mood is important in Norland. If your Lords get too depressed, overworked, or annoyed, they will refuse to perform their overseeing tasks, and the peasants will take the chance to chill out. So if the guilt from sinning can wreck a characters mood, it is indeed a thing to be wary of.
But don’t worry, the church informs me, you can confess to the Bishop and relieve this spiritual pain. That sounds wonderful. Sin is clearly to be avoided, and his holiness blesses us with his mere presence. We offer the Bishop a room in one of our unoccupied lordly houses. Piety is important to the people of Nandos. We are a holy and modest people.
In the next room Jula is fucking a rutabaga farmer called Oisin.
<img loading=“lazy” src=“https://assetsio.gnwcdn.com/norland-early-access-7.jpg?width=2048&height=2048&fit=bounds&quality=85&format=jpg&auto=webp" onerror=“this.onerror=null;this.src=‘https://blogger.googleusercontent.com/img/a/AVvXsEhe7F7TRXHtjiKvHb5vS7DmnxvpHiDyoYyYvm1nHB3Qp2_w3BnM6A2eq4v7FYxCC9bfZt3a9vIMtAYEKUiaDQbHMg-ViyGmRIj39MLp0bGFfgfYw1Dc9q_H-T0wiTm3l0Uq42dETrN9eC8aGJ9_IORZsxST1AcLR7np1koOfcc7tnHa4S8Mwz_xD9d0=s16000';" alt=“A tutorial pop-up informs the player of the concept of “sin” while a Lord has sex with a rutabaga farmer in the background. - 7”>
Image credit:Rock Paper Shotgun / Hooded Horse
She pays him when he leaves. For a minute I think this will not bode well. I mouse away for a moment. What will the bishop think? I hope he hasn’t notic–
But the Bishop is in Madam MacDrip’s room. They are also having sex.
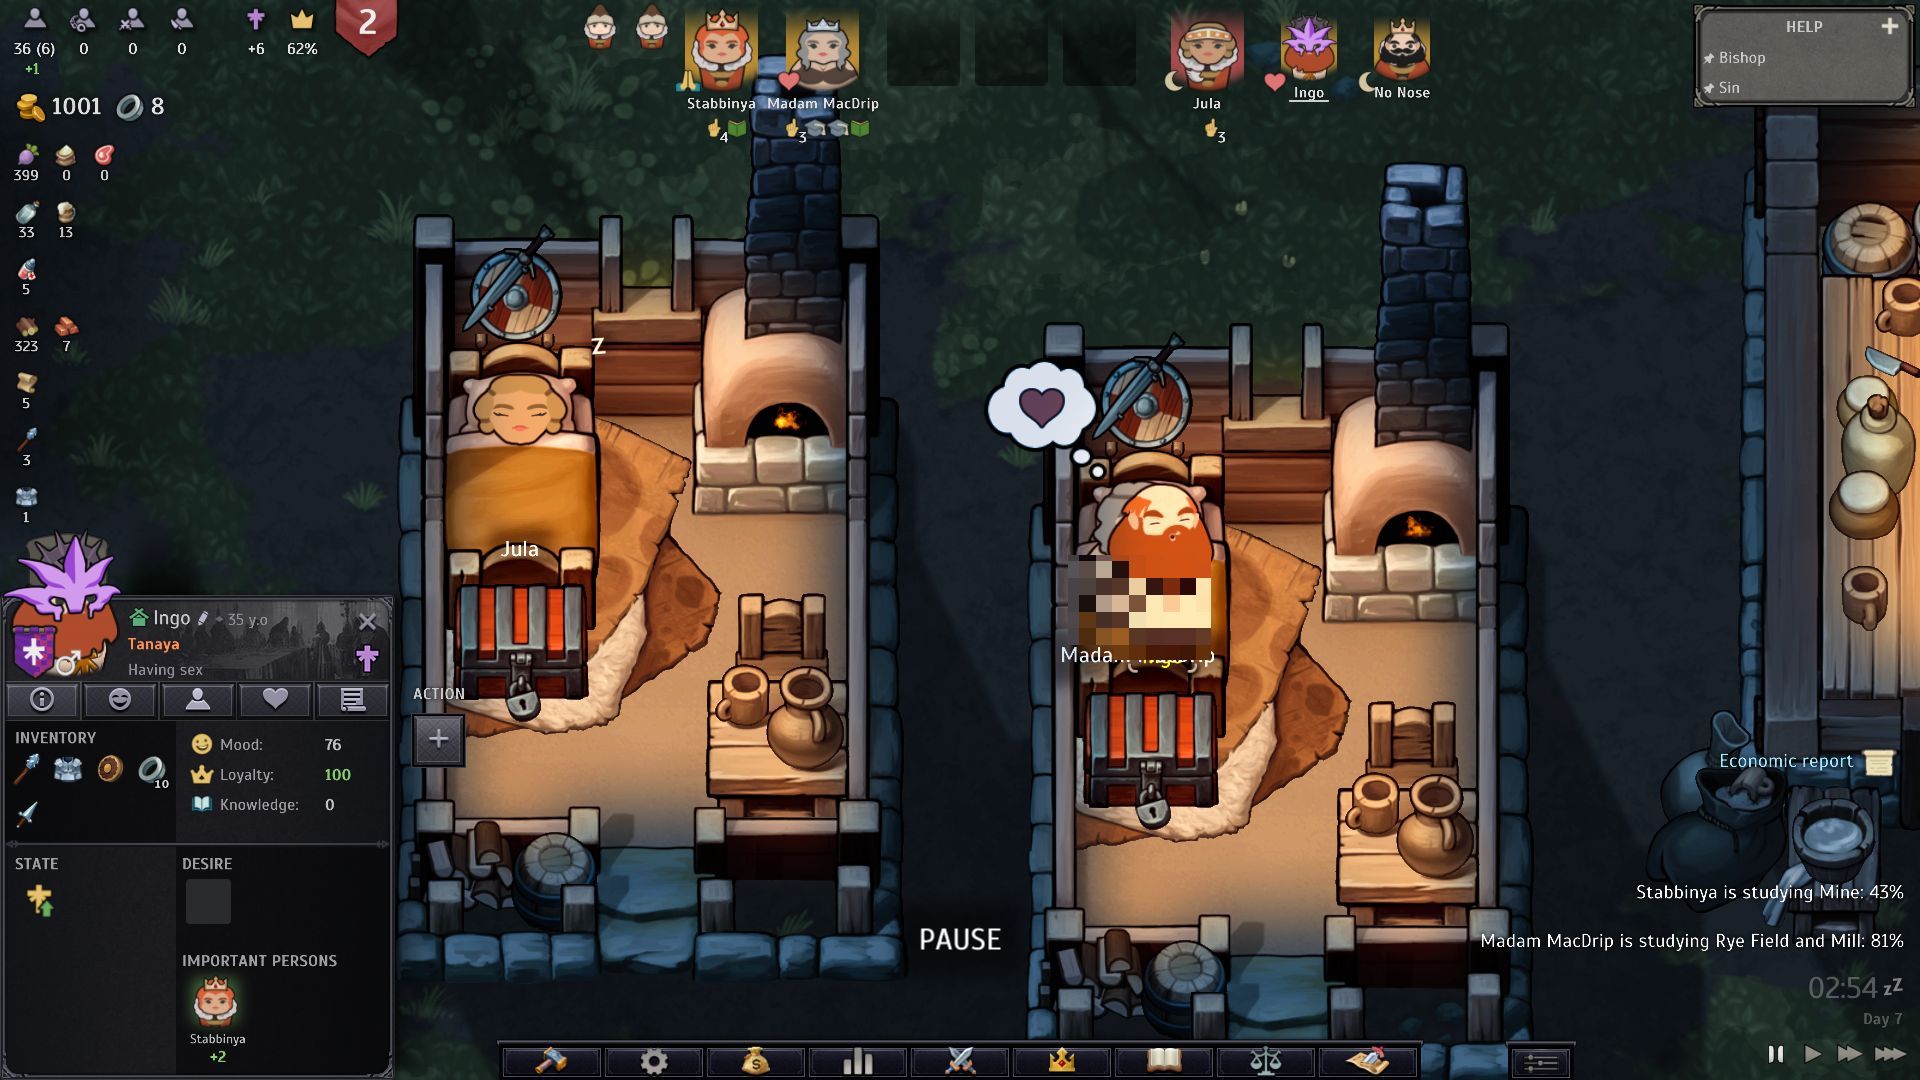
Image credit:Rock Paper Shotgun / Hooded Horse
The good news is that King No Nose has slept through the entire horny fiasco. The bad news is that Madam MacDrip is so overcome with sinful guilt the next morning that she refuses to work until she can absolve herself. Of course, the way to achieve absolution is to confess her sin to the same Bishop she was riding last night. That’s when I find out the cost of this ritual: six silver rings.
I see now what is happening. Who would have thought the church could be so conniving?
I refuse to let Madam MacDrip confess. Everything that happens afterwards is disaster upon disaster. More kings from distant lands visit, but I don’t have the housing to accommodate them, which humiliates my nation. One of the visitors starts insulting Jula, forcing her into a deep depression. The others, wracked with false guilt and stretched thin across field and lumberyard, also become moody. A “fleshwolf” attacks a stray peasant in the woods and then wanders into the library, its mouth bloody and examining baby Pinkcheeks like a pudding it doesn’t want right now, but will happily enjoy later.


I put together a hunting team, Jula and Queen Stabbinya, in an effort to purge nearby wolves and maybe even improve their relationship (hunts can result in “deep” conversations between characters) but scarcely have they donned their armour than they break into a physical fight between themselves. Meanwhile, Baby Looksmax and Pinkcheeks are having some kind of lute-playing contest and, judging by the emoji-like icons appearing in their speech bubbles (skulls, biohazard symbols, medicine bottles) I can only conclude that they are discussing what it means to die. They are five years old.
The soil grows fallow. The rutabagas go untended. The mine we spent so long researching goes unused. And in the chirps of the dawn chorus, a prophecy arrives - a little pop-up note from the church that says: get ready, your town will someday soon be attacked by a pack of eleven wolves.
I dismiss the letter with grim cynicism and look at the Bishop who still hasn’t left our town, is still abusing our hospitality, drinking our moonshine and eating our vegetables while doing nothing useful. He fills one of our manor houses with his stench every night. I’ve had a good time with Norland so far. I gained far more laughter from it than other Rimworld competitors in any case. And I haven’t even got truly stuck into the inter-city trading or the marriage proposals, the alliance making or the war-mongering (one downside about the game is that it will take some time to learn). But if I am going to get into all that, it won’t be from the god forsaken town of Nandos. Let the wolves come, I decide. One last time I examine Ingo, the clerical bed pest and sextortionist in purple robes, as he meanders smugly around town. And I remember something else the game lets you do. I set a task for one of the lords: Attempt to Kill the Bishop.


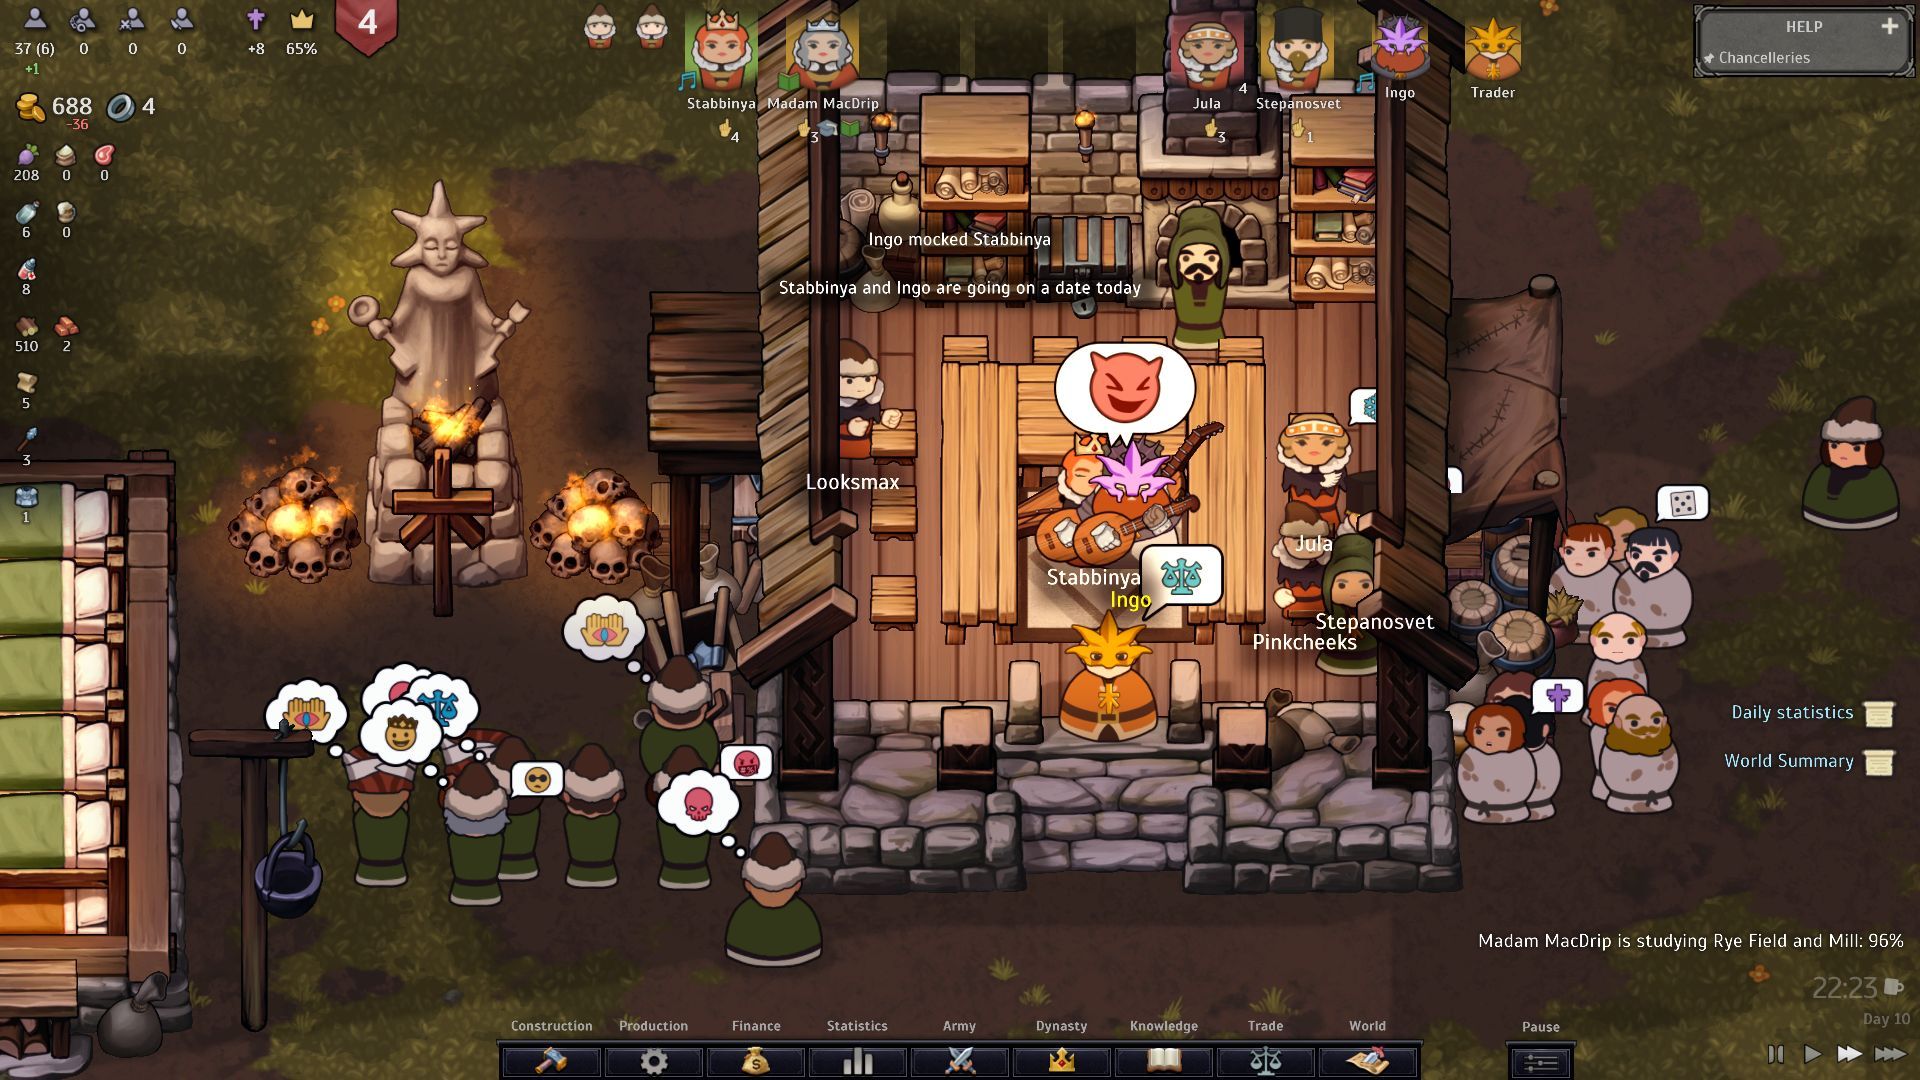
That night, Queen Stabbinya brought him to the hall, got him drunk, played music with him in front of the whole town and made angel face emojis at him as she walked him back to her chambers, where again they did what Bishops are wont to do. As he stumbled back into his own room at one in the morning, the Queen quietly rose and followed at some distance. As he fell asleep, she stood outside his door, and lit his entire building on fire. And - this is the damnedest thing - he survived. He ran from the building, fully immolated, only to be stamped out by the feet of a dozen panicking peasants. Not only did he fail to succumb to the burns from this terrible ordeal. He liked it . Inspecting the Bishop, I found he gets a mood boost from “religious enjoyment of injuries”. Of course he does. Of course.
When the wolves of prophecy approached shortly afterwards, I did nothing to stop them. This place was cursed. Baby Looksmaxx suffered a gruesome death in the jaws of three slavering beasts. What of it? Madam MacDrip was likewise eaten. I’m glad. Norland, still in early access, might not be as deep or fleshed-out as its sci-fi stablemate Rimworld, but it still feels surprisingly complex and varied. And it still delivers funny anecdotes. By the time the sun set on my settlement’s last day, the main street was covered in blood, and the peasants were dragging every corpse they could to the pyre next to the village altar. The only injustice? That Bishop Ingo was not among them.

Norland
PC
Rock Paper Shotgun is better when you sign in
Sign in and join us on our journey to discover strange and compelling PC games.

All 75 Arc Raiders Blueprints and where to get them
These areas have the highest chance of giving you Blueprints

Image credit:Rock Paper Shotgun/Embark Studios

Looking for more Arc Raiders Blueprints? It’s a special day when you find a Blueprint, as they’re among the most valuable items in Arc Raiders. If you find a Blueprint that you haven’t already found, then you must make sure you hold onto it at all costs, because Blueprints are the key to one of the most important and powerful systems of meta-progression in the game.
This guide aims to be the very best guide on Blueprints you can find, starting with a primer on what exactly they are and how they work in Arc Raiders, before delving into exactly where to get Blueprints and the very best farming spots for you to take in your search.
We’ll also go over how to get Blueprints from other unlikely activities, such as destroying Surveyors and completing specific quests. And you’ll also find the full list of all 75 Blueprints in Arc Raiders on this page (including the newest Blueprints added with the Cold Snap update , such as the Deadline Blueprint and Firework Box Blueprint), giving you all the information you need to expand your own crafting repertoire.
In this guide:
- What are Blueprints in Arc Raiders?
- Full Blueprint list: All crafting recipes
- Where to find Blueprints in Arc Raiders Blueprints obtained from quests Blueprints obtained from Trials Best Blueprint farming locations

What are Blueprints in Arc Raiders?
Blueprints in Arc Raiders are special items which, if you manage to extract with them, you can expend to permanently unlock a new crafting recipe in your Workshop. If you manage to extract from a raid with an Anvil Blueprint, for example, you can unlock the ability to craft your very own Anvil Pistol, as many times as you like (as long as you have the crafting materials).
To use a Blueprint, simply open your Inventory while in the lobby, then right-click on the Blueprint and click “Learn And Consume” . This will permanently unlock the recipe for that item in your Workshop. As of the Stella Montis update, there are allegedly 75 different Blueprints to unlock - although only 68 are confirmed to be in the game so far. You can see all the Blueprints you’ve found and unlocked by going to the Workshop menu, and hitting “R” to bring up the Blueprint screen.
It’s possible to find duplicates of past Blueprints you’ve already unlocked. If you find these, then you can either sell them, or - if you like to play with friends - you can take it into a match and gift it to your friend so they can unlock that recipe for themselves. Another option is to keep hold of them until the time comes to donate them to the Expedition.
Full Blueprint list: All crafting recipes
Below is the full list of all the Blueprints that are currently available to find in Arc Raiders, and the crafting recipe required for each item:
| Blueprint | Type | Recipe | Crafted At |
|---|---|---|---|
| Bettina | Weapon | 3x Advanced Mechanical Components 3x Heavy Gun Parts 3x Canister | Gunsmith 3 |
| Blue Light Stick | Quick Use | 3x Chemicals | Utility Station 1 |
| Aphelion | Weapon | 3x Magnetic Accelerator 3x Complex Gun Parts 1x Matriarch Reactor | Gunsmith 3 |
| Combat Mk. 3 (Flanking) | Augment | 2x Advanced Electrical Components 3x Processor | Gear Bench 3 |
| Combat Mk. 3 (Aggressive) | Augment | 2x Advanced Electrical Components 3x Processor | Gear Bench 3 |
| Complex Gun Parts | Material | 2x Light Gun Parts 2x Medium Gun Parts 2x Heavy Gun Parts | Refiner 3 |
| Fireworks Box | Quick Use | 1x Explosive Compound 3x Pop Trigger | Explosives Station 2 |
| Gas Mine | Mine | 4x Chemicals 2x Rubber Parts | Explosives Station 1 |
| Green Light Stick | Quick Use | 3x Chemicals | Utility Station 1 |
| Pulse Mine | Mine | 1x Crude Explosives 1x Wires | Explosives Station 1 |
| Seeker Grenade | Grenade | 1x Crude Explosives 2x ARC Alloy | Explosives Station 1 |
| Looting Mk. 3 (Survivor) | Augment | 2x Advanced Electrical Components 3x Processor | Gear Bench 3 |
| Angled Grip II | Mod | 2x Mechanical Components 3x Duct Tape | Gunsmith 2 |
| Angled Grip III | Mod | 2x Mod Components 5x Duct Tape | Gunsmith 3 |
| Hullcracker | Weapon | 1x Magnetic Accelerator 3x Heavy Gun Parts 1x Exodus Modules | Gunsmith 3 |
| Launcher Ammo | Ammo | 5x Metal Parts 1x Crude Explosives | Workbench 1 |
| Anvil | Weapon | 5x Mechanical Components 5x Simple Gun Parts | Gunsmith 2 |
| Anvil Splitter | Mod | 2x Mod Components 3x Processor | Gunsmith 3 |
| ??? | ??? | ??? | ??? |
| Barricade Kit | Quick Use | 1x Mechanical Components | Utility Station 2 |
| Blaze Grenade | Grenade | 1x Explosive Compound 2x Oil | Explosives Station 3 |
| Bobcat | Weapon | 3x Advanced Mechanical Components 3x Light Gun Parts | Gunsmith 3 |
| Osprey | Weapon | 2x Advanced Mechanical Components 3x Medium Gun Parts 7x Wires | Gunsmith 3 |
| Burletta | Weapon | 3x Mechanical Components 3x Simple Gun Parts | Gunsmith 1 |
| Compensator II | Mod | 2x Mechanical Components 4x Wires | Gunsmith 2 |
| Compensator III | Mod | 2x Mod Components 8x Wires | Gunsmith 3 |
| Defibrillator | Quick Use | 9x Plastic Parts 1x Moss | Medical Lab 2 |
| ??? | ??? | ??? | ??? |
| Equalizer | Weapon | 3x Magnetic Accelerator 3x Complex Gun Parts 1x Queen Reactor | Gunsmith 3 |
| Extended Barrel | Mod | 2x Mod Components 8x Wires | Gunsmith 3 |
| Extended Light Mag II | Mod | 2x Mechanical Components 3x Steel Spring | Gunsmith 2 |
| Extended Light Mag III | Mod | 2x Mod Components 5x Steel Spring | Gunsmith 3 |
| Extended Medium Mag II | Mod | 2x Mechanical Components 3x Steel Spring | Gunsmith 2 |
| Extended Medium Mag III | Mod | 2x Mod Components 5x Steel Spring | Gunsmith 3 |
| Extended Shotgun Mag II | Mod | 2x Mechanical Components 3x Steel Spring | Gunsmith 2 |
| Extended Shotgun Mag III | Mod | 2x Mod Components 5x Steel Spring | Gunsmith 3 |
| Remote Raider Flare | Quick Use | 2x Chemicals 4x Rubber Parts | Utility Station 1 |
| Heavy Gun Parts | Material | 4x Simple Gun Parts | Refiner 2 |
| Venator | Weapon | 2x Advanced Mechanical Components 3x Medium Gun Parts 5x Magnet | Gunsmith 3 |
| Il Toro | Weapon | 5x Mechanical Components 6x Simple Gun Parts | Gunsmith 1 |
| Jolt Mine | Mine | 1x Electrical Components 1x Battery | Explosives Station 2 |
| Explosive Mine | Mine | 1x Explosive Compound 1x Sensors | Explosives Station 3 |
| Jupiter | Weapon | 3x Magnetic Accelerator 3x Complex Gun Parts 1x Queen Reactor | Gunsmith 3 |
| Light Gun Parts | Material | 4x Simple Gun Parts | Refiner 2 |
| Lightweight Stock | Mod | 2x Mod Components 5x Duct Tape | Gunsmith 3 |
| Lure Grenade | Grenade | 1x Speaker Component 1x Electrical Components | Utility Station 2 |
| Medium Gun Parts | Material | 4x Simple Gun Parts | Refiner 2 |
| Torrente | Weapon | 2x Advanced Mechanical Components 3x Medium Gun Parts 6x Steel Spring | Gunsmith 3 |
| Muzzle Brake II | Mod | 2x Mechanical Components 4x Wires | Gunsmith 2 |
| Muzzle Brake III | Mod | 2x Mod Components 8x Wires | Gunsmith 3 |
| Padded Stock | Mod | 2x Mod Components 5x Duct Tape | Gunsmith 3 |
| Shotgun Choke II | Mod | 2x Mechanical Components 4x Wires | Gunsmith 2 |
| Shotgun Choke III | Mod | 2x Mod Components 8x Wires | Gunsmith 3 |
| Shotgun Silencer | Mod | 2x Mod Components 8x Wires | Gunsmith 3 |
| Showstopper | Grenade | 1x Advanced Electrical Components 1x Voltage Converter | Explosives Station 3 |
| Silencer I | Mod | 2x Mechanical Components 4x Wires | Gunsmith 2 |
| Silencer II | Mod | 2x Mod Components 8x Wires | Gunsmith 3 |
| Snap Hook | Quick Use | 2x Power Rod 3x Rope 1x Exodus Modules | Utility Station 3 |
| Stable Stock II | Mod | 2x Mechanical Components 3x Duct Tape | Gunsmith 2 |
| Stable Stock III | Mod | 2x Mod Components 5x Duct Tape | Gunsmith 3 |
| Tagging Grenade | Grenade | 1x Electrical Components 1x Sensors | Utility Station 3 |
| Tempest | Weapon | 3x Advanced Mechanical Components 3x Medium Gun Parts 3x Canister | Gunsmith 3 |
| Trigger Nade | Grenade | 2x Crude Explosives 1x Processor | Explosives Station 2 |
| Vertical Grip II | Mod | 2x Mechanical Components 3x Duct Tape | Gunsmith 2 |
| Vertical Grip III | Mod | 2x Mod Components 5x Duct Tape | Gunsmith 3 |
| Vita Shot | Quick Use | 2x Antiseptic 1x Syringe | Medical Lab 3 |
| Vita Spray | Quick Use | 3x Antiseptic 1x Canister | Medical Lab 3 |
| Vulcano | Weapon | 1x Magnetic Accelerator 3x Heavy Gun Parts 1x Exodus Modules | Gunsmith 3 |
| Wolfpack | Grenade | 2x Explosive Compound 2x Sensors | Explosives Station 3 |
| Red Light Stick | Quick Use | 3x Chemicals | Utility Station 1 |
| Smoke Grenade | Grenade | 14x Chemicals 1x Canister | Utility Station 2 |
| Deadline | Mine | 3x Explosive Compound 2x ARC Circuitry | Explosives Station 3 |
| Trailblazer | Grenade | 1x Explosive Compound 1x Synthesized Fuel | Explosives Station 3 |
| Tactical Mk. 3 (Defensive) | Augment | 2x Advanced Electrical Components 3x Processor | Gear Bench 3 |
| Tactical Mk. 3 (Healing) | Augment | 2x Advanced Electrical Components 3x Processor | Gear Bench 3 |
| Yellow Light Stick | Quick Use | 3x Chemicals | Utility Station 1 |
Note: The missing Blueprints in this list likely have not actually been added to the game at the time of writing, because none of the playerbase has managed to find any of them. As they are added to the game, I will update this page with the most relevant information so you know exactly how to get all 75 Arc Raiders Blueprints.
Where to find Blueprints in Arc Raiders
Below is a list of all containers, modifiers, and events which maximise your chances of finding Blueprints:
- Certain quests reward you with specific Blueprints .
- Completing Trials has a high chance of offering Blueprints as rewards.
- Surveyors have a decent chance of dropping Blueprints on death.
- High loot value areas tend to have a greater chance of spawning Blueprints.
- Night Raids and Storms may increase rare Blueprint spawn chances in containers.
- Containers with higher numbers of items may have a higher tendency to spawn Blueprints. As a result, Blue Gate (which has many “large” containers containing multiple items) may give you a higher chance of spawning Blueprints.
- Raider containers (Raider Caches, Weapon Boxes, Medical Bags, Grenade Tubes) have increased Blueprint drop rates. As a result, the Uncovered Caches event gives you a high chance of finding Blueprints.
- Security Lockers have a higher than average chance of containing Blueprints.
- Certain Blueprints only seem to spawn under specific circumstances: Tempest Blueprint only spawns during Night Raid events. Vulcano Blueprint only spawns during Hidden Bunker events. Jupiter and Equaliser Blueprints only spawn during Harvester events.

Raider Caches, Weapon Boxes, and other raider-oriented container types have a good chance of offering Blueprints. |Image credit:Rock Paper Shotgun/Embark Studios
Blueprints have a very low chance of spawning in any container in Arc Raiders, around 1-2% on average. However, there is a higher chance of finding Blueprints in particular container types. Specifically, you can find more Blueprints in Raider containers and security lockers.
Beyond this, if you’re looking for Blueprints you should focus on regions of the map which are marked as having particularly high-value loot. Areas such as the Control Tower in Dam Battlegrounds, the Arrival and Departure Buildings in Spaceport, and Pilgrim’s Peak in Blue Gate all have a better-than-average chance of spawning Blueprints somewhere amongst all their containers. Night Raids and Electromagnetic Storm events also increase the drop chances of certain Blueprints .
In addition to these containers, you can often loot Blueprints from destroyed Surveyors - the largest of the rolling ball ARC. Surveyors are more commonly found on the later maps - Spaceport and Blue Gate - and if one spawns in your match, you’ll likely see it by the blue laser beam that it casts into the sky while “surveying”.
Surveyors are quite well-armoured and will very speedily run away from you once it notices you, but if you can take one down then make sure you loot all its parts for a chance of obtaining certain unusual Blueprints.
Blueprints obtained from quests
One way in which you can get Blueprints is by completing certain quests for the vendors in Speranza. Some quests will reward you with a specific item Blueprint upon completion, so as long as you work through all the quests in Arc Raiders, you are guaranteed those Blueprints.
Here is the full list of all Blueprints you can get from quest rewards:
- Trigger Nade Blueprint: Rewarded after completing “Sparks Fly”.
- Lure Grenade Blueprint: Rewarded after completing “Greasing Her Palms”.
- Burletta Blueprint: Rewarded after completing “Industrial Espionage”.
- Hullcracker Blueprint (and Launcher Ammo Blueprint): Rewarded after completing “The Major’s Footlocker”.
Alas, that’s only 4 Blueprints out of a total of 75 to unlock, so for the vast majority you will need to find them yourself during a raid. If you’re intent on farming Blueprints, then it’s best to equip yourself with cheap gear in case you lose it, but don’t use a free loadout because then you won’t get a safe pocket to stash any new Blueprint you find. No pain in Arc Raiders is sharper than failing to extract with a new Blueprint you’ve been after for a dozen hours already.

One of the best ways to get Blueprints is by hitting three stars on all five Trials every week. |Image credit:Rock Paper Shotgun/Embark Studios
Blueprints obtained from Trials
One of the very best ways to get Blueprints is as rewards for completing Trials in Arc Raiders. Trials are unlocked from Level 15 onwards, and allow you to earn rewards by focusing on certain tasks over the course of several raids. For example, one Trial might task you with dealing damage to Hornets, while another might challenge you to loot Supply Drops.
Trials refresh on a weekly basis, with a new week bringing five new Trials. Each Trial can offer up to three rewards after passing certain score milestones, and it’s possible to receive very high level loot from these reward crates - including Blueprints. So if you want to unlock as many Blueprints as possible, you should make a point of completing as many Trials as possible each week.
Best Blueprint farming locations
The very best way to get Blueprints is to frequent specific areas of the maps which combine high-tier loot pools with the right types of containers to search. Here are my recommendations for where to find Blueprints on every map, so you can always keep the search going for new crafting recipes to unlock.

Image credit:Rock Paper Shotgun/Embark Studios
Dam Battlegrounds
The best places to farm Blueprints on Dam Battlegrounds are the Control Tower, Power Generation Complex, Ruby Residence, and Pale Apartments . The first two regions, despite only being marked on the map as mid-tier loot, contain a phenomenal number of containers to loot. The Control Tower can also contain a couple of high-tier Security Lockers - though of course, you’ll need to have unlocked the Security Breach skill at the end of the Survival tree.
There’s also a lot of reporting amongst the playerbase that the Residential areas in the top-left of the map - Pale Apartments and Ruby Residence - give you a comparatively strong chance of finding Blueprints. Considering their size, there’s a high density of containers to loot in both locations, and they also have the benefit of being fairly out of the way. So you’re more likely to have all the containers to yourself.
Buried City
The best Blueprint farming locations on Buried City are the Santa Maria Houses, Grandioso Apartments, Town Hall, and the various buildings of the New District . Grandioso Apartments has a lower number of containers than the rest, but a high chance of spawning weapon cases - which have good Blueprint drop rates. The others are high-tier loot areas, with plenty of lootable containers - including Security Lockers.
Spaceport
The best places to find Blueprints on Spaceport are the Arrival and Departure Buildings, as well as Control Tower A6 and the Launch Towers . All these areas are labelled as high-value loot regions, and many of them are also very handily connected to one another by the Spaceport wall, which you can use to quickly run from one area to the next. At the tops of most of these buildings you’ll find at least one Security Locker, so this is an excellent farming route for players looking to find Blueprints.
The downside to looting Blueprints on Spaceport is that all these areas are hotly contested, particularly in Duos and Squads. You’ll need to be very focused and fast in order to complete the full farming route.

Image credit:Rock Paper Shotgun/Embark Studios
Blue Gate
Blue Gate tends to have a good chance of dropping Blueprints, potentially because it generally has a high number of containers which can hold lots of items; so there’s a higher chance of a Blueprint spawning in each container. In my experience, the best Blueprint farming spots on Blue Gate are Pilgrim’s Peak, Raider’s Refuge, the Ancient Fort, and the Underground Complex beneath the Warehouse .
All of these areas contain a wealth of containers to loot. Raider’s Refuge has less to loot, but the majority of the containers in and around the Refuge are raider containers, which have a high chance of containing Blueprints - particularly during major events.
Stella Montis
On the whole, Stella Montis seems to have a very low drop rate for Blueprints (though a high chance of dropping other high-tier loot). If you do want to try farming Blueprints on this map, the best places to find Blueprints in Stella Montis are Medical Research, Assembly Workshop, and the Business Center . These areas have the highest density of containers to loot on the map.
In addition to this, the Western Tunnel has a few different Security Lockers to loot, so while there’s very little to loot elsewhere in this area of the map, it’s worth hitting those Security Lockers if you spawn there at the start of a match.
That wraps up this primer on how to get all the Blueprints in Arc Raiders as quickly as possible. With the Expedition system constantly resetting a large number of players’ Blueprints, it’s more important than ever to have the most up-to-date information on where to find all these Blueprints.
While you’re here, be sure to check out our Arc Raiders best guns tier list , as well as our primers on the best skills to unlock and all the different Field Depot locations on every map.

ARC Raiders
PS5 , Xbox Series X/S , PC
Rock Paper Shotgun is better when you sign in
Sign in and join us on our journey to discover strange and compelling PC games.
