I play Foxhole as a pacifist medic who refuses to carry a gun but the enemy doesn’t seem impressed
Trust me, I’m sort of a doctor

Image credit:Rock Paper Shotgun / Siege Camp

Another explosion sends the bodies flying. “Has anyone been here long enough to tell me what the hell is going on!?” the sergeant yells. He sounds annoyed. The field hospital is gone, probably blown to pieces. Troops keep wandering north and disappearing from view, only to come flying back as airborne cadavers moments later. The number of corpses and spilled backpacks on the road imply that someone in battalion headquarters (if such a place even exists) has made a terrible decision. If the Colonial forces want to win the persistent online war of Foxhole , suggests the sergeant with his many irritated noises, then someone needs to piece these dying fools together. As the only medic in a 500 metre radius, that means me.

Foxhole is a game of top-down multiplayer war on both a grand and granular scale, where every bullet you fire has been made by another soldier somewhere far away. It evokes the legendary battles of Eve Online or Planetside 2 , albeit in an alternate universe World War II. And it’s as much about infighting over logistics as it is about getting caught in a friendly troop’s wayward grenade blast. In a previous outing , Sin called it a game in which you must “derive satisfaction from doing helpful things without recognition.”
That doesn’t mean throwing your life away at the front. It means moving metal girders from one town to another, refuelling abandoned vehicles, dismantling tank traps, and refilling old trenches with soil. Your success as a frontline soldier hinges on the thankless work of players who just want the roads to be neat and tidy, as if the town of “Scurvyshire” might lose a Village of the Year competition if it’s not kept clean. The logistics players in this game are so organised, they once went on strike .
But more recently, it got an infantry update that adds anti-tank guns for any poor sods facing a column of armoured vehicles, as well as two new tanks for said sods to panic-fire upon. But all that is very violent. I’m more interested in the expanded role that medics play on the battlefield since my last adventures back in 2017 . There are a lot of useful roles to adopt at the front - a mortar operator, a spotter, an ammo distributor - all of them gun-toting and ready to fire off a few rounds if needed. But I’m a doctor, not a fighter, as I have frequently yelled toward enemy lines. That does not seem to have any effect on the number of bullets that whizz past my skull. Nevertheless, I decide not to carry a gun as I play.
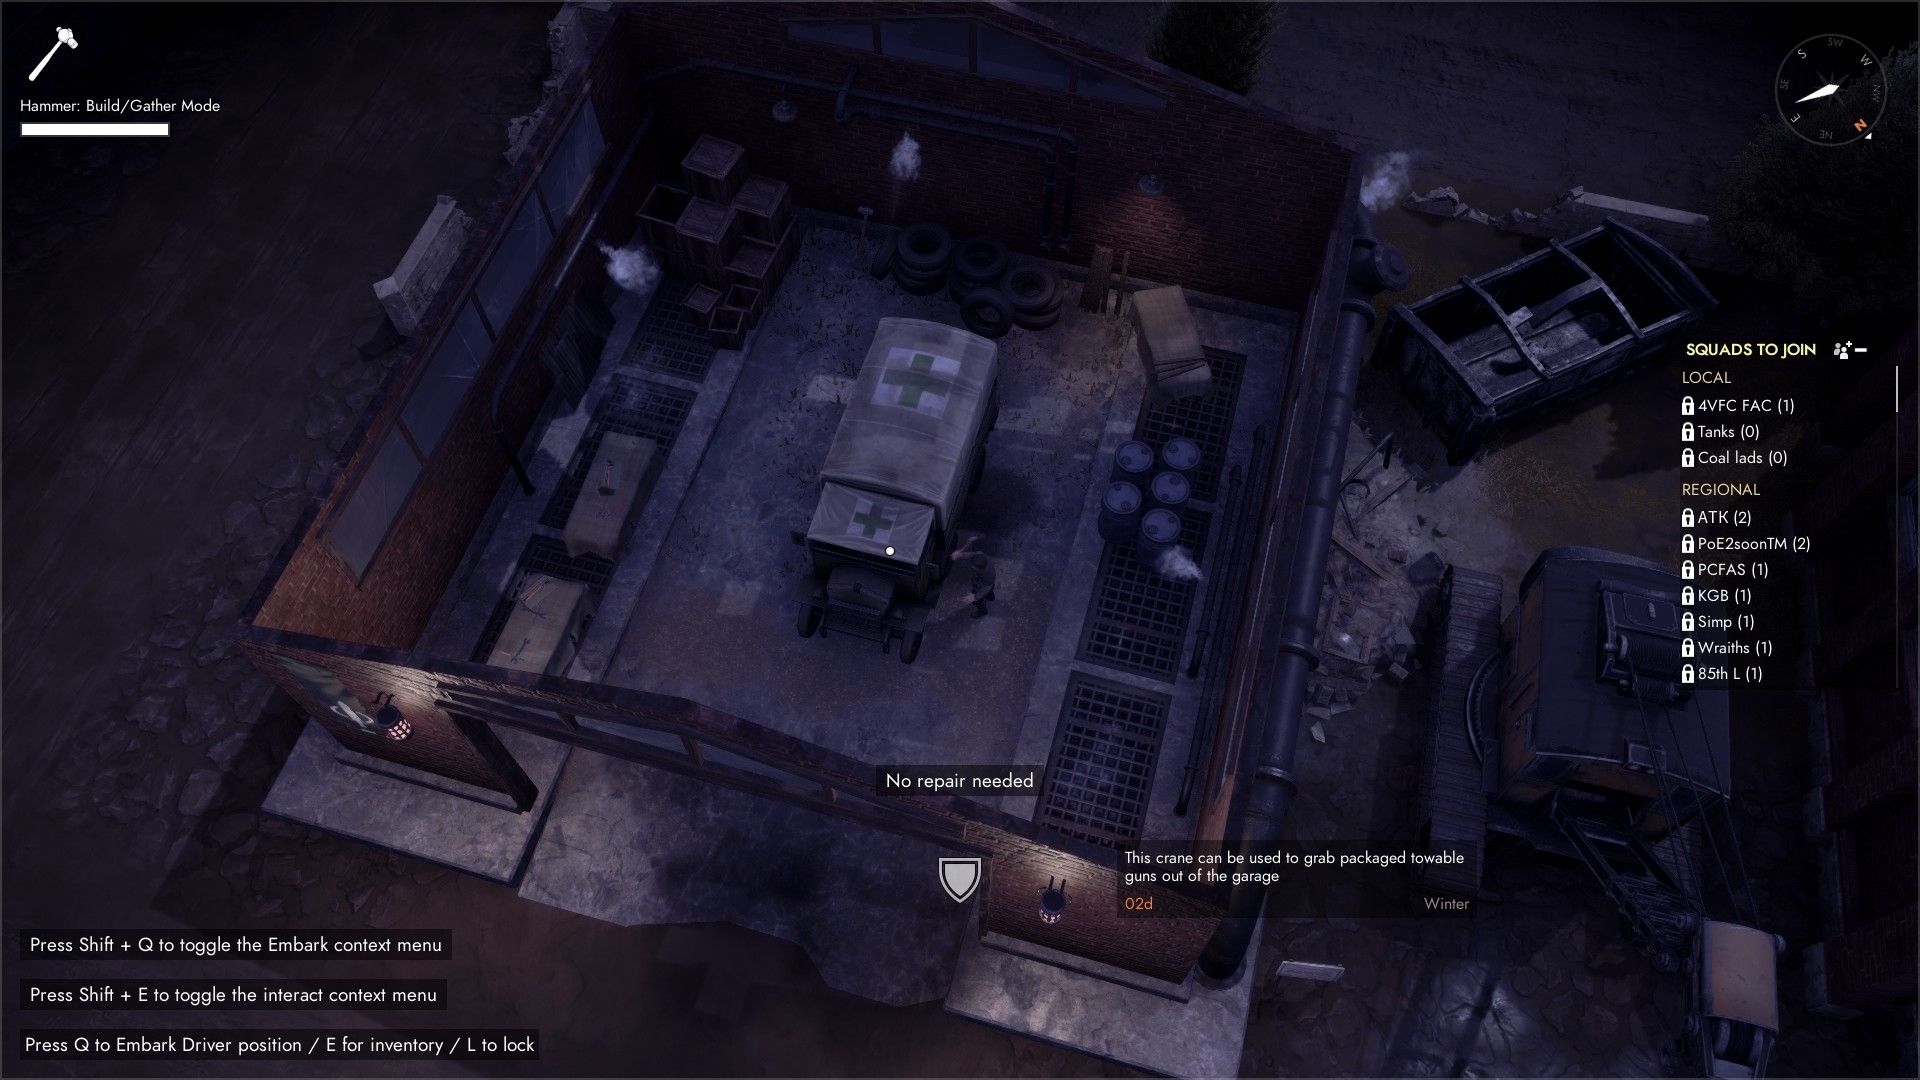
Image credit:Rock Paper Shotgun / Siege Camp
The general loop will be familiar to anyone who’s played a similar medical role in first-person shooters like the hectic dumbassery of Battlefield V or the excellently tense Hell Let Loose . You equip yourself with trauma kits and plasma at the spawn point (usually a small town headquarters) and use those to revive fallen friends. You also stock up on a first aid kit and bandages, useful for wrapping up wounds of soldiers, who often bleed so heavily it looks like they’ve fallen in a vat of cherry jam. For added drama, you can also heft fallen warbuds onto your shoulders and hoof it as fast as possible away from the gunfire, like a true Forrest Gump. This shoulder-slinging is something even non-medics can do, and it feels very heroic, even if it gets you killed quite a lot.
But those are just the basics of the battlefield. There’s one other very fun medic responsibility - the saving of “critically wounded soldiers”. These are rare bodies that spring up following a soldier’s death, hard to spot and even harder to retrieve when the artillery shells are falling. They aren’t players at all, but little harvestable dudes almost indistinguishable from your online pals. Bringing these hurt NPC folk to field hospitals will see you dump them in a bed as a “patient” and (following a countdown timer) you can discharge them and harvest them for “shirts”.
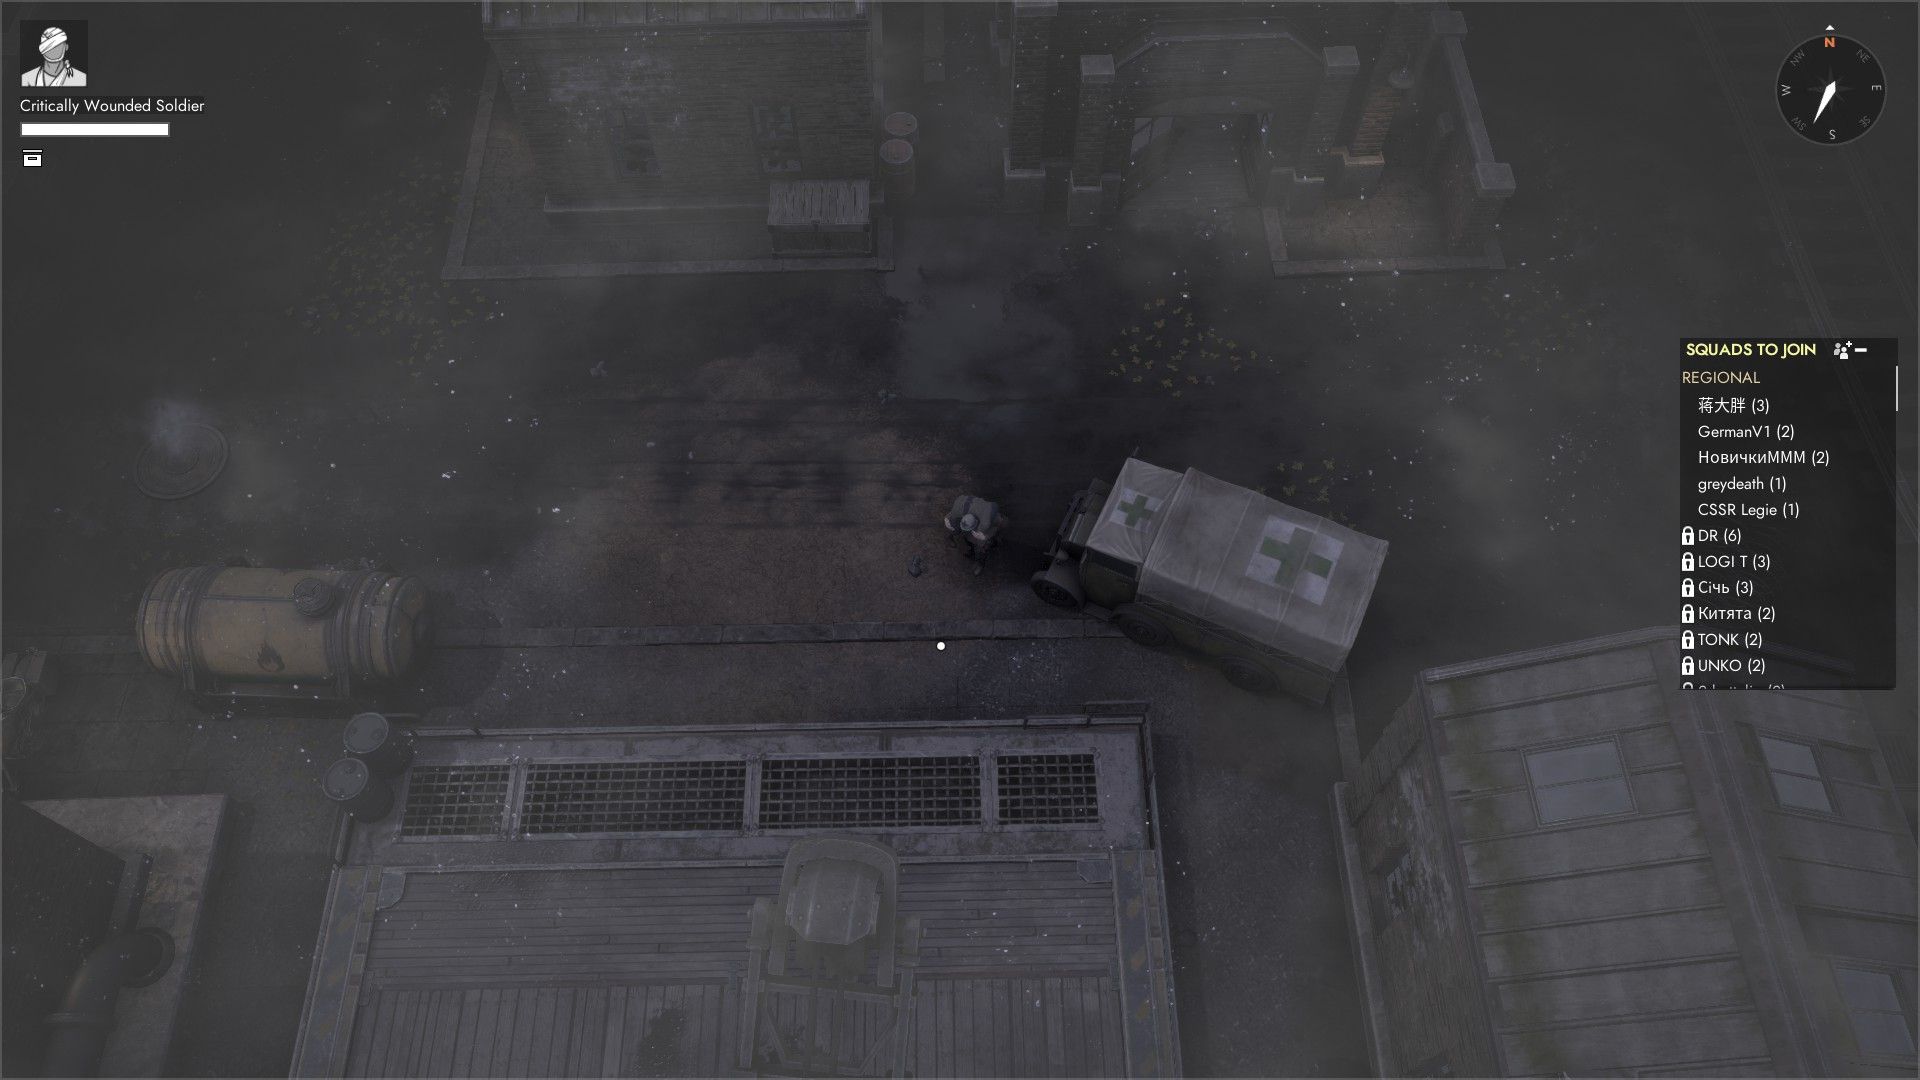
Image credit:Rock Paper Shotgun / Siege Camp
These shirts aren’t just clothes. They’re used all over the map as respawn tickets for real life players. So by grabbing these groaning troops on death’s door (sometimes even using an ambulance to transport them across the map) you’re essentially saving a few handy respawns. I like to think of the final moments of this process as sadly picking up the laundry of fallen fighters, like Sgt Malarkey does in Band Of Brothers .
But that’s only if you spot such downed troops. And in my current predicament, I have bigger concerns. We have overextended into a new region, and everyone is running on fumes. It’s snowing. The troops need ammo, winter clothes, and basic materials to build and repair the bunkers we need to dig in. The sergeant who briefly showed up to take charge has disappeared, either abandoning us to our fate or (more likely) killed by an errant mortar blast. The Wardens, our grey-uniformed enemy, have leaked through our porous lines and around our forward encampment. A host of 10 or 20 players are now dangerously close to being cut off.
<img loading=“lazy” src=“https://assetsio.gnwcdn.com/foxhole-medics-infantry-update-8.jpg?width=2048&height=2048&fit=bounds&quality=85&format=jpg&auto=webp" onerror=“this.onerror=null;this.src=‘https://blogger.googleusercontent.com/img/a/AVvXsEhe7F7TRXHtjiKvHb5vS7DmnxvpHiDyoYyYvm1nHB3Qp2_w3BnM6A2eq4v7FYxCC9bfZt3a9vIMtAYEKUiaDQbHMg-ViyGmRIj39MLp0bGFfgfYw1Dc9q_H-T0wiTm3l0Uq42dETrN9eC8aGJ9_IORZsxST1AcLR7np1koOfcc7tnHa4S8Mwz_xD9d0=s16000';" alt=“The player huddles in a foxhole while snow blankets the area and a message reads “you are freezing to death”. - 6”>
Image credit:Rock Paper Shotgun / Siege Camp
My best chance of saving lives, I decide, is not to heal those here with the meagre bandages I have. But to break away in my ambulance and come back with a stack of medical supplies, shirts, and thick coats. As I speed south, I pass a quiet Warden scout lying prone by a bridge. More signs of our impending encirclement. I check the map - a huge sprawl of geography that has greatly increased since the game’s first appearance in 2017. “NEED WINTER CLOTHING,” yells one note pinned to a sector near our front. They’re not wrong. Stay too long exposed to the cold without decent clothes and your character will simply lie down and freeze to death. Another note reminds me of my other responsibilities: “Plasma, first aid, ammo,” it begs. There is no way I can fit everything we need in one ambulance.
I arrive at the nearby town, picturesquely called “The Baths” despite being more like a set of freezing ruins. I hop out and start piling everything I can from headquarters into my ambulance. In minutes I’m back on the road, hopeful and happy that I’m not just delivering medical supplies but also a bunch of basic materials - the fundamental building blocks of a huge number of items. Happy, that is, until I run straight into the arse end of a Warden transport truck. And unlike me, the truck driver has the honour of being escorted through the settlement by an armoured car. We are just outside the settlement of “Loggerhead”, which is fitting, because that is what the armoured car and I are about to come to.
The gunner fires at me and I dodge my ambulance behind the enemy logistics truck, trying to use his own teammate as cover. It works, but only for a moment. The armoured bulleteer zips around and fills my engine with lead. Time to abandon the vehicle, I think, and step out just in time to be shredded by the gunner’s enthusiastic tat-tat-tat. I die alone, my mission a failure. Later, when I look at the map, I will notice that my army mates have long been surrounded. They will not survive the day.
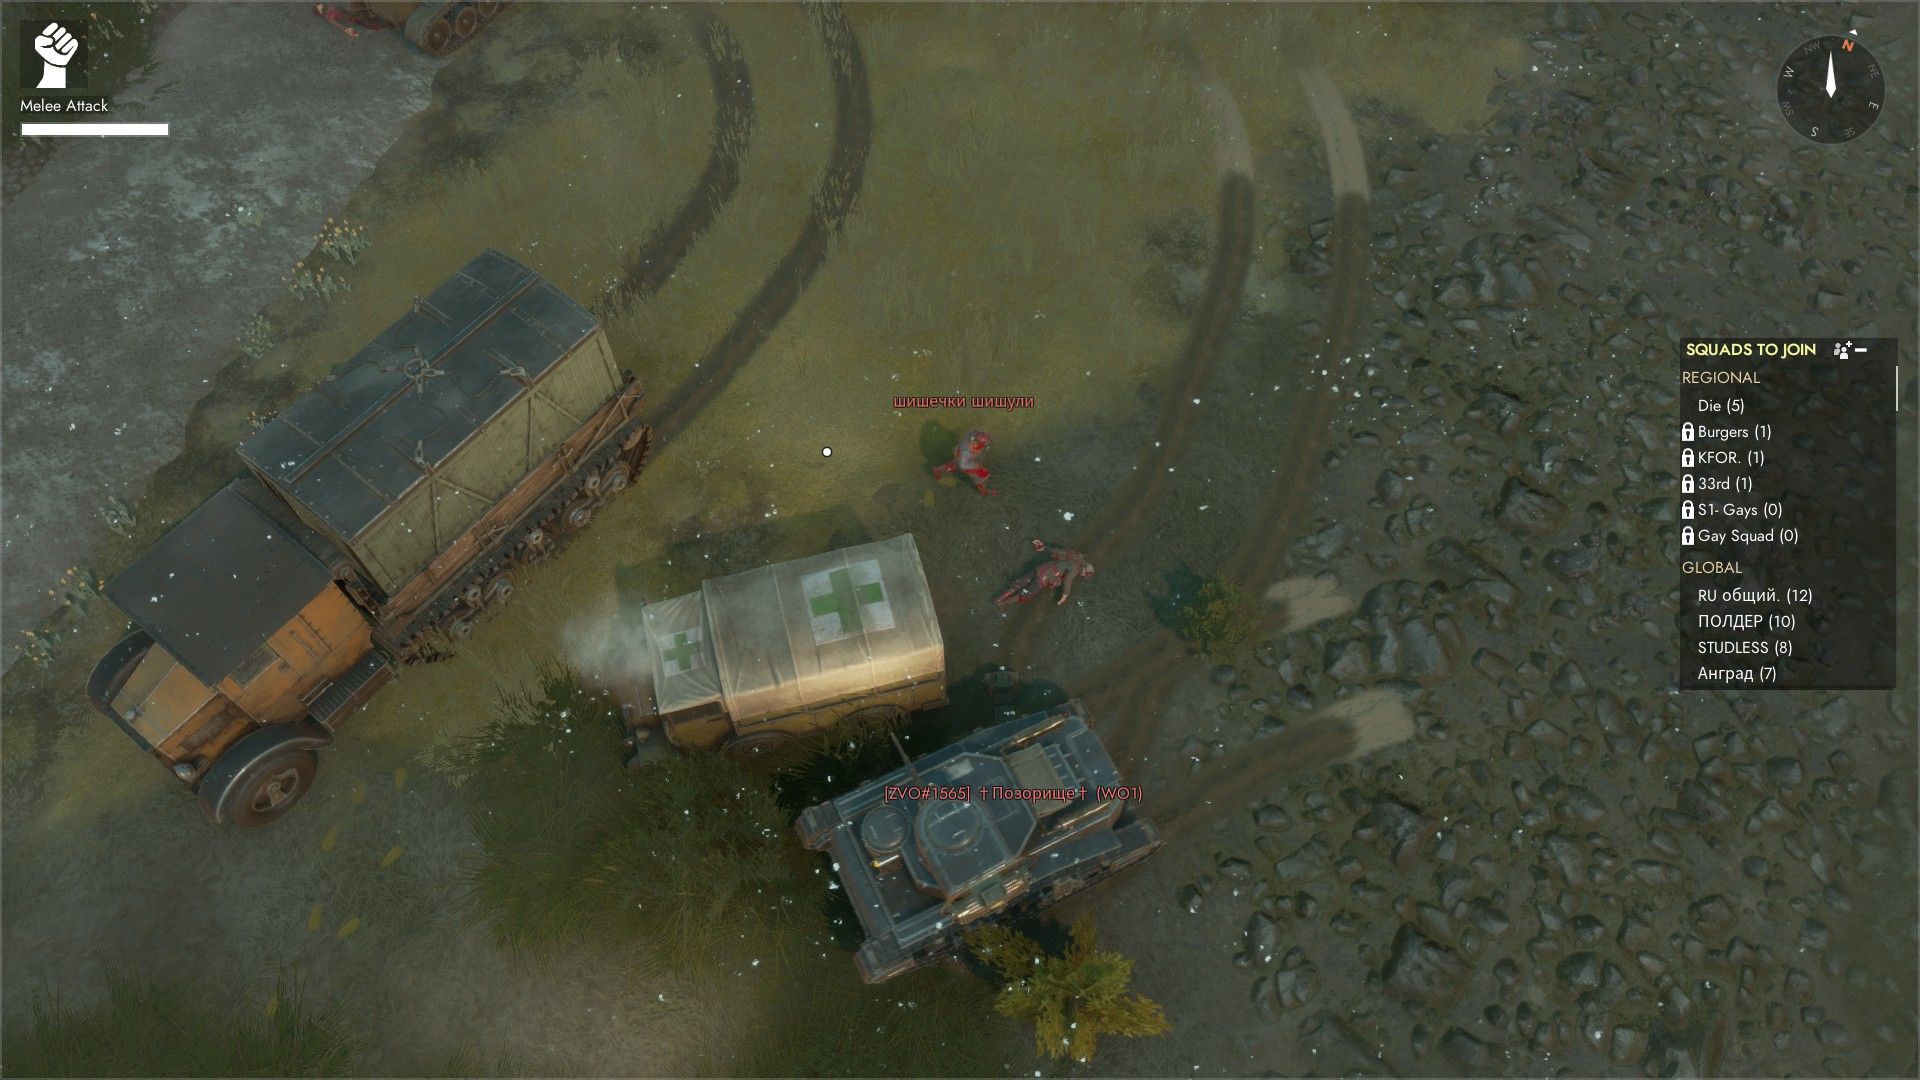
Image credit:Rock Paper Shotgun / Siege Camp
Not every medical emergency has been so ill-fated, though. In the next big fight I encountered, I scurried around the bombed-out buildings of an urban flashpoint, bringing my ambulance back and forth through bombed streets, and actually managed to save some of those “critically wounded” NPC soldiers I’ve mentioned. I even got to use my ambulance’s siren horn to honk trucks and passing tanks out of my way. Don’t they know a man is dying here! I need to harvest his linen!
When I wasn’t healing folks, I put myself to use scuttling around like a rodent, picking up the ammo and medical supplies from the dead and bringing it back to base. “Whoever keeps bringing back the dead people’s supplies,” said some bystanding commander, “is the fucking king.” A happy result of Foxhole’s chaotic teamwork is that you feel like you can make a difference, even if you refuse to carry a gun. A medic, especially, is a gratifying job. You get to see your patients stand up and rush back into the fray, and many players pause to thank you, or even role play with groans of pain when they get struck by a blast of shrapnel.
Shell after shell hits that town, but I go on running around without a rifle, picking up all the bullets, radios, gas masks, and first aid kits I can find, squirreling it all back to the nearest bunker and dumping everything in a big box for fresh recruits to find. In this act, and in the act of bringing injured men home just so I can iron their shirts, I have discovered Foxhole’s true nature. It is actually a game about recycling.


Some time after the urban battle I find myself on another medical run. This time I have a bigger truck as the ambulance just won’t carry what I need. It’s full of clean shirts and medical kits - badly needed in another village to the north. The map looks clean, there’s no reason to be afraid. But out of the blue four Warden partizans appear by the roadside and shoot out my tires. They surround the car, and - forever lacking the gun that might save me from such scenarios - I do the only thing I can think of. I yell: “I surrender”.
I clamber out of the truck and do a “hands-on-head” emote. They slowly approach me without firing. I invoke the Geneva convention and tell them everything. I am a doctor, I don’t even carry a gun. They are doing a fine job, I insist, and are upstanding gentlemen. They seem to be very amenable and ask only that I unlock the truck full of supplies, which I assent to with gracious dignity, and barely any whimpering at all.
The truck is open. They inspect the contents and seem satisfied. Then one of the men in grey wonders aloud: “Is it bad to kill someone after they surrender?” It is an airy question, perhaps directed at his friends, or perhaps to a passing cloud. The Wardens aim their guns and fill my torso with bullets. I have only a few seconds to gasp with my dying breath: “Hey, you broke the rules. You broke the rules of war.”
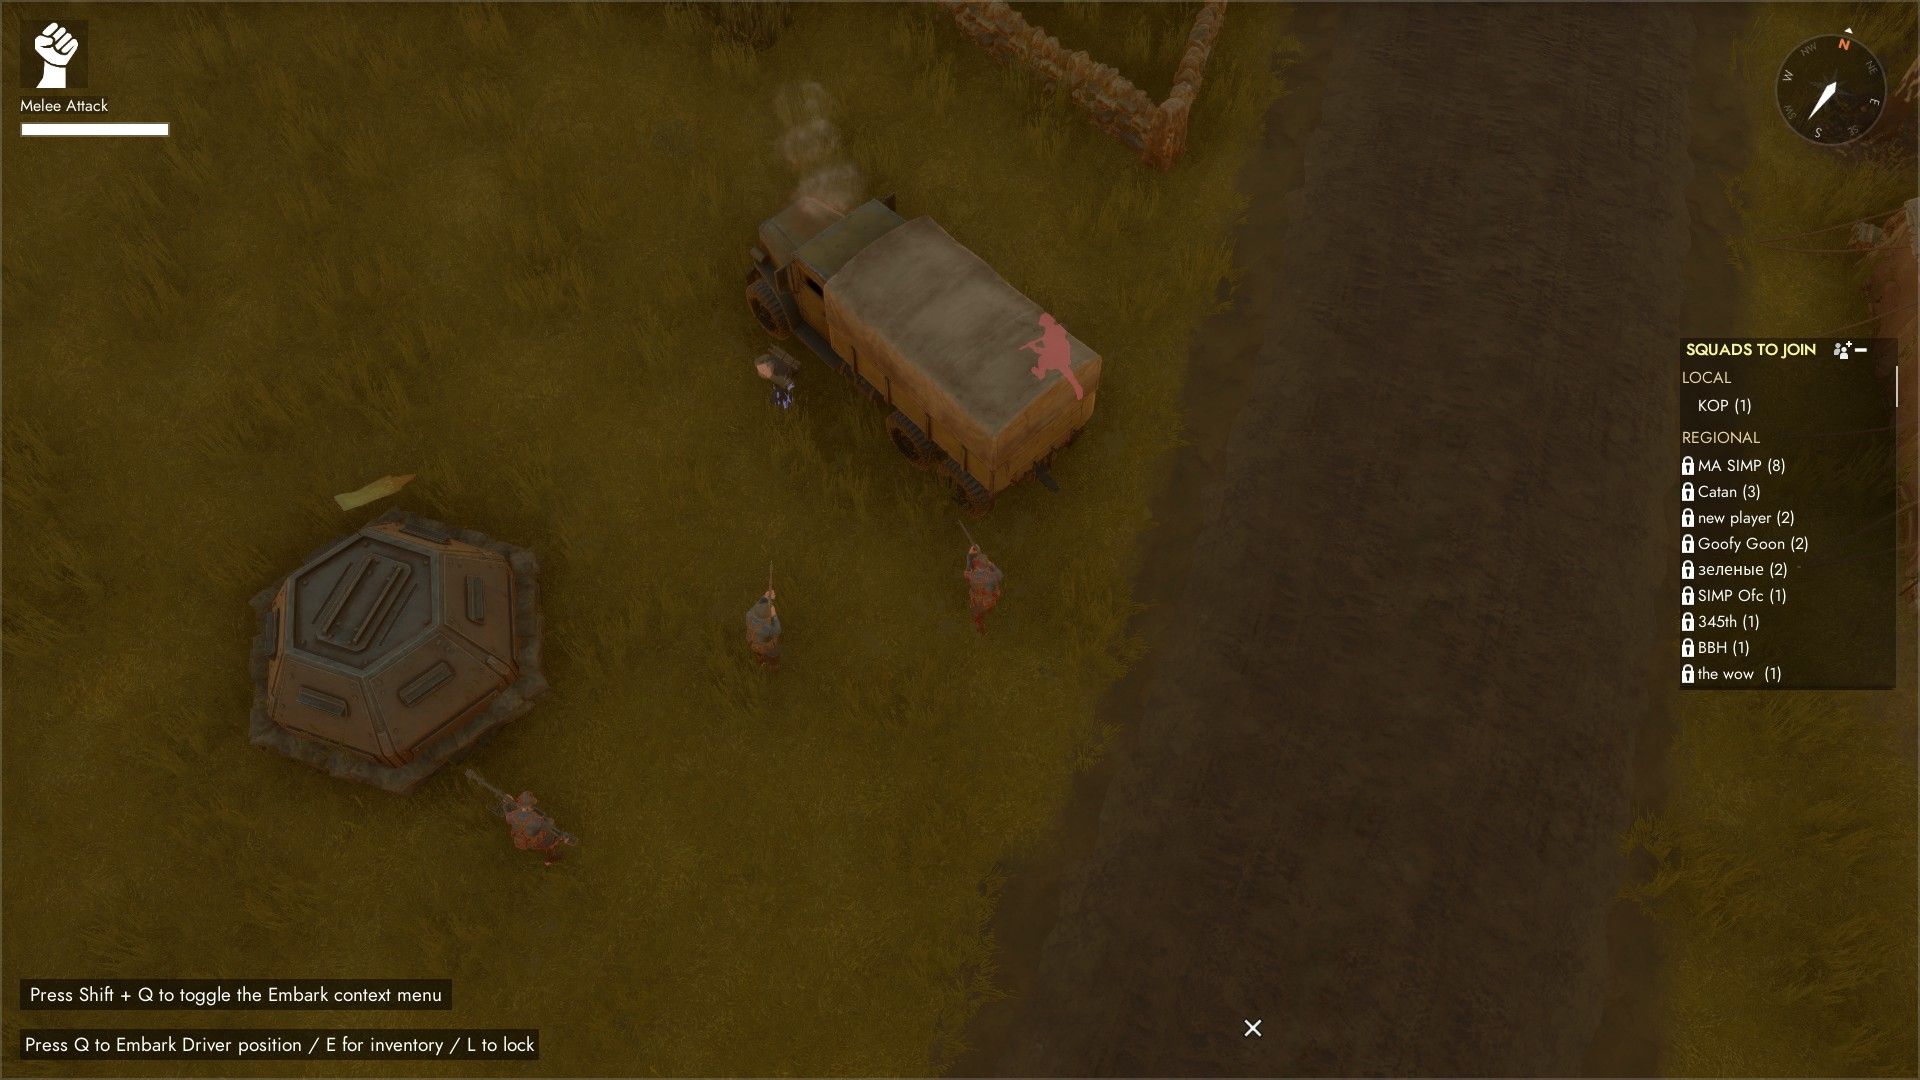
Image credit:Rock Paper Shotgun / Siege Camp
In this, Foxhole continues to be that rare type of game: a mucky multiplayer war full of great opportunities for role-playing, be that as a disastrous doctor, or any other war-time career. I chose a life as a medic this time. But you could easily be a quiet hero building railway lines as part of a crew of engineers, or captain the sea freighters that will deliver crates full of binoculars to the snipers who can actually make good use of them. In summer, the game will open up a whole new avenue of play by adding planes - each of them due to be piloted by real players. The unionised logistics players will no doubt be squinting at the cost of building and supplying such war machines. But me? I’m looking forward to a gloriously inaccurate drop behind enemy lines, and all the wounds I’ll have to treat as a result.
Foxhole
PC
Rock Paper Shotgun is better when you sign in
Sign in and join us on our journey to discover strange and compelling PC games.

All 75 Arc Raiders Blueprints and where to get them
These areas have the highest chance of giving you Blueprints

Image credit:Rock Paper Shotgun/Embark Studios

Looking for more Arc Raiders Blueprints? It’s a special day when you find a Blueprint, as they’re among the most valuable items in Arc Raiders. If you find a Blueprint that you haven’t already found, then you must make sure you hold onto it at all costs, because Blueprints are the key to one of the most important and powerful systems of meta-progression in the game.
This guide aims to be the very best guide on Blueprints you can find, starting with a primer on what exactly they are and how they work in Arc Raiders, before delving into exactly where to get Blueprints and the very best farming spots for you to take in your search.
We’ll also go over how to get Blueprints from other unlikely activities, such as destroying Surveyors and completing specific quests. And you’ll also find the full list of all 75 Blueprints in Arc Raiders on this page (including the newest Blueprints added with the Cold Snap update , such as the Deadline Blueprint and Firework Box Blueprint), giving you all the information you need to expand your own crafting repertoire.
In this guide:
- What are Blueprints in Arc Raiders?
- Full Blueprint list: All crafting recipes
- Where to find Blueprints in Arc Raiders Blueprints obtained from quests Blueprints obtained from Trials Best Blueprint farming locations

What are Blueprints in Arc Raiders?
Blueprints in Arc Raiders are special items which, if you manage to extract with them, you can expend to permanently unlock a new crafting recipe in your Workshop. If you manage to extract from a raid with an Anvil Blueprint, for example, you can unlock the ability to craft your very own Anvil Pistol, as many times as you like (as long as you have the crafting materials).
To use a Blueprint, simply open your Inventory while in the lobby, then right-click on the Blueprint and click “Learn And Consume” . This will permanently unlock the recipe for that item in your Workshop. As of the Stella Montis update, there are allegedly 75 different Blueprints to unlock - although only 68 are confirmed to be in the game so far. You can see all the Blueprints you’ve found and unlocked by going to the Workshop menu, and hitting “R” to bring up the Blueprint screen.
It’s possible to find duplicates of past Blueprints you’ve already unlocked. If you find these, then you can either sell them, or - if you like to play with friends - you can take it into a match and gift it to your friend so they can unlock that recipe for themselves. Another option is to keep hold of them until the time comes to donate them to the Expedition.
Full Blueprint list: All crafting recipes
Below is the full list of all the Blueprints that are currently available to find in Arc Raiders, and the crafting recipe required for each item:
| Blueprint | Type | Recipe | Crafted At |
|---|---|---|---|
| Bettina | Weapon | 3x Advanced Mechanical Components 3x Heavy Gun Parts 3x Canister | Gunsmith 3 |
| Blue Light Stick | Quick Use | 3x Chemicals | Utility Station 1 |
| Aphelion | Weapon | 3x Magnetic Accelerator 3x Complex Gun Parts 1x Matriarch Reactor | Gunsmith 3 |
| Combat Mk. 3 (Flanking) | Augment | 2x Advanced Electrical Components 3x Processor | Gear Bench 3 |
| Combat Mk. 3 (Aggressive) | Augment | 2x Advanced Electrical Components 3x Processor | Gear Bench 3 |
| Complex Gun Parts | Material | 2x Light Gun Parts 2x Medium Gun Parts 2x Heavy Gun Parts | Refiner 3 |
| Fireworks Box | Quick Use | 1x Explosive Compound 3x Pop Trigger | Explosives Station 2 |
| Gas Mine | Mine | 4x Chemicals 2x Rubber Parts | Explosives Station 1 |
| Green Light Stick | Quick Use | 3x Chemicals | Utility Station 1 |
| Pulse Mine | Mine | 1x Crude Explosives 1x Wires | Explosives Station 1 |
| Seeker Grenade | Grenade | 1x Crude Explosives 2x ARC Alloy | Explosives Station 1 |
| Looting Mk. 3 (Survivor) | Augment | 2x Advanced Electrical Components 3x Processor | Gear Bench 3 |
| Angled Grip II | Mod | 2x Mechanical Components 3x Duct Tape | Gunsmith 2 |
| Angled Grip III | Mod | 2x Mod Components 5x Duct Tape | Gunsmith 3 |
| Hullcracker | Weapon | 1x Magnetic Accelerator 3x Heavy Gun Parts 1x Exodus Modules | Gunsmith 3 |
| Launcher Ammo | Ammo | 5x Metal Parts 1x Crude Explosives | Workbench 1 |
| Anvil | Weapon | 5x Mechanical Components 5x Simple Gun Parts | Gunsmith 2 |
| Anvil Splitter | Mod | 2x Mod Components 3x Processor | Gunsmith 3 |
| ??? | ??? | ??? | ??? |
| Barricade Kit | Quick Use | 1x Mechanical Components | Utility Station 2 |
| Blaze Grenade | Grenade | 1x Explosive Compound 2x Oil | Explosives Station 3 |
| Bobcat | Weapon | 3x Advanced Mechanical Components 3x Light Gun Parts | Gunsmith 3 |
| Osprey | Weapon | 2x Advanced Mechanical Components 3x Medium Gun Parts 7x Wires | Gunsmith 3 |
| Burletta | Weapon | 3x Mechanical Components 3x Simple Gun Parts | Gunsmith 1 |
| Compensator II | Mod | 2x Mechanical Components 4x Wires | Gunsmith 2 |
| Compensator III | Mod | 2x Mod Components 8x Wires | Gunsmith 3 |
| Defibrillator | Quick Use | 9x Plastic Parts 1x Moss | Medical Lab 2 |
| ??? | ??? | ??? | ??? |
| Equalizer | Weapon | 3x Magnetic Accelerator 3x Complex Gun Parts 1x Queen Reactor | Gunsmith 3 |
| Extended Barrel | Mod | 2x Mod Components 8x Wires | Gunsmith 3 |
| Extended Light Mag II | Mod | 2x Mechanical Components 3x Steel Spring | Gunsmith 2 |
| Extended Light Mag III | Mod | 2x Mod Components 5x Steel Spring | Gunsmith 3 |
| Extended Medium Mag II | Mod | 2x Mechanical Components 3x Steel Spring | Gunsmith 2 |
| Extended Medium Mag III | Mod | 2x Mod Components 5x Steel Spring | Gunsmith 3 |
| Extended Shotgun Mag II | Mod | 2x Mechanical Components 3x Steel Spring | Gunsmith 2 |
| Extended Shotgun Mag III | Mod | 2x Mod Components 5x Steel Spring | Gunsmith 3 |
| Remote Raider Flare | Quick Use | 2x Chemicals 4x Rubber Parts | Utility Station 1 |
| Heavy Gun Parts | Material | 4x Simple Gun Parts | Refiner 2 |
| Venator | Weapon | 2x Advanced Mechanical Components 3x Medium Gun Parts 5x Magnet | Gunsmith 3 |
| Il Toro | Weapon | 5x Mechanical Components 6x Simple Gun Parts | Gunsmith 1 |
| Jolt Mine | Mine | 1x Electrical Components 1x Battery | Explosives Station 2 |
| Explosive Mine | Mine | 1x Explosive Compound 1x Sensors | Explosives Station 3 |
| Jupiter | Weapon | 3x Magnetic Accelerator 3x Complex Gun Parts 1x Queen Reactor | Gunsmith 3 |
| Light Gun Parts | Material | 4x Simple Gun Parts | Refiner 2 |
| Lightweight Stock | Mod | 2x Mod Components 5x Duct Tape | Gunsmith 3 |
| Lure Grenade | Grenade | 1x Speaker Component 1x Electrical Components | Utility Station 2 |
| Medium Gun Parts | Material | 4x Simple Gun Parts | Refiner 2 |
| Torrente | Weapon | 2x Advanced Mechanical Components 3x Medium Gun Parts 6x Steel Spring | Gunsmith 3 |
| Muzzle Brake II | Mod | 2x Mechanical Components 4x Wires | Gunsmith 2 |
| Muzzle Brake III | Mod | 2x Mod Components 8x Wires | Gunsmith 3 |
| Padded Stock | Mod | 2x Mod Components 5x Duct Tape | Gunsmith 3 |
| Shotgun Choke II | Mod | 2x Mechanical Components 4x Wires | Gunsmith 2 |
| Shotgun Choke III | Mod | 2x Mod Components 8x Wires | Gunsmith 3 |
| Shotgun Silencer | Mod | 2x Mod Components 8x Wires | Gunsmith 3 |
| Showstopper | Grenade | 1x Advanced Electrical Components 1x Voltage Converter | Explosives Station 3 |
| Silencer I | Mod | 2x Mechanical Components 4x Wires | Gunsmith 2 |
| Silencer II | Mod | 2x Mod Components 8x Wires | Gunsmith 3 |
| Snap Hook | Quick Use | 2x Power Rod 3x Rope 1x Exodus Modules | Utility Station 3 |
| Stable Stock II | Mod | 2x Mechanical Components 3x Duct Tape | Gunsmith 2 |
| Stable Stock III | Mod | 2x Mod Components 5x Duct Tape | Gunsmith 3 |
| Tagging Grenade | Grenade | 1x Electrical Components 1x Sensors | Utility Station 3 |
| Tempest | Weapon | 3x Advanced Mechanical Components 3x Medium Gun Parts 3x Canister | Gunsmith 3 |
| Trigger Nade | Grenade | 2x Crude Explosives 1x Processor | Explosives Station 2 |
| Vertical Grip II | Mod | 2x Mechanical Components 3x Duct Tape | Gunsmith 2 |
| Vertical Grip III | Mod | 2x Mod Components 5x Duct Tape | Gunsmith 3 |
| Vita Shot | Quick Use | 2x Antiseptic 1x Syringe | Medical Lab 3 |
| Vita Spray | Quick Use | 3x Antiseptic 1x Canister | Medical Lab 3 |
| Vulcano | Weapon | 1x Magnetic Accelerator 3x Heavy Gun Parts 1x Exodus Modules | Gunsmith 3 |
| Wolfpack | Grenade | 2x Explosive Compound 2x Sensors | Explosives Station 3 |
| Red Light Stick | Quick Use | 3x Chemicals | Utility Station 1 |
| Smoke Grenade | Grenade | 14x Chemicals 1x Canister | Utility Station 2 |
| Deadline | Mine | 3x Explosive Compound 2x ARC Circuitry | Explosives Station 3 |
| Trailblazer | Grenade | 1x Explosive Compound 1x Synthesized Fuel | Explosives Station 3 |
| Tactical Mk. 3 (Defensive) | Augment | 2x Advanced Electrical Components 3x Processor | Gear Bench 3 |
| Tactical Mk. 3 (Healing) | Augment | 2x Advanced Electrical Components 3x Processor | Gear Bench 3 |
| Yellow Light Stick | Quick Use | 3x Chemicals | Utility Station 1 |
Note: The missing Blueprints in this list likely have not actually been added to the game at the time of writing, because none of the playerbase has managed to find any of them. As they are added to the game, I will update this page with the most relevant information so you know exactly how to get all 75 Arc Raiders Blueprints.
Where to find Blueprints in Arc Raiders
Below is a list of all containers, modifiers, and events which maximise your chances of finding Blueprints:
- Certain quests reward you with specific Blueprints .
- Completing Trials has a high chance of offering Blueprints as rewards.
- Surveyors have a decent chance of dropping Blueprints on death.
- High loot value areas tend to have a greater chance of spawning Blueprints.
- Night Raids and Storms may increase rare Blueprint spawn chances in containers.
- Containers with higher numbers of items may have a higher tendency to spawn Blueprints. As a result, Blue Gate (which has many “large” containers containing multiple items) may give you a higher chance of spawning Blueprints.
- Raider containers (Raider Caches, Weapon Boxes, Medical Bags, Grenade Tubes) have increased Blueprint drop rates. As a result, the Uncovered Caches event gives you a high chance of finding Blueprints.
- Security Lockers have a higher than average chance of containing Blueprints.
- Certain Blueprints only seem to spawn under specific circumstances: Tempest Blueprint only spawns during Night Raid events. Vulcano Blueprint only spawns during Hidden Bunker events. Jupiter and Equaliser Blueprints only spawn during Harvester events.

Raider Caches, Weapon Boxes, and other raider-oriented container types have a good chance of offering Blueprints. |Image credit:Rock Paper Shotgun/Embark Studios
Blueprints have a very low chance of spawning in any container in Arc Raiders, around 1-2% on average. However, there is a higher chance of finding Blueprints in particular container types. Specifically, you can find more Blueprints in Raider containers and security lockers.
Beyond this, if you’re looking for Blueprints you should focus on regions of the map which are marked as having particularly high-value loot. Areas such as the Control Tower in Dam Battlegrounds, the Arrival and Departure Buildings in Spaceport, and Pilgrim’s Peak in Blue Gate all have a better-than-average chance of spawning Blueprints somewhere amongst all their containers. Night Raids and Electromagnetic Storm events also increase the drop chances of certain Blueprints .
In addition to these containers, you can often loot Blueprints from destroyed Surveyors - the largest of the rolling ball ARC. Surveyors are more commonly found on the later maps - Spaceport and Blue Gate - and if one spawns in your match, you’ll likely see it by the blue laser beam that it casts into the sky while “surveying”.
Surveyors are quite well-armoured and will very speedily run away from you once it notices you, but if you can take one down then make sure you loot all its parts for a chance of obtaining certain unusual Blueprints.
Blueprints obtained from quests
One way in which you can get Blueprints is by completing certain quests for the vendors in Speranza. Some quests will reward you with a specific item Blueprint upon completion, so as long as you work through all the quests in Arc Raiders, you are guaranteed those Blueprints.
Here is the full list of all Blueprints you can get from quest rewards:
- Trigger Nade Blueprint: Rewarded after completing “Sparks Fly”.
- Lure Grenade Blueprint: Rewarded after completing “Greasing Her Palms”.
- Burletta Blueprint: Rewarded after completing “Industrial Espionage”.
- Hullcracker Blueprint (and Launcher Ammo Blueprint): Rewarded after completing “The Major’s Footlocker”.
Alas, that’s only 4 Blueprints out of a total of 75 to unlock, so for the vast majority you will need to find them yourself during a raid. If you’re intent on farming Blueprints, then it’s best to equip yourself with cheap gear in case you lose it, but don’t use a free loadout because then you won’t get a safe pocket to stash any new Blueprint you find. No pain in Arc Raiders is sharper than failing to extract with a new Blueprint you’ve been after for a dozen hours already.

One of the best ways to get Blueprints is by hitting three stars on all five Trials every week. |Image credit:Rock Paper Shotgun/Embark Studios
Blueprints obtained from Trials
One of the very best ways to get Blueprints is as rewards for completing Trials in Arc Raiders. Trials are unlocked from Level 15 onwards, and allow you to earn rewards by focusing on certain tasks over the course of several raids. For example, one Trial might task you with dealing damage to Hornets, while another might challenge you to loot Supply Drops.
Trials refresh on a weekly basis, with a new week bringing five new Trials. Each Trial can offer up to three rewards after passing certain score milestones, and it’s possible to receive very high level loot from these reward crates - including Blueprints. So if you want to unlock as many Blueprints as possible, you should make a point of completing as many Trials as possible each week.
Best Blueprint farming locations
The very best way to get Blueprints is to frequent specific areas of the maps which combine high-tier loot pools with the right types of containers to search. Here are my recommendations for where to find Blueprints on every map, so you can always keep the search going for new crafting recipes to unlock.

Image credit:Rock Paper Shotgun/Embark Studios
Dam Battlegrounds
The best places to farm Blueprints on Dam Battlegrounds are the Control Tower, Power Generation Complex, Ruby Residence, and Pale Apartments . The first two regions, despite only being marked on the map as mid-tier loot, contain a phenomenal number of containers to loot. The Control Tower can also contain a couple of high-tier Security Lockers - though of course, you’ll need to have unlocked the Security Breach skill at the end of the Survival tree.
There’s also a lot of reporting amongst the playerbase that the Residential areas in the top-left of the map - Pale Apartments and Ruby Residence - give you a comparatively strong chance of finding Blueprints. Considering their size, there’s a high density of containers to loot in both locations, and they also have the benefit of being fairly out of the way. So you’re more likely to have all the containers to yourself.
Buried City
The best Blueprint farming locations on Buried City are the Santa Maria Houses, Grandioso Apartments, Town Hall, and the various buildings of the New District . Grandioso Apartments has a lower number of containers than the rest, but a high chance of spawning weapon cases - which have good Blueprint drop rates. The others are high-tier loot areas, with plenty of lootable containers - including Security Lockers.
Spaceport
The best places to find Blueprints on Spaceport are the Arrival and Departure Buildings, as well as Control Tower A6 and the Launch Towers . All these areas are labelled as high-value loot regions, and many of them are also very handily connected to one another by the Spaceport wall, which you can use to quickly run from one area to the next. At the tops of most of these buildings you’ll find at least one Security Locker, so this is an excellent farming route for players looking to find Blueprints.
The downside to looting Blueprints on Spaceport is that all these areas are hotly contested, particularly in Duos and Squads. You’ll need to be very focused and fast in order to complete the full farming route.

Image credit:Rock Paper Shotgun/Embark Studios
Blue Gate
Blue Gate tends to have a good chance of dropping Blueprints, potentially because it generally has a high number of containers which can hold lots of items; so there’s a higher chance of a Blueprint spawning in each container. In my experience, the best Blueprint farming spots on Blue Gate are Pilgrim’s Peak, Raider’s Refuge, the Ancient Fort, and the Underground Complex beneath the Warehouse .
All of these areas contain a wealth of containers to loot. Raider’s Refuge has less to loot, but the majority of the containers in and around the Refuge are raider containers, which have a high chance of containing Blueprints - particularly during major events.
Stella Montis
On the whole, Stella Montis seems to have a very low drop rate for Blueprints (though a high chance of dropping other high-tier loot). If you do want to try farming Blueprints on this map, the best places to find Blueprints in Stella Montis are Medical Research, Assembly Workshop, and the Business Center . These areas have the highest density of containers to loot on the map.
In addition to this, the Western Tunnel has a few different Security Lockers to loot, so while there’s very little to loot elsewhere in this area of the map, it’s worth hitting those Security Lockers if you spawn there at the start of a match.
That wraps up this primer on how to get all the Blueprints in Arc Raiders as quickly as possible. With the Expedition system constantly resetting a large number of players’ Blueprints, it’s more important than ever to have the most up-to-date information on where to find all these Blueprints.
While you’re here, be sure to check out our Arc Raiders best guns tier list , as well as our primers on the best skills to unlock and all the different Field Depot locations on every map.

ARC Raiders
PS5 , Xbox Series X/S , PC
Rock Paper Shotgun is better when you sign in
Sign in and join us on our journey to discover strange and compelling PC games.
