I have determined which Lethal Company monster is the hardest worker and should be hired
Petition The Company to elect this fellow as employee of the month

Image credit:Rock Paper Shotgun/Zeekerss.

Most of my time in Lethal Company is full of tomfoolery, panicking, and ultimately letting the quota down. As I run back and forth from the ship, only able to carry four things at a time in my puny arms, I frequently see the various monster inhabitants of the game excelling at pretty much everything. The Forest Keeper has brawny strength and can travel across the map in a blink of an eye, the Eyeless Dogs can sniff out an intruder in next to no time and The Butler has dedicated his life to maintaining a mansion even after the owners have long since gone.
This had me thinking - surely the various monster inhabitants of Lethal Company would make for a much better worker than myself?
Sure, most of them are ravenous killing machines - but that fits with the core values of The Company. After all, most of your time spent in the game will be collecting scrap on distant moons to meet an arbitrary quota set by The Company. You’ll then feed your pilfered belongings to the insatiable maw of a tentacled horror (otherwise known as the boss). You may be able to sympathise depending on your occupation.
So, if the monsters in Lethal Company were given the chance to work for said company, which of them would make it as an employee of the month and which would crash and burn harder than me getting thrown from the airlock five times in a row?
Join me as I peruse the CV’s of my favourite monsters in Lethal Company (as far as I know only half of them have opposable thumbs) and advocate for which of them should be my replacement as The Company’s new hire. After all, once this month’s Games Club is finished I’m not sure they’ll even let me back on the ship.
#7 - Ghost Girl

Image credit:Rock Paper Shotgun/Zeekerss
| Pros: Has thumbs to carry scrap. Is persistent when achieving her goals (of killing you). Nice sense of fashion. | Cons: Could possibly contravene child labour laws. Technically a ghost. Seems like a chatterbox, will probably gossip on shift. |
|---|
Yes she’s a child, yes she’s a ghost, and yes she’s possibly unable to leave her haunting grounds but Ghost Girl is just productive enough to make the list. I could see her in a management-type role, one where employees are too scared of her creepy child ghost giggling to disobey her demands for scrap.
Alternatively, she would make a killing in PR. As the most human-looking of the monsters on offer, she could become something of a mascot and deliver propaganda that The Company is a ‘family-run business’. People love that kind of corporate embellishment. Although, we are making an assumption here that most of the universe is more receptive to ‘human-looking’ creatures. That’s Earthling vanity for you.
#6 Forest Keeper
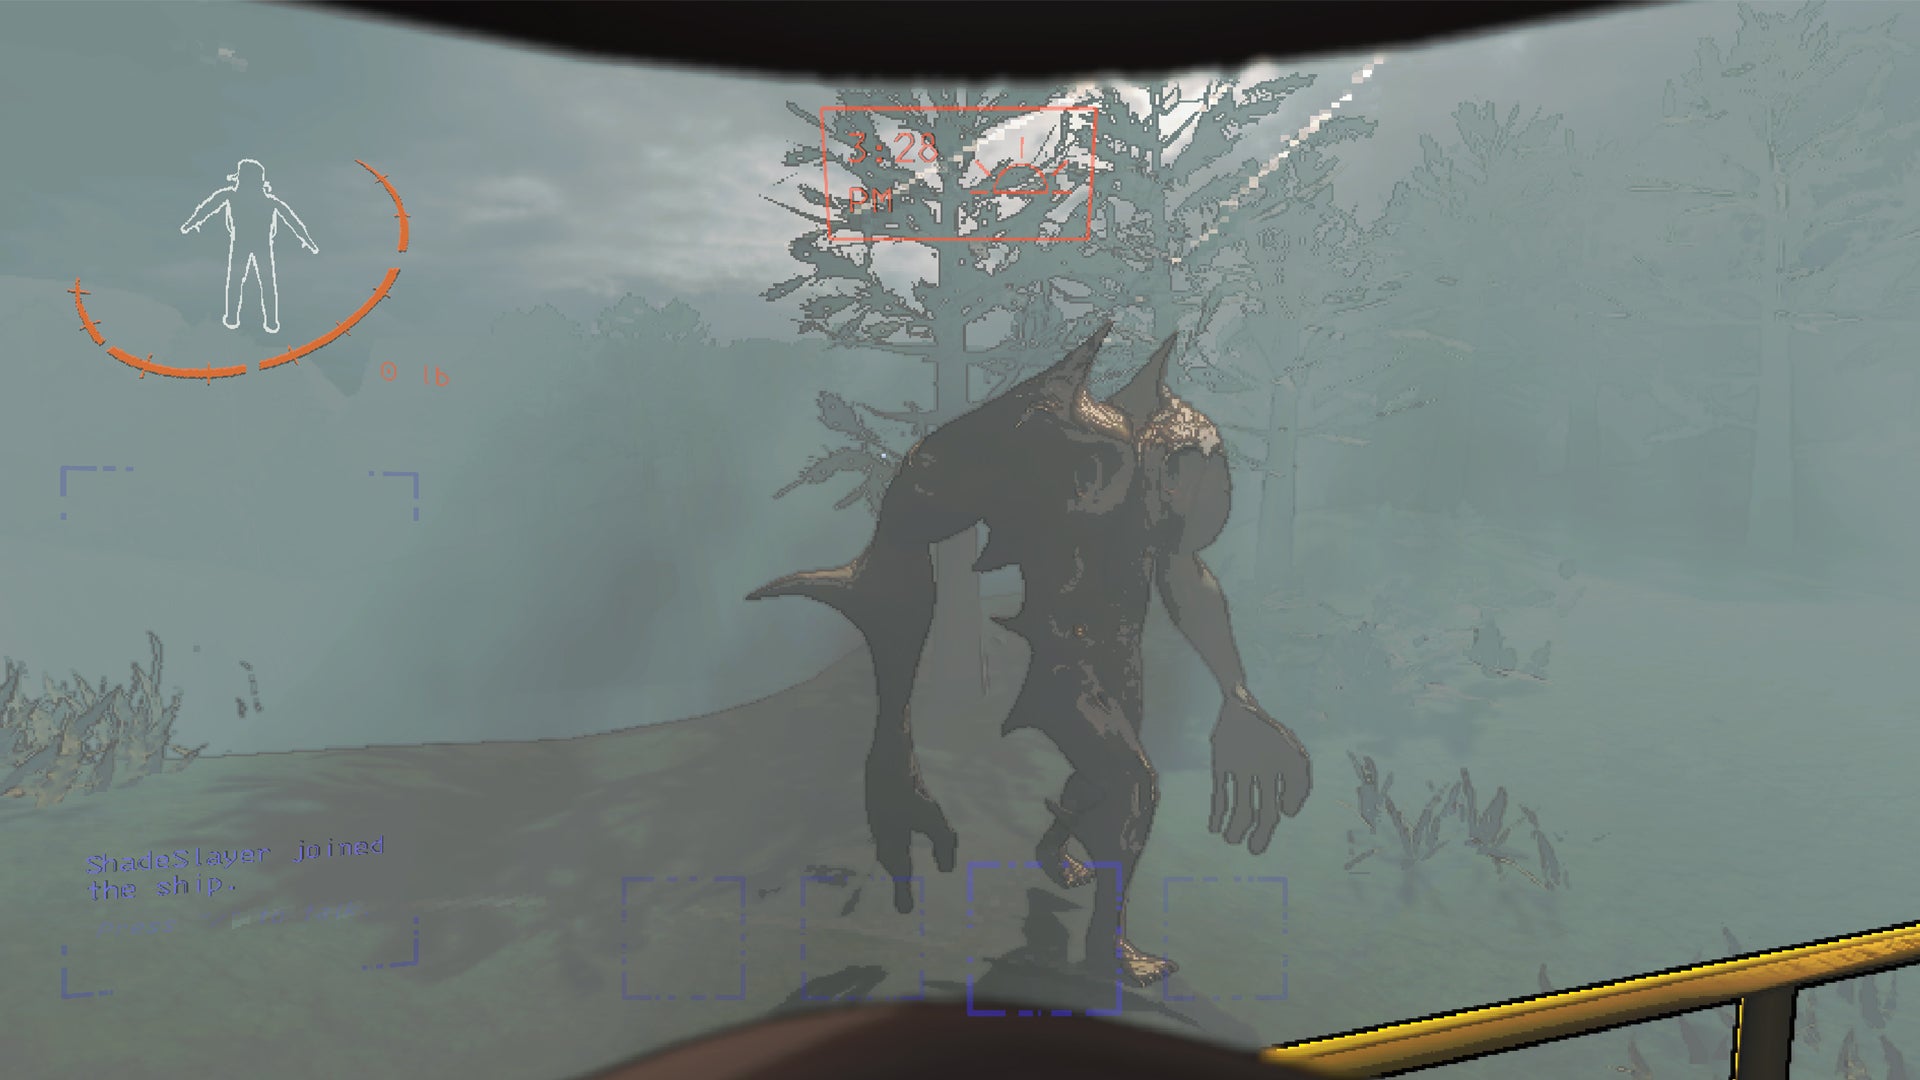
Image credit:Rock Paper Shotgun/Zeekerss
| Pros: Can do heavy lifting Are environmentally conscious. Have excellent sight. | Cons: Impossible to source chairs for them at a company meeting Will probably force everyone to use paper straws. Prone to being distracted by a laser pointer. |
|---|
It’s also fairly faithful to The Company’s values as collecting scrap from planets and bringing it back to the maw for repurposing is, in a way, recycling. Even if that purpose is to see it get gobbled up faster than a Creme Egg on Easter.
#5 The Masked

Image credit:Rock Paper Shotgun/Zeekerss
| Pros: Again - thumbs. Fantastic posture when impersonating others. Loyal to The Company, will be the corporate snitch. | Cons: Hated by their colleagues. Lack of a sense of identity. Will brag about their knowledge of the Marvel Universe and will ply you with unsolicited facts when trying to enjoy your lunch. |
|---|
The Masked is just a little too try-hard. They’ll follow you around, take on your appearance and pass off your jokes as their own like a troubled teen trying to ‘find themselves’, only to ‘find’ you. There comes a point when it goes beyond flattery to a flat-out obsession, and that point is usually the end of a sharp knife if Single White Female taught us anything.
The Masked will shamble around, following you without actually doing any work for themselves, just as in office life there are some people born to coast through life by mirroring others and befriending bosses. They’re most likely to be the corporate suck-up and they’re definitely going to tell The Company about any unauthorised lunch breaks - but hey! Corporate Randalls do well in this world. In a few years, they’ll be your manager.
I get the sense the only thing they feel strongly about personally is entertainment, evidenced by their possession of the theatre mask. Theatre kids have had it hard enough though, so I prefer to think of them as adult Marvel fans - the sort of co-worker to bombard you with MCU lore while you’re just trying to put in your time and avoid being caught clock-watching.
#4 Nutcracker

Image credit:Rock Paper Shotgun/Zeekerss
| Pros: Can handle firearms. Rocks a powerful shoulder pad. Can bring a sampling of German culture to the job. | Cons: Often drops their firearms. Thumbs would be nice. Suffers from seasonal depression. A HR nightmare when placed on shift with someone with a nut allergy. |
|---|
Ever wondered what nutcrackers do for the other 11 months of the year when they’re not chomping down on Brazil nuts and causing impromptu visits to the emergency room via finger-related injuries? Christmas is a part-time gig, and these guys need to support their families too, you know. For that reason alone they deserve a pity place at The Company. I’d argue the same case for Michael Bublé, but we all know he only exits hibernation during Christmas to provide jazzy hits and a panic purchase for dads buying mums their annual calendar.
As a result of their year-on-year duty to the holiday, The Nutcracker has developed something of a temper. Let’s utilise this. The addition of shotguns and terrifying unhinged jaws earns them a spot on guard duty, at least. After all, it’s not enough to collect the scrap - we need to guard it from pesky players too. Just know, if you ever dare to make the unforgivable mistake of playing Xmas tunes in November, they’ll quit with the wrath of 1,000 spurned George Michaels.
#3 Circuit Bees
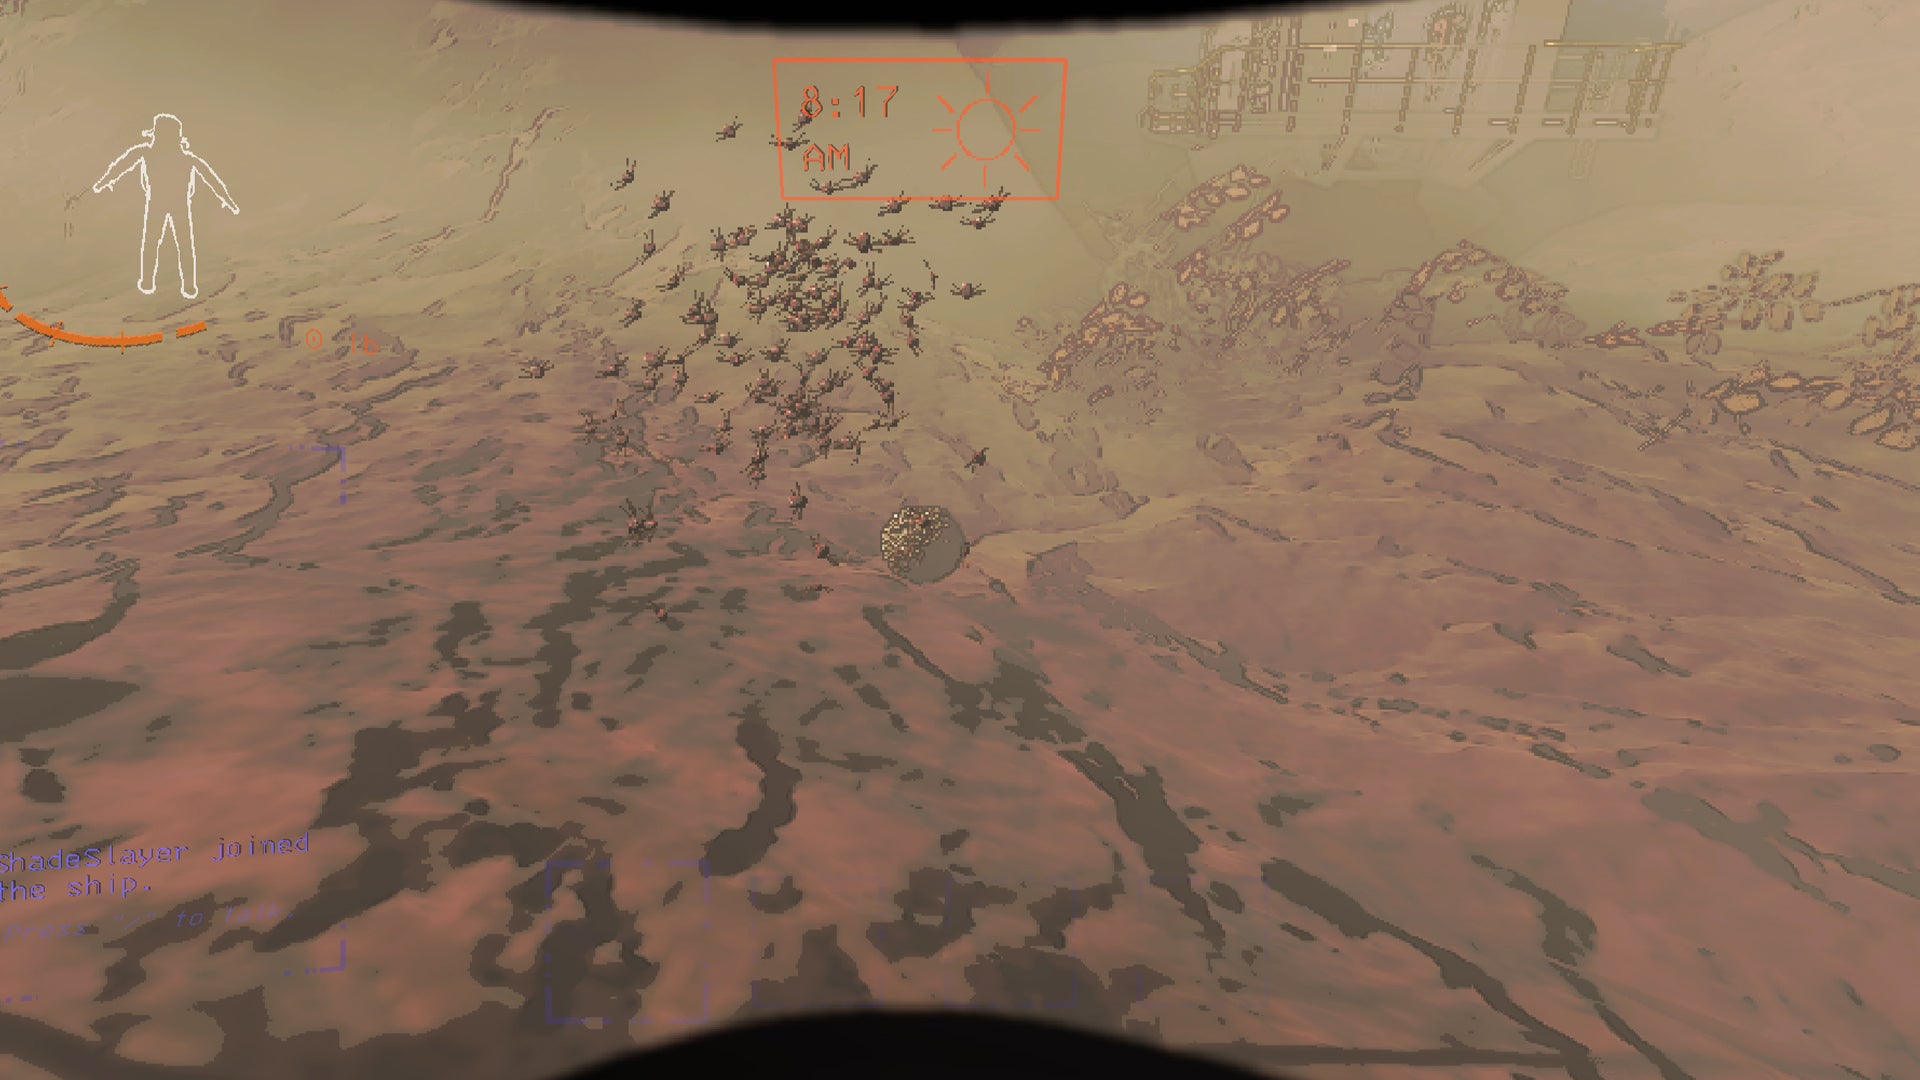
Image credit:Rock Paper Shotgun/Zeekerss
| Pros: Always bring honey to corporate parties. Will do the work of a team on one salary. Have a matriarchal society. Great PR advertisement for National Women’s Day. | Cons: Are literally a swarm of bees. Will die if they accidentally sting someone. The person they sting could also die. Will probably need to take an anger management course. |
|---|
Okay so bees aren’t exactly going to do any heavy lifting, but they are the hardest workers of the animal kingdom. They wouldn’t need any vacation or sick days because if anyone isn’t pulling their weight in the colony they are ostracised and sentenced to death by exposure. Bees are hardcore, man.
Lethal Company paints a picture of a universe scrambling for resources. With bees you can repopulate a planet of organic life - that means crops. Assuming The Company cares about that sort of thing, which is unlikely. If nothing else, they’ll motivate the other workers. You’ll never see a person move as fast as someone surrounded by bees.
#2 The Butler

Image credit:Rock Paper Shotgun/Zeekerss
| Pros: Comes with his own cleaning equipment. Impeccable dress sense. Maddening loyalty. Will not leave their post even if they’re the only life forms on the moon in question. | Cons: Carries the burden of all mistreated butlers in video games. Takes 15-30 seconds to open doors. Just drop your broom, man. They look like they need Kate Bush on repeat when initiating a cleaning spree. |
|---|
I think it’s time we, as gamers, issue an apology to all mistreated butlers from over the years. We all laugh at silly old Winston getting stuck in the fridge again but these poor sods simply aren’t paid enough. So, as a loyal employee tirelessly cleaning up the messes of every chaotic player to come into their homes and ransack the place, I propose they get some much-needed recognition. A pay rise, reduced hours so they can spend more time with their grandkids, and perhaps a corporate discount for eye care. Those little sockets are well overdue for a check-up.
With the increased pay, they can finally sample some of those Starbucks the youth of today waste their money on and see what the hype is all about. Just not too many, or they won’t be able to afford a house. That’s how that works, right? Or maybe they can save up and buy a mansion of their own. Then hire a butler to look after it for them when they go cruising. Of course, a butler hiring a butler does call into question the social etiquette of such a scenario. I assume any conflicts they have will go to the court of butlers, overseen by head butler Carson for all final decisions.
#1 Hoarding Bug

Image credit:Rock Paper Shotgun/Zeekerss
| Pros: They live for collecting scrap. Will be hard-pressed to take a day off. Have unblinking eyes that scream ‘I will devour your soul’. Will not falter under a Karen’s demands. Will attack anyone who attempts to steal company property. | Cons: May have to take a week off work to appear on the popular galactic show ‘Hoarders’. Have become a meme. May be stopped frequently in their daily duties for selfies and TikTok dances. Are very likely to form a cult based around the worship of scrap. May conflict with company interests. |
|---|
Whether you think they’re the cutest little fellows in Lethal Company or you’re not a fan, we can all agree that Hoarding Bugs collect scrap like men on a mission. To the point where I have started to theorise that they worship The Company as their bug lords and shower them with offerings of scrap. Yes, I have just canonised The Company as bug overlords. We don’t know what they look like so it could be true.
The Hoarding Bugs could just be using it to build nests of course, but either way, these chirpy over-achievers consistently collect scrap like their lives depend on it and will literally die to keep ahold of a whoopie cushion. Thus I believe the Hoarding Bugs deserve a lot more recognition and respect for their dedication to the grind. They will chase and beat you up until you return your stolen goods to them; there is a lesson to be learned here for any loot goblins.
The Hoarding Bugs are, therefore, my pick for the best workers in Lethal Company. They must be promoted immediately and given an honourary title like employee of the month. Such praise will get them working harder to feed the ever-hungry beast and signify that for just this once, the little man can succeed…to middle management.
If you’re more of a monster fighter rather than a lover, check out our list of all monsters and how to beat them in Lethal Company. Also, check out our Lethal Company best mods list if you want to invigorate your gameplay and switch it up a tad.
Lethal Company
Video Game
Rock Paper Shotgun is better when you sign in
Sign in and join us on our journey to discover strange and compelling PC games.

All 75 Arc Raiders Blueprints and where to get them
These areas have the highest chance of giving you Blueprints

Image credit:Rock Paper Shotgun/Embark Studios

Looking for more Arc Raiders Blueprints? It’s a special day when you find a Blueprint, as they’re among the most valuable items in Arc Raiders. If you find a Blueprint that you haven’t already found, then you must make sure you hold onto it at all costs, because Blueprints are the key to one of the most important and powerful systems of meta-progression in the game.
This guide aims to be the very best guide on Blueprints you can find, starting with a primer on what exactly they are and how they work in Arc Raiders, before delving into exactly where to get Blueprints and the very best farming spots for you to take in your search.
We’ll also go over how to get Blueprints from other unlikely activities, such as destroying Surveyors and completing specific quests. And you’ll also find the full list of all 75 Blueprints in Arc Raiders on this page (including the newest Blueprints added with the Cold Snap update , such as the Deadline Blueprint and Firework Box Blueprint), giving you all the information you need to expand your own crafting repertoire.
In this guide:
- What are Blueprints in Arc Raiders?
- Full Blueprint list: All crafting recipes
- Where to find Blueprints in Arc Raiders Blueprints obtained from quests Blueprints obtained from Trials Best Blueprint farming locations

What are Blueprints in Arc Raiders?
Blueprints in Arc Raiders are special items which, if you manage to extract with them, you can expend to permanently unlock a new crafting recipe in your Workshop. If you manage to extract from a raid with an Anvil Blueprint, for example, you can unlock the ability to craft your very own Anvil Pistol, as many times as you like (as long as you have the crafting materials).
To use a Blueprint, simply open your Inventory while in the lobby, then right-click on the Blueprint and click “Learn And Consume” . This will permanently unlock the recipe for that item in your Workshop. As of the Stella Montis update, there are allegedly 75 different Blueprints to unlock - although only 68 are confirmed to be in the game so far. You can see all the Blueprints you’ve found and unlocked by going to the Workshop menu, and hitting “R” to bring up the Blueprint screen.
It’s possible to find duplicates of past Blueprints you’ve already unlocked. If you find these, then you can either sell them, or - if you like to play with friends - you can take it into a match and gift it to your friend so they can unlock that recipe for themselves. Another option is to keep hold of them until the time comes to donate them to the Expedition.
Full Blueprint list: All crafting recipes
Below is the full list of all the Blueprints that are currently available to find in Arc Raiders, and the crafting recipe required for each item:
| Blueprint | Type | Recipe | Crafted At |
|---|---|---|---|
| Bettina | Weapon | 3x Advanced Mechanical Components 3x Heavy Gun Parts 3x Canister | Gunsmith 3 |
| Blue Light Stick | Quick Use | 3x Chemicals | Utility Station 1 |
| Aphelion | Weapon | 3x Magnetic Accelerator 3x Complex Gun Parts 1x Matriarch Reactor | Gunsmith 3 |
| Combat Mk. 3 (Flanking) | Augment | 2x Advanced Electrical Components 3x Processor | Gear Bench 3 |
| Combat Mk. 3 (Aggressive) | Augment | 2x Advanced Electrical Components 3x Processor | Gear Bench 3 |
| Complex Gun Parts | Material | 2x Light Gun Parts 2x Medium Gun Parts 2x Heavy Gun Parts | Refiner 3 |
| Fireworks Box | Quick Use | 1x Explosive Compound 3x Pop Trigger | Explosives Station 2 |
| Gas Mine | Mine | 4x Chemicals 2x Rubber Parts | Explosives Station 1 |
| Green Light Stick | Quick Use | 3x Chemicals | Utility Station 1 |
| Pulse Mine | Mine | 1x Crude Explosives 1x Wires | Explosives Station 1 |
| Seeker Grenade | Grenade | 1x Crude Explosives 2x ARC Alloy | Explosives Station 1 |
| Looting Mk. 3 (Survivor) | Augment | 2x Advanced Electrical Components 3x Processor | Gear Bench 3 |
| Angled Grip II | Mod | 2x Mechanical Components 3x Duct Tape | Gunsmith 2 |
| Angled Grip III | Mod | 2x Mod Components 5x Duct Tape | Gunsmith 3 |
| Hullcracker | Weapon | 1x Magnetic Accelerator 3x Heavy Gun Parts 1x Exodus Modules | Gunsmith 3 |
| Launcher Ammo | Ammo | 5x Metal Parts 1x Crude Explosives | Workbench 1 |
| Anvil | Weapon | 5x Mechanical Components 5x Simple Gun Parts | Gunsmith 2 |
| Anvil Splitter | Mod | 2x Mod Components 3x Processor | Gunsmith 3 |
| ??? | ??? | ??? | ??? |
| Barricade Kit | Quick Use | 1x Mechanical Components | Utility Station 2 |
| Blaze Grenade | Grenade | 1x Explosive Compound 2x Oil | Explosives Station 3 |
| Bobcat | Weapon | 3x Advanced Mechanical Components 3x Light Gun Parts | Gunsmith 3 |
| Osprey | Weapon | 2x Advanced Mechanical Components 3x Medium Gun Parts 7x Wires | Gunsmith 3 |
| Burletta | Weapon | 3x Mechanical Components 3x Simple Gun Parts | Gunsmith 1 |
| Compensator II | Mod | 2x Mechanical Components 4x Wires | Gunsmith 2 |
| Compensator III | Mod | 2x Mod Components 8x Wires | Gunsmith 3 |
| Defibrillator | Quick Use | 9x Plastic Parts 1x Moss | Medical Lab 2 |
| ??? | ??? | ??? | ??? |
| Equalizer | Weapon | 3x Magnetic Accelerator 3x Complex Gun Parts 1x Queen Reactor | Gunsmith 3 |
| Extended Barrel | Mod | 2x Mod Components 8x Wires | Gunsmith 3 |
| Extended Light Mag II | Mod | 2x Mechanical Components 3x Steel Spring | Gunsmith 2 |
| Extended Light Mag III | Mod | 2x Mod Components 5x Steel Spring | Gunsmith 3 |
| Extended Medium Mag II | Mod | 2x Mechanical Components 3x Steel Spring | Gunsmith 2 |
| Extended Medium Mag III | Mod | 2x Mod Components 5x Steel Spring | Gunsmith 3 |
| Extended Shotgun Mag II | Mod | 2x Mechanical Components 3x Steel Spring | Gunsmith 2 |
| Extended Shotgun Mag III | Mod | 2x Mod Components 5x Steel Spring | Gunsmith 3 |
| Remote Raider Flare | Quick Use | 2x Chemicals 4x Rubber Parts | Utility Station 1 |
| Heavy Gun Parts | Material | 4x Simple Gun Parts | Refiner 2 |
| Venator | Weapon | 2x Advanced Mechanical Components 3x Medium Gun Parts 5x Magnet | Gunsmith 3 |
| Il Toro | Weapon | 5x Mechanical Components 6x Simple Gun Parts | Gunsmith 1 |
| Jolt Mine | Mine | 1x Electrical Components 1x Battery | Explosives Station 2 |
| Explosive Mine | Mine | 1x Explosive Compound 1x Sensors | Explosives Station 3 |
| Jupiter | Weapon | 3x Magnetic Accelerator 3x Complex Gun Parts 1x Queen Reactor | Gunsmith 3 |
| Light Gun Parts | Material | 4x Simple Gun Parts | Refiner 2 |
| Lightweight Stock | Mod | 2x Mod Components 5x Duct Tape | Gunsmith 3 |
| Lure Grenade | Grenade | 1x Speaker Component 1x Electrical Components | Utility Station 2 |
| Medium Gun Parts | Material | 4x Simple Gun Parts | Refiner 2 |
| Torrente | Weapon | 2x Advanced Mechanical Components 3x Medium Gun Parts 6x Steel Spring | Gunsmith 3 |
| Muzzle Brake II | Mod | 2x Mechanical Components 4x Wires | Gunsmith 2 |
| Muzzle Brake III | Mod | 2x Mod Components 8x Wires | Gunsmith 3 |
| Padded Stock | Mod | 2x Mod Components 5x Duct Tape | Gunsmith 3 |
| Shotgun Choke II | Mod | 2x Mechanical Components 4x Wires | Gunsmith 2 |
| Shotgun Choke III | Mod | 2x Mod Components 8x Wires | Gunsmith 3 |
| Shotgun Silencer | Mod | 2x Mod Components 8x Wires | Gunsmith 3 |
| Showstopper | Grenade | 1x Advanced Electrical Components 1x Voltage Converter | Explosives Station 3 |
| Silencer I | Mod | 2x Mechanical Components 4x Wires | Gunsmith 2 |
| Silencer II | Mod | 2x Mod Components 8x Wires | Gunsmith 3 |
| Snap Hook | Quick Use | 2x Power Rod 3x Rope 1x Exodus Modules | Utility Station 3 |
| Stable Stock II | Mod | 2x Mechanical Components 3x Duct Tape | Gunsmith 2 |
| Stable Stock III | Mod | 2x Mod Components 5x Duct Tape | Gunsmith 3 |
| Tagging Grenade | Grenade | 1x Electrical Components 1x Sensors | Utility Station 3 |
| Tempest | Weapon | 3x Advanced Mechanical Components 3x Medium Gun Parts 3x Canister | Gunsmith 3 |
| Trigger Nade | Grenade | 2x Crude Explosives 1x Processor | Explosives Station 2 |
| Vertical Grip II | Mod | 2x Mechanical Components 3x Duct Tape | Gunsmith 2 |
| Vertical Grip III | Mod | 2x Mod Components 5x Duct Tape | Gunsmith 3 |
| Vita Shot | Quick Use | 2x Antiseptic 1x Syringe | Medical Lab 3 |
| Vita Spray | Quick Use | 3x Antiseptic 1x Canister | Medical Lab 3 |
| Vulcano | Weapon | 1x Magnetic Accelerator 3x Heavy Gun Parts 1x Exodus Modules | Gunsmith 3 |
| Wolfpack | Grenade | 2x Explosive Compound 2x Sensors | Explosives Station 3 |
| Red Light Stick | Quick Use | 3x Chemicals | Utility Station 1 |
| Smoke Grenade | Grenade | 14x Chemicals 1x Canister | Utility Station 2 |
| Deadline | Mine | 3x Explosive Compound 2x ARC Circuitry | Explosives Station 3 |
| Trailblazer | Grenade | 1x Explosive Compound 1x Synthesized Fuel | Explosives Station 3 |
| Tactical Mk. 3 (Defensive) | Augment | 2x Advanced Electrical Components 3x Processor | Gear Bench 3 |
| Tactical Mk. 3 (Healing) | Augment | 2x Advanced Electrical Components 3x Processor | Gear Bench 3 |
| Yellow Light Stick | Quick Use | 3x Chemicals | Utility Station 1 |
Note: The missing Blueprints in this list likely have not actually been added to the game at the time of writing, because none of the playerbase has managed to find any of them. As they are added to the game, I will update this page with the most relevant information so you know exactly how to get all 75 Arc Raiders Blueprints.
Where to find Blueprints in Arc Raiders
Below is a list of all containers, modifiers, and events which maximise your chances of finding Blueprints:
- Certain quests reward you with specific Blueprints .
- Completing Trials has a high chance of offering Blueprints as rewards.
- Surveyors have a decent chance of dropping Blueprints on death.
- High loot value areas tend to have a greater chance of spawning Blueprints.
- Night Raids and Storms may increase rare Blueprint spawn chances in containers.
- Containers with higher numbers of items may have a higher tendency to spawn Blueprints. As a result, Blue Gate (which has many “large” containers containing multiple items) may give you a higher chance of spawning Blueprints.
- Raider containers (Raider Caches, Weapon Boxes, Medical Bags, Grenade Tubes) have increased Blueprint drop rates. As a result, the Uncovered Caches event gives you a high chance of finding Blueprints.
- Security Lockers have a higher than average chance of containing Blueprints.
- Certain Blueprints only seem to spawn under specific circumstances: Tempest Blueprint only spawns during Night Raid events. Vulcano Blueprint only spawns during Hidden Bunker events. Jupiter and Equaliser Blueprints only spawn during Harvester events.

Raider Caches, Weapon Boxes, and other raider-oriented container types have a good chance of offering Blueprints. |Image credit:Rock Paper Shotgun/Embark Studios
Blueprints have a very low chance of spawning in any container in Arc Raiders, around 1-2% on average. However, there is a higher chance of finding Blueprints in particular container types. Specifically, you can find more Blueprints in Raider containers and security lockers.
Beyond this, if you’re looking for Blueprints you should focus on regions of the map which are marked as having particularly high-value loot. Areas such as the Control Tower in Dam Battlegrounds, the Arrival and Departure Buildings in Spaceport, and Pilgrim’s Peak in Blue Gate all have a better-than-average chance of spawning Blueprints somewhere amongst all their containers. Night Raids and Electromagnetic Storm events also increase the drop chances of certain Blueprints .
In addition to these containers, you can often loot Blueprints from destroyed Surveyors - the largest of the rolling ball ARC. Surveyors are more commonly found on the later maps - Spaceport and Blue Gate - and if one spawns in your match, you’ll likely see it by the blue laser beam that it casts into the sky while “surveying”.
Surveyors are quite well-armoured and will very speedily run away from you once it notices you, but if you can take one down then make sure you loot all its parts for a chance of obtaining certain unusual Blueprints.
Blueprints obtained from quests
One way in which you can get Blueprints is by completing certain quests for the vendors in Speranza. Some quests will reward you with a specific item Blueprint upon completion, so as long as you work through all the quests in Arc Raiders, you are guaranteed those Blueprints.
Here is the full list of all Blueprints you can get from quest rewards:
- Trigger Nade Blueprint: Rewarded after completing “Sparks Fly”.
- Lure Grenade Blueprint: Rewarded after completing “Greasing Her Palms”.
- Burletta Blueprint: Rewarded after completing “Industrial Espionage”.
- Hullcracker Blueprint (and Launcher Ammo Blueprint): Rewarded after completing “The Major’s Footlocker”.
Alas, that’s only 4 Blueprints out of a total of 75 to unlock, so for the vast majority you will need to find them yourself during a raid. If you’re intent on farming Blueprints, then it’s best to equip yourself with cheap gear in case you lose it, but don’t use a free loadout because then you won’t get a safe pocket to stash any new Blueprint you find. No pain in Arc Raiders is sharper than failing to extract with a new Blueprint you’ve been after for a dozen hours already.

One of the best ways to get Blueprints is by hitting three stars on all five Trials every week. |Image credit:Rock Paper Shotgun/Embark Studios
Blueprints obtained from Trials
One of the very best ways to get Blueprints is as rewards for completing Trials in Arc Raiders. Trials are unlocked from Level 15 onwards, and allow you to earn rewards by focusing on certain tasks over the course of several raids. For example, one Trial might task you with dealing damage to Hornets, while another might challenge you to loot Supply Drops.
Trials refresh on a weekly basis, with a new week bringing five new Trials. Each Trial can offer up to three rewards after passing certain score milestones, and it’s possible to receive very high level loot from these reward crates - including Blueprints. So if you want to unlock as many Blueprints as possible, you should make a point of completing as many Trials as possible each week.
Best Blueprint farming locations
The very best way to get Blueprints is to frequent specific areas of the maps which combine high-tier loot pools with the right types of containers to search. Here are my recommendations for where to find Blueprints on every map, so you can always keep the search going for new crafting recipes to unlock.

Image credit:Rock Paper Shotgun/Embark Studios
Dam Battlegrounds
The best places to farm Blueprints on Dam Battlegrounds are the Control Tower, Power Generation Complex, Ruby Residence, and Pale Apartments . The first two regions, despite only being marked on the map as mid-tier loot, contain a phenomenal number of containers to loot. The Control Tower can also contain a couple of high-tier Security Lockers - though of course, you’ll need to have unlocked the Security Breach skill at the end of the Survival tree.
There’s also a lot of reporting amongst the playerbase that the Residential areas in the top-left of the map - Pale Apartments and Ruby Residence - give you a comparatively strong chance of finding Blueprints. Considering their size, there’s a high density of containers to loot in both locations, and they also have the benefit of being fairly out of the way. So you’re more likely to have all the containers to yourself.
Buried City
The best Blueprint farming locations on Buried City are the Santa Maria Houses, Grandioso Apartments, Town Hall, and the various buildings of the New District . Grandioso Apartments has a lower number of containers than the rest, but a high chance of spawning weapon cases - which have good Blueprint drop rates. The others are high-tier loot areas, with plenty of lootable containers - including Security Lockers.
Spaceport
The best places to find Blueprints on Spaceport are the Arrival and Departure Buildings, as well as Control Tower A6 and the Launch Towers . All these areas are labelled as high-value loot regions, and many of them are also very handily connected to one another by the Spaceport wall, which you can use to quickly run from one area to the next. At the tops of most of these buildings you’ll find at least one Security Locker, so this is an excellent farming route for players looking to find Blueprints.
The downside to looting Blueprints on Spaceport is that all these areas are hotly contested, particularly in Duos and Squads. You’ll need to be very focused and fast in order to complete the full farming route.

Image credit:Rock Paper Shotgun/Embark Studios
Blue Gate
Blue Gate tends to have a good chance of dropping Blueprints, potentially because it generally has a high number of containers which can hold lots of items; so there’s a higher chance of a Blueprint spawning in each container. In my experience, the best Blueprint farming spots on Blue Gate are Pilgrim’s Peak, Raider’s Refuge, the Ancient Fort, and the Underground Complex beneath the Warehouse .
All of these areas contain a wealth of containers to loot. Raider’s Refuge has less to loot, but the majority of the containers in and around the Refuge are raider containers, which have a high chance of containing Blueprints - particularly during major events.
Stella Montis
On the whole, Stella Montis seems to have a very low drop rate for Blueprints (though a high chance of dropping other high-tier loot). If you do want to try farming Blueprints on this map, the best places to find Blueprints in Stella Montis are Medical Research, Assembly Workshop, and the Business Center . These areas have the highest density of containers to loot on the map.
In addition to this, the Western Tunnel has a few different Security Lockers to loot, so while there’s very little to loot elsewhere in this area of the map, it’s worth hitting those Security Lockers if you spawn there at the start of a match.
That wraps up this primer on how to get all the Blueprints in Arc Raiders as quickly as possible. With the Expedition system constantly resetting a large number of players’ Blueprints, it’s more important than ever to have the most up-to-date information on where to find all these Blueprints.
While you’re here, be sure to check out our Arc Raiders best guns tier list , as well as our primers on the best skills to unlock and all the different Field Depot locations on every map.

ARC Raiders
PS5 , Xbox Series X/S , PC
Rock Paper Shotgun is better when you sign in
Sign in and join us on our journey to discover strange and compelling PC games.
