How to unlock every Spell in Black Myth Wukong
Get every Mysticism, Alteration, Strand, and Transformation Spell in the game
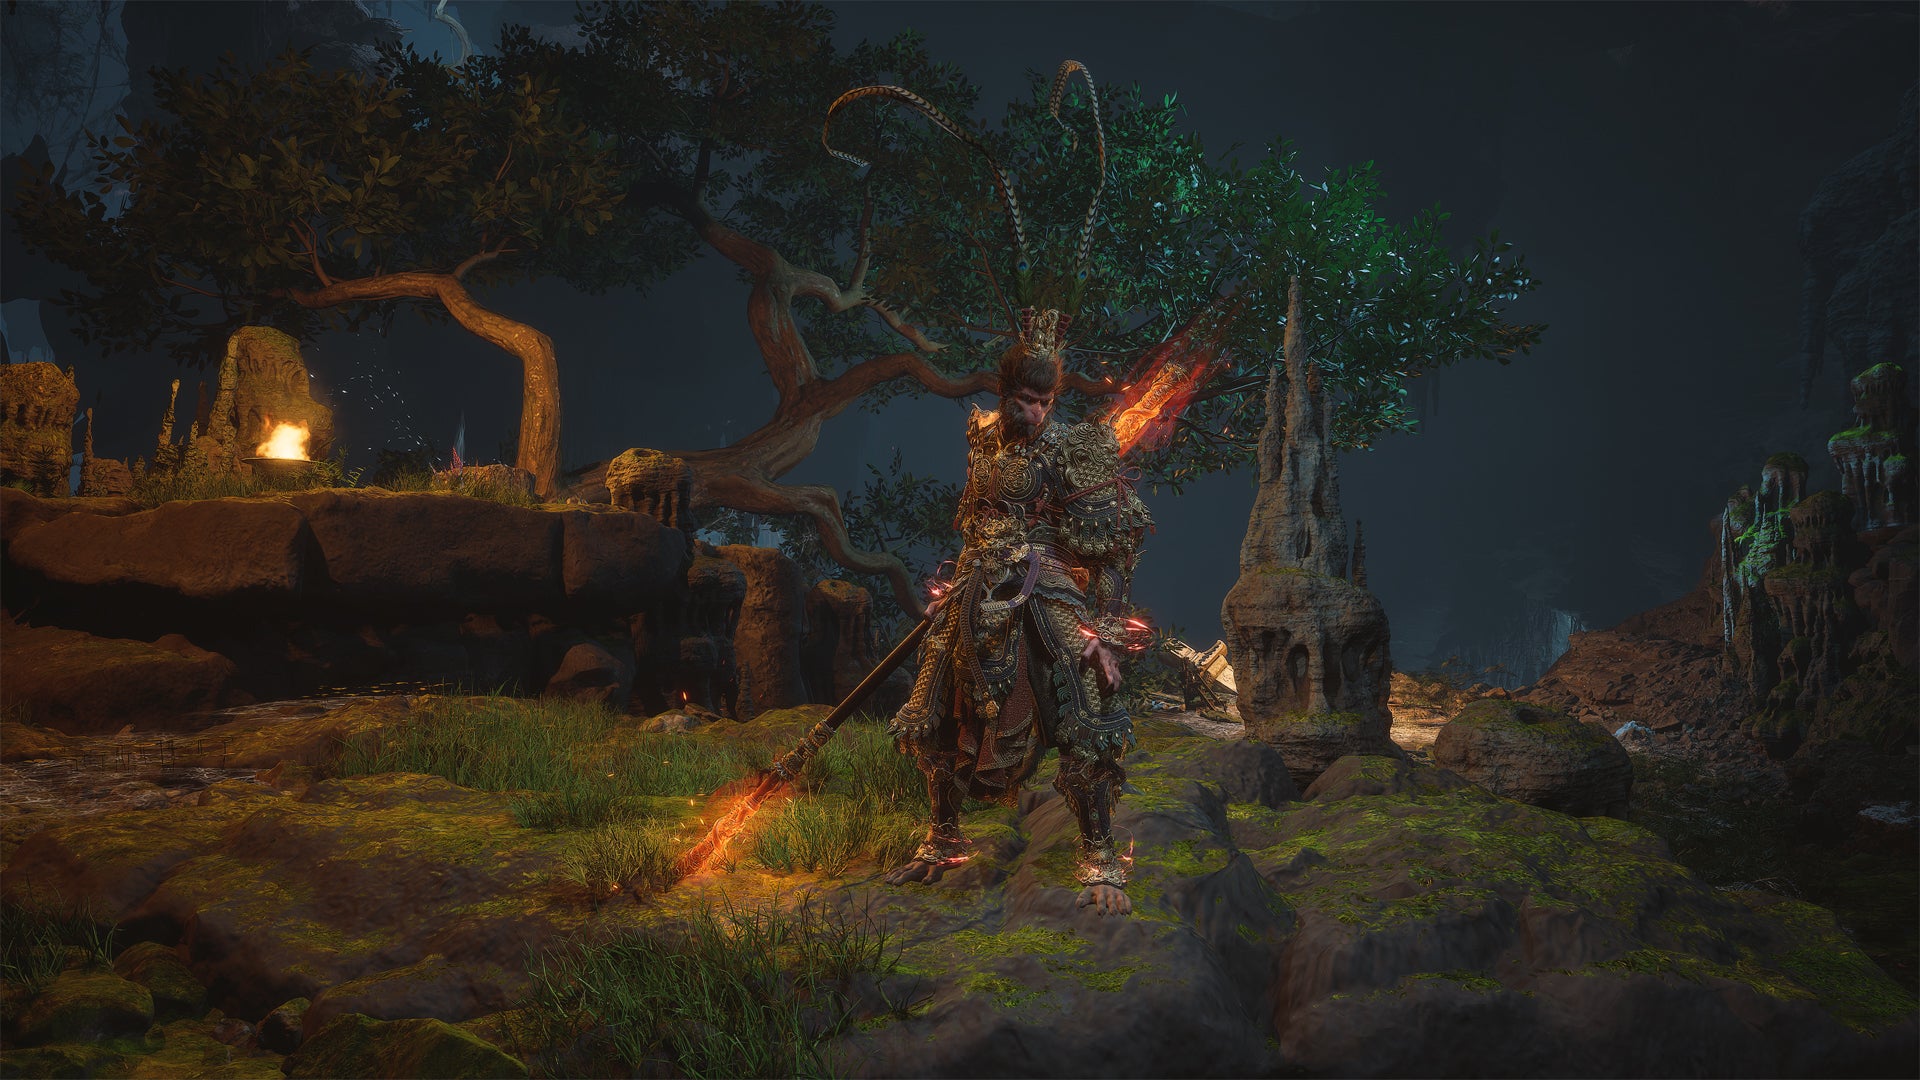
Image credit:Rock Paper Shotgun/Game Science

Want to unlock every Spell in Black Myth Wukong? Whether they’re used to immobilize the enemy, spawn duplicates, or transform into a Guai warrior, Spells form an unmissable part of Black Myth: Wukong ’s combat system. If you obtain them all, you can find the perfect Spell combination to suit your playstyle.
Of course, some Spells are more useful than others. If you don’t want to collect them all, we can point you to the best Spells in the game. You might want to combine them with the best Skills - and grab some extra Sparks from meditation spots to upgrade their skill trees.
Whether you’re looking for a specific Spell or intend to collect all of them, here’s how to unlock every Spell in Black Myth: Wukong.
Mysticism Spells
There are three Mysticism Spells in Black Myth: Wukong. Before we show you how to obtain them, here’s what they do:
- Immobilize : Binds the enemy in place.
- Ring of Fire : Draws a ring on the ground. The ring can enhance healing and provide buffs.
- Spell Binder : Enhances attack and critical rate but disables Spells, Vessels, Transformations, and Soul Skills.
How to obtain Immobilize
The Immobilize Spell is unlocked upon defeating the Bullguard boss in Chapter 1. He’ll be waiting for you on the main path, not far from the “Front Hills” Shrine (the first Shrine in the game). You can’t miss this one.
How to obtain Ring of Fire
The Ring of Fire Spell is obtained by defeating the Macaque Chief in Chapter 3. You will first encounter him on the Snowhill Path, near the “Frost-Clad Path” Keeper’s Shrine . The Macaque Chief flees the scene upon his defeat, but you’ll find him again after unlocking the “Warding Temple” Shrine. Once the second fight has ended, you’ll receive the Ring of Fire.
How to obtain Spell Binder
Unlike the previous Mysticism Spells, the Spell Binder ability is easy to miss. It’s unlocked upon defeating the Green-Capped Martialist boss in Chapter 3, but you’ll need to complete the full treasure hunter questline to reach this boss. Here’s how to do so:
Go to the “North Shore of the Bitter Lake” Keeper’s Shrine in the Bitter Lake area. If you turn your back to the Shrine, you can see a path along the shoreline to your right; follow this path until you see an NPC threatened by some enemies in front of you.

Follow the snowy path and rescue the treasure hunter. |Image credit:Rock Paper Shotgun/Game Science
Knock down the enemies and speak with the NPC, who turns out to be the treasure hunter. Make sure you’ve exhausted his dialogue, then find him again near the “Towers of Karma” Shrine in the Valley of Ecstasy. He’s sitting on the right side of the path ahead of the Shrine (you can follow his voice - he’ll be complaining about the cold).
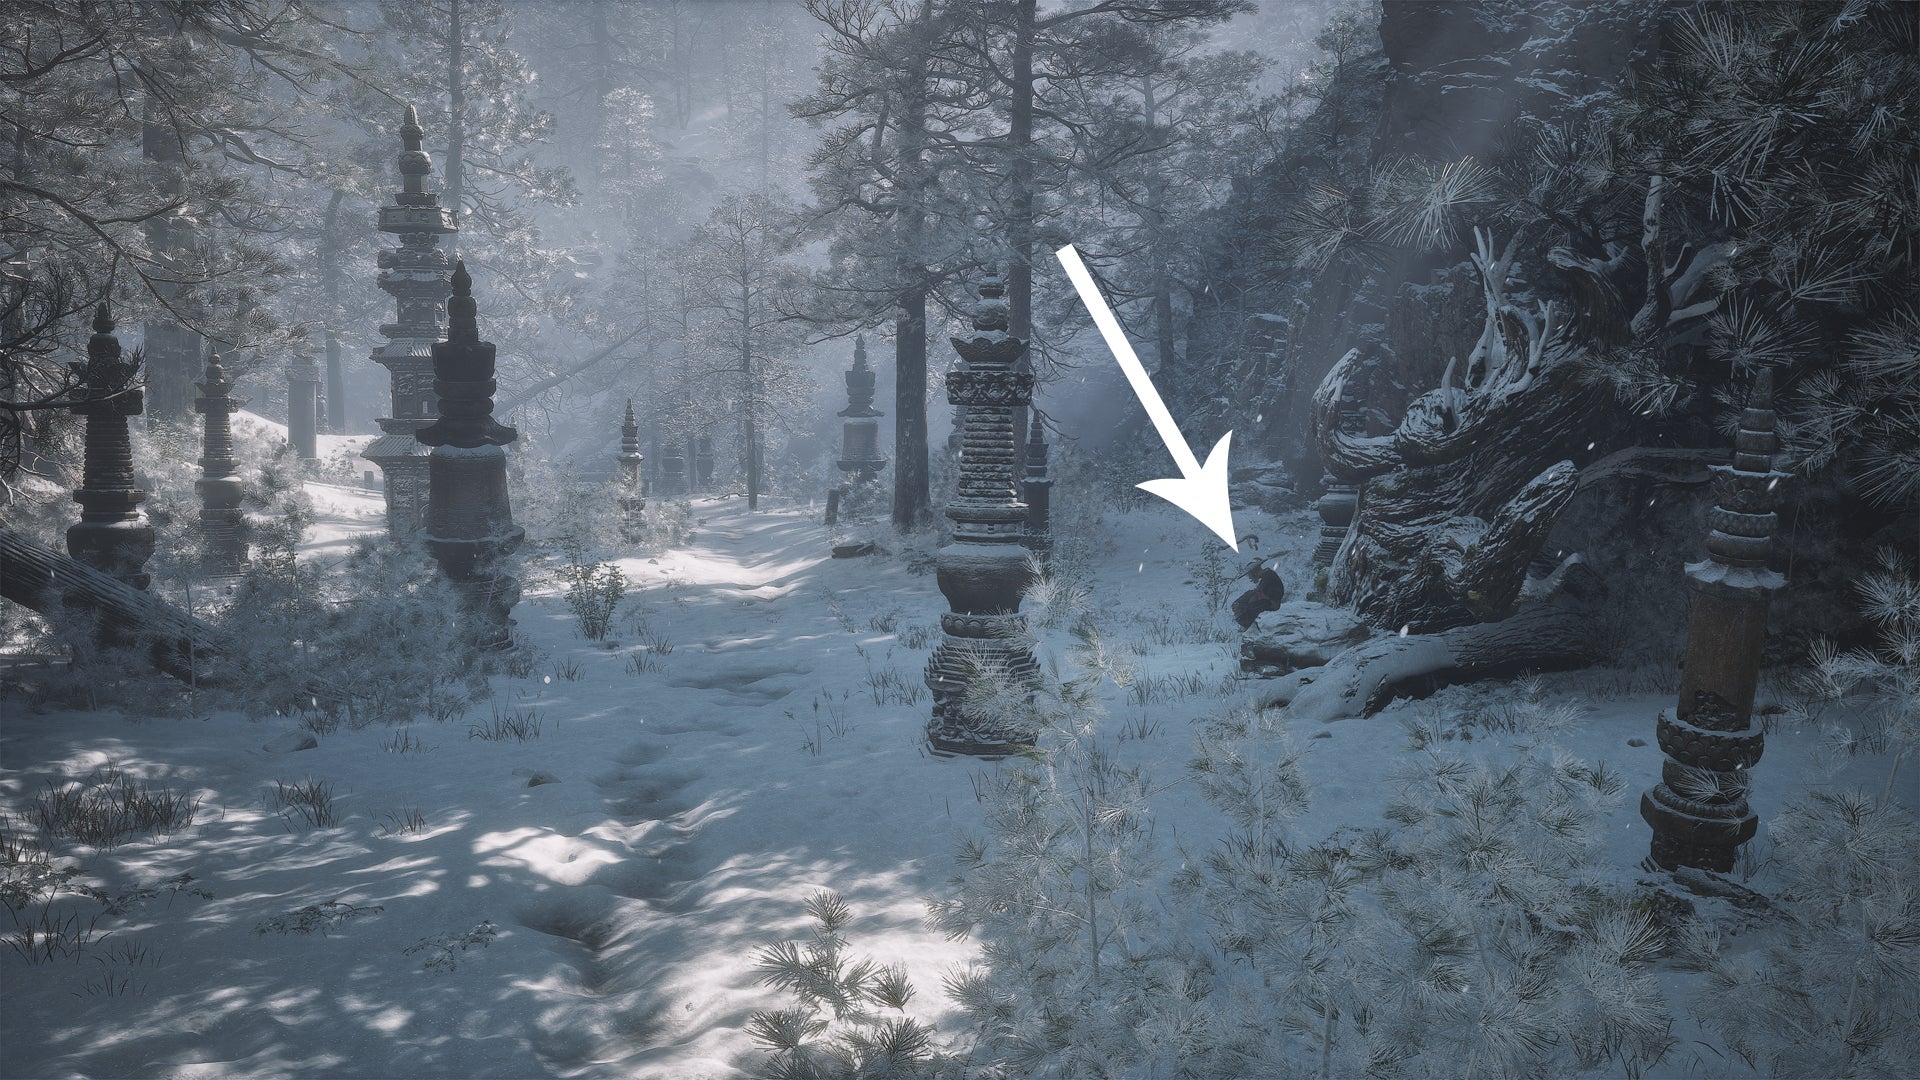
The treasure hunter is waiting in the Valley of Ecstasy. |Image credit:Rock Paper Shotgun/Game Science
Equip the Ring of Fire spell and use it in front of the treasure hunter, then talk to him again.
Next, fast-travel to the “Forest of Felicity” Shrine and walk down the hill to your right (turn right before passing through the shrine gate with the dead monk). When you find the road below, turn left and stick to the left. After crossing the small lake, drop down the ledge behind the frozen monks.
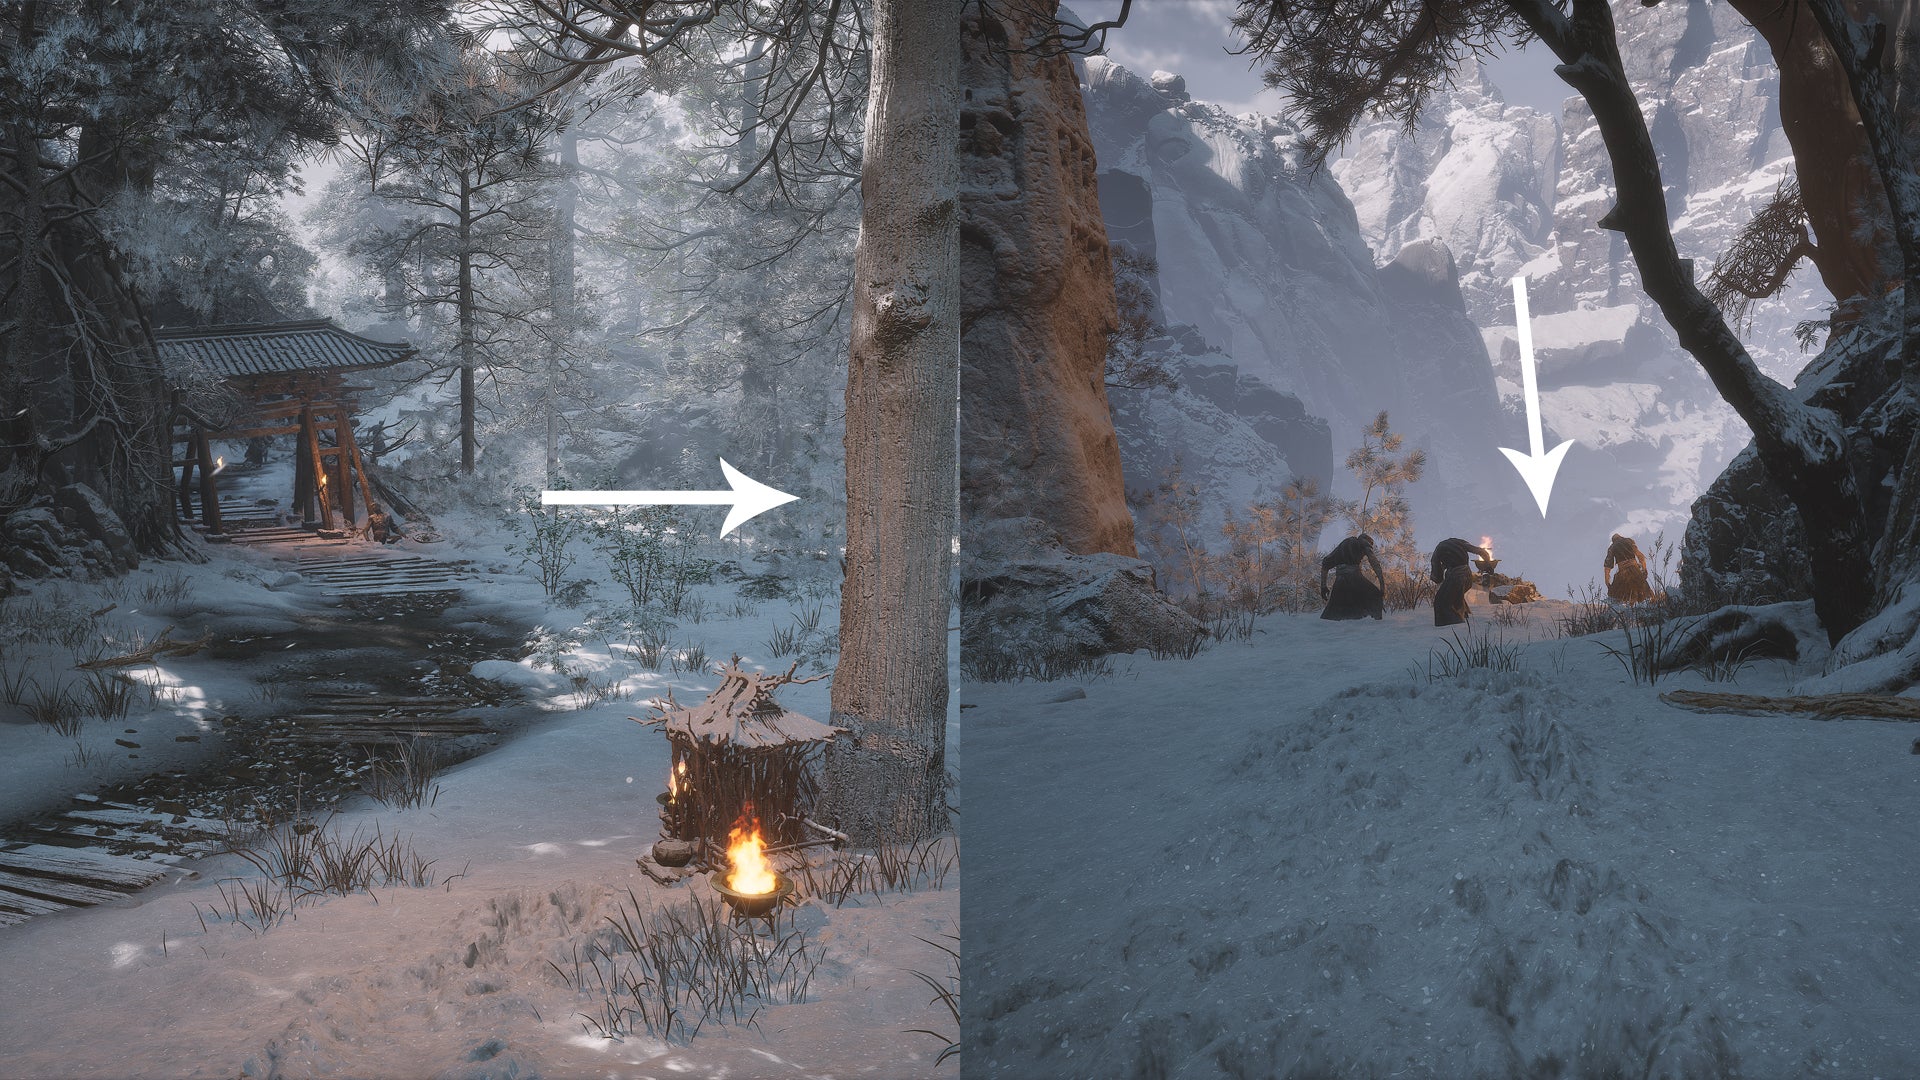
Go off-road and drop down the ledge to reach the Melon Field. |Image credit:Rock Paper Shotgun/Game Science
Keep going down until you reach the “Melon Field” Shrine. Next to this Shrine, you’ll find the Green-Capped Martialist ’s boss arena; defeat this boss to complete the treasure hunter’s side quest and obtain the Spell Binder ability.
Alteration Spells
Black Myth: Wukong has two Alteration Spells: Rock Solid and Cloud Step. Here’s what they do:
- Cloud Step : Disperse into mist as you leave a decoy behind.
- Rock Solid : Transform into a rock. When cast before an incoming attack, deflects the damage.
How to obtain Cloud Step
To obtain Cloud Step, you must defeat the Black Wind King in Chapter 1. He’s located in the Black Wind Cave, just beyond the “Cave Interior” Shrine. This is on the main route, so you can’t miss it.
How to obtain Rock Solid
To obtain Rock Solid, you must defeat the Tiger Vanguard boss in Chapter 2. You’ll find this boss in the Crouching Tiger Temple, behind the “Temple Entrance” Shrine. Just walk up the stairs and you’ll see the boss arena ahead of you.

This way to the Tiger Vanguard boss and the Rock Solid Spell. |Image credit:Rock Paper Shotgun/Game Science
Strand Spells
There are only two Strand Spells in Black Myth Wukong: Pluck of Many and Life Saving Strand - the last of which is particularly hard to obtain. In short, here’s what to expect from these Spells:
- A Pluck of Many : Summons at least four duplicates to the battlefield to fight alongside you.
- Life-Saving Strand : Every 10 minutes, you can revive at your current location instead of a Shrine.
How to obtain A Pluck of Many
A Pluck of Many is automatically unlocked upon reaching the “Cellar” Shrine below the Crouching Tiger Temple in Chapter 2. There are two ways to reach this Spell location; firstly, you can defeat the Tiger Vanguard in the Crouching Tiger Temple (same boss who dropped Rock Solid) as well as the Stone Vanguard boss near the “Rockrest Flat” Shrine on Fright Cliff. The items dropped by these bosses allow you to activate the statue in the Tiger Vanguard’s arena, which opens a door to the Cellar below (down the bloodied mouth).
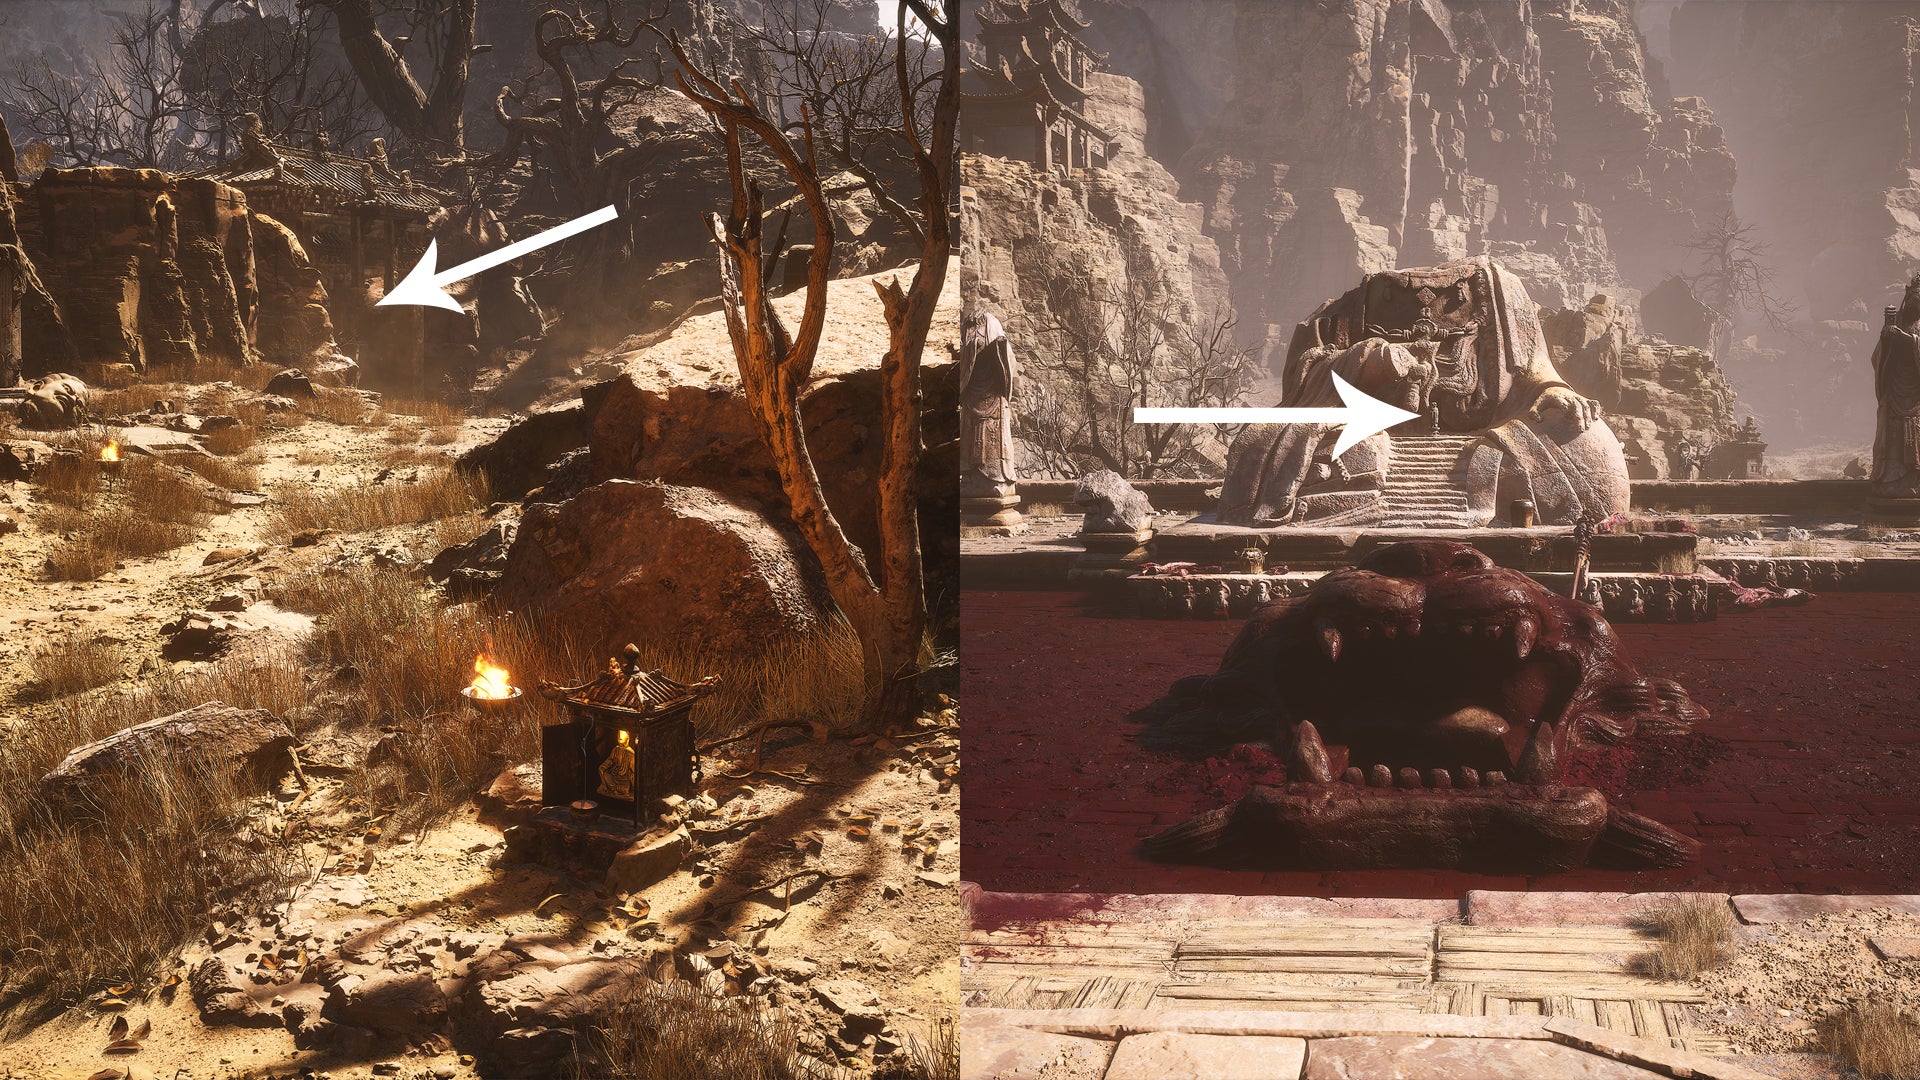
The gate on the left leads to the Stone Vanguard boss. Take the boss’s drop to the statue in the Tiger Vanguard’s arena to unlock the Cellar. |Image credit:Rock Paper Shotgun/Game Science
Alternatively, you can just defeat the Stone Vanguard and follow the path behind the boss arena. While walking away from the “Rock Clash Platform” Shrine, take the path to the right, and when you seemingly hit a dead end, drop down the sandy slope to your left. When you see the “Windseal Gate” Shrine ahead of you, turn right and go through the large doors. The Cellar Shrine and the Pluck of Many Spell are on the other side of the valley.
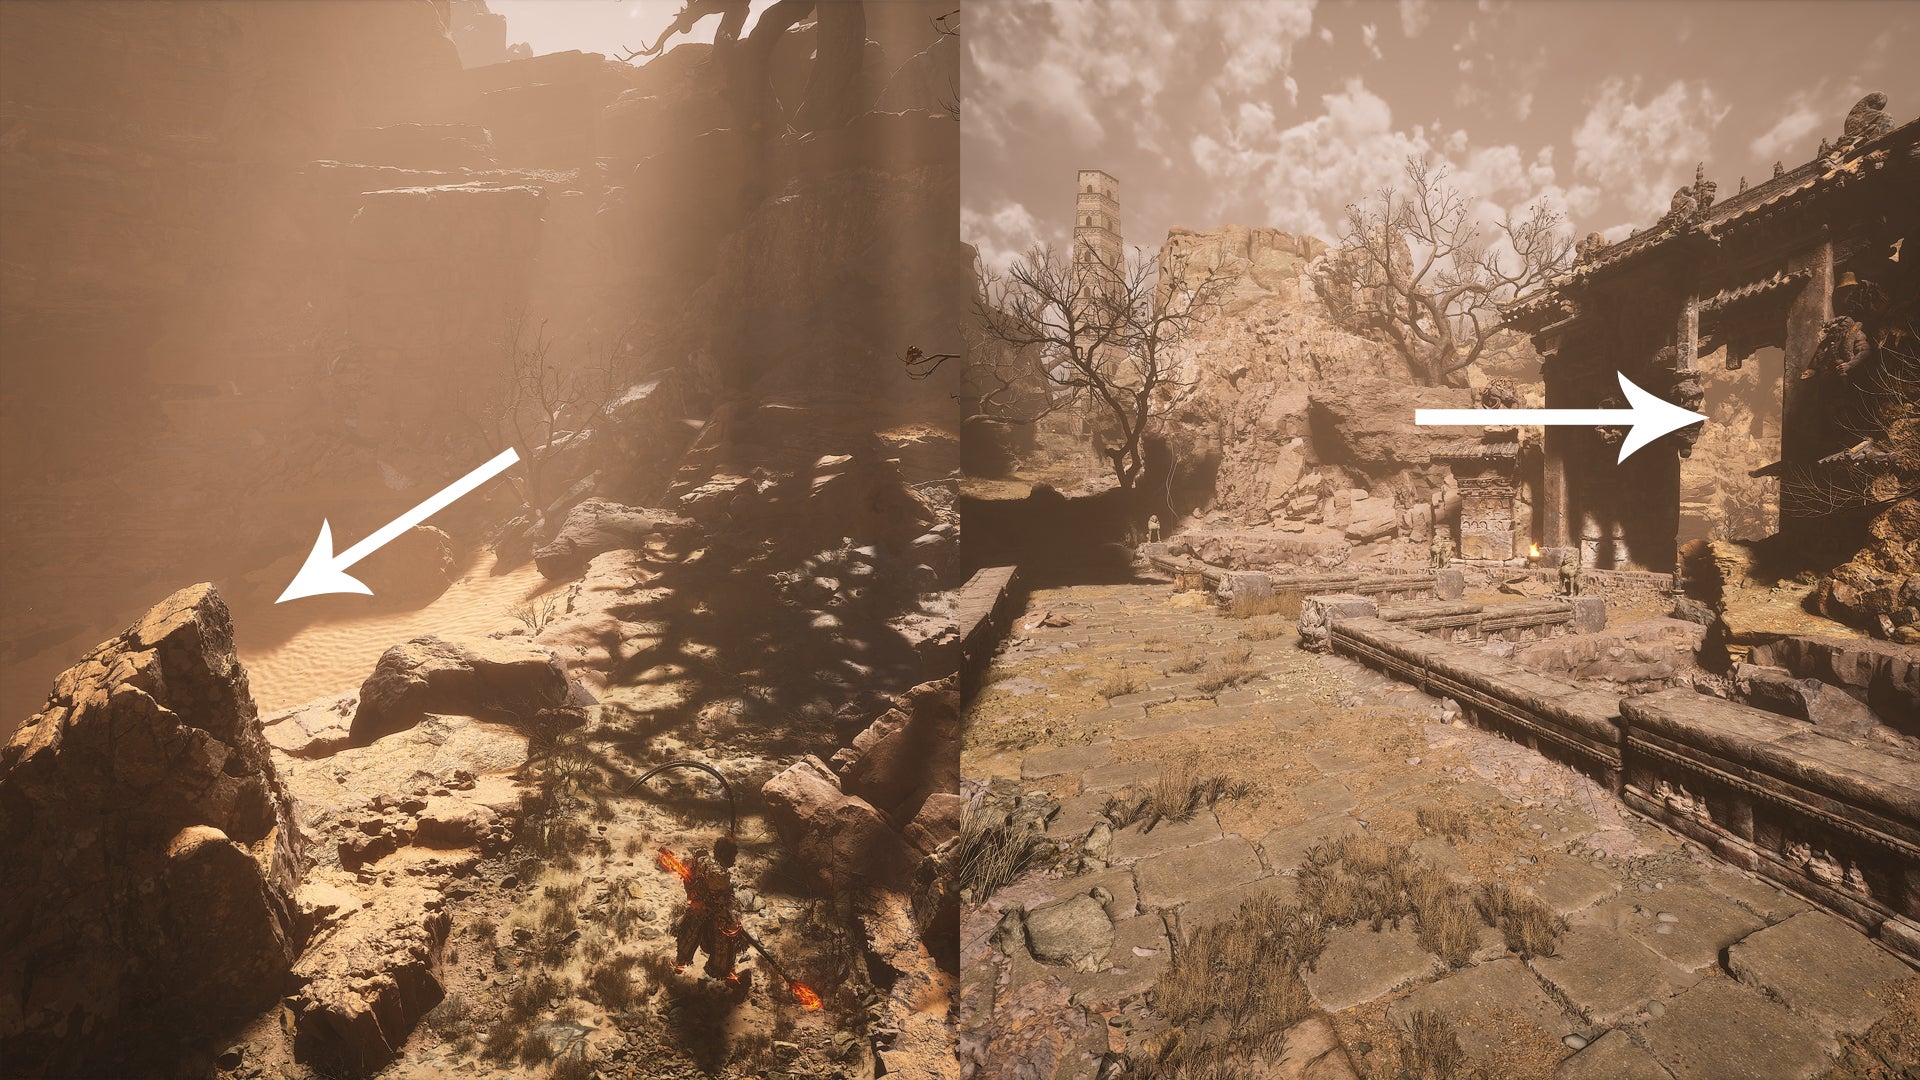
Drop down the slope behind the Stone Vanguard’s arena and enter the doorway on your right. |Image credit:Rock Paper Shotgun/Game Science
How to obtain Life-Saving Strand
The second Strand Spell, Life-Saving Strand, is much harder to obtain as you need to complete a full Black Myth Wukong playthrough and start a New Game Plus . It’s automatically unlocked at the start of this second playthrough though, no extra steps required.
Transformation Spells
Compared to the previous Spell types, there are far more Transformation Spells to be found in Black myth Wukong. Here’s an overview of every Transformation Spell:
- Red Tides : Wolf Guai Transformation. Inflicts Scorch Bane on the enemy.
- Azure Dust : Rock Guai Transformation. Is immune to all Four Banes and builds Might upon being hit.
- Ashen Slumber : Rat Guai Transformation. Inflicts Scorch Bane, builds Focus, and can cause a massive explosion.
- Ebon Flow : Yin Tiger Transformation. Has strong Focus-based attacks.
- Hoarfrost : Monk from the Sea Transformation. Inflicts Frost Bane.
- Umbral Abyss : Macaque Chief Transformation. Is immune to Frost but can inflict Frost Bane.
- Golden Lining : Yellow Loong Transformation. Gain immunity to Shock and the ability to see through enemy attacks. Successful hits inflict Thunder Bane.
- Violet Hail : Worm Guai Transformation. Is immune to Poison but can inflict Poison Bane.
- Dark Thunder : Horse Guai Transformation. Is immune to Thunder but can inflict Thunder Bane.
- Azure Dome : Stone Monkey Transformation. Has immunity to Shock and Poison and converts Frost and Scorch into a damage buff. Can use other Spells.
How to obtain Red Tides
This Transformation is dropped by one of the earliest optional bosses in the game: Guangzhi . Walk in a (nearly) straight line from the “Outside the Forest” Shrine in the Forest of Wolves (passing the Wandering Wight on your right), and you’ll see his boss arena.
How to obtain Azure Dust
You must complete the Man-In-Stone questline to obtain Azure Dust. In short, you should reach Chapter 2, fight the Rat King and Second Rat Prince boss, speak with the Man-In-Stone behind the “Squall Hideout” Shrine, defeat the Mother Of Stones , and then defeat the Man-In-Stone himself. We’ve got a detailed Man-In-Stone quest walkthrough to help you out with that.
How to obtain Ashen Slumber
First, find the house with the large rock inside in Chapter 2. Starting from the “Village Entrance” Shrine, it’s on the other end of Sandgate Village. Have a chat with the person inside this rock, and be sure to exhaust all dialogue. Next, defeat the nearby two-headed rats and return to speak with the voice in the house.
Proceed through Chapter 3 until you’ve defeated Captain Void-Illusion . Afterwards, the Ashen Slumber Spell can be collected from the Rat Prince’s body in a prison cell near the “Lower Pagoda” Shrine. With your back to the Shrine, walk along the edge, past the group of petrified monks, and take the second-to-last door on your right. You can pick up a quest from the prisoner NPC here, but you don’t have to complete it to collect the Ashen Slumber.
If you don’t see the body (probably due to not killing the two-headed rats in Chapter 2), you’ll have to defeat the Third Rat Prince : starting from the “Higher Pagoda” Shrine, head inside and go left. After walking down to the lower level, you’ll find the Rat Prince ahead of you.
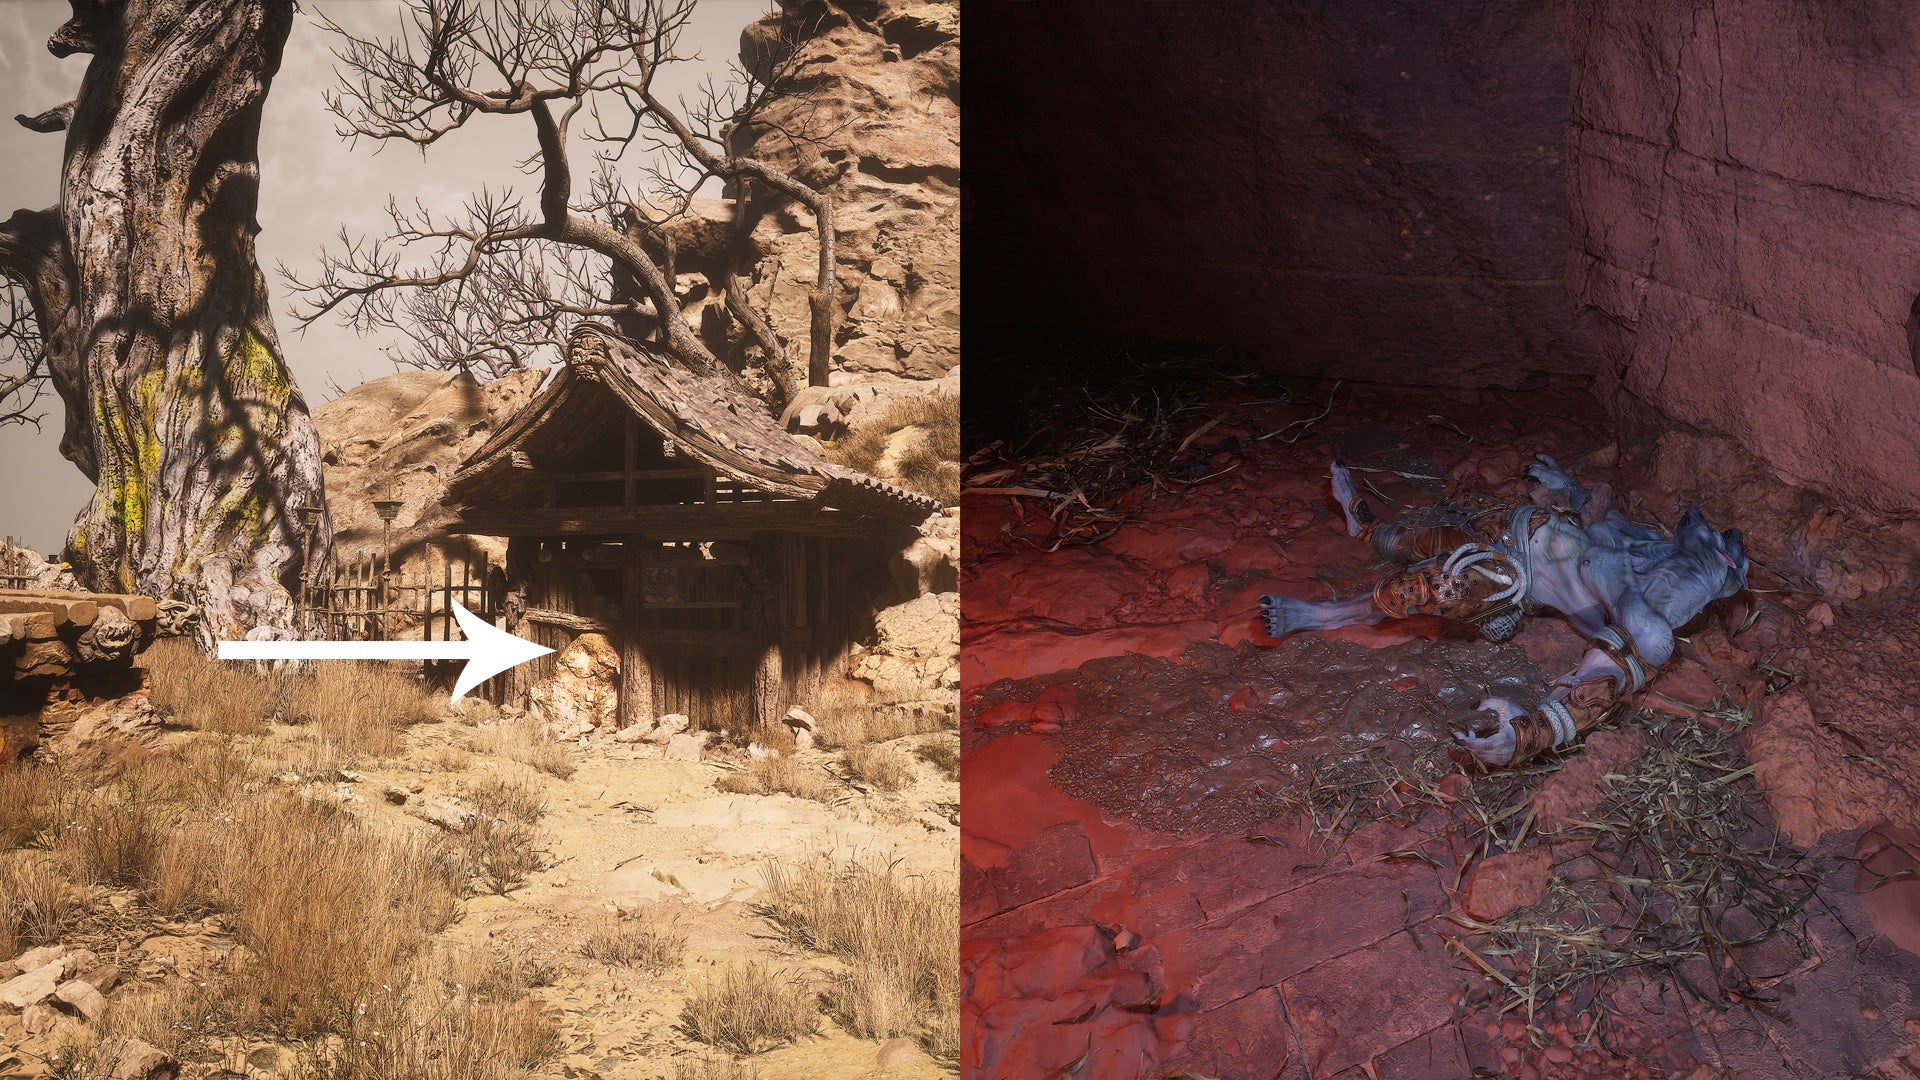
Chat with the trapped person in Chapter 2, then defeat Captain Void-Illusion to collect Ashen Slumber in a prison cell in Chapter 3. |Image credit:Rock Paper Shotgun/Game Science
How to obtain Ebon Flow
Challenge the Yin Tiger blacksmith to a duel and win the fight to obtain Ebon Flow. Yin Tiger is in the Zodiac Village; to find this place, complete Chen Loong’s questline . In short, you must find Chen Loong near the “North Shore of the Bitter Lake” Keeper’s Shrine in Chapter 3, get some pills from Xu Dog in Chapter 2 (this involves defeating Lang-Li-Guhh-Baw in that same Chapter), and return the medicine to Chen Loong.
How to obtain Hoarfrost
The Hoarfrost Spell is dropped by the Monk from the Sea boss in the New Thunderclap Temple, Chapter 3. Instead of heading into the main complex, turn your back to the “Temple Entrance” Shrine and take the doorway ahead of you. You’ll find the Monk from the Sea on the square behind the large temple building.
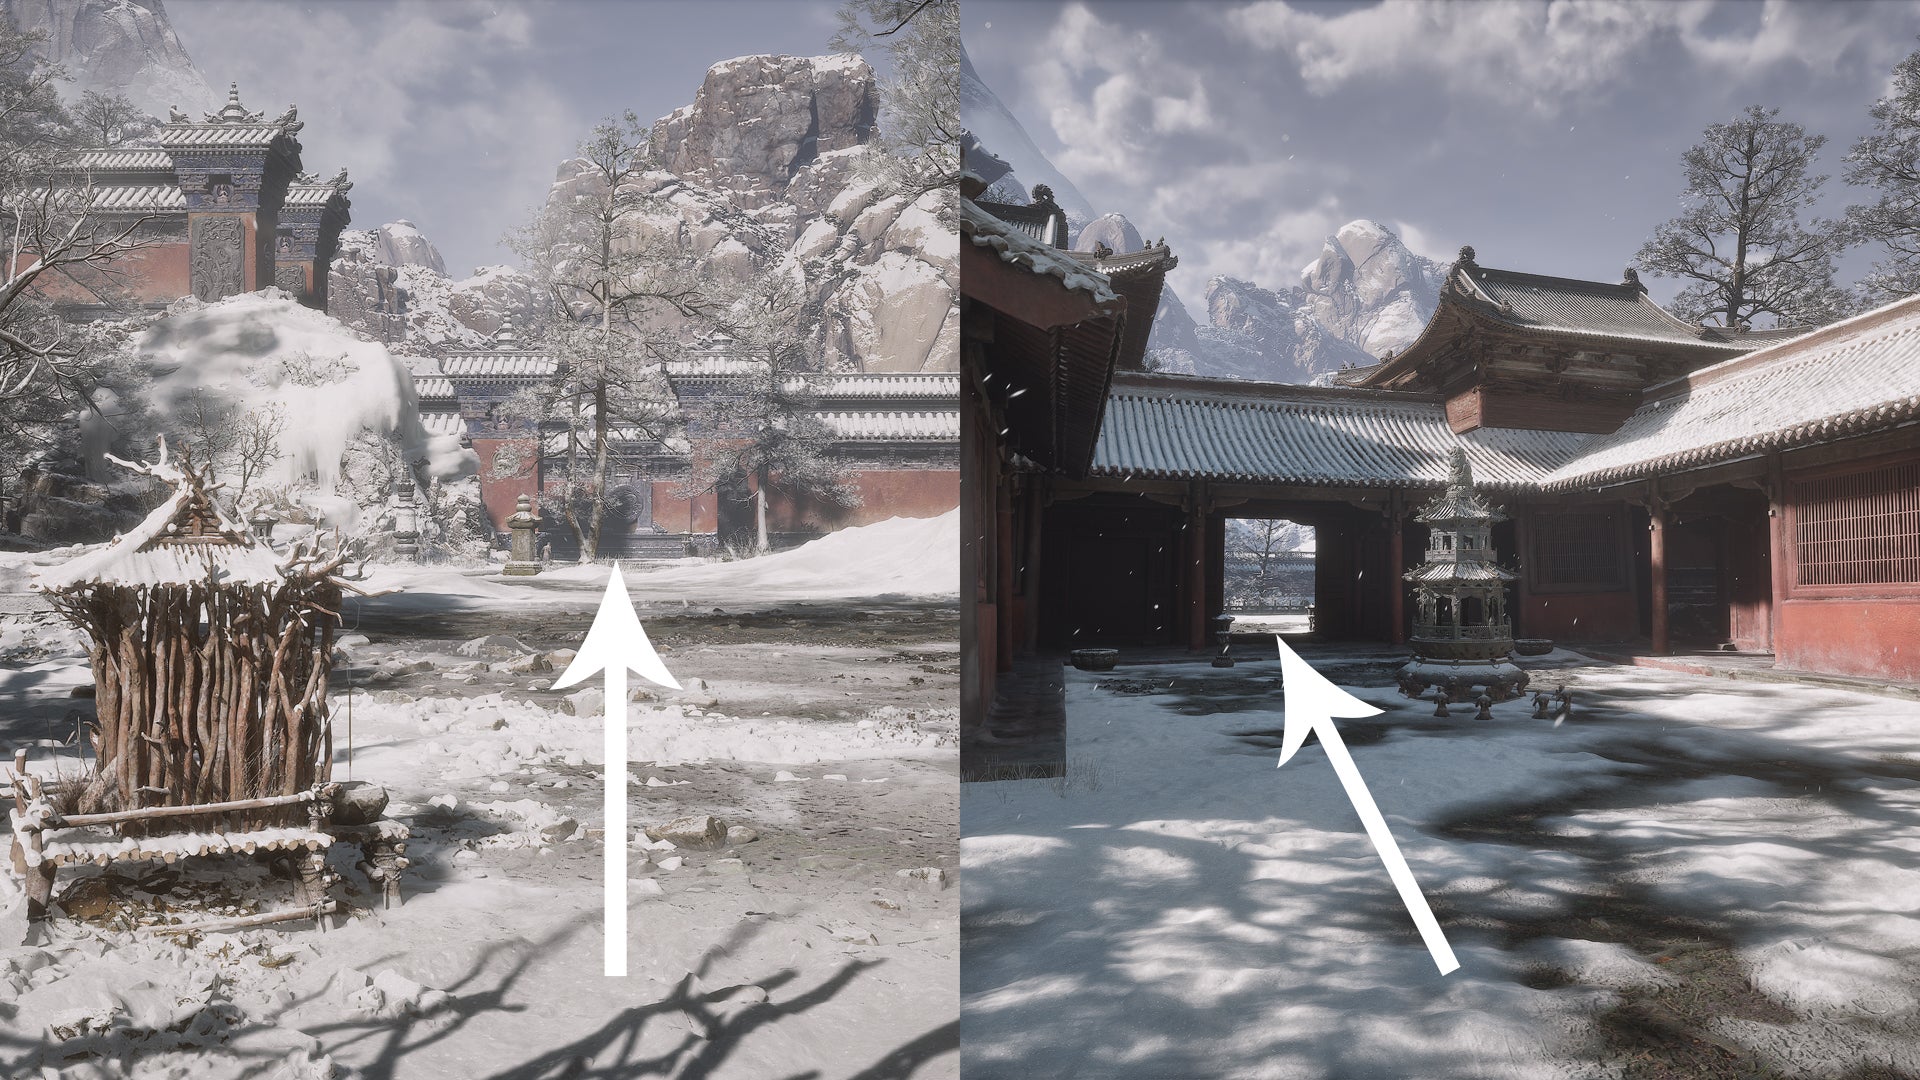
Take the correct doorway near the Temple Entrance Shrine, and you can’t miss this one. |Image credit:Rock Paper Shotgun/Game Science
How to obtain Umbral Abyss
Defeat Yellowbrow, the final boss of Chapter 3, to obtain this Transformation Spell. Can’t miss it!
How to obtain Golden Lining
Defeat Yellow Loong in Chapter 4. Beware that you must defeat all previous Loong bosses to unlock this fight. That includes Red Loong , Black Loong and Cyan Loong .
When that’s done, go to the “Relief of the Fallen Loong” Shrine in the Webbed Hollow, where you’ll find Yellow Loong. If you haven’t found that place yet, start from the Cliff of Oblivion Shrine and take the path on the left, past Buddha’s Right Hand . Go straight ahead, crossing the dragonfly bridge, and drop down. Immediately turn right and follow the path as it circles around the rock pillar. When you see a small wooden ledge on your left, drop down again.
Cross the suspension bridge, continue through the large cave room, and cross the narrow bridge between the cocoon spiders (use Cloudstep to avoid a fight). Yellow Loong is in the small pagoda in the next area.

If you haven’t been to the Relief of the Fallen loong yet, walk past Buddha’s Right Hand and cross the hanging bridge. |Image credit:Rock Paper Shotgun/Game Science
How to obtain Violet Hail
Defeat Daoist Mi in the secret area of Chapter 4: Purple Cloud Mountain. To unlock Purple Cloud Mountain, you must defeat the Venom Daoist in two locations. After the second fight, you can interact with a mural to teleport to the hidden area.
Once there, you’ll find Daoist Mi behind the “Petalfall Hamlet” Shrine, in front of a building on the left side of the path. To start the fight, exhaust his dialogue, defeat nearby yellow-robed monks until one of them drops the Violet Hail item, and speak with Daoist Mi again.

Defeat Daoist Mi in Purple Cloud Mountain. |Image credit:Rock Paper Shotgun/Game Science
How to obtain Dark Thunder
To get Dark Thunder, you must do the horse NPC’s questline, a.k.a. Ma Tianba’s quest. This means you’ll have to speak with the horse NPC in Chapters 1-4, then defeat the Keeper of Flaming Mountains boss (on the main path), and interact with a crimson cart a bit further on the way. Unfortunately, you’ll get locked out of this quest if you miss the horse’s locations before completing the Chapters.
Here’s where to find the horse:
- Chapter 1 : In a cave near the Back Hills Shrine.
- Chapter 2 : In a building in Sandgate Village, near the edge of the cliff.
- Chapter 3 : In the New Thunderclap Temple. He’s upstairs in the large building on the left side before entering Yellowbrow’s building.
- Chapter 4 : Stuck inside a massive cocoon in the Webbed Hollow. Go to “Middle Hollow”, drop down to where the cocoons are and walk straight ahead, across the large open area. On the other side, turn right and follow the path that leads slightly upwards. Stick to the left and you’ll see the cocoon ahead of you.
To find the cart with the Dark Thunder Spell in Chapter 5, go to the “Valley Entrance” Shrine in the Furnace Valley of Chapter 5 and, while facing the Shrine, take the path to the left. In the lower valley, make a U-turn to the right to find the cart, then choose “pull” to get the Spell.
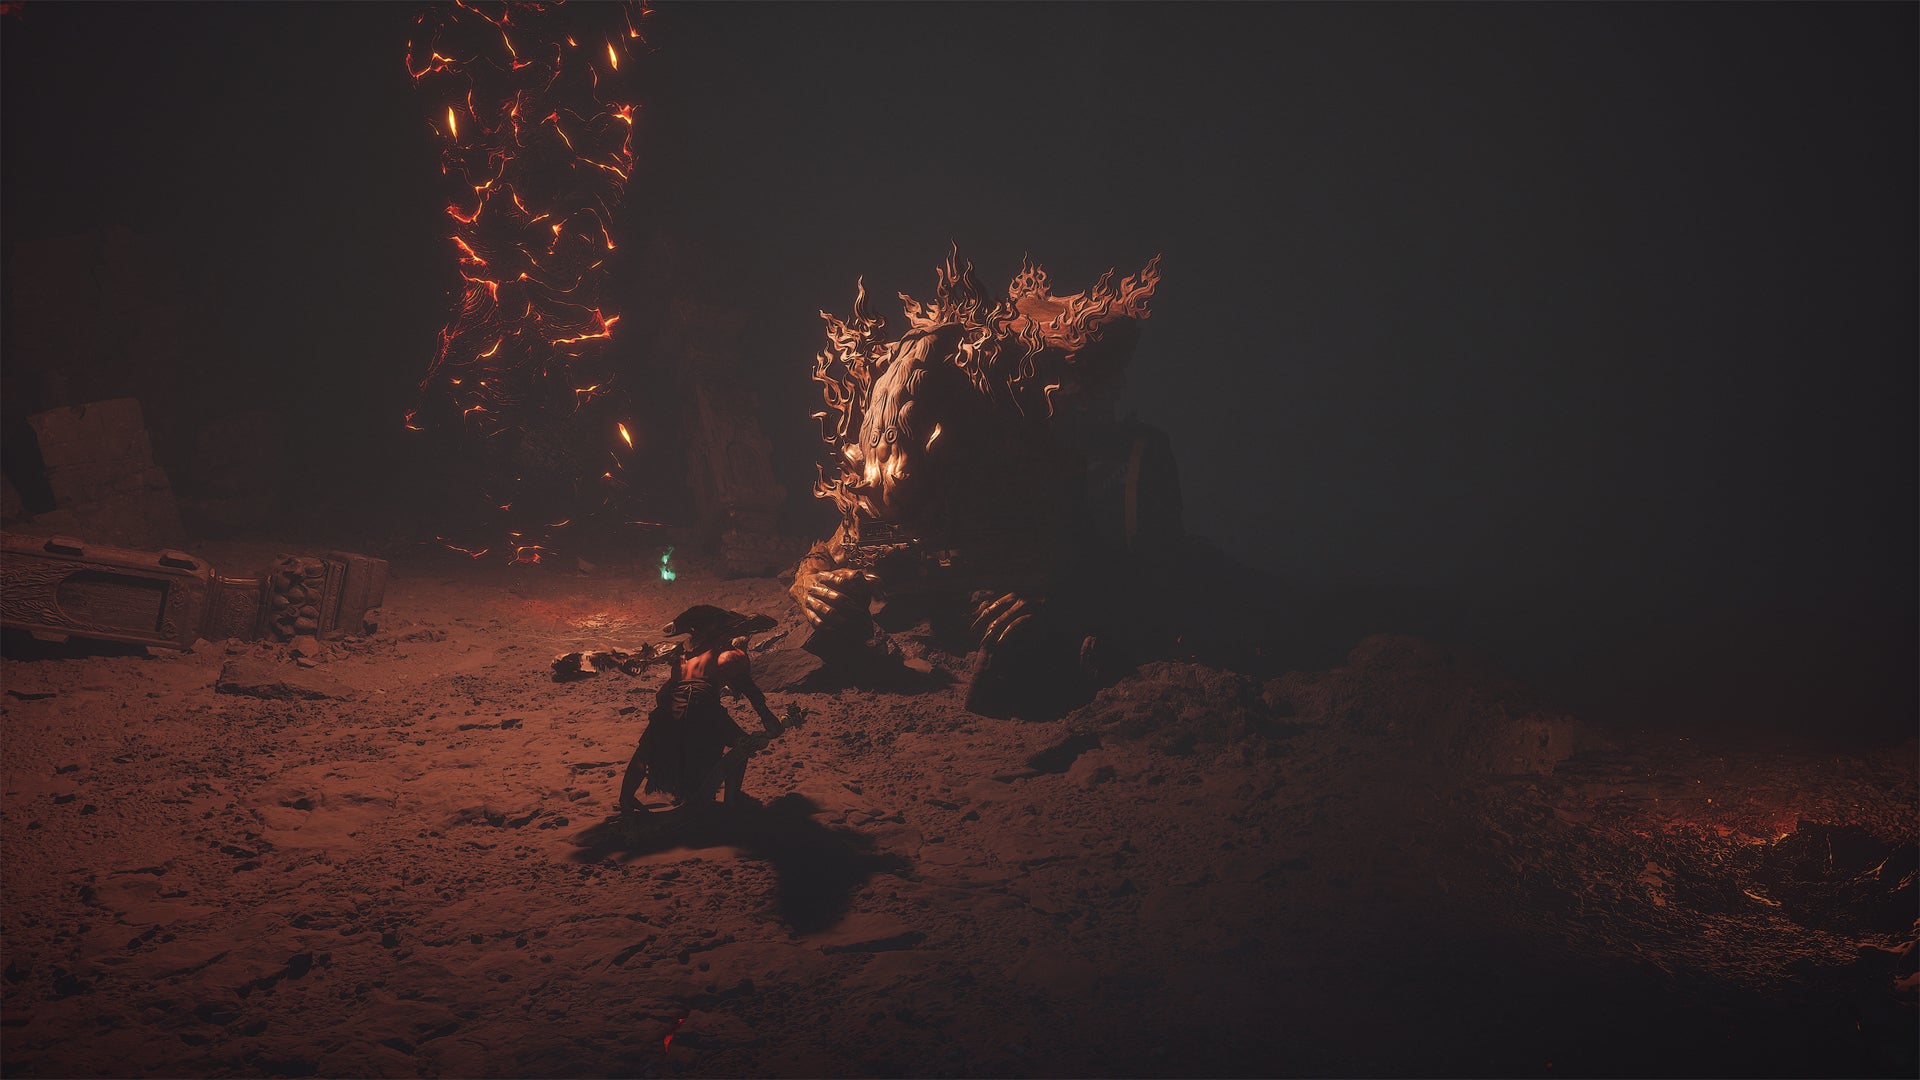
Pull the string on this cart to obtain Dark Thunder. |Image credit:Rock Paper Shotgun/Game Science
How to obtain Azure Dome
Easier said than done, but you must complete Black Myth: Wukong’s Secret Ending to obtain the Azure Dome Spell. We’ve got a full guide on how to reach the Secret Ending , but in short, you must complete the “secret” sections in each Chapter:
- Chapter 1 : Clear the Ancient Guanyin Temple secret area
- Chapter 2 : Clear the Kingdom of Sahali secret area
- Chapter 3 : Complete the treasure hunter side quest
- Chapter 4 : Clear the Purple Cloud Mountain secret area
- Chapter 5 : Clear the Bishui Cave secret area
- Defeat the secret boss: Erlang

Defeat this guy to get the Azure Dome, but be warned; he’s got some serious combat skills. |Image credit:Rock Paper Shotgun/Game Science
That’s how to unlock every Black Myth Wukong Spell. Now that you have the Spells, make sure you don’t miss out on the best Spirits . Be sure to collect the best weapons and best armour too, as you’ll need them to get the best builds in the game. For more upgrades, you might want to grab the Luojia Fragrant Vine and Awaken Wine Worms collectibles.


Black Myth: Wukong
PS5 , PC
Rock Paper Shotgun is better when you sign in
Sign in and join us on our journey to discover strange and compelling PC games.

All 75 Arc Raiders Blueprints and where to get them
These areas have the highest chance of giving you Blueprints

Image credit:Rock Paper Shotgun/Embark Studios

Looking for more Arc Raiders Blueprints? It’s a special day when you find a Blueprint, as they’re among the most valuable items in Arc Raiders. If you find a Blueprint that you haven’t already found, then you must make sure you hold onto it at all costs, because Blueprints are the key to one of the most important and powerful systems of meta-progression in the game.
This guide aims to be the very best guide on Blueprints you can find, starting with a primer on what exactly they are and how they work in Arc Raiders, before delving into exactly where to get Blueprints and the very best farming spots for you to take in your search.
We’ll also go over how to get Blueprints from other unlikely activities, such as destroying Surveyors and completing specific quests. And you’ll also find the full list of all 75 Blueprints in Arc Raiders on this page (including the newest Blueprints added with the Cold Snap update , such as the Deadline Blueprint and Firework Box Blueprint), giving you all the information you need to expand your own crafting repertoire.
In this guide:
- What are Blueprints in Arc Raiders?
- Full Blueprint list: All crafting recipes
- Where to find Blueprints in Arc Raiders Blueprints obtained from quests Blueprints obtained from Trials Best Blueprint farming locations

What are Blueprints in Arc Raiders?
Blueprints in Arc Raiders are special items which, if you manage to extract with them, you can expend to permanently unlock a new crafting recipe in your Workshop. If you manage to extract from a raid with an Anvil Blueprint, for example, you can unlock the ability to craft your very own Anvil Pistol, as many times as you like (as long as you have the crafting materials).
To use a Blueprint, simply open your Inventory while in the lobby, then right-click on the Blueprint and click “Learn And Consume” . This will permanently unlock the recipe for that item in your Workshop. As of the Stella Montis update, there are allegedly 75 different Blueprints to unlock - although only 68 are confirmed to be in the game so far. You can see all the Blueprints you’ve found and unlocked by going to the Workshop menu, and hitting “R” to bring up the Blueprint screen.
It’s possible to find duplicates of past Blueprints you’ve already unlocked. If you find these, then you can either sell them, or - if you like to play with friends - you can take it into a match and gift it to your friend so they can unlock that recipe for themselves. Another option is to keep hold of them until the time comes to donate them to the Expedition.
Full Blueprint list: All crafting recipes
Below is the full list of all the Blueprints that are currently available to find in Arc Raiders, and the crafting recipe required for each item:
| Blueprint | Type | Recipe | Crafted At |
|---|---|---|---|
| Bettina | Weapon | 3x Advanced Mechanical Components 3x Heavy Gun Parts 3x Canister | Gunsmith 3 |
| Blue Light Stick | Quick Use | 3x Chemicals | Utility Station 1 |
| Aphelion | Weapon | 3x Magnetic Accelerator 3x Complex Gun Parts 1x Matriarch Reactor | Gunsmith 3 |
| Combat Mk. 3 (Flanking) | Augment | 2x Advanced Electrical Components 3x Processor | Gear Bench 3 |
| Combat Mk. 3 (Aggressive) | Augment | 2x Advanced Electrical Components 3x Processor | Gear Bench 3 |
| Complex Gun Parts | Material | 2x Light Gun Parts 2x Medium Gun Parts 2x Heavy Gun Parts | Refiner 3 |
| Fireworks Box | Quick Use | 1x Explosive Compound 3x Pop Trigger | Explosives Station 2 |
| Gas Mine | Mine | 4x Chemicals 2x Rubber Parts | Explosives Station 1 |
| Green Light Stick | Quick Use | 3x Chemicals | Utility Station 1 |
| Pulse Mine | Mine | 1x Crude Explosives 1x Wires | Explosives Station 1 |
| Seeker Grenade | Grenade | 1x Crude Explosives 2x ARC Alloy | Explosives Station 1 |
| Looting Mk. 3 (Survivor) | Augment | 2x Advanced Electrical Components 3x Processor | Gear Bench 3 |
| Angled Grip II | Mod | 2x Mechanical Components 3x Duct Tape | Gunsmith 2 |
| Angled Grip III | Mod | 2x Mod Components 5x Duct Tape | Gunsmith 3 |
| Hullcracker | Weapon | 1x Magnetic Accelerator 3x Heavy Gun Parts 1x Exodus Modules | Gunsmith 3 |
| Launcher Ammo | Ammo | 5x Metal Parts 1x Crude Explosives | Workbench 1 |
| Anvil | Weapon | 5x Mechanical Components 5x Simple Gun Parts | Gunsmith 2 |
| Anvil Splitter | Mod | 2x Mod Components 3x Processor | Gunsmith 3 |
| ??? | ??? | ??? | ??? |
| Barricade Kit | Quick Use | 1x Mechanical Components | Utility Station 2 |
| Blaze Grenade | Grenade | 1x Explosive Compound 2x Oil | Explosives Station 3 |
| Bobcat | Weapon | 3x Advanced Mechanical Components 3x Light Gun Parts | Gunsmith 3 |
| Osprey | Weapon | 2x Advanced Mechanical Components 3x Medium Gun Parts 7x Wires | Gunsmith 3 |
| Burletta | Weapon | 3x Mechanical Components 3x Simple Gun Parts | Gunsmith 1 |
| Compensator II | Mod | 2x Mechanical Components 4x Wires | Gunsmith 2 |
| Compensator III | Mod | 2x Mod Components 8x Wires | Gunsmith 3 |
| Defibrillator | Quick Use | 9x Plastic Parts 1x Moss | Medical Lab 2 |
| ??? | ??? | ??? | ??? |
| Equalizer | Weapon | 3x Magnetic Accelerator 3x Complex Gun Parts 1x Queen Reactor | Gunsmith 3 |
| Extended Barrel | Mod | 2x Mod Components 8x Wires | Gunsmith 3 |
| Extended Light Mag II | Mod | 2x Mechanical Components 3x Steel Spring | Gunsmith 2 |
| Extended Light Mag III | Mod | 2x Mod Components 5x Steel Spring | Gunsmith 3 |
| Extended Medium Mag II | Mod | 2x Mechanical Components 3x Steel Spring | Gunsmith 2 |
| Extended Medium Mag III | Mod | 2x Mod Components 5x Steel Spring | Gunsmith 3 |
| Extended Shotgun Mag II | Mod | 2x Mechanical Components 3x Steel Spring | Gunsmith 2 |
| Extended Shotgun Mag III | Mod | 2x Mod Components 5x Steel Spring | Gunsmith 3 |
| Remote Raider Flare | Quick Use | 2x Chemicals 4x Rubber Parts | Utility Station 1 |
| Heavy Gun Parts | Material | 4x Simple Gun Parts | Refiner 2 |
| Venator | Weapon | 2x Advanced Mechanical Components 3x Medium Gun Parts 5x Magnet | Gunsmith 3 |
| Il Toro | Weapon | 5x Mechanical Components 6x Simple Gun Parts | Gunsmith 1 |
| Jolt Mine | Mine | 1x Electrical Components 1x Battery | Explosives Station 2 |
| Explosive Mine | Mine | 1x Explosive Compound 1x Sensors | Explosives Station 3 |
| Jupiter | Weapon | 3x Magnetic Accelerator 3x Complex Gun Parts 1x Queen Reactor | Gunsmith 3 |
| Light Gun Parts | Material | 4x Simple Gun Parts | Refiner 2 |
| Lightweight Stock | Mod | 2x Mod Components 5x Duct Tape | Gunsmith 3 |
| Lure Grenade | Grenade | 1x Speaker Component 1x Electrical Components | Utility Station 2 |
| Medium Gun Parts | Material | 4x Simple Gun Parts | Refiner 2 |
| Torrente | Weapon | 2x Advanced Mechanical Components 3x Medium Gun Parts 6x Steel Spring | Gunsmith 3 |
| Muzzle Brake II | Mod | 2x Mechanical Components 4x Wires | Gunsmith 2 |
| Muzzle Brake III | Mod | 2x Mod Components 8x Wires | Gunsmith 3 |
| Padded Stock | Mod | 2x Mod Components 5x Duct Tape | Gunsmith 3 |
| Shotgun Choke II | Mod | 2x Mechanical Components 4x Wires | Gunsmith 2 |
| Shotgun Choke III | Mod | 2x Mod Components 8x Wires | Gunsmith 3 |
| Shotgun Silencer | Mod | 2x Mod Components 8x Wires | Gunsmith 3 |
| Showstopper | Grenade | 1x Advanced Electrical Components 1x Voltage Converter | Explosives Station 3 |
| Silencer I | Mod | 2x Mechanical Components 4x Wires | Gunsmith 2 |
| Silencer II | Mod | 2x Mod Components 8x Wires | Gunsmith 3 |
| Snap Hook | Quick Use | 2x Power Rod 3x Rope 1x Exodus Modules | Utility Station 3 |
| Stable Stock II | Mod | 2x Mechanical Components 3x Duct Tape | Gunsmith 2 |
| Stable Stock III | Mod | 2x Mod Components 5x Duct Tape | Gunsmith 3 |
| Tagging Grenade | Grenade | 1x Electrical Components 1x Sensors | Utility Station 3 |
| Tempest | Weapon | 3x Advanced Mechanical Components 3x Medium Gun Parts 3x Canister | Gunsmith 3 |
| Trigger Nade | Grenade | 2x Crude Explosives 1x Processor | Explosives Station 2 |
| Vertical Grip II | Mod | 2x Mechanical Components 3x Duct Tape | Gunsmith 2 |
| Vertical Grip III | Mod | 2x Mod Components 5x Duct Tape | Gunsmith 3 |
| Vita Shot | Quick Use | 2x Antiseptic 1x Syringe | Medical Lab 3 |
| Vita Spray | Quick Use | 3x Antiseptic 1x Canister | Medical Lab 3 |
| Vulcano | Weapon | 1x Magnetic Accelerator 3x Heavy Gun Parts 1x Exodus Modules | Gunsmith 3 |
| Wolfpack | Grenade | 2x Explosive Compound 2x Sensors | Explosives Station 3 |
| Red Light Stick | Quick Use | 3x Chemicals | Utility Station 1 |
| Smoke Grenade | Grenade | 14x Chemicals 1x Canister | Utility Station 2 |
| Deadline | Mine | 3x Explosive Compound 2x ARC Circuitry | Explosives Station 3 |
| Trailblazer | Grenade | 1x Explosive Compound 1x Synthesized Fuel | Explosives Station 3 |
| Tactical Mk. 3 (Defensive) | Augment | 2x Advanced Electrical Components 3x Processor | Gear Bench 3 |
| Tactical Mk. 3 (Healing) | Augment | 2x Advanced Electrical Components 3x Processor | Gear Bench 3 |
| Yellow Light Stick | Quick Use | 3x Chemicals | Utility Station 1 |
Note: The missing Blueprints in this list likely have not actually been added to the game at the time of writing, because none of the playerbase has managed to find any of them. As they are added to the game, I will update this page with the most relevant information so you know exactly how to get all 75 Arc Raiders Blueprints.
Where to find Blueprints in Arc Raiders
Below is a list of all containers, modifiers, and events which maximise your chances of finding Blueprints:
- Certain quests reward you with specific Blueprints .
- Completing Trials has a high chance of offering Blueprints as rewards.
- Surveyors have a decent chance of dropping Blueprints on death.
- High loot value areas tend to have a greater chance of spawning Blueprints.
- Night Raids and Storms may increase rare Blueprint spawn chances in containers.
- Containers with higher numbers of items may have a higher tendency to spawn Blueprints. As a result, Blue Gate (which has many “large” containers containing multiple items) may give you a higher chance of spawning Blueprints.
- Raider containers (Raider Caches, Weapon Boxes, Medical Bags, Grenade Tubes) have increased Blueprint drop rates. As a result, the Uncovered Caches event gives you a high chance of finding Blueprints.
- Security Lockers have a higher than average chance of containing Blueprints.
- Certain Blueprints only seem to spawn under specific circumstances: Tempest Blueprint only spawns during Night Raid events. Vulcano Blueprint only spawns during Hidden Bunker events. Jupiter and Equaliser Blueprints only spawn during Harvester events.

Raider Caches, Weapon Boxes, and other raider-oriented container types have a good chance of offering Blueprints. |Image credit:Rock Paper Shotgun/Embark Studios
Blueprints have a very low chance of spawning in any container in Arc Raiders, around 1-2% on average. However, there is a higher chance of finding Blueprints in particular container types. Specifically, you can find more Blueprints in Raider containers and security lockers.
Beyond this, if you’re looking for Blueprints you should focus on regions of the map which are marked as having particularly high-value loot. Areas such as the Control Tower in Dam Battlegrounds, the Arrival and Departure Buildings in Spaceport, and Pilgrim’s Peak in Blue Gate all have a better-than-average chance of spawning Blueprints somewhere amongst all their containers. Night Raids and Electromagnetic Storm events also increase the drop chances of certain Blueprints .
In addition to these containers, you can often loot Blueprints from destroyed Surveyors - the largest of the rolling ball ARC. Surveyors are more commonly found on the later maps - Spaceport and Blue Gate - and if one spawns in your match, you’ll likely see it by the blue laser beam that it casts into the sky while “surveying”.
Surveyors are quite well-armoured and will very speedily run away from you once it notices you, but if you can take one down then make sure you loot all its parts for a chance of obtaining certain unusual Blueprints.
Blueprints obtained from quests
One way in which you can get Blueprints is by completing certain quests for the vendors in Speranza. Some quests will reward you with a specific item Blueprint upon completion, so as long as you work through all the quests in Arc Raiders, you are guaranteed those Blueprints.
Here is the full list of all Blueprints you can get from quest rewards:
- Trigger Nade Blueprint: Rewarded after completing “Sparks Fly”.
- Lure Grenade Blueprint: Rewarded after completing “Greasing Her Palms”.
- Burletta Blueprint: Rewarded after completing “Industrial Espionage”.
- Hullcracker Blueprint (and Launcher Ammo Blueprint): Rewarded after completing “The Major’s Footlocker”.
Alas, that’s only 4 Blueprints out of a total of 75 to unlock, so for the vast majority you will need to find them yourself during a raid. If you’re intent on farming Blueprints, then it’s best to equip yourself with cheap gear in case you lose it, but don’t use a free loadout because then you won’t get a safe pocket to stash any new Blueprint you find. No pain in Arc Raiders is sharper than failing to extract with a new Blueprint you’ve been after for a dozen hours already.

One of the best ways to get Blueprints is by hitting three stars on all five Trials every week. |Image credit:Rock Paper Shotgun/Embark Studios
Blueprints obtained from Trials
One of the very best ways to get Blueprints is as rewards for completing Trials in Arc Raiders. Trials are unlocked from Level 15 onwards, and allow you to earn rewards by focusing on certain tasks over the course of several raids. For example, one Trial might task you with dealing damage to Hornets, while another might challenge you to loot Supply Drops.
Trials refresh on a weekly basis, with a new week bringing five new Trials. Each Trial can offer up to three rewards after passing certain score milestones, and it’s possible to receive very high level loot from these reward crates - including Blueprints. So if you want to unlock as many Blueprints as possible, you should make a point of completing as many Trials as possible each week.
Best Blueprint farming locations
The very best way to get Blueprints is to frequent specific areas of the maps which combine high-tier loot pools with the right types of containers to search. Here are my recommendations for where to find Blueprints on every map, so you can always keep the search going for new crafting recipes to unlock.

Image credit:Rock Paper Shotgun/Embark Studios
Dam Battlegrounds
The best places to farm Blueprints on Dam Battlegrounds are the Control Tower, Power Generation Complex, Ruby Residence, and Pale Apartments . The first two regions, despite only being marked on the map as mid-tier loot, contain a phenomenal number of containers to loot. The Control Tower can also contain a couple of high-tier Security Lockers - though of course, you’ll need to have unlocked the Security Breach skill at the end of the Survival tree.
There’s also a lot of reporting amongst the playerbase that the Residential areas in the top-left of the map - Pale Apartments and Ruby Residence - give you a comparatively strong chance of finding Blueprints. Considering their size, there’s a high density of containers to loot in both locations, and they also have the benefit of being fairly out of the way. So you’re more likely to have all the containers to yourself.
Buried City
The best Blueprint farming locations on Buried City are the Santa Maria Houses, Grandioso Apartments, Town Hall, and the various buildings of the New District . Grandioso Apartments has a lower number of containers than the rest, but a high chance of spawning weapon cases - which have good Blueprint drop rates. The others are high-tier loot areas, with plenty of lootable containers - including Security Lockers.
Spaceport
The best places to find Blueprints on Spaceport are the Arrival and Departure Buildings, as well as Control Tower A6 and the Launch Towers . All these areas are labelled as high-value loot regions, and many of them are also very handily connected to one another by the Spaceport wall, which you can use to quickly run from one area to the next. At the tops of most of these buildings you’ll find at least one Security Locker, so this is an excellent farming route for players looking to find Blueprints.
The downside to looting Blueprints on Spaceport is that all these areas are hotly contested, particularly in Duos and Squads. You’ll need to be very focused and fast in order to complete the full farming route.

Image credit:Rock Paper Shotgun/Embark Studios
Blue Gate
Blue Gate tends to have a good chance of dropping Blueprints, potentially because it generally has a high number of containers which can hold lots of items; so there’s a higher chance of a Blueprint spawning in each container. In my experience, the best Blueprint farming spots on Blue Gate are Pilgrim’s Peak, Raider’s Refuge, the Ancient Fort, and the Underground Complex beneath the Warehouse .
All of these areas contain a wealth of containers to loot. Raider’s Refuge has less to loot, but the majority of the containers in and around the Refuge are raider containers, which have a high chance of containing Blueprints - particularly during major events.
Stella Montis
On the whole, Stella Montis seems to have a very low drop rate for Blueprints (though a high chance of dropping other high-tier loot). If you do want to try farming Blueprints on this map, the best places to find Blueprints in Stella Montis are Medical Research, Assembly Workshop, and the Business Center . These areas have the highest density of containers to loot on the map.
In addition to this, the Western Tunnel has a few different Security Lockers to loot, so while there’s very little to loot elsewhere in this area of the map, it’s worth hitting those Security Lockers if you spawn there at the start of a match.
That wraps up this primer on how to get all the Blueprints in Arc Raiders as quickly as possible. With the Expedition system constantly resetting a large number of players’ Blueprints, it’s more important than ever to have the most up-to-date information on where to find all these Blueprints.
While you’re here, be sure to check out our Arc Raiders best guns tier list , as well as our primers on the best skills to unlock and all the different Field Depot locations on every map.


ARC Raiders
PS5 , Xbox Series X/S , PC
Rock Paper Shotgun is better when you sign in
Sign in and join us on our journey to discover strange and compelling PC games.
