How to be the worst wizard in Dragon’s Dogma 2 - Act 1
The first of three hours with Capcom’s sumptuous, chaotic action-RPG

Image credit:Capcom

Before I sat down to play three hours of Dragon’s Dogma 2 at a Capcom event last month, I gave myself two broad objectives. The first was to discover if there’s anything genuinely different about this undeniably enchanting but very familiar sequel to one of the happiest, barmiest action- RPGs of the past 20 years. The second was to royally screw myself by fielding a party consisting exclusively of magic-users.
In Dragon’s Dogma 2 as in Dragon’s Dogma 1, you lead a gang of up to three AI-controlled “pawn” characters – one permanent main sidekick who levels up alongside you, plus two auxiliary pawns created by other players, who are either summoned at Rift stones or spawned into the open world as hired help. As in most RPGs, the ideal party setup is a mix of pure melee, ranged and magical DPS or support classes, but given the whimsicality of Dragon’s Dogma’s sorcery, with its levitation spells and lightning whips, I’ve always wanted to try a whole playthrough as a posse of unescorted occultists.
Dragon’s Dogma 2 harbours several flavours of spell-caster. During the hands-on, I kick off with the Mystic Spearhand, which as the name implies, is a wizard who specialises in melee. With two PRs looking on, I’m given a party of default pawns comprising two mages and a warrior, and unceremoniously dumped outside that most romantic of medieval burgs, Checkpoint Rest Town.
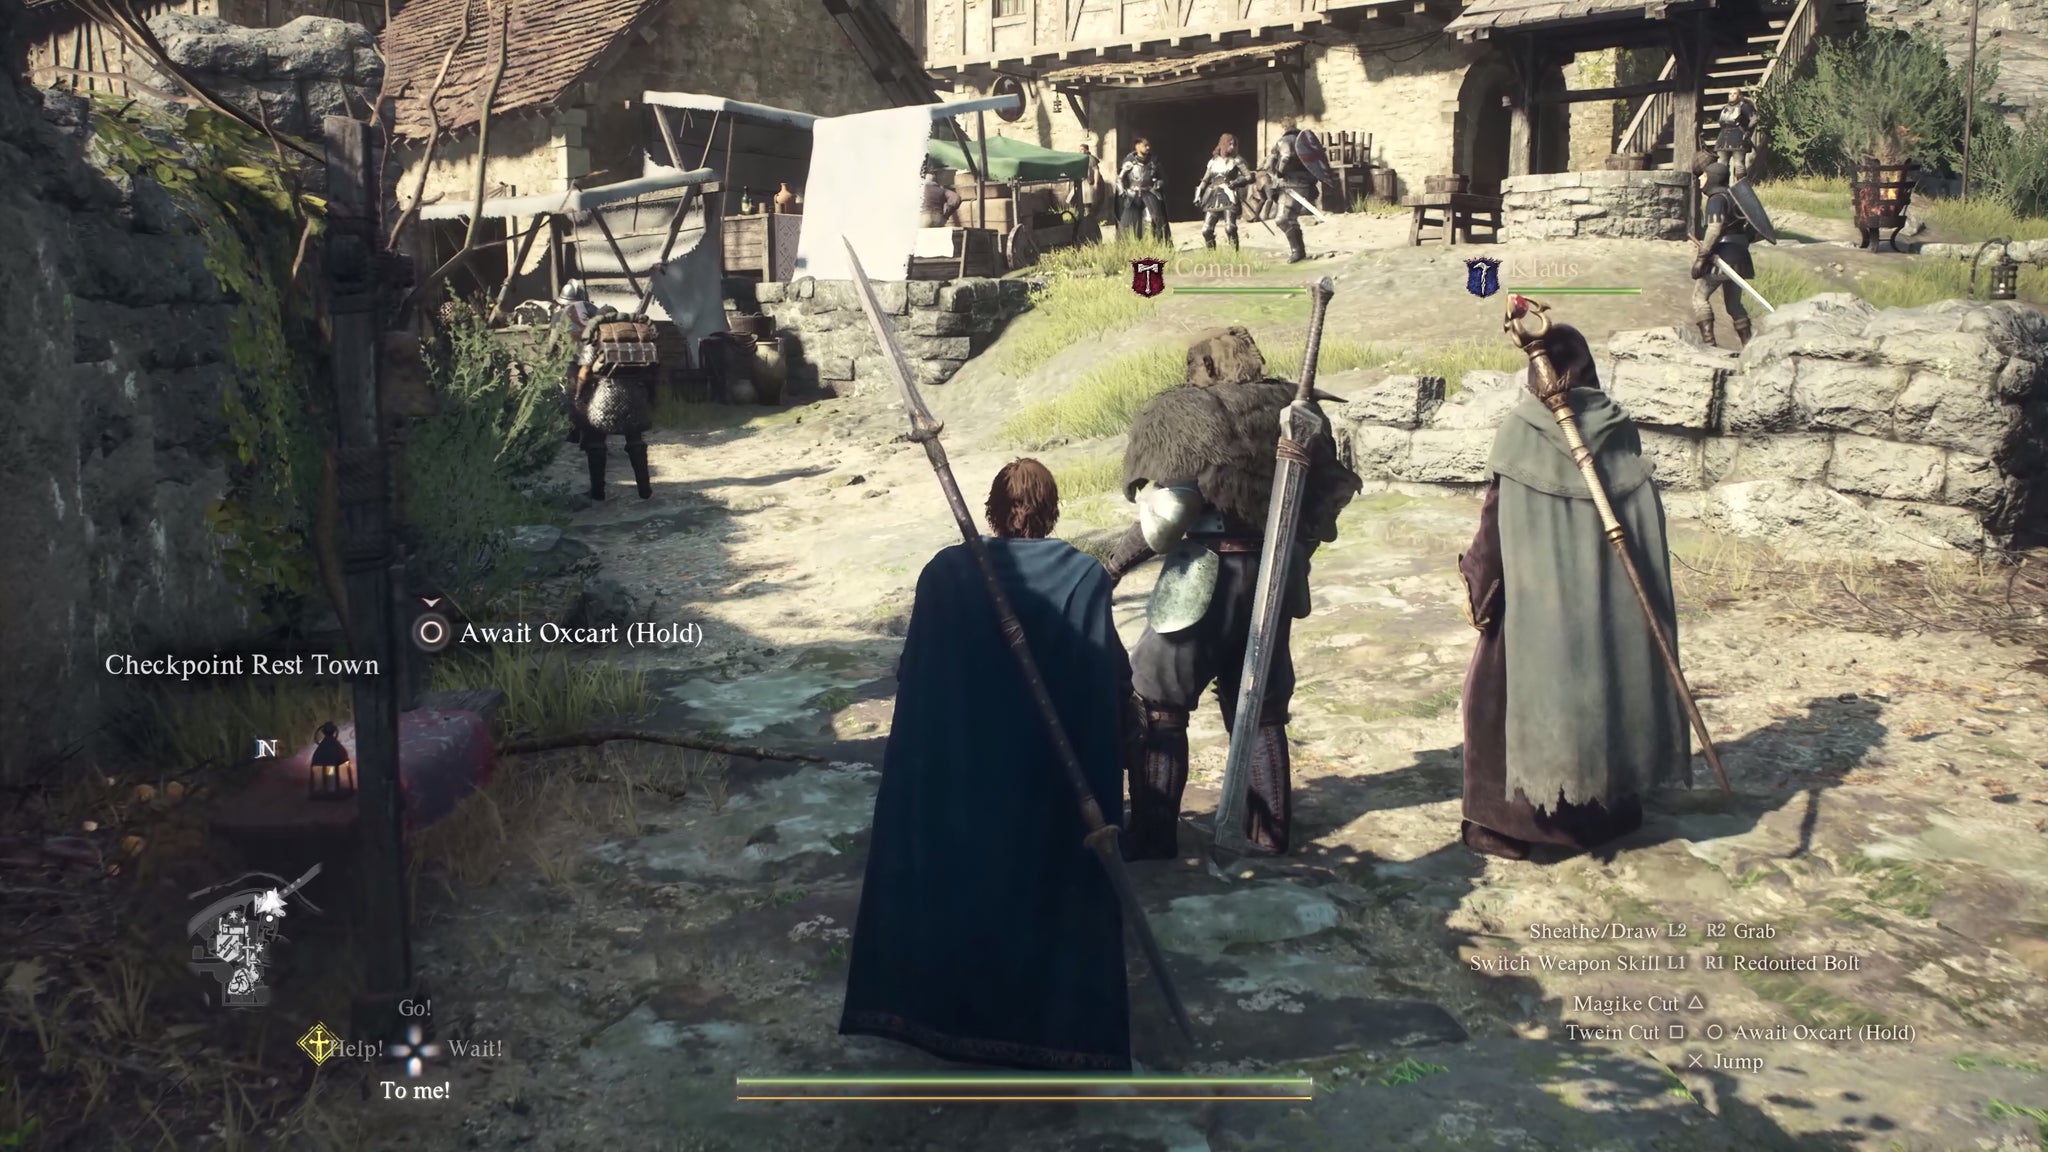
Thus, Checkpoint Rest Town. Sadly these aren’t my screenshots - they’re captured from B-roll provided by Capcom. |Image credit:Capcom
I feel like I need to play them side-by-side to confirm this, but I suspect one of the biggest differences between Dragon’s Dogmas 1 and 2 is the greater density and bustle of the sequel’s world. Even smaller, grubbier settlements such as Checkpoint Rest Town teem with bystanders who keep up a pleasing burble of incidental dialogue - “aught’s to do!” this and “consarn’ it all!” that. Towns also seem to contain more quest-giving NPCs, though it could just be that the sequel’s quest-giving NPCs are pushier - they’re almost Skyrim -esque in their tendency to overshare.
Walking into the main square, I’m set upon by a guy with a lion’s face called Offulve, who locks me into some fixed-camera dialogue and requests that I look for a “pretty stone” so that he can hoodwink his employer or something. Mate, I’m still trying to remember the control scheme here - I don’t have time for your parlour games. I tell Offulve to fulve off, walk another 20 metres, and am collared by some lairy dude in armour who wants to gossip about an ancient battleground awash with skeletal soldiers and phantoms. I disengage brusquely and stumble into a chat with an old shopkeeper called Morris who wants me to look for his grandson Rodge.
In the process I learn that some quests have a completion time. Rodge is even now being gnawed on by some wolves, and the smart money suggests that he’ll be digested in, oh, let’s say three days of in-game time. Will I intervene? No, I will not. I am the Arisen, dragon-scarred avenger of these lands, not some jumped-up babysitter. Besides, if there’s one thing I’ve learned from years of previewing open world games it’s that the best stuff often happens well away from the questlines.
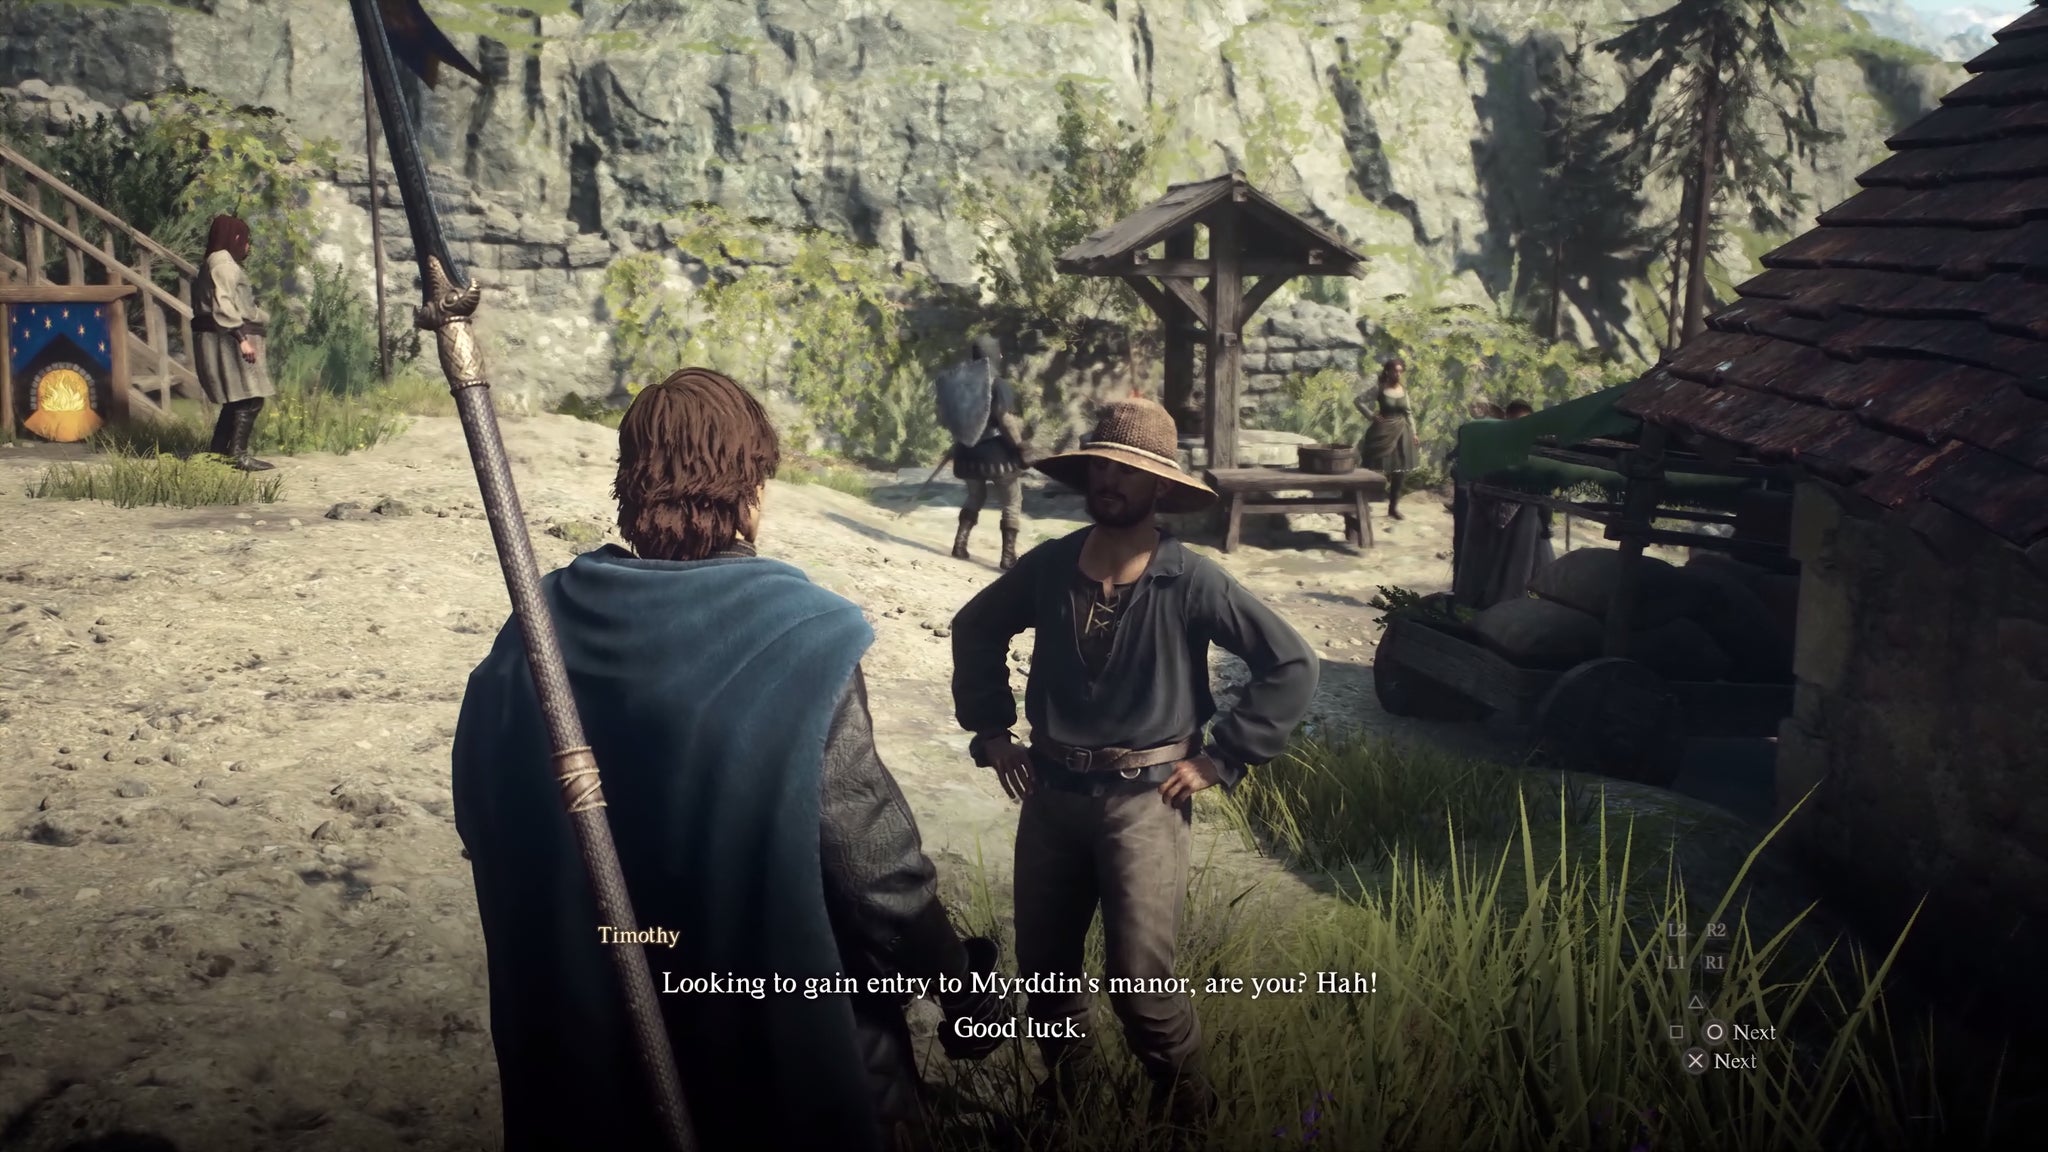
Image credit:Capcom
My trio of pre-fabbed pawns in tow, I sally up the hill to the imposing fortified gate at the town’s summit. The PR guys inform me that this is the entrance to the desert realm of Battahl, the second of Dragon’s Dogma 2’s major areas and home of the Beastren. A gate guard looks up. Do I have a permit for passage? I check my inventory and why yes, I do have a permit – thanks PRs! But the guard is a deeply paranoid man. He refuses to believe that this is really my permit, and demands that I procure another one. Zounds, it feels like I’m nudging up against some quest or other. I consider showing the guard my enchanted spear and explaining that this is my permit, actually, but brutalising the constabulary is not going to get me through that portcullis, so I spin on my heel majestically and stride back down the road into the temperate countryside of Vermund.
It’s time to put this open world through its paces. First, though, some journalistic housekeeping: I need to make my pawn entourage properly wizardly. For the purposes of this super-sorcerous diary write-up, I’m going to give them new names, borrowed from great spellcrafters throughout the ages. I rename one of the mages Galadriel, aka Princess of the Ñoldor, Lady of the Wood, Mistress of Magic. The other I rename Donald Duck, aka The Duck. If you haven’t played Kingdom Hearts you might scoff that Donald Duck isn’t much of a wizard, but I would usher you urgently to one side and explain in a whisper that Donald Duck is, in fact, one of very few Final Fantasy characters who can cast Zettaflare, and that if Donald Duck were sufficiently provoked – say, because some asshole sneered at his spellduckship – he could murder you, me, Galadriel and everybody we’ve ever loved.
And then there’s the third pawn, Conan. He’s some kind of barbarian, as you may guess, and as such, he can get stuffed. I scornfully dismiss the handsome brute – OK, I actually send him off with a thumbs-up rating and a modest gift of consumables for his creator, because the greatest magic of all is courtesy. As he leaves, Conan grumbles that “I fear your party will be diminished by my absence”. He’s not wrong, especially because I promptly forget to recruit a replacement pawn from the crowd, but still - I’ll make him eat those words.
We enter the wilds! Everything quickly goes pear-shaped. Rounding a canyon bend, we spy a group of torch-wielding goblins harassing a goat. Donald Duck is apoplectic. He tries to hit the goblins with thunderbolts and is immediately stabbed in the kidneys. Galadriel then attempts to cast a healing aura and gets axed in the face. The goblins and goblin-variants in Dragon’s Dogma 2 seem nastier than their forebears in the 2012 game, opening fights with flying leap attacks that appear paced to stunlock you, unless you block, which we mostly can’t, because we’re a bunch of squishy sorcerors. As I catch up and wade in belatedly with my enchanted spear, my party’s lack of balance is painfully obvious.
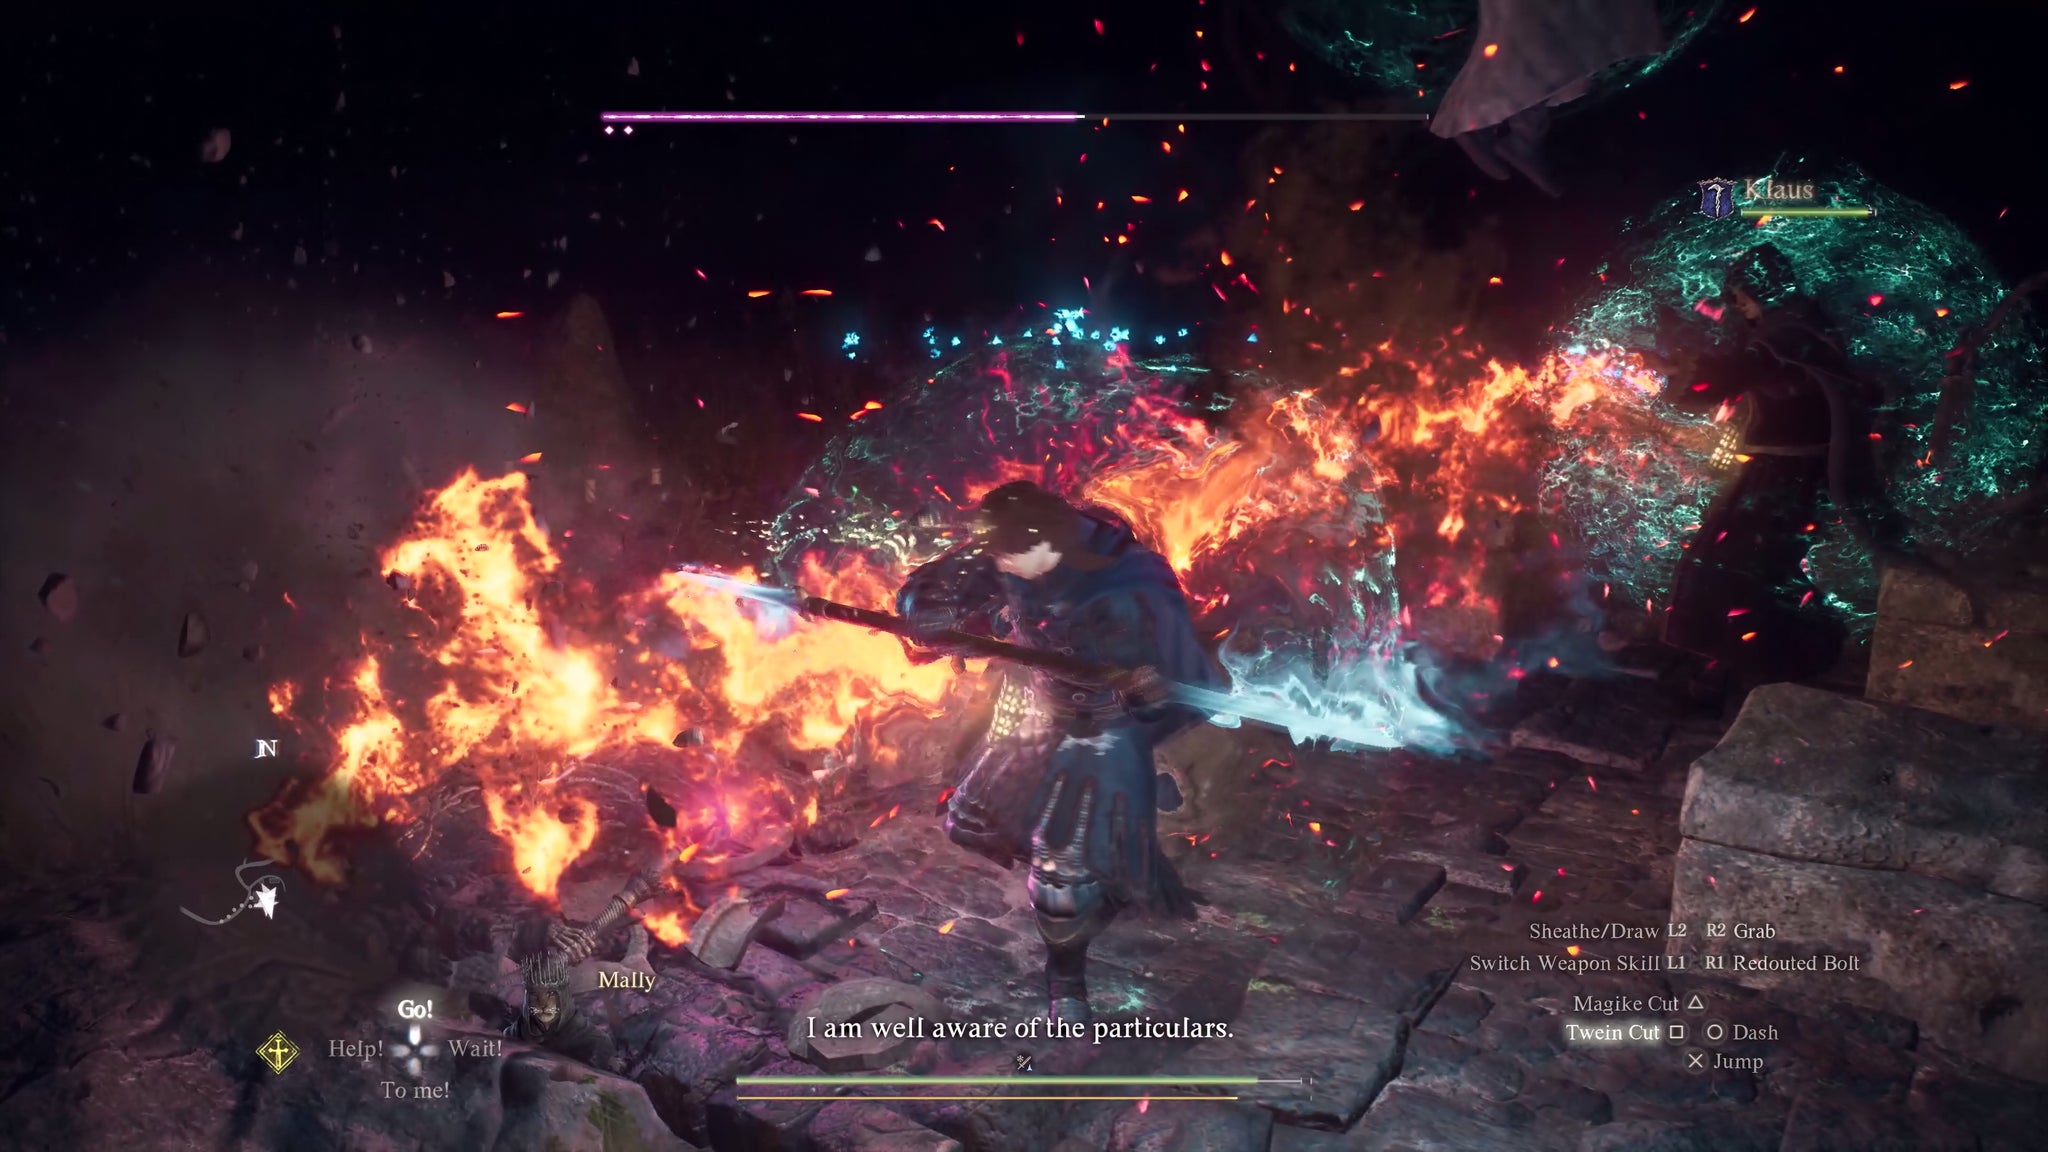
Image credit:Capcom
Still, the Mystic Spearhand isn’t too shabby on the frontlines. I use a kind of blink-stab to get behind one goblin and then launch a wave of turquoise puissance into the mob. A terrible realisation dawns: the Mystic Spearhand is sort of a Jedi Knight. Its signature move is essentially a low-level Force throw, conjuring a small bubble of energy within which you can seize enemies and objects and punt them about with a flick of your wrist. Come to think of it, my preview character looks a bit like Anakin Skywalker - he’s got the same surfer haircut. Argh, I wish they’d let me capture my own screens.
I am going to perform incredible feats with telekinesis. But first, I am going to stroll blithely into this here cave. Galadriel is right in the middle of a long anecdote about pawn mythology when some kind of massive gecko falls off the ceiling and the gloom comes alive with enemy health bars. As in the first game, darkness in Dragon’s Dogma 2 is dark ; you’ll want to fill up and equip your oil lantern before straying into any dungeons. Or, you can light your way by firing off spells in all directions.
I use the Farce to hurl a chunk of wood at one of the lizards and am swiftly surrounded, stabbed and sat on. Fortunately this spectacle of lacklustre Farcemanship buys Donald Duck the time he needs to rattle off a colour-clashing but undeniably effective series of fire, icicle and lightning spells. It may be that he doesn’t yet know this enemy’s elemental weakness, and is testing out different status effects: pawns accrue such knowledge when they travel alongside you, taking it with them when they’re summoned by other players.
Donald’s barrage gives me space to regain my feet – recovery times in Dragon’s Dogma 2 are long, comparable to those of the Monster Hunter games - and flex my budding Sith abilities with greater success. It turns out you need to wound enemies a bit before they’ll consent to be Farce Thrown, which, you know, that’s not how Darth Vader rolled, but you do you, Capcom. I hurl the reptiles around unscientifically while Galadriel, who is still telling me that anecdote about bloody pawn mythology, summons various healing and power-up auras. It doesn’t appear possible to use Mystic Spearhand telekinesis on your companions, not even “accidentally”, though as somebody who often employed Dragonshouting as a means of transporting glitchy Skyrim companions, I plan to experiment on that front down the line.
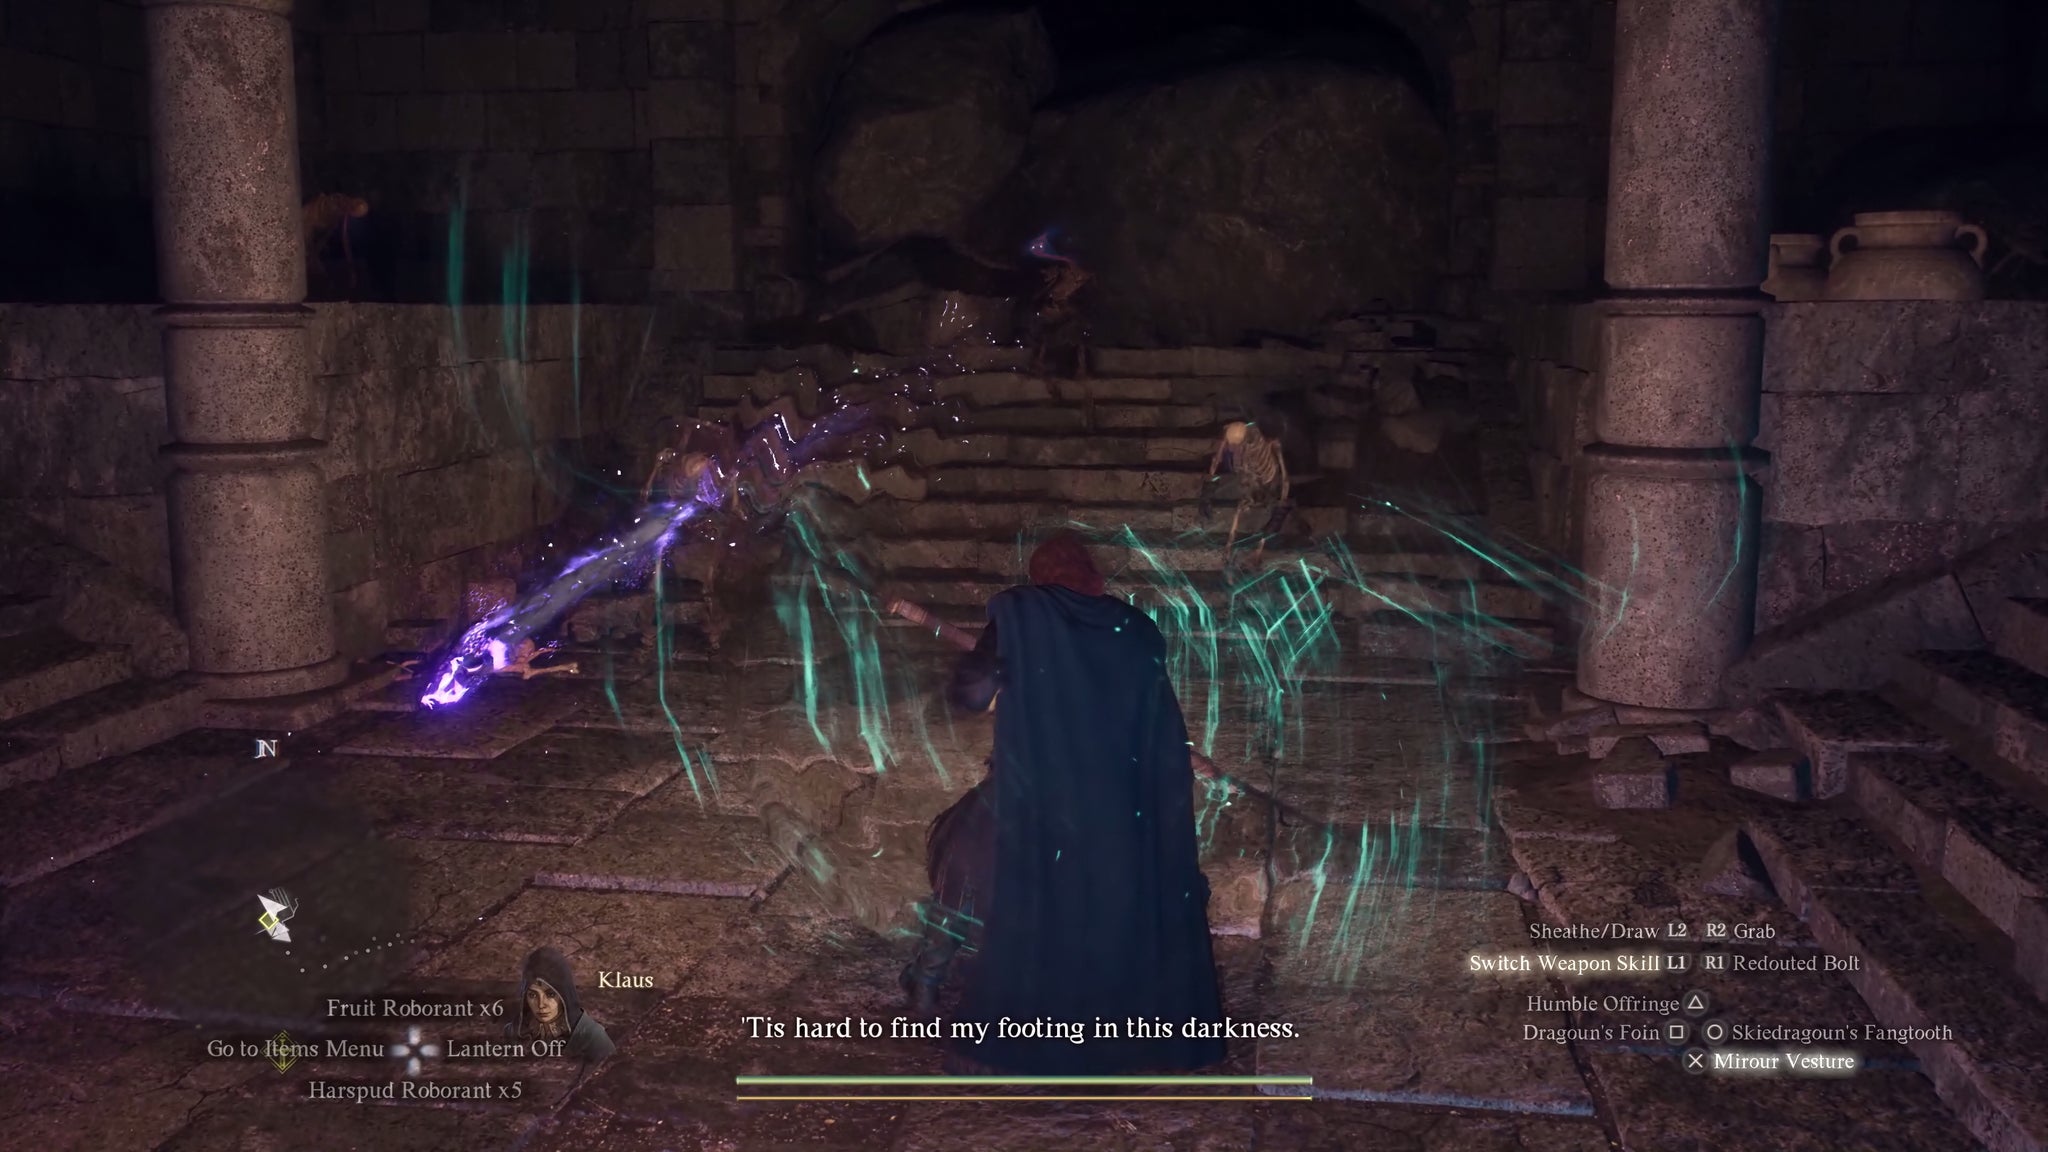
Image credit:Capcom
I’m just beginning to lose patience with the fauna when lo, an Ogre lumbers out of a bush with the air of a midboss returning from the loo. Now this is a foe worthy of Dragonkin Skywalker’s ample talents. I really hated Ogres in the first game for a couple of reasons. Firstly, they are massive creeps who make a point of scooping up female characters, running off with them and chewing on them like dog toys. Secondly, they get all rowdy and hyperactive when they’re low health, which is problematic in caves – thankfully, we are currently standing on a forest track, in full beaming sunshine.
I blink-stab through the Ogre, chiselling approximately 2% off one of its three healthbars. It responds by performing a standing jump and landing right on my head. Excellent! Marvelous! Let’s do this. The Ogre refuses to play ball, however. It skips the customary warm-up fight, plucks a levitating Galadriel out of the air, and gallops away hooting and hollering into the woods. This is an outrage! Come back with my Galadriel, you scumbag. I’m pretty sure she’s the only one in the group with healing spells.
I think mournfully of Conan, our banished warrior, who is probably even now telling his creator-player what an absolute chud I am. Warriors certainly come in handy when you’re fighting a big, fast, tough enemy like an Ogre. Then, as if in answer to my prayers, some kind of cavalry arrives in the shape of a travelling oxcart. Homely though they are, these carts are among Dragon’s Dogma 2’s headline features – you can buy passage in order to fast travel between major landmarks, which has led to some discussion of fast travel systems in general . What I didn’t realise, going into this hands-on, is that each comes with an entourage of mercenaries. Were these seasoned adventurers going to abandon some pack of quack-conjurers to their plight? The hell they were. Accompanied by a sword-and-boarder, a nimble archer and a fellow mage, Donald Duck and I hare away in pursuit of the Ogre and find it nibbling on Galadriel’s head.

Image credit:Capcom
Galadriel doesn’t seem excessively bothered by this. “Do hurry,” she says placidly, adding that we should be cautious of the Ogre’s slime and that it’ll be an easier target if we knock it on its bum. This is the kind of steadiness under pressure you just don’t get from stupid warriors. We dutifully light the monster up with stormclouds, teleporting groundpounds, fiery sword combos and arrows to the knee. It doesn’t fall over, but it does lose patience with Galadriel and throws her off a cliff, KO-ing her. Ever the responsible squad leader, I leap down to revive her. The Ogre follows. Look, can you just give me a minute please. The Ogre smacks me around like a tennis ball on a string, but I eventually break away and revive Galadriel – just before her spirit fades back into the Rift - while the oxcart guards keep the creature occupied.
Rising demurely to her feet, the Lady of the Wood casts some kind of icicle nuke, engulfing the Ogre in frost stalagmites even as Donald Duck catapults himself out of the treeline, lands on the monster’s head and sets it on fire. That’s good teamwork, colleagues! The Ogre dislodges the Duck by flopping onto its back, attempts to charge at me and gets itself all tangled up in the oxcart, which has meanwhile been picking its way down the hillside with the remorseless calm of an old lady trying to jump the queue at Tescos.
The oxcart proves to be the Ogre’s undoing. It passive-aggressively buffets the monster into the cliff face, sabotaging its maneouvres while I teleport onto a flailing arm, haul myself up to the creature’s face and start jabbing it in the nose with my spear. In short order there’s a burst of victory slow-mo, a fanfare plays, and congratulations one and all - we have successfully defeated an Ogre with a party of magic-users. Those oxcart guards? Well, they chipped in a bit here and there.

It seems only polite to complete the first leg of my hands-on diary by booking passage aboard the cart. While sitting in the cart (pawns still have to walk, which feels very mean-spirited of Capcom) you can hold a button to fall asleep, fast-forwarding to your destination. Or you can choose to stay conscious for the whole ride. The developers have prepared for this eventuality, with cutaway camera perspectives kicking in while you’re idling in the cart. It’s certainly a delight to watch the scenery pass: Dragon’s Dogma 2’s Oblivion-adjacent high fantasy aesthetic can seem a bit insipid, next to the Jurassic settings of stablemate Monster Hunter, but the geography is gorgeous on the whole.
Mind you, given that oxcarts travel at slightly slower than walking speed, I estimate that making a habit of staying awake during such journeys will extend your playthrough by about 10,000 hours. During my hands-on, I had other fish to fry, but that’s a tale for another day.
Part 2 is live! Click on for cautionary tales about dried fruit and emergent gameplay.
Dragon’s Dogma 2
PS5 , Xbox Series X/S , PC
Rock Paper Shotgun is better when you sign in
Sign in and join us on our journey to discover strange and compelling PC games.

All 75 Arc Raiders Blueprints and where to get them
These areas have the highest chance of giving you Blueprints

Image credit:Rock Paper Shotgun/Embark Studios

Looking for more Arc Raiders Blueprints? It’s a special day when you find a Blueprint, as they’re among the most valuable items in Arc Raiders. If you find a Blueprint that you haven’t already found, then you must make sure you hold onto it at all costs, because Blueprints are the key to one of the most important and powerful systems of meta-progression in the game.
This guide aims to be the very best guide on Blueprints you can find, starting with a primer on what exactly they are and how they work in Arc Raiders, before delving into exactly where to get Blueprints and the very best farming spots for you to take in your search.
We’ll also go over how to get Blueprints from other unlikely activities, such as destroying Surveyors and completing specific quests. And you’ll also find the full list of all 75 Blueprints in Arc Raiders on this page (including the newest Blueprints added with the Cold Snap update , such as the Deadline Blueprint and Firework Box Blueprint), giving you all the information you need to expand your own crafting repertoire.
In this guide:
- What are Blueprints in Arc Raiders?
- Full Blueprint list: All crafting recipes
- Where to find Blueprints in Arc Raiders Blueprints obtained from quests Blueprints obtained from Trials Best Blueprint farming locations

What are Blueprints in Arc Raiders?
Blueprints in Arc Raiders are special items which, if you manage to extract with them, you can expend to permanently unlock a new crafting recipe in your Workshop. If you manage to extract from a raid with an Anvil Blueprint, for example, you can unlock the ability to craft your very own Anvil Pistol, as many times as you like (as long as you have the crafting materials).
To use a Blueprint, simply open your Inventory while in the lobby, then right-click on the Blueprint and click “Learn And Consume” . This will permanently unlock the recipe for that item in your Workshop. As of the Stella Montis update, there are allegedly 75 different Blueprints to unlock - although only 68 are confirmed to be in the game so far. You can see all the Blueprints you’ve found and unlocked by going to the Workshop menu, and hitting “R” to bring up the Blueprint screen.
It’s possible to find duplicates of past Blueprints you’ve already unlocked. If you find these, then you can either sell them, or - if you like to play with friends - you can take it into a match and gift it to your friend so they can unlock that recipe for themselves. Another option is to keep hold of them until the time comes to donate them to the Expedition.
Full Blueprint list: All crafting recipes
Below is the full list of all the Blueprints that are currently available to find in Arc Raiders, and the crafting recipe required for each item:
| Blueprint | Type | Recipe | Crafted At |
|---|---|---|---|
| Bettina | Weapon | 3x Advanced Mechanical Components 3x Heavy Gun Parts 3x Canister | Gunsmith 3 |
| Blue Light Stick | Quick Use | 3x Chemicals | Utility Station 1 |
| Aphelion | Weapon | 3x Magnetic Accelerator 3x Complex Gun Parts 1x Matriarch Reactor | Gunsmith 3 |
| Combat Mk. 3 (Flanking) | Augment | 2x Advanced Electrical Components 3x Processor | Gear Bench 3 |
| Combat Mk. 3 (Aggressive) | Augment | 2x Advanced Electrical Components 3x Processor | Gear Bench 3 |
| Complex Gun Parts | Material | 2x Light Gun Parts 2x Medium Gun Parts 2x Heavy Gun Parts | Refiner 3 |
| Fireworks Box | Quick Use | 1x Explosive Compound 3x Pop Trigger | Explosives Station 2 |
| Gas Mine | Mine | 4x Chemicals 2x Rubber Parts | Explosives Station 1 |
| Green Light Stick | Quick Use | 3x Chemicals | Utility Station 1 |
| Pulse Mine | Mine | 1x Crude Explosives 1x Wires | Explosives Station 1 |
| Seeker Grenade | Grenade | 1x Crude Explosives 2x ARC Alloy | Explosives Station 1 |
| Looting Mk. 3 (Survivor) | Augment | 2x Advanced Electrical Components 3x Processor | Gear Bench 3 |
| Angled Grip II | Mod | 2x Mechanical Components 3x Duct Tape | Gunsmith 2 |
| Angled Grip III | Mod | 2x Mod Components 5x Duct Tape | Gunsmith 3 |
| Hullcracker | Weapon | 1x Magnetic Accelerator 3x Heavy Gun Parts 1x Exodus Modules | Gunsmith 3 |
| Launcher Ammo | Ammo | 5x Metal Parts 1x Crude Explosives | Workbench 1 |
| Anvil | Weapon | 5x Mechanical Components 5x Simple Gun Parts | Gunsmith 2 |
| Anvil Splitter | Mod | 2x Mod Components 3x Processor | Gunsmith 3 |
| ??? | ??? | ??? | ??? |
| Barricade Kit | Quick Use | 1x Mechanical Components | Utility Station 2 |
| Blaze Grenade | Grenade | 1x Explosive Compound 2x Oil | Explosives Station 3 |
| Bobcat | Weapon | 3x Advanced Mechanical Components 3x Light Gun Parts | Gunsmith 3 |
| Osprey | Weapon | 2x Advanced Mechanical Components 3x Medium Gun Parts 7x Wires | Gunsmith 3 |
| Burletta | Weapon | 3x Mechanical Components 3x Simple Gun Parts | Gunsmith 1 |
| Compensator II | Mod | 2x Mechanical Components 4x Wires | Gunsmith 2 |
| Compensator III | Mod | 2x Mod Components 8x Wires | Gunsmith 3 |
| Defibrillator | Quick Use | 9x Plastic Parts 1x Moss | Medical Lab 2 |
| ??? | ??? | ??? | ??? |
| Equalizer | Weapon | 3x Magnetic Accelerator 3x Complex Gun Parts 1x Queen Reactor | Gunsmith 3 |
| Extended Barrel | Mod | 2x Mod Components 8x Wires | Gunsmith 3 |
| Extended Light Mag II | Mod | 2x Mechanical Components 3x Steel Spring | Gunsmith 2 |
| Extended Light Mag III | Mod | 2x Mod Components 5x Steel Spring | Gunsmith 3 |
| Extended Medium Mag II | Mod | 2x Mechanical Components 3x Steel Spring | Gunsmith 2 |
| Extended Medium Mag III | Mod | 2x Mod Components 5x Steel Spring | Gunsmith 3 |
| Extended Shotgun Mag II | Mod | 2x Mechanical Components 3x Steel Spring | Gunsmith 2 |
| Extended Shotgun Mag III | Mod | 2x Mod Components 5x Steel Spring | Gunsmith 3 |
| Remote Raider Flare | Quick Use | 2x Chemicals 4x Rubber Parts | Utility Station 1 |
| Heavy Gun Parts | Material | 4x Simple Gun Parts | Refiner 2 |
| Venator | Weapon | 2x Advanced Mechanical Components 3x Medium Gun Parts 5x Magnet | Gunsmith 3 |
| Il Toro | Weapon | 5x Mechanical Components 6x Simple Gun Parts | Gunsmith 1 |
| Jolt Mine | Mine | 1x Electrical Components 1x Battery | Explosives Station 2 |
| Explosive Mine | Mine | 1x Explosive Compound 1x Sensors | Explosives Station 3 |
| Jupiter | Weapon | 3x Magnetic Accelerator 3x Complex Gun Parts 1x Queen Reactor | Gunsmith 3 |
| Light Gun Parts | Material | 4x Simple Gun Parts | Refiner 2 |
| Lightweight Stock | Mod | 2x Mod Components 5x Duct Tape | Gunsmith 3 |
| Lure Grenade | Grenade | 1x Speaker Component 1x Electrical Components | Utility Station 2 |
| Medium Gun Parts | Material | 4x Simple Gun Parts | Refiner 2 |
| Torrente | Weapon | 2x Advanced Mechanical Components 3x Medium Gun Parts 6x Steel Spring | Gunsmith 3 |
| Muzzle Brake II | Mod | 2x Mechanical Components 4x Wires | Gunsmith 2 |
| Muzzle Brake III | Mod | 2x Mod Components 8x Wires | Gunsmith 3 |
| Padded Stock | Mod | 2x Mod Components 5x Duct Tape | Gunsmith 3 |
| Shotgun Choke II | Mod | 2x Mechanical Components 4x Wires | Gunsmith 2 |
| Shotgun Choke III | Mod | 2x Mod Components 8x Wires | Gunsmith 3 |
| Shotgun Silencer | Mod | 2x Mod Components 8x Wires | Gunsmith 3 |
| Showstopper | Grenade | 1x Advanced Electrical Components 1x Voltage Converter | Explosives Station 3 |
| Silencer I | Mod | 2x Mechanical Components 4x Wires | Gunsmith 2 |
| Silencer II | Mod | 2x Mod Components 8x Wires | Gunsmith 3 |
| Snap Hook | Quick Use | 2x Power Rod 3x Rope 1x Exodus Modules | Utility Station 3 |
| Stable Stock II | Mod | 2x Mechanical Components 3x Duct Tape | Gunsmith 2 |
| Stable Stock III | Mod | 2x Mod Components 5x Duct Tape | Gunsmith 3 |
| Tagging Grenade | Grenade | 1x Electrical Components 1x Sensors | Utility Station 3 |
| Tempest | Weapon | 3x Advanced Mechanical Components 3x Medium Gun Parts 3x Canister | Gunsmith 3 |
| Trigger Nade | Grenade | 2x Crude Explosives 1x Processor | Explosives Station 2 |
| Vertical Grip II | Mod | 2x Mechanical Components 3x Duct Tape | Gunsmith 2 |
| Vertical Grip III | Mod | 2x Mod Components 5x Duct Tape | Gunsmith 3 |
| Vita Shot | Quick Use | 2x Antiseptic 1x Syringe | Medical Lab 3 |
| Vita Spray | Quick Use | 3x Antiseptic 1x Canister | Medical Lab 3 |
| Vulcano | Weapon | 1x Magnetic Accelerator 3x Heavy Gun Parts 1x Exodus Modules | Gunsmith 3 |
| Wolfpack | Grenade | 2x Explosive Compound 2x Sensors | Explosives Station 3 |
| Red Light Stick | Quick Use | 3x Chemicals | Utility Station 1 |
| Smoke Grenade | Grenade | 14x Chemicals 1x Canister | Utility Station 2 |
| Deadline | Mine | 3x Explosive Compound 2x ARC Circuitry | Explosives Station 3 |
| Trailblazer | Grenade | 1x Explosive Compound 1x Synthesized Fuel | Explosives Station 3 |
| Tactical Mk. 3 (Defensive) | Augment | 2x Advanced Electrical Components 3x Processor | Gear Bench 3 |
| Tactical Mk. 3 (Healing) | Augment | 2x Advanced Electrical Components 3x Processor | Gear Bench 3 |
| Yellow Light Stick | Quick Use | 3x Chemicals | Utility Station 1 |
Note: The missing Blueprints in this list likely have not actually been added to the game at the time of writing, because none of the playerbase has managed to find any of them. As they are added to the game, I will update this page with the most relevant information so you know exactly how to get all 75 Arc Raiders Blueprints.
Where to find Blueprints in Arc Raiders
Below is a list of all containers, modifiers, and events which maximise your chances of finding Blueprints:
- Certain quests reward you with specific Blueprints .
- Completing Trials has a high chance of offering Blueprints as rewards.
- Surveyors have a decent chance of dropping Blueprints on death.
- High loot value areas tend to have a greater chance of spawning Blueprints.
- Night Raids and Storms may increase rare Blueprint spawn chances in containers.
- Containers with higher numbers of items may have a higher tendency to spawn Blueprints. As a result, Blue Gate (which has many “large” containers containing multiple items) may give you a higher chance of spawning Blueprints.
- Raider containers (Raider Caches, Weapon Boxes, Medical Bags, Grenade Tubes) have increased Blueprint drop rates. As a result, the Uncovered Caches event gives you a high chance of finding Blueprints.
- Security Lockers have a higher than average chance of containing Blueprints.
- Certain Blueprints only seem to spawn under specific circumstances: Tempest Blueprint only spawns during Night Raid events. Vulcano Blueprint only spawns during Hidden Bunker events. Jupiter and Equaliser Blueprints only spawn during Harvester events.

Raider Caches, Weapon Boxes, and other raider-oriented container types have a good chance of offering Blueprints. |Image credit:Rock Paper Shotgun/Embark Studios
Blueprints have a very low chance of spawning in any container in Arc Raiders, around 1-2% on average. However, there is a higher chance of finding Blueprints in particular container types. Specifically, you can find more Blueprints in Raider containers and security lockers.
Beyond this, if you’re looking for Blueprints you should focus on regions of the map which are marked as having particularly high-value loot. Areas such as the Control Tower in Dam Battlegrounds, the Arrival and Departure Buildings in Spaceport, and Pilgrim’s Peak in Blue Gate all have a better-than-average chance of spawning Blueprints somewhere amongst all their containers. Night Raids and Electromagnetic Storm events also increase the drop chances of certain Blueprints .
In addition to these containers, you can often loot Blueprints from destroyed Surveyors - the largest of the rolling ball ARC. Surveyors are more commonly found on the later maps - Spaceport and Blue Gate - and if one spawns in your match, you’ll likely see it by the blue laser beam that it casts into the sky while “surveying”.
Surveyors are quite well-armoured and will very speedily run away from you once it notices you, but if you can take one down then make sure you loot all its parts for a chance of obtaining certain unusual Blueprints.
Blueprints obtained from quests
One way in which you can get Blueprints is by completing certain quests for the vendors in Speranza. Some quests will reward you with a specific item Blueprint upon completion, so as long as you work through all the quests in Arc Raiders, you are guaranteed those Blueprints.
Here is the full list of all Blueprints you can get from quest rewards:
- Trigger Nade Blueprint: Rewarded after completing “Sparks Fly”.
- Lure Grenade Blueprint: Rewarded after completing “Greasing Her Palms”.
- Burletta Blueprint: Rewarded after completing “Industrial Espionage”.
- Hullcracker Blueprint (and Launcher Ammo Blueprint): Rewarded after completing “The Major’s Footlocker”.
Alas, that’s only 4 Blueprints out of a total of 75 to unlock, so for the vast majority you will need to find them yourself during a raid. If you’re intent on farming Blueprints, then it’s best to equip yourself with cheap gear in case you lose it, but don’t use a free loadout because then you won’t get a safe pocket to stash any new Blueprint you find. No pain in Arc Raiders is sharper than failing to extract with a new Blueprint you’ve been after for a dozen hours already.

One of the best ways to get Blueprints is by hitting three stars on all five Trials every week. |Image credit:Rock Paper Shotgun/Embark Studios
Blueprints obtained from Trials
One of the very best ways to get Blueprints is as rewards for completing Trials in Arc Raiders. Trials are unlocked from Level 15 onwards, and allow you to earn rewards by focusing on certain tasks over the course of several raids. For example, one Trial might task you with dealing damage to Hornets, while another might challenge you to loot Supply Drops.
Trials refresh on a weekly basis, with a new week bringing five new Trials. Each Trial can offer up to three rewards after passing certain score milestones, and it’s possible to receive very high level loot from these reward crates - including Blueprints. So if you want to unlock as many Blueprints as possible, you should make a point of completing as many Trials as possible each week.
Best Blueprint farming locations
The very best way to get Blueprints is to frequent specific areas of the maps which combine high-tier loot pools with the right types of containers to search. Here are my recommendations for where to find Blueprints on every map, so you can always keep the search going for new crafting recipes to unlock.

Image credit:Rock Paper Shotgun/Embark Studios
Dam Battlegrounds
The best places to farm Blueprints on Dam Battlegrounds are the Control Tower, Power Generation Complex, Ruby Residence, and Pale Apartments . The first two regions, despite only being marked on the map as mid-tier loot, contain a phenomenal number of containers to loot. The Control Tower can also contain a couple of high-tier Security Lockers - though of course, you’ll need to have unlocked the Security Breach skill at the end of the Survival tree.
There’s also a lot of reporting amongst the playerbase that the Residential areas in the top-left of the map - Pale Apartments and Ruby Residence - give you a comparatively strong chance of finding Blueprints. Considering their size, there’s a high density of containers to loot in both locations, and they also have the benefit of being fairly out of the way. So you’re more likely to have all the containers to yourself.
Buried City
The best Blueprint farming locations on Buried City are the Santa Maria Houses, Grandioso Apartments, Town Hall, and the various buildings of the New District . Grandioso Apartments has a lower number of containers than the rest, but a high chance of spawning weapon cases - which have good Blueprint drop rates. The others are high-tier loot areas, with plenty of lootable containers - including Security Lockers.
Spaceport
The best places to find Blueprints on Spaceport are the Arrival and Departure Buildings, as well as Control Tower A6 and the Launch Towers . All these areas are labelled as high-value loot regions, and many of them are also very handily connected to one another by the Spaceport wall, which you can use to quickly run from one area to the next. At the tops of most of these buildings you’ll find at least one Security Locker, so this is an excellent farming route for players looking to find Blueprints.
The downside to looting Blueprints on Spaceport is that all these areas are hotly contested, particularly in Duos and Squads. You’ll need to be very focused and fast in order to complete the full farming route.

Image credit:Rock Paper Shotgun/Embark Studios
Blue Gate
Blue Gate tends to have a good chance of dropping Blueprints, potentially because it generally has a high number of containers which can hold lots of items; so there’s a higher chance of a Blueprint spawning in each container. In my experience, the best Blueprint farming spots on Blue Gate are Pilgrim’s Peak, Raider’s Refuge, the Ancient Fort, and the Underground Complex beneath the Warehouse .
All of these areas contain a wealth of containers to loot. Raider’s Refuge has less to loot, but the majority of the containers in and around the Refuge are raider containers, which have a high chance of containing Blueprints - particularly during major events.
Stella Montis
On the whole, Stella Montis seems to have a very low drop rate for Blueprints (though a high chance of dropping other high-tier loot). If you do want to try farming Blueprints on this map, the best places to find Blueprints in Stella Montis are Medical Research, Assembly Workshop, and the Business Center . These areas have the highest density of containers to loot on the map.
In addition to this, the Western Tunnel has a few different Security Lockers to loot, so while there’s very little to loot elsewhere in this area of the map, it’s worth hitting those Security Lockers if you spawn there at the start of a match.
That wraps up this primer on how to get all the Blueprints in Arc Raiders as quickly as possible. With the Expedition system constantly resetting a large number of players’ Blueprints, it’s more important than ever to have the most up-to-date information on where to find all these Blueprints.
While you’re here, be sure to check out our Arc Raiders best guns tier list , as well as our primers on the best skills to unlock and all the different Field Depot locations on every map.

ARC Raiders
PS5 , Xbox Series X/S , PC
Rock Paper Shotgun is better when you sign in
Sign in and join us on our journey to discover strange and compelling PC games.
