Hollow Knight: Silksong review
Spool’s gold

Image credit:Rock Paper Shotgun/Team Cherry

Hollow Knight: Silksong has a mean streak that sometimes tilts into vindictiveness, but its pin-sharp combat and wondrous exploration are too good to pass up.
- Developer: Team Cherry
- Publisher: Team Cherry
- Release: September 4th 2025
- On: Windows
- From: Steam , Game Pass
- Price: $20/£17/€20
- Reviewed on: Steam Deck; Intel Core i9-10900K, 32GB RAM, Nvidia RTX 3090, Windows 10
I want to give Hollow Knight: Silksong a thrashing. A fully suited C-suite bollocking. I want to verbally repay unto it every cruel death, every pernickety jumping puzzle, every time-thieving runback it’s inflicted on me across the past five days.
But I can’t. For every moment of frustration, there are five of relief, of joy, of beauty even. As in Hollow Knight , Silksong stretches itself over a vast Metroidvania map, and yet its intricacies – its narrowest tunnels leading to grand new regions, its more acrobatic and tailorable combat movesets – make for constantly rewarding exploration, as well as some thrillingly free-flowing bugfights. There have been a couple times when I never wanted to play it again, and many more when I wish I never had to stop.
This time, as you traverse the deeply religious (and utterly bell-obsessed) kingdom of Pharloom, you’re playing as Hornet – a recurring Hollow Knight boss whose newly weakened state suggests she’s spent the last eight years eating Deliveroo and endlessly refreshing her own subreddit. Start reawakening abilities and unearthering upgrades, though, and some of that old power starts humming once more. Her heal is riskier than the Knight’s, using up an entire supply of silk/soul/energy/whatever, but much more potent, and equipping different crests will – similar to a stance system – significantly alter her base moveset of needle slashes. Even her dash power, gained relatively early, adds sprinting and long-jump abilities that the Knight’s equivalent never did.
Very quickly, then, Hornet becomes a more agile hero, albeit one that needs skillful application of her talents to avoid shunting into another bug’s blade. It’s also understandable that to counter this agility, she should face more powerful foes, though how Silksong goes about this is a bit blunt: it basically gives everyone outside of the humblest larvae an unexpectedly generous health pool and, for boss and grunt bugs alike, the strength to hit for two masks of health instead of the standard one.
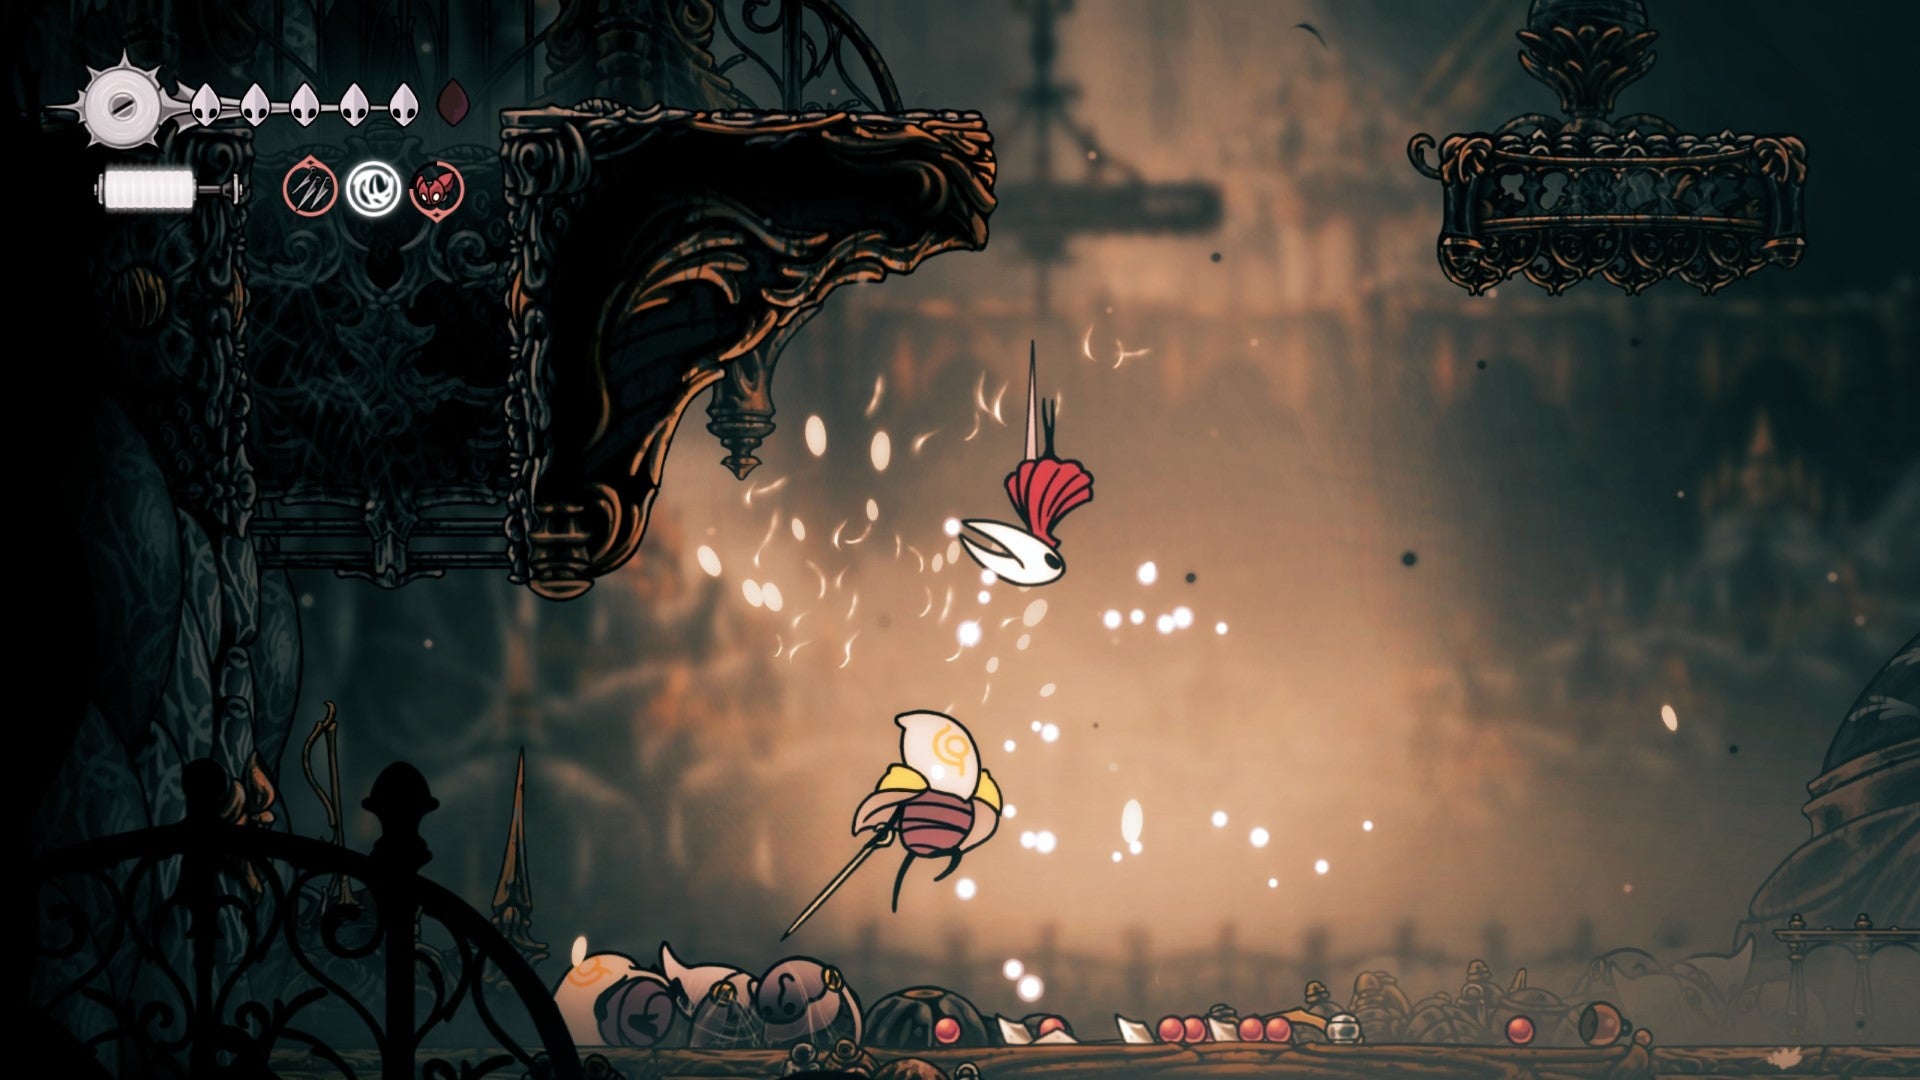
Image credit:Rock Paper Shotgun/Team Cherry
This is harsh. The maths involved essentially make the first, hard-earned mask upgrade useless. You start with five, so upping to six won’t actually let you survive an extra hit, which together with the reduced availability of heals makes it feel like you need to play an even more pixel-perfect dodging game than in Hollow Knight.
Still, since all that falls under a fair and long-lasting tenet of Soulslikery – don’t get hit in the first place – I can’t get too cross about it. Yet Silksong does, sometimes, let slip a more recognisably callous side, one with – at best – antiquated views on punishing failure.
This is most apparent in some of the platforming challenges, specifically those that rely heavily on pogoing. For the uninitiated, that’s performing a downwards strike on an enemy or environmental prop to bounce back up off it. These bits are uniformly horrible, because unlike so much of Silksong’s combat – and indeed, the majority of its running/jumping/grappling moves – pogoing doesn’t feel consistent .
Sometimes I’ll boing into the sky, nearby insects holding up little ‘10.0’ signs (in my mind). Others, I’ll get about three millimetres of air from the same manoeuvre and tumble fatally into some spikes. Because there are always spikes. It gets marginally more forgiving with a particular crest that swaps Hornet’s default diagonal thrusts for a straight downward sweep, but the uneven reactions to successful hits remains a source of lost health and swear words throughout.


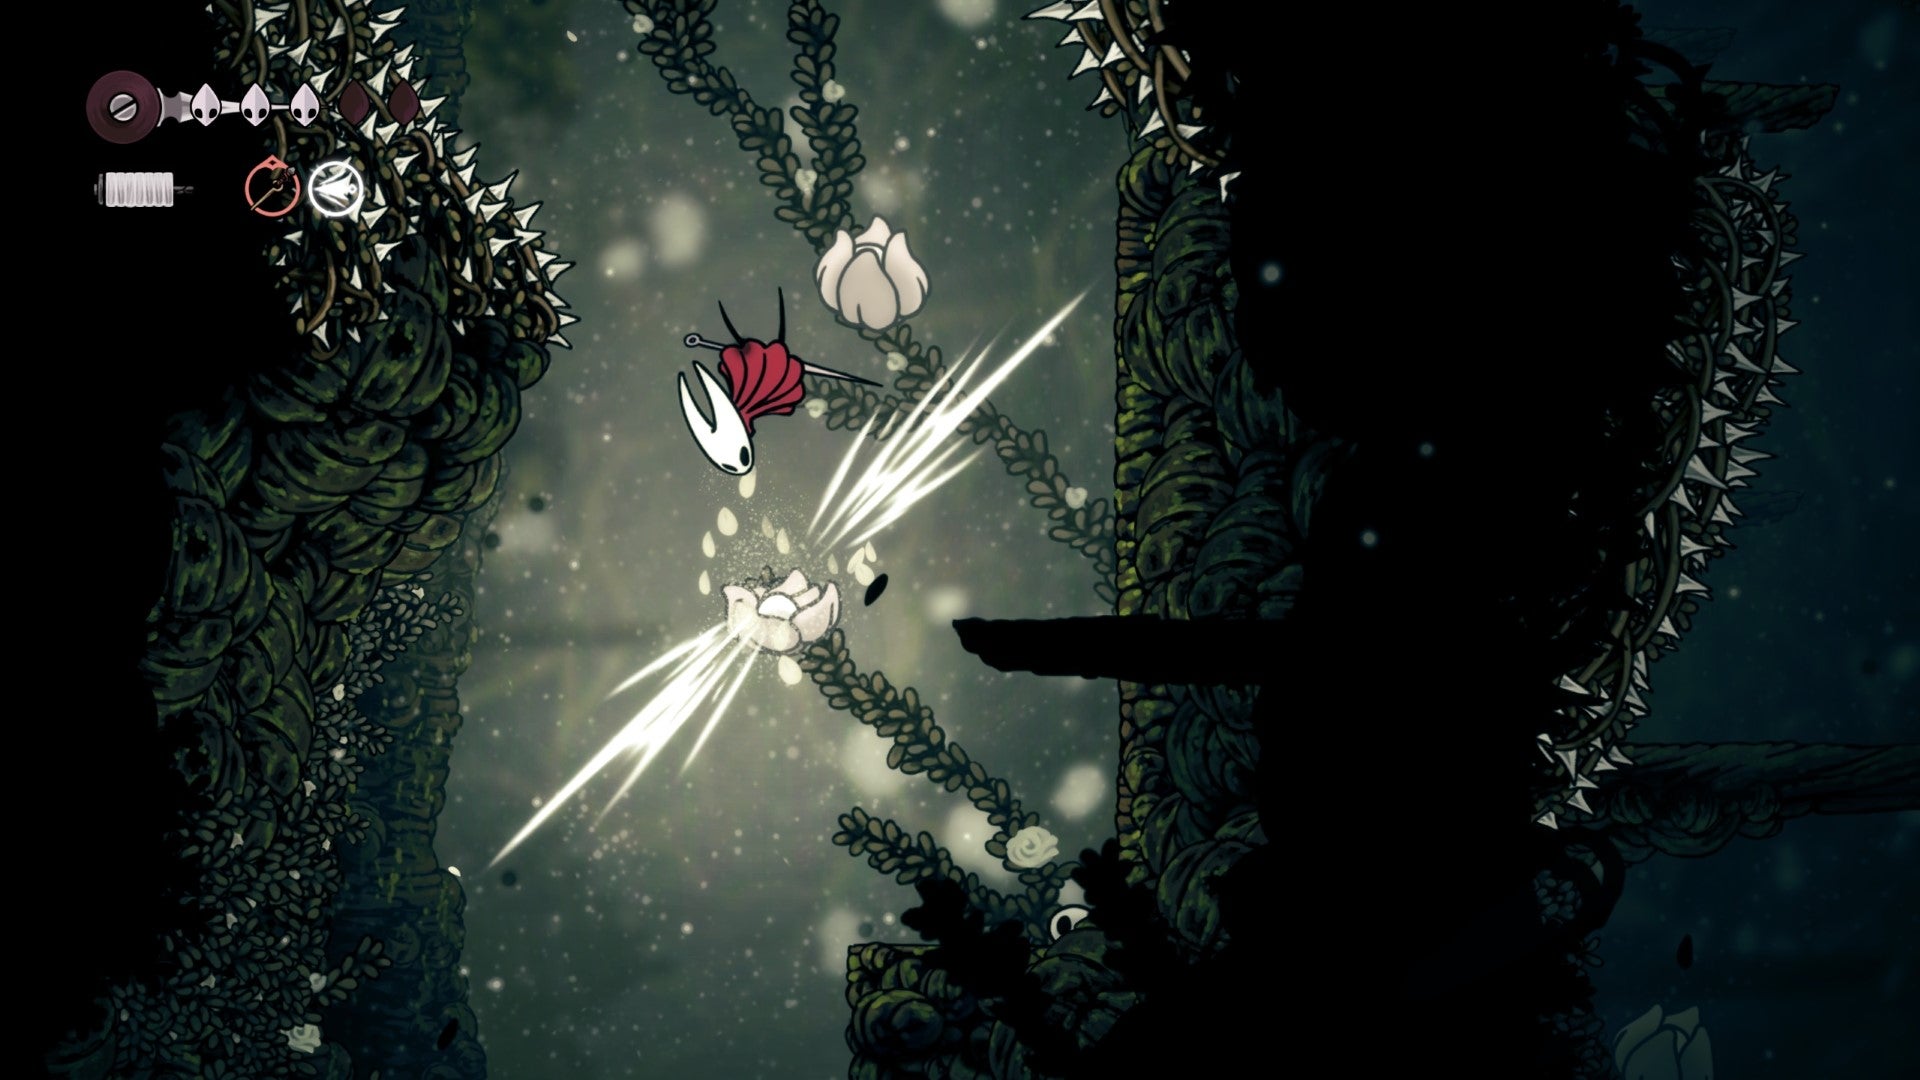
It doesn’t need to be like this, and the worst part is that Silksong knows it. There’s one region that’s basically one super-extended platforming run, and despite it being diamond-hard in its own right, I relished fresh attempts because I was only ever being held back my own timing and movements – not the whims of a bouncy flower.
Except the tension thing doesn’t work because you can just dash over or under every non-boss enemy, and losing to a boss themselves already carries the punishment of not allowing you to play the game any further. In other words, they’re boring busywork, a fact that modern Souls and Soulslikes have increasingly got wise to. Even FromSoftware, developers to whom the Hollow Knight games partially owe their existence, knew to put Stakes of Marika in Elden Ring .
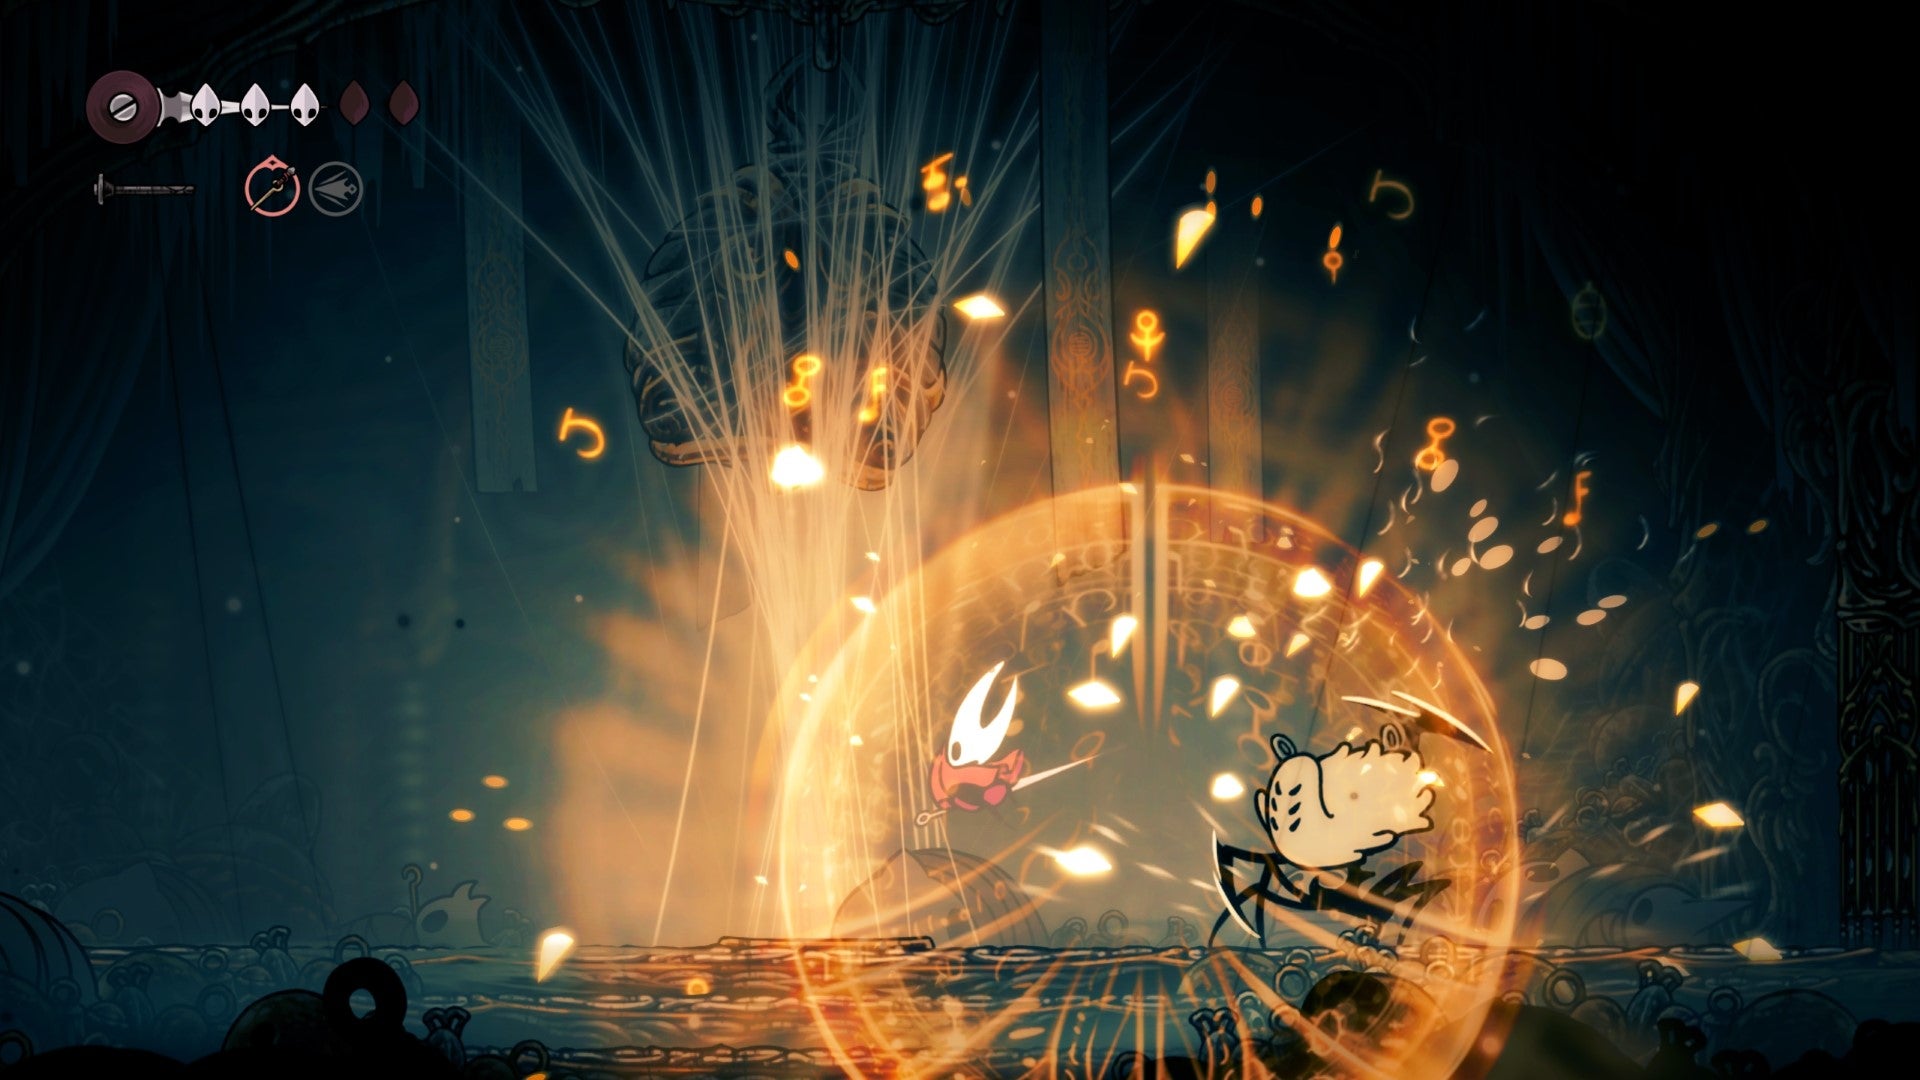
Image credit:Rock Paper Shotgun/Team Cherry
So yes, Silksong is hard, and not always in ways that are fun to overcome. There is, however, a touch of give and take here. In exchange for tougher battles and platforming, exploration and navigation get some concessions – none of which amount to full-on handholding, but should let you enjoy wandering without needing a pad full of notes on the side. Objectives and sidequests, for example, are now tracked in your journal. Metroidvania heresy? Not quite – quest descriptions are still light enough on details that you’ll still need to listen to NPC chatter for meaningful pointers. It’s just a little help with keeping count of which errands you’ve agreed to, or how many collectibles you’ve gathered for certain tasks.
Background signage highlighting benches, shops, and fast travel points also seem more frequent and much harder to miss than in Hollow Knight. Again, this is hardly the game playing itself, but as long as I’m being battered around by double-damaging megafauna, I think I deserve the likes of bigger signs . New players, who are otherwise afforded nothing but pain, should find these help them avoid getting lost as well.
Still, sometimes it’s nice to get lost on purpose. Pharloom is, as previously discussed , an absolute looker, and half the pleasure of navigating its caves, crypts, and palaces is looking for its next chunk of lavishly drawn, beautifully lit fantasyscape. It’s still a broken vestige of a once-prosperous realm, as is custom, but it’s a bit more diverse than Hallownest, enticing you into magma-pooled factories and snow-capped mountains. Where there’s more of a crossover between games, the qualities of each biome seem heightened and intensified: its leafy areas are slightly more verdant, its royal towers slightly more opulent. It’s a darkly wonderful place to be, hardship or no.
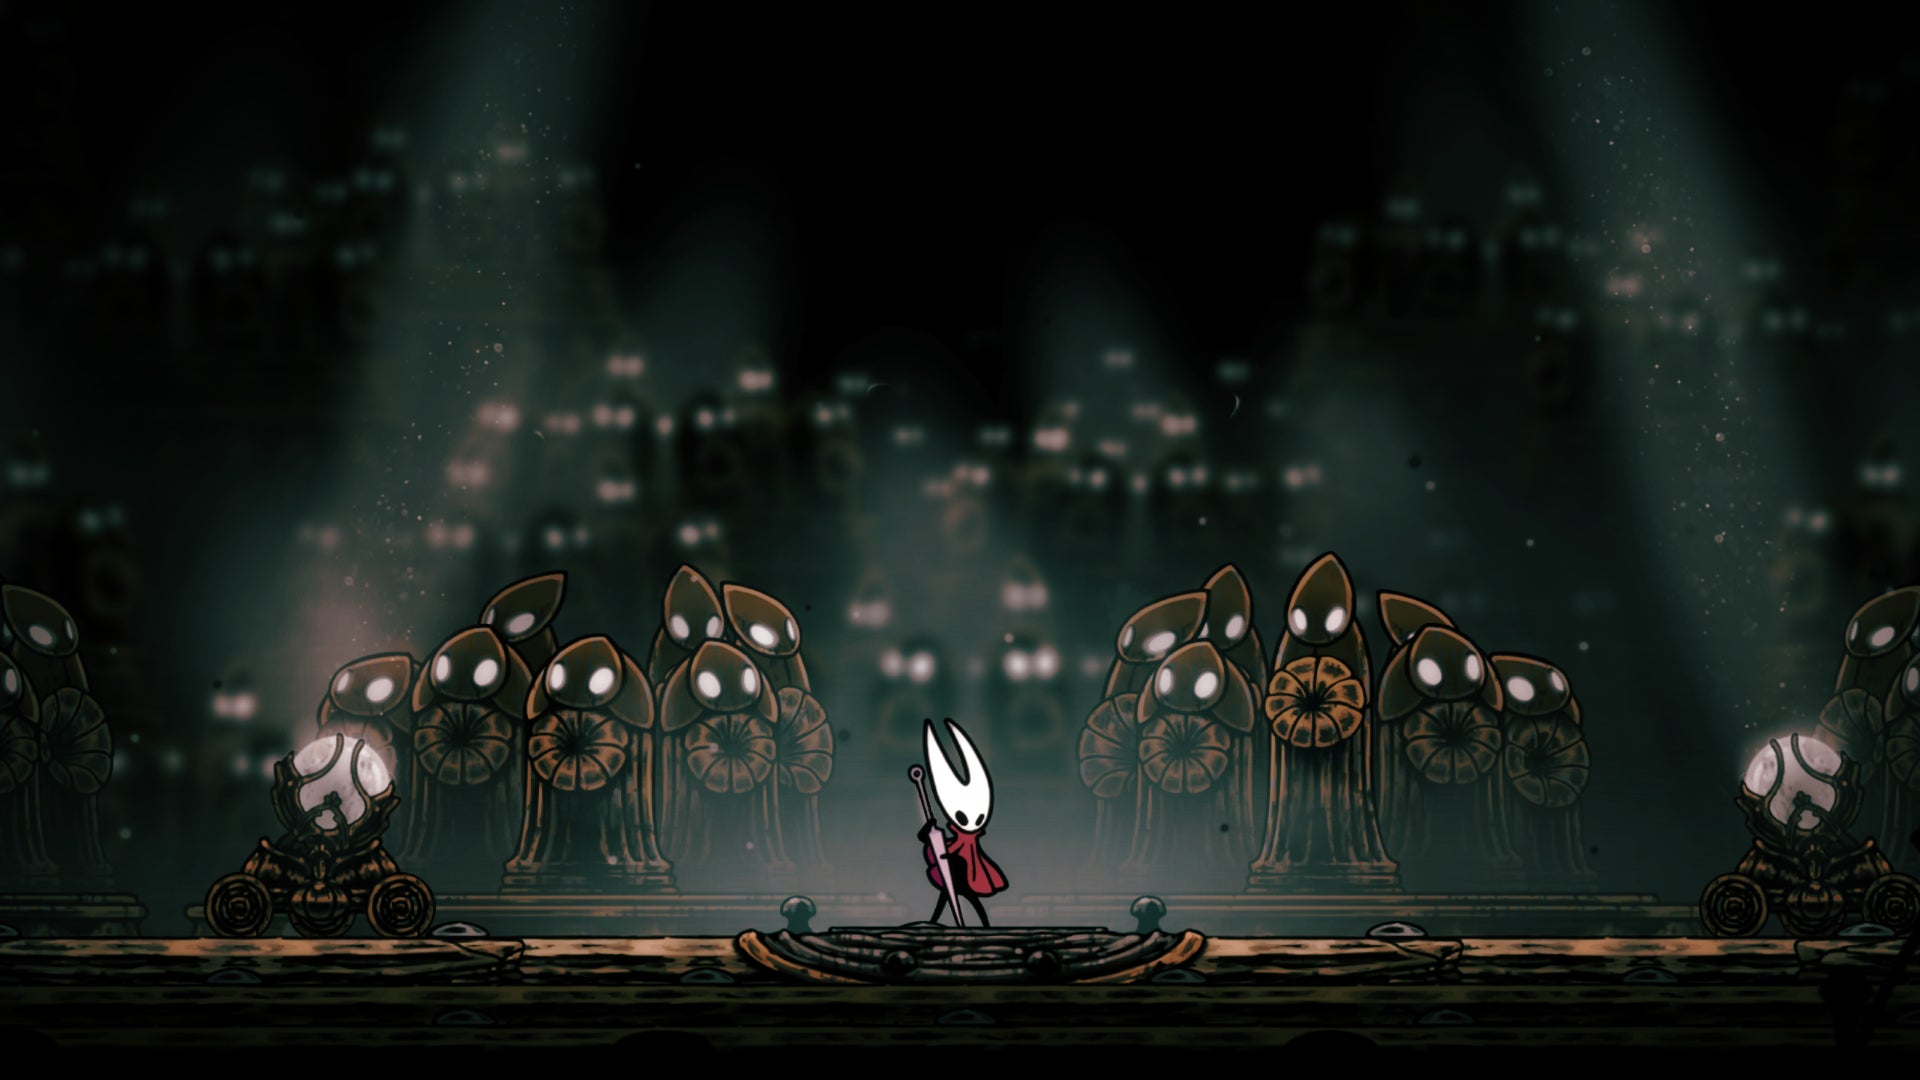
Image credit:Rock Paper Shotgun/Team Cherry
It’s also another, enormous example of how well Team Cherry can effectively beckon you to danger. Almost every tunnel or silo is littered with offshoots and ledges, just begging for a quick look, which often turns into a long look, which might just turn into two hours poking around a completely different area that you may have never discovered if you didn’t take that one turn.
These paths won’t always lead to something grand, or even something you can attend to immediately – this is still the M-V word – but going off-track becomes second nature when so many do lead to something interesting, or valuable, or indeed, something you just know you’ll come back to later. Also, that tingly sense of danger invoked by runback apologists? You get something just like that every time you enter a new area, creeping forward into the unknown with a watchful eye out for ambushes.
There is some backtracking, especially if you’re doing sidequests, though the sprint and those well-marked fast travel spots shave off most of the tedium. Besides, revisiting settlements makes for good opportunities to check in with Silksong’s likeable cast of NPCs, who very often have something new to say on repeat visits – about the world, about its story, about you – even if they’ve nothing new to ask in return.
Silksong’s simplest pleasure, mind, is its greatest one: hitting nasties with a sharp piece of metal. The hefty, percussive thwack of Hornet’s needle is even more of a satisfying sense-tickler than Hollow Knight’s nail, and the extra mobility – compounded by the meatiness and higher damage output of enemies – ensures that fights, big or small, routinely become dynamic back-and-forths where victory or death balance on a pin’s edge. Silksong’s combat has had the better of me dozens of times, and yet it’s so electric and frenetic that writing this paragraph still makes me wish I was back in the midst of it.
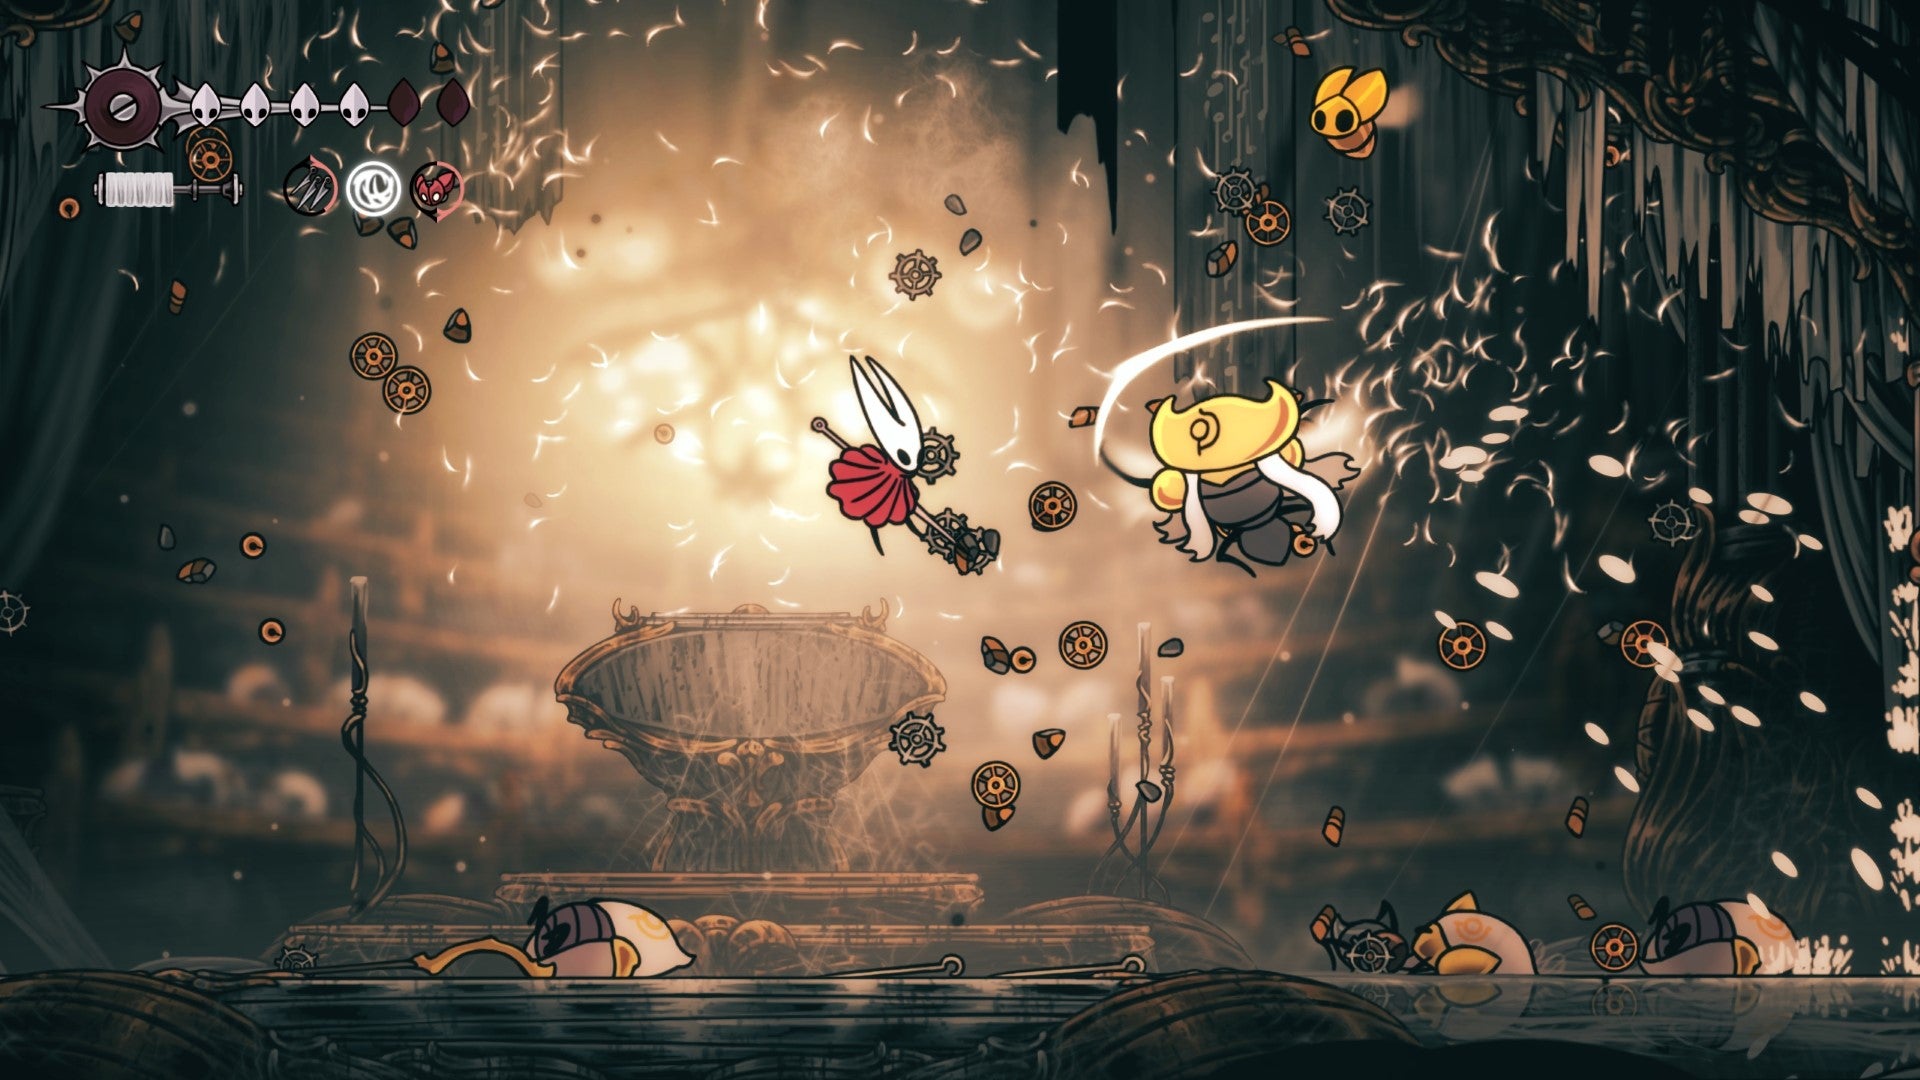
Image credit:Rock Paper Shotgun/Team Cherry
After getting past the initial couple of basic bigbugs, there’s a good mixture of boss concepts in here as well. My favourites are the ones that simply have you one-on-one with direct fighters – straight duels serve as the best showcases for all your combined talents – but there’s a respectable variety across the board, ranging from giants that mess with the safety of the terrain to bullet-hell hazard spewers and, in one particularly memorable battle, twin automatons that make Silksong’s oft-balletic fighting a literal dance. They’re fun to fight, even if they’re not at all fun to lose to.
Happily, Silksong also gives you much more scope to tweak your offensive and defensive options than the original’s charm system afforded. On top of Hornet’s thread skills, replacing the Knight’s spells and Nail Arts, an unlockable array of tools provide heaps of new melee, ranged, or protective gadgets. These all plug into your selected crest, which determines base attack patterns – I ended up settling on the long, loping swings of the Reaper crest, with shorter, faster stabs or more powerful charged-up strikes emerging as alternatives. Ultimately, it all amounts to a welcome degree of flexibility, especially where bosses are concerned. As much as these fights are decided by dodging skills, I’ve definitely had some clashes go smoother after mixing up my tools.
I’m still not convinced that counterbalancing your own strengths requires a mean streak that’s quite as mean as Silksong’s. And I didn’t even have space to complain much about the trade economy, which bleeds you dry for rosary beads (Pharloom’s chosen currency) despite only half the game’s enemies dropping them. Still, when I look at Silksong in my Steam library – a strange thing in itself, given how long it took to get there – I don’t think about counting beads. I don’t even think about boss runbacks. I think about the little branches on my map, representing territory unexplored and adventures yet to be had. I think about how I can shine my needle to a keener edge, and what would happen if I thrust it into that lanky bug I couldn’t get part earlier.
In short: Silksong, I can and will get mad at you. But I can’t stay mad at you. You brilliant, beautiful bastard of a game.
Find out how we conduct our reviews by reading our review policy .

Hollow Knight: Silksong
PC , Nintendo Switch
Rock Paper Shotgun is better when you sign in
Sign in and join us on our journey to discover strange and compelling PC games.

All 75 Arc Raiders Blueprints and where to get them
These areas have the highest chance of giving you Blueprints

Image credit:Rock Paper Shotgun/Embark Studios

Looking for more Arc Raiders Blueprints? It’s a special day when you find a Blueprint, as they’re among the most valuable items in Arc Raiders. If you find a Blueprint that you haven’t already found, then you must make sure you hold onto it at all costs, because Blueprints are the key to one of the most important and powerful systems of meta-progression in the game.
This guide aims to be the very best guide on Blueprints you can find, starting with a primer on what exactly they are and how they work in Arc Raiders, before delving into exactly where to get Blueprints and the very best farming spots for you to take in your search.
We’ll also go over how to get Blueprints from other unlikely activities, such as destroying Surveyors and completing specific quests. And you’ll also find the full list of all 75 Blueprints in Arc Raiders on this page (including the newest Blueprints added with the Cold Snap update , such as the Deadline Blueprint and Firework Box Blueprint), giving you all the information you need to expand your own crafting repertoire.
In this guide:
- What are Blueprints in Arc Raiders?
- Full Blueprint list: All crafting recipes
- Where to find Blueprints in Arc Raiders Blueprints obtained from quests Blueprints obtained from Trials Best Blueprint farming locations

What are Blueprints in Arc Raiders?
Blueprints in Arc Raiders are special items which, if you manage to extract with them, you can expend to permanently unlock a new crafting recipe in your Workshop. If you manage to extract from a raid with an Anvil Blueprint, for example, you can unlock the ability to craft your very own Anvil Pistol, as many times as you like (as long as you have the crafting materials).
To use a Blueprint, simply open your Inventory while in the lobby, then right-click on the Blueprint and click “Learn And Consume” . This will permanently unlock the recipe for that item in your Workshop. As of the Stella Montis update, there are allegedly 75 different Blueprints to unlock - although only 68 are confirmed to be in the game so far. You can see all the Blueprints you’ve found and unlocked by going to the Workshop menu, and hitting “R” to bring up the Blueprint screen.
It’s possible to find duplicates of past Blueprints you’ve already unlocked. If you find these, then you can either sell them, or - if you like to play with friends - you can take it into a match and gift it to your friend so they can unlock that recipe for themselves. Another option is to keep hold of them until the time comes to donate them to the Expedition.
Full Blueprint list: All crafting recipes
Below is the full list of all the Blueprints that are currently available to find in Arc Raiders, and the crafting recipe required for each item:
| Blueprint | Type | Recipe | Crafted At |
|---|---|---|---|
| Bettina | Weapon | 3x Advanced Mechanical Components 3x Heavy Gun Parts 3x Canister | Gunsmith 3 |
| Blue Light Stick | Quick Use | 3x Chemicals | Utility Station 1 |
| Aphelion | Weapon | 3x Magnetic Accelerator 3x Complex Gun Parts 1x Matriarch Reactor | Gunsmith 3 |
| Combat Mk. 3 (Flanking) | Augment | 2x Advanced Electrical Components 3x Processor | Gear Bench 3 |
| Combat Mk. 3 (Aggressive) | Augment | 2x Advanced Electrical Components 3x Processor | Gear Bench 3 |
| Complex Gun Parts | Material | 2x Light Gun Parts 2x Medium Gun Parts 2x Heavy Gun Parts | Refiner 3 |
| Fireworks Box | Quick Use | 1x Explosive Compound 3x Pop Trigger | Explosives Station 2 |
| Gas Mine | Mine | 4x Chemicals 2x Rubber Parts | Explosives Station 1 |
| Green Light Stick | Quick Use | 3x Chemicals | Utility Station 1 |
| Pulse Mine | Mine | 1x Crude Explosives 1x Wires | Explosives Station 1 |
| Seeker Grenade | Grenade | 1x Crude Explosives 2x ARC Alloy | Explosives Station 1 |
| Looting Mk. 3 (Survivor) | Augment | 2x Advanced Electrical Components 3x Processor | Gear Bench 3 |
| Angled Grip II | Mod | 2x Mechanical Components 3x Duct Tape | Gunsmith 2 |
| Angled Grip III | Mod | 2x Mod Components 5x Duct Tape | Gunsmith 3 |
| Hullcracker | Weapon | 1x Magnetic Accelerator 3x Heavy Gun Parts 1x Exodus Modules | Gunsmith 3 |
| Launcher Ammo | Ammo | 5x Metal Parts 1x Crude Explosives | Workbench 1 |
| Anvil | Weapon | 5x Mechanical Components 5x Simple Gun Parts | Gunsmith 2 |
| Anvil Splitter | Mod | 2x Mod Components 3x Processor | Gunsmith 3 |
| ??? | ??? | ??? | ??? |
| Barricade Kit | Quick Use | 1x Mechanical Components | Utility Station 2 |
| Blaze Grenade | Grenade | 1x Explosive Compound 2x Oil | Explosives Station 3 |
| Bobcat | Weapon | 3x Advanced Mechanical Components 3x Light Gun Parts | Gunsmith 3 |
| Osprey | Weapon | 2x Advanced Mechanical Components 3x Medium Gun Parts 7x Wires | Gunsmith 3 |
| Burletta | Weapon | 3x Mechanical Components 3x Simple Gun Parts | Gunsmith 1 |
| Compensator II | Mod | 2x Mechanical Components 4x Wires | Gunsmith 2 |
| Compensator III | Mod | 2x Mod Components 8x Wires | Gunsmith 3 |
| Defibrillator | Quick Use | 9x Plastic Parts 1x Moss | Medical Lab 2 |
| ??? | ??? | ??? | ??? |
| Equalizer | Weapon | 3x Magnetic Accelerator 3x Complex Gun Parts 1x Queen Reactor | Gunsmith 3 |
| Extended Barrel | Mod | 2x Mod Components 8x Wires | Gunsmith 3 |
| Extended Light Mag II | Mod | 2x Mechanical Components 3x Steel Spring | Gunsmith 2 |
| Extended Light Mag III | Mod | 2x Mod Components 5x Steel Spring | Gunsmith 3 |
| Extended Medium Mag II | Mod | 2x Mechanical Components 3x Steel Spring | Gunsmith 2 |
| Extended Medium Mag III | Mod | 2x Mod Components 5x Steel Spring | Gunsmith 3 |
| Extended Shotgun Mag II | Mod | 2x Mechanical Components 3x Steel Spring | Gunsmith 2 |
| Extended Shotgun Mag III | Mod | 2x Mod Components 5x Steel Spring | Gunsmith 3 |
| Remote Raider Flare | Quick Use | 2x Chemicals 4x Rubber Parts | Utility Station 1 |
| Heavy Gun Parts | Material | 4x Simple Gun Parts | Refiner 2 |
| Venator | Weapon | 2x Advanced Mechanical Components 3x Medium Gun Parts 5x Magnet | Gunsmith 3 |
| Il Toro | Weapon | 5x Mechanical Components 6x Simple Gun Parts | Gunsmith 1 |
| Jolt Mine | Mine | 1x Electrical Components 1x Battery | Explosives Station 2 |
| Explosive Mine | Mine | 1x Explosive Compound 1x Sensors | Explosives Station 3 |
| Jupiter | Weapon | 3x Magnetic Accelerator 3x Complex Gun Parts 1x Queen Reactor | Gunsmith 3 |
| Light Gun Parts | Material | 4x Simple Gun Parts | Refiner 2 |
| Lightweight Stock | Mod | 2x Mod Components 5x Duct Tape | Gunsmith 3 |
| Lure Grenade | Grenade | 1x Speaker Component 1x Electrical Components | Utility Station 2 |
| Medium Gun Parts | Material | 4x Simple Gun Parts | Refiner 2 |
| Torrente | Weapon | 2x Advanced Mechanical Components 3x Medium Gun Parts 6x Steel Spring | Gunsmith 3 |
| Muzzle Brake II | Mod | 2x Mechanical Components 4x Wires | Gunsmith 2 |
| Muzzle Brake III | Mod | 2x Mod Components 8x Wires | Gunsmith 3 |
| Padded Stock | Mod | 2x Mod Components 5x Duct Tape | Gunsmith 3 |
| Shotgun Choke II | Mod | 2x Mechanical Components 4x Wires | Gunsmith 2 |
| Shotgun Choke III | Mod | 2x Mod Components 8x Wires | Gunsmith 3 |
| Shotgun Silencer | Mod | 2x Mod Components 8x Wires | Gunsmith 3 |
| Showstopper | Grenade | 1x Advanced Electrical Components 1x Voltage Converter | Explosives Station 3 |
| Silencer I | Mod | 2x Mechanical Components 4x Wires | Gunsmith 2 |
| Silencer II | Mod | 2x Mod Components 8x Wires | Gunsmith 3 |
| Snap Hook | Quick Use | 2x Power Rod 3x Rope 1x Exodus Modules | Utility Station 3 |
| Stable Stock II | Mod | 2x Mechanical Components 3x Duct Tape | Gunsmith 2 |
| Stable Stock III | Mod | 2x Mod Components 5x Duct Tape | Gunsmith 3 |
| Tagging Grenade | Grenade | 1x Electrical Components 1x Sensors | Utility Station 3 |
| Tempest | Weapon | 3x Advanced Mechanical Components 3x Medium Gun Parts 3x Canister | Gunsmith 3 |
| Trigger Nade | Grenade | 2x Crude Explosives 1x Processor | Explosives Station 2 |
| Vertical Grip II | Mod | 2x Mechanical Components 3x Duct Tape | Gunsmith 2 |
| Vertical Grip III | Mod | 2x Mod Components 5x Duct Tape | Gunsmith 3 |
| Vita Shot | Quick Use | 2x Antiseptic 1x Syringe | Medical Lab 3 |
| Vita Spray | Quick Use | 3x Antiseptic 1x Canister | Medical Lab 3 |
| Vulcano | Weapon | 1x Magnetic Accelerator 3x Heavy Gun Parts 1x Exodus Modules | Gunsmith 3 |
| Wolfpack | Grenade | 2x Explosive Compound 2x Sensors | Explosives Station 3 |
| Red Light Stick | Quick Use | 3x Chemicals | Utility Station 1 |
| Smoke Grenade | Grenade | 14x Chemicals 1x Canister | Utility Station 2 |
| Deadline | Mine | 3x Explosive Compound 2x ARC Circuitry | Explosives Station 3 |
| Trailblazer | Grenade | 1x Explosive Compound 1x Synthesized Fuel | Explosives Station 3 |
| Tactical Mk. 3 (Defensive) | Augment | 2x Advanced Electrical Components 3x Processor | Gear Bench 3 |
| Tactical Mk. 3 (Healing) | Augment | 2x Advanced Electrical Components 3x Processor | Gear Bench 3 |
| Yellow Light Stick | Quick Use | 3x Chemicals | Utility Station 1 |
Note: The missing Blueprints in this list likely have not actually been added to the game at the time of writing, because none of the playerbase has managed to find any of them. As they are added to the game, I will update this page with the most relevant information so you know exactly how to get all 75 Arc Raiders Blueprints.
Where to find Blueprints in Arc Raiders
Below is a list of all containers, modifiers, and events which maximise your chances of finding Blueprints:
- Certain quests reward you with specific Blueprints .
- Completing Trials has a high chance of offering Blueprints as rewards.
- Surveyors have a decent chance of dropping Blueprints on death.
- High loot value areas tend to have a greater chance of spawning Blueprints.
- Night Raids and Storms may increase rare Blueprint spawn chances in containers.
- Containers with higher numbers of items may have a higher tendency to spawn Blueprints. As a result, Blue Gate (which has many “large” containers containing multiple items) may give you a higher chance of spawning Blueprints.
- Raider containers (Raider Caches, Weapon Boxes, Medical Bags, Grenade Tubes) have increased Blueprint drop rates. As a result, the Uncovered Caches event gives you a high chance of finding Blueprints.
- Security Lockers have a higher than average chance of containing Blueprints.
- Certain Blueprints only seem to spawn under specific circumstances: Tempest Blueprint only spawns during Night Raid events. Vulcano Blueprint only spawns during Hidden Bunker events. Jupiter and Equaliser Blueprints only spawn during Harvester events.

Raider Caches, Weapon Boxes, and other raider-oriented container types have a good chance of offering Blueprints. |Image credit:Rock Paper Shotgun/Embark Studios
Blueprints have a very low chance of spawning in any container in Arc Raiders, around 1-2% on average. However, there is a higher chance of finding Blueprints in particular container types. Specifically, you can find more Blueprints in Raider containers and security lockers.
Beyond this, if you’re looking for Blueprints you should focus on regions of the map which are marked as having particularly high-value loot. Areas such as the Control Tower in Dam Battlegrounds, the Arrival and Departure Buildings in Spaceport, and Pilgrim’s Peak in Blue Gate all have a better-than-average chance of spawning Blueprints somewhere amongst all their containers. Night Raids and Electromagnetic Storm events also increase the drop chances of certain Blueprints .
In addition to these containers, you can often loot Blueprints from destroyed Surveyors - the largest of the rolling ball ARC. Surveyors are more commonly found on the later maps - Spaceport and Blue Gate - and if one spawns in your match, you’ll likely see it by the blue laser beam that it casts into the sky while “surveying”.
Surveyors are quite well-armoured and will very speedily run away from you once it notices you, but if you can take one down then make sure you loot all its parts for a chance of obtaining certain unusual Blueprints.
Blueprints obtained from quests
One way in which you can get Blueprints is by completing certain quests for the vendors in Speranza. Some quests will reward you with a specific item Blueprint upon completion, so as long as you work through all the quests in Arc Raiders, you are guaranteed those Blueprints.
Here is the full list of all Blueprints you can get from quest rewards:
- Trigger Nade Blueprint: Rewarded after completing “Sparks Fly”.
- Lure Grenade Blueprint: Rewarded after completing “Greasing Her Palms”.
- Burletta Blueprint: Rewarded after completing “Industrial Espionage”.
- Hullcracker Blueprint (and Launcher Ammo Blueprint): Rewarded after completing “The Major’s Footlocker”.
Alas, that’s only 4 Blueprints out of a total of 75 to unlock, so for the vast majority you will need to find them yourself during a raid. If you’re intent on farming Blueprints, then it’s best to equip yourself with cheap gear in case you lose it, but don’t use a free loadout because then you won’t get a safe pocket to stash any new Blueprint you find. No pain in Arc Raiders is sharper than failing to extract with a new Blueprint you’ve been after for a dozen hours already.

One of the best ways to get Blueprints is by hitting three stars on all five Trials every week. |Image credit:Rock Paper Shotgun/Embark Studios
Blueprints obtained from Trials
One of the very best ways to get Blueprints is as rewards for completing Trials in Arc Raiders. Trials are unlocked from Level 15 onwards, and allow you to earn rewards by focusing on certain tasks over the course of several raids. For example, one Trial might task you with dealing damage to Hornets, while another might challenge you to loot Supply Drops.
Trials refresh on a weekly basis, with a new week bringing five new Trials. Each Trial can offer up to three rewards after passing certain score milestones, and it’s possible to receive very high level loot from these reward crates - including Blueprints. So if you want to unlock as many Blueprints as possible, you should make a point of completing as many Trials as possible each week.
Best Blueprint farming locations
The very best way to get Blueprints is to frequent specific areas of the maps which combine high-tier loot pools with the right types of containers to search. Here are my recommendations for where to find Blueprints on every map, so you can always keep the search going for new crafting recipes to unlock.

Image credit:Rock Paper Shotgun/Embark Studios
Dam Battlegrounds
The best places to farm Blueprints on Dam Battlegrounds are the Control Tower, Power Generation Complex, Ruby Residence, and Pale Apartments . The first two regions, despite only being marked on the map as mid-tier loot, contain a phenomenal number of containers to loot. The Control Tower can also contain a couple of high-tier Security Lockers - though of course, you’ll need to have unlocked the Security Breach skill at the end of the Survival tree.
There’s also a lot of reporting amongst the playerbase that the Residential areas in the top-left of the map - Pale Apartments and Ruby Residence - give you a comparatively strong chance of finding Blueprints. Considering their size, there’s a high density of containers to loot in both locations, and they also have the benefit of being fairly out of the way. So you’re more likely to have all the containers to yourself.
Buried City
The best Blueprint farming locations on Buried City are the Santa Maria Houses, Grandioso Apartments, Town Hall, and the various buildings of the New District . Grandioso Apartments has a lower number of containers than the rest, but a high chance of spawning weapon cases - which have good Blueprint drop rates. The others are high-tier loot areas, with plenty of lootable containers - including Security Lockers.
Spaceport
The best places to find Blueprints on Spaceport are the Arrival and Departure Buildings, as well as Control Tower A6 and the Launch Towers . All these areas are labelled as high-value loot regions, and many of them are also very handily connected to one another by the Spaceport wall, which you can use to quickly run from one area to the next. At the tops of most of these buildings you’ll find at least one Security Locker, so this is an excellent farming route for players looking to find Blueprints.
The downside to looting Blueprints on Spaceport is that all these areas are hotly contested, particularly in Duos and Squads. You’ll need to be very focused and fast in order to complete the full farming route.

Image credit:Rock Paper Shotgun/Embark Studios
Blue Gate
Blue Gate tends to have a good chance of dropping Blueprints, potentially because it generally has a high number of containers which can hold lots of items; so there’s a higher chance of a Blueprint spawning in each container. In my experience, the best Blueprint farming spots on Blue Gate are Pilgrim’s Peak, Raider’s Refuge, the Ancient Fort, and the Underground Complex beneath the Warehouse .
All of these areas contain a wealth of containers to loot. Raider’s Refuge has less to loot, but the majority of the containers in and around the Refuge are raider containers, which have a high chance of containing Blueprints - particularly during major events.
Stella Montis
On the whole, Stella Montis seems to have a very low drop rate for Blueprints (though a high chance of dropping other high-tier loot). If you do want to try farming Blueprints on this map, the best places to find Blueprints in Stella Montis are Medical Research, Assembly Workshop, and the Business Center . These areas have the highest density of containers to loot on the map.
In addition to this, the Western Tunnel has a few different Security Lockers to loot, so while there’s very little to loot elsewhere in this area of the map, it’s worth hitting those Security Lockers if you spawn there at the start of a match.
That wraps up this primer on how to get all the Blueprints in Arc Raiders as quickly as possible. With the Expedition system constantly resetting a large number of players’ Blueprints, it’s more important than ever to have the most up-to-date information on where to find all these Blueprints.
While you’re here, be sure to check out our Arc Raiders best guns tier list , as well as our primers on the best skills to unlock and all the different Field Depot locations on every map.

ARC Raiders
PS5 , Xbox Series X/S , PC
Rock Paper Shotgun is better when you sign in
Sign in and join us on our journey to discover strange and compelling PC games.
