Helldivers 2 review: a co-op shooter mixed with comedy genius
My idea of heaven

Image credit:Rock Paper Shotgun/PlayStation PC LLC

- Developer: Arrowhead Games
- Publisher: PlayStation PC LLC
- Release: Out now
- On: Windows
- From: Steam , Epic Games Store
- Price: £35/€40/$40
- Reviewed on: Intel Core i7-12700F, 16GB RAM, Nvidia RTX 3080, Windows 11
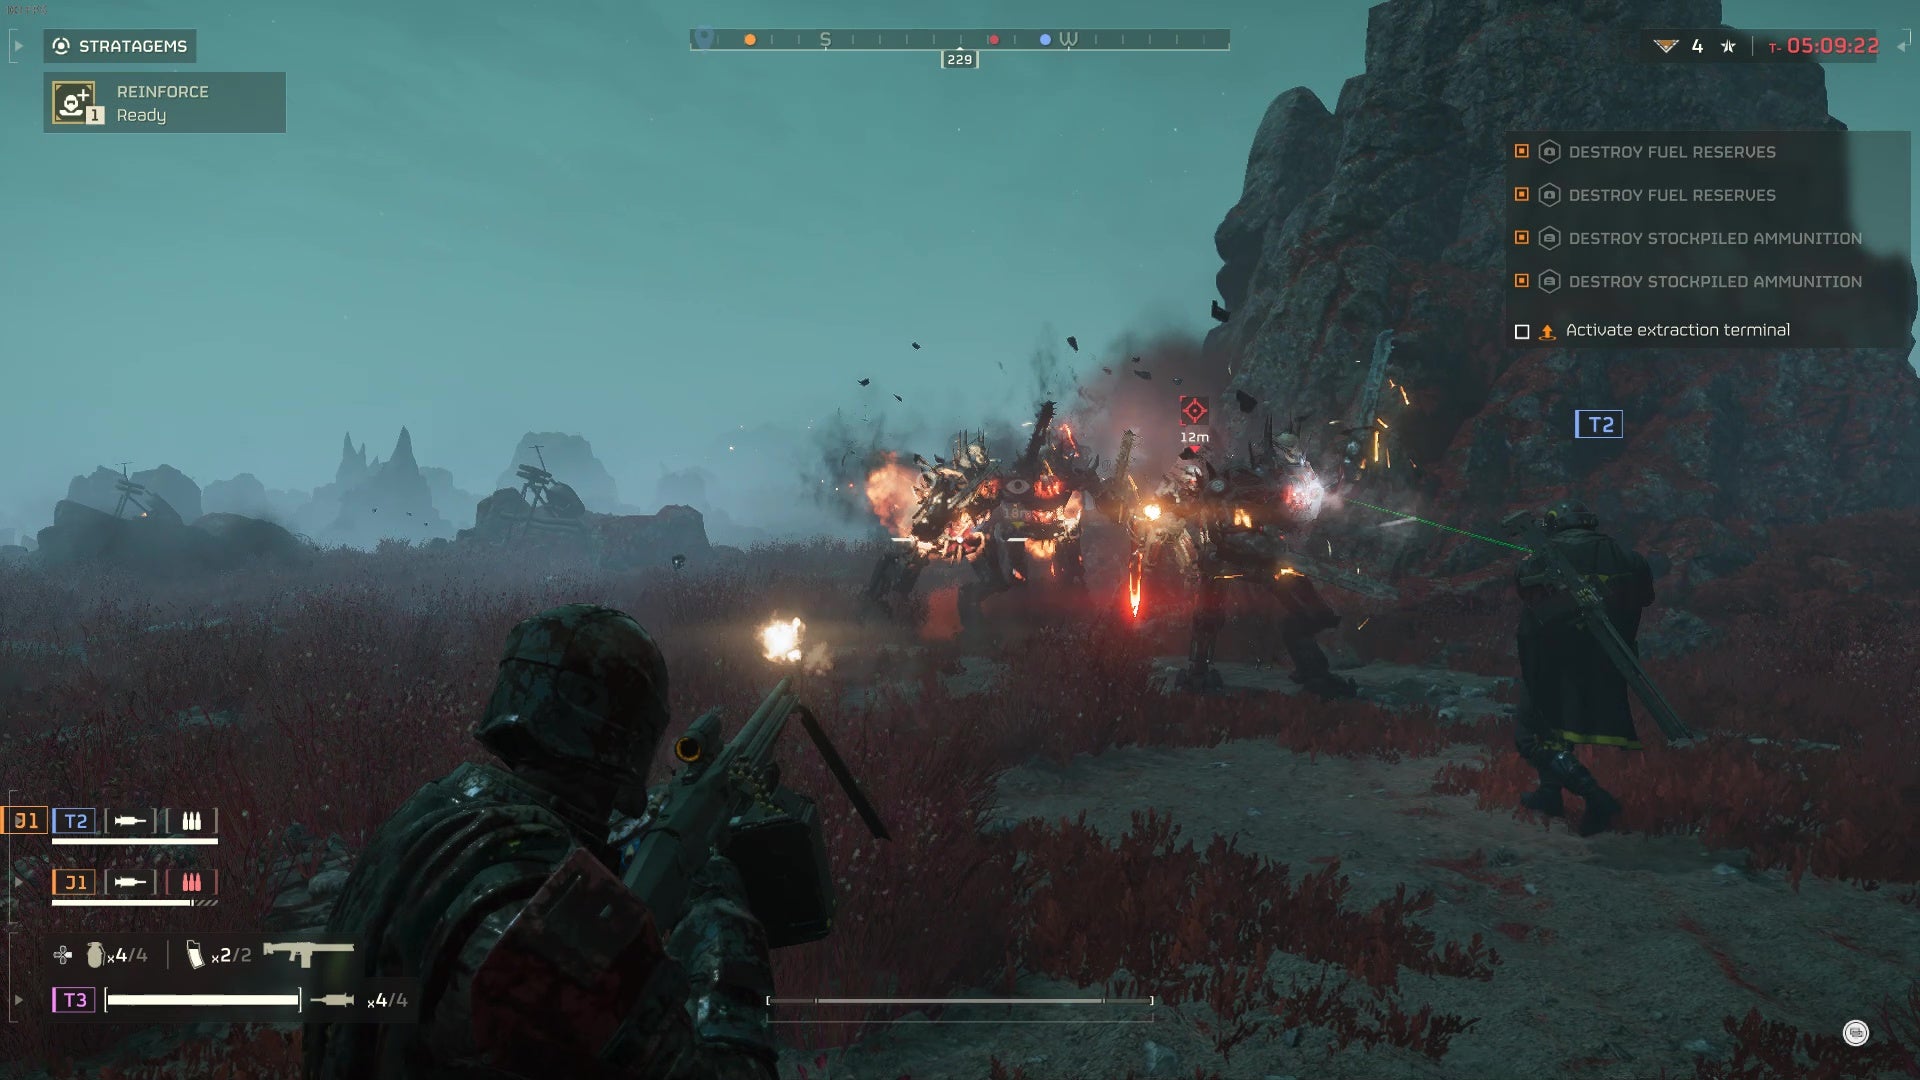
Helldivers 2 is a third-person co-op shooter that’s centred as much around action as it is comedy. Gigantic insects and red-eyed robots threaten the sanctity of Super Earth and, frankly, this isn’t on. As a Helldiver, you must team up with your compatriots and pulverise these menaces for freedom (a shoulder-mounted laser cannon) and democracy (an aerial bombardment). Seriousness is reserved for the act of extermination, which adds tactility to the familiar motions of a shooter, making for horde management that promotes efficiency and frequent lapses of judgement in equal measure. Helldivers 2 is a slapstick masterpiece.
To begin proceedings, you post up in your spaceship, or the ship of whoever’s hosting your co-op group. All ships have identical interiors, but you can customise your soldier’s armour, weaponry, bonuses, and Stratagems (special abilities) in what quickly becomes a nice breathing space to decompress, spend, and re-energise. In the cockpit you’ll then select a mission from a roundtable that brings the Galactic War into perspective. In the centre is Super Earth. To the West are planets rife with Automatons, in what’s basically T-1000 Hills. And to the East are planets blighted by giant bugs with a penchant for mandibles and bulging gas sacks. You’ll then select a planet in one of these halves, with missions sorted by difficulty and whatever form the subsequent eradication will take.
Helldivers supports crossplay, and I found it easy enough to join my pals on PlayStation 5. It was simply a case of exchanging friend codes, before I could join them pre-mission or even mid-game. I’ve had zero issues so far. |Image credit:Rock Paper Shotgun/PlayStation
All missions have a timer that counts down, whether that be a lengthy 30-minutes or a quickfire fifteen, and it’s your job to complete the main objectives within the time limit. For instance, destroying a number of bug nests before the final big ask - extracting safely. Feeling confident? Some missions are home to optional objectives, so if you tick those off and zip out of there safely, you’ll receive bonus rewards. Fail to extract and you’ll still get currency for upgrades, but they’ll be trimmed down a touch. And to clear up any potential live-service scares: yes, there’s a paid battle pass with some powerful goodies, but rewards don’t ever make it feel like a focus.
The loop, then, is to rinse bugs or robots, get home, buy some new toys, and do it again and again and again. While this might sound a bit repetitive, it’s the act of diving into hell and fending off the droves that keeps you coming back, not necessarily the rewards. Finally, we have a live service game that values heft over numbers, and dismemberment over health bars, so much so that a new shotgun excites me by virtue of how it’ll feel in the hands and not where it sits within a rarity rainbow. The only rarity rainbow you’ll find here is when light glints off your comrades’ limbs as they tumble through the air. On second thought… they’re just rainbows.
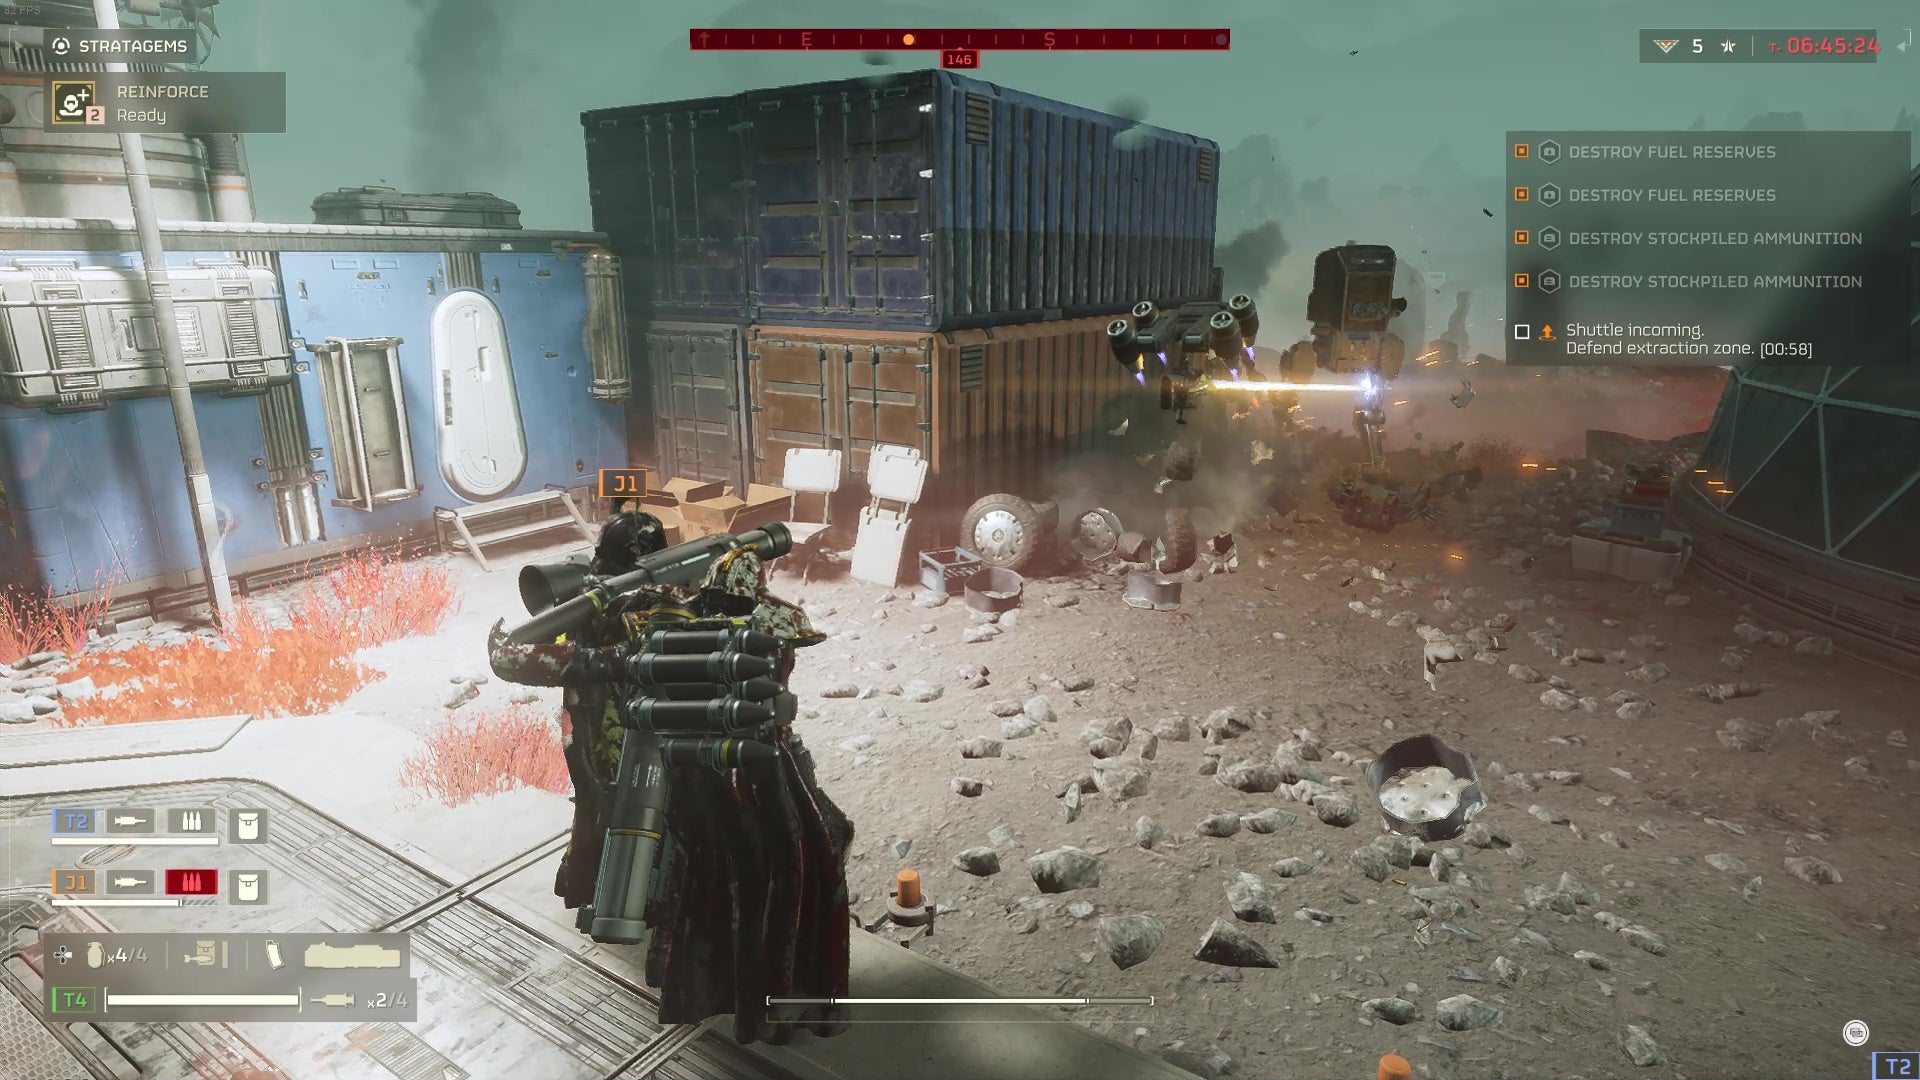
I particularly love how some Stratagems force jolly co-operation, like one particular rocket launcher. To make it function, one of you needs to wear a backpack full of shells, which you’ll then feed into the rocket launcher as your pal pulls the trigger. |Image credit:Rock Paper Shotgun/PlayStation
For those versed in third-person shooters , combat eases you in with a familiar rhythm of shooting, reloading, sprinting, and the like. But in many of these motions lie little details that force the management section of your brain to spin, delicately putting you under more strain as the hordes close in. For instance, reloading before you’ve emptied a magazine means wasting precious unused bullets, while accuracy is determined by your stance, so standing still or crouching means a greater chance of successful slaughter.
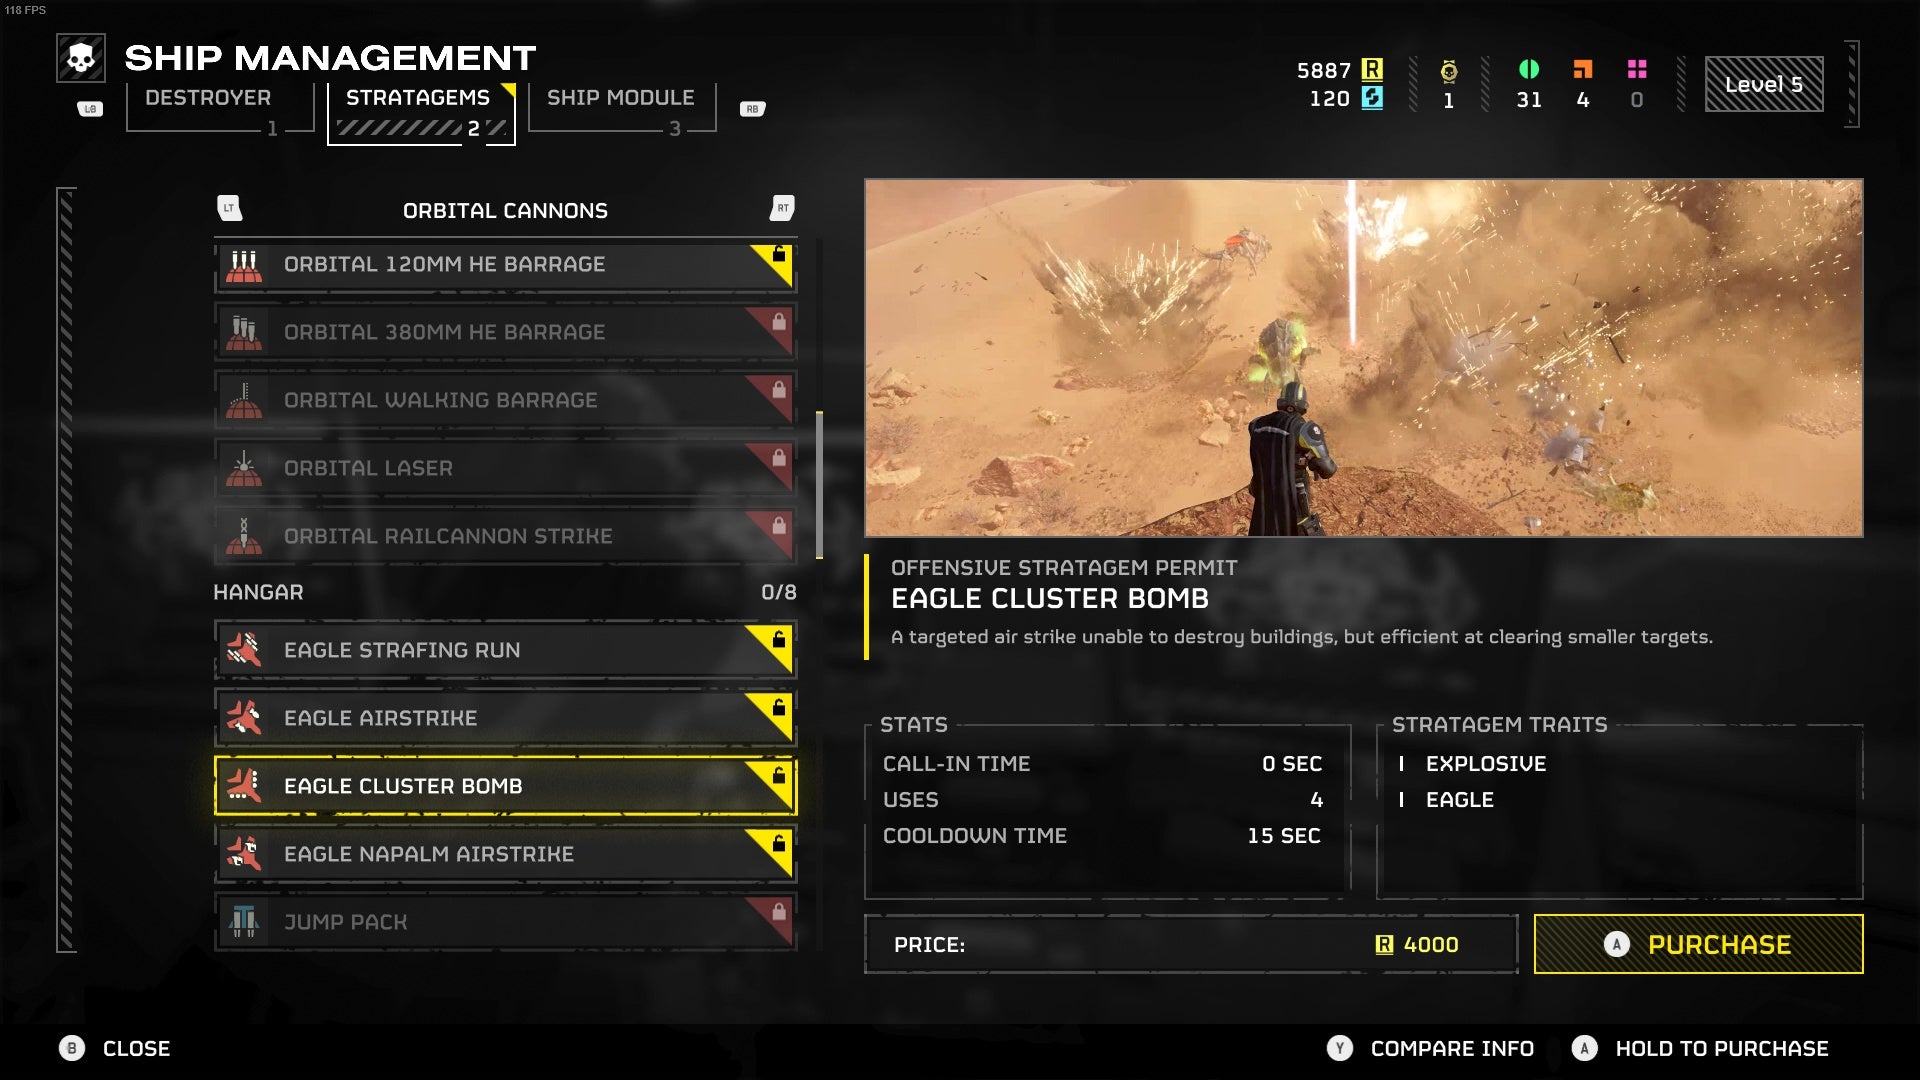
If shooting is your bread, then Stratagems are your butter. Unlockable back at your ship, these are powerful tools that’ll rain down from the sky, either in a delivery pod or as an explosive shelling. You can carry up to four in total, all of which have cooldowns and - Helldivers 2 is a generous soul - unlimited uses. Again, you can’t just press a button and they’ll conveniently fly in, oh no! Like a fighting game , you’ll need to stand stock still and stab a short combination of button presses to make it appear as a grenade in your hand. Lob the Stratagem and it’ll call forth a blue beam for “care package”, and a red beam for “if you stand anywhere near this, you will die”.
Stratagems are a real spectacle. Nothing beats watching an orbital strike slam into a turret post and reduce it to metal splinters, or watching as your robot companion’s laser sizzles through Terminids. But a greater joy lies in co-ordinating your abilities with your pals, as the key to tackling the toughest missions is having a variety of tools at your disposal. I often bring an anti-tank missile launcher in with me, so my pals and I have a way to crack open the beefiest armoured lads, reducing them from terrifying threats to glorified walnuts. Another of friend is also partial to a gatling turret for extra firepower in final stand moments. Others focus more on artillery. Napalm strikes built for roasting enormous nests. Nuke equivalents that melt entire armies. A bomb that creates an acidic haze.
If it wasn’t already clear, the game’s challenges aren’t designed to be met by a resistance of one. It’s built with co-op in mind and I can’t envision myself playing it alone. An option to matchmake with randoms is present, but I’d say it’s far from the true experience of cackling alongside your friends. |Image credit:Rock Paper Shotgun/PlayStation
Success is somewhat determined by the Stratagems you’ve earned, but clearing the toughest stages becomes an exercise in clarity of thought as chaos descends around you. The joy of Helldivers 2 is in the mastery of its motions and in the management of your sky tools, so even the most insurmountable odds always feel doable. Upping the difficulty level means stronger enemies who require more tactical nous to bring down, not a bump in a gear requirement; refreshing, to say the least.
And it’s the Stratagems that provide many slapstick moments. Honestly, Helldivers 2 might be funniest game of the year, as the pressure of the bugs and the robots and the forced physicality of your inputs encourages a comedy of human error. A ‘friendly’ turret might target an enemy in the distance mincing your friend who unknowingly stumbles into its bullet stream, then a bomb blast might send you tumbling into a lake. One time, a friend checked Xwitter for a split-second and he walked straight into a mine, vaporising him instantly. Another time, a friend shot a seemingly innocuous canister, only for all of our screens to turn white. He’d unleashed a nuke, killing us all instantly.
Death isn’t the end in Helldivers 2, though. This is a game that understands the importance of generosity, giving all players a single pool of lives to draw from during a mission. If a friend carks it, you can call them back in via the “Reinforcement” Stratagem, which is normally one of the simpler ones to pull off, though in hairier moments even this can feel like quite a task in and of itself. But even when that life pool drops down to one, Helldivers 2 is there, ready to give you another leg up. Instead of punishing you with a fatal zero, you’ll simply enter a longer, more charitable cooldown period, giving your remaining ally the chance they need to survive just long enough to sling a friend back into the fray. It feeds the fantasy of that last ditch effort, and begets fun every single time.

Image credit:Rock Paper Shotgun/PlayStation

Performance for me has been absolutely fine on the highest settings. And as for thoseserver issues, no major qualms that would affect this review. They’ll get sorted eventually (some already have)and the devs are doing their utmost to iron out any lingering problems.Image credit:Rock Paper Shotgun/PlayStation
The game also knows that variety keeps missions from growing stale. You’ll still encounter the same objectives every now and again, but the act of completion is joyful enough to keep them engaging. Whether you’re exploding an outpost or loading up an enormous missile silo by literally depositing ammunition into its maw, every act is carried by how it all feels: heavy, frantic and, perhaps most of all, impactful. Some objectives you complete actually reward you with in-game changes, like the missile silo appearing in your Stratagems tab as a powerful aerial barrage, or the felling of a gigantic mushroom clearing the smog that’s plagued your visibility.
Helldivers 2 offers up a good range of enemy types to tackle as well. On the robot side in particular, many of them require co-ordinated teamwork to take down, with Star Wars-esque walkers needing a good flank to kill the spindly lad who controls them, while chainsaw-handed warriors require precise amputation, stat. The bugs are perhaps less ambitious on this front - based on my current experience, it seems like they mostly consist of 90% fodder and only 10% hulking chargers or stealthy stalkers, and I’d like to see a few more medium-sized horribles to keep things lively. Still, these are very small gripes in the grand scheme of things, and the planets make up for these deficiencies by being, well, really pretty and laid out so that you’re never far from an interesting objective.
Helldivers 2 has filled an ache in my heart. My friends and I have longed for another fun co-op shooter since we all drifted away from Warzone, and Helldivers 2 has exceeded my expectations on every front - and particularly as someone who’s grown tired of live service tropes . Yes, it might be lean in comparison to some live service giants when it comes to unlockables ( looking at you, Destiny 2 ), but I think it has a longer tail by virtue of silliness being its top priority, where twists on simple acts make it a laugh generator and skill venerator. I could go on about how you can switch to first person for crunchier, more accurate shooting. How rockets can turn into explosive skimming stones if you angle them at the dirt. How the orange flashes of a gatling gun cutting through a dense mist is so beautiful it brings a tear to my eye. Oh heck, just buy the damn thing.
This review is based on a retail build of the game, provided by publishers PlayStation PC LLC.
Find out how we conduct our reviews by reading our review policy .
Helldivers 2
PS5 , PC
Rock Paper Shotgun is better when you sign in
Sign in and join us on our journey to discover strange and compelling PC games.

All 75 Arc Raiders Blueprints and where to get them
These areas have the highest chance of giving you Blueprints

Image credit:Rock Paper Shotgun/Embark Studios

Looking for more Arc Raiders Blueprints? It’s a special day when you find a Blueprint, as they’re among the most valuable items in Arc Raiders. If you find a Blueprint that you haven’t already found, then you must make sure you hold onto it at all costs, because Blueprints are the key to one of the most important and powerful systems of meta-progression in the game.
This guide aims to be the very best guide on Blueprints you can find, starting with a primer on what exactly they are and how they work in Arc Raiders, before delving into exactly where to get Blueprints and the very best farming spots for you to take in your search.
We’ll also go over how to get Blueprints from other unlikely activities, such as destroying Surveyors and completing specific quests. And you’ll also find the full list of all 75 Blueprints in Arc Raiders on this page (including the newest Blueprints added with the Cold Snap update , such as the Deadline Blueprint and Firework Box Blueprint), giving you all the information you need to expand your own crafting repertoire.
In this guide:
- What are Blueprints in Arc Raiders?
- Full Blueprint list: All crafting recipes
- Where to find Blueprints in Arc Raiders Blueprints obtained from quests Blueprints obtained from Trials Best Blueprint farming locations

What are Blueprints in Arc Raiders?
Blueprints in Arc Raiders are special items which, if you manage to extract with them, you can expend to permanently unlock a new crafting recipe in your Workshop. If you manage to extract from a raid with an Anvil Blueprint, for example, you can unlock the ability to craft your very own Anvil Pistol, as many times as you like (as long as you have the crafting materials).
To use a Blueprint, simply open your Inventory while in the lobby, then right-click on the Blueprint and click “Learn And Consume” . This will permanently unlock the recipe for that item in your Workshop. As of the Stella Montis update, there are allegedly 75 different Blueprints to unlock - although only 68 are confirmed to be in the game so far. You can see all the Blueprints you’ve found and unlocked by going to the Workshop menu, and hitting “R” to bring up the Blueprint screen.
It’s possible to find duplicates of past Blueprints you’ve already unlocked. If you find these, then you can either sell them, or - if you like to play with friends - you can take it into a match and gift it to your friend so they can unlock that recipe for themselves. Another option is to keep hold of them until the time comes to donate them to the Expedition.
Full Blueprint list: All crafting recipes
Below is the full list of all the Blueprints that are currently available to find in Arc Raiders, and the crafting recipe required for each item:
| Blueprint | Type | Recipe | Crafted At |
|---|---|---|---|
| Bettina | Weapon | 3x Advanced Mechanical Components 3x Heavy Gun Parts 3x Canister | Gunsmith 3 |
| Blue Light Stick | Quick Use | 3x Chemicals | Utility Station 1 |
| Aphelion | Weapon | 3x Magnetic Accelerator 3x Complex Gun Parts 1x Matriarch Reactor | Gunsmith 3 |
| Combat Mk. 3 (Flanking) | Augment | 2x Advanced Electrical Components 3x Processor | Gear Bench 3 |
| Combat Mk. 3 (Aggressive) | Augment | 2x Advanced Electrical Components 3x Processor | Gear Bench 3 |
| Complex Gun Parts | Material | 2x Light Gun Parts 2x Medium Gun Parts 2x Heavy Gun Parts | Refiner 3 |
| Fireworks Box | Quick Use | 1x Explosive Compound 3x Pop Trigger | Explosives Station 2 |
| Gas Mine | Mine | 4x Chemicals 2x Rubber Parts | Explosives Station 1 |
| Green Light Stick | Quick Use | 3x Chemicals | Utility Station 1 |
| Pulse Mine | Mine | 1x Crude Explosives 1x Wires | Explosives Station 1 |
| Seeker Grenade | Grenade | 1x Crude Explosives 2x ARC Alloy | Explosives Station 1 |
| Looting Mk. 3 (Survivor) | Augment | 2x Advanced Electrical Components 3x Processor | Gear Bench 3 |
| Angled Grip II | Mod | 2x Mechanical Components 3x Duct Tape | Gunsmith 2 |
| Angled Grip III | Mod | 2x Mod Components 5x Duct Tape | Gunsmith 3 |
| Hullcracker | Weapon | 1x Magnetic Accelerator 3x Heavy Gun Parts 1x Exodus Modules | Gunsmith 3 |
| Launcher Ammo | Ammo | 5x Metal Parts 1x Crude Explosives | Workbench 1 |
| Anvil | Weapon | 5x Mechanical Components 5x Simple Gun Parts | Gunsmith 2 |
| Anvil Splitter | Mod | 2x Mod Components 3x Processor | Gunsmith 3 |
| ??? | ??? | ??? | ??? |
| Barricade Kit | Quick Use | 1x Mechanical Components | Utility Station 2 |
| Blaze Grenade | Grenade | 1x Explosive Compound 2x Oil | Explosives Station 3 |
| Bobcat | Weapon | 3x Advanced Mechanical Components 3x Light Gun Parts | Gunsmith 3 |
| Osprey | Weapon | 2x Advanced Mechanical Components 3x Medium Gun Parts 7x Wires | Gunsmith 3 |
| Burletta | Weapon | 3x Mechanical Components 3x Simple Gun Parts | Gunsmith 1 |
| Compensator II | Mod | 2x Mechanical Components 4x Wires | Gunsmith 2 |
| Compensator III | Mod | 2x Mod Components 8x Wires | Gunsmith 3 |
| Defibrillator | Quick Use | 9x Plastic Parts 1x Moss | Medical Lab 2 |
| ??? | ??? | ??? | ??? |
| Equalizer | Weapon | 3x Magnetic Accelerator 3x Complex Gun Parts 1x Queen Reactor | Gunsmith 3 |
| Extended Barrel | Mod | 2x Mod Components 8x Wires | Gunsmith 3 |
| Extended Light Mag II | Mod | 2x Mechanical Components 3x Steel Spring | Gunsmith 2 |
| Extended Light Mag III | Mod | 2x Mod Components 5x Steel Spring | Gunsmith 3 |
| Extended Medium Mag II | Mod | 2x Mechanical Components 3x Steel Spring | Gunsmith 2 |
| Extended Medium Mag III | Mod | 2x Mod Components 5x Steel Spring | Gunsmith 3 |
| Extended Shotgun Mag II | Mod | 2x Mechanical Components 3x Steel Spring | Gunsmith 2 |
| Extended Shotgun Mag III | Mod | 2x Mod Components 5x Steel Spring | Gunsmith 3 |
| Remote Raider Flare | Quick Use | 2x Chemicals 4x Rubber Parts | Utility Station 1 |
| Heavy Gun Parts | Material | 4x Simple Gun Parts | Refiner 2 |
| Venator | Weapon | 2x Advanced Mechanical Components 3x Medium Gun Parts 5x Magnet | Gunsmith 3 |
| Il Toro | Weapon | 5x Mechanical Components 6x Simple Gun Parts | Gunsmith 1 |
| Jolt Mine | Mine | 1x Electrical Components 1x Battery | Explosives Station 2 |
| Explosive Mine | Mine | 1x Explosive Compound 1x Sensors | Explosives Station 3 |
| Jupiter | Weapon | 3x Magnetic Accelerator 3x Complex Gun Parts 1x Queen Reactor | Gunsmith 3 |
| Light Gun Parts | Material | 4x Simple Gun Parts | Refiner 2 |
| Lightweight Stock | Mod | 2x Mod Components 5x Duct Tape | Gunsmith 3 |
| Lure Grenade | Grenade | 1x Speaker Component 1x Electrical Components | Utility Station 2 |
| Medium Gun Parts | Material | 4x Simple Gun Parts | Refiner 2 |
| Torrente | Weapon | 2x Advanced Mechanical Components 3x Medium Gun Parts 6x Steel Spring | Gunsmith 3 |
| Muzzle Brake II | Mod | 2x Mechanical Components 4x Wires | Gunsmith 2 |
| Muzzle Brake III | Mod | 2x Mod Components 8x Wires | Gunsmith 3 |
| Padded Stock | Mod | 2x Mod Components 5x Duct Tape | Gunsmith 3 |
| Shotgun Choke II | Mod | 2x Mechanical Components 4x Wires | Gunsmith 2 |
| Shotgun Choke III | Mod | 2x Mod Components 8x Wires | Gunsmith 3 |
| Shotgun Silencer | Mod | 2x Mod Components 8x Wires | Gunsmith 3 |
| Showstopper | Grenade | 1x Advanced Electrical Components 1x Voltage Converter | Explosives Station 3 |
| Silencer I | Mod | 2x Mechanical Components 4x Wires | Gunsmith 2 |
| Silencer II | Mod | 2x Mod Components 8x Wires | Gunsmith 3 |
| Snap Hook | Quick Use | 2x Power Rod 3x Rope 1x Exodus Modules | Utility Station 3 |
| Stable Stock II | Mod | 2x Mechanical Components 3x Duct Tape | Gunsmith 2 |
| Stable Stock III | Mod | 2x Mod Components 5x Duct Tape | Gunsmith 3 |
| Tagging Grenade | Grenade | 1x Electrical Components 1x Sensors | Utility Station 3 |
| Tempest | Weapon | 3x Advanced Mechanical Components 3x Medium Gun Parts 3x Canister | Gunsmith 3 |
| Trigger Nade | Grenade | 2x Crude Explosives 1x Processor | Explosives Station 2 |
| Vertical Grip II | Mod | 2x Mechanical Components 3x Duct Tape | Gunsmith 2 |
| Vertical Grip III | Mod | 2x Mod Components 5x Duct Tape | Gunsmith 3 |
| Vita Shot | Quick Use | 2x Antiseptic 1x Syringe | Medical Lab 3 |
| Vita Spray | Quick Use | 3x Antiseptic 1x Canister | Medical Lab 3 |
| Vulcano | Weapon | 1x Magnetic Accelerator 3x Heavy Gun Parts 1x Exodus Modules | Gunsmith 3 |
| Wolfpack | Grenade | 2x Explosive Compound 2x Sensors | Explosives Station 3 |
| Red Light Stick | Quick Use | 3x Chemicals | Utility Station 1 |
| Smoke Grenade | Grenade | 14x Chemicals 1x Canister | Utility Station 2 |
| Deadline | Mine | 3x Explosive Compound 2x ARC Circuitry | Explosives Station 3 |
| Trailblazer | Grenade | 1x Explosive Compound 1x Synthesized Fuel | Explosives Station 3 |
| Tactical Mk. 3 (Defensive) | Augment | 2x Advanced Electrical Components 3x Processor | Gear Bench 3 |
| Tactical Mk. 3 (Healing) | Augment | 2x Advanced Electrical Components 3x Processor | Gear Bench 3 |
| Yellow Light Stick | Quick Use | 3x Chemicals | Utility Station 1 |
Note: The missing Blueprints in this list likely have not actually been added to the game at the time of writing, because none of the playerbase has managed to find any of them. As they are added to the game, I will update this page with the most relevant information so you know exactly how to get all 75 Arc Raiders Blueprints.
Where to find Blueprints in Arc Raiders
Below is a list of all containers, modifiers, and events which maximise your chances of finding Blueprints:
- Certain quests reward you with specific Blueprints .
- Completing Trials has a high chance of offering Blueprints as rewards.
- Surveyors have a decent chance of dropping Blueprints on death.
- High loot value areas tend to have a greater chance of spawning Blueprints.
- Night Raids and Storms may increase rare Blueprint spawn chances in containers.
- Containers with higher numbers of items may have a higher tendency to spawn Blueprints. As a result, Blue Gate (which has many “large” containers containing multiple items) may give you a higher chance of spawning Blueprints.
- Raider containers (Raider Caches, Weapon Boxes, Medical Bags, Grenade Tubes) have increased Blueprint drop rates. As a result, the Uncovered Caches event gives you a high chance of finding Blueprints.
- Security Lockers have a higher than average chance of containing Blueprints.
- Certain Blueprints only seem to spawn under specific circumstances: Tempest Blueprint only spawns during Night Raid events. Vulcano Blueprint only spawns during Hidden Bunker events. Jupiter and Equaliser Blueprints only spawn during Harvester events.

Raider Caches, Weapon Boxes, and other raider-oriented container types have a good chance of offering Blueprints. |Image credit:Rock Paper Shotgun/Embark Studios
Blueprints have a very low chance of spawning in any container in Arc Raiders, around 1-2% on average. However, there is a higher chance of finding Blueprints in particular container types. Specifically, you can find more Blueprints in Raider containers and security lockers.
Beyond this, if you’re looking for Blueprints you should focus on regions of the map which are marked as having particularly high-value loot. Areas such as the Control Tower in Dam Battlegrounds, the Arrival and Departure Buildings in Spaceport, and Pilgrim’s Peak in Blue Gate all have a better-than-average chance of spawning Blueprints somewhere amongst all their containers. Night Raids and Electromagnetic Storm events also increase the drop chances of certain Blueprints .
In addition to these containers, you can often loot Blueprints from destroyed Surveyors - the largest of the rolling ball ARC. Surveyors are more commonly found on the later maps - Spaceport and Blue Gate - and if one spawns in your match, you’ll likely see it by the blue laser beam that it casts into the sky while “surveying”.
Surveyors are quite well-armoured and will very speedily run away from you once it notices you, but if you can take one down then make sure you loot all its parts for a chance of obtaining certain unusual Blueprints.
Blueprints obtained from quests
One way in which you can get Blueprints is by completing certain quests for the vendors in Speranza. Some quests will reward you with a specific item Blueprint upon completion, so as long as you work through all the quests in Arc Raiders, you are guaranteed those Blueprints.
Here is the full list of all Blueprints you can get from quest rewards:
- Trigger Nade Blueprint: Rewarded after completing “Sparks Fly”.
- Lure Grenade Blueprint: Rewarded after completing “Greasing Her Palms”.
- Burletta Blueprint: Rewarded after completing “Industrial Espionage”.
- Hullcracker Blueprint (and Launcher Ammo Blueprint): Rewarded after completing “The Major’s Footlocker”.
Alas, that’s only 4 Blueprints out of a total of 75 to unlock, so for the vast majority you will need to find them yourself during a raid. If you’re intent on farming Blueprints, then it’s best to equip yourself with cheap gear in case you lose it, but don’t use a free loadout because then you won’t get a safe pocket to stash any new Blueprint you find. No pain in Arc Raiders is sharper than failing to extract with a new Blueprint you’ve been after for a dozen hours already.

One of the best ways to get Blueprints is by hitting three stars on all five Trials every week. |Image credit:Rock Paper Shotgun/Embark Studios
Blueprints obtained from Trials
One of the very best ways to get Blueprints is as rewards for completing Trials in Arc Raiders. Trials are unlocked from Level 15 onwards, and allow you to earn rewards by focusing on certain tasks over the course of several raids. For example, one Trial might task you with dealing damage to Hornets, while another might challenge you to loot Supply Drops.
Trials refresh on a weekly basis, with a new week bringing five new Trials. Each Trial can offer up to three rewards after passing certain score milestones, and it’s possible to receive very high level loot from these reward crates - including Blueprints. So if you want to unlock as many Blueprints as possible, you should make a point of completing as many Trials as possible each week.
Best Blueprint farming locations
The very best way to get Blueprints is to frequent specific areas of the maps which combine high-tier loot pools with the right types of containers to search. Here are my recommendations for where to find Blueprints on every map, so you can always keep the search going for new crafting recipes to unlock.

Image credit:Rock Paper Shotgun/Embark Studios
Dam Battlegrounds
The best places to farm Blueprints on Dam Battlegrounds are the Control Tower, Power Generation Complex, Ruby Residence, and Pale Apartments . The first two regions, despite only being marked on the map as mid-tier loot, contain a phenomenal number of containers to loot. The Control Tower can also contain a couple of high-tier Security Lockers - though of course, you’ll need to have unlocked the Security Breach skill at the end of the Survival tree.
There’s also a lot of reporting amongst the playerbase that the Residential areas in the top-left of the map - Pale Apartments and Ruby Residence - give you a comparatively strong chance of finding Blueprints. Considering their size, there’s a high density of containers to loot in both locations, and they also have the benefit of being fairly out of the way. So you’re more likely to have all the containers to yourself.
Buried City
The best Blueprint farming locations on Buried City are the Santa Maria Houses, Grandioso Apartments, Town Hall, and the various buildings of the New District . Grandioso Apartments has a lower number of containers than the rest, but a high chance of spawning weapon cases - which have good Blueprint drop rates. The others are high-tier loot areas, with plenty of lootable containers - including Security Lockers.
Spaceport
The best places to find Blueprints on Spaceport are the Arrival and Departure Buildings, as well as Control Tower A6 and the Launch Towers . All these areas are labelled as high-value loot regions, and many of them are also very handily connected to one another by the Spaceport wall, which you can use to quickly run from one area to the next. At the tops of most of these buildings you’ll find at least one Security Locker, so this is an excellent farming route for players looking to find Blueprints.
The downside to looting Blueprints on Spaceport is that all these areas are hotly contested, particularly in Duos and Squads. You’ll need to be very focused and fast in order to complete the full farming route.

Image credit:Rock Paper Shotgun/Embark Studios
Blue Gate
Blue Gate tends to have a good chance of dropping Blueprints, potentially because it generally has a high number of containers which can hold lots of items; so there’s a higher chance of a Blueprint spawning in each container. In my experience, the best Blueprint farming spots on Blue Gate are Pilgrim’s Peak, Raider’s Refuge, the Ancient Fort, and the Underground Complex beneath the Warehouse .
All of these areas contain a wealth of containers to loot. Raider’s Refuge has less to loot, but the majority of the containers in and around the Refuge are raider containers, which have a high chance of containing Blueprints - particularly during major events.
Stella Montis
On the whole, Stella Montis seems to have a very low drop rate for Blueprints (though a high chance of dropping other high-tier loot). If you do want to try farming Blueprints on this map, the best places to find Blueprints in Stella Montis are Medical Research, Assembly Workshop, and the Business Center . These areas have the highest density of containers to loot on the map.
In addition to this, the Western Tunnel has a few different Security Lockers to loot, so while there’s very little to loot elsewhere in this area of the map, it’s worth hitting those Security Lockers if you spawn there at the start of a match.
That wraps up this primer on how to get all the Blueprints in Arc Raiders as quickly as possible. With the Expedition system constantly resetting a large number of players’ Blueprints, it’s more important than ever to have the most up-to-date information on where to find all these Blueprints.
While you’re here, be sure to check out our Arc Raiders best guns tier list , as well as our primers on the best skills to unlock and all the different Field Depot locations on every map.

ARC Raiders
PS5 , Xbox Series X/S , PC
Rock Paper Shotgun is better when you sign in
Sign in and join us on our journey to discover strange and compelling PC games.
