Final Fantasy 7 Rebirth: Best Materia
10 of the best Materia to equip on all characters in FF7 Rebirth

Image credit:IGN/Square Enix

Wondering what the best Materia is in Final Fantasy 7 Rebirth? The shiny, multi-coloured orbs known as Materia have been a Final Fantasy 7 calling card since the original game’s release in 1997. In Final Fantasy 7 Rebirth, they return with more unique combinations than ever before. You might not be able to carry over your exact Materia from Final Fantasy 7 Remake, but you’ll nevertheless find plenty of options, and a firm grasp of the Materia system is necessary for Cloud and his party to succeed in their final encounters against Sephiroth.
Between magic, support, command, complete, and summoning Materia, there’s much flexibility on the display. Still, there are a few mainstays worth relying upon, and in this guide, we’ll outline ten picks for the best Materia in Final Fantasy 7 Rebirth , with options that’ll serve you well in both the early game and the endgame. These Materia strategies work for both the PS5 Final Fantasy 7 Rebirth release and the recent PC port.
Final Fantasy 7 Rebirth: Best Materia
Fire and Ice
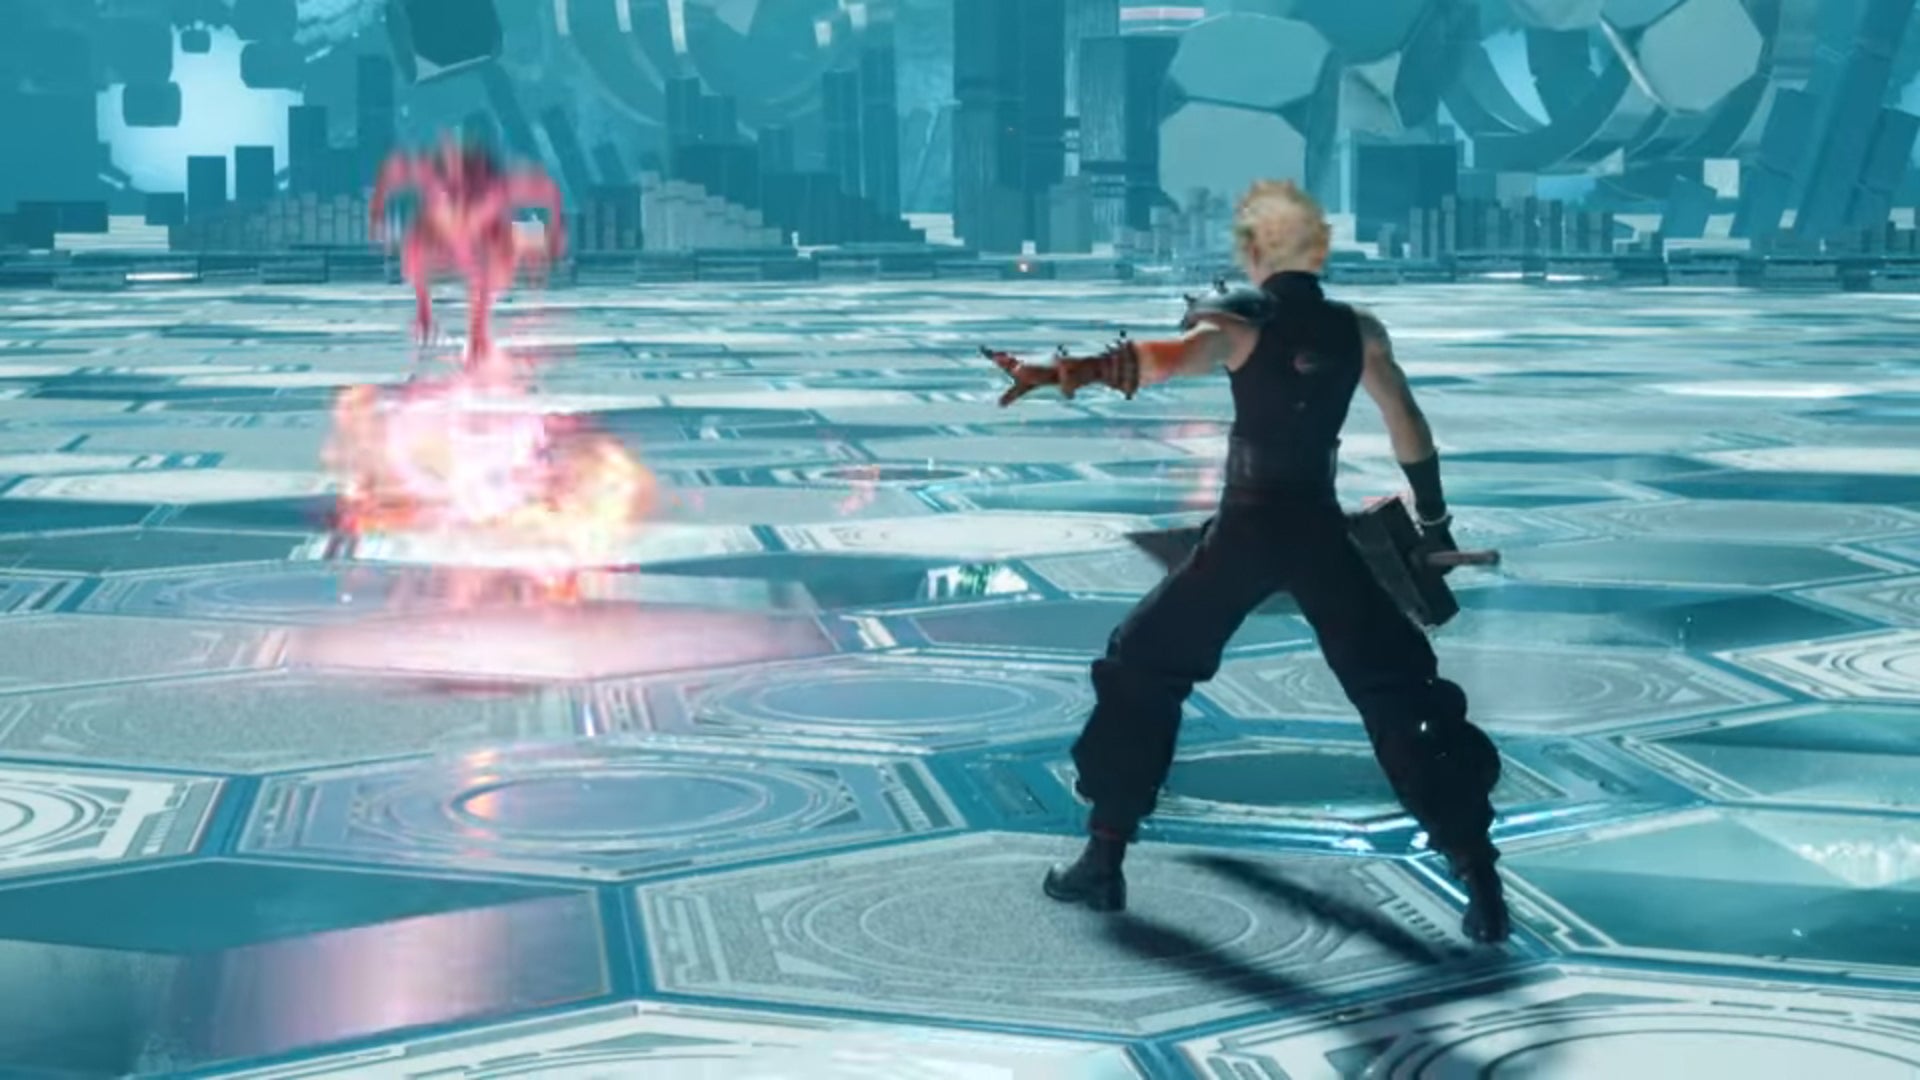
Fire and Ice will remain tried and true elements throughout Final Fantasy 7 Rebirth, affecting a wide variety of enemies. |Image credit:IGN/Square Enix
Fire and Ice is a classic spellcasting combo that links the separate Fire and Ice Materia together into a singular orb. It’s the first of several offensive options that combine two Materia together, and it’s a great way for both saving space and giving yourself flexible magic options. Depending on what you prefer in terms of elemental magic, for Final Fantasy 7 Rebirth’s early game, this will be a go-to Materia along with Lightning and Wind or Poison and Petrify, both described below.
Fire and Ice can be obtained via the following ways:
- From Chapter 2 onwards, you can develop Fire and Ice by speaking with Chadley in the Grasslands, and spending 10 Data Points.
Fire and Ice offers up the following spells:
- Level 1 - Fire (4 MP cost) Deals a small amount of Fire damage; Blizzard (4 MP cost) Deals a small amount of Ice damage
- Level 2 - Fira (1,200 AP, 10 MP cost) Deals a moderate amount of Fire damage; Blizzara (1,200 AP, 10 MP cost) Deals a moderate amount of Ice damage
- Level 3 - Firaga (2,400 AP, 21 MP cost) Deals a large amount of Fire damage; Blizzaga (2,400 AP, 21 MP cost) Deals a large amount of Ice damage
Lightning and Wind
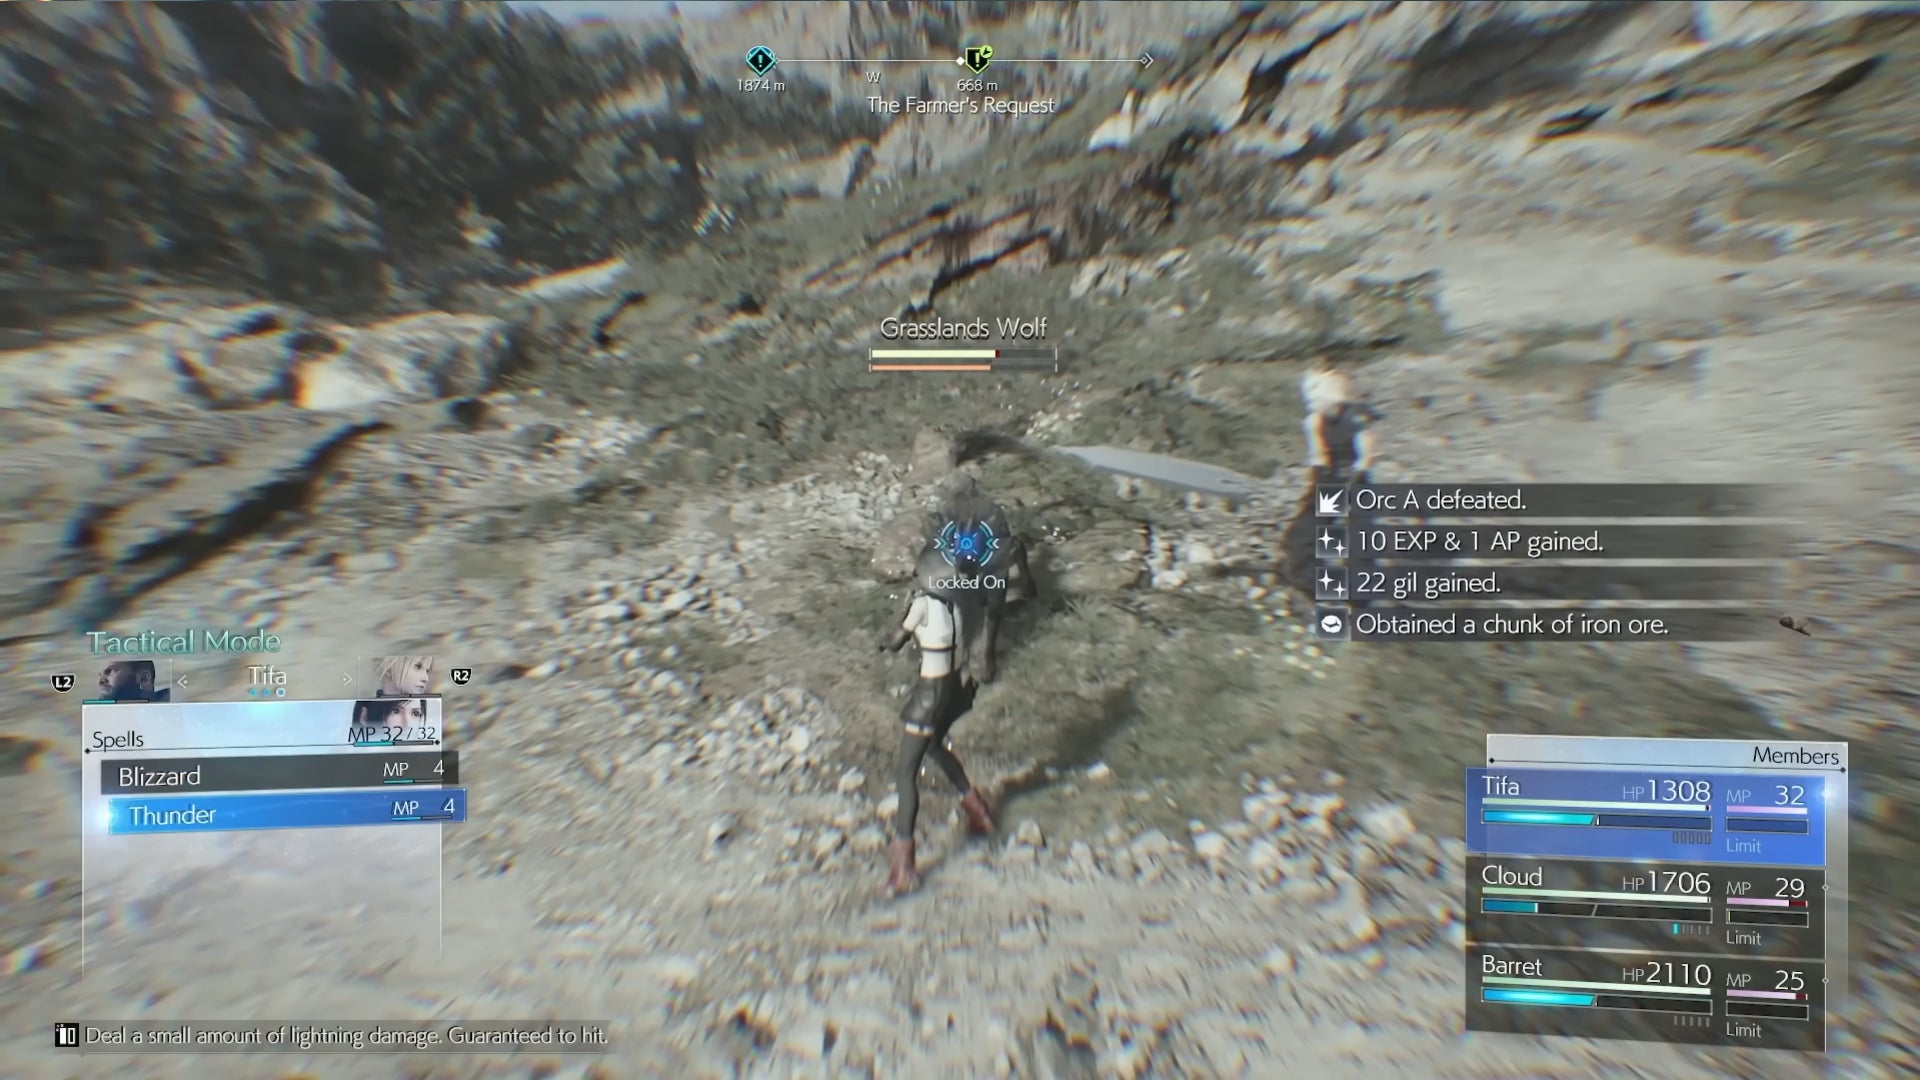
There’s nothing quite like supplementing Tifa’s punches with a little bit of Lightning and Wind synergy. |Image credit:IGN/Square Enix
Similar to Fire and Ice, Lightning and Wind combines the separate Lightning and Wind Materia into one, saving slots and giving you the chance to cast more powerful magics, like Thundaga and Aeroga. It’s worth noting that there are fewer foes in Final Fantasy 7 Rebirth weak to Lightning and Wind as there are susceptible to Fire and Ice, but this two-in-one Materia is still worth having when you come up against mechanical or flying enemies.
Lightning and Wind can be obtained via the following ways:
- From Chapter 4 onwards, you can develop Lightning and Wind by speaking with Chadley in Junon and spending 30 Data Points.
Lightning and Wind offers up the following spells:
- Level 1 - Thunder (5 MP cost) Deals a small amount of Lightning damage; Aero (4 MP cost) Deals a small amount of Wind damage
- Level 2 - Thundara (1,200 AP, 11 MP cost) Deals a moderate amount of Lightning damage; Aerora (1,200 AP, 10 MP cost) Deals a moderate amount of Wind damage
- Level 3 - Thundaga (2,400 AP, 22 MP cost) Deals a large amount of Lightning damage; Aeroga (2,400 AP, 21 MP cost) Deals a large amount of Wind damage
Poison and Petrify
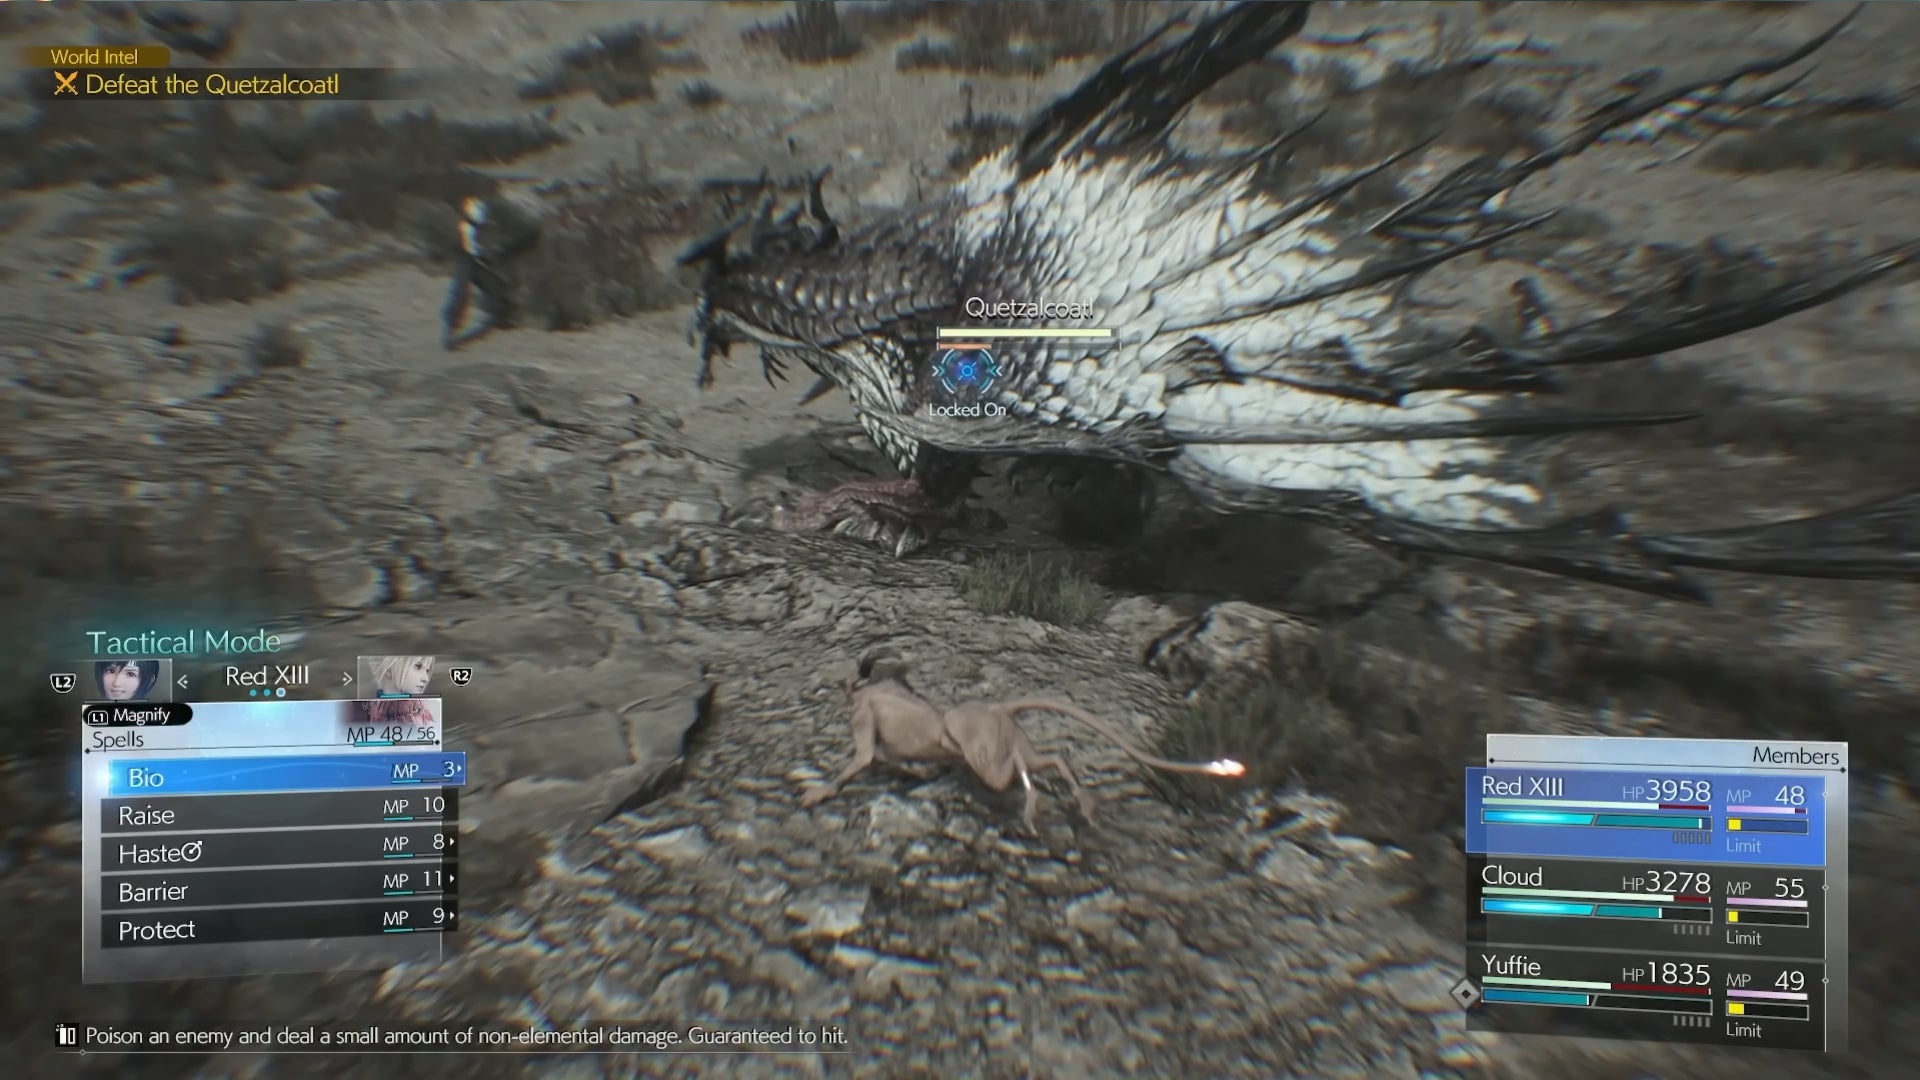
Here we can see Red XIII getting ready to inflict Bio on Quetzalcoatl. While it might not deal massive damage at first, don’t dismiss the long-term effects of the Poison status. |Image credit:IGN/Square Enix
Yet another mixed Materia, Poison and Petrify takes the two separate Poison and Petrify Materia and combines them into one. Bio and Quake tend to be lesser used spells, but they’re both handy to have on deck thanks to the long-term status effects and flexibility that they offer. Quake spells can Petrify, which potentially kills certain enemies outright, and generally deals lots of damage at once but cost more MP. Meanwhile, Bio spells don’t cost much MP and inflict Poison, which deals weak damage over time that nevertheless adds up.
Poison and Petrify can be obtained via the following ways:
- From Chapter 10 onwards, you can develop Poison and Petrify by speaking with Chadley in Cosmo Canyon and spending 70 Data Points.
Poison and Petrify offers up the following spells:
- Level 1 - Bio (3 MP cost) Deals a small amount of damage and inflicts Poison; Quake (13 MP cost) Deals a large amount of damage and inflicts Petrify
- Level 2 - Biora (1,200 AP, 8 MP cost) Deals a moderate amount of damage and inflicts Poison; Quakera (1,200 AP, 20 MP cost) Deals a moderate amount of damage and inflicts Petrify
- Level 3 - Bioga (2,400 AP, 13 MP cost) Deals a large amount of damage and inflicts Poison; Quaga (2,400 AP, 25 MP cost) Deals a huge amount of damage and inflicts Petrify)
Elemental

Cloud delivers some truly crispy attacks to these flying baddies thanks to the Fire elemental attribute. |Image credit:IGN/Square Enix
Elemental adds elemental damage or resistance to weapons and armour whenever it’s paired with an element Materia on that same piece of equipment. For instance, if you’ve got a sword and outfit it with Elemental and the mixed Fire and Ice Materia listed above, you can now inflict both Fire and Ice damage with your strikes. Lots of enemies are weak to these basic elements, and if you want a high damage build, it’s absolutely worthwhile to level up Elemental and place it on all your best weapons.
Elemental can be obtained via the following ways:
- From Chapter 4 onwards, complete the “Junon Battle Intel: Conqueror of the Skies” challenge in Chadley’s Combat Simulator.
- From Chapter 9 onwards, complete the “Gongaga Battle Intel: Distant Tremors” challenge in Chadley’s Combat Simulator.
- After you defeat the endgame boss Gilgamesh, complete the “Brutal Challenge: Requiem for the Scorned” challenge in Chadley’s Combat Simulator.
Elemental offers up the following effects:
- Level 1 - If added to a weapon , adds 8% linked elemental damage; if added to an armor , halves linked elemental damage
- Level 2 - If added to a weapon , adds 15% linked elemental damage; if added to an armor , prevents linked elemental damage
- Level 3 - If added to a weapon , adds 23% linked elemental damage; if added to an armor , absorbs linked elemental damage
Time
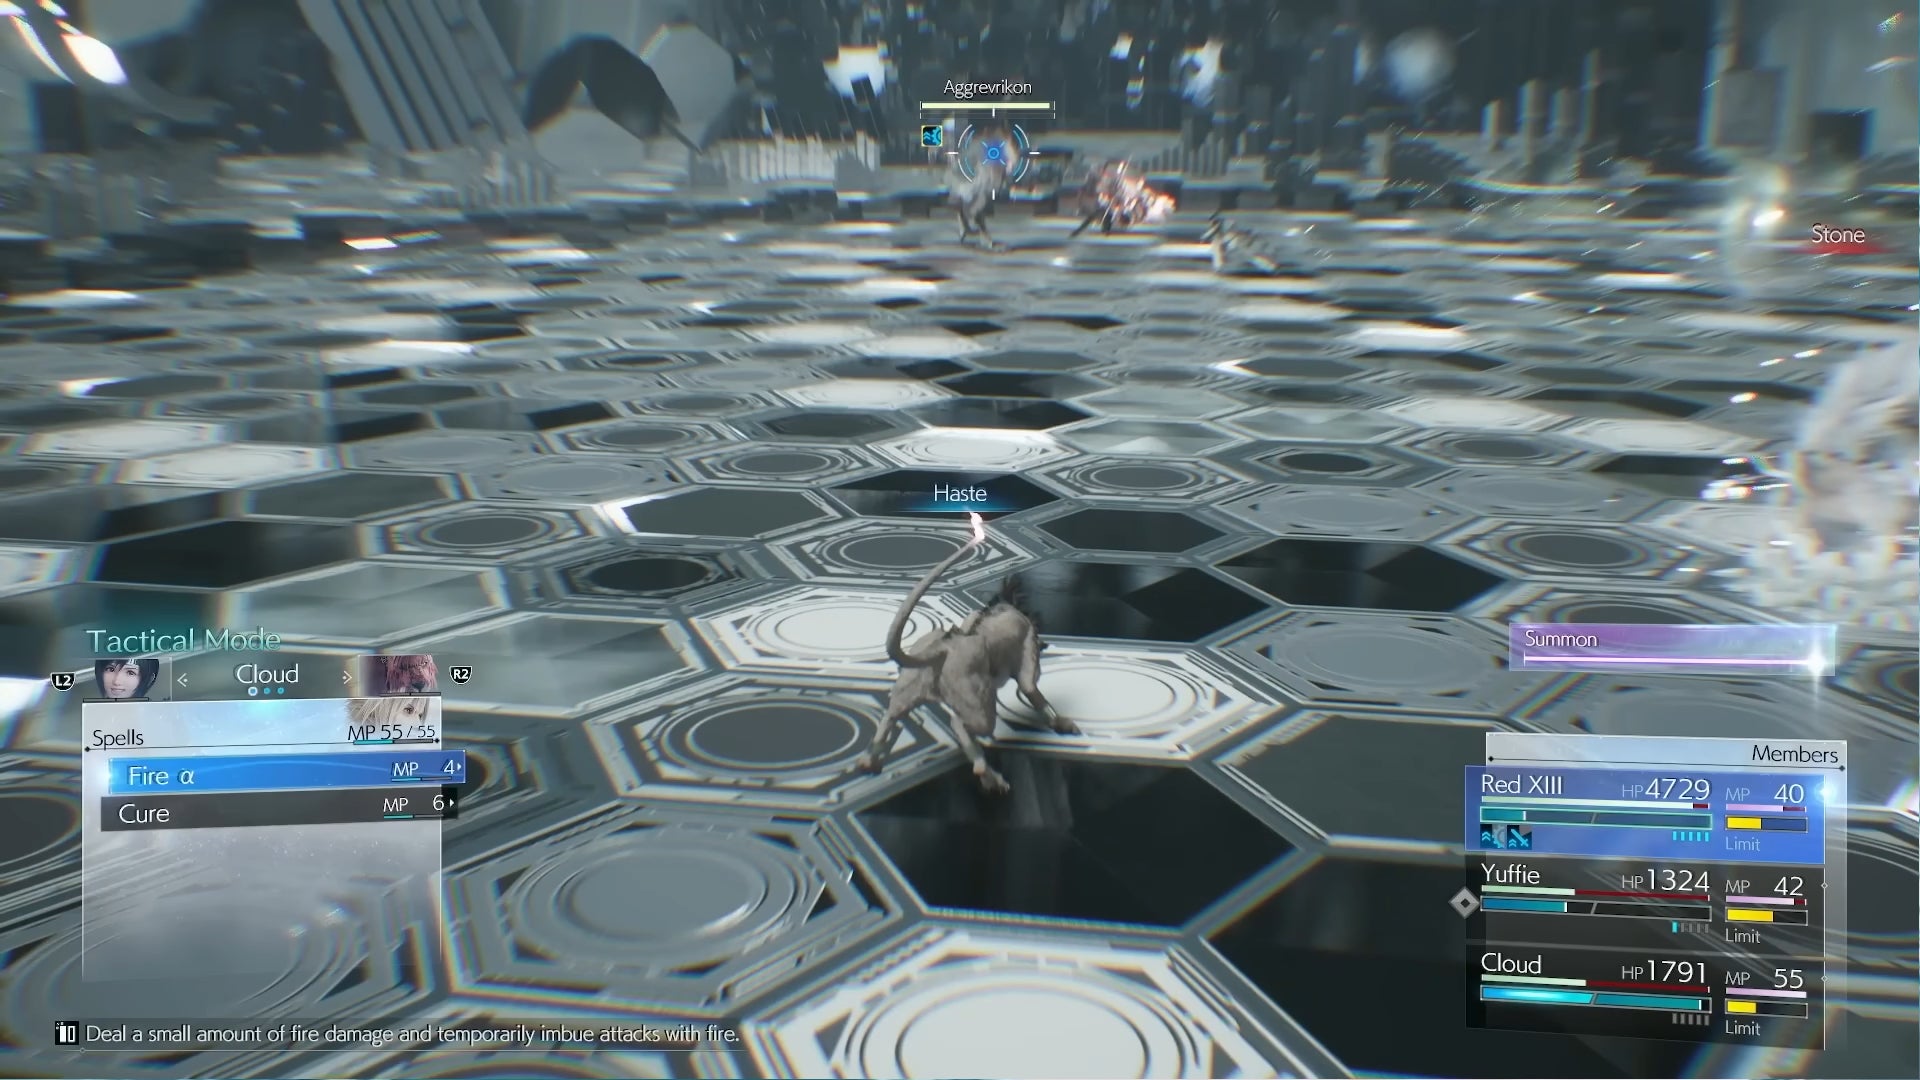
Haste is one of the vital spells provided by Time - use it to speed up your party! |Image credit:IGN/Square Enix
Time is an superb support Materia that offers up three critical spells - Haste, which speeds up movement, Slow, which reduces enemy speed, and Stop, which freezes an enemy dead in their tracks. Combine Time with Magnify, outlined below, to instantly speed up all party members or send all enemies on the field into a sluggish fix. Final Fantasy 7 doesn’t have a true ‘Time Mage’ character, unlike some other games in the series - but equipping this is the closest thing.
Time can be obtained via the following ways:
- In Chapter 6, Costa del Sol, you can win Time if you get Rank III (15,000) in the Brigantine version of Pirate’s Rampage.
- From Chapter 10 onwards, you can purchase Time from vendors for 5,000 Gil.
- From Chapter 11 onwards, complete the “Nibel Region Intel: Level 1” challenge in Chadley’s Combat Simulator.
Time offers up the following spells:
- Level 1 - Haste (4 MP cost) Speeds up the holder’s movement
- Level 2 - Slow (200 AP, 4 MP cost) Reduces the speed of the enemy target
- Level 3 - Stop (900 AP, 14 MP cost) Completely stops the enemy target
Magnify
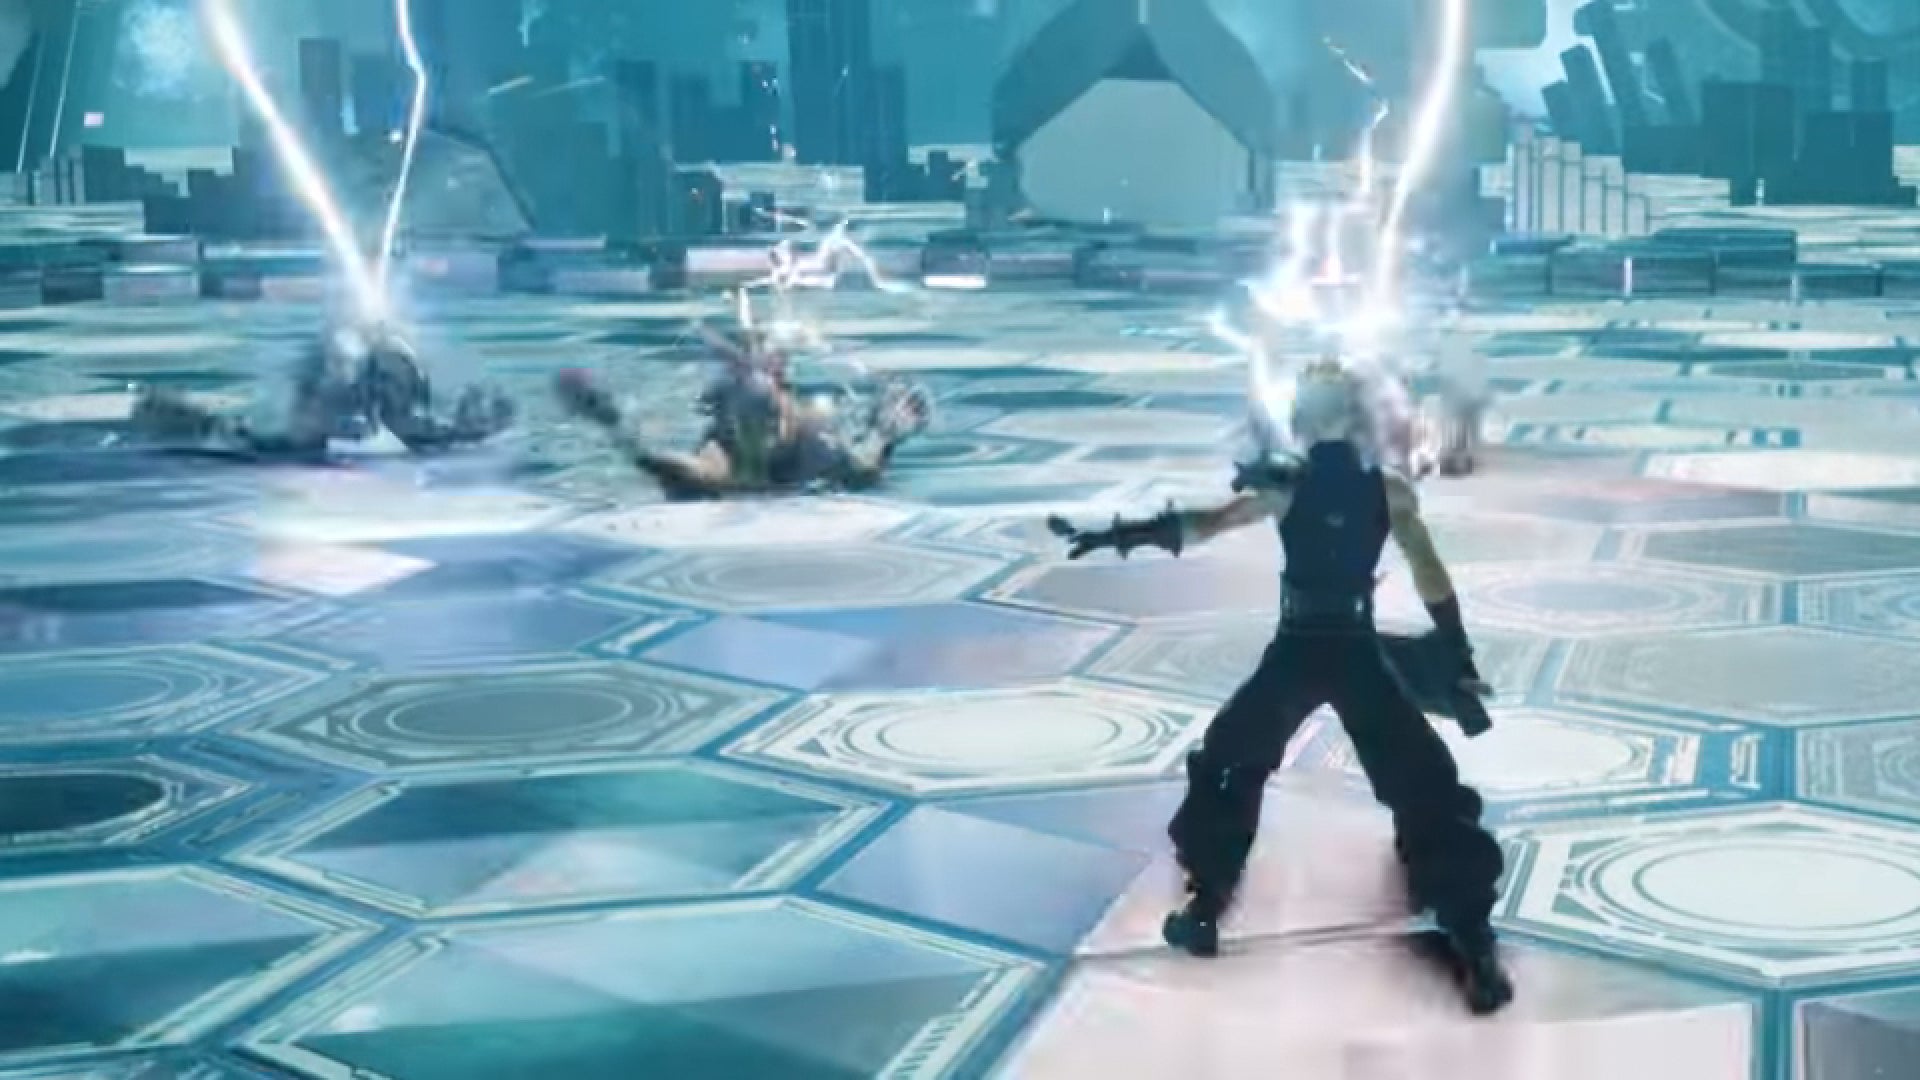
What’s better than using Thundaga? Using Thundaga on three targets at once. |Image credit:IGN/Square Enix
Magnify slightly reduces the potency of whatever Materia you’ve linked it with, but it makes up for this by hitting multiple targets. If you want to rampage through weak mobs, then combine Magnify with the offensive Materia of your choice (for instance, Fire and Ice + Magnify) to burn them to bits very quickly. Magnify is also a good pairing with Time, described above, for speeding all of your characters up or slowing all foes down.
Magnify can be obtained via the following ways:
- In Chapter 1, go across the wooden planks and climb down the left section of the cliff in the Northern Ridge area of Mt. Nibel.
- Recruit Cait Sith in Chapter 9; he has Magnify in his inventory from the getgo.
- From Chapter 12 onwards, complete the “Victim of Circumstance” side quest in Cosmo Canyon.
- After you defeat the endgame boss Gilgamesh, complete the “Brutal Challenge: Hellions’ Intonement” in Chadley’s Combat Simulator.
Magnify offers up the following effects:
- Level 1 - Expand target count of linked Materia (potency reduced by -60% when expanded)
- Level 2 - (500 AP cost) Expand target count of linked Materia (potency reduced by -45% when expanded)
- Level 3 - (1,500 AP cost) Expand target count of linked Materia (potency reduced by -25% when expanded)
ATB Boost
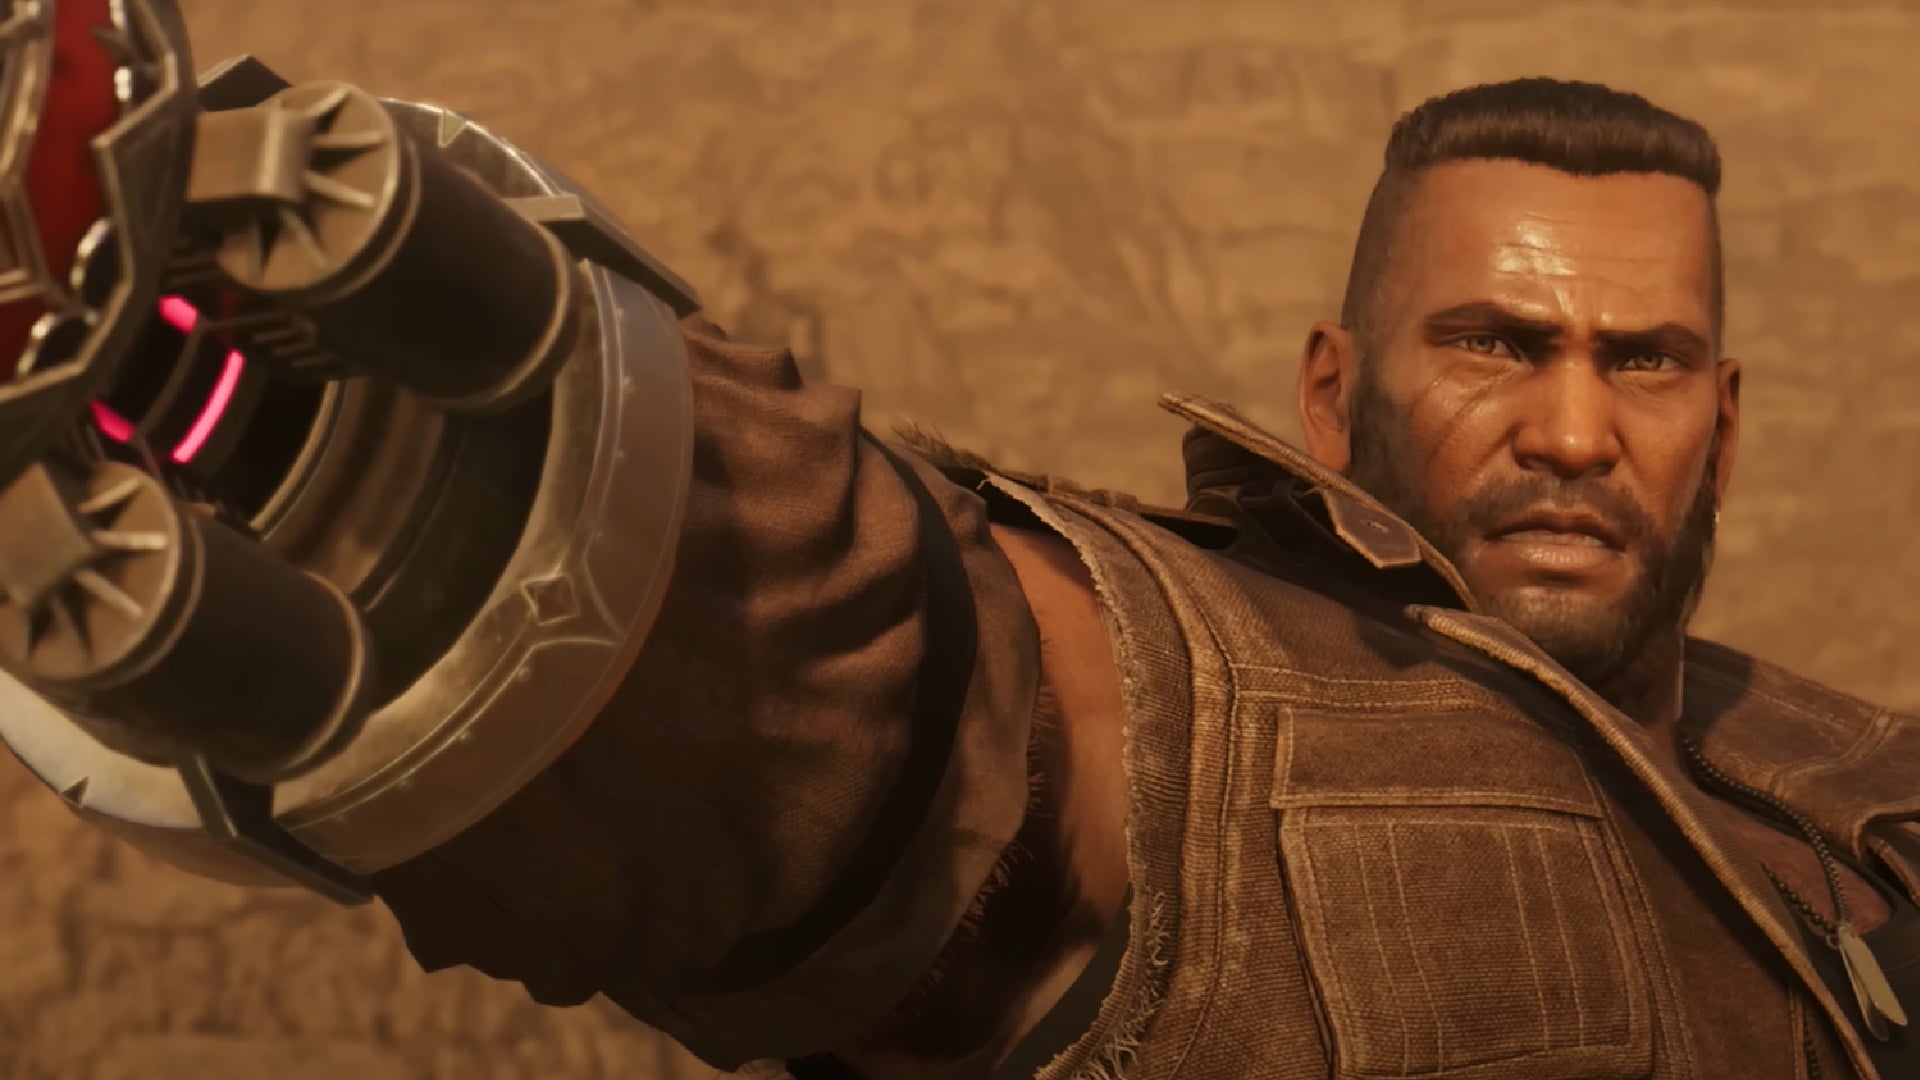
ATB Boost pairs well with Barret, if you enjoy frequently spamming his two ATB charge abilities. |Image credit:Rock Paper Shotgun/Square Enix
ATB Boost is a great support Materia. When activated, it doubles a character’s current ATB charge - for example, if you only have one ATB bar filled, pop ATB Boost and you’ll have two. This is highly useful when you need a sudden surge of ATB to activate spells in rapid succession, like using Thundaga twice in a row. ATB Boost does have a very long cooldown, so try giving it to a speedy character like Tifa who builds up ATB quickly. Barret is also a good choice, since most of his abilities only require two ATB charges.
ATB Boost can be obtained via the following ways:
- From Chapter 7 onwards, you can develop ATB Boost by speaking with Chadley in Corel and spending 15 Data Points
ATB Boost offers up the following effects:
- Level 1 - Double the ATB meter’s charge (cooldown: 180 seconds )
- Level 2 - (300 AP cost) Double the ATB meter’s charge (cooldown: 150 seconds )
- Level 3 - (600 AP cost) Double the ATB meter’s charge (cooldown: 120 seconds )
- Level 4 - (600 AP cost) Double the ATB meter’s charge (cooldown: 90 seconds )
- Level 5 - (600 AP cost) Double the ATB meter’s charge (cooldown: 60 seconds )
Auto-Cast

Stick Auto-Cast on Aerith and watch her heal your party without you having to waste precious moments in combat. |Image credit:Square Enix
Auto-Cast lets an ally you’re not controlling automatically cast spells via whatever Materia it’s linked to. If you’re tired of micro-managing your party and switching back and forth in the throes of battle, use Auto-Cast to make your job easier. I recommend pairing it with a healing Materia if you’d like a character to readily pop Cure spells - though as the game goes on, you may want to become less reliant on AI casting in favour of manual precision. Still, in the early game, Auto-Cast is great.
Auto-Cast can be obtained via the following ways:
- In Chapter 1, go towards the storage containers outside of the Northern Ridge on Mt. Nibel.
- From Chapter 1 onwards, you can develop Auto-Cast by speaking with Chadley in the Grasslands, and spending 10 Data Points.
ATB Boost offers up the following effects:
- Level 1 - Activate Auto-Cast
- Level 2 - (200 AP cost) Increase Magic by 2%
Assess
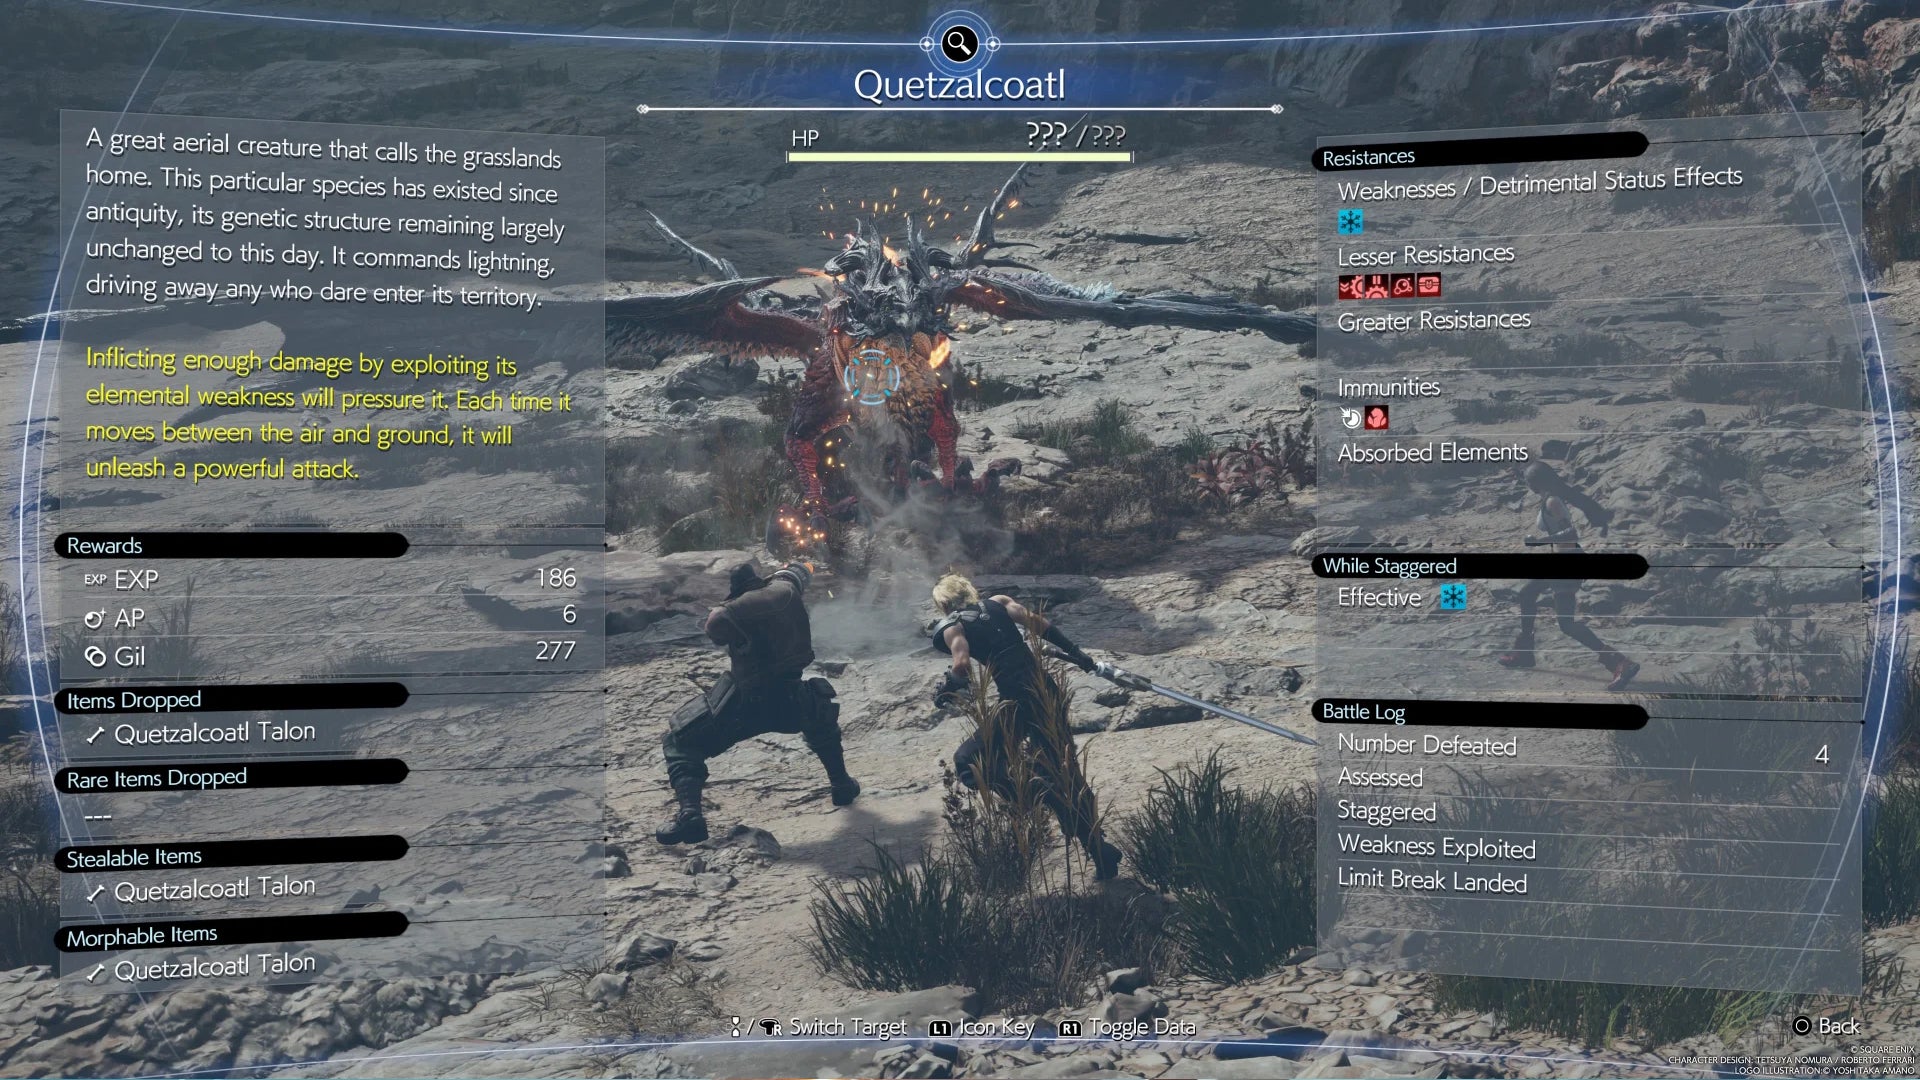
The information revealed by Assess is an invaluable resource against tough bosses. |Image credit:IGN/Square Enix
Assess is the Materia to utilise if you want some advice on beating enemies. This is infinitely useful throughout the entire game for familiarising yourself with weaknesses, resistances, and immunities, as well as what attacks to use while staggering or pressuring an opponent. Even better, after using this on one foe, it’ll apply to all foes of that same type you encounter in the future. It’s a good idea to Assess as many enemies as you can, as you’ll need to do so in order to open up Chadley’s Combat Simulator battles.
Assess can be obtained via the following ways:
- From Chapter 2 onwards, Assess can be purchased from all Materia shops.
- Recruit Yuffie in Chapter 7; she has Assess in her inventory from the getgo.
Assess offers up the following effects:
- Level 1 - Use Assess on the currently-targeted enemy
- Level 2 - (300 AP cost) Use Assess on every enemy in the fight
AP Up
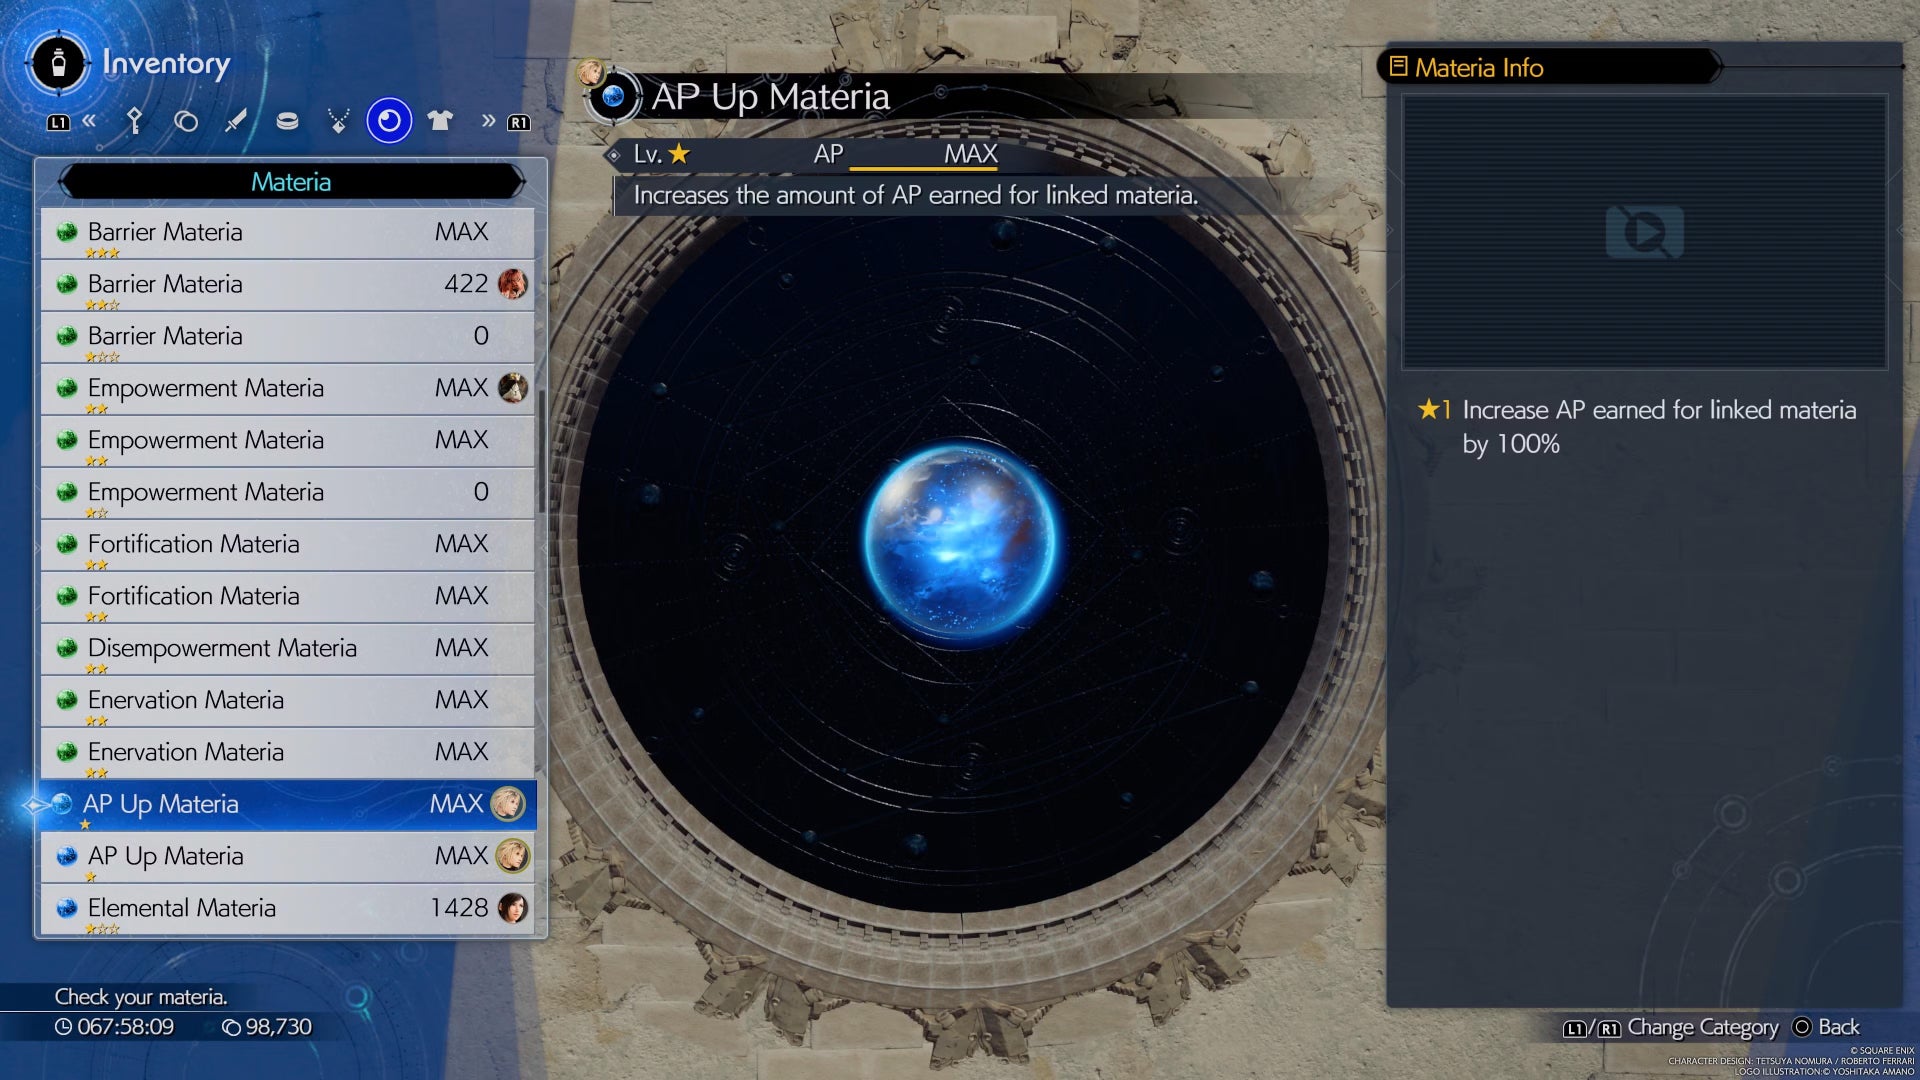
AP Up might offer less flashy results than other Materia here, but if you want to level up your Materia collection as a whole, you need it. |Image credit:IGN/Square Enix
AP Up is elegant, simple, and important. When linked with another Materia, it’ll double the AP that those Materia earn from battles. AP Up works with any other type of Materia and makes for a supremely handy way of filling out Materia slots when you don’t have anything else in your repertoire at the moment. Equip it as much as possible for a smooth leveling up process.
AP Up can be obtained via the following ways:
- In Chapter 3, go towards the end of the thin walkway in the Mythril Mine after Barret and Red XIII leave your party.
- From Chapter 9 onwards, complete the “Corel Battle Intel: Badlands Beasts” challenge in Chadley’s Combat Simulator.
- From Chapter 11 onwards, complete the “Nibel Battle Intel: Chthonian Rondo” challenge in Chadley’s Combat Simulator.
- After finishing the main story, complete the “Six-Person Bouts: Ululating Quartet” in the Gold Saucer’s Musclehead Colosseum.
And there you have our list of our ten favourite Materia in Final Fantasy 7 Rebirth! If you’re looking for some advice on great weapons to slot these Materia into, check out our guide on the best weapons for each character, as well as their locations. We’ve also got a guide on how to romance Tifa if you’d rather have some love in Cloud’s life.


Final Fantasy VII Rebirth
PS5 , Xbox Series X/S , PC , Nintendo Switch 2
Rock Paper Shotgun is better when you sign in
Sign in and join us on our journey to discover strange and compelling PC games.

All 75 Arc Raiders Blueprints and where to get them
These areas have the highest chance of giving you Blueprints

Image credit:Rock Paper Shotgun/Embark Studios

Looking for more Arc Raiders Blueprints? It’s a special day when you find a Blueprint, as they’re among the most valuable items in Arc Raiders. If you find a Blueprint that you haven’t already found, then you must make sure you hold onto it at all costs, because Blueprints are the key to one of the most important and powerful systems of meta-progression in the game.
This guide aims to be the very best guide on Blueprints you can find, starting with a primer on what exactly they are and how they work in Arc Raiders, before delving into exactly where to get Blueprints and the very best farming spots for you to take in your search.
We’ll also go over how to get Blueprints from other unlikely activities, such as destroying Surveyors and completing specific quests. And you’ll also find the full list of all 75 Blueprints in Arc Raiders on this page (including the newest Blueprints added with the Cold Snap update , such as the Deadline Blueprint and Firework Box Blueprint), giving you all the information you need to expand your own crafting repertoire.
In this guide:
- What are Blueprints in Arc Raiders?
- Full Blueprint list: All crafting recipes
- Where to find Blueprints in Arc Raiders Blueprints obtained from quests Blueprints obtained from Trials Best Blueprint farming locations

What are Blueprints in Arc Raiders?
Blueprints in Arc Raiders are special items which, if you manage to extract with them, you can expend to permanently unlock a new crafting recipe in your Workshop. If you manage to extract from a raid with an Anvil Blueprint, for example, you can unlock the ability to craft your very own Anvil Pistol, as many times as you like (as long as you have the crafting materials).
To use a Blueprint, simply open your Inventory while in the lobby, then right-click on the Blueprint and click “Learn And Consume” . This will permanently unlock the recipe for that item in your Workshop. As of the Stella Montis update, there are allegedly 75 different Blueprints to unlock - although only 68 are confirmed to be in the game so far. You can see all the Blueprints you’ve found and unlocked by going to the Workshop menu, and hitting “R” to bring up the Blueprint screen.
It’s possible to find duplicates of past Blueprints you’ve already unlocked. If you find these, then you can either sell them, or - if you like to play with friends - you can take it into a match and gift it to your friend so they can unlock that recipe for themselves. Another option is to keep hold of them until the time comes to donate them to the Expedition.
Full Blueprint list: All crafting recipes
Below is the full list of all the Blueprints that are currently available to find in Arc Raiders, and the crafting recipe required for each item:
| Blueprint | Type | Recipe | Crafted At |
|---|---|---|---|
| Bettina | Weapon | 3x Advanced Mechanical Components 3x Heavy Gun Parts 3x Canister | Gunsmith 3 |
| Blue Light Stick | Quick Use | 3x Chemicals | Utility Station 1 |
| Aphelion | Weapon | 3x Magnetic Accelerator 3x Complex Gun Parts 1x Matriarch Reactor | Gunsmith 3 |
| Combat Mk. 3 (Flanking) | Augment | 2x Advanced Electrical Components 3x Processor | Gear Bench 3 |
| Combat Mk. 3 (Aggressive) | Augment | 2x Advanced Electrical Components 3x Processor | Gear Bench 3 |
| Complex Gun Parts | Material | 2x Light Gun Parts 2x Medium Gun Parts 2x Heavy Gun Parts | Refiner 3 |
| Fireworks Box | Quick Use | 1x Explosive Compound 3x Pop Trigger | Explosives Station 2 |
| Gas Mine | Mine | 4x Chemicals 2x Rubber Parts | Explosives Station 1 |
| Green Light Stick | Quick Use | 3x Chemicals | Utility Station 1 |
| Pulse Mine | Mine | 1x Crude Explosives 1x Wires | Explosives Station 1 |
| Seeker Grenade | Grenade | 1x Crude Explosives 2x ARC Alloy | Explosives Station 1 |
| Looting Mk. 3 (Survivor) | Augment | 2x Advanced Electrical Components 3x Processor | Gear Bench 3 |
| Angled Grip II | Mod | 2x Mechanical Components 3x Duct Tape | Gunsmith 2 |
| Angled Grip III | Mod | 2x Mod Components 5x Duct Tape | Gunsmith 3 |
| Hullcracker | Weapon | 1x Magnetic Accelerator 3x Heavy Gun Parts 1x Exodus Modules | Gunsmith 3 |
| Launcher Ammo | Ammo | 5x Metal Parts 1x Crude Explosives | Workbench 1 |
| Anvil | Weapon | 5x Mechanical Components 5x Simple Gun Parts | Gunsmith 2 |
| Anvil Splitter | Mod | 2x Mod Components 3x Processor | Gunsmith 3 |
| ??? | ??? | ??? | ??? |
| Barricade Kit | Quick Use | 1x Mechanical Components | Utility Station 2 |
| Blaze Grenade | Grenade | 1x Explosive Compound 2x Oil | Explosives Station 3 |
| Bobcat | Weapon | 3x Advanced Mechanical Components 3x Light Gun Parts | Gunsmith 3 |
| Osprey | Weapon | 2x Advanced Mechanical Components 3x Medium Gun Parts 7x Wires | Gunsmith 3 |
| Burletta | Weapon | 3x Mechanical Components 3x Simple Gun Parts | Gunsmith 1 |
| Compensator II | Mod | 2x Mechanical Components 4x Wires | Gunsmith 2 |
| Compensator III | Mod | 2x Mod Components 8x Wires | Gunsmith 3 |
| Defibrillator | Quick Use | 9x Plastic Parts 1x Moss | Medical Lab 2 |
| ??? | ??? | ??? | ??? |
| Equalizer | Weapon | 3x Magnetic Accelerator 3x Complex Gun Parts 1x Queen Reactor | Gunsmith 3 |
| Extended Barrel | Mod | 2x Mod Components 8x Wires | Gunsmith 3 |
| Extended Light Mag II | Mod | 2x Mechanical Components 3x Steel Spring | Gunsmith 2 |
| Extended Light Mag III | Mod | 2x Mod Components 5x Steel Spring | Gunsmith 3 |
| Extended Medium Mag II | Mod | 2x Mechanical Components 3x Steel Spring | Gunsmith 2 |
| Extended Medium Mag III | Mod | 2x Mod Components 5x Steel Spring | Gunsmith 3 |
| Extended Shotgun Mag II | Mod | 2x Mechanical Components 3x Steel Spring | Gunsmith 2 |
| Extended Shotgun Mag III | Mod | 2x Mod Components 5x Steel Spring | Gunsmith 3 |
| Remote Raider Flare | Quick Use | 2x Chemicals 4x Rubber Parts | Utility Station 1 |
| Heavy Gun Parts | Material | 4x Simple Gun Parts | Refiner 2 |
| Venator | Weapon | 2x Advanced Mechanical Components 3x Medium Gun Parts 5x Magnet | Gunsmith 3 |
| Il Toro | Weapon | 5x Mechanical Components 6x Simple Gun Parts | Gunsmith 1 |
| Jolt Mine | Mine | 1x Electrical Components 1x Battery | Explosives Station 2 |
| Explosive Mine | Mine | 1x Explosive Compound 1x Sensors | Explosives Station 3 |
| Jupiter | Weapon | 3x Magnetic Accelerator 3x Complex Gun Parts 1x Queen Reactor | Gunsmith 3 |
| Light Gun Parts | Material | 4x Simple Gun Parts | Refiner 2 |
| Lightweight Stock | Mod | 2x Mod Components 5x Duct Tape | Gunsmith 3 |
| Lure Grenade | Grenade | 1x Speaker Component 1x Electrical Components | Utility Station 2 |
| Medium Gun Parts | Material | 4x Simple Gun Parts | Refiner 2 |
| Torrente | Weapon | 2x Advanced Mechanical Components 3x Medium Gun Parts 6x Steel Spring | Gunsmith 3 |
| Muzzle Brake II | Mod | 2x Mechanical Components 4x Wires | Gunsmith 2 |
| Muzzle Brake III | Mod | 2x Mod Components 8x Wires | Gunsmith 3 |
| Padded Stock | Mod | 2x Mod Components 5x Duct Tape | Gunsmith 3 |
| Shotgun Choke II | Mod | 2x Mechanical Components 4x Wires | Gunsmith 2 |
| Shotgun Choke III | Mod | 2x Mod Components 8x Wires | Gunsmith 3 |
| Shotgun Silencer | Mod | 2x Mod Components 8x Wires | Gunsmith 3 |
| Showstopper | Grenade | 1x Advanced Electrical Components 1x Voltage Converter | Explosives Station 3 |
| Silencer I | Mod | 2x Mechanical Components 4x Wires | Gunsmith 2 |
| Silencer II | Mod | 2x Mod Components 8x Wires | Gunsmith 3 |
| Snap Hook | Quick Use | 2x Power Rod 3x Rope 1x Exodus Modules | Utility Station 3 |
| Stable Stock II | Mod | 2x Mechanical Components 3x Duct Tape | Gunsmith 2 |
| Stable Stock III | Mod | 2x Mod Components 5x Duct Tape | Gunsmith 3 |
| Tagging Grenade | Grenade | 1x Electrical Components 1x Sensors | Utility Station 3 |
| Tempest | Weapon | 3x Advanced Mechanical Components 3x Medium Gun Parts 3x Canister | Gunsmith 3 |
| Trigger Nade | Grenade | 2x Crude Explosives 1x Processor | Explosives Station 2 |
| Vertical Grip II | Mod | 2x Mechanical Components 3x Duct Tape | Gunsmith 2 |
| Vertical Grip III | Mod | 2x Mod Components 5x Duct Tape | Gunsmith 3 |
| Vita Shot | Quick Use | 2x Antiseptic 1x Syringe | Medical Lab 3 |
| Vita Spray | Quick Use | 3x Antiseptic 1x Canister | Medical Lab 3 |
| Vulcano | Weapon | 1x Magnetic Accelerator 3x Heavy Gun Parts 1x Exodus Modules | Gunsmith 3 |
| Wolfpack | Grenade | 2x Explosive Compound 2x Sensors | Explosives Station 3 |
| Red Light Stick | Quick Use | 3x Chemicals | Utility Station 1 |
| Smoke Grenade | Grenade | 14x Chemicals 1x Canister | Utility Station 2 |
| Deadline | Mine | 3x Explosive Compound 2x ARC Circuitry | Explosives Station 3 |
| Trailblazer | Grenade | 1x Explosive Compound 1x Synthesized Fuel | Explosives Station 3 |
| Tactical Mk. 3 (Defensive) | Augment | 2x Advanced Electrical Components 3x Processor | Gear Bench 3 |
| Tactical Mk. 3 (Healing) | Augment | 2x Advanced Electrical Components 3x Processor | Gear Bench 3 |
| Yellow Light Stick | Quick Use | 3x Chemicals | Utility Station 1 |
Note: The missing Blueprints in this list likely have not actually been added to the game at the time of writing, because none of the playerbase has managed to find any of them. As they are added to the game, I will update this page with the most relevant information so you know exactly how to get all 75 Arc Raiders Blueprints.
Where to find Blueprints in Arc Raiders
Below is a list of all containers, modifiers, and events which maximise your chances of finding Blueprints:
- Certain quests reward you with specific Blueprints .
- Completing Trials has a high chance of offering Blueprints as rewards.
- Surveyors have a decent chance of dropping Blueprints on death.
- High loot value areas tend to have a greater chance of spawning Blueprints.
- Night Raids and Storms may increase rare Blueprint spawn chances in containers.
- Containers with higher numbers of items may have a higher tendency to spawn Blueprints. As a result, Blue Gate (which has many “large” containers containing multiple items) may give you a higher chance of spawning Blueprints.
- Raider containers (Raider Caches, Weapon Boxes, Medical Bags, Grenade Tubes) have increased Blueprint drop rates. As a result, the Uncovered Caches event gives you a high chance of finding Blueprints.
- Security Lockers have a higher than average chance of containing Blueprints.
- Certain Blueprints only seem to spawn under specific circumstances: Tempest Blueprint only spawns during Night Raid events. Vulcano Blueprint only spawns during Hidden Bunker events. Jupiter and Equaliser Blueprints only spawn during Harvester events.

Raider Caches, Weapon Boxes, and other raider-oriented container types have a good chance of offering Blueprints. |Image credit:Rock Paper Shotgun/Embark Studios
Blueprints have a very low chance of spawning in any container in Arc Raiders, around 1-2% on average. However, there is a higher chance of finding Blueprints in particular container types. Specifically, you can find more Blueprints in Raider containers and security lockers.
Beyond this, if you’re looking for Blueprints you should focus on regions of the map which are marked as having particularly high-value loot. Areas such as the Control Tower in Dam Battlegrounds, the Arrival and Departure Buildings in Spaceport, and Pilgrim’s Peak in Blue Gate all have a better-than-average chance of spawning Blueprints somewhere amongst all their containers. Night Raids and Electromagnetic Storm events also increase the drop chances of certain Blueprints .
In addition to these containers, you can often loot Blueprints from destroyed Surveyors - the largest of the rolling ball ARC. Surveyors are more commonly found on the later maps - Spaceport and Blue Gate - and if one spawns in your match, you’ll likely see it by the blue laser beam that it casts into the sky while “surveying”.
Surveyors are quite well-armoured and will very speedily run away from you once it notices you, but if you can take one down then make sure you loot all its parts for a chance of obtaining certain unusual Blueprints.
Blueprints obtained from quests
One way in which you can get Blueprints is by completing certain quests for the vendors in Speranza. Some quests will reward you with a specific item Blueprint upon completion, so as long as you work through all the quests in Arc Raiders, you are guaranteed those Blueprints.
Here is the full list of all Blueprints you can get from quest rewards:
- Trigger Nade Blueprint: Rewarded after completing “Sparks Fly”.
- Lure Grenade Blueprint: Rewarded after completing “Greasing Her Palms”.
- Burletta Blueprint: Rewarded after completing “Industrial Espionage”.
- Hullcracker Blueprint (and Launcher Ammo Blueprint): Rewarded after completing “The Major’s Footlocker”.
Alas, that’s only 4 Blueprints out of a total of 75 to unlock, so for the vast majority you will need to find them yourself during a raid. If you’re intent on farming Blueprints, then it’s best to equip yourself with cheap gear in case you lose it, but don’t use a free loadout because then you won’t get a safe pocket to stash any new Blueprint you find. No pain in Arc Raiders is sharper than failing to extract with a new Blueprint you’ve been after for a dozen hours already.

One of the best ways to get Blueprints is by hitting three stars on all five Trials every week. |Image credit:Rock Paper Shotgun/Embark Studios
Blueprints obtained from Trials
One of the very best ways to get Blueprints is as rewards for completing Trials in Arc Raiders. Trials are unlocked from Level 15 onwards, and allow you to earn rewards by focusing on certain tasks over the course of several raids. For example, one Trial might task you with dealing damage to Hornets, while another might challenge you to loot Supply Drops.
Trials refresh on a weekly basis, with a new week bringing five new Trials. Each Trial can offer up to three rewards after passing certain score milestones, and it’s possible to receive very high level loot from these reward crates - including Blueprints. So if you want to unlock as many Blueprints as possible, you should make a point of completing as many Trials as possible each week.
Best Blueprint farming locations
The very best way to get Blueprints is to frequent specific areas of the maps which combine high-tier loot pools with the right types of containers to search. Here are my recommendations for where to find Blueprints on every map, so you can always keep the search going for new crafting recipes to unlock.

Image credit:Rock Paper Shotgun/Embark Studios
Dam Battlegrounds
The best places to farm Blueprints on Dam Battlegrounds are the Control Tower, Power Generation Complex, Ruby Residence, and Pale Apartments . The first two regions, despite only being marked on the map as mid-tier loot, contain a phenomenal number of containers to loot. The Control Tower can also contain a couple of high-tier Security Lockers - though of course, you’ll need to have unlocked the Security Breach skill at the end of the Survival tree.
There’s also a lot of reporting amongst the playerbase that the Residential areas in the top-left of the map - Pale Apartments and Ruby Residence - give you a comparatively strong chance of finding Blueprints. Considering their size, there’s a high density of containers to loot in both locations, and they also have the benefit of being fairly out of the way. So you’re more likely to have all the containers to yourself.
Buried City
The best Blueprint farming locations on Buried City are the Santa Maria Houses, Grandioso Apartments, Town Hall, and the various buildings of the New District . Grandioso Apartments has a lower number of containers than the rest, but a high chance of spawning weapon cases - which have good Blueprint drop rates. The others are high-tier loot areas, with plenty of lootable containers - including Security Lockers.
Spaceport
The best places to find Blueprints on Spaceport are the Arrival and Departure Buildings, as well as Control Tower A6 and the Launch Towers . All these areas are labelled as high-value loot regions, and many of them are also very handily connected to one another by the Spaceport wall, which you can use to quickly run from one area to the next. At the tops of most of these buildings you’ll find at least one Security Locker, so this is an excellent farming route for players looking to find Blueprints.
The downside to looting Blueprints on Spaceport is that all these areas are hotly contested, particularly in Duos and Squads. You’ll need to be very focused and fast in order to complete the full farming route.

Image credit:Rock Paper Shotgun/Embark Studios
Blue Gate
Blue Gate tends to have a good chance of dropping Blueprints, potentially because it generally has a high number of containers which can hold lots of items; so there’s a higher chance of a Blueprint spawning in each container. In my experience, the best Blueprint farming spots on Blue Gate are Pilgrim’s Peak, Raider’s Refuge, the Ancient Fort, and the Underground Complex beneath the Warehouse .
All of these areas contain a wealth of containers to loot. Raider’s Refuge has less to loot, but the majority of the containers in and around the Refuge are raider containers, which have a high chance of containing Blueprints - particularly during major events.
Stella Montis
On the whole, Stella Montis seems to have a very low drop rate for Blueprints (though a high chance of dropping other high-tier loot). If you do want to try farming Blueprints on this map, the best places to find Blueprints in Stella Montis are Medical Research, Assembly Workshop, and the Business Center . These areas have the highest density of containers to loot on the map.
In addition to this, the Western Tunnel has a few different Security Lockers to loot, so while there’s very little to loot elsewhere in this area of the map, it’s worth hitting those Security Lockers if you spawn there at the start of a match.
That wraps up this primer on how to get all the Blueprints in Arc Raiders as quickly as possible. With the Expedition system constantly resetting a large number of players’ Blueprints, it’s more important than ever to have the most up-to-date information on where to find all these Blueprints.
While you’re here, be sure to check out our Arc Raiders best guns tier list , as well as our primers on the best skills to unlock and all the different Field Depot locations on every map.


ARC Raiders
PS5 , Xbox Series X/S , PC
Rock Paper Shotgun is better when you sign in
Sign in and join us on our journey to discover strange and compelling PC games.
