Final Fantasy 16 review: if it were half as big it’d be twice as good
Clive service game

Image credit:Square Enix

- Developer: Square Enix
- Publisher: Square Enix
- Release: September 17th 2024
- On: Windows
- From: Steam , Epic Games Store , Humble Bundle
- Price: £45/€49/$49
- Reviewed on: Intel Core-i7 12700F, 16GB RAM, Nvidia RTX 3060, Windows 11
I’m reasonably sure Final Fantasy 16 isn’t the longest Final Fantasy I’ve ever played, but it feels that way, for a multitude of reasons. The major one is that a lot of its quests exist to create distance between places and plot beats. They are overwritten errands such as bringing people lunch or fetching herbs or carrying letters - dessicated, MMO-ish fare, thrust into a moderately enjoyable action- RPG for the sake of incremental worldbuilding and scale.
Even the more exciting varieties follow a formula you soon internalise: a colourful but basically unnecessary chinwag; a hike through a scenic but not very intriguing stretch of map you’ve probably already seen in part; a fight with a few monsters you’ve almost certainly beaten up a dozen times before. There are some decent sidequests towards the end - tangents dedicated to core companions, before you mount your final run on the Big Bad. The majority of quests are also optional, if you don’t mind skipping the level-up rewards. But you have no way of knowing which are worth skipping, and to be wholly unromantic, you have no way of skipping out on an appropriate percentage of the asking price. Perhaps most damningly of all, there is no minigame - no life-devouring cardgame, snowboard section or weirdo excursion into animal husbandry - to console you when all the busyworking gets too much.
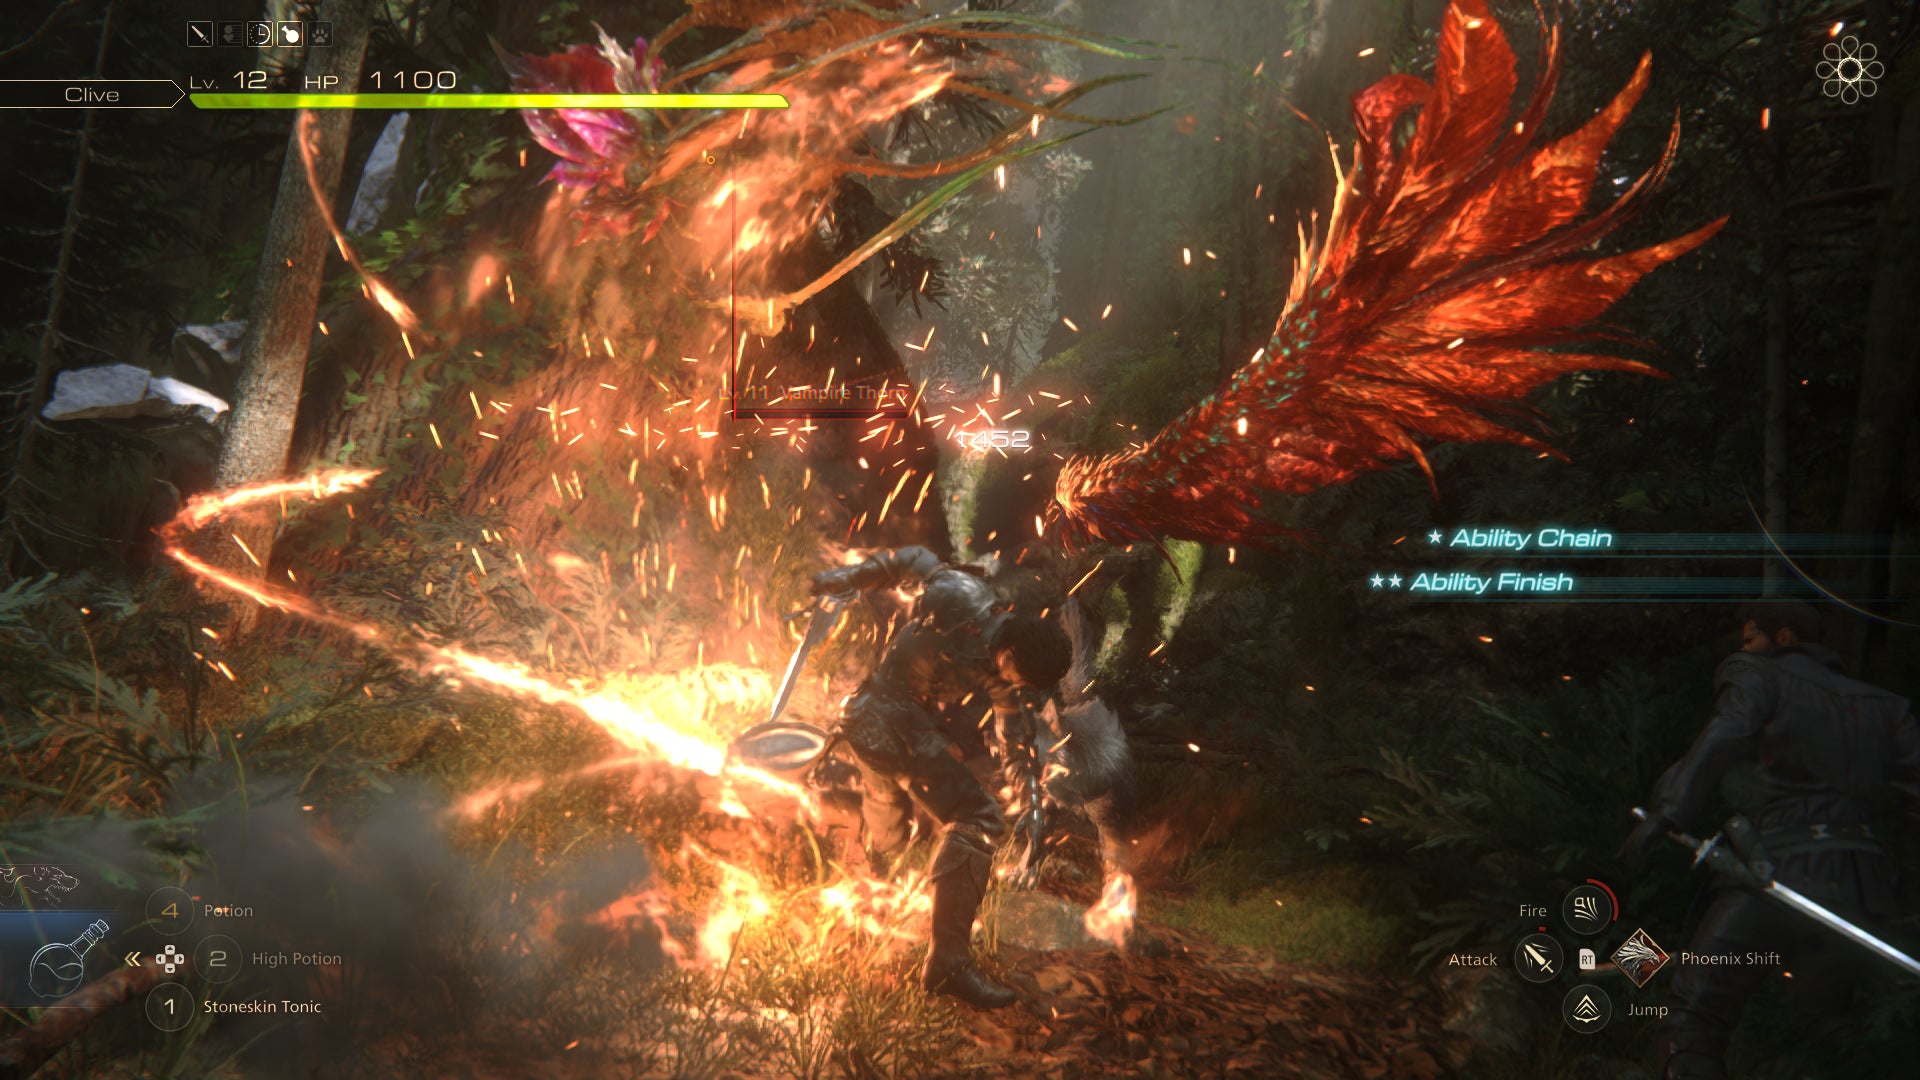
Image credit:Rock Paper Shotgun/Square Enix
Another reason Final Fantasy 16 feels longer than most is that you’ll spend essentially all of it in the shoes of one character, Ben Starr’s disgraced and outcast noble Clive Rosfeld. Clive isn’t terrible company, in fairness. He’s a glowering bundle of guilt and grief who slowly thaws and learns to live again, as is generally the fate of glowering bundles of guilt and grief in video game stories. I found him deeply unlovely at first, but was surprised by how much I’d warmed to him 50 hours later, and that isn’t just Stockholm Syndrome: Clive matures believably, making or re-establishing connections, scraping together a purpose and even achieving a vocal setting beyond “anguished growl”. All the same, I would not have chosen to spend 50 hours watching him learn not to be such a massive grumpyface, and I can’t say the rest of the cast made a lasting impression on me either.
FF16 does have some very charismatic characters. In the early game, there’s Ralph Inneson’s Cid, a distressingly sexy Loiner, all twinkle and rumble and wedge of bare chest, who serves as Clive’s mentor. Later on, there’s Stewart Clarke’s Dion, Final Fantasy’s (somehow) first openly gay character and a melancholy perfect prince who is engulfed in toxic family dynamics of his own. Looking back, however, I feel like even Cid and Dion are all surface shimmer - I remember them chiefly as collections of clothing, poses and accents that are fundamentally props for Clive’s ponderous journey of self-discovery. And for every solid supporting act FF16 has, it treats you to a bunch of paper tigers. The women of the cast are especially poorly served - they’re a pretty bald set of sexist caricatures in a story that takes too much inspiration from Game Of Thrones. Clive’s childhood sweetheart Jill, played by Susannah Fielding, is a perpetually wilting wallflower. Nina Yndis’s Benedikta, henchwoman of a sinister, remote kingdom, is a prancing seductress. Clive’s mother Anabella, performed by Christina Cole, is a viperish hag.
The focus on Clive isn’t purely born of a wish to tell a more straightforward hero story than the party-based shenanigans of old. Perhaps Final Fantasy 16’s cleverest flourish is that it’s a steady deconstruction of Clive’s centrality. Before we get into that, I guess I should talk setting. FF16 unfolds in Valisthea, a high fantasy world of kingdoms who are fighting tooth and nail for control of various supernatural entities or resources. There are the Mothercrystals, glittering mana mountains whose fragments are the source of most of Valisthea’s magic. There are the Bearers, a despised subclass of enslaved humans who can wield magic without using crystals. And there are the Eikons, godlike creatures based on Final Fantasy’s summons, together with the much-coveted human Dominants who can channel their powers.
As a piece of worldbuilding, Valisthea is alright. It’s got some very shiny castles, some plausibly disorderly bazaars, and a few nicely enveloping underground crypts, created by the obligatory super-advanced elder race. Its limitation is partly homogeneity, in a couple of senses. On the one hand, it’s a bunch of branching corridors and arenas that can feel, if not look, interchangeable. On the other, the population are conspicuously white with a predominantly Anglophone British voice cast, but many areas take heavy inspiration from north Africa and the Middle East, which makes Valisthea resemble some kind of expat colony or worse, piece of appropriative cosplay. The medieval fantasy aesthetic occasionally comes off as dry, next to the richer ambient colour palettes and geography of the older turn-based games, and certain social structures simply aren’t that convincing: the Bearers stuff is a ramshackle take on slavery that feels like it’s based chiefly on representations of such things in other video games.

Aside from the constant warring over MacGuffins, the realm is threatened by a mysterious case of habitat death, the Blight, which appears linked to the realm’s magic. Clive’s motivation at the start of the game is finding those who engineered his family’s downfall, including a strange rogue Dominant who can channel the demonic Ifrit. But he’s eventually drawn into the role of world-saver, setting out from a base in the middle of the world map to knock over various antagonists while plumbing the origins of the Blight. The latter third of the game moves beyond the feuding over land and resources to a metaphysical confrontation with puppetmasters in the shadows.
Clive’s defining capacity as both a playable character and a work of narrative is that he can absorb the powers of the Dominants he befriends or defeats; once toppled or persuaded, they endow him with suites of unlockable attacks, evasive moves and super abilities. It might feel like a slap in the face for Final Fantasy’s traditional party-based format: all of FF16’s grandest supporting characters ultimately exist as upgrade fuel for sulky himbo Clive, so that he can conjure up darkswords and do aerial juggles. Small wonder they feel so superficial. And this is sort of the point.
Clive’s ability to dominate the Dominants and concentrate Valisthea’s overall agency within himself isn’t just the usual boss-upgrade treadmill, but a subplot with a sinister dimension. Learning what this entails is a lot of fun. But it also requires a gigantic preamble, and even as a Squaresoft4ever diehard who is well accustomed to Final Foreshadowing, I don’t think it’s quite worth the legwork.
Nor, I would argue is the combat, even though the combat is good. FF16 is sort of Devil May Cry with a million times the cutscenes. Fights take place in the same world as exploration, and see you performing combos and special moves with a cooldown to both damage and, eventually, stagger an enemy, which (as in FF13) opens a window in which your attacks hit harder and they don’t fight back.
The unlockable Eikon suites slowly layer up this foundation. You can equip and switch between three at once in real-time, and they fit certain playstyles: Garuda is about speed and juggles, for example, while Bahumut’s signature trick is a charging AOE lightning bombardment that requires you to avoid damage. There’s a fair amount of theorycrafting to be done once you’ve hooked up with enough Eikons. The controls are intuitive, and the animations and effects are as fancy as you’d expect from a numbered FF (albeit with spotty performance ), but again, it’s all smeared too thin. You will fight a lot of foes who exist to create friction, and when quests are dragging on, it’s tempting to brute-force the stagger mechanic rather than playing with the options at your disposal.

Image credit:Rock Paper Shotgun/Square Enix
If the bread-and-butter skirmishes get boring, the crowning bossfights are some reprieve. Most begin as larger-than-life regular battles, with participants fully incarnating as Eikons with distinct movesets. From there, they escalate into absolutely shameless, full-bore QTE-driven cinematics that stand proudly alongside the wilder summons of the turn-based games. The best weave in mechanics from other genres, like bullet hell and on-rails shooting. You could argue that these crescendoes are all the more awe-inspiring for existing in a game’s worth of quests to deliver lunch, but I think that’s letting Square Enix off easy. In a shorter, more focused RPG that is less tentative about its strengths, less fixated on scale, these bosses would have really sung.
Still, I’m not sure even cutting the playlength dramatically would have made FF16’s fundamentals essential. The use of a single protagonist and the specific choice of Clive as frontman are a glass ceiling the game strains to move beyond, though it does, at least, use that glass ceiling as a mirror.
It’s a lavishly made and occasionally engrossing epic, definitely a game you’ll relish more if, unlike the average reviewer, you can afford to take your time. But it doesn’t have the wackiness and starpower of its most obvious rivals, the Final Fantasy 7 remakes . Its major characters would be bit-parts in Midgar, filling out the crowd at Seventh Heaven. Jill is the lady by the jukebox trying not to get mistaken for a mop. Cid makes for a captivating presence behind the bar, but he’s clocking off early tonight. And Clive? Clive is that woebegone regular who’s sort of a hit with the ladies but who insists on telling everybody about his domestic quarrels and who just won’t sodding leave.
Find out how we conduct our reviews by reading our review policy .
Final Fantasy XVI
PS5
Rock Paper Shotgun is better when you sign in
Sign in and join us on our journey to discover strange and compelling PC games.

All 75 Arc Raiders Blueprints and where to get them
These areas have the highest chance of giving you Blueprints

Image credit:Rock Paper Shotgun/Embark Studios

Looking for more Arc Raiders Blueprints? It’s a special day when you find a Blueprint, as they’re among the most valuable items in Arc Raiders. If you find a Blueprint that you haven’t already found, then you must make sure you hold onto it at all costs, because Blueprints are the key to one of the most important and powerful systems of meta-progression in the game.
This guide aims to be the very best guide on Blueprints you can find, starting with a primer on what exactly they are and how they work in Arc Raiders, before delving into exactly where to get Blueprints and the very best farming spots for you to take in your search.
We’ll also go over how to get Blueprints from other unlikely activities, such as destroying Surveyors and completing specific quests. And you’ll also find the full list of all 75 Blueprints in Arc Raiders on this page (including the newest Blueprints added with the Cold Snap update , such as the Deadline Blueprint and Firework Box Blueprint), giving you all the information you need to expand your own crafting repertoire.
In this guide:
- What are Blueprints in Arc Raiders?
- Full Blueprint list: All crafting recipes
- Where to find Blueprints in Arc Raiders Blueprints obtained from quests Blueprints obtained from Trials Best Blueprint farming locations

What are Blueprints in Arc Raiders?
Blueprints in Arc Raiders are special items which, if you manage to extract with them, you can expend to permanently unlock a new crafting recipe in your Workshop. If you manage to extract from a raid with an Anvil Blueprint, for example, you can unlock the ability to craft your very own Anvil Pistol, as many times as you like (as long as you have the crafting materials).
To use a Blueprint, simply open your Inventory while in the lobby, then right-click on the Blueprint and click “Learn And Consume” . This will permanently unlock the recipe for that item in your Workshop. As of the Stella Montis update, there are allegedly 75 different Blueprints to unlock - although only 68 are confirmed to be in the game so far. You can see all the Blueprints you’ve found and unlocked by going to the Workshop menu, and hitting “R” to bring up the Blueprint screen.
It’s possible to find duplicates of past Blueprints you’ve already unlocked. If you find these, then you can either sell them, or - if you like to play with friends - you can take it into a match and gift it to your friend so they can unlock that recipe for themselves. Another option is to keep hold of them until the time comes to donate them to the Expedition.
Full Blueprint list: All crafting recipes
Below is the full list of all the Blueprints that are currently available to find in Arc Raiders, and the crafting recipe required for each item:
| Blueprint | Type | Recipe | Crafted At |
|---|---|---|---|
| Bettina | Weapon | 3x Advanced Mechanical Components 3x Heavy Gun Parts 3x Canister | Gunsmith 3 |
| Blue Light Stick | Quick Use | 3x Chemicals | Utility Station 1 |
| Aphelion | Weapon | 3x Magnetic Accelerator 3x Complex Gun Parts 1x Matriarch Reactor | Gunsmith 3 |
| Combat Mk. 3 (Flanking) | Augment | 2x Advanced Electrical Components 3x Processor | Gear Bench 3 |
| Combat Mk. 3 (Aggressive) | Augment | 2x Advanced Electrical Components 3x Processor | Gear Bench 3 |
| Complex Gun Parts | Material | 2x Light Gun Parts 2x Medium Gun Parts 2x Heavy Gun Parts | Refiner 3 |
| Fireworks Box | Quick Use | 1x Explosive Compound 3x Pop Trigger | Explosives Station 2 |
| Gas Mine | Mine | 4x Chemicals 2x Rubber Parts | Explosives Station 1 |
| Green Light Stick | Quick Use | 3x Chemicals | Utility Station 1 |
| Pulse Mine | Mine | 1x Crude Explosives 1x Wires | Explosives Station 1 |
| Seeker Grenade | Grenade | 1x Crude Explosives 2x ARC Alloy | Explosives Station 1 |
| Looting Mk. 3 (Survivor) | Augment | 2x Advanced Electrical Components 3x Processor | Gear Bench 3 |
| Angled Grip II | Mod | 2x Mechanical Components 3x Duct Tape | Gunsmith 2 |
| Angled Grip III | Mod | 2x Mod Components 5x Duct Tape | Gunsmith 3 |
| Hullcracker | Weapon | 1x Magnetic Accelerator 3x Heavy Gun Parts 1x Exodus Modules | Gunsmith 3 |
| Launcher Ammo | Ammo | 5x Metal Parts 1x Crude Explosives | Workbench 1 |
| Anvil | Weapon | 5x Mechanical Components 5x Simple Gun Parts | Gunsmith 2 |
| Anvil Splitter | Mod | 2x Mod Components 3x Processor | Gunsmith 3 |
| ??? | ??? | ??? | ??? |
| Barricade Kit | Quick Use | 1x Mechanical Components | Utility Station 2 |
| Blaze Grenade | Grenade | 1x Explosive Compound 2x Oil | Explosives Station 3 |
| Bobcat | Weapon | 3x Advanced Mechanical Components 3x Light Gun Parts | Gunsmith 3 |
| Osprey | Weapon | 2x Advanced Mechanical Components 3x Medium Gun Parts 7x Wires | Gunsmith 3 |
| Burletta | Weapon | 3x Mechanical Components 3x Simple Gun Parts | Gunsmith 1 |
| Compensator II | Mod | 2x Mechanical Components 4x Wires | Gunsmith 2 |
| Compensator III | Mod | 2x Mod Components 8x Wires | Gunsmith 3 |
| Defibrillator | Quick Use | 9x Plastic Parts 1x Moss | Medical Lab 2 |
| ??? | ??? | ??? | ??? |
| Equalizer | Weapon | 3x Magnetic Accelerator 3x Complex Gun Parts 1x Queen Reactor | Gunsmith 3 |
| Extended Barrel | Mod | 2x Mod Components 8x Wires | Gunsmith 3 |
| Extended Light Mag II | Mod | 2x Mechanical Components 3x Steel Spring | Gunsmith 2 |
| Extended Light Mag III | Mod | 2x Mod Components 5x Steel Spring | Gunsmith 3 |
| Extended Medium Mag II | Mod | 2x Mechanical Components 3x Steel Spring | Gunsmith 2 |
| Extended Medium Mag III | Mod | 2x Mod Components 5x Steel Spring | Gunsmith 3 |
| Extended Shotgun Mag II | Mod | 2x Mechanical Components 3x Steel Spring | Gunsmith 2 |
| Extended Shotgun Mag III | Mod | 2x Mod Components 5x Steel Spring | Gunsmith 3 |
| Remote Raider Flare | Quick Use | 2x Chemicals 4x Rubber Parts | Utility Station 1 |
| Heavy Gun Parts | Material | 4x Simple Gun Parts | Refiner 2 |
| Venator | Weapon | 2x Advanced Mechanical Components 3x Medium Gun Parts 5x Magnet | Gunsmith 3 |
| Il Toro | Weapon | 5x Mechanical Components 6x Simple Gun Parts | Gunsmith 1 |
| Jolt Mine | Mine | 1x Electrical Components 1x Battery | Explosives Station 2 |
| Explosive Mine | Mine | 1x Explosive Compound 1x Sensors | Explosives Station 3 |
| Jupiter | Weapon | 3x Magnetic Accelerator 3x Complex Gun Parts 1x Queen Reactor | Gunsmith 3 |
| Light Gun Parts | Material | 4x Simple Gun Parts | Refiner 2 |
| Lightweight Stock | Mod | 2x Mod Components 5x Duct Tape | Gunsmith 3 |
| Lure Grenade | Grenade | 1x Speaker Component 1x Electrical Components | Utility Station 2 |
| Medium Gun Parts | Material | 4x Simple Gun Parts | Refiner 2 |
| Torrente | Weapon | 2x Advanced Mechanical Components 3x Medium Gun Parts 6x Steel Spring | Gunsmith 3 |
| Muzzle Brake II | Mod | 2x Mechanical Components 4x Wires | Gunsmith 2 |
| Muzzle Brake III | Mod | 2x Mod Components 8x Wires | Gunsmith 3 |
| Padded Stock | Mod | 2x Mod Components 5x Duct Tape | Gunsmith 3 |
| Shotgun Choke II | Mod | 2x Mechanical Components 4x Wires | Gunsmith 2 |
| Shotgun Choke III | Mod | 2x Mod Components 8x Wires | Gunsmith 3 |
| Shotgun Silencer | Mod | 2x Mod Components 8x Wires | Gunsmith 3 |
| Showstopper | Grenade | 1x Advanced Electrical Components 1x Voltage Converter | Explosives Station 3 |
| Silencer I | Mod | 2x Mechanical Components 4x Wires | Gunsmith 2 |
| Silencer II | Mod | 2x Mod Components 8x Wires | Gunsmith 3 |
| Snap Hook | Quick Use | 2x Power Rod 3x Rope 1x Exodus Modules | Utility Station 3 |
| Stable Stock II | Mod | 2x Mechanical Components 3x Duct Tape | Gunsmith 2 |
| Stable Stock III | Mod | 2x Mod Components 5x Duct Tape | Gunsmith 3 |
| Tagging Grenade | Grenade | 1x Electrical Components 1x Sensors | Utility Station 3 |
| Tempest | Weapon | 3x Advanced Mechanical Components 3x Medium Gun Parts 3x Canister | Gunsmith 3 |
| Trigger Nade | Grenade | 2x Crude Explosives 1x Processor | Explosives Station 2 |
| Vertical Grip II | Mod | 2x Mechanical Components 3x Duct Tape | Gunsmith 2 |
| Vertical Grip III | Mod | 2x Mod Components 5x Duct Tape | Gunsmith 3 |
| Vita Shot | Quick Use | 2x Antiseptic 1x Syringe | Medical Lab 3 |
| Vita Spray | Quick Use | 3x Antiseptic 1x Canister | Medical Lab 3 |
| Vulcano | Weapon | 1x Magnetic Accelerator 3x Heavy Gun Parts 1x Exodus Modules | Gunsmith 3 |
| Wolfpack | Grenade | 2x Explosive Compound 2x Sensors | Explosives Station 3 |
| Red Light Stick | Quick Use | 3x Chemicals | Utility Station 1 |
| Smoke Grenade | Grenade | 14x Chemicals 1x Canister | Utility Station 2 |
| Deadline | Mine | 3x Explosive Compound 2x ARC Circuitry | Explosives Station 3 |
| Trailblazer | Grenade | 1x Explosive Compound 1x Synthesized Fuel | Explosives Station 3 |
| Tactical Mk. 3 (Defensive) | Augment | 2x Advanced Electrical Components 3x Processor | Gear Bench 3 |
| Tactical Mk. 3 (Healing) | Augment | 2x Advanced Electrical Components 3x Processor | Gear Bench 3 |
| Yellow Light Stick | Quick Use | 3x Chemicals | Utility Station 1 |
Note: The missing Blueprints in this list likely have not actually been added to the game at the time of writing, because none of the playerbase has managed to find any of them. As they are added to the game, I will update this page with the most relevant information so you know exactly how to get all 75 Arc Raiders Blueprints.
Where to find Blueprints in Arc Raiders
Below is a list of all containers, modifiers, and events which maximise your chances of finding Blueprints:
- Certain quests reward you with specific Blueprints .
- Completing Trials has a high chance of offering Blueprints as rewards.
- Surveyors have a decent chance of dropping Blueprints on death.
- High loot value areas tend to have a greater chance of spawning Blueprints.
- Night Raids and Storms may increase rare Blueprint spawn chances in containers.
- Containers with higher numbers of items may have a higher tendency to spawn Blueprints. As a result, Blue Gate (which has many “large” containers containing multiple items) may give you a higher chance of spawning Blueprints.
- Raider containers (Raider Caches, Weapon Boxes, Medical Bags, Grenade Tubes) have increased Blueprint drop rates. As a result, the Uncovered Caches event gives you a high chance of finding Blueprints.
- Security Lockers have a higher than average chance of containing Blueprints.
- Certain Blueprints only seem to spawn under specific circumstances: Tempest Blueprint only spawns during Night Raid events. Vulcano Blueprint only spawns during Hidden Bunker events. Jupiter and Equaliser Blueprints only spawn during Harvester events.

Raider Caches, Weapon Boxes, and other raider-oriented container types have a good chance of offering Blueprints. |Image credit:Rock Paper Shotgun/Embark Studios
Blueprints have a very low chance of spawning in any container in Arc Raiders, around 1-2% on average. However, there is a higher chance of finding Blueprints in particular container types. Specifically, you can find more Blueprints in Raider containers and security lockers.
Beyond this, if you’re looking for Blueprints you should focus on regions of the map which are marked as having particularly high-value loot. Areas such as the Control Tower in Dam Battlegrounds, the Arrival and Departure Buildings in Spaceport, and Pilgrim’s Peak in Blue Gate all have a better-than-average chance of spawning Blueprints somewhere amongst all their containers. Night Raids and Electromagnetic Storm events also increase the drop chances of certain Blueprints .
In addition to these containers, you can often loot Blueprints from destroyed Surveyors - the largest of the rolling ball ARC. Surveyors are more commonly found on the later maps - Spaceport and Blue Gate - and if one spawns in your match, you’ll likely see it by the blue laser beam that it casts into the sky while “surveying”.
Surveyors are quite well-armoured and will very speedily run away from you once it notices you, but if you can take one down then make sure you loot all its parts for a chance of obtaining certain unusual Blueprints.
Blueprints obtained from quests
One way in which you can get Blueprints is by completing certain quests for the vendors in Speranza. Some quests will reward you with a specific item Blueprint upon completion, so as long as you work through all the quests in Arc Raiders, you are guaranteed those Blueprints.
Here is the full list of all Blueprints you can get from quest rewards:
- Trigger Nade Blueprint: Rewarded after completing “Sparks Fly”.
- Lure Grenade Blueprint: Rewarded after completing “Greasing Her Palms”.
- Burletta Blueprint: Rewarded after completing “Industrial Espionage”.
- Hullcracker Blueprint (and Launcher Ammo Blueprint): Rewarded after completing “The Major’s Footlocker”.
Alas, that’s only 4 Blueprints out of a total of 75 to unlock, so for the vast majority you will need to find them yourself during a raid. If you’re intent on farming Blueprints, then it’s best to equip yourself with cheap gear in case you lose it, but don’t use a free loadout because then you won’t get a safe pocket to stash any new Blueprint you find. No pain in Arc Raiders is sharper than failing to extract with a new Blueprint you’ve been after for a dozen hours already.

One of the best ways to get Blueprints is by hitting three stars on all five Trials every week. |Image credit:Rock Paper Shotgun/Embark Studios
Blueprints obtained from Trials
One of the very best ways to get Blueprints is as rewards for completing Trials in Arc Raiders. Trials are unlocked from Level 15 onwards, and allow you to earn rewards by focusing on certain tasks over the course of several raids. For example, one Trial might task you with dealing damage to Hornets, while another might challenge you to loot Supply Drops.
Trials refresh on a weekly basis, with a new week bringing five new Trials. Each Trial can offer up to three rewards after passing certain score milestones, and it’s possible to receive very high level loot from these reward crates - including Blueprints. So if you want to unlock as many Blueprints as possible, you should make a point of completing as many Trials as possible each week.
Best Blueprint farming locations
The very best way to get Blueprints is to frequent specific areas of the maps which combine high-tier loot pools with the right types of containers to search. Here are my recommendations for where to find Blueprints on every map, so you can always keep the search going for new crafting recipes to unlock.

Image credit:Rock Paper Shotgun/Embark Studios
Dam Battlegrounds
The best places to farm Blueprints on Dam Battlegrounds are the Control Tower, Power Generation Complex, Ruby Residence, and Pale Apartments . The first two regions, despite only being marked on the map as mid-tier loot, contain a phenomenal number of containers to loot. The Control Tower can also contain a couple of high-tier Security Lockers - though of course, you’ll need to have unlocked the Security Breach skill at the end of the Survival tree.
There’s also a lot of reporting amongst the playerbase that the Residential areas in the top-left of the map - Pale Apartments and Ruby Residence - give you a comparatively strong chance of finding Blueprints. Considering their size, there’s a high density of containers to loot in both locations, and they also have the benefit of being fairly out of the way. So you’re more likely to have all the containers to yourself.
Buried City
The best Blueprint farming locations on Buried City are the Santa Maria Houses, Grandioso Apartments, Town Hall, and the various buildings of the New District . Grandioso Apartments has a lower number of containers than the rest, but a high chance of spawning weapon cases - which have good Blueprint drop rates. The others are high-tier loot areas, with plenty of lootable containers - including Security Lockers.
Spaceport
The best places to find Blueprints on Spaceport are the Arrival and Departure Buildings, as well as Control Tower A6 and the Launch Towers . All these areas are labelled as high-value loot regions, and many of them are also very handily connected to one another by the Spaceport wall, which you can use to quickly run from one area to the next. At the tops of most of these buildings you’ll find at least one Security Locker, so this is an excellent farming route for players looking to find Blueprints.
The downside to looting Blueprints on Spaceport is that all these areas are hotly contested, particularly in Duos and Squads. You’ll need to be very focused and fast in order to complete the full farming route.

Image credit:Rock Paper Shotgun/Embark Studios
Blue Gate
Blue Gate tends to have a good chance of dropping Blueprints, potentially because it generally has a high number of containers which can hold lots of items; so there’s a higher chance of a Blueprint spawning in each container. In my experience, the best Blueprint farming spots on Blue Gate are Pilgrim’s Peak, Raider’s Refuge, the Ancient Fort, and the Underground Complex beneath the Warehouse .
All of these areas contain a wealth of containers to loot. Raider’s Refuge has less to loot, but the majority of the containers in and around the Refuge are raider containers, which have a high chance of containing Blueprints - particularly during major events.
Stella Montis
On the whole, Stella Montis seems to have a very low drop rate for Blueprints (though a high chance of dropping other high-tier loot). If you do want to try farming Blueprints on this map, the best places to find Blueprints in Stella Montis are Medical Research, Assembly Workshop, and the Business Center . These areas have the highest density of containers to loot on the map.
In addition to this, the Western Tunnel has a few different Security Lockers to loot, so while there’s very little to loot elsewhere in this area of the map, it’s worth hitting those Security Lockers if you spawn there at the start of a match.
That wraps up this primer on how to get all the Blueprints in Arc Raiders as quickly as possible. With the Expedition system constantly resetting a large number of players’ Blueprints, it’s more important than ever to have the most up-to-date information on where to find all these Blueprints.
While you’re here, be sure to check out our Arc Raiders best guns tier list , as well as our primers on the best skills to unlock and all the different Field Depot locations on every map.

ARC Raiders
PS5 , Xbox Series X/S , PC
Rock Paper Shotgun is better when you sign in
Sign in and join us on our journey to discover strange and compelling PC games.
