FBC: Firebreak review
Losing control

Image credit:Rock Paper Shotgun / Remedy Entertainment

- Developer: Remedy Entertainment
- Publisher: Remedy Entertainment
- Release: June 17th 2025
- On: Windows
- From: Steam , Epic Games Store , Game Pass
- Price: $40/£33/€40
- Reviewed on: Intel Core i9-10900K, 32GB RAM, Nvidia RTX 3090, Windows 10
Well, you can’t say Remedy don’t have range. After the screeching survival horror of Alan Wake 2 comes FBC: Firebreak , a three-person multiplayer FPS spun off from Wakeverse stablemate (and excellent action game in its own right) Control . Perspective isn’t the only thing that shifts, either, as Firebreak reframes Control’s eerie, New Weird -influenced setting as a backdrop for comedy co-op shenanigans. There will be gnomes creating lightning storms.
Back in the Oldest House, the illogically vast and currently invaded headquarters of the Federal Bureau of Control, Firebreakers – volunteer office drones turned underqualified field agents – gear up to do battle with whatever outdated guns and jerry-rigged tools they can find. The Firebreak initiative is as haphazard and cobbled-together a task force as you’re likely to see, and ultimately, a reflection of the game it stars in: one that’s plucky and capable of impressing, yet never quite comes together as a cohesive prospect.
Your opponents are, once again, the Hiss, Control’s resonance-based baddies who take up residence in the warped bodies of less prepared FBC staff. Deprived of that game’s desk-chucking superpowers, Firebreak’s Anti-Hiss toolbox is more mundane, with most of the firepower coming from simple firearms. The satisfaction of their shooting experience varies wildly, depending on the precise flavour of gun in use; shotguns and the hunting rifle are great fun, being boomy, weighty blasters that stagger chunkier enemies and send weaker ones airborne. The assault rifle and SMG, though? Awful. These deal about as much damage to a Hiss as a rude email, and with the pre-upgrade models especially, only fire off slightly faster.
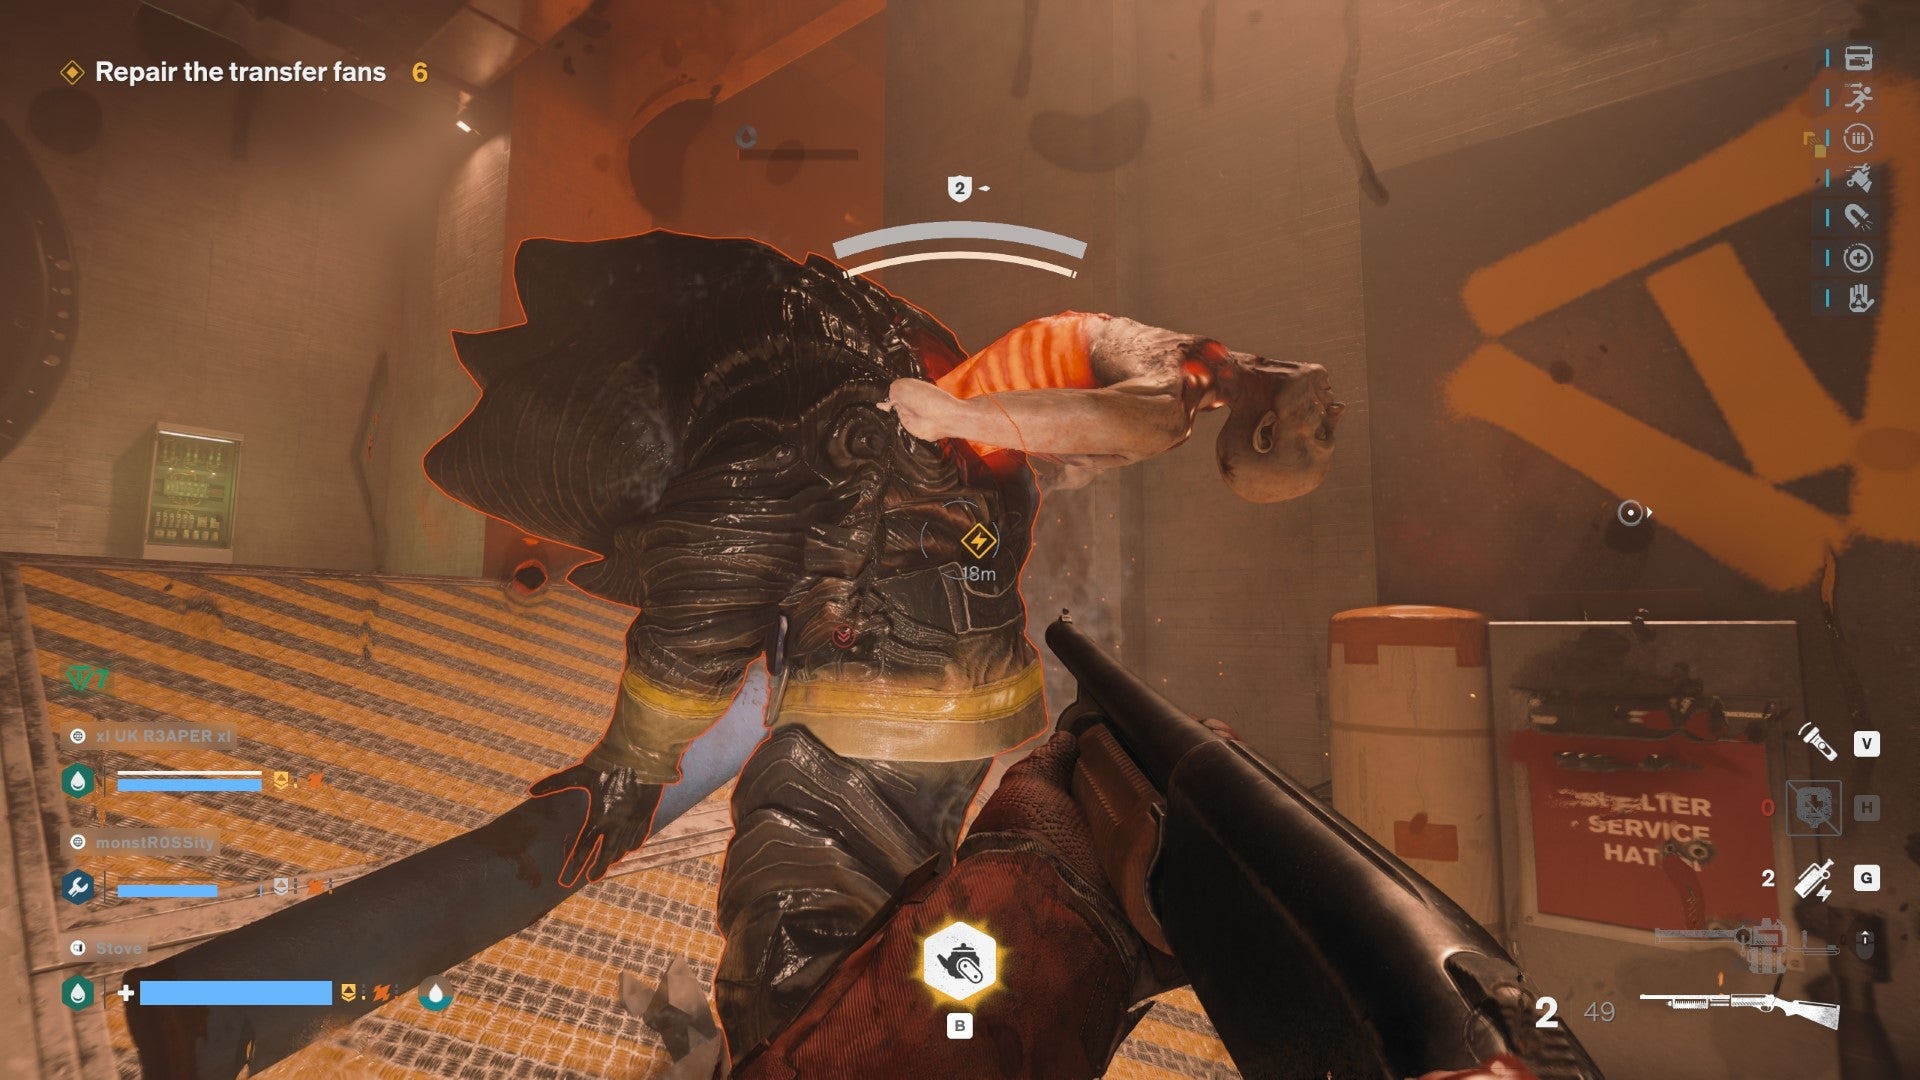
Image credit:Rock Paper Shotgun / Remedy Entertainment
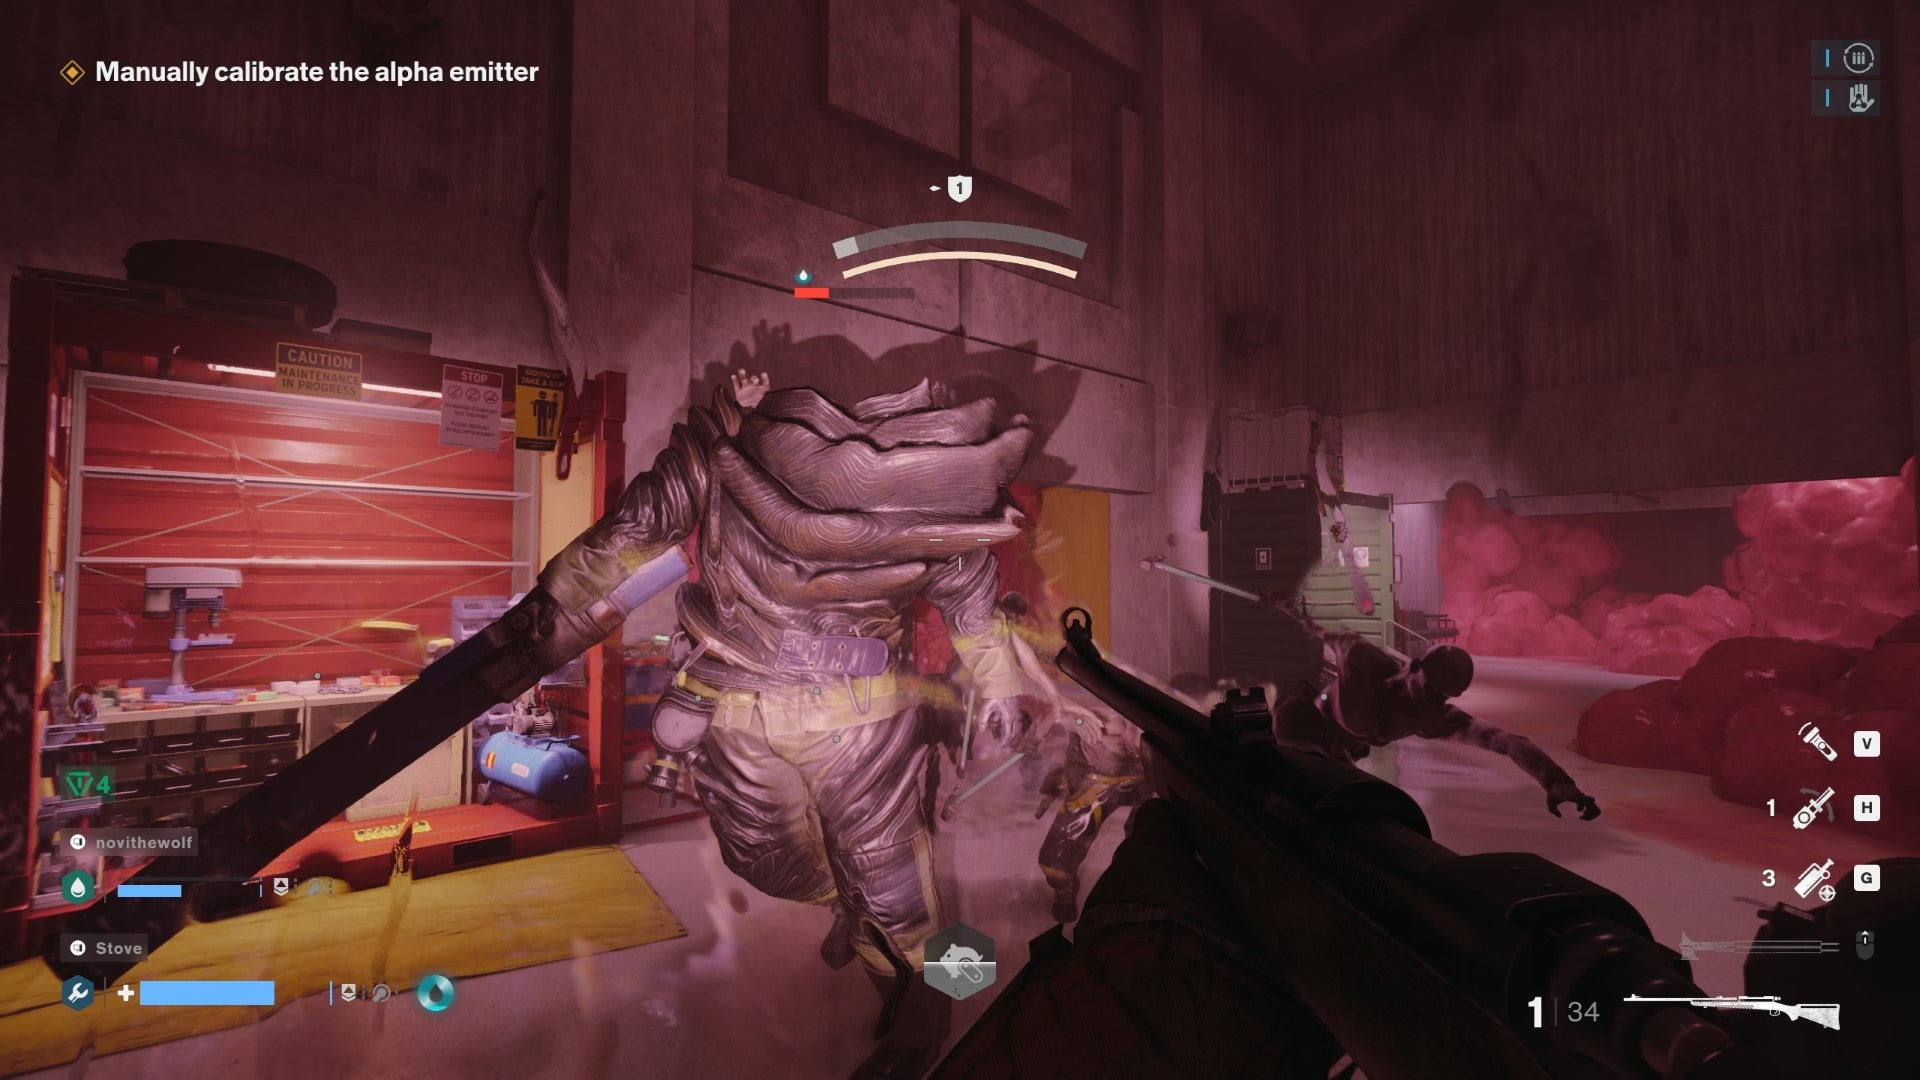
Livening up these gunfights are Crisis Kits, Firebreak’s take on player classes, which include one unique tool, a helpful deployable, and an Altered Augment – an ultimate, basically – apiece. The latter play into the FBC’s mission statement of containing and researching artifacts that defy natural law, and conveniently, they often prove useful in a scrap. Chuck a spooky teapot on top of the Splash Kit’s water-spewing Ejector tool, for instance, and its harmless payloads become globs of melty magma; that gnome, meanwhile, is the hateful star of the electricity-focused Jump kit, whose obsession with following the nearest live creature makes it as likely to smite its user with summoned lightning as the Hiss.
That said, the tools are mainly utilities, designed to speed up janitor work like fixing machinery or extinguishing fires. That sounds boring, and it often is. But sometimes, these tools come good: at least some of the fires will be the ones engulfing your teammates, so timely dousing with the Ejector could save a life. Much of the wire-fiddling work also needs doing under the pressure of a Hiss assault wave, turning simple wrench whacks into genuine clutch plays.
The ability to apply shock and wetness at will also ties into the elemental interactions that grant Firebreak’s action a much-needed third dimension. Intentionally setting these up can be tricky, unless you’ve got teammates on mics, but the first time you lethally zap a gang of drenched Hiss with conduction-boosted chain lightning feels like you’re outsmarting the paranormal as well as out-shooting it. And I wanted to reach through my screen and hug the teammate who, seeing that our whole squad was about to perish from the heat of a possessed furnace, had the presence of mind to shoot out an overhead sprinkler, rescuing the run with an improvised shower.


Firebreak is usually content to let players discover these interactions for themselves, though the very start of your Firebreaking career arguably would benefit from a firmer helping hand. The onboarding process is not kind: with only the briefest of tooltips offering advice, it’s all too easy to launch into the opening mission (or job, as the game calls them) with little to no understanding of how all these magical contraptions work. And, just to make an even worse first impression, said job is a deflatingly straightforward matter of fixing some electrical boxes and leaving.
That’s because at first, you’ll need to not just unlock each of the five jobs by completing the preceding one, but also the full length of each job – they’re split up into three sections, or Clearance Levels – by beating the shorter, lower-level versions in order.
The idea behind this structure is that the availability of shorter missions makes Firebreak more accessible to busy types, who might not have the time or inclination to settle down for 45-minute slogs in the vein of Left 4 Dead ’s campaigns or Deep Rock Galactic ’s weekly Deep Dives. Noble in concept, and technically successful in practice, with most Level 1 jobs clearable in a couple of minutes and Level 2s doable in around ten.
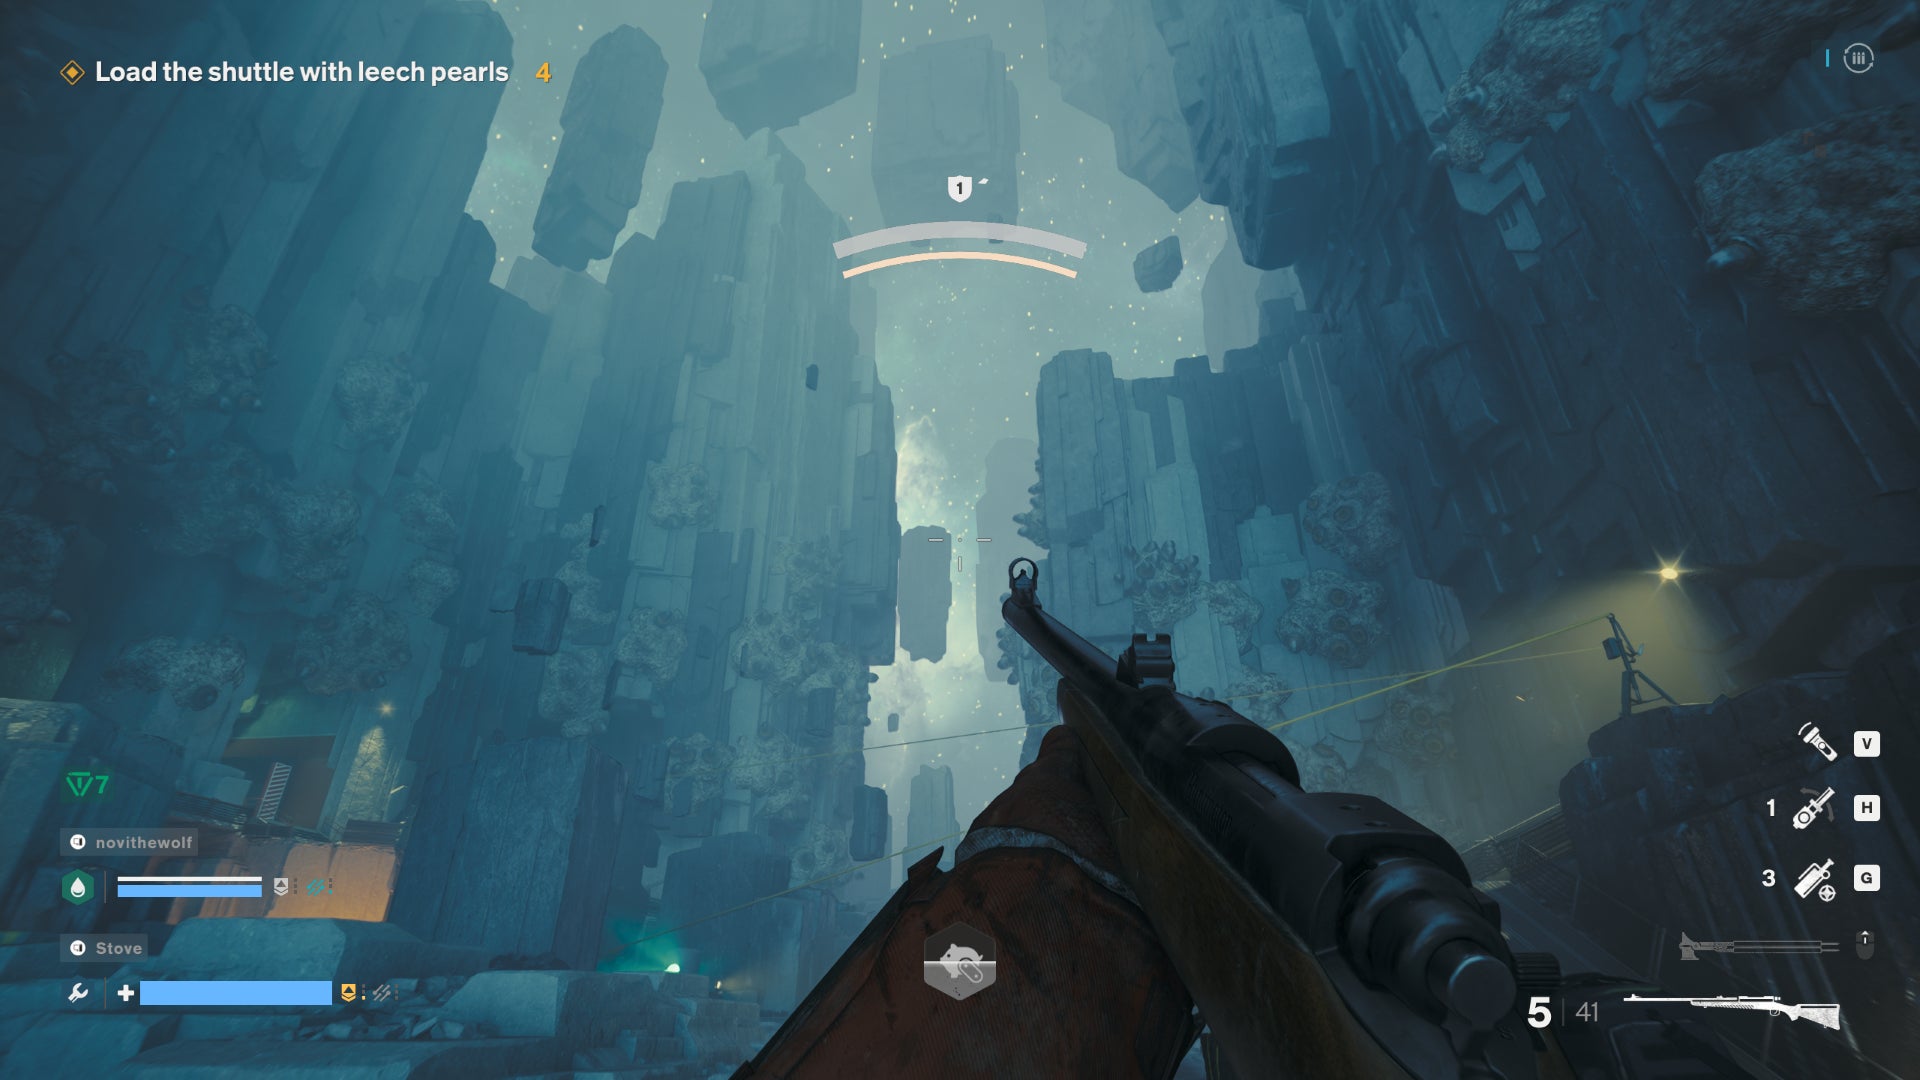
Image credit:Rock Paper Shotgun / Remedy Entertainment
Sadly, not all Clearance Levels are created equal. The first two are always and exclusively based around the workmanlike maintenance tasks – fixing generators, tossing radioactive orbs into a cart, shooting sticky notes and suchlike. That leaves only the third to ever offer a meaningful twist or dramatic climax, like battling an ogre made of Post-Its or launching a waste disposal rocket into space. These are invariably the highlights of any job, and so to stick to the lower Clearance Levels isn’t just to play a faster game, but a duller one as well.
Corruption effects, where an escaped artifact plays havoc on anything from player shields to gravity, could spice up the handyman simulation. My personal favourite? An anomalous snare drum that forces enemies to move and attack at hilariously exaggerated speed, as if Sam Lake accidentally sat on a Fast Forward button over at Remedy HQ. Except these too are strictly limited to Level 3 runs, hollowing out further the promise that Firebreak would be a less time-intensive take on live service .
As does, it turns out, the entire progression system . Pretty much everything requires XP tokens to unlock: perks, guns, upgraded perks, upgraded guns, and most gallingly, the deployable and Altered Augment for each kit. You don’t even get these as standard, making those early missions even more stripped-back. And, because weapon and kit upgrades are gated behind tiered pages – think the battle passes in Helldivers 2 – you’ll often end up wasting points on gear you might not even want, just to spend enough for the next page to open up.
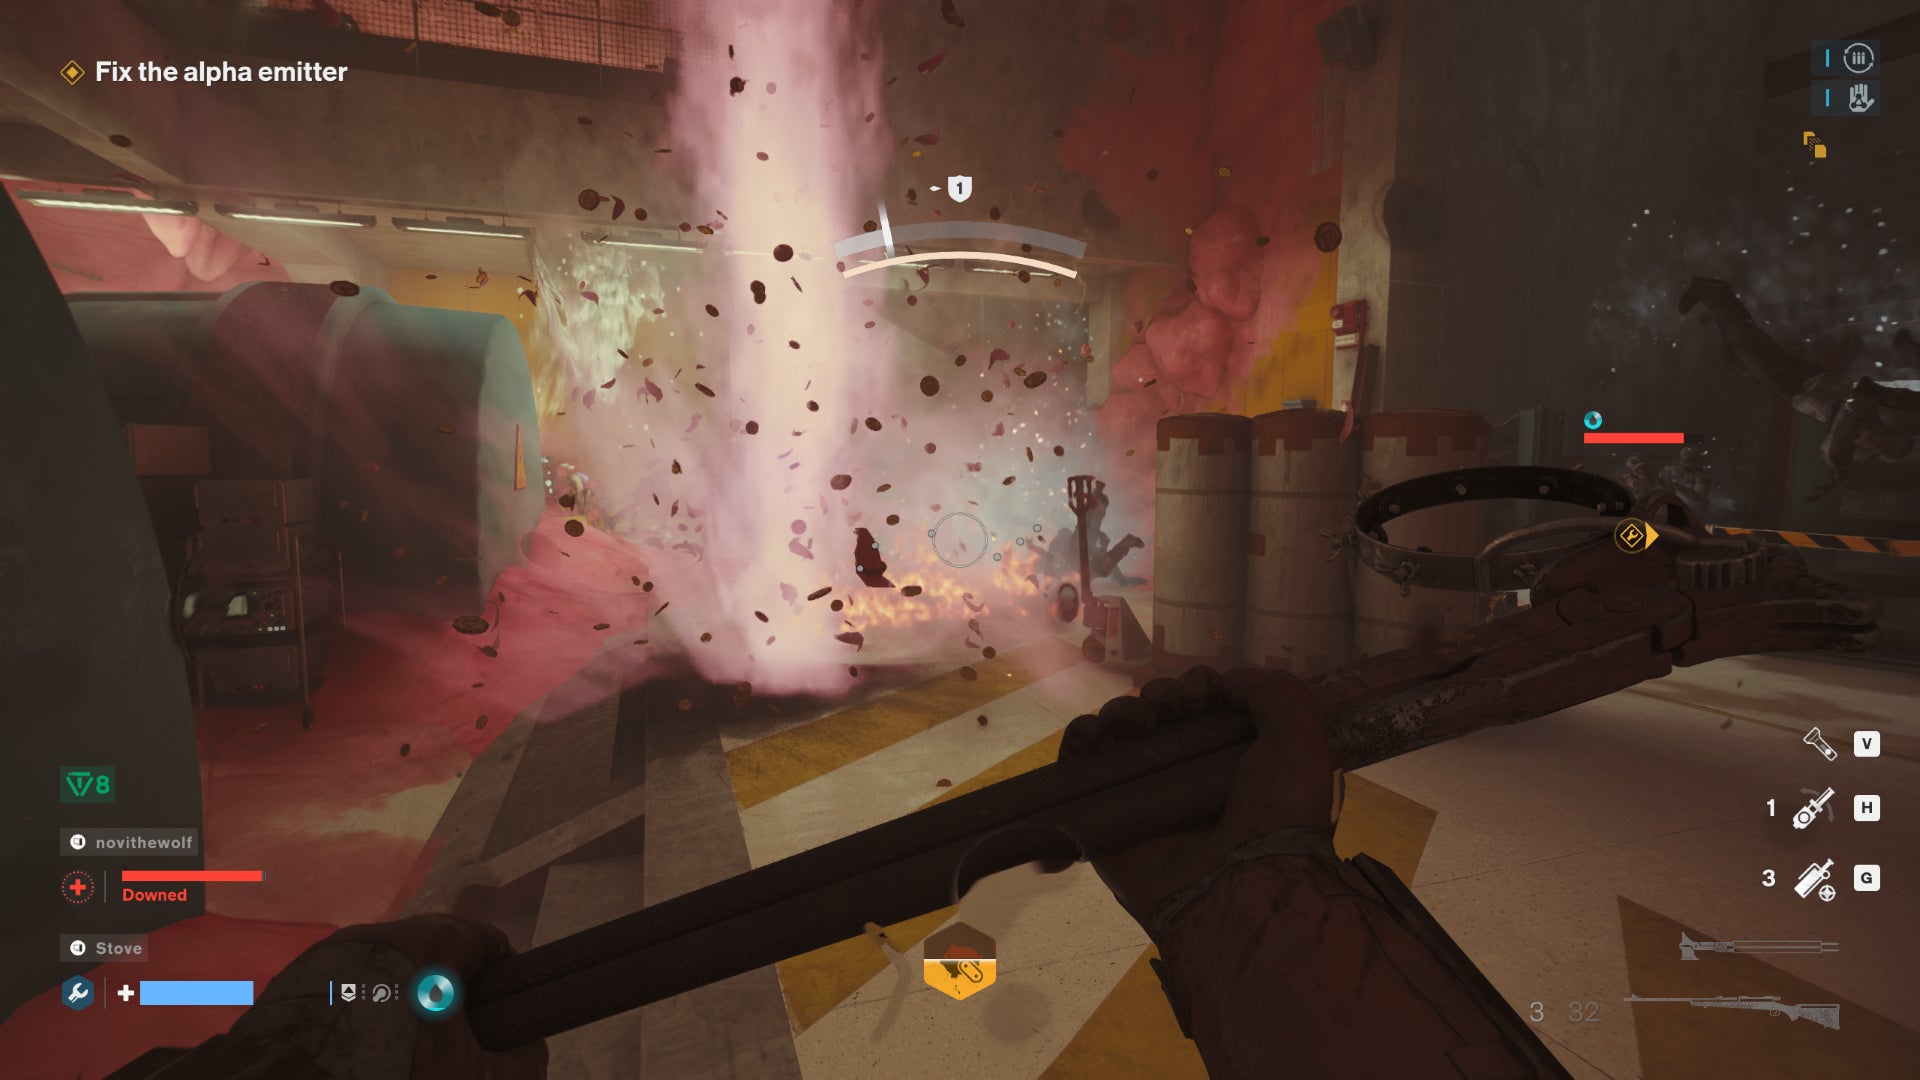
Image credit:Rock Paper Shotgun / Remedy Entertainment
In effect, you’ll need a lot of XP to get beyond the weakest guns and perks, once again disadvantaging those who only fancy dipping in now and then. Folk who put the hours in will indeed be rewarded, but then even with a full set of maximum Clearance levels, there are still only five job types for now. Corruption or not, Firebreak soon ends up repeating itself, quietly slipping into the grinding habits that it simultaneously claims to reject.
All of that is not to say that Firebreak is devoid of fun. There’s actually an hours-wide sweet spot, between that iffy start and the point where job fatigue kicks in, where it’s very enjoyable indeed, a gloriously “Why not?” mess of exploding piggy banks, skin-of-the-teeth monster containment, and glowing men in floating chairs hurling masonry at you. I wish it lasted longer, but it’s there.
It also helps that Firebreak inherits certain charms from Control, particularly the Oldest House itself. This was already a great vidjamagame fightspace back when we were aggressively levitating through it as Jesse Faden, and from the first-person perspective of these nameless FBC mooks, its imposing sense of brutalist enormousness is even stronger. It sometimes even pulls one of its lore-established spacial shifts, like cheekily putting a safe room on a ceiling and forcing poor Firebreakers to climb a debris ladder to open it.
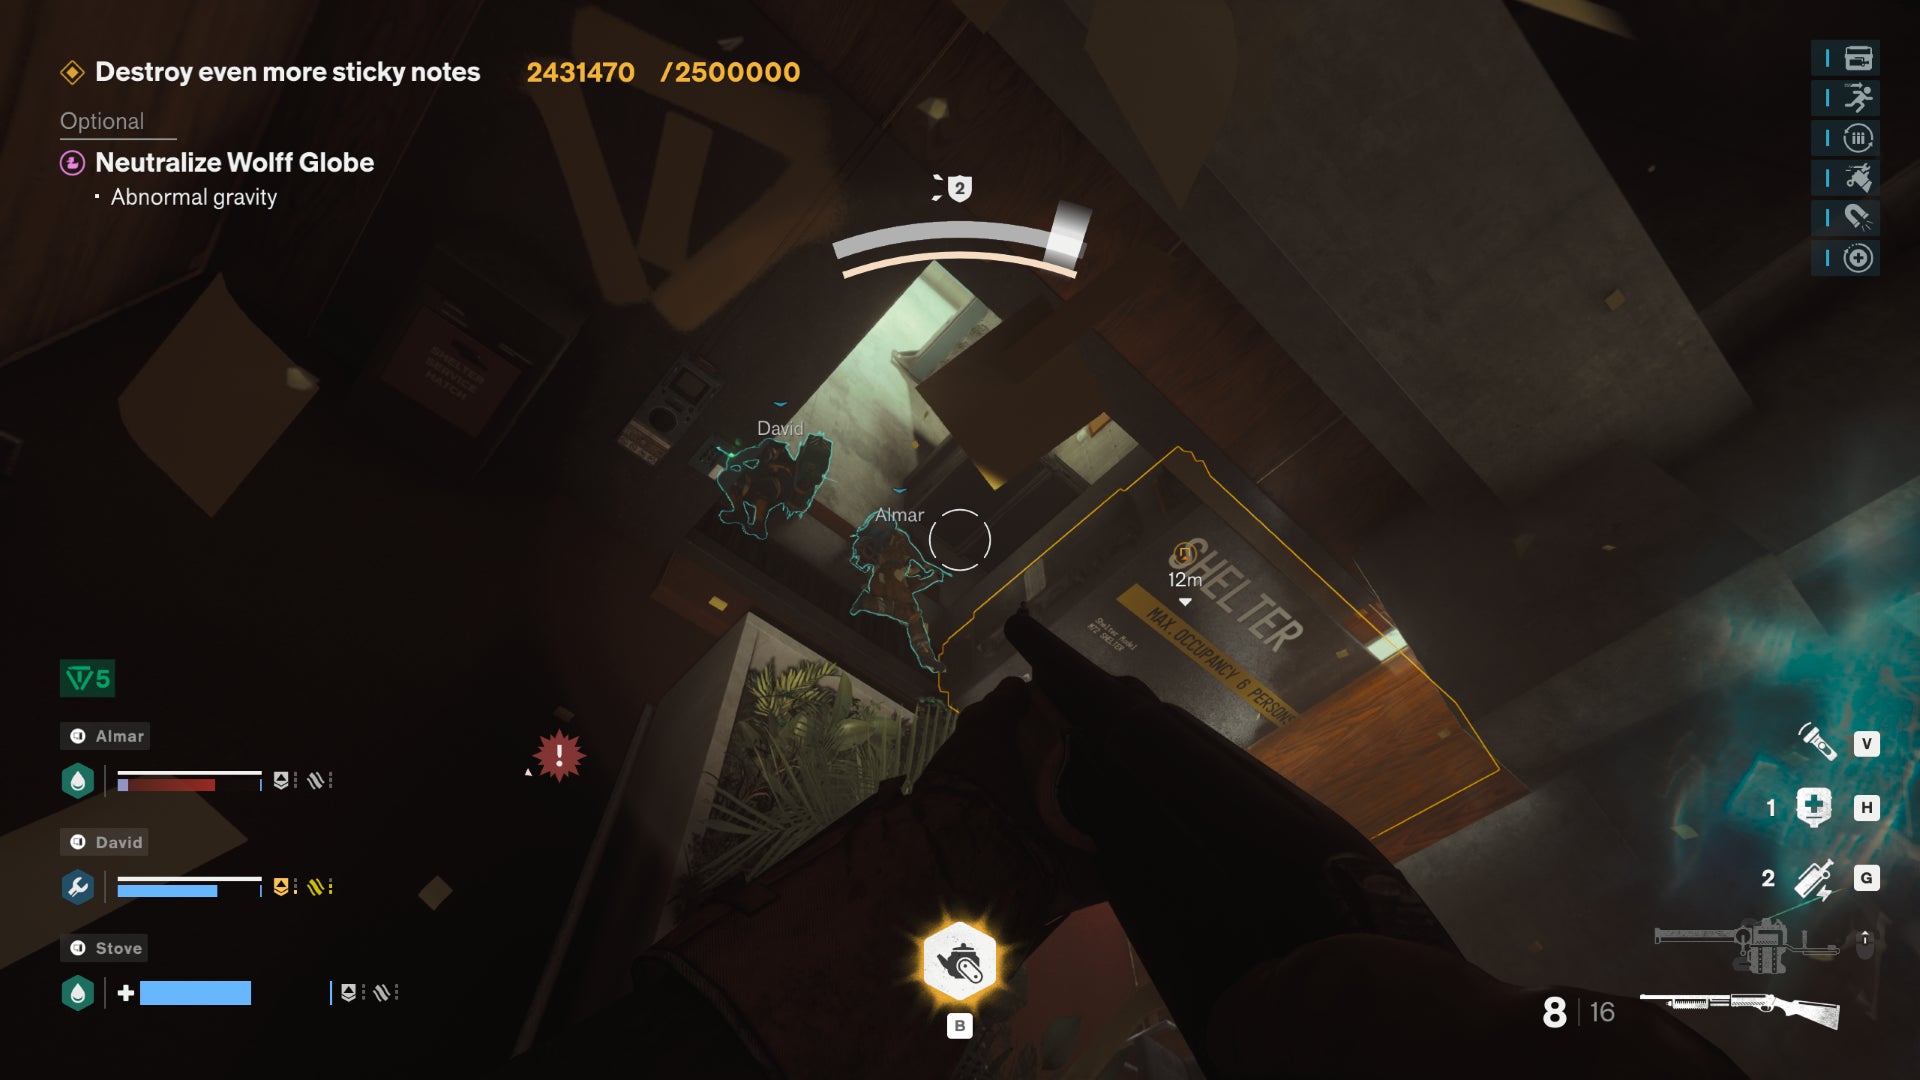
Image credit:Rock Paper Shotgun / Remedy Entertainment
Regretfully, genuine oddities like this are rare, which together with the marked tonal shift makes the Control relationship feel like a surprisingly distant one. I get why this was attempted – co-op shooters are inherently disorderly, so a lighter tone makes sense on paper. And some of the ways in which Firebreak communicates this intent are likeable in themselves, such as how the ammo station refill animation has your combat-inexperienced character frantically grabbing handfuls of loose bullets. Or how Firebreak’s version of a mobile turret is just a big pneumatic tube sat on a desk chair. That’s good design language, in a vacuum. But at least for me, a seasoned Control liker, it perhaps strays far enough from the original vibe that I can never draw too deep from a shared well of excitement.
As for the techy stuff, the public matchmaking is reasonably reliable at finding comrades to play with, especially if you’re willing to hop into Quick Play rather than fine-tuning a lobby for yourself. I have been put into a few laggy games, but that was when the matchmaking pool was comprised solely of journalists and influencers – it seems to have an easier time finding low-latency hosts now it’s been released in the wild.

Image credit:Rock Paper Shotgun / Remedy Entertainment
Whether Firebreak can maintain a healthy supply of volunteers, however, may depend as much on its post-launch overtime work than on the game itself. As it stands, its successes are at risk of being overshadowed by a weak introductory phase and a general lightness of activities once you’ve unlocked all the jobs’ Clearance Levels. At least two more jobs are due for later this year, though those alone won’t address Firebreak’s investment-heavy progression system, weak weapons, or lack of effective onboarding.
Still, they could serve as an opportunity to de-boring the lower Clearance Levels, by replacing the simple repair tasks with more unique and substantial objectives. That would both sweeten the deal of replaying jobs for XP, and steer Firebreak back towards to the ideal of shorter deployments that are still worth playing. Would such an approach risk overstuffing a full, three-stage job? Maybe, but then this is the studio that made We Sing and the Ashtray Maze, and I’d very much like to see Firebreak gain some of that confident maximalism. Right now, it’s lacking, and not just in musical numbers.
This review is based on review code provided by the publisher.
Find out how we conduct our reviews by reading our review policy .
FBC: Firebreak
PS5 , Xbox Series X/S , PC
Rock Paper Shotgun is better when you sign in
Sign in and join us on our journey to discover strange and compelling PC games.

All 75 Arc Raiders Blueprints and where to get them
These areas have the highest chance of giving you Blueprints

Image credit:Rock Paper Shotgun/Embark Studios

Looking for more Arc Raiders Blueprints? It’s a special day when you find a Blueprint, as they’re among the most valuable items in Arc Raiders. If you find a Blueprint that you haven’t already found, then you must make sure you hold onto it at all costs, because Blueprints are the key to one of the most important and powerful systems of meta-progression in the game.
This guide aims to be the very best guide on Blueprints you can find, starting with a primer on what exactly they are and how they work in Arc Raiders, before delving into exactly where to get Blueprints and the very best farming spots for you to take in your search.
We’ll also go over how to get Blueprints from other unlikely activities, such as destroying Surveyors and completing specific quests. And you’ll also find the full list of all 75 Blueprints in Arc Raiders on this page (including the newest Blueprints added with the Cold Snap update , such as the Deadline Blueprint and Firework Box Blueprint), giving you all the information you need to expand your own crafting repertoire.
In this guide:
- What are Blueprints in Arc Raiders?
- Full Blueprint list: All crafting recipes
- Where to find Blueprints in Arc Raiders Blueprints obtained from quests Blueprints obtained from Trials Best Blueprint farming locations

What are Blueprints in Arc Raiders?
Blueprints in Arc Raiders are special items which, if you manage to extract with them, you can expend to permanently unlock a new crafting recipe in your Workshop. If you manage to extract from a raid with an Anvil Blueprint, for example, you can unlock the ability to craft your very own Anvil Pistol, as many times as you like (as long as you have the crafting materials).
To use a Blueprint, simply open your Inventory while in the lobby, then right-click on the Blueprint and click “Learn And Consume” . This will permanently unlock the recipe for that item in your Workshop. As of the Stella Montis update, there are allegedly 75 different Blueprints to unlock - although only 68 are confirmed to be in the game so far. You can see all the Blueprints you’ve found and unlocked by going to the Workshop menu, and hitting “R” to bring up the Blueprint screen.
It’s possible to find duplicates of past Blueprints you’ve already unlocked. If you find these, then you can either sell them, or - if you like to play with friends - you can take it into a match and gift it to your friend so they can unlock that recipe for themselves. Another option is to keep hold of them until the time comes to donate them to the Expedition.
Full Blueprint list: All crafting recipes
Below is the full list of all the Blueprints that are currently available to find in Arc Raiders, and the crafting recipe required for each item:
| Blueprint | Type | Recipe | Crafted At |
|---|---|---|---|
| Bettina | Weapon | 3x Advanced Mechanical Components 3x Heavy Gun Parts 3x Canister | Gunsmith 3 |
| Blue Light Stick | Quick Use | 3x Chemicals | Utility Station 1 |
| Aphelion | Weapon | 3x Magnetic Accelerator 3x Complex Gun Parts 1x Matriarch Reactor | Gunsmith 3 |
| Combat Mk. 3 (Flanking) | Augment | 2x Advanced Electrical Components 3x Processor | Gear Bench 3 |
| Combat Mk. 3 (Aggressive) | Augment | 2x Advanced Electrical Components 3x Processor | Gear Bench 3 |
| Complex Gun Parts | Material | 2x Light Gun Parts 2x Medium Gun Parts 2x Heavy Gun Parts | Refiner 3 |
| Fireworks Box | Quick Use | 1x Explosive Compound 3x Pop Trigger | Explosives Station 2 |
| Gas Mine | Mine | 4x Chemicals 2x Rubber Parts | Explosives Station 1 |
| Green Light Stick | Quick Use | 3x Chemicals | Utility Station 1 |
| Pulse Mine | Mine | 1x Crude Explosives 1x Wires | Explosives Station 1 |
| Seeker Grenade | Grenade | 1x Crude Explosives 2x ARC Alloy | Explosives Station 1 |
| Looting Mk. 3 (Survivor) | Augment | 2x Advanced Electrical Components 3x Processor | Gear Bench 3 |
| Angled Grip II | Mod | 2x Mechanical Components 3x Duct Tape | Gunsmith 2 |
| Angled Grip III | Mod | 2x Mod Components 5x Duct Tape | Gunsmith 3 |
| Hullcracker | Weapon | 1x Magnetic Accelerator 3x Heavy Gun Parts 1x Exodus Modules | Gunsmith 3 |
| Launcher Ammo | Ammo | 5x Metal Parts 1x Crude Explosives | Workbench 1 |
| Anvil | Weapon | 5x Mechanical Components 5x Simple Gun Parts | Gunsmith 2 |
| Anvil Splitter | Mod | 2x Mod Components 3x Processor | Gunsmith 3 |
| ??? | ??? | ??? | ??? |
| Barricade Kit | Quick Use | 1x Mechanical Components | Utility Station 2 |
| Blaze Grenade | Grenade | 1x Explosive Compound 2x Oil | Explosives Station 3 |
| Bobcat | Weapon | 3x Advanced Mechanical Components 3x Light Gun Parts | Gunsmith 3 |
| Osprey | Weapon | 2x Advanced Mechanical Components 3x Medium Gun Parts 7x Wires | Gunsmith 3 |
| Burletta | Weapon | 3x Mechanical Components 3x Simple Gun Parts | Gunsmith 1 |
| Compensator II | Mod | 2x Mechanical Components 4x Wires | Gunsmith 2 |
| Compensator III | Mod | 2x Mod Components 8x Wires | Gunsmith 3 |
| Defibrillator | Quick Use | 9x Plastic Parts 1x Moss | Medical Lab 2 |
| ??? | ??? | ??? | ??? |
| Equalizer | Weapon | 3x Magnetic Accelerator 3x Complex Gun Parts 1x Queen Reactor | Gunsmith 3 |
| Extended Barrel | Mod | 2x Mod Components 8x Wires | Gunsmith 3 |
| Extended Light Mag II | Mod | 2x Mechanical Components 3x Steel Spring | Gunsmith 2 |
| Extended Light Mag III | Mod | 2x Mod Components 5x Steel Spring | Gunsmith 3 |
| Extended Medium Mag II | Mod | 2x Mechanical Components 3x Steel Spring | Gunsmith 2 |
| Extended Medium Mag III | Mod | 2x Mod Components 5x Steel Spring | Gunsmith 3 |
| Extended Shotgun Mag II | Mod | 2x Mechanical Components 3x Steel Spring | Gunsmith 2 |
| Extended Shotgun Mag III | Mod | 2x Mod Components 5x Steel Spring | Gunsmith 3 |
| Remote Raider Flare | Quick Use | 2x Chemicals 4x Rubber Parts | Utility Station 1 |
| Heavy Gun Parts | Material | 4x Simple Gun Parts | Refiner 2 |
| Venator | Weapon | 2x Advanced Mechanical Components 3x Medium Gun Parts 5x Magnet | Gunsmith 3 |
| Il Toro | Weapon | 5x Mechanical Components 6x Simple Gun Parts | Gunsmith 1 |
| Jolt Mine | Mine | 1x Electrical Components 1x Battery | Explosives Station 2 |
| Explosive Mine | Mine | 1x Explosive Compound 1x Sensors | Explosives Station 3 |
| Jupiter | Weapon | 3x Magnetic Accelerator 3x Complex Gun Parts 1x Queen Reactor | Gunsmith 3 |
| Light Gun Parts | Material | 4x Simple Gun Parts | Refiner 2 |
| Lightweight Stock | Mod | 2x Mod Components 5x Duct Tape | Gunsmith 3 |
| Lure Grenade | Grenade | 1x Speaker Component 1x Electrical Components | Utility Station 2 |
| Medium Gun Parts | Material | 4x Simple Gun Parts | Refiner 2 |
| Torrente | Weapon | 2x Advanced Mechanical Components 3x Medium Gun Parts 6x Steel Spring | Gunsmith 3 |
| Muzzle Brake II | Mod | 2x Mechanical Components 4x Wires | Gunsmith 2 |
| Muzzle Brake III | Mod | 2x Mod Components 8x Wires | Gunsmith 3 |
| Padded Stock | Mod | 2x Mod Components 5x Duct Tape | Gunsmith 3 |
| Shotgun Choke II | Mod | 2x Mechanical Components 4x Wires | Gunsmith 2 |
| Shotgun Choke III | Mod | 2x Mod Components 8x Wires | Gunsmith 3 |
| Shotgun Silencer | Mod | 2x Mod Components 8x Wires | Gunsmith 3 |
| Showstopper | Grenade | 1x Advanced Electrical Components 1x Voltage Converter | Explosives Station 3 |
| Silencer I | Mod | 2x Mechanical Components 4x Wires | Gunsmith 2 |
| Silencer II | Mod | 2x Mod Components 8x Wires | Gunsmith 3 |
| Snap Hook | Quick Use | 2x Power Rod 3x Rope 1x Exodus Modules | Utility Station 3 |
| Stable Stock II | Mod | 2x Mechanical Components 3x Duct Tape | Gunsmith 2 |
| Stable Stock III | Mod | 2x Mod Components 5x Duct Tape | Gunsmith 3 |
| Tagging Grenade | Grenade | 1x Electrical Components 1x Sensors | Utility Station 3 |
| Tempest | Weapon | 3x Advanced Mechanical Components 3x Medium Gun Parts 3x Canister | Gunsmith 3 |
| Trigger Nade | Grenade | 2x Crude Explosives 1x Processor | Explosives Station 2 |
| Vertical Grip II | Mod | 2x Mechanical Components 3x Duct Tape | Gunsmith 2 |
| Vertical Grip III | Mod | 2x Mod Components 5x Duct Tape | Gunsmith 3 |
| Vita Shot | Quick Use | 2x Antiseptic 1x Syringe | Medical Lab 3 |
| Vita Spray | Quick Use | 3x Antiseptic 1x Canister | Medical Lab 3 |
| Vulcano | Weapon | 1x Magnetic Accelerator 3x Heavy Gun Parts 1x Exodus Modules | Gunsmith 3 |
| Wolfpack | Grenade | 2x Explosive Compound 2x Sensors | Explosives Station 3 |
| Red Light Stick | Quick Use | 3x Chemicals | Utility Station 1 |
| Smoke Grenade | Grenade | 14x Chemicals 1x Canister | Utility Station 2 |
| Deadline | Mine | 3x Explosive Compound 2x ARC Circuitry | Explosives Station 3 |
| Trailblazer | Grenade | 1x Explosive Compound 1x Synthesized Fuel | Explosives Station 3 |
| Tactical Mk. 3 (Defensive) | Augment | 2x Advanced Electrical Components 3x Processor | Gear Bench 3 |
| Tactical Mk. 3 (Healing) | Augment | 2x Advanced Electrical Components 3x Processor | Gear Bench 3 |
| Yellow Light Stick | Quick Use | 3x Chemicals | Utility Station 1 |
Note: The missing Blueprints in this list likely have not actually been added to the game at the time of writing, because none of the playerbase has managed to find any of them. As they are added to the game, I will update this page with the most relevant information so you know exactly how to get all 75 Arc Raiders Blueprints.
Where to find Blueprints in Arc Raiders
Below is a list of all containers, modifiers, and events which maximise your chances of finding Blueprints:
- Certain quests reward you with specific Blueprints .
- Completing Trials has a high chance of offering Blueprints as rewards.
- Surveyors have a decent chance of dropping Blueprints on death.
- High loot value areas tend to have a greater chance of spawning Blueprints.
- Night Raids and Storms may increase rare Blueprint spawn chances in containers.
- Containers with higher numbers of items may have a higher tendency to spawn Blueprints. As a result, Blue Gate (which has many “large” containers containing multiple items) may give you a higher chance of spawning Blueprints.
- Raider containers (Raider Caches, Weapon Boxes, Medical Bags, Grenade Tubes) have increased Blueprint drop rates. As a result, the Uncovered Caches event gives you a high chance of finding Blueprints.
- Security Lockers have a higher than average chance of containing Blueprints.
- Certain Blueprints only seem to spawn under specific circumstances: Tempest Blueprint only spawns during Night Raid events. Vulcano Blueprint only spawns during Hidden Bunker events. Jupiter and Equaliser Blueprints only spawn during Harvester events.

Raider Caches, Weapon Boxes, and other raider-oriented container types have a good chance of offering Blueprints. |Image credit:Rock Paper Shotgun/Embark Studios
Blueprints have a very low chance of spawning in any container in Arc Raiders, around 1-2% on average. However, there is a higher chance of finding Blueprints in particular container types. Specifically, you can find more Blueprints in Raider containers and security lockers.
Beyond this, if you’re looking for Blueprints you should focus on regions of the map which are marked as having particularly high-value loot. Areas such as the Control Tower in Dam Battlegrounds, the Arrival and Departure Buildings in Spaceport, and Pilgrim’s Peak in Blue Gate all have a better-than-average chance of spawning Blueprints somewhere amongst all their containers. Night Raids and Electromagnetic Storm events also increase the drop chances of certain Blueprints .
In addition to these containers, you can often loot Blueprints from destroyed Surveyors - the largest of the rolling ball ARC. Surveyors are more commonly found on the later maps - Spaceport and Blue Gate - and if one spawns in your match, you’ll likely see it by the blue laser beam that it casts into the sky while “surveying”.
Surveyors are quite well-armoured and will very speedily run away from you once it notices you, but if you can take one down then make sure you loot all its parts for a chance of obtaining certain unusual Blueprints.
Blueprints obtained from quests
One way in which you can get Blueprints is by completing certain quests for the vendors in Speranza. Some quests will reward you with a specific item Blueprint upon completion, so as long as you work through all the quests in Arc Raiders, you are guaranteed those Blueprints.
Here is the full list of all Blueprints you can get from quest rewards:
- Trigger Nade Blueprint: Rewarded after completing “Sparks Fly”.
- Lure Grenade Blueprint: Rewarded after completing “Greasing Her Palms”.
- Burletta Blueprint: Rewarded after completing “Industrial Espionage”.
- Hullcracker Blueprint (and Launcher Ammo Blueprint): Rewarded after completing “The Major’s Footlocker”.
Alas, that’s only 4 Blueprints out of a total of 75 to unlock, so for the vast majority you will need to find them yourself during a raid. If you’re intent on farming Blueprints, then it’s best to equip yourself with cheap gear in case you lose it, but don’t use a free loadout because then you won’t get a safe pocket to stash any new Blueprint you find. No pain in Arc Raiders is sharper than failing to extract with a new Blueprint you’ve been after for a dozen hours already.

One of the best ways to get Blueprints is by hitting three stars on all five Trials every week. |Image credit:Rock Paper Shotgun/Embark Studios
Blueprints obtained from Trials
One of the very best ways to get Blueprints is as rewards for completing Trials in Arc Raiders. Trials are unlocked from Level 15 onwards, and allow you to earn rewards by focusing on certain tasks over the course of several raids. For example, one Trial might task you with dealing damage to Hornets, while another might challenge you to loot Supply Drops.
Trials refresh on a weekly basis, with a new week bringing five new Trials. Each Trial can offer up to three rewards after passing certain score milestones, and it’s possible to receive very high level loot from these reward crates - including Blueprints. So if you want to unlock as many Blueprints as possible, you should make a point of completing as many Trials as possible each week.
Best Blueprint farming locations
The very best way to get Blueprints is to frequent specific areas of the maps which combine high-tier loot pools with the right types of containers to search. Here are my recommendations for where to find Blueprints on every map, so you can always keep the search going for new crafting recipes to unlock.

Image credit:Rock Paper Shotgun/Embark Studios
Dam Battlegrounds
The best places to farm Blueprints on Dam Battlegrounds are the Control Tower, Power Generation Complex, Ruby Residence, and Pale Apartments . The first two regions, despite only being marked on the map as mid-tier loot, contain a phenomenal number of containers to loot. The Control Tower can also contain a couple of high-tier Security Lockers - though of course, you’ll need to have unlocked the Security Breach skill at the end of the Survival tree.
There’s also a lot of reporting amongst the playerbase that the Residential areas in the top-left of the map - Pale Apartments and Ruby Residence - give you a comparatively strong chance of finding Blueprints. Considering their size, there’s a high density of containers to loot in both locations, and they also have the benefit of being fairly out of the way. So you’re more likely to have all the containers to yourself.
Buried City
The best Blueprint farming locations on Buried City are the Santa Maria Houses, Grandioso Apartments, Town Hall, and the various buildings of the New District . Grandioso Apartments has a lower number of containers than the rest, but a high chance of spawning weapon cases - which have good Blueprint drop rates. The others are high-tier loot areas, with plenty of lootable containers - including Security Lockers.
Spaceport
The best places to find Blueprints on Spaceport are the Arrival and Departure Buildings, as well as Control Tower A6 and the Launch Towers . All these areas are labelled as high-value loot regions, and many of them are also very handily connected to one another by the Spaceport wall, which you can use to quickly run from one area to the next. At the tops of most of these buildings you’ll find at least one Security Locker, so this is an excellent farming route for players looking to find Blueprints.
The downside to looting Blueprints on Spaceport is that all these areas are hotly contested, particularly in Duos and Squads. You’ll need to be very focused and fast in order to complete the full farming route.

Image credit:Rock Paper Shotgun/Embark Studios
Blue Gate
Blue Gate tends to have a good chance of dropping Blueprints, potentially because it generally has a high number of containers which can hold lots of items; so there’s a higher chance of a Blueprint spawning in each container. In my experience, the best Blueprint farming spots on Blue Gate are Pilgrim’s Peak, Raider’s Refuge, the Ancient Fort, and the Underground Complex beneath the Warehouse .
All of these areas contain a wealth of containers to loot. Raider’s Refuge has less to loot, but the majority of the containers in and around the Refuge are raider containers, which have a high chance of containing Blueprints - particularly during major events.
Stella Montis
On the whole, Stella Montis seems to have a very low drop rate for Blueprints (though a high chance of dropping other high-tier loot). If you do want to try farming Blueprints on this map, the best places to find Blueprints in Stella Montis are Medical Research, Assembly Workshop, and the Business Center . These areas have the highest density of containers to loot on the map.
In addition to this, the Western Tunnel has a few different Security Lockers to loot, so while there’s very little to loot elsewhere in this area of the map, it’s worth hitting those Security Lockers if you spawn there at the start of a match.
That wraps up this primer on how to get all the Blueprints in Arc Raiders as quickly as possible. With the Expedition system constantly resetting a large number of players’ Blueprints, it’s more important than ever to have the most up-to-date information on where to find all these Blueprints.
While you’re here, be sure to check out our Arc Raiders best guns tier list , as well as our primers on the best skills to unlock and all the different Field Depot locations on every map.

ARC Raiders
PS5 , Xbox Series X/S , PC
Rock Paper Shotgun is better when you sign in
Sign in and join us on our journey to discover strange and compelling PC games.
