Europa Universalis 5 is so complex its developers will let you automate half the game
But should you?
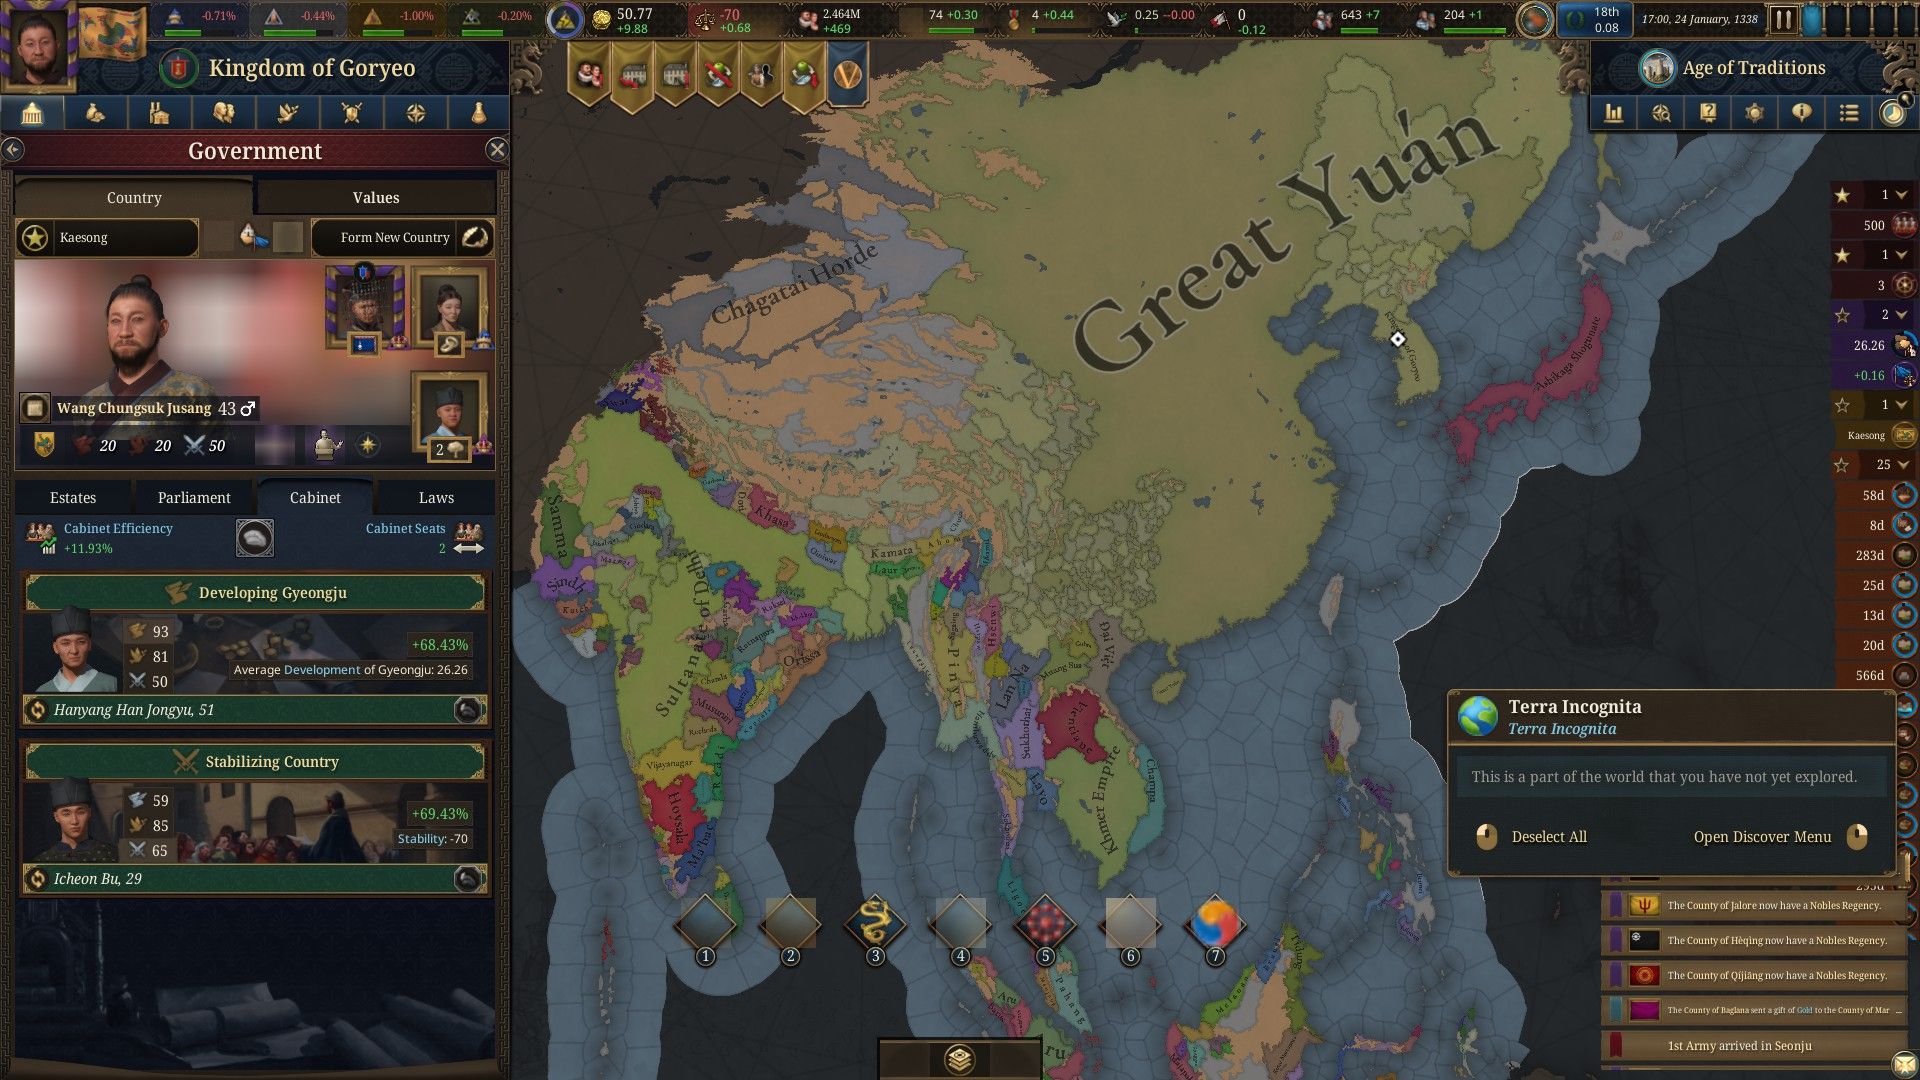
Image credit:Rock Paper Shotgun / Paradox Interactive

I am rewriting the history of Korea, and there are blotty ink stains everywhere. Europa Universalis 5 was announced yesterday , the official unveiling of a grand strategy game that has been an open secret since April last year, thanks to a long-running dev diary . As reveals go, it was less a cloak and dagger ambush and more an elephant charge that everyone in Europe could see coming from fifteen countries away. Still, elephants are always nice. I got some hands-on time with an early build of the map-happy historical simulation, and I’m delighted to report that the kingdom of Korea is struggling. After instituting many new laws, the leader of the nation has passed away. He was steely, noble, robust, and will be remembered as much for his kindness as his strength. He died of the common cold.
It’s okay, the computer will clean all this up.

But wait, before I get into how much power the game’s AI has, let’s cover the basics. If you have no clue about Europa Universalis, just know that they’re big, complicated historical sims about building huge empires and engaging in questionable geopolitics. You play as the crown of an entire country, and you steer that impossibly large tanker through hundreds of years of human history. Europa Universalis 5 starts in the year 1337 and it stops in… well, we’re not yet sure (Paradox isn’t telling). But it’ll be enough time that trade will flourish, new wonders will be invented, and nations will rise and fall through revolution and reform. A lot of people will die of plague.
Or smallpox, in the case of Korea in the 1300s. My capital, Kaesong, is stricken by the disease early in the game, and I get a notification that the “pop” numbers there are dwindling rapidly. These “pops” are new to EU5, but not new to Paradox strategy games. If you’ve played Victoria 3 or Stellaris , you’ll understand a little the nature of these digitised peoples. A pop is basically a unit of humanity, and you need to keep them satisfied and healthy if your country is to benefit. Their needs often flash up as a bulletin: saffron, wheat, beer, cloth. Smallpox, as far as I can tell, is not a need.
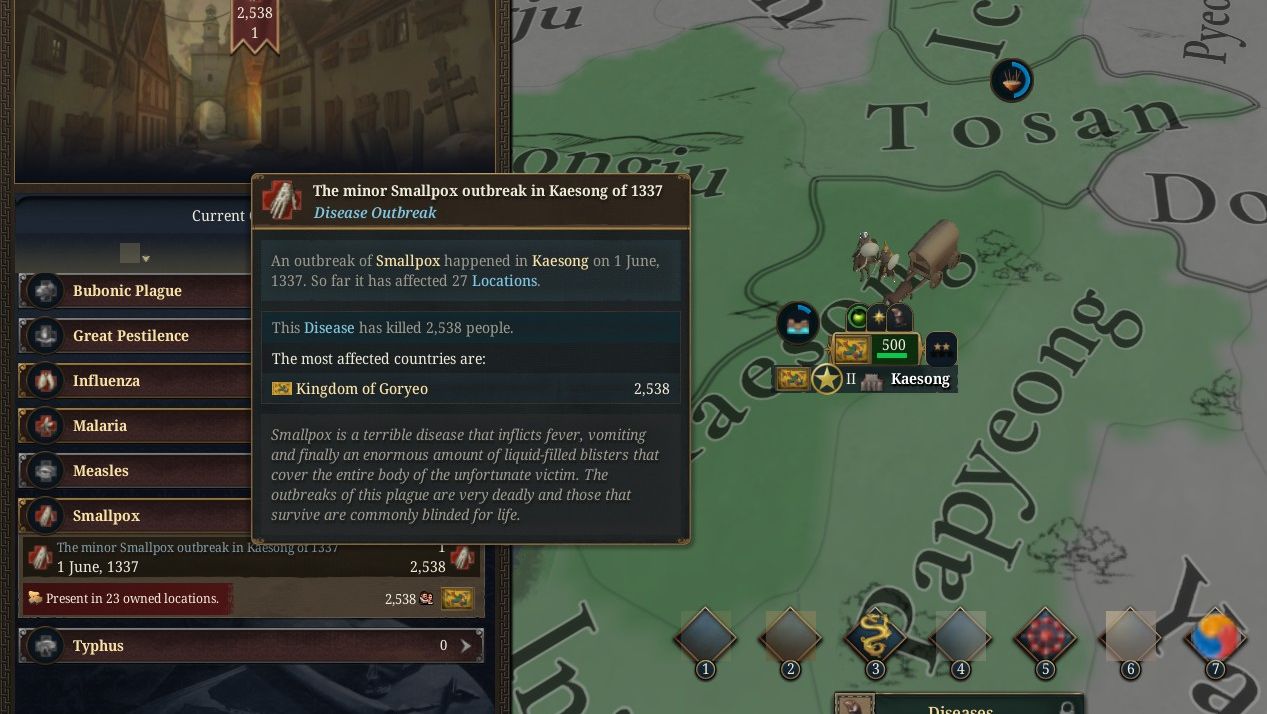
Just got a touch of the pox, I’ll be in tomorrow boss. |Image credit:Rock Paper Shotgun / Paradox Interactive
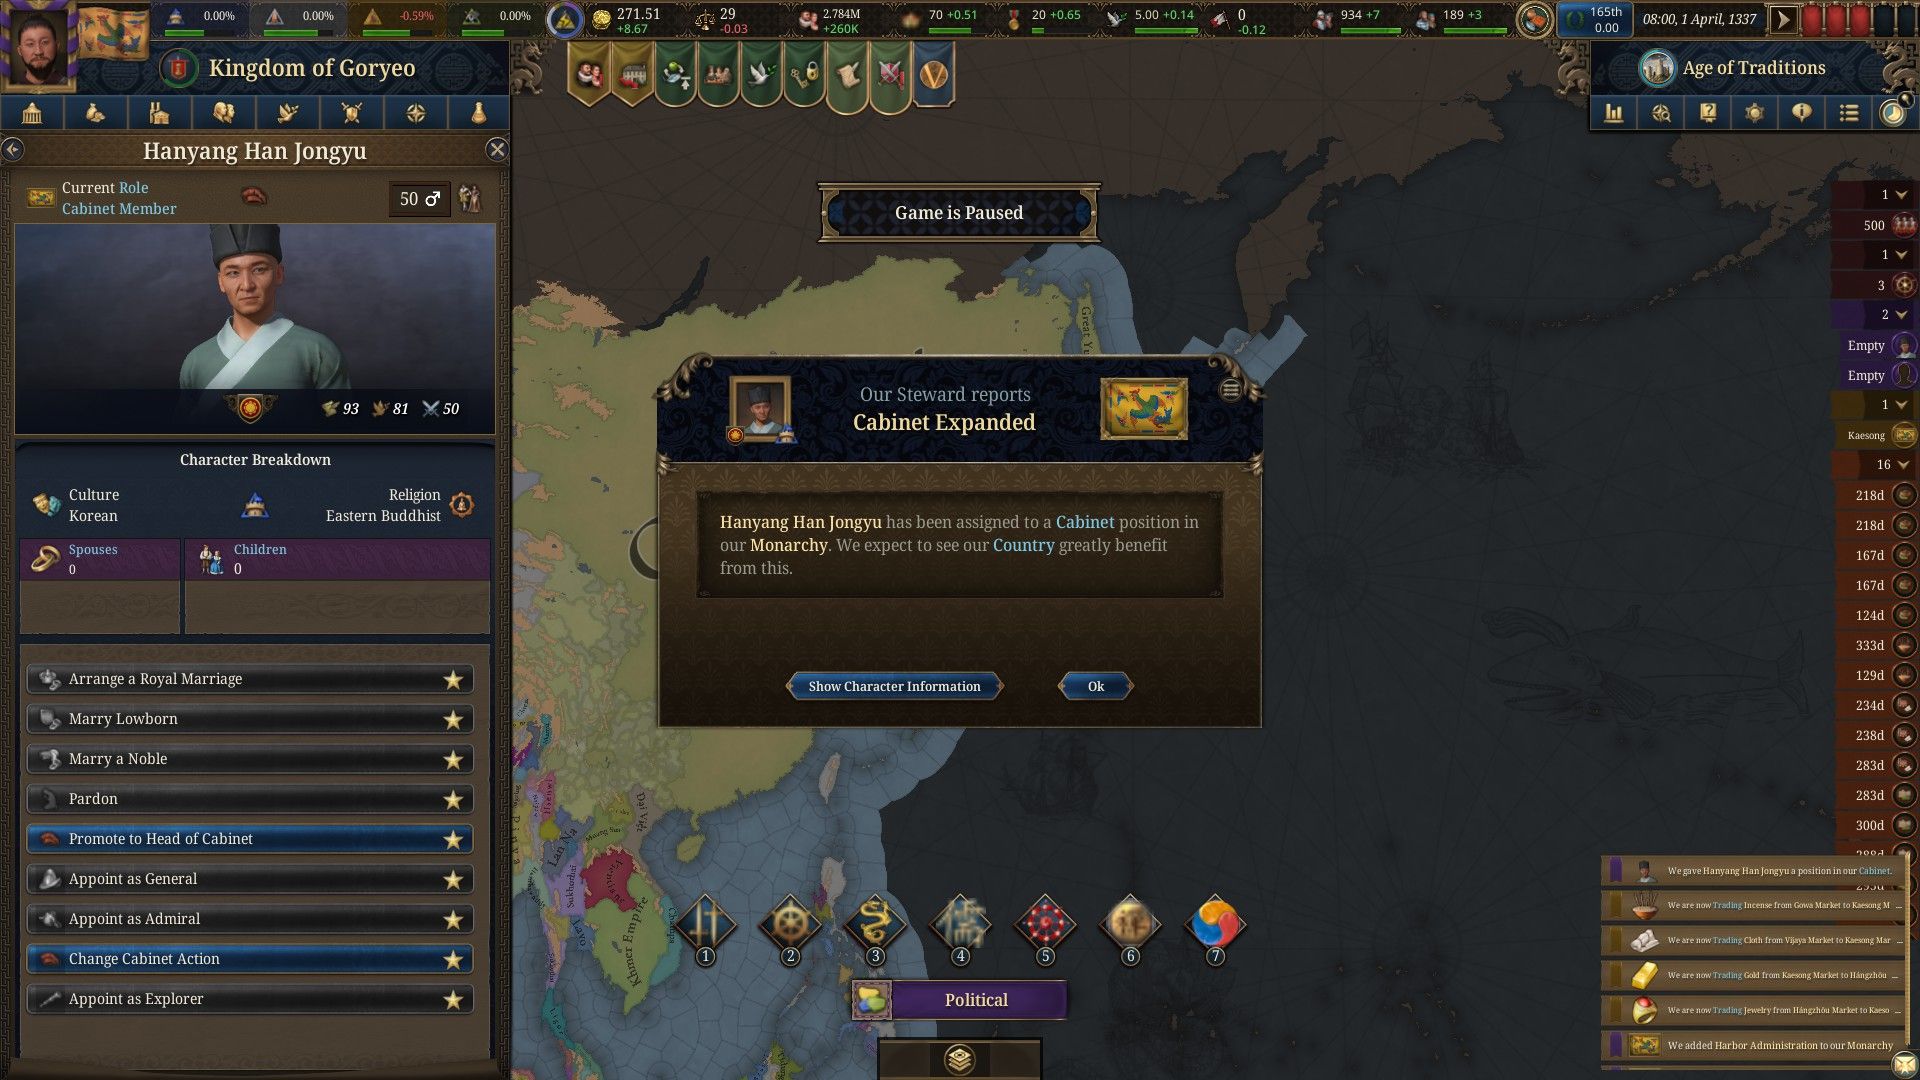
But I can do little about it, only watch as my people dwindle, knowing that each diminished pop means fewer workers in factories, and fewer folk to recruit in armies (a fact that has big implications for warmongering players). For now, I will do what I can. I reform the harbours, making all our ports more efficient. I build a bunch of cloth guilds and fiber crop farms in the south of the country. I send diplomats to China, Japan, and Vietnam to improve relations. And I build a wharf in poxy Kaesong to attract more sailors (we’ll need ’em once the pest clears). Finally, I appoint two clever cabinet ministers to develop the south of our country, and to go on a charm offensive to neighbouring nations. These characters won’t be as fleshed-out as, say, the councillors of Crusader Kings 3 . But Paradox do plan for the named people in EUV to have a little more colour to them than in the previous game.
So far, it feels very Europa, very Universalis. I do much of my national tweaking before I even press the “unpause” button at the start of the game. This is how you’ll often play a Paradox grand strategy game. You blast the game’s speed up (a little timer in the corner) until a bunch of important events happen, then freeze it for an extended round of reform and rejigging. History runs fast and slow, depending on how chaotic things have gotten. Wartime, in particular, involves a lot of pause-spamming, as you manoeuvre troops this way and that.
But not for me. This time I’ve handed military matters over to the game’s newly minted automation. This big new feature manifests as little cogwheels you click above specific menus, to flag you’d rather the game itself do the hard sums. I go through the nature of automation more in a separate massive Europa Universalis explainer post but basically you can now hand off a surprising number of the game’s nitty-gritty systems to the AI. Don’t care about setting taxes? Click the auto-cog. Can’t stand the thought of choosing what building is good for the economy? Smash that cog button. Hate the army and everything they stand for? Cog time.
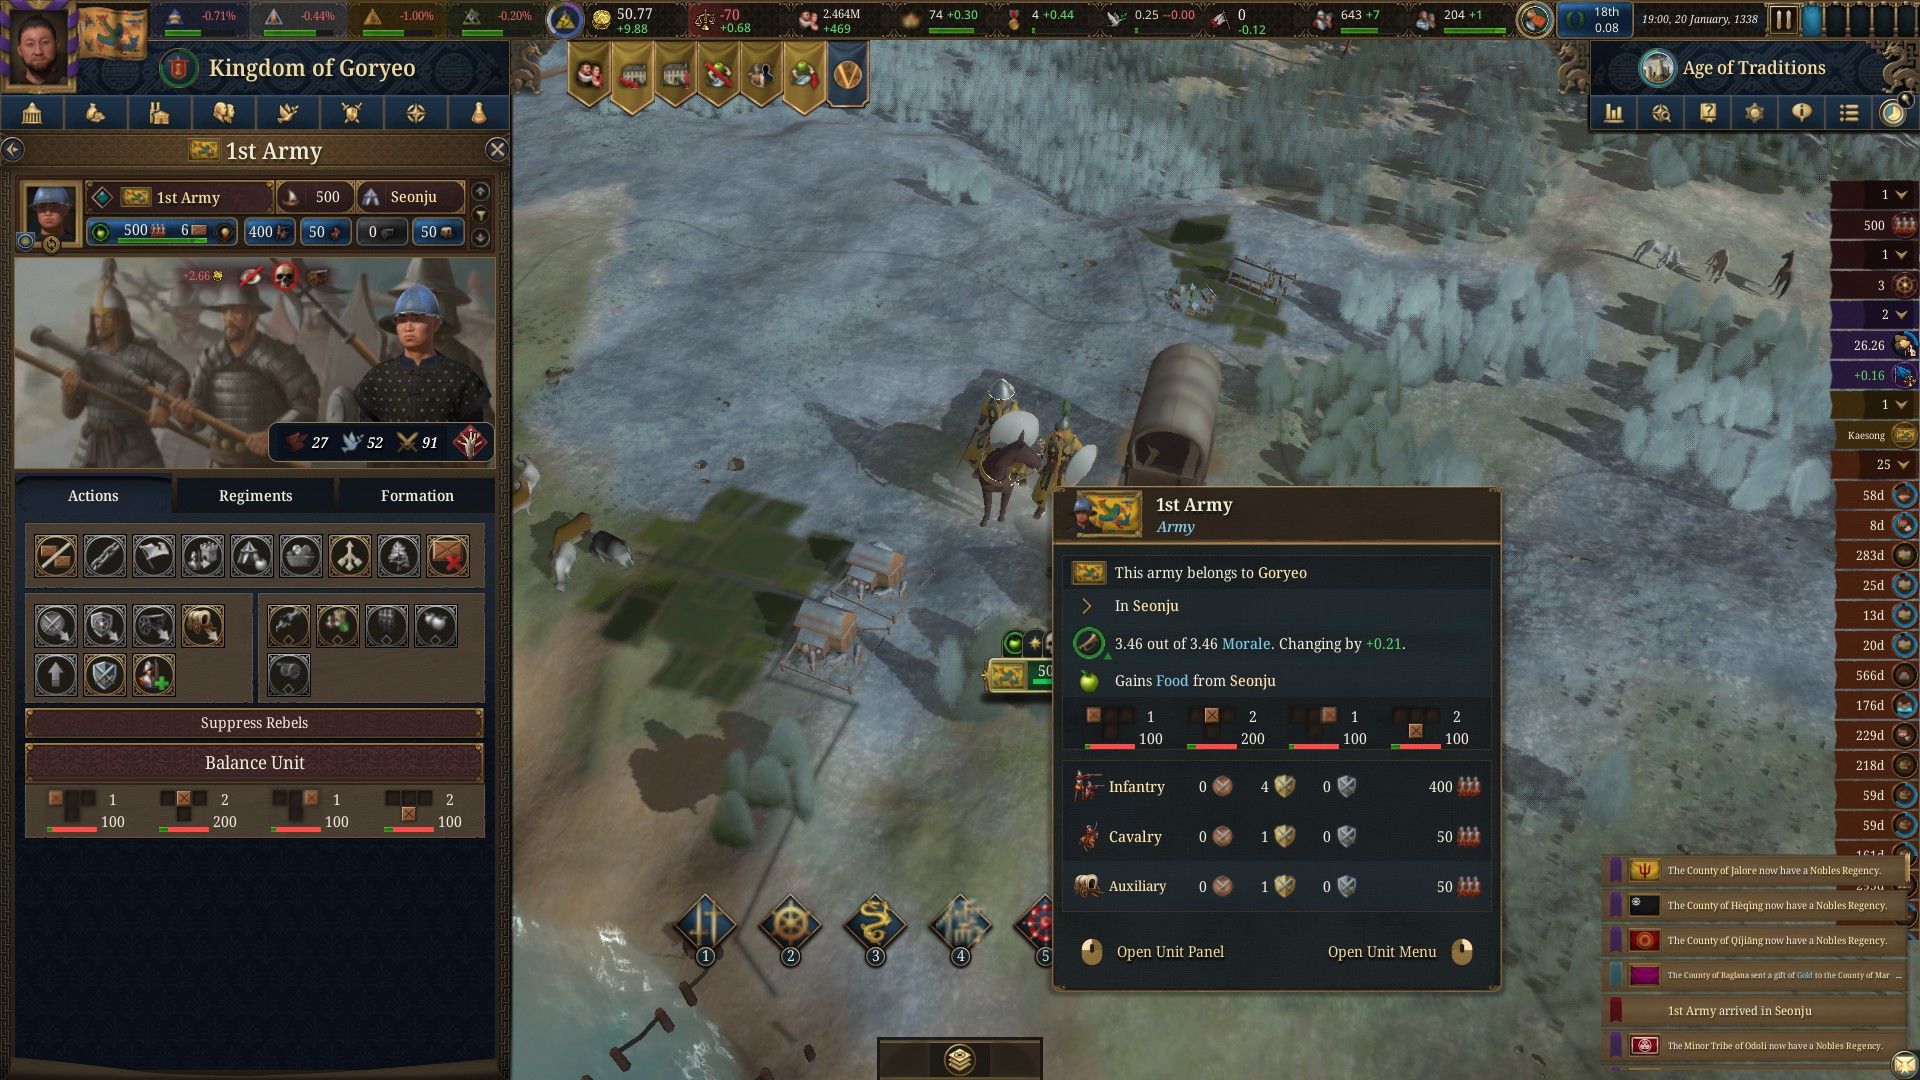
Do whatever you like, army boys. I’m off to the countryside. |Image credit:Rock Paper Shotgun / Paradox Interactive
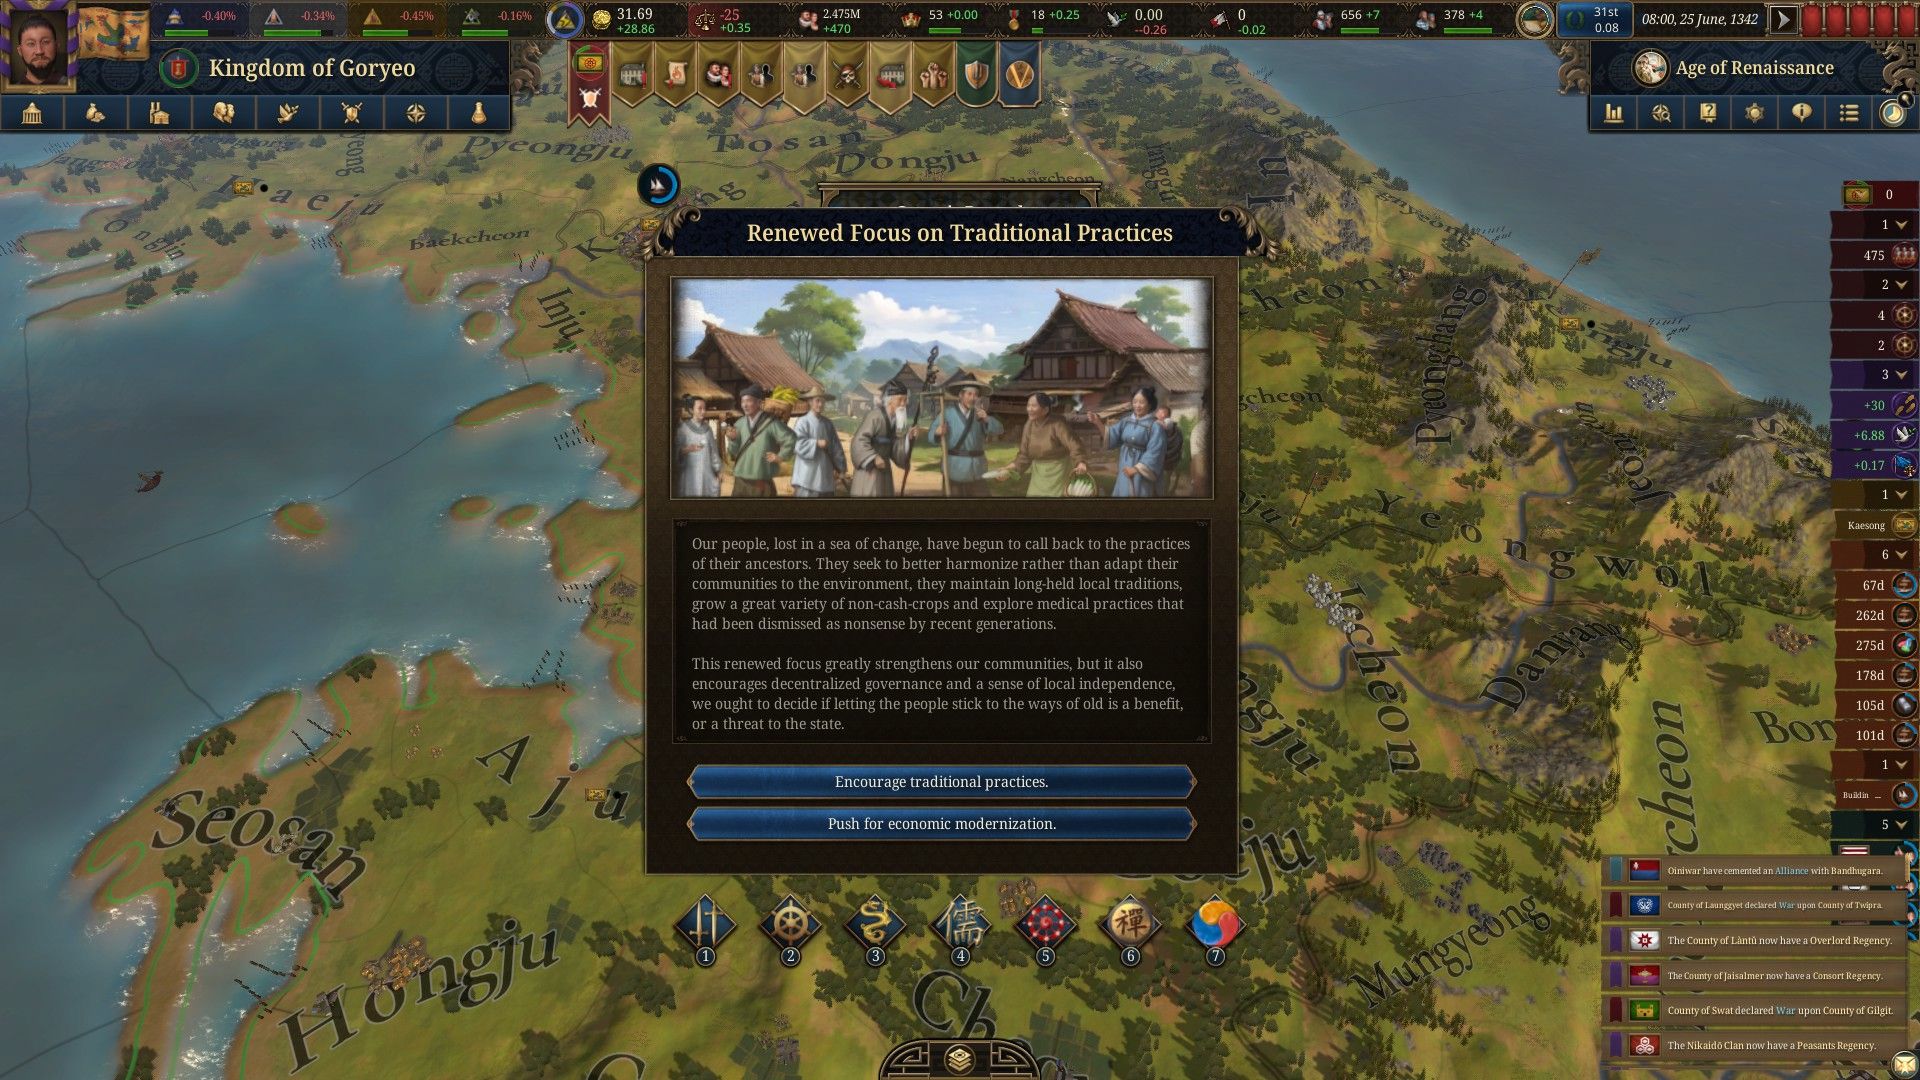
So instead of a militaristic nation of Korean conquerors, I spend the next few years dipping around the map, in and out of production and trade menus, requesting a tar pit here, a gold mine there. It is the equivalent of the king showing up at every backwater village in the country on a grand tour, scratching his chin for 30 seconds and saying: “Fish. You make fish now.” Then leaving the local peasants in a scramble to retrain.
My “gardening” approach to the country’s development results in serious population and employment fluctuations, as labourers automatically migrate between provinces to work in the new pepper farms and cloth mills that I build in areas far from their homes. I’m sure none of this will cause any disruption to society. Besides, it is good for a people to see their king. I am a man of the commons! A friend to peasant and farmer alike!
Innovate!? Over my dead body. |Image credit:Rock Paper Shotgun / Paradox Interactive
Perhaps too much so. The urban classes are getting annoyed. And the elite aristocracy are giving me serious side-eye. This is another new feature to EU5 - there are four big groups you’ll need to keep broadly satisfied if you don’t want to get into trouble. These four “estates” include the clergy, the commonfolk, the nobility, and the city-dwelling merchant classes (the burghers). I keep comparing this to the (much simpler) lobby group juggling of Reigns , the swipey king sim in which you need to balance church, army, public, and treasury, or face a nasty beheading.
In EU5, however, there isn’t a hard “game over” from neglecting or irritating a single group. But trouble will arise. For example, in Korea the nobility held over 50% of the voting power in our parliament. Which meant any time a parliamentary debate occurred (one way of instituting helpful new laws) I had to sleazily sidle up to the aristocracy like a greasy fanboy. The laws that would benefit the nobles always had the most chance of passing, and if I wanted anything else done, they held most sway.
Careful manipulation of the estates over the course of a game can decrease the power of some and put others on a more even footing, but also light the long fuse for all the decade-by-decade disruption that comes with such a change. Like anything in these games, a shift in power takes a long time. In the shorter term, you’ll be keeping the commoners or burghers happy by granting them privileges - basically little stickers that go in a column next to their name in one menu, which offer various benefits to that group.
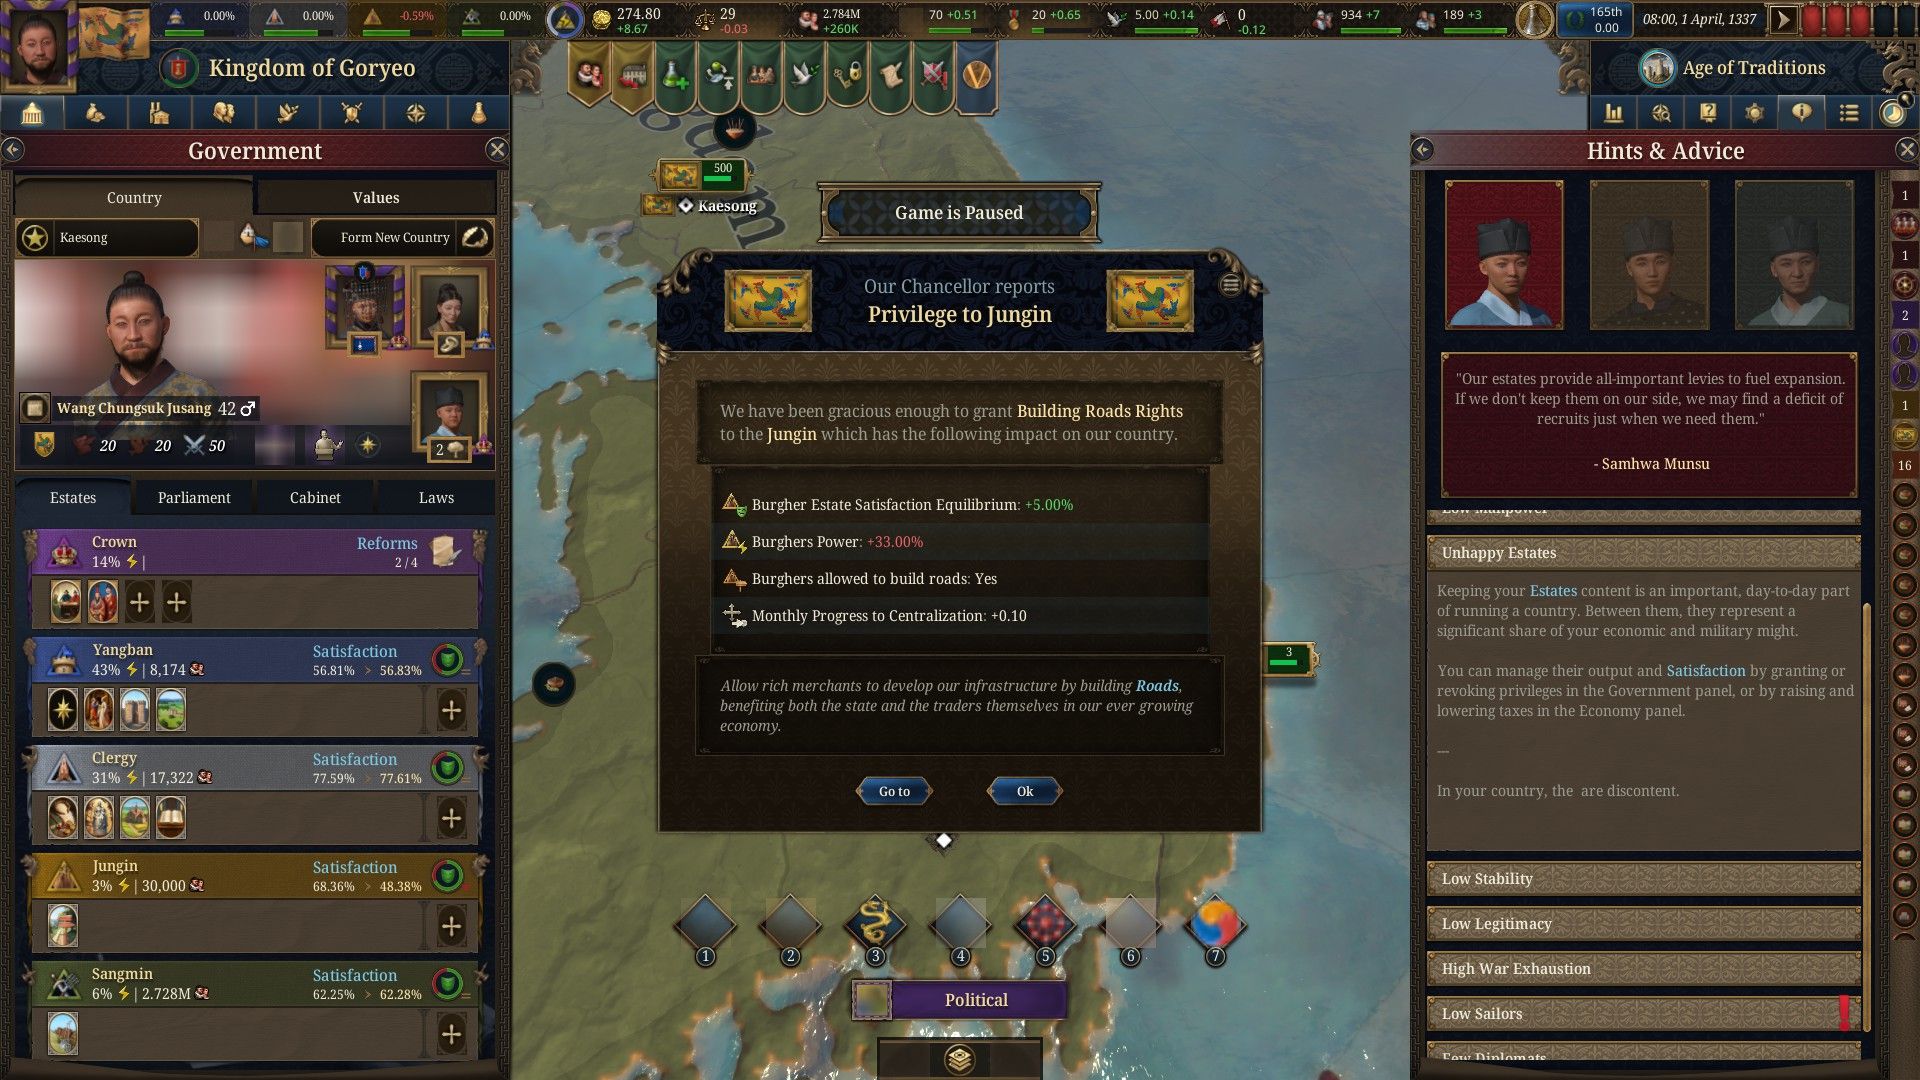
The squabbling estates have to be kept in line. |Image credit:Rock Paper Shotgun / Paradox Interactive
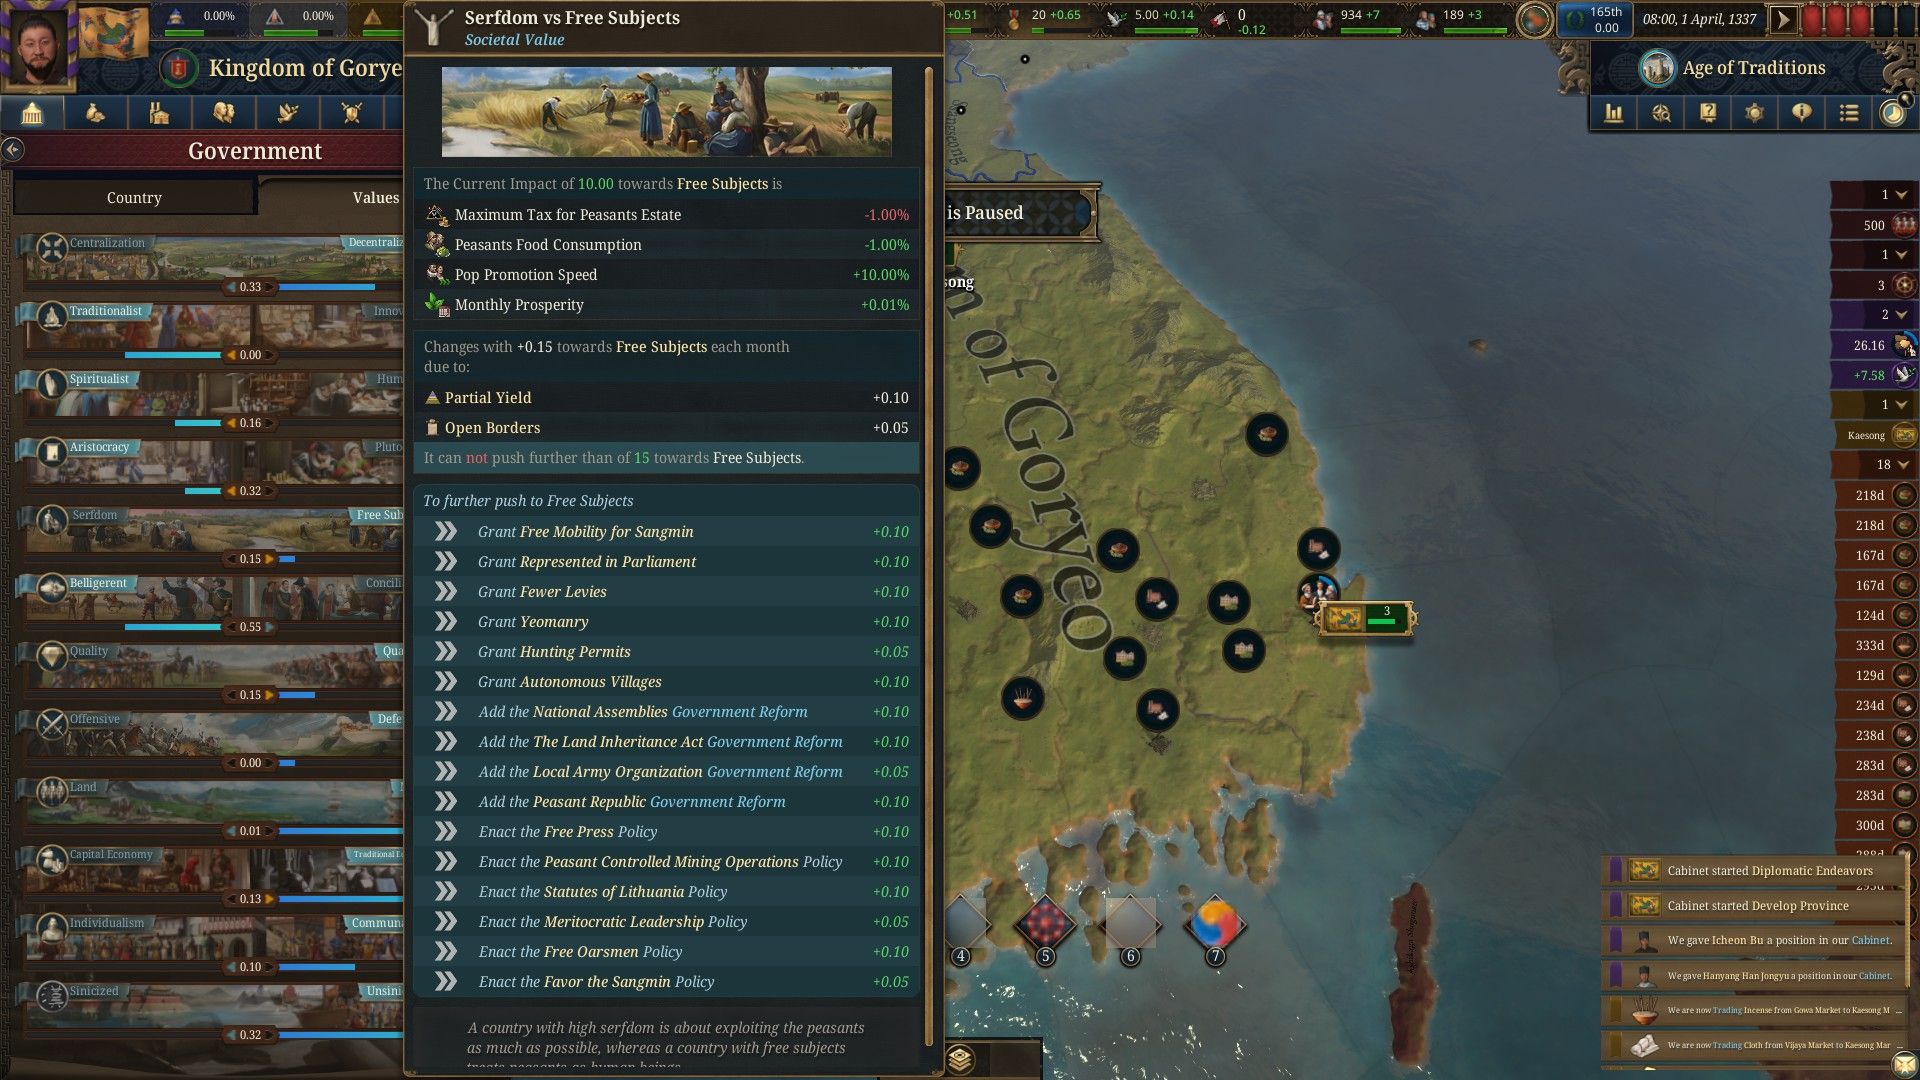
In Korea I let the urban class build their own roads, for example, normally the reserve of the upper class. For the commoners I gave my blessing for free movement between provinces, undoubtedly annoying any noblefolk who wanted an immovable serfdom. But how else am I supposed to spread smallpox to all those in need? Also, all those new factories I built down south were sitting empty. The business district requires blood.
Meanwhile, the generals, who I have largely left to their own devices using those robust automation gizmos, have declared that the nation of Ssangseong (a northern chunk of the peninsula not officially part of Korea yet) is ripe for the picking. We have full right to march in and take it, I am told. I find this disagreeable to Buddhist principles - a religion I adhere to strictly. So strictly that I recently made it law that all future heirs must be the same religion.
No. We will not do a war today. It’s not on my to-do list. But the game helpfully informs me that it is a historical event. If I hover over the option to press my claim, I’m told: “This event option… will make you take the same decision as the country did in history.” A handy little note. But I refuse to indulge the army’s bloodlust just because it is the “canon” lore of Korea. No, I want to see what all the other complicated bits and bobs do before I go stomping into the battlefields. What’s more, I need all those peasants in my pepper fields, silver mines, and cloth mills. Because money appears to be running low.
At this point, I decide to experiment. I hand over the markets and trade to the game’s automation too, wondering if it will do a better job.
It instantly doubles my monthly income.
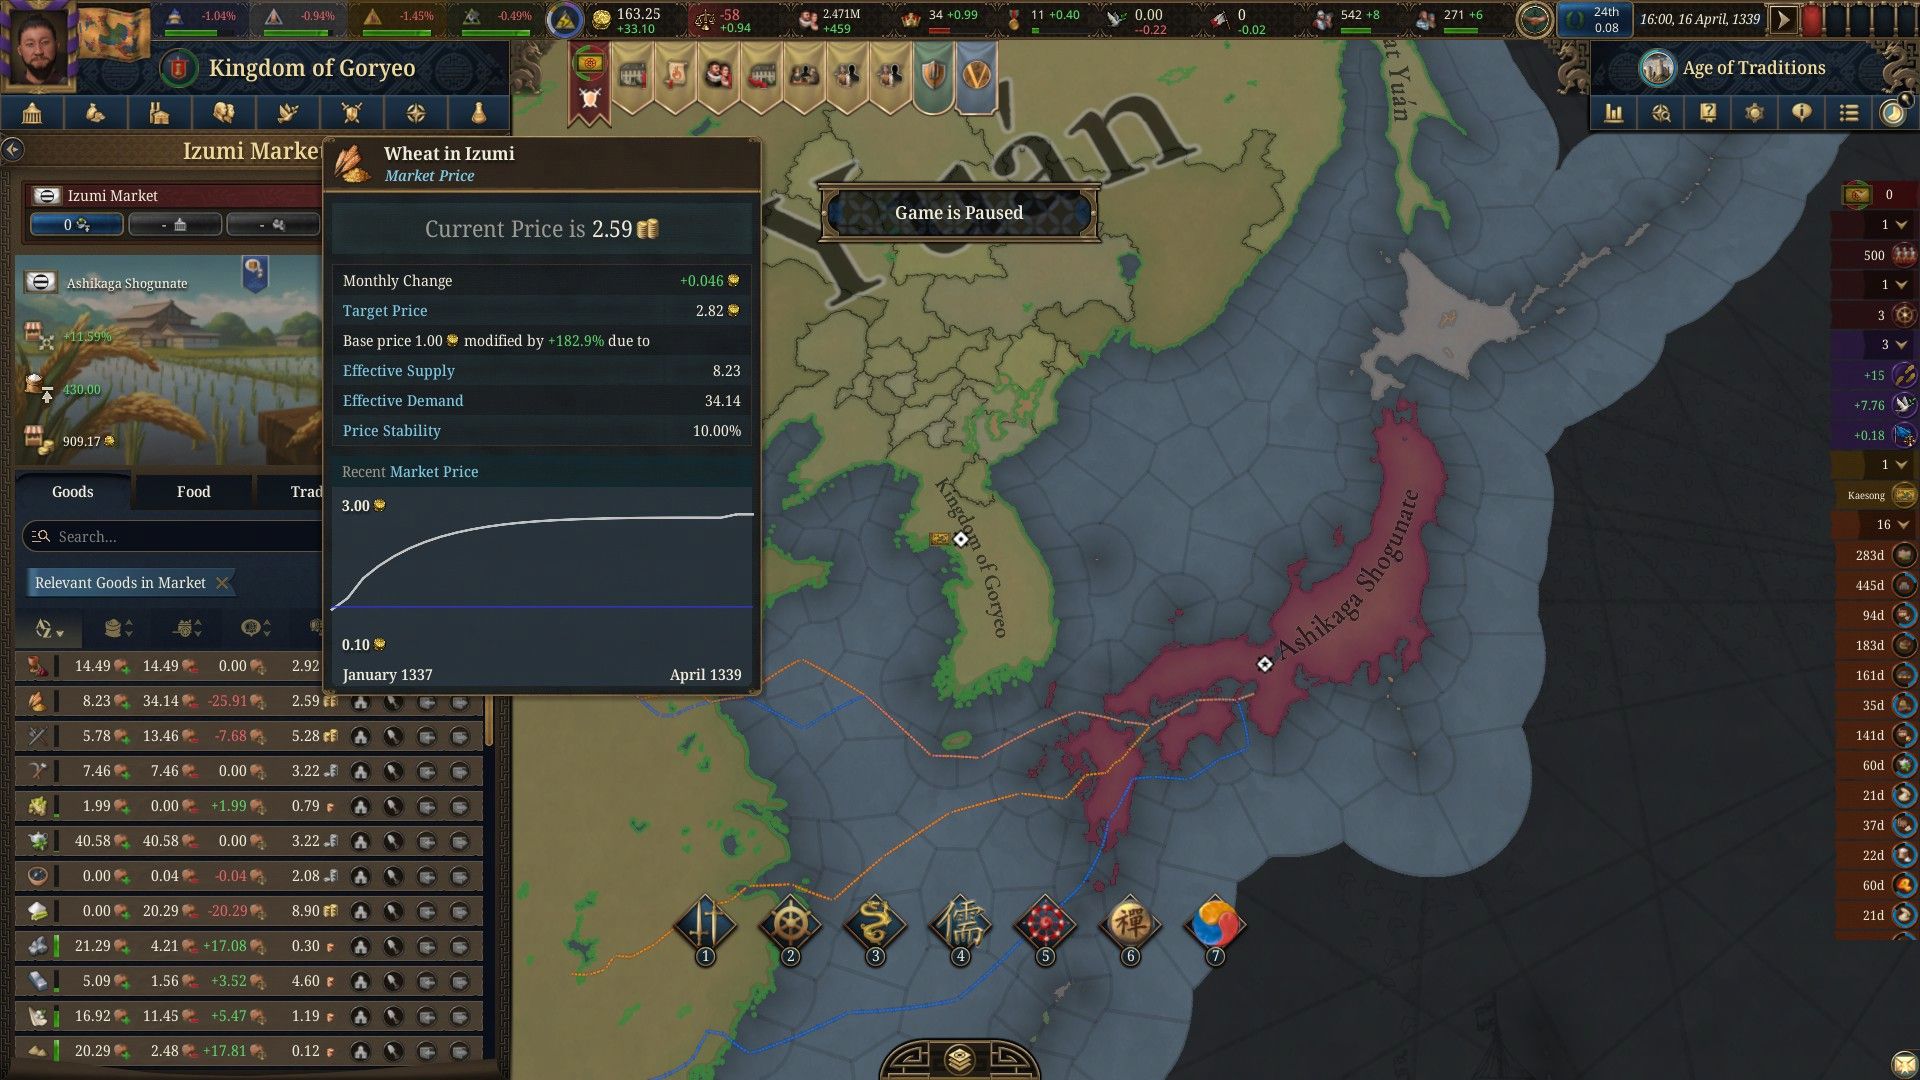
Trade is booming. |Image credit:Rock Paper Shotgun / Paradox Interactive
And here’s the rub with EU5, as it exists so far. The automation is billed as a helpful feature for newbies. But when used, it can actually obscure the machinery of the game further. Give the computer control of your building queue and vast chunks of change will vanish from your treasury without you knowing where it went. Hand over army manoeuvres and patrols to the AI, and you may suddenly see an enemy army slipping through the lines, because something else was more important to the black box. I have no idea what trades and deals the game was doing to get that cashflow. Not only that, but my enjoyment of these parts of the game quickly seeped away once the machine was playing itself. If I wanted my time with Korea to be fun, I had to accept that I would earn less money.
For seasoned players, automation may prove a useful tool for offloading certain economic decisions in difficult eras when they need to focus like a laser beam on military tactics. But for a new player, I worry it’ll actually cause extra confusion. It’s hard to know what’s happening under the hood of this clockwork contraption when you’re supposedly in control, never mind when you hand some of that control to a helpful gremlin. Of course, the game isn’t done yet, and none of it is yet tutorialised. Everything may be more clearly presented on release day.
Easy come, easy go. |Image credit:Rock Paper Shotgun / Paradox Interactive
With the trade doing its own thing, and a lovely network of dirt roads developing throughout the south, I forgo my chance to see how Korea evolves in its quest to become a capitalistic hellstate and throw off Mongol oversight. Instead, for a final glory lap before my time with the preview build runs out, I start a new game in good old Ireland, where all despots’ dreams go to die.
To be more accurate, I rule a single county in Ireland. My struggle as the petty king of Donegal conforms to the general experience of playing as a chieftain in Ireland in other Paradox games. In that you are poor, useless, and your army consists of about 50 cattle-raiding lunatics at any one time. As an Irishman, it is exceedingly difficult to get anything done. Playing as small territories like this is playing Europa Universalis in hard mode, and confirms that the series remains, at its most overwhelming, a sequence of interesting buttons that are greyed out or otherwise unclickable.
You can sometimes easily discover why you’re unable to do something by reading the flavour text or following tooltips. But often you’re none the wiser. Why can’t we get rid of this nationwide rule that deeply drains our diplomatic clout? No clue. Why can’t my cattle raiders besiege this one city? Dunno. How come no marriageable partners show up when I scour Europe for them? Hm. Might just be my profile pic.
I also played a 40-minute game during a studio visit to Paradox Tinto last month. But getting presented with EUV and told you only have 40 minutes to play is like being served a full English breakfast and told that you may lick one baked bean. |Image credit:Rock Paper Shotgun / Paradox Interactive
There are answers to all the puzzlements that arise as you click around, but they are often tucked away. So yes, all the open-ended complex wizardry of Europa Universalis seems to be here for the sequel, but so is all the nitpicky “you can’t do that” non-buttonry which can be a turn off to some. Especially to beginners who often walk away nonplussed and baffled as to what they’re supposed to even do. Shouldn’t a king be powerful? Well yes, but not if you have -100 opinion and poor “tribal cohesion”, whatever that means. In this respect, the pain threshold for Paradox grand strategy doesn’t appear to have been abolished. Is giving players an automation button the fix for such confusion? I’m doubtful, but again, we’ve yet to see the final implementation.
But crucially for Paradox, the complexity won’t matter a jot to anyone with hundreds of hours of the previous game under their medieval chastity belt. Judging from my Korean country-mongering, the slavering sicko who is normally attracted to these games will be furiously pushing the plus key in their brain to speed up time until release day. I’m disgusted to report that I am one of them.

Europa Universalis V
PC
Rock Paper Shotgun is better when you sign in
Sign in and join us on our journey to discover strange and compelling PC games.

All 75 Arc Raiders Blueprints and where to get them
These areas have the highest chance of giving you Blueprints

Image credit:Rock Paper Shotgun/Embark Studios

Looking for more Arc Raiders Blueprints? It’s a special day when you find a Blueprint, as they’re among the most valuable items in Arc Raiders. If you find a Blueprint that you haven’t already found, then you must make sure you hold onto it at all costs, because Blueprints are the key to one of the most important and powerful systems of meta-progression in the game.
This guide aims to be the very best guide on Blueprints you can find, starting with a primer on what exactly they are and how they work in Arc Raiders, before delving into exactly where to get Blueprints and the very best farming spots for you to take in your search.
We’ll also go over how to get Blueprints from other unlikely activities, such as destroying Surveyors and completing specific quests. And you’ll also find the full list of all 75 Blueprints in Arc Raiders on this page (including the newest Blueprints added with the Cold Snap update , such as the Deadline Blueprint and Firework Box Blueprint), giving you all the information you need to expand your own crafting repertoire.
In this guide:
- What are Blueprints in Arc Raiders?
- Full Blueprint list: All crafting recipes
- Where to find Blueprints in Arc Raiders Blueprints obtained from quests Blueprints obtained from Trials Best Blueprint farming locations

What are Blueprints in Arc Raiders?
Blueprints in Arc Raiders are special items which, if you manage to extract with them, you can expend to permanently unlock a new crafting recipe in your Workshop. If you manage to extract from a raid with an Anvil Blueprint, for example, you can unlock the ability to craft your very own Anvil Pistol, as many times as you like (as long as you have the crafting materials).
To use a Blueprint, simply open your Inventory while in the lobby, then right-click on the Blueprint and click “Learn And Consume” . This will permanently unlock the recipe for that item in your Workshop. As of the Stella Montis update, there are allegedly 75 different Blueprints to unlock - although only 68 are confirmed to be in the game so far. You can see all the Blueprints you’ve found and unlocked by going to the Workshop menu, and hitting “R” to bring up the Blueprint screen.
It’s possible to find duplicates of past Blueprints you’ve already unlocked. If you find these, then you can either sell them, or - if you like to play with friends - you can take it into a match and gift it to your friend so they can unlock that recipe for themselves. Another option is to keep hold of them until the time comes to donate them to the Expedition.
Full Blueprint list: All crafting recipes
Below is the full list of all the Blueprints that are currently available to find in Arc Raiders, and the crafting recipe required for each item:
| Blueprint | Type | Recipe | Crafted At |
|---|---|---|---|
| Bettina | Weapon | 3x Advanced Mechanical Components 3x Heavy Gun Parts 3x Canister | Gunsmith 3 |
| Blue Light Stick | Quick Use | 3x Chemicals | Utility Station 1 |
| Aphelion | Weapon | 3x Magnetic Accelerator 3x Complex Gun Parts 1x Matriarch Reactor | Gunsmith 3 |
| Combat Mk. 3 (Flanking) | Augment | 2x Advanced Electrical Components 3x Processor | Gear Bench 3 |
| Combat Mk. 3 (Aggressive) | Augment | 2x Advanced Electrical Components 3x Processor | Gear Bench 3 |
| Complex Gun Parts | Material | 2x Light Gun Parts 2x Medium Gun Parts 2x Heavy Gun Parts | Refiner 3 |
| Fireworks Box | Quick Use | 1x Explosive Compound 3x Pop Trigger | Explosives Station 2 |
| Gas Mine | Mine | 4x Chemicals 2x Rubber Parts | Explosives Station 1 |
| Green Light Stick | Quick Use | 3x Chemicals | Utility Station 1 |
| Pulse Mine | Mine | 1x Crude Explosives 1x Wires | Explosives Station 1 |
| Seeker Grenade | Grenade | 1x Crude Explosives 2x ARC Alloy | Explosives Station 1 |
| Looting Mk. 3 (Survivor) | Augment | 2x Advanced Electrical Components 3x Processor | Gear Bench 3 |
| Angled Grip II | Mod | 2x Mechanical Components 3x Duct Tape | Gunsmith 2 |
| Angled Grip III | Mod | 2x Mod Components 5x Duct Tape | Gunsmith 3 |
| Hullcracker | Weapon | 1x Magnetic Accelerator 3x Heavy Gun Parts 1x Exodus Modules | Gunsmith 3 |
| Launcher Ammo | Ammo | 5x Metal Parts 1x Crude Explosives | Workbench 1 |
| Anvil | Weapon | 5x Mechanical Components 5x Simple Gun Parts | Gunsmith 2 |
| Anvil Splitter | Mod | 2x Mod Components 3x Processor | Gunsmith 3 |
| ??? | ??? | ??? | ??? |
| Barricade Kit | Quick Use | 1x Mechanical Components | Utility Station 2 |
| Blaze Grenade | Grenade | 1x Explosive Compound 2x Oil | Explosives Station 3 |
| Bobcat | Weapon | 3x Advanced Mechanical Components 3x Light Gun Parts | Gunsmith 3 |
| Osprey | Weapon | 2x Advanced Mechanical Components 3x Medium Gun Parts 7x Wires | Gunsmith 3 |
| Burletta | Weapon | 3x Mechanical Components 3x Simple Gun Parts | Gunsmith 1 |
| Compensator II | Mod | 2x Mechanical Components 4x Wires | Gunsmith 2 |
| Compensator III | Mod | 2x Mod Components 8x Wires | Gunsmith 3 |
| Defibrillator | Quick Use | 9x Plastic Parts 1x Moss | Medical Lab 2 |
| ??? | ??? | ??? | ??? |
| Equalizer | Weapon | 3x Magnetic Accelerator 3x Complex Gun Parts 1x Queen Reactor | Gunsmith 3 |
| Extended Barrel | Mod | 2x Mod Components 8x Wires | Gunsmith 3 |
| Extended Light Mag II | Mod | 2x Mechanical Components 3x Steel Spring | Gunsmith 2 |
| Extended Light Mag III | Mod | 2x Mod Components 5x Steel Spring | Gunsmith 3 |
| Extended Medium Mag II | Mod | 2x Mechanical Components 3x Steel Spring | Gunsmith 2 |
| Extended Medium Mag III | Mod | 2x Mod Components 5x Steel Spring | Gunsmith 3 |
| Extended Shotgun Mag II | Mod | 2x Mechanical Components 3x Steel Spring | Gunsmith 2 |
| Extended Shotgun Mag III | Mod | 2x Mod Components 5x Steel Spring | Gunsmith 3 |
| Remote Raider Flare | Quick Use | 2x Chemicals 4x Rubber Parts | Utility Station 1 |
| Heavy Gun Parts | Material | 4x Simple Gun Parts | Refiner 2 |
| Venator | Weapon | 2x Advanced Mechanical Components 3x Medium Gun Parts 5x Magnet | Gunsmith 3 |
| Il Toro | Weapon | 5x Mechanical Components 6x Simple Gun Parts | Gunsmith 1 |
| Jolt Mine | Mine | 1x Electrical Components 1x Battery | Explosives Station 2 |
| Explosive Mine | Mine | 1x Explosive Compound 1x Sensors | Explosives Station 3 |
| Jupiter | Weapon | 3x Magnetic Accelerator 3x Complex Gun Parts 1x Queen Reactor | Gunsmith 3 |
| Light Gun Parts | Material | 4x Simple Gun Parts | Refiner 2 |
| Lightweight Stock | Mod | 2x Mod Components 5x Duct Tape | Gunsmith 3 |
| Lure Grenade | Grenade | 1x Speaker Component 1x Electrical Components | Utility Station 2 |
| Medium Gun Parts | Material | 4x Simple Gun Parts | Refiner 2 |
| Torrente | Weapon | 2x Advanced Mechanical Components 3x Medium Gun Parts 6x Steel Spring | Gunsmith 3 |
| Muzzle Brake II | Mod | 2x Mechanical Components 4x Wires | Gunsmith 2 |
| Muzzle Brake III | Mod | 2x Mod Components 8x Wires | Gunsmith 3 |
| Padded Stock | Mod | 2x Mod Components 5x Duct Tape | Gunsmith 3 |
| Shotgun Choke II | Mod | 2x Mechanical Components 4x Wires | Gunsmith 2 |
| Shotgun Choke III | Mod | 2x Mod Components 8x Wires | Gunsmith 3 |
| Shotgun Silencer | Mod | 2x Mod Components 8x Wires | Gunsmith 3 |
| Showstopper | Grenade | 1x Advanced Electrical Components 1x Voltage Converter | Explosives Station 3 |
| Silencer I | Mod | 2x Mechanical Components 4x Wires | Gunsmith 2 |
| Silencer II | Mod | 2x Mod Components 8x Wires | Gunsmith 3 |
| Snap Hook | Quick Use | 2x Power Rod 3x Rope 1x Exodus Modules | Utility Station 3 |
| Stable Stock II | Mod | 2x Mechanical Components 3x Duct Tape | Gunsmith 2 |
| Stable Stock III | Mod | 2x Mod Components 5x Duct Tape | Gunsmith 3 |
| Tagging Grenade | Grenade | 1x Electrical Components 1x Sensors | Utility Station 3 |
| Tempest | Weapon | 3x Advanced Mechanical Components 3x Medium Gun Parts 3x Canister | Gunsmith 3 |
| Trigger Nade | Grenade | 2x Crude Explosives 1x Processor | Explosives Station 2 |
| Vertical Grip II | Mod | 2x Mechanical Components 3x Duct Tape | Gunsmith 2 |
| Vertical Grip III | Mod | 2x Mod Components 5x Duct Tape | Gunsmith 3 |
| Vita Shot | Quick Use | 2x Antiseptic 1x Syringe | Medical Lab 3 |
| Vita Spray | Quick Use | 3x Antiseptic 1x Canister | Medical Lab 3 |
| Vulcano | Weapon | 1x Magnetic Accelerator 3x Heavy Gun Parts 1x Exodus Modules | Gunsmith 3 |
| Wolfpack | Grenade | 2x Explosive Compound 2x Sensors | Explosives Station 3 |
| Red Light Stick | Quick Use | 3x Chemicals | Utility Station 1 |
| Smoke Grenade | Grenade | 14x Chemicals 1x Canister | Utility Station 2 |
| Deadline | Mine | 3x Explosive Compound 2x ARC Circuitry | Explosives Station 3 |
| Trailblazer | Grenade | 1x Explosive Compound 1x Synthesized Fuel | Explosives Station 3 |
| Tactical Mk. 3 (Defensive) | Augment | 2x Advanced Electrical Components 3x Processor | Gear Bench 3 |
| Tactical Mk. 3 (Healing) | Augment | 2x Advanced Electrical Components 3x Processor | Gear Bench 3 |
| Yellow Light Stick | Quick Use | 3x Chemicals | Utility Station 1 |
Note: The missing Blueprints in this list likely have not actually been added to the game at the time of writing, because none of the playerbase has managed to find any of them. As they are added to the game, I will update this page with the most relevant information so you know exactly how to get all 75 Arc Raiders Blueprints.
Where to find Blueprints in Arc Raiders
Below is a list of all containers, modifiers, and events which maximise your chances of finding Blueprints:
- Certain quests reward you with specific Blueprints .
- Completing Trials has a high chance of offering Blueprints as rewards.
- Surveyors have a decent chance of dropping Blueprints on death.
- High loot value areas tend to have a greater chance of spawning Blueprints.
- Night Raids and Storms may increase rare Blueprint spawn chances in containers.
- Containers with higher numbers of items may have a higher tendency to spawn Blueprints. As a result, Blue Gate (which has many “large” containers containing multiple items) may give you a higher chance of spawning Blueprints.
- Raider containers (Raider Caches, Weapon Boxes, Medical Bags, Grenade Tubes) have increased Blueprint drop rates. As a result, the Uncovered Caches event gives you a high chance of finding Blueprints.
- Security Lockers have a higher than average chance of containing Blueprints.
- Certain Blueprints only seem to spawn under specific circumstances: Tempest Blueprint only spawns during Night Raid events. Vulcano Blueprint only spawns during Hidden Bunker events. Jupiter and Equaliser Blueprints only spawn during Harvester events.

Raider Caches, Weapon Boxes, and other raider-oriented container types have a good chance of offering Blueprints. |Image credit:Rock Paper Shotgun/Embark Studios
Blueprints have a very low chance of spawning in any container in Arc Raiders, around 1-2% on average. However, there is a higher chance of finding Blueprints in particular container types. Specifically, you can find more Blueprints in Raider containers and security lockers.
Beyond this, if you’re looking for Blueprints you should focus on regions of the map which are marked as having particularly high-value loot. Areas such as the Control Tower in Dam Battlegrounds, the Arrival and Departure Buildings in Spaceport, and Pilgrim’s Peak in Blue Gate all have a better-than-average chance of spawning Blueprints somewhere amongst all their containers. Night Raids and Electromagnetic Storm events also increase the drop chances of certain Blueprints .
In addition to these containers, you can often loot Blueprints from destroyed Surveyors - the largest of the rolling ball ARC. Surveyors are more commonly found on the later maps - Spaceport and Blue Gate - and if one spawns in your match, you’ll likely see it by the blue laser beam that it casts into the sky while “surveying”.
Surveyors are quite well-armoured and will very speedily run away from you once it notices you, but if you can take one down then make sure you loot all its parts for a chance of obtaining certain unusual Blueprints.
Blueprints obtained from quests
One way in which you can get Blueprints is by completing certain quests for the vendors in Speranza. Some quests will reward you with a specific item Blueprint upon completion, so as long as you work through all the quests in Arc Raiders, you are guaranteed those Blueprints.
Here is the full list of all Blueprints you can get from quest rewards:
- Trigger Nade Blueprint: Rewarded after completing “Sparks Fly”.
- Lure Grenade Blueprint: Rewarded after completing “Greasing Her Palms”.
- Burletta Blueprint: Rewarded after completing “Industrial Espionage”.
- Hullcracker Blueprint (and Launcher Ammo Blueprint): Rewarded after completing “The Major’s Footlocker”.
Alas, that’s only 4 Blueprints out of a total of 75 to unlock, so for the vast majority you will need to find them yourself during a raid. If you’re intent on farming Blueprints, then it’s best to equip yourself with cheap gear in case you lose it, but don’t use a free loadout because then you won’t get a safe pocket to stash any new Blueprint you find. No pain in Arc Raiders is sharper than failing to extract with a new Blueprint you’ve been after for a dozen hours already.

One of the best ways to get Blueprints is by hitting three stars on all five Trials every week. |Image credit:Rock Paper Shotgun/Embark Studios
Blueprints obtained from Trials
One of the very best ways to get Blueprints is as rewards for completing Trials in Arc Raiders. Trials are unlocked from Level 15 onwards, and allow you to earn rewards by focusing on certain tasks over the course of several raids. For example, one Trial might task you with dealing damage to Hornets, while another might challenge you to loot Supply Drops.
Trials refresh on a weekly basis, with a new week bringing five new Trials. Each Trial can offer up to three rewards after passing certain score milestones, and it’s possible to receive very high level loot from these reward crates - including Blueprints. So if you want to unlock as many Blueprints as possible, you should make a point of completing as many Trials as possible each week.
Best Blueprint farming locations
The very best way to get Blueprints is to frequent specific areas of the maps which combine high-tier loot pools with the right types of containers to search. Here are my recommendations for where to find Blueprints on every map, so you can always keep the search going for new crafting recipes to unlock.

Image credit:Rock Paper Shotgun/Embark Studios
Dam Battlegrounds
The best places to farm Blueprints on Dam Battlegrounds are the Control Tower, Power Generation Complex, Ruby Residence, and Pale Apartments . The first two regions, despite only being marked on the map as mid-tier loot, contain a phenomenal number of containers to loot. The Control Tower can also contain a couple of high-tier Security Lockers - though of course, you’ll need to have unlocked the Security Breach skill at the end of the Survival tree.
There’s also a lot of reporting amongst the playerbase that the Residential areas in the top-left of the map - Pale Apartments and Ruby Residence - give you a comparatively strong chance of finding Blueprints. Considering their size, there’s a high density of containers to loot in both locations, and they also have the benefit of being fairly out of the way. So you’re more likely to have all the containers to yourself.
Buried City
The best Blueprint farming locations on Buried City are the Santa Maria Houses, Grandioso Apartments, Town Hall, and the various buildings of the New District . Grandioso Apartments has a lower number of containers than the rest, but a high chance of spawning weapon cases - which have good Blueprint drop rates. The others are high-tier loot areas, with plenty of lootable containers - including Security Lockers.
Spaceport
The best places to find Blueprints on Spaceport are the Arrival and Departure Buildings, as well as Control Tower A6 and the Launch Towers . All these areas are labelled as high-value loot regions, and many of them are also very handily connected to one another by the Spaceport wall, which you can use to quickly run from one area to the next. At the tops of most of these buildings you’ll find at least one Security Locker, so this is an excellent farming route for players looking to find Blueprints.
The downside to looting Blueprints on Spaceport is that all these areas are hotly contested, particularly in Duos and Squads. You’ll need to be very focused and fast in order to complete the full farming route.

Image credit:Rock Paper Shotgun/Embark Studios
Blue Gate
Blue Gate tends to have a good chance of dropping Blueprints, potentially because it generally has a high number of containers which can hold lots of items; so there’s a higher chance of a Blueprint spawning in each container. In my experience, the best Blueprint farming spots on Blue Gate are Pilgrim’s Peak, Raider’s Refuge, the Ancient Fort, and the Underground Complex beneath the Warehouse .
All of these areas contain a wealth of containers to loot. Raider’s Refuge has less to loot, but the majority of the containers in and around the Refuge are raider containers, which have a high chance of containing Blueprints - particularly during major events.
Stella Montis
On the whole, Stella Montis seems to have a very low drop rate for Blueprints (though a high chance of dropping other high-tier loot). If you do want to try farming Blueprints on this map, the best places to find Blueprints in Stella Montis are Medical Research, Assembly Workshop, and the Business Center . These areas have the highest density of containers to loot on the map.
In addition to this, the Western Tunnel has a few different Security Lockers to loot, so while there’s very little to loot elsewhere in this area of the map, it’s worth hitting those Security Lockers if you spawn there at the start of a match.
That wraps up this primer on how to get all the Blueprints in Arc Raiders as quickly as possible. With the Expedition system constantly resetting a large number of players’ Blueprints, it’s more important than ever to have the most up-to-date information on where to find all these Blueprints.
While you’re here, be sure to check out our Arc Raiders best guns tier list , as well as our primers on the best skills to unlock and all the different Field Depot locations on every map.

ARC Raiders
PS5 , Xbox Series X/S , PC
Rock Paper Shotgun is better when you sign in
Sign in and join us on our journey to discover strange and compelling PC games.
