Elden Ring: Ranni The Witch questline walkthrough
Overexplaining the entirety of Ranni’s questline, including all optional steps and dialogue

Image credit:Rock Paper Shotgun/Bandai Namco

Want to complete Ranni’s questline in Elden Ring without missing out a single step or section of dialogue? Even among the dozens of Elden Ring quests on offer, Ranni’s quest - like Ranni herself - is special. It’s by far the longest and most fleshed out side quest in Elden Ring ; it ties together a number of other characters’ questlines (if you do it right), has enormous ramifications for the lore of Elden Ring , and gives you some fantastic boss fights and legendary rewards; and completing Ranni’s entire questline even unlocks a unique ending for the base game.
You can first meet Ranni very early on in your journey, and even from this early meeting there are signs that this is a character with some very grand plans, which are soon to be set in motion. But Ranni needs some help to realise her lifelong ambition. That’s where you come in.
If you’re stuck at any point during this massive storyline, fear not. The guide below features a full-length, step-by-step walkthrough of Ranni’s questline in Elden Ring , showing you exactly where to go and what to do at every step. With over a thousand hours of experience with Elden Ring, we’ve combed every recess of this questline to make sure this guide covers all the optional steps and dialogue, potential fail states and decision points, and even the deep lore that Ranni’s quest unravels over its massive storyline.
Elden Ring Ranni quest walkthrough
Below is our full step-by-step walkthrough of Ranni’s questline in Elden Ring. This list contains many optional steps which flesh out the questline’s story, but if you’re only interested in finishing the quest’s major steps, we’ve marked all required steps with an exclamation mark on the right-hand side.
Ranni questline - All steps:
- Meet Ranni at the Church of Elleh after receiving Torrent
- Progress Blaidd’s quest until after you kill Bloodhound Knight Darriwil
- Meet Sorcerer Rogier in the Chapel in Stormveil Castle
- Defeat Godrick The Grafted in Stormveil Castle
- Find Rogier’s bloodstain beneath Stormveil Castle
- Speak to Rogier in the Roundtable Hold
- Speak to Fia to obtain the Knifeprint Clue
- Obtain the Black Knifeprint from Liurnia’s Black Knife Catacombs
- Give the Black Knifeprint to Rogier
- Rest and speak to Rogier again about the Black Knifeprint
- Meet Smithing-Master Iji beyond the Kingsrealm Ruins in Liurnia
- Defeat Royal Knight Loretta at the end of Caria Manor in north Liurnia
- Meet Ranni in Ranni’s Rise behind Caria Manor
- Speak to Rogier again about Ranni
- Speak to Ranni in Ranni’s Rise and agree to serve her
- Speak to Blaidd, Iji, and Seluvis in Ranni’s Rise
- Speak to Blaidd in Siofra River beneath the Mistwood
- Option A: Speak to Seluvis (Seluvis’s Rise), then Sellen (Waypoint Ruins)
- Option B: Speak to Jerren (Redmane Castle), then Iji (Kingsrealm Ruins)
- Speak to Blaidd again in Siofra River about your discoveries
- Speak with Jerren at Redmane Castle to unlock the Radahn fight
- Defeat Starscourge Radahn in Redmane Castle
- Speak with Blaidd after the fight
- Find Blaidd trapped in the Forlorn Hound Evergaol
- Speak to Iji about Blaidd’s predicament
- Enter Nokron via the new crater in Limgrave
- Obtain the Fingerslayer Blade from Nokron
- Deliver the Fingerslayer Blade to Ranni
- Use the Carian Inverted Statue in the Study Hall
- Speak with Iji about where Ranni has gone
- Use the teleporter at the top of Renna’s Rise to reach Ainsel River
- Pick up the Miniature Ranni doll in the river
- Rest at the Ainsel River Main Site Of Grace and speak to Miniature Ranni
- Rest at the Nokstella, Eternal City Site Of Grace and speak to Miniature Ranni
- Rest at the Nokstella Waterfall Basin Site Of Grace and speak to Miniature Ranni
- Defeat the Baleful Shadow in Nokstella to receive the Discarded Palace Key
- Defeat Rennala at the Academy Of Raya Lucaria (if you haven’t already)
- Loot the Dark Moon Ring from the chest in Rennala’s library
- Head through the Lake of Rot beyond Nokstella
- Interact with the coffin in the Grand Cloister
- Defeat Astel, Naturalborn of the Void
- Meet Blaidd at Ranni’s Rise anytime after the Astel fight
- Speak to Iji about Blaidd
- Reload the area and find Iji once again
- Use the Dark Moon Ring to reach the Moonlight Altar in Liurnia
- Enter the Cathedral of Manus Celes cellar and speak to Ranni
- Speak to Miniature Ranni at the top of Ranni’s Rise
- Use Ranni’s summon sign after the final boss for Ranni’s Age Of Stars ending
Many of these steps are optional, and several parts can be done in a different order, but this offers you the most comprehensive experience of the entire questline.
To help you find exactly where to go at each step, you can use the below map, which shows the location of all 48 steps of Ranni’s questline.
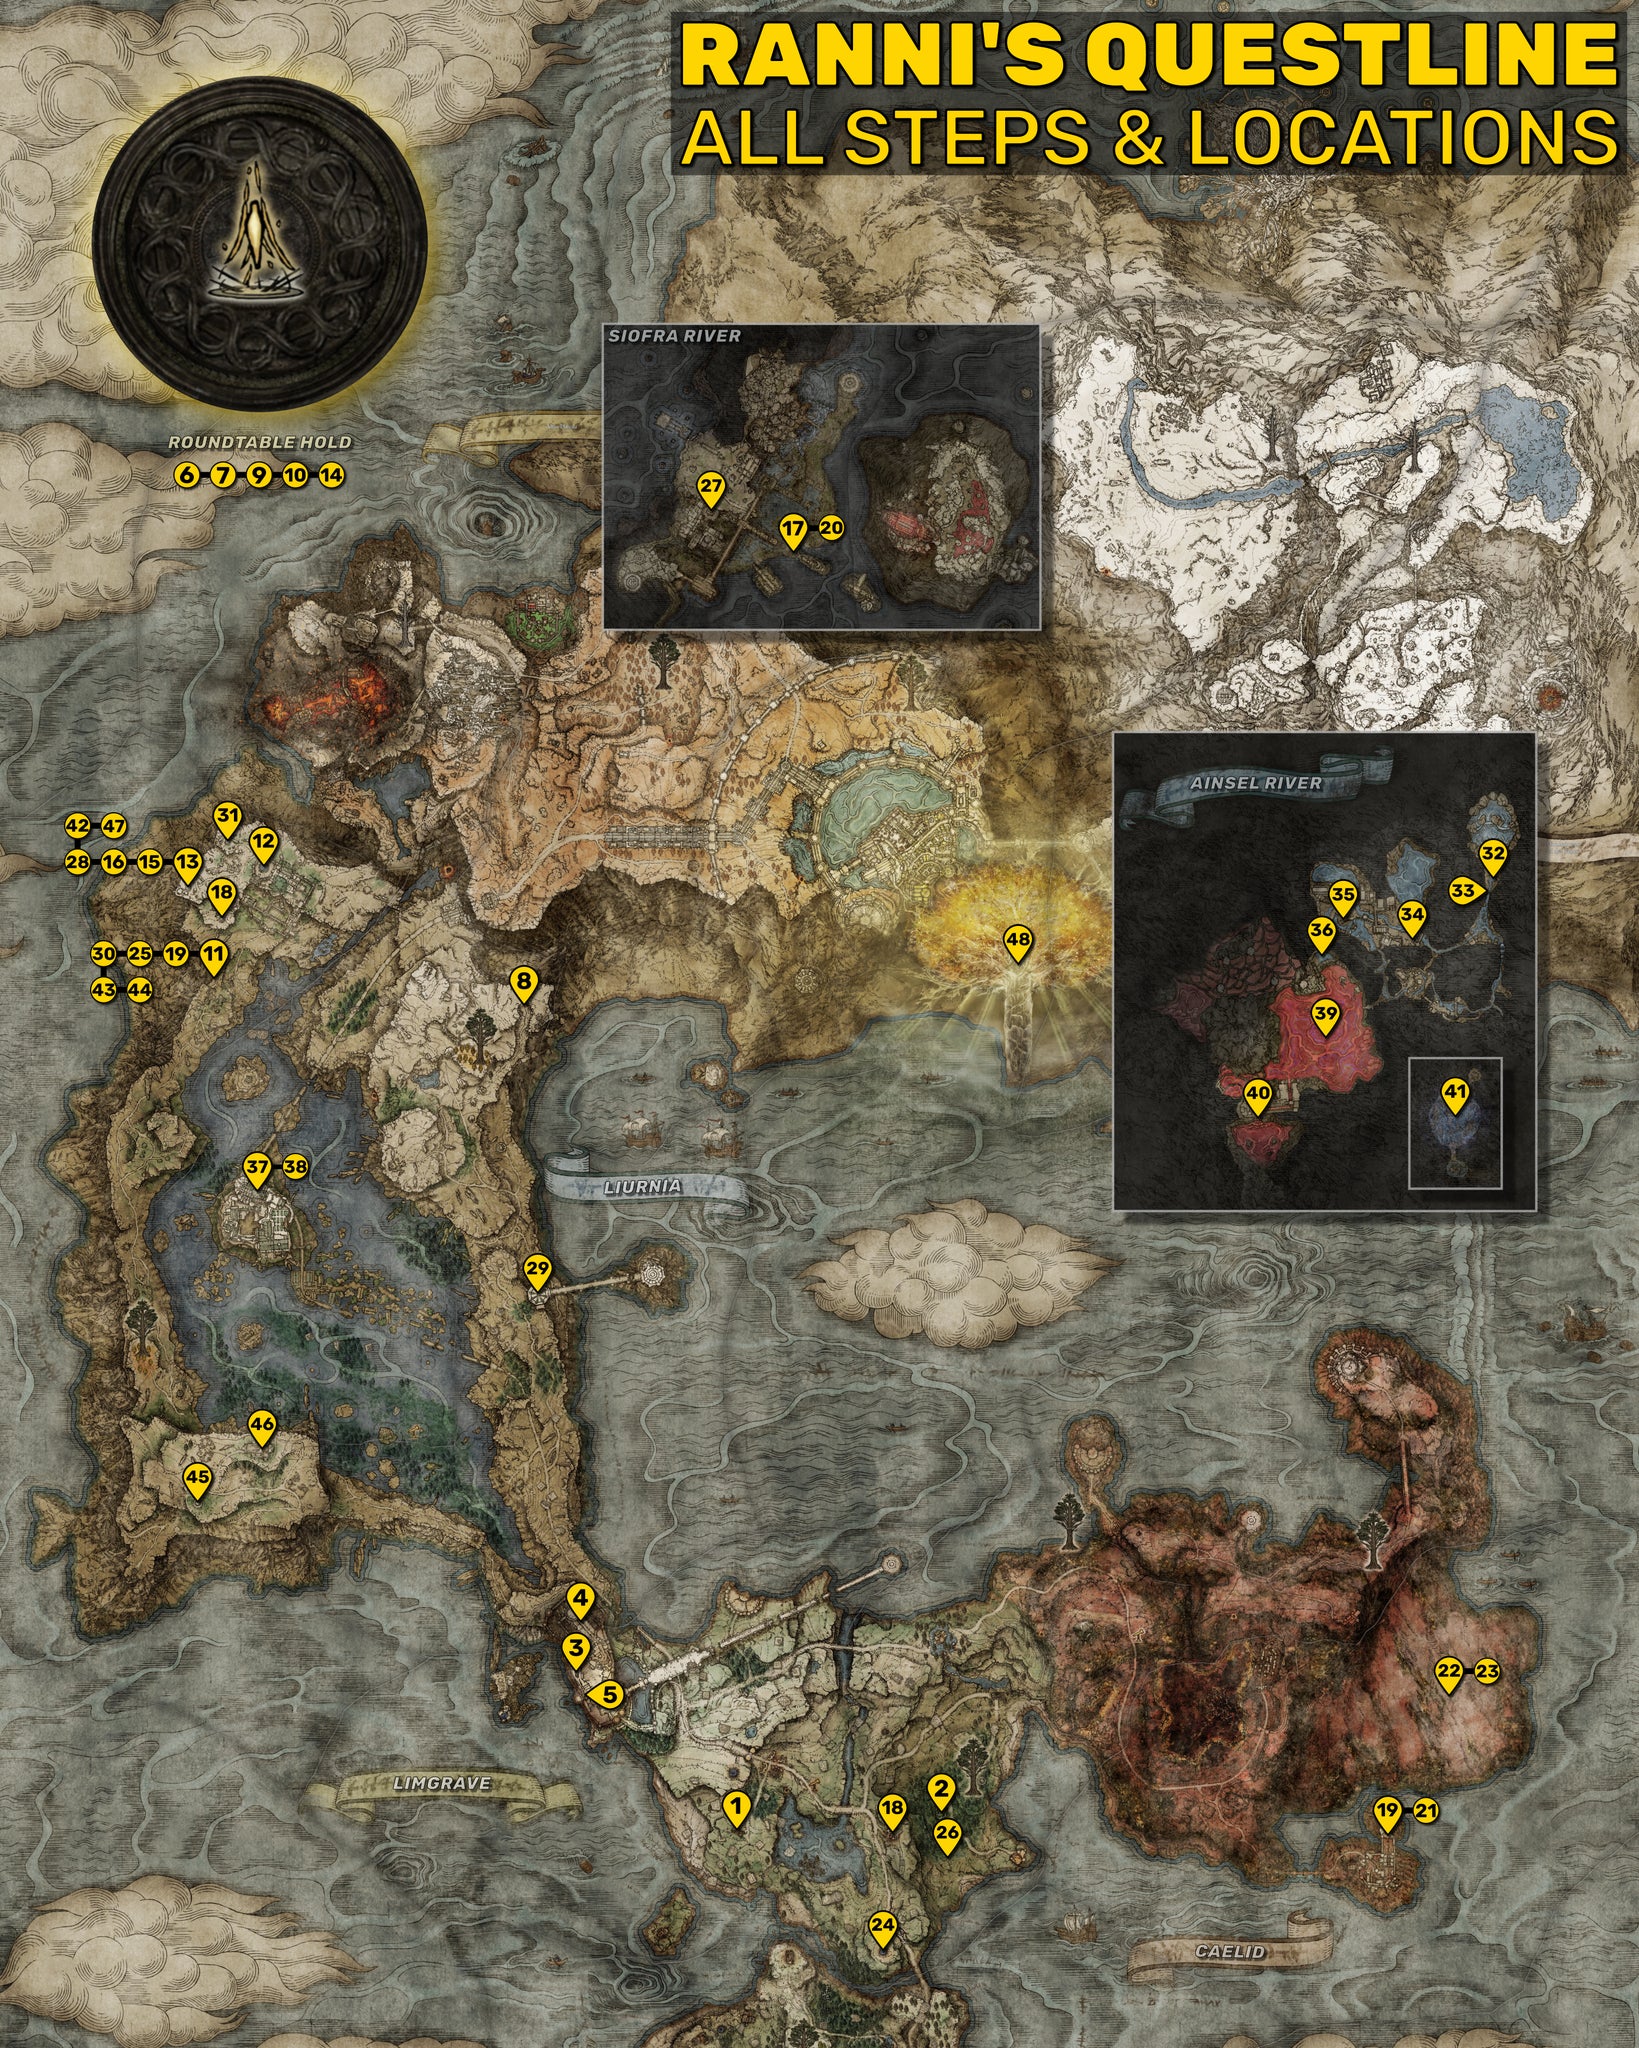
Click to view this map at full resolution!|Image credit:Rock Paper Shotgun/Bandai Namco
1. Meet Ranni at the Church of Elleh after receiving Torrent
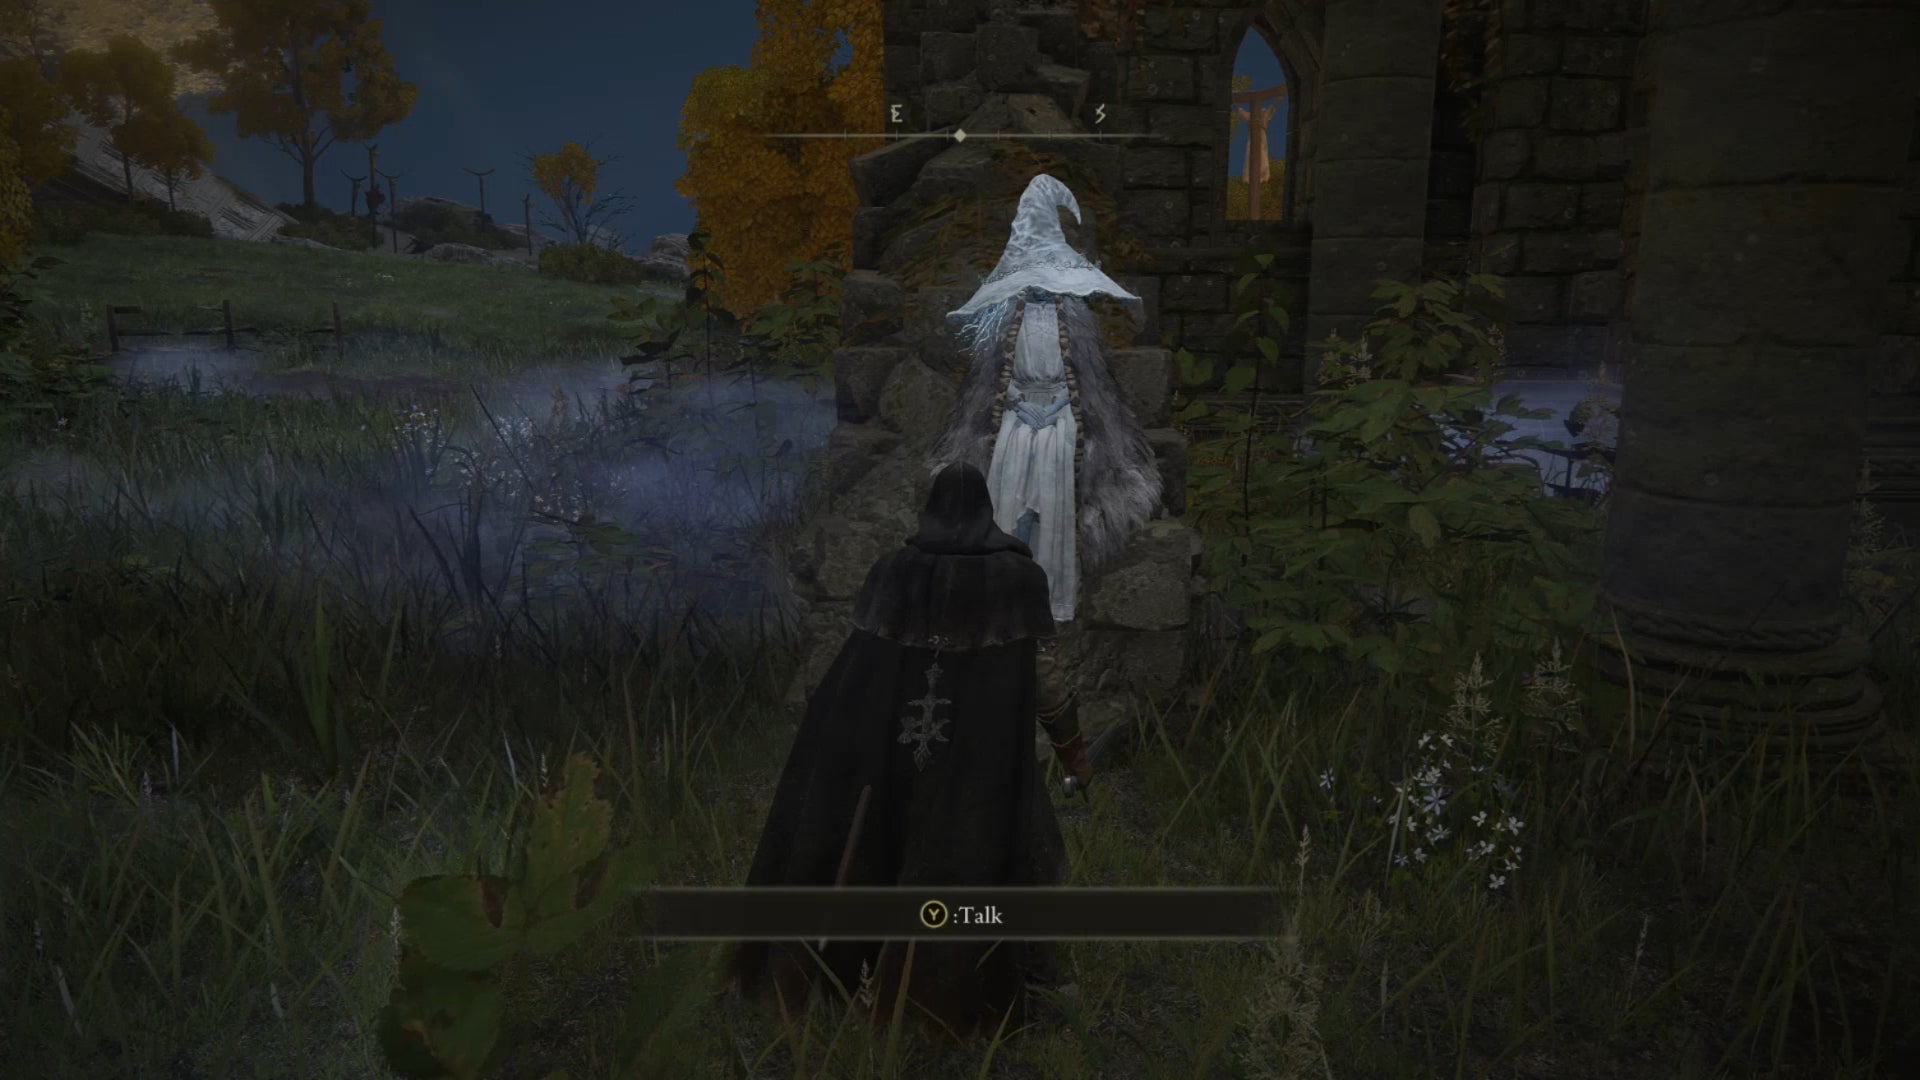
Image credit:Rock Paper Shotgun/Bandai Namco
Ranni is one of the first NPCs you are able to come across in Limgrave. After you obtain your horse Torrent from Melina, head to the Church of Elleh at night . You should find Ranni sitting at one of the walls of the church, waiting for you.
Speak with Ranni. She’ll introduce herself as “Renna” for now, and she’ll give you the Spirit Calling Bell used to summon Spirit Ashes , before disappearing into the night with characteristic mystery.
If you didn’t do any of this, don’t worry: you can purchase the Spirit Calling Bell from the Twin Maiden Husks at the Roundtable Hold later on. The rest of Ranni’s questline will still be available to you.
2. Progress Blaidd’s quest until after you kill Bloodhound Knight Darriwil
Blaidd is another NPC with his own questline, but it’s so closely connected with Ranni’s own quest and story that we’re including it in this walkthrough. You can first find (or rather, hear Blaidd at the Mistwood in east Limgrave. As you approach the Mistwood Ruins you’ll hear some strange howling, which you can then report to Merchant Kalé at the Church Of Elleh.
Kalé will give you the “Finger Snap” gesture for you to perform in front of Blaidd to get him down from his high perch in the Mistwood Ruins. Speak with him, and he’ll tell you he’s after someone called Darriwil. You can then find Bloodhound Knight Darriwil in the Forlorn Hound Evergaol in south Limgrave, and defeat him (either with or without Blaidd’s help). Once that’s done, you can speak with Blaidd once more outside the Evergaol - and that’s the last thing you can do with Blaidd for the time being. He’ll return later in Ranni’s questline.
3. Meet Sorcerer Rogier in the Chapel in Stormveil Castle
Sorcerer Rogier is a friendly character you first meet in the Chapel in Stormveil Castle . Prior to this you can optionally summon Rogier to help you fight Margit, The Fell Omen . Regardless of this, you’ll find Rogier hanging out in the Chapel not far beyond the Rampart Tower Site Of Grace.
It isn’t necessary, but for the most complete version of Ranni’s quest you should complete the following parts of Rogier’s quest at this point.
4. Defeat Godrick The Grafted in Stormveil Castle
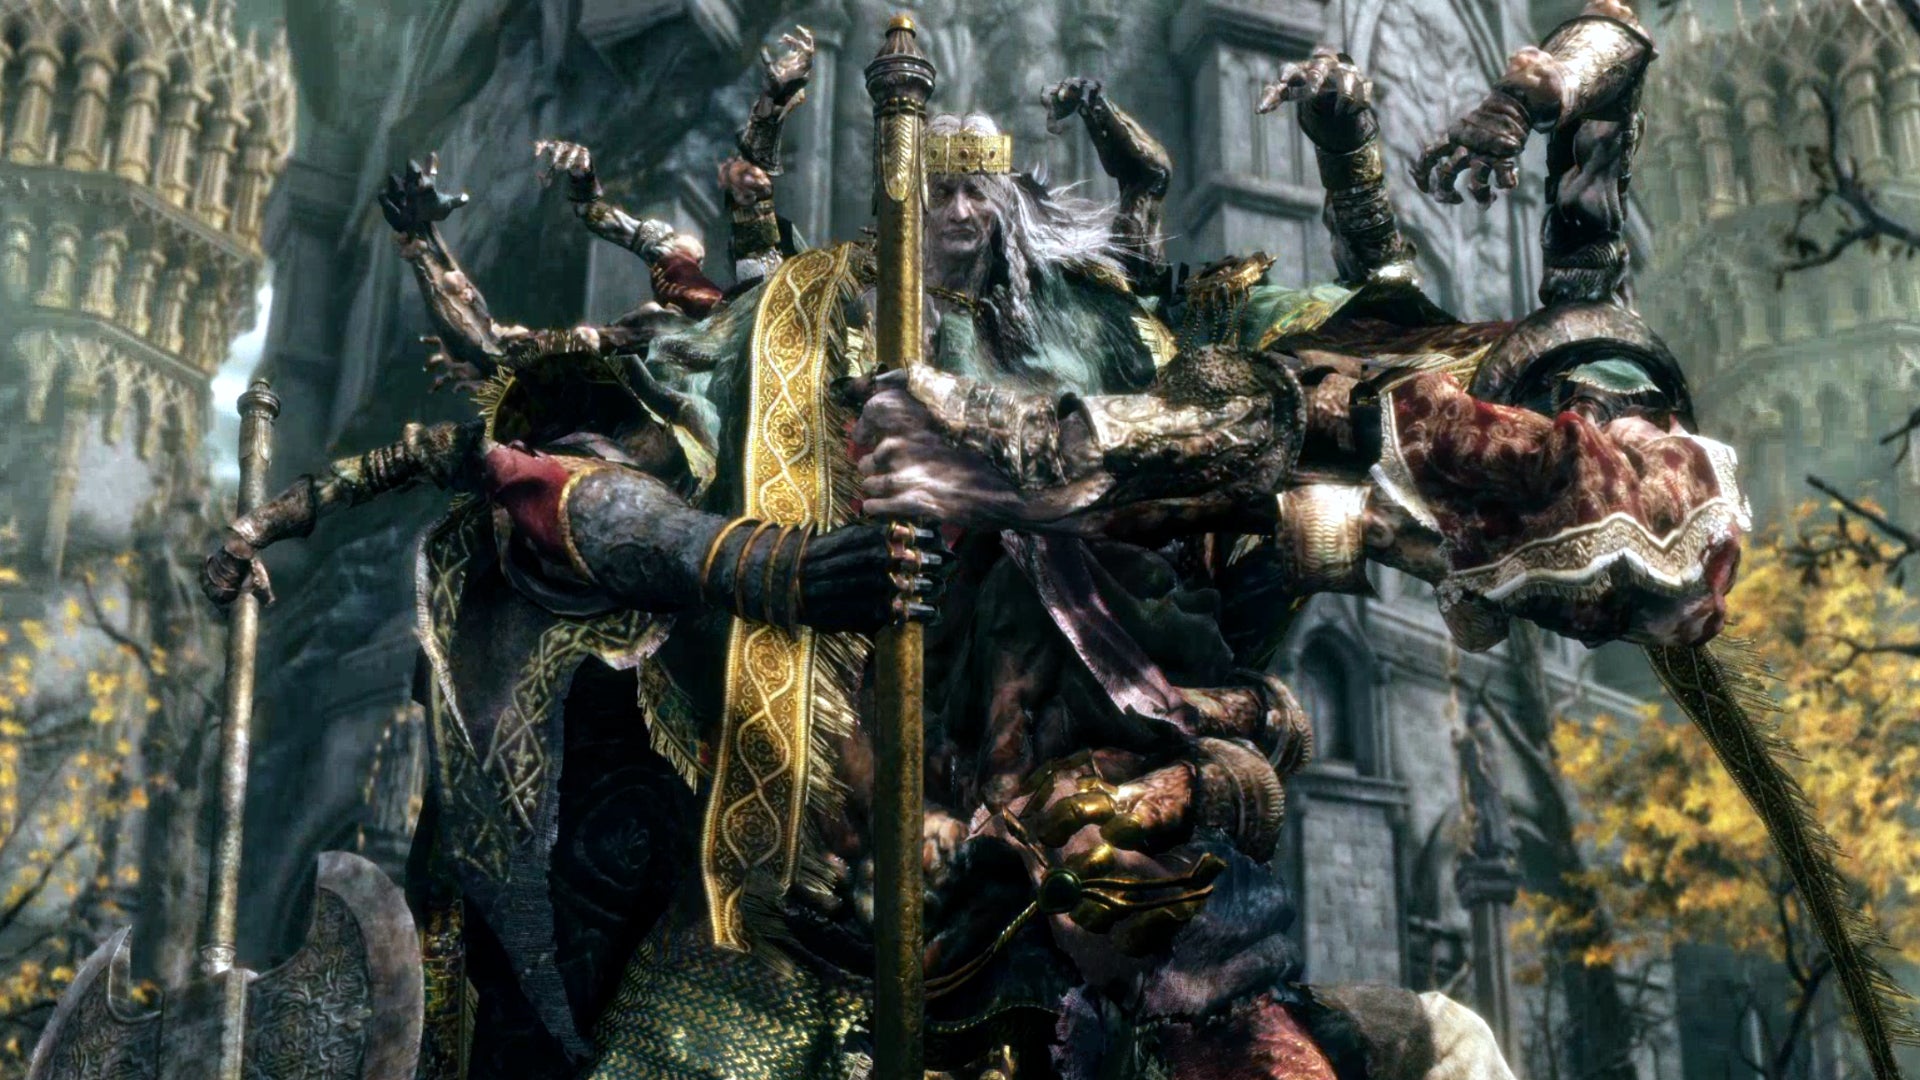
Image credit:Rock Paper Shotgun/Bandai Namco
Godrick The Grafted , the lord of Stormveil Castle, tends to be the first Shardbearer most players encounter and defeat in Elden Ring. Strictly speaking it isn’t necessary to defeat Godrick in order to complete Ranni’s quest, but doing so will allow you to progress Rogier’s personal questline , which ties into Ranni’s quest in quite satisfying ways.
5. Find Rogier’s bloodstain beneath Stormveil Castle
A well-concealed path in Stormveil Castle will lead you to a hidden area beneath the castle containing several rats and an Ulcerated Tree Spirit . Just beyond the Ulcerated Tree Spirit, you’ll find the iconic Prince Of Death’s face - a grotesque and gigantic black corpse face with enormous lore implications.
Beside the Prince Of Death corpse is a bloodstain. Interact with the bloodstain , and you’ll see a bloody afterimage of Sorcerer Rogier getting impaled by Death Blight.
6. Speak to Rogier in the Roundtable Hold
Defeating Godrick prompts Rogier to appear on the balcony in the Roundtable Hold , and finding Rogier’s bloodstain will unlock an important bit of dialogue. Rogier will explain more about the corpse, and its relation to Godwyn’s death and the Night Of Black Knives - an event which has always fascinated Rogier.
“The misshapen corpse under Stormveil? That is a sacred relic. Of the black knives plot. As that famed night of assassination is known. It happened during the Golden Age of the Erdtree, long before the shattering of the Elden Ring. Someone stole a fragment of the Rune of Death from Maliketh, the Black Blade. And on a bitter night, murdered Godwyn the Golden. That was the first recorded Death of a demigod in all history. And it became the catalyst. Soon, the Elden Ring was smashed, and thus sprang forth the war known as the Shattering. I once wished to become a scholar, you see. I’ve spent many an hour scouring the archives for knowledge of that fateful plot.”
7. Speak to Fia to obtain the Knifeprint Clue

Image credit:Rock Paper Shotgun/Bandai Namco
Next you should speak with Fia in the Roundtable Hold, and let her hold you. You may need to do this on a couple of different occasions first, but after speaking to Rogier about the corpse under Stormveil, you’ll get the option to select the “Do you know?…” dialogue option while she holds you.
Fia will then tell you about Rogier and his obsession with the Black Knives plot. She’ll give you a Knifeprint Clue item, which is a map that points to a particular dungeon in Liurnia.
“My dear… Have you ever heard of black knifeprints? Dear Rogier likes to talk of it when abed. The ancient plot, in which the first of the Demigods was slain. The black knives wielded by the assassins who committed the act, along with the impressions they made, somehow hide the truth of the conspiracy. These grand affairs are hardly my forté… But dear Rogier began to weep as he spoke… In truth I’ve heard tell from someone else, about the black knifeprints that fascinate dear Rogier so. But it wouldn’t be right to give this to him, stuck as he is in the Roundtable Hold. Perhaps you could make use of it?”
8. Obtain the Black Knifeprint from Liurnia’s Black Knife Catacombs
Fia’s Knifeprint Clue map points to the Black Knife Catacombs in northeast Liurnia , so the next step is to head there and clear the dungeon. It’s a seemingly simple skeleton-filled dungeon but has more going on there than meets the eye.
The actual boss of the Black Knife Catacombs is a Cemetary Shade, who can be accessed by riding the final of the three large guillotines up to a higher ledge. But if you keep going down the main path and then hit the wall at the end of the final room, you’ll reveal a hidden boss battle against a Black Knife Assassin . Once you’ve killed it, you’ll obtain a unique Black Knifeprint item.
9. Give the Black Knifeprint to Rogier
Return to the Roundtable Hold, and speak with Rogier. You can now give him the Black Knifeprint , which will interest him very much, as it’s evidence of the person behind the Black Knives plot. Rogier asks you at this point to leave the Black Knifeprint with him for a time so that he can study it further.
10. Rest and speak to Rogier again about the Black Knifeprint
Reload the Roundtable Hold by resting at the central Site Of Grace (or just coming back later on), and speak to Rogier again. By this time he’ll have discovered a very important truth, and here is where his quest intertwines with Ranni’s. It turns out that Ranni was the one who imbued all the Black Knives with the Rune Of Destined Death, allowing them to slay demigods. It was Ranni who orchestrated the Night Of Black Knives and had her step-brother, Godwyn The Golden, murdered.
“Ahh, hello. I was hoping to see you. My examination is complete. Here’s the knifeprint back, with my thanks. Now, I have a fairly good idea who performed the rite upon the blade. The person who orchestrated the Night of the Black Knives. Lunar Princess Ranni. One of the children born to King Consort Radagon and his first wife, Rennala. Demigod and sister to General Radahn and Praetor Rykard. Hers was the name I discovered in the imprint.”
Rogier wants further details: he wants you, somehow, to procure the cursemark of Destined Death for him, which he thinks will be somewhere upon Ranni’s flesh. You can ask him about Ranni’s location, and he’ll impart that she may well be in the large manor in northern Liurnia - Caria Manor. That’s your next stop.
“Truly, you have my thanks. But, if I might be so bold, I would also like to ask something more of you. If Ranni truly is the one who plotted that fateful night, then she should bear the cursemark of Destined Death somewhere upon her flesh. I would like you to procure it for me. And then all will be laid bare. I will have the answers I have sought for so long.”
11. Meet Smithing-Master Iji beyond the Kingsrealm Ruins in Liurnia
There is only one route up to Caria Manor - via the western edge of Liurnia Of The Lakes . Head up this edge and you’ll eventually come across the Kingsrealm Ruins. The path ends at a blank wall inside the ruins. To progress, attack the wall to reveal a hidden way out , and a path which leads all the way to Caria Manor.
Immediately north of the Kingsrealm Ruins is the Road To The Manor Site Of Grace. Sitting nearby you can find a giant called Smithing-Master Iji . You can speak with him at this point, and while it is not necessary, he is a character who will crop up later in Ranni’s quest, so it’s good to get to know him now.
12. Defeat Royal Knight Loretta at the end of Caria Manor in north Liurnia
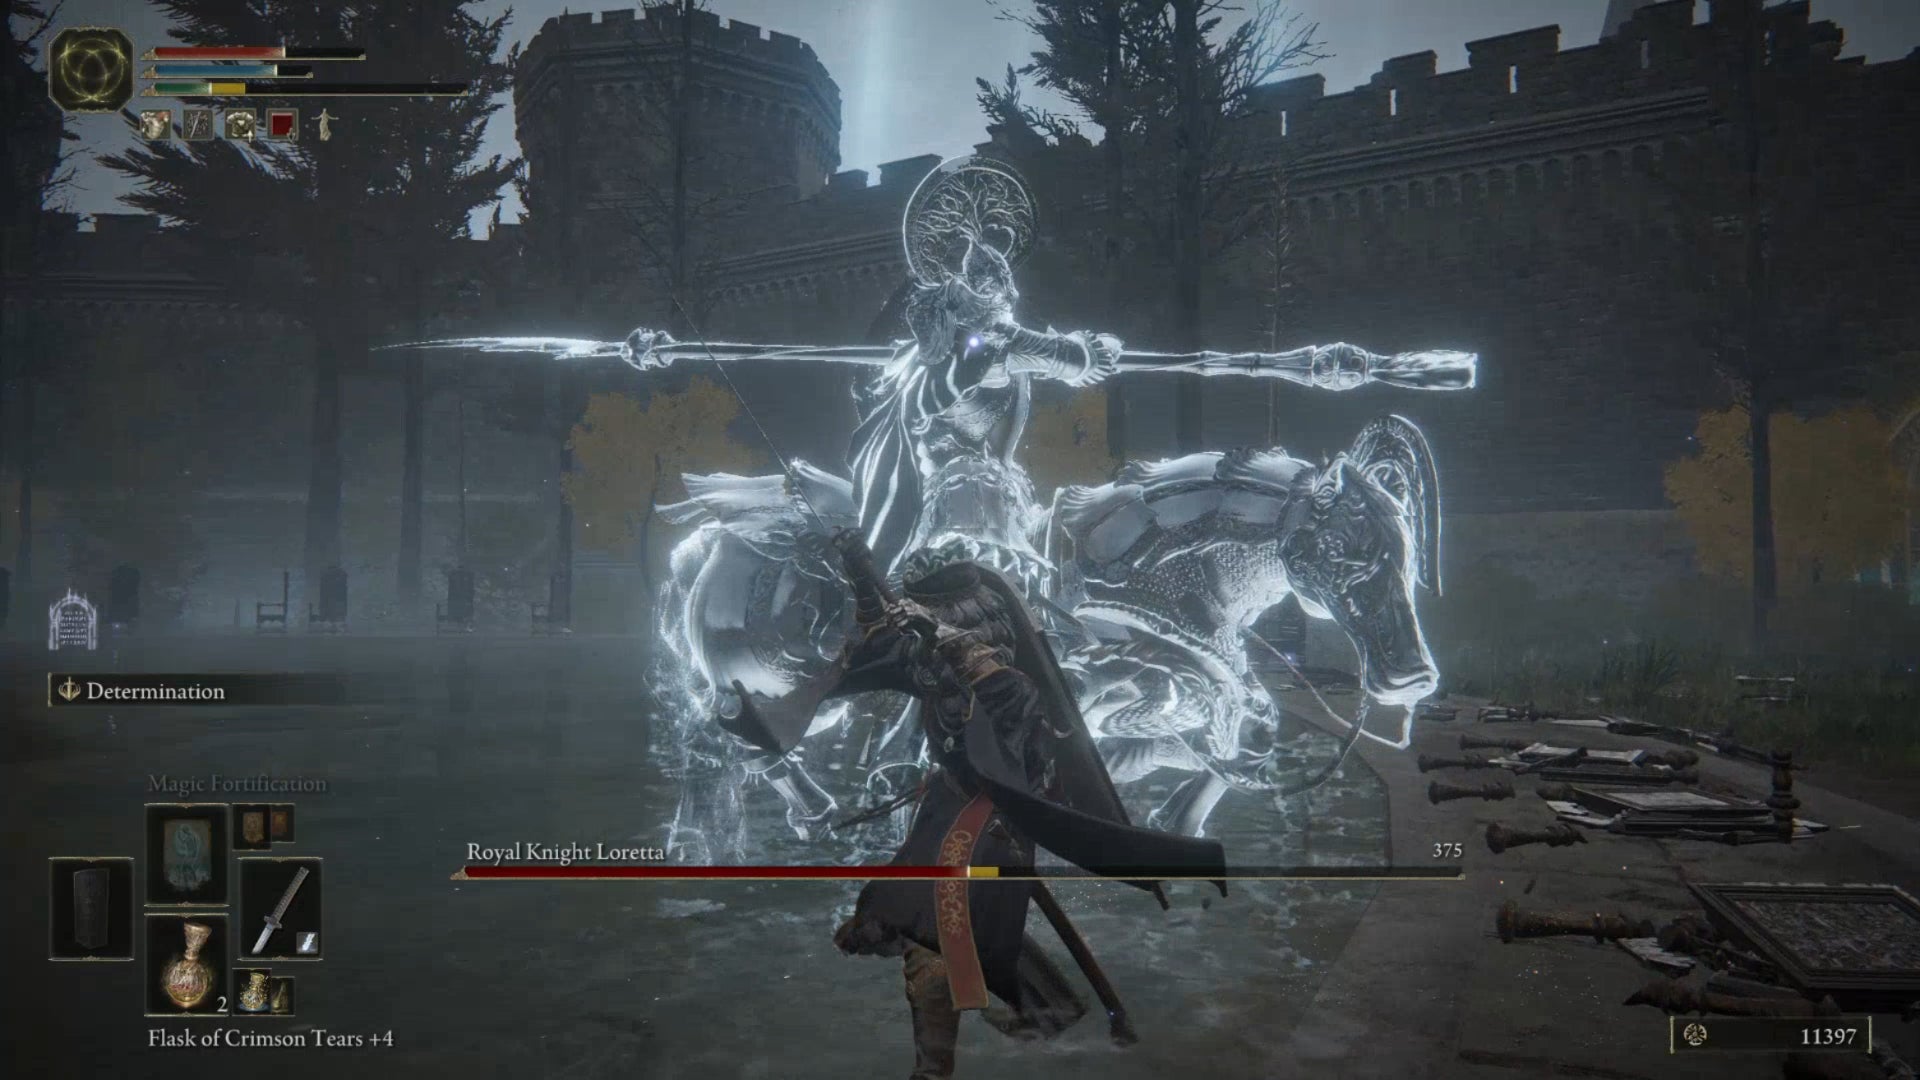
Image credit:Rock Paper Shotgun/Bandai Namco
Next, head north to Caria Manor , and fight your way through the various Fingercreepers, Sorcerers, and Direwolves to the Royal Moongazing Grounds at the very top. Here you’ll need to defeat the Caria Manor boss: Royal Knight Loretta .
Loretta is essentially a Night’s Cavalry boss with access to a few different powerful (but dodgeable) sorceries which she likes to spam. Take your time, avoid her swipes, and prepare to dodge her giant magical greatbow shots. She likely won’t give you too much trouble, as long as you’re not underlevelled (I’d put Caria Manor on a similar difficulty level to Raya Lucaria itself).
13. Meet Ranni in Ranni’s Rise behind Caria Manor
Once Loretta is defeated, head through the exit and you’ll emerge behind Caria Manor. This is the only way to access this region and the three towers within, called the Three Sisters . Head to Ranni’s Rise, which is the central of the three towers. It’s guarded by Glintstone Dragon Adula - you can either run past it, or attack it, but if you attack it then it will simply disappear at half-health.
Head up to the top of Ranni’s Rise , and you’ll finally meet the legendary witch herself. If you’ve followed Rogier’s questline up to this point (as per above), then she’ll greet you coolly, making it clear she knows why you’re here, and she’ll tell you that the Cursemark Of Death is no longer upon her, but hidden elsewhere. If you have skipped Rogier’s steps, then she’ll skip straight ahead to the next meeting, where she asks if you wish to serve her.
14. Speak to Rogier again about Ranni
Once you’ve met with Ranni at her tower, you can return to Rogier and let him know that you found her. He’ll suggest that you serve Ranni in order to get close enough to her to obtain the location of the Cursemark Of Death for him.
15. Speak to Ranni in Ranni’s Rise and agree to serve her
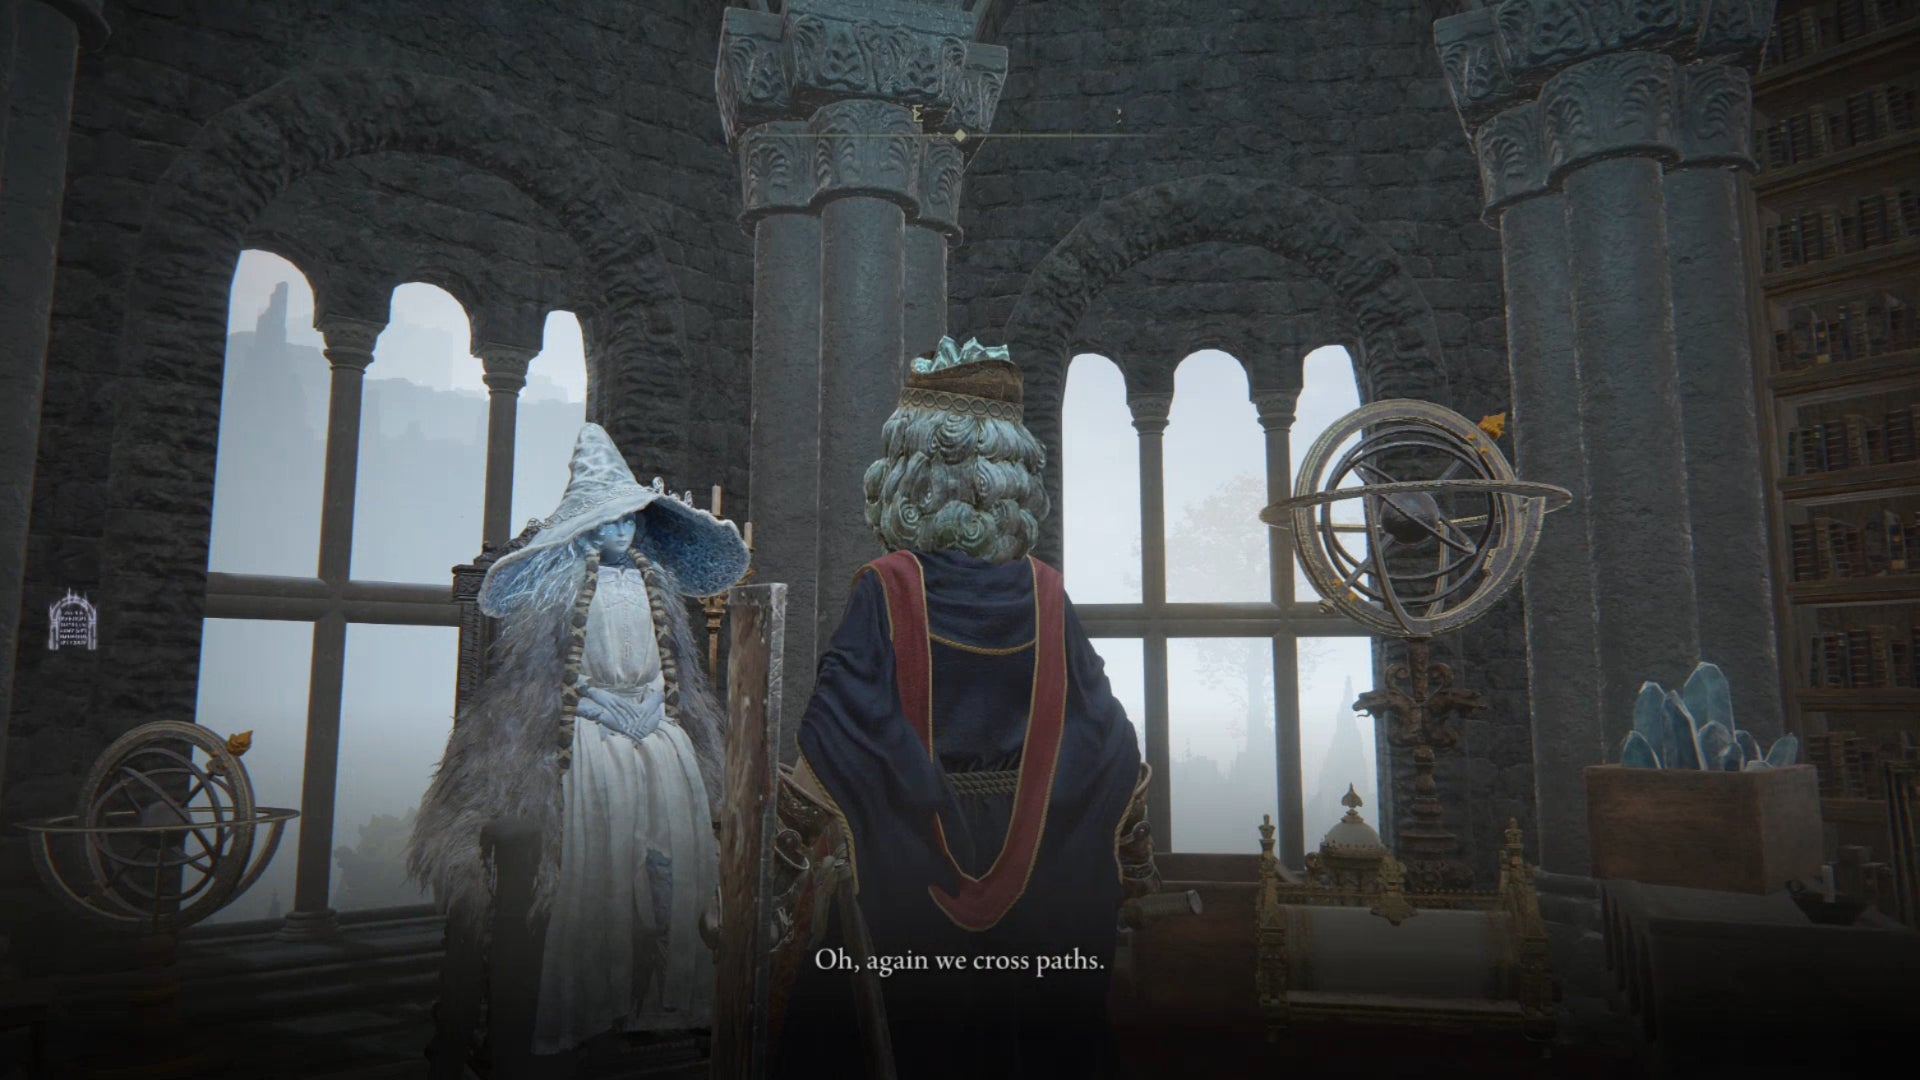
Image credit:Rock Paper Shotgun/Bandai Namco
Return to Ranni at the top of Ranni’s Rise, and pledge yourself to her service . Technically this is the first truly essential step in her entire questline, although if you skip all the aforementioned steps then entering her service upon your first meeting with her can seem quite random.
If you have returned to her following Rogier’s advice, Ranni will shrewdly acknowledge that she can see right through your scheme - but lets you enter her service anyway. Presumably because she knows your chances of getting one over on her are pretty damn slim.
“There is, in my service, a half-wolven warrior by the name of Blaidd. I would have thee join him in searching for the hidden treasure of Nokron, the Eternal City. I have called for Blaidd to greet thee below. Take from him the particulars.”
16. Speak to Blaidd, Iji, and Seluvis in Ranni’s Rise
Once you’ve become one of Ranni’s “vassals”, her first task for you is to go downstairs in her tower and speak with her other followers - two of whom you’ve already met. Blaidd, Iji, and a sorcerer named Preceptor Seluvis are all available in ethereal form to converse with, and learn a bit more about them and how they fit into Ranni’s grand scheme.
17. Speak to Blaidd in Siofra River beneath the Mistwood
The next step is to meet with Blaidd properly and help him with his current quest, which is to try and locate the underground Eternal City Of Nokron - specifically a treasure within the city that Ranni needs. Blaidd can be found in Siofra River , the underground area beneath Limgrave and Caelid which is accessible via the Siofra River Well in the Mistwood.
Progress through Siofra River until you reach the Siofra River Bank Site Of Grace. After that, you’ll find Blaidd on the cliff edge a short distance to the northeast. Speak with him and he’ll reveal he’s at a dead end with his quest - he can see Nokron above him, but can’t figure out how to get there. He suggests you speak with the sorcerer Seluvis , who might know more - but there are actually two ways to progress beyond this point, so let’s go over both options below.
18. Option A: Speak to Seluvis (Seluvis’s Rise), then Sellen (Waypoint Ruins)
Your aim now is to figure out how to reach Nokron. The obvious path is to do as Blaidd suggests, and speak with Preceptor Seluvis . Seluvis can be found in the tower next to Ranni’s Rise on the west side. He’s a piece of work, and treats you with contempt, but tells you that he asked his acquaintance, the Sorceress Sellen , to look into the matter of Nokron long ago. He’ll write you a letter of introduction to bring to Sellen.
You can find Sellen at the Waypoint Ruins in Limgrave , in the cellar behind a Pumpkin Head miniboss. Introduce yourself to her if you haven’t already, and then give her Seluvis’s letter of introduction. She’ll then explain to you that General Radahn is keeping the stars in stasis, and thus, Ranni’s destiny (her goal). So, to reach Nokron, Radahn must first be defeated .
“The stars alter the fate of the Carian royal family. And the fate of your mistress, Ranni. But long ago, General Radahn challenged the swirling constellations, and in a crushing victory, arrested their cycles. Now, he is the force that repulses the stars. If General Radahn were to die, the stars would resume their movement. And so, too, would Ranni’s destiny.”
19. Option B: Speak to Jerren (Redmane Castle), then Iji (Kingsrealm Ruins)
The other, less obvious option to figure out the mystery of Nokron is to head straight to Redmane Castle in the southeast corner of Caelid, and speak with Jerren . As long as you’ve already spoken with Iji before this meeting, you’ll be able to talk to Jerren about Iji - and he’ll ask you that the next time you see Iji, you pass on the rather cryptic message that “the festival of Radahn will surely set Ranni’s fate into motion”.
Travel back to Liurnia and speak with Iji at the Kingsrealm Ruins. Pass on Jerren’s message, and Iji will put two and two together and realise the same thing Sorceress Sellen did: that Radahn must be killed in order to progress Ranni’s quest.
“Oh, no, wait… How did I not see it before? I ought to retire as war counsellor for such a gross oversight! Let me explain. The fate of the Carian royal family is guided by the stars. As is the fate of Lady Ranni, first heir in the Carian royal line. But General Radahn is the conqueror of the stars. Who stood up to the swirling constellations, halting their movement in a smashing victory. And so, if General Radahn were defeated, the stars would once again resume their movement. As would Lady Ranni’s destiny. Perhaps, even, revealing the elusive path that leads to Nokron.”
20. Speak to Blaidd again in Siofra River about your discoveries
Having completed either of the above options, you can now optionally return to Blaidd in Siofra River to tell him what you’ve discovered. He’ll be waiting on the cliffside exactly where you last saw him.
Tell Blaidd what you’ve found out about Radahn, and he’ll surmise that you should both meet at Redmane Castle to face Radahn, for the purpose of advancing Ranni’s destiny.
21. Speak with Jerren at Redmane Castle to unlock the Radahn fight
Now you can head straight to Redmane Castle, which will have gained several new guests due to the commencement of the Radahn Festival . Feel free to speak with all the guests (including your ally Blaidd once more).
When you’re ready, you can speak with Jerren to unlock the ability to face Radahn at least.
22. Defeat Starscourge Radahn in Redmane Castle
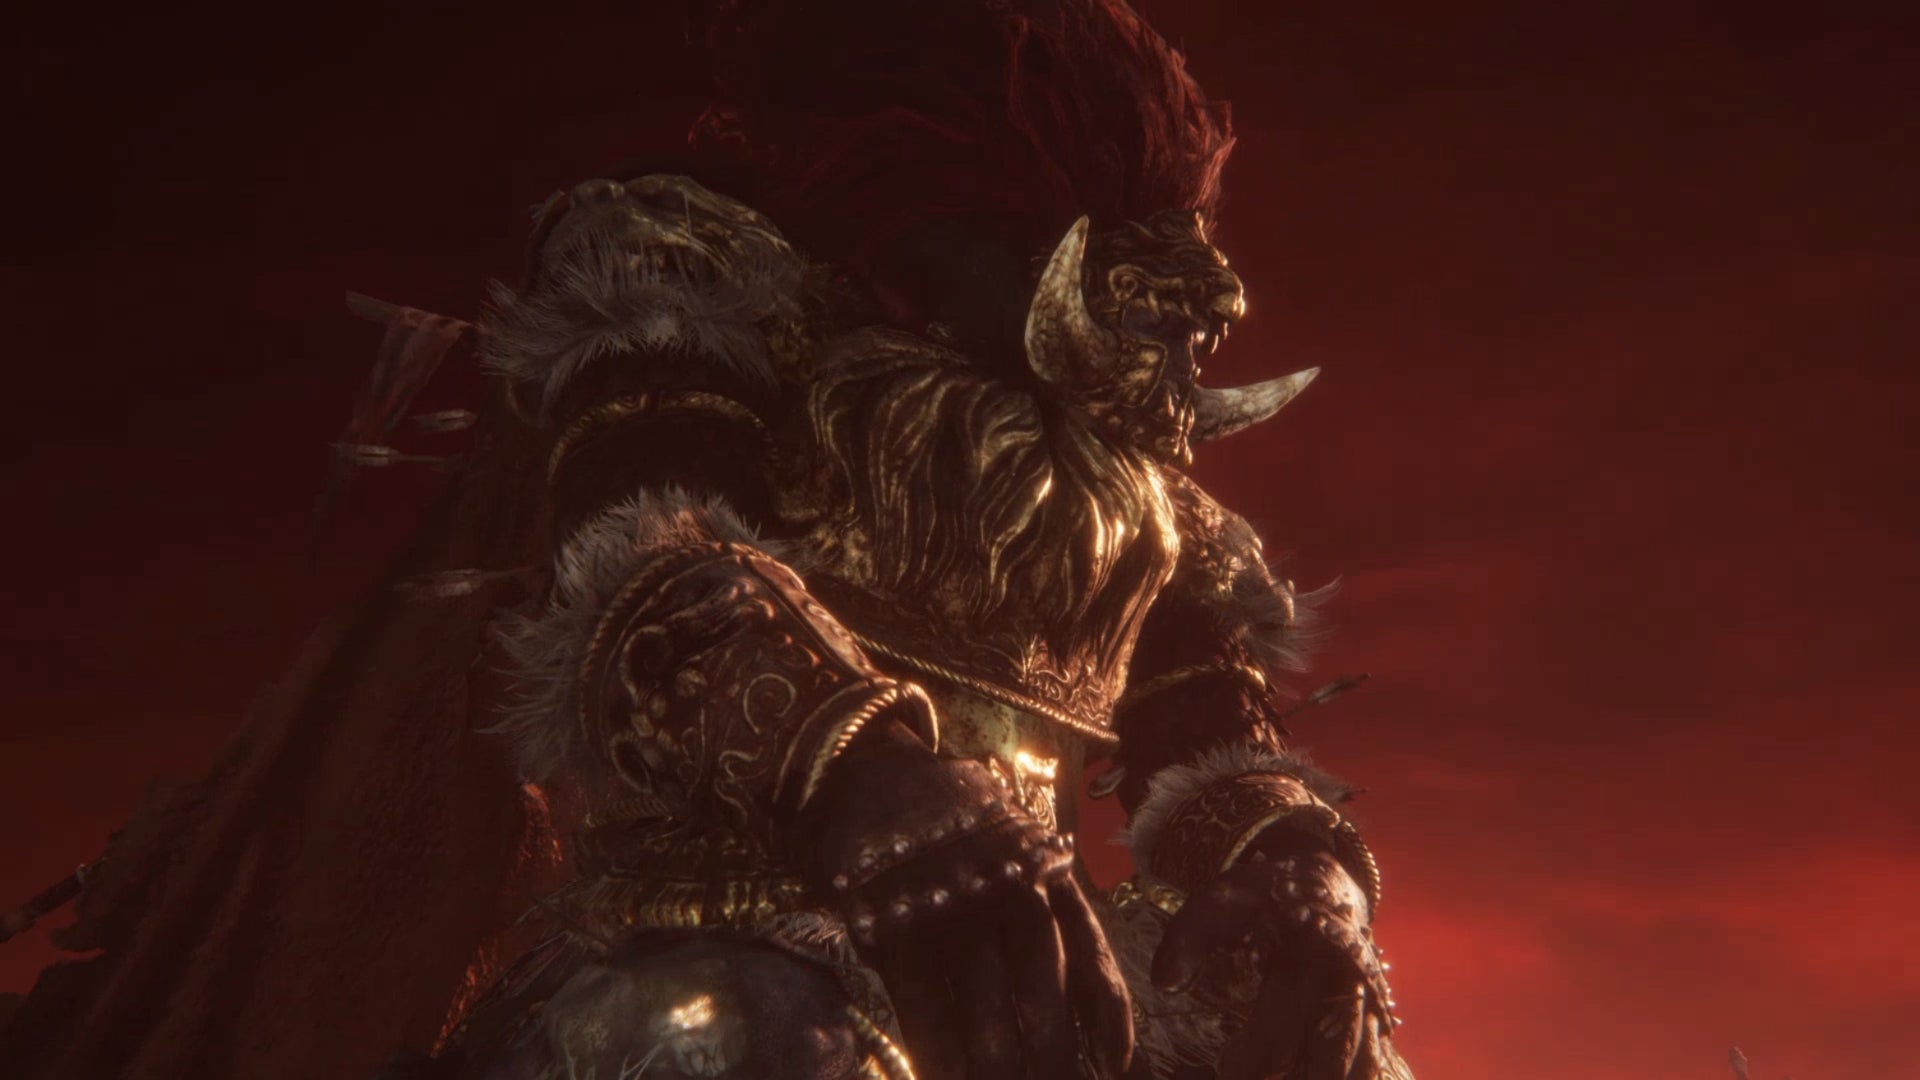
Image credit:Rock Paper Shotgun/Bandai Namco
Ranni’s questline cannot be progressed beyond this point until you have defeated Starscourge Radahn . The bad news is he’s rather a challenging fight. The good news is that it’s a memorable, iconic fight, so just enjoy the sheer spectacle of challenging one of the mightiest demigods in Elden Ring.
When you finally defeat Radahn, a short cutscene will play which shows meteors starting to fall from the sky after Radahn’s death - including a particularly large one which lands somewhere in the vicinity of Limgrave .
23. Speak with Blaidd after the fight
Rest at the Starscourge Radahn Site Of Grace , and Blaidd will appear near the Grace. You can speak with him again for a bit of extra dialogue about the fight, and the meteorite that you both witnessed. He then urges you to head to the location of the crater and meet him in Nokron.
24. Find Blaidd trapped in the Forlorn Hound Evergaol
An interesting twist of fate now befalls our friend Blaidd. Head to the Forlorn Hound Evergaol in south Limgrave, where you (theoretically) defeated Bloodhound Knight Darriwil. Standing atop the Evergaol you can interact with the entrance to speak with Blaidd, who’s been trapped inside.
“Oh, it’s you… It’s me, Blaidd. Old Iji trapped me here. Told me I’d bring nought but bale to Lady Ranni. But there’s no chance that could happen. I’m part of her being. Her very shadow… I thought old Iji knew as much… Honestly, I don’t know what’s going on anymore…”
Blaidd will reveal that it was in fact his (and your) ally Iji who trapped him, and Blaidd has no idea why. You can choose either to let him out or keep him trapped inside - either way it won’t affect his (or Ranni’s) quest in any way, except for some different dialogue. If you release him, he’ll thank you and say he’s going to find Ranni to make sure she’s safe. If you don’t release him, he’ll simply wonder where it all went wrong.
25. Speak to Iji about Blaidd’s predicament
If you’ve spoken with Blaidd in the Evergaol, then you can go to Iji to see why he trapped Blaidd there . You can do this whether or not you freed Blaidd.
Iji will explain that, as Ranni’s “Shadow”, Blaidd will turn on Ranni the moment Ranni raises a hand against the Two Fingers (which is exactly what Ranni intends to do). Hence, Iji’s imprisonment of Blaidd to prevent that twist of fate.
“I presume you’ve spoken with Blaidd? Very well. There is something you should know. The Two Fingers gave Blaidd to Lady Ranni, as a faithful follower. Her very shadow, incapable of treachery. But if Lady Ranni, as an Empyrean, resists being an instrument of the Two Fingers, the shadow will go mad, transforming from a follower into a horrid curse. But such is his destiny. In such matters, Blaidd’s own thoughts hold no weight. It pains me so, but he must be neutralised. For Lady Ranni’s sake.”
26. Enter Nokron via the new crater in Limgrave
With Radahn dealt with, you can now head to the south of the Mistwood for your next destination. You won’t have to search for long - the landscape has been substantially altered by a massive new crater in the ground. This is your entrance to Nokron.
Carefully parkour your way down the edge of the crater in a spiral fashion until you reach the region of Nokron itself.
27. Obtain the Fingerslayer Blade from Nokron
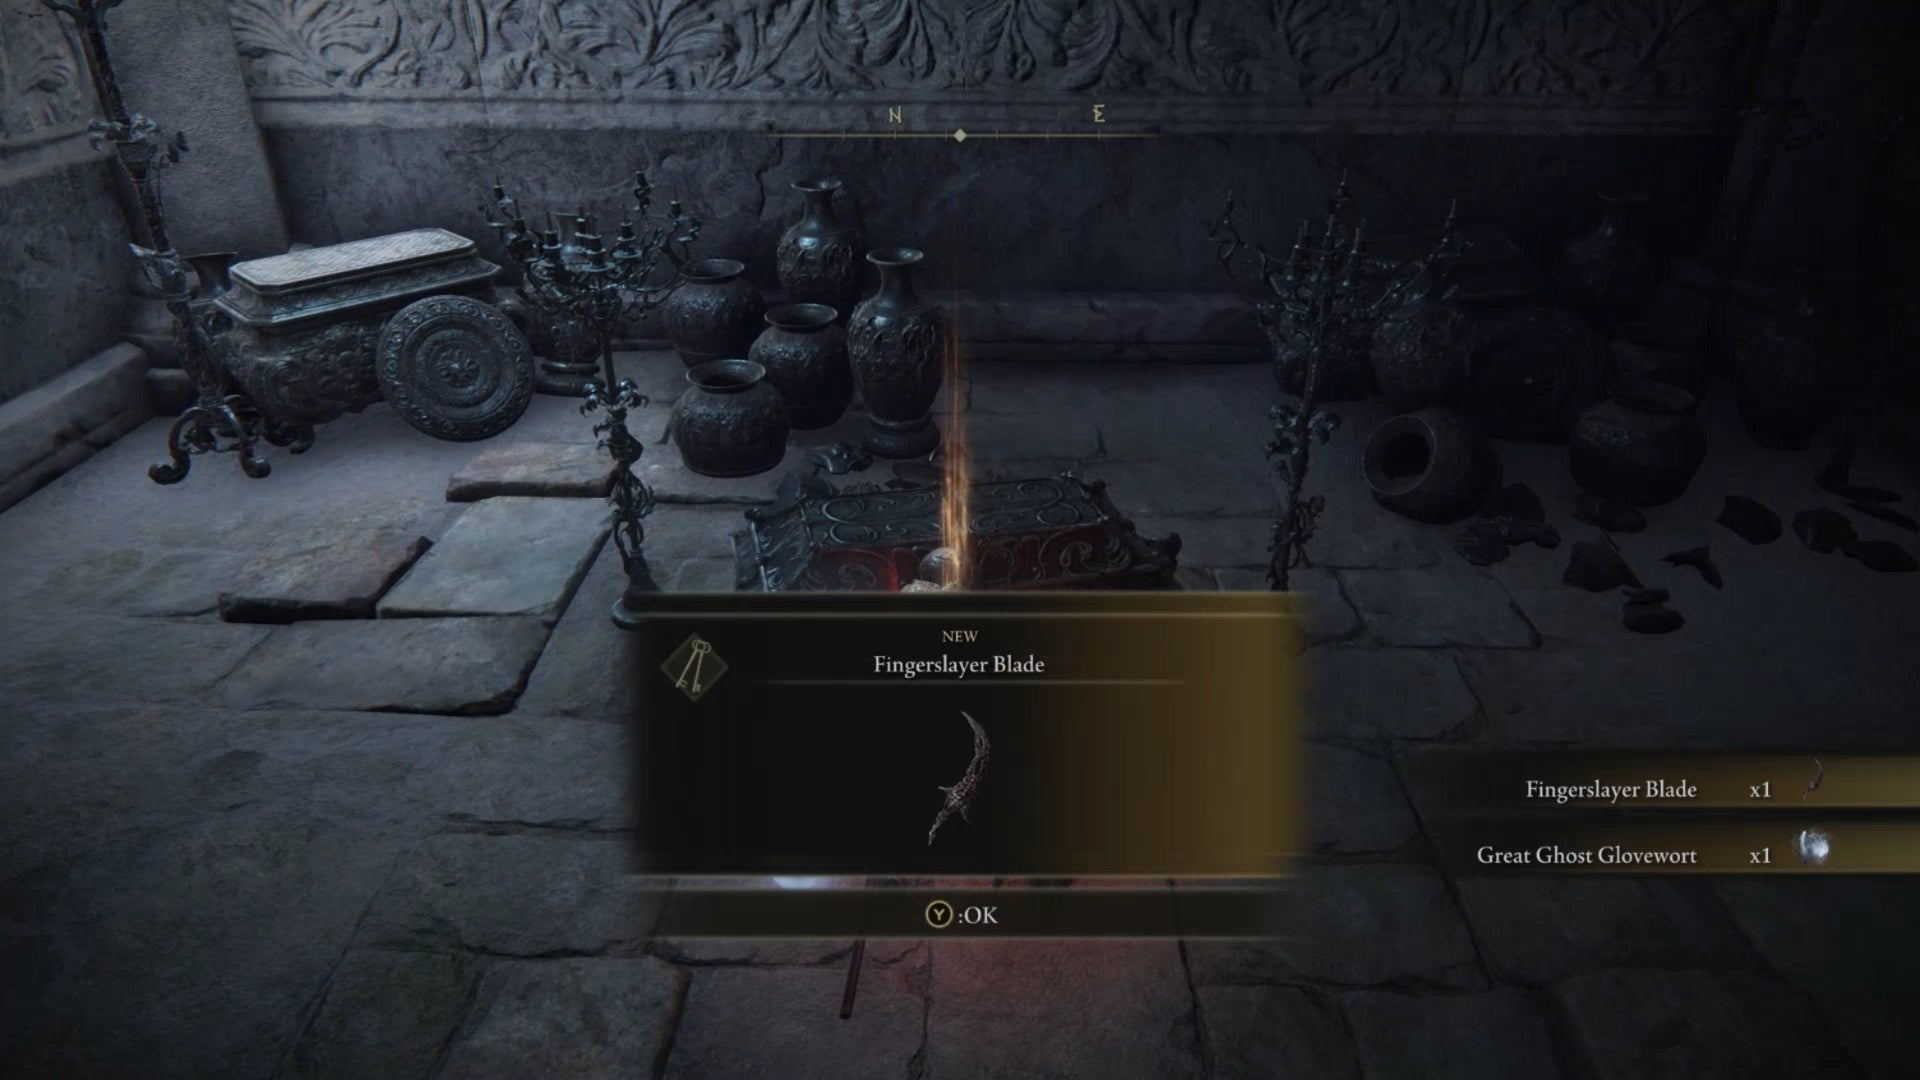
Image credit:Rock Paper Shotgun/Bandai Namco
The whole purpose of this has been to retrieve the treasure of Nokron for Ranni. Progress far enough through Nokron (including a couple of parkour sections across the rooftops of the city), and you’ll eventually reach a massive skeletal statue . At the foot of this statue is a chest containing the treasure in question: the Fingerslayer Blade .
If you’re confused about where to go: you must head past the Mimic Tear boss until you reach the Ancestral Woods Site Of Grace; then jump off the cliff next to the Site Of Grace and onto the nearby building ledge. Follow the parkour path down into Night’s Sacred Ground. From here, it’s a fairly linear path to the skeletal statue and the Fingerslayer Blade.
28. Deliver the Fingerslayer Blade to Ranni
The next step is to simply return to Ranni at the top of Ranni’s Rise in Liurnia, and deliver the Fingerslayer Blade to her. She’ll be pleased with you, and seemingly free you from her service, saying she must embark now on a journey and needs you no longer.
Ranni will also reward your good work with a curious unique item: the Carian Inverted Statue . This isn’t vital to the rest of Ranni’s quest, but we’ll explain how to use it in the optional next step.
29. Use the Carian Inverted Statue in the Study Hall

Image credit:Rock Paper Shotgun/Bandai Namco
This step doesn’t progress Ranni’s quest, but seeing as Ranni just gave you the Carian Inverted Statue, you might as well see what it unlocks at this point!
The Carian Inverted Statue can be placed atop the pedestal in the Carian Study Hall in east Liurnia. This will invert the entire Study Hall interior, allowing you reach a previously inaccessible elevator that takes you to the Divine Tower Of Liurnia . Beware the Godskin Noble guarding the bridge - if you haven’t encountered any Godskins before, they can be a nasty surprise for you.
Unlike the other Divine Towers in Elden Ring, in this one you can’t restore a Great Rune. Instead, at the top you’ll at long last find the Cursemark Of Death , on Ranni’s discarded flesh. It’s rather too late to bring this legendary lore item to Rogier, unfortunately.
30. Speak with Iji about where Ranni has gone
This is one part that confuses a lot of players, because it feels like Ranni’s quest stops here. She’s congratulated you on your task, given you a reward, released you from service, and disappeared. But there’s a lot more still to come!
To get an inkling of what to do next, you can optionally speak with Iji, who is found as always just north of the Kingsrealm Ruins on the road up to Caria Manor. He will give you an important piece of information about what to do next.
“Have you heard? Lady Ranni has departed on her journey. Along the dark path of the Empyrean, from Renna’s Rise, as she calls it. It would not have been possible without you. As Lady Ranni’s war counselor, and moreover, her childhood warden, I express my deepest gratitude. You, and only you, were Lady Ranni’s true champion.”
31. Use the teleporter at the top of Renna’s Rise to reach Ainsel River

Image credit:Rock Paper Shotgun/Bandai Namco
Iji’s words make the next step clear. To continue Ranni’s questline, you must now head to the eastern tower of the Three Sisters, known as “Renna’s Rise” (not Ranni’s Rise). Previously this tower was closed to you, but having delivered the Fingerslayer Blade to Ranni, the tower is now open.
Head to the top of Renna’s Rise, and you’ll find a teleporter. Interact with the teleporter , and it will transport you to an area in the underground region of Ainsel River, deep below Liurnia.
32. Pick up the Miniature Ranni doll in the river
In front of you when you arrive in Ainsel River, there should be a loot drop on a coffin. Loot it and you’ll find a Miniature Ranni doll, which is apparently cool to the touch. How enigmatic.
33. Rest at the Ainsel River Main Site Of Grace and speak to Miniature Ranni

Image credit:Rock Paper Shotgun/Bandai Namco
A very short walk further down Ainsel River will take you to the Ainsel River Main Site Of Grace. While resting at this Site Of Grace, you’ll see a new option to “Talk to miniature Ranni” .
At first it will not respond, but keep attempting to speak to it and it’ll eventually deign to speak to you. As it turns out, the doll was a disguise, and you actually are speaking to Ranni herself. Exhaust her dialogue, and she’ll set you on another quest: to slay the Baleful Shadow down here in the Ainsel River and Nokstella.
34. Rest at the Nokstella, Eternal City Site Of Grace and speak to Miniature Ranni
Follow the path along Ainsel River and you’ll soon enter Nokstella. Rest at the first Site Of Grace you come across ( Nokstella, Eternal City ), and you will again gain the option to speak to the Miniature Ranni doll.
At this point, Ranni will explain a little bit more about her backstory as an Empyrean, and the role this Baleful Shadow plays in everything. It’s some good lore.
“I was once an Empyrean. Of the demigods, only I, Miquella, and Malenia could claim that title. Each of us was chosen by our own Two Fingers, as a candidate to succeed Queen Marika, to become the new god of the coming age. Which is when I received Blaidd. In the form of a vassal tailored for an Empyrean. But I would not acquiesce to the Two Fingers. I stole the Rune of Death, slew mine own Empyrean flesh, casting it away. I would not be controlled by that thing. The Two Fingers and I have been cursing each other ever since… And the Baleful Shadows… are their assassins.”
35. Rest at the Nokstella Waterfall Basin Site Of Grace and speak to Miniature Ranni
The final little private talk you can have with Miniature Ranni is at the Nokstella Waterfall Basin Site Of Grace. At this point, she will continue her tale:
“Even when I turned my back upon the Two Fingers, Blaidd remained my loyal ally. Heh. Though he was created a vassal for an Empyrean, he was a colossal failure, on the part of the Two Fingers. Blaidd, and Iji both… Art willing to give too much to me. Yet they both understand. What lieth beyond the dark path… That I must betray everything, and rid the world of what came before. Ah, should I add thee to the list? Another one, kind of heart. As kind of heart as they.”
36. Defeat the Baleful Shadow in Nokstella to receive the Discarded Palace Key
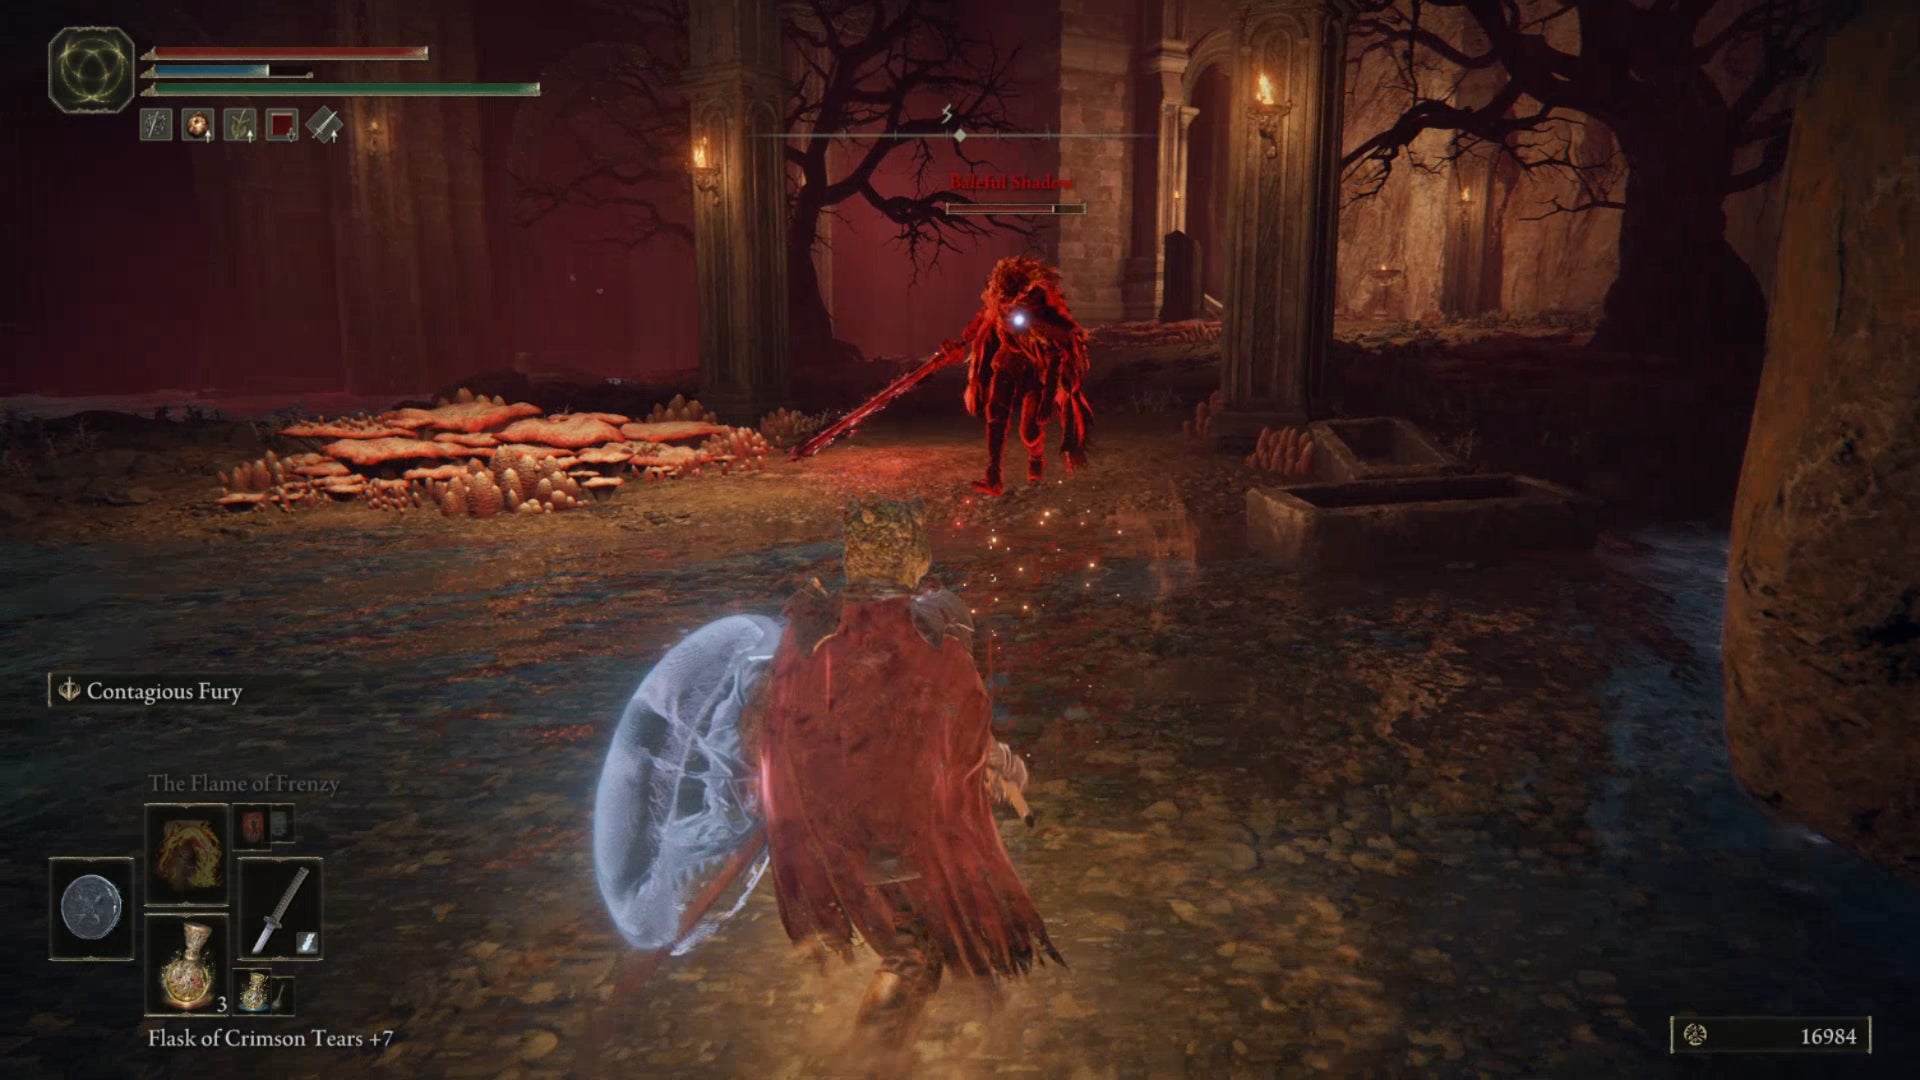
Image credit:Rock Paper Shotgun/Bandai Namco
Progress just a small distance beyond the Nokstella Waterfall Basin, and you’ll at last find the Baleful Shadow invader, which is a Bloodhound Knight enemy like Darriwil. It’s a decently tough adversary depending on your build , but defeat it and Ranni will reward you once more with a Discarded Palace Key .
You may also notice at this point that Ranni appears to say farewell to you. If you inspect the Miniature Ranni doll after this goodbye, it will no longer be cool to the touch, indicating that Ranni’s spirit has fled this doll .
“Beautifully fought. My thanks. ‘Twas more of a challenge than I envisioned. Now I can finally stand before them. This is farewell, my dear. Tell Blaidd, and Iji… I love them.”
However, amazingly, this still is not the end of Ranni’s quest.
37. Defeat Rennala at the Academy Of Raya Lucaria (if you haven’t already)
It’s quite likely that by this point you’ve already defeated Rennala, Queen Of The Full Moon at the end of the Academy Of Raya Lucaria. If you haven’t defeated Rennala, now is the time to do it, because you won’t be able to progress to the very end of Ranni’s quest otherwise.
38. Loot the Dark Moon Ring from the chest in Rennala’s library
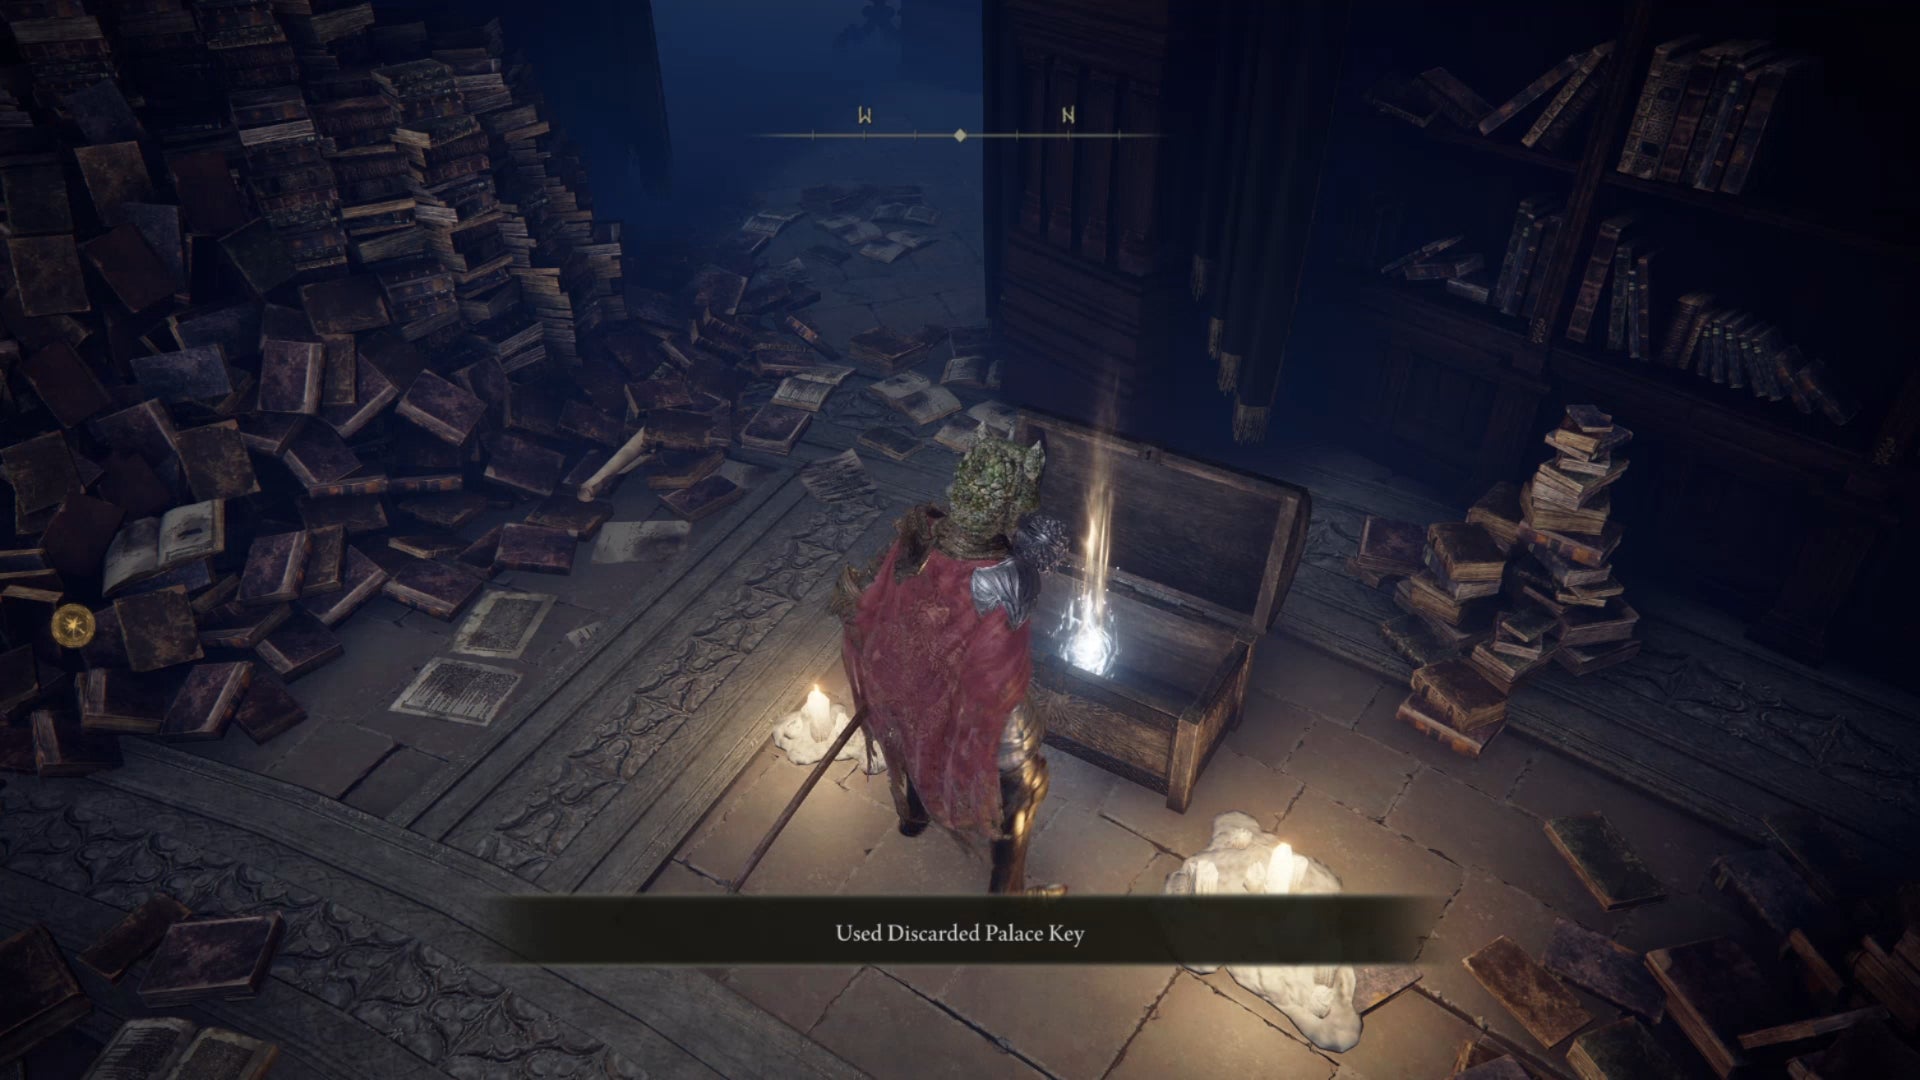
Image credit:Rock Paper Shotgun/Bandai Namco
Assuming that Rennala has been defeated, you should head to the Grand Library (Rennala’s arena), and use the Discarded Palace Key that Ranni gave you to open the locked chest behind Rennala .
Inside the chest you’ll find another key item - the Dark Moon Ring . This Ring will allow you passage to a secret area of Liurnia later on, and you cannot complete Ranni’s questline without it.
39. Head through the Lake of Rot beyond Nokstella
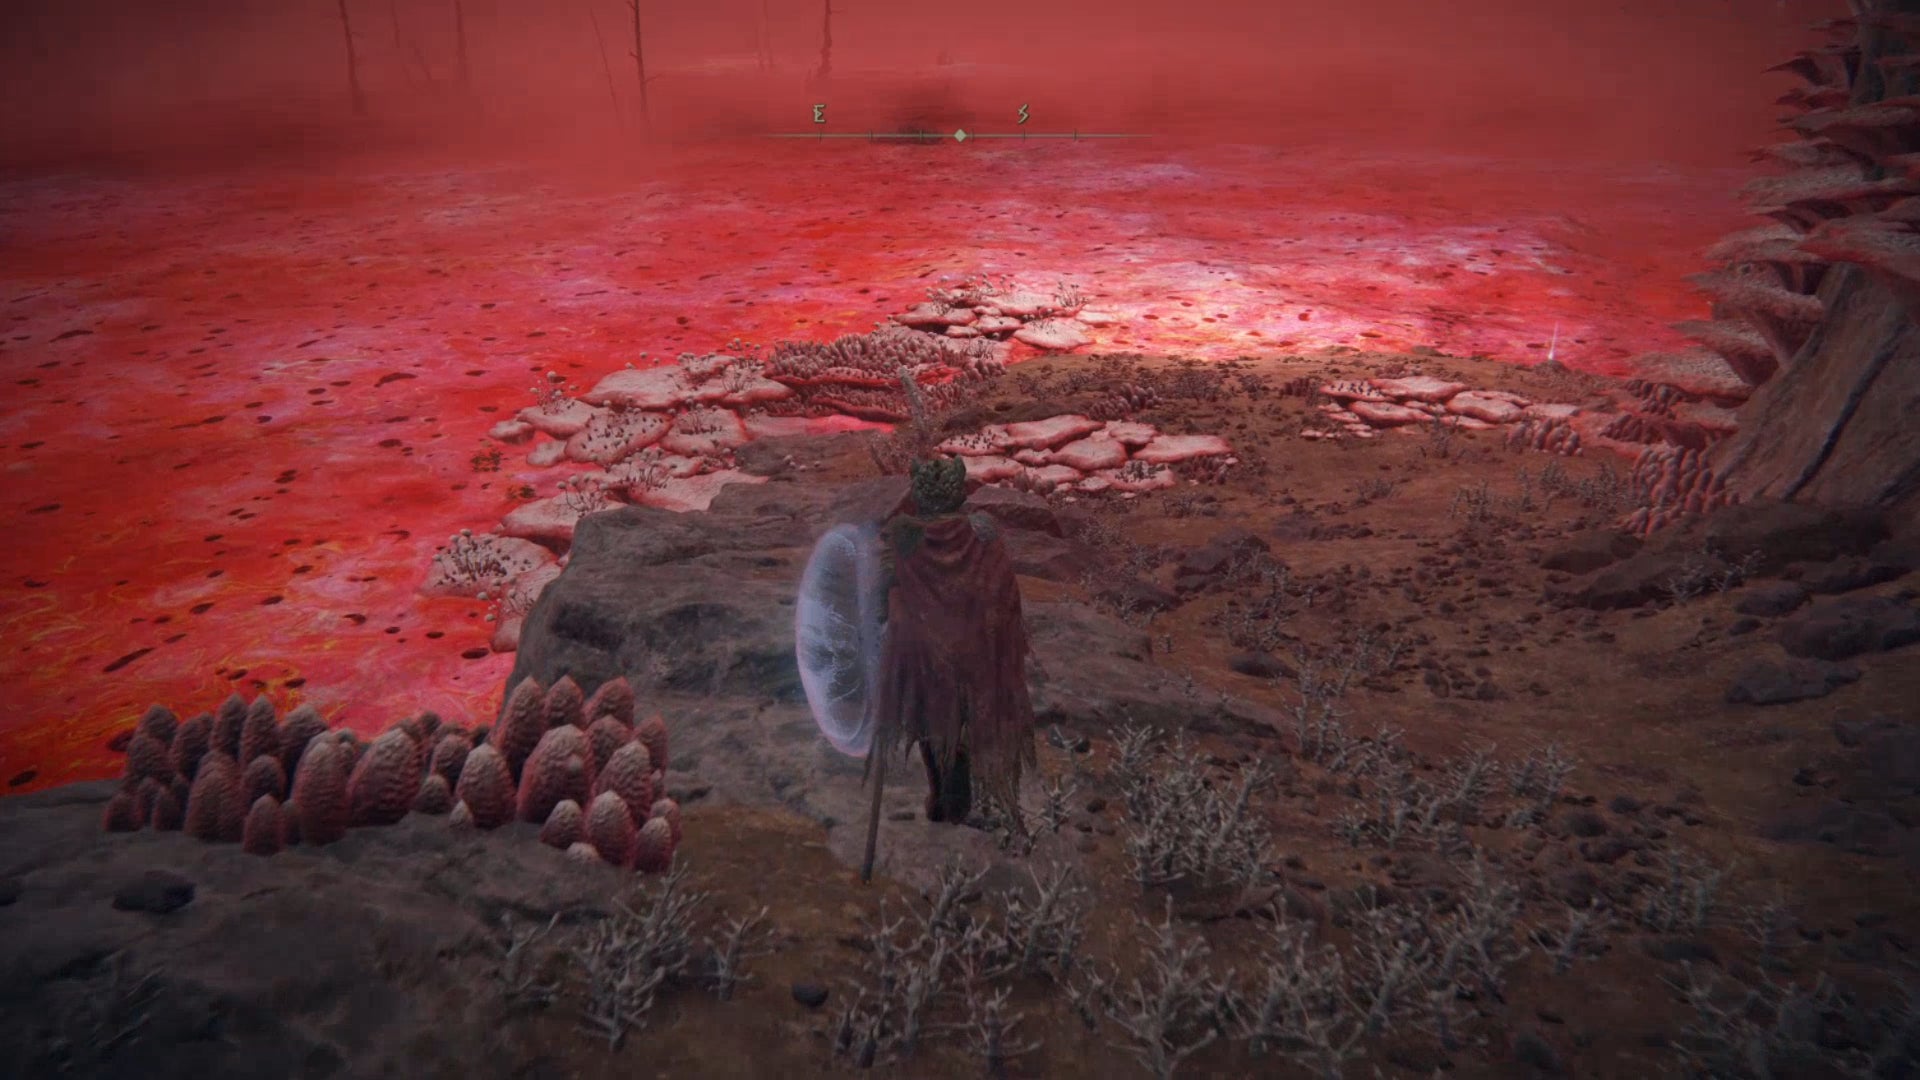
Image credit:Rock Paper Shotgun/Bandai Namco
Fast Travel back to where you defeated the Baleful Shadow in Nokstella. Proceed just a little beyond the arena, and you’ll find an elevator that will take you even further underground. You’ll emerge in a new and infamous region of Elden Ring: the aptly named Lake of Rot . Standing in this lake builds up your Scarlet Rot meter, which is essentially an even powerful form of poison. It’s not a nice place.
You can either just run straight through the Rot and keep curing and healing yourself to stay alive, or you can activate the various pressure plates in the Lake to bring new platforms out of the lake to help you navigate the Rot more easily. There’s a Dragonkin Soldier on the left-hand side partway through the Lake, but it’s not essential to defeat (though it does drop a pretty excellent weapon).
40. Interact with the coffin in the Grand Cloister
At the end of the Lake Of Rot you’ll reach a more built up area called the Grand Cloister , which is filled with Kindred Of Rot, and an Ulcerated Tree Spirit. Parkour down to the bottom walkway, and head to the end where the various Kindred are praying in front of a temple.
It’s worth looting the temple for the Scorpion’s Stinger weapon inside, but your actual objective is found to the left just before the steps leading up to the temple. At the end of this path you’ll find a slightly ajar coffin. Interact with the coffin to climb inside , triggering a cutscene that transports you to a new area.
41. Defeat Astel, Naturalborn of the Void
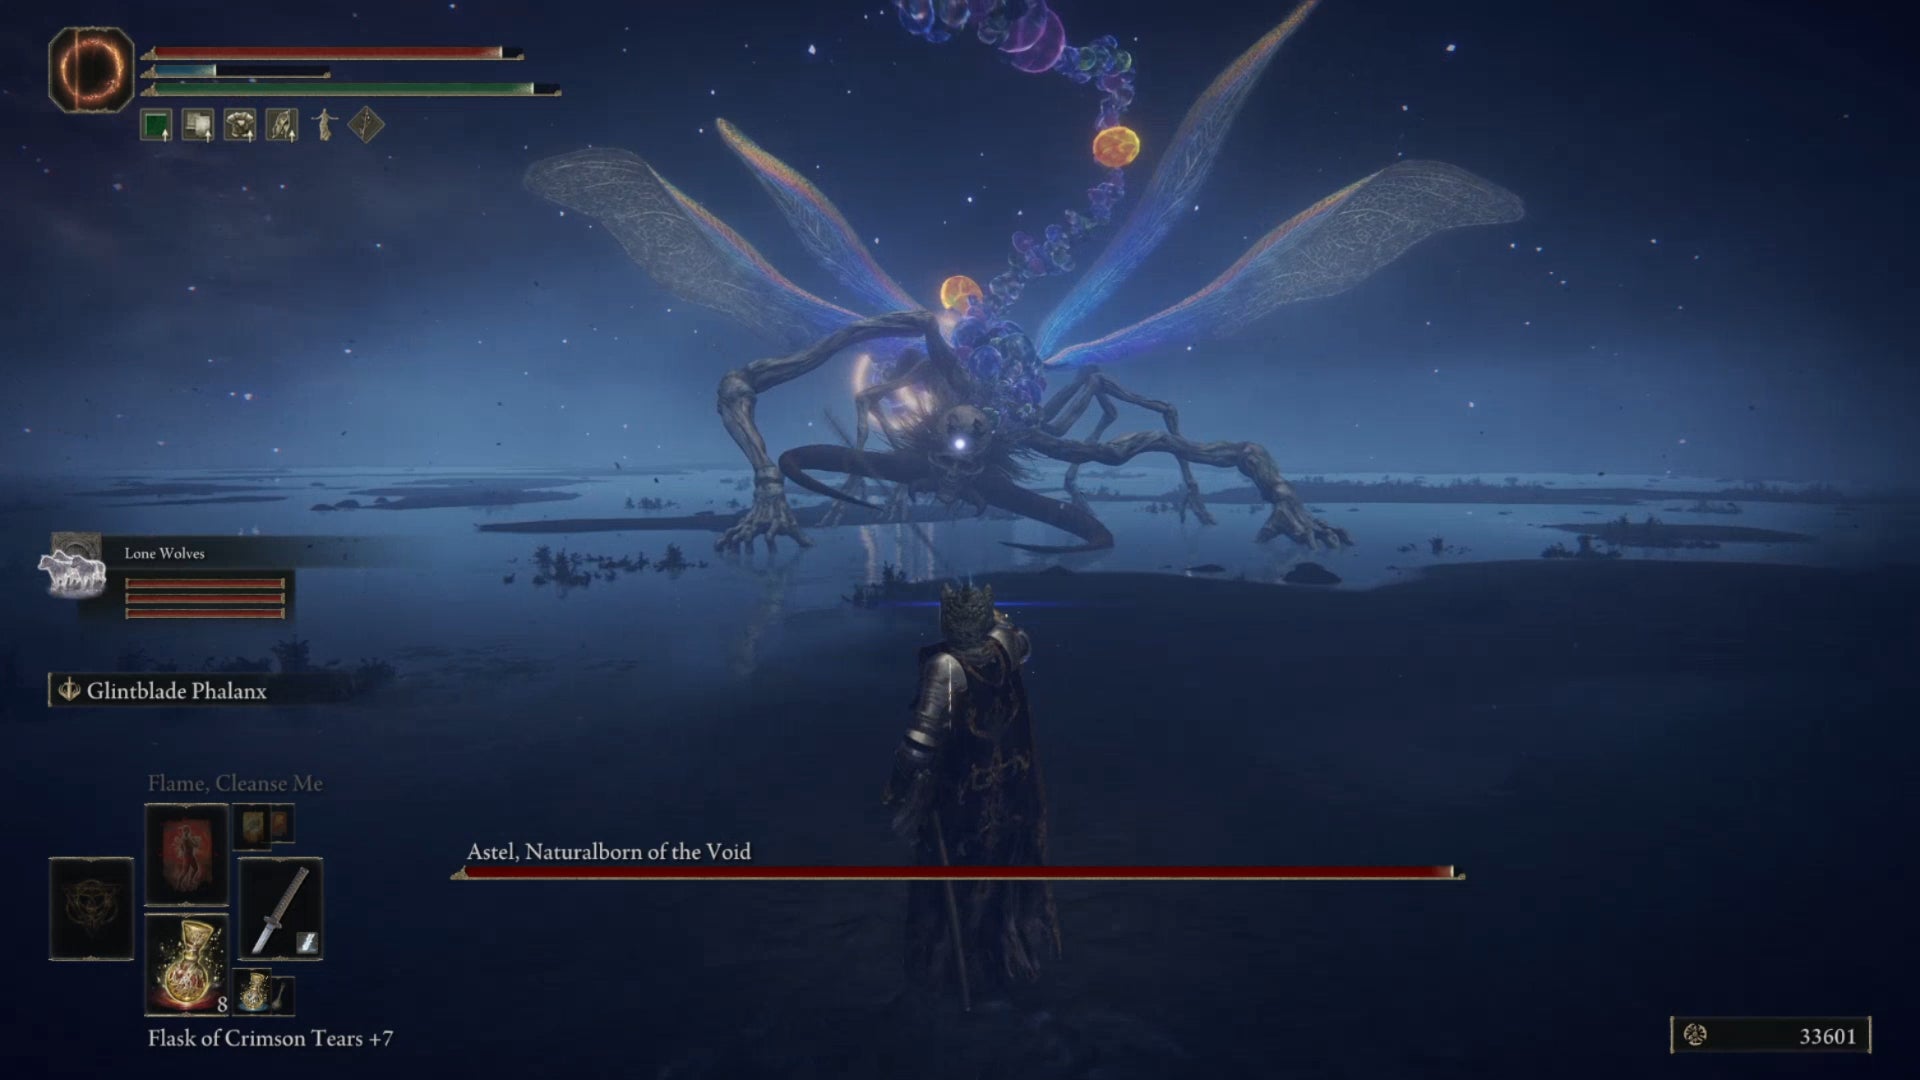
Image credit:Rock Paper Shotgun/Bandai Namco
The Grand Cloister coffin brings you face to face with another of Elden Ring’s most iconic boss fights - Astel, Naturalborn of the Void . Take your time - this boss is made tricky by its high resistances and area of effect attacks, but try to whack it in the head with your physical weapons as much as possible and you should take it down before too long.
42. Meet Blaidd at Ranni’s Rise anytime after the Astel fight
This is an optional extra step, but it closes out Blaidd’s story and adds more context to Ranni’s quest. Anytime after defeating Astel, return to Ranni’s Rise and just outside the tower you will find Blaidd - and he’s hostile.
There’s nothing for you to do except kill him . Well, you could ignore him, but he’ll stay there forever, hostile. Killing Blaidd rewards you with the Royal Greatsword and Blaidd’s Set of armor. It’s a sad ending to a much-liked character, though.
43. Speak to Iji about Blaidd
After your unfortunate encounter with Blaidd, you can optionally go back to Iji and tell him what has happened . He’ll be surprised and confused, and think harshly upon himself for his “misjudgement”.
“Unthinkable, how could Blaidd… How did he break free from his cell? No, more importantly… Blaidd became a curse that plagued Lady Ranni, yet in madness, gave himself to her. I’ve made a grave misjudgement. And I thought myself a capable war counselor… I’ll catch up with you soon enough, Blaidd. When I do, I only hope you’ll accept my apology.”
44. Reload the area and find Iji once again
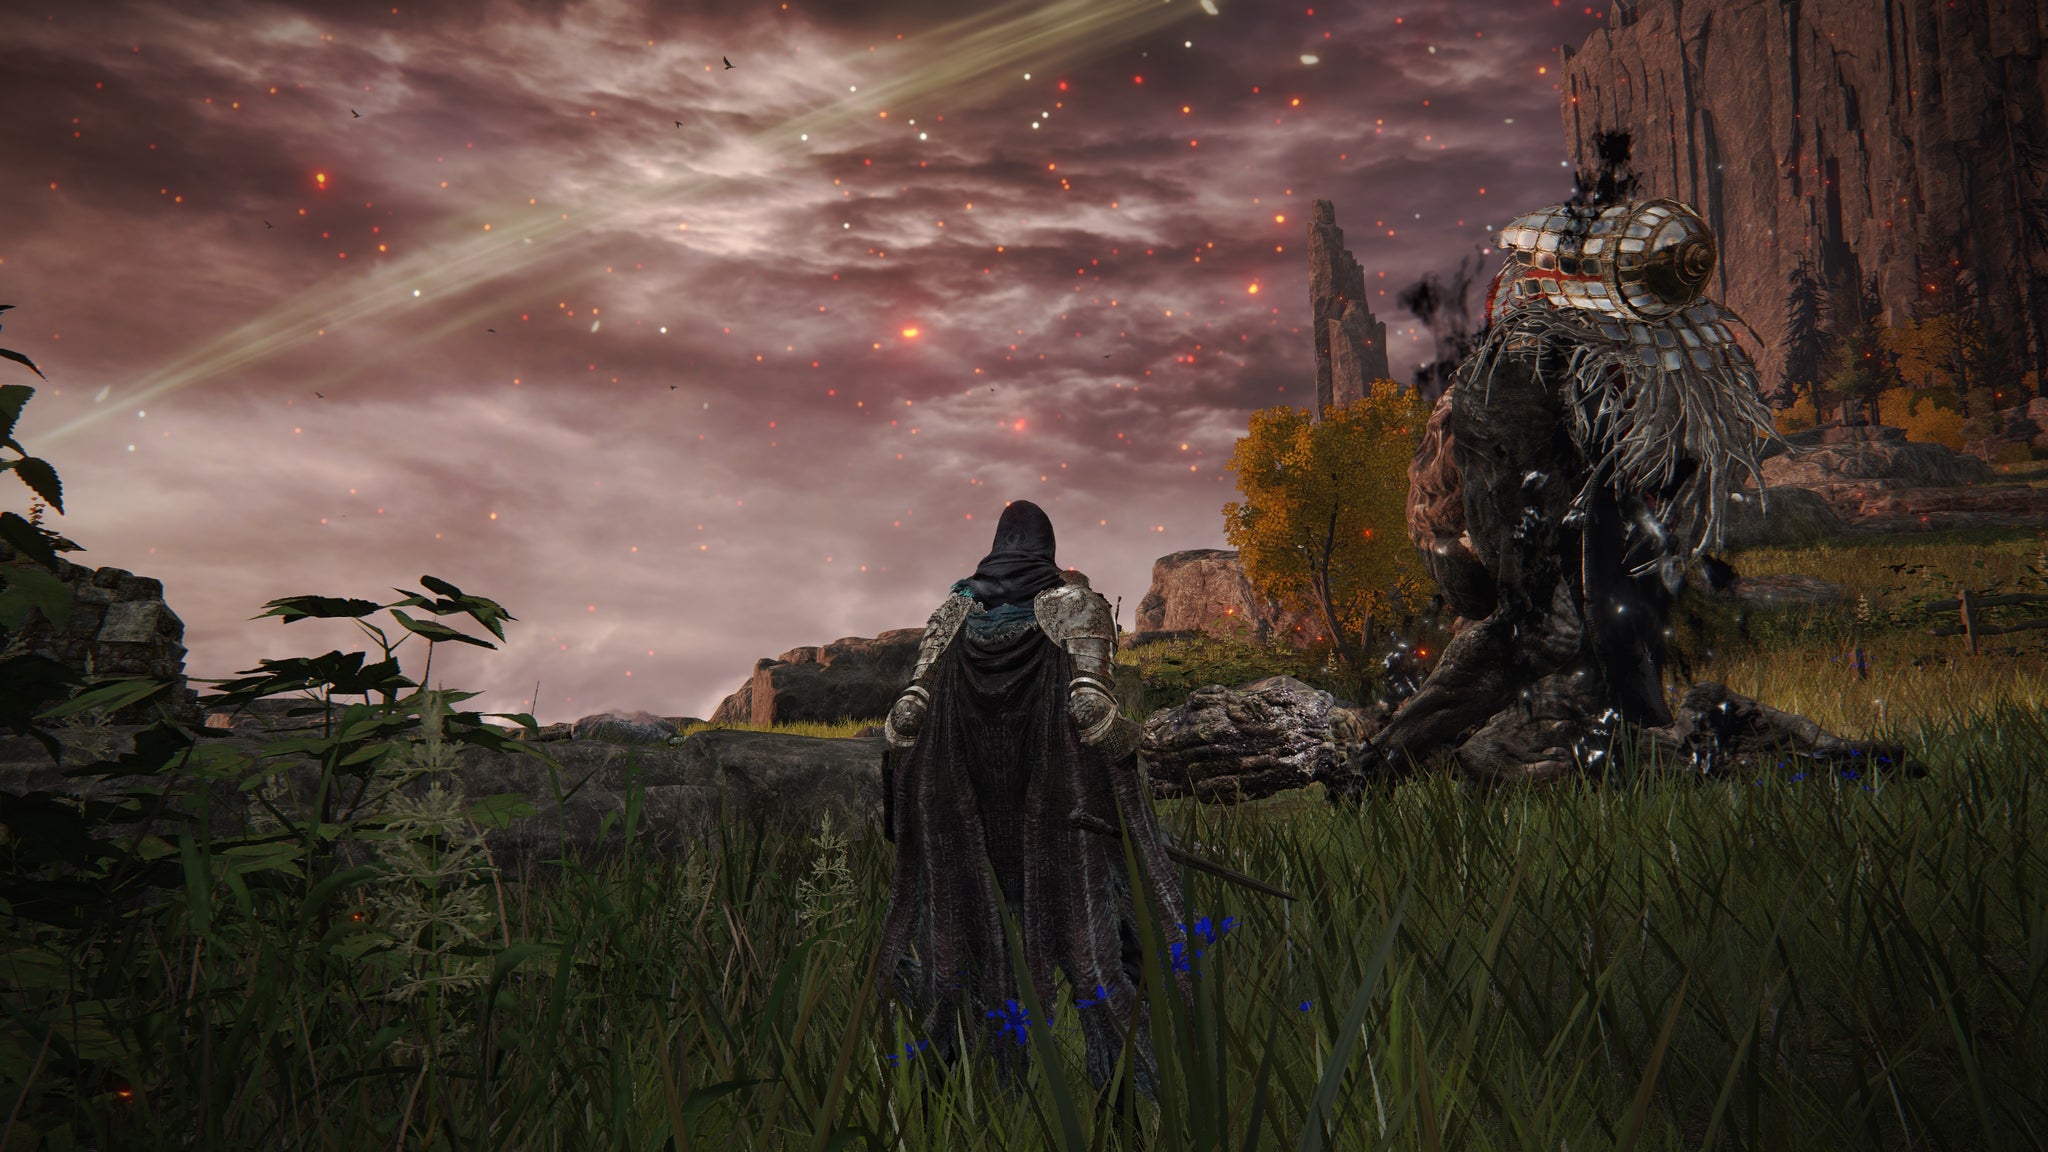
Image credit:Rock Paper Shotgun/Bandai Namco
Sadly, Iji’s last words about catching up with Blaidd soon enough are quite literal. Reload the area and go to Iji once again. In the middle of the road you’ll find his dead body , surrounded by dead Black Knife Assassins. You can feel free at this point to loot Iji’s Bell Bearing and his Mirrorhelm from his body.
45. Use the Dark Moon Ring to reach the Moonlight Altar in Liurnia
We’re almost at the end of Ranni’s questline now! After you defeat Astel, you can progress further beyond the arena to an elevator. Note that you must have looted the Dark Moon Ring from Rennala’s library before you do this! If you don’t have the Ring, then the way forward will be blocked by a magical seal .
Ascend the lift and you’ll emerge in the Moonlight Altar - a sub-section of Liurnia to the southwest which is scaled much higher than the rest of Liurnia. This place is filled with Dragons, a Rise tower, and one of the most difficult Evergaol bosses in the game - all of which are optional.
46. Enter the Cathedral of Manus Celes cellar and speak to Ranni
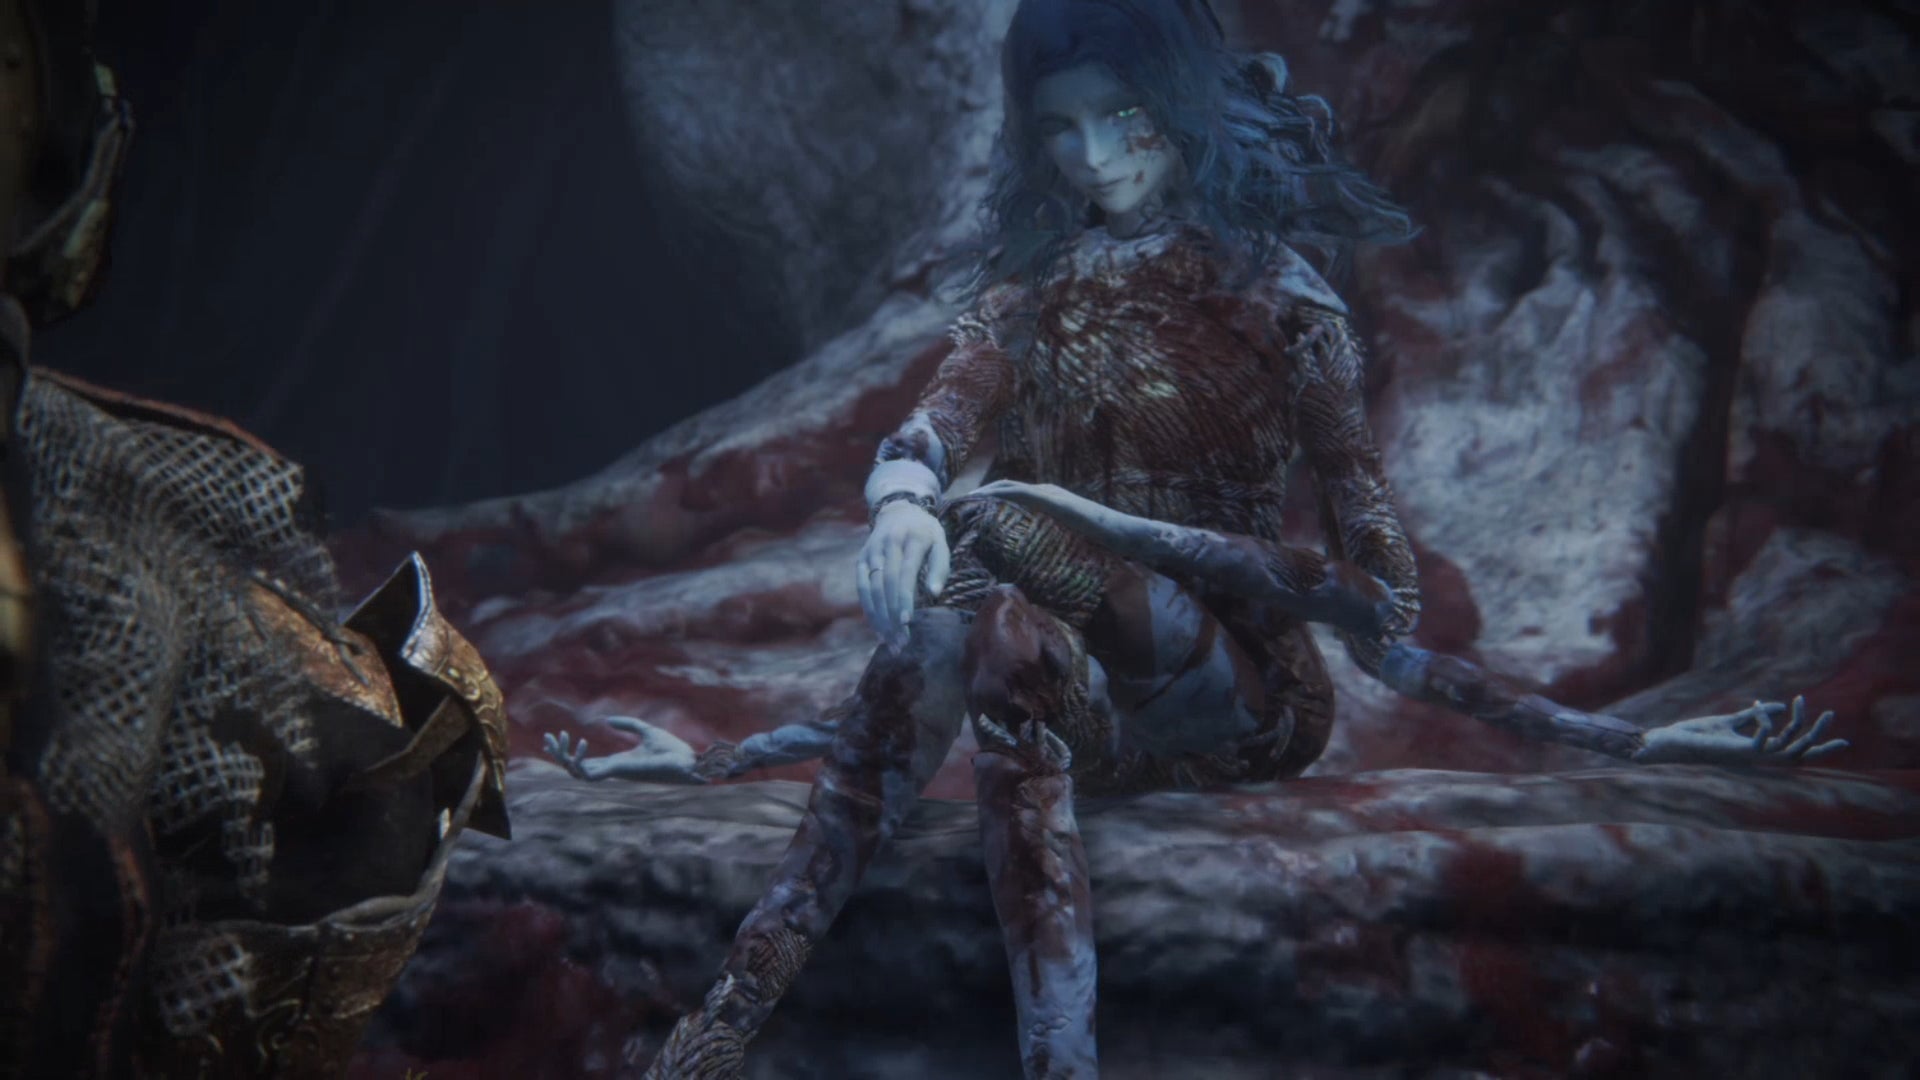
Image credit:Rock Paper Shotgun/Bandai Namco
The main landmark in the Moonlight Altar is the large Cathedral Of Manus Celes , which is visible the moment you emerge at the top of this area. Head to it, and as you approach you’ll be accosted by Glintstone Dragon Adula - the same dragon that you once found prowling around Ranni’s Rise. Again, you can either run past it or defeat it.
Enter the Cathedral, and descend the steps to the cellar . Follow this short underground path and you’ll finally find a seemingly lifeless Ranni sitting beneath a murdered Two Fingers. Interact with Ranni, and your character will place the Dark Moon Ring onto her finger . Ranni’s lifeless doll body will then disappear, and the now alive-and-well Ranni will appear in her previous form to thank you.
“So, it was thee, who would become my Lord. Perhaps I needn’t have warned thee. I am pleased, however. Thou’rt a fitting choice. I go now, to the night sky. It is there I shall find mine order. I bid thee travel the path of the Lord. And once all is done, we shall see each other once more.”
After this conversation, Ranni bequeathes to you a reward which you can loot from the floor. The reward is the Dark Moon Greatsword - one of the legendary armaments , and a very familiar blade for those who have played the Dark Souls games.
47. Speak to Miniature Ranni at the top of Ranni’s Rise
One last extra optional step - once you’ve completed her questline, Miniature Ranni (which is still in your inventory forevermore) has one more conversation to impart.
Fast Travel to Ranni’s Rise, and rest at the Ranni’s Chamber Site Of Grace at the very top of the tower where she used to sit. You can speak here to Miniature Ranni, and she’ll tell you a few more precious details about her grand plan.
“I take it thou’st noticed? I shouldn’t be surprised. I thought I might expound a little further… Upon the order I envision. Mine will be an order not of gold, but the stars and moon of the chill night. I would keep them far from the earth beneath our feet. As it is now, life, and souls, and order are bound tightly together, but I would have them at great remove. And have the certainties of sight, emotion, faith, and touch… All become impossibilities. Which is why I would abandon this soil, with mine order. Wouldst thou come to me, even now, my one and only lord?”
48. Use Ranni’s summon sign after the final boss for Ranni’s Age Of Stars ending
Ranni’s quest technically ends at the Cathedral Of Manus Celes, but completing her questline also unlocks a unique ending for Elden Ring . Once you defeat the base game’s final boss, you can choose to activate Ranni’s blue summon sign on the ground to choose her Age Of Stars ending, which has you leave the Lands Between as Ranni’s consort.
We consider Ranni’s Age Of Stars to be the best possible ending you can achieve in Elden Ring. For more information on this important decision, you can refer to our Elden Ring endings walkthrough!
That’s Ranni’s entire questline in Elden Ring. It’s a quest which spans nearly the entirety of Elden Ring’s base game, and you’ll need to earn a lot of power in order to complete it. To help you further, you can check out our guides on the best weapons and best armor in Elden Ring, along with key guides like how to start the Shadow Of The Erdtree DLC .
Elden Ring
PS4 , PS5 , Xbox One , Xbox Series X/S , PC
Rock Paper Shotgun is better when you sign in
Sign in and join us on our journey to discover strange and compelling PC games.

All 75 Arc Raiders Blueprints and where to get them
These areas have the highest chance of giving you Blueprints

Image credit:Rock Paper Shotgun/Embark Studios
Looking for more Arc Raiders Blueprints? It’s a special day when you find a Blueprint, as they’re among the most valuable items in Arc Raiders. If you find a Blueprint that you haven’t already found, then you must make sure you hold onto it at all costs, because Blueprints are the key to one of the most important and powerful systems of meta-progression in the game.
This guide aims to be the very best guide on Blueprints you can find, starting with a primer on what exactly they are and how they work in Arc Raiders, before delving into exactly where to get Blueprints and the very best farming spots for you to take in your search.
We’ll also go over how to get Blueprints from other unlikely activities, such as destroying Surveyors and completing specific quests. And you’ll also find the full list of all 75 Blueprints in Arc Raiders on this page (including the newest Blueprints added with the Cold Snap update , such as the Deadline Blueprint and Firework Box Blueprint), giving you all the information you need to expand your own crafting repertoire.
In this guide:
- What are Blueprints in Arc Raiders?
- Full Blueprint list: All crafting recipes
- Where to find Blueprints in Arc Raiders Blueprints obtained from quests Blueprints obtained from Trials Best Blueprint farming locations

What are Blueprints in Arc Raiders?
Blueprints in Arc Raiders are special items which, if you manage to extract with them, you can expend to permanently unlock a new crafting recipe in your Workshop. If you manage to extract from a raid with an Anvil Blueprint, for example, you can unlock the ability to craft your very own Anvil Pistol, as many times as you like (as long as you have the crafting materials).
To use a Blueprint, simply open your Inventory while in the lobby, then right-click on the Blueprint and click “Learn And Consume” . This will permanently unlock the recipe for that item in your Workshop. As of the Stella Montis update, there are allegedly 75 different Blueprints to unlock - although only 68 are confirmed to be in the game so far. You can see all the Blueprints you’ve found and unlocked by going to the Workshop menu, and hitting “R” to bring up the Blueprint screen.
It’s possible to find duplicates of past Blueprints you’ve already unlocked. If you find these, then you can either sell them, or - if you like to play with friends - you can take it into a match and gift it to your friend so they can unlock that recipe for themselves. Another option is to keep hold of them until the time comes to donate them to the Expedition.
Full Blueprint list: All crafting recipes
Below is the full list of all the Blueprints that are currently available to find in Arc Raiders, and the crafting recipe required for each item:
| Blueprint | Type | Recipe | Crafted At |
|---|---|---|---|
| Bettina | Weapon | 3x Advanced Mechanical Components 3x Heavy Gun Parts 3x Canister | Gunsmith 3 |
| Blue Light Stick | Quick Use | 3x Chemicals | Utility Station 1 |
| Aphelion | Weapon | 3x Magnetic Accelerator 3x Complex Gun Parts 1x Matriarch Reactor | Gunsmith 3 |
| Combat Mk. 3 (Flanking) | Augment | 2x Advanced Electrical Components 3x Processor | Gear Bench 3 |
| Combat Mk. 3 (Aggressive) | Augment | 2x Advanced Electrical Components 3x Processor | Gear Bench 3 |
| Complex Gun Parts | Material | 2x Light Gun Parts 2x Medium Gun Parts 2x Heavy Gun Parts | Refiner 3 |
| Fireworks Box | Quick Use | 1x Explosive Compound 3x Pop Trigger | Explosives Station 2 |
| Gas Mine | Mine | 4x Chemicals 2x Rubber Parts | Explosives Station 1 |
| Green Light Stick | Quick Use | 3x Chemicals | Utility Station 1 |
| Pulse Mine | Mine | 1x Crude Explosives 1x Wires | Explosives Station 1 |
| Seeker Grenade | Grenade | 1x Crude Explosives 2x ARC Alloy | Explosives Station 1 |
| Looting Mk. 3 (Survivor) | Augment | 2x Advanced Electrical Components 3x Processor | Gear Bench 3 |
| Angled Grip II | Mod | 2x Mechanical Components 3x Duct Tape | Gunsmith 2 |
| Angled Grip III | Mod | 2x Mod Components 5x Duct Tape | Gunsmith 3 |
| Hullcracker | Weapon | 1x Magnetic Accelerator 3x Heavy Gun Parts 1x Exodus Modules | Gunsmith 3 |
| Launcher Ammo | Ammo | 5x Metal Parts 1x Crude Explosives | Workbench 1 |
| Anvil | Weapon | 5x Mechanical Components 5x Simple Gun Parts | Gunsmith 2 |
| Anvil Splitter | Mod | 2x Mod Components 3x Processor | Gunsmith 3 |
| ??? | ??? | ??? | ??? |
| Barricade Kit | Quick Use | 1x Mechanical Components | Utility Station 2 |
| Blaze Grenade | Grenade | 1x Explosive Compound 2x Oil | Explosives Station 3 |
| Bobcat | Weapon | 3x Advanced Mechanical Components 3x Light Gun Parts | Gunsmith 3 |
| Osprey | Weapon | 2x Advanced Mechanical Components 3x Medium Gun Parts 7x Wires | Gunsmith 3 |
| Burletta | Weapon | 3x Mechanical Components 3x Simple Gun Parts | Gunsmith 1 |
| Compensator II | Mod | 2x Mechanical Components 4x Wires | Gunsmith 2 |
| Compensator III | Mod | 2x Mod Components 8x Wires | Gunsmith 3 |
| Defibrillator | Quick Use | 9x Plastic Parts 1x Moss | Medical Lab 2 |
| ??? | ??? | ??? | ??? |
| Equalizer | Weapon | 3x Magnetic Accelerator 3x Complex Gun Parts 1x Queen Reactor | Gunsmith 3 |
| Extended Barrel | Mod | 2x Mod Components 8x Wires | Gunsmith 3 |
| Extended Light Mag II | Mod | 2x Mechanical Components 3x Steel Spring | Gunsmith 2 |
| Extended Light Mag III | Mod | 2x Mod Components 5x Steel Spring | Gunsmith 3 |
| Extended Medium Mag II | Mod | 2x Mechanical Components 3x Steel Spring | Gunsmith 2 |
| Extended Medium Mag III | Mod | 2x Mod Components 5x Steel Spring | Gunsmith 3 |
| Extended Shotgun Mag II | Mod | 2x Mechanical Components 3x Steel Spring | Gunsmith 2 |
| Extended Shotgun Mag III | Mod | 2x Mod Components 5x Steel Spring | Gunsmith 3 |
| Remote Raider Flare | Quick Use | 2x Chemicals 4x Rubber Parts | Utility Station 1 |
| Heavy Gun Parts | Material | 4x Simple Gun Parts | Refiner 2 |
| Venator | Weapon | 2x Advanced Mechanical Components 3x Medium Gun Parts 5x Magnet | Gunsmith 3 |
| Il Toro | Weapon | 5x Mechanical Components 6x Simple Gun Parts | Gunsmith 1 |
| Jolt Mine | Mine | 1x Electrical Components 1x Battery | Explosives Station 2 |
| Explosive Mine | Mine | 1x Explosive Compound 1x Sensors | Explosives Station 3 |
| Jupiter | Weapon | 3x Magnetic Accelerator 3x Complex Gun Parts 1x Queen Reactor | Gunsmith 3 |
| Light Gun Parts | Material | 4x Simple Gun Parts | Refiner 2 |
| Lightweight Stock | Mod | 2x Mod Components 5x Duct Tape | Gunsmith 3 |
| Lure Grenade | Grenade | 1x Speaker Component 1x Electrical Components | Utility Station 2 |
| Medium Gun Parts | Material | 4x Simple Gun Parts | Refiner 2 |
| Torrente | Weapon | 2x Advanced Mechanical Components 3x Medium Gun Parts 6x Steel Spring | Gunsmith 3 |
| Muzzle Brake II | Mod | 2x Mechanical Components 4x Wires | Gunsmith 2 |
| Muzzle Brake III | Mod | 2x Mod Components 8x Wires | Gunsmith 3 |
| Padded Stock | Mod | 2x Mod Components 5x Duct Tape | Gunsmith 3 |
| Shotgun Choke II | Mod | 2x Mechanical Components 4x Wires | Gunsmith 2 |
| Shotgun Choke III | Mod | 2x Mod Components 8x Wires | Gunsmith 3 |
| Shotgun Silencer | Mod | 2x Mod Components 8x Wires | Gunsmith 3 |
| Showstopper | Grenade | 1x Advanced Electrical Components 1x Voltage Converter | Explosives Station 3 |
| Silencer I | Mod | 2x Mechanical Components 4x Wires | Gunsmith 2 |
| Silencer II | Mod | 2x Mod Components 8x Wires | Gunsmith 3 |
| Snap Hook | Quick Use | 2x Power Rod 3x Rope 1x Exodus Modules | Utility Station 3 |
| Stable Stock II | Mod | 2x Mechanical Components 3x Duct Tape | Gunsmith 2 |
| Stable Stock III | Mod | 2x Mod Components 5x Duct Tape | Gunsmith 3 |
| Tagging Grenade | Grenade | 1x Electrical Components 1x Sensors | Utility Station 3 |
| Tempest | Weapon | 3x Advanced Mechanical Components 3x Medium Gun Parts 3x Canister | Gunsmith 3 |
| Trigger Nade | Grenade | 2x Crude Explosives 1x Processor | Explosives Station 2 |
| Vertical Grip II | Mod | 2x Mechanical Components 3x Duct Tape | Gunsmith 2 |
| Vertical Grip III | Mod | 2x Mod Components 5x Duct Tape | Gunsmith 3 |
| Vita Shot | Quick Use | 2x Antiseptic 1x Syringe | Medical Lab 3 |
| Vita Spray | Quick Use | 3x Antiseptic 1x Canister | Medical Lab 3 |
| Vulcano | Weapon | 1x Magnetic Accelerator 3x Heavy Gun Parts 1x Exodus Modules | Gunsmith 3 |
| Wolfpack | Grenade | 2x Explosive Compound 2x Sensors | Explosives Station 3 |
| Red Light Stick | Quick Use | 3x Chemicals | Utility Station 1 |
| Smoke Grenade | Grenade | 14x Chemicals 1x Canister | Utility Station 2 |
| Deadline | Mine | 3x Explosive Compound 2x ARC Circuitry | Explosives Station 3 |
| Trailblazer | Grenade | 1x Explosive Compound 1x Synthesized Fuel | Explosives Station 3 |
| Tactical Mk. 3 (Defensive) | Augment | 2x Advanced Electrical Components 3x Processor | Gear Bench 3 |
| Tactical Mk. 3 (Healing) | Augment | 2x Advanced Electrical Components 3x Processor | Gear Bench 3 |
| Yellow Light Stick | Quick Use | 3x Chemicals | Utility Station 1 |
Note: The missing Blueprints in this list likely have not actually been added to the game at the time of writing, because none of the playerbase has managed to find any of them. As they are added to the game, I will update this page with the most relevant information so you know exactly how to get all 75 Arc Raiders Blueprints.
Where to find Blueprints in Arc Raiders
Below is a list of all containers, modifiers, and events which maximise your chances of finding Blueprints:
- Certain quests reward you with specific Blueprints .
- Completing Trials has a high chance of offering Blueprints as rewards.
- Surveyors have a decent chance of dropping Blueprints on death.
- High loot value areas tend to have a greater chance of spawning Blueprints.
- Night Raids and Storms may increase rare Blueprint spawn chances in containers.
- Containers with higher numbers of items may have a higher tendency to spawn Blueprints. As a result, Blue Gate (which has many “large” containers containing multiple items) may give you a higher chance of spawning Blueprints.
- Raider containers (Raider Caches, Weapon Boxes, Medical Bags, Grenade Tubes) have increased Blueprint drop rates. As a result, the Uncovered Caches event gives you a high chance of finding Blueprints.
- Security Lockers have a higher than average chance of containing Blueprints.
- Certain Blueprints only seem to spawn under specific circumstances: Tempest Blueprint only spawns during Night Raid events. Vulcano Blueprint only spawns during Hidden Bunker events. Jupiter and Equaliser Blueprints only spawn during Harvester events.

Raider Caches, Weapon Boxes, and other raider-oriented container types have a good chance of offering Blueprints. |Image credit:Rock Paper Shotgun/Embark Studios
Blueprints have a very low chance of spawning in any container in Arc Raiders, around 1-2% on average. However, there is a higher chance of finding Blueprints in particular container types. Specifically, you can find more Blueprints in Raider containers and security lockers.
Beyond this, if you’re looking for Blueprints you should focus on regions of the map which are marked as having particularly high-value loot. Areas such as the Control Tower in Dam Battlegrounds, the Arrival and Departure Buildings in Spaceport, and Pilgrim’s Peak in Blue Gate all have a better-than-average chance of spawning Blueprints somewhere amongst all their containers. Night Raids and Electromagnetic Storm events also increase the drop chances of certain Blueprints .
In addition to these containers, you can often loot Blueprints from destroyed Surveyors - the largest of the rolling ball ARC. Surveyors are more commonly found on the later maps - Spaceport and Blue Gate - and if one spawns in your match, you’ll likely see it by the blue laser beam that it casts into the sky while “surveying”.
Surveyors are quite well-armoured and will very speedily run away from you once it notices you, but if you can take one down then make sure you loot all its parts for a chance of obtaining certain unusual Blueprints.
Blueprints obtained from quests
One way in which you can get Blueprints is by completing certain quests for the vendors in Speranza. Some quests will reward you with a specific item Blueprint upon completion, so as long as you work through all the quests in Arc Raiders, you are guaranteed those Blueprints.
Here is the full list of all Blueprints you can get from quest rewards:
- Trigger Nade Blueprint: Rewarded after completing “Sparks Fly”.
- Lure Grenade Blueprint: Rewarded after completing “Greasing Her Palms”.
- Burletta Blueprint: Rewarded after completing “Industrial Espionage”.
- Hullcracker Blueprint (and Launcher Ammo Blueprint): Rewarded after completing “The Major’s Footlocker”.
Alas, that’s only 4 Blueprints out of a total of 75 to unlock, so for the vast majority you will need to find them yourself during a raid. If you’re intent on farming Blueprints, then it’s best to equip yourself with cheap gear in case you lose it, but don’t use a free loadout because then you won’t get a safe pocket to stash any new Blueprint you find. No pain in Arc Raiders is sharper than failing to extract with a new Blueprint you’ve been after for a dozen hours already.

One of the best ways to get Blueprints is by hitting three stars on all five Trials every week. |Image credit:Rock Paper Shotgun/Embark Studios
Blueprints obtained from Trials
One of the very best ways to get Blueprints is as rewards for completing Trials in Arc Raiders. Trials are unlocked from Level 15 onwards, and allow you to earn rewards by focusing on certain tasks over the course of several raids. For example, one Trial might task you with dealing damage to Hornets, while another might challenge you to loot Supply Drops.
Trials refresh on a weekly basis, with a new week bringing five new Trials. Each Trial can offer up to three rewards after passing certain score milestones, and it’s possible to receive very high level loot from these reward crates - including Blueprints. So if you want to unlock as many Blueprints as possible, you should make a point of completing as many Trials as possible each week.
Best Blueprint farming locations
The very best way to get Blueprints is to frequent specific areas of the maps which combine high-tier loot pools with the right types of containers to search. Here are my recommendations for where to find Blueprints on every map, so you can always keep the search going for new crafting recipes to unlock.

Image credit:Rock Paper Shotgun/Embark Studios
Dam Battlegrounds
The best places to farm Blueprints on Dam Battlegrounds are the Control Tower, Power Generation Complex, Ruby Residence, and Pale Apartments . The first two regions, despite only being marked on the map as mid-tier loot, contain a phenomenal number of containers to loot. The Control Tower can also contain a couple of high-tier Security Lockers - though of course, you’ll need to have unlocked the Security Breach skill at the end of the Survival tree.
There’s also a lot of reporting amongst the playerbase that the Residential areas in the top-left of the map - Pale Apartments and Ruby Residence - give you a comparatively strong chance of finding Blueprints. Considering their size, there’s a high density of containers to loot in both locations, and they also have the benefit of being fairly out of the way. So you’re more likely to have all the containers to yourself.
Buried City
The best Blueprint farming locations on Buried City are the Santa Maria Houses, Grandioso Apartments, Town Hall, and the various buildings of the New District . Grandioso Apartments has a lower number of containers than the rest, but a high chance of spawning weapon cases - which have good Blueprint drop rates. The others are high-tier loot areas, with plenty of lootable containers - including Security Lockers.
Spaceport
The best places to find Blueprints on Spaceport are the Arrival and Departure Buildings, as well as Control Tower A6 and the Launch Towers . All these areas are labelled as high-value loot regions, and many of them are also very handily connected to one another by the Spaceport wall, which you can use to quickly run from one area to the next. At the tops of most of these buildings you’ll find at least one Security Locker, so this is an excellent farming route for players looking to find Blueprints.
The downside to looting Blueprints on Spaceport is that all these areas are hotly contested, particularly in Duos and Squads. You’ll need to be very focused and fast in order to complete the full farming route.

Image credit:Rock Paper Shotgun/Embark Studios
Blue Gate
Blue Gate tends to have a good chance of dropping Blueprints, potentially because it generally has a high number of containers which can hold lots of items; so there’s a higher chance of a Blueprint spawning in each container. In my experience, the best Blueprint farming spots on Blue Gate are Pilgrim’s Peak, Raider’s Refuge, the Ancient Fort, and the Underground Complex beneath the Warehouse .
All of these areas contain a wealth of containers to loot. Raider’s Refuge has less to loot, but the majority of the containers in and around the Refuge are raider containers, which have a high chance of containing Blueprints - particularly during major events.
Stella Montis
On the whole, Stella Montis seems to have a very low drop rate for Blueprints (though a high chance of dropping other high-tier loot). If you do want to try farming Blueprints on this map, the best places to find Blueprints in Stella Montis are Medical Research, Assembly Workshop, and the Business Center . These areas have the highest density of containers to loot on the map.
In addition to this, the Western Tunnel has a few different Security Lockers to loot, so while there’s very little to loot elsewhere in this area of the map, it’s worth hitting those Security Lockers if you spawn there at the start of a match.
That wraps up this primer on how to get all the Blueprints in Arc Raiders as quickly as possible. With the Expedition system constantly resetting a large number of players’ Blueprints, it’s more important than ever to have the most up-to-date information on where to find all these Blueprints.
While you’re here, be sure to check out our Arc Raiders best guns tier list , as well as our primers on the best skills to unlock and all the different Field Depot locations on every map.

ARC Raiders
PS5 , Xbox Series X/S , PC
Rock Paper Shotgun is better when you sign in
Sign in and join us on our journey to discover strange and compelling PC games.
