Elden Ring: Nightreign - Best main boss order for all 8 Nightlords
Here’s our ranking of each Nightlord and Expedition, including The Forsaken Hollows
Image credit:Rock Paper Shotgun/Bandai Namco

What order should you fight the main bosses in Elden Ring: Nightreign and The Forsaken Hollows DLC? The Nightlords are some of the most fearsome bosses in FromSoftware’s history, not least because the entirety of Nightreign seems predicated on the question: “what if that familiar run back to the boss after dying lasts a whole 40 minutes?” These main bosses require you not only to best them in combat, but also to survive and thrive in both days of their Expedition first. It’s never an easy task, whether you’re playing solo or in a team of three Nightfarers - and if you die, you can’t just try again immediately like with the various base Elden Ring bosses .
Nightlords are powerful, spectacular, and without a doubt the main bosses of Elden Ring: Nightreign. But if you’re struggling to progress through the various Expeditions, it could be that you need to follow a more sensible boss order than what the game presents you with in the Expedition menu. Below you can find our recommended main boss order for all 10 Nightlords in Elden Ring: Nightreign, including the Nightlords in The Forsaken Hollows DLC .

Elden Ring: Nightreign main boss order
The main bosses in Nightreign are presented in a particular order in-game when you select your Expedition, but this is not the order we’d recommend. Here is our recommended Nightlord boss order, to provide a more gradual incline in difficulty over time:
Recommended main boss order:
- Gladius, Beast Of Night (Tricephalos)
- Maris, Fathom Of Night (Augur)
- Adel, Baron Of Night (Gaping Jaw)
- Gnoster, Wisdom Of Night (Sentient Pest)
- Caligo, Miasma Of Night (Fissure In The Fog)
- Libra, Creature Of Night (Equilibrious Beast)
- Fulghor, Champion Of Nightglow (Darkdrift Knight)
- The Shape Of Night / Heolstor, The Nightlord (Night Aspect)
- Weapon Bequeathed Harmonia (Balancers)
- Traitorous Straghess/Pure Impulse Straghess (Dreglord)
The last two bosses, the Balancers and Dreglord, are from The Forsaken Hollows DLC , and you don’t really have a choice when it comes to their order. Weapon Bequeathed Harmonia must be defeated before fighting the Dreglord, though in some respects they’re a tougher boss. That said, these Nightlords are DLC for a reason, as they’re considerably tough and best suited for players who have finished the base game.
It’s also worth noting that this is our recommended order if you’re playing Nightreign in multiplayer. The challenge level of these bosses does change when you’re playing in solo mode instead. If you’re playing singleplayer , you may find that Libra is significantly easier, and Gnoster is quite a bit harder. So if you’re playing through the bosses in solo then we’d recommend swapping these two Nightlords around in the above order.
No matter what, you will need to defeat Gladius first because you only have the Tricephalos Expedition available to you at the start of a Nightreign playthrough. Defeating Gladius will unlock all the others, as well as unlocking a short questline that will unlock the hidden Duchess and Revenant characters to boot.
1. Gladius, Beast Of Night

Image credit:Rock Paper Shotgun/Bandai Namco
- Expedition: Tricephalos
- Night 1 Bosses: Bell Bearing Hunter, Demi-Humans
- Night 2 Bosses: Fell Omen, Tree Sentinel
- Weak To: Holy, Sleep
- Resistant To: Fire, Poison, Frostbite
- Immune To: Madness
- Unlocked By: Available from start
- Easier In Solo?: Yes, slightly easier in solo
- Recommended Nightfarers: Ironeye, Raider, Guardian
Gladius, Beast Of Night will always be the first main boss to defeat in Nightreign, because you can only unlock the other Expeditions after defeating Gladius. The killer part is that Gladius isn’t actually the easiest Nightlord to face (though it is one of them). A highly mobile three-headed dog with a swinging chain-blade of massive range, Gladius can easily sneak an attack your way when you’re not expecting it, particularly with the added chaos of multiplayer.
It’s particularly dangerous in its periodic alternate phase where it transforms into three separate dogs, with the leader siccing the other two on a single target. Fortunately, this opens up Gladius’s two great weaknesses. First: Holy damage will very easily stagger the individual dogs. And second: if you can land a powerful attack on two or all three dogs at once, you’ll deal twice (or thrice) the damage with a single attack. This makes Ironeye’s, Raider’s, and Guardian’s ultimates very powerful against the Tricephalos Nightlord.
2. Maris, Fathom Of Night
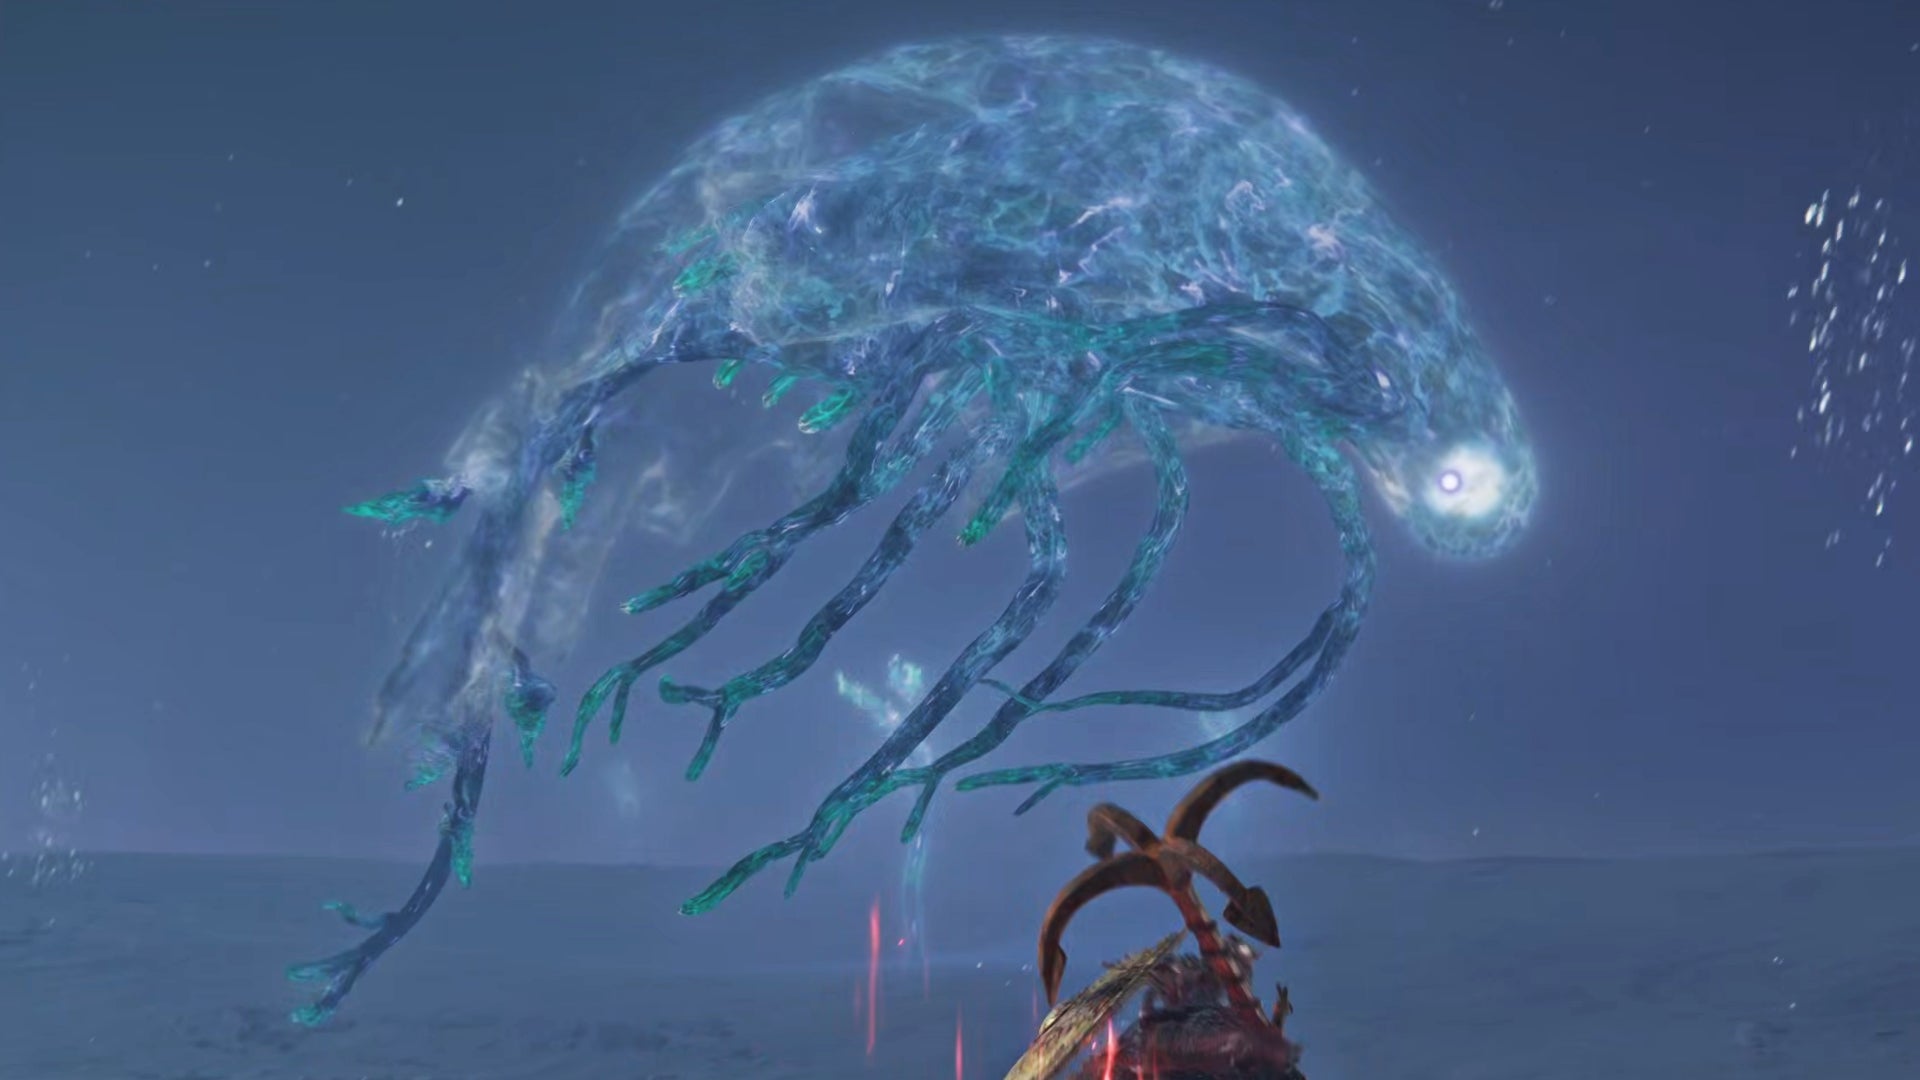
Image credit:Rock Paper Shotgun/Bandai Namco
- Expedition: Augur
- Night 1 Bosses: Gaping Dragon, Grafted Monarch, Wormface
- Night 2 Bosses: Full-Grown Fallingstar Beast, Tree Sentinel
- Weak To: Lightning
- Resistant To: Magic, Fire, Holy
- Immune To: Madness, Poison, Bleed, Sleep
- Unlocked By: Completing Tricephalos Expedition
- Easier In Solo?: No, easier in multiplayer
- Recommended Nightfarers: Recluse, Ironeye, Raider
Maris, Fathom Of Night is the Nightlord we recommend facing immediately after beating Gladius. A graceful alien creature floating through the air and inflicting sleep wherever it goes, Maris is a very different kind of main boss - more akin to the Ancestor Spirit or Elden Beast . This Nightlord fight is comparatively very tranquil, deliberate, and readable; and that makes it far easier to understand exactly what’s going on and what you must do.
If you want the easiest time beating Maris then you should pick a powerful ranged character like Recluse or Ironeye, but it’s not necessary. You can whale on the Fathom Of Night whenever it drops low - and indeed you should when it sinks in foetal position to the ground, because it’s the only way to avoid the massive (and often fatal) buildup of sleep that occurs. Becoming familiar with the flow and tells of this boss fight is easier than with any of the other Nightlords, and while that can sometimes lead to a feeling of helplessness when you end up dying anyway (no Nightlord is easy), we do recommend you take on Maris before any of the other Nightlords you unlock after Gladius.
3. Adel, Baron Of Night

Image credit:Rock Paper Shotgun/Bandai Namco
- Expedition: Gaping Jaw
- Night 1 Bosses: Night’s Cavalry x2, Valiant Gargoyle, Wormface
- Night 2 Bosses: Ancient Dragon, Crucible Knight/Golden Hippopotamus, Outland Commander
- Weak To: Poison, Rot, Frostbite, Sleep
- Resistant To: Lightning, Fire, Bleed
- Immune To: Madness
- Unlocked By: Completing Tricephalos Expedition
- Easier In Solo?: Equivalent
- Recommended Nightfarers: Ironeye, Executor, Duchess
Adel, Baron Of Night provides a good introduction to just how chaotic the Nightlord boss fights can end up being. This giant reptilian boss rather lacks the grace on show from Maris, flopping and thrashing about wildly and (if you’re doing things right and poisoning it) copiously vomiting onto the arena.
Players who had trouble with the likes of the Ulcerated Tree Spirit and other camera-destroying bosses might have some trouble here, but once you’re used to Adel’s moveset, it’s really not that bad. If you’re struggling then you can keep the boss at a distance with Ironeye and using Marking to dodge through its charge attacks. But as long as you have a bit of confidence, Adel can be dodged fairly reliably, even in his explosive second phase. It might be a shock to the system moving from Maris to Adel given their very different styles, but we do think the Gaping Jaw Expedition is likely the easiest to beat after Tricephalos and Augur.
4. Gnoster, Wisdom Of Night

Image credit:Rock Paper Shotgun/Bandai Namco
- Expedition: Sentient Pest
- Night 1 Bosses: Battlefield Commander, Centipede Demon, Smelter Demon, Tibia Mariner, Ulcerated Tree Spirit
- Night 2 Bosses: Draconic Tree Sentinel, Great Wyrm, Nox Dragonkin Soldier
- Weak To: Fire, Bleed, Rot, Frostbite
- Resistant To: Magic, Lightning, Holy
- Immune To: Madness
- Unlocked By: Completing Tricephalos Expedition
- Easier In Solo?: No, easier in multiplayer
- Recommended Nightfarers: Ironeye, Raider, Recluse
Gnoster, Wisdom Of Night takes the form of a giant poisonous moth that flits about casting magical attacks at your team, while its companion - an even more giant black scorpion - harasses you from ground level. Like Gladius, the good news is that both creatures can be damaged and contribute to the same boss health bar. But while Gnoster’s first phase is a simple matter of keeping the scorpion busy while you attack the moth at range, the Nightlord’s second phase where the two creatures combine into one relentlessly charging, magic-spewing duo makes it a significantly greater challenge than those innocent Tricephalos days.
Fire is key to winning this boss fight quickly, but bear in mind that it’s only the moth that takes extra fire damage. Ironeye is very much at home here, and should be concerned only with harassing the moth and evading the scorpion. His teammates should focus on keeping the Scorpion’s attention and punishing it after every evaded charge. Things get much harder in phase 2, but as always it’s a matter of steadily figuring out how to dodge your way through each of the new attacks. Still, there’s an upward spike in difficulty here in the second phase which puts Gnoster above everything else so far.
5. Caligo, Miasma Of Night
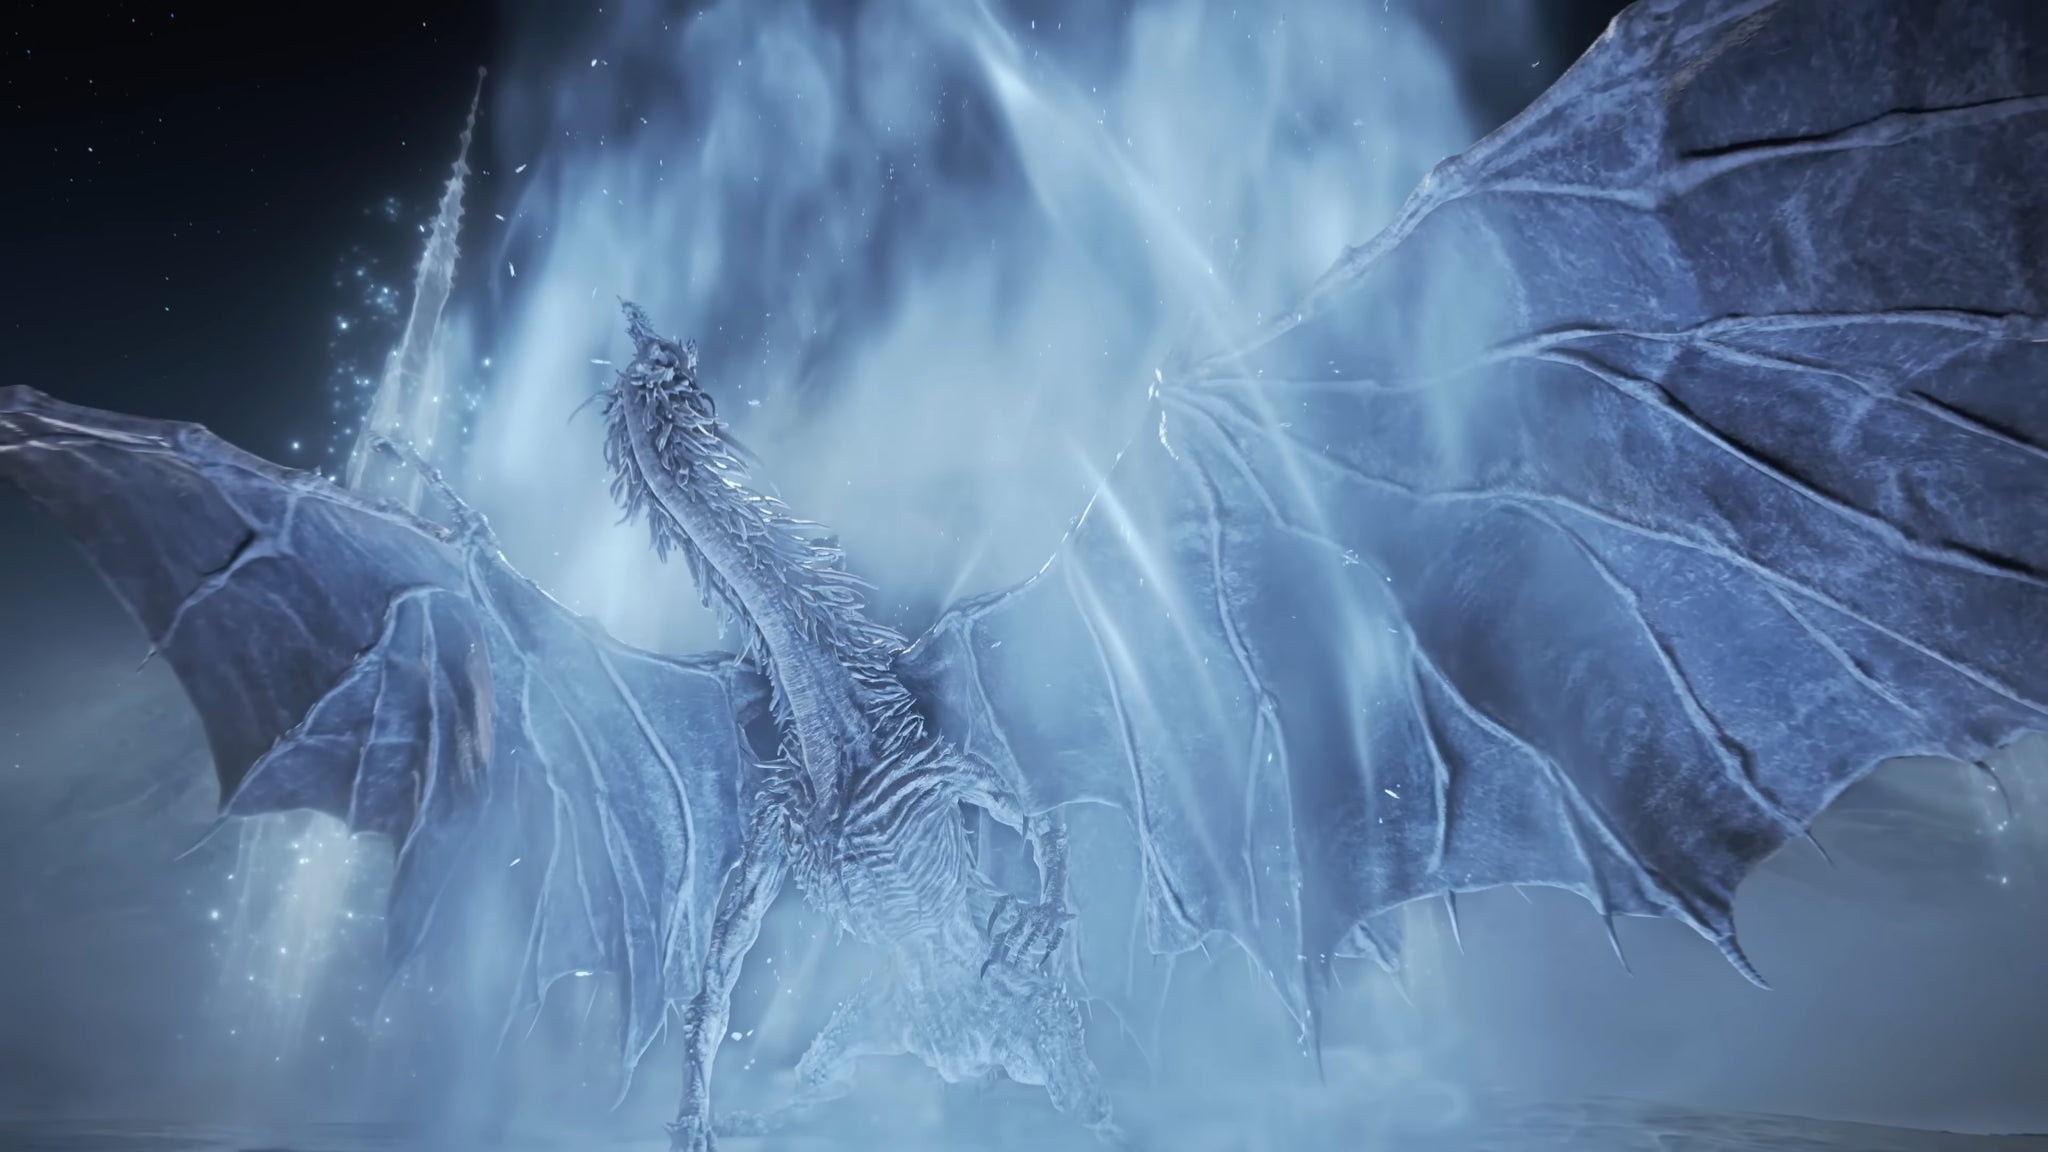
Image credit:Rock Paper Shotgun/Bandai Namco
- Expedition: Fissure In The Fog
- Night 1 Bosses: Grafted Monarch, Smelter Demon, The Duke’s Dear Freja, Tibia Mariner, Ulcerated Tree Spirit
- Night 2 Bosses: Dancer Of The Boreal Valley, Draconic Tree Sentinel, Godskin Duo
- Weak To: Fire
- Resistant To: Magic, Lightning, Holy, Frostbite, Sleep
- Immune To: Madness
- Unlocked By: Completing Tricephalos Expedition
- Easier In Solo?: No, slightly easier in multiplayer
- Recommended Nightfarers: Wylder, Guardian, Recluse
Caligo, Miasma Of Night is my personal favourite main boss fight in Nightreign. Aside from the impeccable vibes, a gigantic white dragon makes for a very readable target. Still, Caligo’s endless gusts of wind can reach across the arena and cleave your health bar in two in an instant, and it has plenty of attacks which are designed to stop you from doing the usual anti-dragon strategy of hiding behind its back legs and hammering away til it falls. You can (and should) still do it, but it’s harder.
There are numerous ways in which Caligo can catch you off-guard, unless you’ve already played against it many times before. The speed with which it can build up frostbite on you is pretty scary, particularly in its more aggressive second phase - which is why we very highly encourage you to make use of the Mountaintop reward whenever it’s available before the end of the Fissure In The Fog Expedition.
6. Libra, Creature Of Night
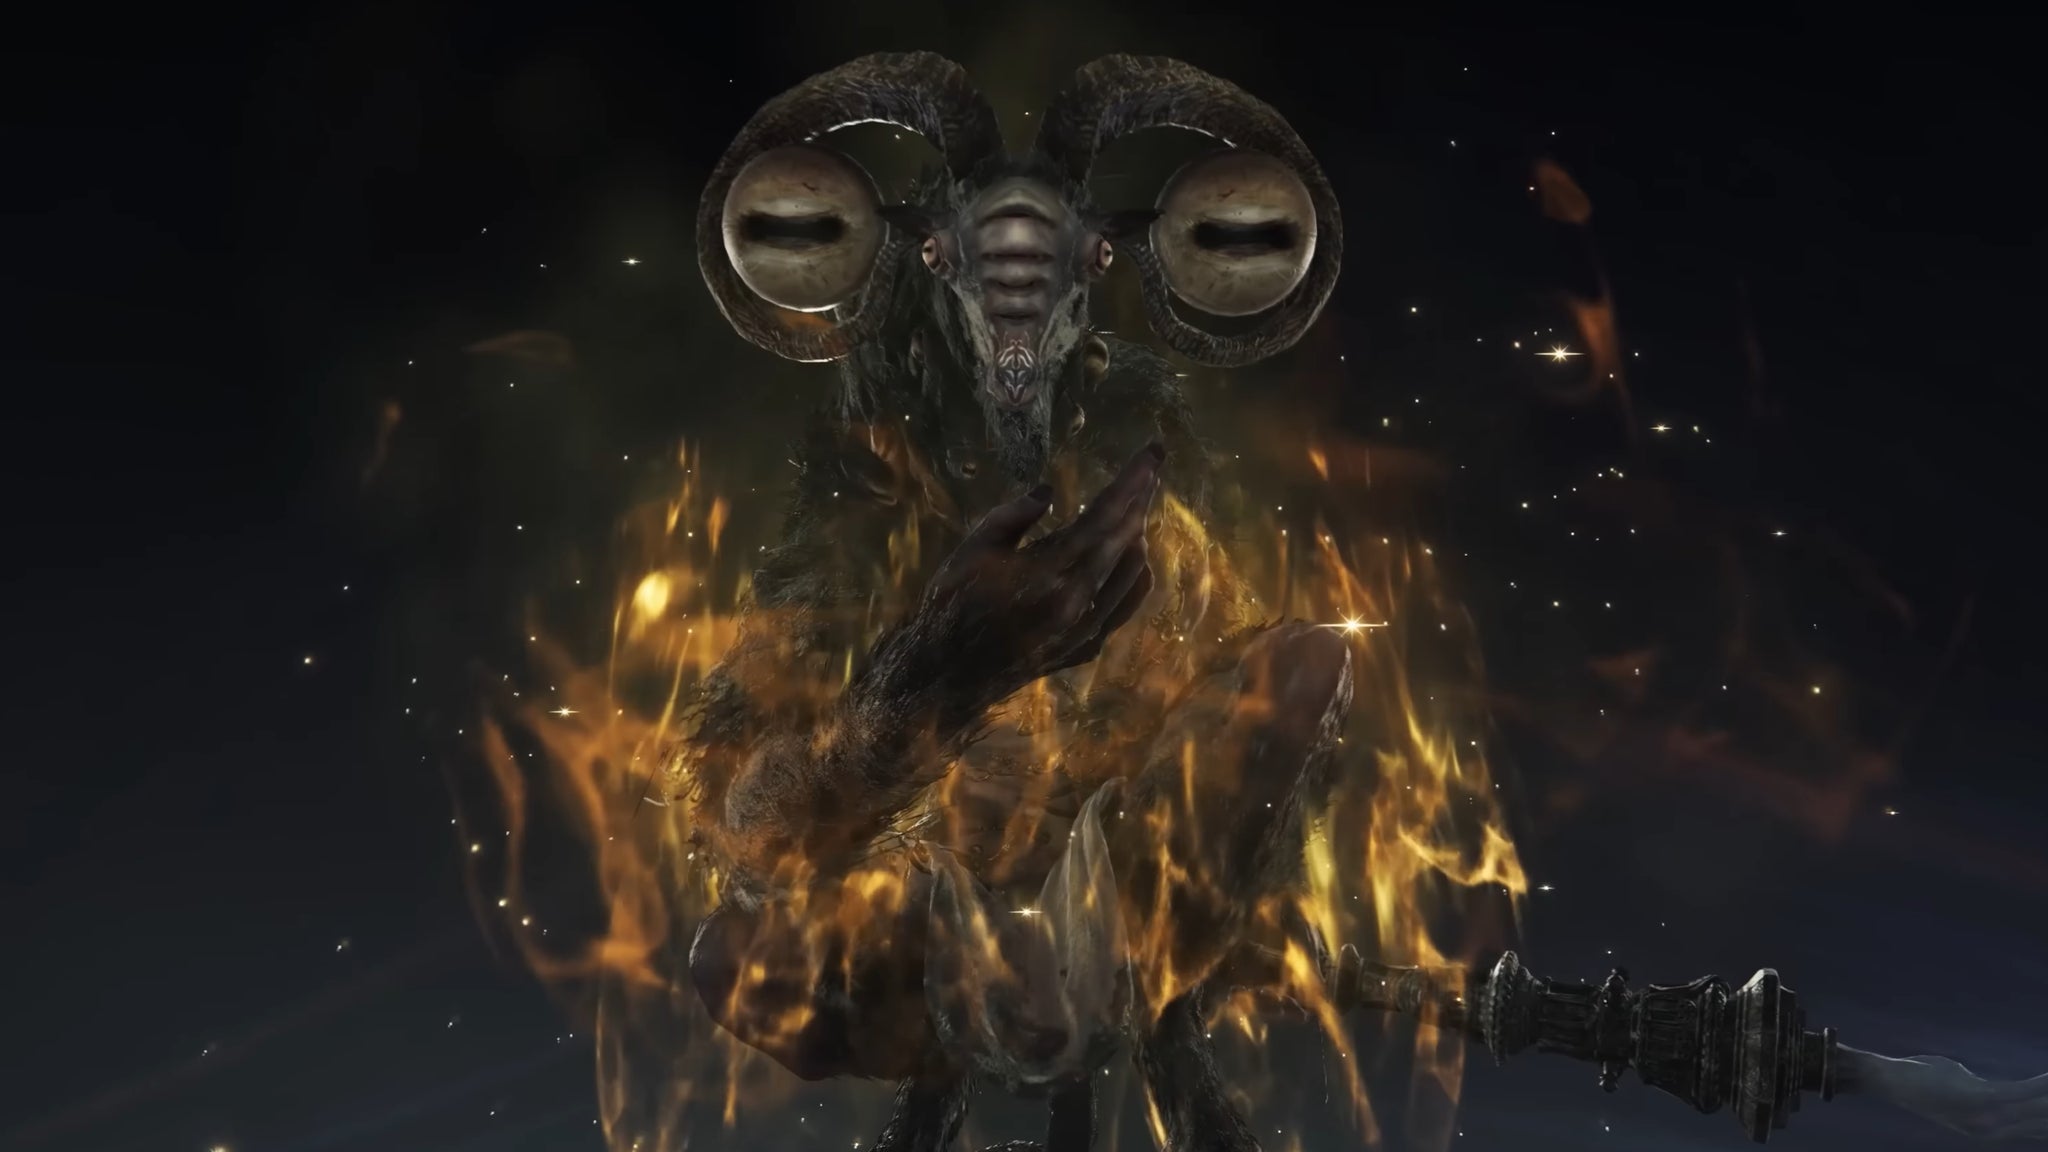
Image credit:Rock Paper Shotgun/Bandai Namco
- Expedition: Equilibrious Beast
- Night 1 Bosses: Centipede Demon, The Duke’s Dear Freja, Tibia Mariner, Royal Revenant
- Night 2 Bosses: Crucible Knight/Golden Hippopotamus, Death Rite Bird, Godskin Duo
- Weak To: Madness, Holy, Fire, Poison, Rot
- Resistant To: Magic
- Immune To: Sleep
- Unlocked By: Completing Tricephalos Expedition
- Easier In Solo?: Yes, considerably easier in solo
- Recommended Nightfarers: Raider, Ironeye, Wylder
Libra, Creature Of Night is a fascinating boss. More than any other Nightlord, Libra feels designed for multiplayer - and as such, when you’re playing as a full team, Libra is actually one of the hardest boss fights in all of Elden Ring: Nightreign. All three of you have to be hyper-focused on the Equilibrious Beast’s hand movements, because they telegraph its terrifyingly powerful Madness-inflicting attacks - a couple of which focus on all players at once. It’s tanky, aggressive, hard to read, and more than capable of removing your health after a single misstep.
It might not be what you’d expect, but if you’re struggling against Libra I highly recommend trying to fight him in solo mode instead. In solo, all Libra’s attacks are easier to read; it’s far less tanky than in multiplayer; and it can’t make use of its irritating “teleport on top of you and explode” spell. Either way, it’s a good idea to use Raider for poise breaking and/or Ironeye for ranged chip damage. And bring lots of status effects, particularly Madness if you’re lucky enough to come across it during your run.
7. Fulghor, Champion Of Nightglow

Image credit:Rock Paper Shotgun/Bandai Namco
- Expedition: Darkdrift Knight
- Night 1 Bosses: Gaping Dragon, Night’s Cavalry x2, Royal Revenant, Valiant Gargoyle, Wormface
- Night 2 Bosses: Nameless King, Nox Dragonkin Soldier, Outland Commander
- Weak To: Lightning, Poison, Rot, Bleed, Frostbite, Sleep
- Resistant To: Holy
- Immune To: Madness
- Unlocked By: Completing Tricephalos Expedition
- Easier In Solo?: Equivalent
- Recommended Nightfarers: Duchess, Executor, Ironeye
Fulghor, Champion Of Nightglow presents a real challenge to the vast majority of Nightreign players when they first meet it. Our pick for the second-hardest boss in the game, this oversized one-armed centaur is - at least at first - actually fairly readable compared to the likes of Adel and Libra, but Fulghor’s speed, reach, and damage potential makes it very punishing indeed.
With good use of Lightning and status effects such as Rot and Poison, it’s certainly tricky but by no means an insurmountable challenge to whittle down Fulghor’s health bar to halfway. At this point though, it grows a frightful left arm, and unlocks some very far-reaching area-of-effect splash attacks that can turn your whole screen into a mess of purple if Fulghor turns its gaze to you. This boss has the aggression of Libra, the speed of Gladius, and a higher health pool than either of them. It’s a serious challenge, and as everyone’s experience is different, I wouldn’t be surprised if Fulghor gives many a player their hardest Nightreign boss fight.
8. The Shape Of Night / Heolstor, The Nightlord

Image credit:Rock Paper Shotgun/IGN/Bandai Namco
- Expedition: Night Aspect
- Night 1 Bosses: Any Night 1 Boss
- Night 2 Bosses: Any Night 2 Boss
- Weak To: Holy, Fire (P1), Lightning (P2)
- Resistant To: Sleep
- Immune To: Bleed, Poison, Frostbite, Madness
- Unlocked By: Completing four different Expeditions
- Easier In Solo?: No, easier in multiplayer
- Recommended Nightfarers: Wylder, Ironeye, Guardian
The Shape Of Night (later Heolstor, The Nightlord ) is the final boss of Nightreign’s base game, unlocked only after defeating at least four other Nightlords. While this does mean you can technically beat the Night Aspect Expedition before you’ve defeated all the others, our recommendation - both from a narrative and a challenge perspective - is to wait until you’ve done everything else before facing Heolstor.
Heolstor is like an amped up Fulghor, with a formidable balance of speed, range, and phenomenal damage that can and will upset even experienced players’ Expeditions. There’s considerably more to learn in this fight, as both The Shape Of Night form and Heolstor’s true form have two separate phases, each with their own unique movesets. High resistances also make status effects like Rot and Poison less impactful than against other Nightlords. It’s a long fight, and one where none of your team can let down their guard for a moment. I would say that Fulghor and Libra run a close second and third place, but in our opinion Heolstor is certainly worth claiming endboss status.
9. Weapon Bequeathed Harmonia
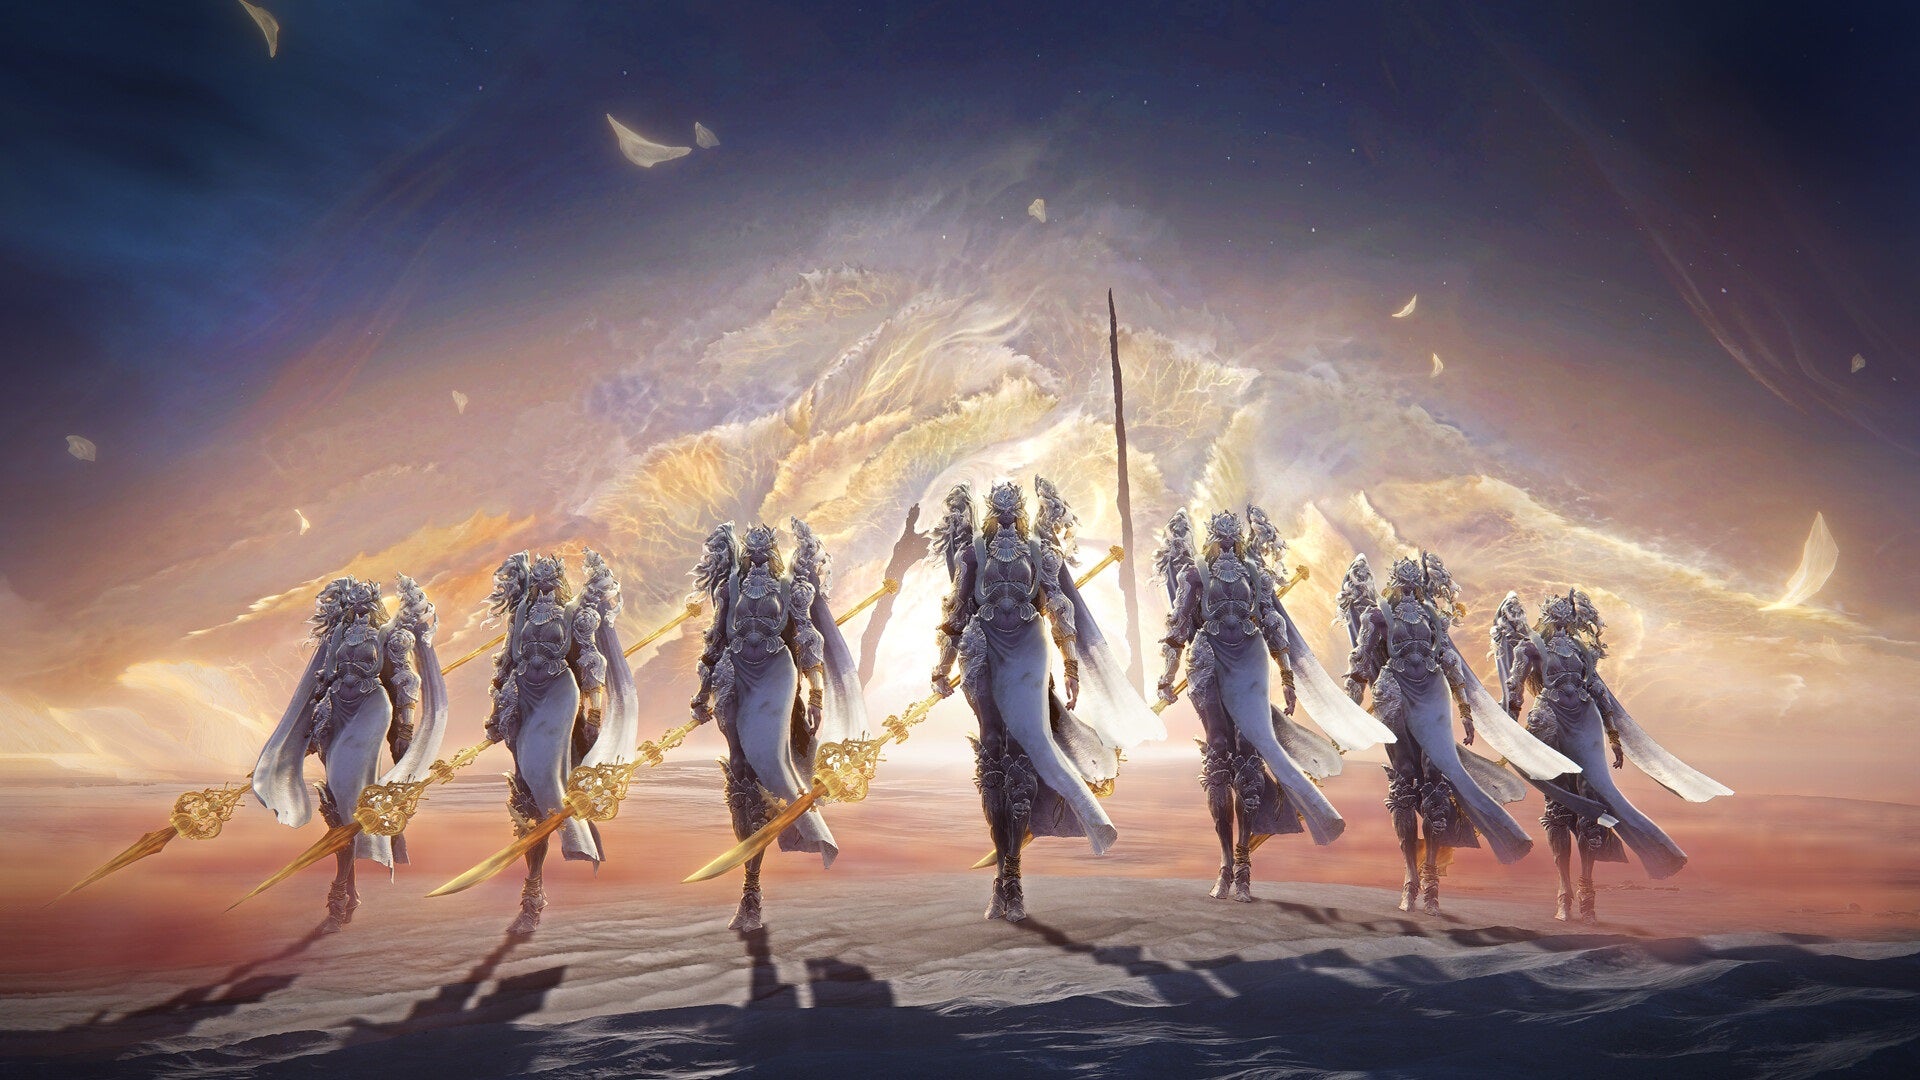
Image credit:Bandai Namco
- Expedition: Balancers
- Night 1 Bosses: Demon in Pain and Demon from Below, Curseblade and Divine Beast Warrior
- Night 2 Bosses: Demon Prince, Mohg Lord of Blood
- Weak To: Sleep
- Resistant To: Bleed, Frostbite, Poison, Scarlet Rot
- Immune To: Madness
- Unlocked By: Unlocking Scholar and Undertaker
- Easier In Solo?: No, considerably easier in multiplayer
- Recommended Nightfarers: Scholar, Undertaker
This collective of angels is the first new boss that awaits you in The Forsaken Hollows DLC, and they’re only accessible after you’ve unlocked Scholar and Undertaker and entered The Great Hollow Shifting Earth . This is a tricky boss designed to upset what you know from Nightreign’s base game, and they’re best suited to the new characters, especially Scholar, who can use his Analyse ability to debuff all of them at once. Attempting to solo all seven Balancers as Scholar is a losing game, though, so be sure to tackle Weapon Bequeathed Harmonia with a good team composition of Nightfarers who can hold aggro.
Fighting the Balancers is an exercise in spatial awareness and defeating one at a time. Recognise their attacks by the weapons they carry - straight spears thrust, curved spears slash, and the maces will issue a slam attack. Once you’ve whittled down the Balancers, a bunch of them will combine into one red-winged angelic being. This means it’s time to dodge, as the remaining Balancers will swoop across the battlefield like planes, leaving exploding trails behind them. (If you’ve got Undertaker on your squad, her Ultimate Loathsome Hex will definitly help with mobility here.) Roll and dodge, then watch out for the main red-winged Balancer’s flurry of spear attacks. Once this is all over, you can finally start your onslaught again, focusing your energy on the main Balancer and hopefully making it through what is a true battle of attrition.
10. Traitorous Straghess/Pure Impulse Straghess

Image credit:Rock Paper Shotgun/Bandai Namco
- Expedition: Dreglord
- Night 1 Bosses: Death Knights, Great Red Bear
- Night 2 Bosses: Knight Artorias, Divine Beast Dancing Lion
- Weak To: Nothing
- Resistant To: Bleed, Frostbite, Poison, Scarlet Rot, Sleep
- Immune To: Madness
- Unlocked By: Defeating the Balancers
- Easier In Solo?: No, easier in multiplayer
- Recommended Nightfarers: Guardian, Ironeye, Raider
Straghess ends our list as the other boss of The Forsaken Hollows DLC, and he offers a hell of a fight. At least he’s not seven foes in one, though, so in some ways taking on the Dreglord is a little less chaotic than the Balancers. Rely on your tried and true tactics of dodging and attacking from the side to make short work of his first form, which issues some nasty swinging attacks that are thankfully well telegraphed. His second form, Pure Impulse Straghess, is more painful. Beware of his ultimate where he summons pillars; he’ll either target a single Nightfarer by jumping into the pillars, or he’ll unleash a wave of Scarlet Rot that covers the entire arena.
Straghess isn’t particularly weak to anything, which is unfortunate, so we recommend sticking with a reliable damage-dealer like Ironeye to bring his health down to size quickly. Guardian and Raider are also very useful for this fight, as Wings of Salvation and Retaliate can respectively protect you from Straghess’ waves of Scarlet Rot or enable you to interrupt many of his normal attacks. There are also a bunch of weaker corpses who will emerge during this fight to try to distract you from the main target, so squishy Nightfarers like Revenant or Scholar need to be careful.
That’s our recommended main boss order for Nightreign; if you’re interested in learning more about all the bosses on offer (including field bosses, evergaol inhabitants, and more) then check out our overall Nightreign bosses and minibosses guide. While you’re here, you could also consult our guides on the best character and best solo characters in the game.
Elden Ring: Nightreign
PS5 , Xbox Series X/S , PC
Rock Paper Shotgun is better when you sign in
Sign in and join us on our journey to discover strange and compelling PC games.

All 75 Arc Raiders Blueprints and where to get them
These areas have the highest chance of giving you Blueprints

Image credit:Rock Paper Shotgun/Embark Studios
Looking for more Arc Raiders Blueprints? It’s a special day when you find a Blueprint, as they’re among the most valuable items in Arc Raiders. If you find a Blueprint that you haven’t already found, then you must make sure you hold onto it at all costs, because Blueprints are the key to one of the most important and powerful systems of meta-progression in the game.
This guide aims to be the very best guide on Blueprints you can find, starting with a primer on what exactly they are and how they work in Arc Raiders, before delving into exactly where to get Blueprints and the very best farming spots for you to take in your search.
We’ll also go over how to get Blueprints from other unlikely activities, such as destroying Surveyors and completing specific quests. And you’ll also find the full list of all 75 Blueprints in Arc Raiders on this page (including the newest Blueprints added with the Cold Snap update , such as the Deadline Blueprint and Firework Box Blueprint), giving you all the information you need to expand your own crafting repertoire.
In this guide:
- What are Blueprints in Arc Raiders?
- Full Blueprint list: All crafting recipes
- Where to find Blueprints in Arc Raiders Blueprints obtained from quests Blueprints obtained from Trials Best Blueprint farming locations

What are Blueprints in Arc Raiders?
Blueprints in Arc Raiders are special items which, if you manage to extract with them, you can expend to permanently unlock a new crafting recipe in your Workshop. If you manage to extract from a raid with an Anvil Blueprint, for example, you can unlock the ability to craft your very own Anvil Pistol, as many times as you like (as long as you have the crafting materials).
To use a Blueprint, simply open your Inventory while in the lobby, then right-click on the Blueprint and click “Learn And Consume” . This will permanently unlock the recipe for that item in your Workshop. As of the Stella Montis update, there are allegedly 75 different Blueprints to unlock - although only 68 are confirmed to be in the game so far. You can see all the Blueprints you’ve found and unlocked by going to the Workshop menu, and hitting “R” to bring up the Blueprint screen.
It’s possible to find duplicates of past Blueprints you’ve already unlocked. If you find these, then you can either sell them, or - if you like to play with friends - you can take it into a match and gift it to your friend so they can unlock that recipe for themselves. Another option is to keep hold of them until the time comes to donate them to the Expedition.
Full Blueprint list: All crafting recipes
Below is the full list of all the Blueprints that are currently available to find in Arc Raiders, and the crafting recipe required for each item:
| Blueprint | Type | Recipe | Crafted At |
|---|---|---|---|
| Bettina | Weapon | 3x Advanced Mechanical Components 3x Heavy Gun Parts 3x Canister | Gunsmith 3 |
| Blue Light Stick | Quick Use | 3x Chemicals | Utility Station 1 |
| Aphelion | Weapon | 3x Magnetic Accelerator 3x Complex Gun Parts 1x Matriarch Reactor | Gunsmith 3 |
| Combat Mk. 3 (Flanking) | Augment | 2x Advanced Electrical Components 3x Processor | Gear Bench 3 |
| Combat Mk. 3 (Aggressive) | Augment | 2x Advanced Electrical Components 3x Processor | Gear Bench 3 |
| Complex Gun Parts | Material | 2x Light Gun Parts 2x Medium Gun Parts 2x Heavy Gun Parts | Refiner 3 |
| Fireworks Box | Quick Use | 1x Explosive Compound 3x Pop Trigger | Explosives Station 2 |
| Gas Mine | Mine | 4x Chemicals 2x Rubber Parts | Explosives Station 1 |
| Green Light Stick | Quick Use | 3x Chemicals | Utility Station 1 |
| Pulse Mine | Mine | 1x Crude Explosives 1x Wires | Explosives Station 1 |
| Seeker Grenade | Grenade | 1x Crude Explosives 2x ARC Alloy | Explosives Station 1 |
| Looting Mk. 3 (Survivor) | Augment | 2x Advanced Electrical Components 3x Processor | Gear Bench 3 |
| Angled Grip II | Mod | 2x Mechanical Components 3x Duct Tape | Gunsmith 2 |
| Angled Grip III | Mod | 2x Mod Components 5x Duct Tape | Gunsmith 3 |
| Hullcracker | Weapon | 1x Magnetic Accelerator 3x Heavy Gun Parts 1x Exodus Modules | Gunsmith 3 |
| Launcher Ammo | Ammo | 5x Metal Parts 1x Crude Explosives | Workbench 1 |
| Anvil | Weapon | 5x Mechanical Components 5x Simple Gun Parts | Gunsmith 2 |
| Anvil Splitter | Mod | 2x Mod Components 3x Processor | Gunsmith 3 |
| ??? | ??? | ??? | ??? |
| Barricade Kit | Quick Use | 1x Mechanical Components | Utility Station 2 |
| Blaze Grenade | Grenade | 1x Explosive Compound 2x Oil | Explosives Station 3 |
| Bobcat | Weapon | 3x Advanced Mechanical Components 3x Light Gun Parts | Gunsmith 3 |
| Osprey | Weapon | 2x Advanced Mechanical Components 3x Medium Gun Parts 7x Wires | Gunsmith 3 |
| Burletta | Weapon | 3x Mechanical Components 3x Simple Gun Parts | Gunsmith 1 |
| Compensator II | Mod | 2x Mechanical Components 4x Wires | Gunsmith 2 |
| Compensator III | Mod | 2x Mod Components 8x Wires | Gunsmith 3 |
| Defibrillator | Quick Use | 9x Plastic Parts 1x Moss | Medical Lab 2 |
| ??? | ??? | ??? | ??? |
| Equalizer | Weapon | 3x Magnetic Accelerator 3x Complex Gun Parts 1x Queen Reactor | Gunsmith 3 |
| Extended Barrel | Mod | 2x Mod Components 8x Wires | Gunsmith 3 |
| Extended Light Mag II | Mod | 2x Mechanical Components 3x Steel Spring | Gunsmith 2 |
| Extended Light Mag III | Mod | 2x Mod Components 5x Steel Spring | Gunsmith 3 |
| Extended Medium Mag II | Mod | 2x Mechanical Components 3x Steel Spring | Gunsmith 2 |
| Extended Medium Mag III | Mod | 2x Mod Components 5x Steel Spring | Gunsmith 3 |
| Extended Shotgun Mag II | Mod | 2x Mechanical Components 3x Steel Spring | Gunsmith 2 |
| Extended Shotgun Mag III | Mod | 2x Mod Components 5x Steel Spring | Gunsmith 3 |
| Remote Raider Flare | Quick Use | 2x Chemicals 4x Rubber Parts | Utility Station 1 |
| Heavy Gun Parts | Material | 4x Simple Gun Parts | Refiner 2 |
| Venator | Weapon | 2x Advanced Mechanical Components 3x Medium Gun Parts 5x Magnet | Gunsmith 3 |
| Il Toro | Weapon | 5x Mechanical Components 6x Simple Gun Parts | Gunsmith 1 |
| Jolt Mine | Mine | 1x Electrical Components 1x Battery | Explosives Station 2 |
| Explosive Mine | Mine | 1x Explosive Compound 1x Sensors | Explosives Station 3 |
| Jupiter | Weapon | 3x Magnetic Accelerator 3x Complex Gun Parts 1x Queen Reactor | Gunsmith 3 |
| Light Gun Parts | Material | 4x Simple Gun Parts | Refiner 2 |
| Lightweight Stock | Mod | 2x Mod Components 5x Duct Tape | Gunsmith 3 |
| Lure Grenade | Grenade | 1x Speaker Component 1x Electrical Components | Utility Station 2 |
| Medium Gun Parts | Material | 4x Simple Gun Parts | Refiner 2 |
| Torrente | Weapon | 2x Advanced Mechanical Components 3x Medium Gun Parts 6x Steel Spring | Gunsmith 3 |
| Muzzle Brake II | Mod | 2x Mechanical Components 4x Wires | Gunsmith 2 |
| Muzzle Brake III | Mod | 2x Mod Components 8x Wires | Gunsmith 3 |
| Padded Stock | Mod | 2x Mod Components 5x Duct Tape | Gunsmith 3 |
| Shotgun Choke II | Mod | 2x Mechanical Components 4x Wires | Gunsmith 2 |
| Shotgun Choke III | Mod | 2x Mod Components 8x Wires | Gunsmith 3 |
| Shotgun Silencer | Mod | 2x Mod Components 8x Wires | Gunsmith 3 |
| Showstopper | Grenade | 1x Advanced Electrical Components 1x Voltage Converter | Explosives Station 3 |
| Silencer I | Mod | 2x Mechanical Components 4x Wires | Gunsmith 2 |
| Silencer II | Mod | 2x Mod Components 8x Wires | Gunsmith 3 |
| Snap Hook | Quick Use | 2x Power Rod 3x Rope 1x Exodus Modules | Utility Station 3 |
| Stable Stock II | Mod | 2x Mechanical Components 3x Duct Tape | Gunsmith 2 |
| Stable Stock III | Mod | 2x Mod Components 5x Duct Tape | Gunsmith 3 |
| Tagging Grenade | Grenade | 1x Electrical Components 1x Sensors | Utility Station 3 |
| Tempest | Weapon | 3x Advanced Mechanical Components 3x Medium Gun Parts 3x Canister | Gunsmith 3 |
| Trigger Nade | Grenade | 2x Crude Explosives 1x Processor | Explosives Station 2 |
| Vertical Grip II | Mod | 2x Mechanical Components 3x Duct Tape | Gunsmith 2 |
| Vertical Grip III | Mod | 2x Mod Components 5x Duct Tape | Gunsmith 3 |
| Vita Shot | Quick Use | 2x Antiseptic 1x Syringe | Medical Lab 3 |
| Vita Spray | Quick Use | 3x Antiseptic 1x Canister | Medical Lab 3 |
| Vulcano | Weapon | 1x Magnetic Accelerator 3x Heavy Gun Parts 1x Exodus Modules | Gunsmith 3 |
| Wolfpack | Grenade | 2x Explosive Compound 2x Sensors | Explosives Station 3 |
| Red Light Stick | Quick Use | 3x Chemicals | Utility Station 1 |
| Smoke Grenade | Grenade | 14x Chemicals 1x Canister | Utility Station 2 |
| Deadline | Mine | 3x Explosive Compound 2x ARC Circuitry | Explosives Station 3 |
| Trailblazer | Grenade | 1x Explosive Compound 1x Synthesized Fuel | Explosives Station 3 |
| Tactical Mk. 3 (Defensive) | Augment | 2x Advanced Electrical Components 3x Processor | Gear Bench 3 |
| Tactical Mk. 3 (Healing) | Augment | 2x Advanced Electrical Components 3x Processor | Gear Bench 3 |
| Yellow Light Stick | Quick Use | 3x Chemicals | Utility Station 1 |
Note: The missing Blueprints in this list likely have not actually been added to the game at the time of writing, because none of the playerbase has managed to find any of them. As they are added to the game, I will update this page with the most relevant information so you know exactly how to get all 75 Arc Raiders Blueprints.
Where to find Blueprints in Arc Raiders
Below is a list of all containers, modifiers, and events which maximise your chances of finding Blueprints:
- Certain quests reward you with specific Blueprints .
- Completing Trials has a high chance of offering Blueprints as rewards.
- Surveyors have a decent chance of dropping Blueprints on death.
- High loot value areas tend to have a greater chance of spawning Blueprints.
- Night Raids and Storms may increase rare Blueprint spawn chances in containers.
- Containers with higher numbers of items may have a higher tendency to spawn Blueprints. As a result, Blue Gate (which has many “large” containers containing multiple items) may give you a higher chance of spawning Blueprints.
- Raider containers (Raider Caches, Weapon Boxes, Medical Bags, Grenade Tubes) have increased Blueprint drop rates. As a result, the Uncovered Caches event gives you a high chance of finding Blueprints.
- Security Lockers have a higher than average chance of containing Blueprints.
- Certain Blueprints only seem to spawn under specific circumstances: Tempest Blueprint only spawns during Night Raid events. Vulcano Blueprint only spawns during Hidden Bunker events. Jupiter and Equaliser Blueprints only spawn during Harvester events.

Raider Caches, Weapon Boxes, and other raider-oriented container types have a good chance of offering Blueprints. |Image credit:Rock Paper Shotgun/Embark Studios
Blueprints have a very low chance of spawning in any container in Arc Raiders, around 1-2% on average. However, there is a higher chance of finding Blueprints in particular container types. Specifically, you can find more Blueprints in Raider containers and security lockers.
Beyond this, if you’re looking for Blueprints you should focus on regions of the map which are marked as having particularly high-value loot. Areas such as the Control Tower in Dam Battlegrounds, the Arrival and Departure Buildings in Spaceport, and Pilgrim’s Peak in Blue Gate all have a better-than-average chance of spawning Blueprints somewhere amongst all their containers. Night Raids and Electromagnetic Storm events also increase the drop chances of certain Blueprints .
In addition to these containers, you can often loot Blueprints from destroyed Surveyors - the largest of the rolling ball ARC. Surveyors are more commonly found on the later maps - Spaceport and Blue Gate - and if one spawns in your match, you’ll likely see it by the blue laser beam that it casts into the sky while “surveying”.
Surveyors are quite well-armoured and will very speedily run away from you once it notices you, but if you can take one down then make sure you loot all its parts for a chance of obtaining certain unusual Blueprints.
Blueprints obtained from quests
One way in which you can get Blueprints is by completing certain quests for the vendors in Speranza. Some quests will reward you with a specific item Blueprint upon completion, so as long as you work through all the quests in Arc Raiders, you are guaranteed those Blueprints.
Here is the full list of all Blueprints you can get from quest rewards:
- Trigger Nade Blueprint: Rewarded after completing “Sparks Fly”.
- Lure Grenade Blueprint: Rewarded after completing “Greasing Her Palms”.
- Burletta Blueprint: Rewarded after completing “Industrial Espionage”.
- Hullcracker Blueprint (and Launcher Ammo Blueprint): Rewarded after completing “The Major’s Footlocker”.
Alas, that’s only 4 Blueprints out of a total of 75 to unlock, so for the vast majority you will need to find them yourself during a raid. If you’re intent on farming Blueprints, then it’s best to equip yourself with cheap gear in case you lose it, but don’t use a free loadout because then you won’t get a safe pocket to stash any new Blueprint you find. No pain in Arc Raiders is sharper than failing to extract with a new Blueprint you’ve been after for a dozen hours already.

One of the best ways to get Blueprints is by hitting three stars on all five Trials every week. |Image credit:Rock Paper Shotgun/Embark Studios
Blueprints obtained from Trials
One of the very best ways to get Blueprints is as rewards for completing Trials in Arc Raiders. Trials are unlocked from Level 15 onwards, and allow you to earn rewards by focusing on certain tasks over the course of several raids. For example, one Trial might task you with dealing damage to Hornets, while another might challenge you to loot Supply Drops.
Trials refresh on a weekly basis, with a new week bringing five new Trials. Each Trial can offer up to three rewards after passing certain score milestones, and it’s possible to receive very high level loot from these reward crates - including Blueprints. So if you want to unlock as many Blueprints as possible, you should make a point of completing as many Trials as possible each week.
Best Blueprint farming locations
The very best way to get Blueprints is to frequent specific areas of the maps which combine high-tier loot pools with the right types of containers to search. Here are my recommendations for where to find Blueprints on every map, so you can always keep the search going for new crafting recipes to unlock.

Image credit:Rock Paper Shotgun/Embark Studios
Dam Battlegrounds
The best places to farm Blueprints on Dam Battlegrounds are the Control Tower, Power Generation Complex, Ruby Residence, and Pale Apartments . The first two regions, despite only being marked on the map as mid-tier loot, contain a phenomenal number of containers to loot. The Control Tower can also contain a couple of high-tier Security Lockers - though of course, you’ll need to have unlocked the Security Breach skill at the end of the Survival tree.
There’s also a lot of reporting amongst the playerbase that the Residential areas in the top-left of the map - Pale Apartments and Ruby Residence - give you a comparatively strong chance of finding Blueprints. Considering their size, there’s a high density of containers to loot in both locations, and they also have the benefit of being fairly out of the way. So you’re more likely to have all the containers to yourself.
Buried City
The best Blueprint farming locations on Buried City are the Santa Maria Houses, Grandioso Apartments, Town Hall, and the various buildings of the New District . Grandioso Apartments has a lower number of containers than the rest, but a high chance of spawning weapon cases - which have good Blueprint drop rates. The others are high-tier loot areas, with plenty of lootable containers - including Security Lockers.
Spaceport
The best places to find Blueprints on Spaceport are the Arrival and Departure Buildings, as well as Control Tower A6 and the Launch Towers . All these areas are labelled as high-value loot regions, and many of them are also very handily connected to one another by the Spaceport wall, which you can use to quickly run from one area to the next. At the tops of most of these buildings you’ll find at least one Security Locker, so this is an excellent farming route for players looking to find Blueprints.
The downside to looting Blueprints on Spaceport is that all these areas are hotly contested, particularly in Duos and Squads. You’ll need to be very focused and fast in order to complete the full farming route.

Image credit:Rock Paper Shotgun/Embark Studios
Blue Gate
Blue Gate tends to have a good chance of dropping Blueprints, potentially because it generally has a high number of containers which can hold lots of items; so there’s a higher chance of a Blueprint spawning in each container. In my experience, the best Blueprint farming spots on Blue Gate are Pilgrim’s Peak, Raider’s Refuge, the Ancient Fort, and the Underground Complex beneath the Warehouse .
All of these areas contain a wealth of containers to loot. Raider’s Refuge has less to loot, but the majority of the containers in and around the Refuge are raider containers, which have a high chance of containing Blueprints - particularly during major events.
Stella Montis
On the whole, Stella Montis seems to have a very low drop rate for Blueprints (though a high chance of dropping other high-tier loot). If you do want to try farming Blueprints on this map, the best places to find Blueprints in Stella Montis are Medical Research, Assembly Workshop, and the Business Center . These areas have the highest density of containers to loot on the map.
In addition to this, the Western Tunnel has a few different Security Lockers to loot, so while there’s very little to loot elsewhere in this area of the map, it’s worth hitting those Security Lockers if you spawn there at the start of a match.
That wraps up this primer on how to get all the Blueprints in Arc Raiders as quickly as possible. With the Expedition system constantly resetting a large number of players’ Blueprints, it’s more important than ever to have the most up-to-date information on where to find all these Blueprints.
While you’re here, be sure to check out our Arc Raiders best guns tier list , as well as our primers on the best skills to unlock and all the different Field Depot locations on every map.

ARC Raiders
PS5 , Xbox Series X/S , PC
Rock Paper Shotgun is better when you sign in
Sign in and join us on our journey to discover strange and compelling PC games.
