Elden Ring: Nightreign - Who is the best solo character?
These are the most powerful Nightfarers for solo Expeditions
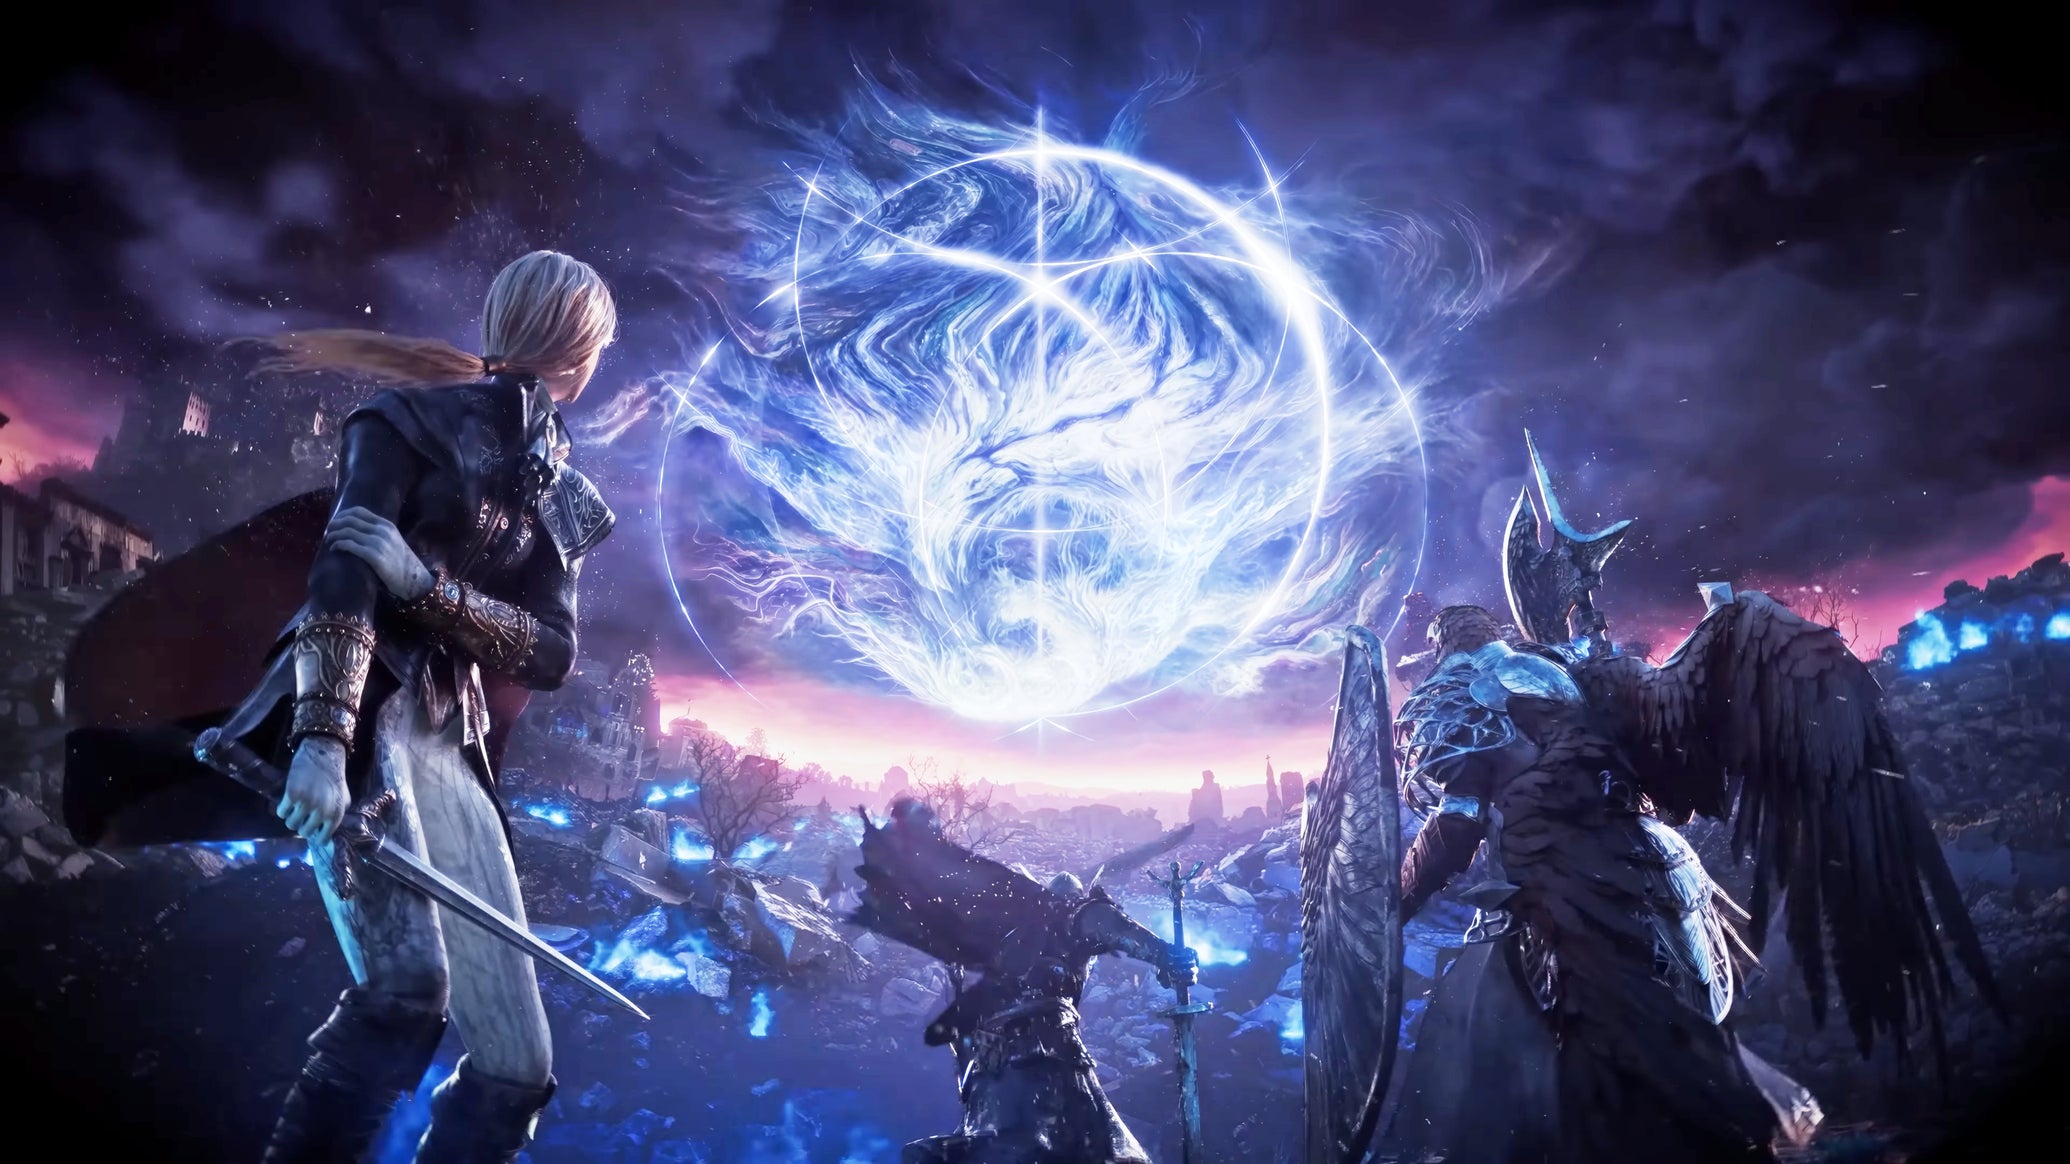
Image credit:Rock Paper Shotgun/Bandai Namco

Who is the best solo character in Elden Ring: Nightreign? Nightreign was built first and foremost as a co-op multiplayer experience, but that’s of course not everyone’s cup of tea. Playing through an Expedition in Nightreign is definitely possible in singleplayer , but it’s far from easy. Despite power scaling which reduces the damage and HP pools of enemies in solo, the nature of combat in Elden Ring means it can be very difficult to survive when it’s just you against an entire map of powerful foes.
After countless hours diving into solo Expeditions with all eight Nightfarers, we’ve discovered that while it’s possible to beat the game solo with any Nightfarer, it gets an awful lot easier if you pick the right character. If you’re struggling to complete your first solo Expedition, you may want to switch things up and pick a more autonomous character whose skillset is particularly strong in singleplayer.
In this guide, we’ve laid out our top picks for the best solo character in Elden Ring: Nightreign . We’ve explained our reasons for each Nightfarer below, and we also provide some handy tips on how to adapt your playstyle for singleplayer with each of these top-tier solo Nightfarers.

Who is the best solo character in Nightreign?
The best characters to play solo in Nightreign are Ironeye, Raider, and Executor . All three characters are very autonomous, with high solo damage potential and skills that can disrupt powerful enemies’ attack patterns. Together, this gives you a far greater degree of safety when playing in singleplayer than the other 5 Nightfarers on offer.
We’ll go over our top three solo character picks in more detail below. For a concise overview of each Nightfarer’s usefulness in solo Expeditions, here are our recommendations for all 8 characters in a solo context, taken from our many hours of experimenting with each Nightfarer on singleplayer Expeditions:
| Nightfarer | Difficulty in Solo | Reason |
|---|---|---|
| Ironeye | Easy | Can deliver consistent damage from a safe distance, stagger with Single Shot, and evade with Marking. |
| Raider | Easy | Very high survivability and enough Strength to easily break the poise of most enemies, disrupting their attacks. |
| Executor | Easy | High skill ceiling, but once mastered, deflects allow the Executor to neatly eviscerate powerful 1v1 bosses. |
| Guardian | Medium | High survivability and strong guard counters, but abilities aren’t terribly helpful in solo, particularly against bosses. |
| Wylder | Medium | Decent damage and balanced stats, but no real advantages, and his skillset wastes some potential in solo. |
| Duchess | Medium | Highly nimble and evasive, but her damage can be outpaced later on as she prefers to synergise her skills with others. |
| Recluse | Hard | Low HP, spells take time to cast, and the sheer complexity of her skillset makes her a challenge in solo. |
| Revenant | Hard | Very low survivability, and cannot rely on her summons to win fights, so her damage potential is lacking in solo. |
Note: The Ironeye, Raider, and Executor are our top picks for solo mode, but if you’re looking for the overall best pick in multiplayer, then be sure to check out our Elden Ring: Nightreign best character tier list .
1. Ironeye
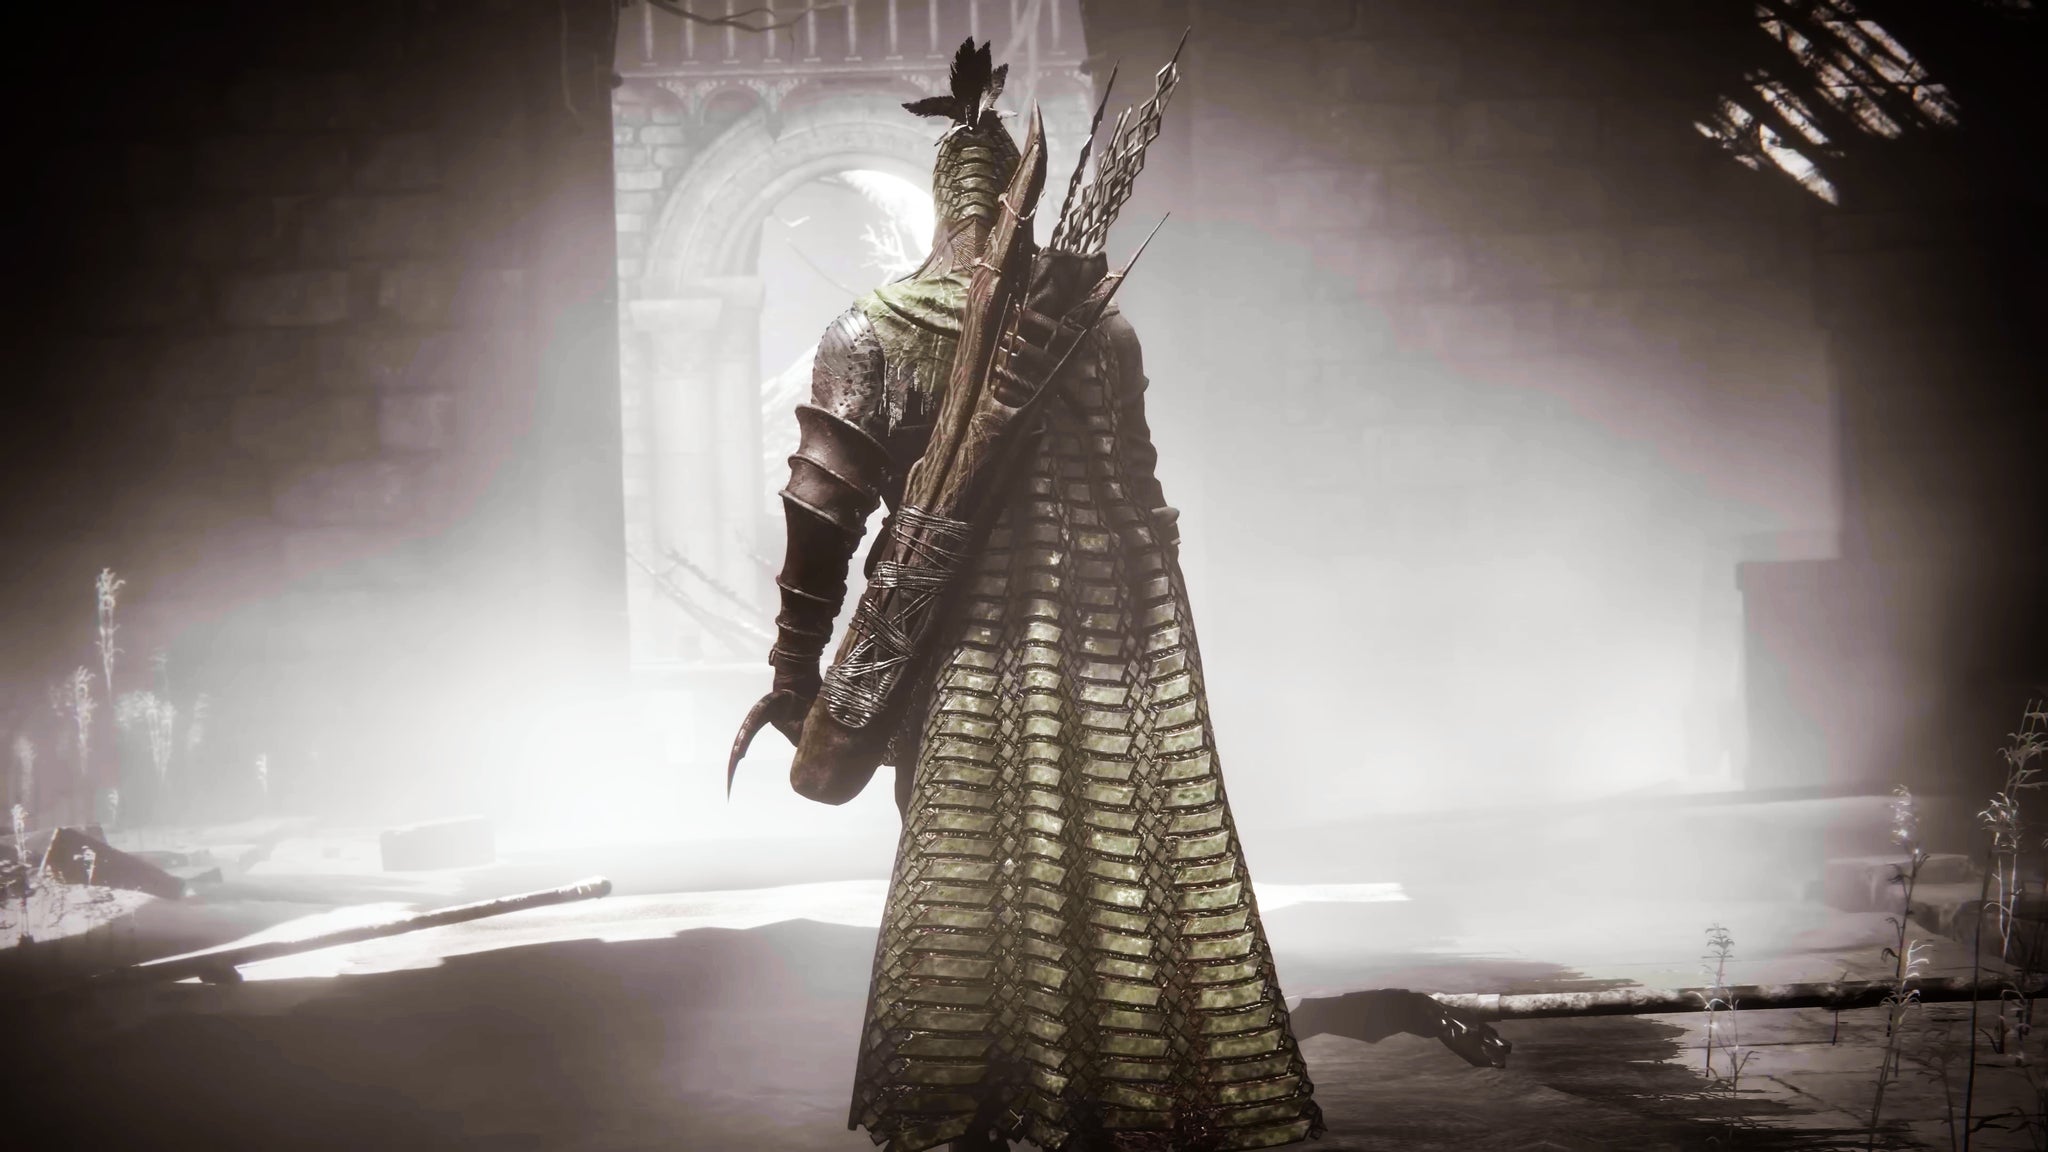
Image credit:Rock Paper Shotgun/Bandai Namco
Ironeye will always be my recommendation for new players struggling to win their first solo Expedition in Nightreign. Any character can wield a ranged weapon, of course, but Ironeye’s speed and damage potential at range is unmatched. Clearing smaller camps on Day 1 is quick and simple, and thanks to his Eagle Eye passive, you’ll gain more loot from farming these camps, which can help you latch onto a strong build very quickly.
Ironeye’s speed with smaller shortbows and longbows make him very adept at dealing with multiple enemies at once, and when it comes to taking on the powerful bosses that end each day, he has the aid of his two active skills. Marking is obviously nice for increasing your damage output on a target for a while, but the real reason it’s so powerful in solo is because it’s a phenomenal evade. You can dive all the way through a boss’s one-shot-kill attack, deal a bit of damage, mark them for more damage, and come out the other side entirely safe.
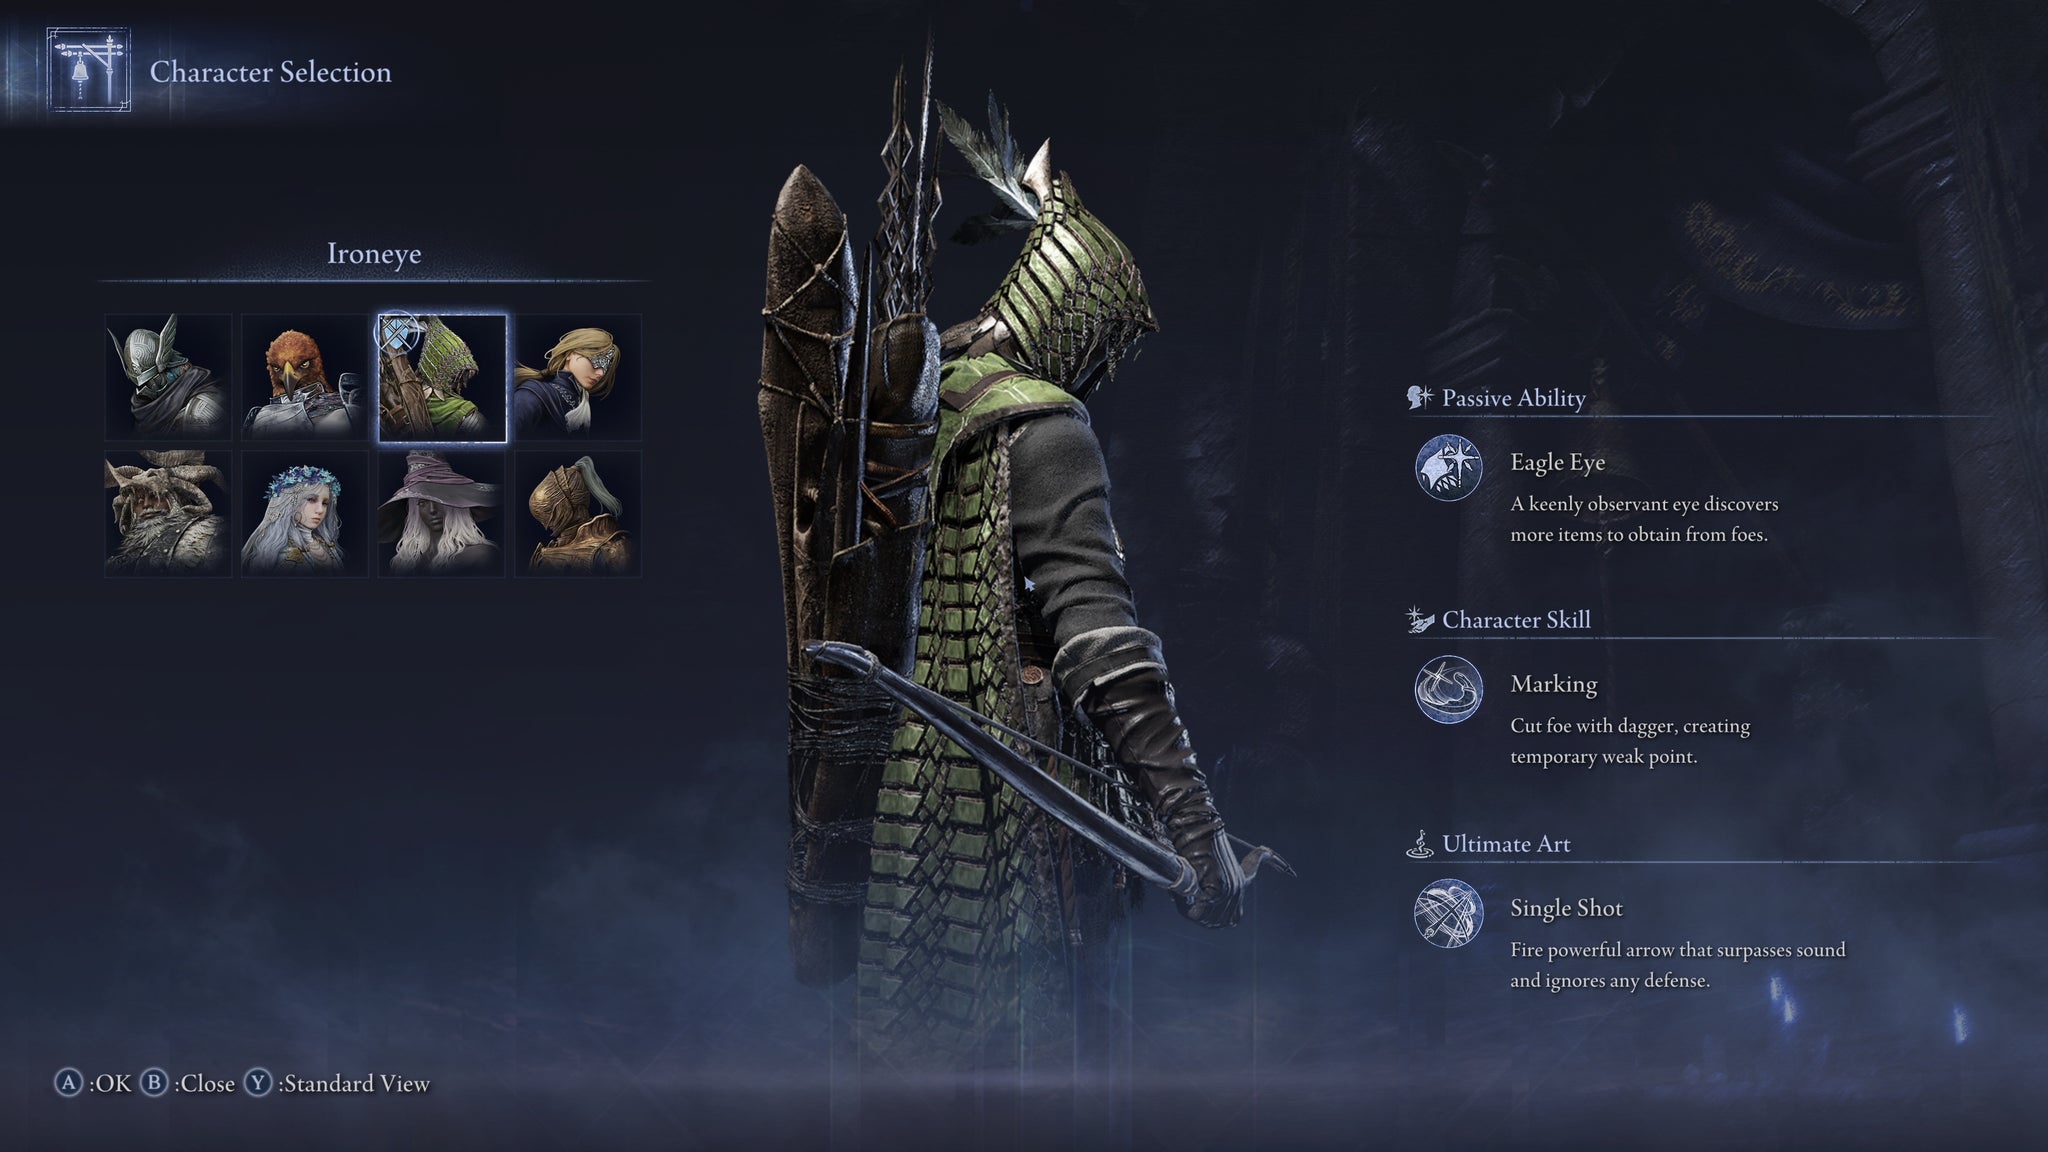
Image credit:Rock Paper Shotgun/Bandai Namco
The downside, of course, is that Ironeye’s HP is pretty low, so you need to be very careful to stay on the outskirts of a fight even in solo and avoid being flanked. If you need some breathing room then Ironeye’s Ultimate is a great source of extra damage and stagger potential (and also renders you invulnerable while casting, like most Ultimates in Nightreign).
The only thing Ironeye really leaves behind when moving from multiplayer to singleplayer is that it’s no longer safe to use gigantic Greatbows and Ballistae, because they lock you in one place for too long. But otherwise, you don’t have to play any different. Ironeye’s skillset and playstyle are simply very well suited for solo players. He’ll be the source of many a player’s first solo win in Nightreign, I’m sure of it.
2. Raider
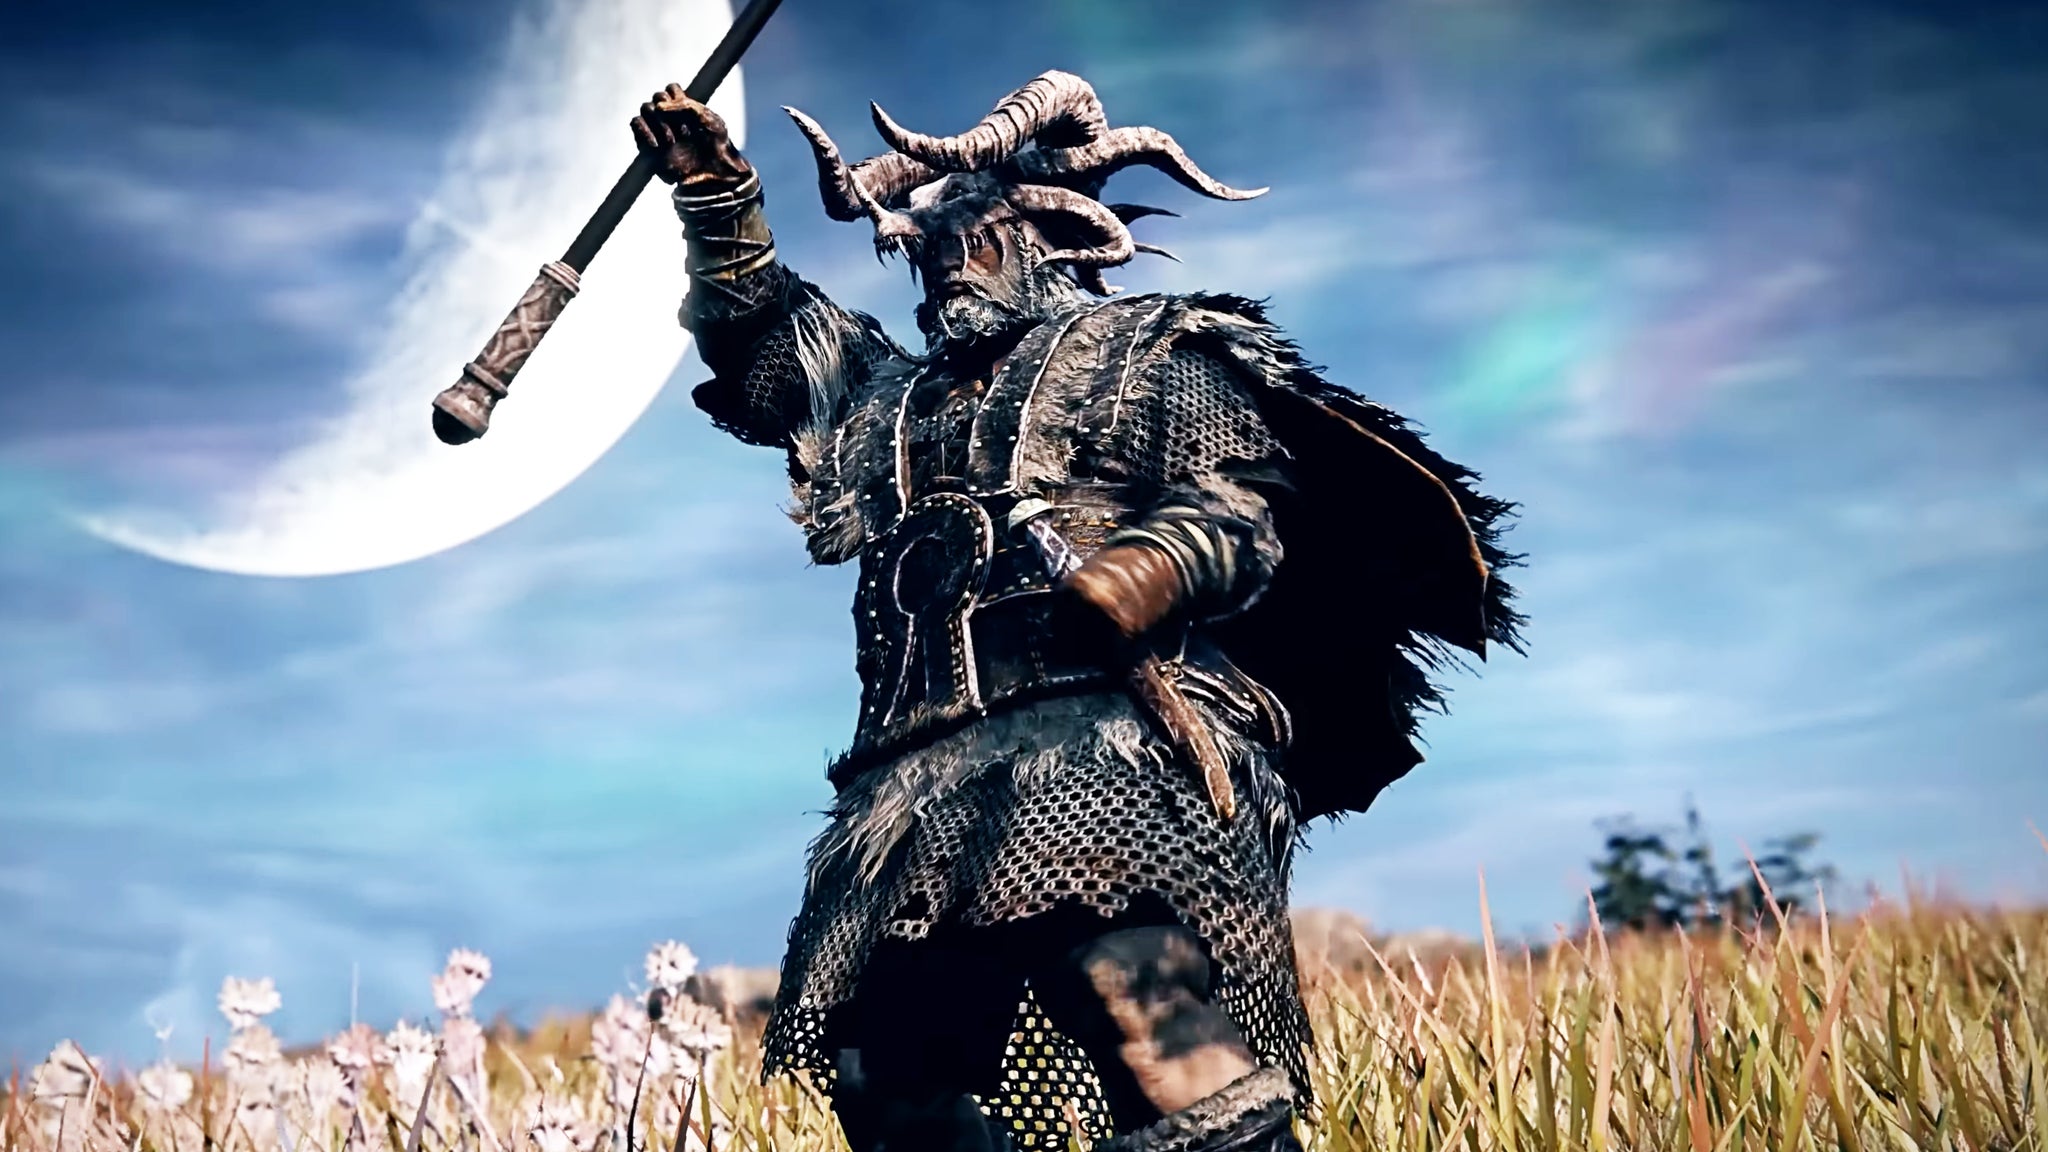
Image credit:Rock Paper Shotgun/Bandai Namco
If you’ve ever seen a player breeze through a challenging boss fight in Elden Ring by putting everything into Strength and wallopping them twice with an oversized club, you already understand why the Raider is such a strong pick in solo mode. His high Strength and affinity with massive weapons gives him not only some phenomenal damage potential, but the ability to interrupt attacks and even stunlock enemies just with a simple chain of light attacks. This alone would make him a strong pick in singleplayer, because it allows you to control the flow of both camp encounters and boss fights far more than you could with a physically weaker Nightfarer like Duchess or even Wylder .
The other reason Raider is such a great pick for singleplayer runs is because he is so darn tanky. With a HP pool and poise rivalled only by the Guardian, he can take a lot of hits before going down. His abilities are also exceptionally strong, because they keep you safe while also allowing opportunities for massive damage to your foe. Retaliate is one of the strongest skills in the game - a low-cooldown counterattack which massively reduces the damage you take while delivering a headbutt that can straight up stagger even bosses.
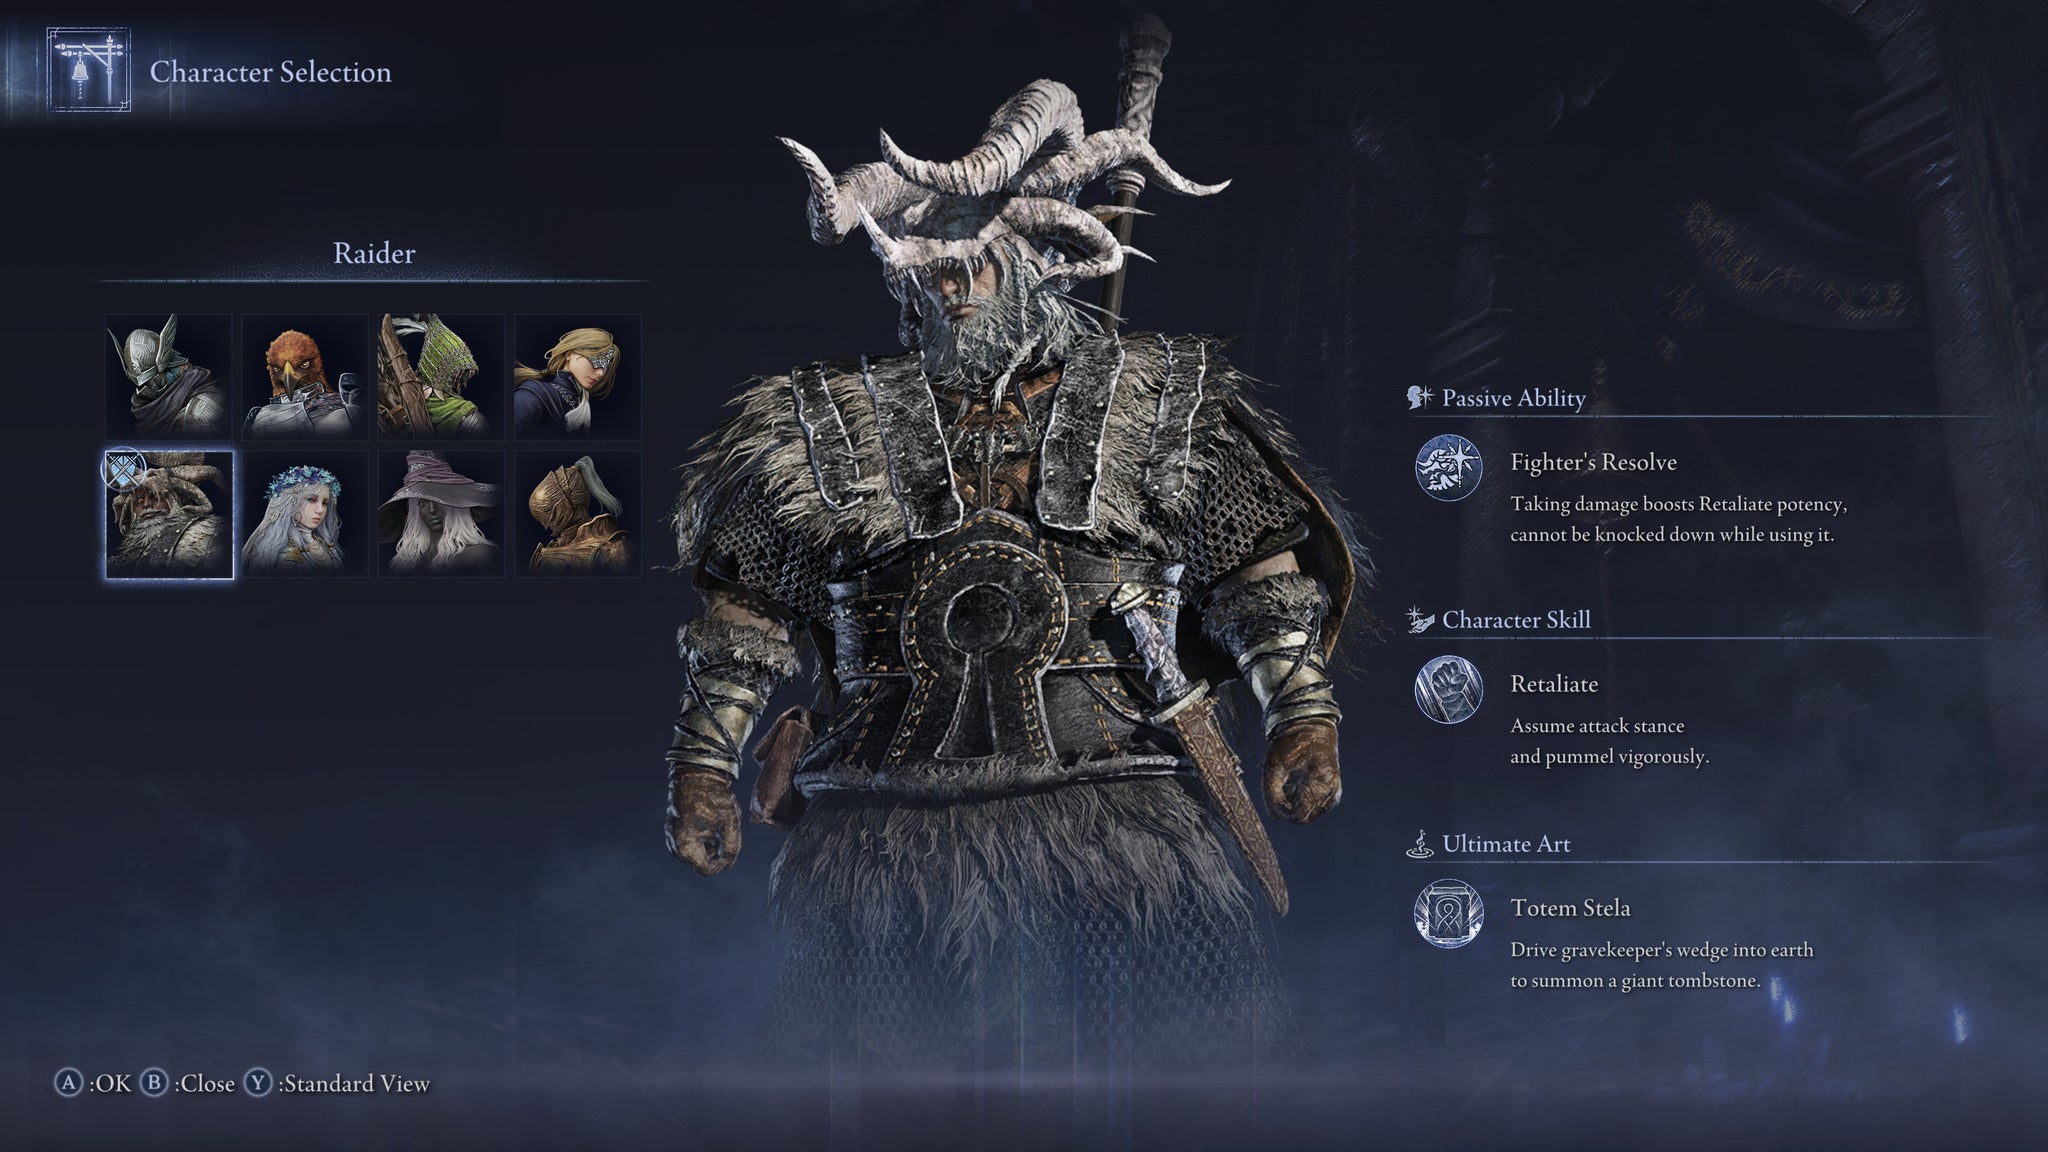
Image credit:Rock Paper Shotgun/Bandai Namco
And if you really need to control the nature of a fight, then Totem Stela can be used to erect a giant tombstone in the middle of the battlefield, giving you lots of (climbable) cover to take advantage of, and increasing your damage for as long as you stay near the totem. The creation of the Totem itself also deals a good amount of damage to anyone hit by the gravestone, and again can deal enough poise damage to instantly stagger a boss.
Of course, if you’re looking for mobility, then you may wish to look elsewhere. Raider is a slow, plodding giant of a Nightfarer. You can equip him with a faster weapon, but then you’re really losing out on what makes him so strong. If you want to see why Raider is so powerful even in solo, then you need to be fearless. Stand in the face of the boss’s most powerful attacks, Retaliate, and then whale on them with the most oversized weapon you can find. If you’ve come from a background of Dex-leaning playthroughs in past FromSoftware games, it can be a learning curve; but you’ll also be amazed how easily Raider can take on bosses that have been the bane of your existence with other Nightfarers.
3. Executor
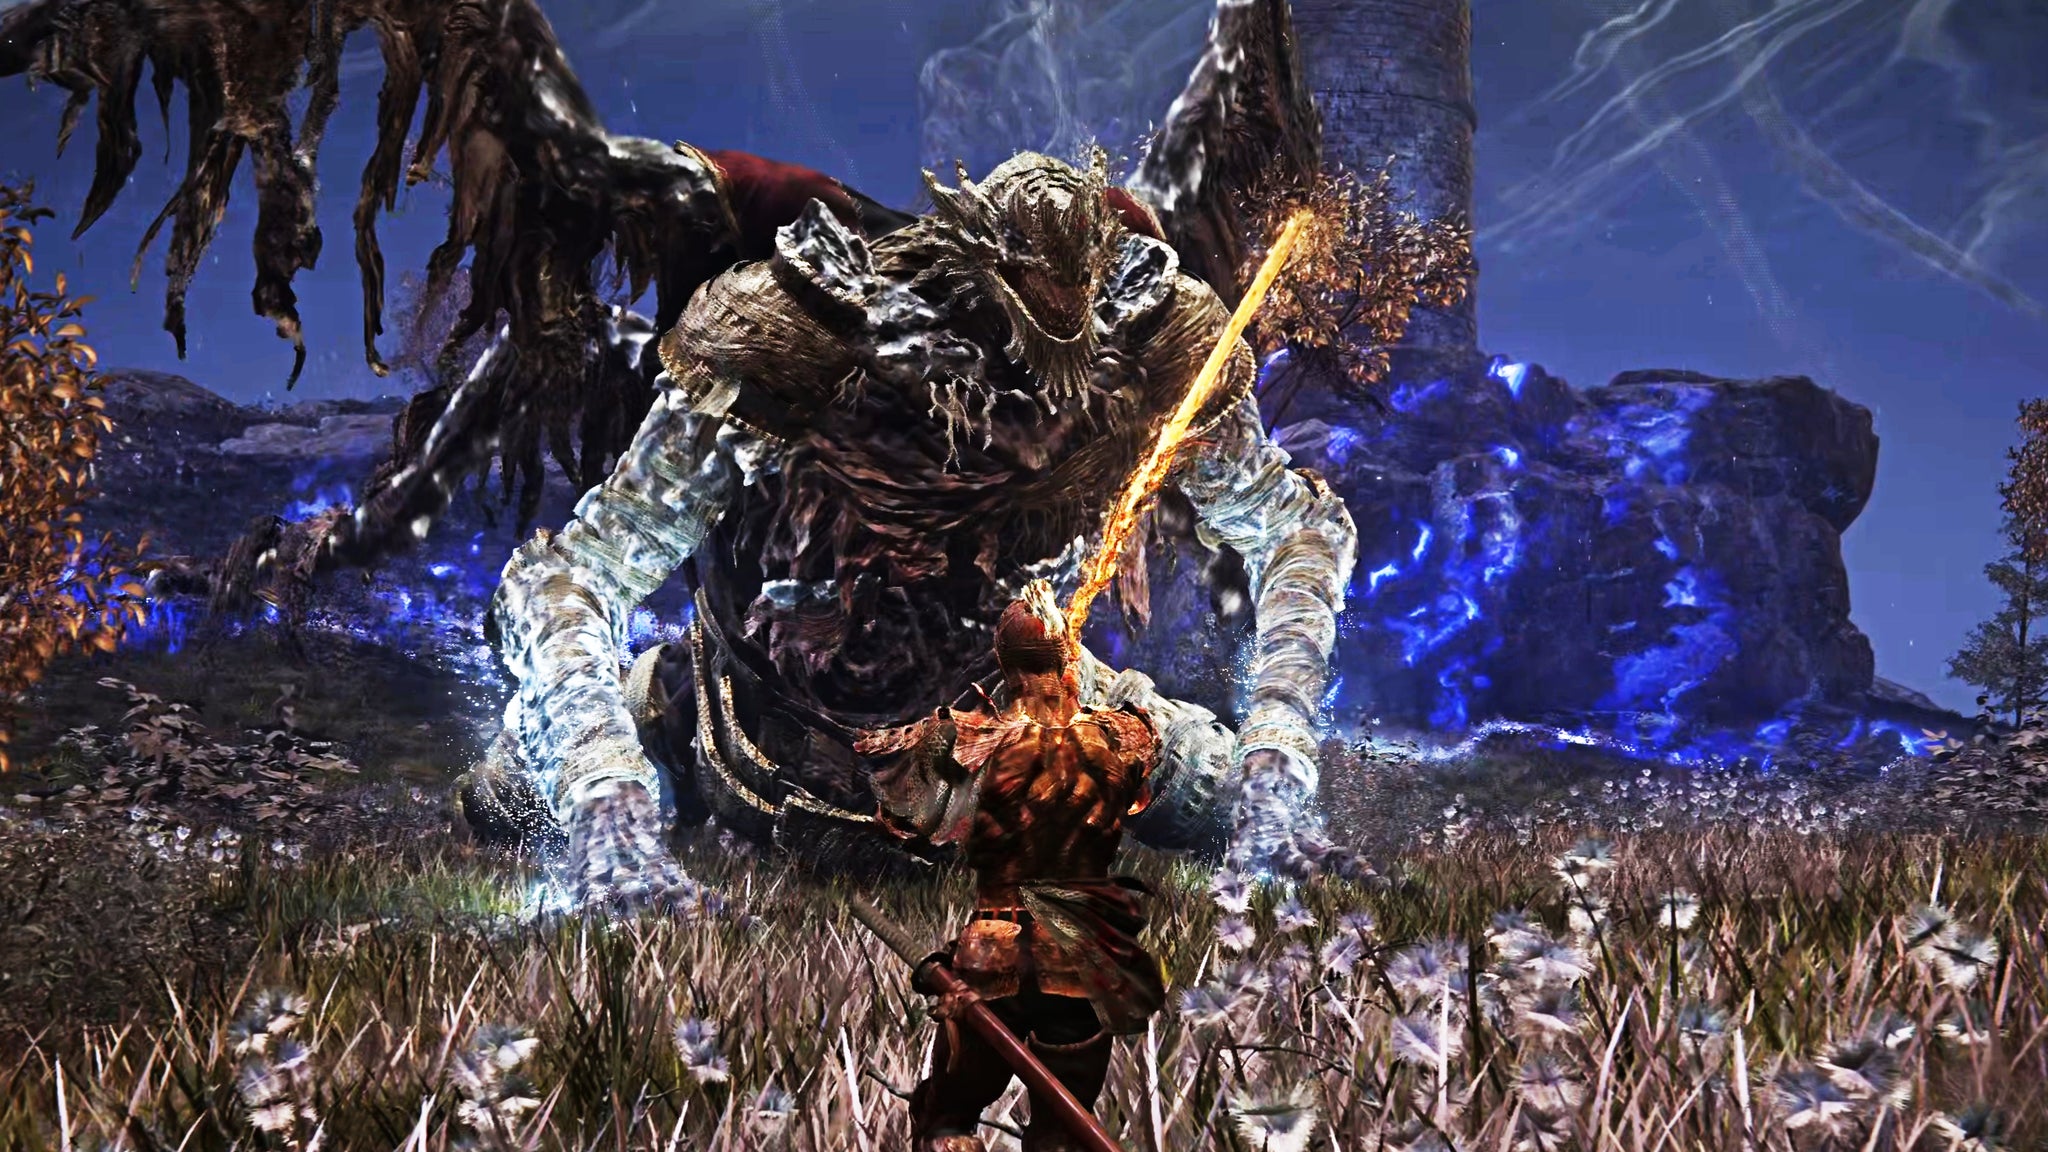
Image credit:Rock Paper Shotgun/Bandai Namco
The Executor is a cautious recommendation for most solo players. When people talk about the Executor, really they think of one thing - his signature Cursed Sword, which allows you to deflect pretty much any attack in the game just like in Sekiro. It’s a phenomenal skill, and one with no cooldown, so you can take the Cursed Blade out and put it away whenever you like. If you are familiar enough with a boss’s attack patterns, then you can absolutely bully them with repeated deflects, causing them to stagger time after time. It turns each fight into a slow and methodical dance, and if you’re good enough, it can make the Executor feel absolutely untouchable.
The caveat is that it takes a long while to gain the knowledge and confidence to become that good with the Executor. You can of course forego this focus on the Cursed Sword’s deflect-heavy playstyle, and play the Executor more like a normal character. High Dexterity and a katana as a starting weapon makes him very strong in early fights, but you must never forget about your low HP pool.
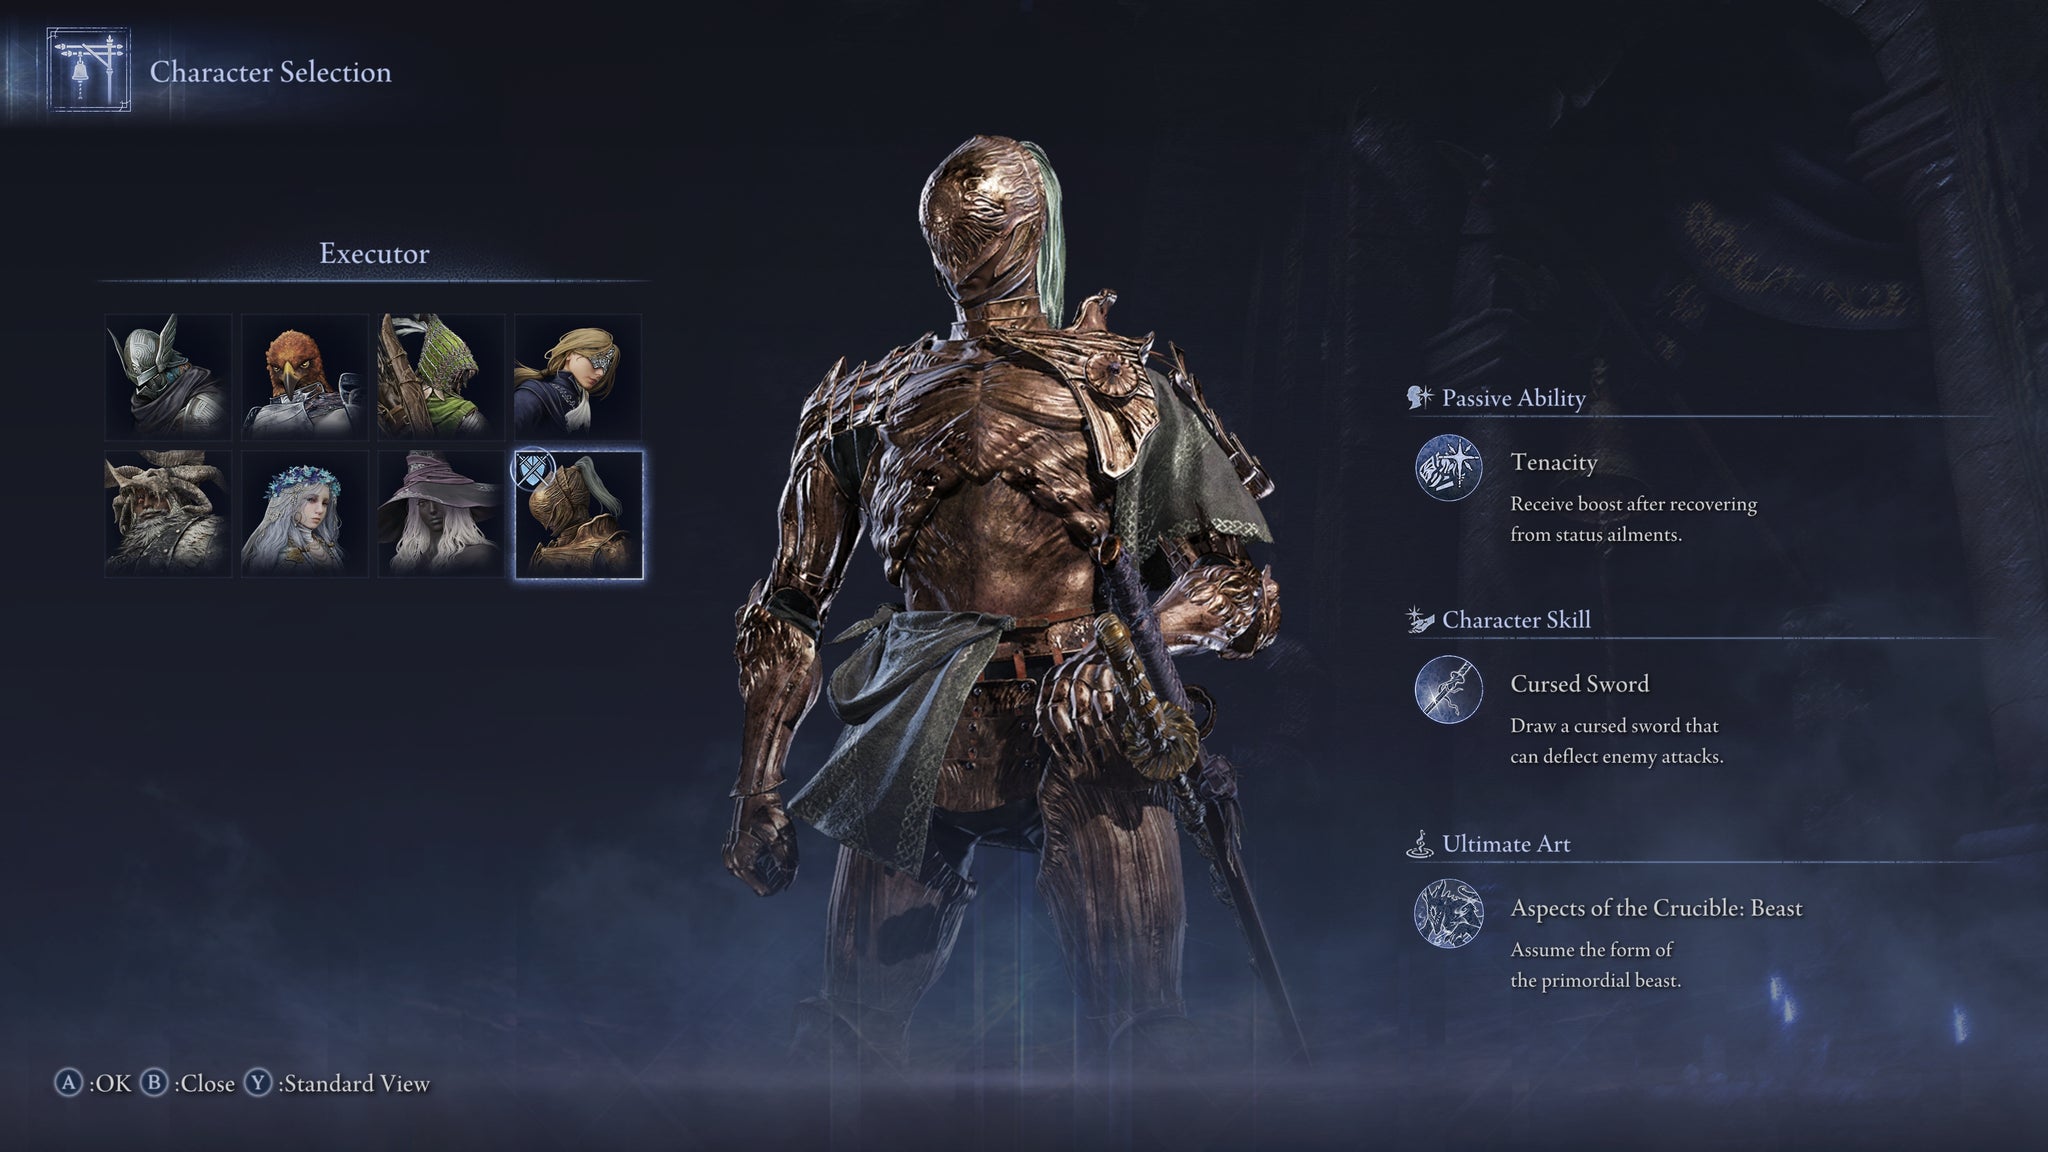
Image credit:Rock Paper Shotgun/Bandai Namco
The other (lesser) caveat is that Executor is built for 1v1 fights, and so will struggle a bit more when outnumbered. So it’s very important to continue repositioning so that you avoid flank attacks when fighting multiple foes. If you do get overwhelmed, the Aspects Of The Crucible: Beast Ultimate Art is a powerful panic button, transforming you into a giant beast for a short time with enough damage potential to wreck a group of weaker enemies, or stagger a single stronger one.
Things can go wrong more quickly with the Executor than with the other two Nightfarers in this list. A single mistimed deflect can spell the end of a run, and that can get frustrating. But I don’t think you can have a conversation about the best solo character and not include the Executor, because against major bosses and Nightlords (which is where most runs tend to end), a good Executor can absolutely dominate the fight if you put the time into learning him.
There you have it: our top picks for the very best solo character in Elden Ring: Nightreign. Hopefully if you’ve been struggling to take on the Nightlord in singleplayer, these three Nightfarers will give you a greater chance of survival all the way to the end of the Expedition.
And if you need more help with Elden Ring: Nightreign, then we have plenty of other guides you can turn to. Make sure you check out our pages on how to increase Flask charges and our multiplayer guide . We’ve also got primers on how to unlock Revenant , how to restore FP and how to get Smithing Stones .

Elden Ring: Nightreign
PS5 , Xbox Series X/S , PC
Rock Paper Shotgun is better when you sign in
Sign in and join us on our journey to discover strange and compelling PC games.

All 75 Arc Raiders Blueprints and where to get them
These areas have the highest chance of giving you Blueprints

Image credit:Rock Paper Shotgun/Embark Studios

Looking for more Arc Raiders Blueprints? It’s a special day when you find a Blueprint, as they’re among the most valuable items in Arc Raiders. If you find a Blueprint that you haven’t already found, then you must make sure you hold onto it at all costs, because Blueprints are the key to one of the most important and powerful systems of meta-progression in the game.
This guide aims to be the very best guide on Blueprints you can find, starting with a primer on what exactly they are and how they work in Arc Raiders, before delving into exactly where to get Blueprints and the very best farming spots for you to take in your search.
We’ll also go over how to get Blueprints from other unlikely activities, such as destroying Surveyors and completing specific quests. And you’ll also find the full list of all 75 Blueprints in Arc Raiders on this page (including the newest Blueprints added with the Cold Snap update , such as the Deadline Blueprint and Firework Box Blueprint), giving you all the information you need to expand your own crafting repertoire.
In this guide:
- What are Blueprints in Arc Raiders?
- Full Blueprint list: All crafting recipes
- Where to find Blueprints in Arc Raiders Blueprints obtained from quests Blueprints obtained from Trials Best Blueprint farming locations

What are Blueprints in Arc Raiders?
Blueprints in Arc Raiders are special items which, if you manage to extract with them, you can expend to permanently unlock a new crafting recipe in your Workshop. If you manage to extract from a raid with an Anvil Blueprint, for example, you can unlock the ability to craft your very own Anvil Pistol, as many times as you like (as long as you have the crafting materials).
To use a Blueprint, simply open your Inventory while in the lobby, then right-click on the Blueprint and click “Learn And Consume” . This will permanently unlock the recipe for that item in your Workshop. As of the Stella Montis update, there are allegedly 75 different Blueprints to unlock - although only 68 are confirmed to be in the game so far. You can see all the Blueprints you’ve found and unlocked by going to the Workshop menu, and hitting “R” to bring up the Blueprint screen.
It’s possible to find duplicates of past Blueprints you’ve already unlocked. If you find these, then you can either sell them, or - if you like to play with friends - you can take it into a match and gift it to your friend so they can unlock that recipe for themselves. Another option is to keep hold of them until the time comes to donate them to the Expedition.
Full Blueprint list: All crafting recipes
Below is the full list of all the Blueprints that are currently available to find in Arc Raiders, and the crafting recipe required for each item:
| Blueprint | Type | Recipe | Crafted At |
|---|---|---|---|
| Bettina | Weapon | 3x Advanced Mechanical Components 3x Heavy Gun Parts 3x Canister | Gunsmith 3 |
| Blue Light Stick | Quick Use | 3x Chemicals | Utility Station 1 |
| Aphelion | Weapon | 3x Magnetic Accelerator 3x Complex Gun Parts 1x Matriarch Reactor | Gunsmith 3 |
| Combat Mk. 3 (Flanking) | Augment | 2x Advanced Electrical Components 3x Processor | Gear Bench 3 |
| Combat Mk. 3 (Aggressive) | Augment | 2x Advanced Electrical Components 3x Processor | Gear Bench 3 |
| Complex Gun Parts | Material | 2x Light Gun Parts 2x Medium Gun Parts 2x Heavy Gun Parts | Refiner 3 |
| Fireworks Box | Quick Use | 1x Explosive Compound 3x Pop Trigger | Explosives Station 2 |
| Gas Mine | Mine | 4x Chemicals 2x Rubber Parts | Explosives Station 1 |
| Green Light Stick | Quick Use | 3x Chemicals | Utility Station 1 |
| Pulse Mine | Mine | 1x Crude Explosives 1x Wires | Explosives Station 1 |
| Seeker Grenade | Grenade | 1x Crude Explosives 2x ARC Alloy | Explosives Station 1 |
| Looting Mk. 3 (Survivor) | Augment | 2x Advanced Electrical Components 3x Processor | Gear Bench 3 |
| Angled Grip II | Mod | 2x Mechanical Components 3x Duct Tape | Gunsmith 2 |
| Angled Grip III | Mod | 2x Mod Components 5x Duct Tape | Gunsmith 3 |
| Hullcracker | Weapon | 1x Magnetic Accelerator 3x Heavy Gun Parts 1x Exodus Modules | Gunsmith 3 |
| Launcher Ammo | Ammo | 5x Metal Parts 1x Crude Explosives | Workbench 1 |
| Anvil | Weapon | 5x Mechanical Components 5x Simple Gun Parts | Gunsmith 2 |
| Anvil Splitter | Mod | 2x Mod Components 3x Processor | Gunsmith 3 |
| ??? | ??? | ??? | ??? |
| Barricade Kit | Quick Use | 1x Mechanical Components | Utility Station 2 |
| Blaze Grenade | Grenade | 1x Explosive Compound 2x Oil | Explosives Station 3 |
| Bobcat | Weapon | 3x Advanced Mechanical Components 3x Light Gun Parts | Gunsmith 3 |
| Osprey | Weapon | 2x Advanced Mechanical Components 3x Medium Gun Parts 7x Wires | Gunsmith 3 |
| Burletta | Weapon | 3x Mechanical Components 3x Simple Gun Parts | Gunsmith 1 |
| Compensator II | Mod | 2x Mechanical Components 4x Wires | Gunsmith 2 |
| Compensator III | Mod | 2x Mod Components 8x Wires | Gunsmith 3 |
| Defibrillator | Quick Use | 9x Plastic Parts 1x Moss | Medical Lab 2 |
| ??? | ??? | ??? | ??? |
| Equalizer | Weapon | 3x Magnetic Accelerator 3x Complex Gun Parts 1x Queen Reactor | Gunsmith 3 |
| Extended Barrel | Mod | 2x Mod Components 8x Wires | Gunsmith 3 |
| Extended Light Mag II | Mod | 2x Mechanical Components 3x Steel Spring | Gunsmith 2 |
| Extended Light Mag III | Mod | 2x Mod Components 5x Steel Spring | Gunsmith 3 |
| Extended Medium Mag II | Mod | 2x Mechanical Components 3x Steel Spring | Gunsmith 2 |
| Extended Medium Mag III | Mod | 2x Mod Components 5x Steel Spring | Gunsmith 3 |
| Extended Shotgun Mag II | Mod | 2x Mechanical Components 3x Steel Spring | Gunsmith 2 |
| Extended Shotgun Mag III | Mod | 2x Mod Components 5x Steel Spring | Gunsmith 3 |
| Remote Raider Flare | Quick Use | 2x Chemicals 4x Rubber Parts | Utility Station 1 |
| Heavy Gun Parts | Material | 4x Simple Gun Parts | Refiner 2 |
| Venator | Weapon | 2x Advanced Mechanical Components 3x Medium Gun Parts 5x Magnet | Gunsmith 3 |
| Il Toro | Weapon | 5x Mechanical Components 6x Simple Gun Parts | Gunsmith 1 |
| Jolt Mine | Mine | 1x Electrical Components 1x Battery | Explosives Station 2 |
| Explosive Mine | Mine | 1x Explosive Compound 1x Sensors | Explosives Station 3 |
| Jupiter | Weapon | 3x Magnetic Accelerator 3x Complex Gun Parts 1x Queen Reactor | Gunsmith 3 |
| Light Gun Parts | Material | 4x Simple Gun Parts | Refiner 2 |
| Lightweight Stock | Mod | 2x Mod Components 5x Duct Tape | Gunsmith 3 |
| Lure Grenade | Grenade | 1x Speaker Component 1x Electrical Components | Utility Station 2 |
| Medium Gun Parts | Material | 4x Simple Gun Parts | Refiner 2 |
| Torrente | Weapon | 2x Advanced Mechanical Components 3x Medium Gun Parts 6x Steel Spring | Gunsmith 3 |
| Muzzle Brake II | Mod | 2x Mechanical Components 4x Wires | Gunsmith 2 |
| Muzzle Brake III | Mod | 2x Mod Components 8x Wires | Gunsmith 3 |
| Padded Stock | Mod | 2x Mod Components 5x Duct Tape | Gunsmith 3 |
| Shotgun Choke II | Mod | 2x Mechanical Components 4x Wires | Gunsmith 2 |
| Shotgun Choke III | Mod | 2x Mod Components 8x Wires | Gunsmith 3 |
| Shotgun Silencer | Mod | 2x Mod Components 8x Wires | Gunsmith 3 |
| Showstopper | Grenade | 1x Advanced Electrical Components 1x Voltage Converter | Explosives Station 3 |
| Silencer I | Mod | 2x Mechanical Components 4x Wires | Gunsmith 2 |
| Silencer II | Mod | 2x Mod Components 8x Wires | Gunsmith 3 |
| Snap Hook | Quick Use | 2x Power Rod 3x Rope 1x Exodus Modules | Utility Station 3 |
| Stable Stock II | Mod | 2x Mechanical Components 3x Duct Tape | Gunsmith 2 |
| Stable Stock III | Mod | 2x Mod Components 5x Duct Tape | Gunsmith 3 |
| Tagging Grenade | Grenade | 1x Electrical Components 1x Sensors | Utility Station 3 |
| Tempest | Weapon | 3x Advanced Mechanical Components 3x Medium Gun Parts 3x Canister | Gunsmith 3 |
| Trigger Nade | Grenade | 2x Crude Explosives 1x Processor | Explosives Station 2 |
| Vertical Grip II | Mod | 2x Mechanical Components 3x Duct Tape | Gunsmith 2 |
| Vertical Grip III | Mod | 2x Mod Components 5x Duct Tape | Gunsmith 3 |
| Vita Shot | Quick Use | 2x Antiseptic 1x Syringe | Medical Lab 3 |
| Vita Spray | Quick Use | 3x Antiseptic 1x Canister | Medical Lab 3 |
| Vulcano | Weapon | 1x Magnetic Accelerator 3x Heavy Gun Parts 1x Exodus Modules | Gunsmith 3 |
| Wolfpack | Grenade | 2x Explosive Compound 2x Sensors | Explosives Station 3 |
| Red Light Stick | Quick Use | 3x Chemicals | Utility Station 1 |
| Smoke Grenade | Grenade | 14x Chemicals 1x Canister | Utility Station 2 |
| Deadline | Mine | 3x Explosive Compound 2x ARC Circuitry | Explosives Station 3 |
| Trailblazer | Grenade | 1x Explosive Compound 1x Synthesized Fuel | Explosives Station 3 |
| Tactical Mk. 3 (Defensive) | Augment | 2x Advanced Electrical Components 3x Processor | Gear Bench 3 |
| Tactical Mk. 3 (Healing) | Augment | 2x Advanced Electrical Components 3x Processor | Gear Bench 3 |
| Yellow Light Stick | Quick Use | 3x Chemicals | Utility Station 1 |
Note: The missing Blueprints in this list likely have not actually been added to the game at the time of writing, because none of the playerbase has managed to find any of them. As they are added to the game, I will update this page with the most relevant information so you know exactly how to get all 75 Arc Raiders Blueprints.
Where to find Blueprints in Arc Raiders
Below is a list of all containers, modifiers, and events which maximise your chances of finding Blueprints:
- Certain quests reward you with specific Blueprints .
- Completing Trials has a high chance of offering Blueprints as rewards.
- Surveyors have a decent chance of dropping Blueprints on death.
- High loot value areas tend to have a greater chance of spawning Blueprints.
- Night Raids and Storms may increase rare Blueprint spawn chances in containers.
- Containers with higher numbers of items may have a higher tendency to spawn Blueprints. As a result, Blue Gate (which has many “large” containers containing multiple items) may give you a higher chance of spawning Blueprints.
- Raider containers (Raider Caches, Weapon Boxes, Medical Bags, Grenade Tubes) have increased Blueprint drop rates. As a result, the Uncovered Caches event gives you a high chance of finding Blueprints.
- Security Lockers have a higher than average chance of containing Blueprints.
- Certain Blueprints only seem to spawn under specific circumstances: Tempest Blueprint only spawns during Night Raid events. Vulcano Blueprint only spawns during Hidden Bunker events. Jupiter and Equaliser Blueprints only spawn during Harvester events.

Raider Caches, Weapon Boxes, and other raider-oriented container types have a good chance of offering Blueprints. |Image credit:Rock Paper Shotgun/Embark Studios
Blueprints have a very low chance of spawning in any container in Arc Raiders, around 1-2% on average. However, there is a higher chance of finding Blueprints in particular container types. Specifically, you can find more Blueprints in Raider containers and security lockers.
Beyond this, if you’re looking for Blueprints you should focus on regions of the map which are marked as having particularly high-value loot. Areas such as the Control Tower in Dam Battlegrounds, the Arrival and Departure Buildings in Spaceport, and Pilgrim’s Peak in Blue Gate all have a better-than-average chance of spawning Blueprints somewhere amongst all their containers. Night Raids and Electromagnetic Storm events also increase the drop chances of certain Blueprints .
In addition to these containers, you can often loot Blueprints from destroyed Surveyors - the largest of the rolling ball ARC. Surveyors are more commonly found on the later maps - Spaceport and Blue Gate - and if one spawns in your match, you’ll likely see it by the blue laser beam that it casts into the sky while “surveying”.
Surveyors are quite well-armoured and will very speedily run away from you once it notices you, but if you can take one down then make sure you loot all its parts for a chance of obtaining certain unusual Blueprints.
Blueprints obtained from quests
One way in which you can get Blueprints is by completing certain quests for the vendors in Speranza. Some quests will reward you with a specific item Blueprint upon completion, so as long as you work through all the quests in Arc Raiders, you are guaranteed those Blueprints.
Here is the full list of all Blueprints you can get from quest rewards:
- Trigger Nade Blueprint: Rewarded after completing “Sparks Fly”.
- Lure Grenade Blueprint: Rewarded after completing “Greasing Her Palms”.
- Burletta Blueprint: Rewarded after completing “Industrial Espionage”.
- Hullcracker Blueprint (and Launcher Ammo Blueprint): Rewarded after completing “The Major’s Footlocker”.
Alas, that’s only 4 Blueprints out of a total of 75 to unlock, so for the vast majority you will need to find them yourself during a raid. If you’re intent on farming Blueprints, then it’s best to equip yourself with cheap gear in case you lose it, but don’t use a free loadout because then you won’t get a safe pocket to stash any new Blueprint you find. No pain in Arc Raiders is sharper than failing to extract with a new Blueprint you’ve been after for a dozen hours already.

One of the best ways to get Blueprints is by hitting three stars on all five Trials every week. |Image credit:Rock Paper Shotgun/Embark Studios
Blueprints obtained from Trials
One of the very best ways to get Blueprints is as rewards for completing Trials in Arc Raiders. Trials are unlocked from Level 15 onwards, and allow you to earn rewards by focusing on certain tasks over the course of several raids. For example, one Trial might task you with dealing damage to Hornets, while another might challenge you to loot Supply Drops.
Trials refresh on a weekly basis, with a new week bringing five new Trials. Each Trial can offer up to three rewards after passing certain score milestones, and it’s possible to receive very high level loot from these reward crates - including Blueprints. So if you want to unlock as many Blueprints as possible, you should make a point of completing as many Trials as possible each week.
Best Blueprint farming locations
The very best way to get Blueprints is to frequent specific areas of the maps which combine high-tier loot pools with the right types of containers to search. Here are my recommendations for where to find Blueprints on every map, so you can always keep the search going for new crafting recipes to unlock.

Image credit:Rock Paper Shotgun/Embark Studios
Dam Battlegrounds
The best places to farm Blueprints on Dam Battlegrounds are the Control Tower, Power Generation Complex, Ruby Residence, and Pale Apartments . The first two regions, despite only being marked on the map as mid-tier loot, contain a phenomenal number of containers to loot. The Control Tower can also contain a couple of high-tier Security Lockers - though of course, you’ll need to have unlocked the Security Breach skill at the end of the Survival tree.
There’s also a lot of reporting amongst the playerbase that the Residential areas in the top-left of the map - Pale Apartments and Ruby Residence - give you a comparatively strong chance of finding Blueprints. Considering their size, there’s a high density of containers to loot in both locations, and they also have the benefit of being fairly out of the way. So you’re more likely to have all the containers to yourself.
Buried City
The best Blueprint farming locations on Buried City are the Santa Maria Houses, Grandioso Apartments, Town Hall, and the various buildings of the New District . Grandioso Apartments has a lower number of containers than the rest, but a high chance of spawning weapon cases - which have good Blueprint drop rates. The others are high-tier loot areas, with plenty of lootable containers - including Security Lockers.
Spaceport
The best places to find Blueprints on Spaceport are the Arrival and Departure Buildings, as well as Control Tower A6 and the Launch Towers . All these areas are labelled as high-value loot regions, and many of them are also very handily connected to one another by the Spaceport wall, which you can use to quickly run from one area to the next. At the tops of most of these buildings you’ll find at least one Security Locker, so this is an excellent farming route for players looking to find Blueprints.
The downside to looting Blueprints on Spaceport is that all these areas are hotly contested, particularly in Duos and Squads. You’ll need to be very focused and fast in order to complete the full farming route.

Image credit:Rock Paper Shotgun/Embark Studios
Blue Gate
Blue Gate tends to have a good chance of dropping Blueprints, potentially because it generally has a high number of containers which can hold lots of items; so there’s a higher chance of a Blueprint spawning in each container. In my experience, the best Blueprint farming spots on Blue Gate are Pilgrim’s Peak, Raider’s Refuge, the Ancient Fort, and the Underground Complex beneath the Warehouse .
All of these areas contain a wealth of containers to loot. Raider’s Refuge has less to loot, but the majority of the containers in and around the Refuge are raider containers, which have a high chance of containing Blueprints - particularly during major events.
Stella Montis
On the whole, Stella Montis seems to have a very low drop rate for Blueprints (though a high chance of dropping other high-tier loot). If you do want to try farming Blueprints on this map, the best places to find Blueprints in Stella Montis are Medical Research, Assembly Workshop, and the Business Center . These areas have the highest density of containers to loot on the map.
In addition to this, the Western Tunnel has a few different Security Lockers to loot, so while there’s very little to loot elsewhere in this area of the map, it’s worth hitting those Security Lockers if you spawn there at the start of a match.
That wraps up this primer on how to get all the Blueprints in Arc Raiders as quickly as possible. With the Expedition system constantly resetting a large number of players’ Blueprints, it’s more important than ever to have the most up-to-date information on where to find all these Blueprints.
While you’re here, be sure to check out our Arc Raiders best guns tier list , as well as our primers on the best skills to unlock and all the different Field Depot locations on every map.


ARC Raiders
PS5 , Xbox Series X/S , PC
Rock Paper Shotgun is better when you sign in
Sign in and join us on our journey to discover strange and compelling PC games.
