Elden Ring: Nightreign tips and tricks
More than 20 must-know tips for all Nightfarers

Image credit:Rock Paper Shotgun/Bandai Namco

Looking for the best tips and tricks in Elden Ring: Nightreign? While Limveld may bear a resemblance to The Lands Between in base Elden Ring , Nightreign is a very different beast - a fast-paced multiplayer take on what was a very deliberate single player experience. As the threat of encroaching darkness constantly draws closer to claim the lives of your Nightfarers, you’ll have to master a new skillset to defeat the Nightlords.
This guide offers up over 20 useful tips for mastering Elden Ring: Nightreign . Even if you’re an old Soulslike master, Nightreign is like no other FromSoftware game out there at the moment, and the secrets below deserve your attention!

Elden Ring: Nightreign tips and tricks
The following pieces of advice are must-know tidbits for any Nightfarer, and run the gamut from offering advice on the best characters for solo play to Nightlord weaknesses. We’ve arranged them in rough order from beginner-friendly tips to ones more appropriate for experienced players.
Familiarise yourself with each Nightfarer
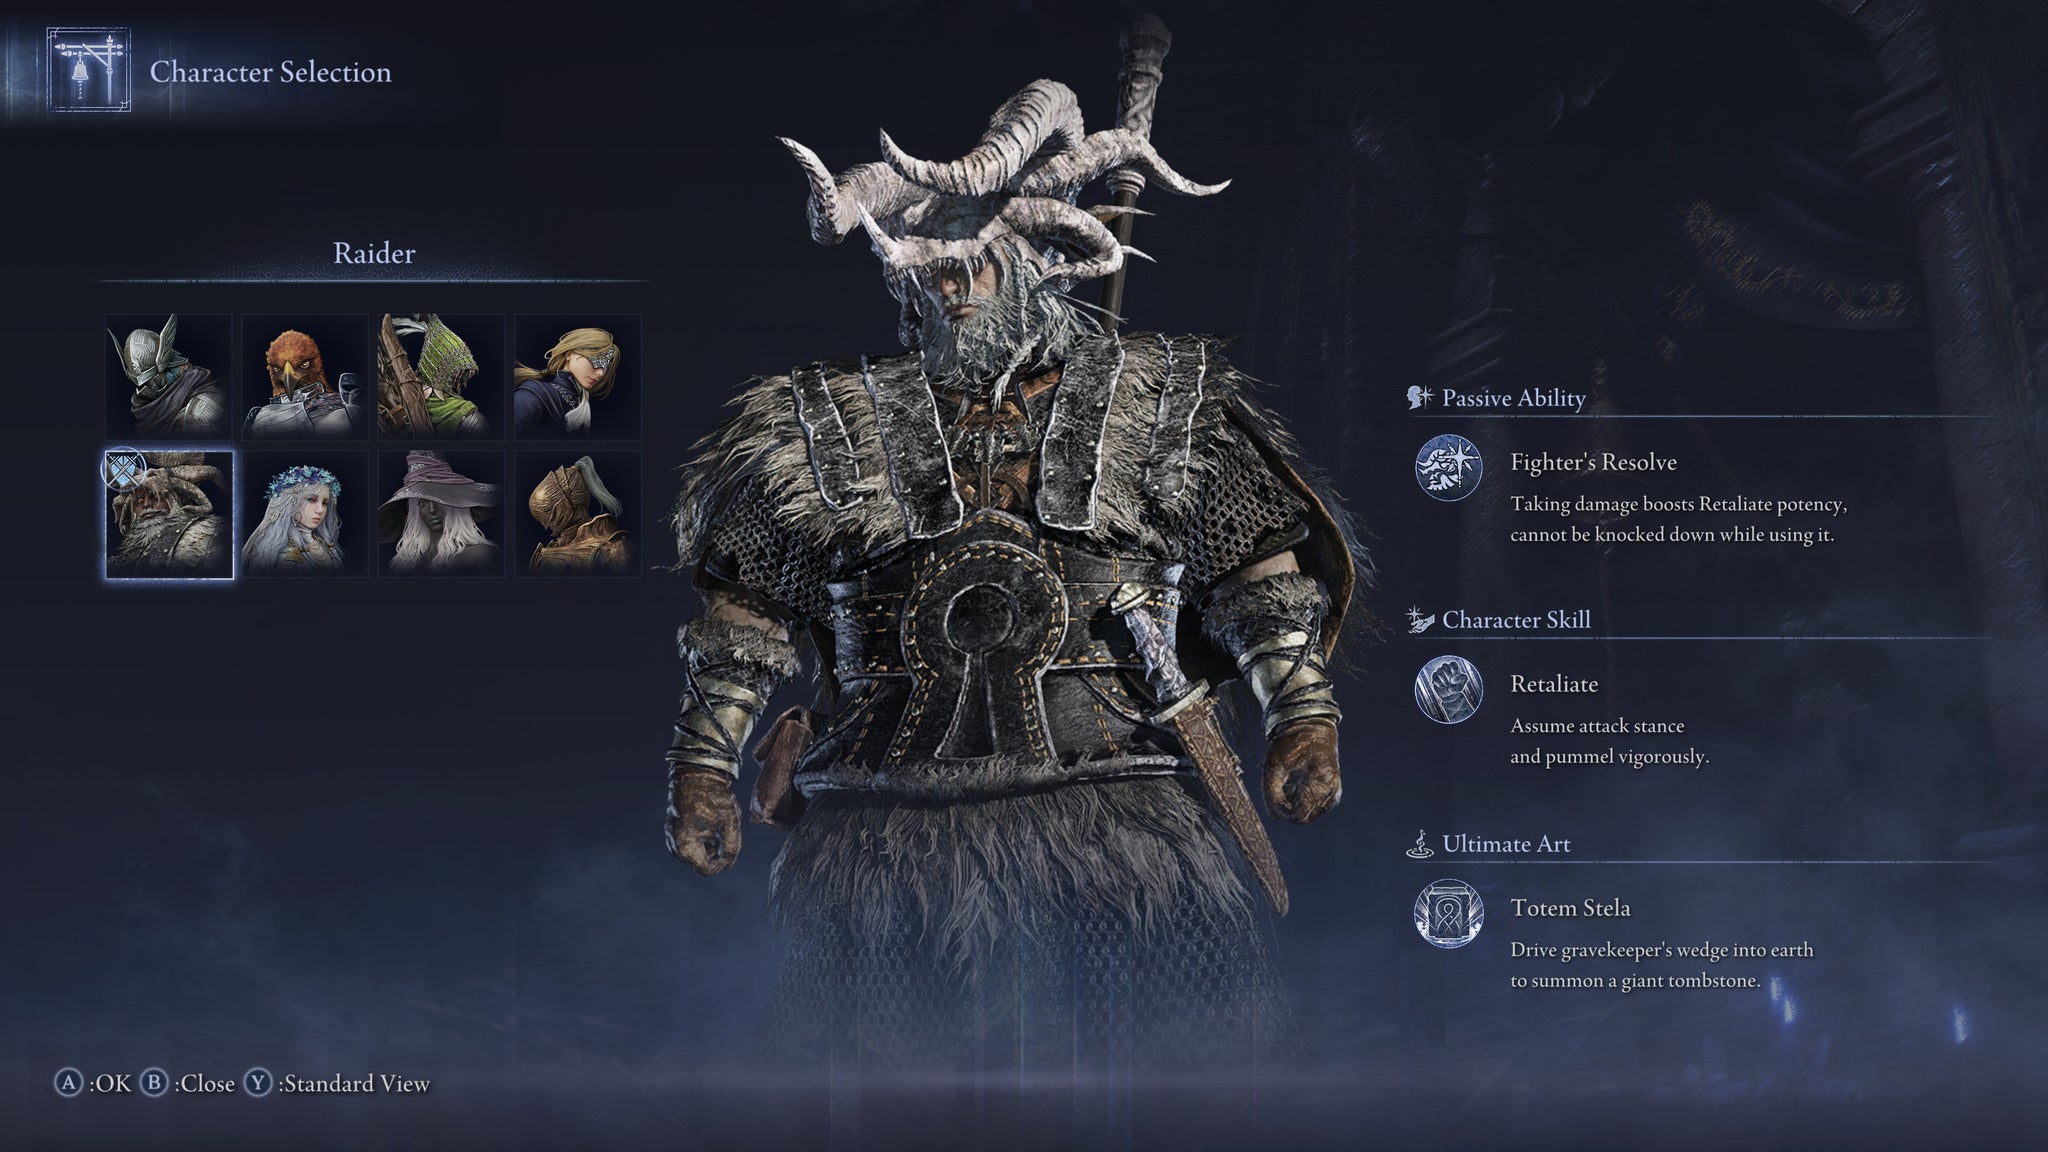
This big fellow, as you might guess, hits like a truck. |Image credit:Rock Paper Shotgun/Bandai Namco
Elden Ring: Nightreign stars eight Nightfarers, and six of them are available from the getgo. We’ve got a character tier list with all the pros and cons of each Nightfarer, but it’s worth mentioning that each represents a different slice of Elden Ring gameplay, from Guardian’s tanky build to Raider’s pulverizing strength.
Unlock Duchess and Revenant ASAP
Duchess and Revenant allow you to attack foes with rogue-like precision and use summons, respectively. Unlocking Duchess is simple, as all you need to do is give the Old Pocketwatch to the Priestess in the Roundtable Hold . Unlocking Revenant takes more effort and requires you to beat the Night Idol boss.
Use the Sparring Grounds to learn your Nightfarer
Nightreign’s Roundtable Hold features a practice arena with three targets and an attacker. You need to chat with the fallen pile of wood on the ground to animate it into coming at you, and if you head over to the chest on the table, you’ll gain access to a number of different sparring weapons. You can also use the control menu to level up your character. Hanging out in the Sparring Grounds is the best way to learn the Recluse’s Magic Cocktail combinations, which brings us to the next tip…
If you want to play as Recluse, learn her Magic Cocktail combinations

If you get to know Recluse well, you too can whip up massive fireballs. |Image credit:Rock Paper Shotgun/Bandai Namco
Recluse uses an elaborate magic system that revolves around extracting elemental affinities and weaving these residues into new spells that don’t cost FP. Playing as Recluse requires learning 14 different spell combinations, but luckily for you, our guide on her Magic Cocktail skill consolidates them in one place.
A good Recluse run is also quite dependant on your teammates; they should be funnelling their staffs and sacred seals to you in case you can use them, and also loading up themselves on the kinds of elemental affinities that you can use to charge your best Magic Cocktail spells.
Solo play is totally viable with the right Nightfarer
Nightreign was designed for three players (though a duo mode is coming soon), but you can also tackle the challenges of the night as a lone wolf if you know what you’re doing. Our guide on the best solo characters may be of use, as will our tips for solo play . In a nutshell, try playing as Ironeye - who’s a very beginner-friendly Nightfarer in his own right.
You can unlock cool skins, but it takes time

Praise the sun! And praise fanservice… |Image credit:Rock Paper Shotgun/Bandai Namco
If you want to customise your Nightfarers’ appearance , use the Roundtable Hold’s Viewing Mirror, which unlocks after defeating two different Nightlords. Skins are expensive - for instance, the Dawn skin costs 14,000 Murk, and the Darkness skin costs 35,000 Murk. Since completed Expeditions tend to give around 2,000 Murk each, you had best prepare to grind. The skins sure are pretty though - and there are even some old favourites for veteran FromSoftware fans (like the Guardian’s Sunlight Knight skin).
Remembrance Quests give you some mighty good Relics
Each Nightfarer has Remembrance quests, which are accessible from the Journal in the Roundtable Hold. Completing these quests give your characters valuable Relics, and their completion also serves as an alternate means of unlocking skins that aren’t completely dependent on Murk, thank goodness. The Relics that you’ll get from Remembrance quests are worth the trouble - the Recluse’s highly useful Vestige of Night, for example, gives her Magic Attack power a +2 boost and activates the Terra Magica sorcery whenever she collects affinity residue.
The max level is 15, but you’re unlikely to reach it
This isn’t base Elden Ring where you’ll be able to leisurely level up by harvesting Runes and visiting Sites of Grace over and over again. There simply isn’t enough time, and so it’s quite rare that you’ll actually hit the max level of 15 in time for the Nightlord on Day 3. In general, it’s best to try to reach at least level 5 in time for tackling the Night 1 boss, and level 10 for the Night 2 boss.
Bosses are different depending on your expedition
If you’re wondering what makes each expedition in Nightreign different, it’s the bosses. Obviously there are a variety of different Nightlords to fight, but the smaller bosses that you’ll face at the end of each day are different as well. For instance, if you want to face the Nameless King , only the Darkdrift Knight and Night Aspect expeditions will give you the chance to fight him.
Wylder’s Claw Shot offers good mobility
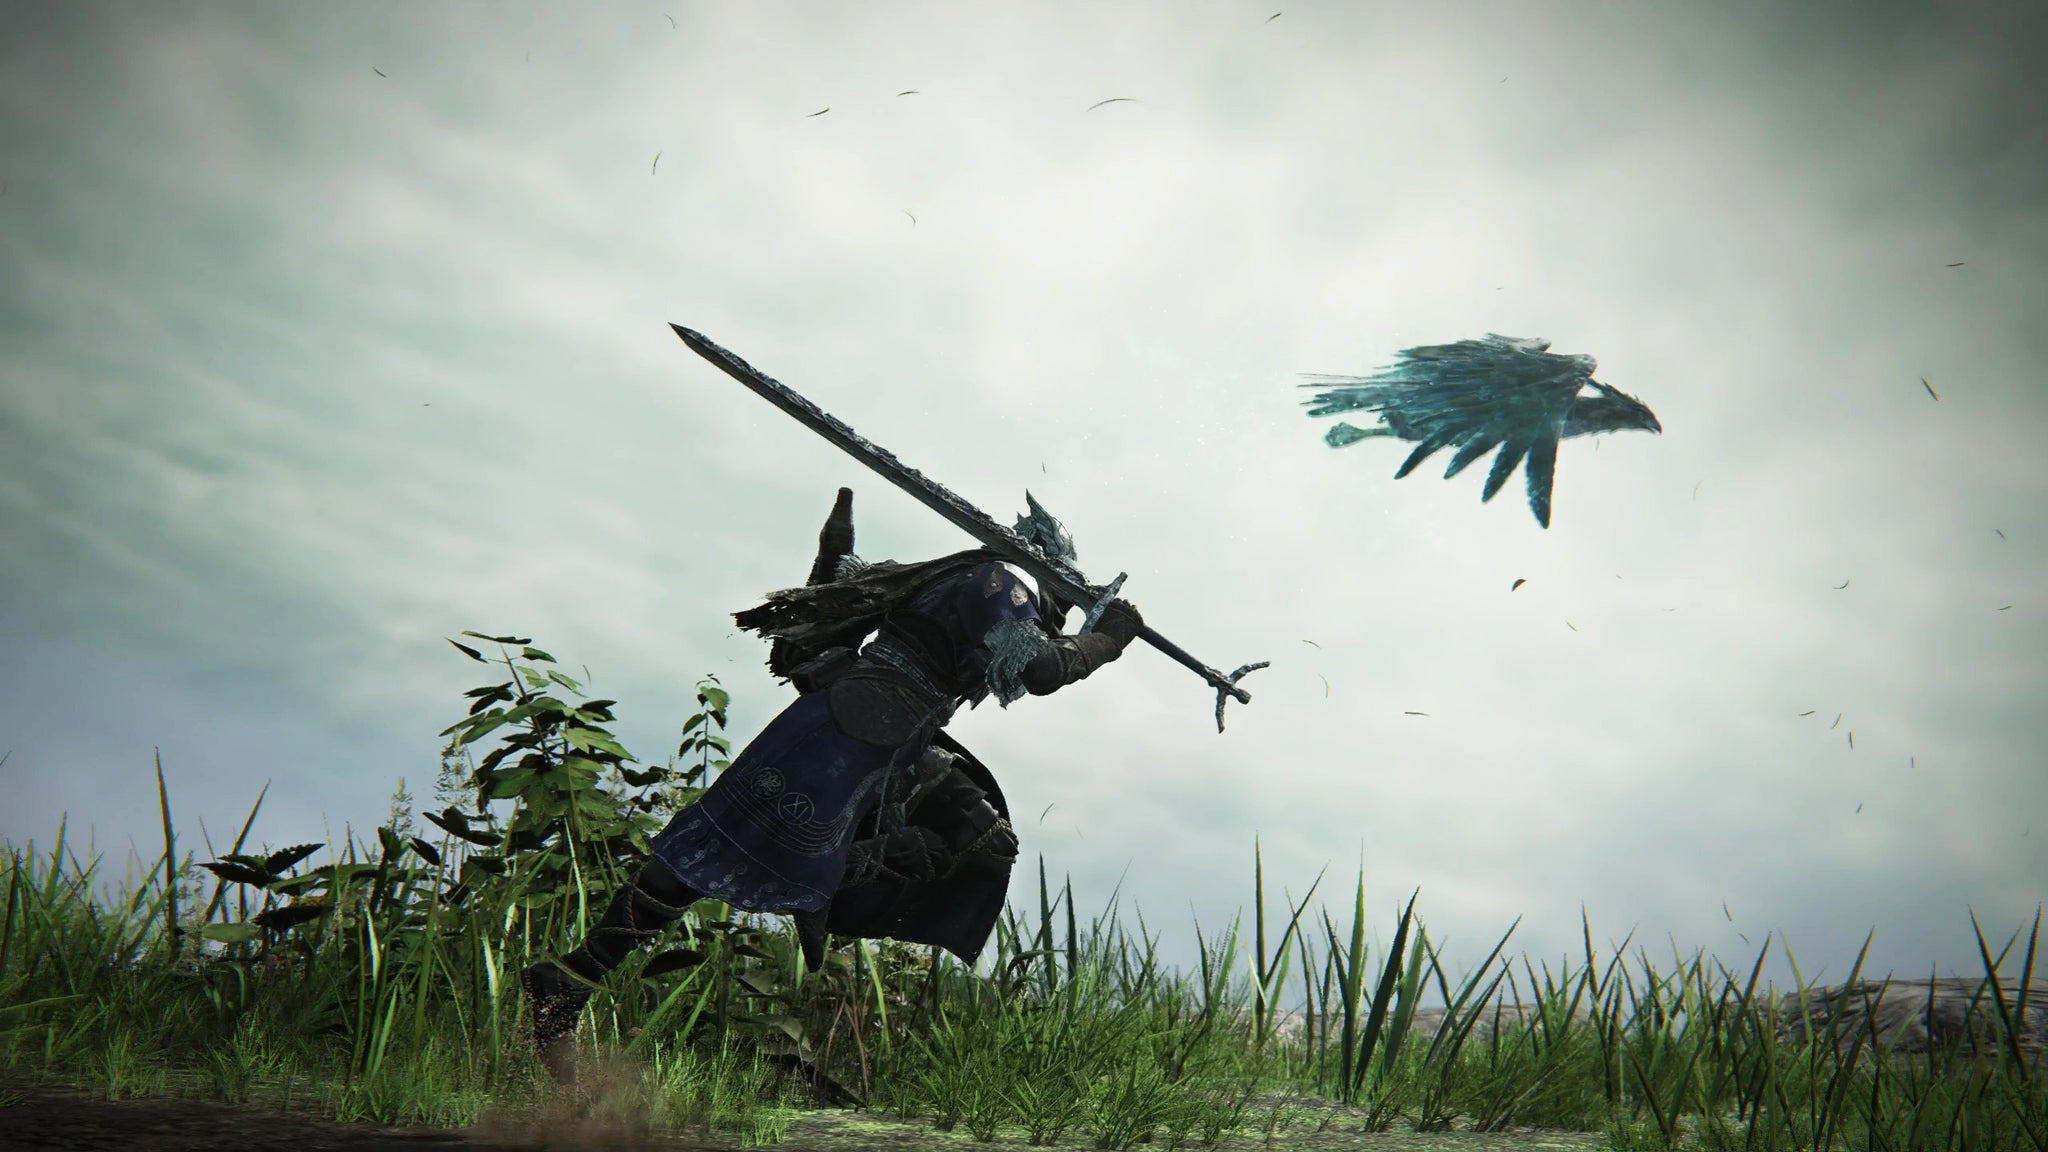
Wylder’s a well-balanced lad with good grappling potential. |Image credit:Rock Paper Shotgun/Bandai Namco
Chances are, you’ll start playing Nightreign as the all-around decent character Wylder , who has balanced stats across the board but also the Claw Shot skill, which is basically a hookshot grapple that lets you pull foes in. But you can also use it for mobility purposes by targeting the Claw Shot at the ground and then jumping right at the end of your propulsion to leap forward and cover extra distance. This is also useful for attacking flying targets.
You can use support ultimates offensively and damage ultimates defensively
Just because a Nightfarer’s ultimate skill is damage-orientated doesn’t mean that it can’t be used to stagger a boss, and vice versa. Wylder’s explosive Onslaught Stake works well at stunning a boss out of a big attack, Raider’s Totem Stela allows comrades to climb atop it and jump down on unsuspecting foes, and Duchess’s Finale, which obscures herself and all surrounding allies, is the perfect segue into a big damage opportunity. Knowing when to pop your ultimate - whether offensively or defensively - is key to mastering your Nightfarer.
Don’t worry about calculating damage
This one’s intended for everyone who took a course in mathematics to figure out exactly how to calculate damage in base Elden Ring. Don’t worry about attack ratios or figuring out damage mitigation stats - in Nightreign, the damage numbers you see on weapons take into account your level scaling, and they are exactly the damage you’re dealing - no need for any quick calculations in your head.
Familiarise yourself with the map to quickly locate churches and merchants
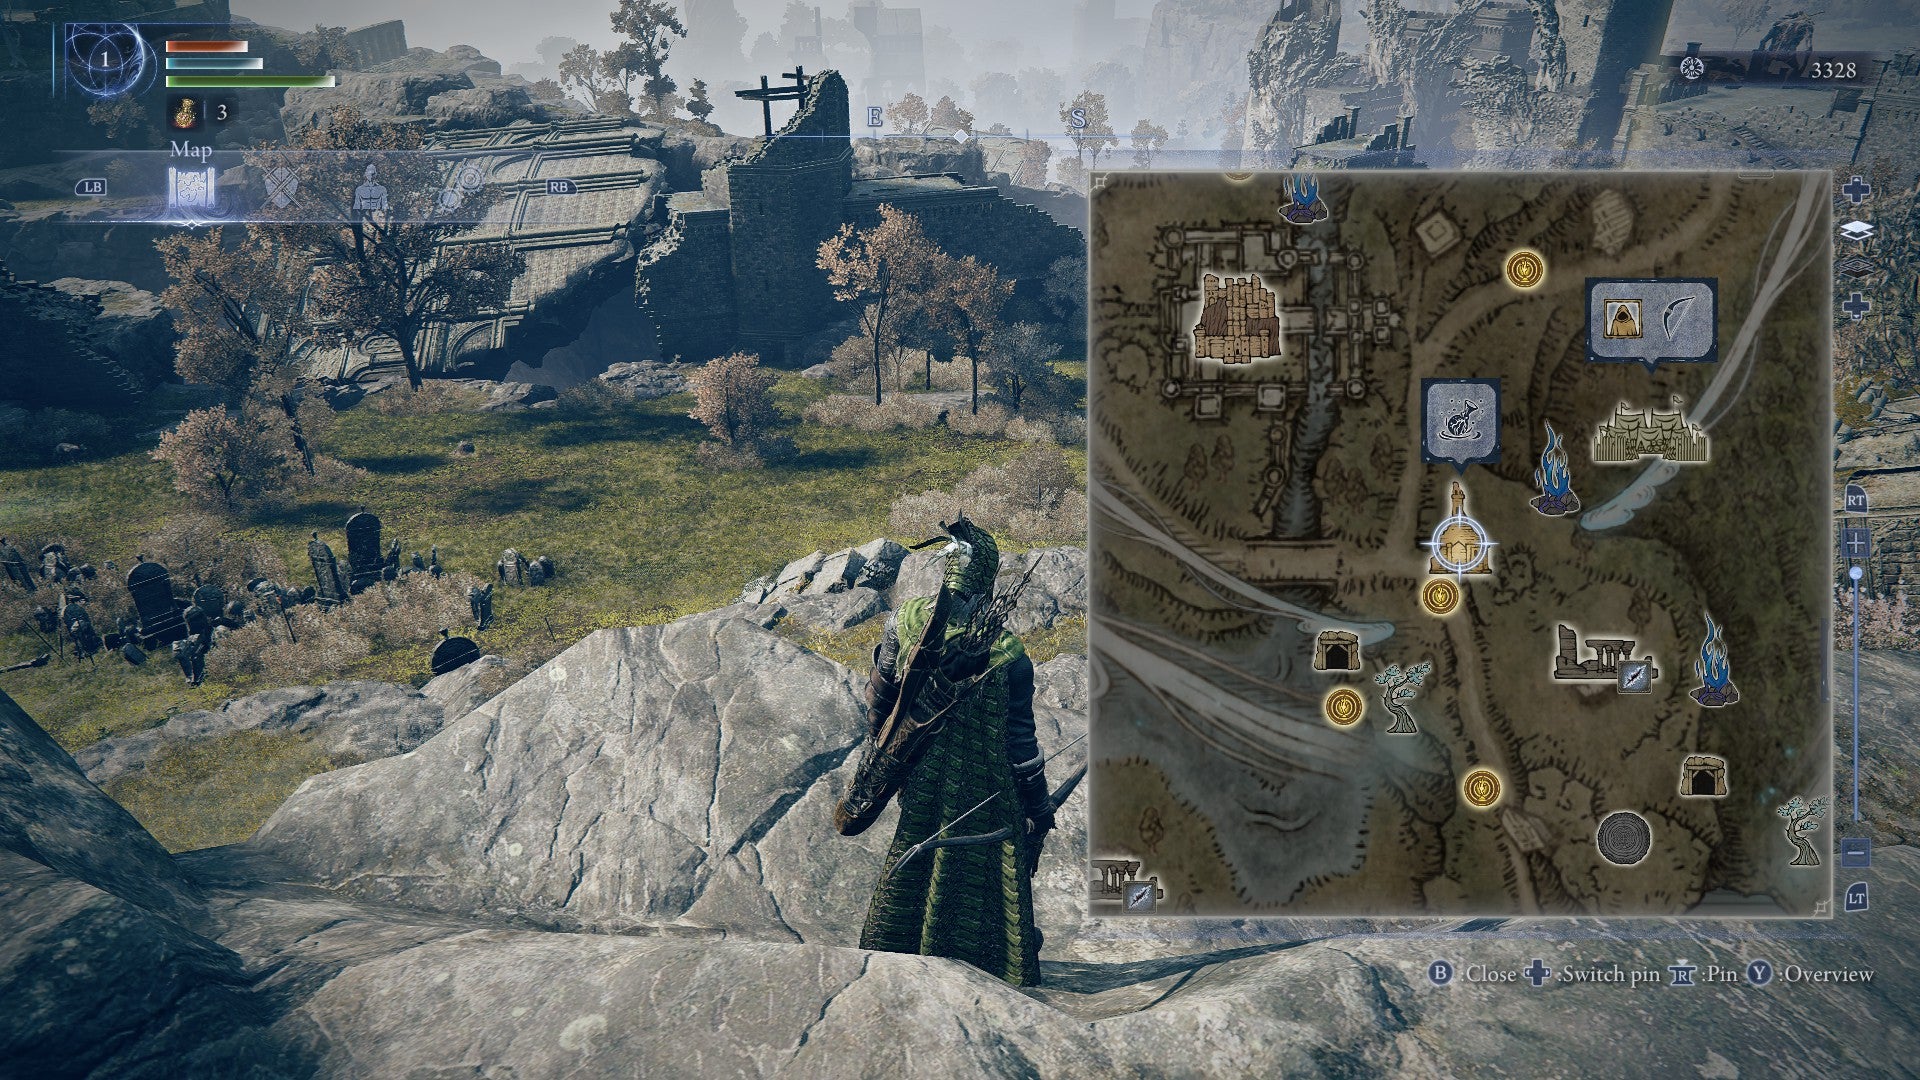
Better get used to instantly recognising the markers on the map. |Image credit:Rock Paper Shotgun/Bandai Namco
At the start of an expedition, pop open the map and check where the churches, merchants, and other points of interest are. 3-4 churches will always spawn randomly in set locations around Limveld, and visiting each church is necessary to increase your Flask Charges . Locating the arrangement of churches at the start of a game may very well determine your route for the entire expedition! And in case you ever have trouble finding merchants, they usually have a fire with a smoke plume to help you spot them in-world.
Be aware of the timing of the night circles
Nightreign’s ever-encroaching night circles are ominous, but thankfully their behaviour is consistent. Each day, it takes 4.5 minutes for the first circle to start closing, then 3 minutes for the circle to finish closing. You then have 3.5 minutes before the second circle starts to close, and 3 minutes before it fully closes. This means every full day lasts 14 minutes, plus however long it takes you to beat the end-of-day boss. If you really want to get hardcore, you can set a timer per match and refer to it to see exactly how long you have.
Also, as a little bonus tip: if a circle closes on one side of the map on Day 1, there’s a higher than average chance it’ll close on roughly the opposite side of the map on Day 2. It also seems weighted on Day 2 to close inside or near the Shifting Earth area of the landscape, if there is one.
Nail down priorities during an expedition
Generally, your top priorities on both days of an expedition should be running to churches and points of interest that house weapons with elements which contain your Nightlord’s weakness. When I play solo, I like to travel along the outer ring of the map, taking down minor enemies and visiting four points of interest and two churches before the end of Day 1. Then I do the same for Day 2, visiting areas that I haven’t passed by yet. In a multiplayer match, a similar strategy works fine, though there’s much more freedom to tackle major foes or explore areas like the central castle.
Not all bosses are worth your time

Chances are, unless you’re very high level, you’ll get more consistent Runes by sticking with normal enemies. |Image credit:Rock Paper Shotgun/Bandai Namco
This is especially true when playing solo, where your main priority is quickly farming Runes from minor enemies, and you should only take on bosses if you’re sure you can defeat them. That said, it’s true for multiplayer as well, and there are certain field bosses you should steer clear of unless you’re very well levelled. If you see a Draconic Tree Sentinel, a Bell Bearing Hunter, or a Royal Carian Knight roaming around, be very careful. Even if you can beat them, it may take so long to whittle down their health that your time is best spent elsewhere. As a general rule, most Field Bosses should only really be tackled on Day 2.
Learn each Nightlord’s elemental weaknesses
Elemental weaknesses were important in base Elden Ring, but feel even more vital in Nightreign due to the fast-paced multiplayer focus of the game. And if you’re playing solo, then you definitely need to rely on exploiting weaknesses to survive. Our guide on all bosses in Nightreign has the full list of vulnerabilities for each foe, but you can also see each Nightlord’s weakness from the Expedition menu.
To ensure you can take advantage of a Nightlord’s weakness, you can equip a Relic which gives your starting weapon that element, and then work on upgrading this weapon over the course of a run using the Smithing Stones gathered from mines on the map. You lose out on one out of your six passive slots ( more on this below ), but the consistency of getting the right element is often worth it.
Don’t neglect ranged weapons even if you’re a melee specialist
It pays to always have a ranged weapon on your Nightfarer, even if you’re playing as an extremely tanky Raider. Not only are they very handy for safely reviving fallen teammates, but since all of Nightreign’s Nightlords and even some of the normal minibosses are distressingly agile, you’ll be thankful if you can safely tag them with a bow that deals status buildup or elemental damage. There’s a reason why Ironeye’s a beginner-friendly character - because he’s got those ranged capabilities from the getgo!
Some passive buffs only apply to weapons you’re holding
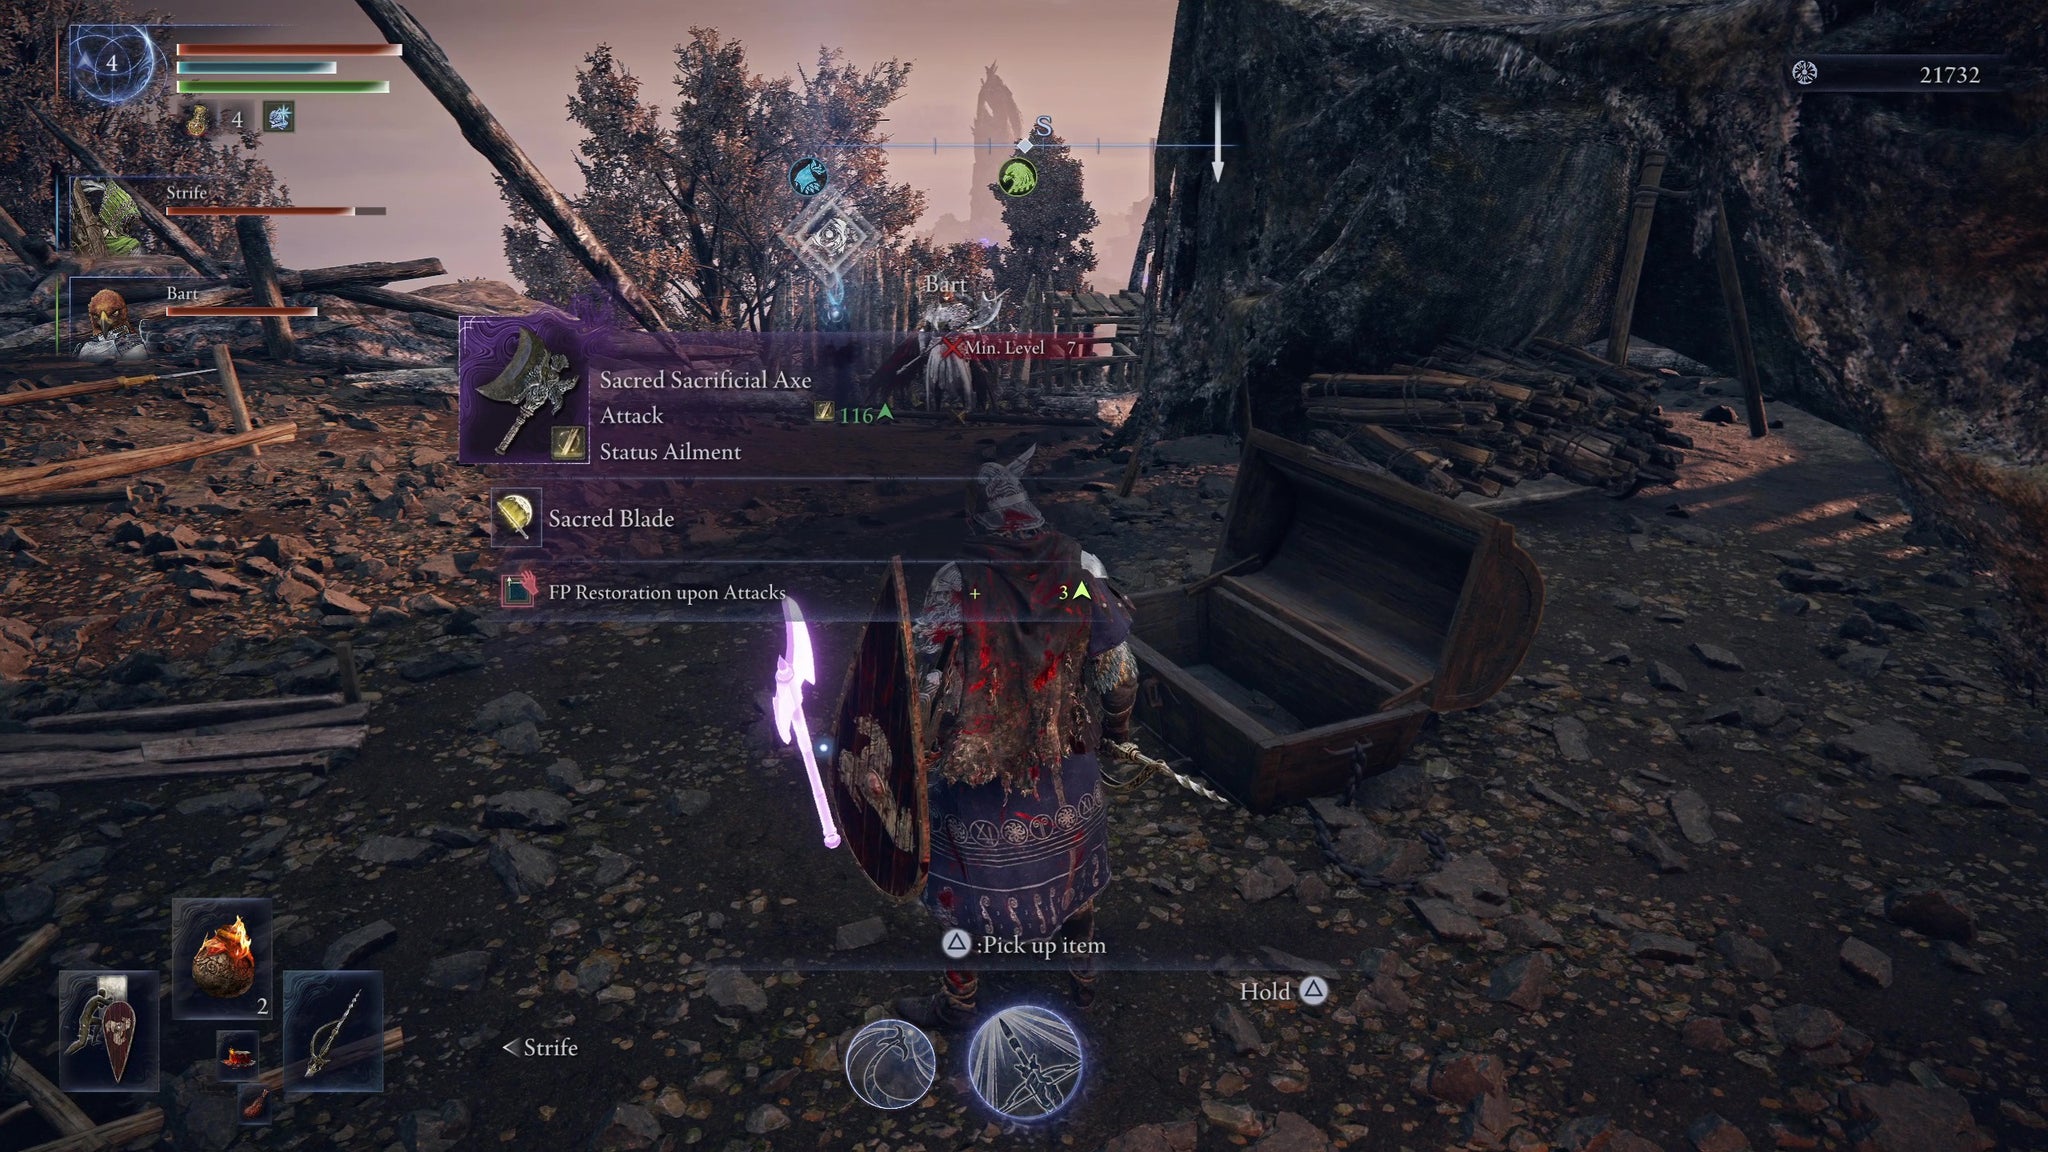
That little red icon next to the FP restoration buff means Wylder has to be actively holding the weapon for it to kick in. |Image credit:Rock Paper Shotgun/Bandai Namco
Generally, all passive effects on weapons will buff you just by having the weapon in your inventory - you don’t even have to equip that weapon in your hands at all throughout your run. However, you might notice that some weapons have their passive abilities listed alongside an unusual red hand symbol. The game never tells you what this means, but in plain language, whenever the passive effect icon has a hand in the corner, it means that passive only applies when the weapon is actually being held. Even having it on your back isn’t enough - you need to actually have it in your hands to gain the passive effect.
Get the Small Pouch upgrade from the merchant
Item slots are a rarity in Nightreign, and especially at the start of an expedition, you’ll likely be aggravated at the need to constantly juggle your inventory. You can alleviate this with the merchant’s Small Pouch, which can be purchased for 5,000 runes and increases the number of item slots. Depending on how many items and weapons you use during an expedition, you’ll need to balance between using your runes to level up and being sure you acquire these item slot upgrades.
Interact with red phantoms to get items
Players accustomed to base Elden Ring’s online mode will be familiar with red phantoms, who represent the shadowy images of other players in your game world. In Nightreign, interacting with red phantoms makes them drop all of their items on the ground. These contain the equipment of random players at the point where their run failed, and can be a great, simple way to get decent gear without any risk. Take advantage of the failure of others!
Be aware of Shifting Earth events

The Mountaintop makes everything really damn cold. |Image credit:Rock Paper Shotgun/Bandai Namco
Shifting Earth events kick in after you beat the Tricephalos expedition for the first time. These are randomised events that occasionally occur during an expedition and alter the map in stunningly dramatic ways. There are four at the moment - the Crater , which spawns a huge lava-filled crater in northern and central Limveld, the Mountaintop , which shifts northwestern parts of the map into a frostbite-laden zone, the Rotted Woods, which spawns Scarlet Rot all over southeastern Limveld, and Noklateo, which creates a huge gothic city in the southwestern part of the map.
Of these Shifting Earth events, the Mountaintop is particularly useful for defeating Caligo at the end of the Fissure In The Fog expedition, mostly thanks to it giving you high resistance to Frostbite and extra damage against dragons.
Always hit the Rotted Woods first thing on Day 2
As a follow-up on the previous tip about Shifting Earth events: most of the time, delving into these deformed landscape areas is optional (albeit recommended). But if you have the Rotted Woods in the southeast corner of your map, then you really need to make it a priority to visit there during your run. The Rotted Woods reward makes you immune to Scarlet Rot, and there’s a high chance that the final circle of Day 2 will close inside the Rotted Woods, making it absolutely paramount that you get this Scarlet Rot immunity before the day ends. We wouldn’t advise you to explore the Rotted Woods until Day 2, because in Day 1 you’re a bit weak to be facing the enemies there; but once Day 2 begins, you should beeline to the Rotted Woods reward before you do anything else.
Get the Cord End, the rarest item in the game
The Cord End is one of Nightreign’s most obscure items, and you can play through multiple expeditions without ever running across it. At the moment, you can only obtain the Cord End via random drops in churches, and its description is unusually ominous: “Gain entry somewhere.” Check our guide on getting and using the Cord End for more info, but in brief, this item unlocks a secret door which can equip your whole team with Sacrificial Twigs. These Talismans will prevent you from losing your runes or dropping a level if you die!
And that finishes our list of tips for Elden Ring: Nightreign! Good luck out there, Nightfarers. If you’re still hankering for more knowledge on facets of the game that we didn’t mention here, check out our guides on how to get Rivers of Blood and how to get Stonesword Keys . If detailed boss guides are what you desire, take a peek at our guides on how to defeat Adel, Baron of Night , or Fulghor, Champion of Nightglow .
Elden Ring: Nightreign
PS5 , Xbox Series X/S , PC
Rock Paper Shotgun is better when you sign in
Sign in and join us on our journey to discover strange and compelling PC games.

All 75 Arc Raiders Blueprints and where to get them
These areas have the highest chance of giving you Blueprints

Image credit:Rock Paper Shotgun/Embark Studios

Looking for more Arc Raiders Blueprints? It’s a special day when you find a Blueprint, as they’re among the most valuable items in Arc Raiders. If you find a Blueprint that you haven’t already found, then you must make sure you hold onto it at all costs, because Blueprints are the key to one of the most important and powerful systems of meta-progression in the game.
This guide aims to be the very best guide on Blueprints you can find, starting with a primer on what exactly they are and how they work in Arc Raiders, before delving into exactly where to get Blueprints and the very best farming spots for you to take in your search.
We’ll also go over how to get Blueprints from other unlikely activities, such as destroying Surveyors and completing specific quests. And you’ll also find the full list of all 75 Blueprints in Arc Raiders on this page (including the newest Blueprints added with the Cold Snap update , such as the Deadline Blueprint and Firework Box Blueprint), giving you all the information you need to expand your own crafting repertoire.
In this guide:
- What are Blueprints in Arc Raiders?
- Full Blueprint list: All crafting recipes
- Where to find Blueprints in Arc Raiders Blueprints obtained from quests Blueprints obtained from Trials Best Blueprint farming locations

What are Blueprints in Arc Raiders?
Blueprints in Arc Raiders are special items which, if you manage to extract with them, you can expend to permanently unlock a new crafting recipe in your Workshop. If you manage to extract from a raid with an Anvil Blueprint, for example, you can unlock the ability to craft your very own Anvil Pistol, as many times as you like (as long as you have the crafting materials).
To use a Blueprint, simply open your Inventory while in the lobby, then right-click on the Blueprint and click “Learn And Consume” . This will permanently unlock the recipe for that item in your Workshop. As of the Stella Montis update, there are allegedly 75 different Blueprints to unlock - although only 68 are confirmed to be in the game so far. You can see all the Blueprints you’ve found and unlocked by going to the Workshop menu, and hitting “R” to bring up the Blueprint screen.
It’s possible to find duplicates of past Blueprints you’ve already unlocked. If you find these, then you can either sell them, or - if you like to play with friends - you can take it into a match and gift it to your friend so they can unlock that recipe for themselves. Another option is to keep hold of them until the time comes to donate them to the Expedition.
Full Blueprint list: All crafting recipes
Below is the full list of all the Blueprints that are currently available to find in Arc Raiders, and the crafting recipe required for each item:
| Blueprint | Type | Recipe | Crafted At |
|---|---|---|---|
| Bettina | Weapon | 3x Advanced Mechanical Components 3x Heavy Gun Parts 3x Canister | Gunsmith 3 |
| Blue Light Stick | Quick Use | 3x Chemicals | Utility Station 1 |
| Aphelion | Weapon | 3x Magnetic Accelerator 3x Complex Gun Parts 1x Matriarch Reactor | Gunsmith 3 |
| Combat Mk. 3 (Flanking) | Augment | 2x Advanced Electrical Components 3x Processor | Gear Bench 3 |
| Combat Mk. 3 (Aggressive) | Augment | 2x Advanced Electrical Components 3x Processor | Gear Bench 3 |
| Complex Gun Parts | Material | 2x Light Gun Parts 2x Medium Gun Parts 2x Heavy Gun Parts | Refiner 3 |
| Fireworks Box | Quick Use | 1x Explosive Compound 3x Pop Trigger | Explosives Station 2 |
| Gas Mine | Mine | 4x Chemicals 2x Rubber Parts | Explosives Station 1 |
| Green Light Stick | Quick Use | 3x Chemicals | Utility Station 1 |
| Pulse Mine | Mine | 1x Crude Explosives 1x Wires | Explosives Station 1 |
| Seeker Grenade | Grenade | 1x Crude Explosives 2x ARC Alloy | Explosives Station 1 |
| Looting Mk. 3 (Survivor) | Augment | 2x Advanced Electrical Components 3x Processor | Gear Bench 3 |
| Angled Grip II | Mod | 2x Mechanical Components 3x Duct Tape | Gunsmith 2 |
| Angled Grip III | Mod | 2x Mod Components 5x Duct Tape | Gunsmith 3 |
| Hullcracker | Weapon | 1x Magnetic Accelerator 3x Heavy Gun Parts 1x Exodus Modules | Gunsmith 3 |
| Launcher Ammo | Ammo | 5x Metal Parts 1x Crude Explosives | Workbench 1 |
| Anvil | Weapon | 5x Mechanical Components 5x Simple Gun Parts | Gunsmith 2 |
| Anvil Splitter | Mod | 2x Mod Components 3x Processor | Gunsmith 3 |
| ??? | ??? | ??? | ??? |
| Barricade Kit | Quick Use | 1x Mechanical Components | Utility Station 2 |
| Blaze Grenade | Grenade | 1x Explosive Compound 2x Oil | Explosives Station 3 |
| Bobcat | Weapon | 3x Advanced Mechanical Components 3x Light Gun Parts | Gunsmith 3 |
| Osprey | Weapon | 2x Advanced Mechanical Components 3x Medium Gun Parts 7x Wires | Gunsmith 3 |
| Burletta | Weapon | 3x Mechanical Components 3x Simple Gun Parts | Gunsmith 1 |
| Compensator II | Mod | 2x Mechanical Components 4x Wires | Gunsmith 2 |
| Compensator III | Mod | 2x Mod Components 8x Wires | Gunsmith 3 |
| Defibrillator | Quick Use | 9x Plastic Parts 1x Moss | Medical Lab 2 |
| ??? | ??? | ??? | ??? |
| Equalizer | Weapon | 3x Magnetic Accelerator 3x Complex Gun Parts 1x Queen Reactor | Gunsmith 3 |
| Extended Barrel | Mod | 2x Mod Components 8x Wires | Gunsmith 3 |
| Extended Light Mag II | Mod | 2x Mechanical Components 3x Steel Spring | Gunsmith 2 |
| Extended Light Mag III | Mod | 2x Mod Components 5x Steel Spring | Gunsmith 3 |
| Extended Medium Mag II | Mod | 2x Mechanical Components 3x Steel Spring | Gunsmith 2 |
| Extended Medium Mag III | Mod | 2x Mod Components 5x Steel Spring | Gunsmith 3 |
| Extended Shotgun Mag II | Mod | 2x Mechanical Components 3x Steel Spring | Gunsmith 2 |
| Extended Shotgun Mag III | Mod | 2x Mod Components 5x Steel Spring | Gunsmith 3 |
| Remote Raider Flare | Quick Use | 2x Chemicals 4x Rubber Parts | Utility Station 1 |
| Heavy Gun Parts | Material | 4x Simple Gun Parts | Refiner 2 |
| Venator | Weapon | 2x Advanced Mechanical Components 3x Medium Gun Parts 5x Magnet | Gunsmith 3 |
| Il Toro | Weapon | 5x Mechanical Components 6x Simple Gun Parts | Gunsmith 1 |
| Jolt Mine | Mine | 1x Electrical Components 1x Battery | Explosives Station 2 |
| Explosive Mine | Mine | 1x Explosive Compound 1x Sensors | Explosives Station 3 |
| Jupiter | Weapon | 3x Magnetic Accelerator 3x Complex Gun Parts 1x Queen Reactor | Gunsmith 3 |
| Light Gun Parts | Material | 4x Simple Gun Parts | Refiner 2 |
| Lightweight Stock | Mod | 2x Mod Components 5x Duct Tape | Gunsmith 3 |
| Lure Grenade | Grenade | 1x Speaker Component 1x Electrical Components | Utility Station 2 |
| Medium Gun Parts | Material | 4x Simple Gun Parts | Refiner 2 |
| Torrente | Weapon | 2x Advanced Mechanical Components 3x Medium Gun Parts 6x Steel Spring | Gunsmith 3 |
| Muzzle Brake II | Mod | 2x Mechanical Components 4x Wires | Gunsmith 2 |
| Muzzle Brake III | Mod | 2x Mod Components 8x Wires | Gunsmith 3 |
| Padded Stock | Mod | 2x Mod Components 5x Duct Tape | Gunsmith 3 |
| Shotgun Choke II | Mod | 2x Mechanical Components 4x Wires | Gunsmith 2 |
| Shotgun Choke III | Mod | 2x Mod Components 8x Wires | Gunsmith 3 |
| Shotgun Silencer | Mod | 2x Mod Components 8x Wires | Gunsmith 3 |
| Showstopper | Grenade | 1x Advanced Electrical Components 1x Voltage Converter | Explosives Station 3 |
| Silencer I | Mod | 2x Mechanical Components 4x Wires | Gunsmith 2 |
| Silencer II | Mod | 2x Mod Components 8x Wires | Gunsmith 3 |
| Snap Hook | Quick Use | 2x Power Rod 3x Rope 1x Exodus Modules | Utility Station 3 |
| Stable Stock II | Mod | 2x Mechanical Components 3x Duct Tape | Gunsmith 2 |
| Stable Stock III | Mod | 2x Mod Components 5x Duct Tape | Gunsmith 3 |
| Tagging Grenade | Grenade | 1x Electrical Components 1x Sensors | Utility Station 3 |
| Tempest | Weapon | 3x Advanced Mechanical Components 3x Medium Gun Parts 3x Canister | Gunsmith 3 |
| Trigger Nade | Grenade | 2x Crude Explosives 1x Processor | Explosives Station 2 |
| Vertical Grip II | Mod | 2x Mechanical Components 3x Duct Tape | Gunsmith 2 |
| Vertical Grip III | Mod | 2x Mod Components 5x Duct Tape | Gunsmith 3 |
| Vita Shot | Quick Use | 2x Antiseptic 1x Syringe | Medical Lab 3 |
| Vita Spray | Quick Use | 3x Antiseptic 1x Canister | Medical Lab 3 |
| Vulcano | Weapon | 1x Magnetic Accelerator 3x Heavy Gun Parts 1x Exodus Modules | Gunsmith 3 |
| Wolfpack | Grenade | 2x Explosive Compound 2x Sensors | Explosives Station 3 |
| Red Light Stick | Quick Use | 3x Chemicals | Utility Station 1 |
| Smoke Grenade | Grenade | 14x Chemicals 1x Canister | Utility Station 2 |
| Deadline | Mine | 3x Explosive Compound 2x ARC Circuitry | Explosives Station 3 |
| Trailblazer | Grenade | 1x Explosive Compound 1x Synthesized Fuel | Explosives Station 3 |
| Tactical Mk. 3 (Defensive) | Augment | 2x Advanced Electrical Components 3x Processor | Gear Bench 3 |
| Tactical Mk. 3 (Healing) | Augment | 2x Advanced Electrical Components 3x Processor | Gear Bench 3 |
| Yellow Light Stick | Quick Use | 3x Chemicals | Utility Station 1 |
Note: The missing Blueprints in this list likely have not actually been added to the game at the time of writing, because none of the playerbase has managed to find any of them. As they are added to the game, I will update this page with the most relevant information so you know exactly how to get all 75 Arc Raiders Blueprints.
Where to find Blueprints in Arc Raiders
Below is a list of all containers, modifiers, and events which maximise your chances of finding Blueprints:
- Certain quests reward you with specific Blueprints .
- Completing Trials has a high chance of offering Blueprints as rewards.
- Surveyors have a decent chance of dropping Blueprints on death.
- High loot value areas tend to have a greater chance of spawning Blueprints.
- Night Raids and Storms may increase rare Blueprint spawn chances in containers.
- Containers with higher numbers of items may have a higher tendency to spawn Blueprints. As a result, Blue Gate (which has many “large” containers containing multiple items) may give you a higher chance of spawning Blueprints.
- Raider containers (Raider Caches, Weapon Boxes, Medical Bags, Grenade Tubes) have increased Blueprint drop rates. As a result, the Uncovered Caches event gives you a high chance of finding Blueprints.
- Security Lockers have a higher than average chance of containing Blueprints.
- Certain Blueprints only seem to spawn under specific circumstances: Tempest Blueprint only spawns during Night Raid events. Vulcano Blueprint only spawns during Hidden Bunker events. Jupiter and Equaliser Blueprints only spawn during Harvester events.

Raider Caches, Weapon Boxes, and other raider-oriented container types have a good chance of offering Blueprints. |Image credit:Rock Paper Shotgun/Embark Studios
Blueprints have a very low chance of spawning in any container in Arc Raiders, around 1-2% on average. However, there is a higher chance of finding Blueprints in particular container types. Specifically, you can find more Blueprints in Raider containers and security lockers.
Beyond this, if you’re looking for Blueprints you should focus on regions of the map which are marked as having particularly high-value loot. Areas such as the Control Tower in Dam Battlegrounds, the Arrival and Departure Buildings in Spaceport, and Pilgrim’s Peak in Blue Gate all have a better-than-average chance of spawning Blueprints somewhere amongst all their containers. Night Raids and Electromagnetic Storm events also increase the drop chances of certain Blueprints .
In addition to these containers, you can often loot Blueprints from destroyed Surveyors - the largest of the rolling ball ARC. Surveyors are more commonly found on the later maps - Spaceport and Blue Gate - and if one spawns in your match, you’ll likely see it by the blue laser beam that it casts into the sky while “surveying”.
Surveyors are quite well-armoured and will very speedily run away from you once it notices you, but if you can take one down then make sure you loot all its parts for a chance of obtaining certain unusual Blueprints.
Blueprints obtained from quests
One way in which you can get Blueprints is by completing certain quests for the vendors in Speranza. Some quests will reward you with a specific item Blueprint upon completion, so as long as you work through all the quests in Arc Raiders, you are guaranteed those Blueprints.
Here is the full list of all Blueprints you can get from quest rewards:
- Trigger Nade Blueprint: Rewarded after completing “Sparks Fly”.
- Lure Grenade Blueprint: Rewarded after completing “Greasing Her Palms”.
- Burletta Blueprint: Rewarded after completing “Industrial Espionage”.
- Hullcracker Blueprint (and Launcher Ammo Blueprint): Rewarded after completing “The Major’s Footlocker”.
Alas, that’s only 4 Blueprints out of a total of 75 to unlock, so for the vast majority you will need to find them yourself during a raid. If you’re intent on farming Blueprints, then it’s best to equip yourself with cheap gear in case you lose it, but don’t use a free loadout because then you won’t get a safe pocket to stash any new Blueprint you find. No pain in Arc Raiders is sharper than failing to extract with a new Blueprint you’ve been after for a dozen hours already.

One of the best ways to get Blueprints is by hitting three stars on all five Trials every week. |Image credit:Rock Paper Shotgun/Embark Studios
Blueprints obtained from Trials
One of the very best ways to get Blueprints is as rewards for completing Trials in Arc Raiders. Trials are unlocked from Level 15 onwards, and allow you to earn rewards by focusing on certain tasks over the course of several raids. For example, one Trial might task you with dealing damage to Hornets, while another might challenge you to loot Supply Drops.
Trials refresh on a weekly basis, with a new week bringing five new Trials. Each Trial can offer up to three rewards after passing certain score milestones, and it’s possible to receive very high level loot from these reward crates - including Blueprints. So if you want to unlock as many Blueprints as possible, you should make a point of completing as many Trials as possible each week.
Best Blueprint farming locations
The very best way to get Blueprints is to frequent specific areas of the maps which combine high-tier loot pools with the right types of containers to search. Here are my recommendations for where to find Blueprints on every map, so you can always keep the search going for new crafting recipes to unlock.

Image credit:Rock Paper Shotgun/Embark Studios
Dam Battlegrounds
The best places to farm Blueprints on Dam Battlegrounds are the Control Tower, Power Generation Complex, Ruby Residence, and Pale Apartments . The first two regions, despite only being marked on the map as mid-tier loot, contain a phenomenal number of containers to loot. The Control Tower can also contain a couple of high-tier Security Lockers - though of course, you’ll need to have unlocked the Security Breach skill at the end of the Survival tree.
There’s also a lot of reporting amongst the playerbase that the Residential areas in the top-left of the map - Pale Apartments and Ruby Residence - give you a comparatively strong chance of finding Blueprints. Considering their size, there’s a high density of containers to loot in both locations, and they also have the benefit of being fairly out of the way. So you’re more likely to have all the containers to yourself.
Buried City
The best Blueprint farming locations on Buried City are the Santa Maria Houses, Grandioso Apartments, Town Hall, and the various buildings of the New District . Grandioso Apartments has a lower number of containers than the rest, but a high chance of spawning weapon cases - which have good Blueprint drop rates. The others are high-tier loot areas, with plenty of lootable containers - including Security Lockers.
Spaceport
The best places to find Blueprints on Spaceport are the Arrival and Departure Buildings, as well as Control Tower A6 and the Launch Towers . All these areas are labelled as high-value loot regions, and many of them are also very handily connected to one another by the Spaceport wall, which you can use to quickly run from one area to the next. At the tops of most of these buildings you’ll find at least one Security Locker, so this is an excellent farming route for players looking to find Blueprints.
The downside to looting Blueprints on Spaceport is that all these areas are hotly contested, particularly in Duos and Squads. You’ll need to be very focused and fast in order to complete the full farming route.

Image credit:Rock Paper Shotgun/Embark Studios
Blue Gate
Blue Gate tends to have a good chance of dropping Blueprints, potentially because it generally has a high number of containers which can hold lots of items; so there’s a higher chance of a Blueprint spawning in each container. In my experience, the best Blueprint farming spots on Blue Gate are Pilgrim’s Peak, Raider’s Refuge, the Ancient Fort, and the Underground Complex beneath the Warehouse .
All of these areas contain a wealth of containers to loot. Raider’s Refuge has less to loot, but the majority of the containers in and around the Refuge are raider containers, which have a high chance of containing Blueprints - particularly during major events.
Stella Montis
On the whole, Stella Montis seems to have a very low drop rate for Blueprints (though a high chance of dropping other high-tier loot). If you do want to try farming Blueprints on this map, the best places to find Blueprints in Stella Montis are Medical Research, Assembly Workshop, and the Business Center . These areas have the highest density of containers to loot on the map.
In addition to this, the Western Tunnel has a few different Security Lockers to loot, so while there’s very little to loot elsewhere in this area of the map, it’s worth hitting those Security Lockers if you spawn there at the start of a match.
That wraps up this primer on how to get all the Blueprints in Arc Raiders as quickly as possible. With the Expedition system constantly resetting a large number of players’ Blueprints, it’s more important than ever to have the most up-to-date information on where to find all these Blueprints.
While you’re here, be sure to check out our Arc Raiders best guns tier list , as well as our primers on the best skills to unlock and all the different Field Depot locations on every map.

ARC Raiders
PS5 , Xbox Series X/S , PC
Rock Paper Shotgun is better when you sign in
Sign in and join us on our journey to discover strange and compelling PC games.
