Elden Ring lore and story explained
Time for a refresher of the entire Elden Ring mythos, ready for Shadow Of The Erdtree

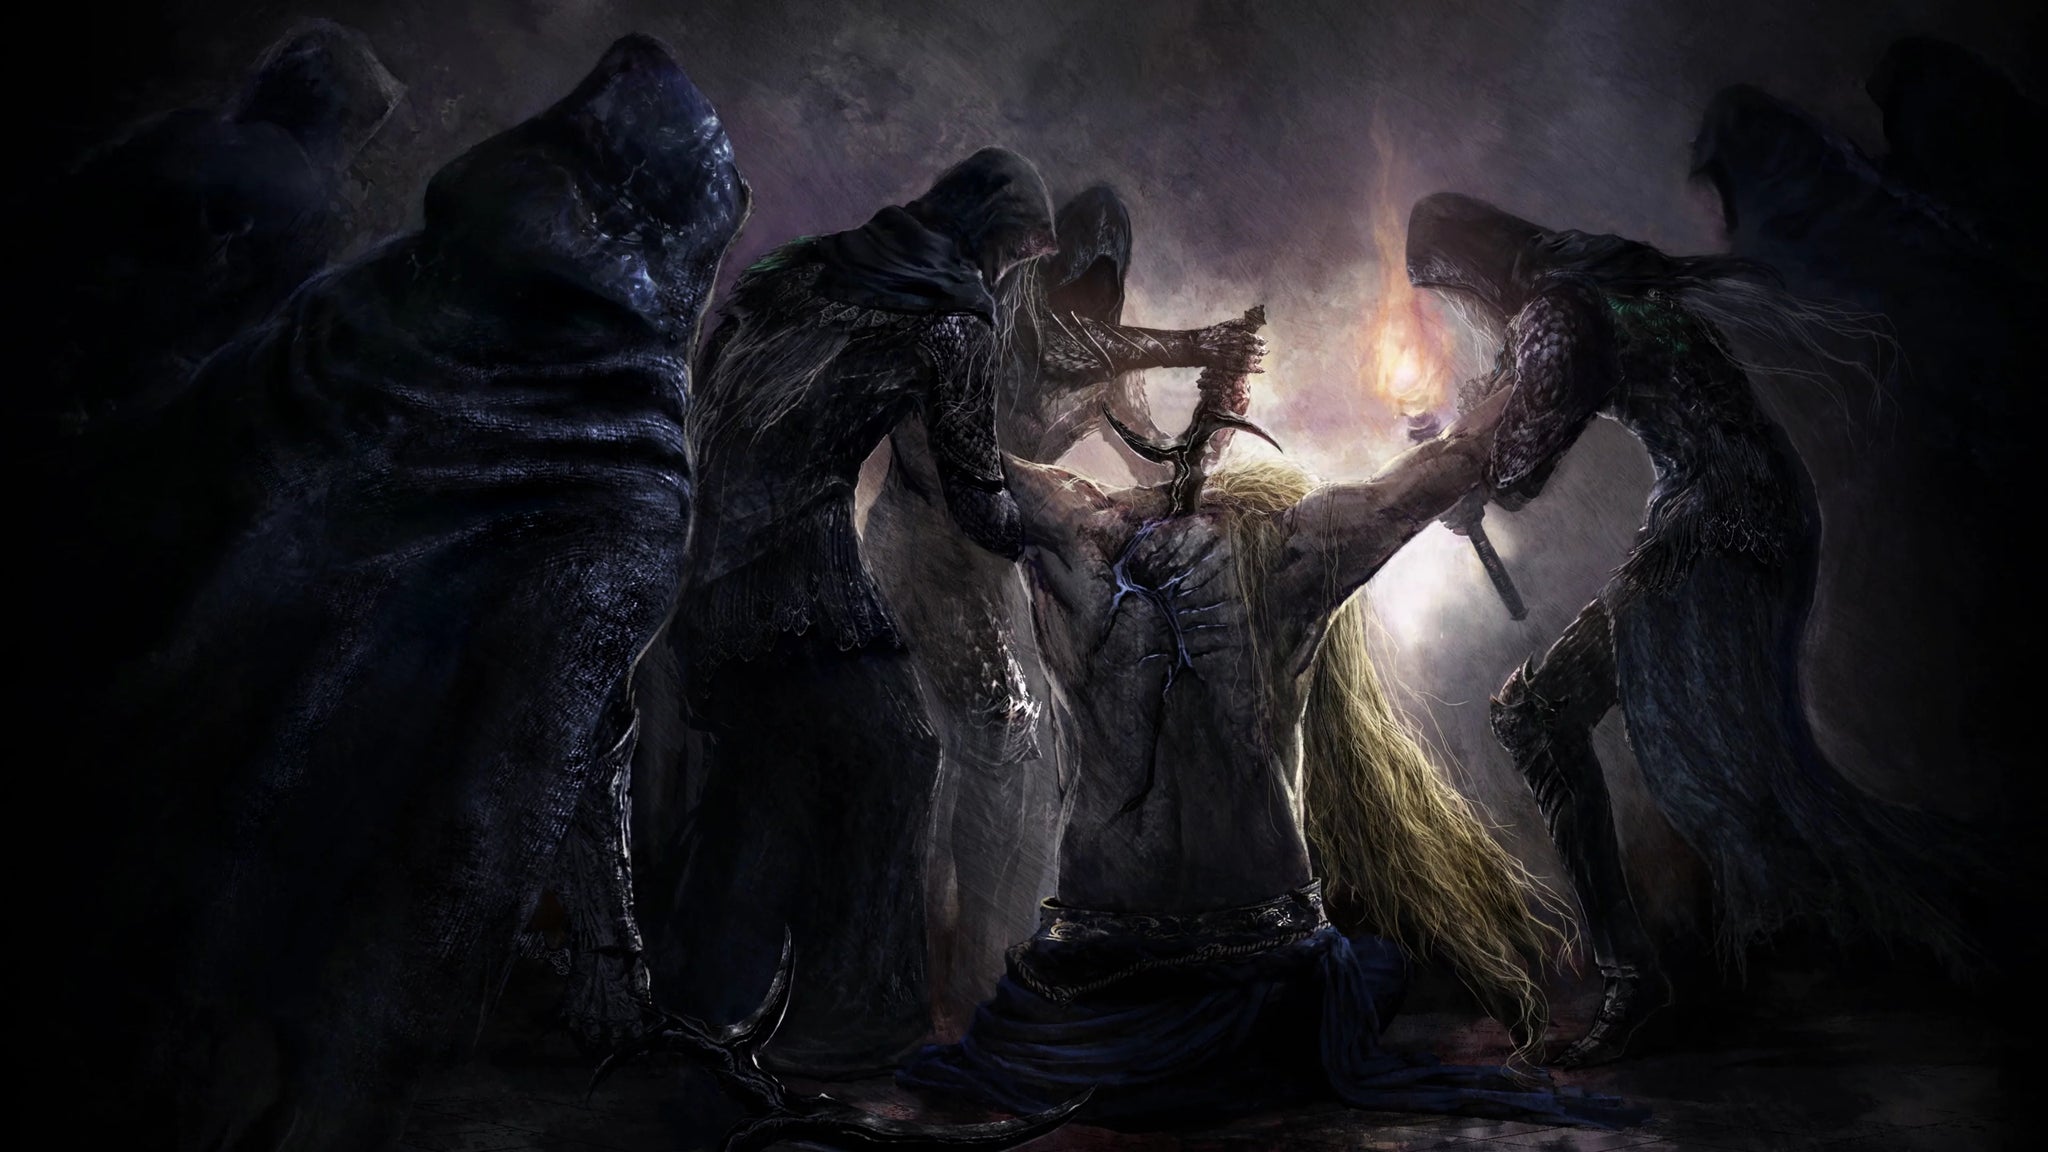
Image credit:Rock Paper Shotgun/Bandai Namco

Want to brush up on your Elden Ring lore? It’s certainly a good time to revisit the story, with the colossal Shadow Of The Erdtree DLC mere days away. Over the past two years, Elden Ring has become just about my favourite game of all time, and a large part of that came from diving deep into the mythos and story of Elden Ring and learning just how much I missed on my first couple of playthroughs.
Elden Ring’s mythos was constructed as a joint project between FromSoft head Hidetaka Miyazaki and George R. R. Martin, which should give you an idea of just how deep and deranged the story gets. But we’re going to break it all down into easily absorbed chunks of lore in this, our ultimate Elden Ring lore guide .
Below, we’ll take you from the prehistoric times before the Erdtree and the Golden Order, back when there was nothing except Dragons, Giants, and otherworldly Outer Gods. And from there, we’ll explain Marika’s rise and conquest of the Lands Between, the various demigods that rose during this time, the fateful Night Of Black Knives and the Shattering; and finally the player character’s journey through the world of Elden Ring, and what it all means.
The story of Elden Ring:
- Chapter 1: The Time Before The Erdtree
- Chapter 2: The Golden Order Begins
- Chapter 3: Godfrey And The First Demigods
- Chapter 4: The Fire Giants
- Chapter 5: The Ancient Dragons
- Chapter 6: The War Ends
- Chapter 7: Rennala’s Demigod Children
- Chapter 8: The Long March Of The Tarnished
- Chapter 9: The Betrayal
- Chapter 10: The Pure Demigods
- Chapter 11: Radahn Defeats The Stars
- Chapter 12: The Night Of Black Knives
- Chapter 13: The Shattering Begins
- Chapter 14: Miquella And Malenia
- Chapter 15: The Tarnished Return
- Chapter 16: The Rise Of The Tarnished
Chapter 1: The Time Before The Erdtree
Key Characters:
| The Great One | The Greater Will |
|---|---|
| The Frenzied Flame | The Elden Beast |
| The Two Fingers |
The entirety of Elden Ring lore seems to begin with an entity called The Great One. Sadly, it’s an entity about which we know basically nothing, except that The Great One was the source from which all things split. And that includes two Outer Gods known as the Greater Will, and the Frenzied Flame (who loosely represent Order and Chaos respectively).
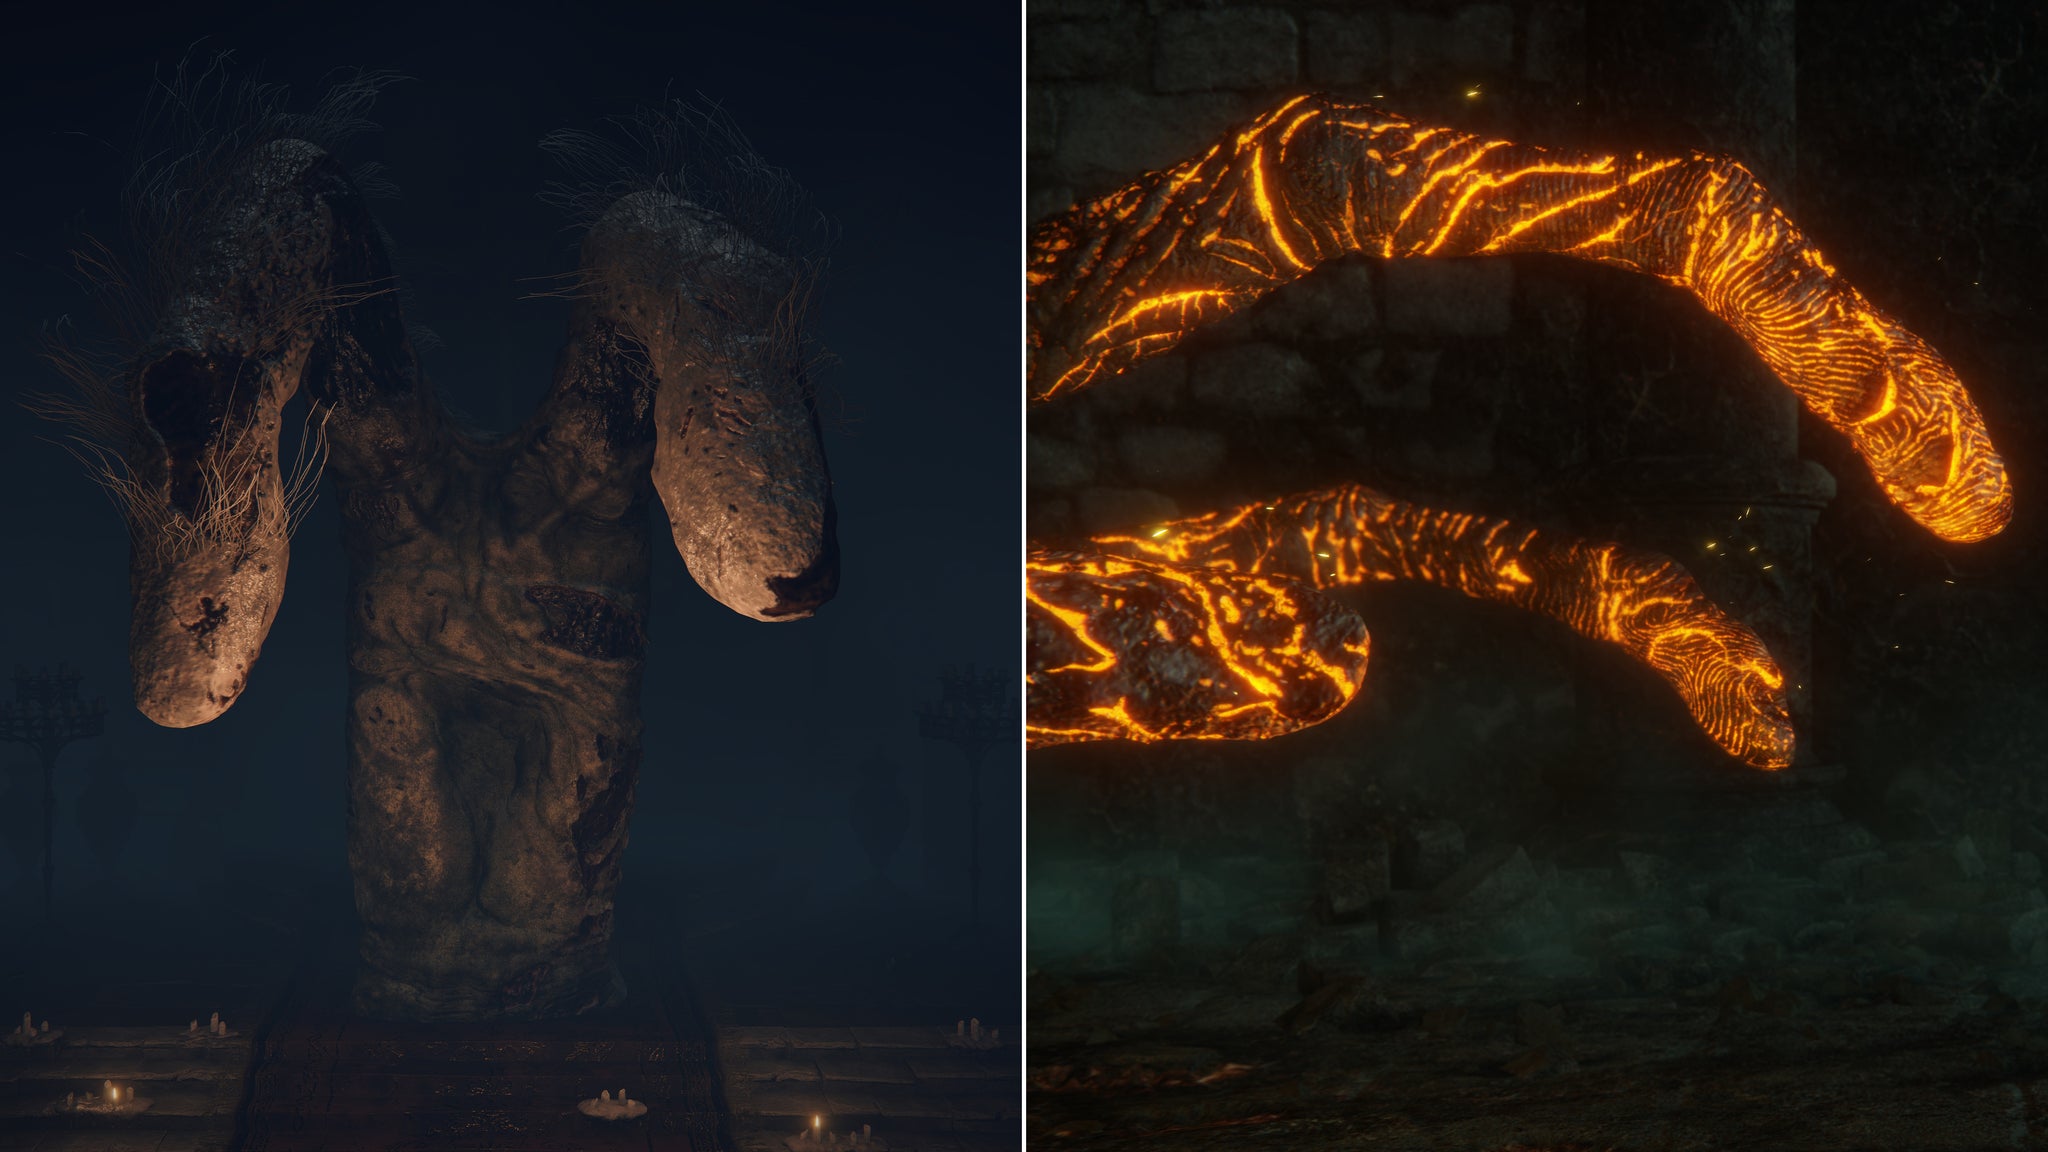
Left: The Two Fingers, vassal of the Greater Will. Right: The Three Fingers, vassal of the Frenzied Flame. Note that together, they make a full five-fingered hand. |Image credit:Rock Paper Shotgun/Bandai Namco
There are several other Outer Gods who appear very early on, such as the God Of Rot, The Formless Mother, The Twinbird God, The Fell God… But the two most important and arguably the most powerful are the Greater Will and the Frenzied Flame. As with all Outer Gods, they are separated from the world of Elden Ring by inconceivably long distances, and can only impose their will upon the world in a limited manner. To that end, most Outer Gods sent envoys to The Lands Between, who could realise their vision from afar.
The Greater Will’s envoys are creatures called the Two Fingers, while the Frenzied Flame’s envoy(s) are the Three Fingers. Throughout Elden Ring the player encounters many Two Fingers, most of them dead. One of the only ones remaining lives inside the Roundtable Hold . It’s unknown whether there were multiple Three Fingers in the world once, but during the events of the game, only one is known to exist deep below Leyndell , the Royal Capital.
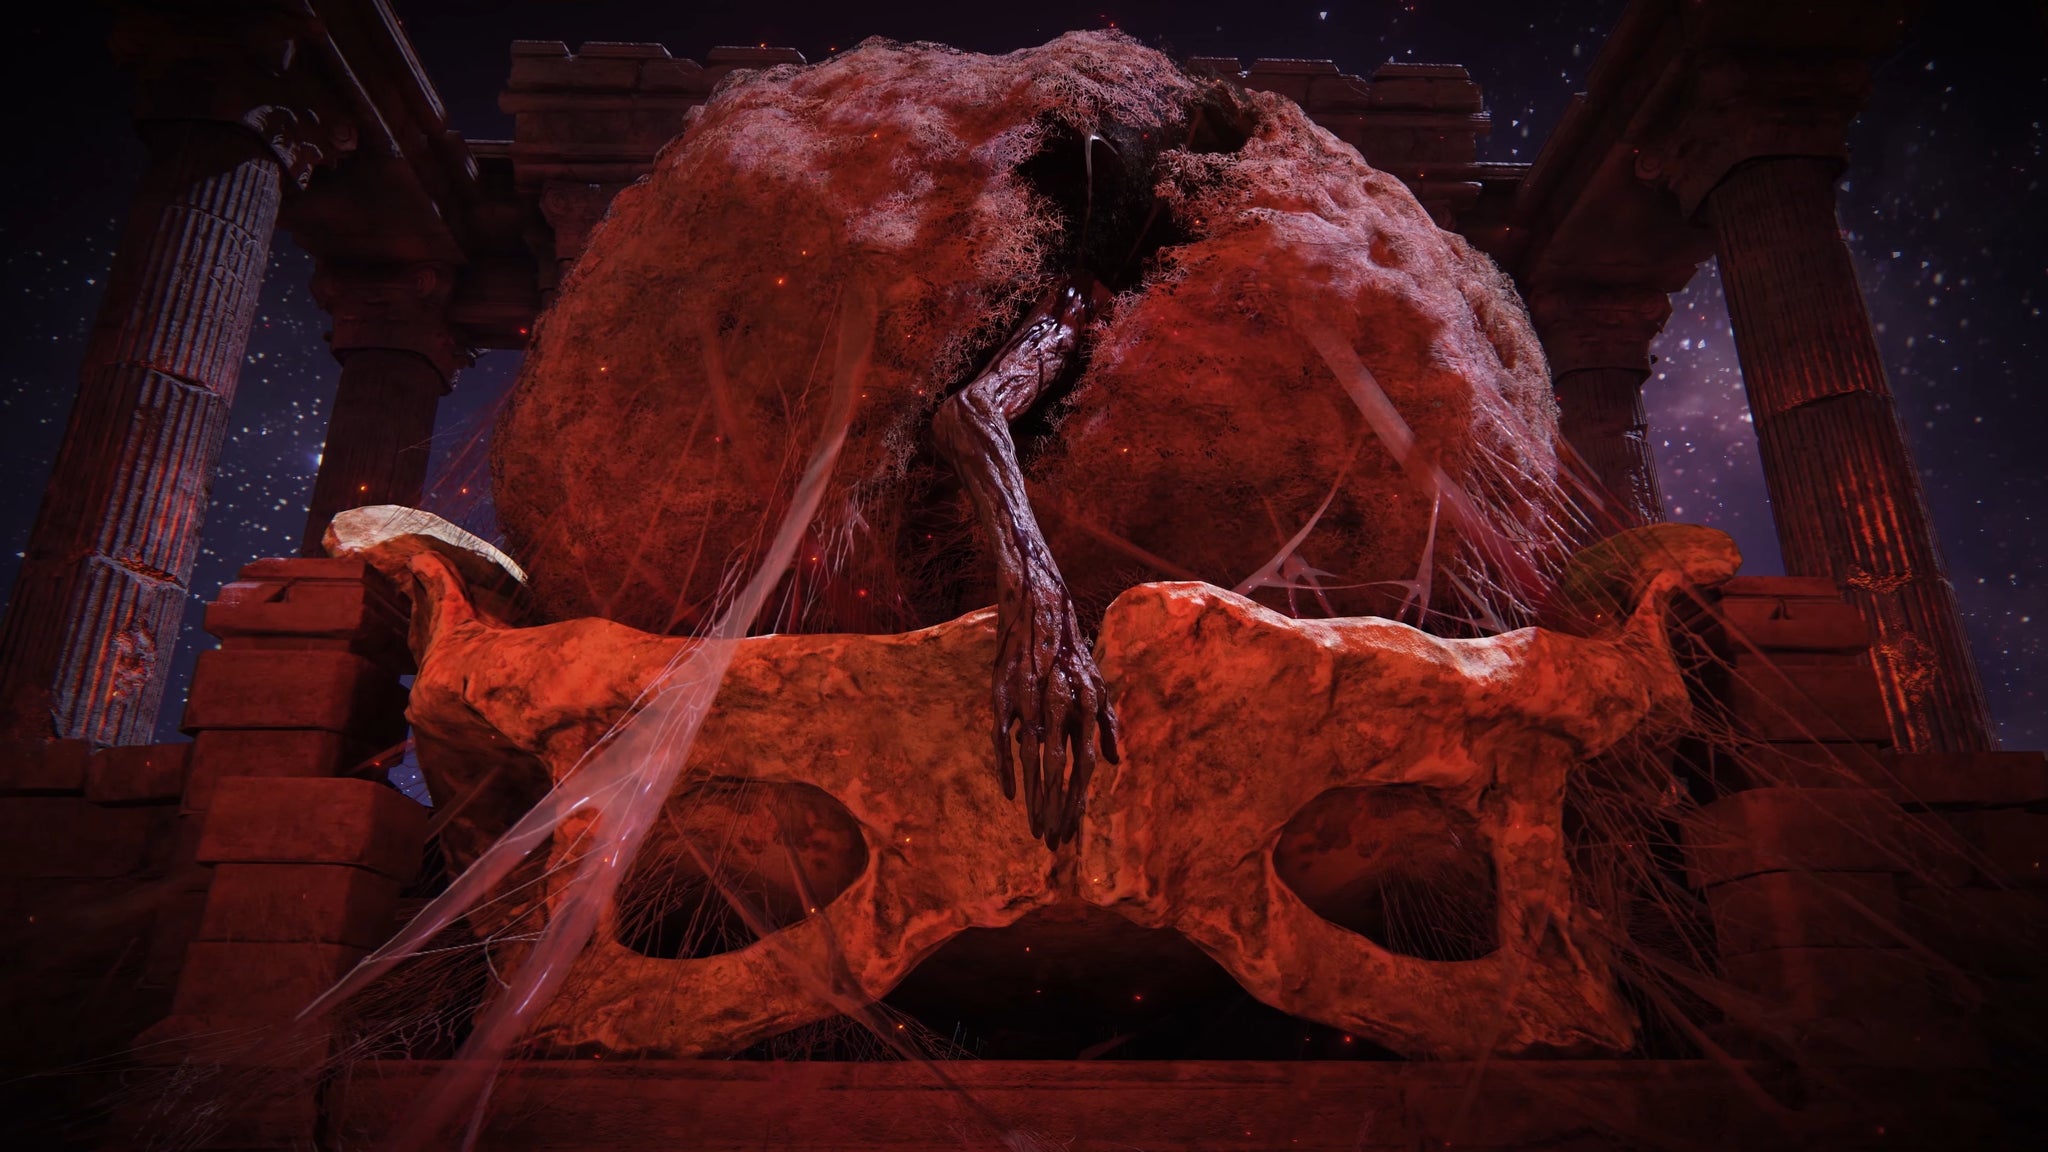
But the Greater Will, true to its name, went a step further in imposing control over the world. It sent a star hurtling into the world carrying an Elden Beast . Imbued with some of the Greater Will’s power, the Elden Beast immediately set about its task: to transform itself into a structure called The Elden Ring.
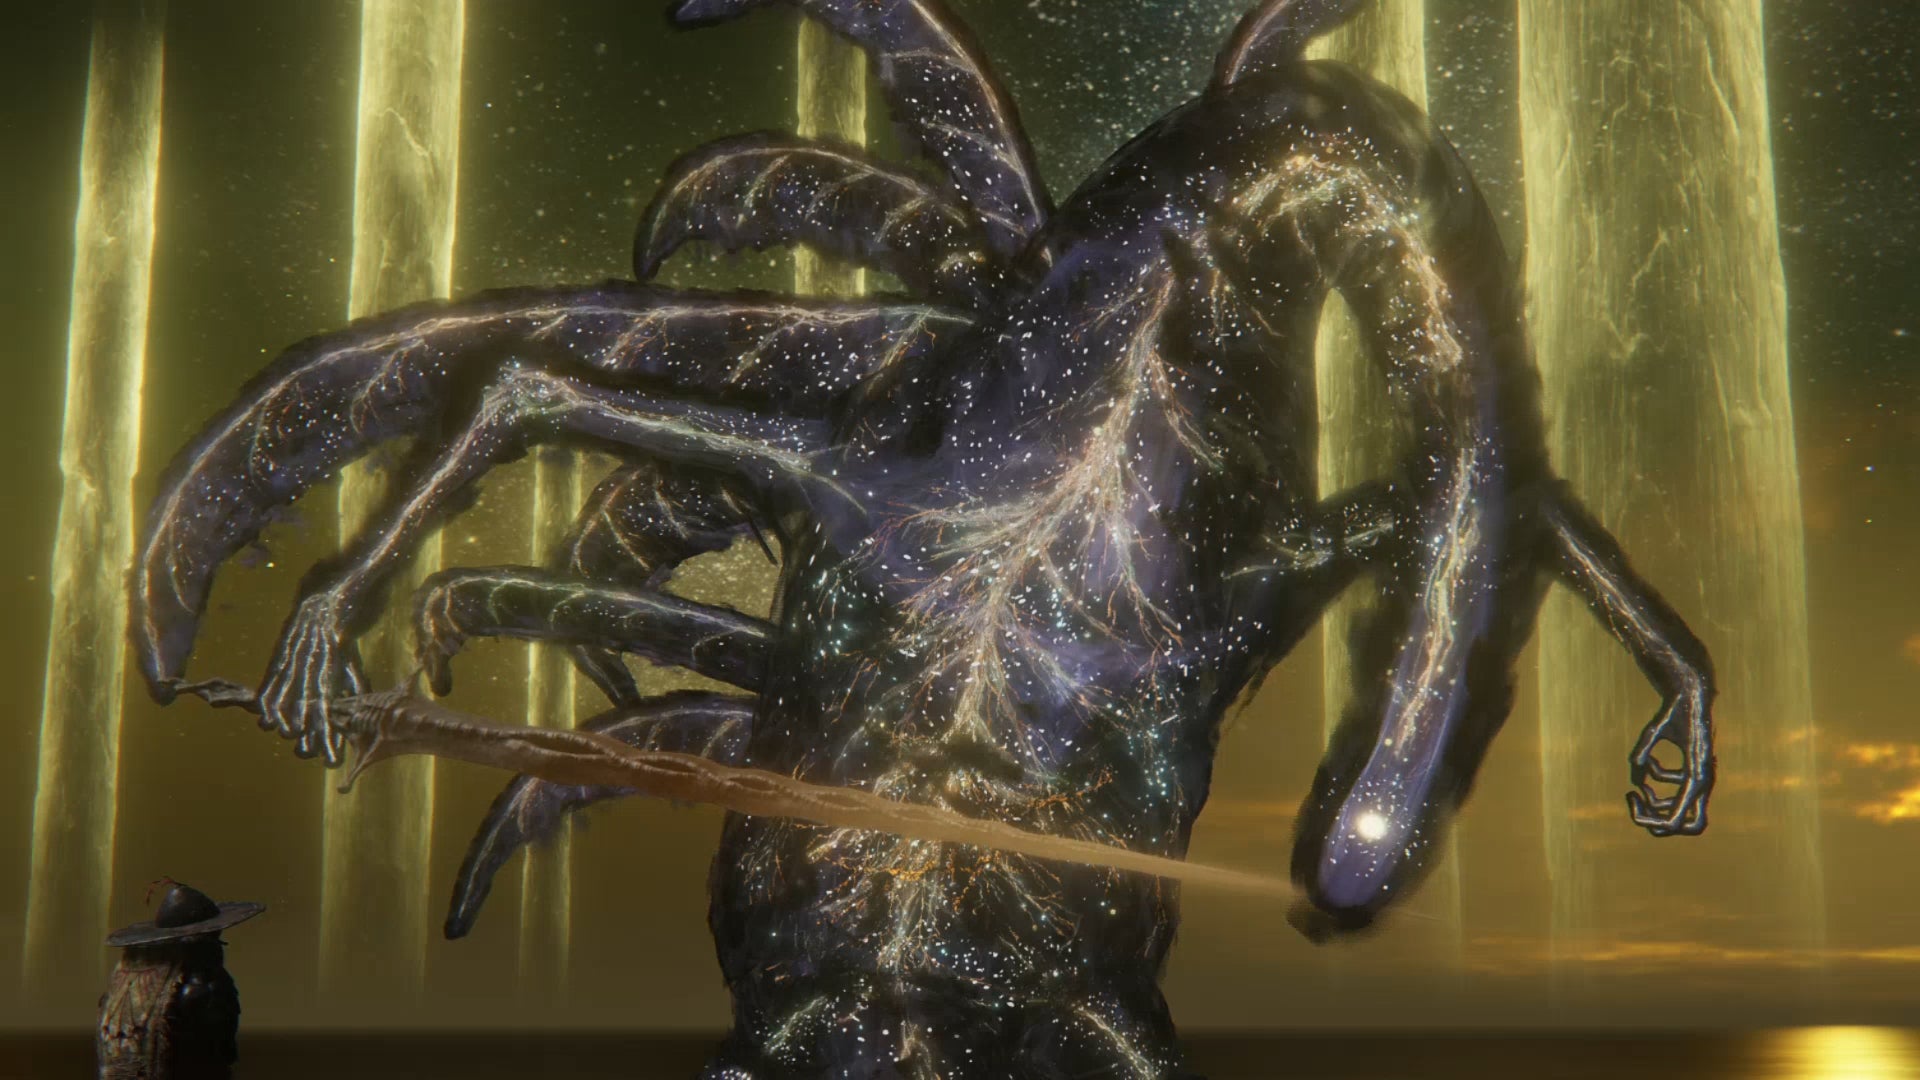
The Elden Beast was sent down to The Lands Between by the Greater Will, to form the Elden Ring itself with its body. |Image credit:Rock Paper Shotgun/FromSoftware
The Elden Ring is a bit hard to describe, but it’s essentially a selection of reality-altering runes (known as Great Runes ). These runes literally define the rules of the world of Elden Ring, such as what happens after death. So the Elden Ring’s role was to reshape the world to follow the rules set by the Greater Will.
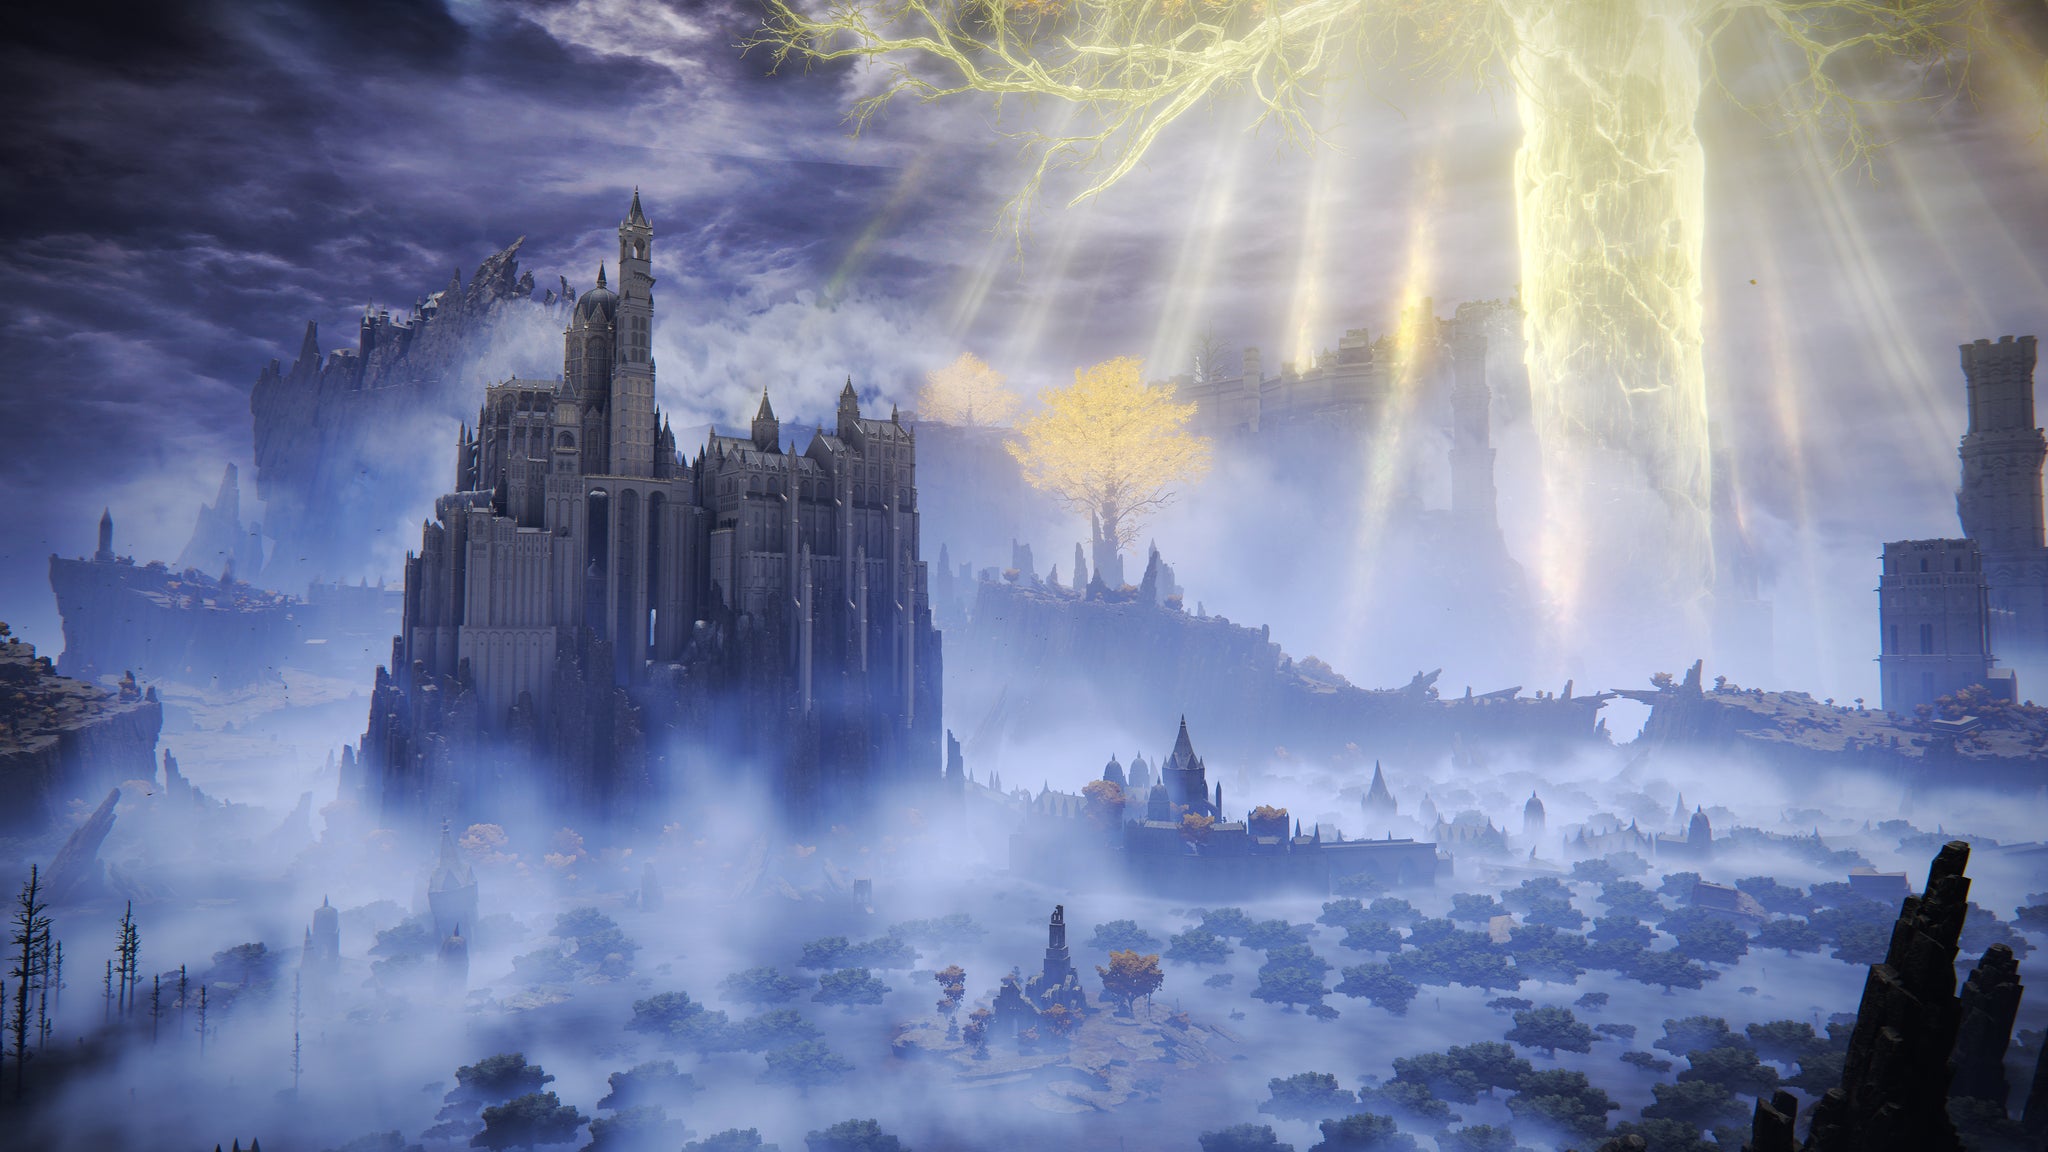
Before the Elden Beast arrived, The Lands Between were fairly ordinary. Well, as ordinary as you can call a land dominated mainly by dragons and giants. It is said that in the time before the Greater Will took over, all life came from something called The Crucible. We don’t really know what the Crucible was. Some think it’s merely a name for what life was like before the Elden Ring was created. Others think the Crucible was a colossal tree, and that the towering golden Erdtree we see in-game is actually just the Crucible, with a golden skin wrapped around it to represent the Greater Will’s control over the land. In any case, the creation of the Elden Ring appeared to also transform the Crucible into the Erdtree - an everpresent beacon of the Greater Will’s (and Marika’s) rule.
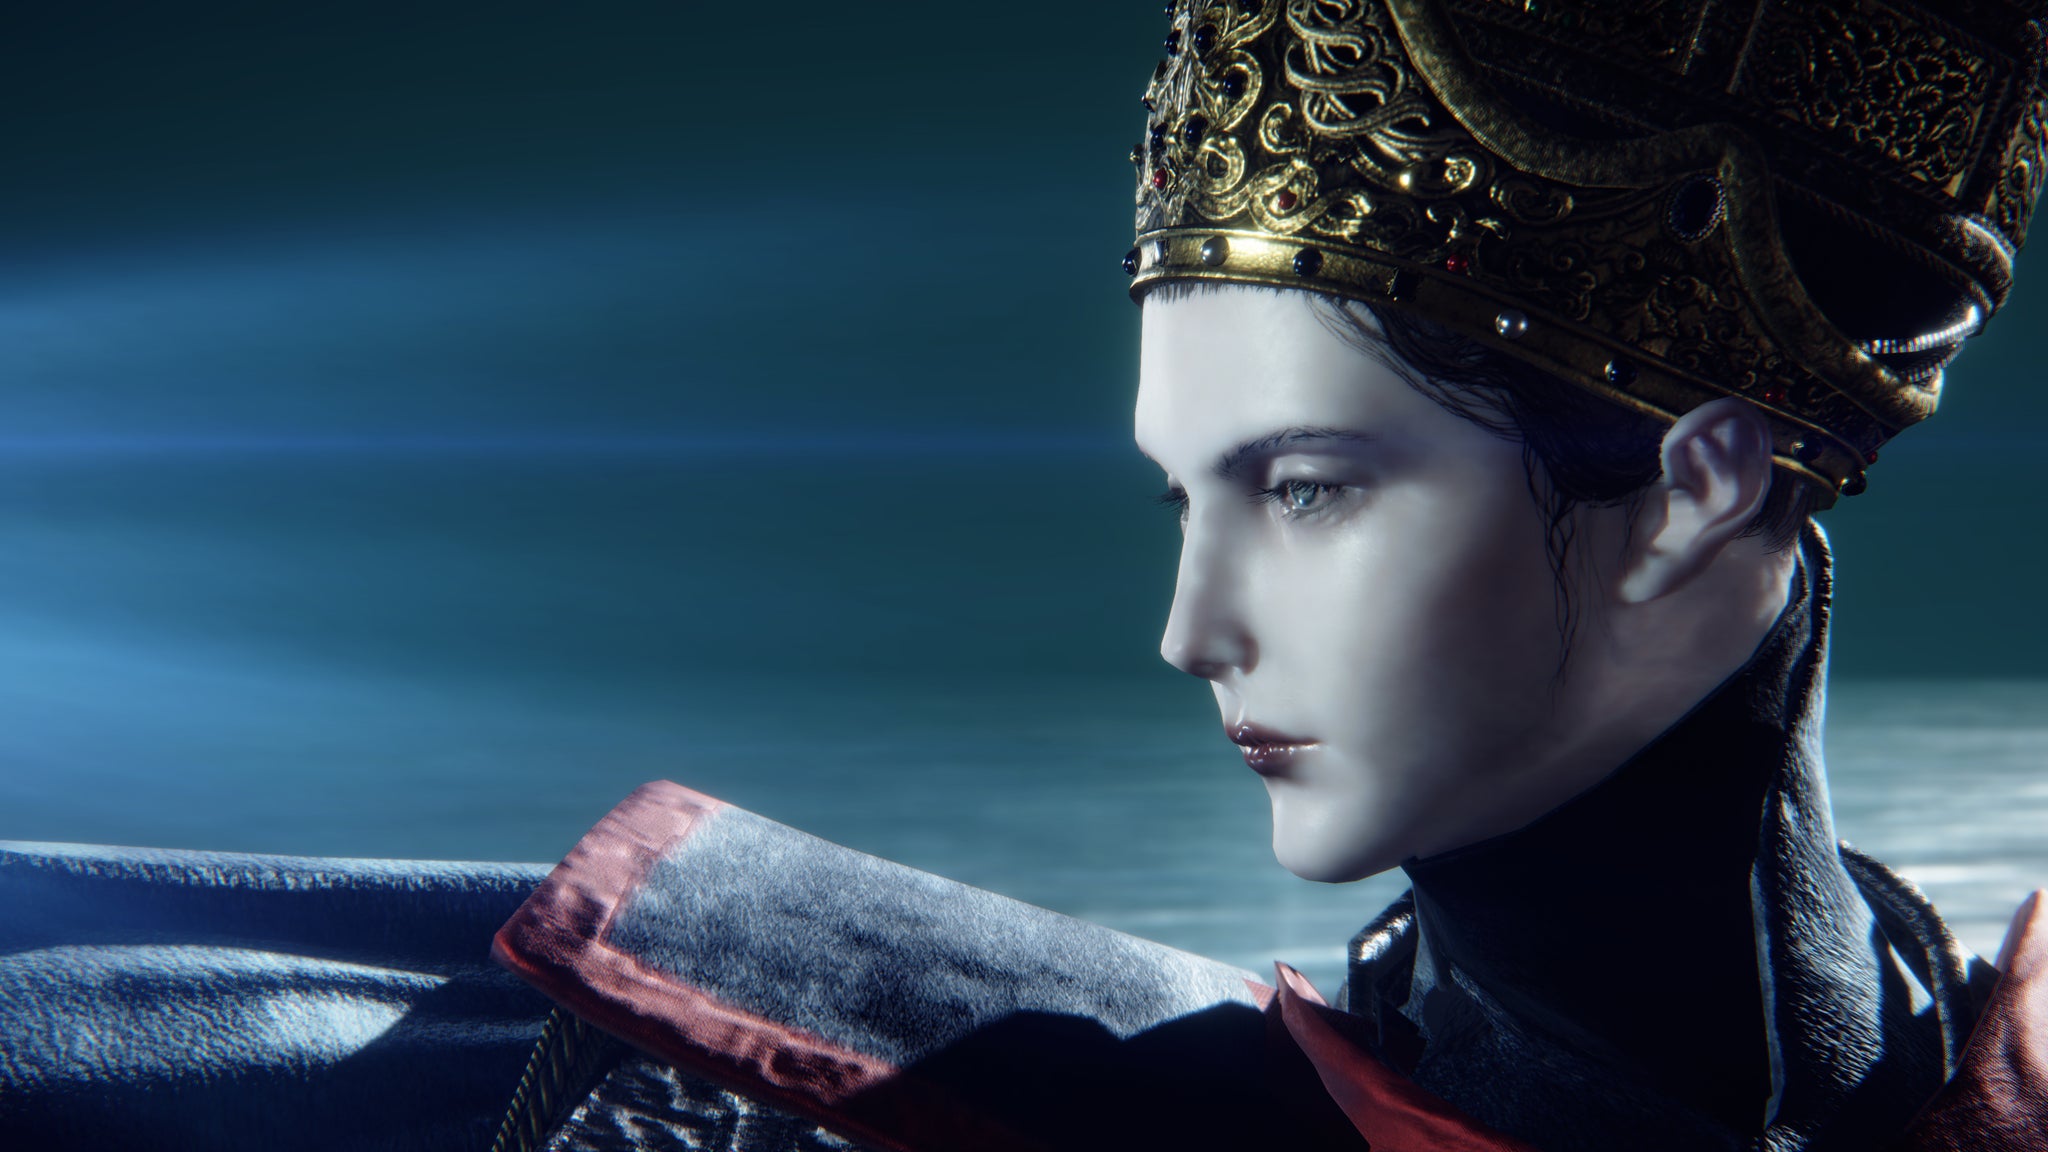
But sending the Elden Beast down to transform itself into the Elden Ring was only one part of the Greater Will’s plan. The next step was to recruit a viceroy who could rule over The Lands Between as the Greater Will’s representative. Enter Queen Marika.
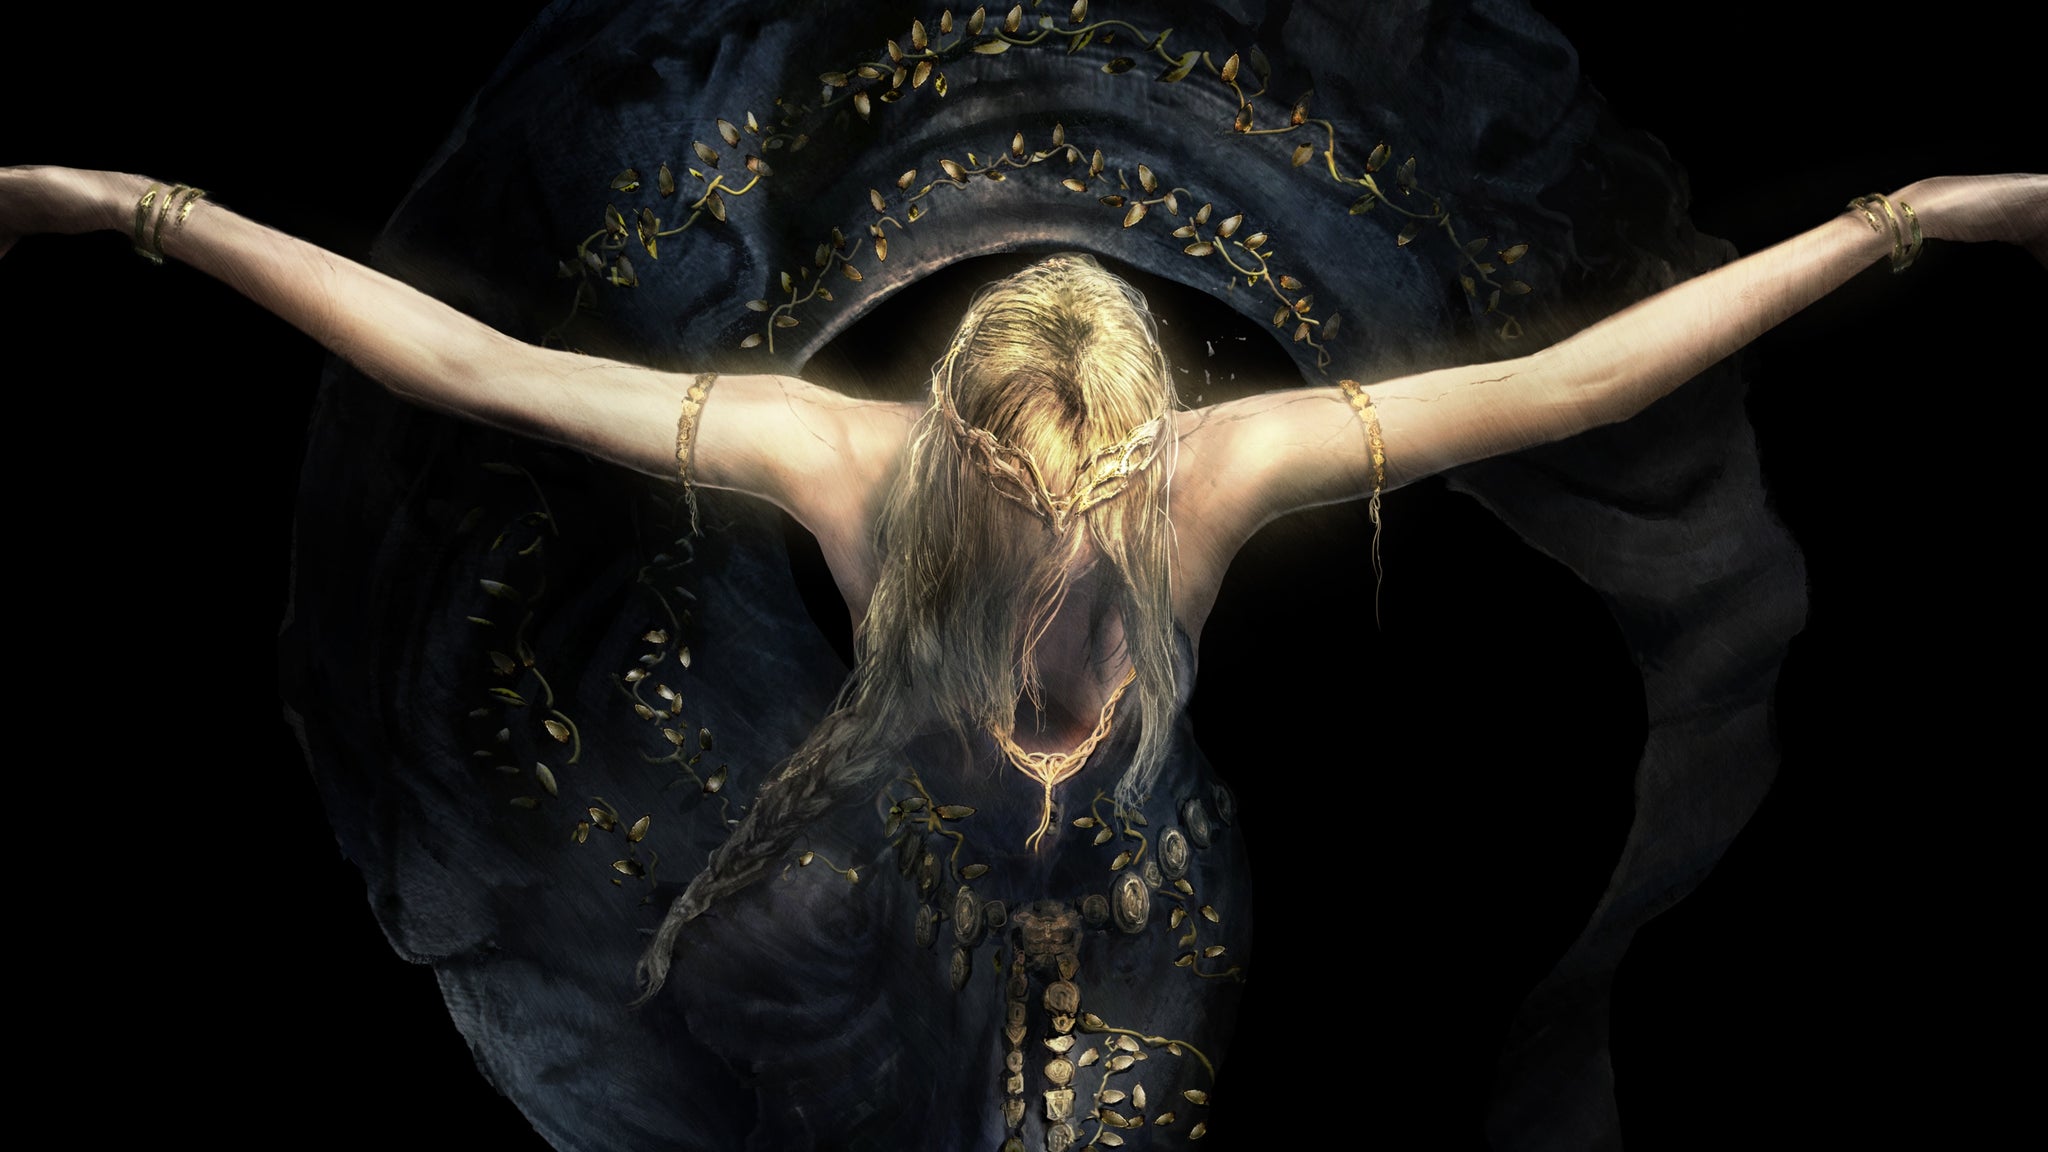
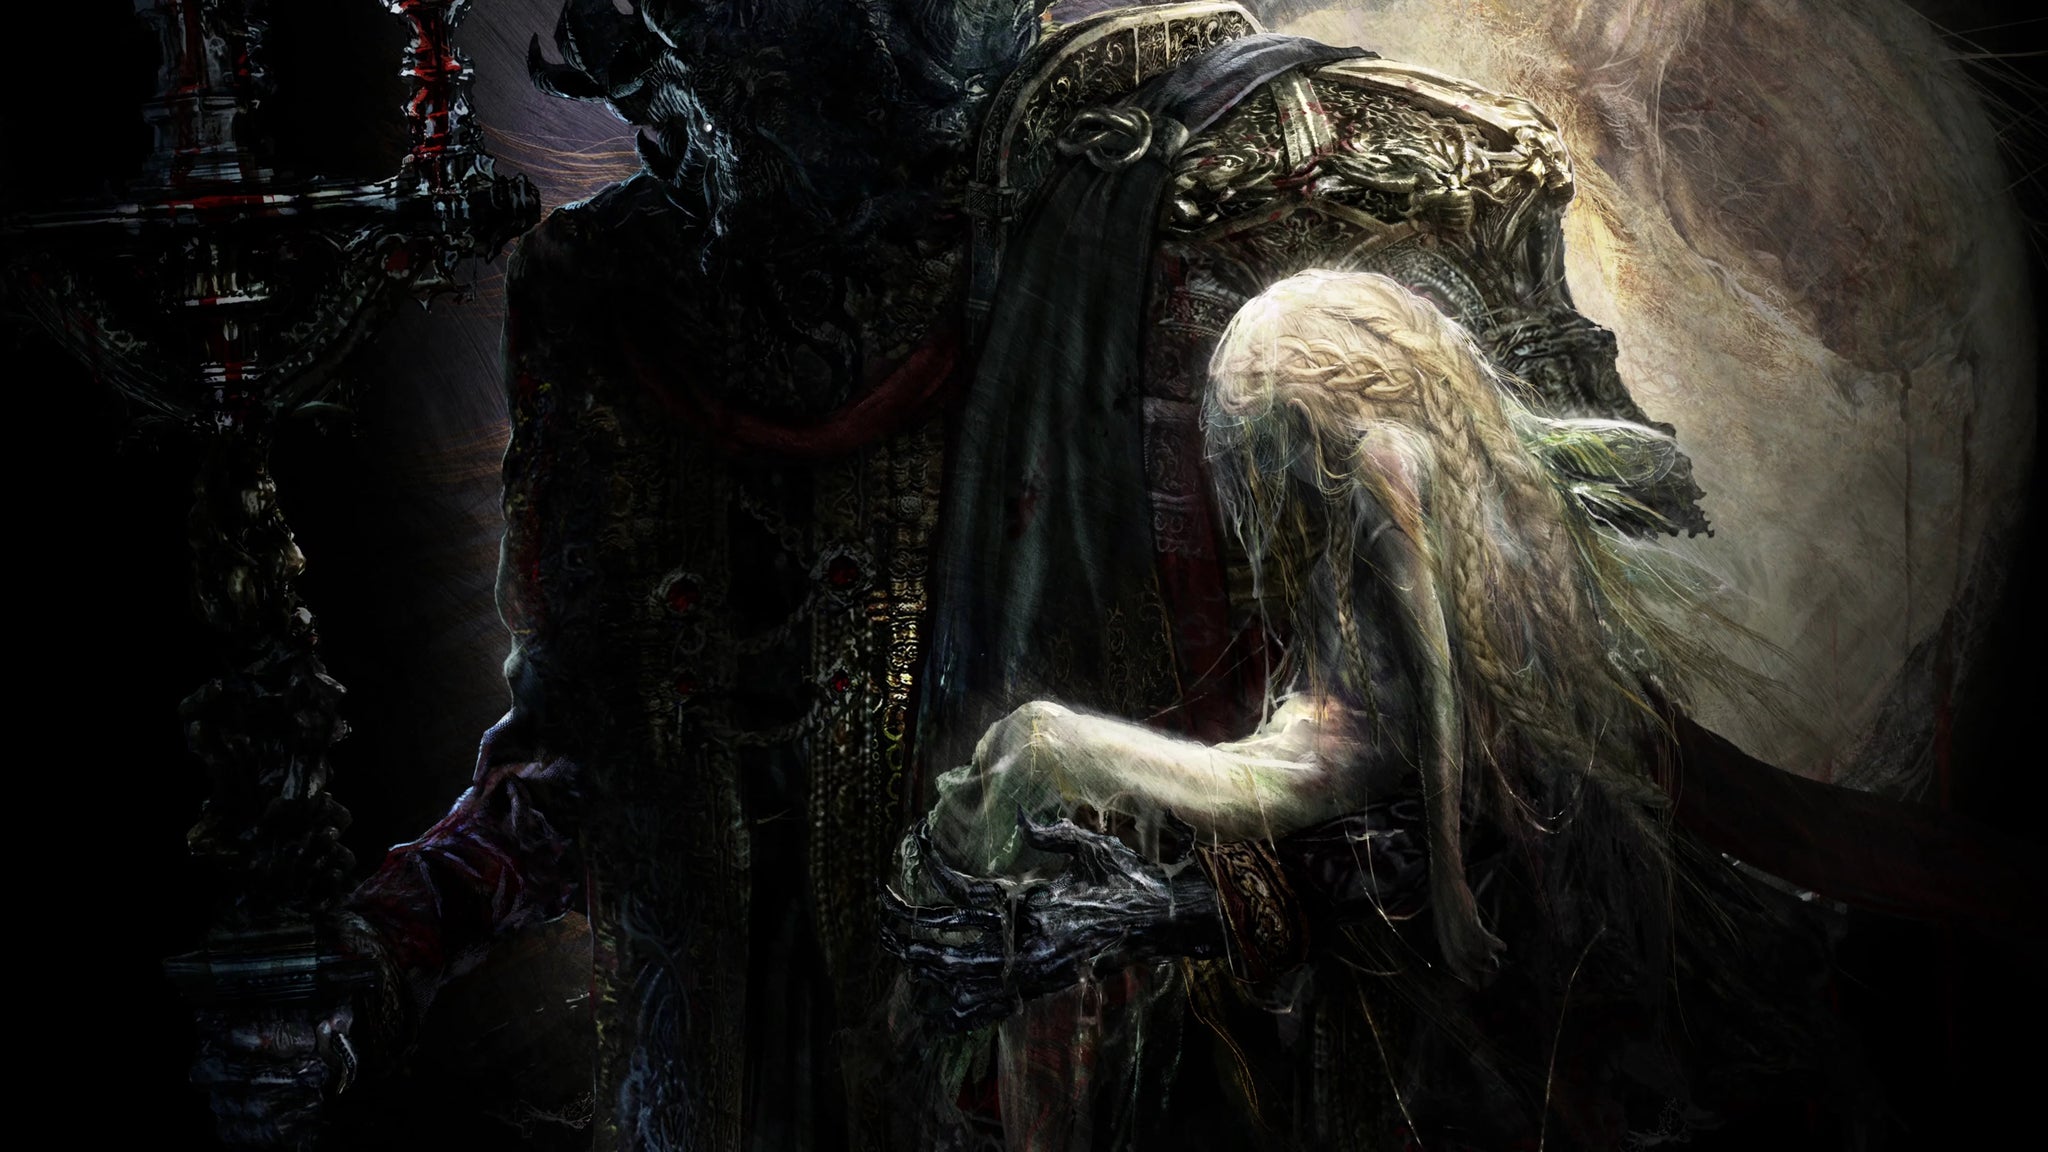
When all’s said and done, Queen Marika is probably the most important character in all of Elden Ring. |Image credit:Rock Paper Shotgun/Bandai Namco
Chapter 2: The Golden Order Begins
Key Characters:
| Queen Marika | Maliketh |
|---|---|
| The Gloam-Eyed Queen |
Before she became Queen, Marika hailed from a race called the Numen, outside The Lands Between. She was chosen by the Two Fingers to become an Empyrean, which basically means she made it to the second interview stage of the Greater Will’s application process for that viceroy position it had just created.
We only know of one other Empyrean chosen at this time - a person (or creature) called The Gloam-Eyed Queen. You know how the Greater Will and the Frenzied Flame were like two sides of the same coin? Order and Chaos? Well, Marika and the Gloam-Eyed Queen represented a similar duality. Marika represented Life Eternal, while the Gloam-Eyed Queen represented Destined Death.
Every Empyrean gets a loyal Shadowbound Beast, and Marika’s was the creature known as Maliketh. |Image credit:Rock Paper Shotgun/FromSoftware
The Two Fingers, after choosing an Empyrean, reward them with a faithful follower known as a Shadow (or Shadowbound Beast, if you’re feeling posh). Usually taking the form of a beast, Shadows are designed to be utterly, unfailingly loyal to their Empyrean. At least, unless that Empyrean turns against the Greater Will. But that’s another story. Marika’s Shadow was a creature called Maliketh , who - perhaps unsurprisingly - is by far the most powerful Shadowbound Beast that we’re aware of.
Marika sent Maliketh to fight the Gloam-Eyed Queen, and Maliketh dutifully slew his mistress’s rival. Marika then retrieved from the dead queen’s corpse the Great Rune governing death itself, and gave it to Maliketh to guard forevermore. Maliketh stowed Destined Death inside his giant sword, earning him the moniker: Maliketh, The Black Blade.
This act marked the beginning of Marika’s Golden Order. By segregating the Rune Of Death away from the Elden Ring, Marika created a world where nothing could die - at least, not permanently. And, in the same act, she placed the power of Destined Death in the hands of her utterly faithful follower, so that she could use it as she saw fit against her enemies. And enemies were plentiful at this time.

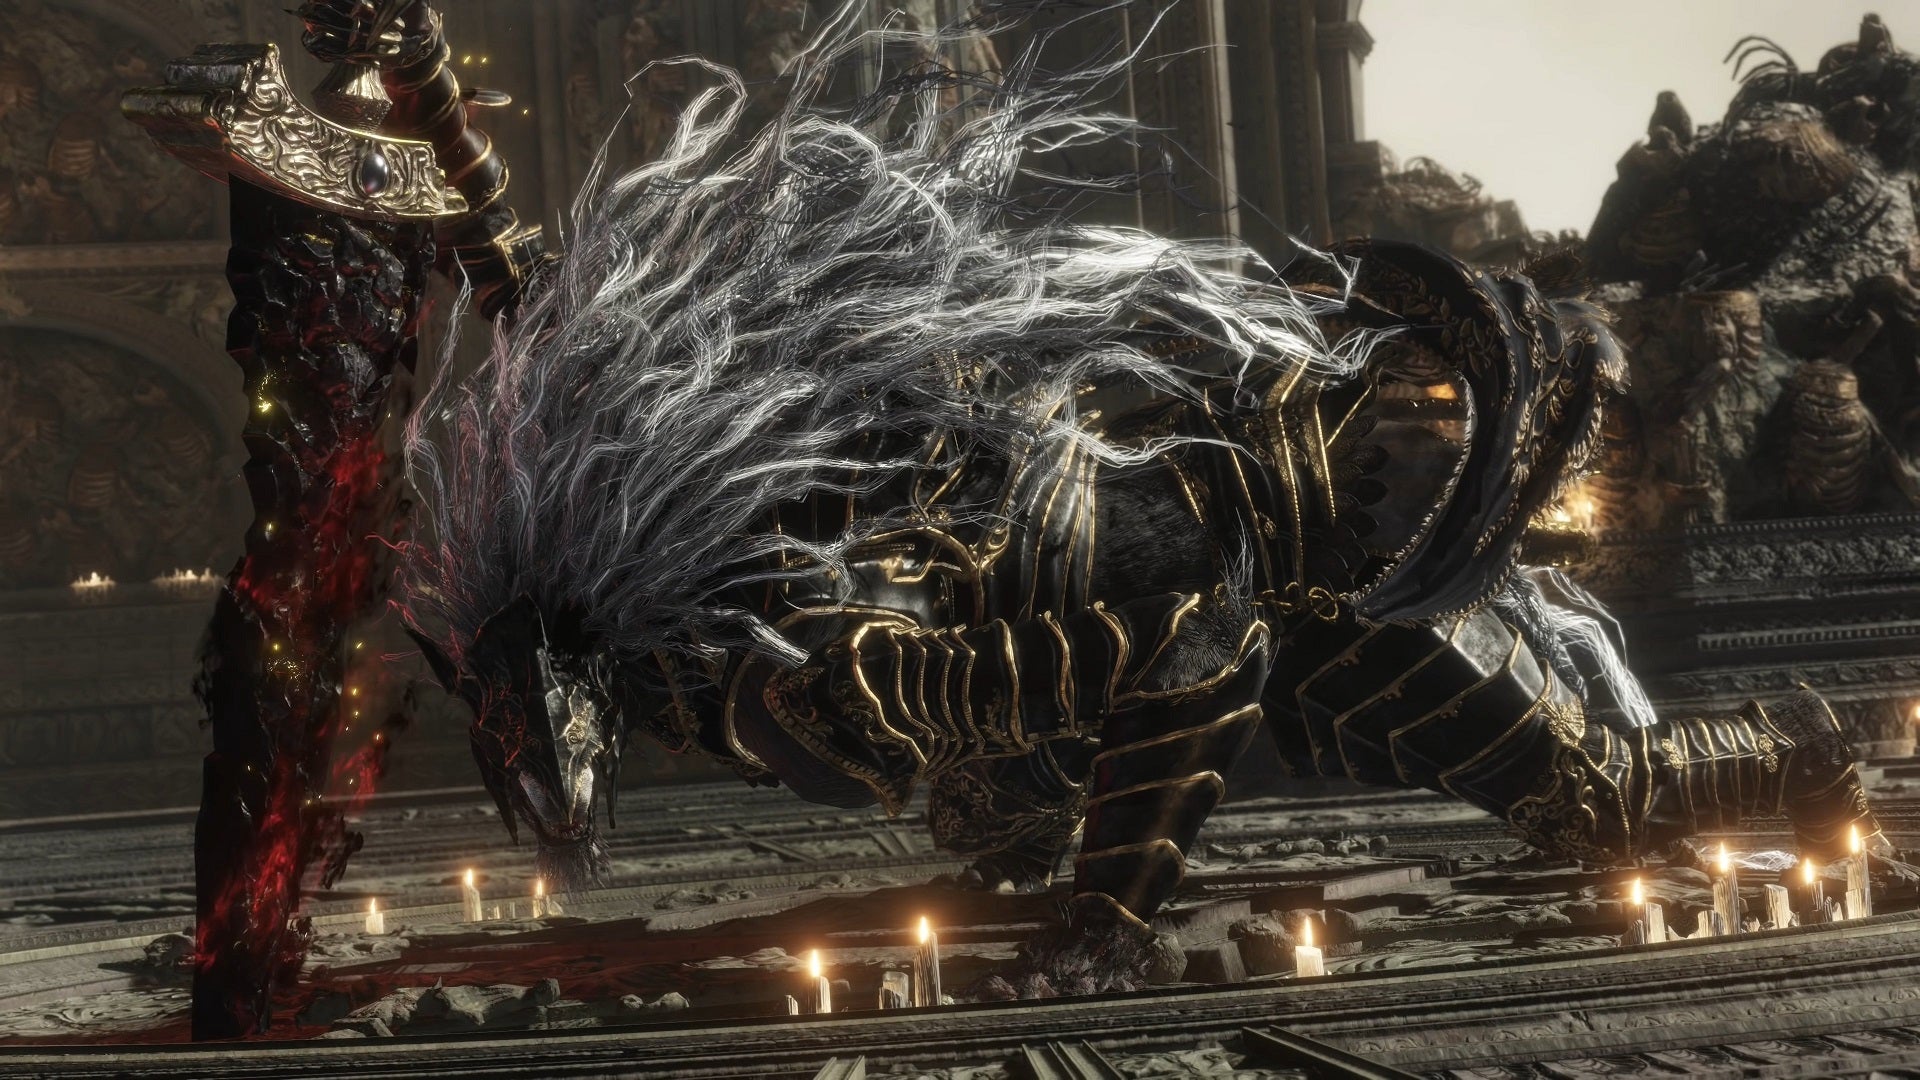
Godfrey, First Elden Lord, carries the Lord Of Beasts, Serosh, upon his back. |Image credit:Rock Paper Shotgun/Bandai Namco
Chapter 3: Godfrey And The First Demigods
Key Characters:
| Queen Marika | Hoarah Loux |
|---|---|
| Godfrey | Godwyn |
| Morgott | Mohg |
Just about every corner of The Lands Between had factions and races who didn’t take kindly to the idea of this new Golden Order coming out of nowhere to rule over reality itself. Marika was about to begin a series of long and savage wars for control. And for that, she needed an army, and a leader.
For this task, she chose a legendary warchief called Hoarah Loux. Hoarah Loux became one of Marika’s foremost weapons alongside the more recondite Maliketh. His only shortcoming was his bloodlust, to which end he made a pact with a Lord Of Beasts called Serosh. Hoarah Loux would carry Serosh on his back henceforth, to quell his lust for battle. Seems a bit extreme, but who knows, maybe that’s the mental health cure we’ve all been waiting for.
It was also at this point that Marika chose Hoarah Loux to become her husband. And Hoarah Loux adopted a new name befitting Marika’s new Golden Order: Godfrey. And as Marika’s husband, Godfrey became known as the land’s first Elden Lord.
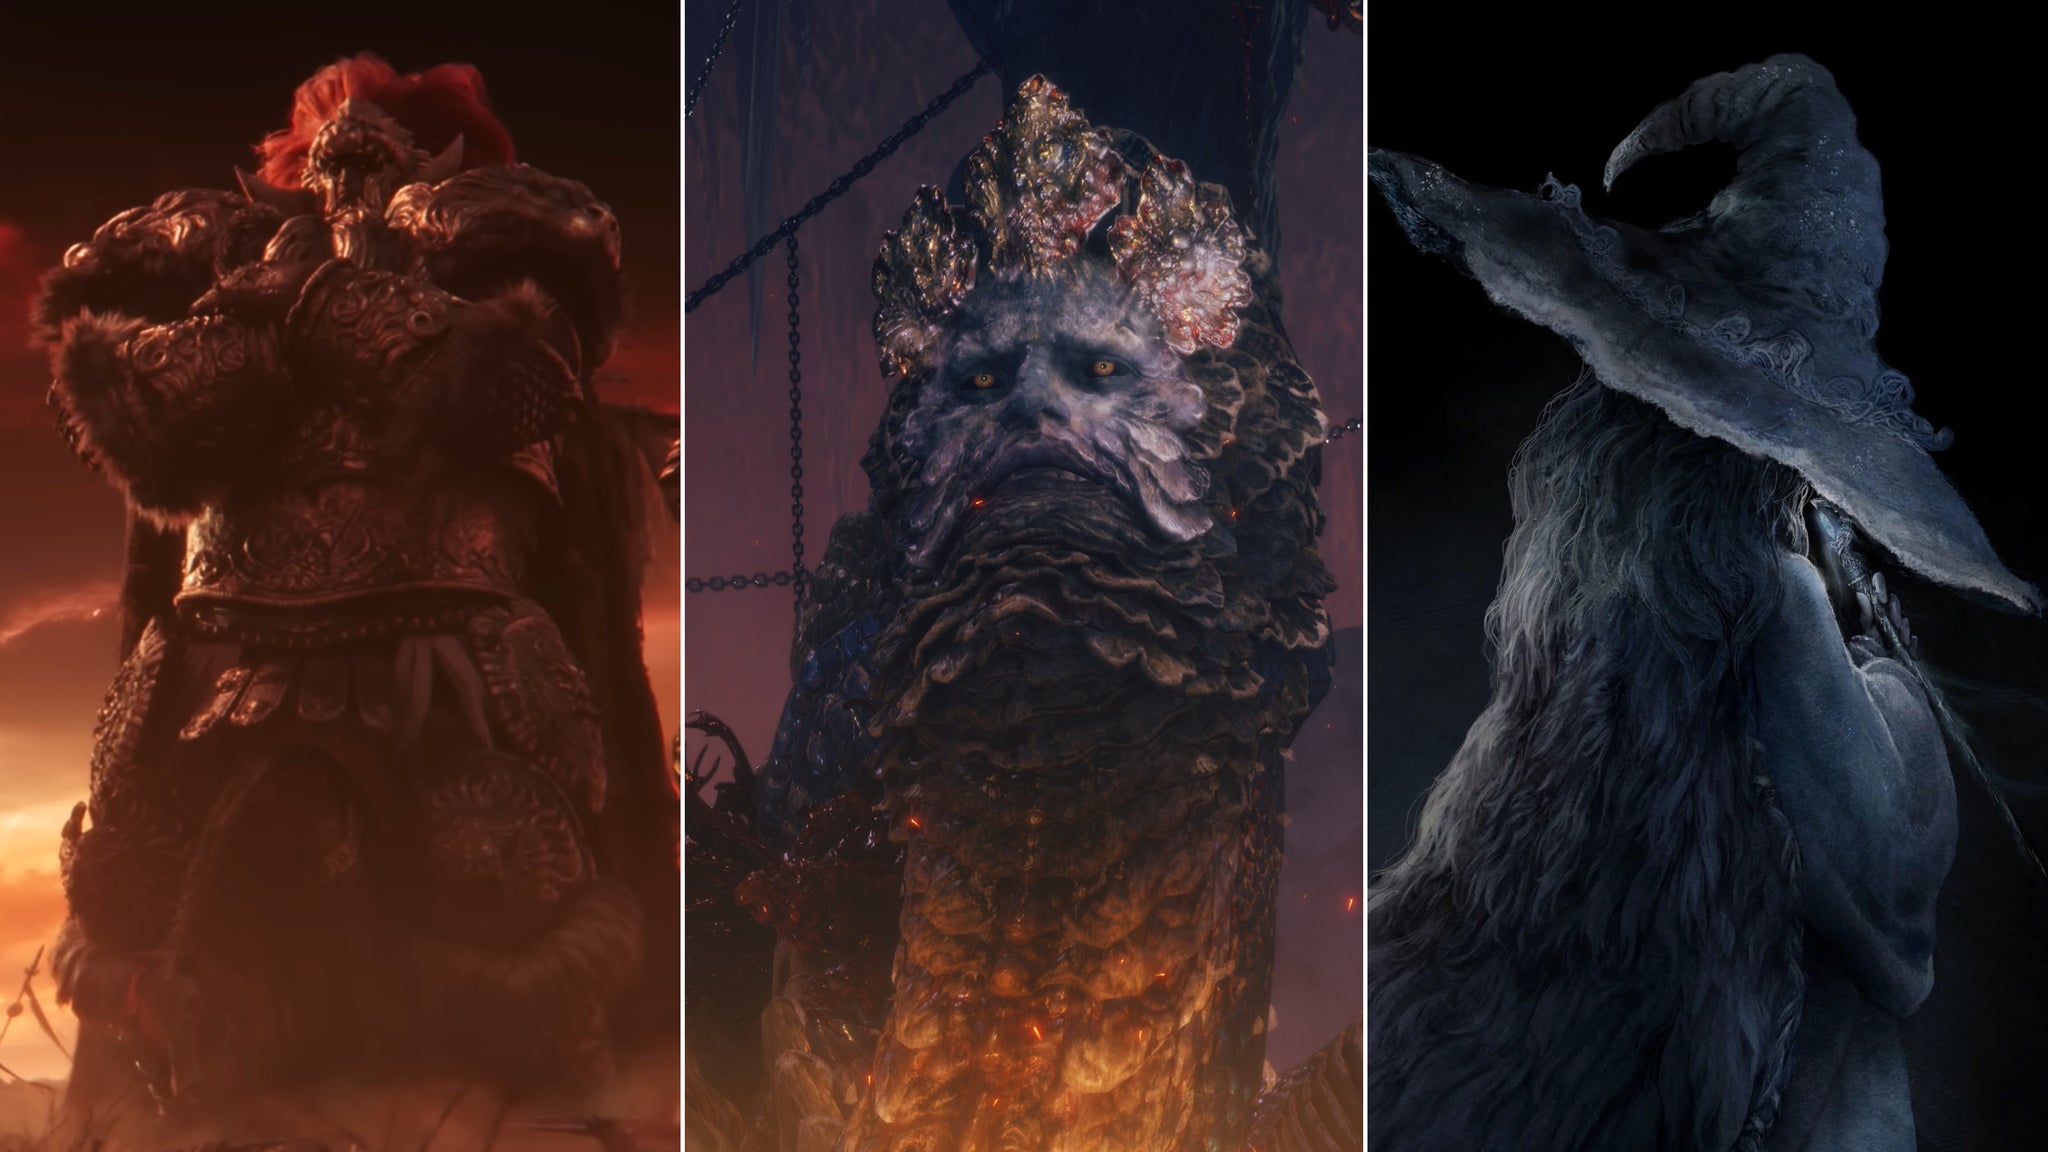
Marika and Godfrey had three children: Godwyn, Morgott , and Mohg . Godwyn was the golden child (no literally, he was known as Godwyn The Golden), and he became a powerful warrior like his father. The twins Morgott and Mohg, however, were born with deformities: horns sprouted every which way from their bodies; so too did tails and wings.
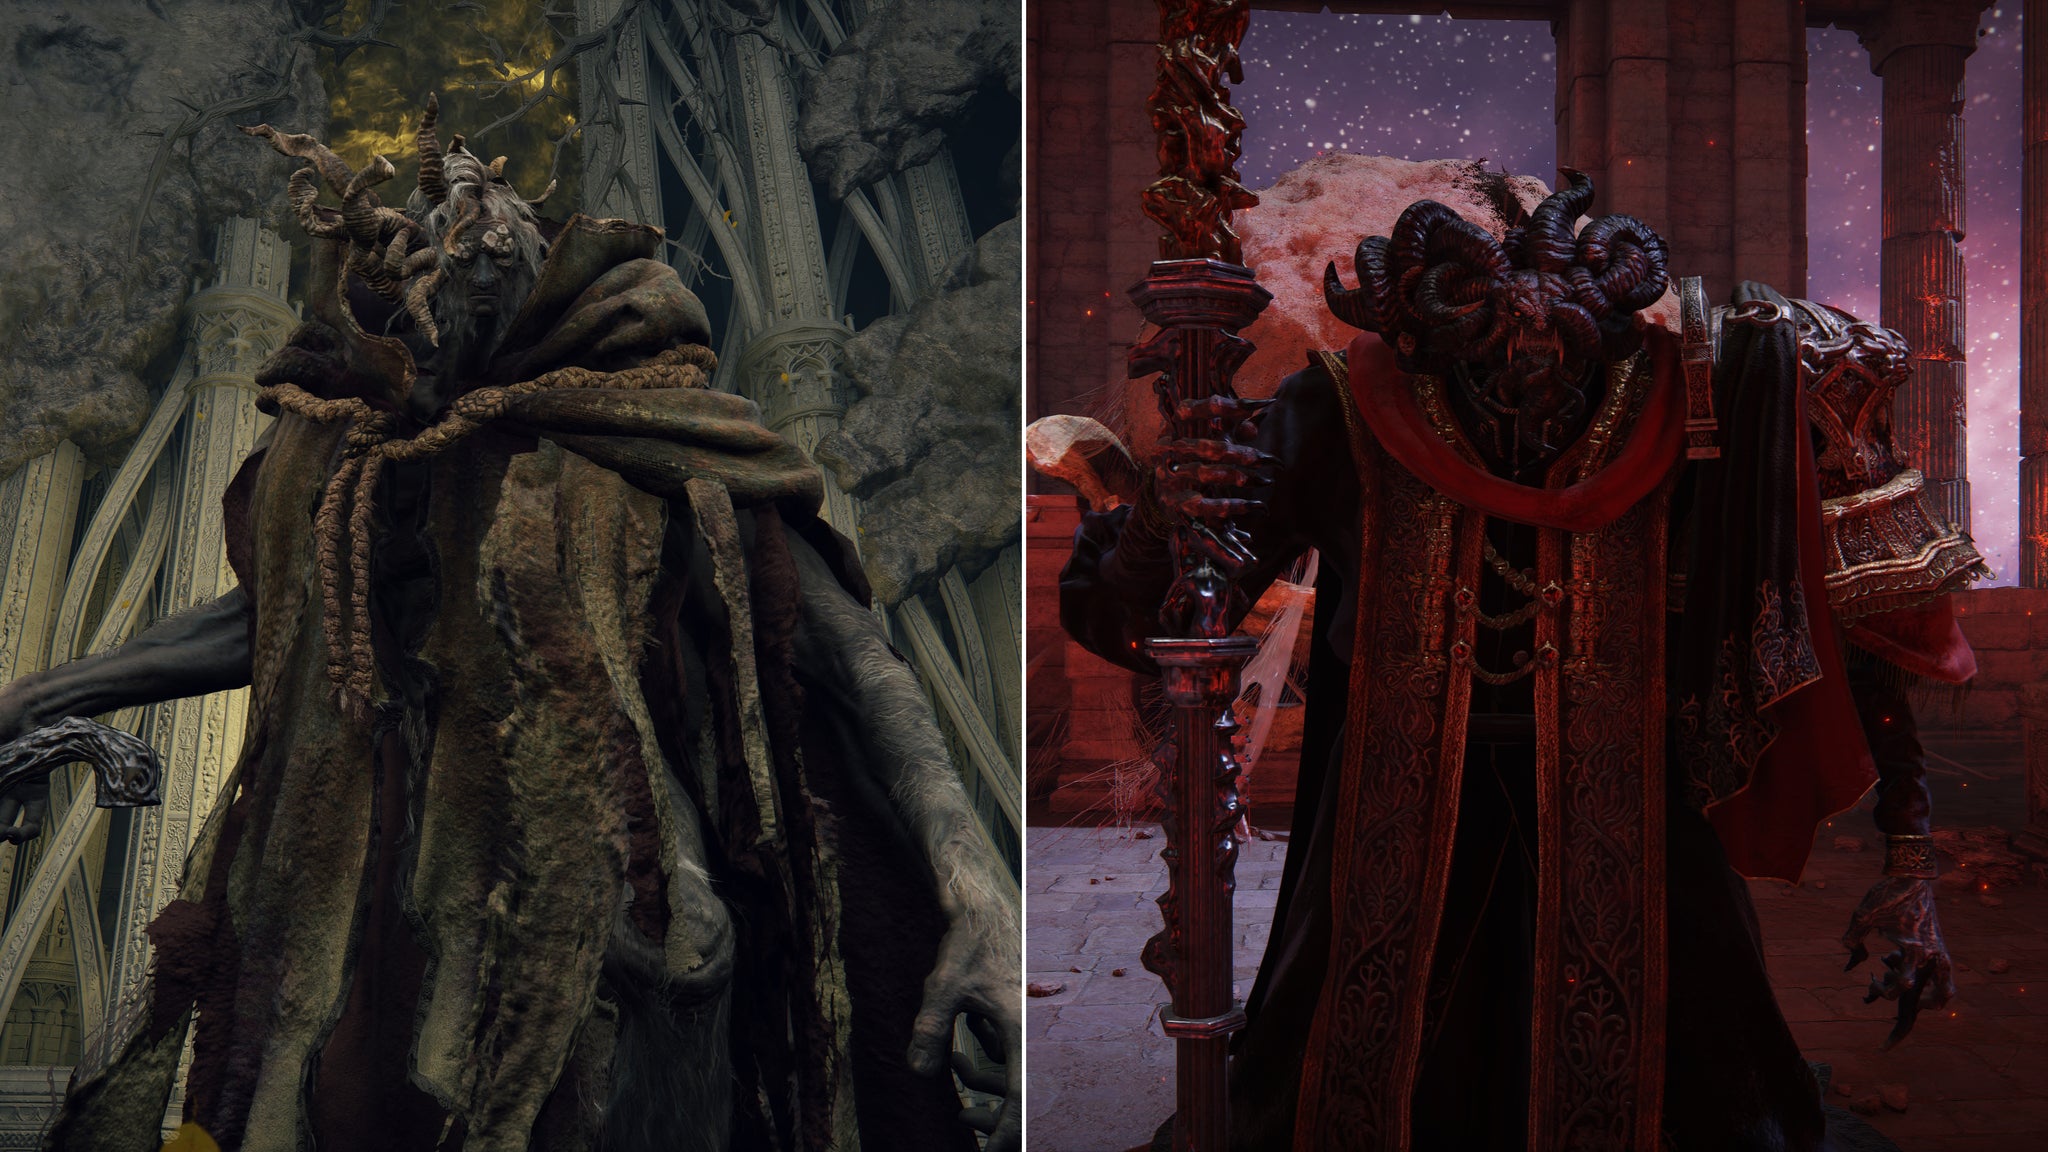
The Omen Twins: Morgott (left) and Mohg (right). |Image credit:Rock Paper Shotgun/Bandai Namco
These deformities made them “Omen”, and according to Marika’s Golden Order, Omen were shunned. Too much of a reminder of the melting pot of life that was the Crucible, in the age before the Erdtree. Omen are usually killed at birth - that’s how taboo it is. But because they were Marika’s own, she simply cast them out into the sewers beneath the capital, as would any decent caring mother.
Thus, the Golden Lineage - the first demigods - was formed. And while Mohg and Morgott were too horny to be of much use, Godwyn would prove himself useful to Marika and Godfrey in the wars ahead.

Fire Giants once dominated the lands north of Leyndell. Now there is only one left. |Image credit:Rock Paper Shotgun/Bandai Namco
Chapter 4: The Fire Giants
Key Characters:
| Queen Marika | Godfrey |
|---|---|
| The Giants | The Fell God |
Marika’s Conquest of The Lands Between met with resistance just about everywhere, but by far the greatest immediate threat were the Fire Giants of the north. They had the backing of an Outer God called The Fell God, and they also had the Flame of Ruin - a type of fire powerful enough to burn even the Erdtree.
Marika sent Godfrey and his army to conquer the Mountaintops Of The Giants . We don’t know how long the war lasted; we only know that Marika’s side won. It also couldn’t have hurt that they were aided by a powerful clan of ice-wielding Zamor Knights.
The One-Eyed Shield item description in-game states that the Fell God “is believed to have been slain by Queen Marika”. Whether this is true or not remains unclear, yet even Marika couldn’t destroy the Flame of Ruin. So instead it was confined to a Forge at the top of the mountain, and The Fire Giants were hunted to extinction except for one, who was left to tend the Flame Of Ruin for all eternity, and guard it against anyone who approaches.
One of the most powerful creatures in Elden Ring is the Dragonlord Placidusax, whose stone scales can alter time itself. |Image credit:Rock Paper Shotgun/Bandai Namco
Chapter 5: The Ancient Dragons
Key Characters:
| Dragonlord Placidusax | Gransax |
|---|---|
| Fortissax | Godfrey |
| Godwyn |
The Ancient Dragons hailed from a floating island called Farum Azula . They had stone scales with time-altering properties, making them immortal (but not unkillable). And they were led by Dragonlord Placidusax , who is said - rather confusingly - to have been Elden Lord in the time before the Erdtree.
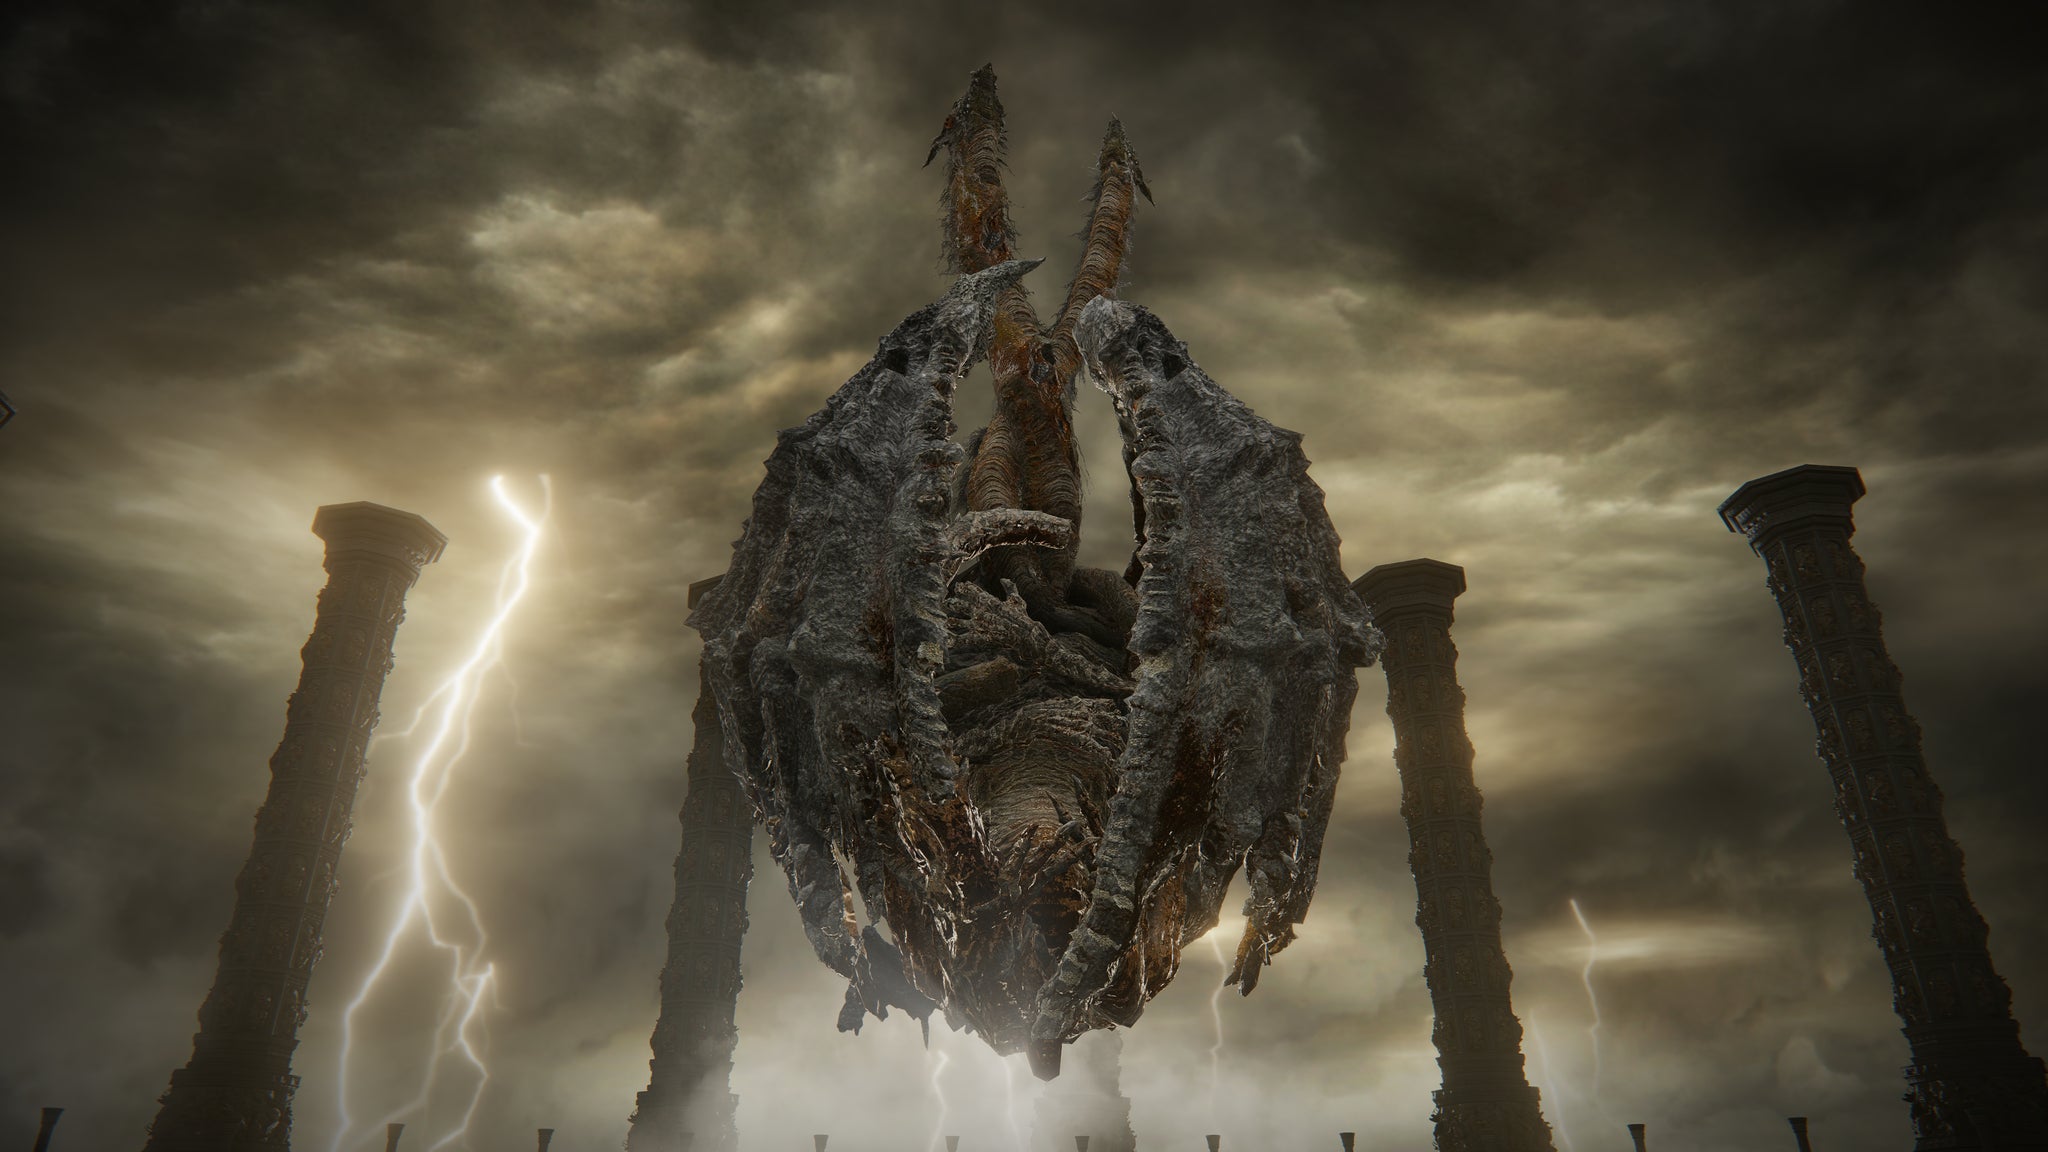
The Ancient Dragons let their feelings on Marika’s Golden Order be known in spectacular fashion. The gigantic dragon Gransax, the largest dragon ever to have existed as far as we know, besieged the capital city of Leyndell. This marks the only time in recorded history that Leyndell’s walls were breached. Gransax’s petrified corpse still remains towering over the city. How it was slain, and who by, we don’t know. But it marked the beginning of the Golden Order’s war against the Ancient Dragons.

Look up while in Leyndell and you can see the remains of Gransax, the largest dragon ever to exist. |Image credit:Rock Paper Shotgun/Bandai Namco
Unlike the Fire Giants, several of the Ancient Dragons managed to survive this war (though many didn’t). Placidusax retreated to its seat of power in Farum Azula and continued to await its god’s return. The Ancient Dragon Fortissax fought a legendary one-on-one fight against Godwyn The Golden, and lost. But Godwyn spared Fortissax’s life, and the two became friends. In fact, it was this union more than anything which resulted in the end of the war, and the rise of the Ancient Dragon Cult as an accepted teaching within the Golden Order.
There is also mention of a mysterious “Stormlord” which Godfrey himself faced alone at some point. We don’t know who the Stormlord is for sure, but many (I included) suspect it was Placidusax, who after all is lord of Farum Azula, where an endless storm rages beyond time. So, it sounds like perhaps Godfrey and Placidusax clashed, just as Godwyn and Fortissax clashed, and Godfrey forced Placidusax into hiding. When the player sees Placidusax in-game, the Dragonlord is missing three of its five heads. Potentially they were lost at the hands of Godfrey.
Unexpectedly, Marika faced her greatest threat in Liurnia, against the Carian Royals. |Image credit:Rock Paper Shotgun/Bandai Namco
Chapter 6: The War Ends
Key Characters:
| Queen Marika | The Nox |
|---|---|
| The Carian Royals | The Raya Lucarians |
| Rennala | Radagon |
There were really only a couple more major threats that Marika needed to take care of after the Giants and the Dragons. One was the Nox - a grey-skinned people who sought to combat the ever-growing influence of the Greater Will. They fashioned Mirrorhelms - helmets made from a crystalline glass, which “wards off the intervention of the Greater Will and its vassal Fingers”. And perhaps even more significantly - they created a weapon called the Fingerslayer Blade, which is “said to be able to harm the Greater Will and its vassals”.
The Nox are encountered a few times in Elden Ring; they were banished by Marika for their treasonous creations. |Image credit:Rock Paper Shotgun/Bandai Namco
Of course, that didn’t go down too well with the Greater Will, so Marika banished the Nox deep underground, where they remained in their Eternal Cities of Nokron and Nokstella, awaiting an age that would take them beyond the influence of the Greater Will and other Outer Gods.
After that, just one true foe remained - the Carian Royal Family. These Carian Royals were situated in Liurnia Of The Lakes , and perhaps surprisingly, they proved themselves such a match for the armies of the Golden Order that not one but two wars were fought over this region, and in neither war was there a clear victor. The sorcery-wielding Carian Knights were powerful indeed, and the head of the family, Rennala , used her lunar magic to “bewitch” (whether literally or figuratively) the Academy Of Raya Lucaria. Against the combined might of the Carian Royals and the Academy, victory in battle was by no means assured for the Golden Order.
It was during these wars that a Golden Order warrior named Radagon came to renown, leading the armies while presumably Godfrey was busy with Giants or Dragons (or making wee little demigods with Marika). The red-haired champion Radagon proved himself as worthy of Marika’s Golden Order as any who came before him, even Godfrey himself. But it was during these two challenging wars that the unlikely pair of Radagon and Rennala fell in love. Their union and marriage brought about an unexpectedly peaceful end to the prolonged bloodshed of the Liurnian wars.
The three children of Rennala and Radagon. From left to right: Radahn, Rykard, Ranni. |Image credit:Rock Paper Shotgun/Bandai Namco
Chapter 7: Rennala’s Demigod Children
Key Characters:
| Radahn | Rykard |
|---|---|
| Ranni |
In the years following the end of the Liurnian wars, Rennala and Radagon had three children, all of them demigods. The three children of Rennala and Radagon were: Radahn , Rykard , and Ranni . Yes, all the “R” names are giving me a headache too.
Radahn grew to be a mountain of a man, a fierce warrior like his father, and an exceptionally powerful practitioner of gravitational magic. Rykard, meanwhile, fused himself to a world-devouring snake. There’s always one, isn’t there.
Ranni took after her mother more than her father, inheriting Rennala’s talent for lunar magic. She also later became the first person (that we know of) since Marika and the Gloam-Eyed Queen to be chosen by the Two Fingers as an Empyrean, a candidate to succeed Marika as god of the Golden Order.

After the war, Godfrey and his army were banished from the Lands Between, becoming the first Tarnished. |Image credit:Rock Paper Shotgun/Bandai Namco
Chapter 8: The Long March Of The Tarnished
Key Characters:
| Queen Marika | Godfrey |
|---|---|
| Hoarah Loux | The Tarnished |
With the Carians pacified, Marika’s conquest of The Lands Between was more or less complete. And it was around this time that she began to look inward, towards the Golden Order and the Greater Will itself. Melina repeats Marika’s words to us at one point in-game: “Those blissful early days of blind belief are long past”, she states. No longer would Marika be a blind obedient slave to the Greater Will.
Godfrey, too, was affected by the war ending. The item description of Godfrey’s Elden Lord Crown reads: “And then, there came a moment. When his last worthy enemy fell. And it was then, as the story is told, that the hue of Lord Godfrey’s eyes faded.”
As it happens, the moment the war ended and the armies were no longer necessary, Marika had divested Godfrey and his armies of their Grace , their holy connection to the Erdtree and the Golden Order. She banished them from The Lands Between: “With thine eyes dimmed, ye will be driven from The Lands Between. Ye will wage war in a land afar, where ye will live, and die”.
Godfrey abandoned his Golden Order moniker, and became known as Hoarah Loux once more. And he and his armies became known as “Tarnished” - those who have lost the Grace of the Erdtree. They left The Lands Between and entered the realm known as the Badlands, where, as Marika stated, they would live and die away from the eternal life of Marika’s Golden Order. Thus, they grew stronger over the generations.
Rennala, Queen Of The Full Moon, would be left heartbroken by the end of Liurnia’s tale. |Image credit:Rock Paper Shotgun/Bandai Namco
Chapter 9: The Betrayal
Key Characters:
| Queen Marika | Radagon |
|---|---|
| Rennala |
One of the great secrets of Elden Ring is revealed to us via a statue of Radagon found in Leyndell, into which the sculptor apparently buried a secret he found about Radagon. Stand in front of this statue and cast the Law Of Regression Incantation towards it, and the truth is revealed as the statue turns from Radagon into Marika.
Turns out, Radagon is Marika. The two people are one and the same. Whether this was always the case or whether Radagon somehow became part of Marika, no one is sure. But viewed in this light, the seemingly happy ending to the Liurnian wars becomes rather more duplicitous. Having encountered more resistance than expected from the Carians, Marika instead seduced Rennala under the guise of Radagon in order to bring about peace.
And once peace was established, Radagon betrayed Rennala, leaving her in favour of Marika. Rennala was left shattered and heartbroken by Radagon’s departure, and she lost the loyalty of her Academy as a result. Liurnia fell into a civil war between the Carian Royals at Caria Manor, and the Academy of Raya Lucaria. And thus, Liurnia would never again pose a threat to Marika’s Golden Order.
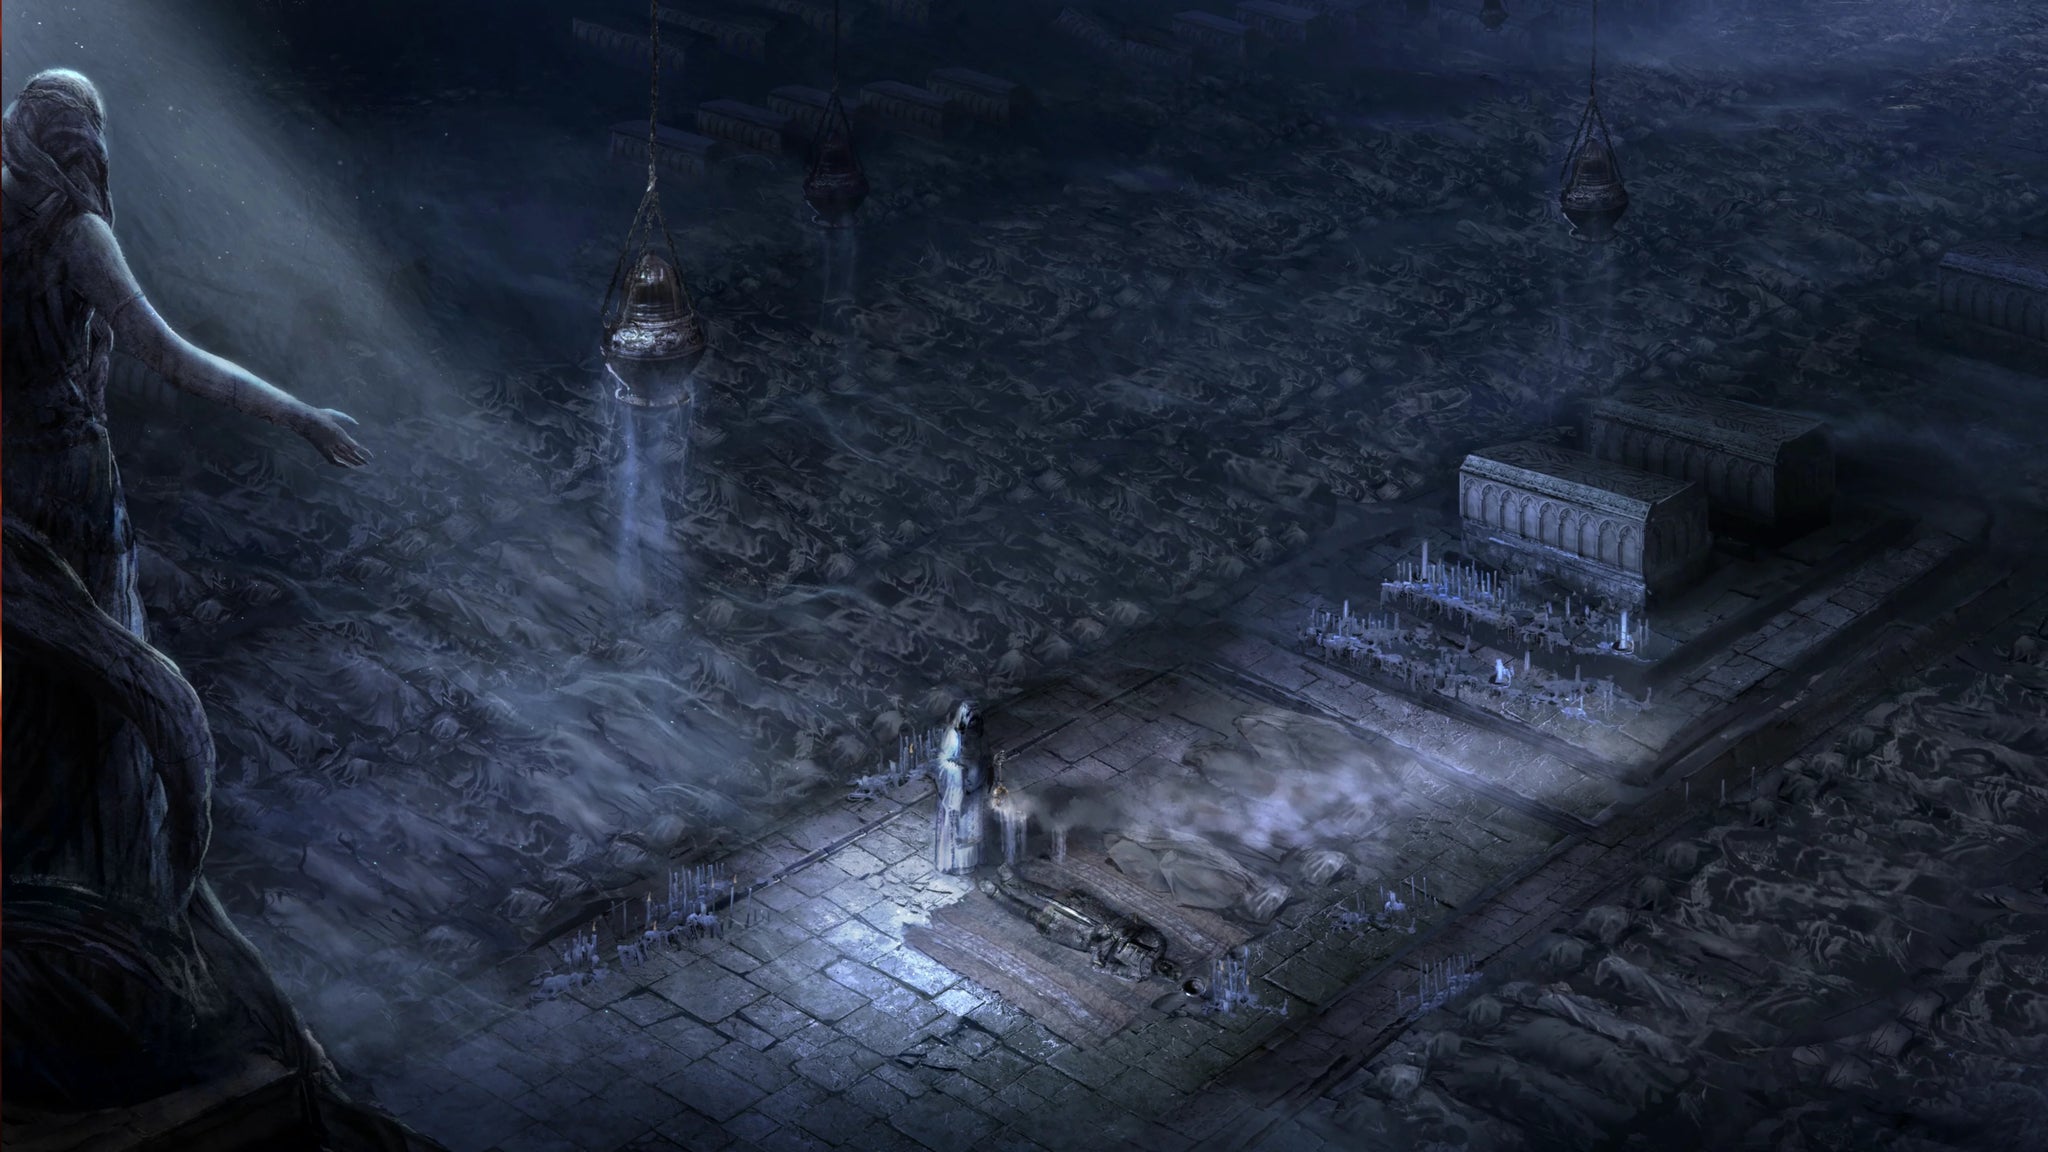
The only thing Radagon left behind for Rennala was an amber egg, containing the Great Rune Of The Unborn, a small part of the Elden Ring associated with rebirth. The heartbroken Rennala would cradle this amber egg, using its power to rebirth her scholars again and again until they became husks of their former selves.
Malenia and her brother Miquella were both born from a single god: Marika herself. |Image credit:Rock Paper Shotgun/Bandai Namco
Chapter 10: The Pure Demigods
Key Characters:
| Malenia | Miquella |
|---|
In a rather incestuous twist, Marika and Radagon - both the same person, remember - ended up having two more children. Don’t think about that too much.
Those two children were the twins, Malenia and Miquella. And because they were technically born from one godly parent, that meant a couple of things for them. First: they were chosen to be Empyreans by the Two Fingers. After all, who better to succeed Marika than the child of Marika and… Marika?
Second: Malenia and Miquella were both born cursed, presumably because of the unusual and slightly incestuous nature of their birth. Miquella was cursed with eternal youth, while Malenia was cursed with a Scarlet Rot sickness.
The stage, now, is more or less set for the Shattering. A quick roundup: we have Marika, and her Golden Order. Her greatest assets: Radagon, Maliketh, and the backing of the Greater Will. Godfrey and his armies have been banished from The Lands Between, and they have become the first Tarnished.
Meanwhile, we have three sets of demigod children. Godwyn, and the Omen twins Morgott and Mohg, were born from Marika and Godfrey. Then later, Radagon (who is Marika) and Rennala had three more children: Radahn, Rykard, and Ranni. And finally, Marika and Radagon has the cursed twins, Malenia and Miquella.
Now, let’s watch Marika’s Golden Order unravel.
Radahn used his legendary gravitational powers to conquer the stars themselves. |Image credit:Rock Paper Shotgun/Bandai Namco
Chapter 11: Radahn Defeats The Stars
Key Characters:
| Radahn | Ranni |
|---|
Radahn, son of Radagon and Rennala, was a giant of a man. And in an act that instantly makes him one of my favourite characters in the entire Elden Ring mythos, he learnt gravitational magic in order to still be able to ride his scrawny little horse without crushing it. Isn’t that just brilliant?
He wasn’t a self-taught gravity practitioner though. His mentor was an Alabaster Lord hailing from the sorcerous town of Sellia, in Caelid. Through the Alabaster Lord’s guidance, Radahn became extremely powerful in the gravitational arts. And his power was already formidable, even for a child of Marika. The Starscourge Heirloom item description in-game calls him “mightiest hero of the demigods”.
Details are shaky, but at some point Radahn pulled off an act of unheard of power for a demigod: he used his gravitational magic to arrest the stars themselves, and keep them in stasis for as long as he would live. Why he did this is not clear. It’s said that by doing so he saved the town of Sellia, which he clearly had some attachment to as it was where he learnt his magic. So it’s possible that a “star” or meteor would have struck Sellia had Radahn not intervened.
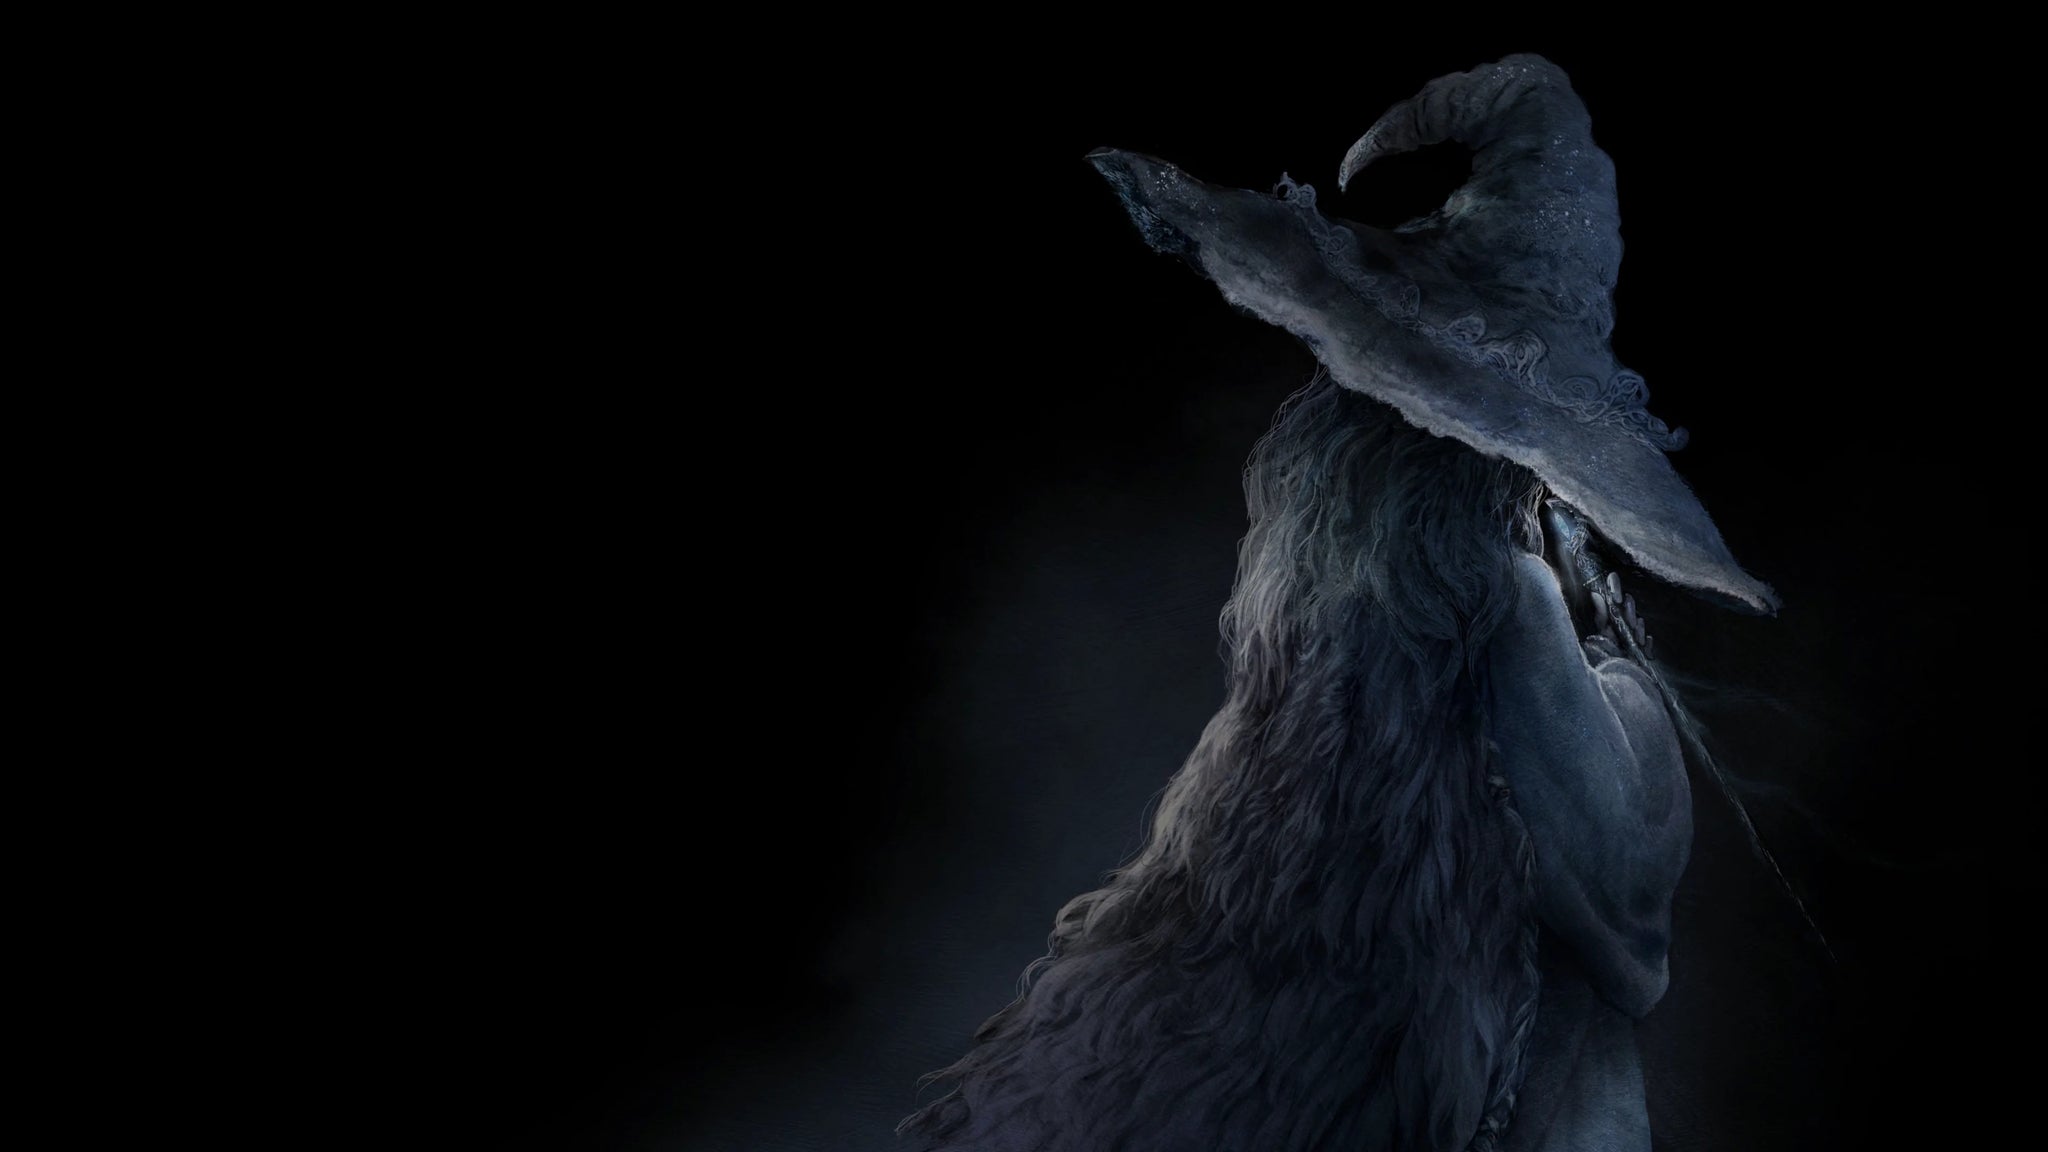
In any case, Radahn’s conquering of the stars had massive implications, particularly for a certain other demigod: his sister, Lunar Princess Ranni. Ranni had a strong affinity with the stars and the night sky; indeed, her ending in Elden Ring is called the Age Of Stars. Her destiny is wrapped up in the movement of the stars - and with the stars in stasis, so too was Ranni’s destiny. It’s unknown whether either of them were aware of this, but from the moment Radahn conquered the stars, it became impossible for Ranni to fully realise her goals while Radahn still lived.
Possibly the most fateful night in the entire Elden Ring mythos was the Night Of Black Knives, where Godwyn The Golden perished. |Image credit:Rock Paper Shotgun/Bandai Namco
Chapter 12: The Night Of Black Knives
Key Characters:
| Ranni | Maliketh |
|---|---|
| Godwyn | Black Knife Assassins |
| Rykard |
Even with the stars in stasis, Ranni wasn’t powerless. She had a plan. See, Ranni may have been made an Empyrean by the Two Fingers, but she despised the Golden Order and the Greater Will, and wished to free herself and The Lands Between from the Greater Will’s influence. She had no army, but she did have her loyal Shadow, a half-wolf named Blaidd; and she also had as her servant a troll Smithing Master known as Iji. And she had her mastery over cold sorceries and lunar magic, courtesy both of her lineage and her mentor, a mysterious crone known as the “Snow Witch”.
Armed with such powers, Ranni made her move. One night, she visited Marika’s Shadow, Maliketh, in Farum Azula. And somehow, she stole a fragment of the Rune Of Death that Maliketh had sworn to guard with his life.
Ranni was the architect behind the Night Of Black Knives, and as such, it was Ranni who indirectly caused the Shattering. |Image credit:Rock Paper Shotgun/Bandai Namco
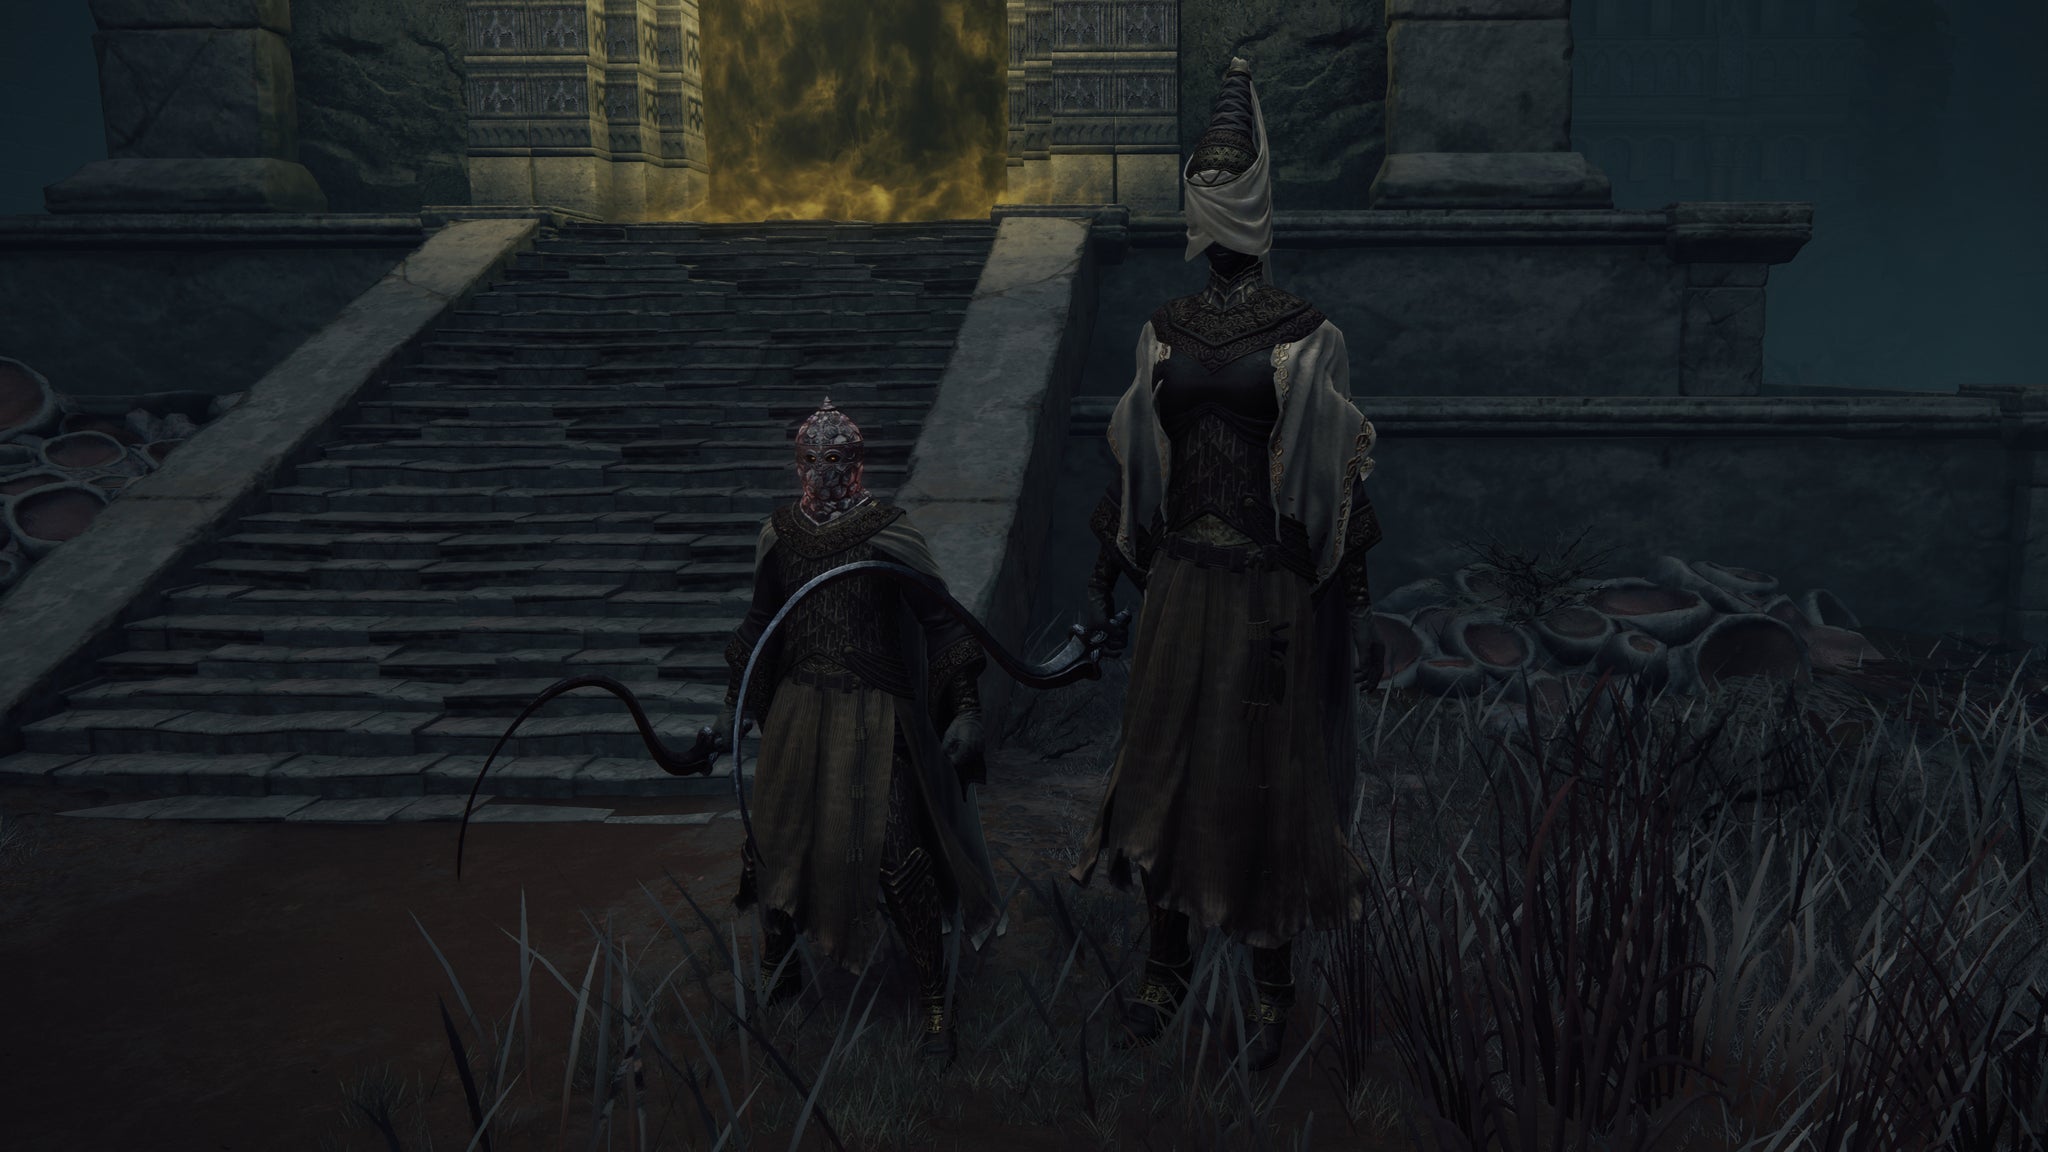
Ranni’s plan was swift and brutal. She employed a group of female Numen warriors called the Black Knife Assassins, and using a ritual, she imbued their Black Knives with the stolen fragment of Death, turning them into blades powerful enough to kill a god. That very night, the Black Knife Assassins set upon their many targets scattered across The Lands Between, all at once. It’s said they targeted many of Marika’s kin (presumably lesser unnamed demigods generations into the Golden Lineage), but the most significant death of all was Marika’s firstborn, Godwyn The Golden.
Godwyn was slain by a group of Black Knife Assassins, led by Alecto, the Black Knife Ringleader. In another carefully conceived ritual, they carved a runemark of Death into Godwyn’s back with their Black Knives; and at exactly the same time, in a different place, Ranni carved the same cursemark into herself. In so doing, both the demigods suffered a “half-death”. Godwyn’s soul was killed, leaving behind his body. And Ranni’s body was slain, but her soul endured.
Godwyn’s body, without a soul, became known as The Prince Of Death: a horrific entity that would mindless spread death everywhere, without end. Through the demigod’s malformed soulless body, the Rune Of Death spread like a disease, sprouting what’s known as Deathroot, which gives rise to Those Who Live In Death (the undead).
Maliketh, despising himself for letting the fragment of Death be stolen from his Black Blade, bound the Blade with his own flesh, sealing it within himself to prevent Destined Death from ever being stolen again. He resolved to undo his mistake by entering The Lands Between under the guise of a Beast Clergyman named Gurranq, and employing Tarnished warriors to track down Deathroot and feed it to him to limit Destined Death’s expansion across the land.
The reason Ranni slew her own body was simple; she explains it to the player. “I stole the Rune of Death, slew mine own Empyrean flesh, casting it away. I would not be controlled by that thing [The Greater Will]”. By discarding her “Empyrean flesh”, she was able to act more freely, beyond the control of the Greater Will and its Two Fingers. And in the same breath, she slew one of Marika’s children, triggering a cascade of consequences that would quickly grow into all-out war between the Demigods.

At some point, Radahn attacked the forces of Leyndell, but Morgott/Margit would meet him in battle and fend him off. |Image credit:Rock Paper Shotgun/Bandai Namco
Chapter 13: The Shattering Begins
Key Characters:
| Queen Marika | Radagon |
|---|---|
| Morgott | Mohg |
| Rennala | Radahn |
| Rykard | Ranni |
| Malenia | Miquella |
| Godrick |
After the Night Of Black Knives and her son Godwyn’s death, Marika made the fateful decision to shatter the Elden Ring itself. The immediate assumption is that she was torn apart by Godwyn’s death, but that’s just one theory. There’s also compelling evidence that Marika herself was pulling the strings that led to the Night Of Black Knives. After all, after her conquest ended, she had plenty of time to look inward and delve into the Golden Order, no longer as a blind puppet of the Greater Will.
Whether this was part of an age-old plan or the product of her grief at losing her son and her control over Death itself, Marika shattered the Elden Ring into pieces. After that, Radagon attempted to repair the Elden Ring, but to no avail. Which is interesting in itself, because, lest we forget, Radagon is Marika. The prevailing theories are: either Radagon is still more of a puppet of the Greater Will, and sought to immediately undo Marika’s treason; or it was always Marika’s intention to shatter the Elden Ring and then rebuild it, perhaps to fix the issues that she had seen within the Golden Order.
Regardless, the Elden Ring could not be repaired, and over time the pieces of the Elden Ring were spread far and wide, and their power quickly snatched up by the various power-coveting demigods who remained. Seemingly as punishment, Marika (and by extension Radagon) was imprisoned within the Erdtree by the Elden Beast itself. But the damage to the Greater Will’s influence was done; everything was spinning out of control.
Of the nine Shardbearers who managed to take Great Runes from the shattered Elden Ring, most of them would end up at war with one another. |Image credit:Rock Paper Shotgun/Bandai Namco
Power corrupts, and the Great Runes that once made up the Elden Ring were pretty much the greatest bits of power in the world at this time. It’s also thought that the Greater Will wished for the remaining demigods to war among themselves in order for one to rise above the rest and prove themselves worthy of becoming the god of the new age. So there may have been some sort of Ring Of Sauron-esque corruption happening to all the demigods with Great Runes, forcing them to act more warlike.
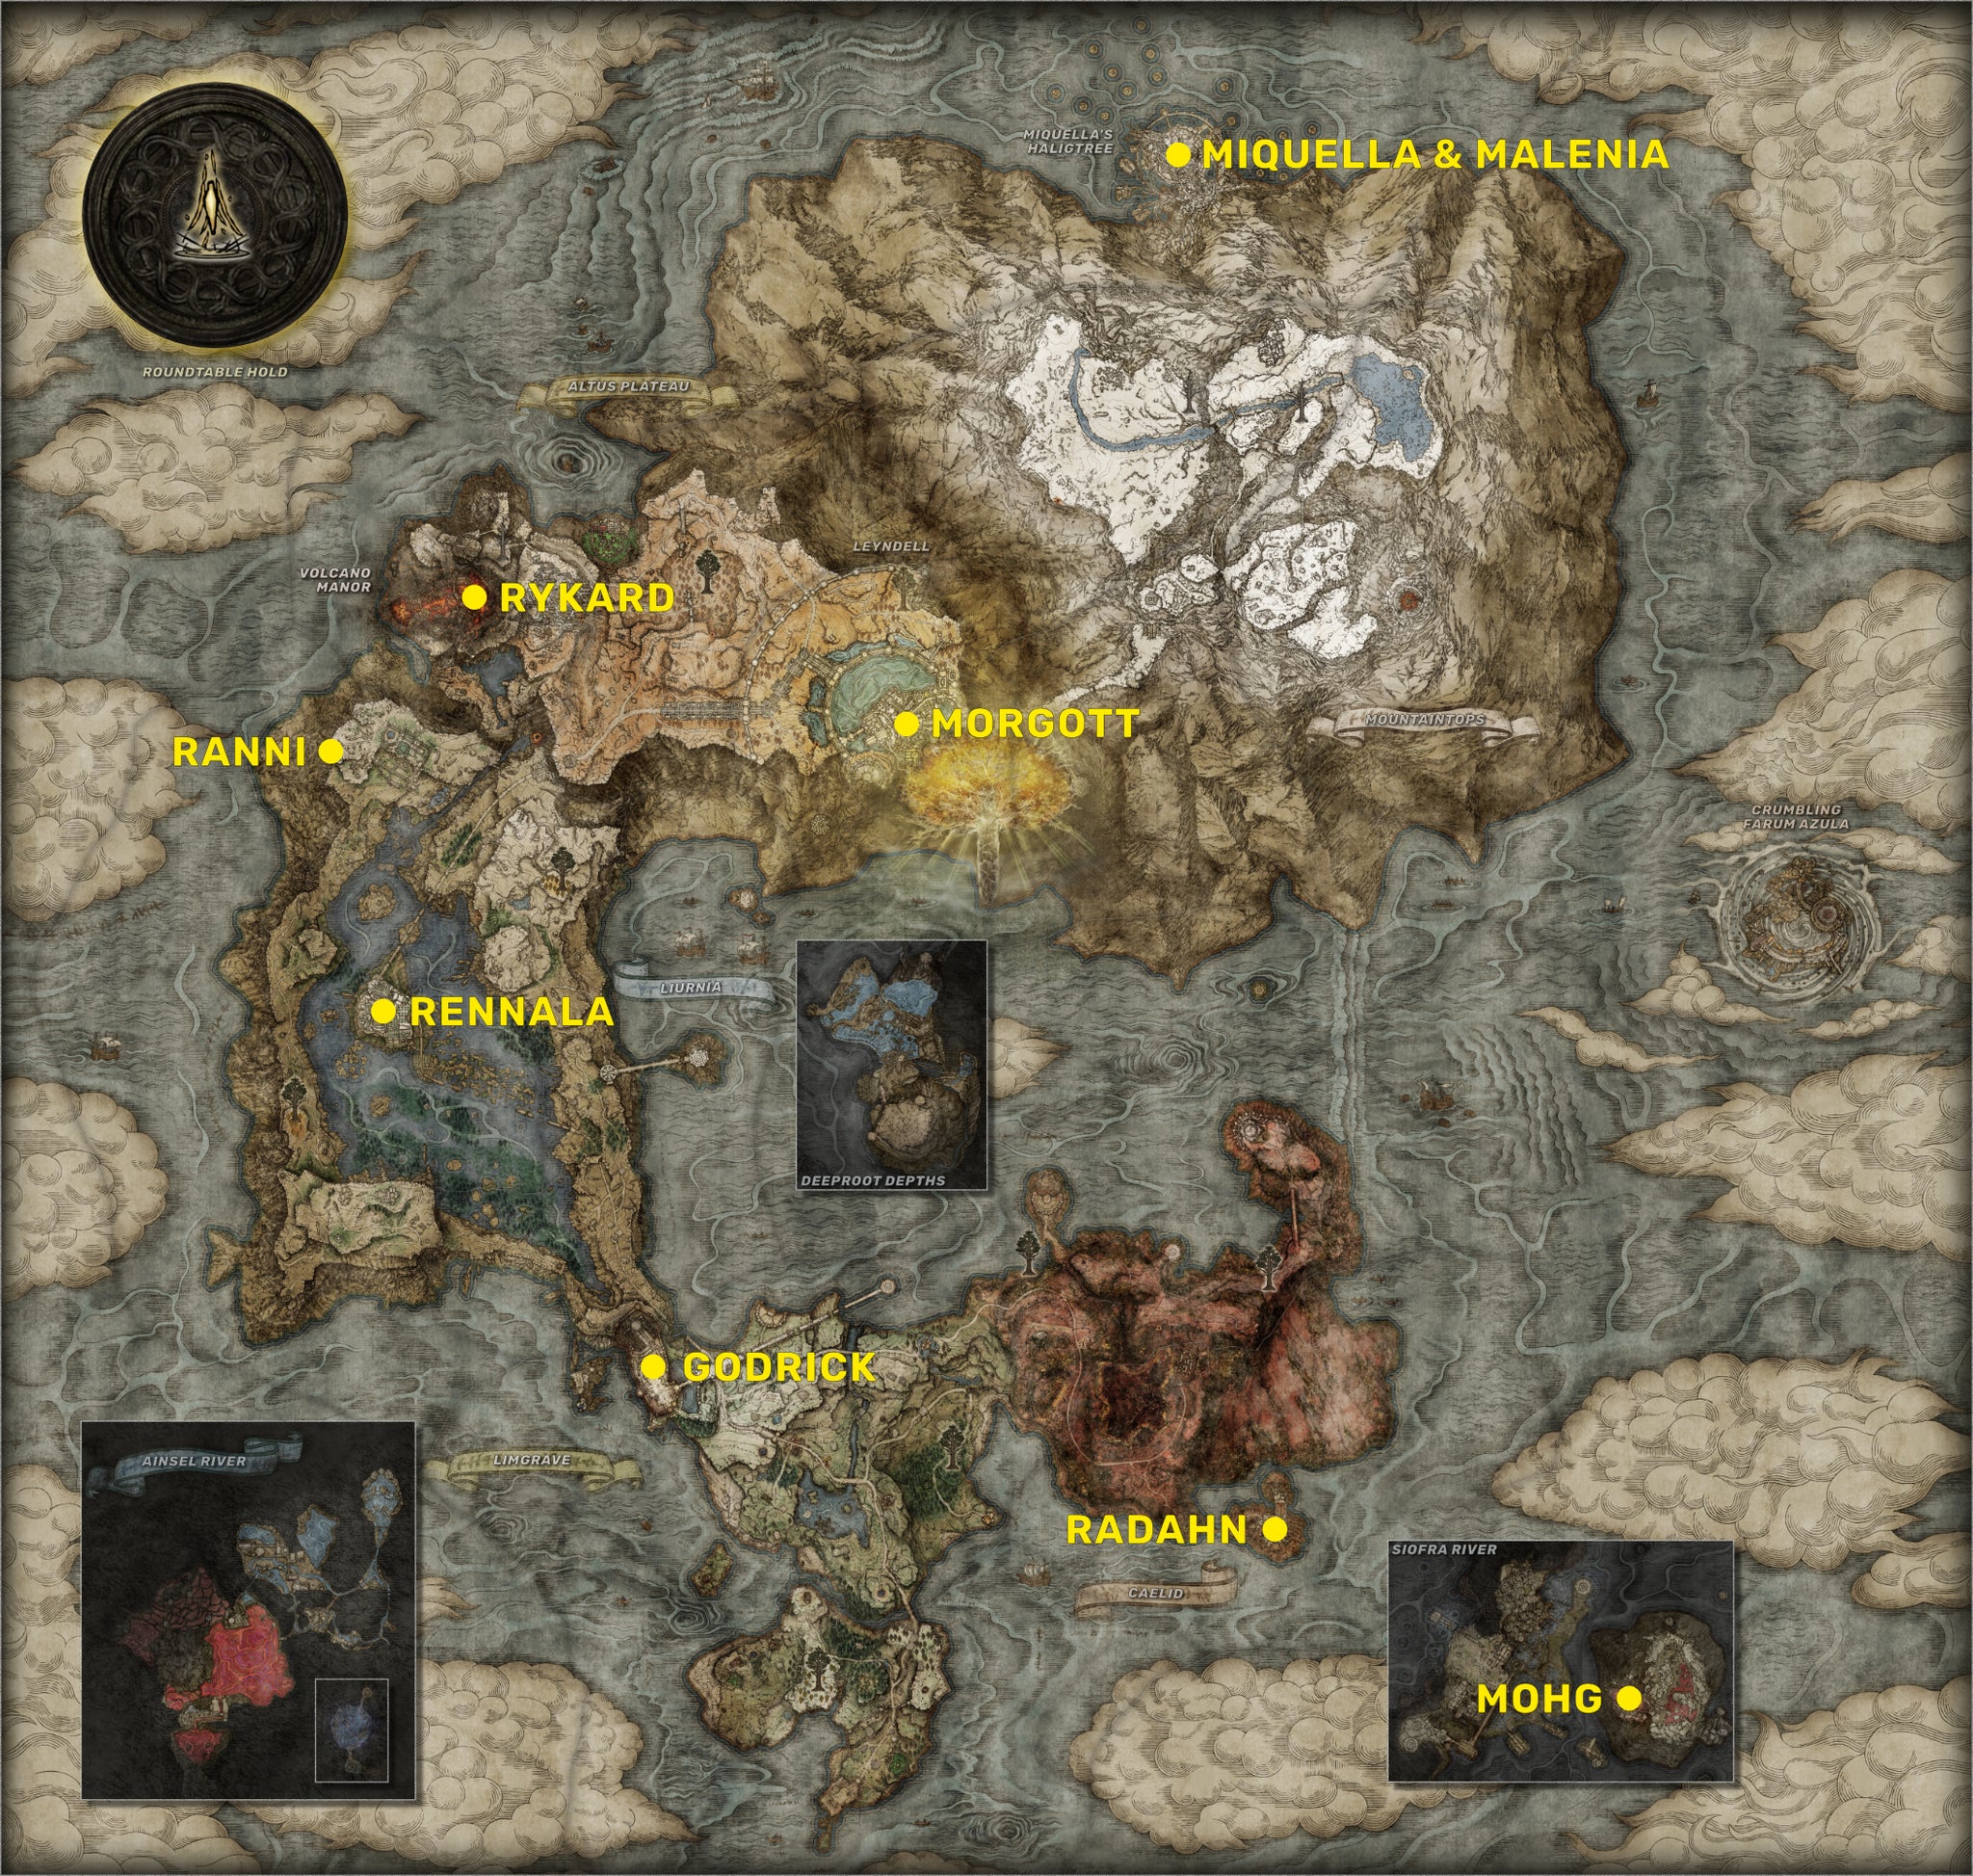
The following demigods took up Great Runes, becoming “Shardbearers”:
- Morgott took an anchor ring that houses the base of the Elden Ring.
- Mohg took a very similar rune to Morgott, but his became “soaked in accursed blood”.
- Rennala, the only non-demigod Shardbearer, still had possession of Radagon’s amber egg containing the Great Rune of the Unborn.
- Radahn took a powerful and burning Great Rune with an innate resistance to Scarlet Rot.
- Rykard took a rune which feeds off the defeat of enemies to restore health.
- Ranni is said to have taken a Great Rune, but then quickly discarded it.
- Malenia took a Great Rune which quickly became half-rotted due to her curse.
- Miquella may have taken a Great Rune, but we know nothing about this one if so.
- Godrick, a relatively weak descendant of Godfrey, somehow ended up with the anchor ring found at the very centre of the Elden Ring.
The devastating war between these demigods became known as the Shattering. Morgott, based in Leyndell, defended the capital against two separate attacks, one of whom was against Radahn. We can see in one of the opening cinematic stills, Morgott (as his alter-ego, Margit, The Fell Omen ) pouncing upon General Radahn. It appears that Morgott’s side forced Radahn’s to retreat, if Morgott’s continued presence in Leyndell during the events of the game is anything to go by.
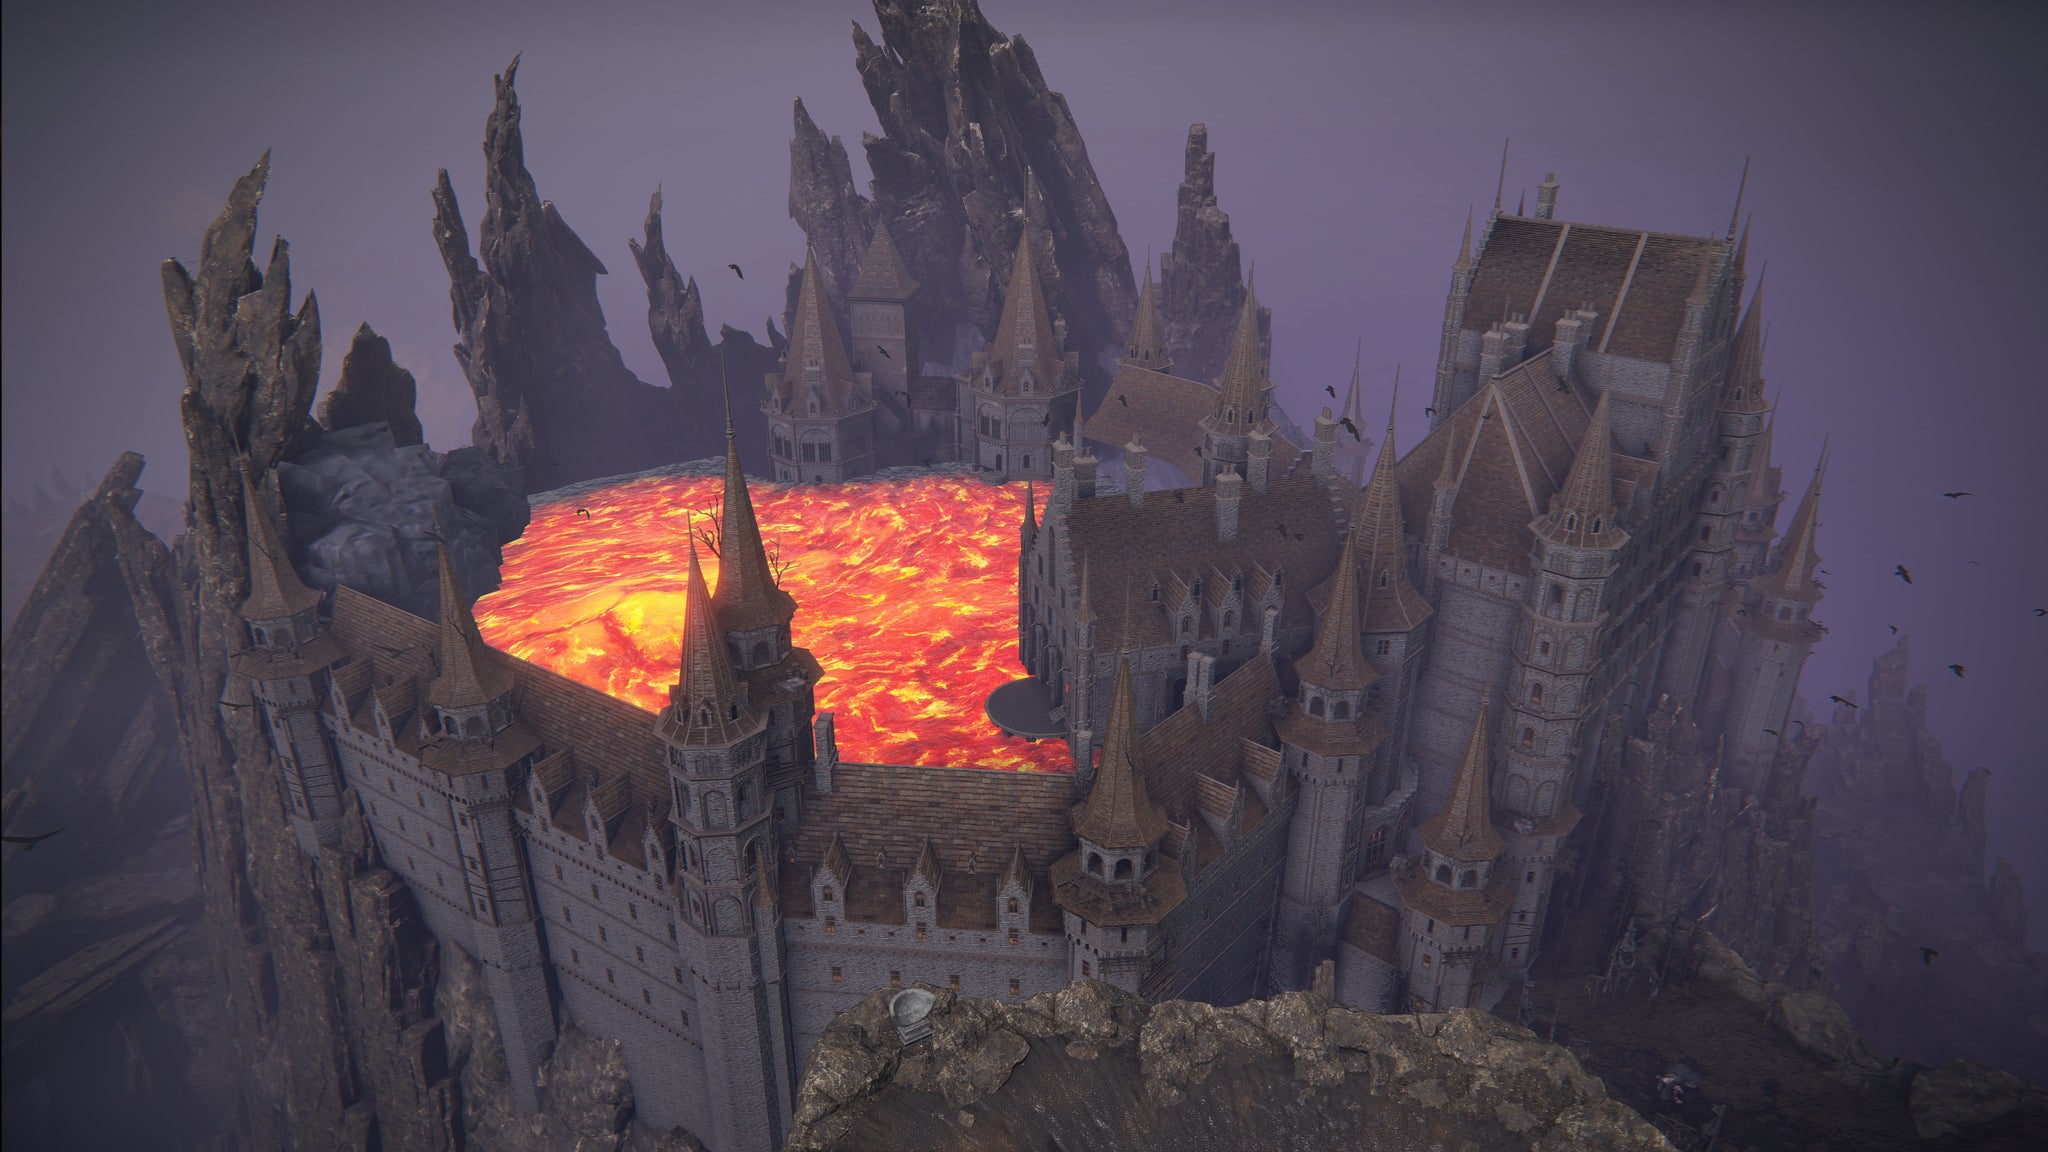
It’s unlikely that the fighting ever reached Volcano Manor itself, but the surrounding mountaintop became littered with dead on both sides. |Image credit:Rock Paper Shotgun/Bandai Namco
At some point afterwards, Morgott’s forces besieged Mount Gelmir and Volcano Manor, the home of Morgott’s stepbrother Rykard. Morgott, despite his Omen nature being shunned by the Golden Order, saw himself as the Order’s protector, and Rykard’s blasphemous ways were a threat that needed purging. The assault on Volcano Manor was said to be the most appalling battle in the Shattering, and the destruction was such that some of Rykard’s men deserted him immediately after the conflict, seeing what Rykard’s blasphemy had wrought. Regardless, it’s clear that both sides suffered heavy losses, and Rykard was left standing (or slithering) by the end of the conflict.
Perhaps the most successful campaign during the Shattering was made by Malenia. Her (and her brother Miquella’s) actions during the war are such that we need a whole new chapter to delve into them.
Miquella’s plan was cut short by Mohg breaking into the Haligtree and stealing Miquella’s cocoon form. |Image credit:Rock Paper Shotgun/Bandai Namco
Chapter 14: Miquella And Malenia
Key Characters:
| Miquella | Malenia |
|---|---|
| Mohg | Radahn |
| Godrick |
As we know, both Miquella and Malenia were born cursed. Miquella, said to be the most fearsome of the Empyreans, devoted much time to trying to cure both his sister and himself. He abandoned the Golden Order’s Fundamentalist doctrine after realising it could provide no cure for them. He created needles out of “unalloyed gold” to ward away the influence of the outer gods, including the Greater Will, one of which he gave to Malenia to try and forestall her Scarlet Rot sickness.
Miquella also watered a sapling with his own blood, hoping to turn it into a new Erdtree with the power to cure himself and Malenia. The sapling grew into a large misshapen tree known as Miquella’s Haligtree . Miquella cocooned himself within the Haligtree itself, possibly in an attempt to cure himself of his eternal youth, or possibly to help the Haligtree grow into a full Erdtree. Either way, before his plan reached fruition, the Haligtree was cut open and Miquella’s cocoon form was stolen away.
The cocoon in Mohg’s throne room where Miquella is said to reside is also the entrance to the Shadow Of The Erdtree DLC. |Image credit:Rock Paper Shotgun/Bandai Namco
The culprit who stole Miquella’s cocooned form was none other than Mohg, twin brother of Morgott. Turns out, while deep underground in Leyndell’s sewers, he was contacted by an Outer God called The Formless Mother, a god associated with pain and bloodflame. Through this connection, Mohg learned powerful bloodflame magic. During the Shattering, Mohg escaped the sewers and set up Mohgwyn Palace as his new home. And it was to here that Mohg absconded with Miquella’s body.
Malenia set off on a conquest across The Lands Between. It’s unclear whether this happened before Miquella was kidnapped, or whether she set off in order to find Miquella after the kidnapping. She and her loyal band of Cleanrot Knights proved undefeatable as she marched all the way from the Haligtree, past the Altus Plateau , down the length of Liurnia.
Godrick The Grafted , in an act of, well, sheer stupidity, insulted Malenia as she approached. Malenia met him in battle, handily beat him, and forced him to surrender.

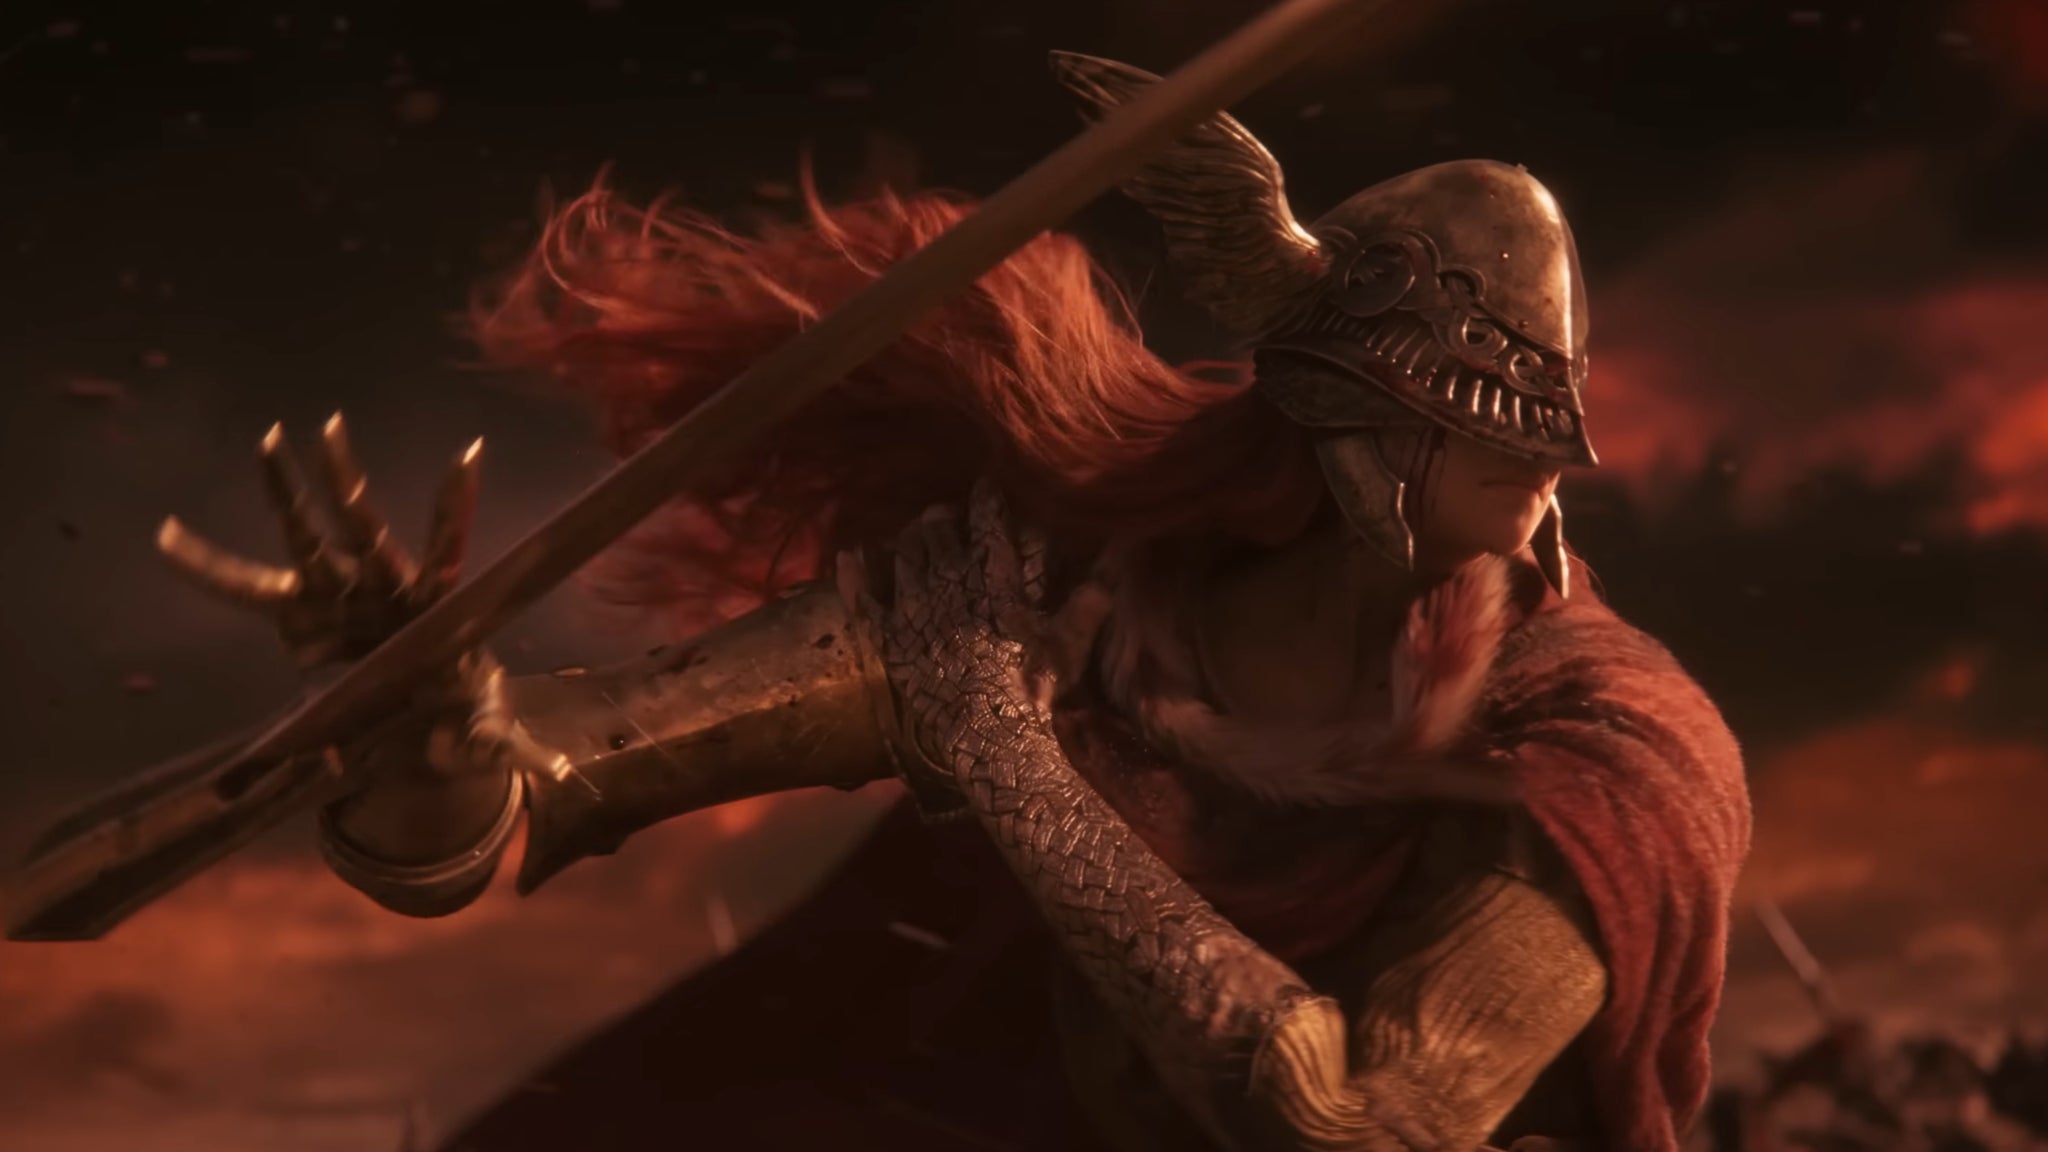
Malenia’s Scarlet Rot is unleashed in full force for the first time during her legendary battle against Radahn. |Image credit:Rock Paper Shotgun/Bandai Namco
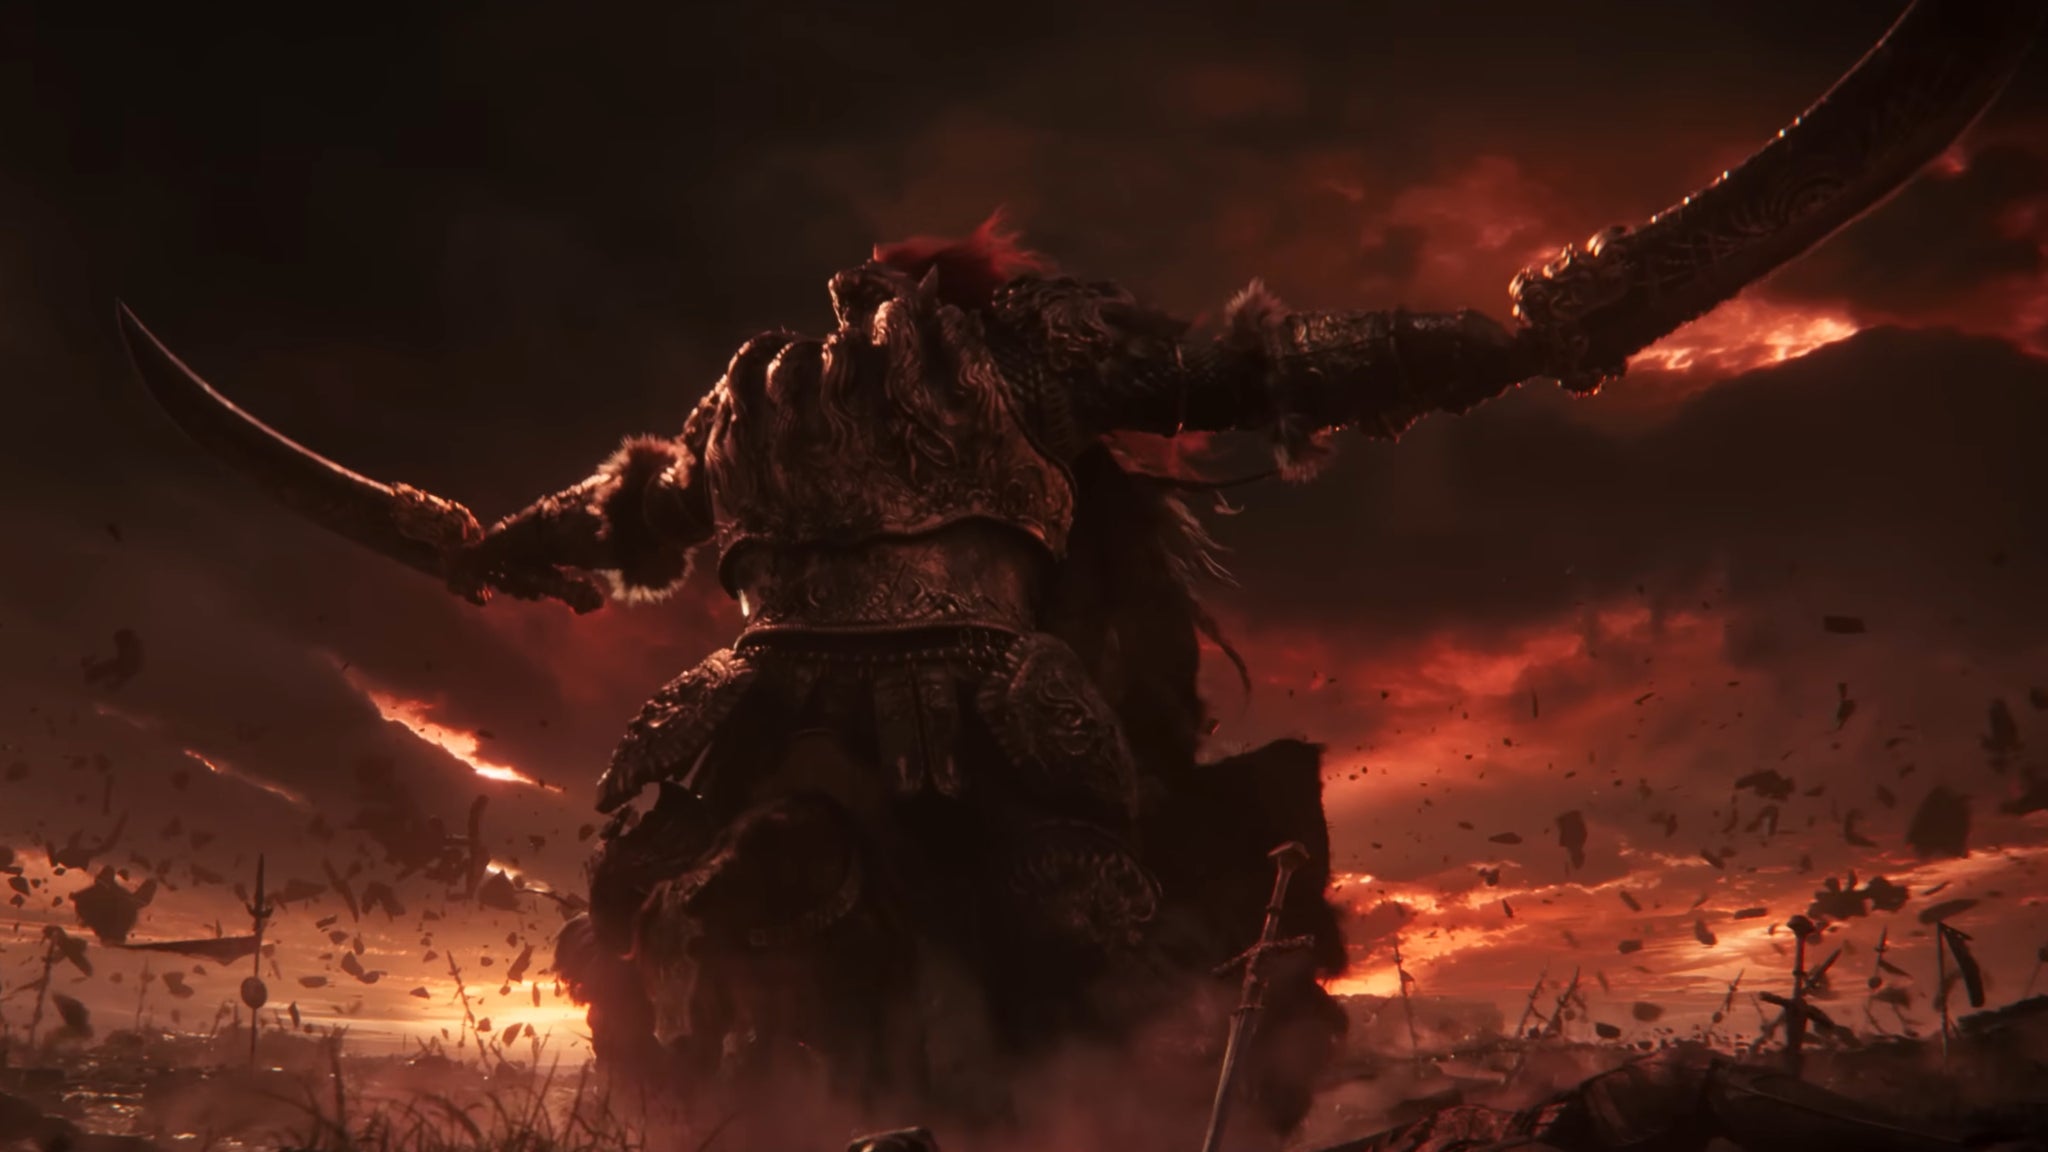
Onward Malenia went, through Limgrave, and into the Caelid Wilds. By this time, the only true challenger left was General Radahn. The other Shardbearers were either beaten or in hiding. So Malenia and Radahn met in the centre of Caelid in what became known as the fateful Battle Of Aeonia. We see some of this legendary fight in the Elden Ring story trailer. The two peerless demigods fought to a standstill, until Malenia was forced - for the very first time - to unleash the full power of the Scarlet Rot inside her.
The effects were devastating. The entire landscape of Caelid was transformed by the Scarlet Rot, and a retreating Radahn was eaten away from the inside by the Rot, turning him into a mindless beast, no longer with any hope or desire to take the throne. Malenia, meanwhile, fell into a coma on the battlefield soon after unleashing the Scarlet Rot. She was later recovered by one of her Cleanrot Knights, and brought back to the roots of the Haligtree to await Miquella’s return.
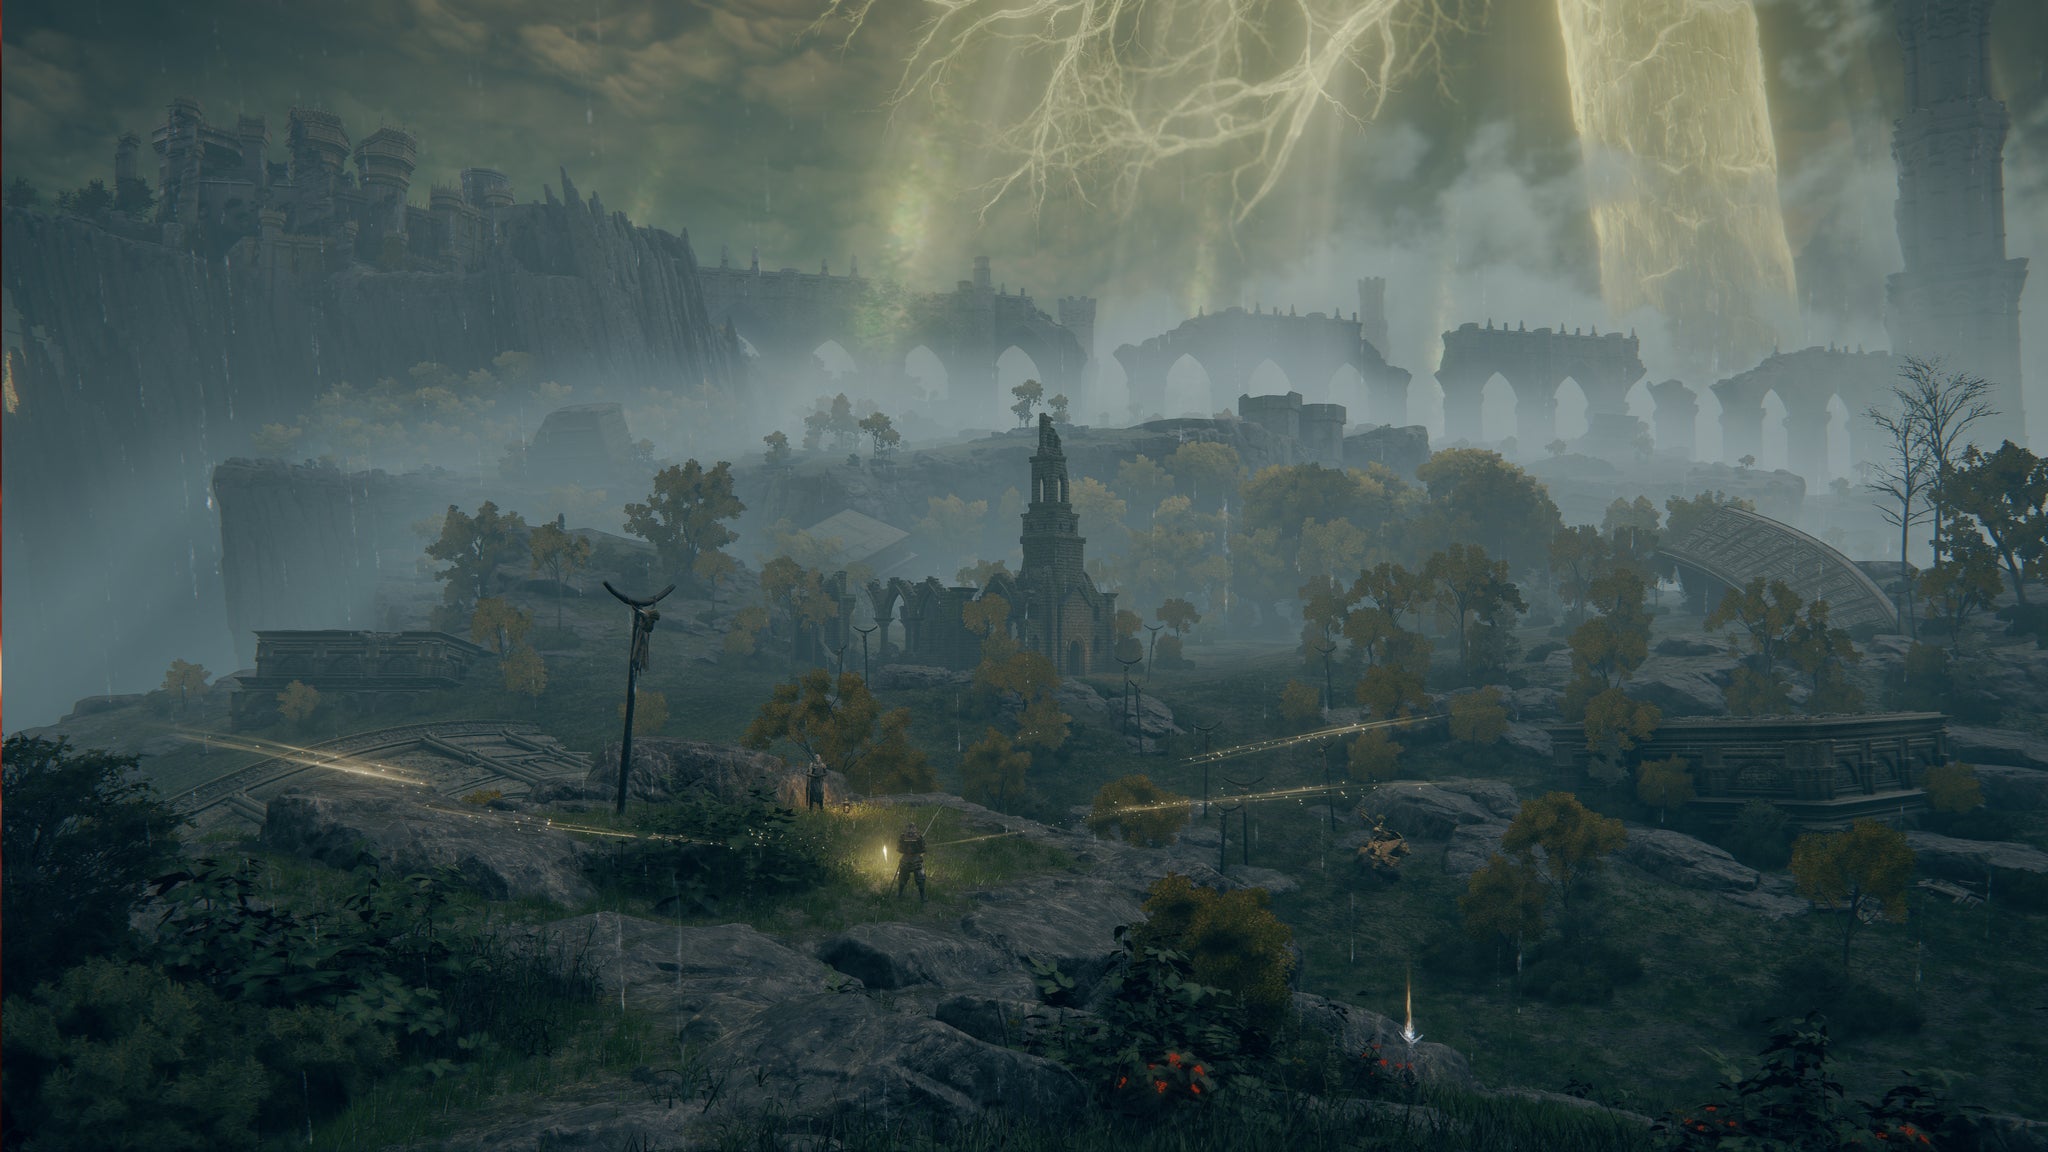
The Tarnished - veterans and descendants of Godfrey’s army - are called back to the Lands Between. You among them. |Image credit:Rock Paper Shotgun/Bandai Namco
Chapter 15: The Tarnished Return
Key Characters:
| The Tarnished | Hoarah Loux |
|---|
All in all, the Shattering was a bit of a failure on the part of pretty much every Shardbearer. Let’s do a quick recap:
- Morgott at least retained control of Leyndell, but he was no closer to bypassing the impenetrable thorns surrounding the Erdtree, and he seemingly lacked the military might to go on any more attacks after the assault on Volcano Manor.
- Mohg successfully kidnapped Miquella while remaining in hiding. But his plan to elevate Miquella to godhood wasn’t working; Miquella would not awaken, no matter what Mohg tried.
- Rennala didn’t partake in the Shattering; the Academy of Raya Lucaria quickly declared itself neutral and sealed itself from the outer world.
- Radahn fought Malenia to a standstill, but her Scarlet Rot ruined him. After that point, he would only wander the coast of Caelid as a mindless beast.
- Rykard stayed within Volcano Manor. He fed himself to a legendary godlike immortal snake, thinking it would give him great power. Perhaps one day the snake would have grown so powerful it would destroy the world, as Rykard foresaw; but this plan would likely take millennia to be realised, if at all.
- Ranni played no role in the Shattering except to start it with the Night Of Black Knives. It was never her intention to become the Greater Will’s new puppet.
- Malenia defeated everyone in battle before meeting Radahn, when she unleashed her Scarlet Rot. The act put her into a coma, and she was carried back to the Haligtree to recover.
- Miquella didn’t partake in any of the Shattering’s battles. He cocooned himself in the Haligtree, but was kidnapped by Mohg, Lord Of Blood.
- Godrick was a pathetic loser who sucked at just about everything he tried to do.
If you were the Greater Will, who would you choose to succeed Marika? Exactly. That’s why the Greater Will abandoned the idea of one of the demigods becoming the new god, and turned to the Tarnished.
If you remember, the Tarnished were the name given to Godfrey (now Hoarah Loux) and his army after they were divested of their Grace and banished from The Lands Between by Marika. The Greater Will called them back to The Lands Between, allowing them (some of them, at least) to be guided by Grace once more. Its hope was that one of the Tarnished would prove themselves worthy of becoming Marika’s new consort and the new Elden Lord.
The guidance of Grace encourages the player to follow the Greater Will’s plan. In many ways, the entire game is about learning to do other things beside what the Greater Will desires. |Image credit:Rock Paper Shotgun/Bandai Namco
Chapter 16: The Rise Of The Tarnished
Key Characters:
| The Tarnished | Melina |
|---|---|
| Morgott | Maliketh |
| Godfrey | Hoarah Loux |
| Queen Marika | Radagon |
| The Elden Beast |
This final chapter effectively describes the events of the game . The player plays as one of the Tarnished called back to The Lands Between by the guidance of Grace. The golden lights of Grace encourage the player to take a path to the nearest Shardbearers and defeat them in battle, gaining their Great Runes and proving to the Greater Will that the Tarnished is worthy of becoming Elden Lord.
Before we wrap up, I’ll devote a few words to talk about one more major character, one of the most mysterious of them all: Melina. She appears to the player very early in the game, giving them the ability to summon the spectral steed Torrent , and offering to play the role of “Finger Maiden” - a follower of the Two Fingers who can turn rune fragments into strength (i.e. levelling up the player’s character). But she is no Finger Maiden really, despite having the power to turn runes into strength.

So little is known about Melina, yet she is possibly the player’s greatest ally over the course of the game. |Image credit:Rock Paper Shotgun/Bandai Namco
In any case, Melina remains the Tarnished’s near-constant companion throughout the events of Elden Ring. The Tarnished eventually defeats enough demigods and earns enough Great Runes to journey to the capital, Leyndell. There, they defeat Morgott, who defends the base of the Erdtree, but find their way into the Erdtree blocked by the thorns that kept Morgott out all this time.
Melina sets the Tarnished on a quest to reach the Flame Of Ruin in the Mountaintops Of The Giants. Once there, Melina puts the Tarnished to sleep, and uses the Flame Of Ruin to burn the Erdtree. The Tarnished then awakens in Crumbling Farum Azula. Possibly because Melina knew that to properly complete their quest, the Tarnished needed to free Destined Death once more. To that end, the Tarnished defeats Maliketh, The Black Blade, Marika’s loyal Shadow, and releases Destined Death upon the world.
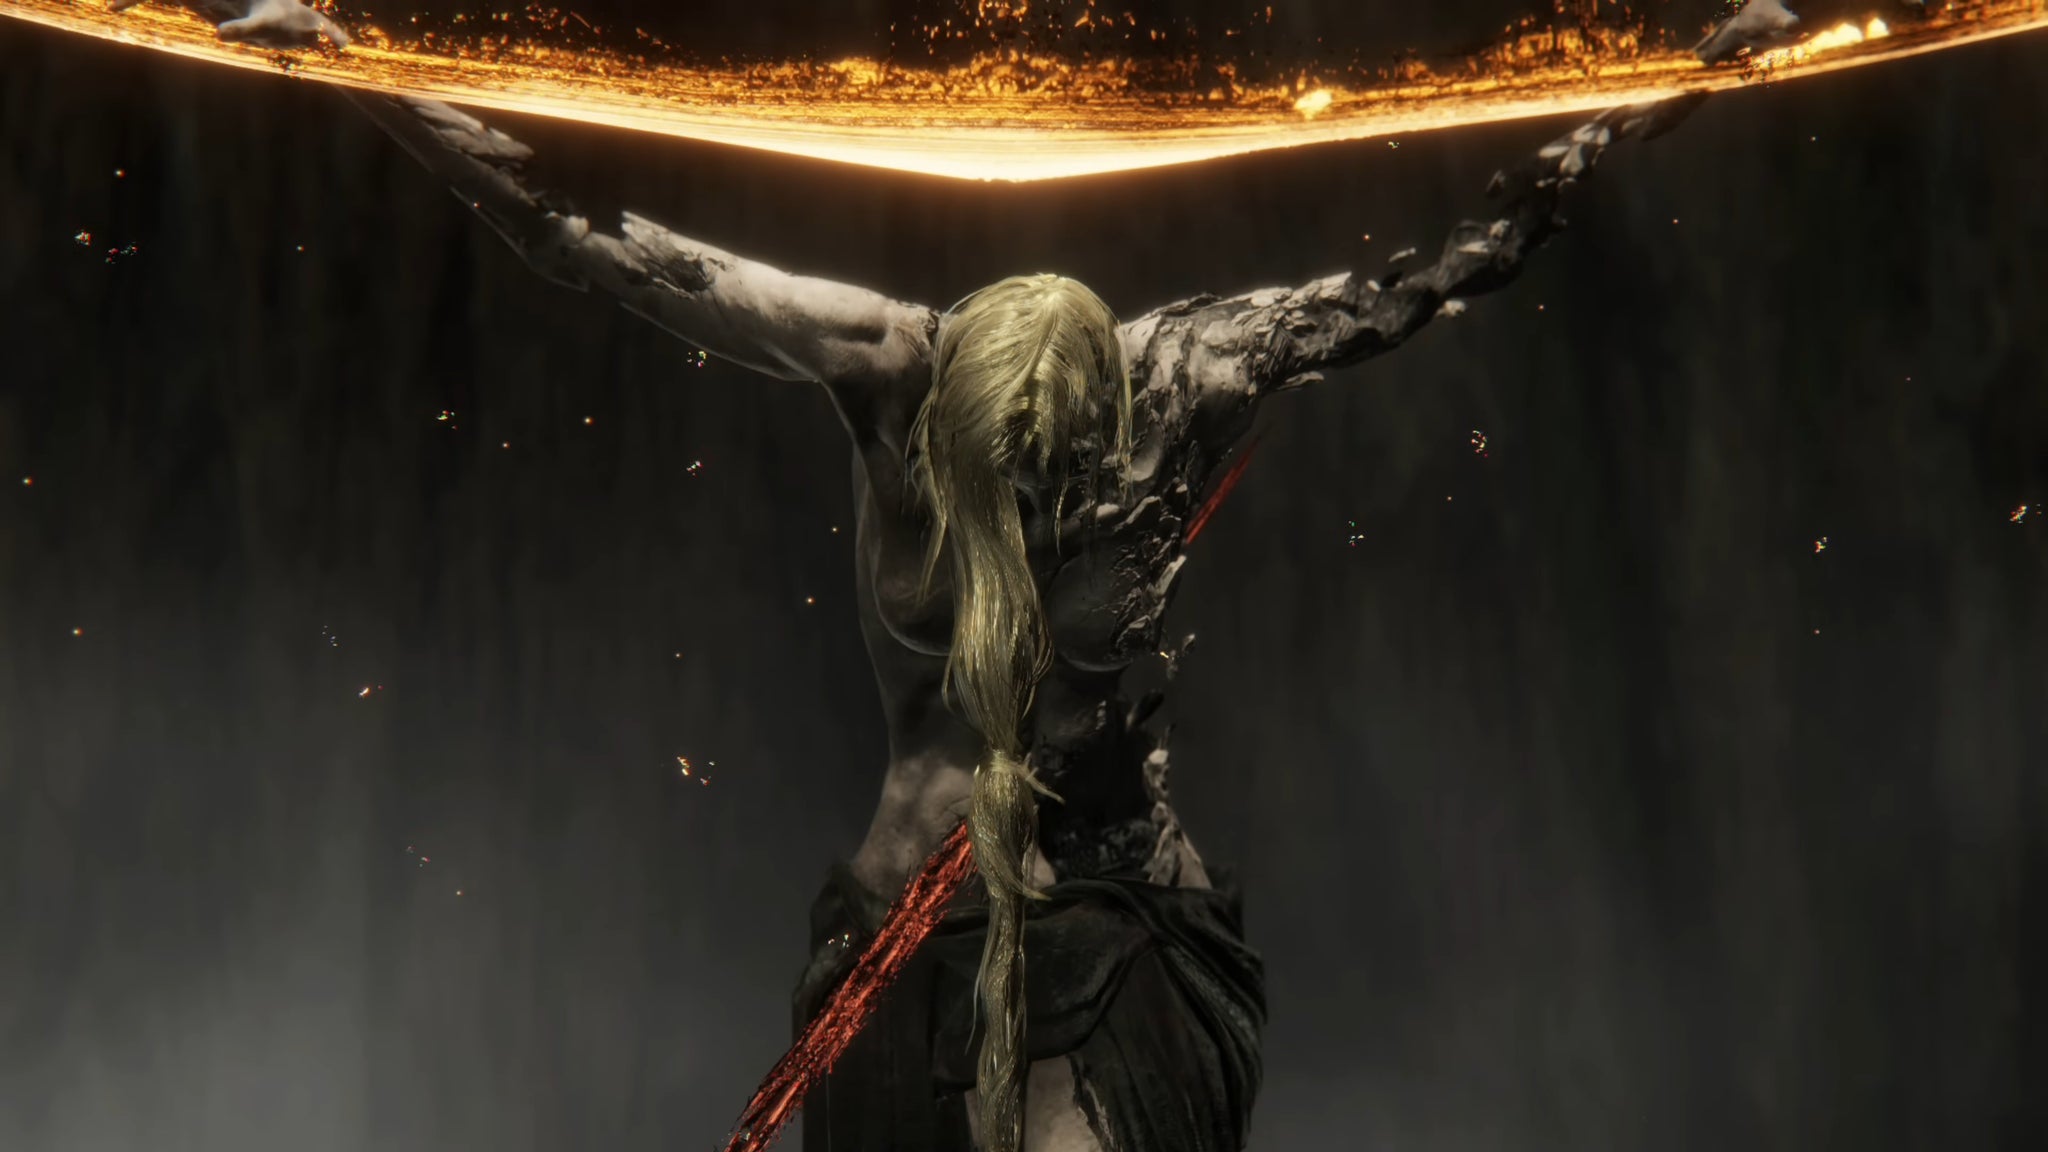
When the player enters the Erdtree at last, they see Marika hoisted in the air and imprisoned, presumably by the Elden Beast itself. |Image credit:Rock Paper Shotgun/Bandai Namco
After that, the player returns to a now burning Erdtree. They are met by Godfrey/Hoarah Loux, who - lest we forget - is another Tarnished, perhaps wishing to become Elden Lord of the new age. But no, the player’s Tarnished proves too much even for the former Elden Lord.
Inside the Erdtree, they see Marika, imprisoned. But at the Tarnished’s approach, Marika is freed. Taking Radagon’s form, the god fights the Tarnished, but is defeated. Finally, the Elden Beast itself awakens and challenges the Tarnished - clearly the burning of the Erdtree was not much appreciated by the Greater Will - but it, too, falls.
After that… Well, the ending depends on the path chosen by the Tarnished. For more information, check out our Elden Ring endings guide . But in nearly every ending, the Tarnished becomes the new Elden Lord, with Marika (or potentially someone else…) as the god of the new age. The only ending which doesn’t follow this path is the Lord Of The Frenzied Flame ending, in which we see the return of our old friend, the Frenzied Flame - the Greater Will’s other half, and the God of Chaos. Following this ending sees the Tarnished become the Lord Of Chaos rather than Elden Lord. They are tasked by the Frenzied Flame to burn the entire world of all Outer Godly influence, and return the world to a state closer to the age of the Crucible, before the Erdtree was formed.
And that’s just about the entire story of Elden Ring. At least, until Shadow Of The Erdtree flips everything on its head.

If you choose the Frenzied Flame ending, then the Erdtree is destroyed and the sky is set ablaze with the Flame of Frenzy. |Image credit:Rock Paper Shotgun/Bandai Namco
Good grief, you actually reached the end of this massive lore dump. Congratulations! Then again, we’re Elden Ring players. We’re used to long and arduous journeys. If you’re just starting another, then take a look at our Elden Ring beginner’s guide , and our guide on what to do first in Elden Ring . You can also follow our tips on the best Elden Ring builds to become as strong as possible ready for Shadow Of The Erdtree.
Elden Ring
PS4 , PS5 , Xbox One , Xbox Series X/S , PC
Rock Paper Shotgun is better when you sign in
Sign in and join us on our journey to discover strange and compelling PC games.

All 75 Arc Raiders Blueprints and where to get them
These areas have the highest chance of giving you Blueprints

Image credit:Rock Paper Shotgun/Embark Studios
Looking for more Arc Raiders Blueprints? It’s a special day when you find a Blueprint, as they’re among the most valuable items in Arc Raiders. If you find a Blueprint that you haven’t already found, then you must make sure you hold onto it at all costs, because Blueprints are the key to one of the most important and powerful systems of meta-progression in the game.
This guide aims to be the very best guide on Blueprints you can find, starting with a primer on what exactly they are and how they work in Arc Raiders, before delving into exactly where to get Blueprints and the very best farming spots for you to take in your search.
We’ll also go over how to get Blueprints from other unlikely activities, such as destroying Surveyors and completing specific quests. And you’ll also find the full list of all 75 Blueprints in Arc Raiders on this page (including the newest Blueprints added with the Cold Snap update , such as the Deadline Blueprint and Firework Box Blueprint), giving you all the information you need to expand your own crafting repertoire.
In this guide:
- What are Blueprints in Arc Raiders?
- Full Blueprint list: All crafting recipes
- Where to find Blueprints in Arc Raiders Blueprints obtained from quests Blueprints obtained from Trials Best Blueprint farming locations

What are Blueprints in Arc Raiders?
Blueprints in Arc Raiders are special items which, if you manage to extract with them, you can expend to permanently unlock a new crafting recipe in your Workshop. If you manage to extract from a raid with an Anvil Blueprint, for example, you can unlock the ability to craft your very own Anvil Pistol, as many times as you like (as long as you have the crafting materials).
To use a Blueprint, simply open your Inventory while in the lobby, then right-click on the Blueprint and click “Learn And Consume” . This will permanently unlock the recipe for that item in your Workshop. As of the Stella Montis update, there are allegedly 75 different Blueprints to unlock - although only 68 are confirmed to be in the game so far. You can see all the Blueprints you’ve found and unlocked by going to the Workshop menu, and hitting “R” to bring up the Blueprint screen.
It’s possible to find duplicates of past Blueprints you’ve already unlocked. If you find these, then you can either sell them, or - if you like to play with friends - you can take it into a match and gift it to your friend so they can unlock that recipe for themselves. Another option is to keep hold of them until the time comes to donate them to the Expedition.
Full Blueprint list: All crafting recipes
Below is the full list of all the Blueprints that are currently available to find in Arc Raiders, and the crafting recipe required for each item:
| Blueprint | Type | Recipe | Crafted At |
|---|---|---|---|
| Bettina | Weapon | 3x Advanced Mechanical Components 3x Heavy Gun Parts 3x Canister | Gunsmith 3 |
| Blue Light Stick | Quick Use | 3x Chemicals | Utility Station 1 |
| Aphelion | Weapon | 3x Magnetic Accelerator 3x Complex Gun Parts 1x Matriarch Reactor | Gunsmith 3 |
| Combat Mk. 3 (Flanking) | Augment | 2x Advanced Electrical Components 3x Processor | Gear Bench 3 |
| Combat Mk. 3 (Aggressive) | Augment | 2x Advanced Electrical Components 3x Processor | Gear Bench 3 |
| Complex Gun Parts | Material | 2x Light Gun Parts 2x Medium Gun Parts 2x Heavy Gun Parts | Refiner 3 |
| Fireworks Box | Quick Use | 1x Explosive Compound 3x Pop Trigger | Explosives Station 2 |
| Gas Mine | Mine | 4x Chemicals 2x Rubber Parts | Explosives Station 1 |
| Green Light Stick | Quick Use | 3x Chemicals | Utility Station 1 |
| Pulse Mine | Mine | 1x Crude Explosives 1x Wires | Explosives Station 1 |
| Seeker Grenade | Grenade | 1x Crude Explosives 2x ARC Alloy | Explosives Station 1 |
| Looting Mk. 3 (Survivor) | Augment | 2x Advanced Electrical Components 3x Processor | Gear Bench 3 |
| Angled Grip II | Mod | 2x Mechanical Components 3x Duct Tape | Gunsmith 2 |
| Angled Grip III | Mod | 2x Mod Components 5x Duct Tape | Gunsmith 3 |
| Hullcracker | Weapon | 1x Magnetic Accelerator 3x Heavy Gun Parts 1x Exodus Modules | Gunsmith 3 |
| Launcher Ammo | Ammo | 5x Metal Parts 1x Crude Explosives | Workbench 1 |
| Anvil | Weapon | 5x Mechanical Components 5x Simple Gun Parts | Gunsmith 2 |
| Anvil Splitter | Mod | 2x Mod Components 3x Processor | Gunsmith 3 |
| ??? | ??? | ??? | ??? |
| Barricade Kit | Quick Use | 1x Mechanical Components | Utility Station 2 |
| Blaze Grenade | Grenade | 1x Explosive Compound 2x Oil | Explosives Station 3 |
| Bobcat | Weapon | 3x Advanced Mechanical Components 3x Light Gun Parts | Gunsmith 3 |
| Osprey | Weapon | 2x Advanced Mechanical Components 3x Medium Gun Parts 7x Wires | Gunsmith 3 |
| Burletta | Weapon | 3x Mechanical Components 3x Simple Gun Parts | Gunsmith 1 |
| Compensator II | Mod | 2x Mechanical Components 4x Wires | Gunsmith 2 |
| Compensator III | Mod | 2x Mod Components 8x Wires | Gunsmith 3 |
| Defibrillator | Quick Use | 9x Plastic Parts 1x Moss | Medical Lab 2 |
| ??? | ??? | ??? | ??? |
| Equalizer | Weapon | 3x Magnetic Accelerator 3x Complex Gun Parts 1x Queen Reactor | Gunsmith 3 |
| Extended Barrel | Mod | 2x Mod Components 8x Wires | Gunsmith 3 |
| Extended Light Mag II | Mod | 2x Mechanical Components 3x Steel Spring | Gunsmith 2 |
| Extended Light Mag III | Mod | 2x Mod Components 5x Steel Spring | Gunsmith 3 |
| Extended Medium Mag II | Mod | 2x Mechanical Components 3x Steel Spring | Gunsmith 2 |
| Extended Medium Mag III | Mod | 2x Mod Components 5x Steel Spring | Gunsmith 3 |
| Extended Shotgun Mag II | Mod | 2x Mechanical Components 3x Steel Spring | Gunsmith 2 |
| Extended Shotgun Mag III | Mod | 2x Mod Components 5x Steel Spring | Gunsmith 3 |
| Remote Raider Flare | Quick Use | 2x Chemicals 4x Rubber Parts | Utility Station 1 |
| Heavy Gun Parts | Material | 4x Simple Gun Parts | Refiner 2 |
| Venator | Weapon | 2x Advanced Mechanical Components 3x Medium Gun Parts 5x Magnet | Gunsmith 3 |
| Il Toro | Weapon | 5x Mechanical Components 6x Simple Gun Parts | Gunsmith 1 |
| Jolt Mine | Mine | 1x Electrical Components 1x Battery | Explosives Station 2 |
| Explosive Mine | Mine | 1x Explosive Compound 1x Sensors | Explosives Station 3 |
| Jupiter | Weapon | 3x Magnetic Accelerator 3x Complex Gun Parts 1x Queen Reactor | Gunsmith 3 |
| Light Gun Parts | Material | 4x Simple Gun Parts | Refiner 2 |
| Lightweight Stock | Mod | 2x Mod Components 5x Duct Tape | Gunsmith 3 |
| Lure Grenade | Grenade | 1x Speaker Component 1x Electrical Components | Utility Station 2 |
| Medium Gun Parts | Material | 4x Simple Gun Parts | Refiner 2 |
| Torrente | Weapon | 2x Advanced Mechanical Components 3x Medium Gun Parts 6x Steel Spring | Gunsmith 3 |
| Muzzle Brake II | Mod | 2x Mechanical Components 4x Wires | Gunsmith 2 |
| Muzzle Brake III | Mod | 2x Mod Components 8x Wires | Gunsmith 3 |
| Padded Stock | Mod | 2x Mod Components 5x Duct Tape | Gunsmith 3 |
| Shotgun Choke II | Mod | 2x Mechanical Components 4x Wires | Gunsmith 2 |
| Shotgun Choke III | Mod | 2x Mod Components 8x Wires | Gunsmith 3 |
| Shotgun Silencer | Mod | 2x Mod Components 8x Wires | Gunsmith 3 |
| Showstopper | Grenade | 1x Advanced Electrical Components 1x Voltage Converter | Explosives Station 3 |
| Silencer I | Mod | 2x Mechanical Components 4x Wires | Gunsmith 2 |
| Silencer II | Mod | 2x Mod Components 8x Wires | Gunsmith 3 |
| Snap Hook | Quick Use | 2x Power Rod 3x Rope 1x Exodus Modules | Utility Station 3 |
| Stable Stock II | Mod | 2x Mechanical Components 3x Duct Tape | Gunsmith 2 |
| Stable Stock III | Mod | 2x Mod Components 5x Duct Tape | Gunsmith 3 |
| Tagging Grenade | Grenade | 1x Electrical Components 1x Sensors | Utility Station 3 |
| Tempest | Weapon | 3x Advanced Mechanical Components 3x Medium Gun Parts 3x Canister | Gunsmith 3 |
| Trigger Nade | Grenade | 2x Crude Explosives 1x Processor | Explosives Station 2 |
| Vertical Grip II | Mod | 2x Mechanical Components 3x Duct Tape | Gunsmith 2 |
| Vertical Grip III | Mod | 2x Mod Components 5x Duct Tape | Gunsmith 3 |
| Vita Shot | Quick Use | 2x Antiseptic 1x Syringe | Medical Lab 3 |
| Vita Spray | Quick Use | 3x Antiseptic 1x Canister | Medical Lab 3 |
| Vulcano | Weapon | 1x Magnetic Accelerator 3x Heavy Gun Parts 1x Exodus Modules | Gunsmith 3 |
| Wolfpack | Grenade | 2x Explosive Compound 2x Sensors | Explosives Station 3 |
| Red Light Stick | Quick Use | 3x Chemicals | Utility Station 1 |
| Smoke Grenade | Grenade | 14x Chemicals 1x Canister | Utility Station 2 |
| Deadline | Mine | 3x Explosive Compound 2x ARC Circuitry | Explosives Station 3 |
| Trailblazer | Grenade | 1x Explosive Compound 1x Synthesized Fuel | Explosives Station 3 |
| Tactical Mk. 3 (Defensive) | Augment | 2x Advanced Electrical Components 3x Processor | Gear Bench 3 |
| Tactical Mk. 3 (Healing) | Augment | 2x Advanced Electrical Components 3x Processor | Gear Bench 3 |
| Yellow Light Stick | Quick Use | 3x Chemicals | Utility Station 1 |
Note: The missing Blueprints in this list likely have not actually been added to the game at the time of writing, because none of the playerbase has managed to find any of them. As they are added to the game, I will update this page with the most relevant information so you know exactly how to get all 75 Arc Raiders Blueprints.
Where to find Blueprints in Arc Raiders
Below is a list of all containers, modifiers, and events which maximise your chances of finding Blueprints:
- Certain quests reward you with specific Blueprints .
- Completing Trials has a high chance of offering Blueprints as rewards.
- Surveyors have a decent chance of dropping Blueprints on death.
- High loot value areas tend to have a greater chance of spawning Blueprints.
- Night Raids and Storms may increase rare Blueprint spawn chances in containers.
- Containers with higher numbers of items may have a higher tendency to spawn Blueprints. As a result, Blue Gate (which has many “large” containers containing multiple items) may give you a higher chance of spawning Blueprints.
- Raider containers (Raider Caches, Weapon Boxes, Medical Bags, Grenade Tubes) have increased Blueprint drop rates. As a result, the Uncovered Caches event gives you a high chance of finding Blueprints.
- Security Lockers have a higher than average chance of containing Blueprints.
- Certain Blueprints only seem to spawn under specific circumstances: Tempest Blueprint only spawns during Night Raid events. Vulcano Blueprint only spawns during Hidden Bunker events. Jupiter and Equaliser Blueprints only spawn during Harvester events.

Raider Caches, Weapon Boxes, and other raider-oriented container types have a good chance of offering Blueprints. |Image credit:Rock Paper Shotgun/Embark Studios
Blueprints have a very low chance of spawning in any container in Arc Raiders, around 1-2% on average. However, there is a higher chance of finding Blueprints in particular container types. Specifically, you can find more Blueprints in Raider containers and security lockers.
Beyond this, if you’re looking for Blueprints you should focus on regions of the map which are marked as having particularly high-value loot. Areas such as the Control Tower in Dam Battlegrounds, the Arrival and Departure Buildings in Spaceport, and Pilgrim’s Peak in Blue Gate all have a better-than-average chance of spawning Blueprints somewhere amongst all their containers. Night Raids and Electromagnetic Storm events also increase the drop chances of certain Blueprints .
In addition to these containers, you can often loot Blueprints from destroyed Surveyors - the largest of the rolling ball ARC. Surveyors are more commonly found on the later maps - Spaceport and Blue Gate - and if one spawns in your match, you’ll likely see it by the blue laser beam that it casts into the sky while “surveying”.
Surveyors are quite well-armoured and will very speedily run away from you once it notices you, but if you can take one down then make sure you loot all its parts for a chance of obtaining certain unusual Blueprints.
Blueprints obtained from quests
One way in which you can get Blueprints is by completing certain quests for the vendors in Speranza. Some quests will reward you with a specific item Blueprint upon completion, so as long as you work through all the quests in Arc Raiders, you are guaranteed those Blueprints.
Here is the full list of all Blueprints you can get from quest rewards:
- Trigger Nade Blueprint: Rewarded after completing “Sparks Fly”.
- Lure Grenade Blueprint: Rewarded after completing “Greasing Her Palms”.
- Burletta Blueprint: Rewarded after completing “Industrial Espionage”.
- Hullcracker Blueprint (and Launcher Ammo Blueprint): Rewarded after completing “The Major’s Footlocker”.
Alas, that’s only 4 Blueprints out of a total of 75 to unlock, so for the vast majority you will need to find them yourself during a raid. If you’re intent on farming Blueprints, then it’s best to equip yourself with cheap gear in case you lose it, but don’t use a free loadout because then you won’t get a safe pocket to stash any new Blueprint you find. No pain in Arc Raiders is sharper than failing to extract with a new Blueprint you’ve been after for a dozen hours already.

One of the best ways to get Blueprints is by hitting three stars on all five Trials every week. |Image credit:Rock Paper Shotgun/Embark Studios
Blueprints obtained from Trials
One of the very best ways to get Blueprints is as rewards for completing Trials in Arc Raiders. Trials are unlocked from Level 15 onwards, and allow you to earn rewards by focusing on certain tasks over the course of several raids. For example, one Trial might task you with dealing damage to Hornets, while another might challenge you to loot Supply Drops.
Trials refresh on a weekly basis, with a new week bringing five new Trials. Each Trial can offer up to three rewards after passing certain score milestones, and it’s possible to receive very high level loot from these reward crates - including Blueprints. So if you want to unlock as many Blueprints as possible, you should make a point of completing as many Trials as possible each week.
Best Blueprint farming locations
The very best way to get Blueprints is to frequent specific areas of the maps which combine high-tier loot pools with the right types of containers to search. Here are my recommendations for where to find Blueprints on every map, so you can always keep the search going for new crafting recipes to unlock.

Image credit:Rock Paper Shotgun/Embark Studios
Dam Battlegrounds
The best places to farm Blueprints on Dam Battlegrounds are the Control Tower, Power Generation Complex, Ruby Residence, and Pale Apartments . The first two regions, despite only being marked on the map as mid-tier loot, contain a phenomenal number of containers to loot. The Control Tower can also contain a couple of high-tier Security Lockers - though of course, you’ll need to have unlocked the Security Breach skill at the end of the Survival tree.
There’s also a lot of reporting amongst the playerbase that the Residential areas in the top-left of the map - Pale Apartments and Ruby Residence - give you a comparatively strong chance of finding Blueprints. Considering their size, there’s a high density of containers to loot in both locations, and they also have the benefit of being fairly out of the way. So you’re more likely to have all the containers to yourself.
Buried City
The best Blueprint farming locations on Buried City are the Santa Maria Houses, Grandioso Apartments, Town Hall, and the various buildings of the New District . Grandioso Apartments has a lower number of containers than the rest, but a high chance of spawning weapon cases - which have good Blueprint drop rates. The others are high-tier loot areas, with plenty of lootable containers - including Security Lockers.
Spaceport
The best places to find Blueprints on Spaceport are the Arrival and Departure Buildings, as well as Control Tower A6 and the Launch Towers . All these areas are labelled as high-value loot regions, and many of them are also very handily connected to one another by the Spaceport wall, which you can use to quickly run from one area to the next. At the tops of most of these buildings you’ll find at least one Security Locker, so this is an excellent farming route for players looking to find Blueprints.
The downside to looting Blueprints on Spaceport is that all these areas are hotly contested, particularly in Duos and Squads. You’ll need to be very focused and fast in order to complete the full farming route.

Image credit:Rock Paper Shotgun/Embark Studios
Blue Gate
Blue Gate tends to have a good chance of dropping Blueprints, potentially because it generally has a high number of containers which can hold lots of items; so there’s a higher chance of a Blueprint spawning in each container. In my experience, the best Blueprint farming spots on Blue Gate are Pilgrim’s Peak, Raider’s Refuge, the Ancient Fort, and the Underground Complex beneath the Warehouse .
All of these areas contain a wealth of containers to loot. Raider’s Refuge has less to loot, but the majority of the containers in and around the Refuge are raider containers, which have a high chance of containing Blueprints - particularly during major events.
Stella Montis
On the whole, Stella Montis seems to have a very low drop rate for Blueprints (though a high chance of dropping other high-tier loot). If you do want to try farming Blueprints on this map, the best places to find Blueprints in Stella Montis are Medical Research, Assembly Workshop, and the Business Center . These areas have the highest density of containers to loot on the map.
In addition to this, the Western Tunnel has a few different Security Lockers to loot, so while there’s very little to loot elsewhere in this area of the map, it’s worth hitting those Security Lockers if you spawn there at the start of a match.
That wraps up this primer on how to get all the Blueprints in Arc Raiders as quickly as possible. With the Expedition system constantly resetting a large number of players’ Blueprints, it’s more important than ever to have the most up-to-date information on where to find all these Blueprints.
While you’re here, be sure to check out our Arc Raiders best guns tier list , as well as our primers on the best skills to unlock and all the different Field Depot locations on every map.

ARC Raiders
PS5 , Xbox Series X/S , PC
Rock Paper Shotgun is better when you sign in
Sign in and join us on our journey to discover strange and compelling PC games.
